“WiFi connected but no internet” is a common sight on Android. And it could be that your phone, too, does not have internet access even after connecting to WiFi. It can happen for various reasons, including faulty router, incorrect settings, and DNS problems. Keep reading as we discuss the best ways to tackle WiFi connected but no internet issues on your Android phone.
Android Connected to WiFi But No Internet? Here’s the Fix
Having a WiFi connection but not being able to use the internet can be very frustrating. What adds to it is the fact that “connected but no internet” doesn’t really specify what’s broken with your phone or router. Whatever the case, we’ve given multiple solutions to help you fix Android connected to WiFi but no internet issue. Read on.
Method 1- Is it the Phone or the WiFi?
An easy way to zero down on what’s causing the problem would be to connect another phone to the same WiFi network. If it can access the internet, something’s wrong with your phone. But if the other device throws the same error, too, it’s time to troubleshoot your WiFi router.
Method 2- Reconnect the WiFi
First things first- disconnect and reconnect to the WiFi network. It may sound basic, but it fixes about half the Wifi-related problems on Android. So, if your phone is not connecting to the internet even after having an active WiFi network, turn the WiFi toggle off and on again to see if it resolves the issue.
Method 3- Check if the Internet is Working
Exhausted Internet Plan
Most ISPs offer unlimited data plans. However, some limit the connection speed or bandwidth past a set threshold to prevent commercial usage. Hence, it would be best to check the status of your internet plan, which can be done directly by calling the ISP.
If you have exhausted the data limit, you can either top up your plan or switch to other networks till the limit is restored (in case of daily capping).
Service Outage
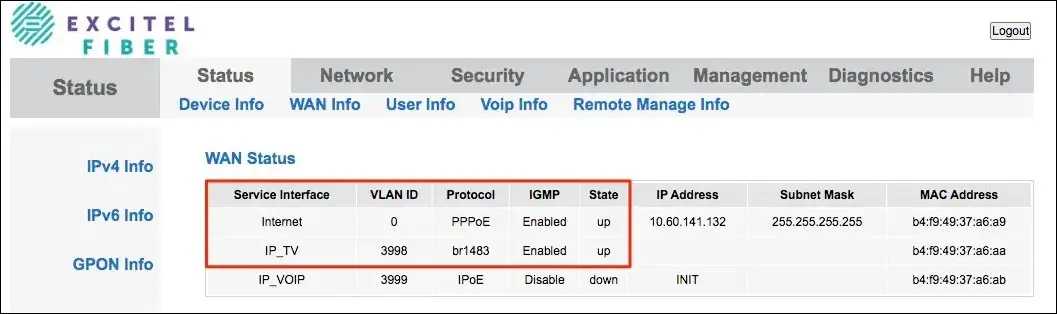
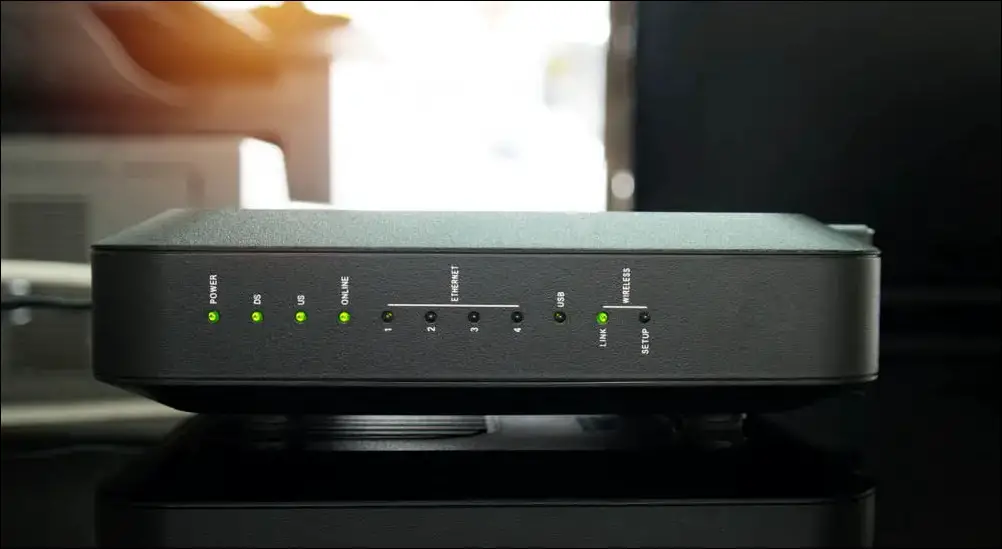
Backend issues with ISP are the most common reason for “WiFi connected but no internet” issues. If the WiFi has stopped working across your devices, check the indicator lights on the router. It could be that your ISP is having a service outage in your area.
You can check this by calling your ISP or logging into the WiFi dashboard or app. All internet providers have a web-based dashboard or an app to connect and manage your Wireless broadband account- this is where you can check the connection health and status.
Damaged Fiber Optic Cable
It could also be that your Fiber optic cable has been accidentally cut or damaged. A few months back, my fiber wire broke due to a rainstorm. And once, I accidentally damaged the optic cable while cleaning the place. So check if cable damage is possible, which, in most cases, is fixed without any charge by the ISP.
Method 4- Forget the WiFi Network
Forget and rejoin- this is an age-old solution that fixes temporary glitches and issues on any WiFi network. Forgetting the WiFi removes the network’s SSID, password, and other related data. Reconnecting to it establishes a fresh connection, which can resolve specific connectivity issues that may have arisen over time.
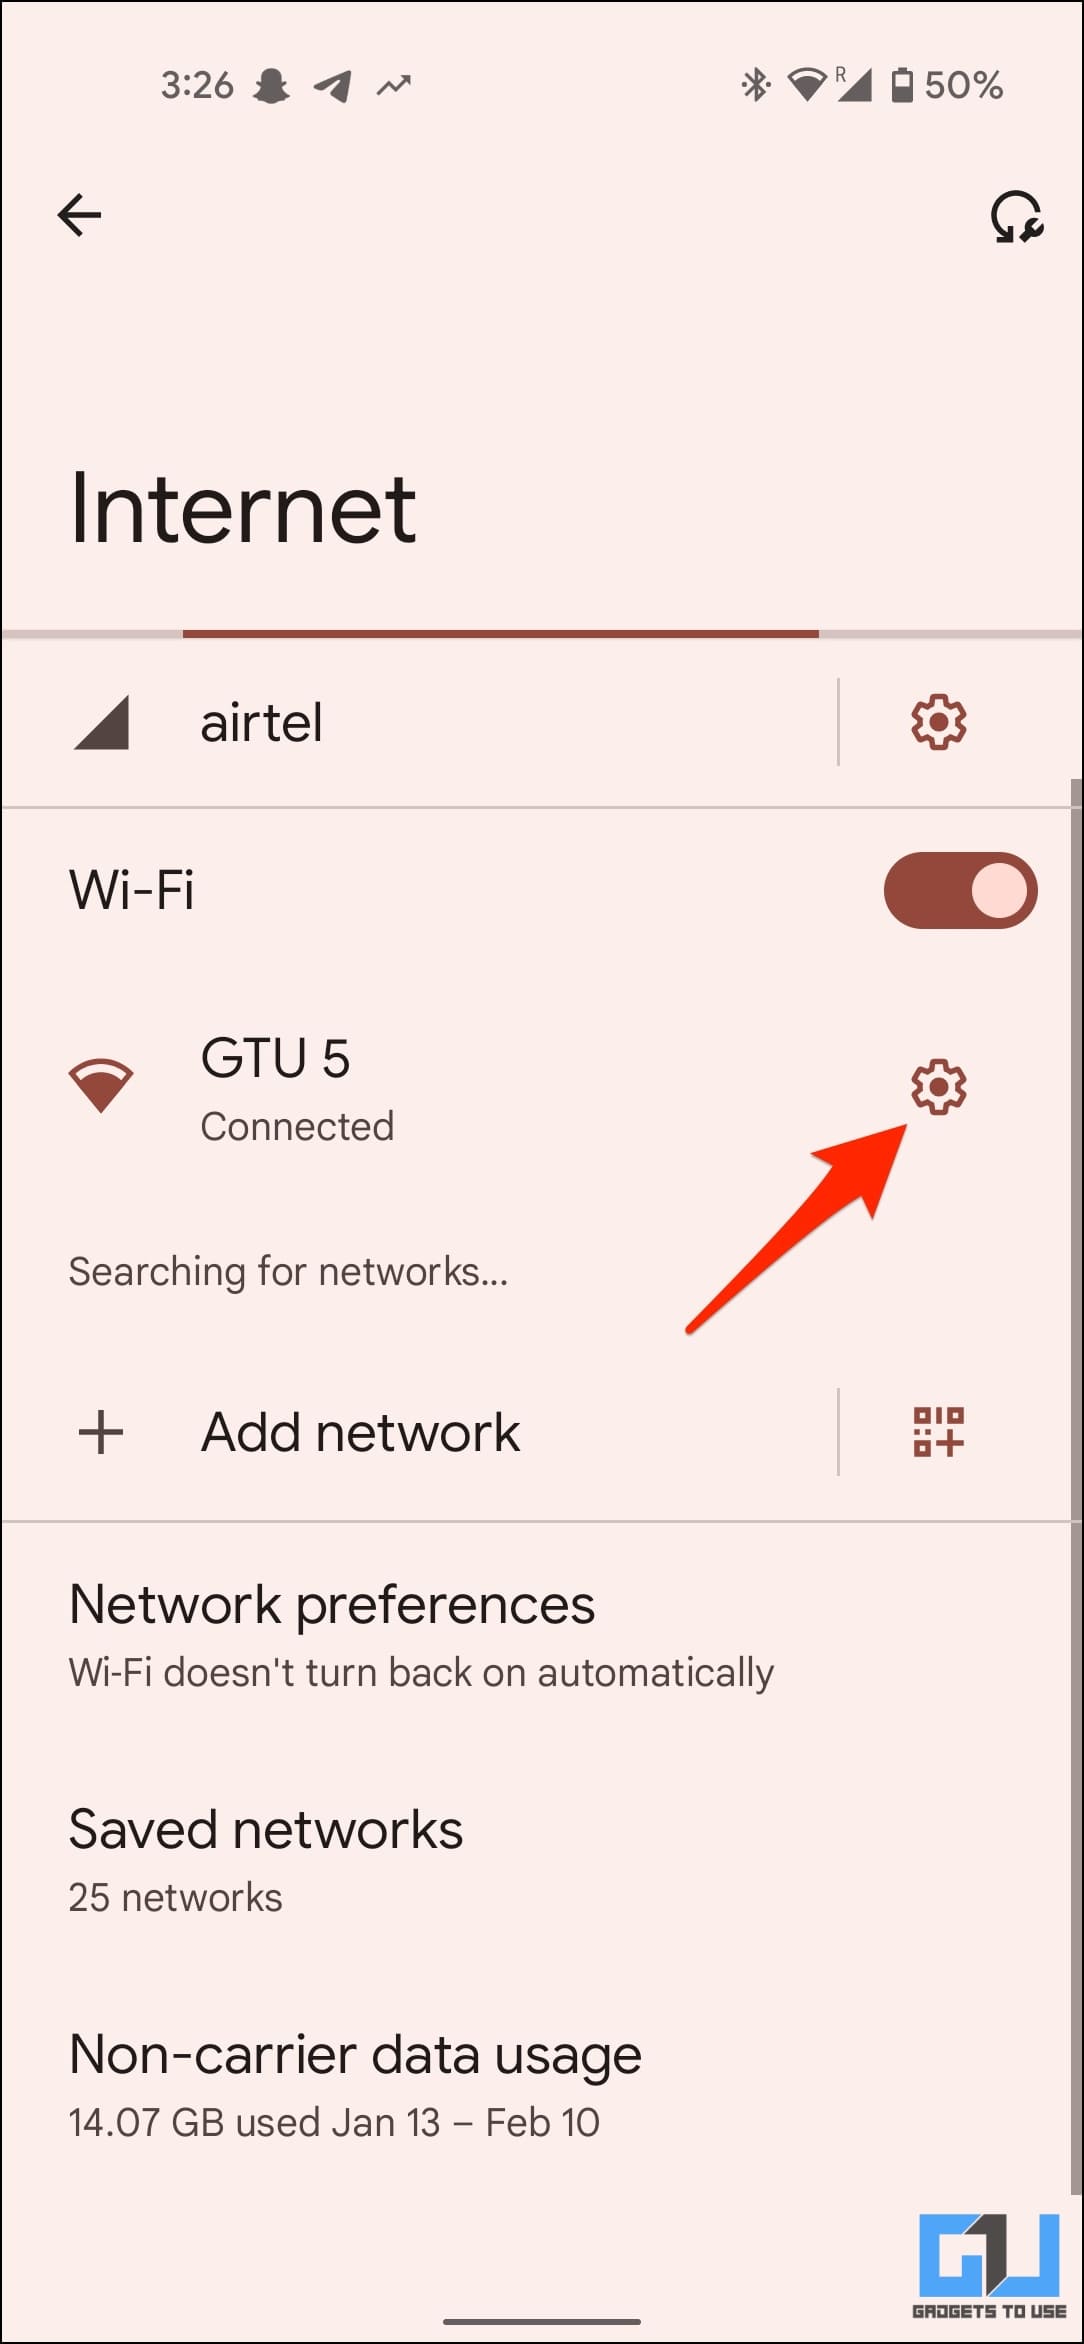
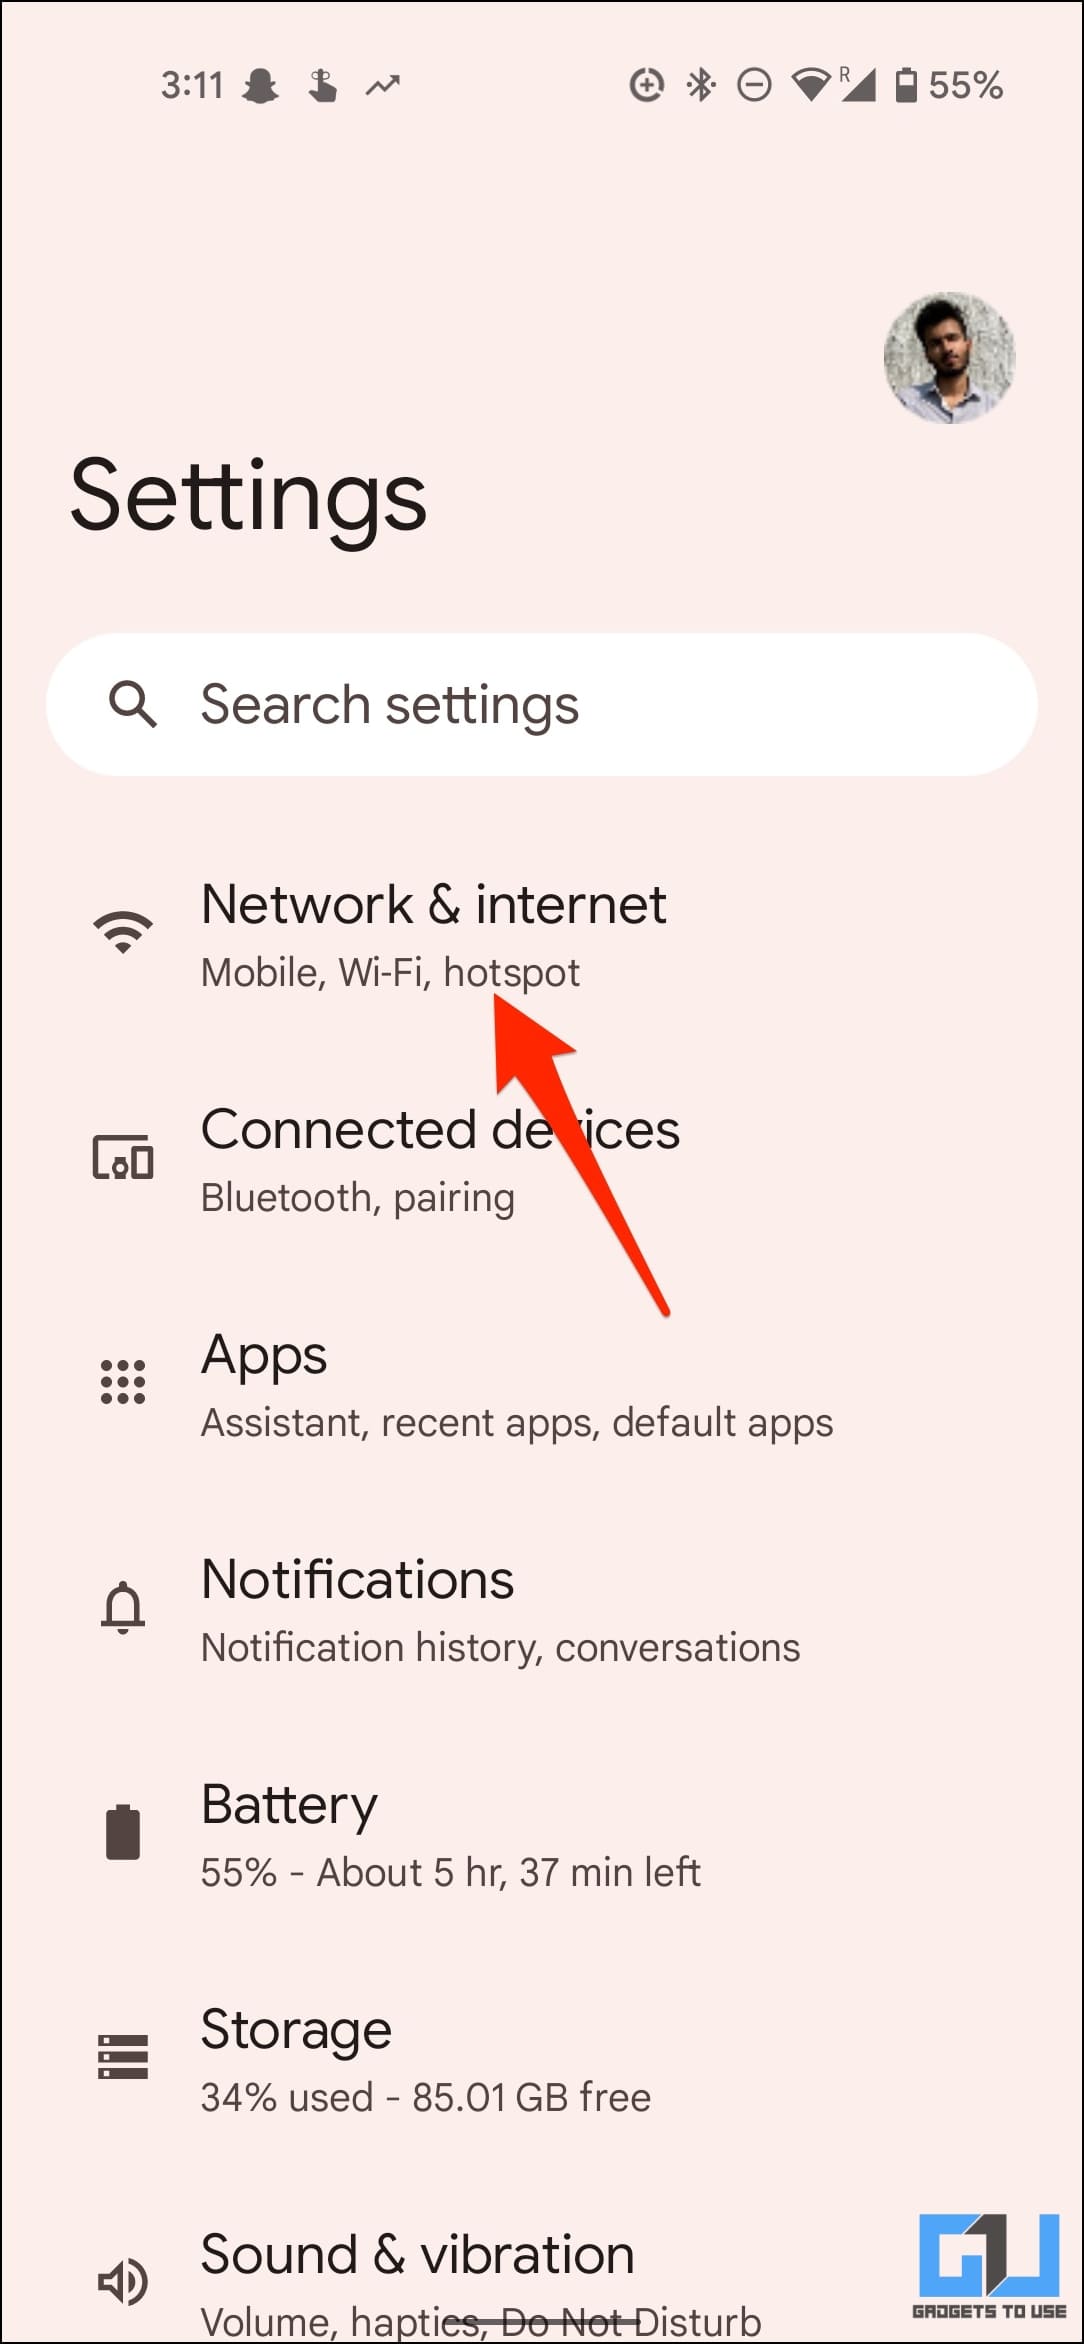
1. Open Settings and tap Network and Internet.
2. Click on WiFi and select the WiFi network you’re having trouble with.
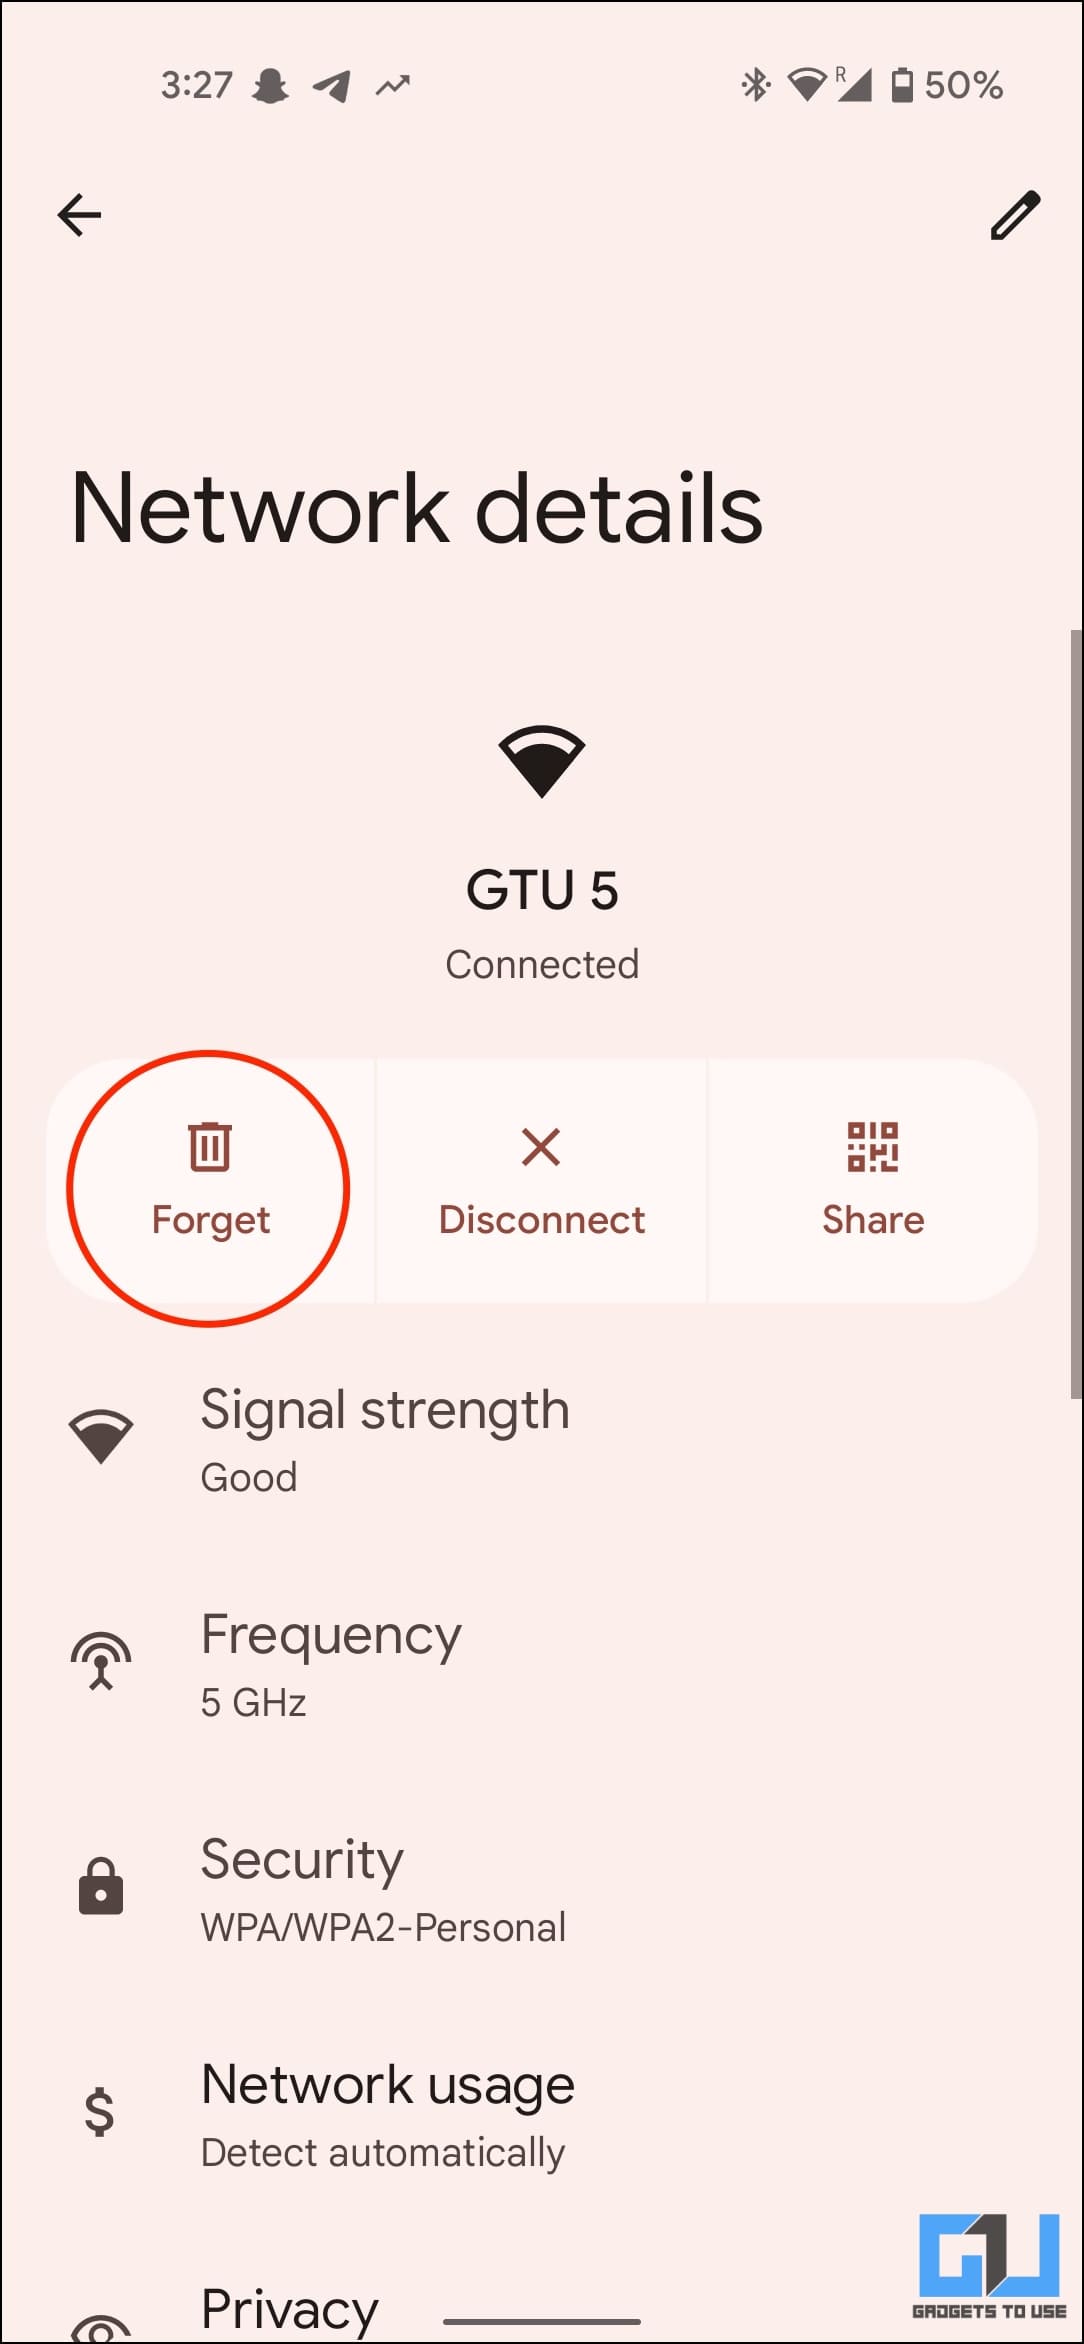
3. Tap Forget to disconnect the WiFi.
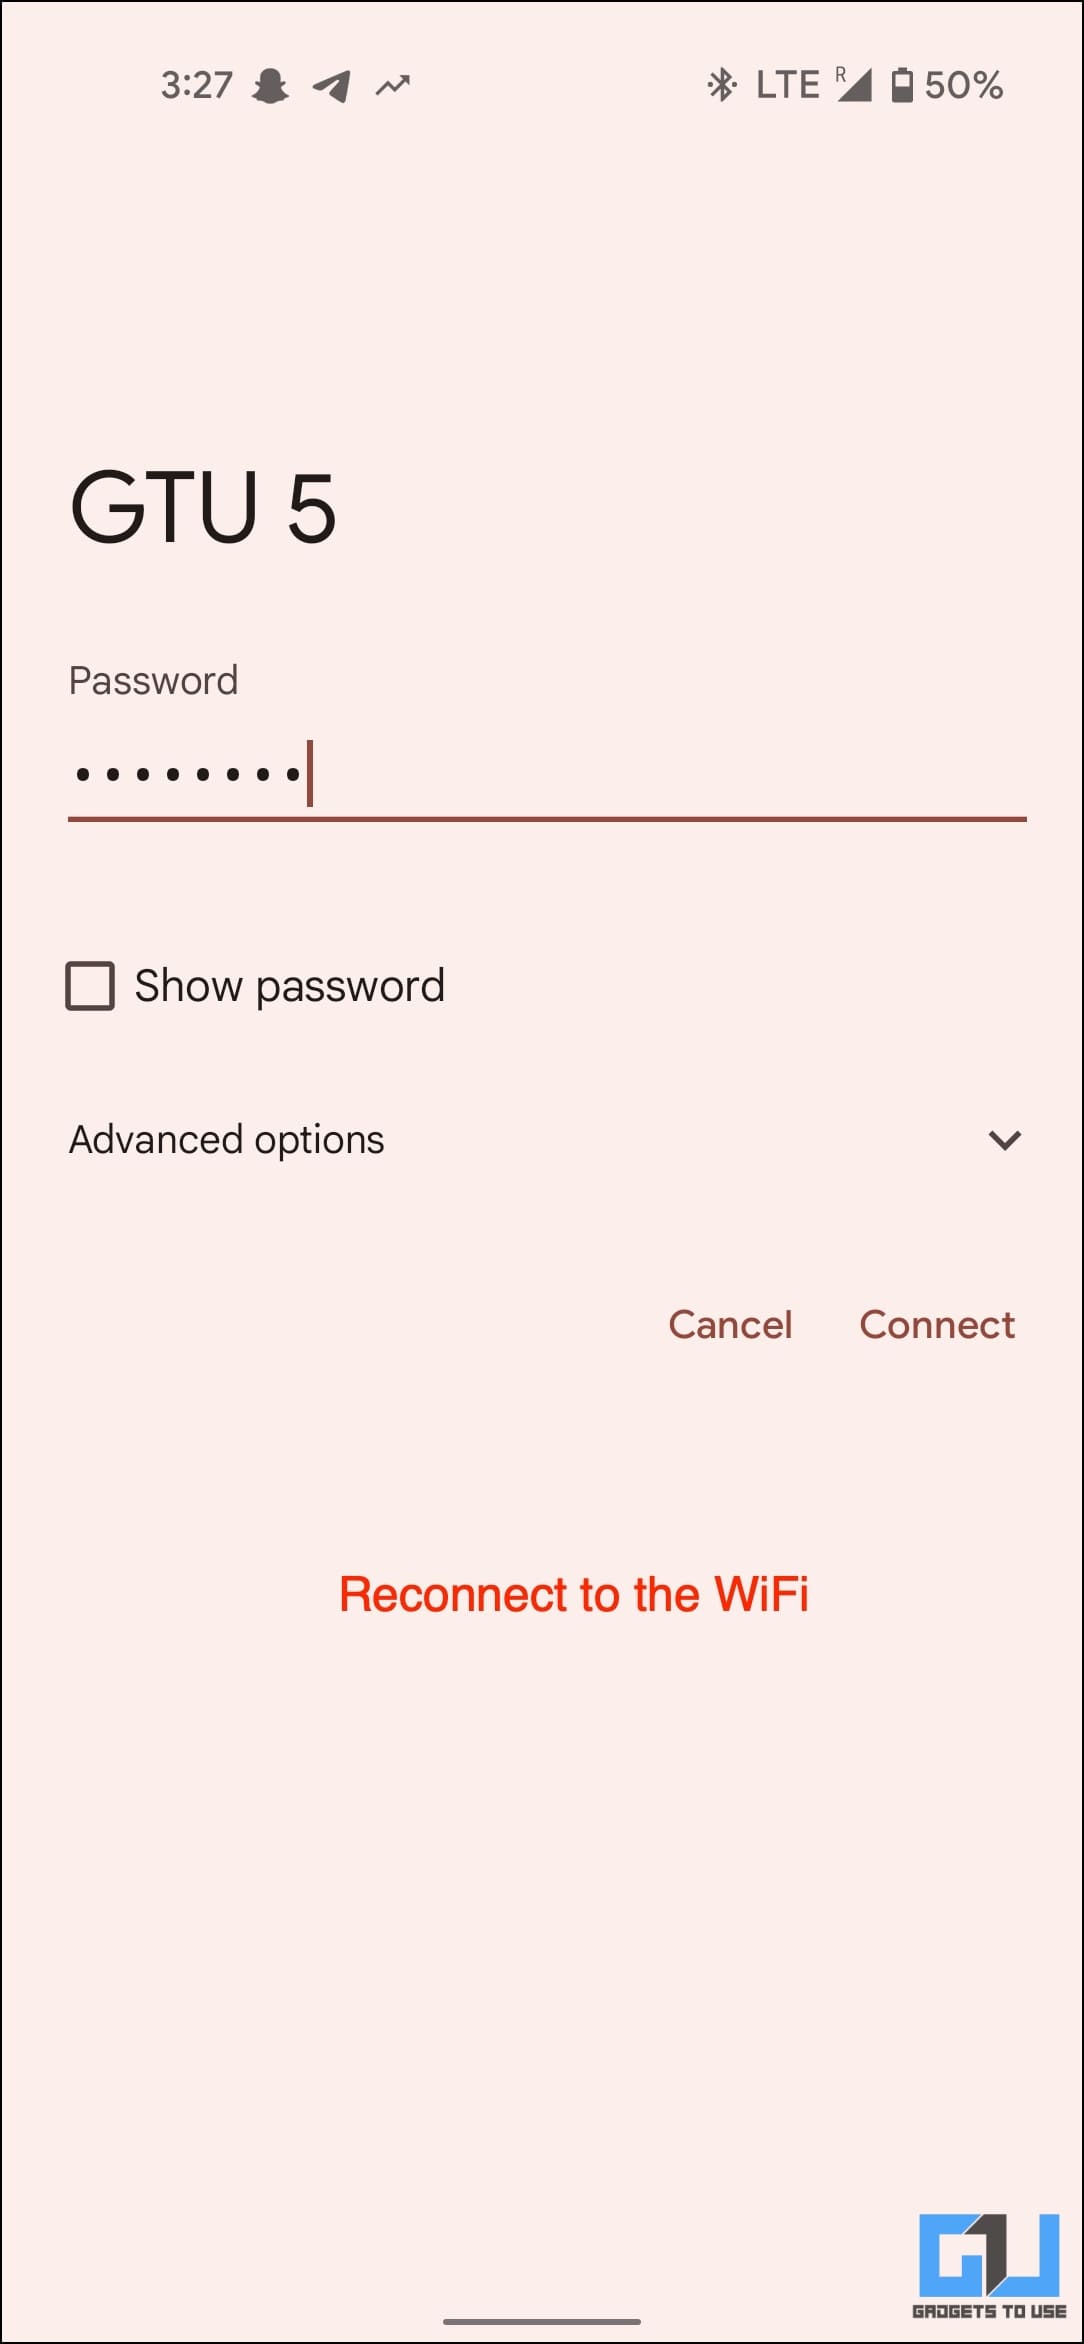
Now, connect back to the WiFi network. Ensure you enter the correct password; otherwise, it’ll keep showing “Connecting, Saved” and won’t connect to the WiFi. If you can’t remember the password, here’s how to see connected WiFi passwords.
Method 5- Restart the Router
Routers run into issues all the time. An easy fix is to restart your router. Doing so will refresh your connection with the line, and it should start working normally.
You can restart the router from the admin page or use physical buttons on the router. A more familiar way would be to unplug the power cord on the back of your router, wait for 20-30 seconds for it to power off completely, and plug in the cable back again.
Give it a good 4-5 minutes to settle down. Once the router is up and working, connect your phone to see if the internet connection is working properly.
Method 6- Turn Off WiFi Traffic Control
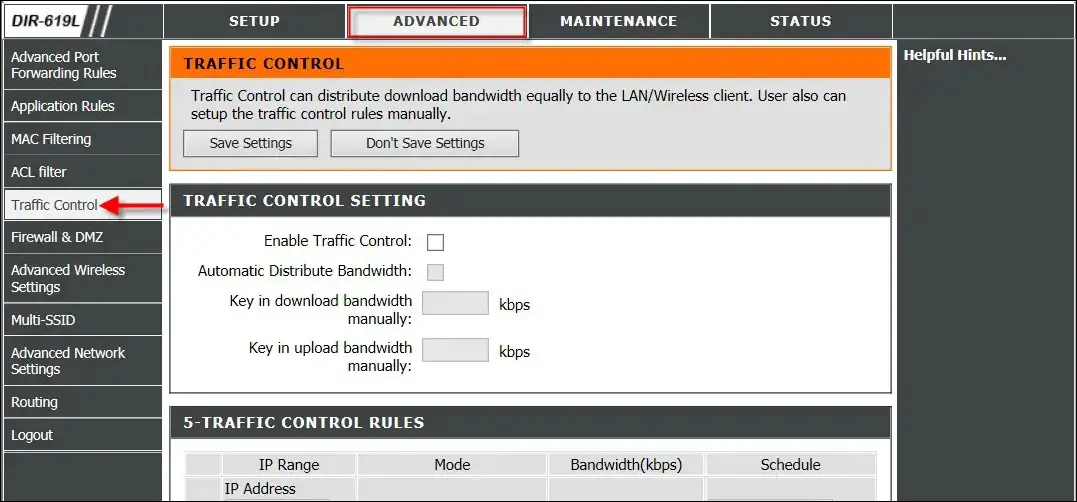
Most routers have a Traffic Control feature that allows controlling and reducing the internet bandwidth for specific devices on the network. If it’s enabled and you are experiencing internet connection issues on some of your devices, we’d recommend turning it off.
Open the browser on your computer and head to the router’s dashboard. Go to Advanced > select Traffic Control. Disable it if turned on and check if the internet starts working on your phone.
Since the process may vary across make and models, don’t forget to check your router’s user manual or the manufacturer’s website and support page for detailed instructions.
Method 7- Reset the Router
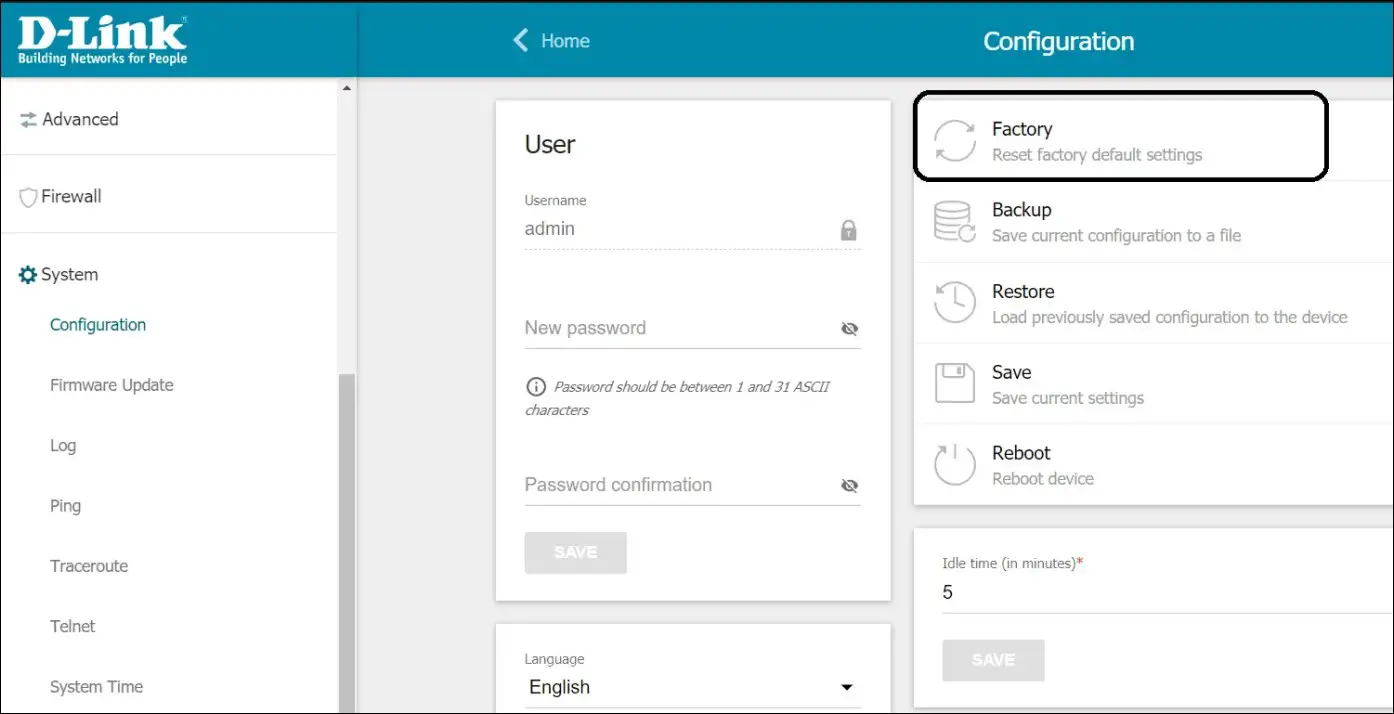
The other option is to reset the router. Doing so will erase all the settings and configurations and start with factory defaults. Usually, the routers have a void where you can insert a SIM ejector tool to trigger the reset.
If you can’t find it, check the user manual that came with the router. Alternatively, you can log on to the router’s dashboard or app, go to the System or Configuration > and choose the Reset option.
Method 8- Update the Router Firmware
Is there a firmware update available for your WiFi router? If yes, log in to your WiFi dashboard and allow the software to update. Doing so may fix router-specific connectivity and performance issues or bugs identified by the manufacturer.
Method 9- Change DNS Server on Android
DNS servers help translate the website links into IP addresses. If the internet is not working on your Android phone despite being connected to WiFi, it could be an issue with the domain server of your internet service provider. Try switching to a different DNS server, as shown below.
Switching to Google DNS

1. Open Settings on your phone.
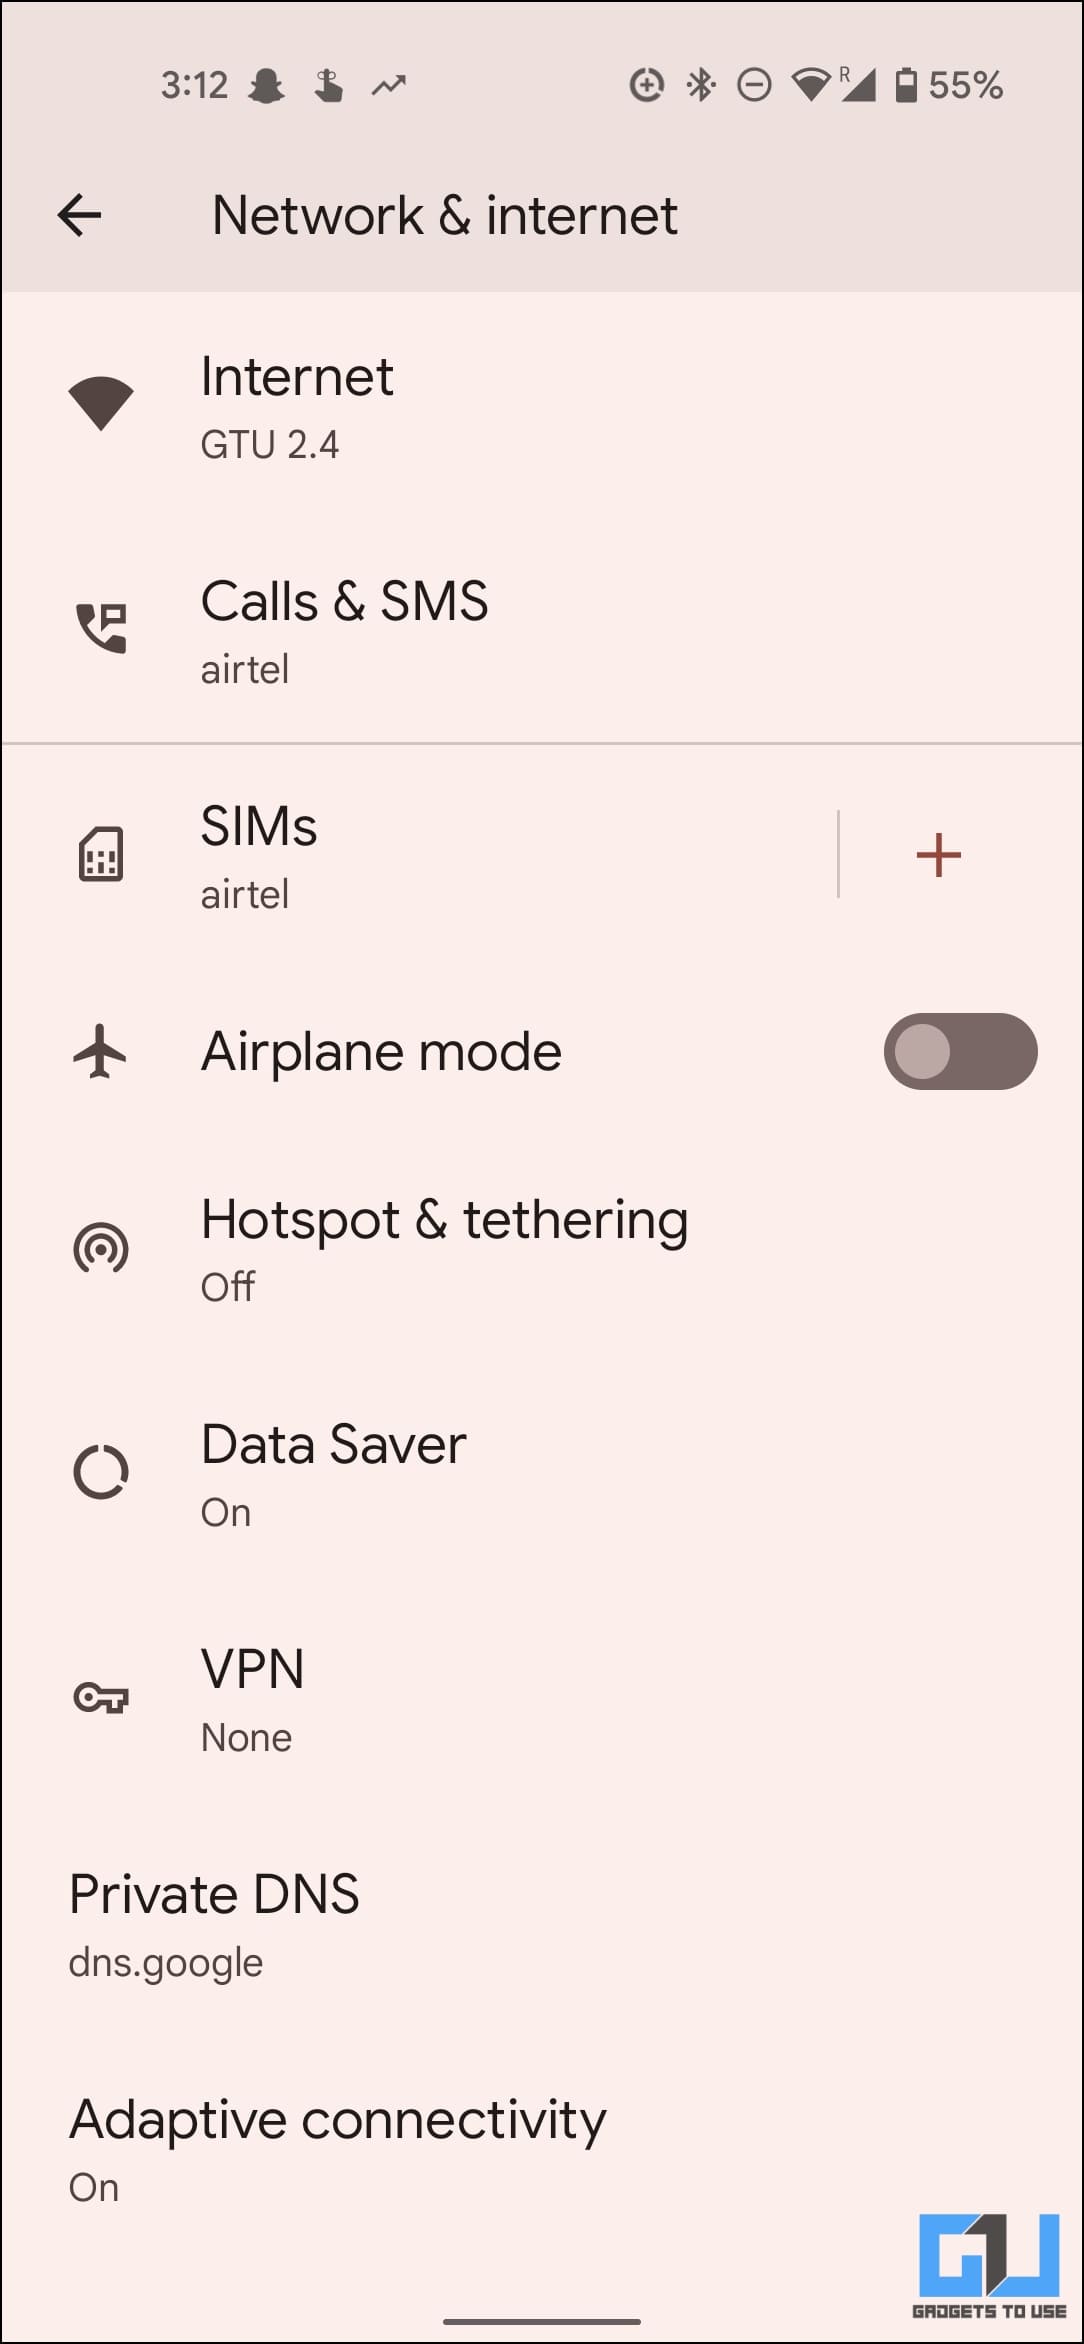
2. Head to Network & Internet.
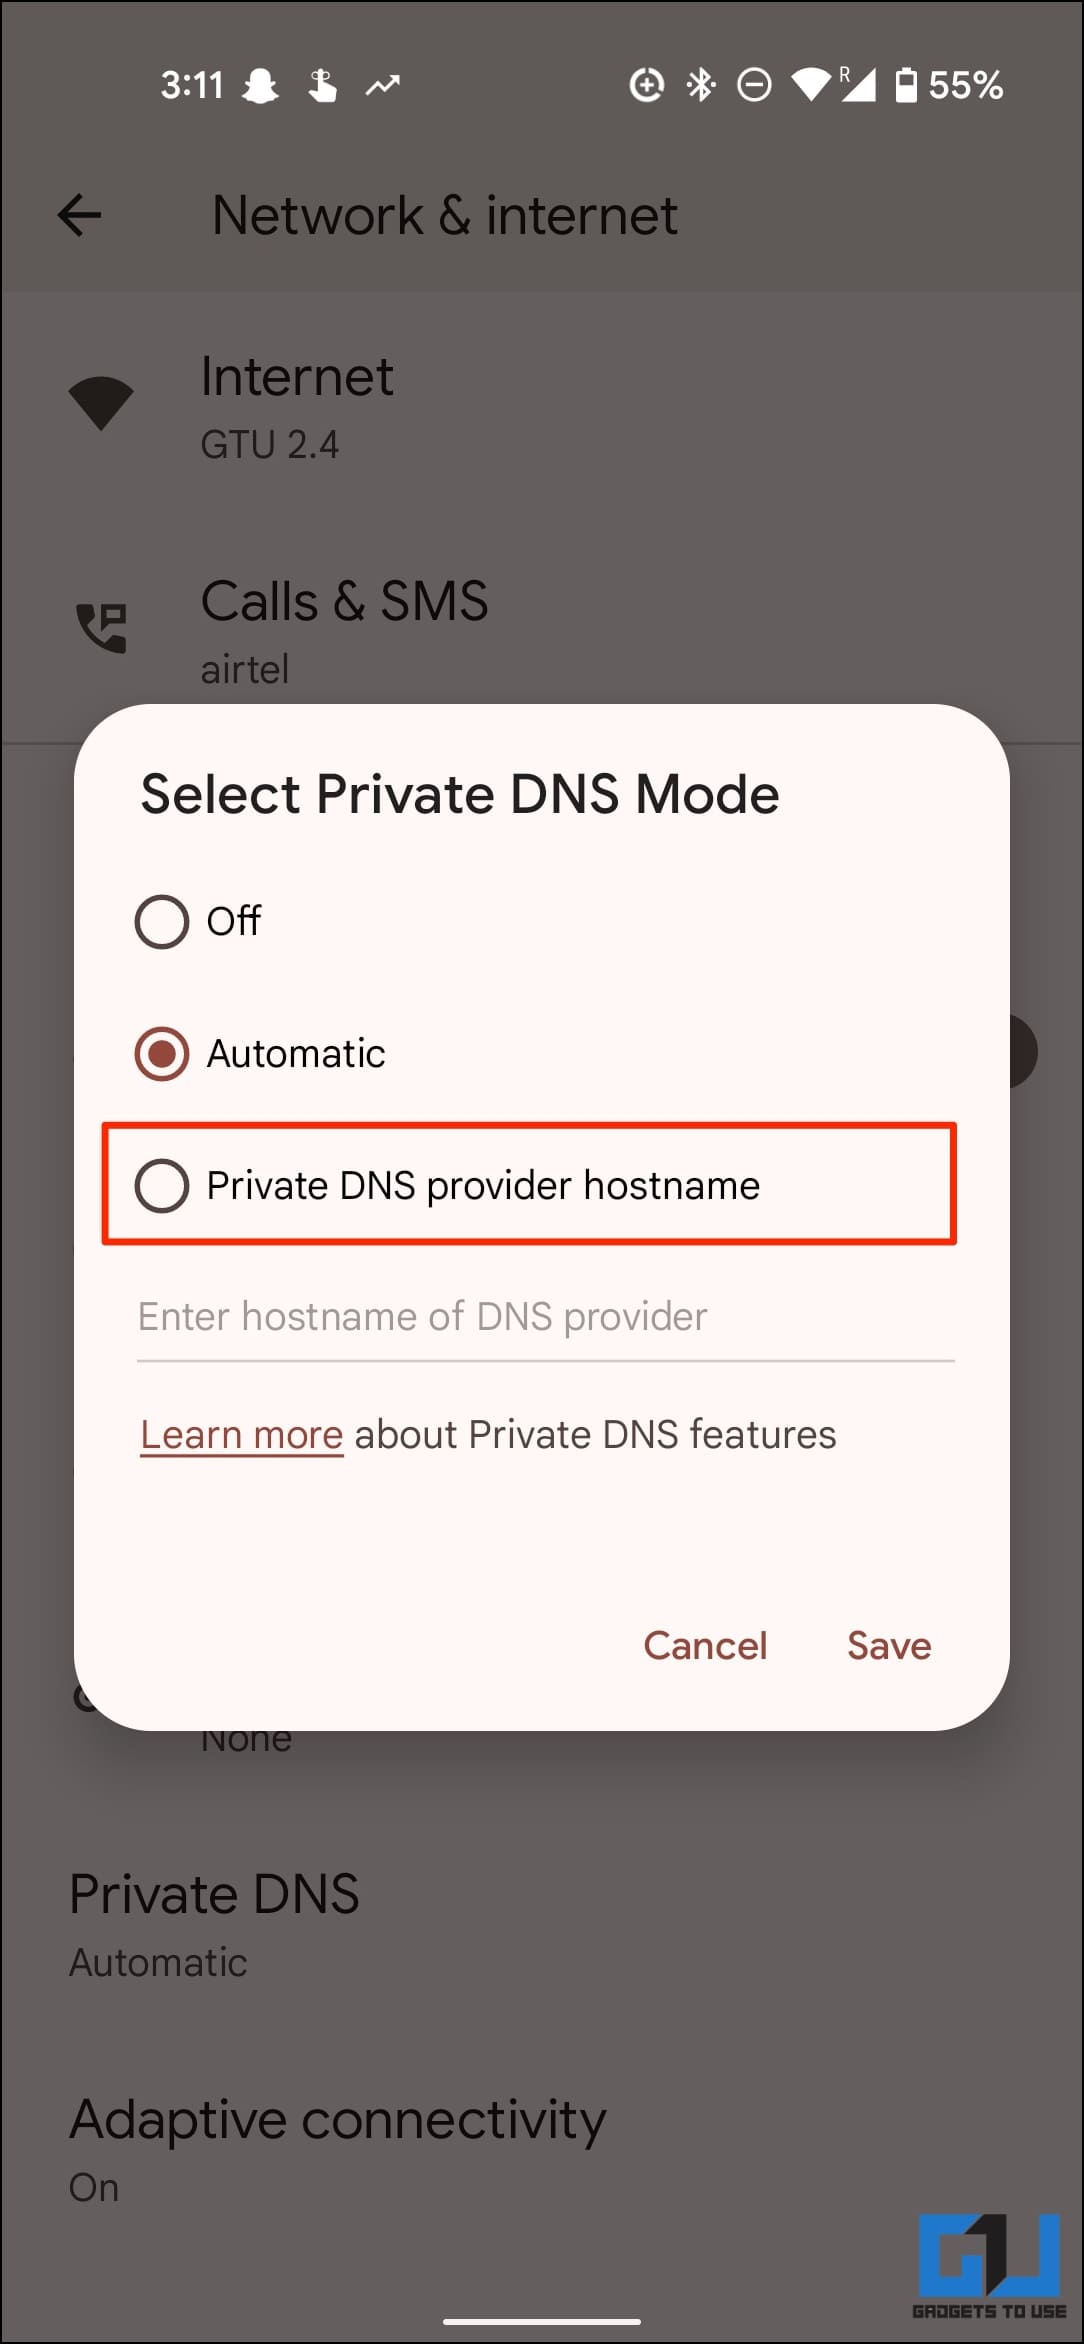
3. Here, click on Private DNS.
4. Change it from Automatic to Private DNS provider hostname.
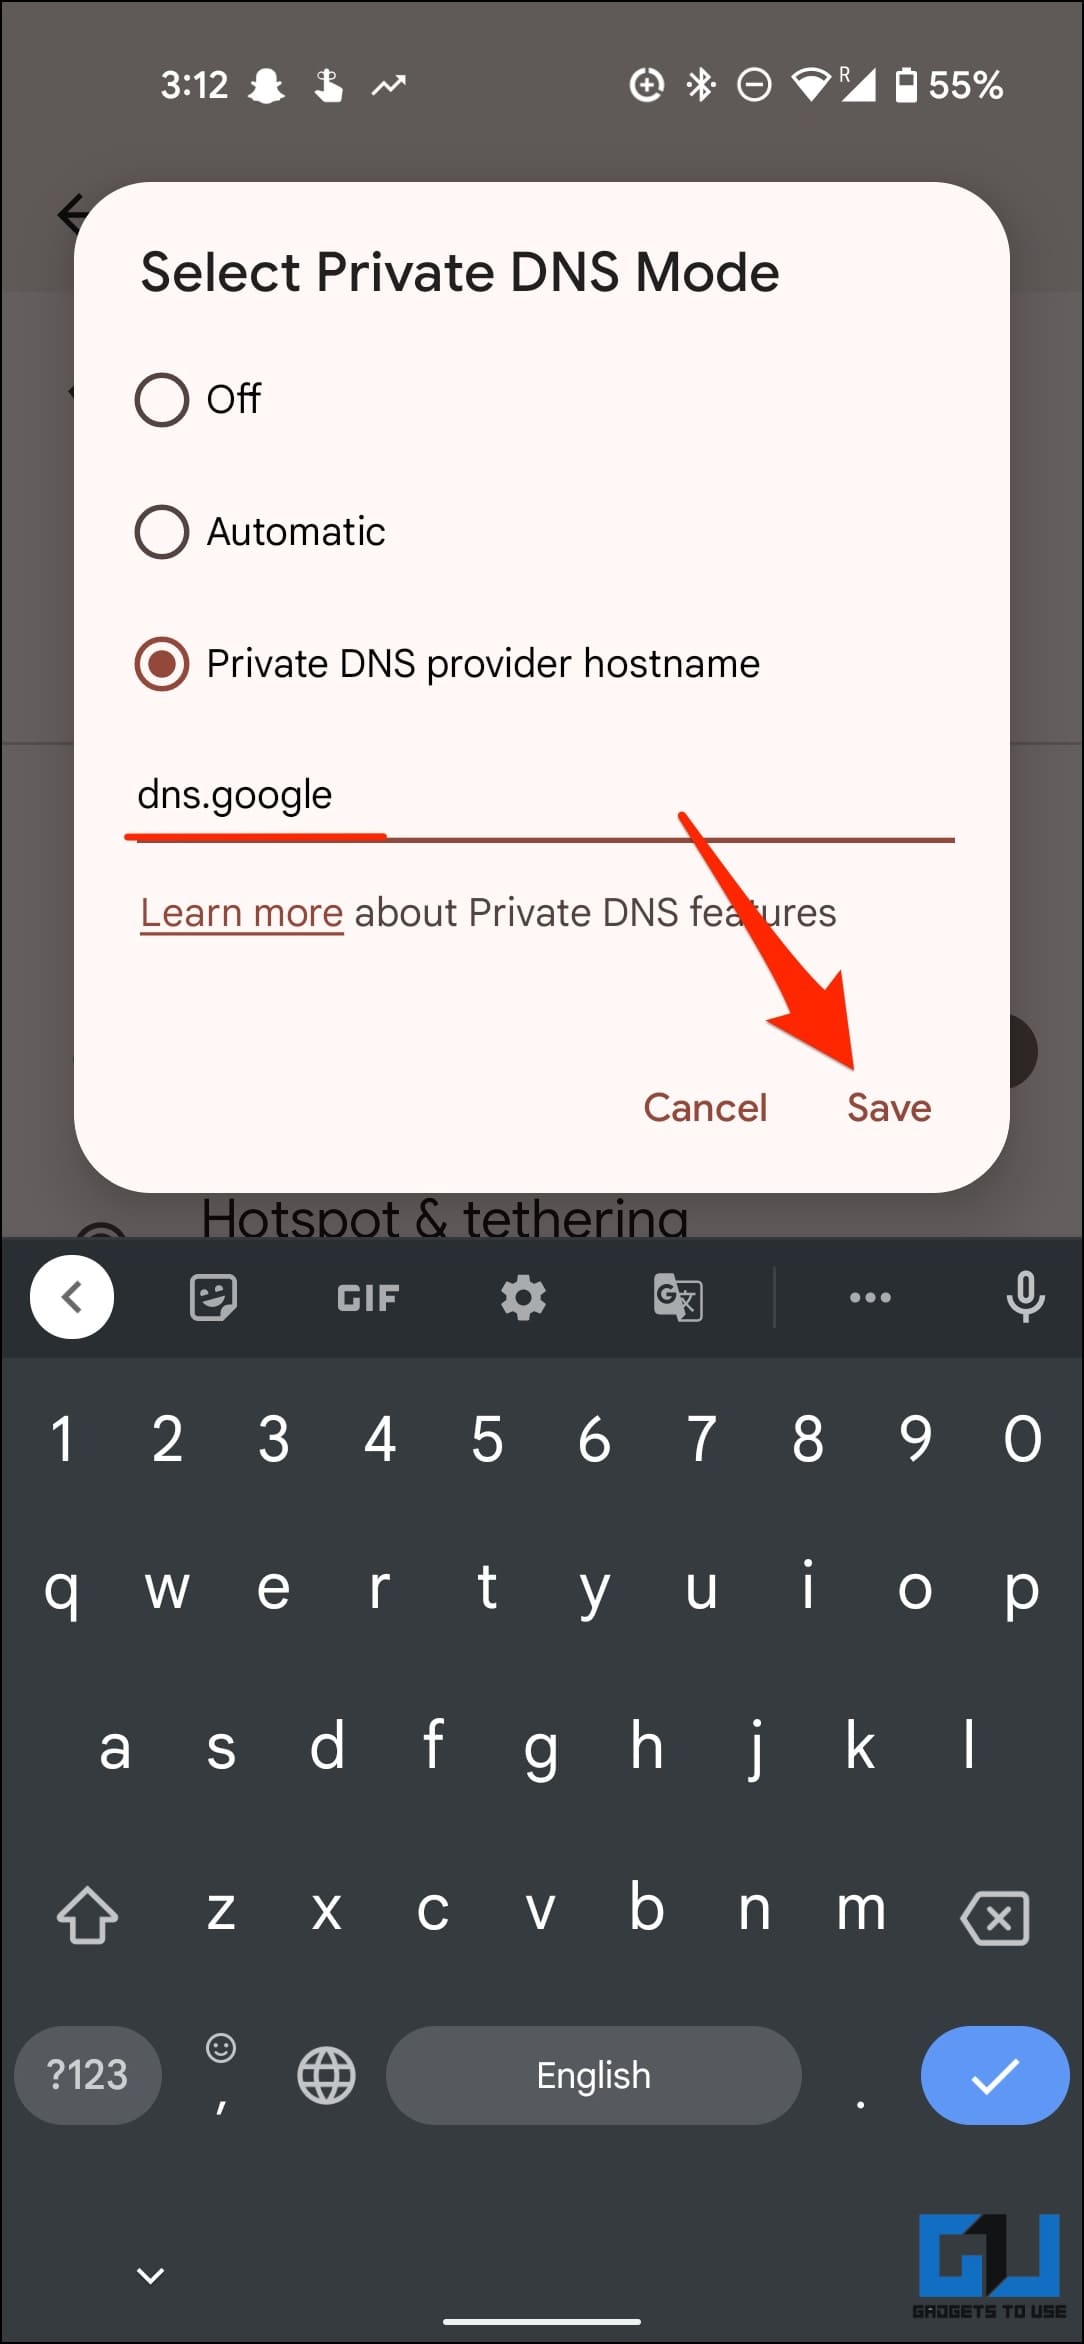
5. Next, enter dns.google in the hostname field. Tap Save.
Switching to Cloudflare DNS
Alternatively, you can switch to Cloudflare DNS by entering “one.one.one.one“ or “1dot1dot1dot1.cloudflare-dns.com”. You can also use the Cloudflare app to enable it:
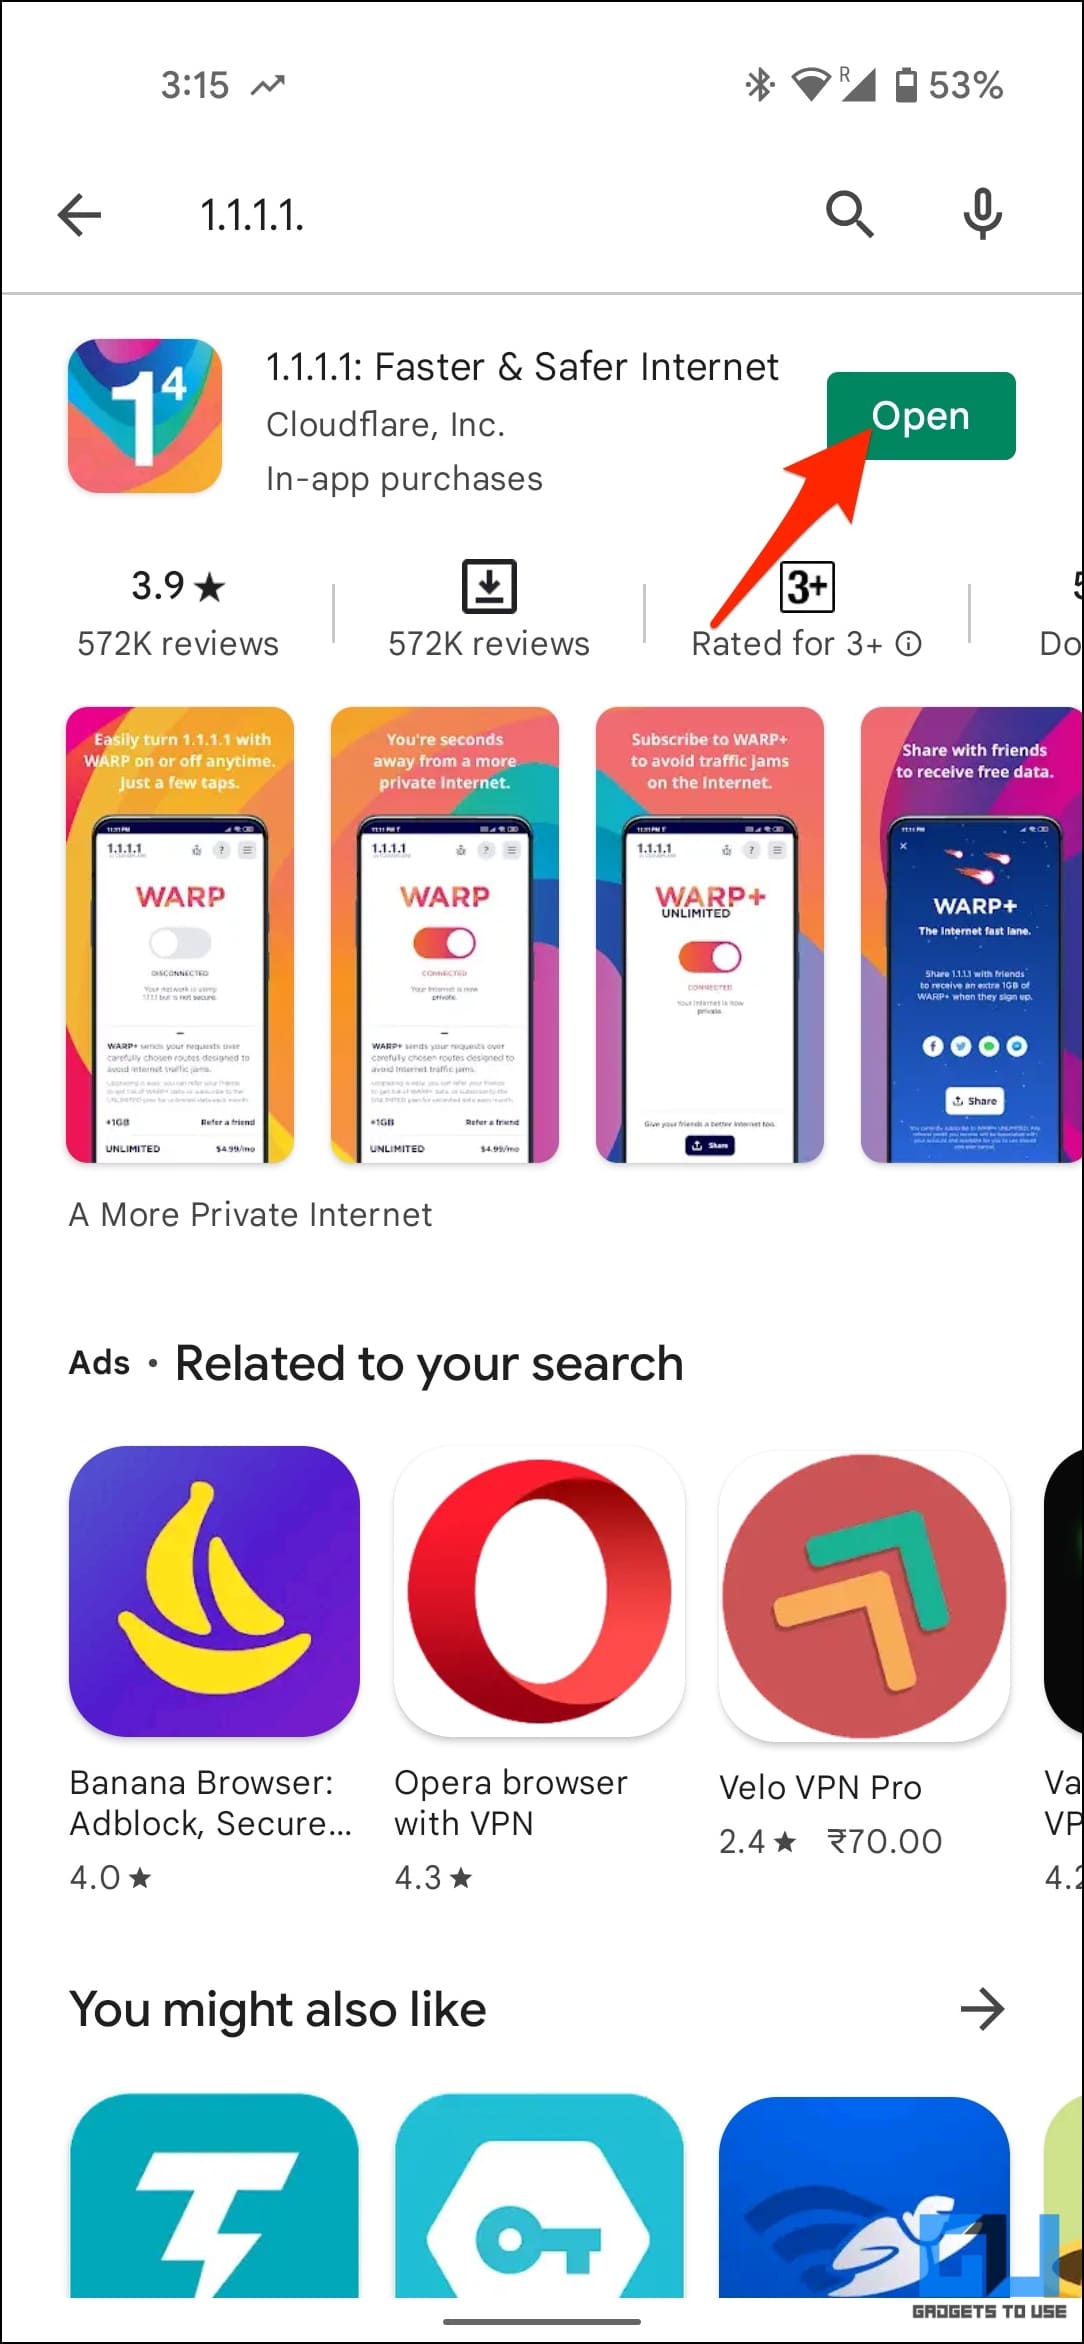
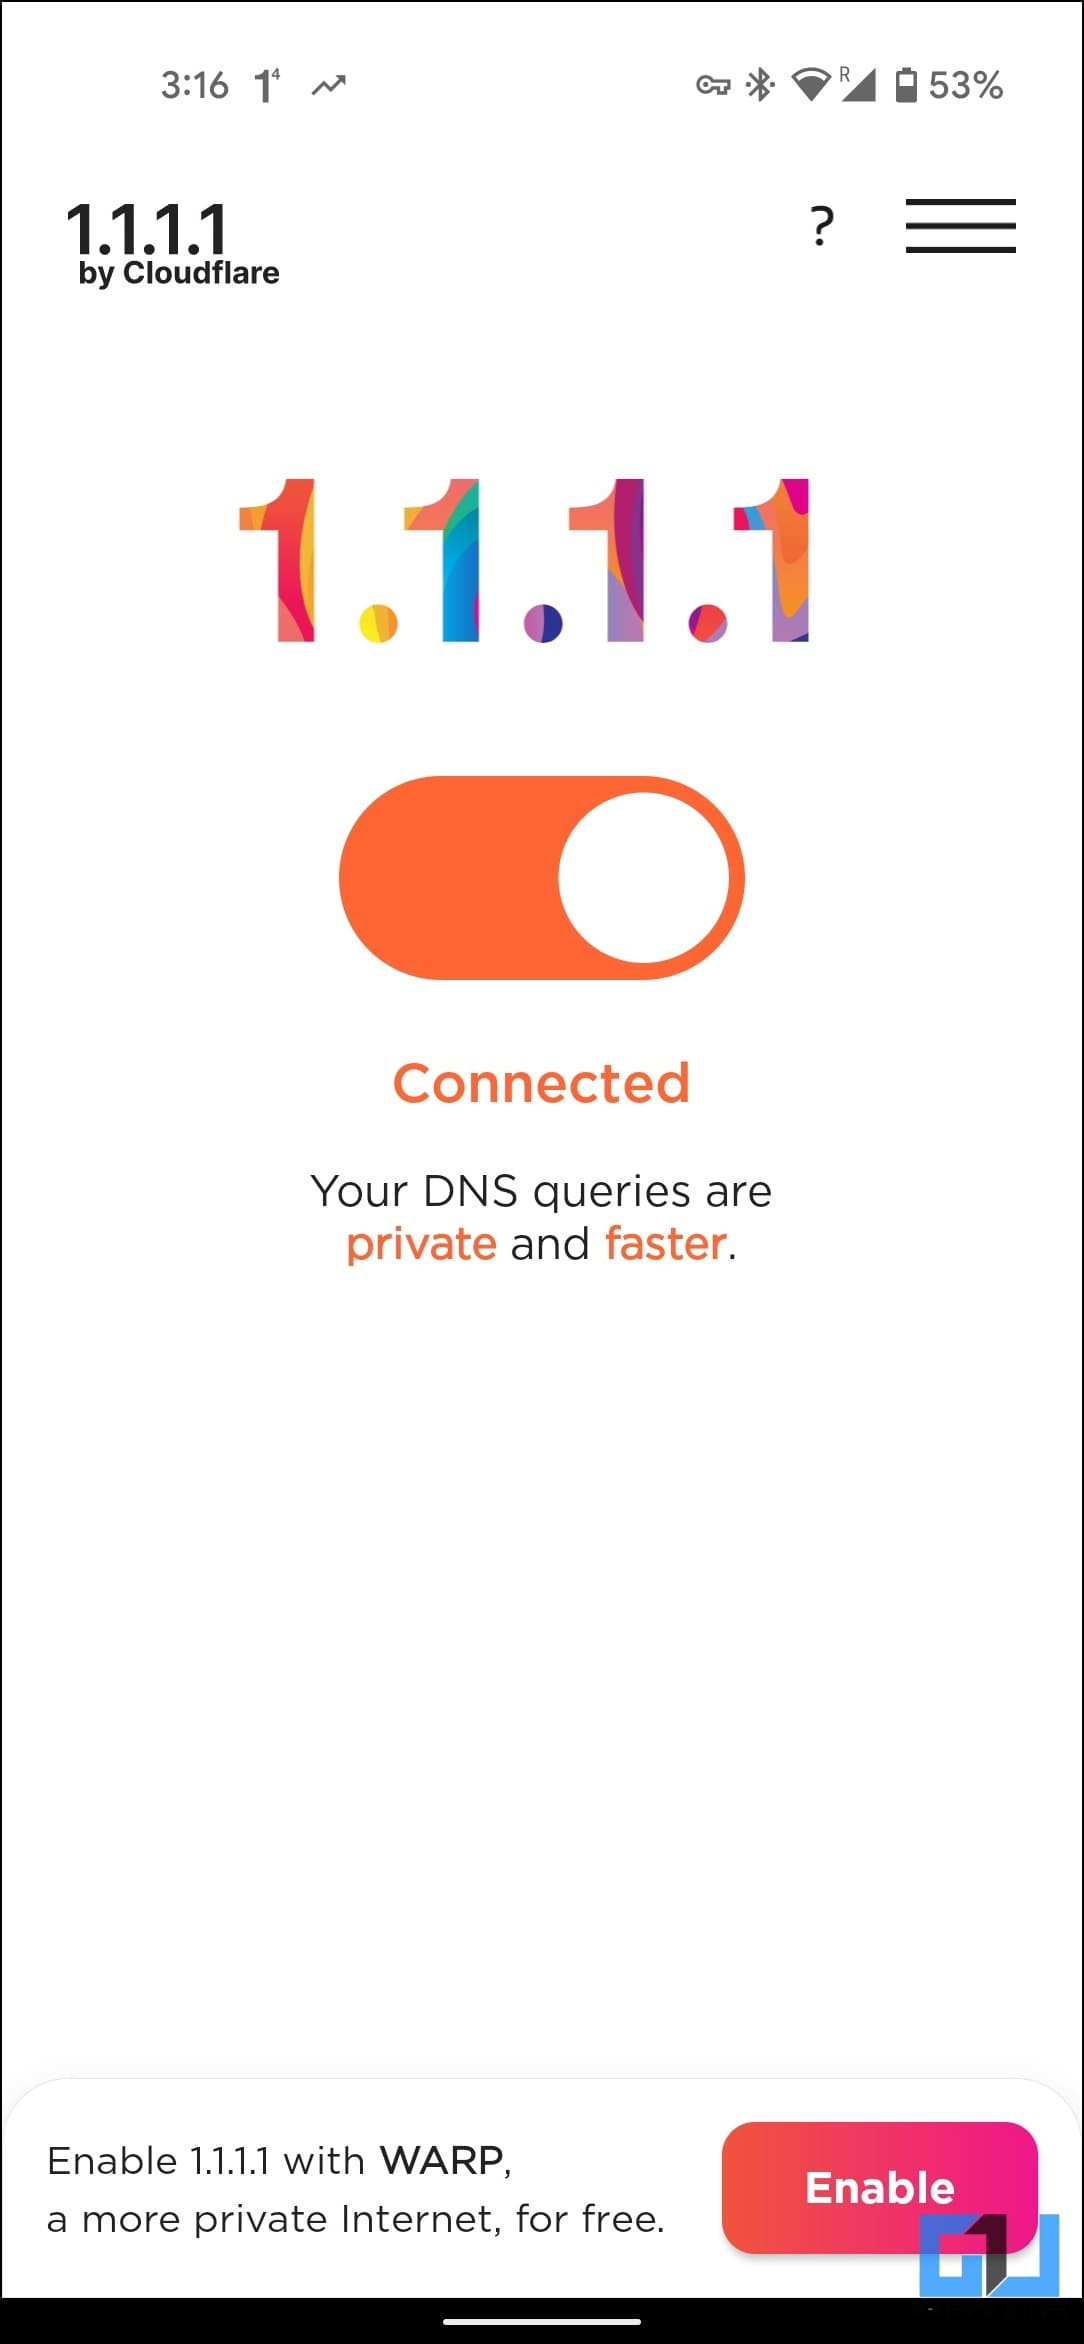
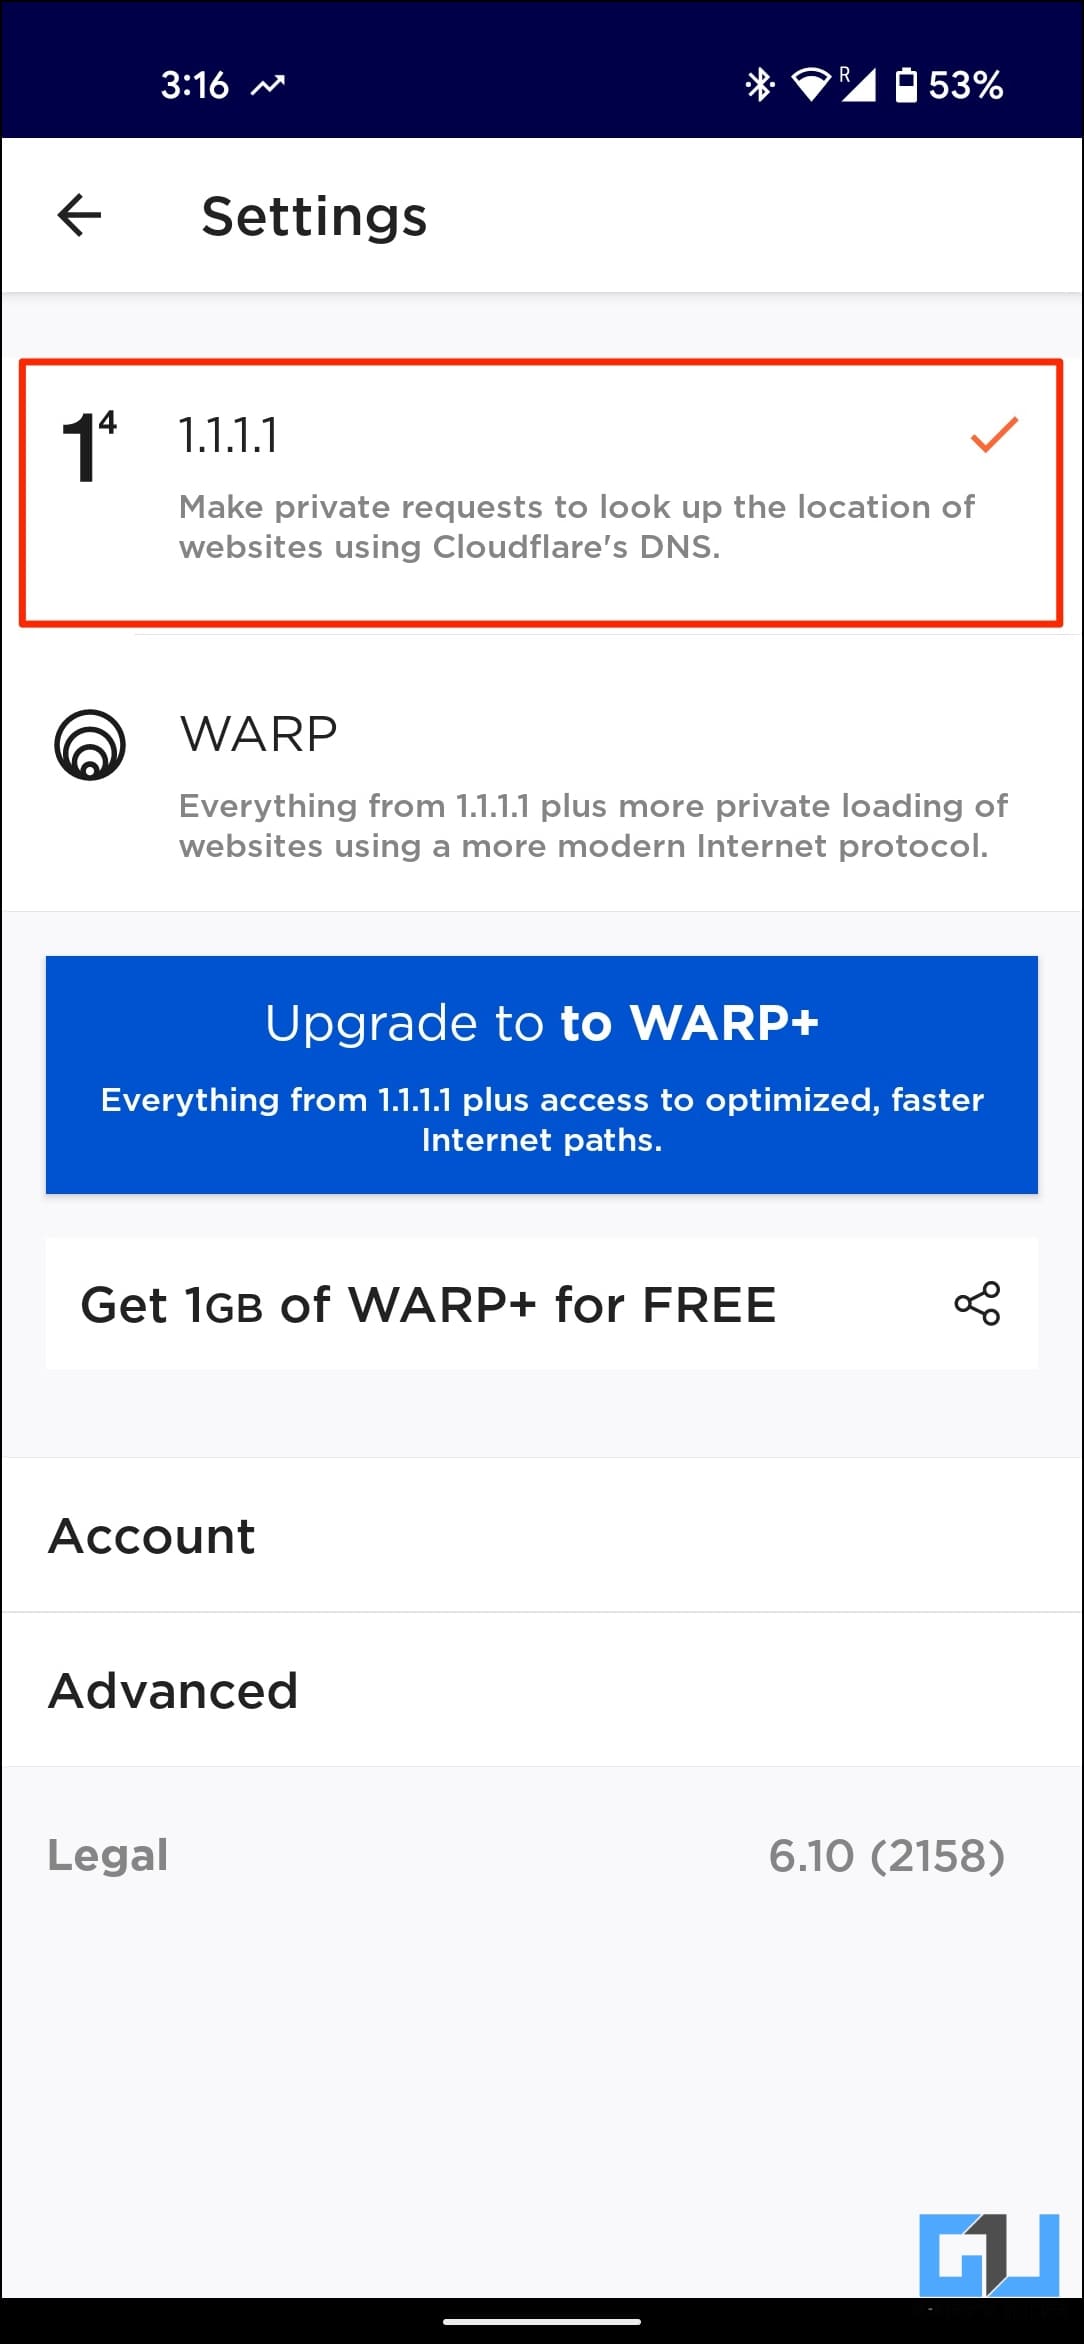
1. Download the 1.1.1.1 + WARP app from the Play Store or App Store.
2. Open the app and accept the terms and conditions.
3. Select 1.1.1.1, enable the toggle, and allow VPN permission to activate.
Changing DNS Settings for WiFi
Changing the DNS using the above methods will also override it for the network. However, you do have the option to change DNS in WiFi settings separately. This can fix the “WiFi connected but no internet” message. To do so:
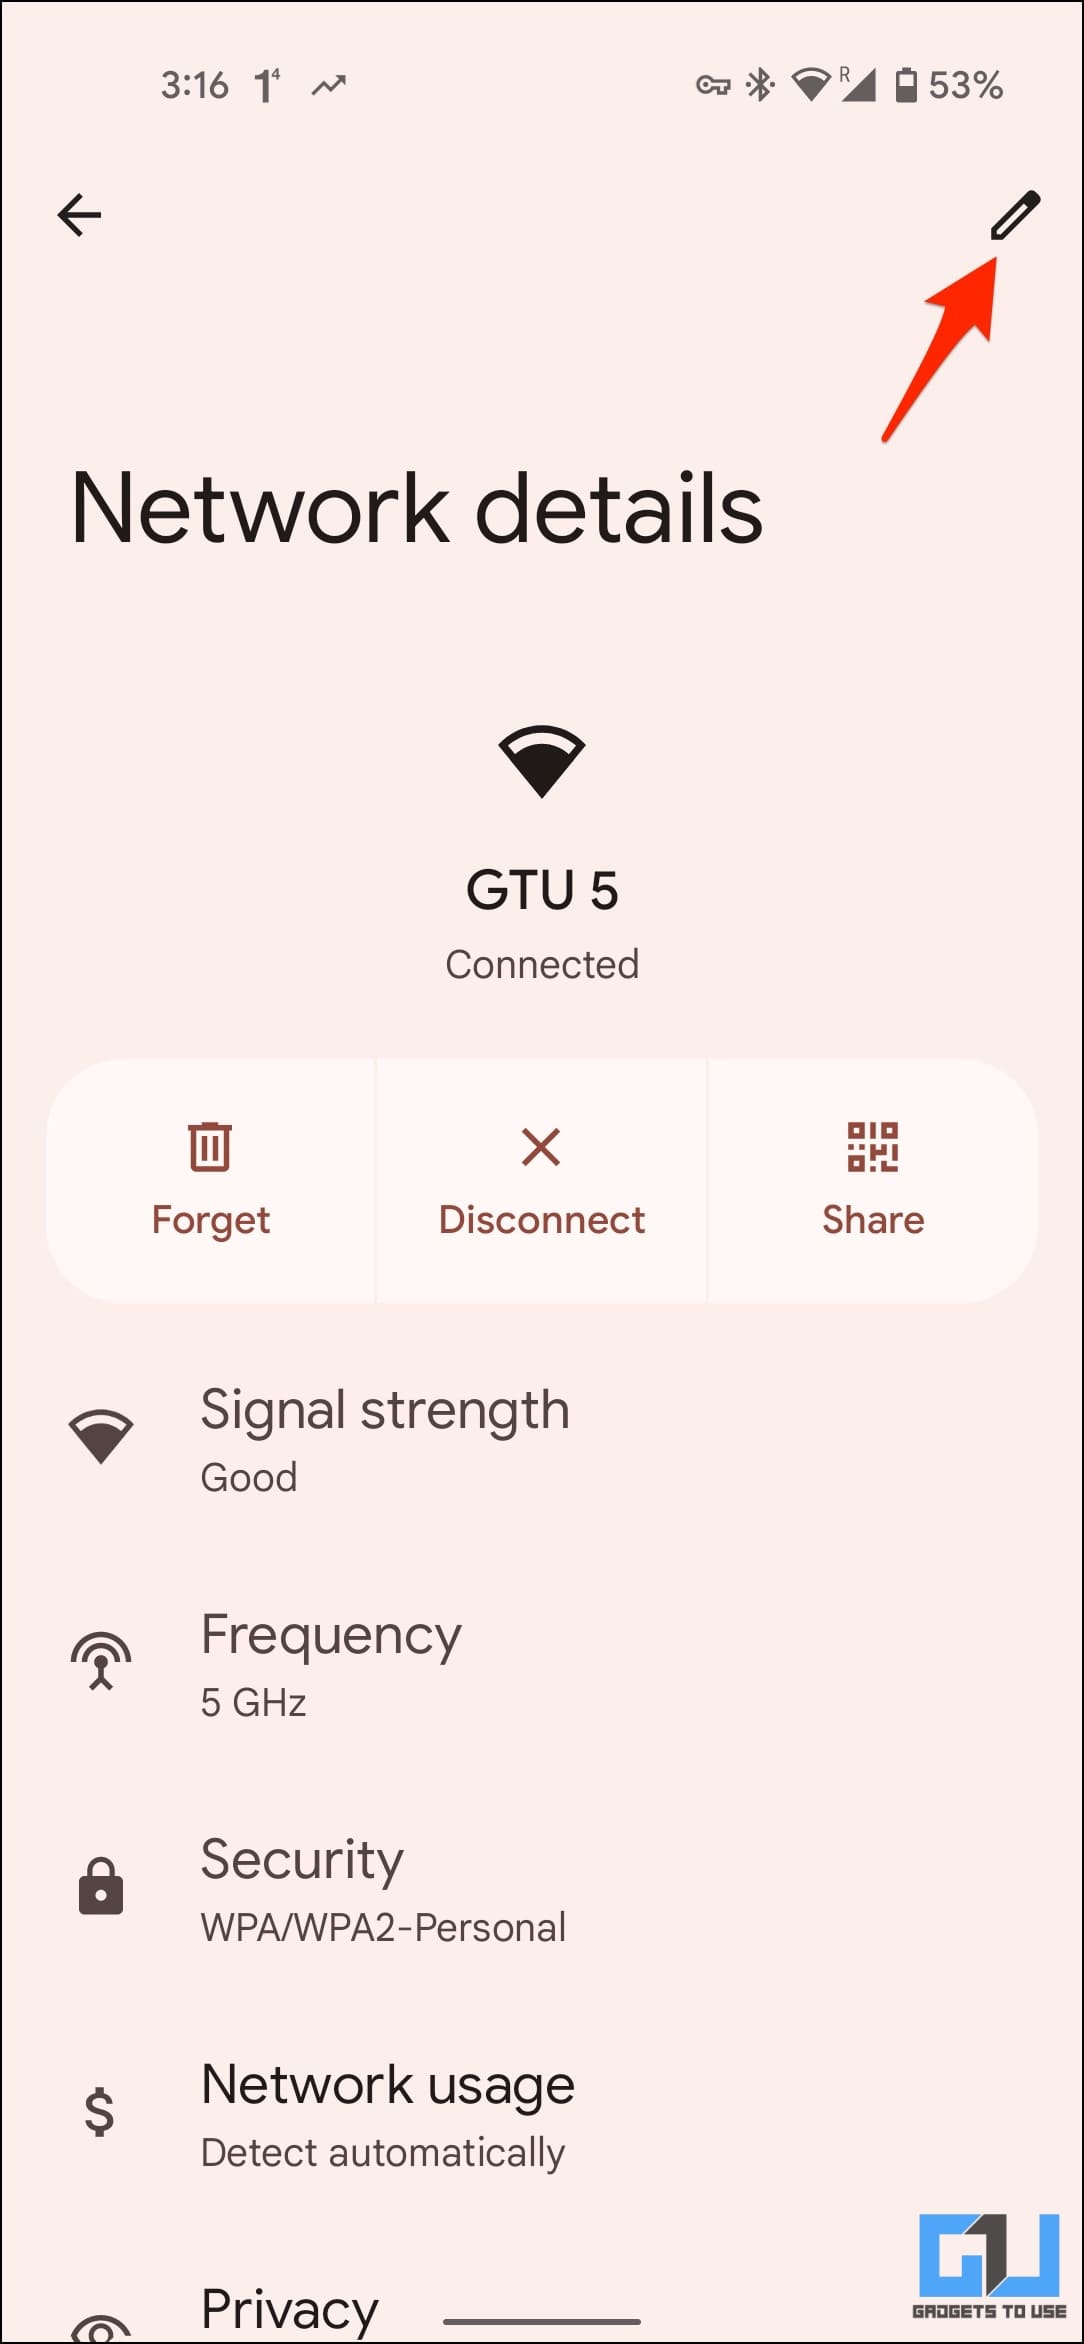
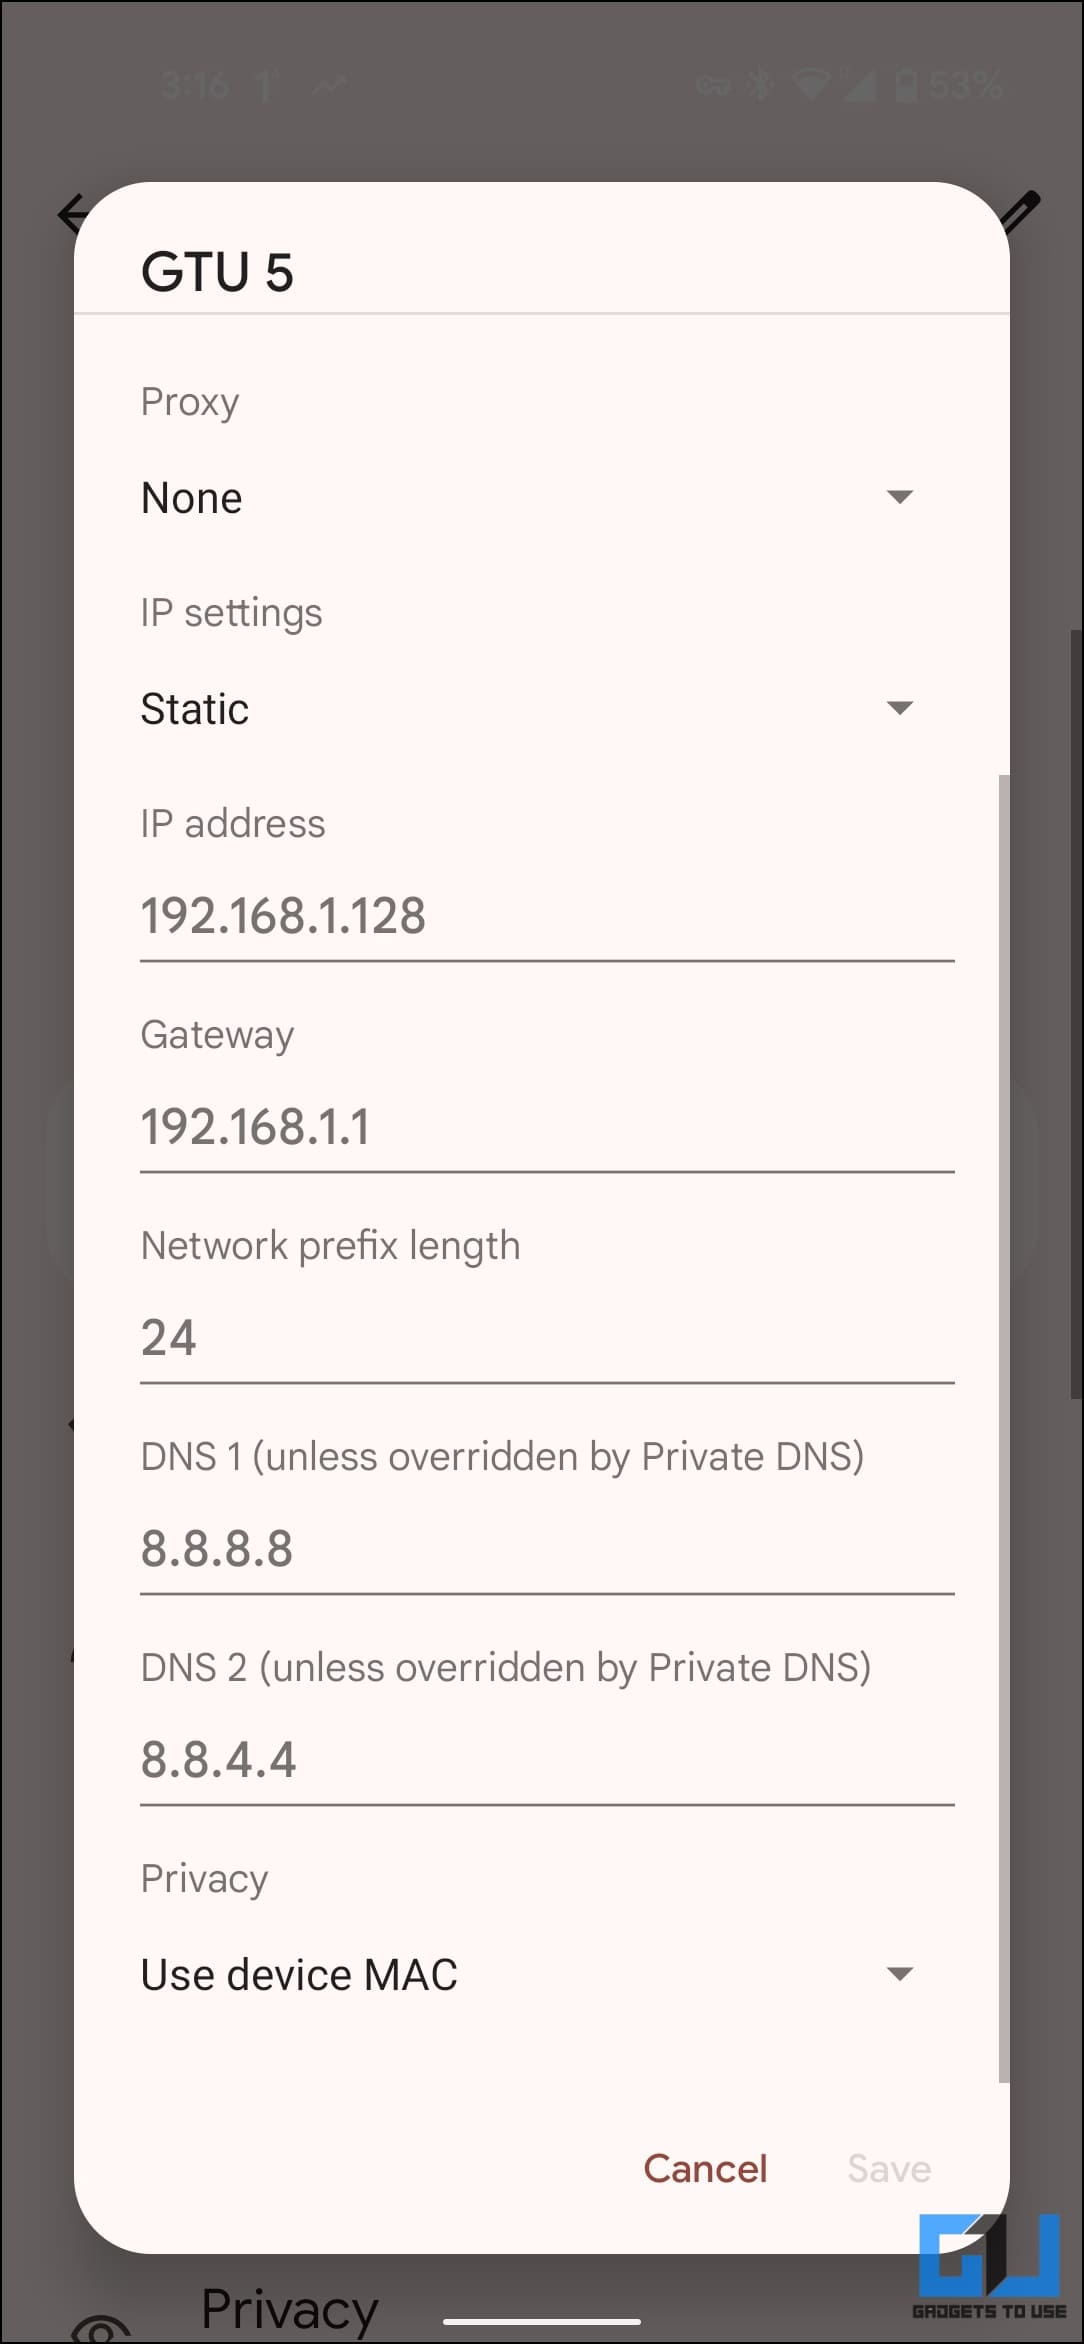
1. Open WiFi settings on your phone and tap the WiFi name.
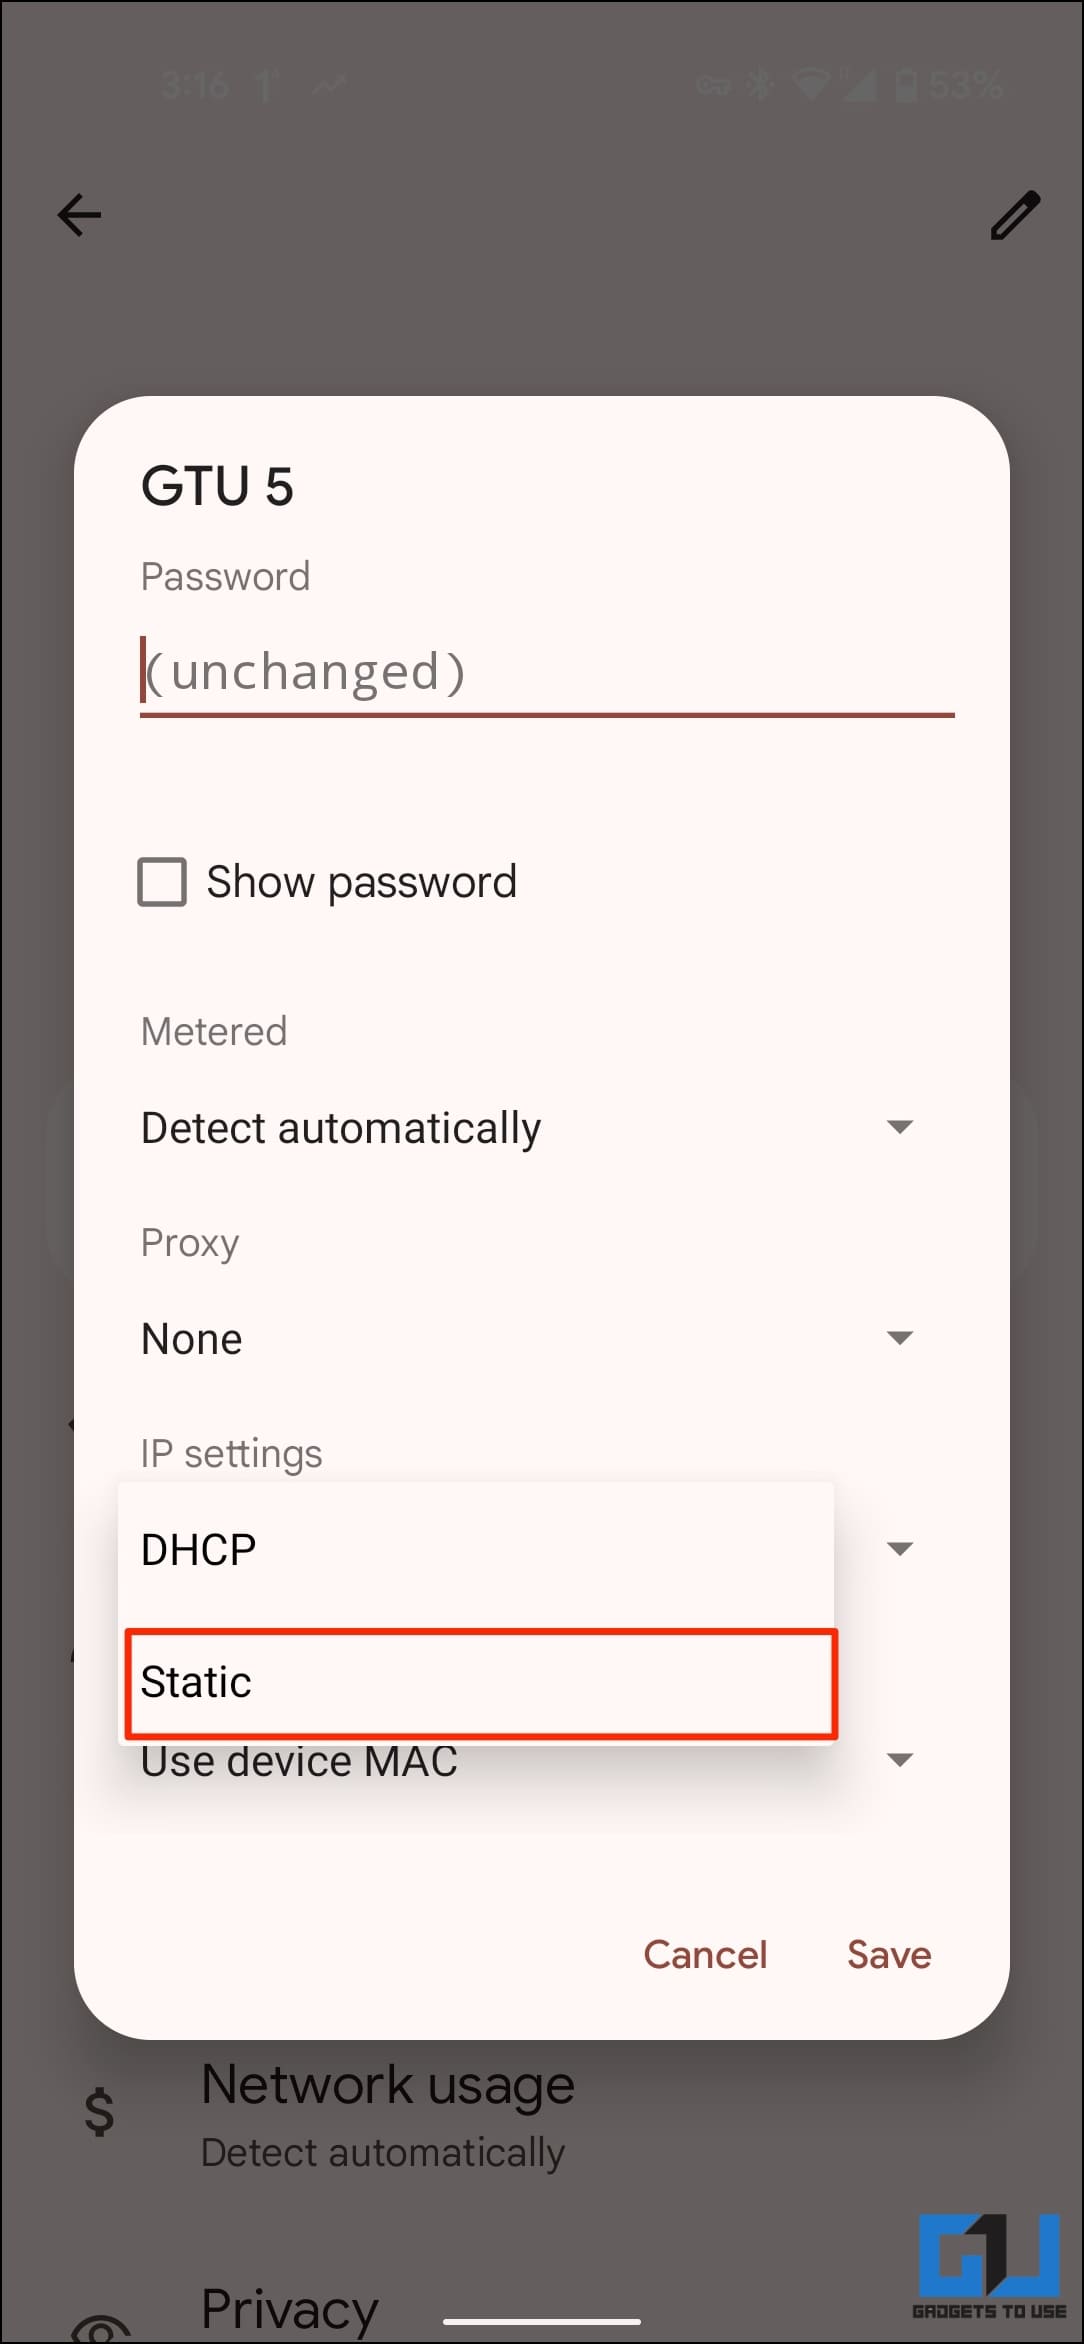
2. Press Edit or Modify Network. Change the IP settings from DHCP to Static.
3. You can now enter a custom DNS address in DNS1 and DNS2.
Method 10- Check Date and Time Settings
Incorrect date and time on your Android phone may lead to the “WiFi connected but no internet” message when trying to join a network. To fix it, synchronize the date and time on your phone using the steps below:
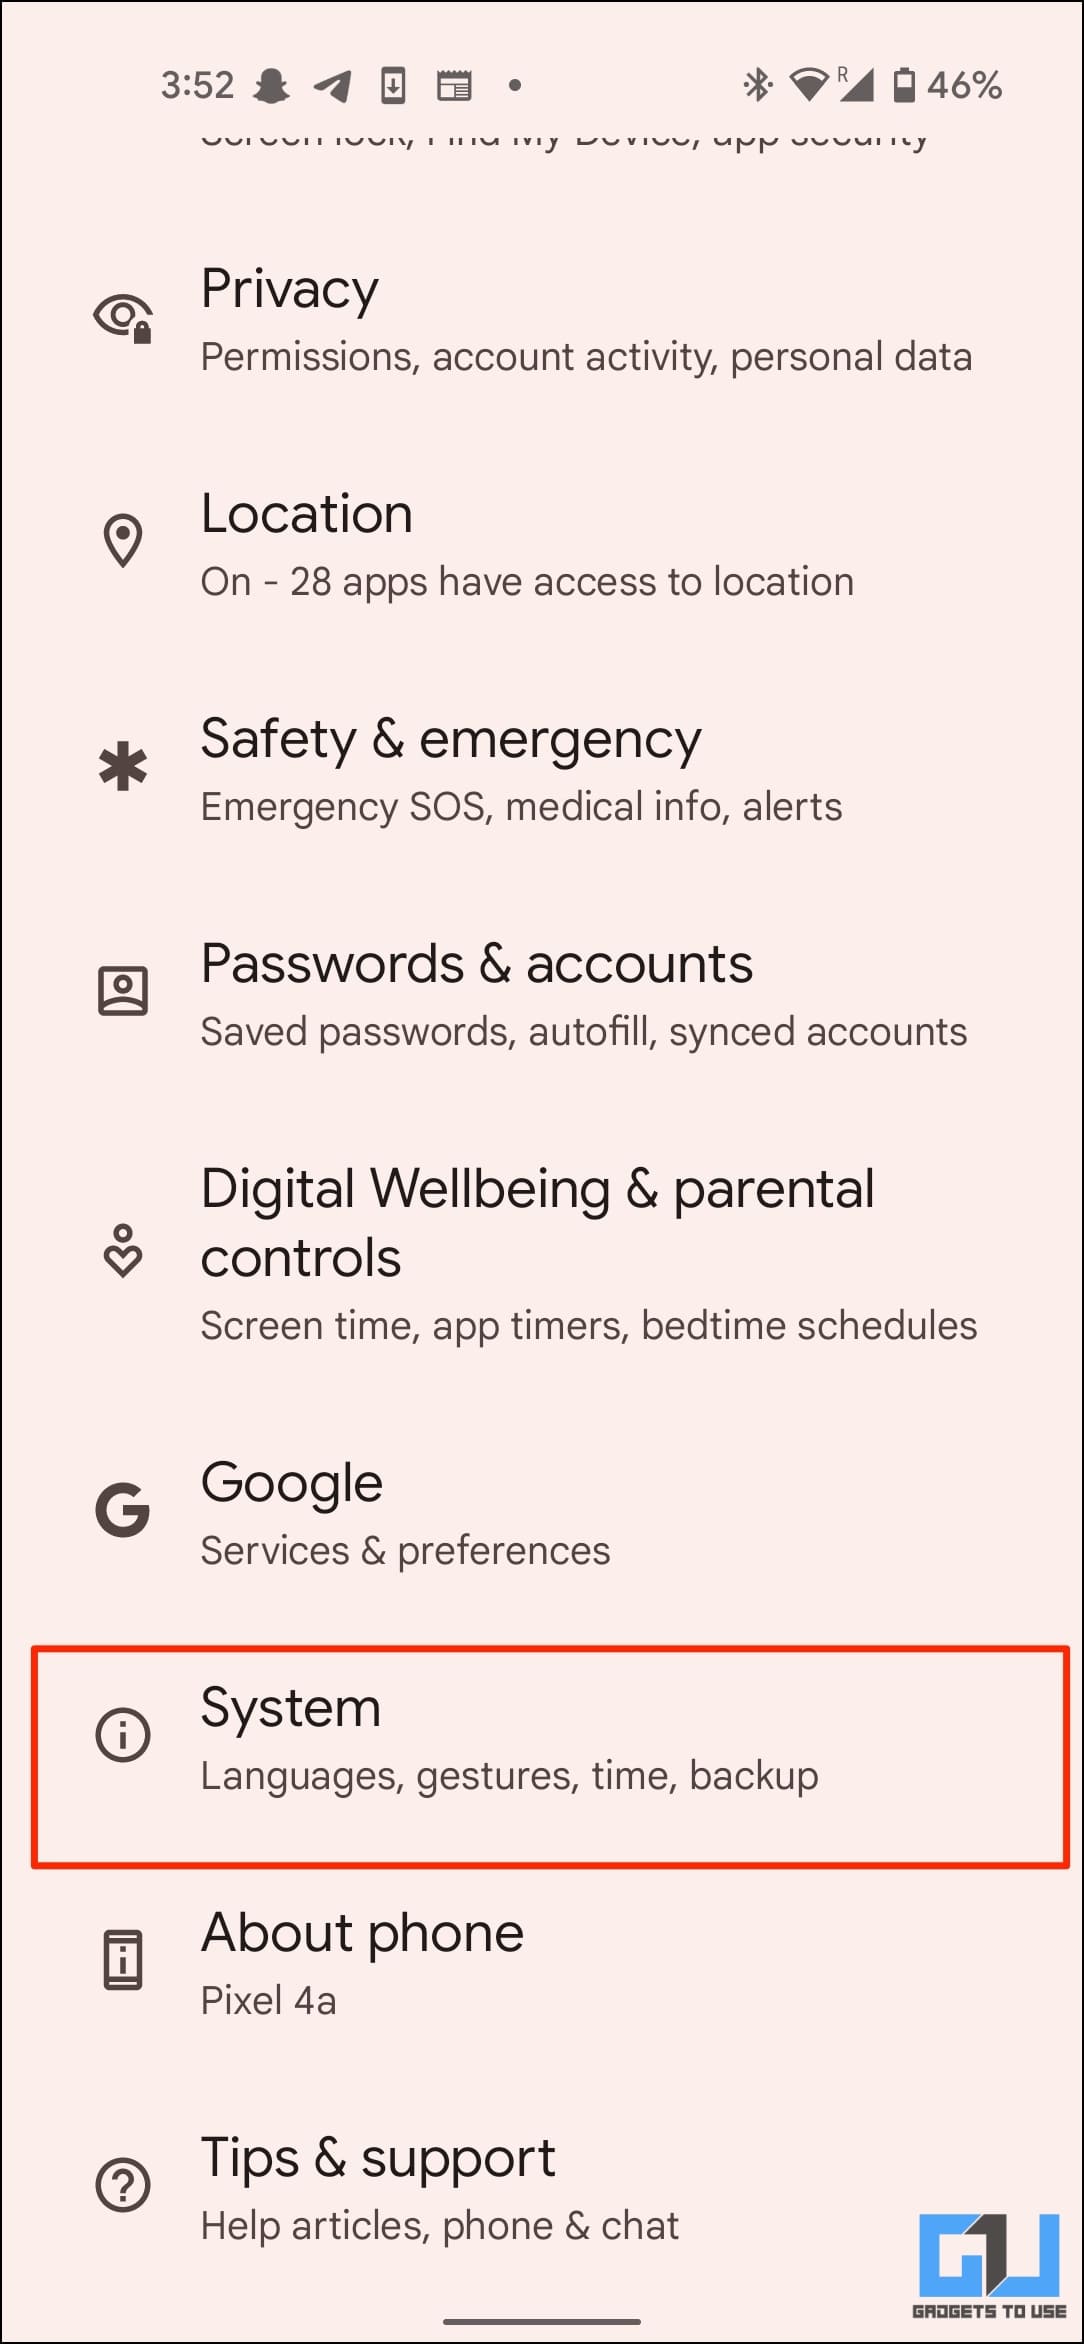
1. Open Settings on your Android phone.
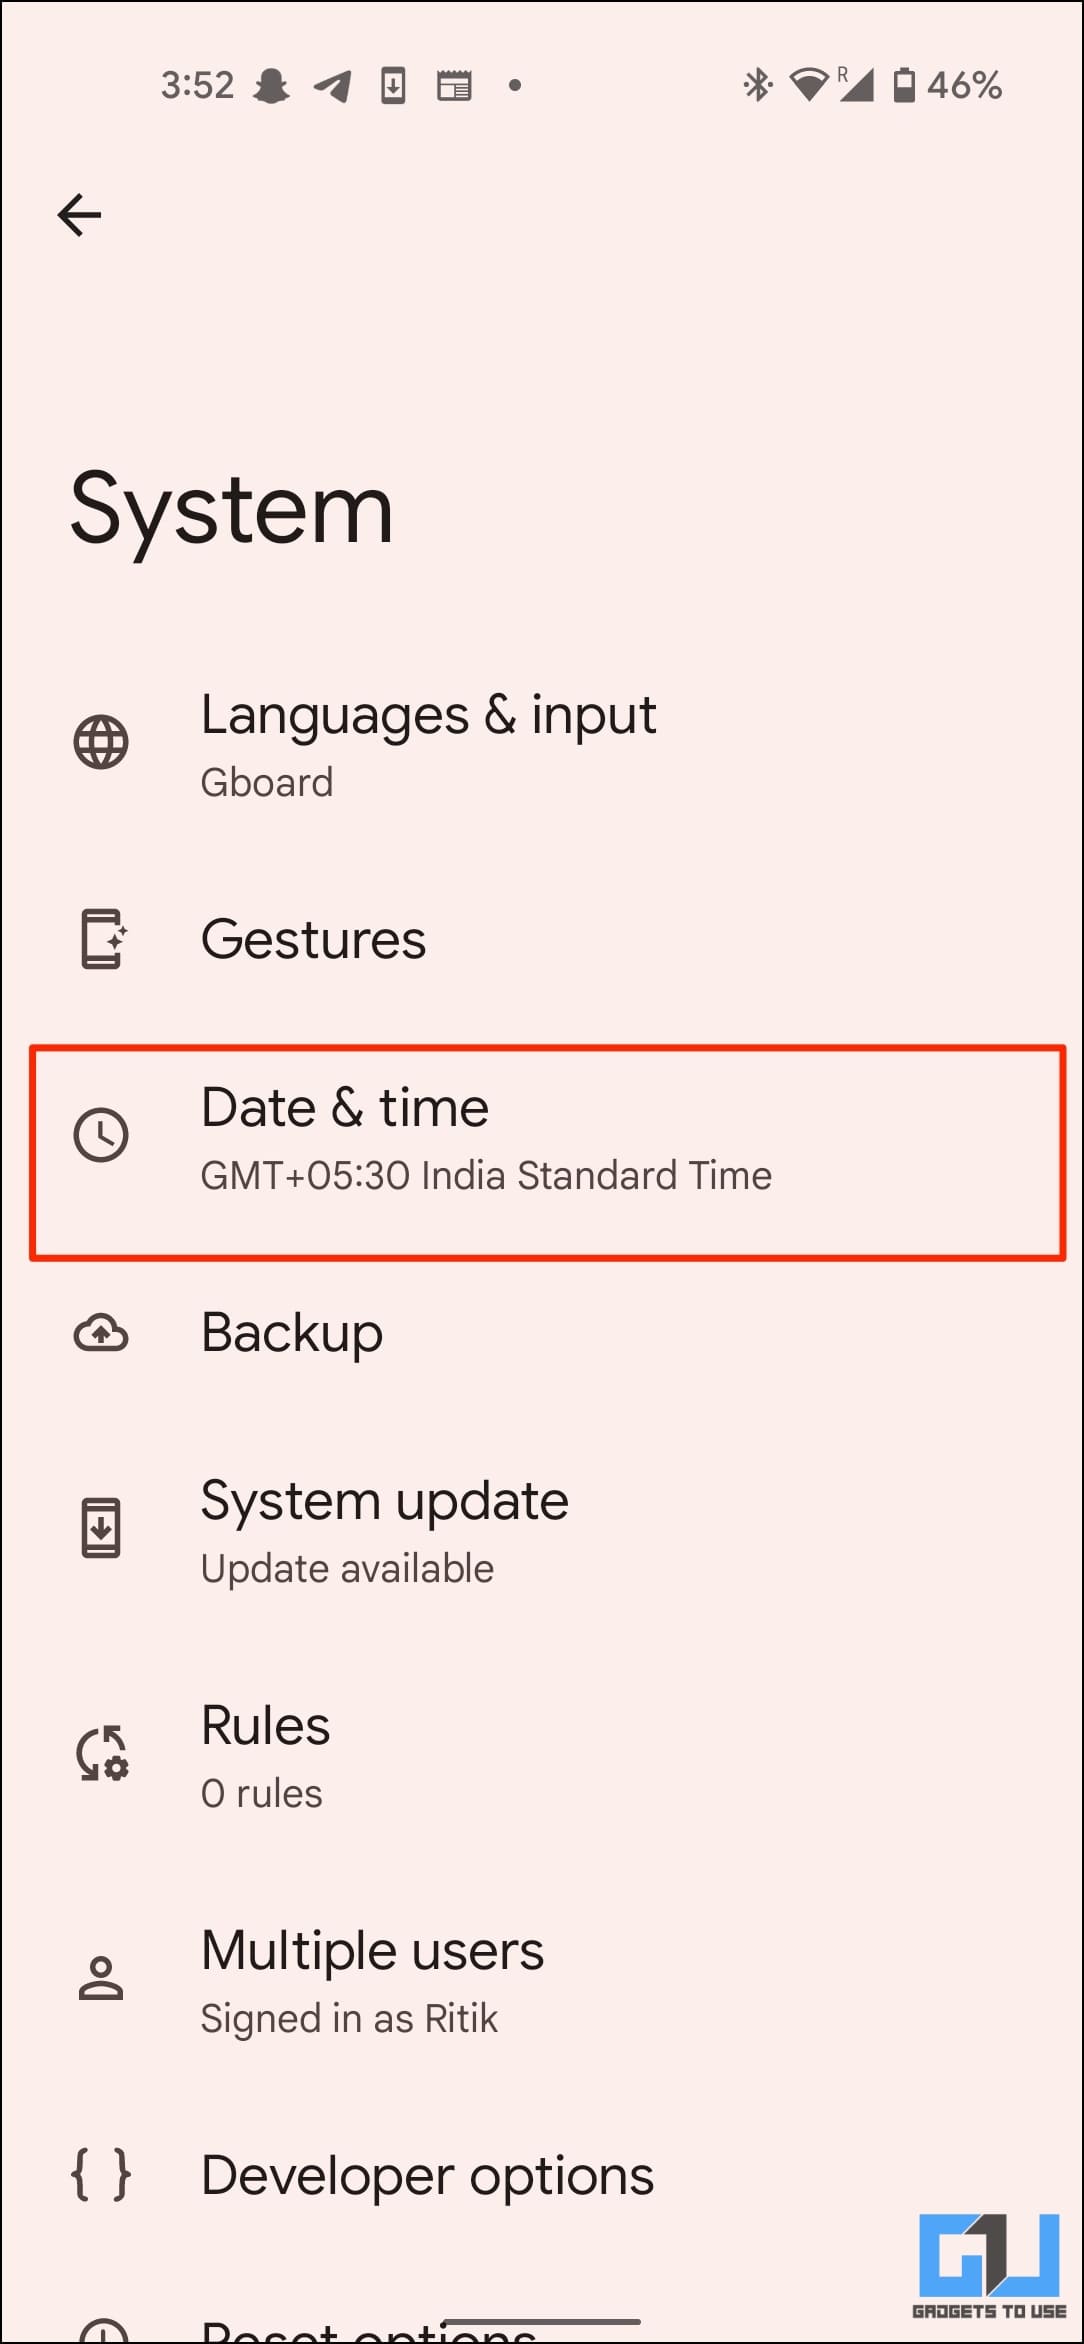
2. Navigate to System > Date & Time.
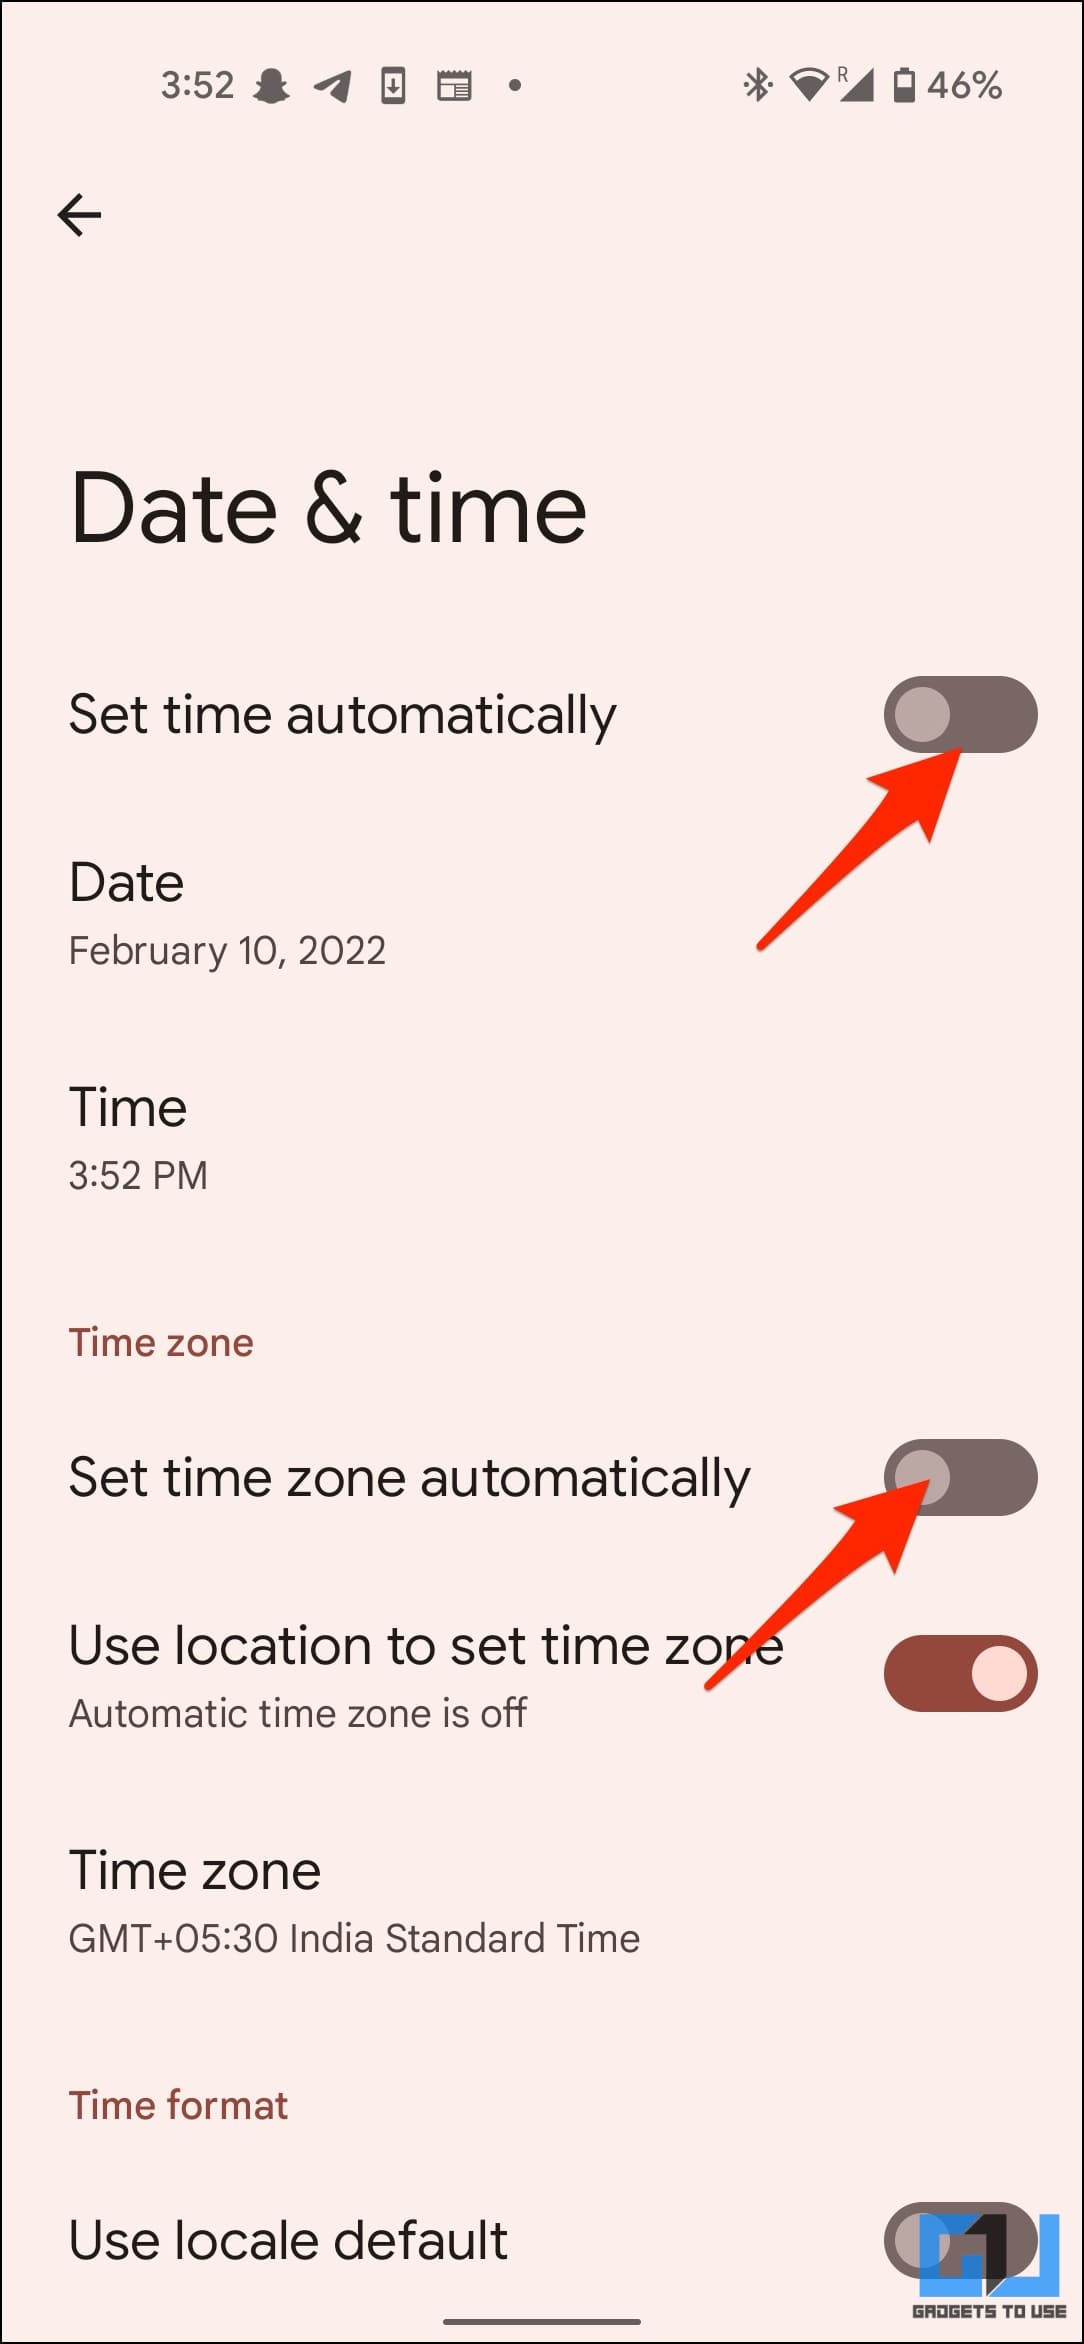
3. Here, enable the toggle for Set time automatically and Set time zone automatically.
Your phone will automatically sync and adjust the time based on your network and location.
Method 11- Enable MAC Address Randomization
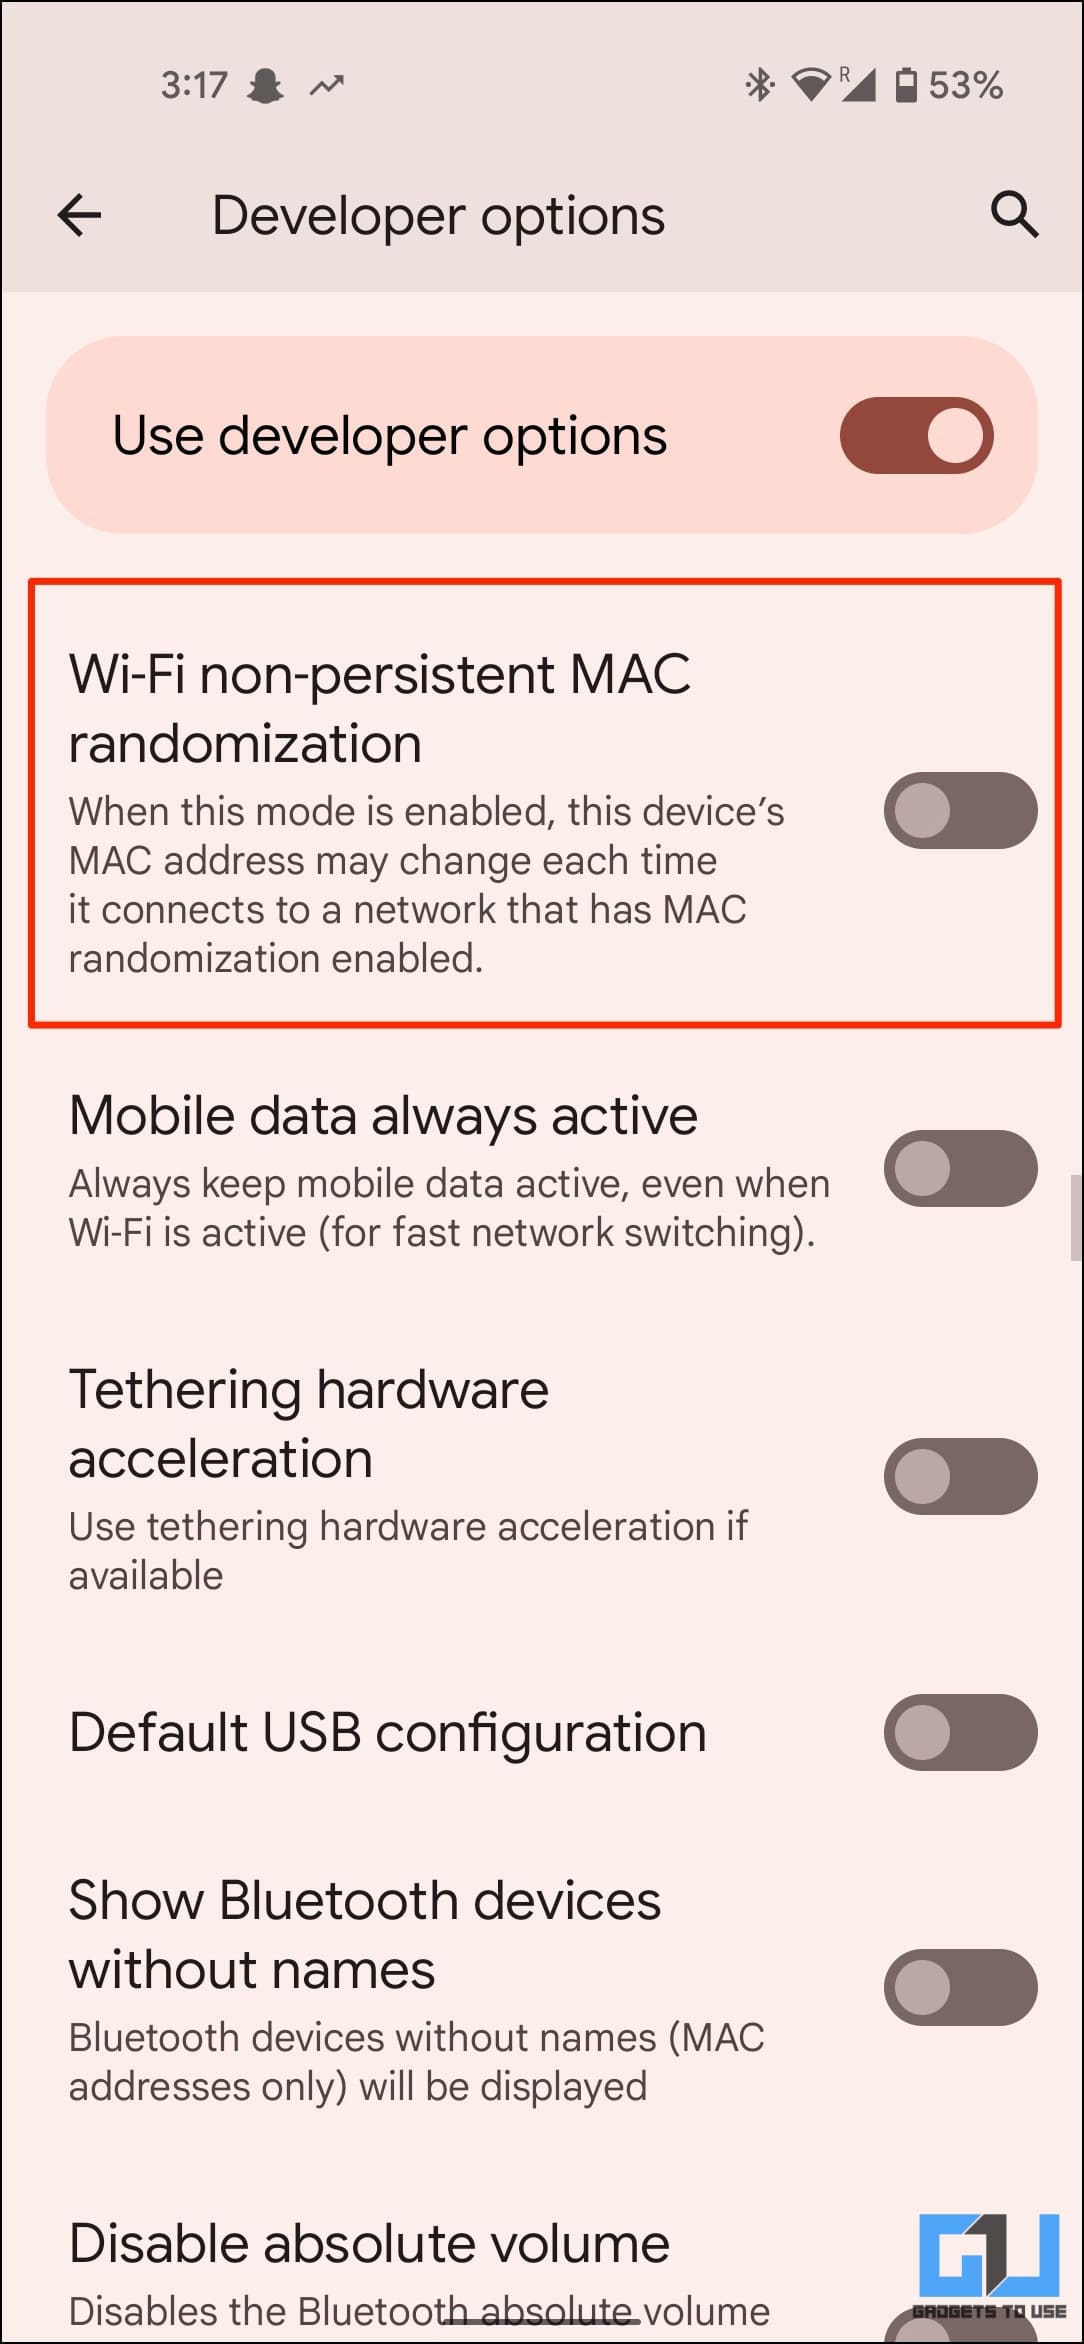
For some users, enabling non-persistent MAC Address Randomization in Developer Options has resolved the WiFi-connected no internet issue on Android. When you turn it on, your Android MAC address will change every time you connect to a network. Here’s how to do it:
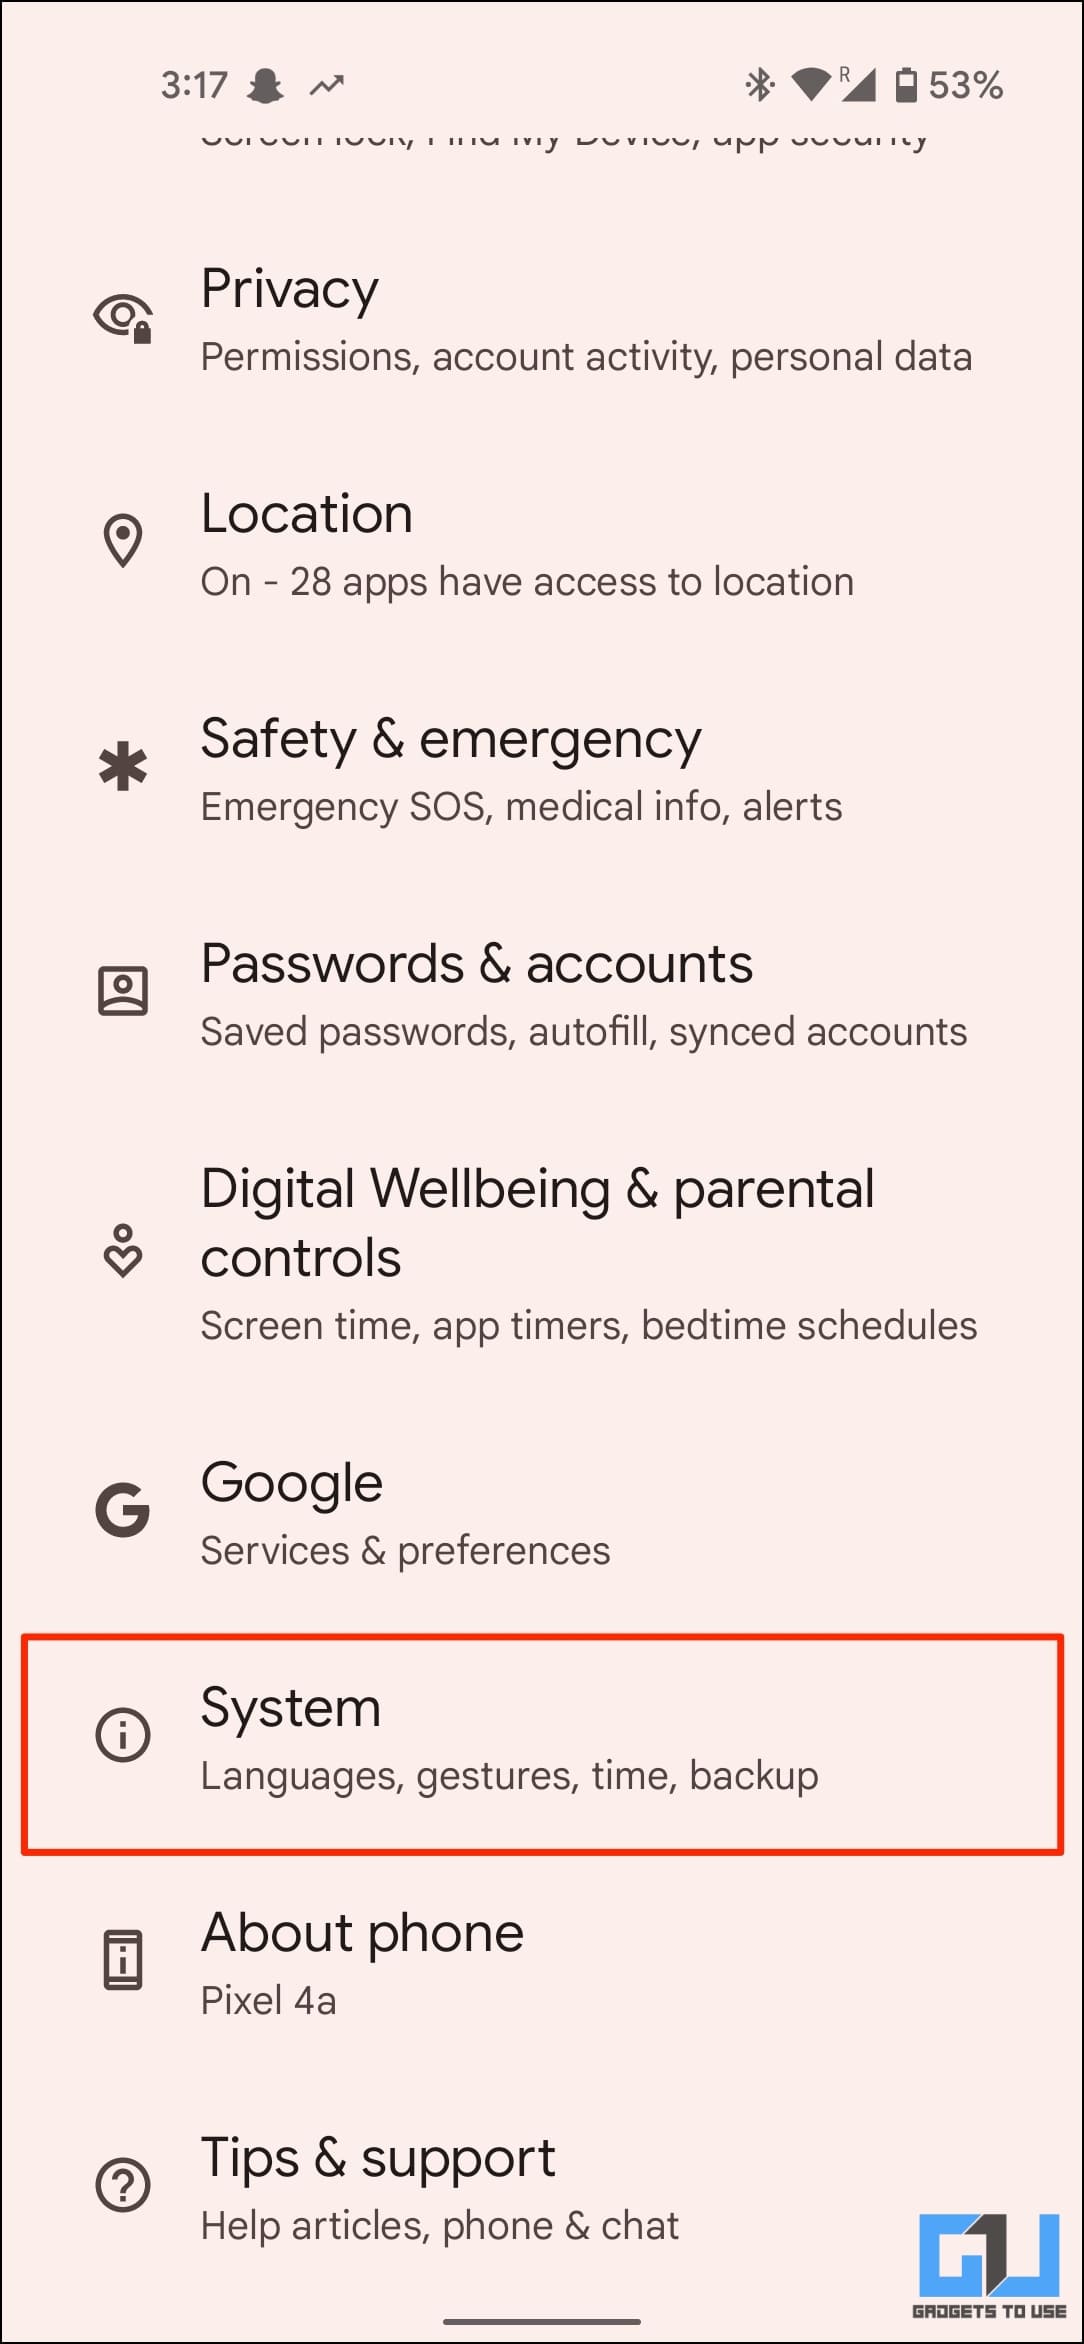
1. Open Settings, scroll down, and click on About Phone.
2. Tap the Build Number seven times to enable Developer Options.
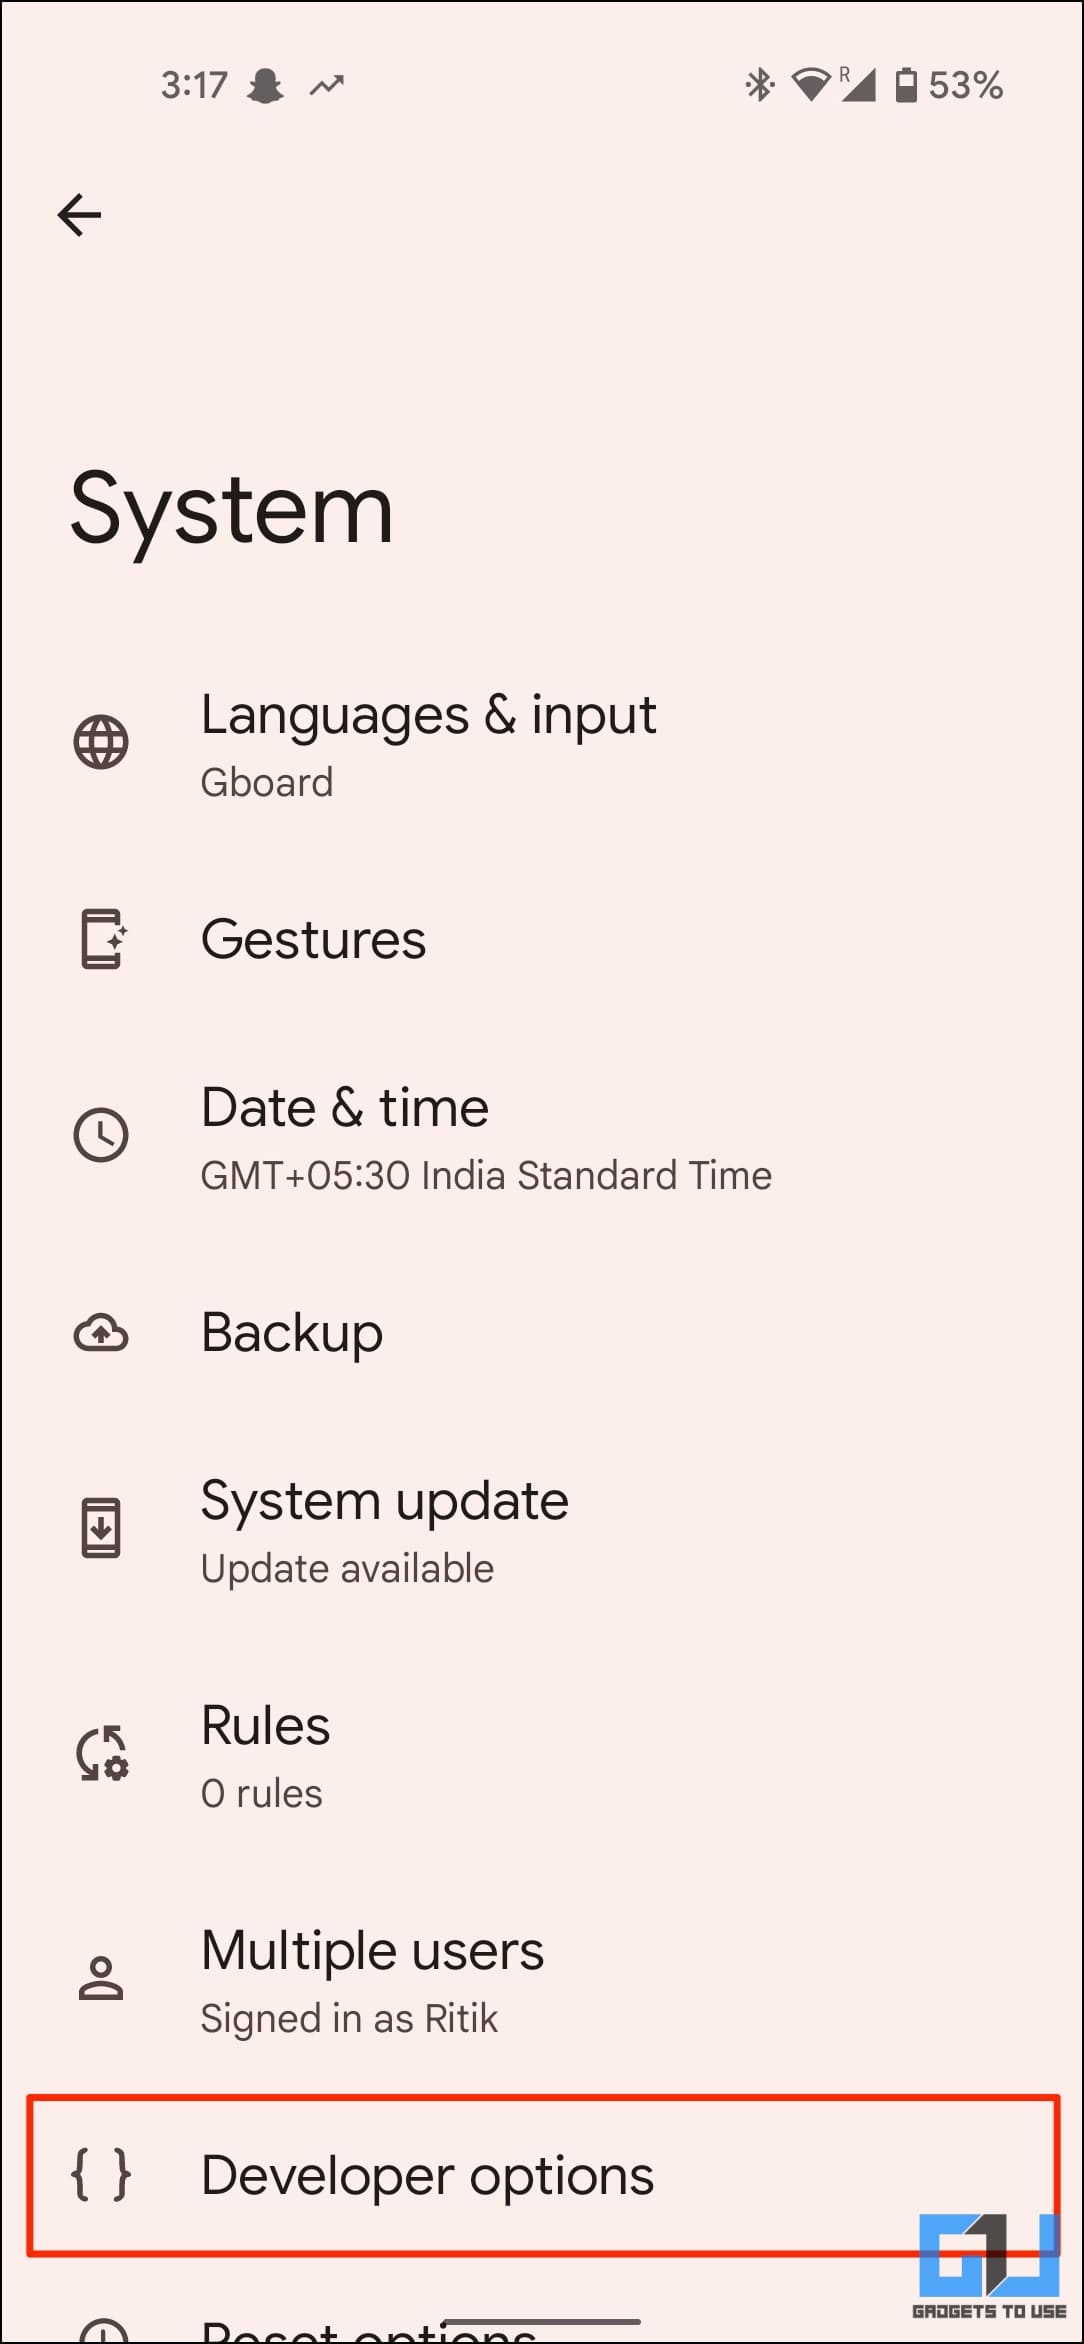
3. Now, go back to Settings > System > Developer Options.
4. Enable the toggle for WiFi Non-persistent MAC Randomization.
Method 12- Refresh Internet Connections
Android 12 comes with a shortcut to reset the internet on the phone. Using it, you can quickly reset your current connection settings and refresh your WiFi network, as shown below:
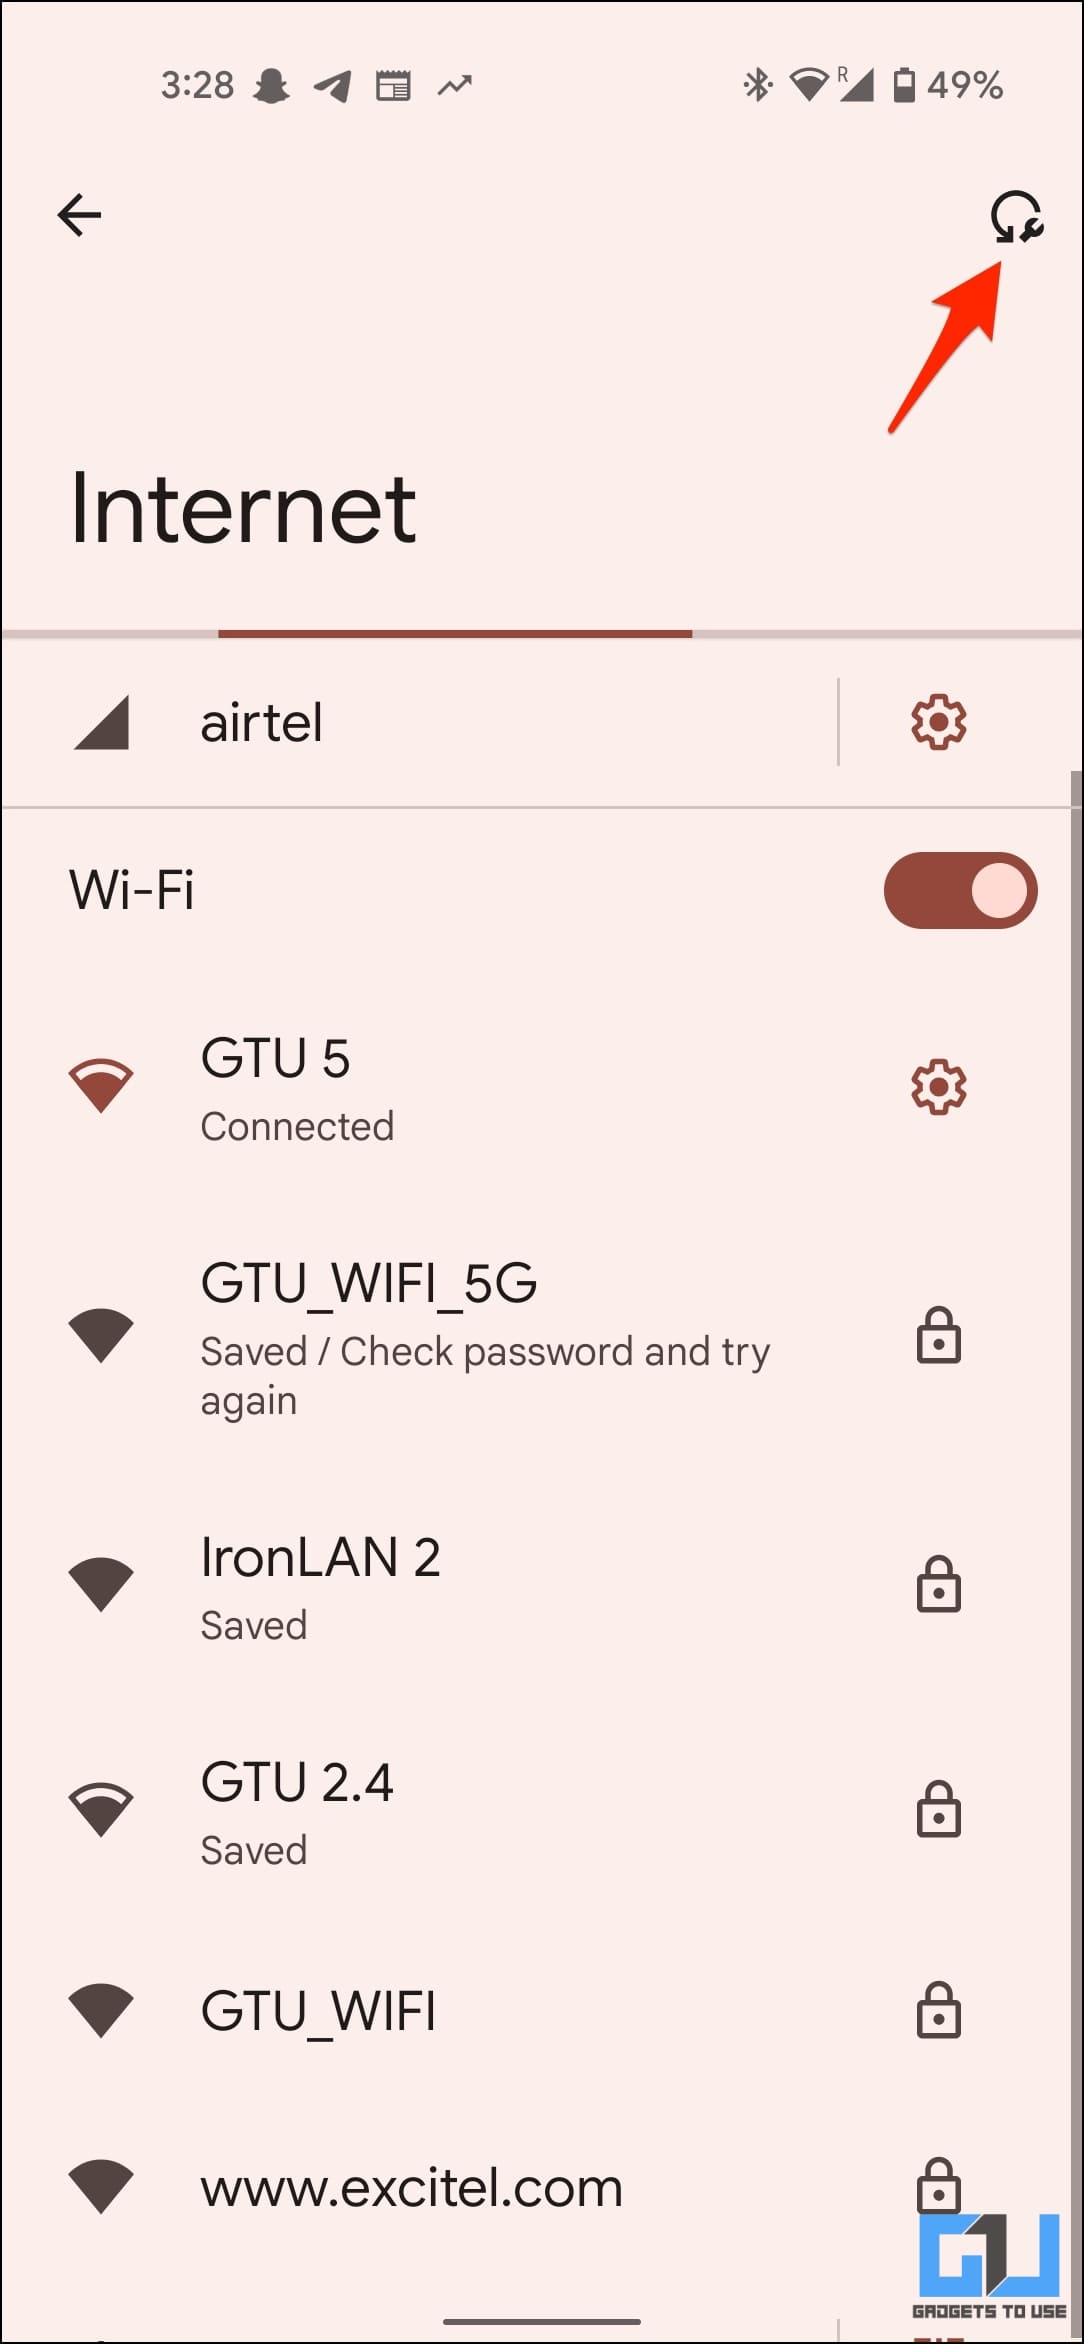
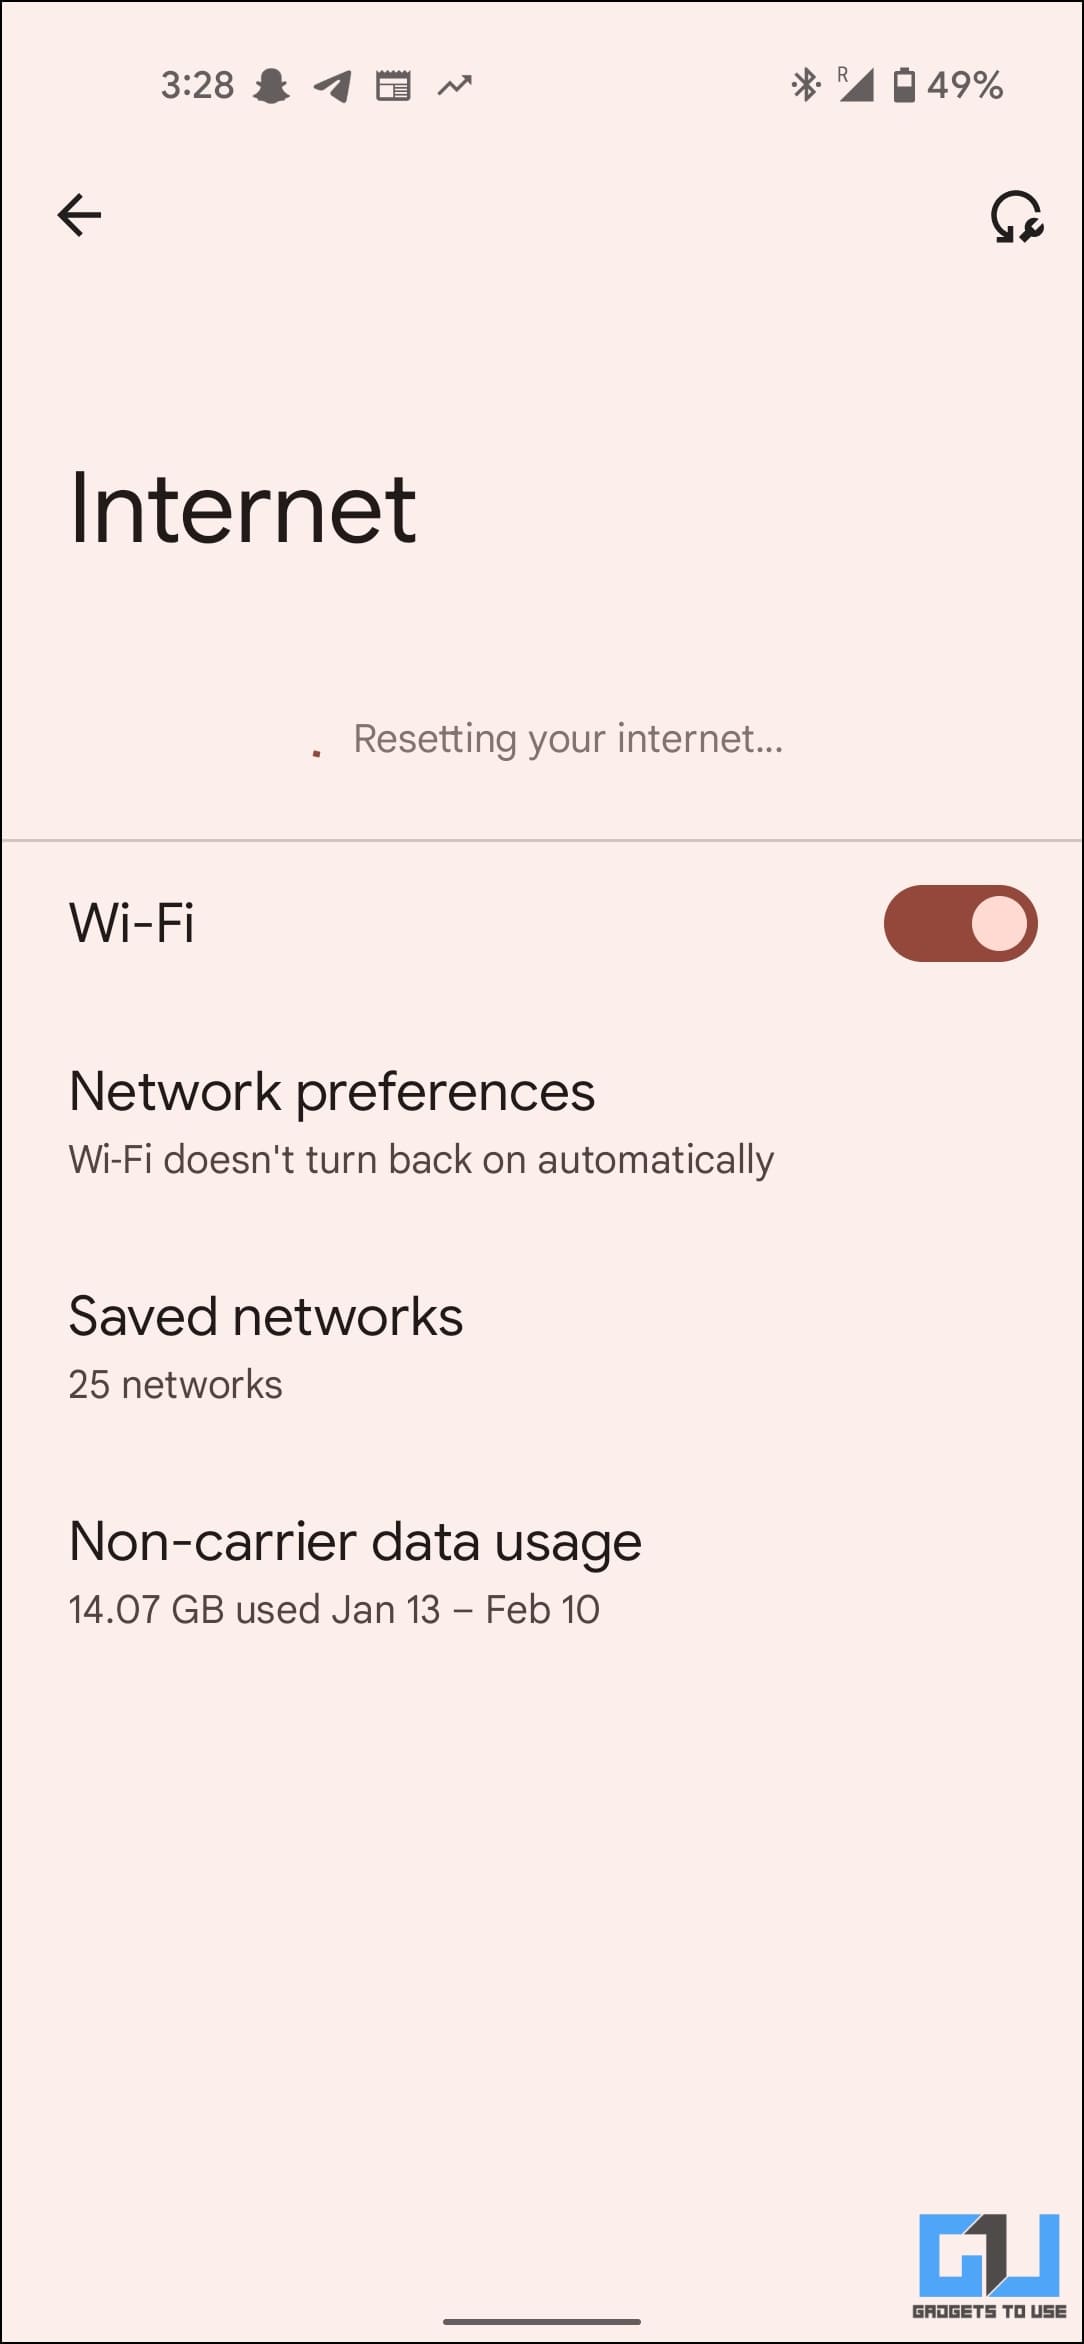
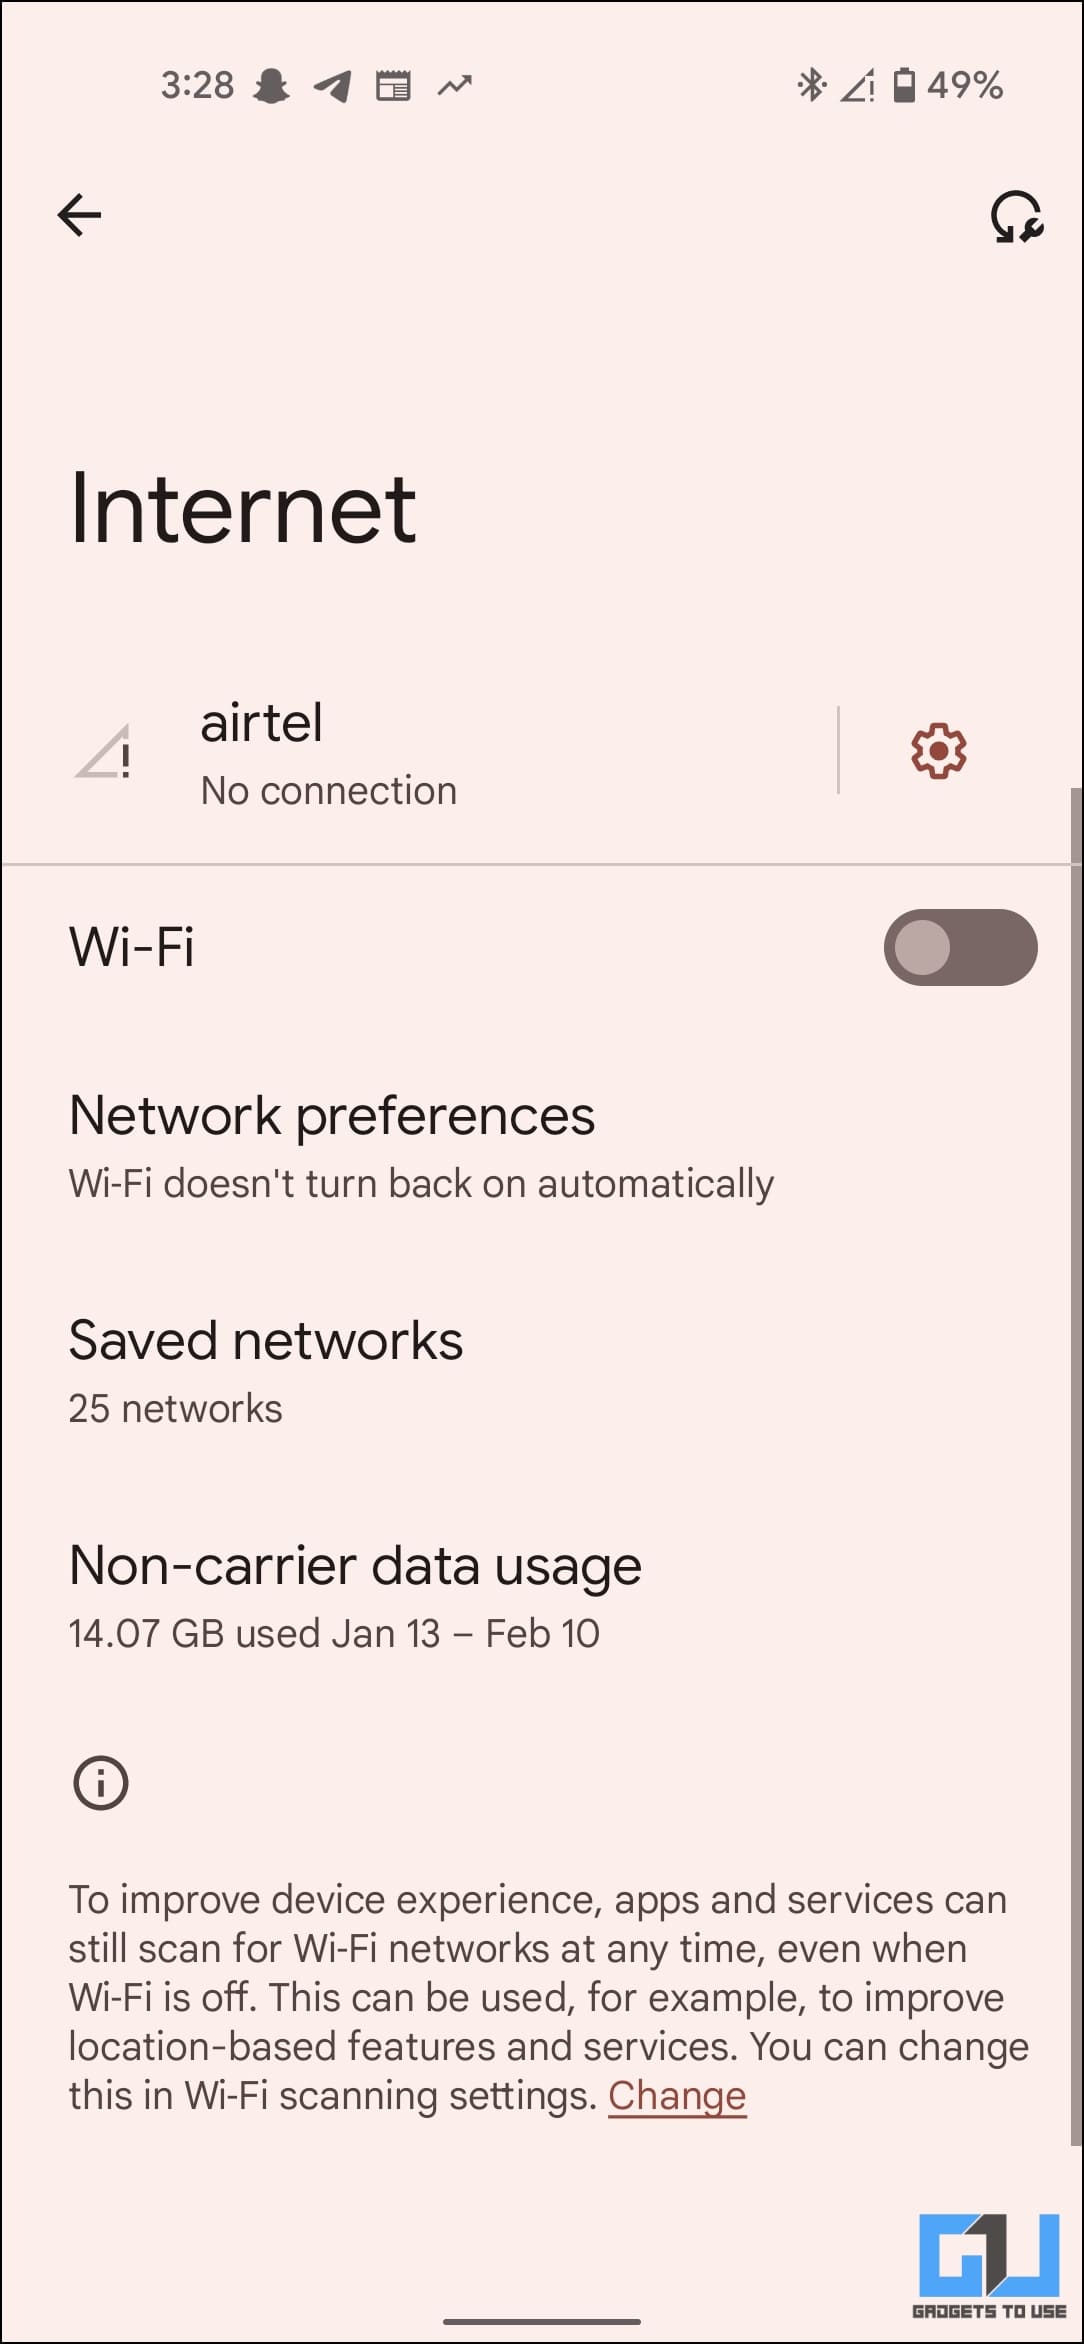
1. Open Settings > Network & Internet on your phone.
2. Here, click on Internet.
3. Click the Reset icon at the top right.
Your Android phone will now refresh the WiFi and mobile data connectivity on your phone and then reconnect to the most recently used or preferred local network. This method will work for all phones running Android 12, 13, and 14.
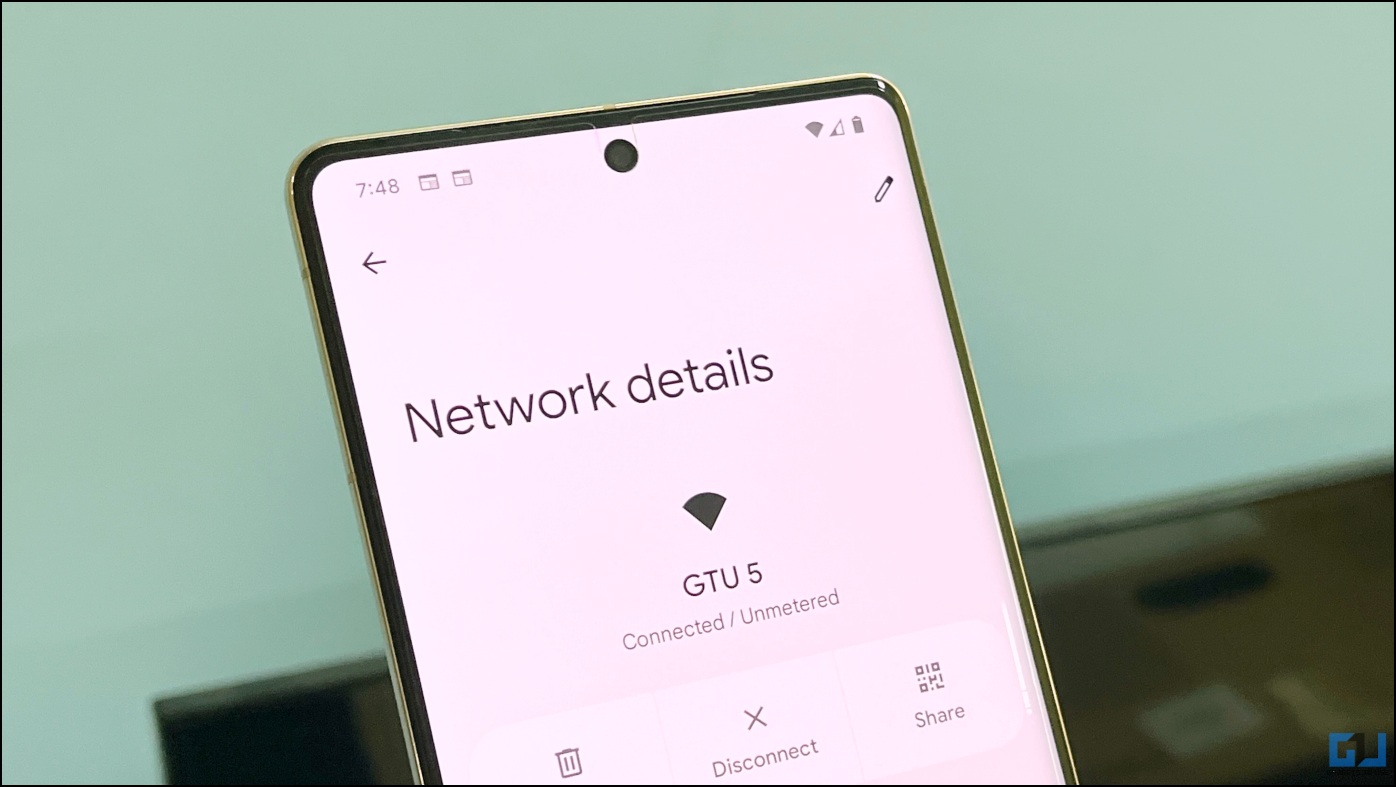
Method 13- Set the WiFi to “Unmetered”
If you’re using a mobile phone hotspot connection, your Android phone may automatically start treating it as “metered.” This means the connection has a data limit associated with it, and your phone will restrict updating apps, downloading system updates, and certain other background tasks.
It could also be that you have accidentally set your WiFi network as “metered,” which might cause certain apps not to work properly. Here’s how to revert it:
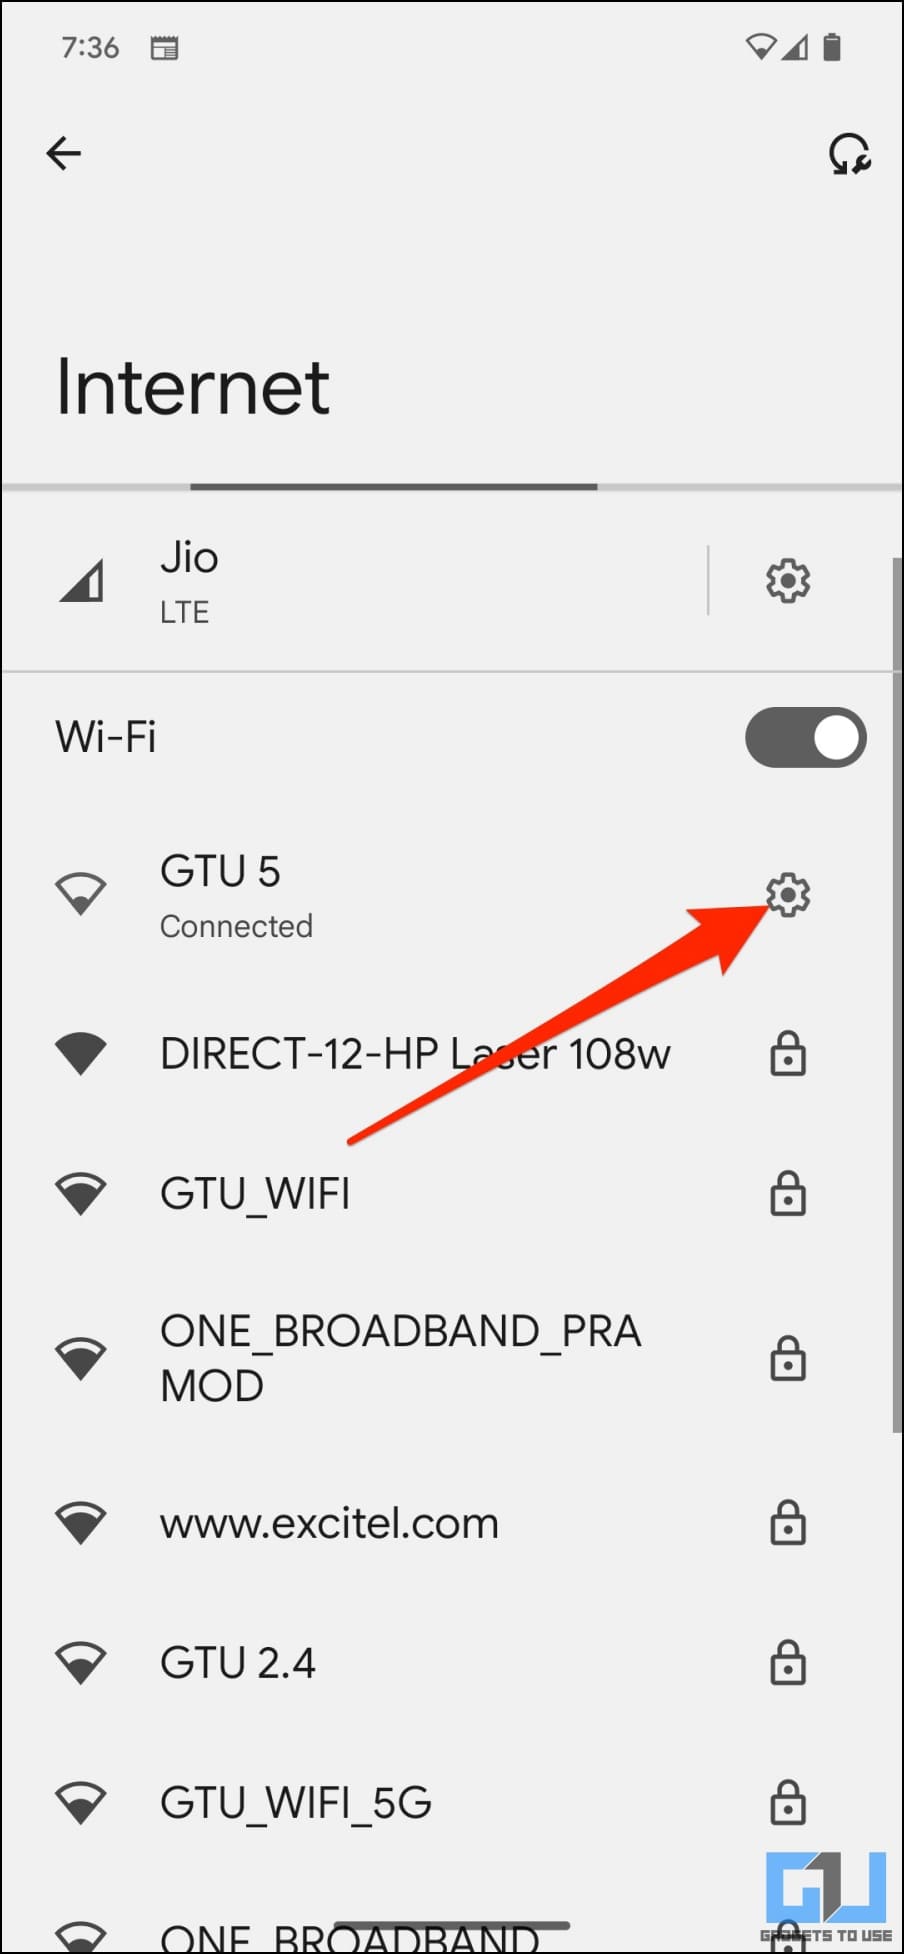
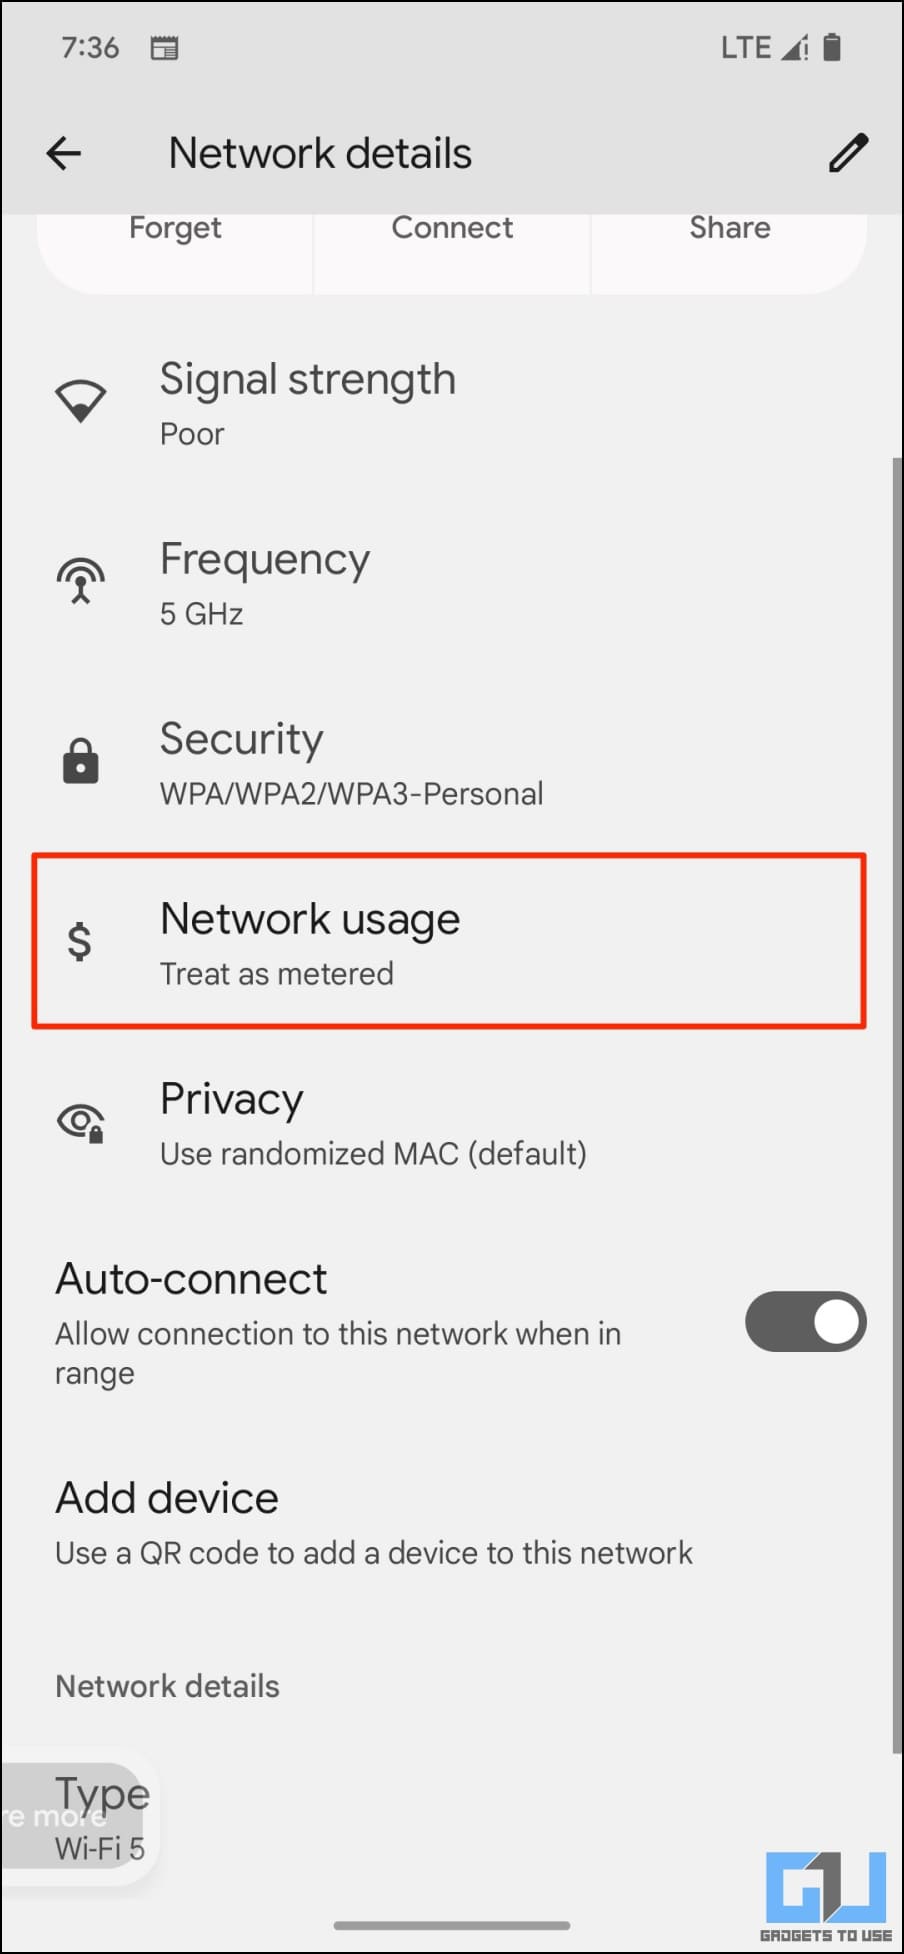
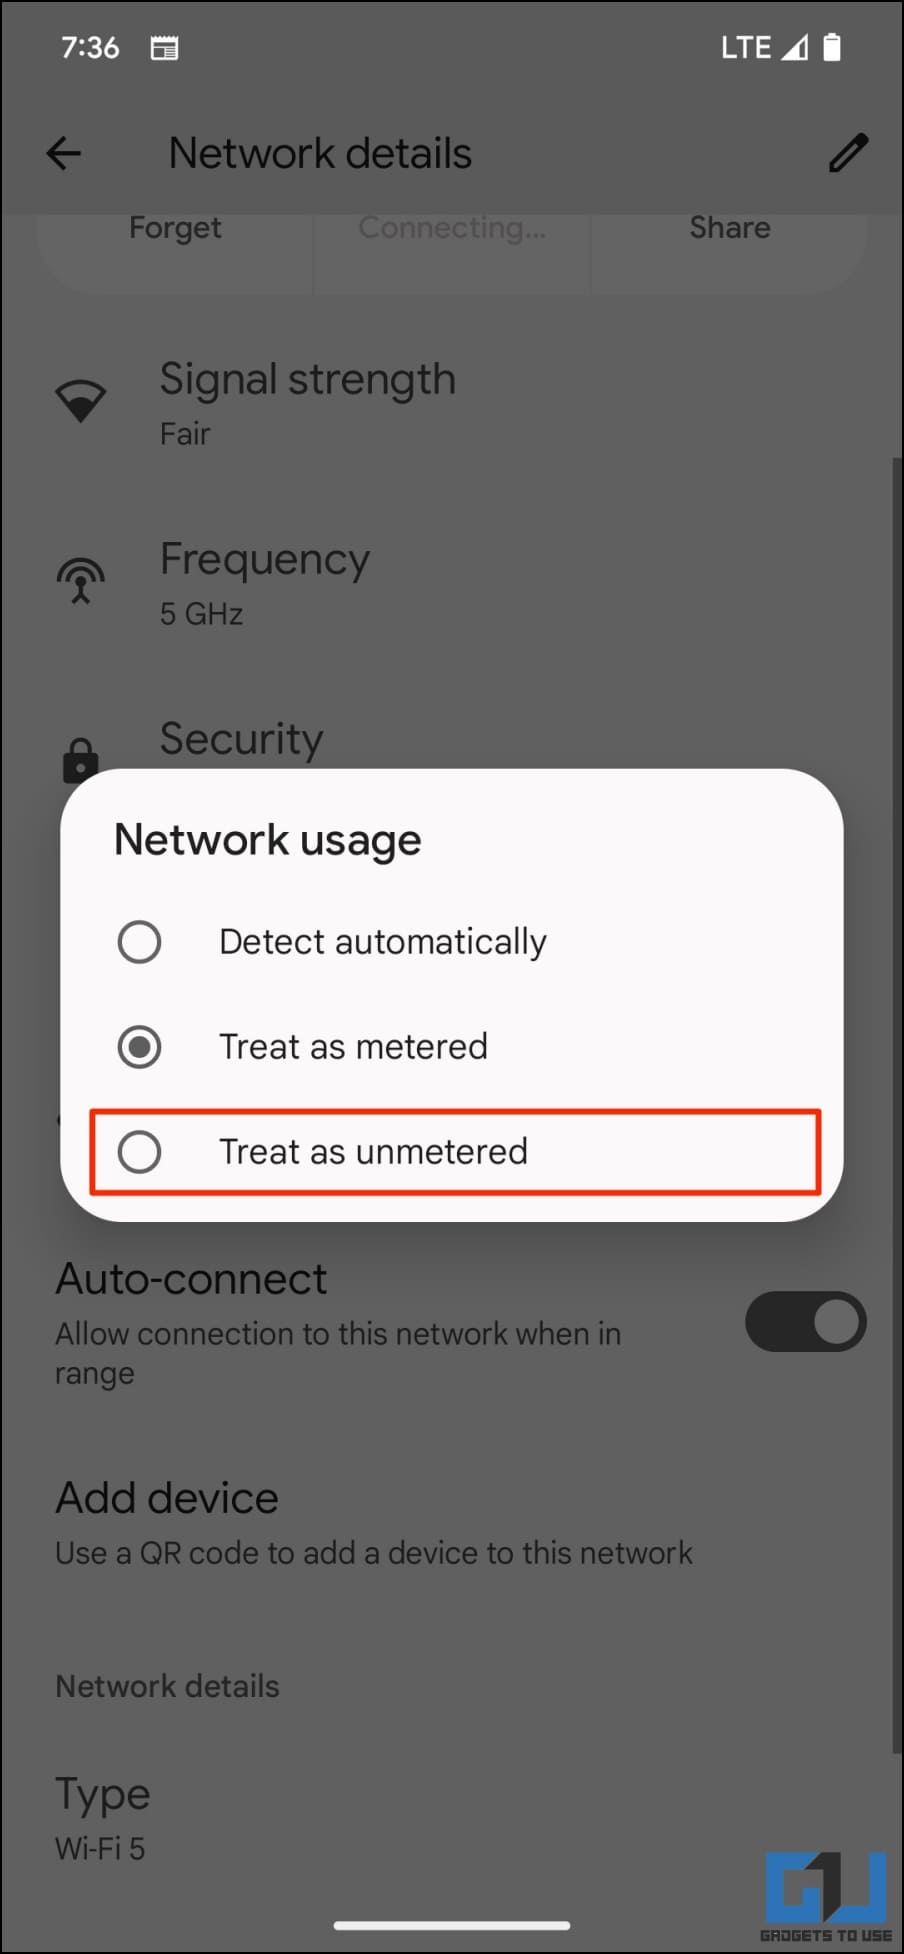
1. Open WiFi settings on your Android phone.
2. Tap the WiFi name.
3. Scroll down, tap Network usage, and change it to Treat as unmetered.
Method 14- Reset Network Settings On Android
If you are still facing WiFi internet connectivity issues, you must reset the network settings on your Android phone. It will only reset the network settings and won’t affect other data. Here’s how to do it:
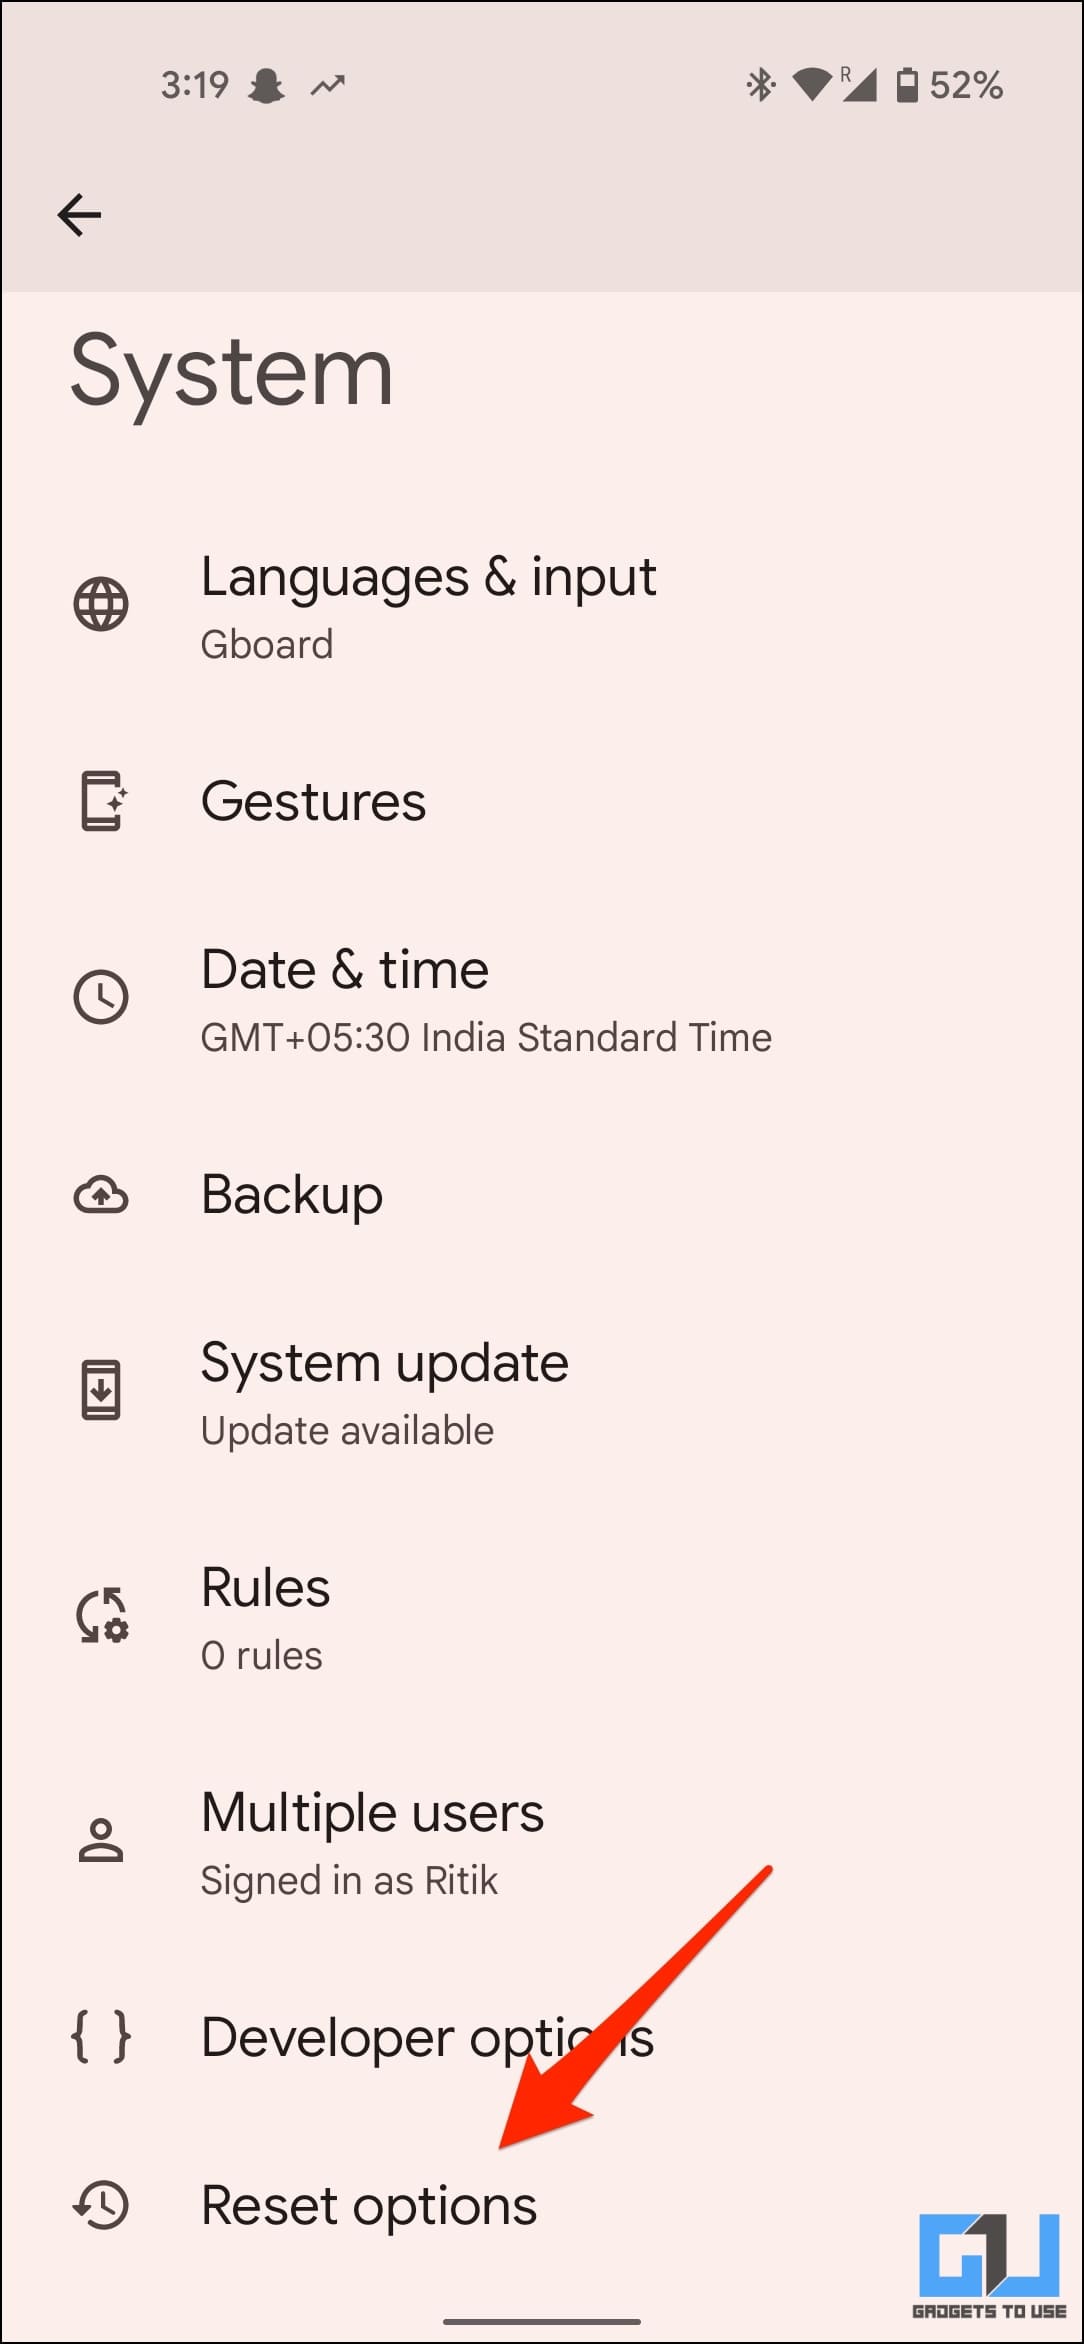
1. Open Settings on your Android phone.
2. Scroll down and go to System > Reset options.
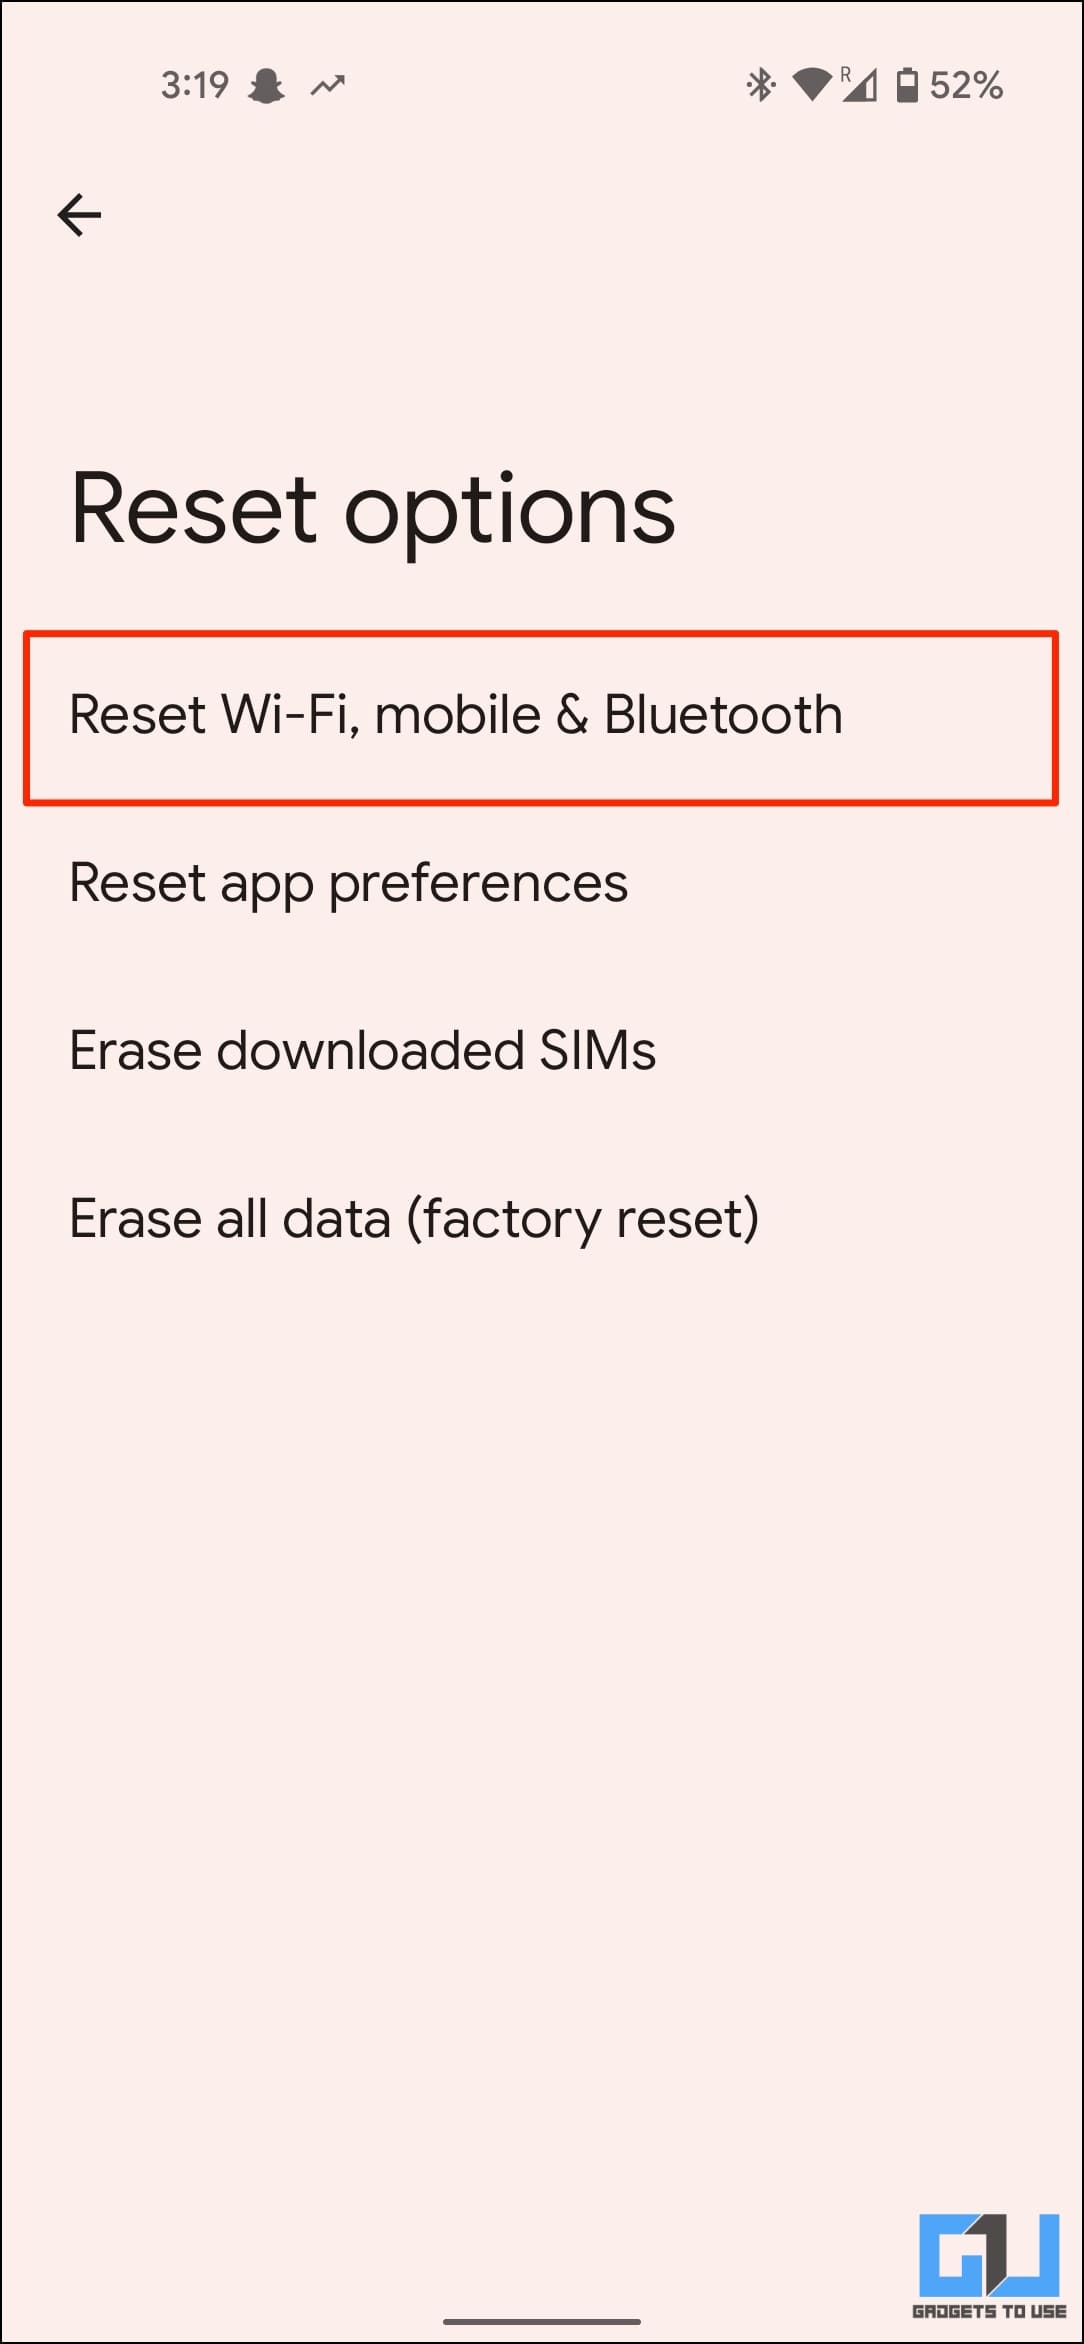
3. Here, click on Reset WiFi, Mobile & Bluetooth.
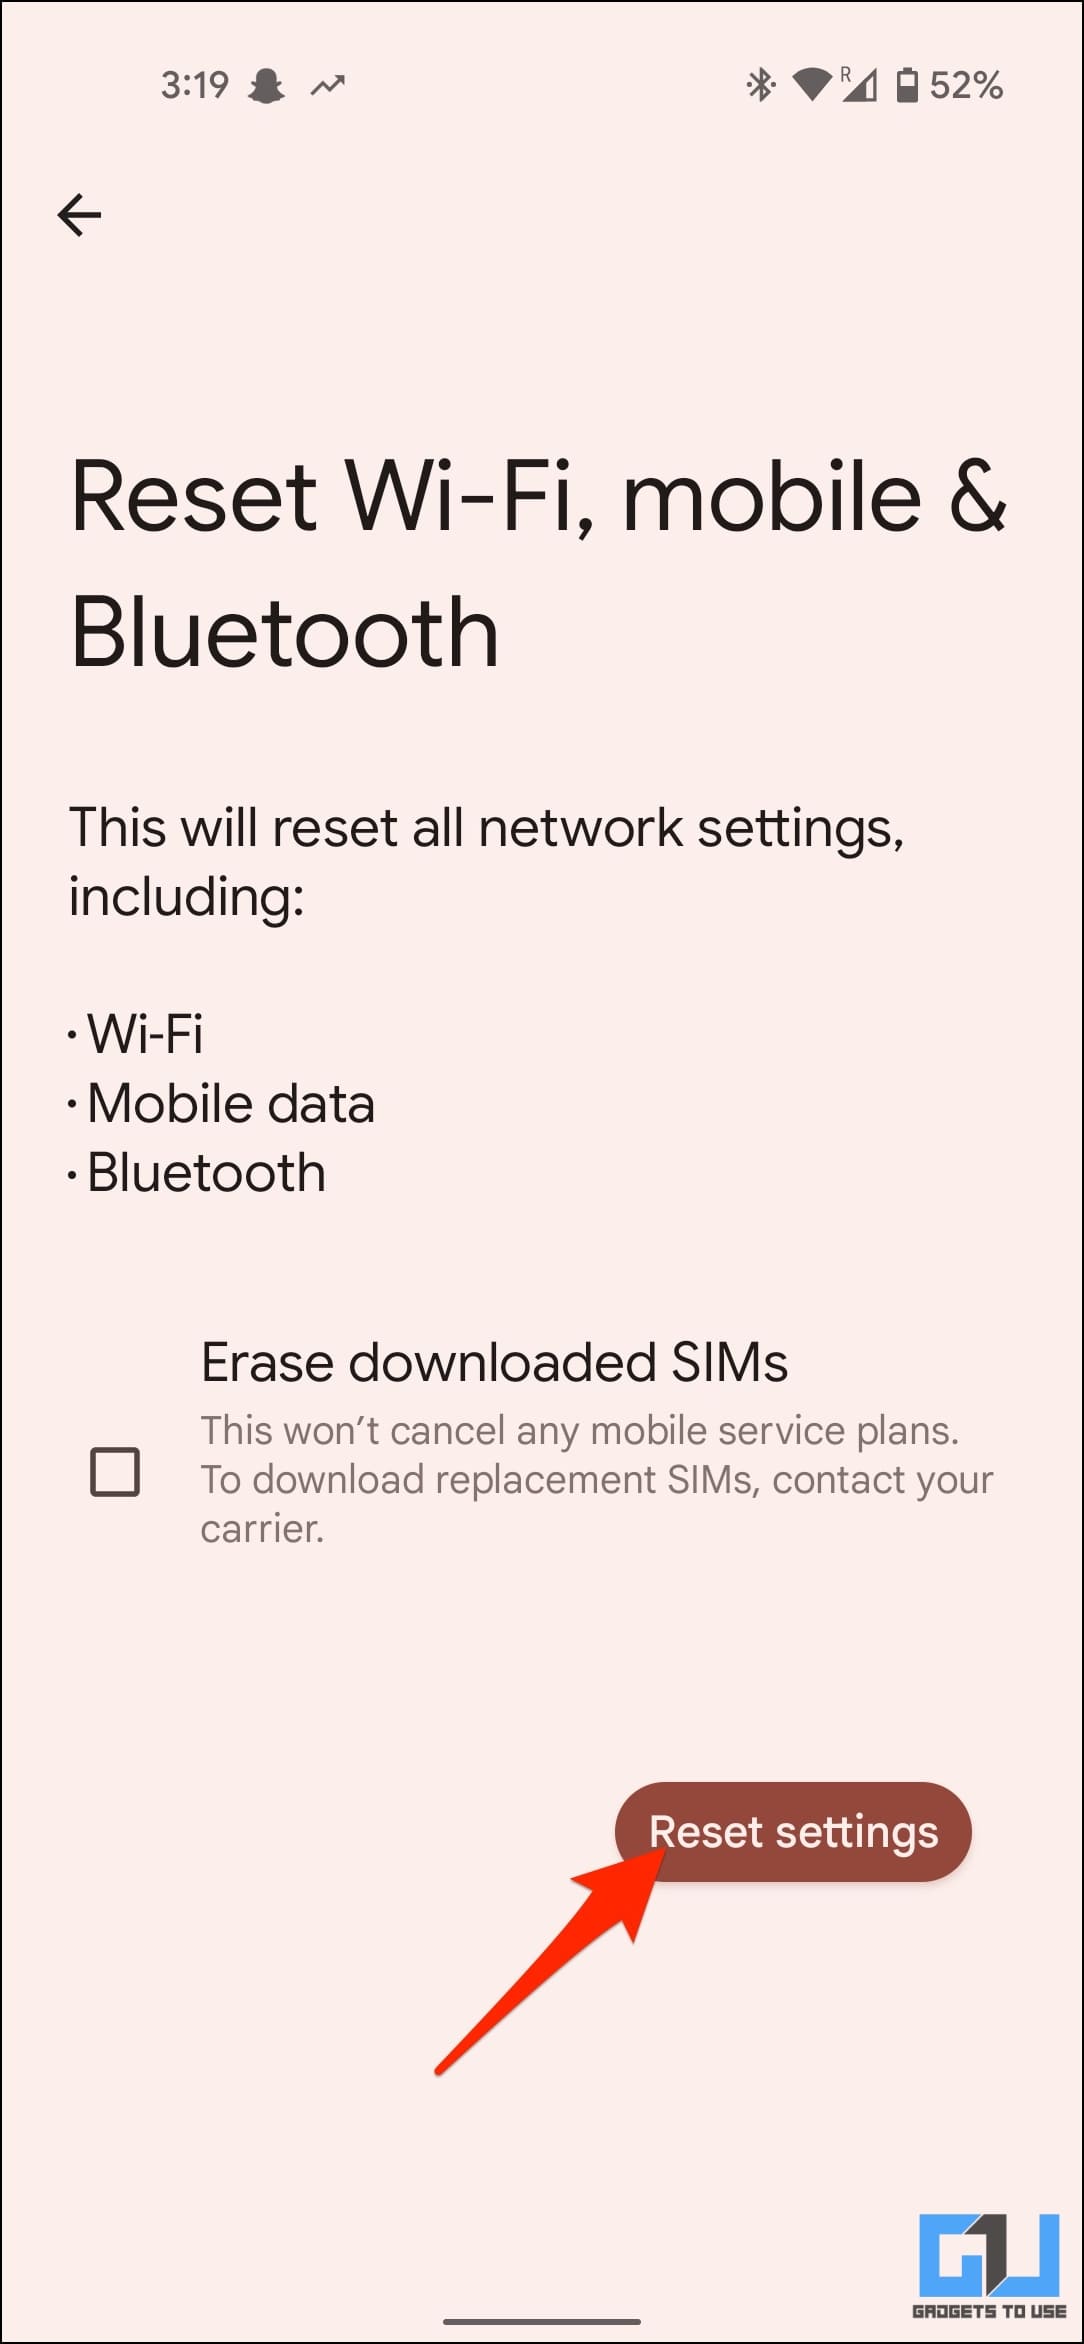
4. Tap Reset Settings to confirm.
Your saved WiFi passwords, Bluetooth connections, and mobile network settings will be reset. You will now have to reconnect to the WiFi network.
Other Solutions for WiFi Connected But No Internet
Apart from the solutions above, you can try the methods below to see if they solve the connectivity issues:
- Uninstall or pause any app that modifies or tweaks network settings on your phone, including VPN, firewall, or DNS-changing apps.
- Factory reset your Android phone. It will reset all the data, including personal files, so take a prior backup.
- Check if other devices are experiencing the same problem. If yes, contact your ISP.
- Make sure your Android phone is within the range of the router. Check for any obstructions and interferences between your phone and router.
Wrapping Up
These are all the solutions to try when your Android phone connects to the WiFi but has no internet. The above guide will likely fix anything and everything wrong with your network, but if none works, you shall contact your internet provider for help. Stay tuned for more such troubleshooting and how-to guides.
You might be interested in:
- 6 Ways to Fix Android Cannot Connect to WiFi But Says Saved, Secured
- 5 Ways to Use Your Android Phone as WiFi Repeater
- 6 Ways to Connect to a WiFi Hotspot Without Password
- 4 Ways to Stop WiFi From Turning on Automatically on Android
You can also follow us for instant tech news at Google News or for tips and tricks, smartphones & gadgets reviews, join GadgetsToUse Telegram Group, or for the latest review videos subscribe GadgetsToUse Youtube Channel.