For iPhone users, taking backup of their phone is a task for some reasons. As you know, Apple offers only 5GB free iCloud storage for each Apple ID and when this fill up, you may lose some of your data including contacts, photos, and documents, unless you have a paid iCloud plan. So, if you are running low on storage space on your iPhone, you should know some other ways too for backup. So, here I am telling three such ways you can use to take back up of your iPhone easily.
Also, read | 3 Easy Ways to Reduce iPhone Photo and Video Size
Ways to Take Backup of Your iPhone
Basically, Apple offers two methods for backing up your iPhone- iCloud backup and iTunes on a device like PC. Besides that, you can take back up of your iPhone to some online storage services like Google Drive or OneDrive.
Using iCloud
You can take iCloud on your iPhone which you can access from anywhere by signing in to your Apple ID. Since this is a cloud backup, it can’t be affected by any damage to your phone and it is also automatically encrypted.
However, there is only one problem with iCloud, Apple only offers out 5GB of free space, so after that, you may need to upgrade to a paid account. Here’s how to take iCloud backup:
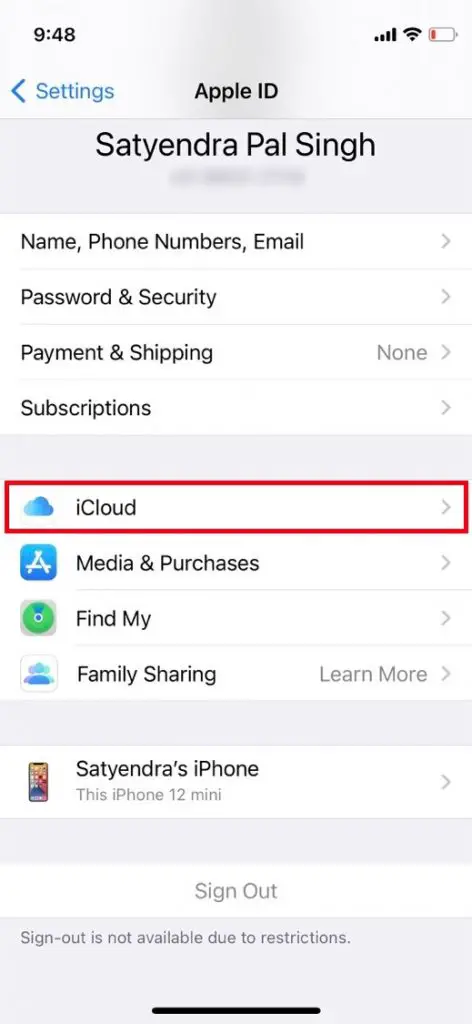
1. Open the Settings app on your iPhone.
2. Tap on your name at the top and choose iCloud.
3. Now, select iCloud Backup.
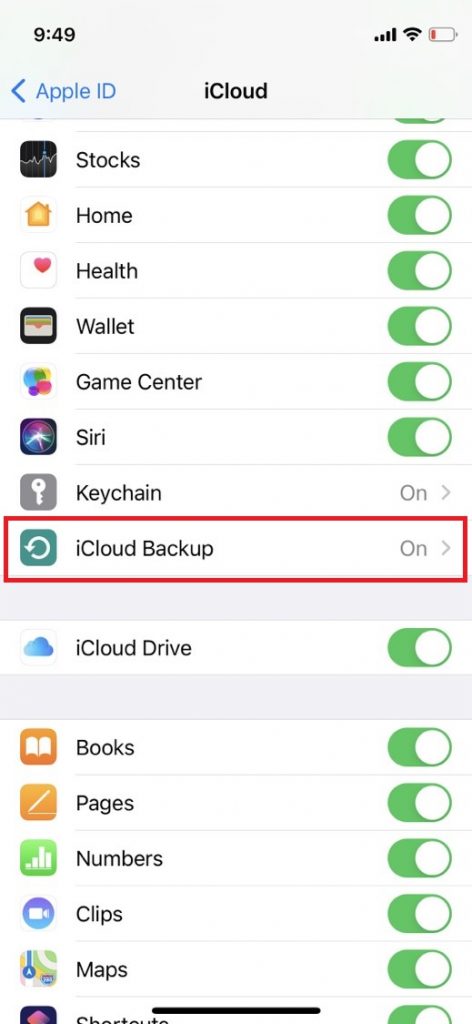
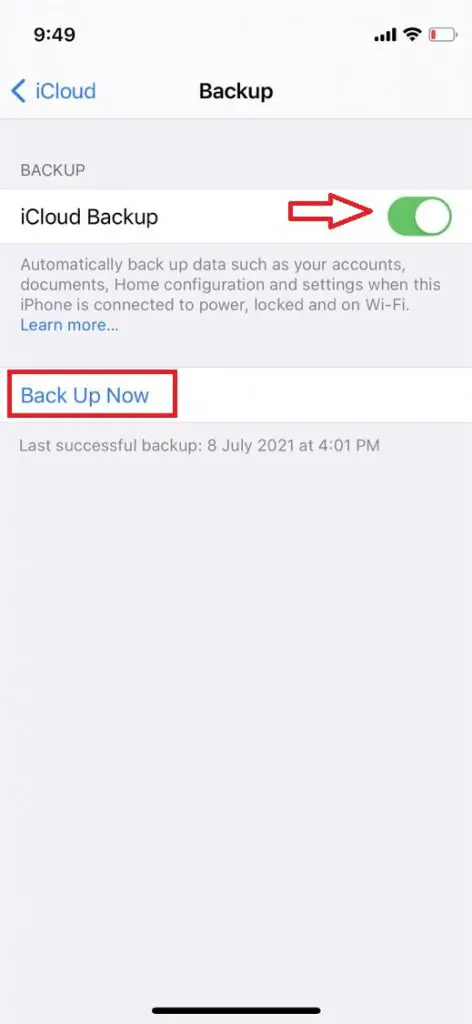
4. If you want to take a manual backup, tap on Back Up Now.
And if you want automatic backup, enable the toggle next to “iCloud Backup.”
Using iTunes
Unlike iCloud backup, iTunes doesn’t rely on the cloud storage and you can only backup your data via iTunes account on your computer. If you back up your iPhone via iTunes, you’ll have a copy of your data to use in case your iPhone is lost or damaged, however if your PC gets damaged, your backup goes with it.
Here’s how to take backup via iTunes:
1. Download iTunes on your PC and open it.
2. Now connect your iPhone to your computer via a USB cable and if asked for a passcode or to Trust This PC, allow it.
3. Select your iPhone in iTunes.

4. Now, click Summary under Settings and then click on Back Up Now.
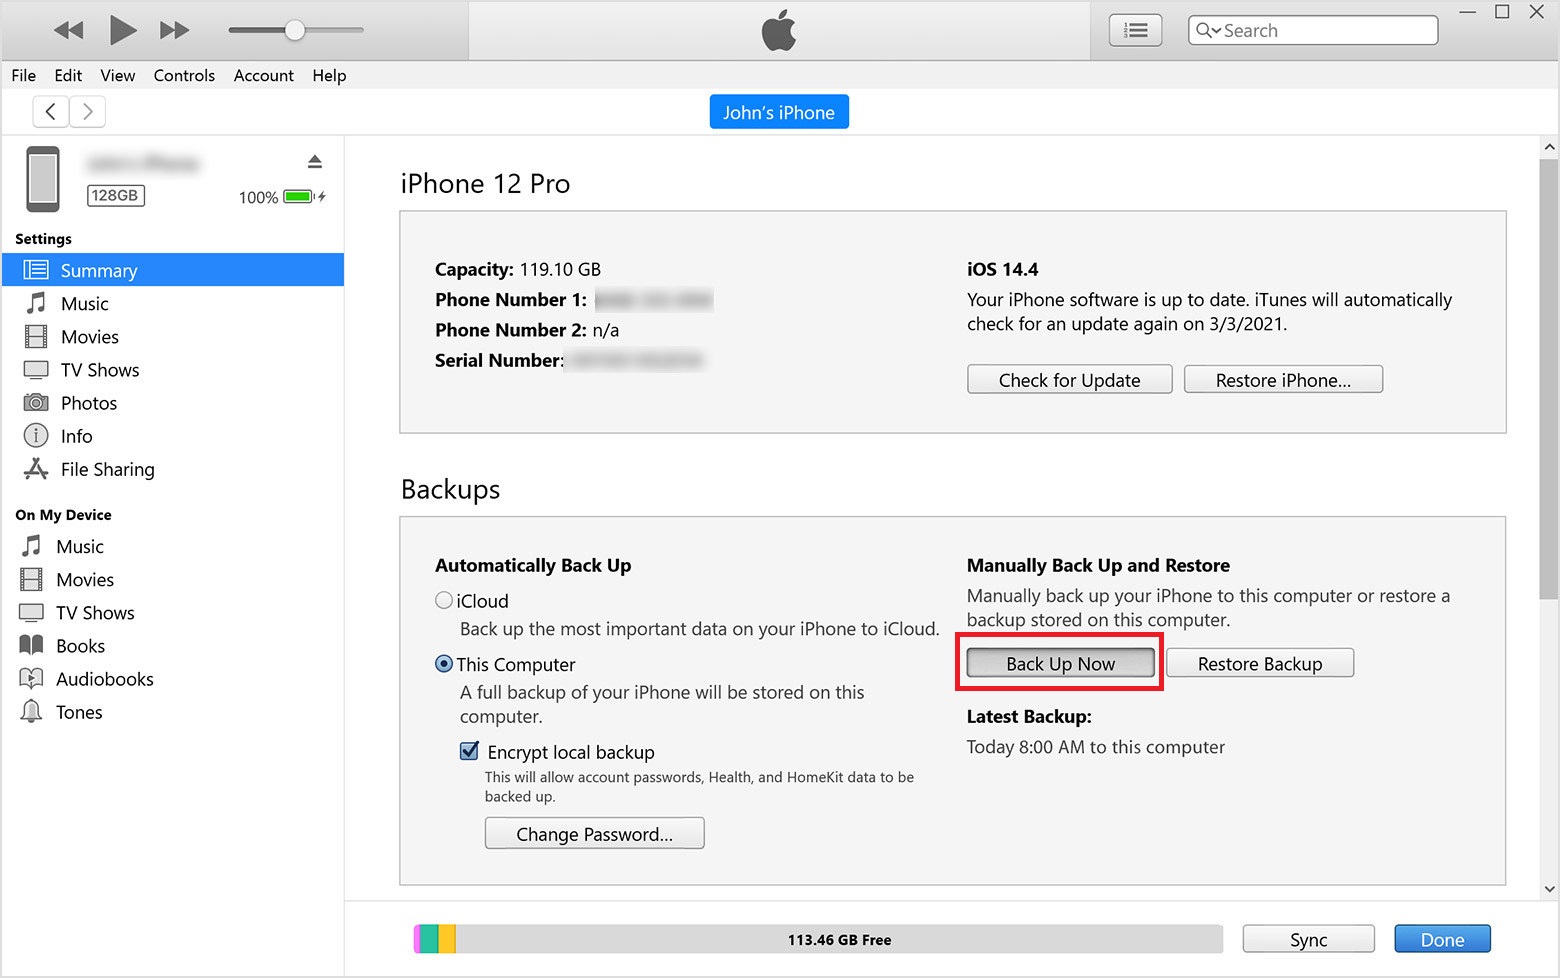
That’s it, your iPhone data will be backed up on this PC and when the process ends you will see that the backup is finished successfully. You’ll see the date and time of the last backup.
Using Google Drive
You can also use some other third-party service to back up your iPhone data online. Google Drvive is one of the best options for this as it backs up your photos, contacts, and calendar. You can this data on your Google Photos, Contacts, and Google Calendar, when you switch to Android. Here’s how to back up your iPhone to Google Drive:
1. Download, install and then open the Google Drive app on your iPhone.
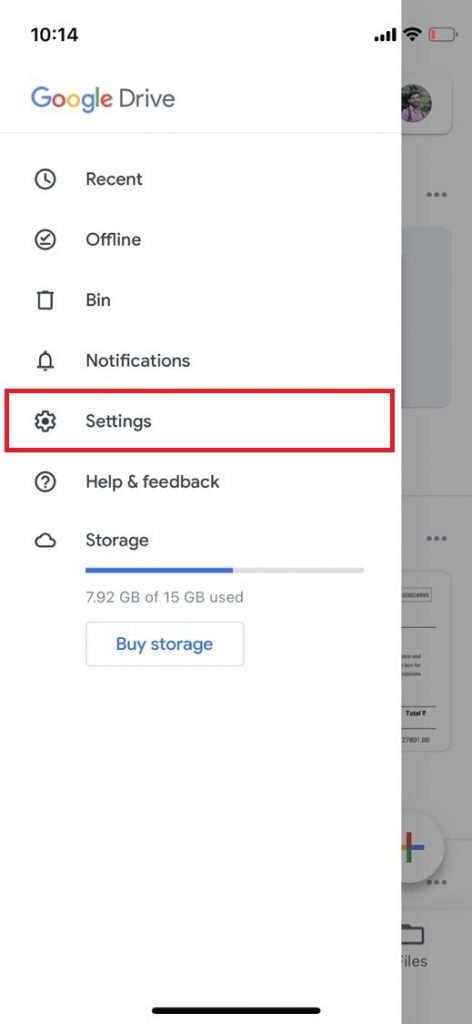
2. Now, tap on the hamburger menu button in the top-left corner.
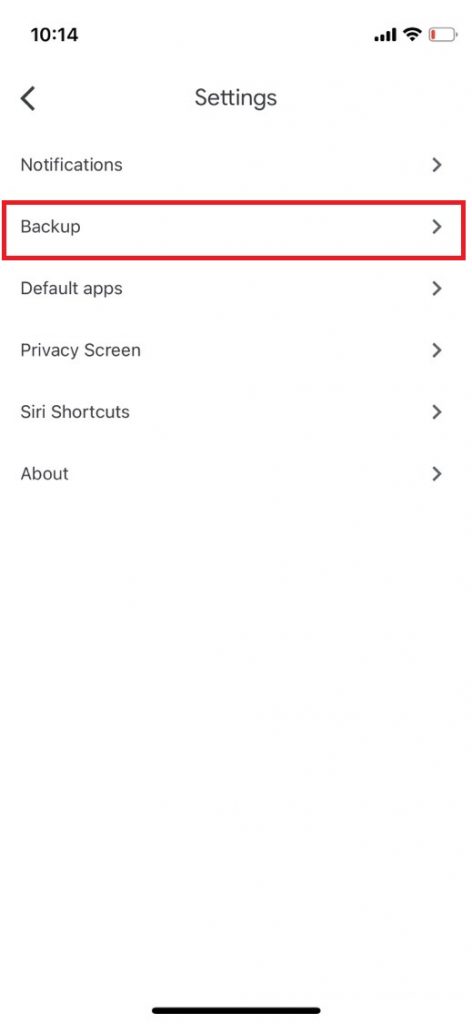
3. There tap Settings and then select Backup.
4. Now, tap on Start Backup.
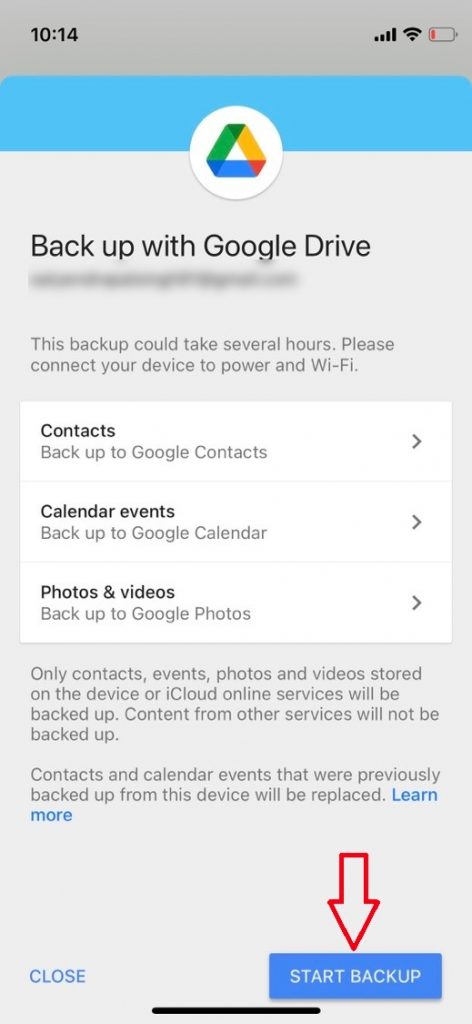
Your backup to Google Drive will start now. If you back up your data multiple times on Google Drive, only new files will be backed up and it will overwrites previous backups. Your photos into different albums won’t back up to Google, and also contacts from other services like Facebook won’t back up either.
You should also note that Google backs up only photos, videos, and contacts, and it doesn’t back up messages, settings, apps, or app data, etc. However, still it is a good alternative if you run out of space on the free iCloud storage.
Bonus Tip: Backup on Computer
Apart from above mentioned methods, you can also back up your iPhone to your Mac or Windows computer, and then back up your computer to the cloud. Here’s how:
- First, back up your iPhone on PC using iCloud or iTunes.
2. Then use an online storage app to automatically sync or copy your photos and videos to your cloud. This process may also not copy app data and messages.

3. Back up your computer to the cloud to protect all your data.
With this process, everything from your iPhone will be backed up on your PC and then on cloud. So if something happens to your iPhone or computer, you have a backup of all your data.
These were some of the best ways to take backup of your iPhone for free and very easily in a few steps. Tell us in the comments, which way you like the most. Also, for more such iPhone tips and tricks, stay tuned!
You can also follow us for instant tech news at Google News or for tips and tricks, smartphones & gadgets reviews, join GadgetsToUse Telegram Group or for the latest review videos subscribe GadgetsToUse Youtube Channel.