Screenshots play a vital role in capturing instant information which can be used for a variety of purposes. If you are using a Windows laptop, you can capture screenshots easily using different methods. In this article, you will learn 6 ways to take screenshots on a Windows laptop. Additionally, you can also learn to take screenshots in Chrome, Firefox while browsing privately.
Also, Read | 3 Ways to add Blur to Screenshots and Photos on Mobile and PC for Free
Ways to Take Screenshot on Windows Laptop
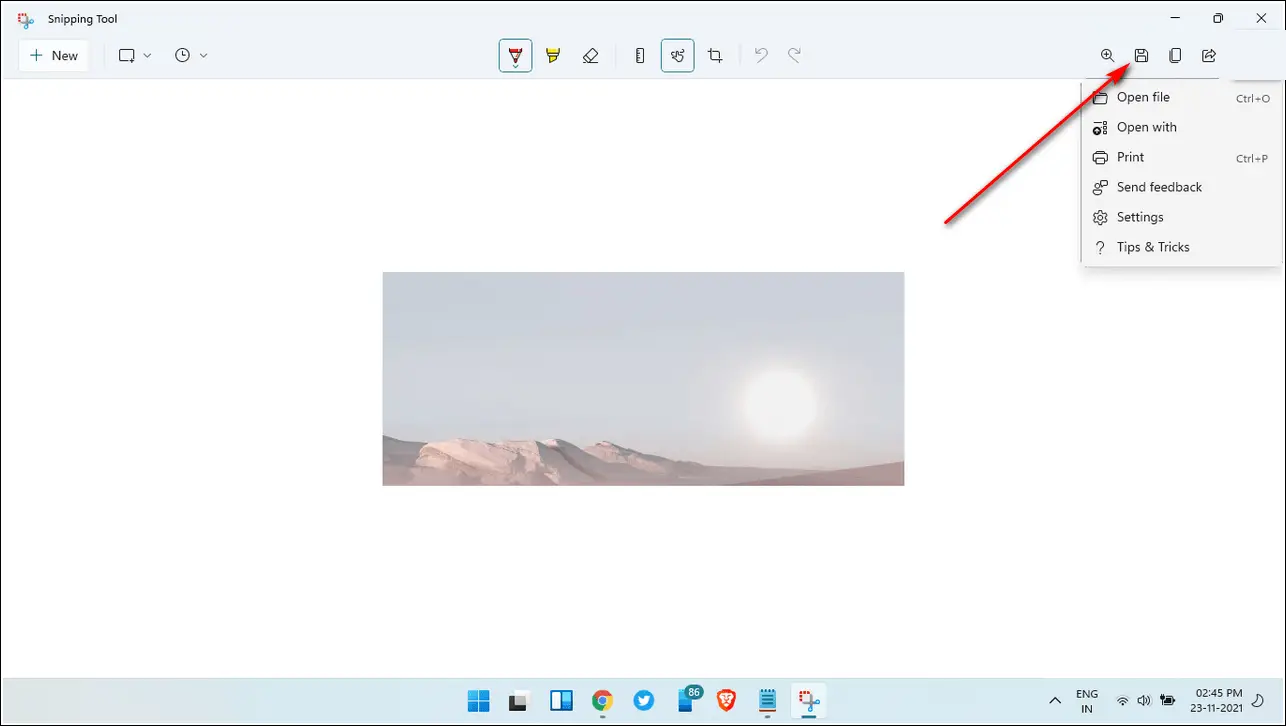
Capture Screenshots using Windows Snipping Tool
Microsoft Windows offers Windows Snipping Tool as an in-built tool to capture screenshots easily in your system. Using this tool, you can either capture the entire screen or save a part of it. It also offers to save the screenshot in a variety of image formats such as JPG, PNG, etc. Follow these simple steps to use the Windows Snipping tool.
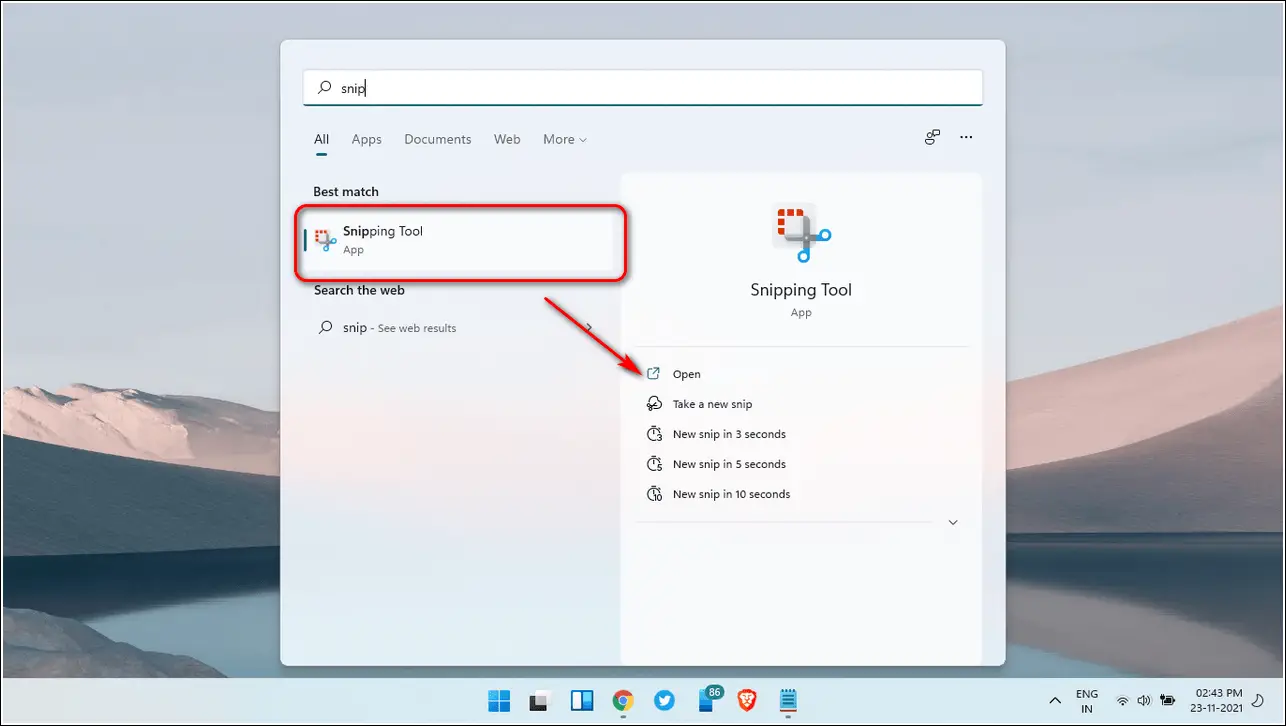
- Press the Windows key, search for Snipping Tool and open it.
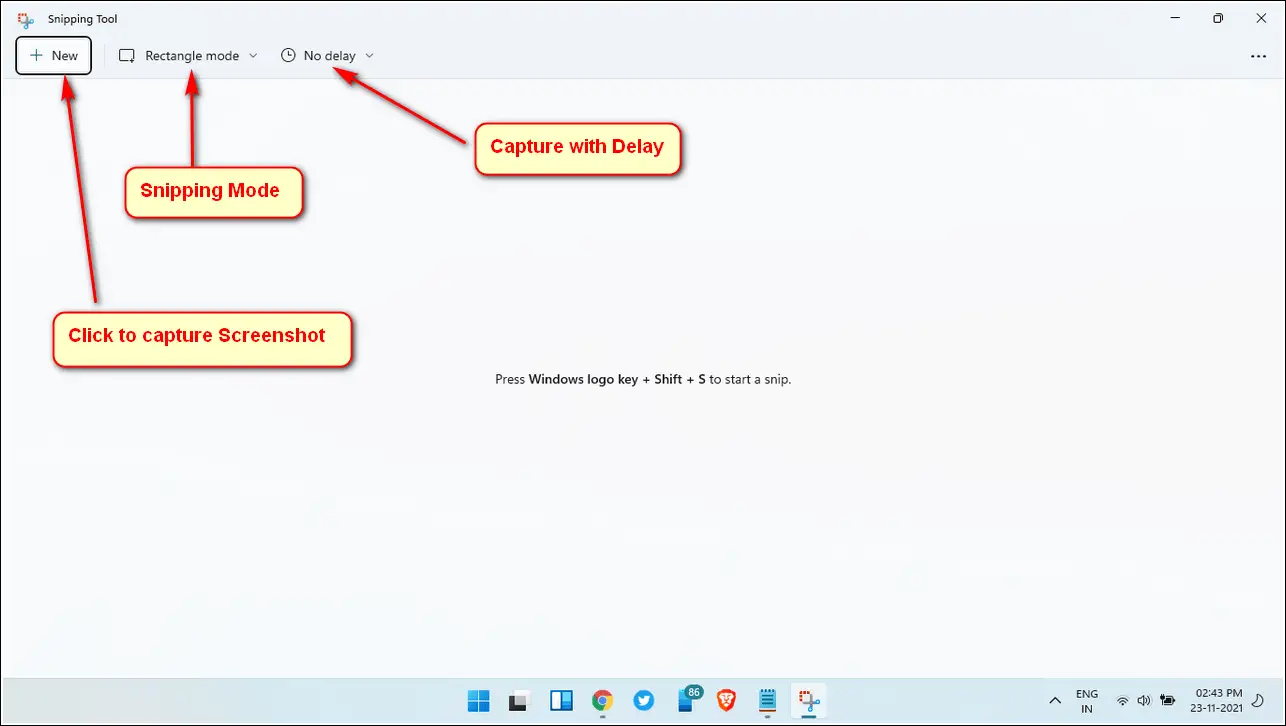
- Select the Screenshot mode from the given list.
- You can also set a timed delay to capture the screenshot.
- Click on the +New button to start capturing a screenshot from the current window.
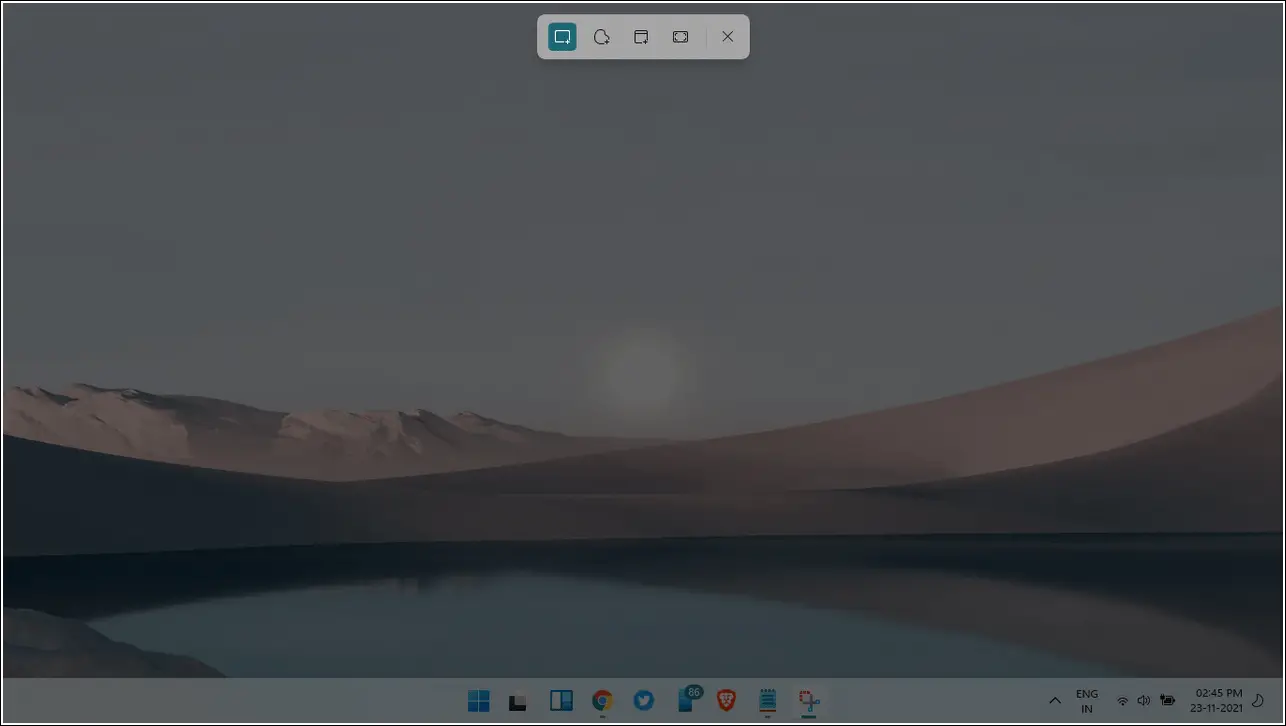
- Drag the Plus-shaped cursor to capture the entire or part of the current window.
- You can edit this captured screenshot using the toolbox.
- To save this image, click on the Save icon.
- Alternatively, you can press Windows + S key and name the file and choose the format to save it.
Use PrintScreen method to take Screenshots
One of the simplest methods to take screenshots on a Windows laptop is via PrtSc Key. Follow these easy steps to capture your own screenshot.
- Open the window which you want to capture as a screenshot.
- Press the PrtSc key (PrintScreen Key) to capture the entire window to the clipboard.
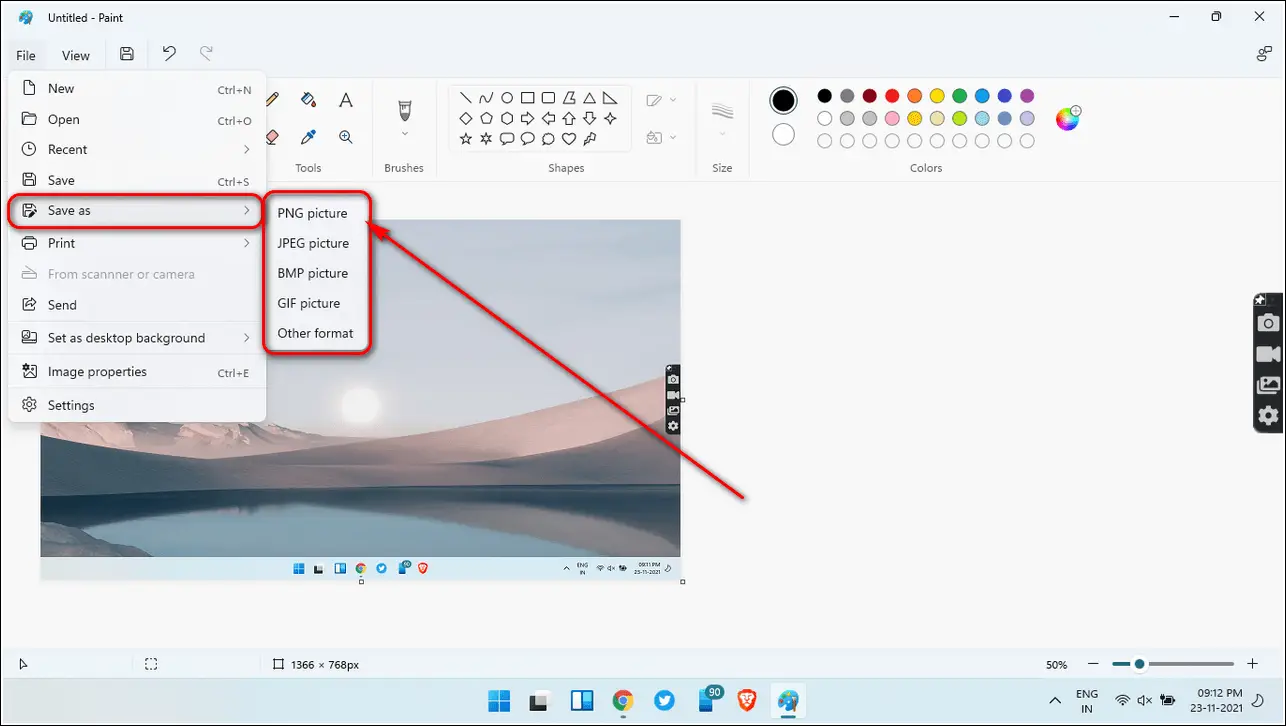
- Open an image editor, for example, MS-Paint.
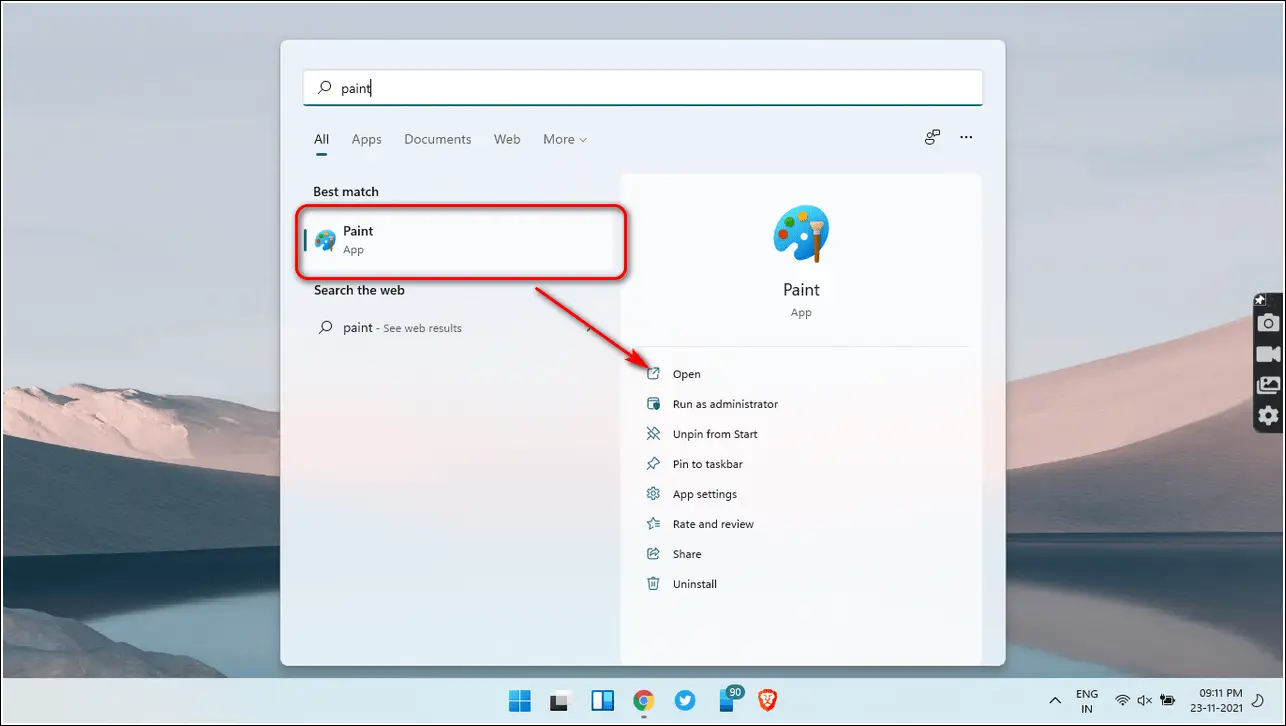
- In the toolbox, click on the Paste icon to paste the screenshot from the clipboard to the Paint app.

- Save this image by pressing Windows + S key combo and choosing your desired format.
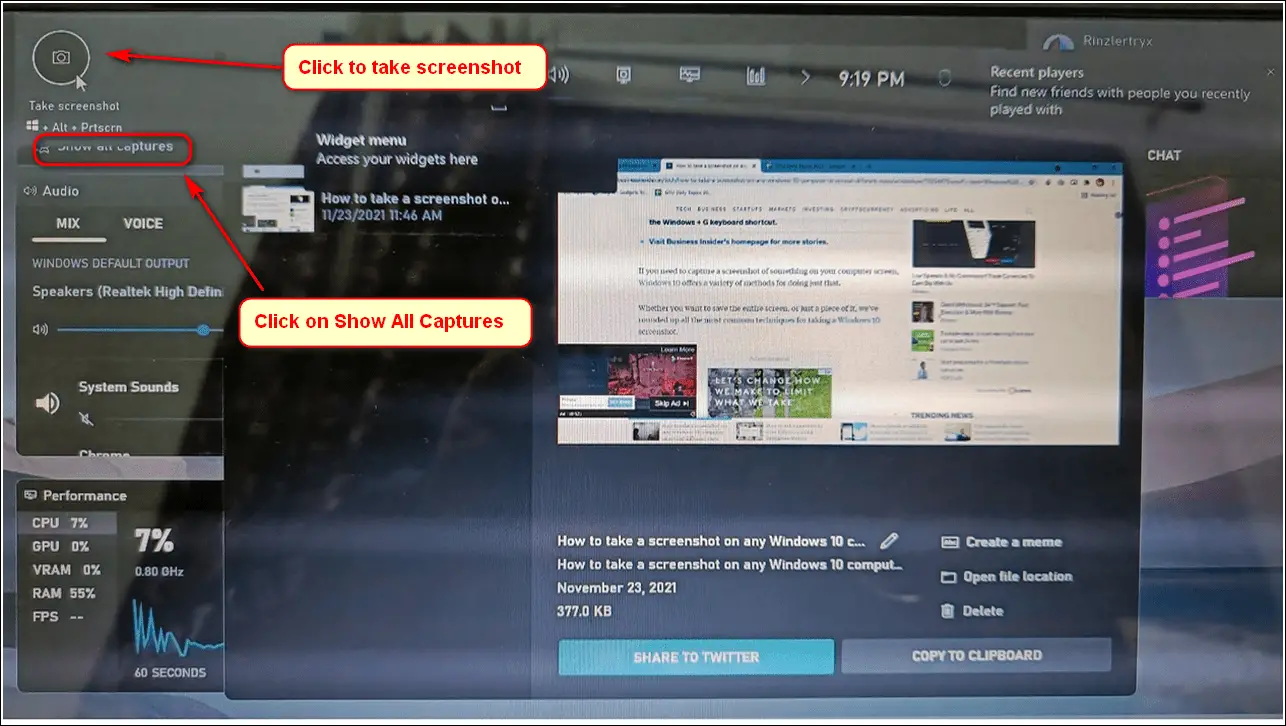
Capture Screenshots using Windows Game Center/Bar
Both Windows 11 and 10 offers an enhanced game center/bar for gamers to take screenshots while playing games on their laptop. This feature is not just limited to games and you can activate it anytime using the hotkeys to take a screenshot of the current window. Follow these steps for achieving this goal.
- Press Windows + Alt + G keys simultaneously on your keyboard to launch Windows Game Center.
- Navigate to the top left corner of the screen to locate the screenshot button and click on it.
- The screenshot of the current window will be captured instantly.
- You can view these screenshots by clicking on Show all Captures button just below the screenshot icon.
Take Screenshots using Windows Hotkeys/Dedicated Keys
If you don’t have enough time to search and open the screenshot app provided in Windows, you can instantly launch it using Windows Hotkeys. Some laptop manufacturers include a dedicated screenshot key in the keyboard of some laptop models for providing ease of access. Alternatively, you can press Windows + Shift + S key combo to instantly launch the Snipping tool.
Make use of Third-party software such as ScreenRec
There are lots of reliable third-party software that offers screen capturing for Windows systems. One such app is ScreenRec which is a free software offering annotated screenshots, instant sharing, and even screen recording. Follow these steps to capture screenshots using ScreenRec.
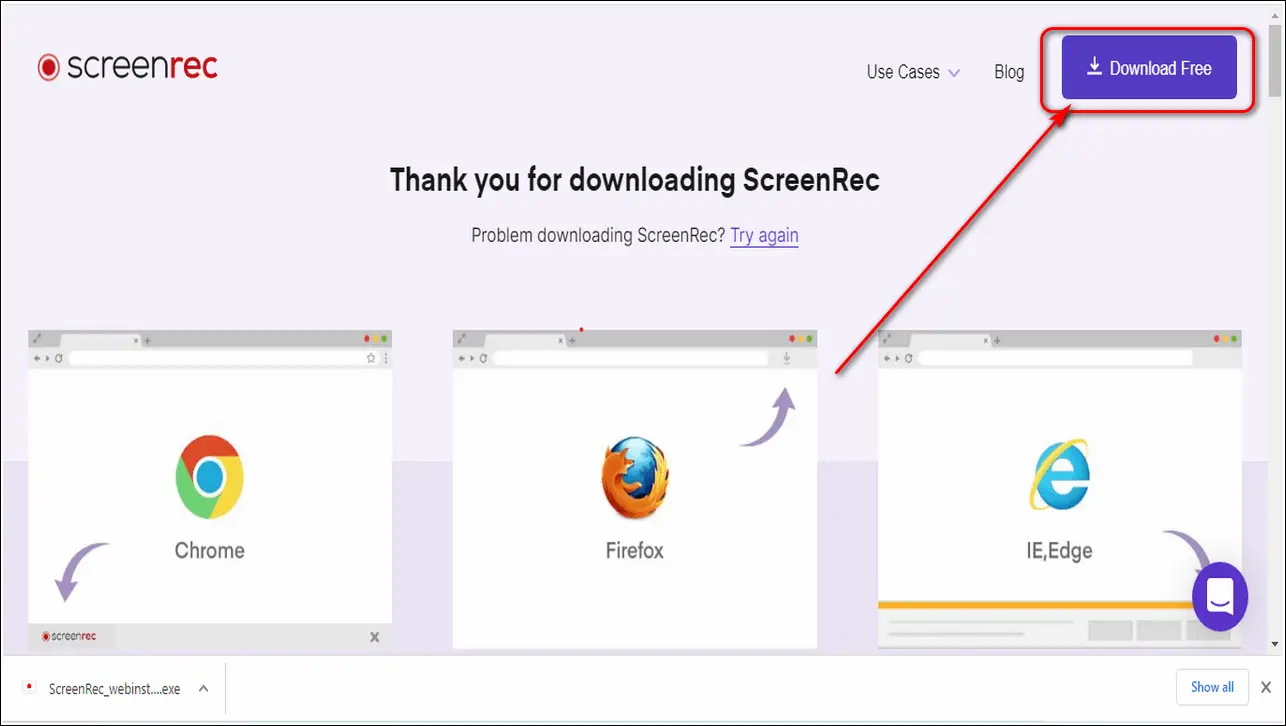
- Download ScreenRec for Windows.
- Install the software to your system by following the steps in the installation wizard.
- Double click on ScreenRec software to run it.
- A bar of 4 icons will appear in the middle right corner of your screen.
- Click on the Camera icon to start taking a screenshot.

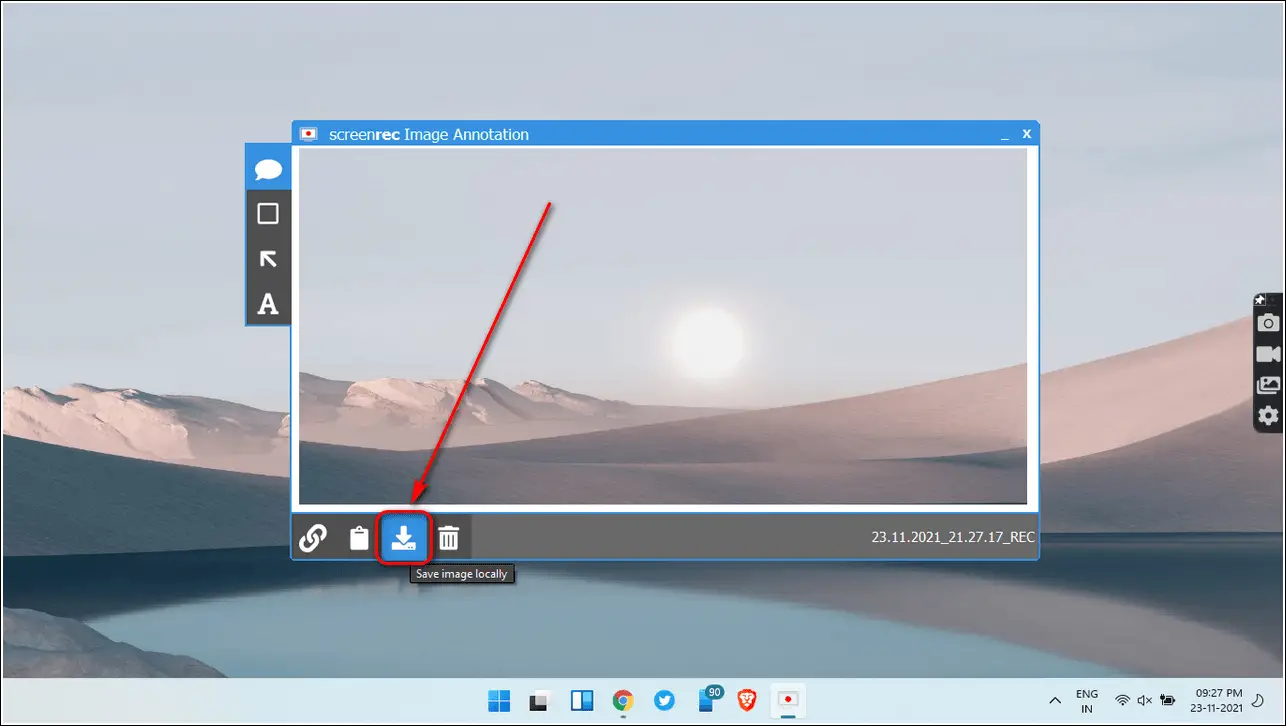
- Drag the cursor on the current window to make a selection and click on the Save Image button to save it to your system.
- You can also record your current screen with audio using this software.
Bonus Tip: Capture Full page Screenshots with Text Annotations
You can also capture full-page screenshots on your mobile and PC along with text annotations. This will help you to add more impactful screenshots to your work. Follow this simple 2-minute read on ways to capture full-page screenshots with annotations on Mobile, PC.
Wrapping Up
In this article, you have learned ways to take screenshots on a Windows laptop. If this article has helped you in learning about the same, then hit the Like button and share this among your friends to assist them in their work as well. As always, stay tuned for more informative articles like this one.
You can also follow us for instant tech news at Google News or for tips and tricks, smartphones & gadgets reviews, join GadgetsToUse Telegram Group, or for the latest review videos subscribe GadgetsToUse Youtube Channel.