

Quick Answer
- So this was a quick guide on how you can show internet upload and download speed in the taskbar on your Windows 10 computer.
- However, there’s no such native option in Windows, and you’ll have to rely on third-party software to add a net speed monitor.
- In this article, let’s see how you can show internet speed in the taskbar on Windows 10.
Showing internet speed on Android devices is quite easy. In fact, most manufacturers bundle it as a built-in feature. However, there’s no such native option in Windows, and you’ll have to rely on third-party software to add a net speed monitor. In this article, let’s see how you can show internet speed in the taskbar on Windows 10.
Show Internet Speed on Windows 10 Taskbar
Here, we’ll be using third-party software called NetSpeedMonitor to show internet speed in the taskbar. The tool will help you monitor your real upload and download speeds on your Windows computer.
Now, while it works without any hitches on older versions of Windows, Windows 10 users may find it tricky to install and set up the software. Below we’ve mentioned a step-by-step guide through which you can show internet speed on the taskbar using NetSpeedMonitor.
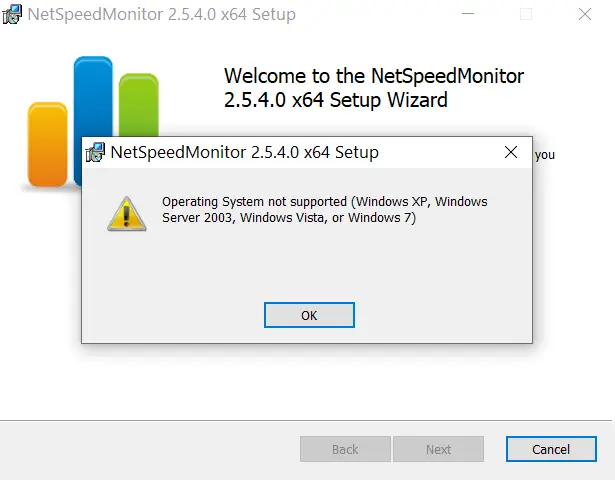
1] To start with, download NetSpeedMonitor from the link given below. The software is free to use and needs to be installed in compatibility mode on Windows 10.
NetSpeedMonitor 64-bit NetSpeedMonitor 32-bit
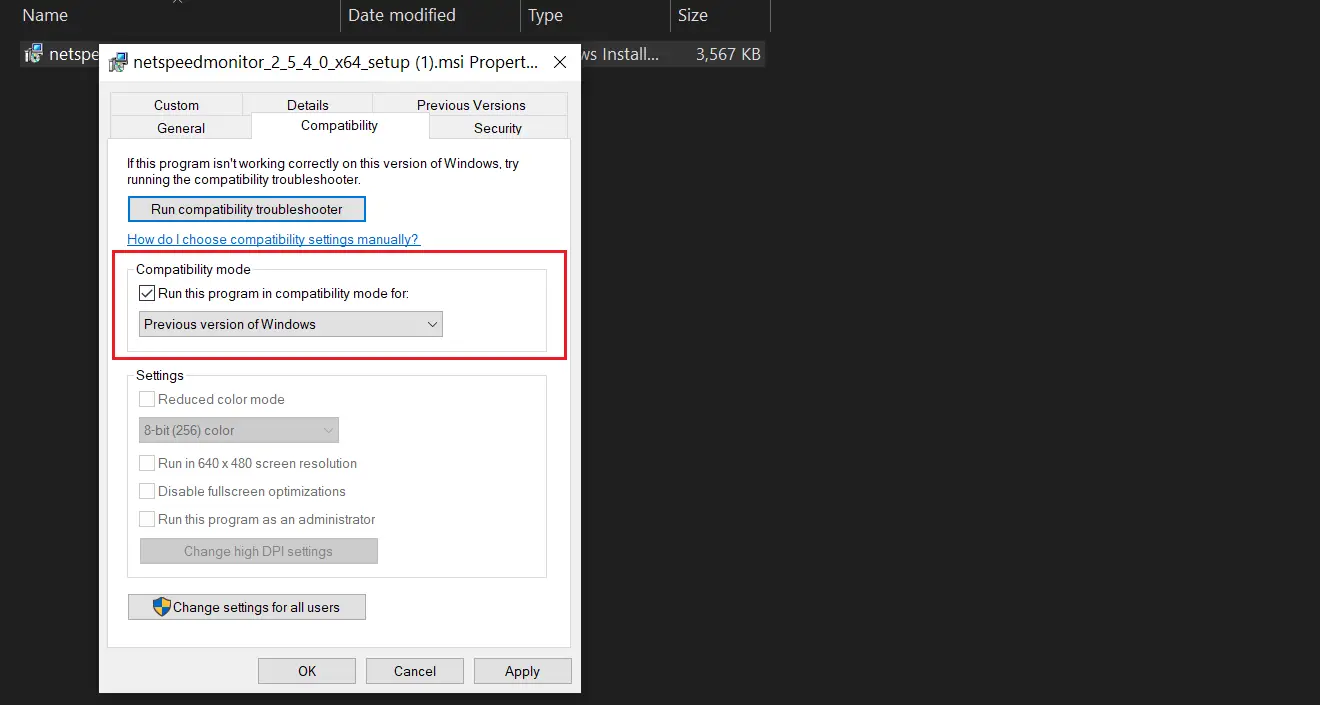
2] Once downloaded, click the setup and install it normally. If you’re on Windows 10, right-click the setup > Properties > Compatibility and tick the Compatibility mode for previous versions of Windows. Hit Apply to save changes.
3] You can now double-click the setup file to install the software normally on Windows 10.
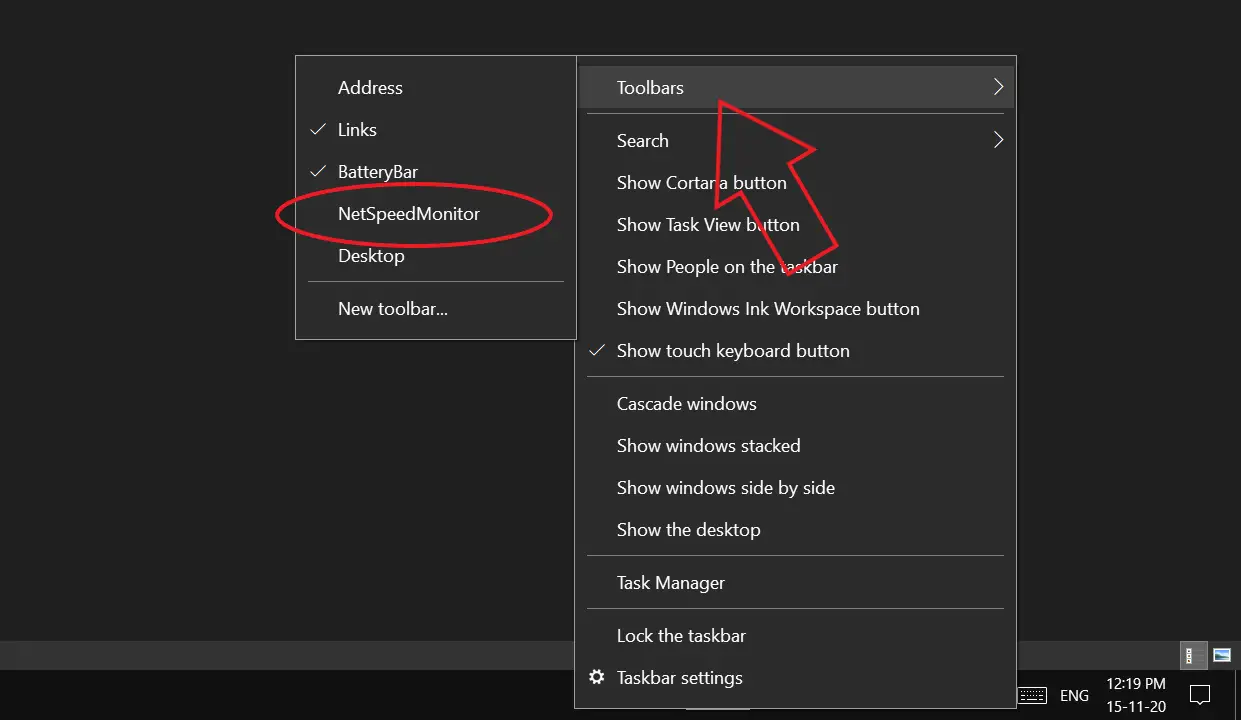
4] After you’ve installed the tool, right-click on the Windows toolbar, and select Toolbars from the available options.
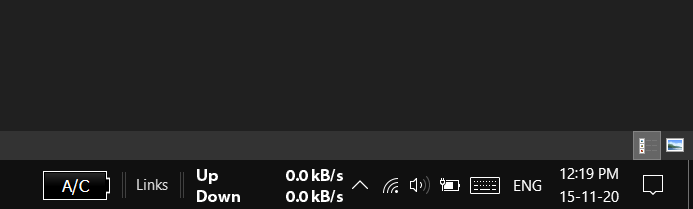
5] Click on NetSpeedMonitor to enable it. As you select it, your internet upload and download speed will automatically start showing in the taskbar at the bottom right.
NetSpeedMonitor Doesn’t Work?
As it was with my case, it’s likely that the NetSpeedMonitor will be stuck at zero and won’t display any speed, even if you’re connected to the internet. In that case, you can follow the easy fix below.
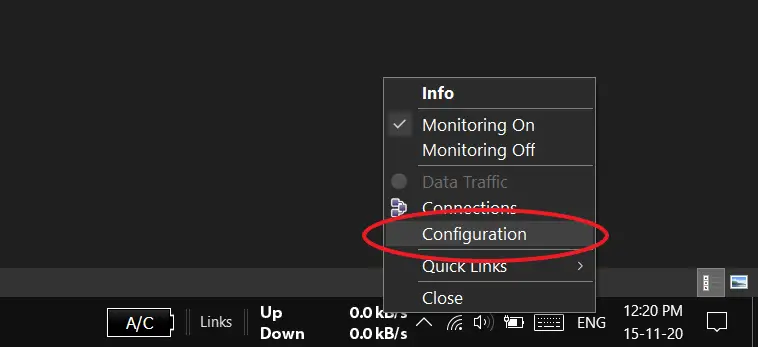
- Right-click on the NetSpeedMonitor meter at the toolbar.
- Select Configuration.
- Once the configuration window opens, click the network interface drop-down menu and select a different interface to see if the meter starts working.
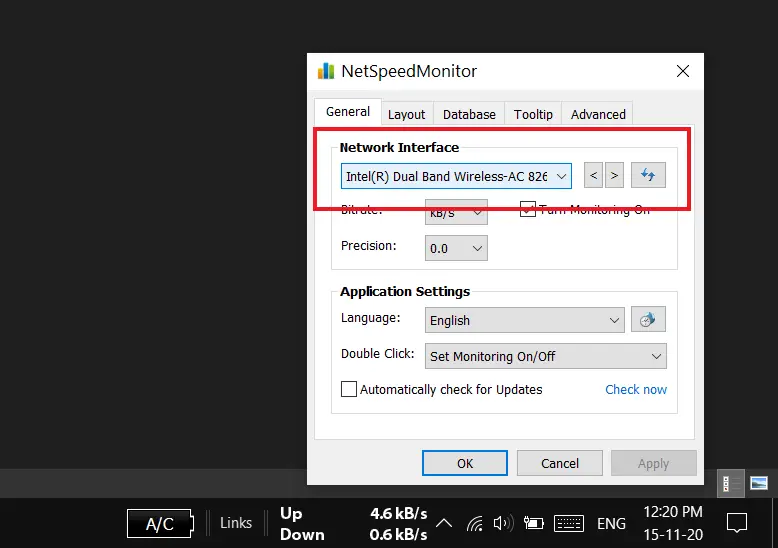
- If it doesn’t, try selecting another interface. Also, make sure that monitoring is enabled.
By default, NetSpeedMonitor shows speeds in kB/s (Kilobits per second). You can change it to KB/s or MB/s or the Bitrate of your choice through the given option. Also, you can turn on/ off the internet speed meter by double-clicking the same in the toolbar.
Wrapping Up
So this was a quick guide on how you can show internet upload and download speed in the taskbar on your Windows 10 computer. We’ve also mentioned a quick fix for NetSpeedMonitor not working issue. Do try it and let us know your experience in the comments below. Feel free to reach out in case of any related doubts or queries.
Also, read- How to Install macOS Dynamic Wallpapers on Windows 10


