Quick Answer
- If you don’t have a product key and want the watermark to disappear, it can be done using a couple of methods stated below.
- In that case, you can keep the batch file on your homescreen and tap it once every time you turn on your PC.
- If you have a valid Windows 10 product key, you can activate and remove the Activate Windows watermark.
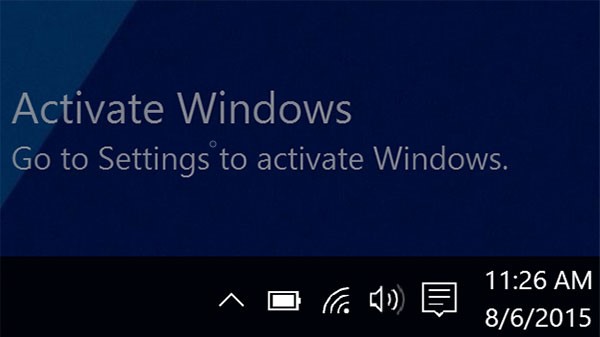
Are you seeing the “Activate Windows; Go to Settings to activate Windows” watermark on your computer’s homescreen? Well, do not worry, we’ve got your back. Here are the top three ways to permanently remove the Activate Windows watermark on Windows 10 PC.
Remove ‘Activate Windows’ Watermark from Windows 10
Why Do You See Activate Windows Watermark?
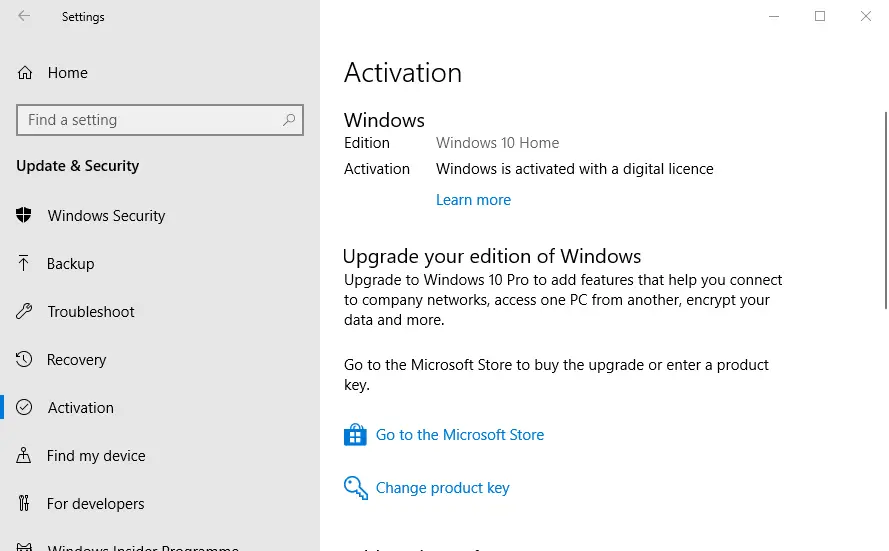
The ‘Activate Windows’ watermark indicates that the copy of the Windows on your computer hasn’t been activated yet or its license has expired. If you have a valid Windows 10 product key, you can activate and remove the Activate Windows watermark.
However, you can’t just use the keys available online which have already been used by others. Instead, you’ll have to buy the key from Microsoft Official Store, Amazon, or any authorized sales channel. Some third-party sellers sell keys for cheap, but it isn’t something that we recommend.
Another reason for the watermark could be a different Windows version. For instance, you bought the product key for Windows 10 Professional but installed Windows 10 Home Edition instead. So, make sure this isn’t the reason in your case.
Activated vs. Unactivated Windows
There aren’t any major differences between activated and unactivated versions of Windows. That said, apart from the watermark and “Activate Windows” notifications, you get limited personalization options, including wallpapers and themes.
Furthermore, the unactivated version will only download critical updates. Stuff like optional updates, extra services, and apps from Microsoft usually bundled with an activated copy will be blocked. Other than that, the system will run just fine.
Ways to Remove Activate Windows Watermark Permanently
If you don’t have a product key and want the watermark to disappear, it can be done using a couple of methods stated below.
Method 1: Using Registry Editor
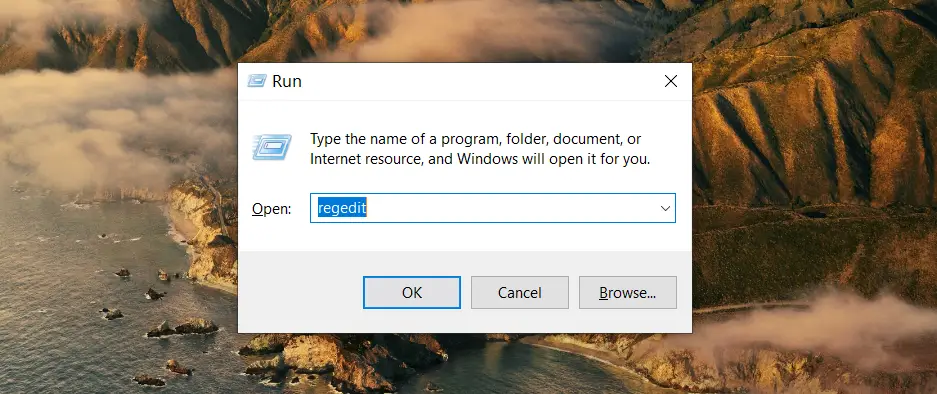
- Press Windows + R to open run.
- Type “Regedit” and press Enter or OK.
- Once the Registry Editor opens, click Files > Export and save it as a backup.
- Click on HKEY_CURRENT_USER and then on Control Panel.
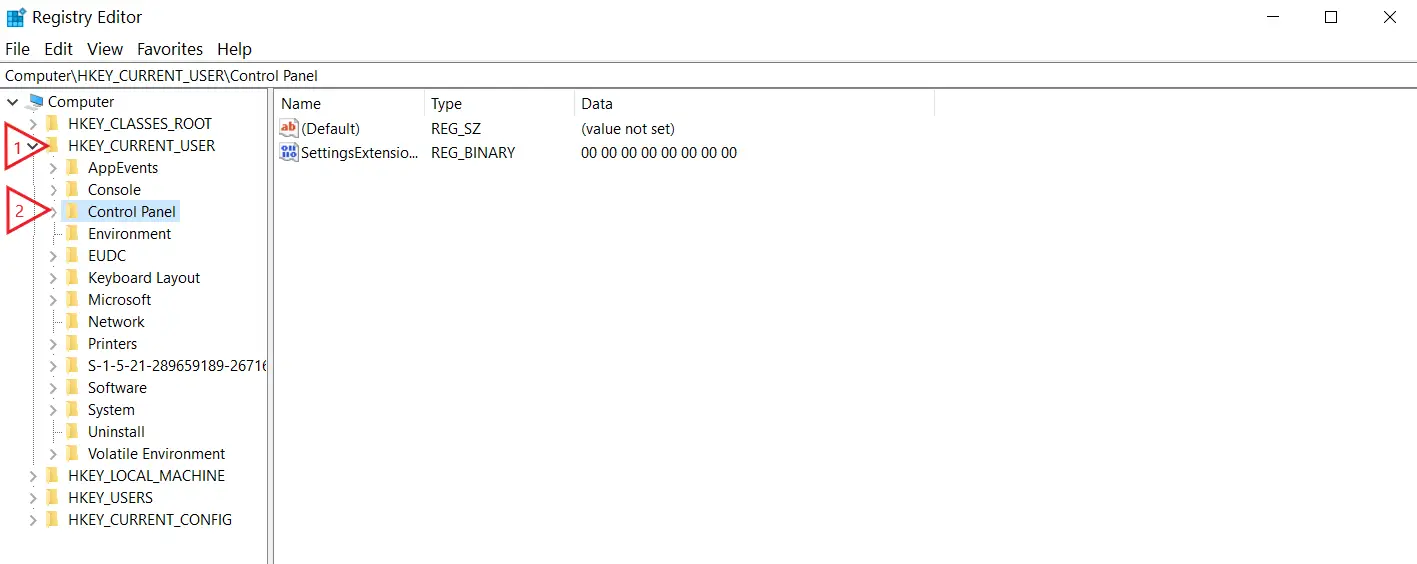
- Now, tap on Desktop.
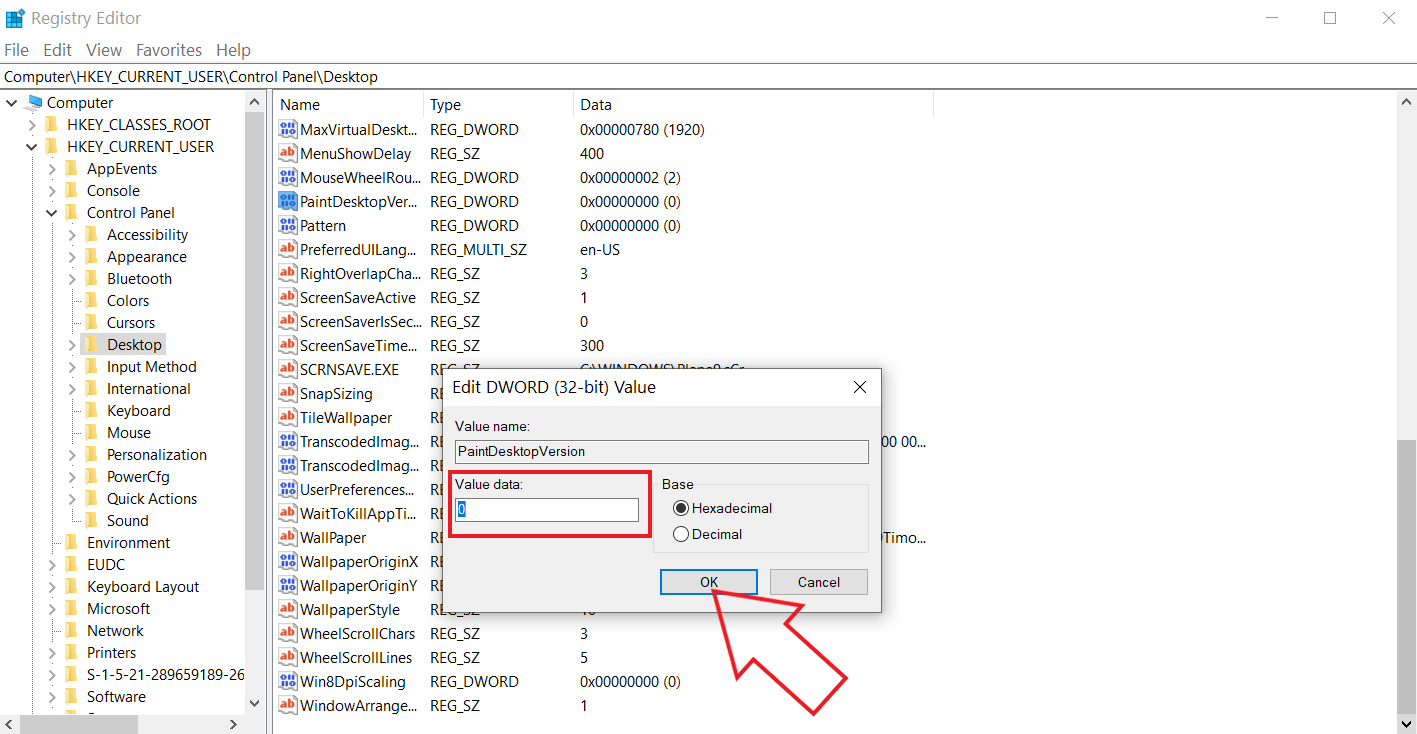
- On the right, scroll down and click the PaintDesktopVersion key.
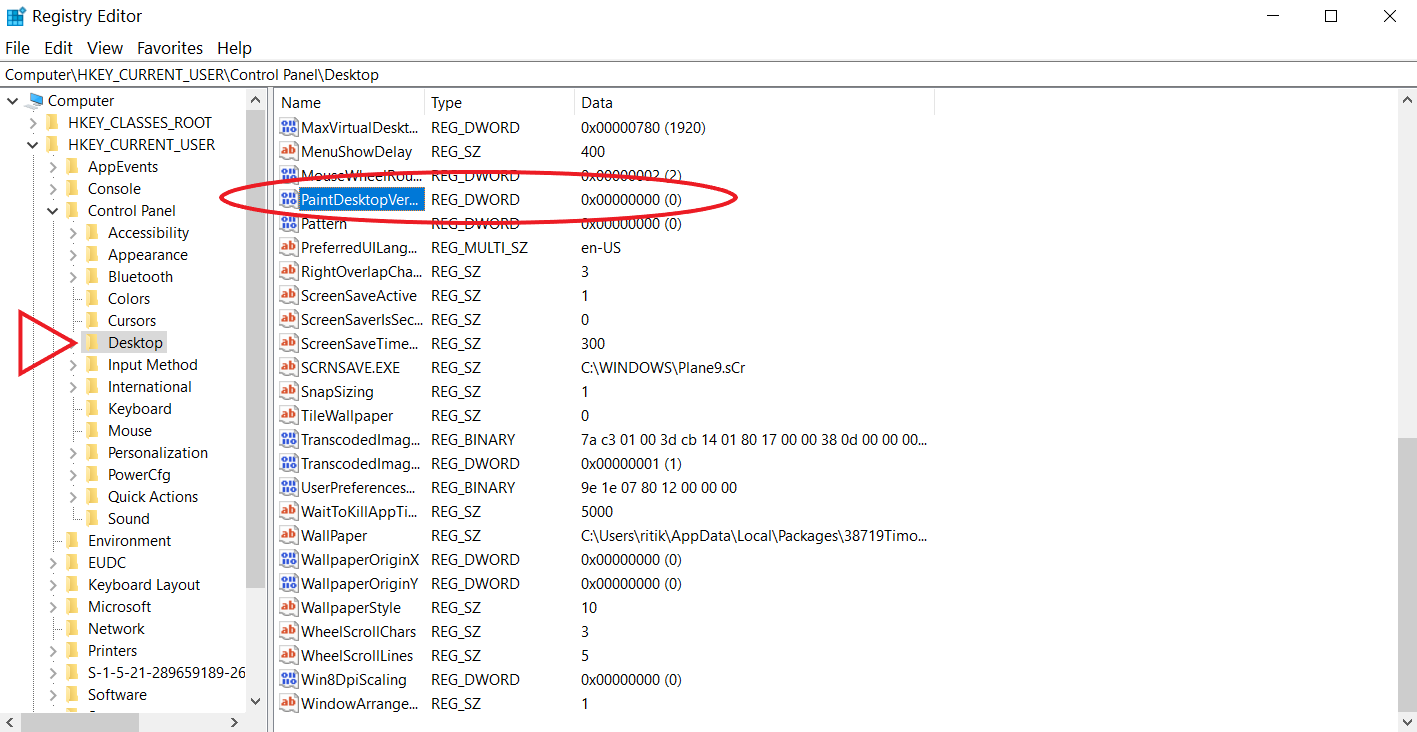
- Double click on it and change the value from 1 to 0.
- Click OK to save changes.
- Close Registry Editor and restart your computer.
Method 2: Kill the Process to Remove Watermark
If the Regedit method above doesn’t work for you, you can use the notepad method, as follows:
- Open the Notepad on your computer. You’ll find it in the Start menu.

- Copy and paste the following, as shown in the screenshot below:
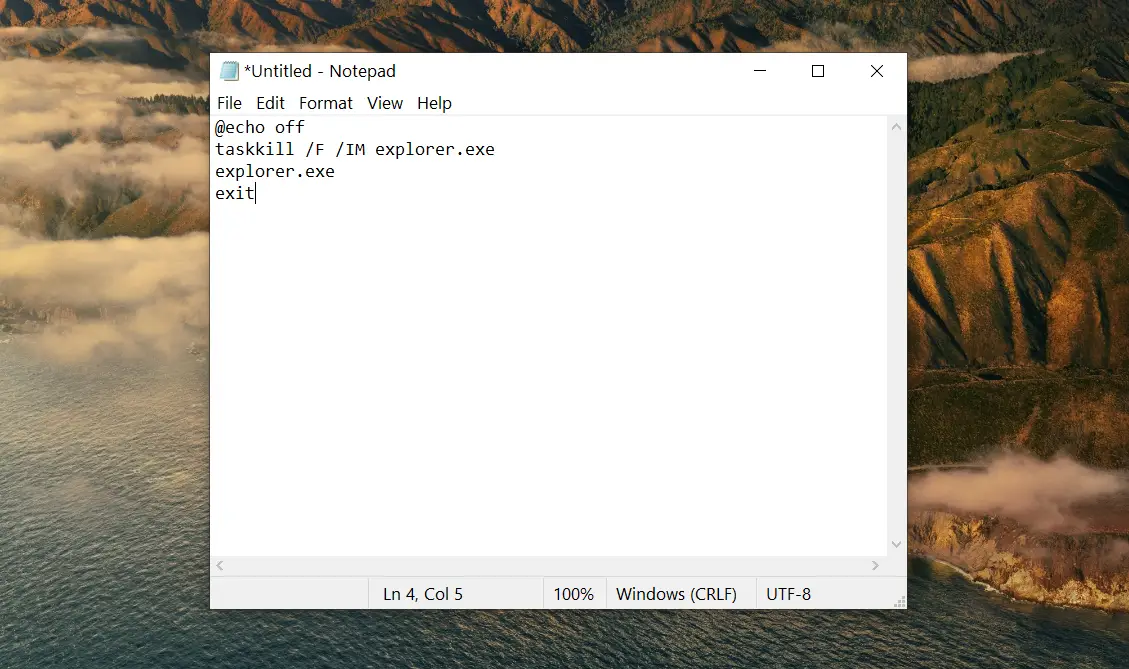
@echo off
taskkill /F /IM explorer.exe
explorer.exe
exit - Click File on the menu bar and then tap Save as.
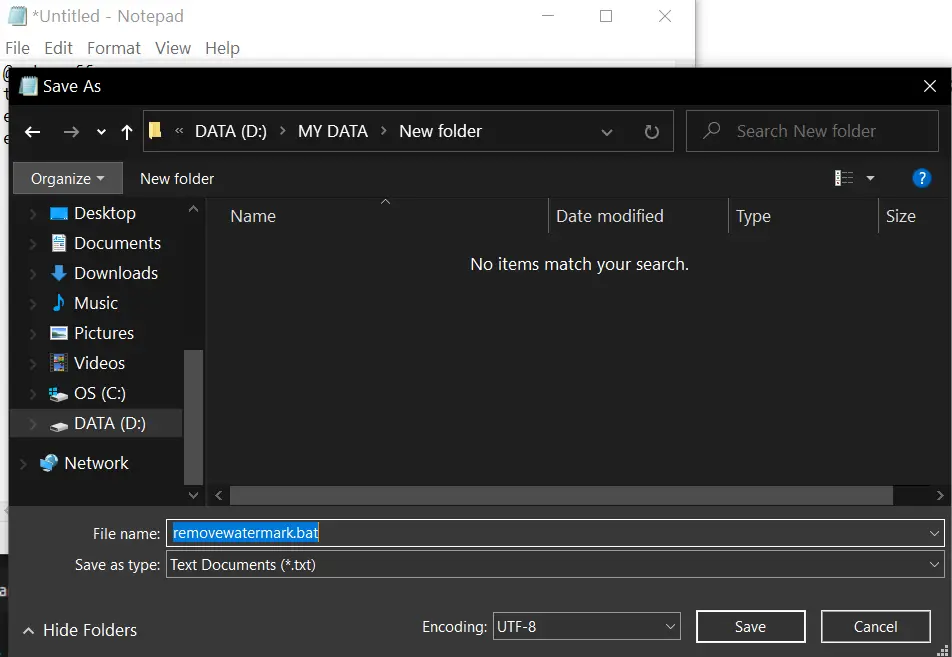
- While saving the file, click on save as all files and name it “xyz.bat.” Make sure that the extension is .bat.
- Now, go to the location where you saved the file.
- Double-click the batch file to run it on your computer.
Once you execute the batch file, the activation message will be gone from your screen. However, note that it’ll re-appear once you restart your computer. In that case, you can keep the batch file on your homescreen and tap it once every time you turn on your PC.
You can also make the batch file run automatically on startup by using Task Scheduler on Windows. This way, the watermark won’t re-appear after reboot. To do it:
- Search for Task Scheduler in Start Menu. Open it.
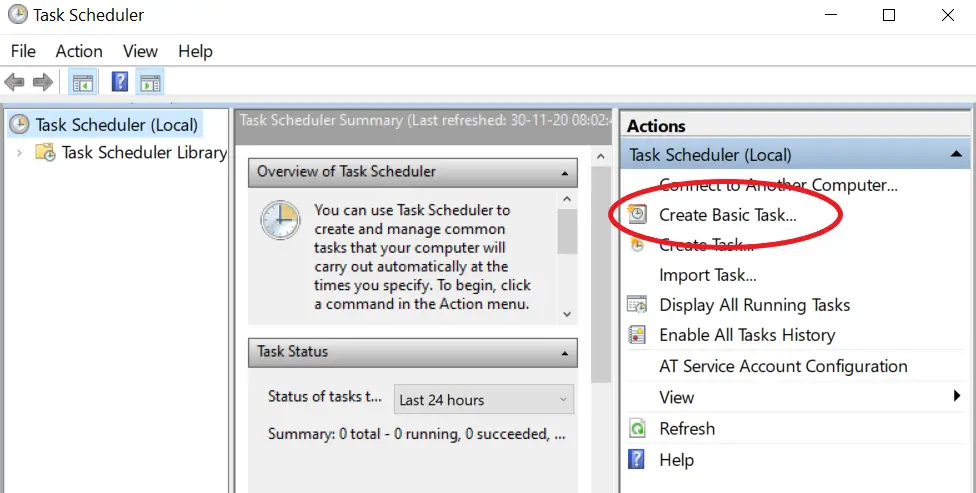
- Click on “Create Basic Task” under Actions at the right.
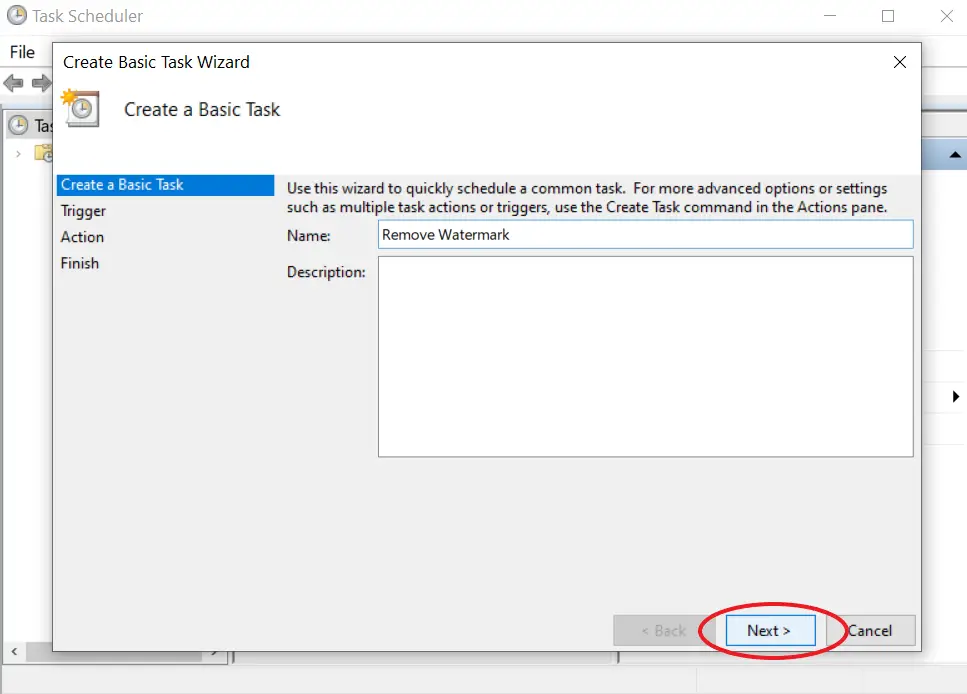
- Name the task and proceed further.
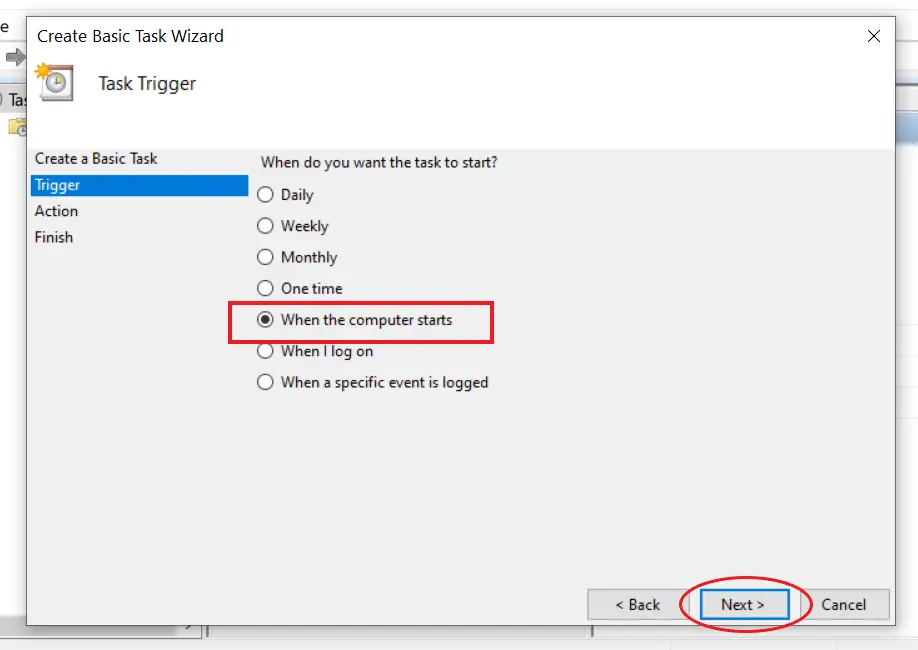
- Now, select “When the computer starts” and click Next.
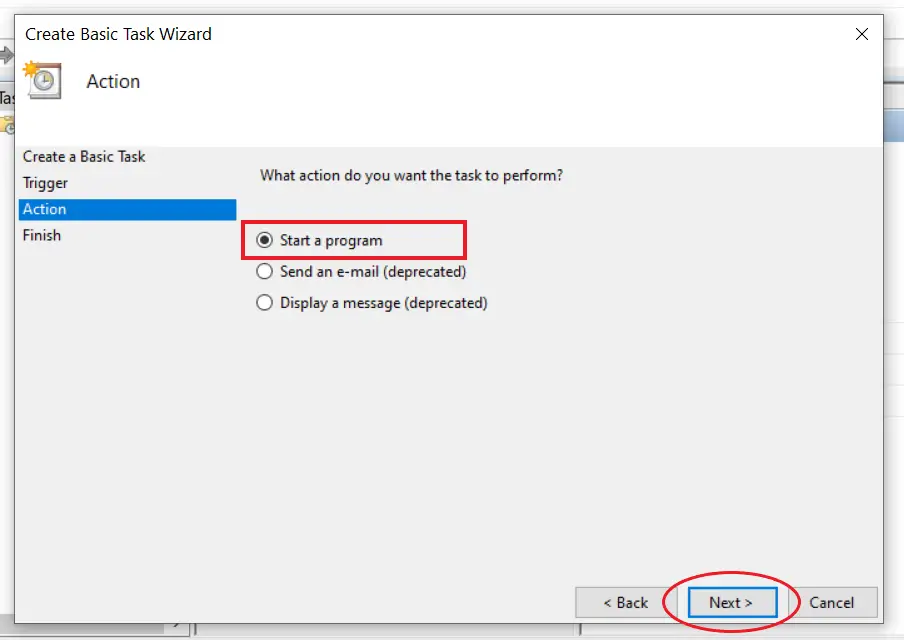
- Choose “Start a program” and press Next.
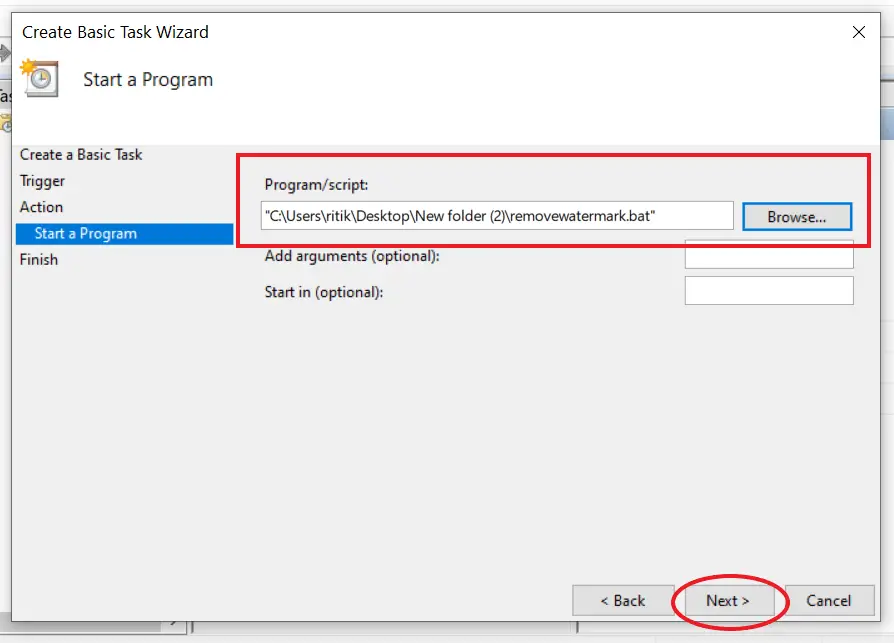
- Click Browse and select the ‘removewatermark.bat’ file.
- Then tap ‘Open’ and press ‘Next.’

- Click ‘Finish’ to schedule the task.
Method 3: Using Command Prompt
If your Windows computer has test mode enabled, it’ll cause the Activate Windows watermark to appear on your screen. You can disable the test mode using some simple commands in CMD, as follows:
- Open the Start menu and type ‘CMD’ in the search bar.
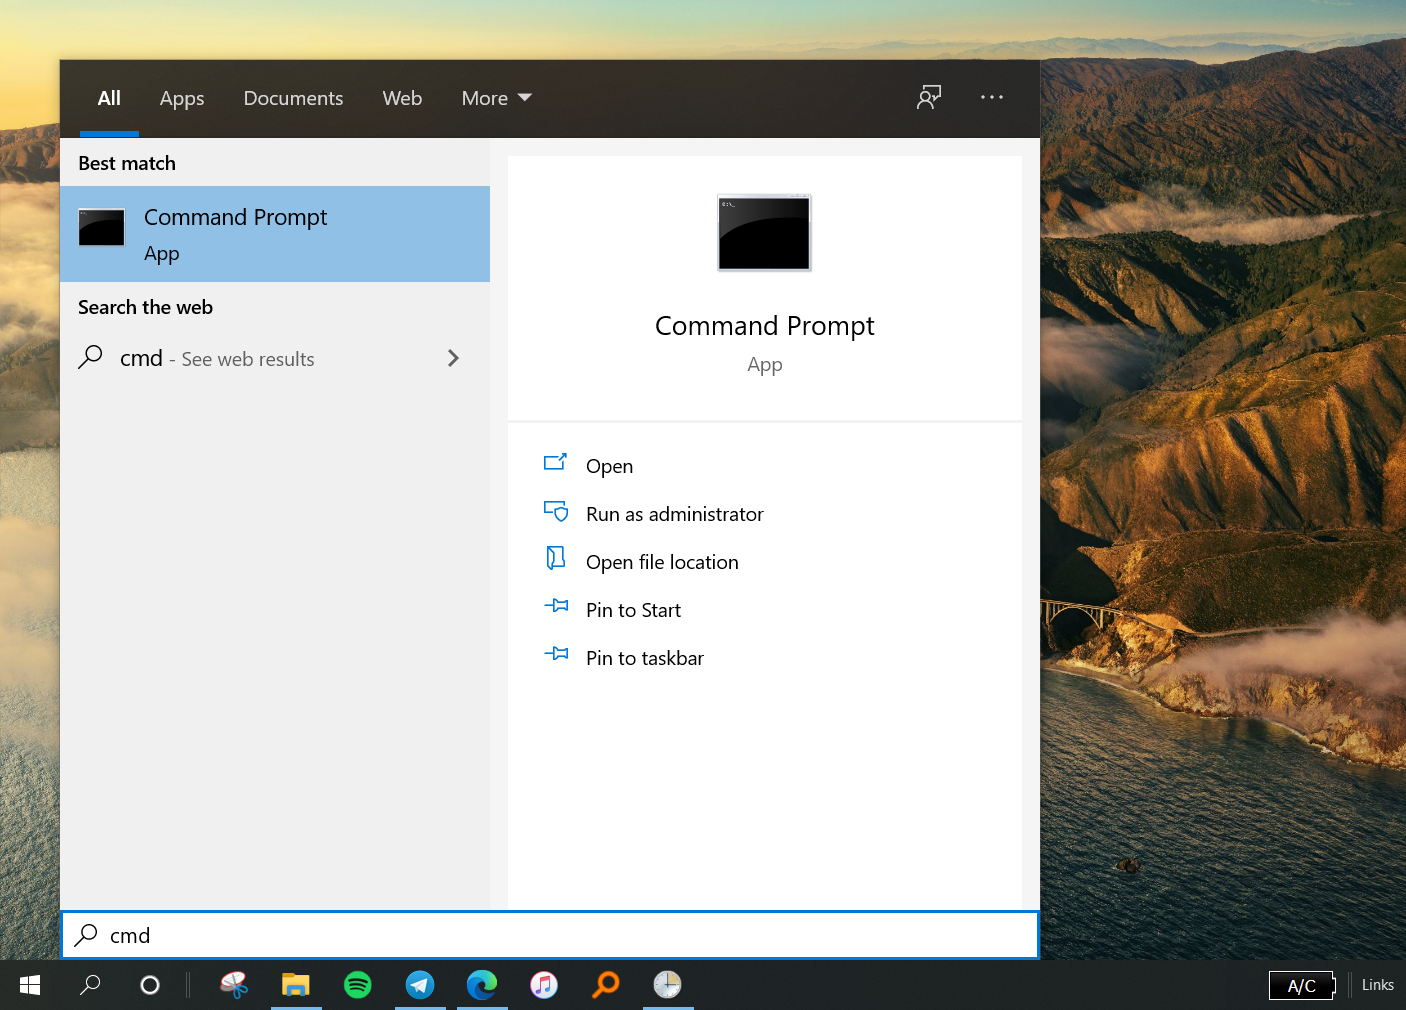
- Right-click on Command Prompt and tap Run as administrator.
- In the CMD window, type bcdedit -set TESTSIGNING OFF and press Enter.

- You’ll see the message, “The operation completed successfully.”
- Now restart your computer.
Wrapping Up
I hope that you’re now able to remove the Activate Windows watermark on your Windows 10 PC. The registry editor method should work well for most of the users. Yet, do let me know which method worked for you. Feel free to reach out via comments in case of any related doubts or queries.
Also, read- 6 Different Ways to Open the Device Manager on Windows 10