Quick Answer
- The Task Manager lets you view startup programs, their impact on the computer’s boot time and allows you to enable or disable the startup programs.
- Tap ‘Create a power plan’ in the sidebar, select ‘High Performance,’ and follow the on-screen instructions to add it manually.
- By the way, if you haven’t tried it yet or if your machine is incompatible, here’s how to install Windows 11 on unsupported PCs.
Windows 11 brings several performance enhancements over the previous-gen Windows 10. It’s sleeker, faster, and more productive. However, many users, especially those who have installed Windows 11 on unsupported devices, may face performance issues, including lag and occasional freezes. While minor problems are here to stay with the Insider preview builds, here are some quick ways to make Windows 11 faster and improve the performance for snappy usage.
Related | 3 Ways to Fix ‘This PC Can’t Run Windows 11’ Error
Make Windows 11 Faster and Improve Performance
Like previous versions, Windows 11 has many options to tweak to get better performance on your computer. So, if you’ve installed the new Windows on your machine, follow the steps below to get the most out of it.
By the way, if you haven’t tried it yet or if your machine is incompatible, here’s how to install Windows 11 on unsupported PCs.
1. Turn Off Visual Effects
Windows automatically decides the performance aspects like visual effects, memory usage, processor scheduling, and more for your computer. You can manually set it to focus more on performance using the steps below.
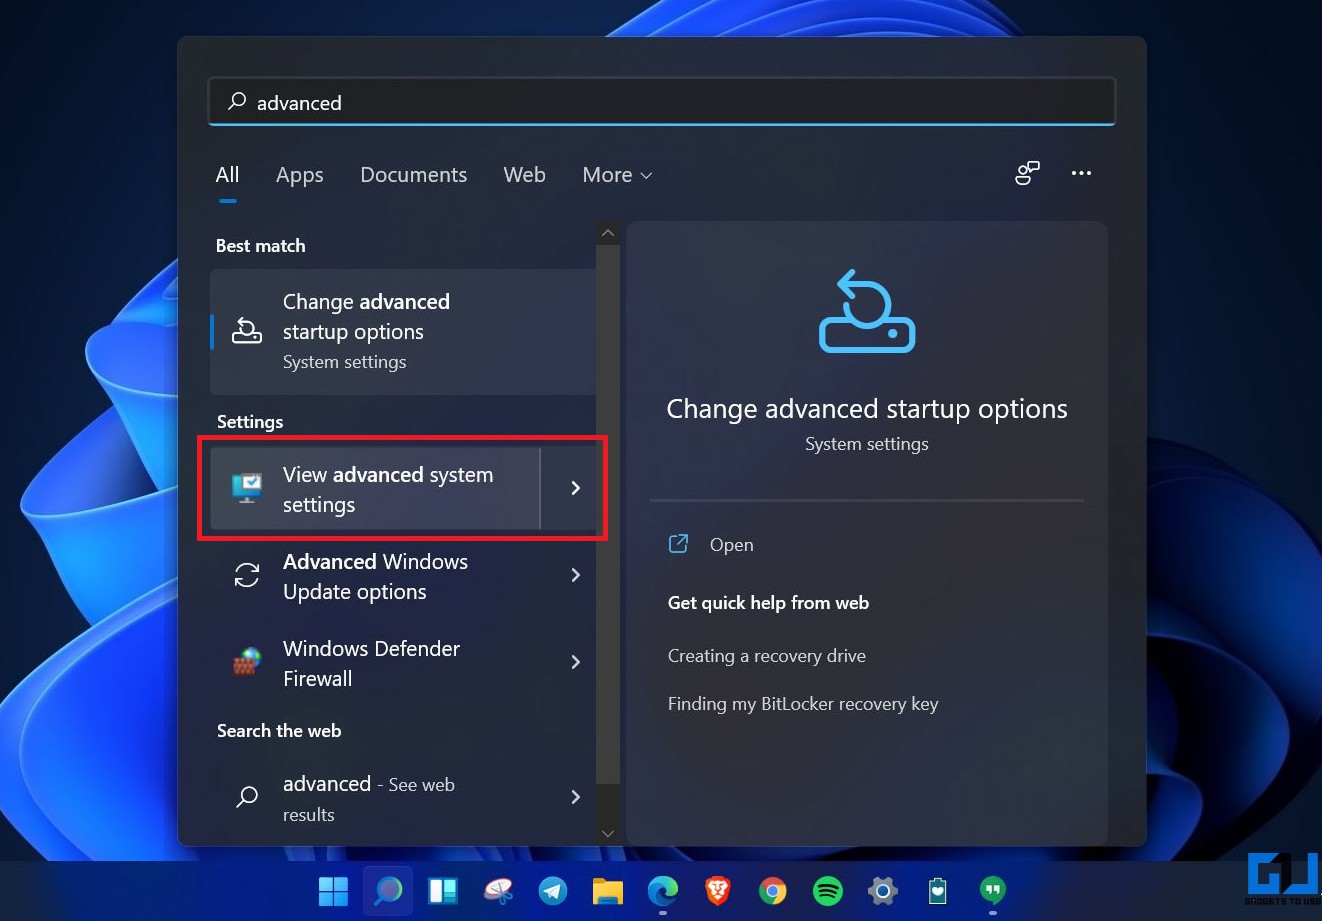
1. Open the Start menu and search for “Advanced.”
2. Click on View Advanced System Settings from the results.
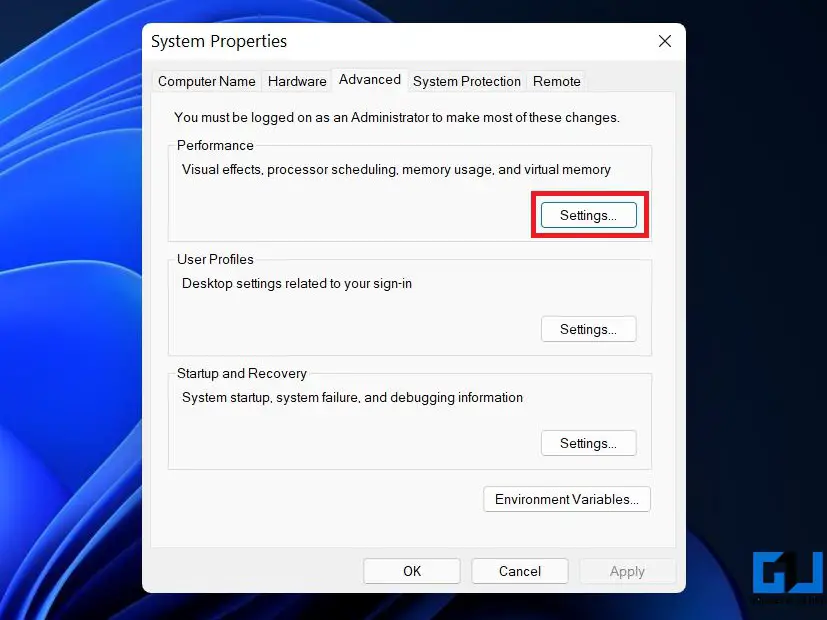
3. Here, click on Settings under Performance.
4. On the next screen, select Adjust for Best Performance.
5. From the options below, tick the boxes for “Show thumbnails instead of icons” and “Smooth edges of screen fonts.”
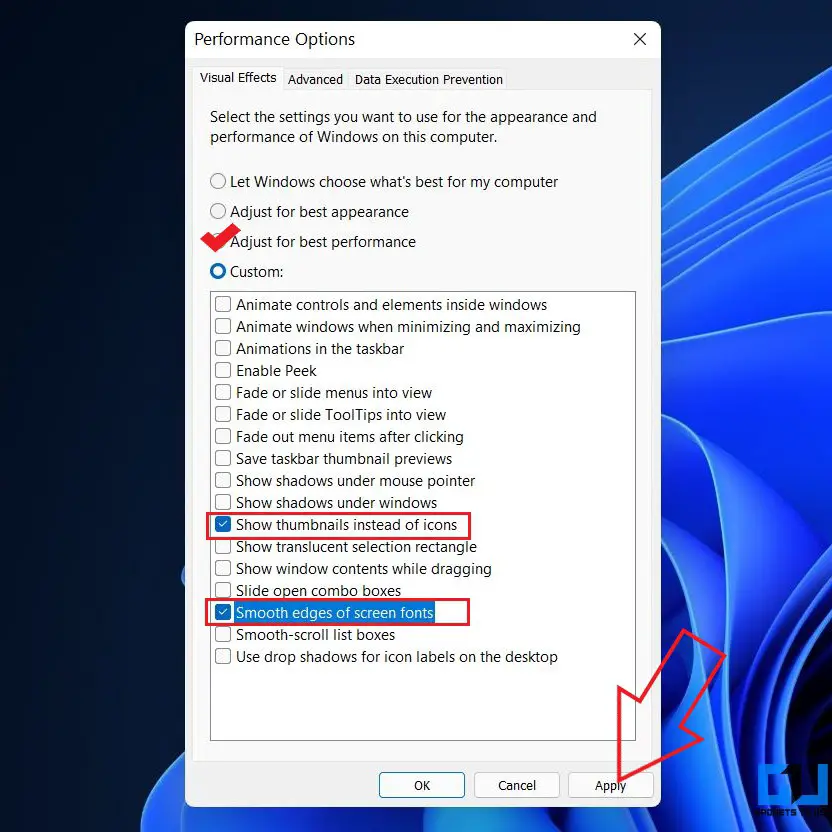
6. Then, click on Apply and tap OK.
Doing so will reduce some visual effects, but at the same time, your Windows 11 PC will feel much faster and snappier without any jitter or lag.
2. Switch to Performance Power Plan
The Power Plan is a mixture of system and hardware settings to manage your device’s power consumption. Natively, it’s set to the Balanced mode. But if you don’t care much about battery life and want to shell out the maximum performance, you can switch to the High-Performance mode, as follows.
1. Open the Start menu and search for “Power Plan.”
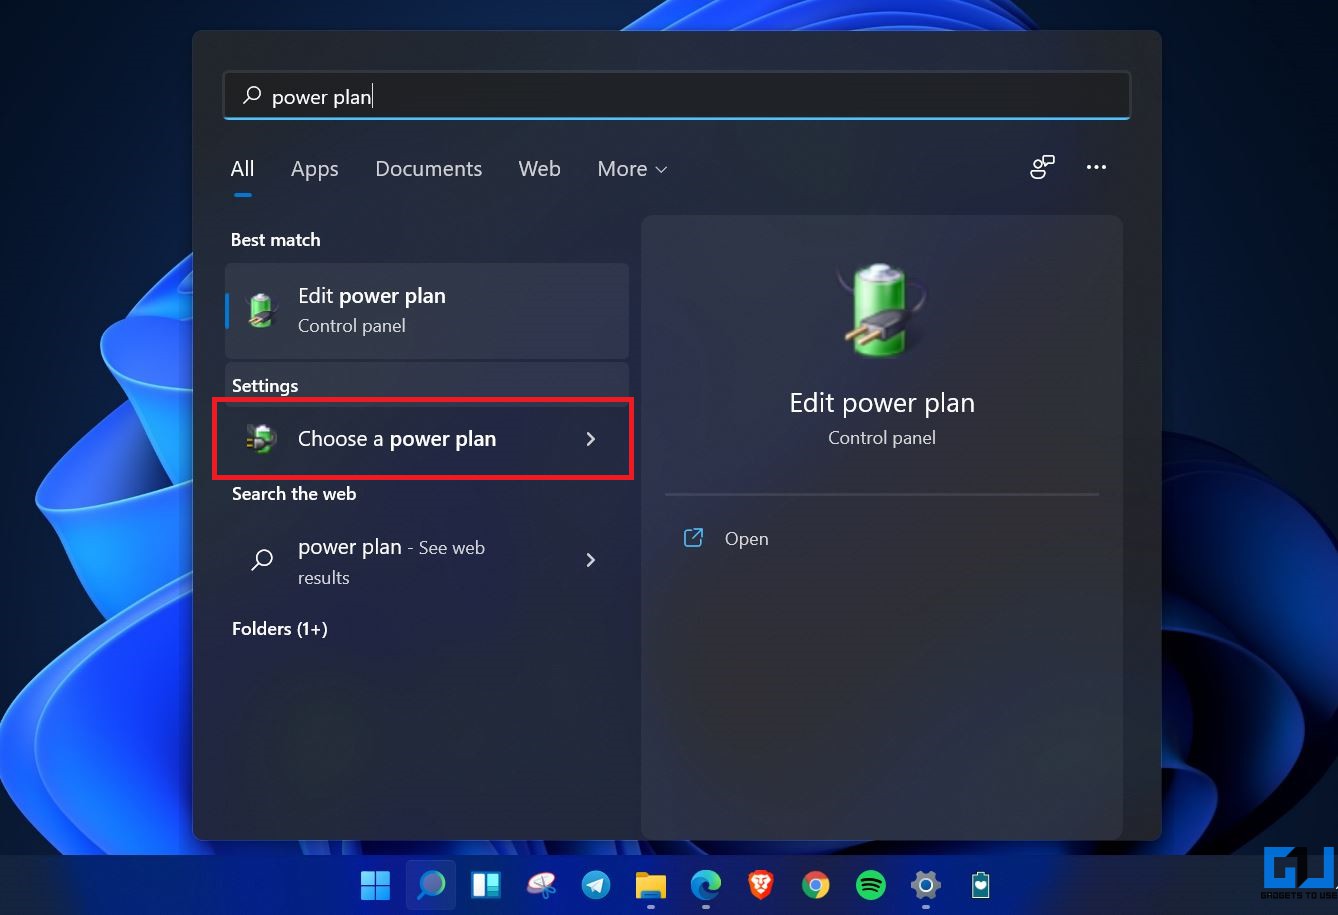
2. Click on Choose a Power Plan.
3. On the next screen, look for the High-Performance plan and select it. You can also choose the Driver Booster Power Plan for gaming.
Can’t find High Performance? Tap ‘Create a power plan’ in the sidebar, select ‘High Performance,’ and follow the on-screen instructions to add it manually.

4. Now, tap Change Plan Settings > Change Advanced Power Settings.
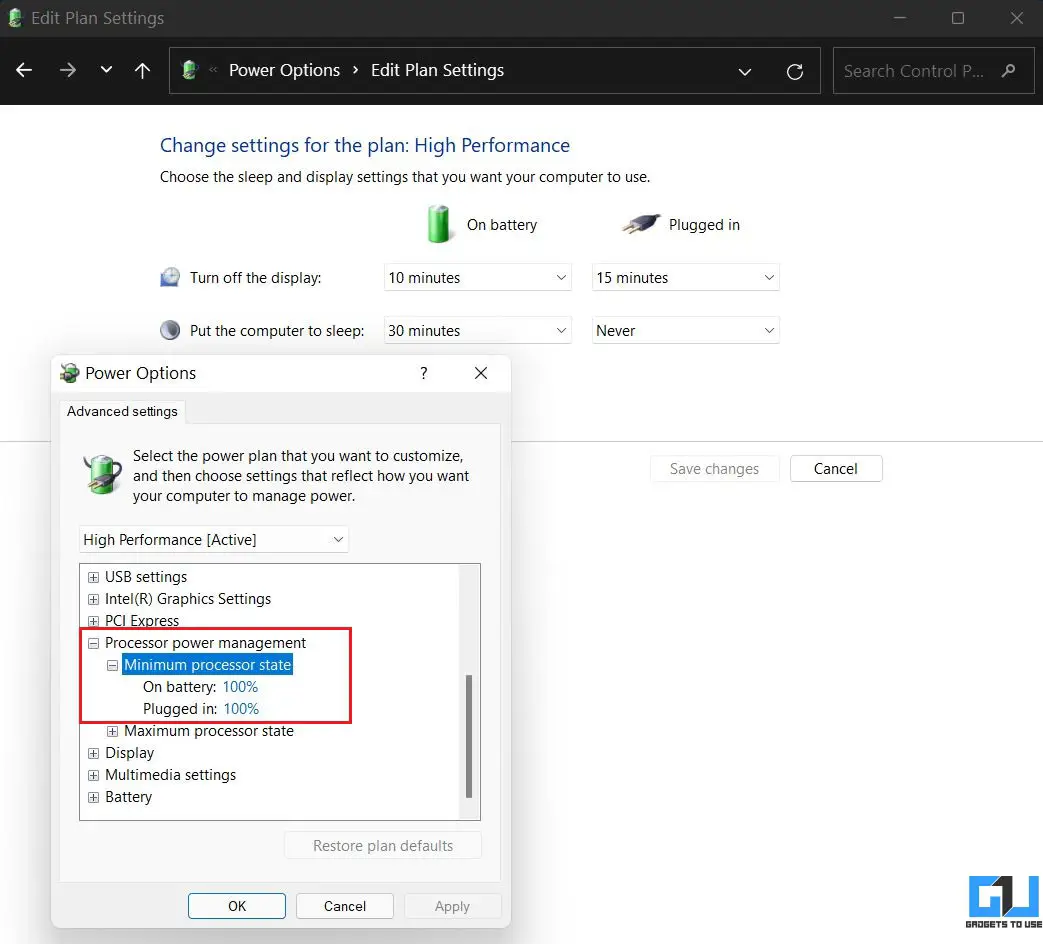
5. Here, go to Processor Power Management and ensure the minimum and maximum processor state is 100%.
3. Disable Startup Apps
The more apps you install on your PC, the longer it’ll take to boot up Windows. You can stop apps from starting automatically on startup to boost your startup time using the steps below.
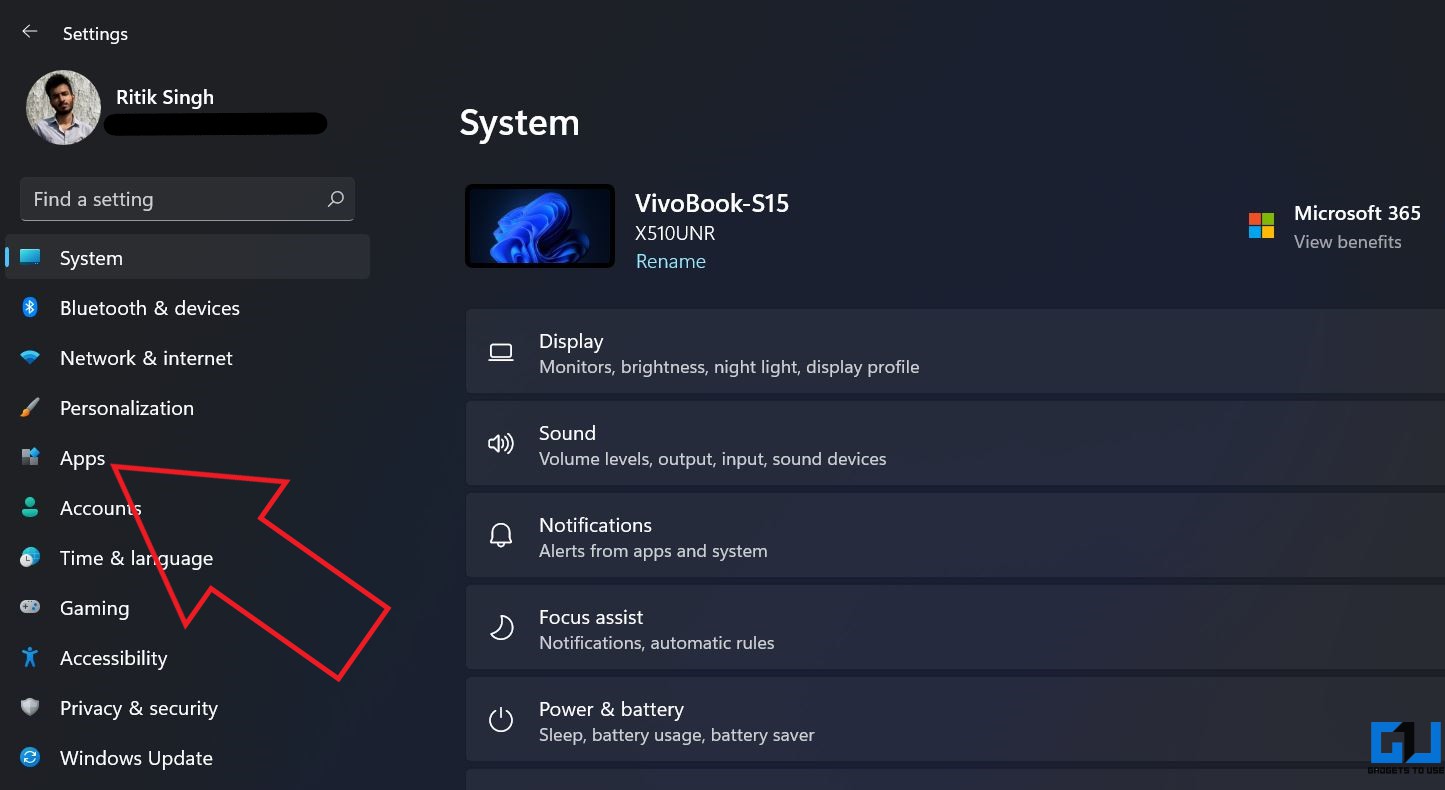
1. Open Settings on your computer and select Apps from the sidebar.
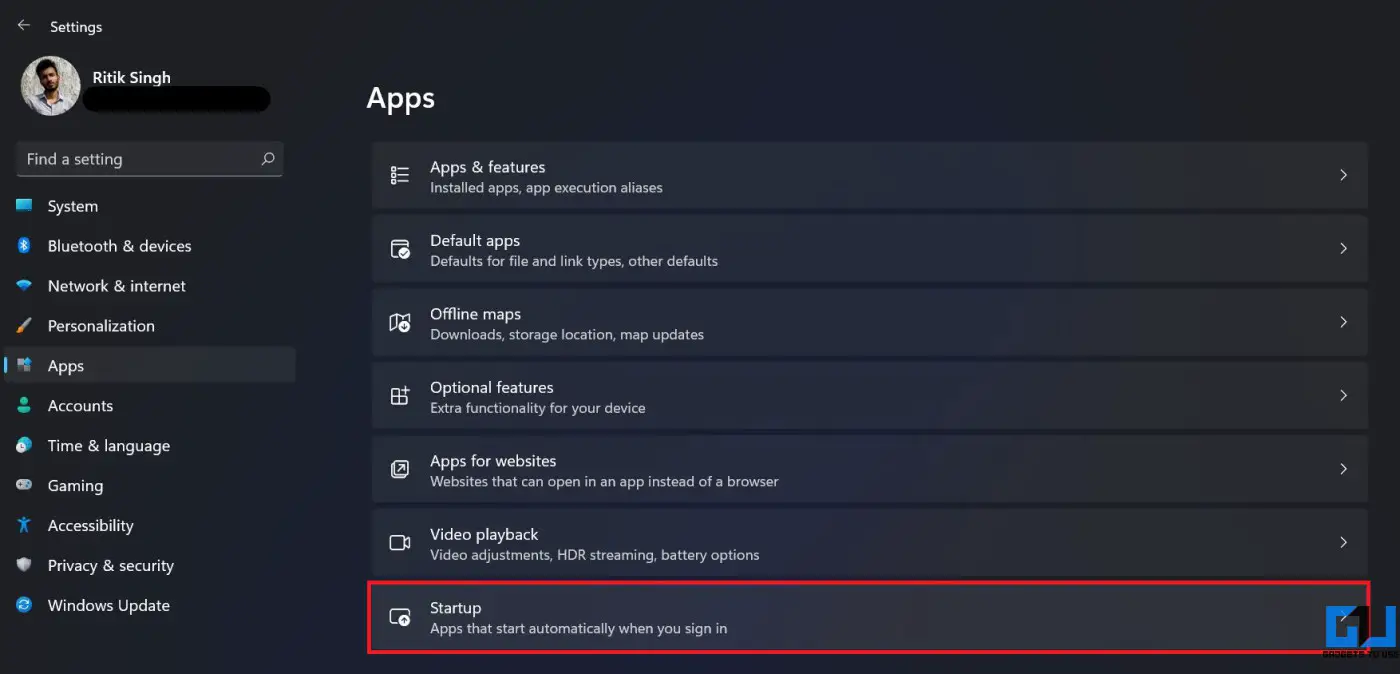
2. Here, select Startup.
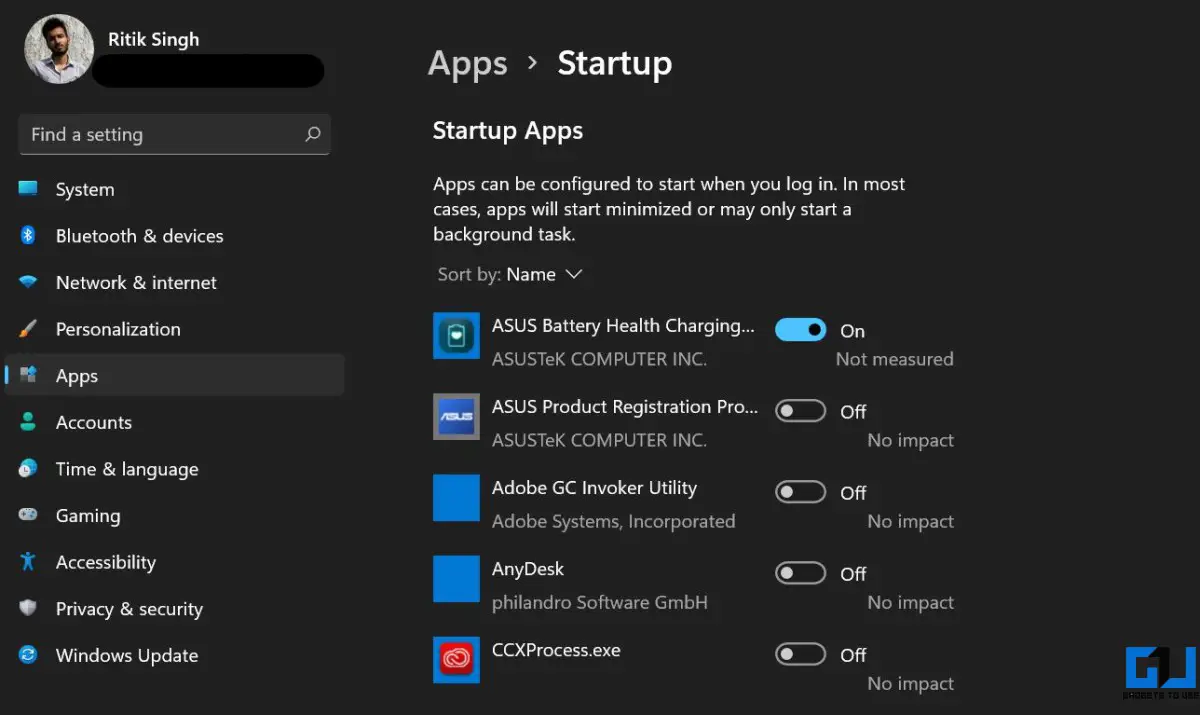
3. On the next page, disable the toggle for apps you don’t want to start automatically.
4. Disable Startup Programs
The Task Manager lets you view startup programs, their impact on the computer’s boot time and allows you to enable or disable the startup programs. Below is how you can disable startup programs using task manager on Windows 11:
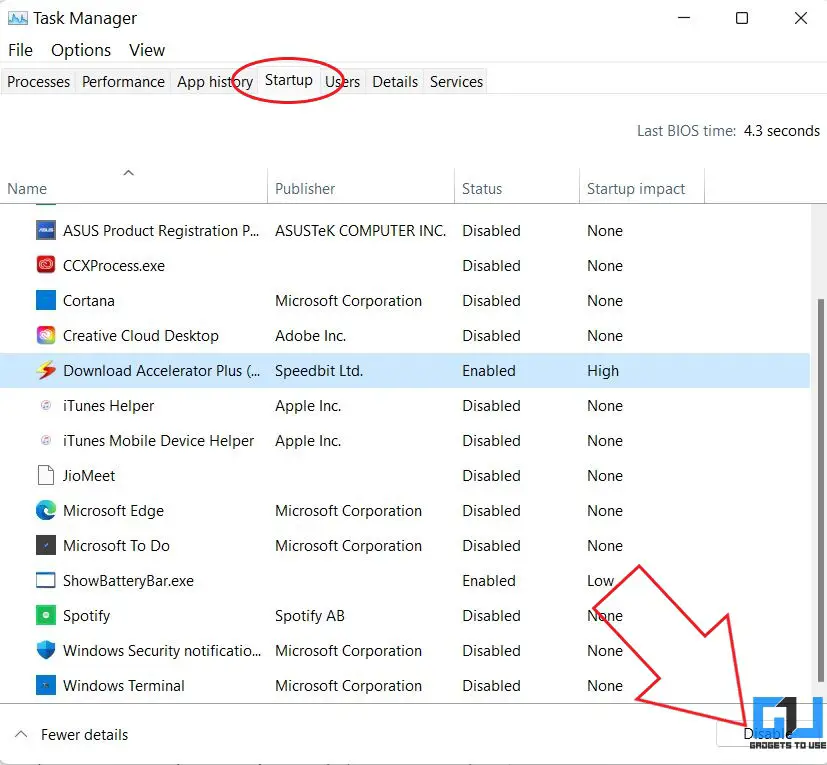
1. Press Ctrl + Shift + Esc to open Task Manager.
2. Go to the Startup tab.
3. Right-click the programs and select Disable.
OR tap the Disable button at the bottom right corner to stop them from starting on boot.
5. Turn On Storage Sense
Windows 11 carries over the Storage Sense feature from Windows 10. It is designed to monitor your computer’s storage and free up space automatically when required by deleting unwanted files, such as temporary system files, items from recycle bin, etc.
1. Open Settings and make sure you’re in the System tab.
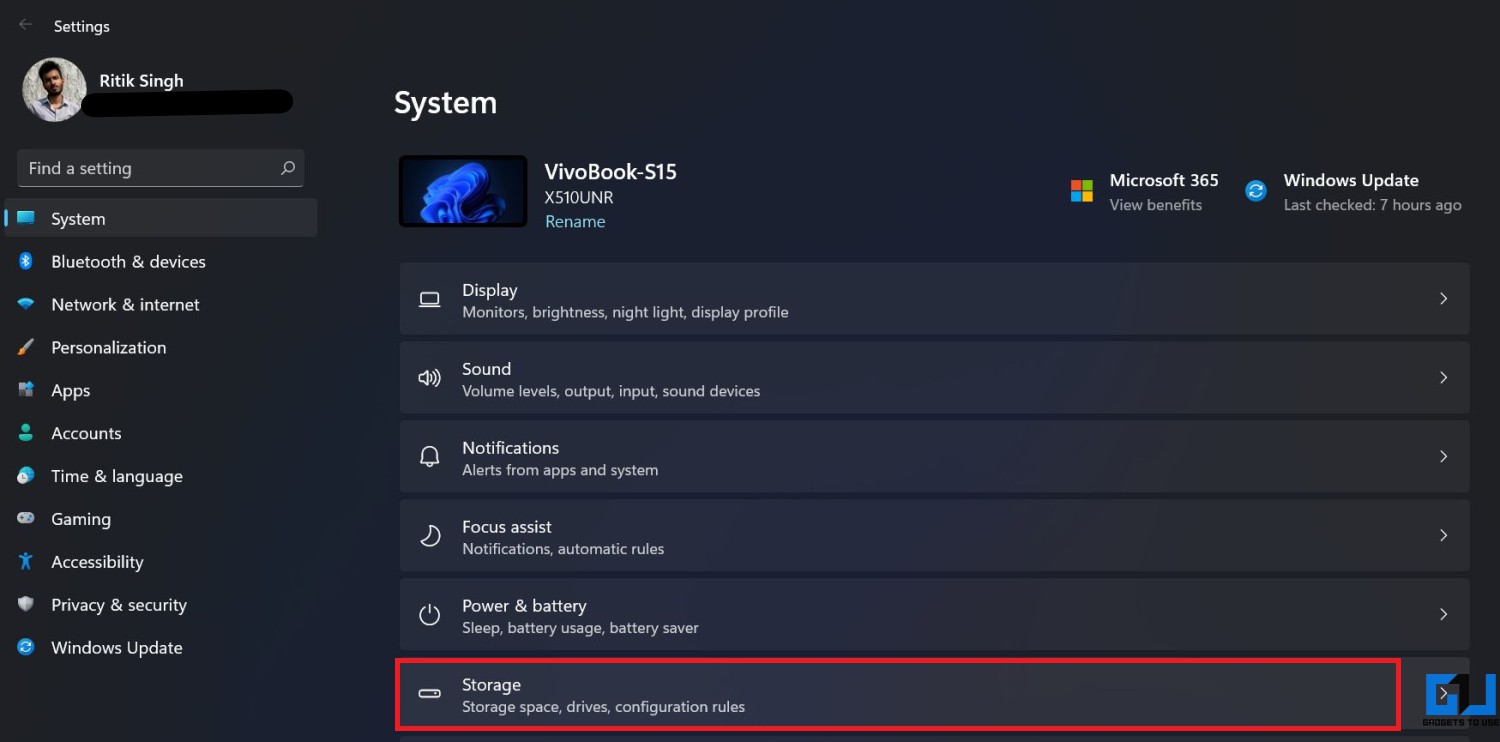
2. Click on Storage and tap Storage Sense.
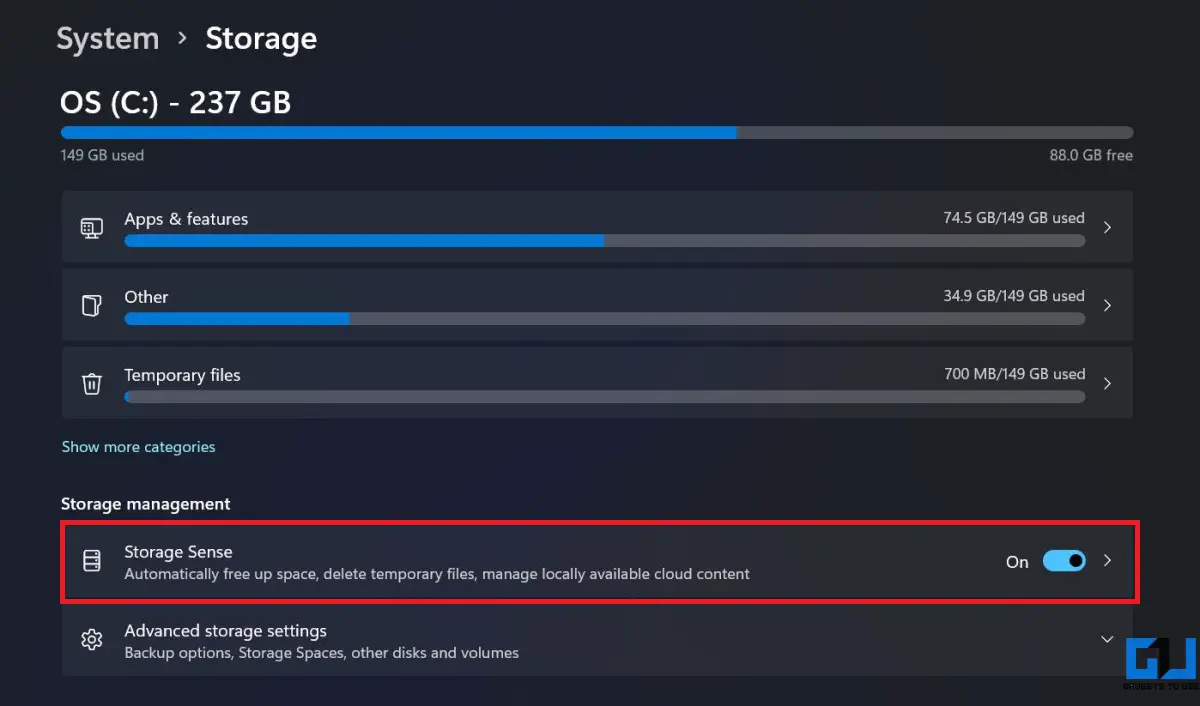
3. Turn on the Storage Sense feature. Select the desired automatic cleanup schedule.
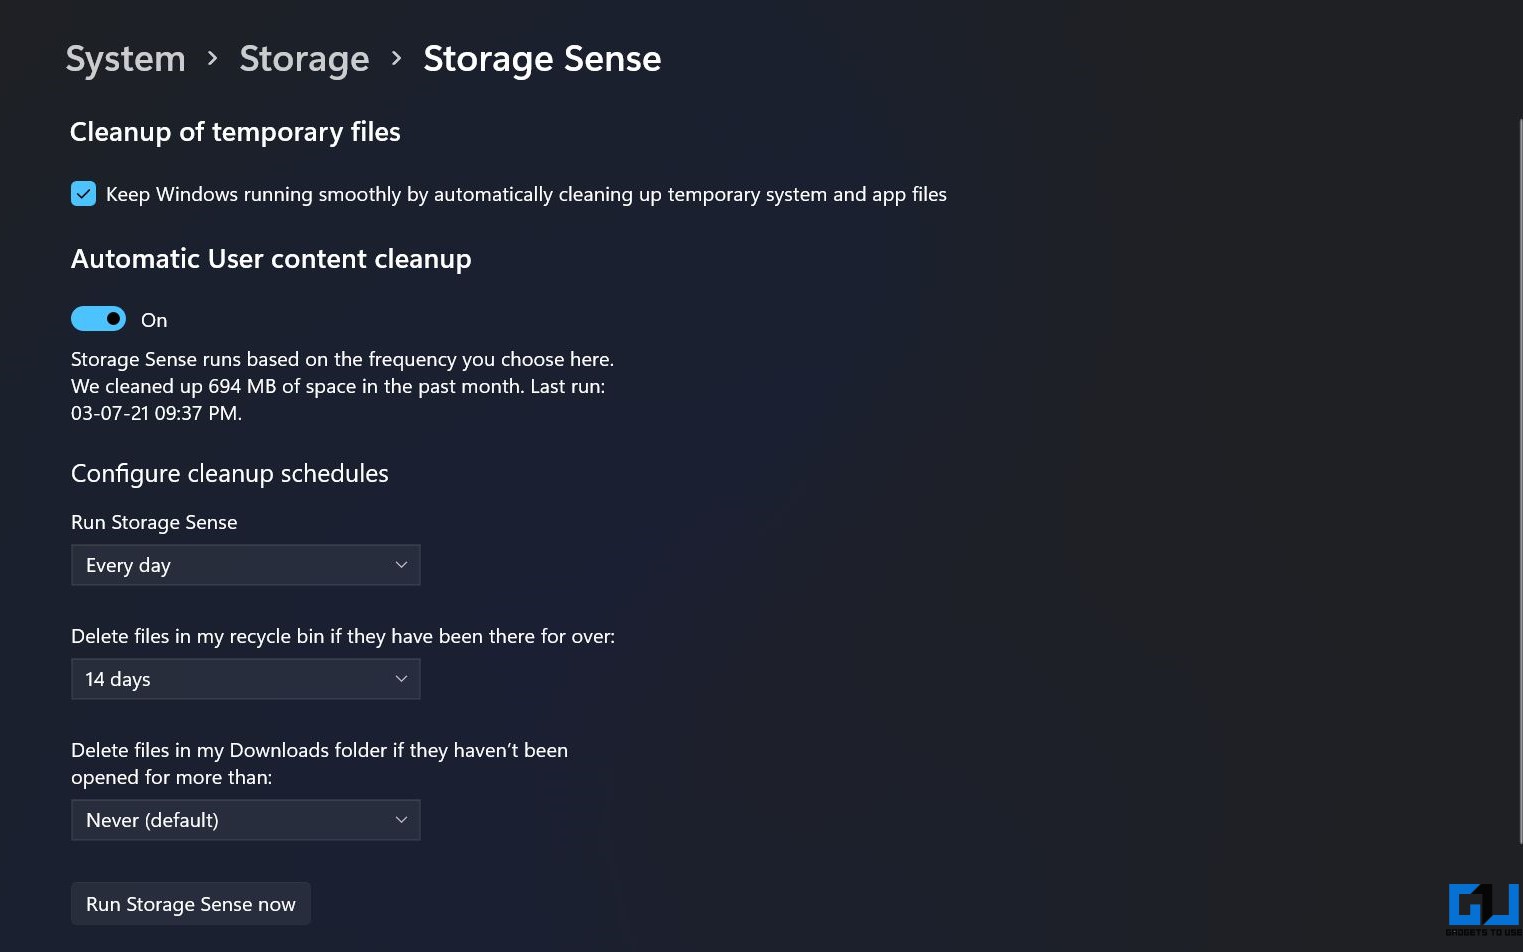
You can also run Storage Sense by tapping Run Storage Sense Now at the bottom.
6. Remove Temporary Files
Over time, your PC may get cluttered with tons of temporary files. This includes thumbnails, downloads, cache, delivery optimization files, update logs, feedback diagnostics, temporary internet files, previous version files, etc.
You can remove these temporary files whenever required to free up storage on your computer. This will definitely positively impact your performance, especially if you’re running low on disk space.
1. Open Settings and make sure you’re in the System tab.
2. Click on Storage and tap Temporary Files.
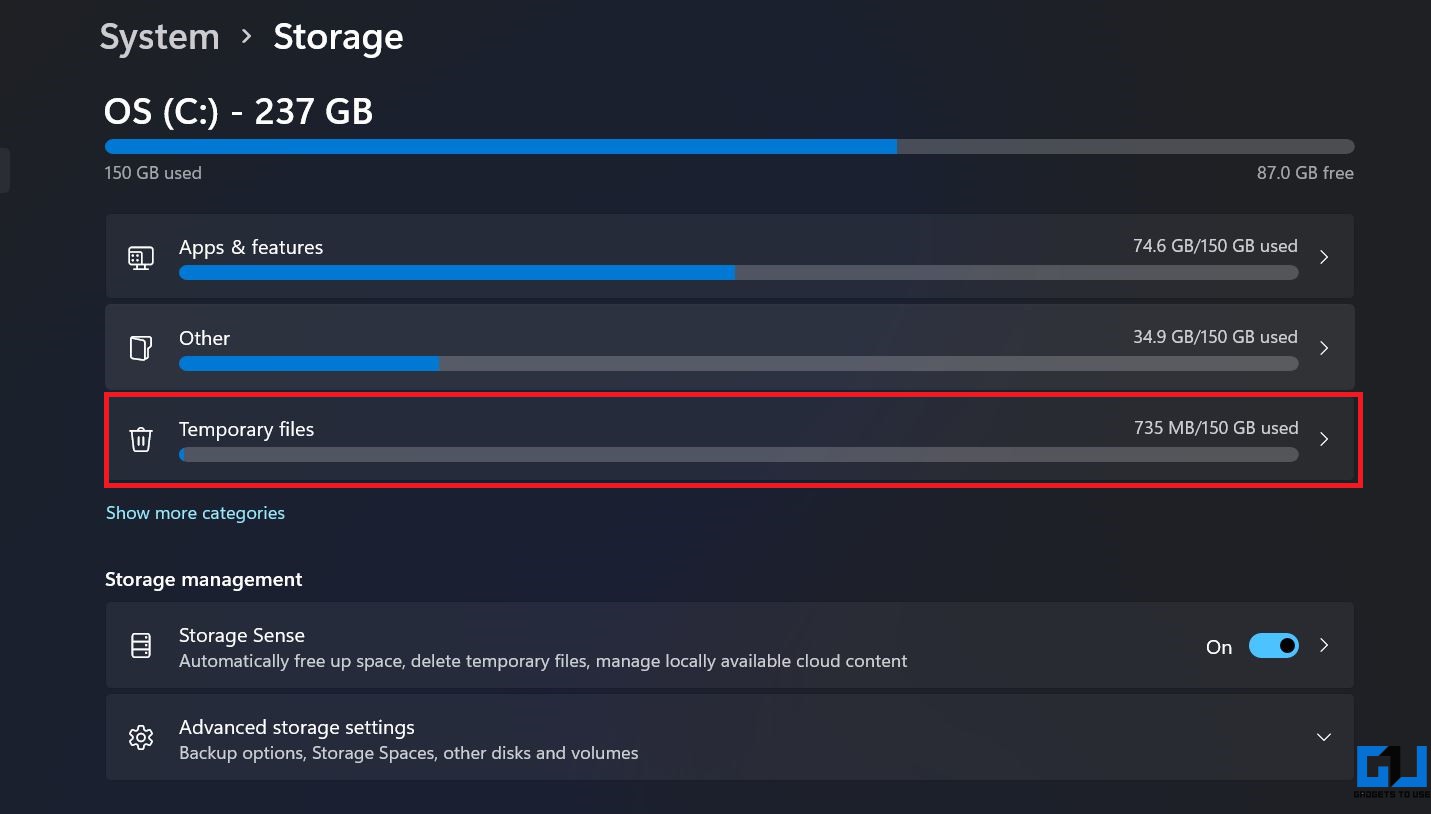
3. Here, select all the unwanted files you want to remove and tap Remove Files.
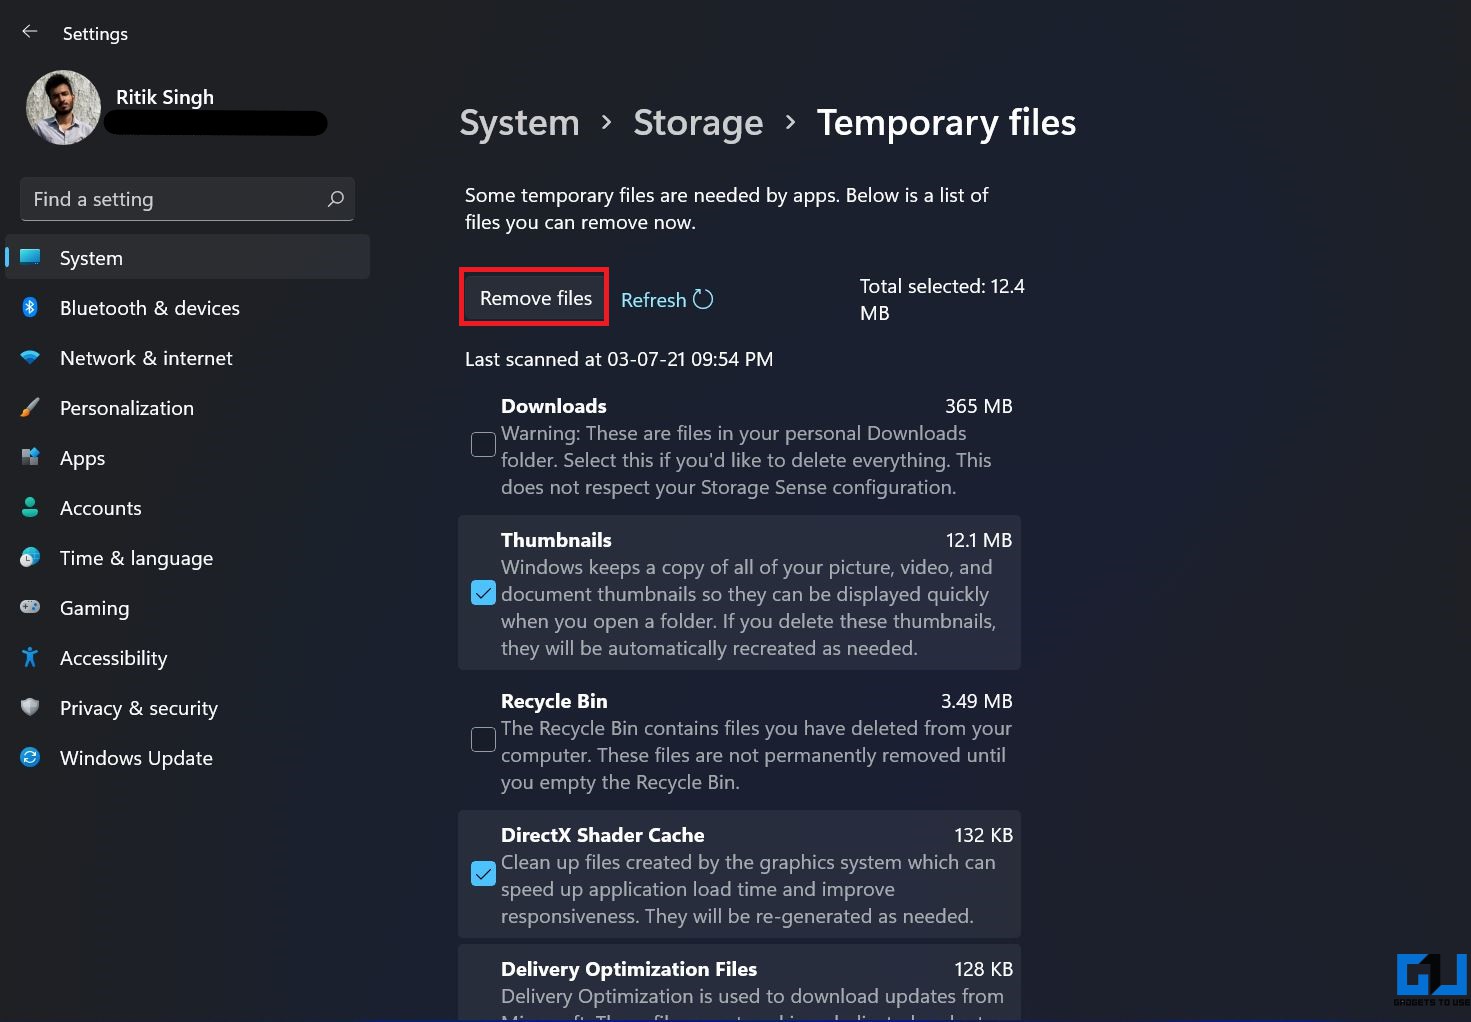
Be careful while dealing with “Downloads” as it contains all your downloaded files. Also, if you’ve recently upgraded to Windows 11, the PC might have previous version files. Delete them only if you’re confident about not rolling back anytime soon.
7. Turn Off Notifications
Constant notifications may bog down your computer. Thankfully, like the previous version, Windows 11 allows you to turn off notifications.
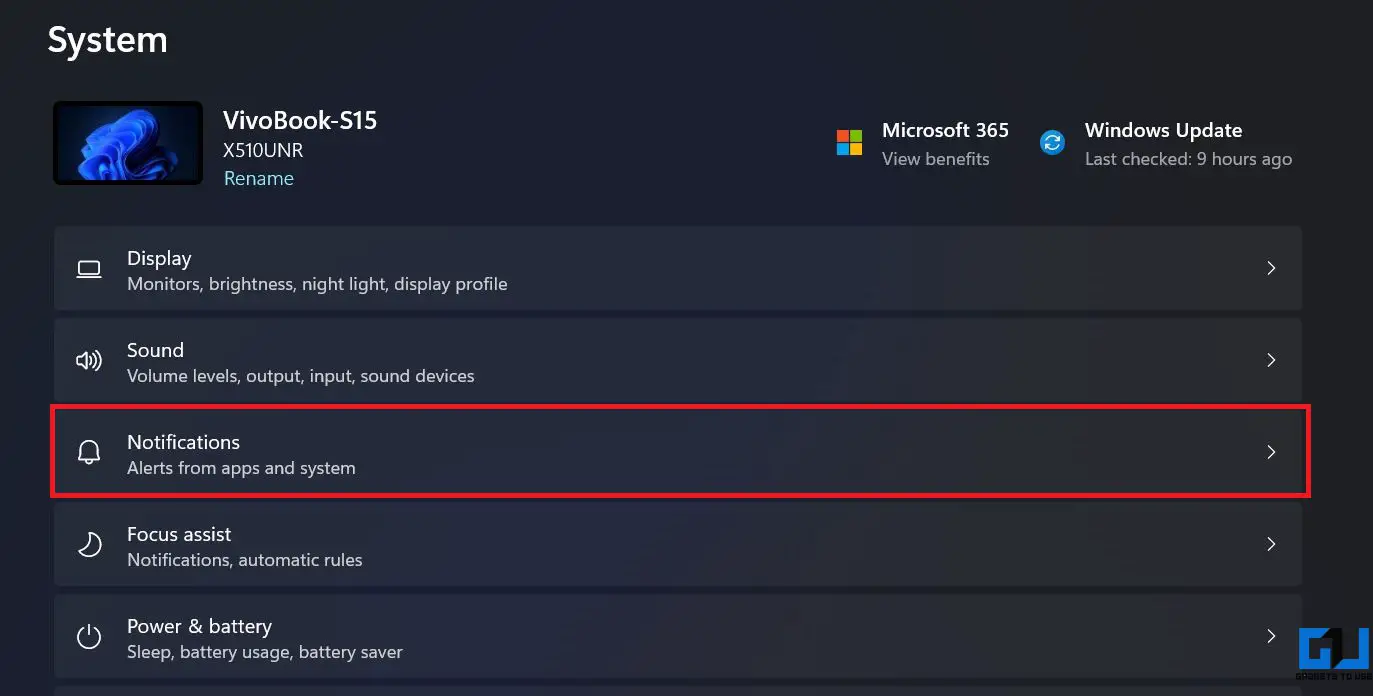
1. Open Settings on your computer.
2. In the System tab, select Notifications.
3. Here, see and disable notifications for unwanted applications.
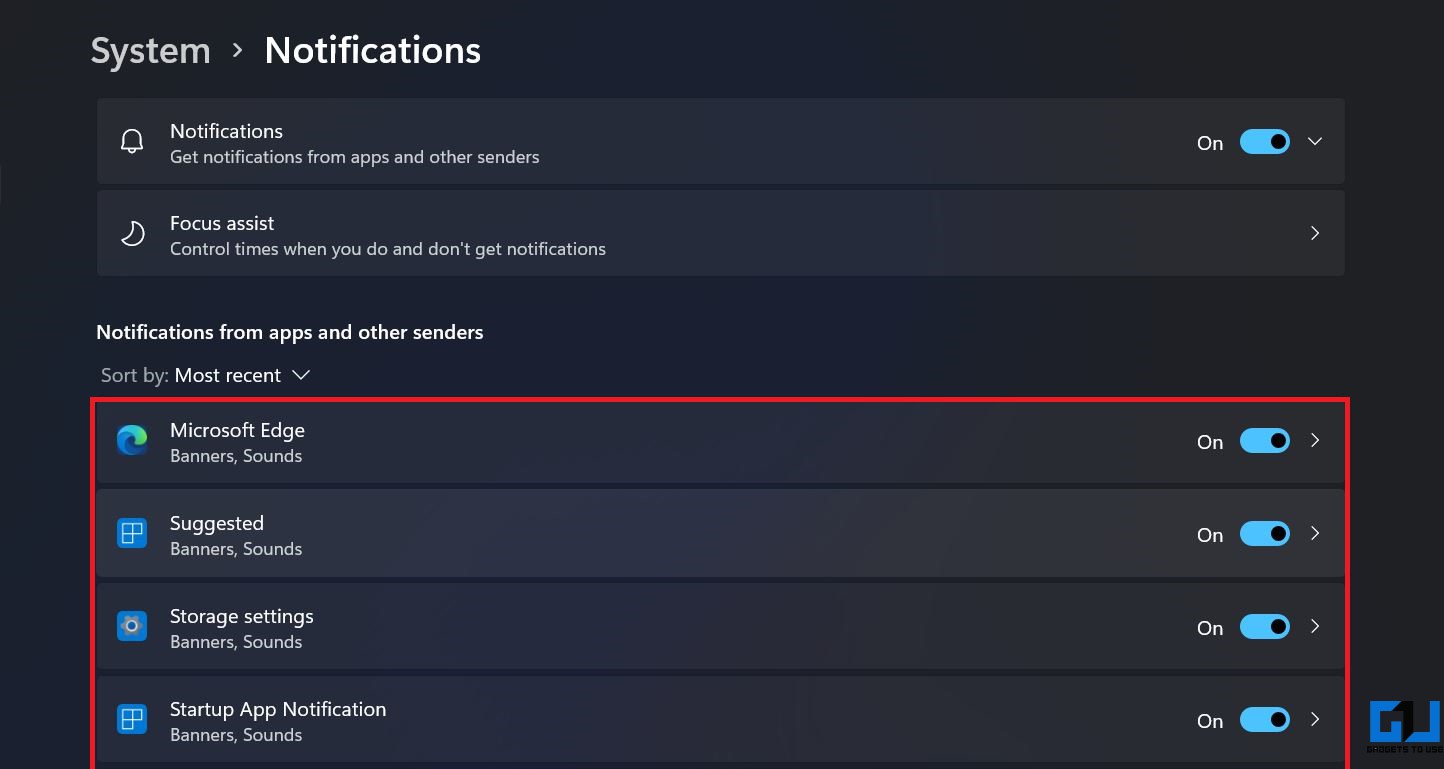
Disable notifications only for apps that are unimportant for you. Otherwise, you might miss out on important alerts.
Wrapping Up- Enjoy a Faster Windows 11
These were some handy ways to speed up the new Windows 11 and improve its performance. I hope your Windows 11 computer now runs faster and snappier than before. Do follow all the steps and let me know your experience. If you have something else to add, please reach out via the comments below. Stay tuned for more such articles.
You can also follow us for instant tech news at Google News or for tips and tricks, smartphones & gadgets reviews, join GadgetsToUse Telegram Group or for the latest review videos subscribe GadgetsToUse Youtube Channel.