

Quick Answer
- Dust and other elements may clog up your USB port which results in your USB devices not being able to interact with the pins of the port properly and your PC in turn is unable to detect these devices.
- Restarting is a simple method as there is a chance that your USB drivers did not load properly during the last boot or encountered a bug or glitch which prevented your system from recognizing any USB devices.
- So make sure that nothing is blocking the USB port and if it seems dirty to you then clean it up with rubbing alcohol and a microfibre cloth.
Windows 11 brought a complete design overhaul and some new features and improvements over Windows 10. But since its release, there have been reports that it is not able to recognize USB storage and devices. And that users are unable to use their USB peripherals on Windows 11. If you are facing such issues as well then stick around as we will discuss 15 great ways to fix USB Not Detected on Windows 11.
Also, read | 5 Best Ways to Fix Android Phone Not Connecting to PC
Why Windows 11 is Unable to Recognize USB Devices?
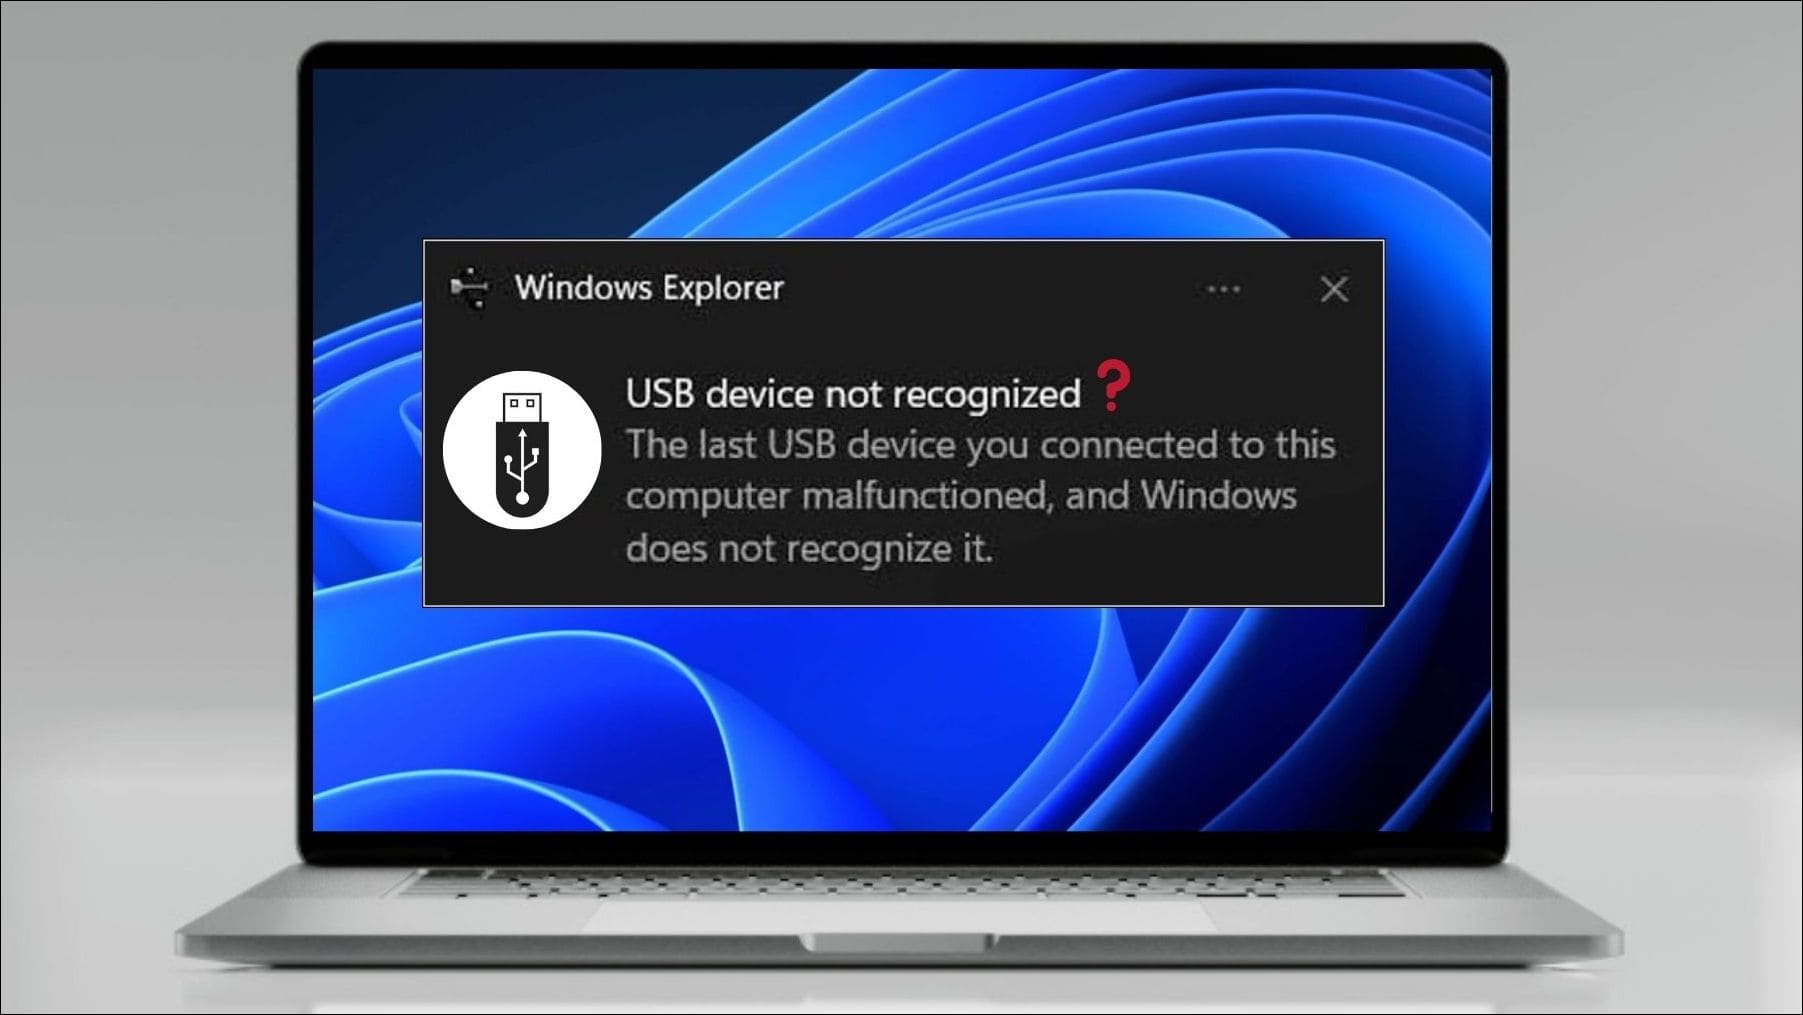
Windows 11 came with several new features, some of them improved battery life and performance. These new features could be the cause of your device not being detected. It is also possible that it is a hardware or driver-related problem. Whatever the cause may be, we will try to help you resolve this issue on your Windows 11 device.
Top Ways to Fix USB Devices Not Detected
Try Connecting to a Different USB Port or a USB Hub
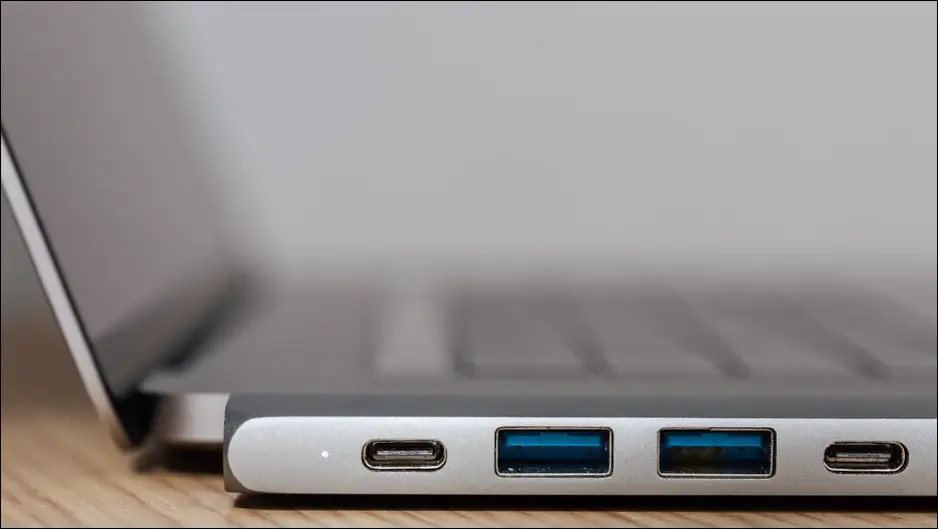
Try plugging your device into another USB port on your laptop or PC to check if it gets detected. It could be that the port might have hardware connection issues and not be able to detect any device. On the other hand, if your laptop comes with only a limited number of USB ports then try using a USB hub and see if that works.
Inspect and Clean the USB Port
Dust and other elements may clog up your USB port which results in your USB devices not being able to interact with the pins of the port properly and your PC in turn is unable to detect these devices. So make sure that nothing is blocking the USB port and if it seems dirty to you then clean it up with rubbing alcohol and a microfibre cloth. Now check if your device is now recognized by your computer.
Allow Media Transfer Permission
You need to allow File Transfer permission from your phone when you connect it to your PC. Without that permission, your PC might not be able to recognize your mobile device. This is how you can enable file transfer permission:
For Android Devices
- Connect your phone to your PC with a USB cable.
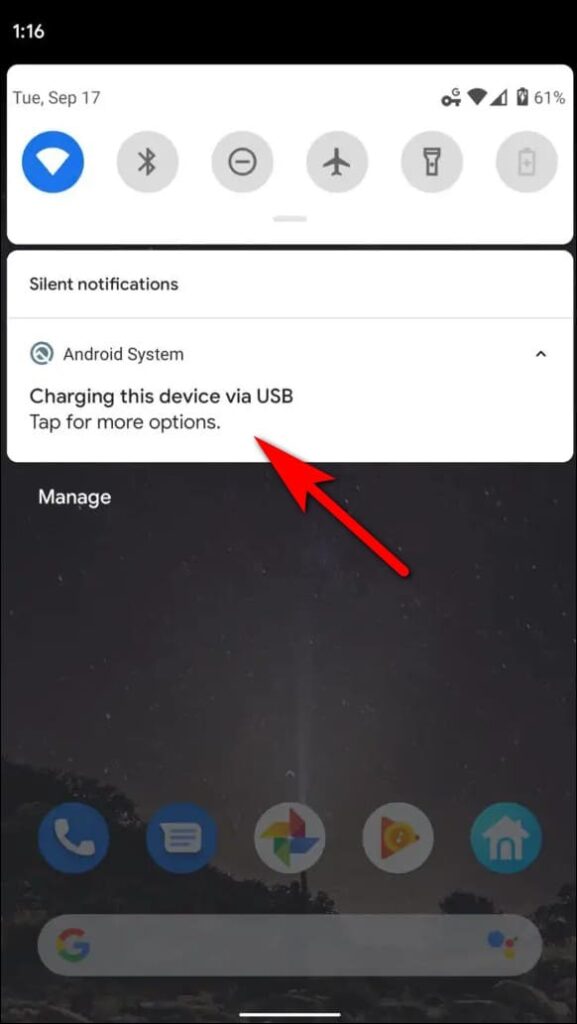
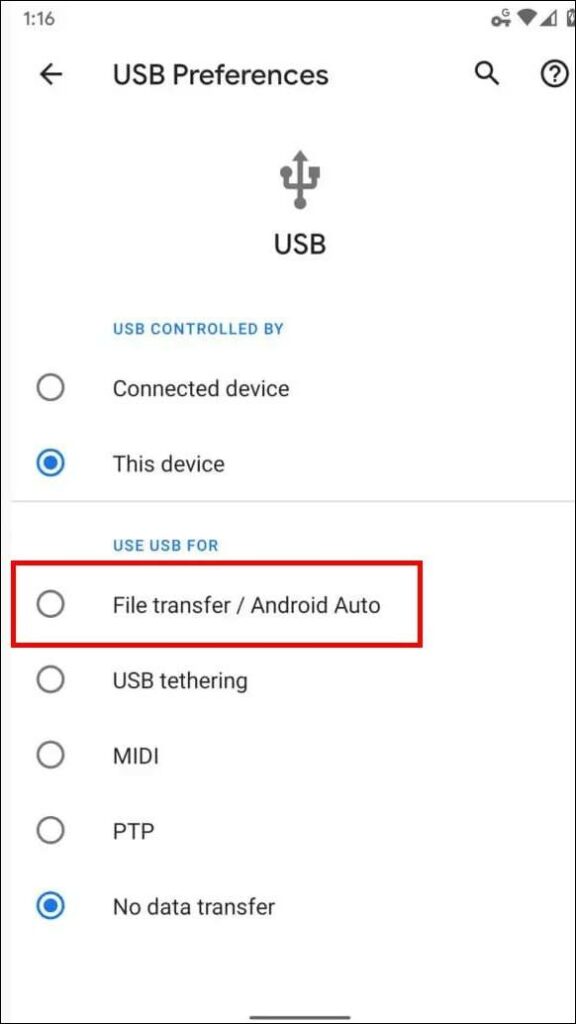
- Once connected, your phone should start charging and it will display a popup or notification.
- Select File Transfer/ Android Auto and your files should be visible on your computer.
For iOS Devices
- Connect your iPhone to your PC with good quality lightning to USB cable.
- Your iPhone should display a popup message asking Allow this device to access photos and videos.
- Press Allow.
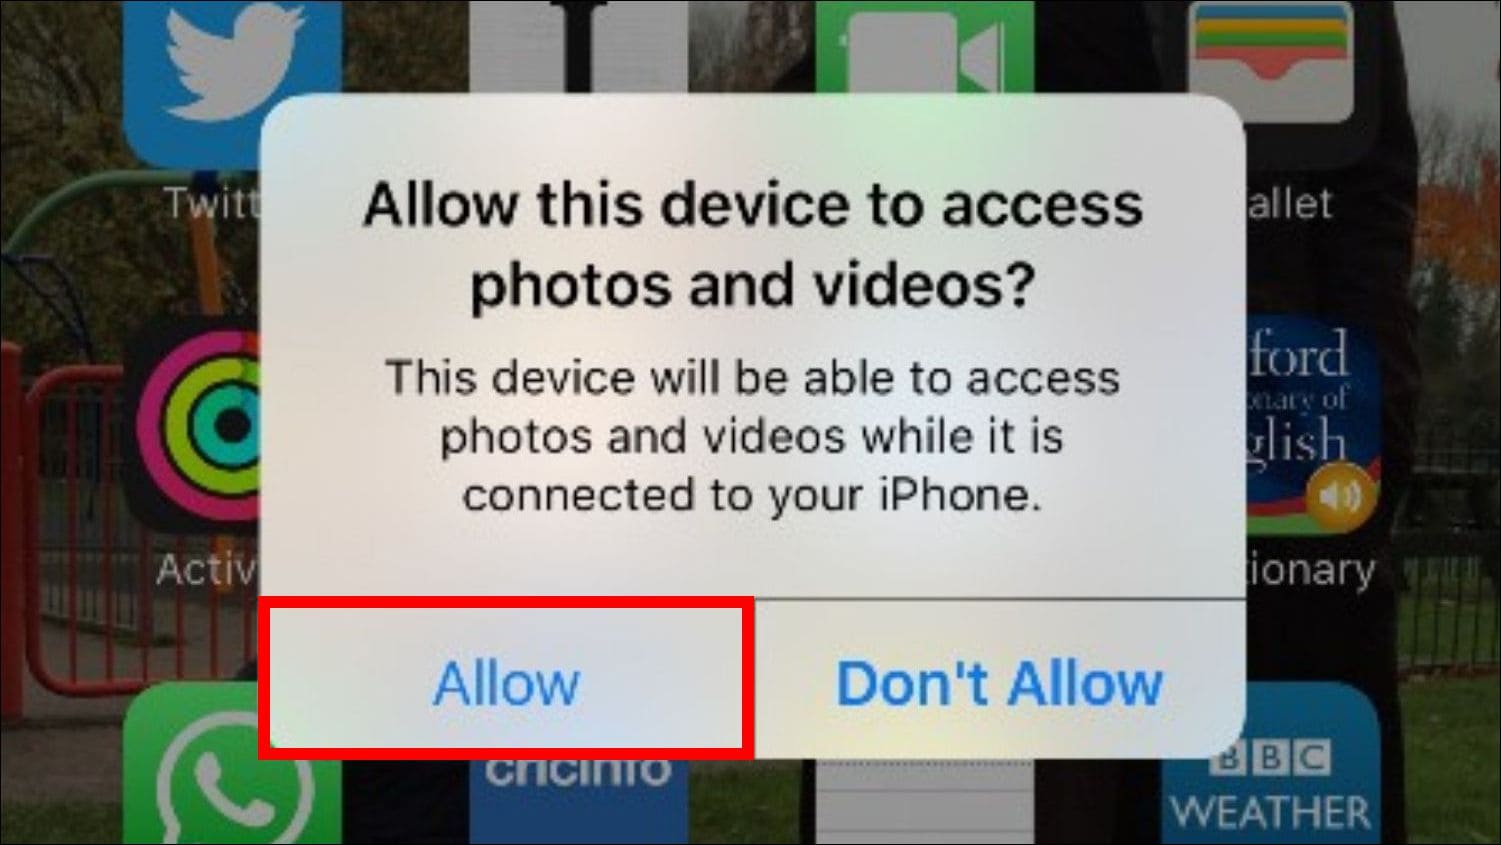
Now you should be able to access photos from your iPhone onto your Windows 11 PC.
Note: You can only access your photos and small videos only when you connect your iPhone to a Windows PC. You will have to download iTunes to access other files.
Related article: 5 Best Ways to Fix Android Phone Not Connecting to PC
Change your USB Drive File System
Another reason Windows 11 is not able to read your USB Drive might be that it is using an older or unsupported file system. You can change it to a newer supported file system but your device will be formatted in the process. If you are okay with that then let us proceed with the process to change the file system.
- Go to File Explorer and right-click on your USB Drive.
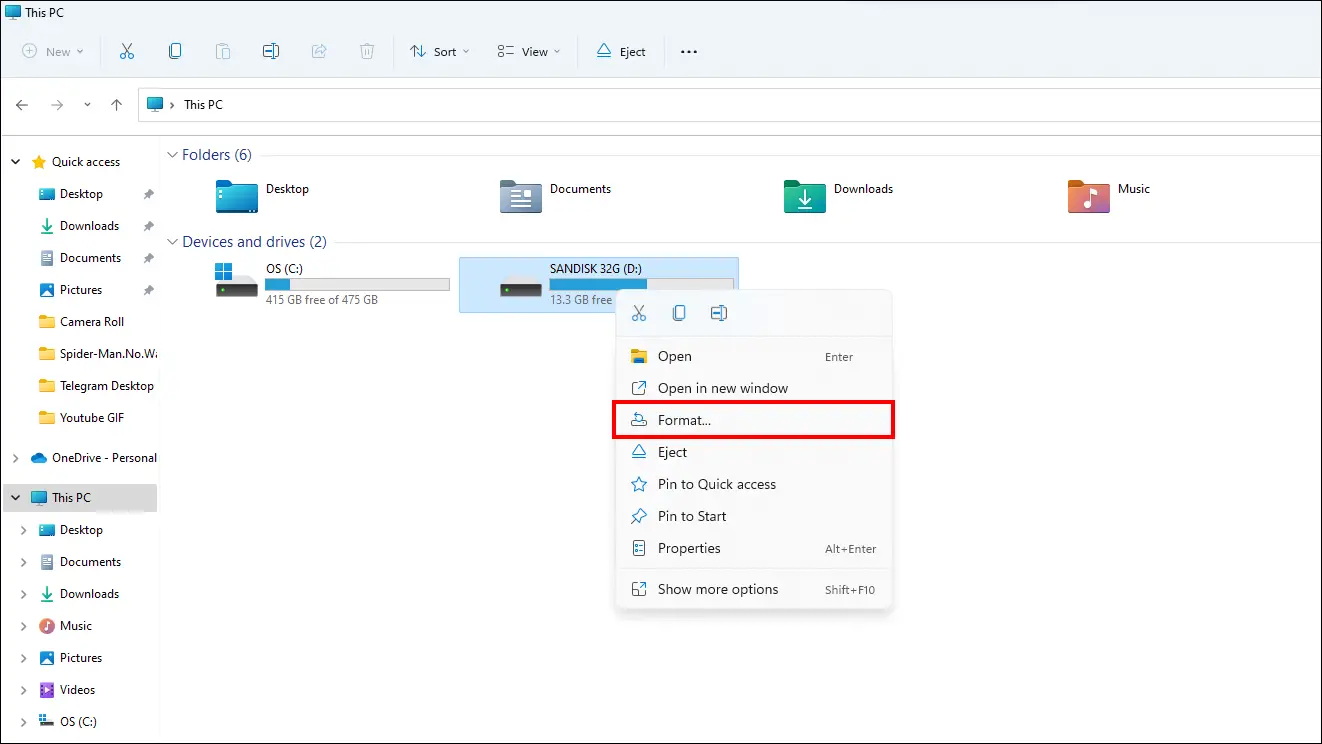
- Click on Format.
- In the File System section, select NTFS.
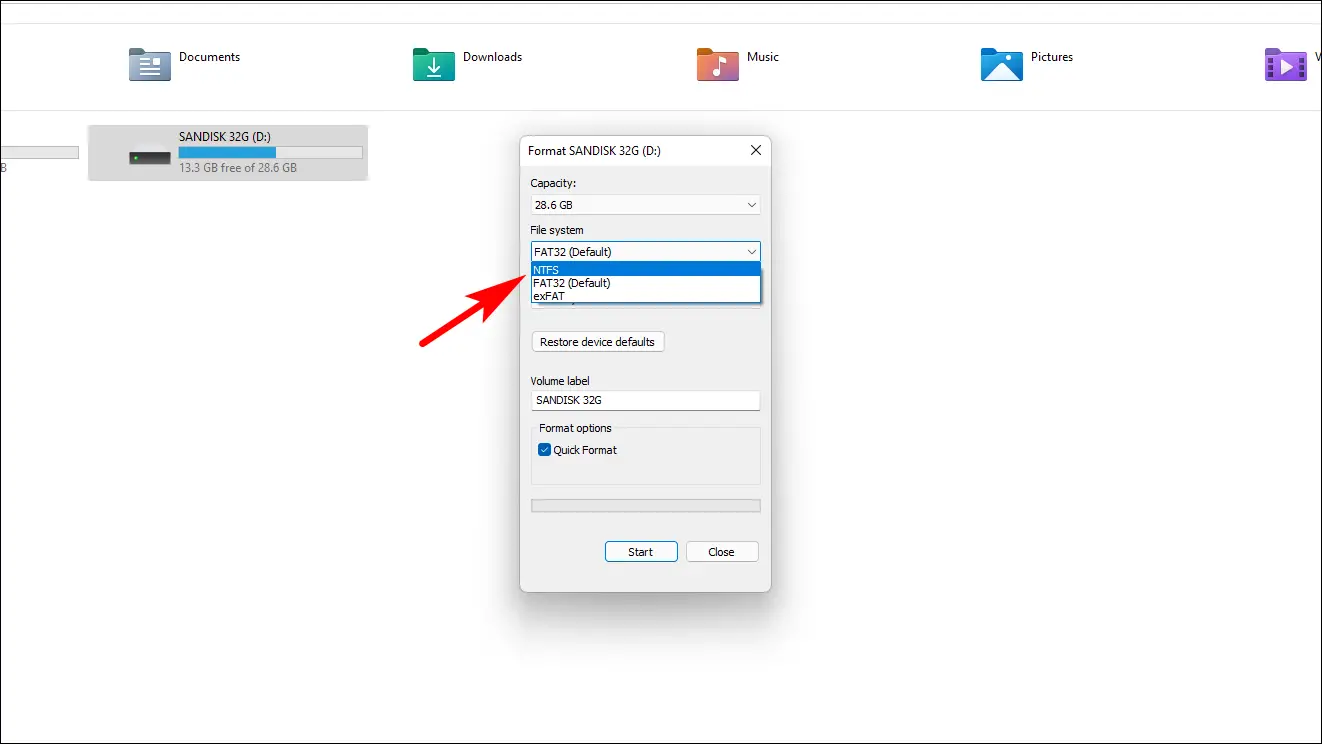
- Check the box next to Quick format and click on Start.
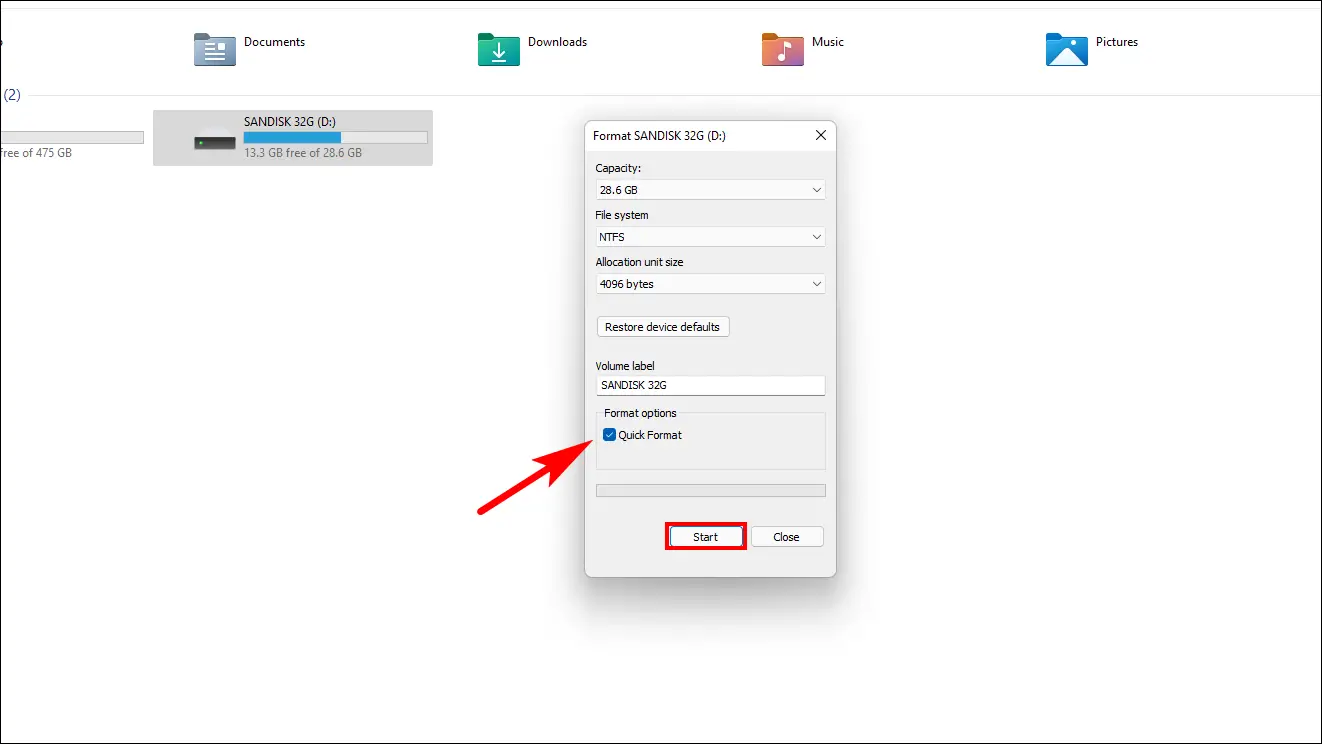
The formatting process will take some time to finish depending on the size of your drive. Once finished, try to copy a large file into the USB Drive to see if it is working properly.
Restart Your Windows 11 PC
Restarting is a simple method as there is a chance that your USB drivers did not load properly during the last boot or encountered a bug or glitch which prevented your system from recognizing any USB devices. So restarting your devices should help fix this issue. To properly restart your Windows 11 PC:
- Click on the Start Button.
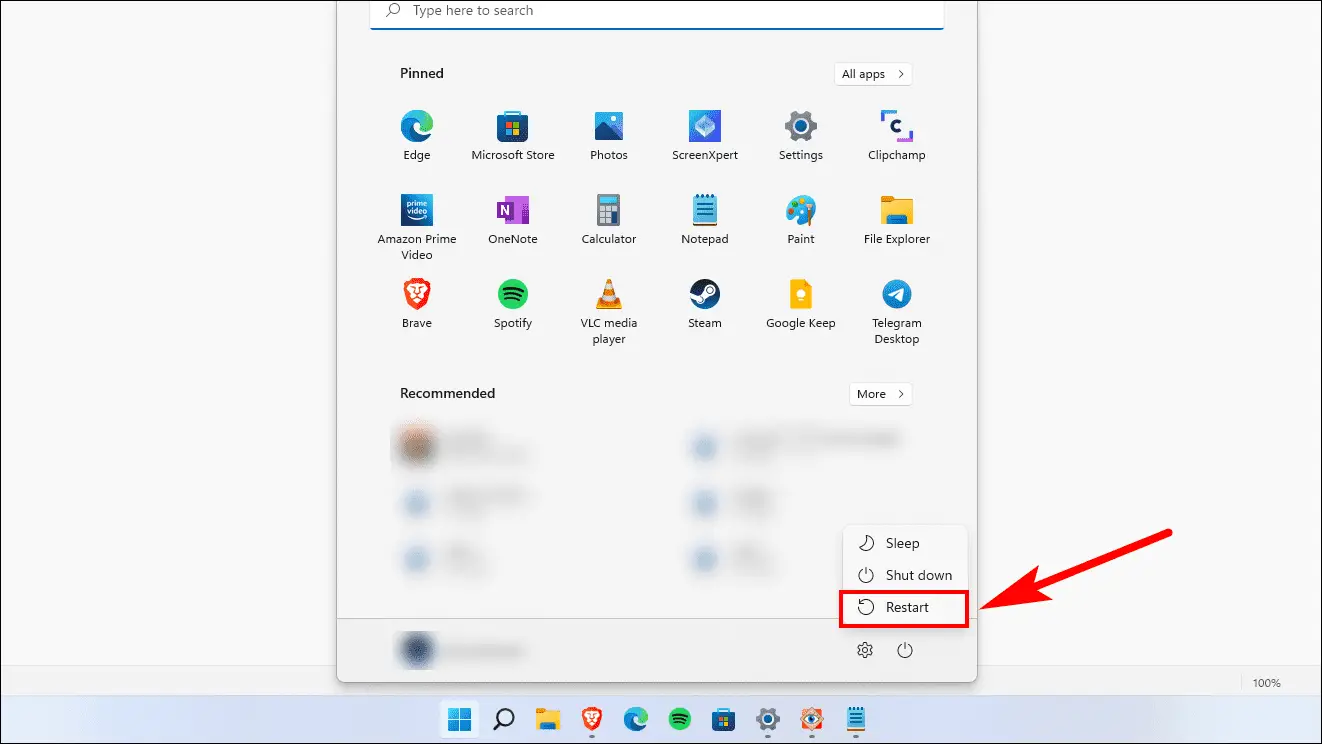
- Then click on the Power Button.

- Here, select the Restart option.
Lookup for New System Updates
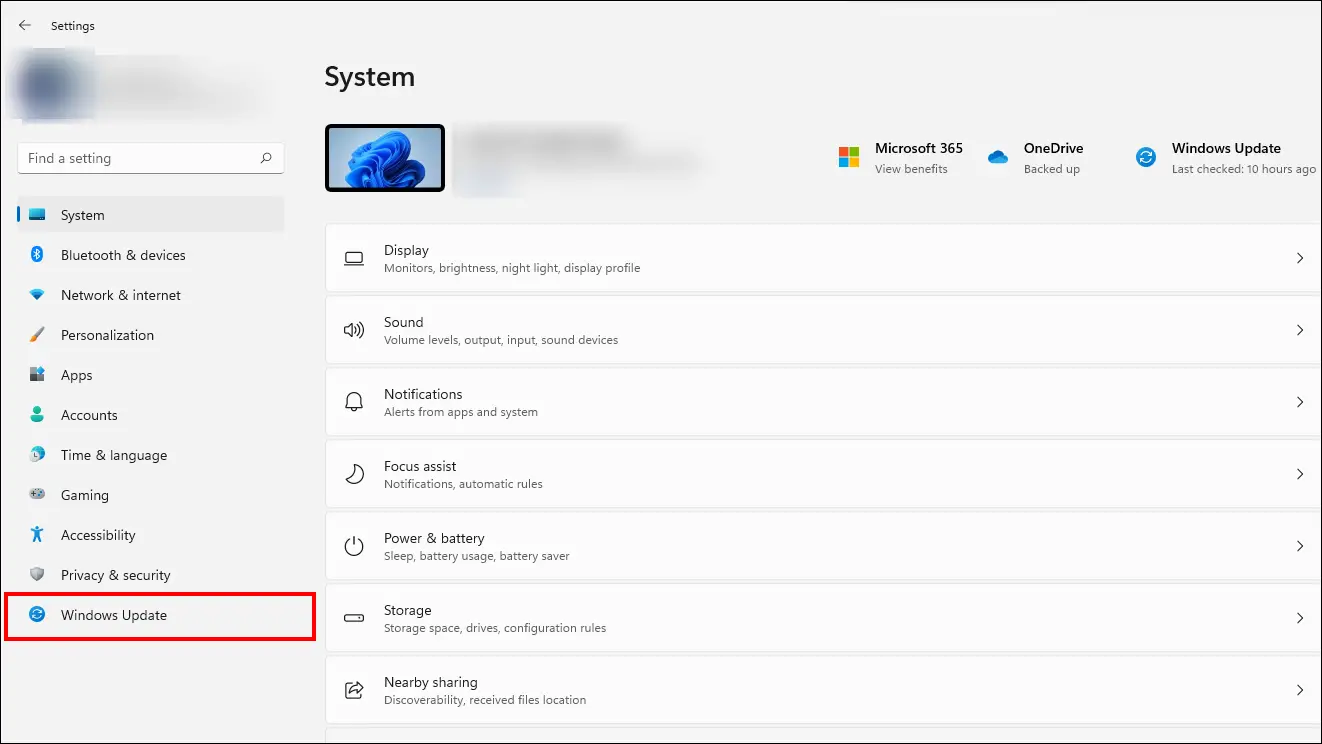
- Press Windows key + I to launch Settings.
- Within Settings, choose Windows Update from the left Sidebar.
- Now click on Check for updates. If there are any new updates then your PC will start downloading and installing them automatically.
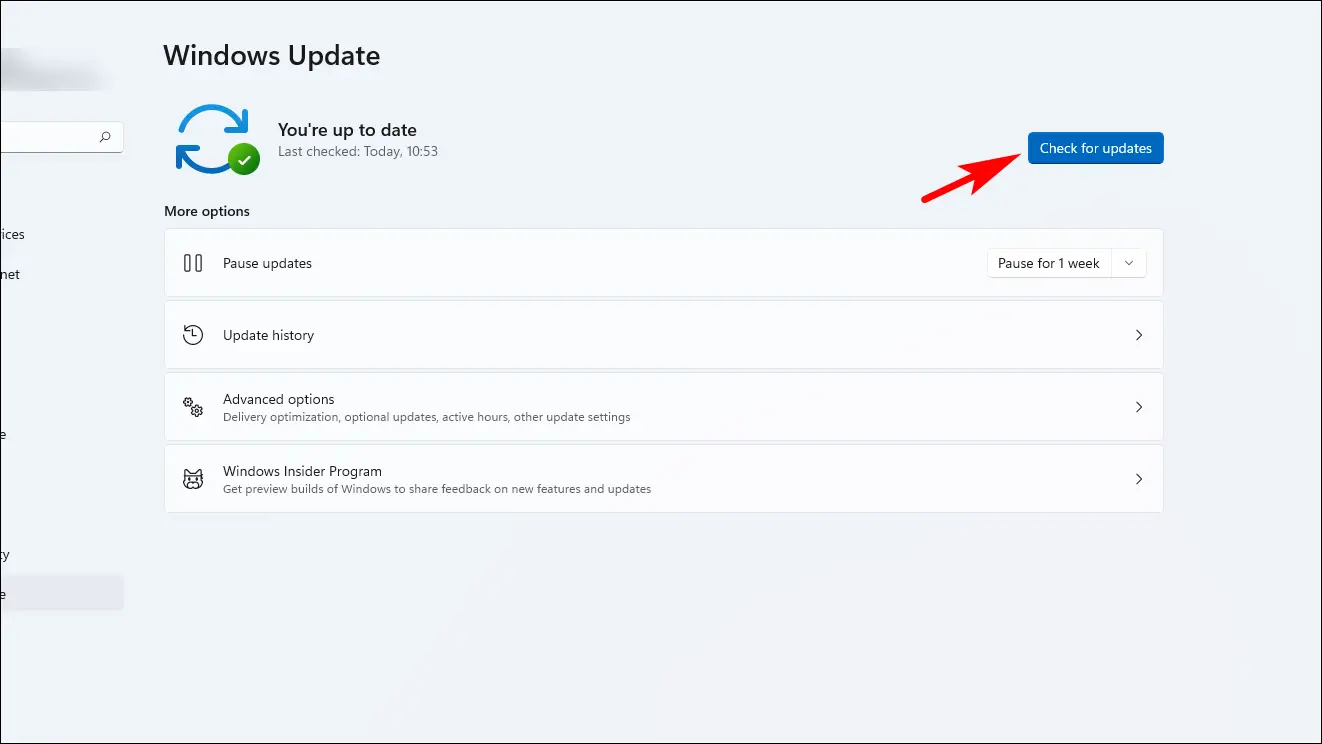
- Restart your system to finish installing the update.
New Updates also bring in support for certain USB devices that were previously not supported. Plugin your USB device and check if it is detected and operating fine.
Check for Optional Driver Updates
Along with major Windows updates, you can also quickly check for any additional or optional updates for your USB drivers straight from the Windows update page. To check for optional updates:
- Press Windows key + I to launch Settings.
- Open the Windows Update option from the Left Sidebar.
- Click on Advanced Options.
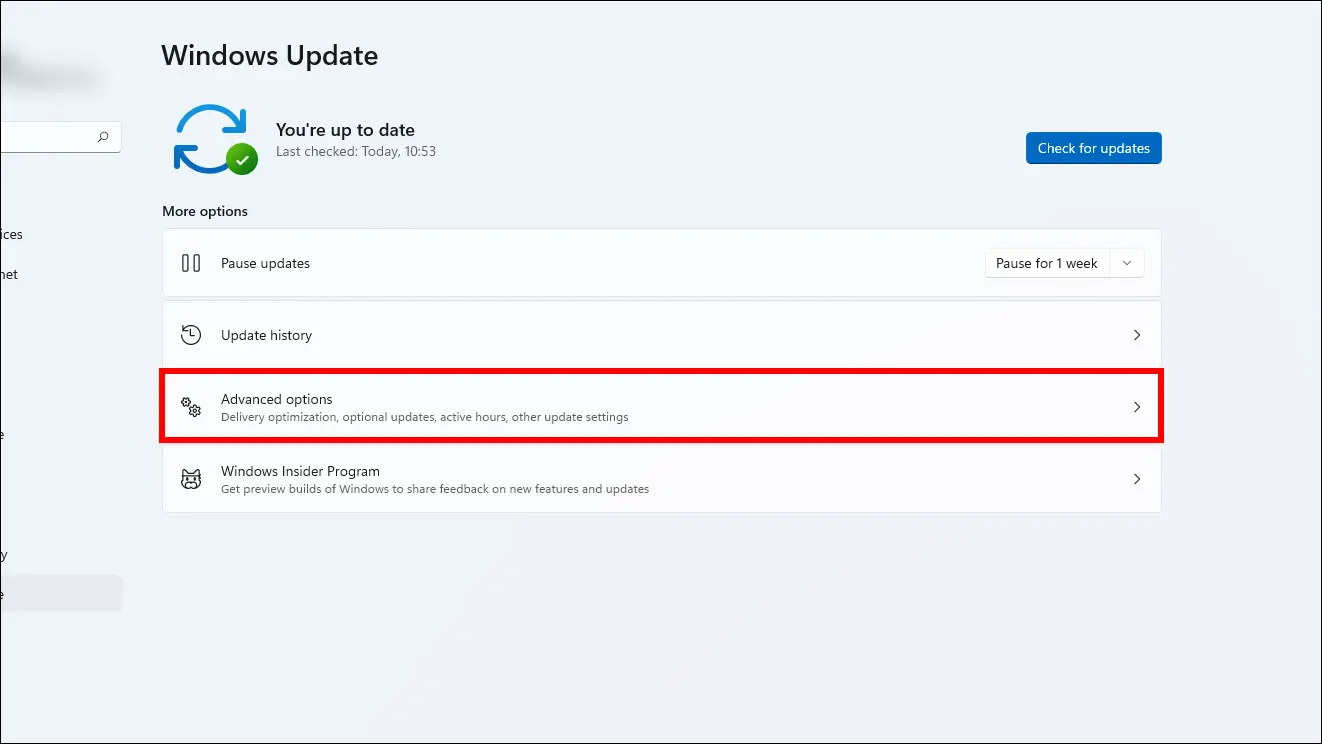
- Go to Optional Updates under the Additional Options section.
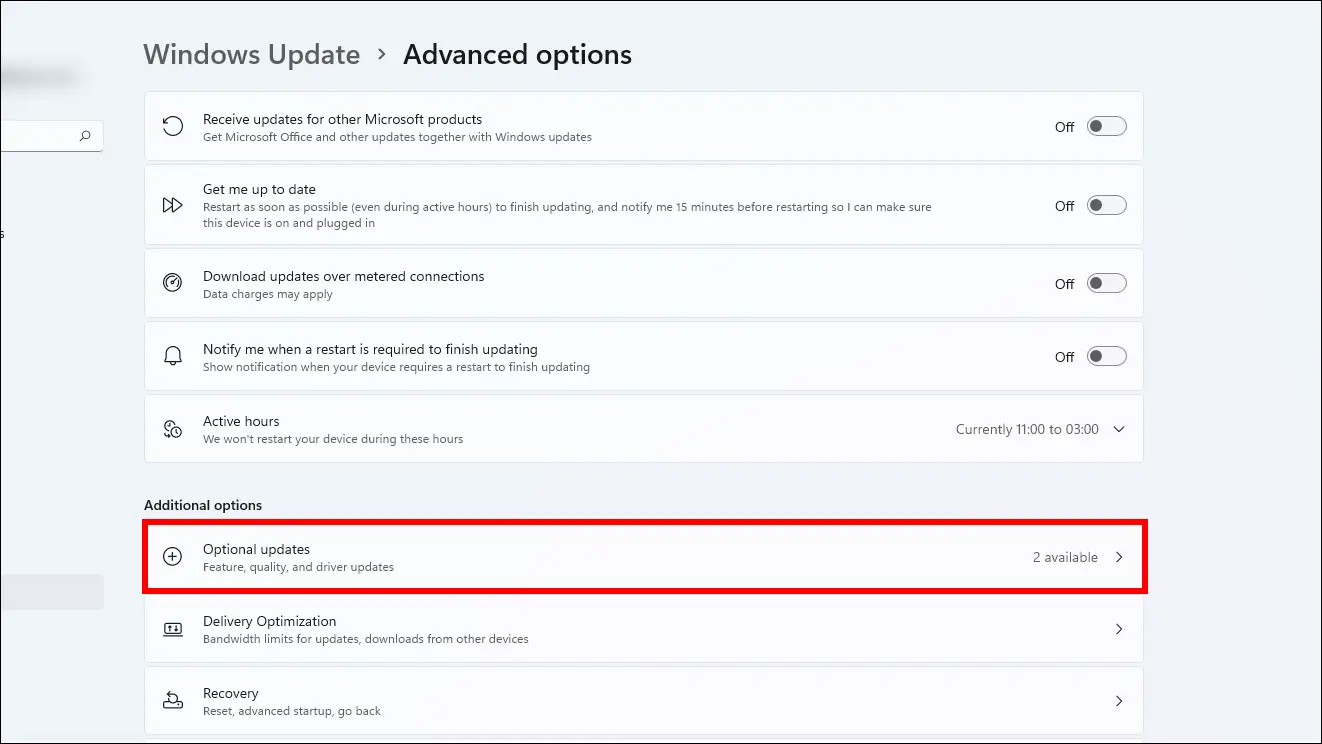
- Select available driver updates and click on Download & Install.
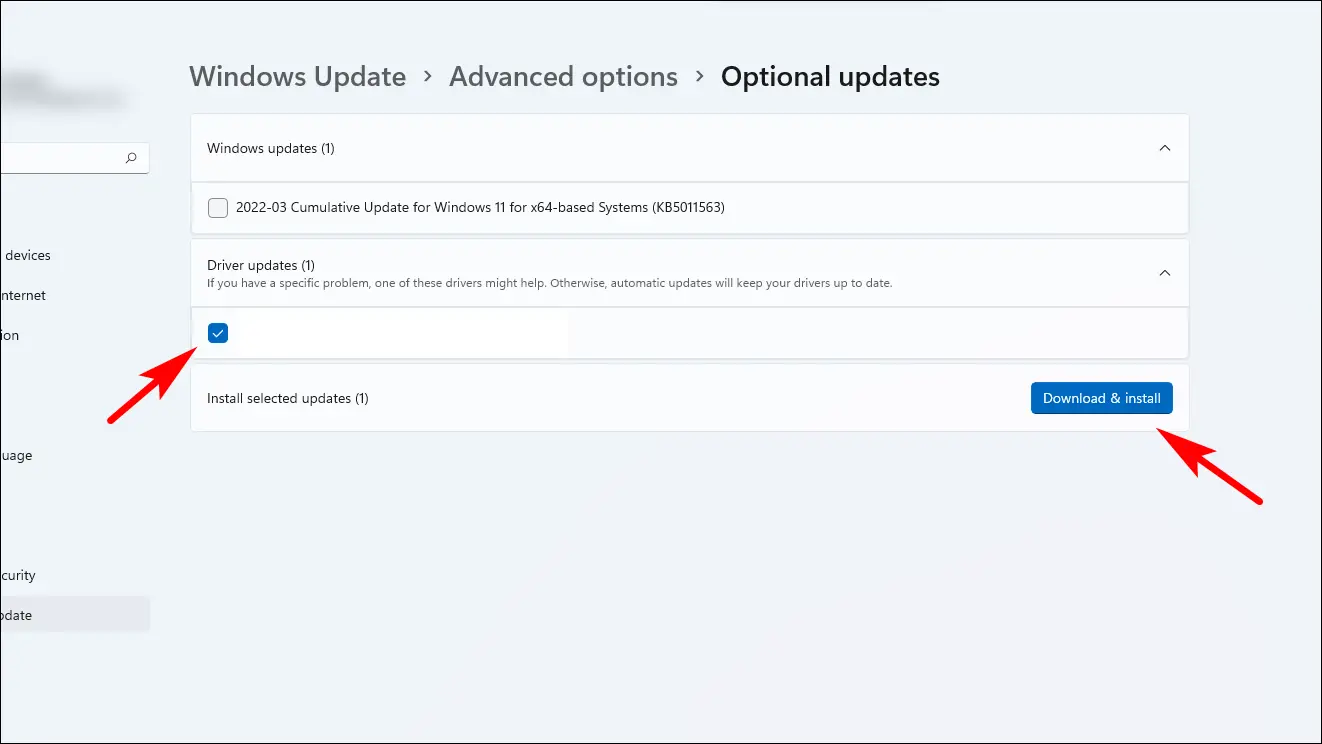
- Restart your PC once the update has been downloaded.
Try connecting your USB device after your computer restarts. You can also check for driver updates from Device Manager for a specific USB port or hub. We will discuss this later.
Make Sure that the USB Device is Working Properly
It is also necessary that you make sure that the issue is not with your USB device before we move further. Try connecting it to another device or PC and check if it is being recognized and working as intended. Also, make sure to clean ports and check for any cable damage or exposed wiring.
Scan your Computer from Device Manager
You can search for any new devices through the scan function in Device Manager. Once it scans your PC, it might be able to recognize your USB device. Follow the steps below to scan your system for hardware changes:
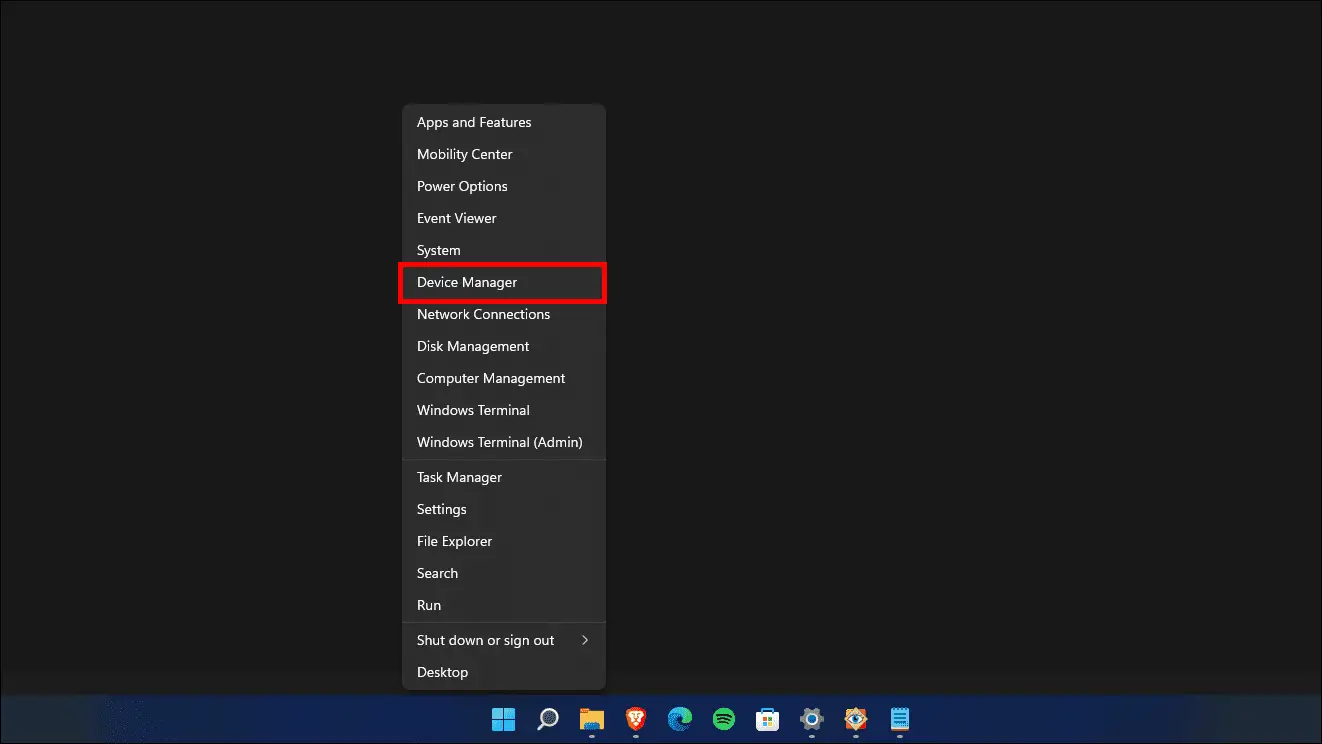
- Press Windows Key + X or right-click on Start to open up a shortcut menu and select Device Manager.
- Right-click on the Computer option.
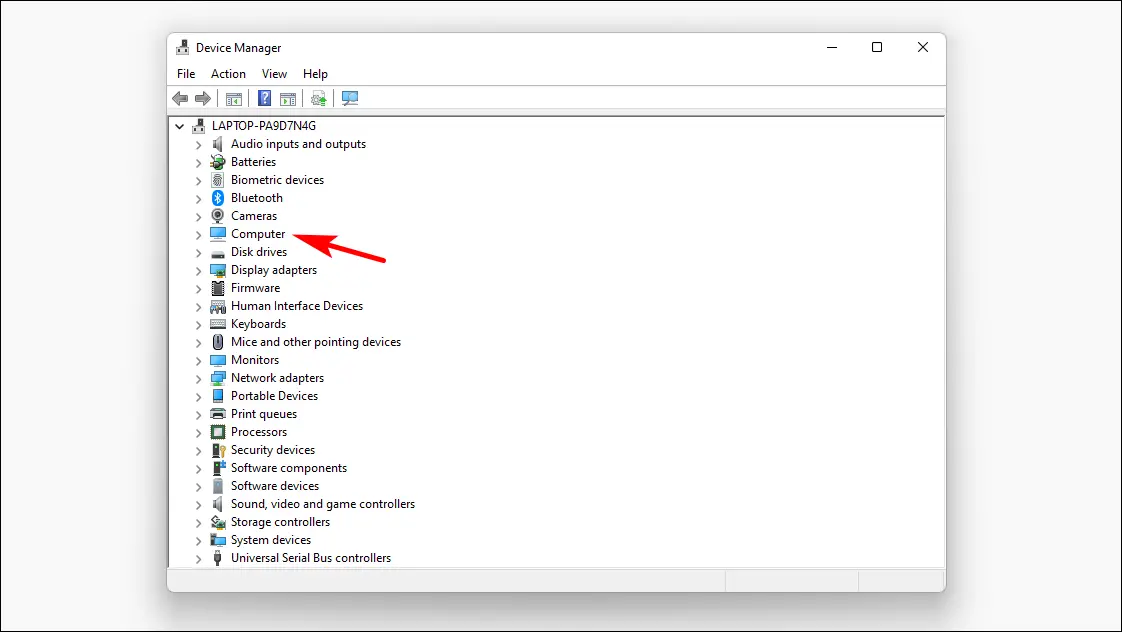
- Click on Scan for hardware changes.
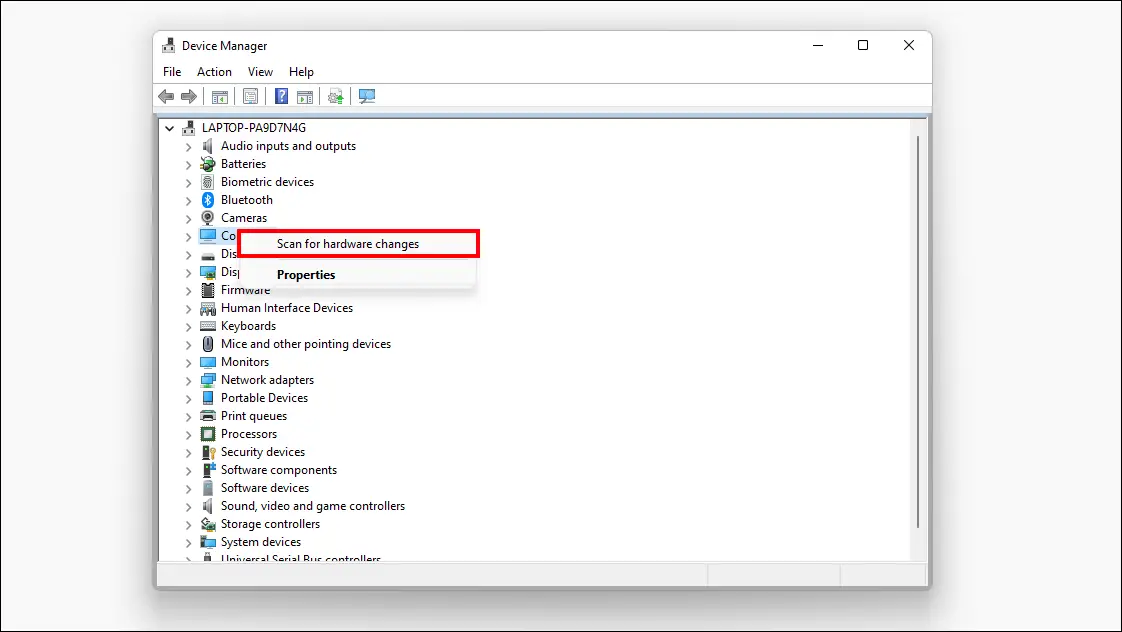
Your computer should search for any new connected devices and your USB device should be visible and working now.
Use USBDeview to View Connected USB Devices
You can use the USBDeview tool to view connected USB devices. It is a free tool developed by Nir Sofer and it can come in quite handy when your PC is not able to recognize a USB device. This is how you can download and set it up:
- Go to this link and find the Download links for your system near the bottom of the page.
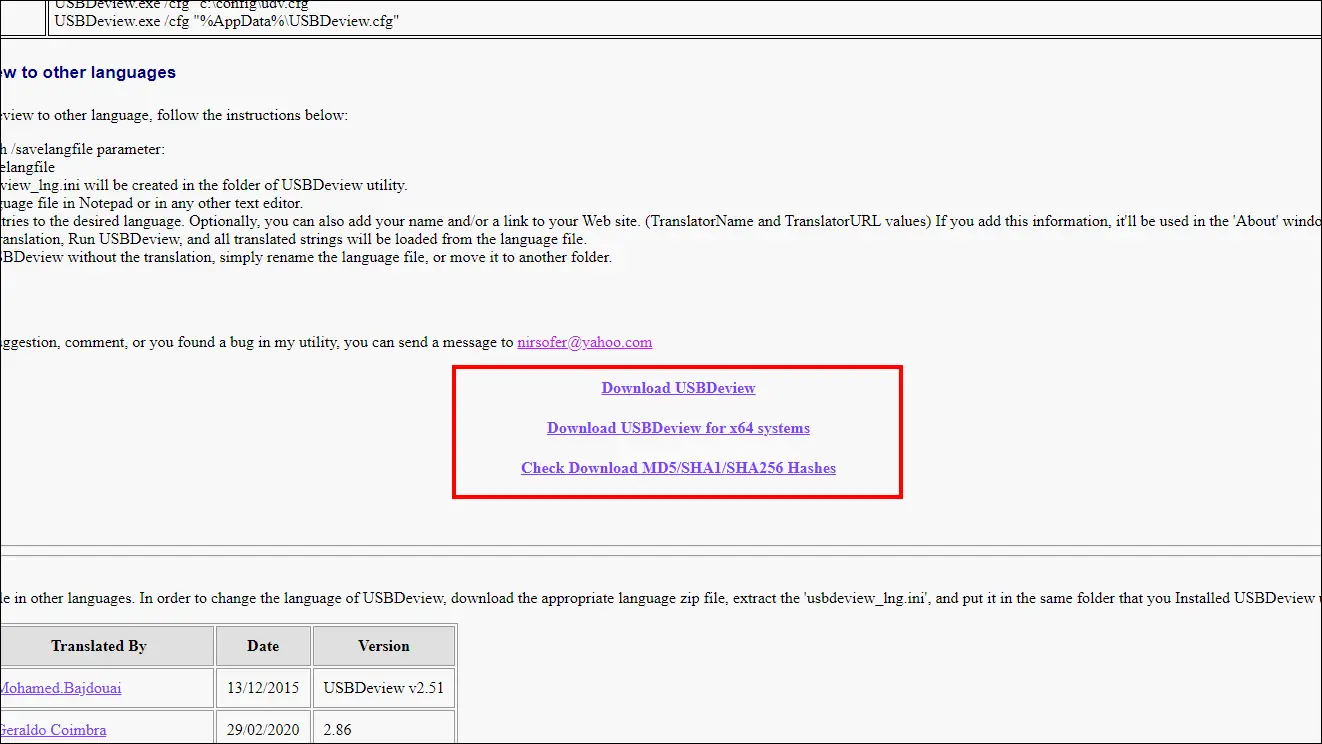
- Download the zip file and extract it to your preferred folder.

- Click on USBDeview to launch the tool.

- You should see currently and previously used USB Devices.
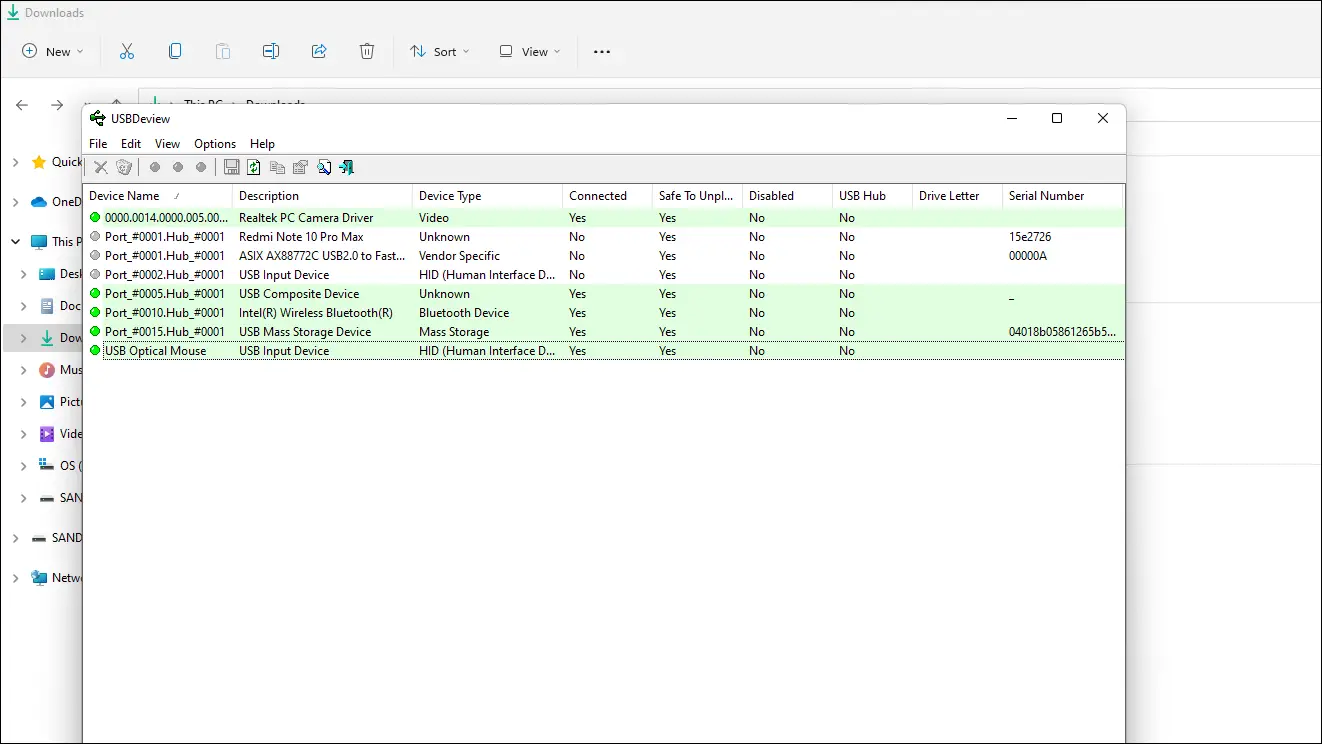
- The Device highlighted in Green indicates that the device is connected properly.
- The device highlighted in Red indicates that the device or port is disabled.
- Right-click on that device and select Disable+Enable Selected Device.
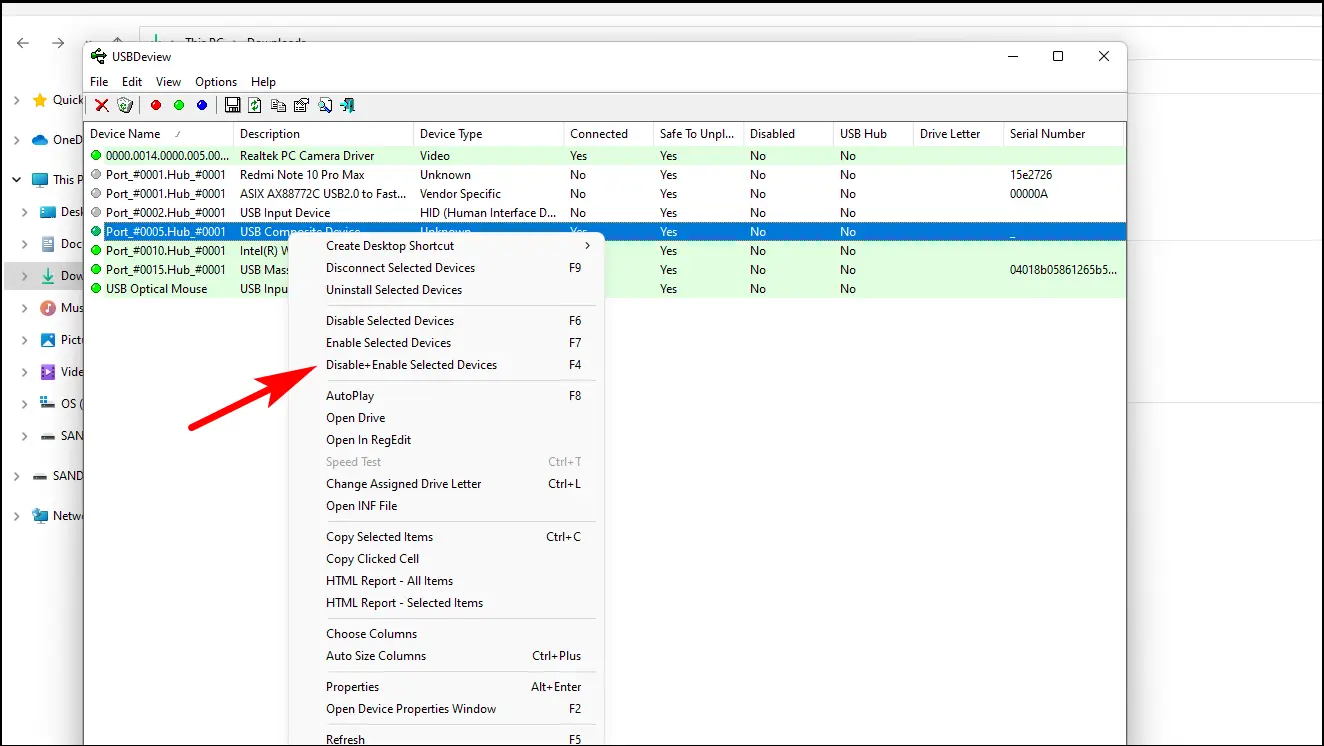
After Enabling the device, your PC should be able to detect it and recognize it. Using this tool you can directly change the Drive name and path.
Update your USB Drivers
Outdated drivers can sometimes fail to recognize the USB device and work properly so it is necessary to make sure that you are using up to date USB drivers. There are two methods to update your drivers. Manually and Automatically. We will take you through both methods:
Automatically Update USB Drivers
- Press Windows Key + X or right-click on Start to open up a menu and select Device Manager.
- Scroll down to Universal Serial Bus controllers and double-click on it to open a list of USB ports and hubs.
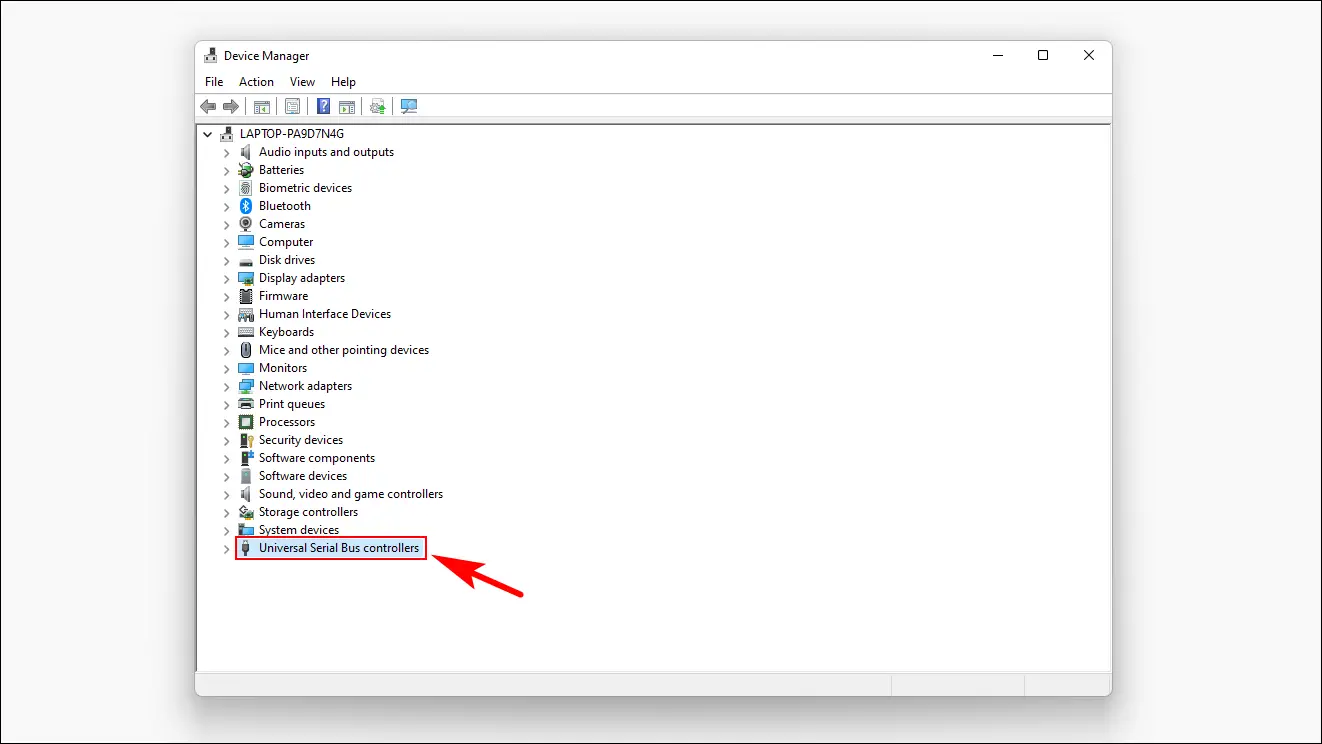
- Select the one you are trying to use and right-click on it.
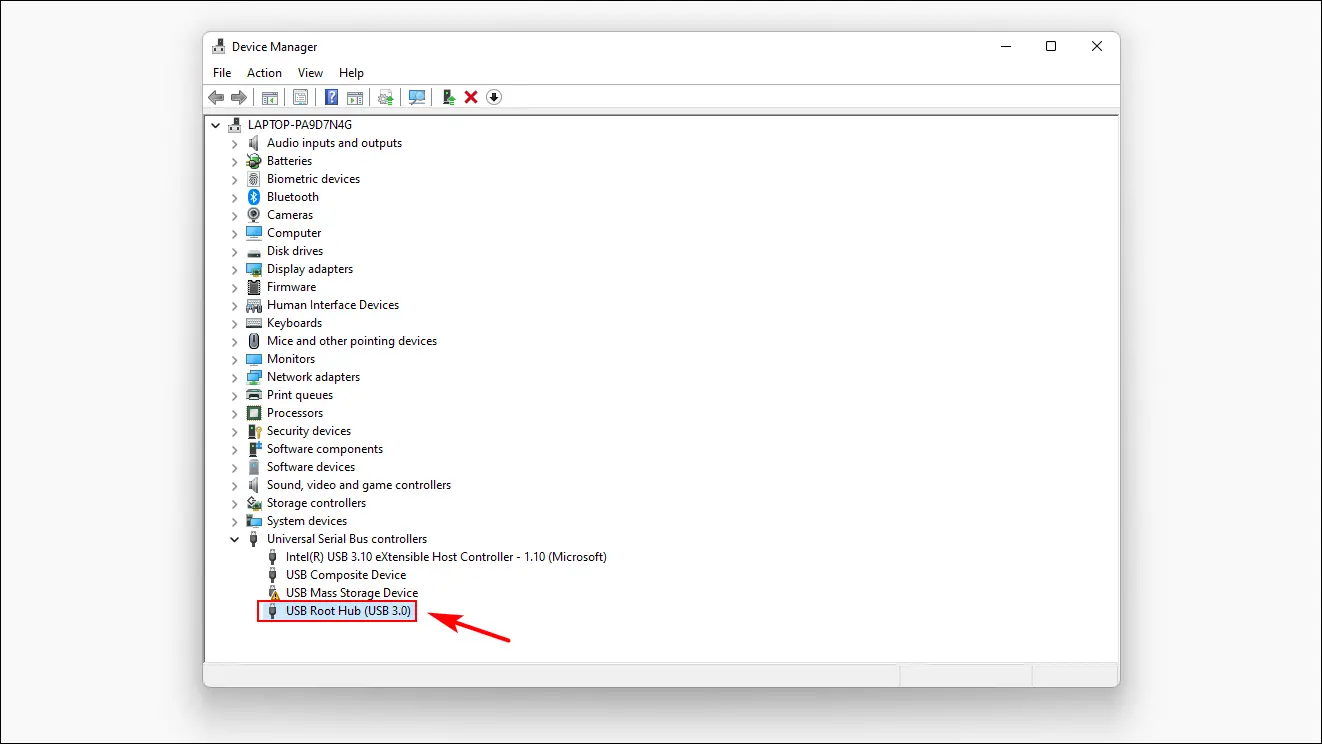
- Now click Update drivers.

- From here, choose Search automatically for drivers.
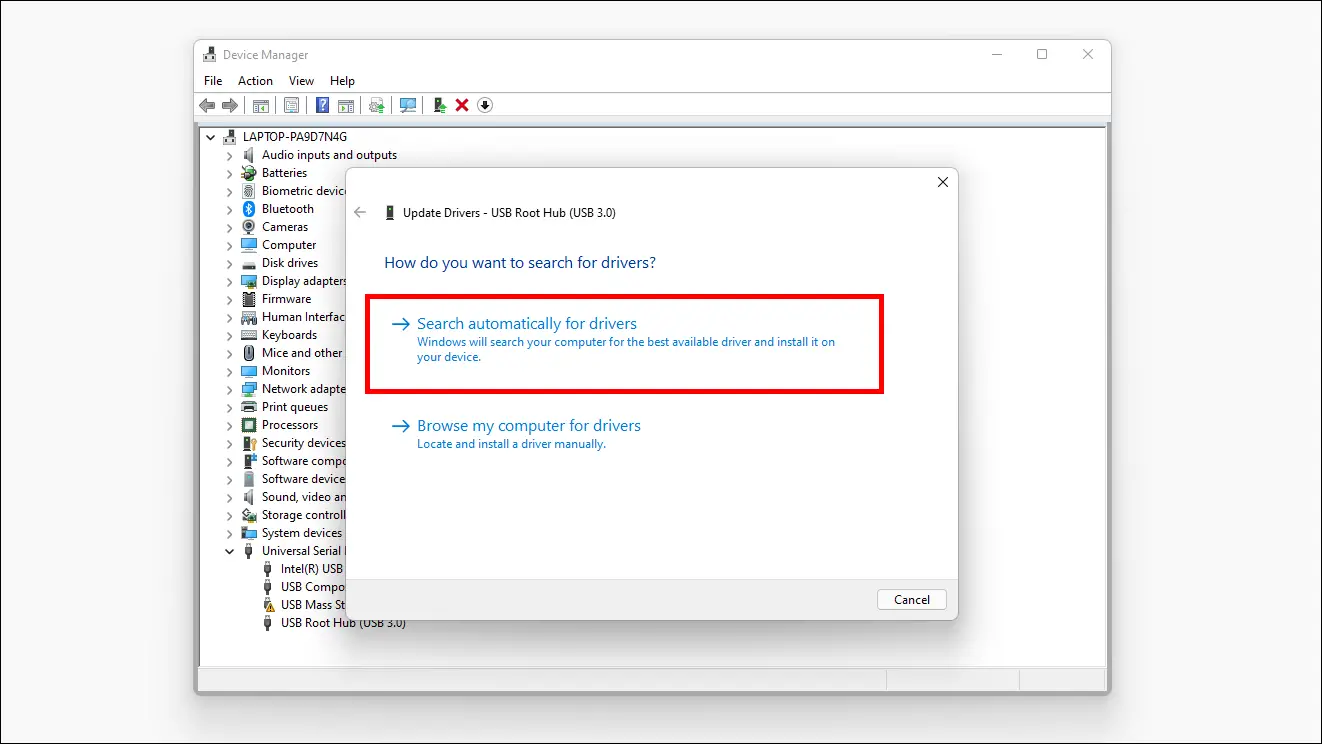
It will search the web for any available updates and guide you through the process of downloading and installing them.
Manually Update USB Drivers
- Search the web for your Laptop or Motherboard’s manufacturer site and lookup for device drivers of your specific model.
- Download the drivers to your PC.
- Now press Windows Key + X to open up the shortcut menu and select Device Manager.
- Scroll down to Universal Serial Bus controllers and double-click on it to open a list of available USB ports and hubs.
- Select the one you are trying to use and right-click on it and click on Update Drivers.
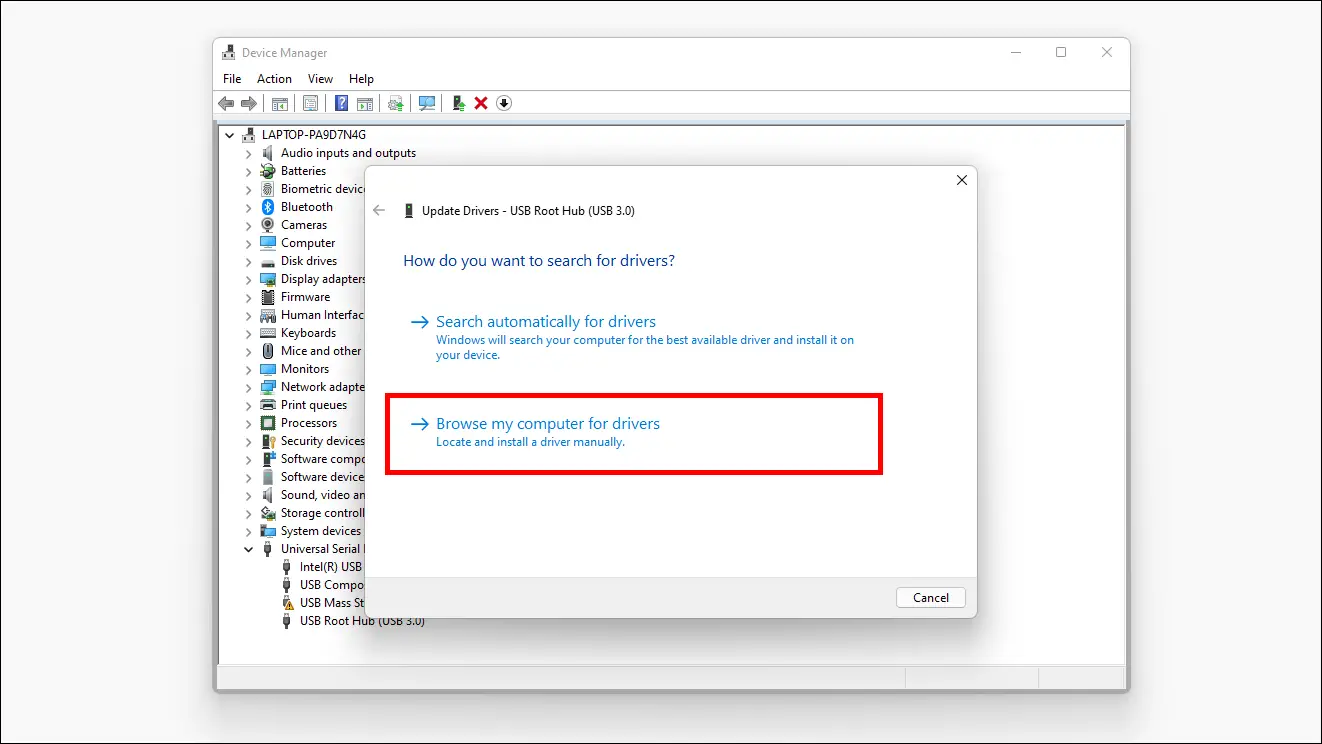
- Choose the option Browse my computer for drivers.
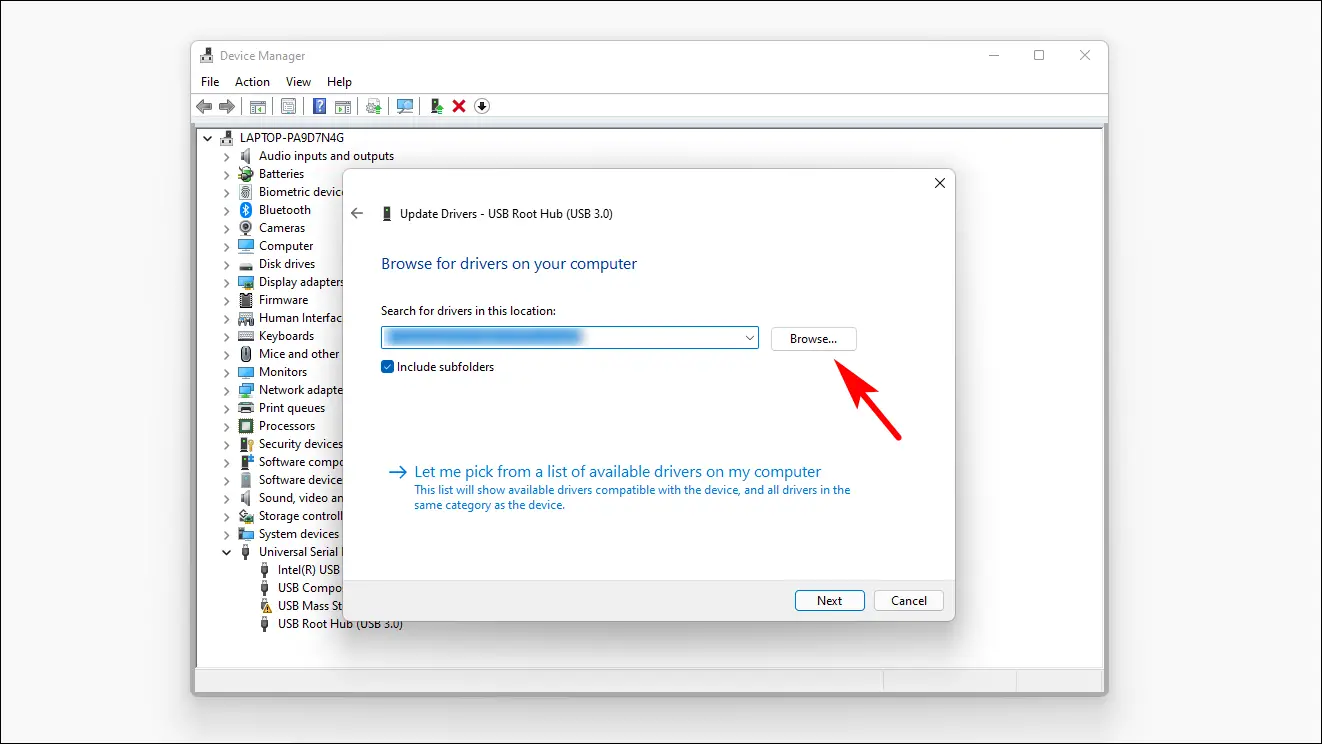
- Click on the Browse button.
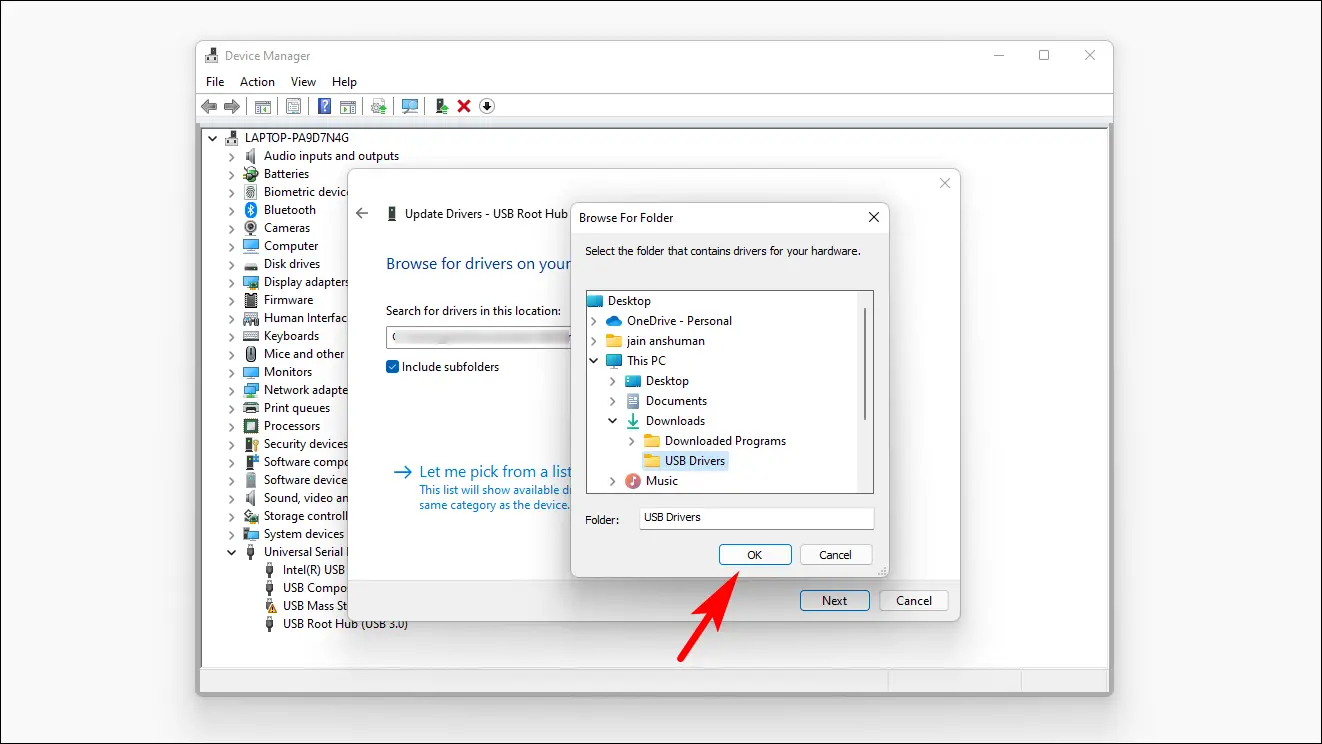
- From here, locate the folder where you have saved the driver update file and click on OK.
Select the driver update file and then follow the instructions to update your USB drivers. Hopefully, your devices should be detected and work properly now.
Uninstall and Reinstall USB Drivers
If updating your drivers does not work then you can try uninstalling them. This has also proven to fix this issue as your system will install the latest drivers upon reboot.
- Press Windows Key + X together and launch Device Manager.
- Scroll down to Universal Serial Bus controllers and double-click on it to expand it.
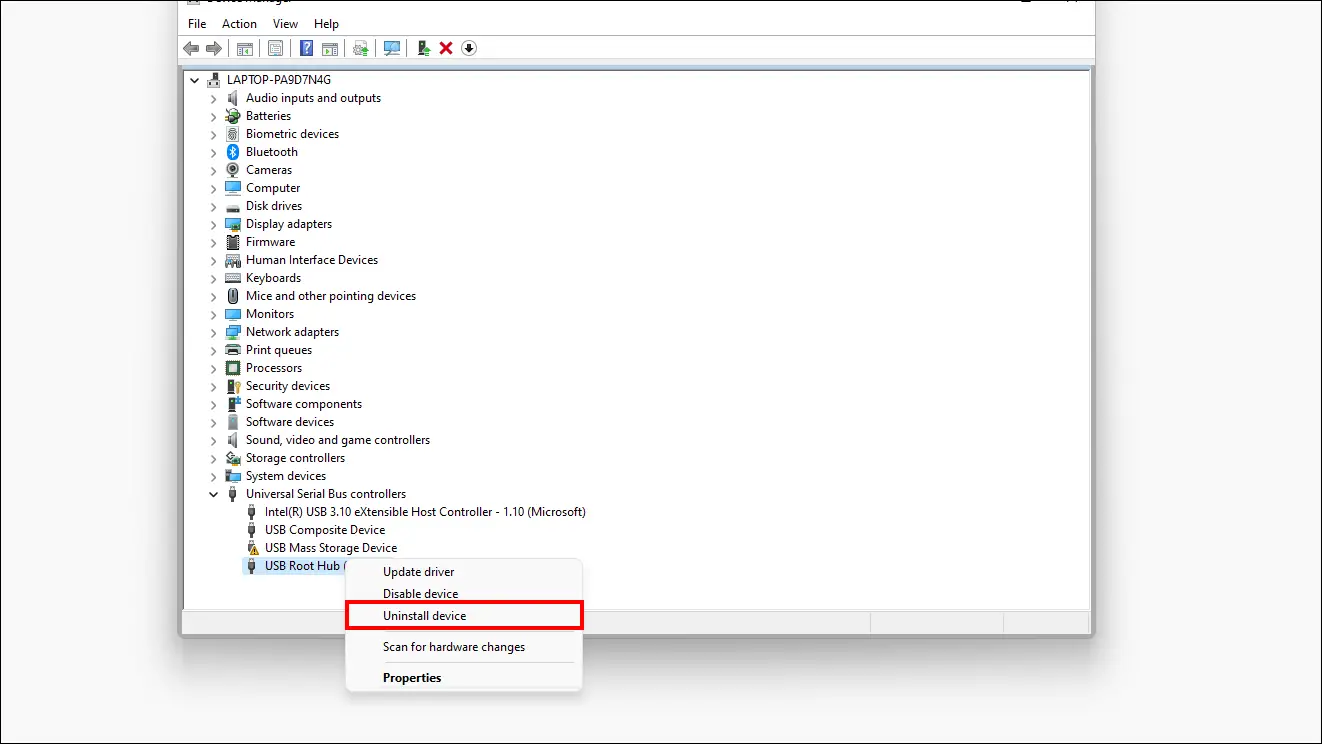
- Locate the specific USB port or hub you want to fix and right-click on it.
- Select Uninstall drivers.
- Again click on Uninstall in the Warning prompt.
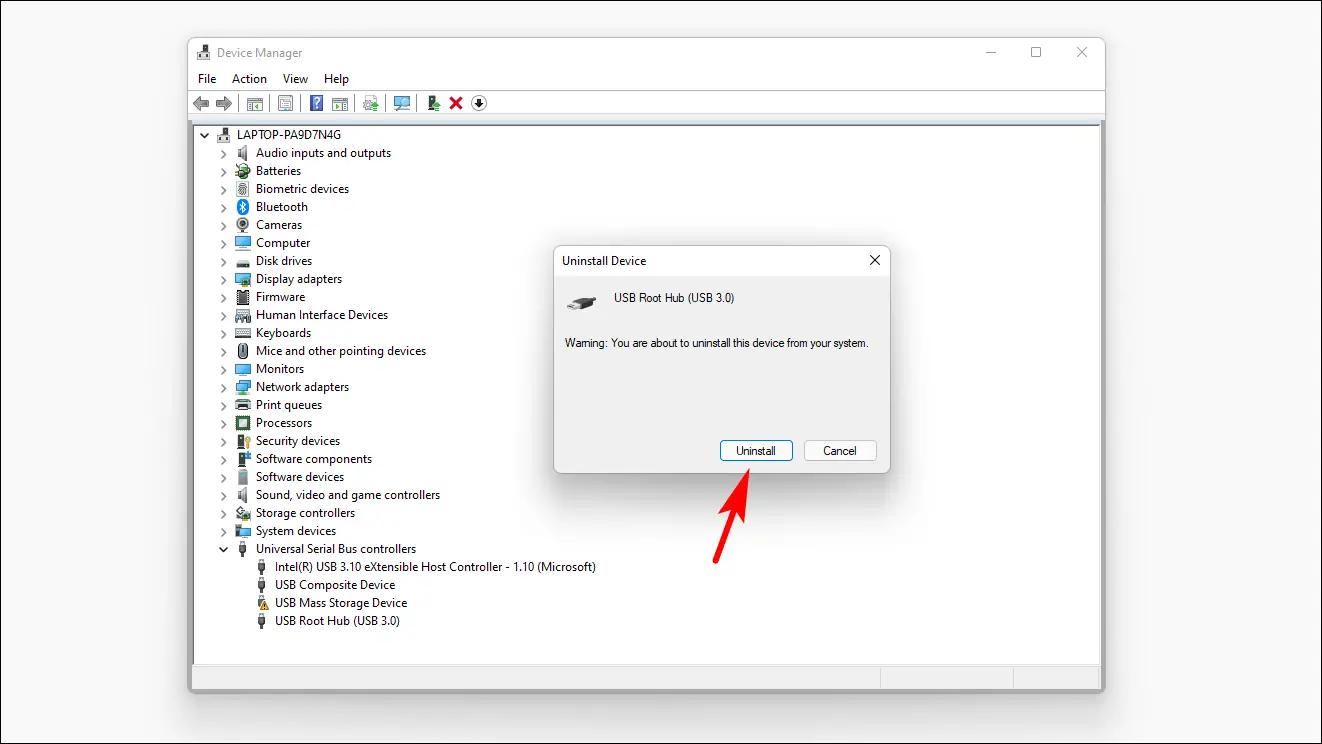
- After the uninstallation, restart your computer.
Your PC will reboot and install new drivers for the USB ports. After reboot, connect the USB device in question and check if it works.
Turn Off Power Management Settings
Windows 11 can turn off USB ports and hubs in the background if your laptop’s battery is low or it is not in use. This can lead to your system not being able to detect any new devices or previously connected devices through that USB port. But you can disable this setting so your USB ports always remain active.
- Open Device Manager by pressing Windows Key + X simultaneously or right-clicking on the Start button and selecting Device Manager from the list.
- Scroll down and double click on Universal Serial Bus controllers.
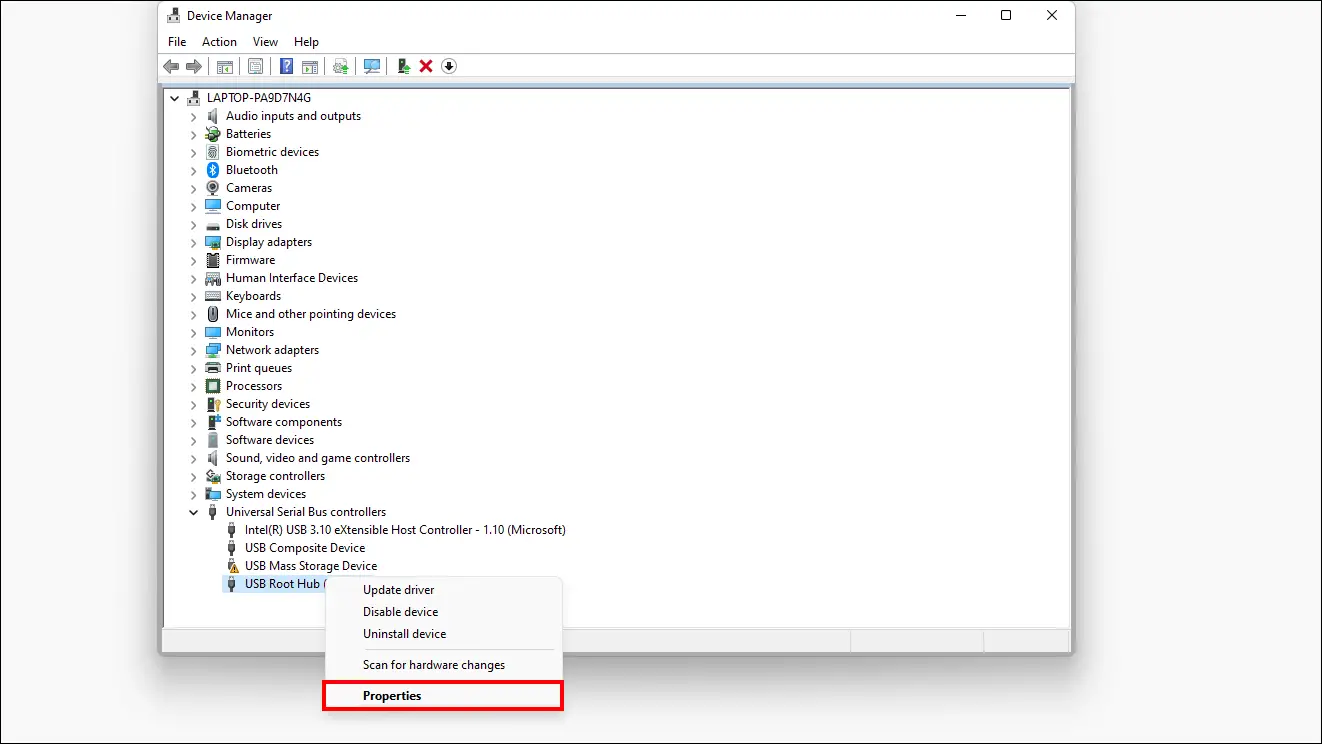
- Select the affected USB port or hub and right-click on it.
- Now go to Properties.
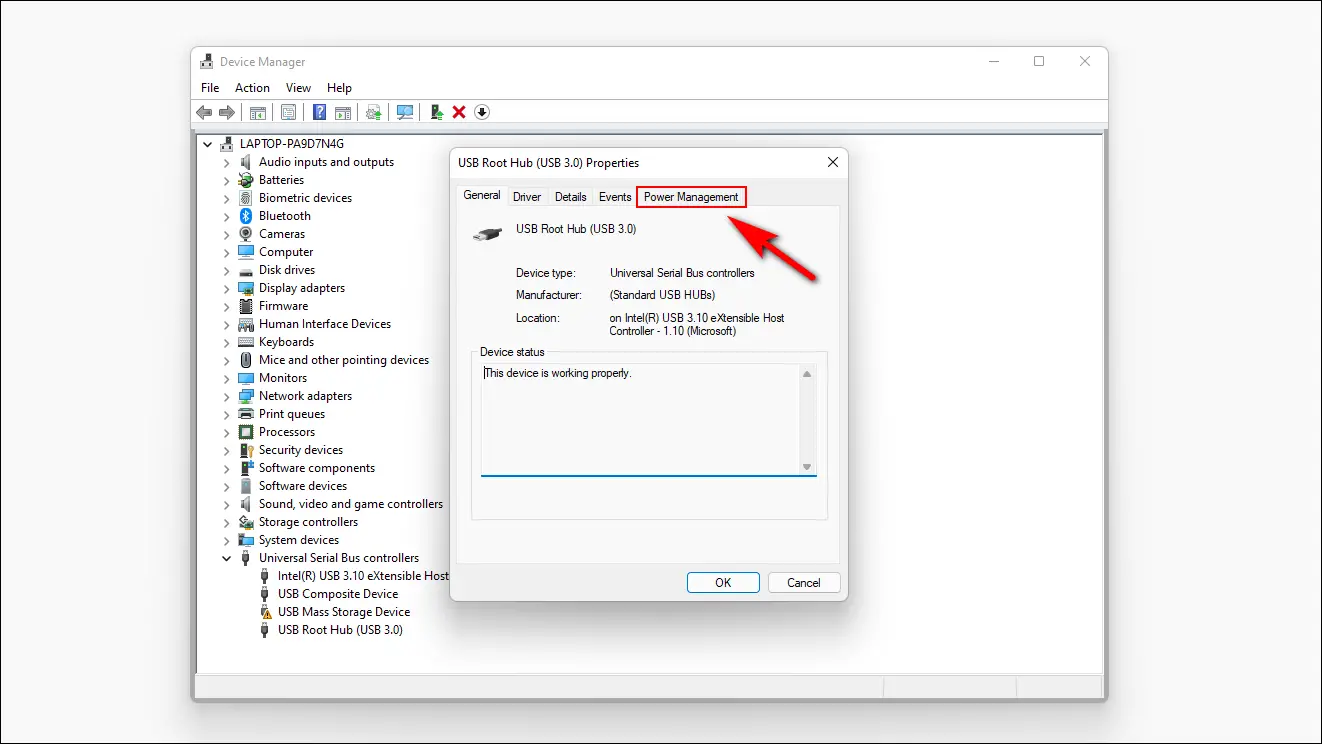
- Here, click on the Power Management section on the top.
- Uncheck the setting Allow the computer to turn off this device to save power and click on OK.
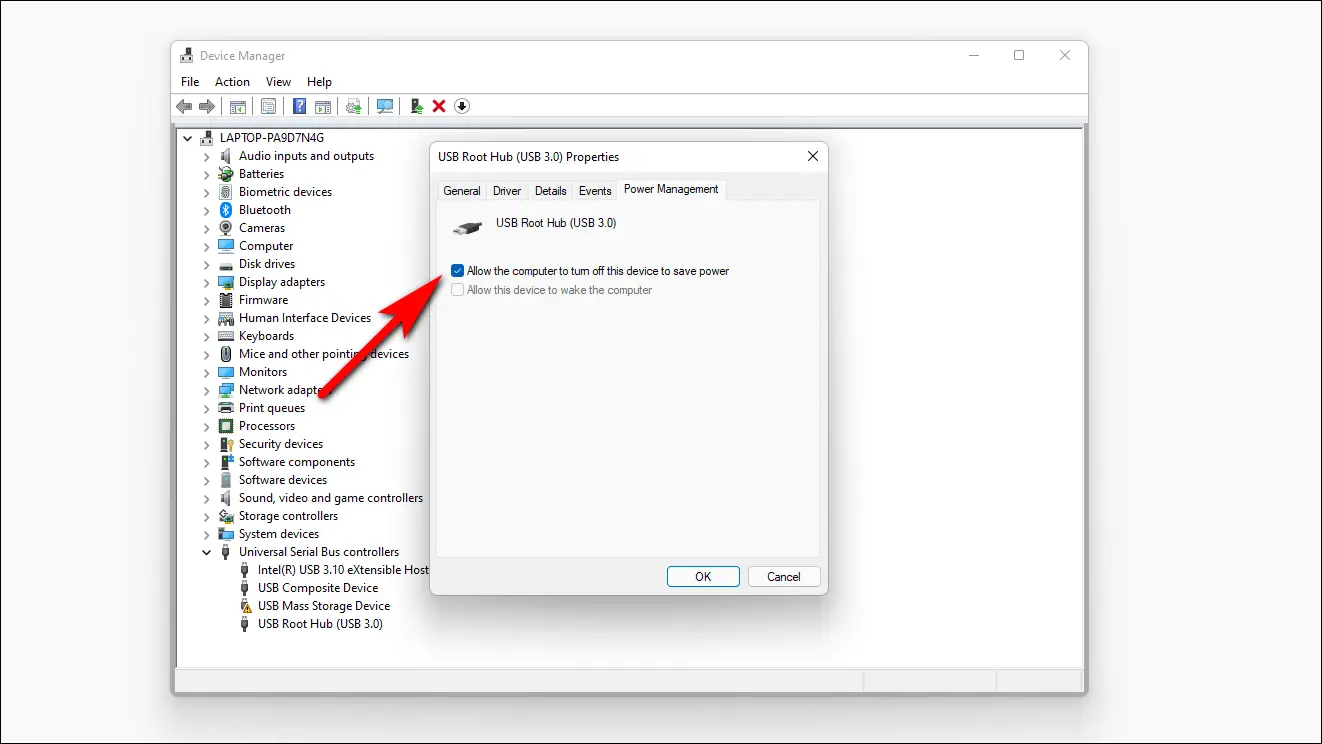
Now your USB ports won’t get turned off even when your Laptop goes into power-saving mode and the USB devices should not be disconnected.
Disable USB Selective Suspend Function
Selective suspend is another setting that disables USB ports operations to save power. It also helps extend battery life but can be annoying when you are trying to connect or use a USB device for a prolonged time. Let us see how to disable it:
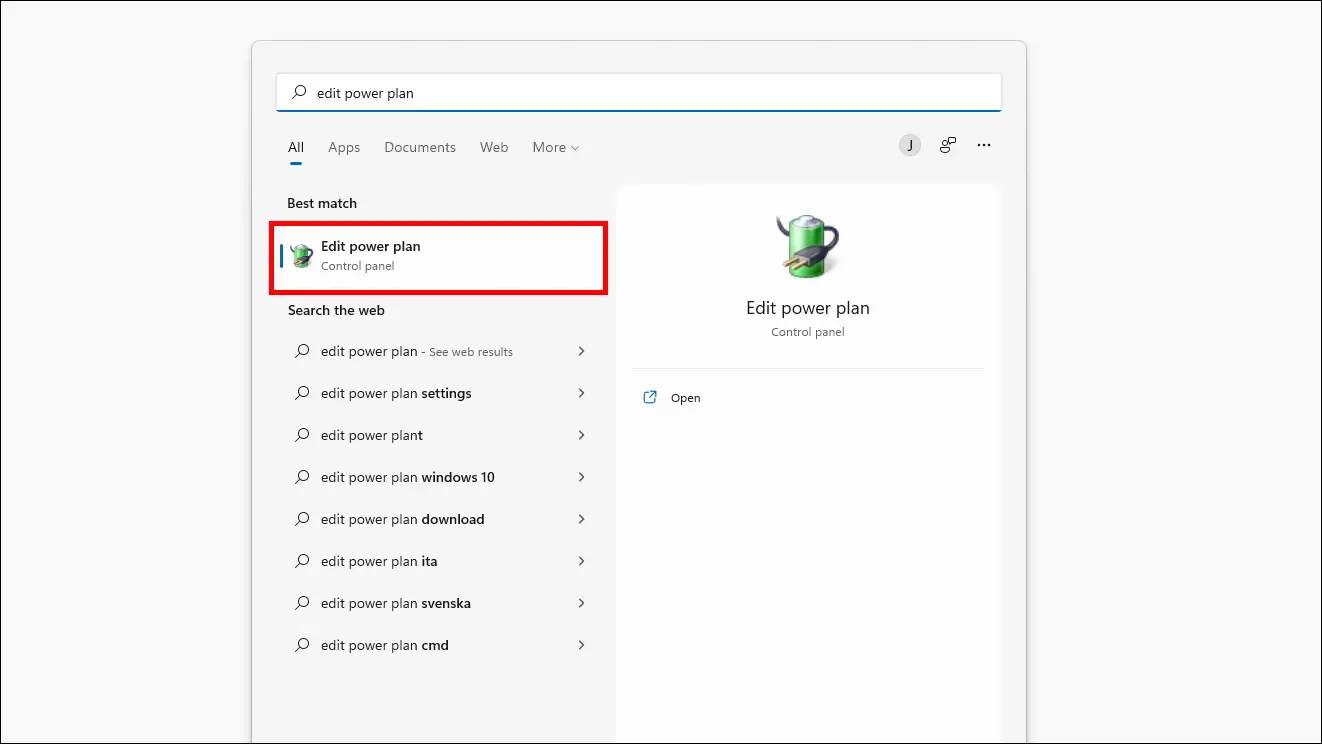
- Open Search and type Edit Power Plan from the top search bar.
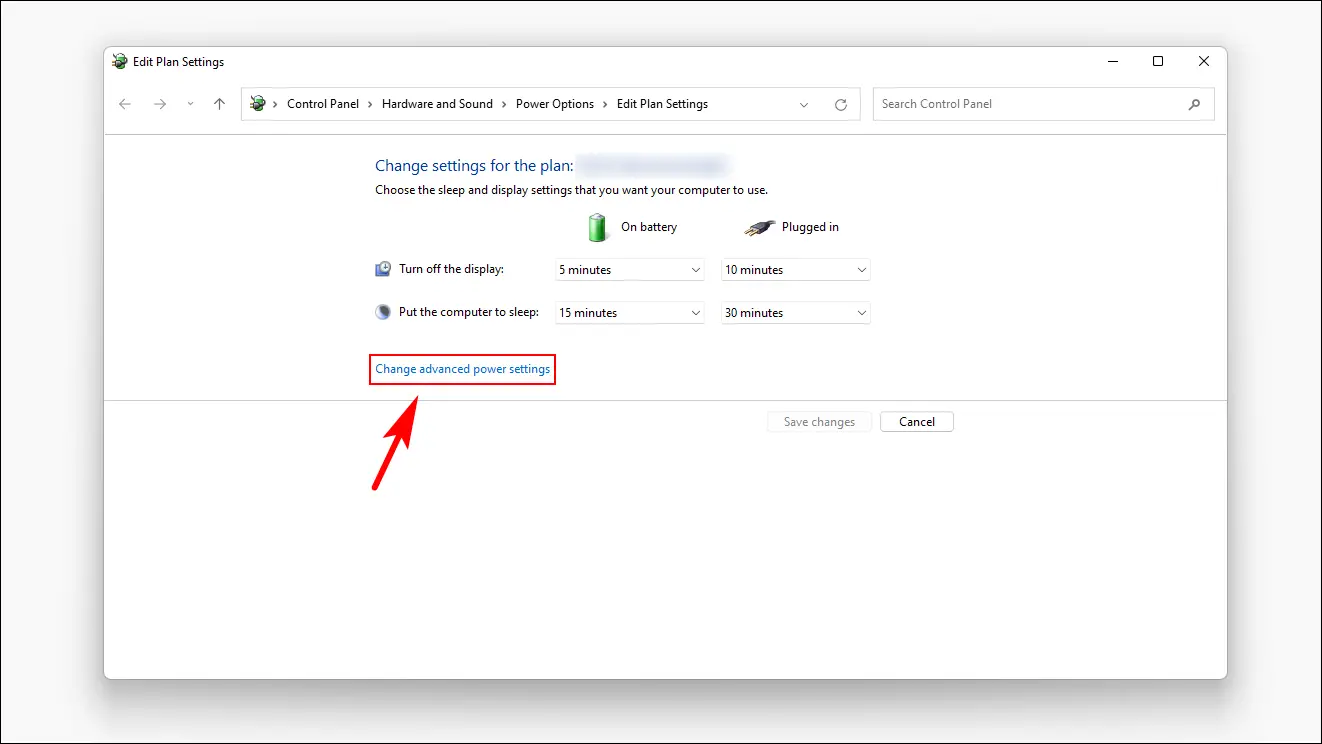
- Go to Change advanced power settings.
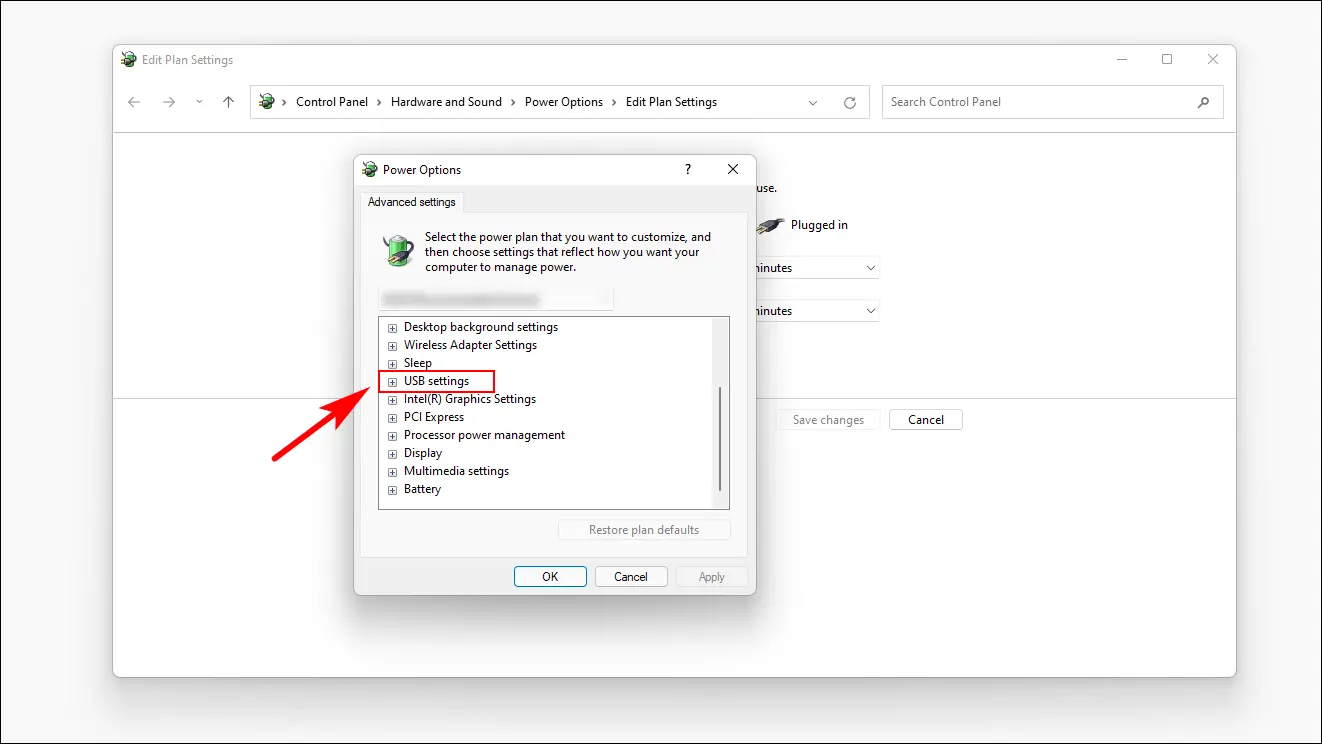
- Scroll down to USB Settings and expand it.
- Double click on USB Selective suspend settings.
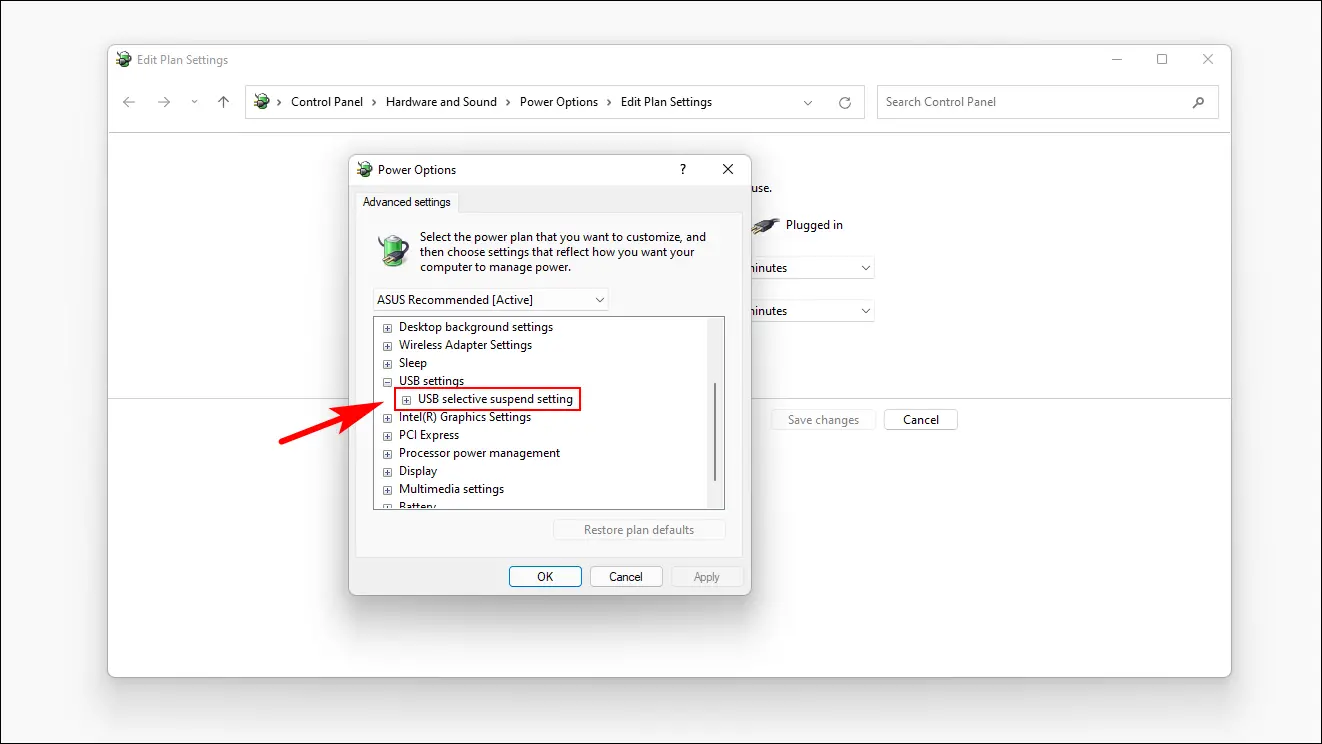
- It should show Settings for Desktop and On Battery for Laptop.
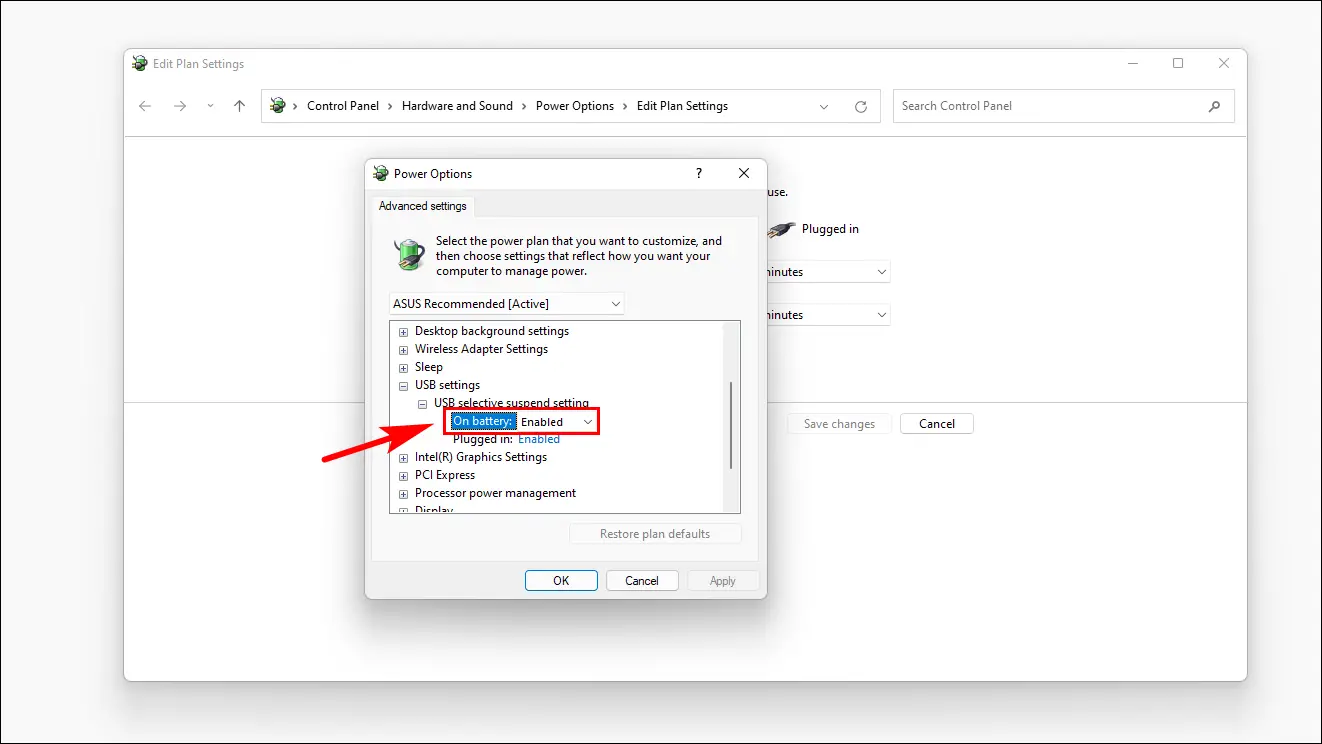
- Click on Enabled next to the options and select Disabled from the menu click Apply to close the window.
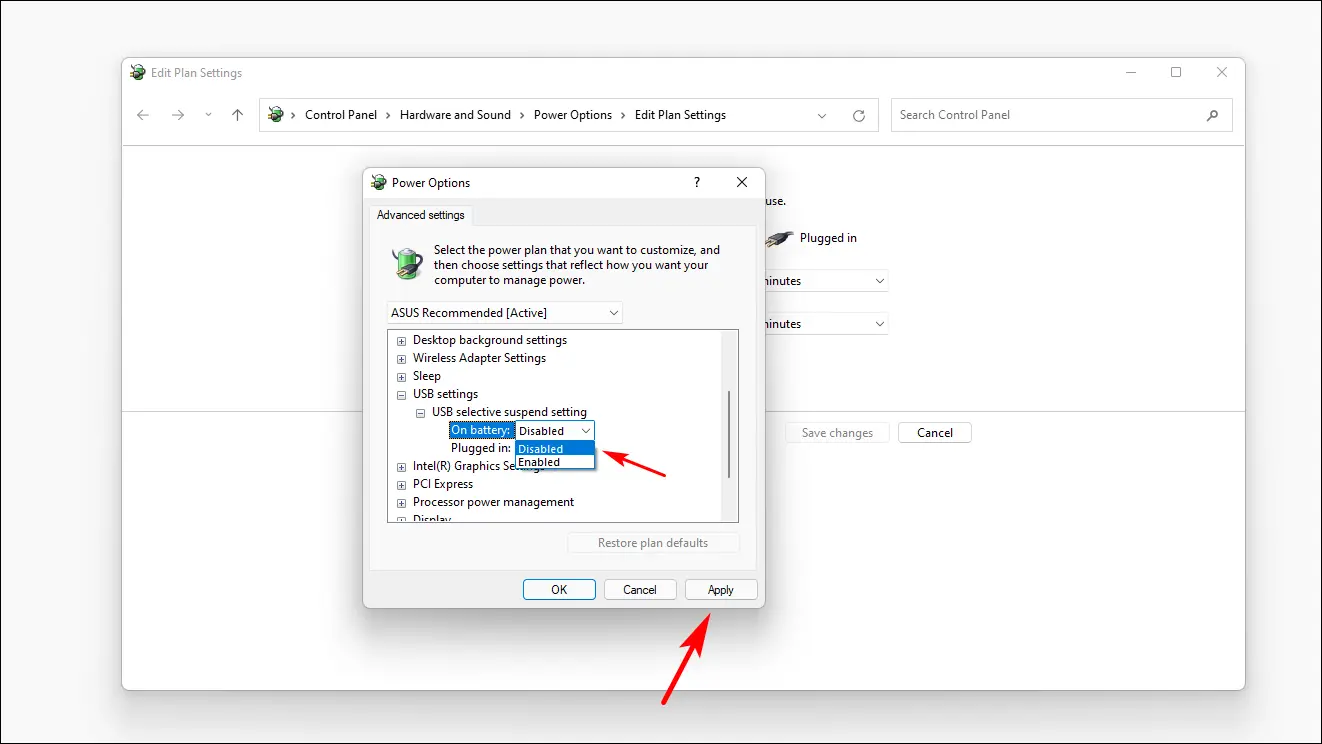
Turning off this setting will make sure that your USB port never turns off automatically in any situation. But it will affect your Laptops battery life.
Scan your Computer for Corrupted System Files
If you have updated your system from Windows 10 to 11 or flashed Windows 11 on your PC manually then it could be possible that your Windows 11 installation might be corrupted which is causing USB related problems. You can run certain commands to replace corrupted files and fix the issue.
- Press Windows Key + X simultaneously or right-click on the Start button and select Windows Terminal (Admin).
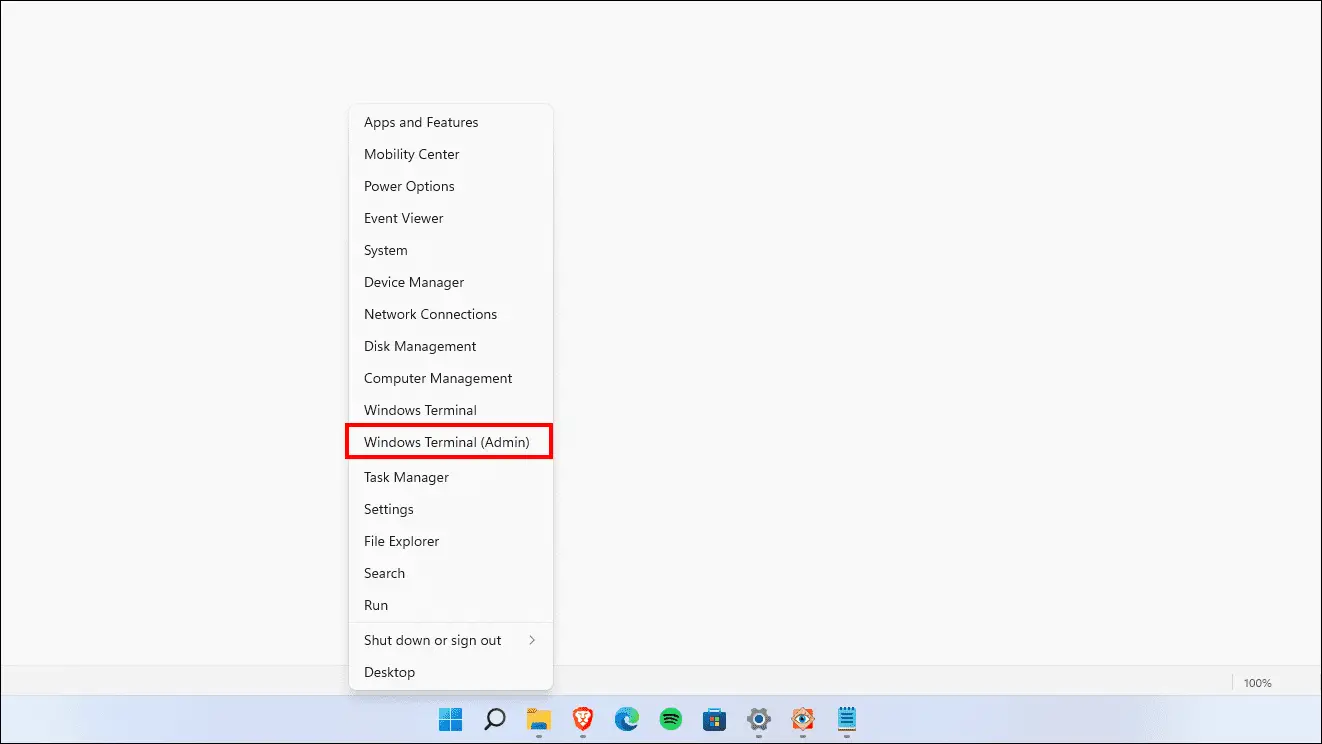
- Copy and paste the below command and press Enter.
DISM /Online /Cleanup-Image /RestoreHealth
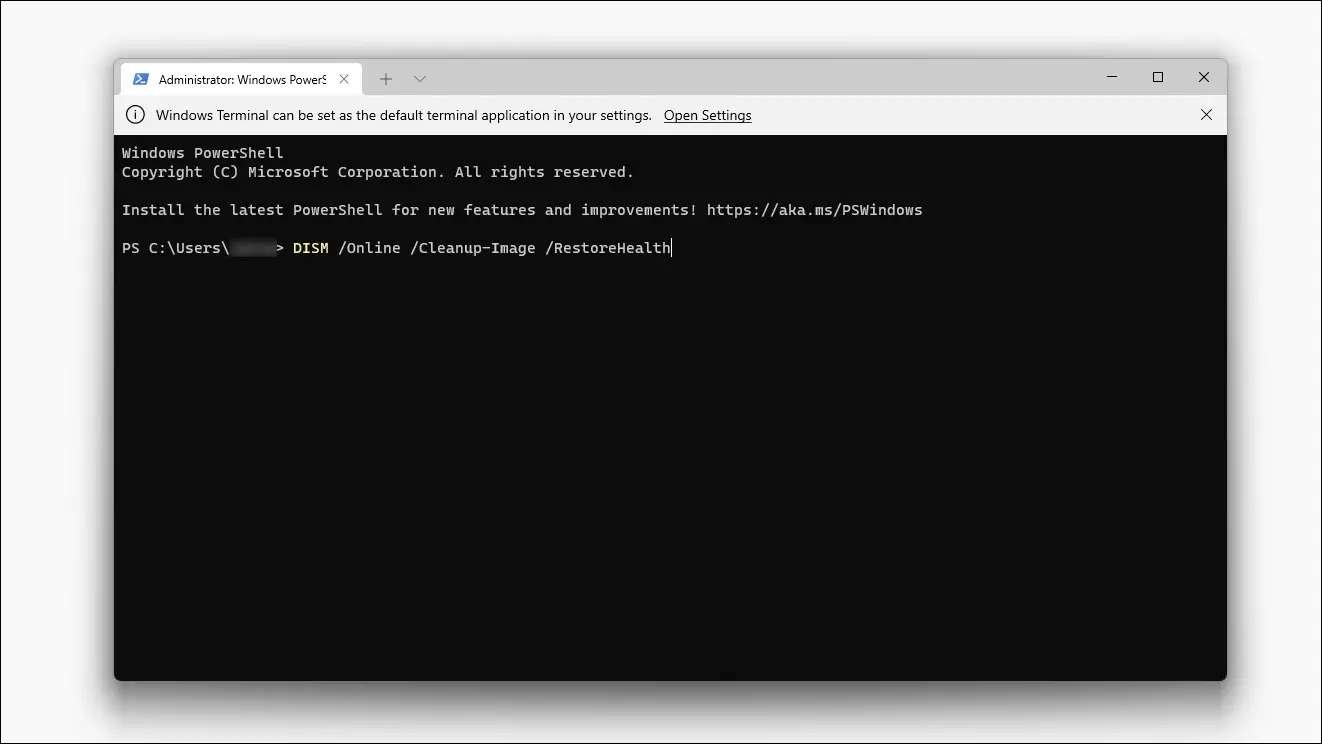
The command will scan Windows images and files and repair any corrupted installation.
- After the scan finishes, copy and paste the below command to run the SFC scan.
sfc /scannow
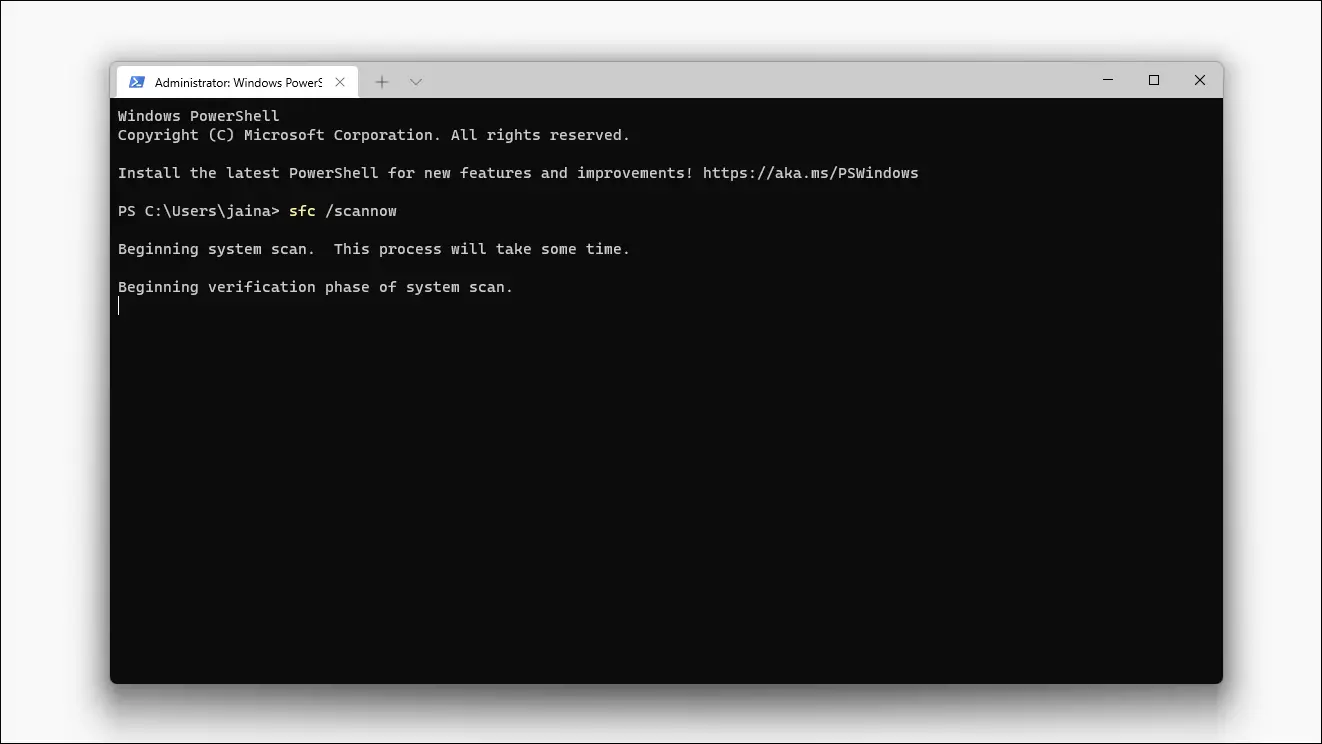
This command is also used to scan and repair system files.
- Once both commands complete their scanning process, restart your computer.
After your PC restarts, you can plug in your USB device or storage to see if it is working.
Boot your PC in Safe Mode
Safe mode starts Windows using a limited set of system files and drivers. No other downloaded app or program will be available in Safe mode. This is a great way to test if a certain program is interfering with your USB device causing it to not get identified.
- Press Windows + I together to open Settings or go to Start and click on Settings.
- Go to System.

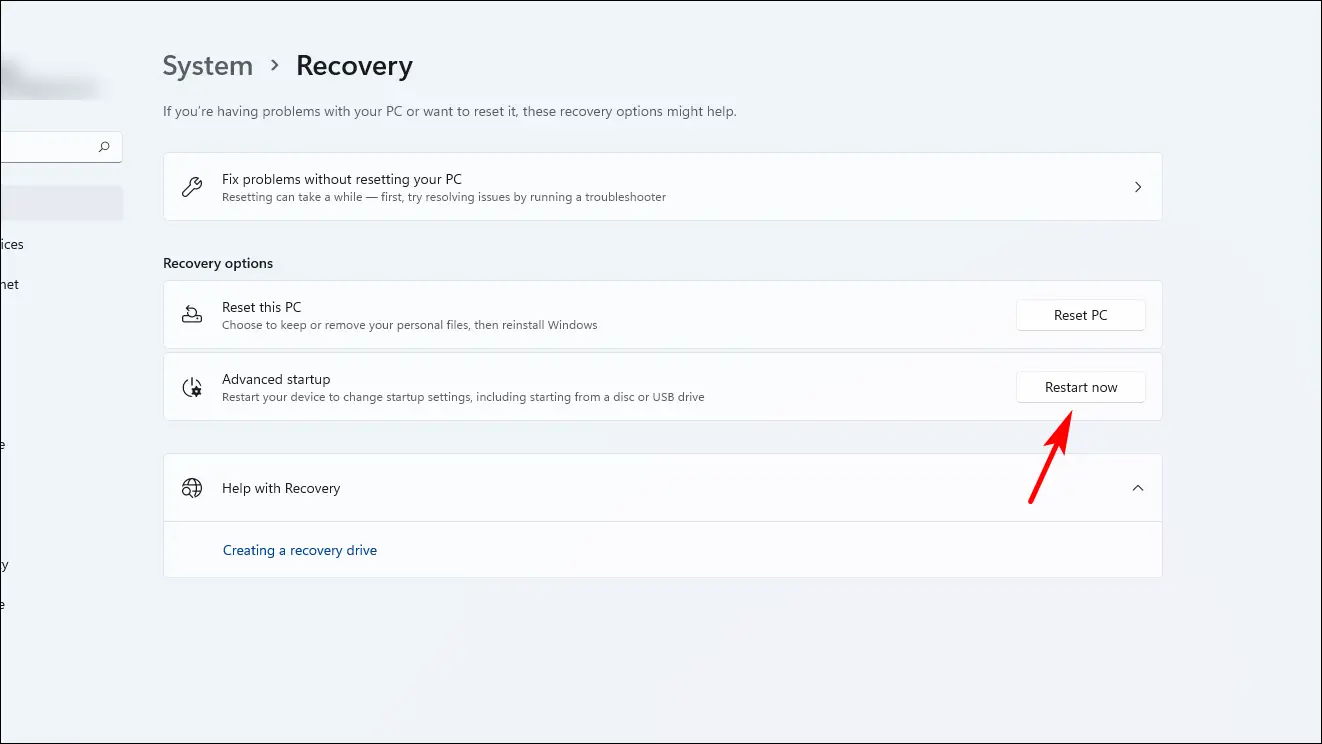
- Scroll down to Recovery and open it.
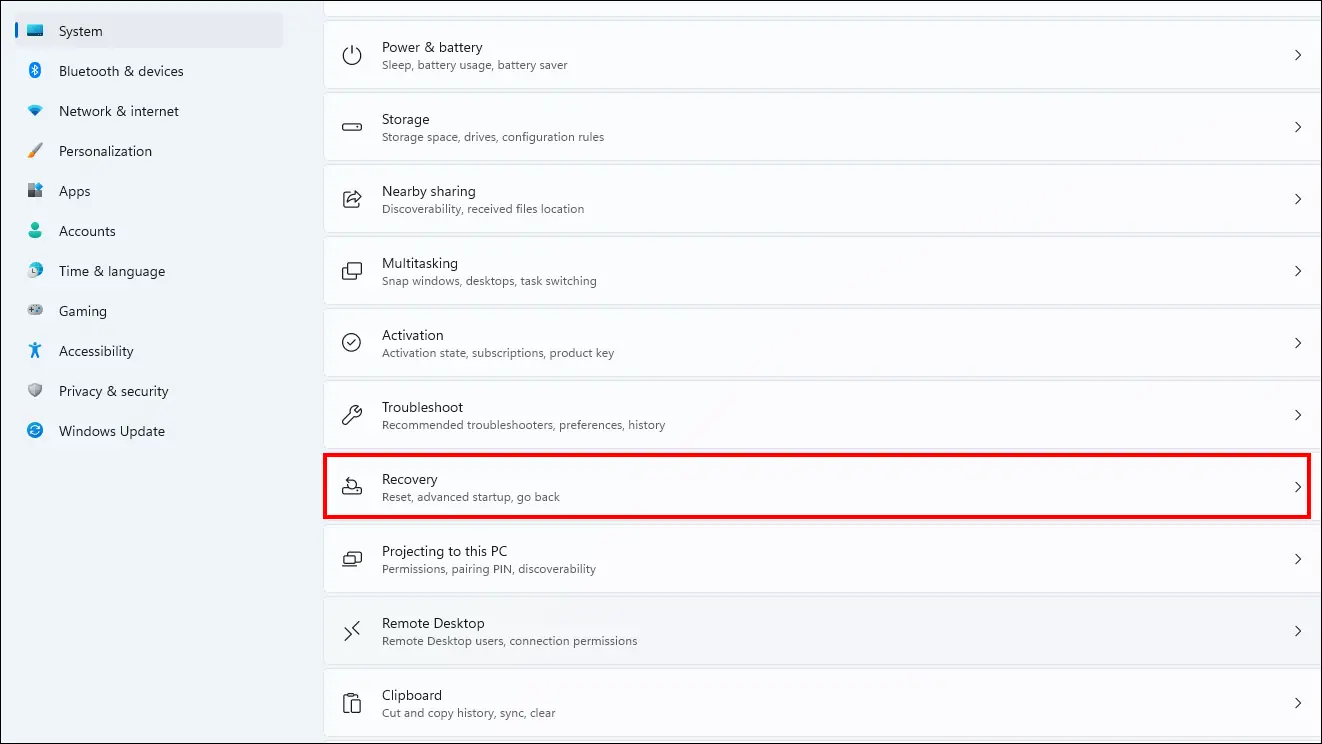
- Click on Restart Now next to the Advanced startup option to restart your computer.
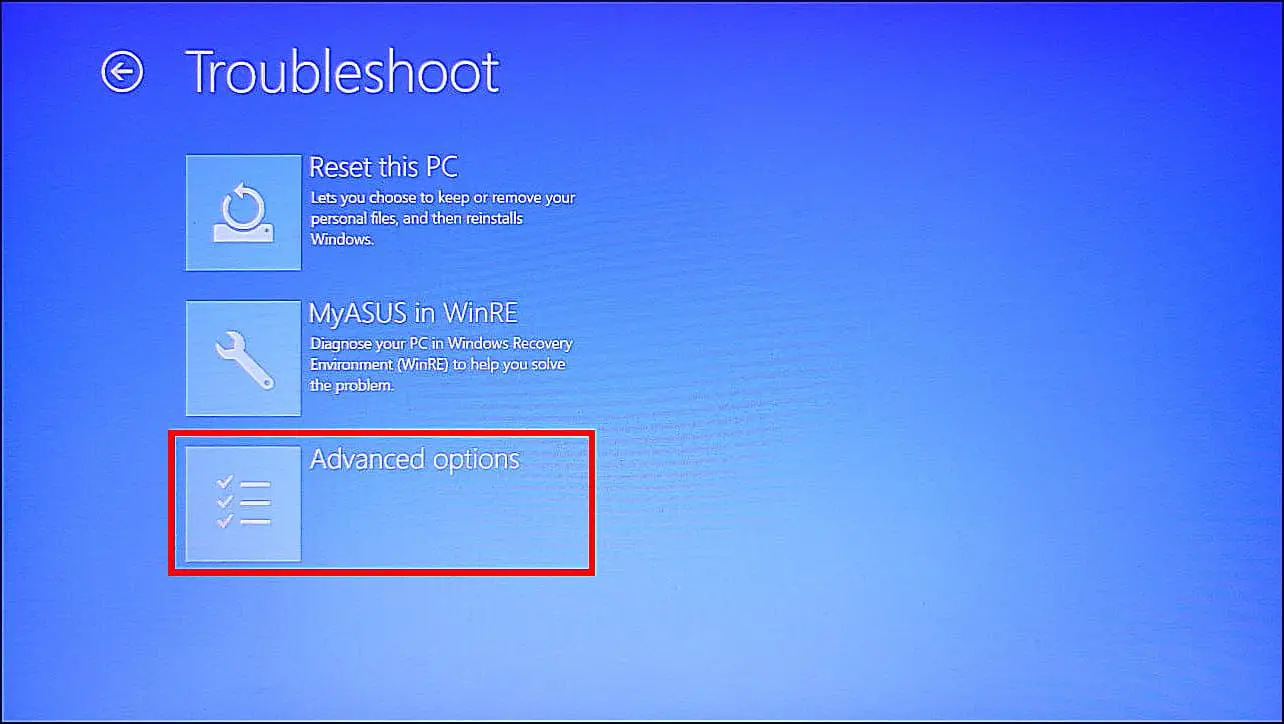
- After it restarts, you will boot into the recovery screen. Select Troubleshoot.
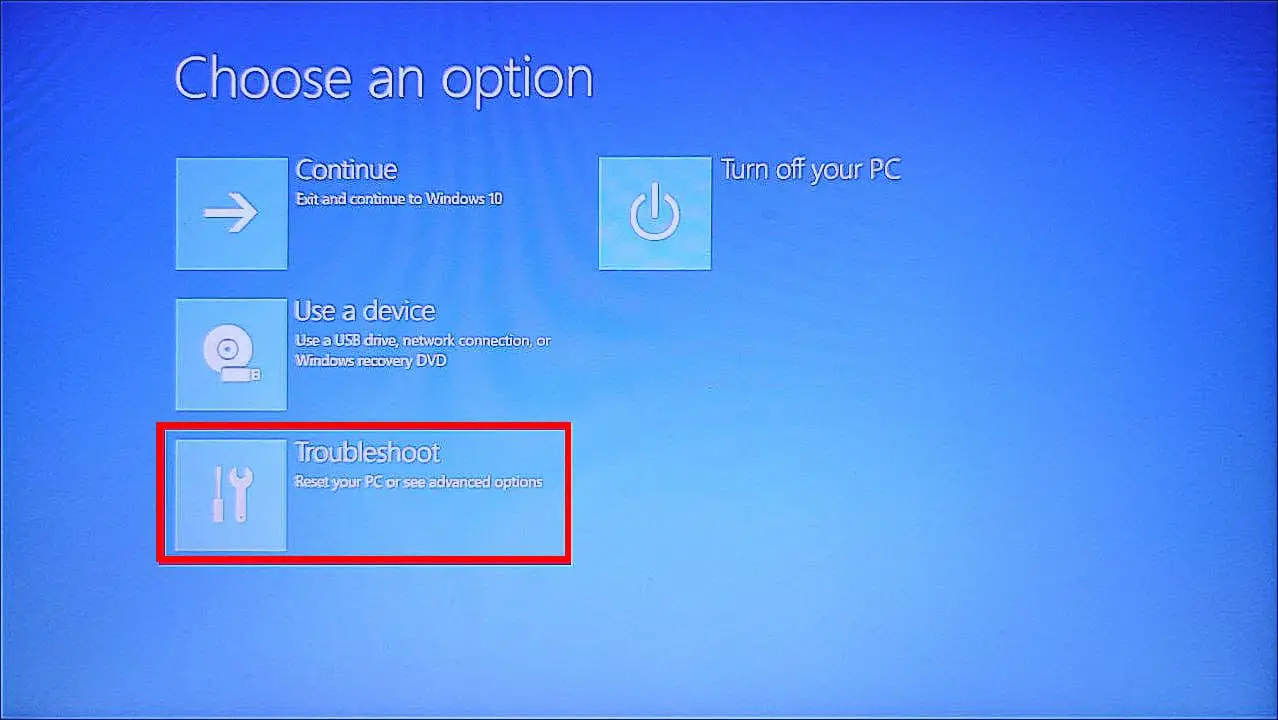
- Now go to Advanced Options.
- Select Startup Settings.
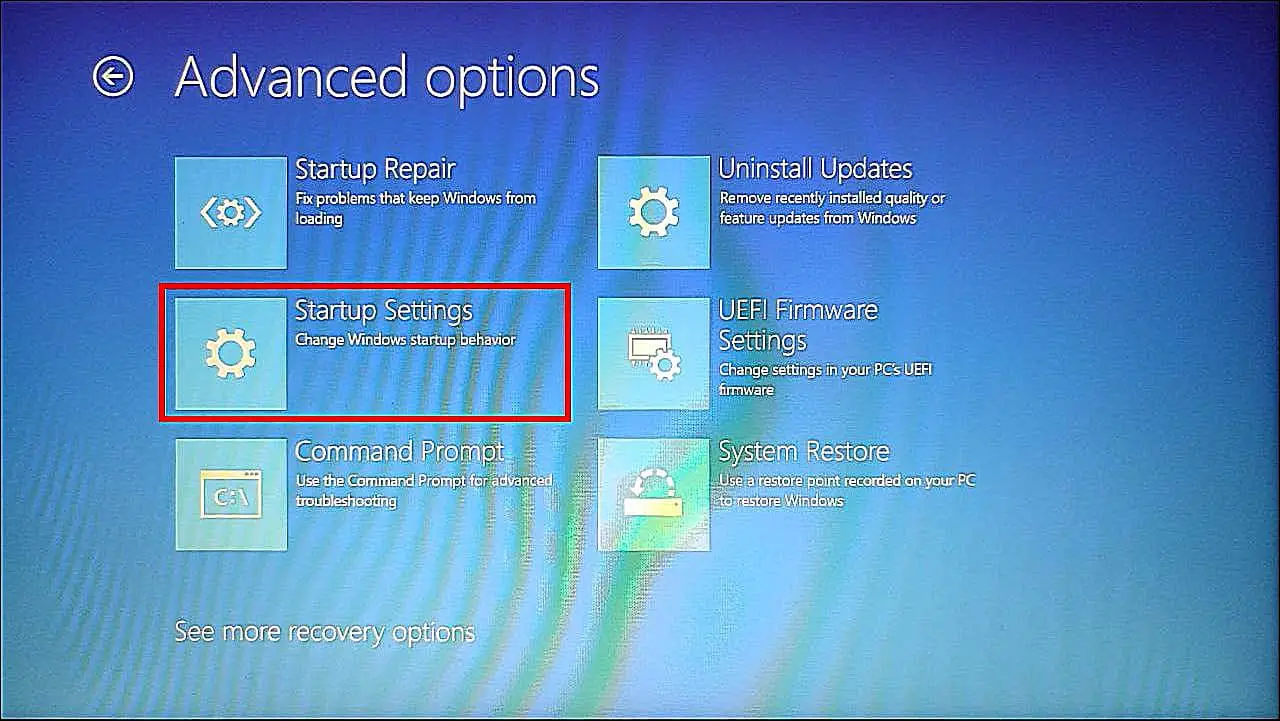
- Now click on Restart.
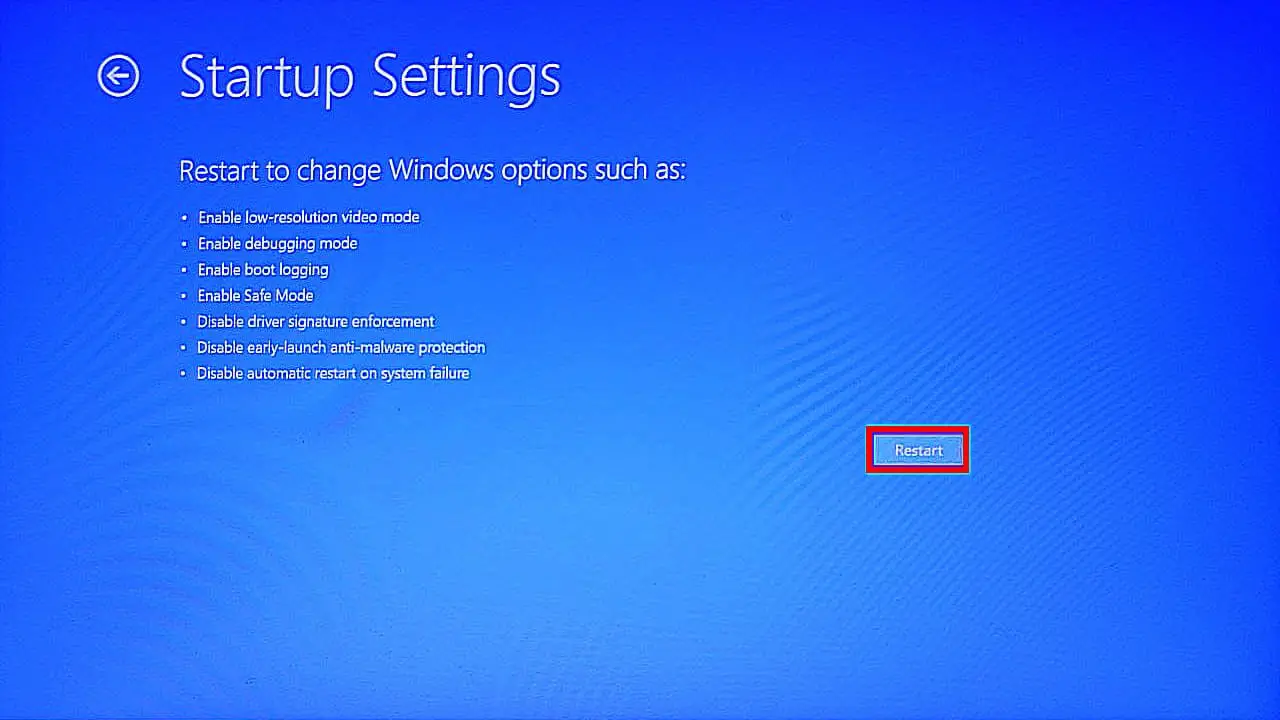
- Your computer will restart again and you should see a list of available options. Choose 4 or F4 to boot your PC in safe mode.
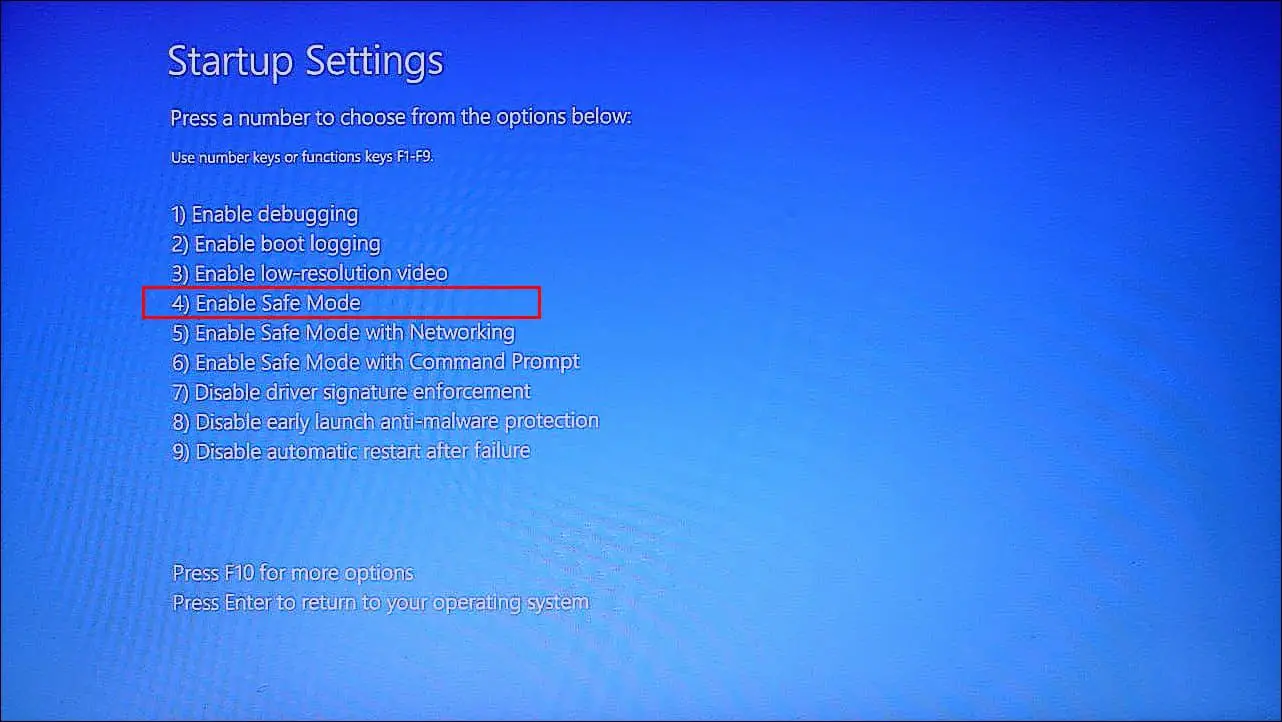
- After it boots in Safe mode, plug in your USB device and check if it is identified by your system and running as intended.
If your USB device is detected in Safe mode then you can be sure that a certain program or driver is causing the issue. You need to boot back to regular Windows 11 and uninstall suspicious or unnecessary apps and programs.
- Reboot your system again to go back to normal Windows 11.
If by any chance this method also does not work for you then it might be a hardware-related failure that you will have to get repaired.
Wrapping Up
USB devices are easy to use and connect, just plug in and they are ready to work. These were all the methods we had to share with you. Your USB device not being detected can be caused by multiple factors but these 15 troubleshooting tips should get your USB device working in no time. Do let us know if any of them worked for you and also suggest other methods if we missed any.
You can also follow us for instant tech news at Google News or for tips and tricks, smartphones & gadgets reviews, join GadgetsToUse Telegram Group, or for the latest review videos subscribe GadgetsToUse Youtube Channel.


