Quick Answer
- 5] Tap the microphone button and click on “Allow” to grant mic permissions to Google Docs when prompted (if it gives an error on Windows 10, open your Windows Privacy settings and turn on microphone access for apps under the App permissions section).
- 2] Click on the Create button “+” given on the bottom right corner of the page to create a new document.
- Go to the previous paragraph, Go to next word, Go to the previous page, and so on.
As you’d acknowledge, Docs by Google is one of the most widely used online word processing services. In fact, a lot of people tend to use it over Microsoft word for cloud backup and a bunch of extra features. That said, it also offers a dedicated voice typing feature using which you can dictate your computer through its microphone.
So, do you find it tiresome typing on the keyboard? Well, let us show you how to use voice typing feature in Google Docs.
Use voice typing feature in Google Docs
Pre-Requisites
- Firstly, make sure that you’ve connected the mic to your PC. In case of laptops, they have built-in microphones, but you need to loud and clear for the voice typing to work accurately. So either grab an external microphone or plug in your wired headset in the audio jack to use its inline-microphone.
- Once you’ve connected the microphone, check it by recording a sample on your PC’s built-in audio recording software. Microphone settings can generally be found in the Control Panel on Windows and under System Preferences on a Mac.
- Lastly, assure that you’re connected to the internet and have the Google Chrome browser installed on your computer.
Using Voice Typing
1] Open the Google Chrome browser and navigate to www.docs.google.com. Now, login with your credentials.
2] Click on the Create button “+” given on the bottom right corner of the page to create a new document. You can also open an existing document you’ve been working on through the dashboard.
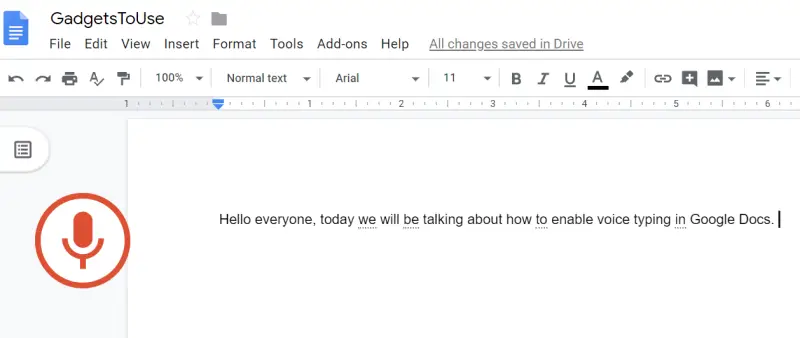
3] Click on Tools in the header and select Voice Typing from the drop-down menu. You can alternatively press Ctrl + Shift+ S in Windows or Command + Shift + S on Mac.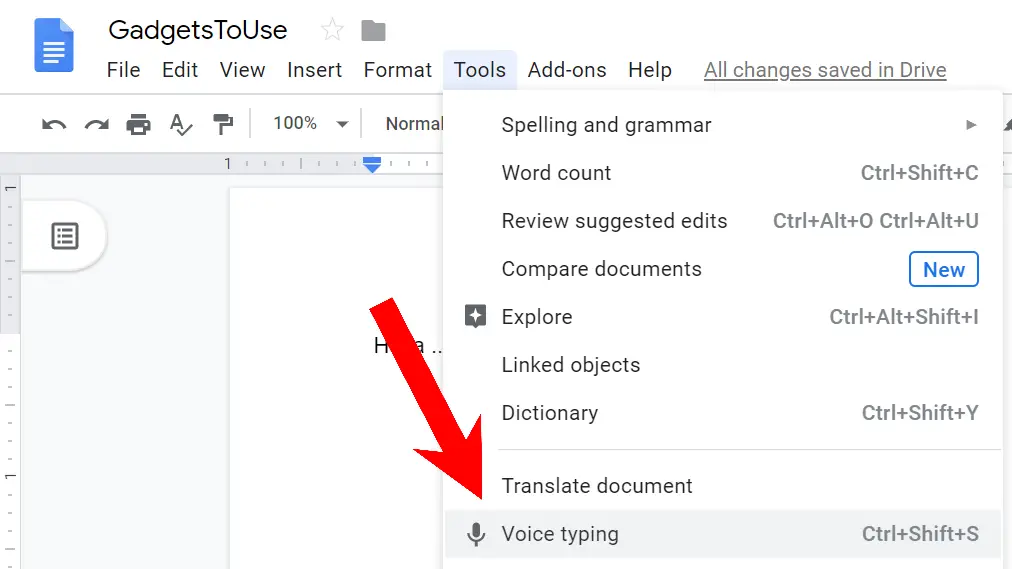
4] You’ll now see a microphone icon at the top-left corner which can be dragged and placed anywhere on the screen.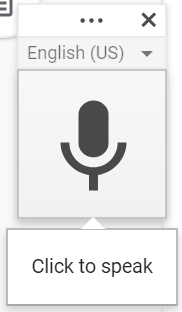
5] Tap the microphone button and click on “Allow” to grant mic permissions to Google Docs when prompted (if it gives an error on Windows 10, open your Windows Privacy settings and turn on microphone access for apps under the App permissions section).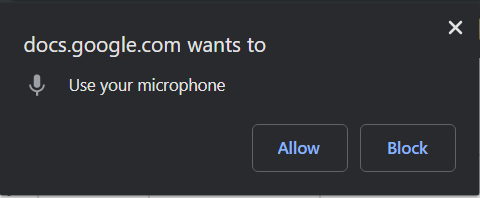
6] Now, tap the microphone button again when you’re ready to speak. Try to speak at a normal speed and volume for accurate conversion. Hit the mic button once again when you’re done.
Note: You can change the language by clicking on the downward-facing arrow on top of the mic button.
Adding Punctuations and using Voice Commands
Apart from basics, you can add punctuation marks and new lines wherever necessary by using general terms like Comma, Period, Exclamation point, Question mark, New line, New paragraph, etc. Furthermore, you can use voice commands to format the text’s font, size, and more. This includes controls like Bold, Italicize, All caps, Underline, Capitalize, Highlight, Decrease font size, Line spacing double, Align left, and more.
You can also say Go to or Move to in order to navigate through the document. For example: Go to the previous paragraph, Go to next word, Go to the previous page, and so on. And lastly, you can stop the voice typing by saying, “Stop listening” and resume in a similar manner. Note that these commands don’t require any special toggle and can be involved in the text while you dictate.
Note: As of now, the voice commands are available only for the English language. And hence, both the account and document language must be English for the feature to work.
Wrapping Up
So this was a simple guide on how to use voice typing feature in Google Docs. While it works quite efficiently, we’ll suggest not to overly rely on it and cross-check the document once you’re done dictating.
That said, Google does offer blue highlights for grammatical mistakes, making it easier for you to make necessary corrections. Let us know your experience with the same in the comments below. Moreover, feel free to reach us in case of any doubts or queries.
Also, read How to Get Dark Mode on Google Chrome on PC.
