Quick Answer
- This can be done primarily by using the Restricted Mode that helps screen out potentially offensive content that you may prefer not to see on your YouTube dashboard.
- 2] Click on your profile icon, located in the top-right corner of the screen, and scroll down to the bottom of the menu.
- 3] Click on Strict (switching to Strict will turn on Restricted Mode while clicking on Don’t Filter will disable the same).
YouTube, being globally the largest video platform, offers content from multiple genres. And hence, it becomes quite challenging to regulate what you’re recommended to on the platform. To tackle the same, Google offers a bunch of nifty tools, letting users have control over the type of content that appears on their YouTube.
This can be done primarily by using the Restricted Mode that helps screen out potentially offensive content that you may prefer not to see on your YouTube dashboard. In this article, let’s talk about what is YouTube restricted mode and how to activate it on Android, iOS, or computer.
What is YouTube Restricted Mode?
YouTube Restricted Mode is an optional setting available on the platform’s web version, as well as application. For starters, it allows for a more limited viewing experience on YouTube, by removing potentially mature content that you may not prefer or don’t want others using your device to see.
This is especially useful for parents who don’t want their children to have accidental exposure to objectional content. Besides, it is also used by administrators on computers in libraries, universities, and other public institutions for obvious reasons.
When turned on, YouTube uses its automated system to check signals like the video’s metadata, title, and the language used in the video. In conjunction, it also uses community flagging, age-restrictions, and other signals to identify and filter out inappropriate content. This mostly includes drugs and alcohol abuse, sexual activities, violent acts, profane language, and more.
How to Activate Restricted Mode on YouTube?
On Android
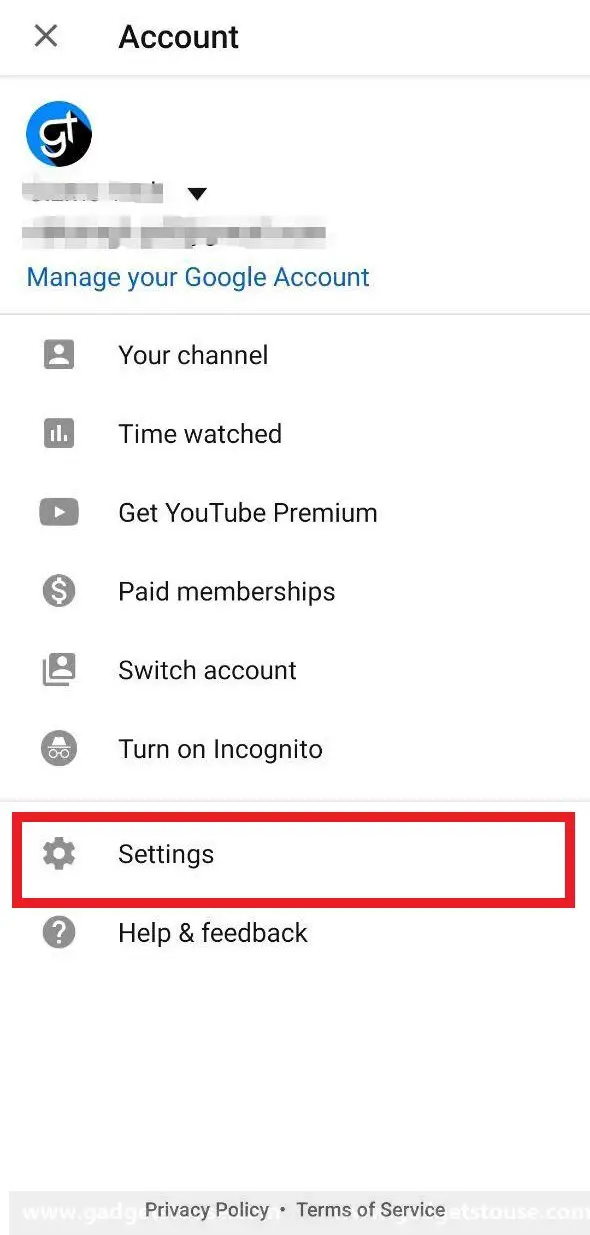
1] Open the YouTube app and sign in with your Google account if not already.
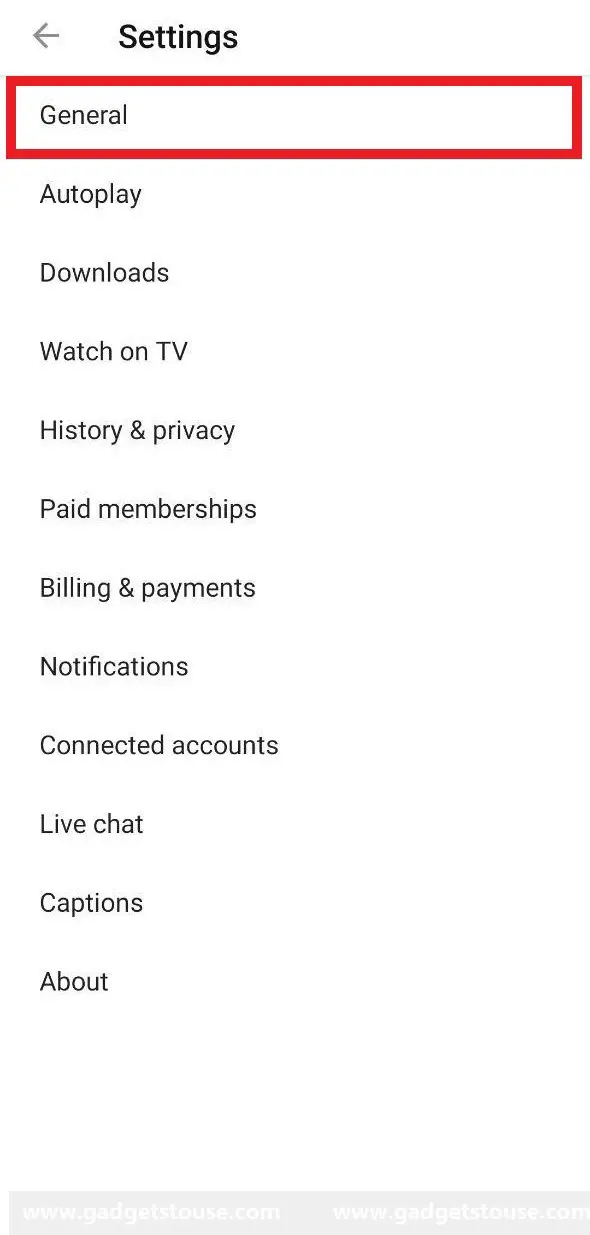
2] Now, tap on your profile picture on the top right corner and navigate to Settings.
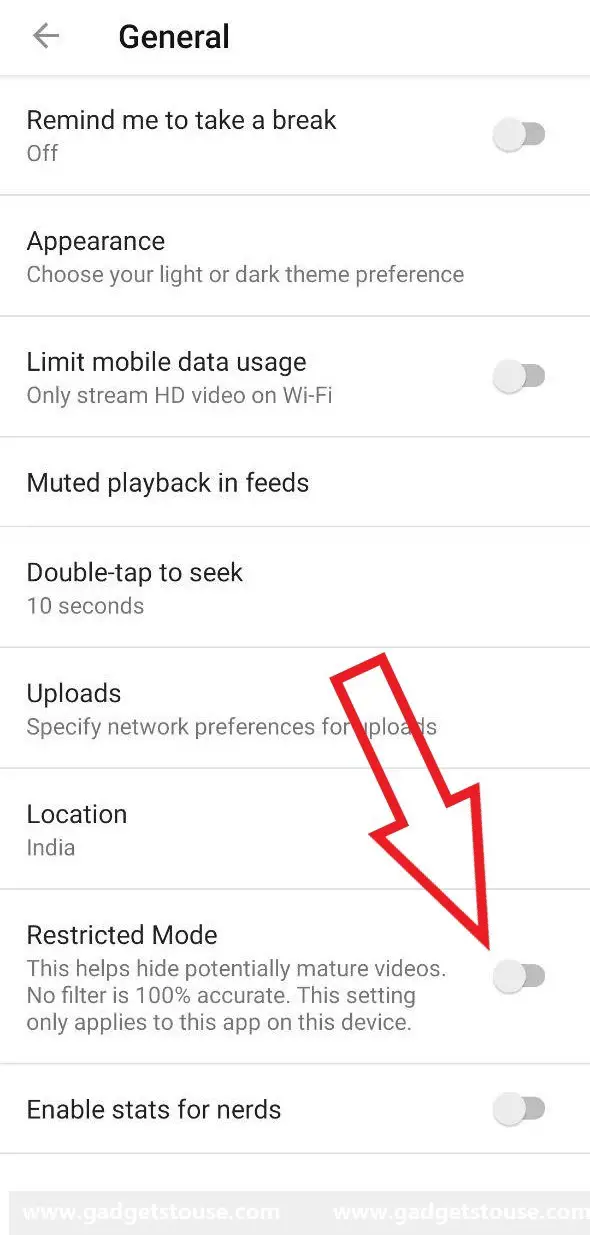
3] Head to the General section and flick the toggle next to “Restricted Mode.” The toggle will turn blue, and restrictions will be applied.
On iOS (iPhone/ iPad)
1] Just like Android, open YouTube, and tap your profile picture in the top right.
2] Tap on Settings and click Restricted Mode Filtering.
3] Click on Strict (switching to Strict will turn on Restricted Mode while clicking on Don’t Filter will disable the same).
On Computer
1] Open your browser and head to www.youtube.com.
2] Click on your profile icon, located in the top-right corner of the screen, and scroll down to the bottom of the menu.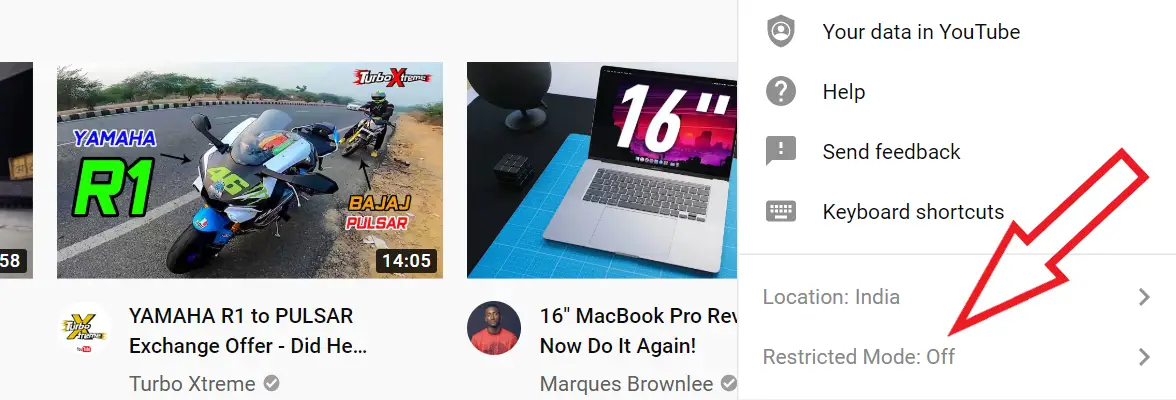
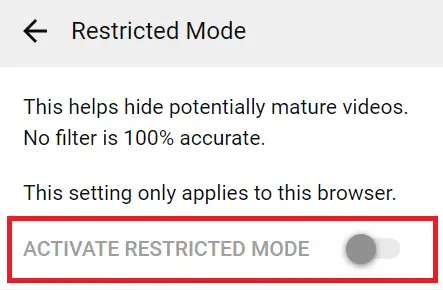
3] Tap on “Restricted Mode: Turned Off” button and enable the toggle in the next prompt. YouTube will now reload in restricted mode.
Wrapping Up
So this was all about YouTube’s restricted mode. Anyway, how useful do you find this feature for yourself? Let us know in the comments below. Also, feel free to reach us in case of any doubts or queries.
Also, read 5 YouTube Features That You Might Not Know About
