Quick Answer
- Alternatively, you can click the WiFi icon in the taskbar, select properties, and set it as a metered connection.
- By default, Windows 10 is set to automatically update in the background to provide with latest security patches and performance improvements.
- 3] Now, scroll down and set the date till you want to stop automatic Windows updates under the ‘Pause Updates’ section.
By default, Windows 10 is set to automatically update in the background to provide with latest security patches and performance improvements. However, not many people want this feature. Therefore, we are here with a quick guide on how to stop Windows from updating automatically.
Stop Automatic Updates on Windows 10
Now, there are certain issues with Windows automatic updates. For starters, it not only wastes your time with forced reboots but also eats significant network bandwidth. The latter could be a problem for people running limited data plans.
Moreover, we’ve seen automatic updates causing issues by breaking some or the other feature. Anyway, while there’s no direct button to disable Windows automatic updates, there are certain workarounds, given below.
1. Set as Metered Connection
If you’re using WiFi for the internet, you can set it as a metered connection on your PC. Doing so will stop Windows from automatically downloading updates using the wireless network.
1] On your Windows 10 machine, head to Settings > Network & Internet.
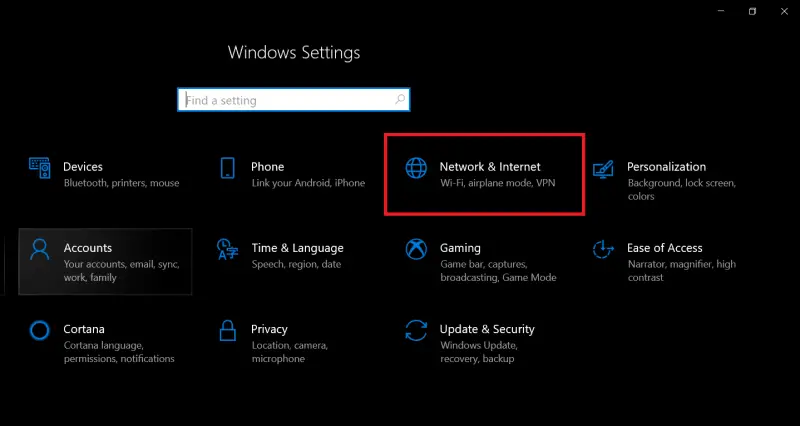
2] Here, select Change Connection Properties for the connected WiFi network.
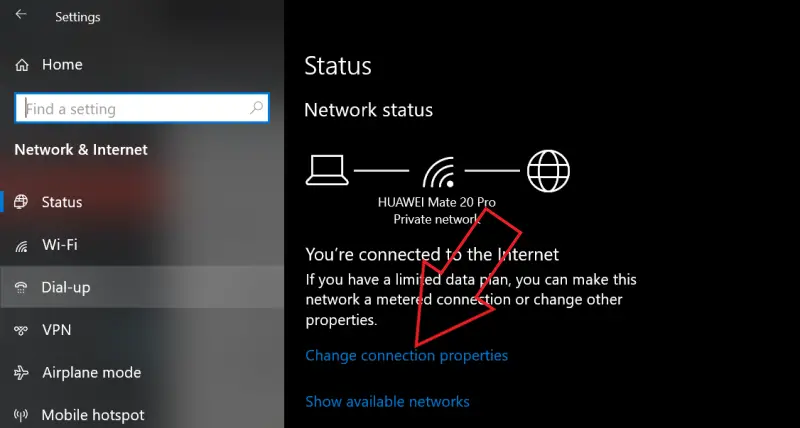
3] Now, scroll down and enable Set as Metered Connection.

Alternatively, you can click the WiFi icon in the taskbar, select properties, and set it as a metered connection.
2. Pause Windows Updates in Settings
The other option is to pause Windows automatic updates to a specific date, as follows.
1] Go to Settings > Update & Security.
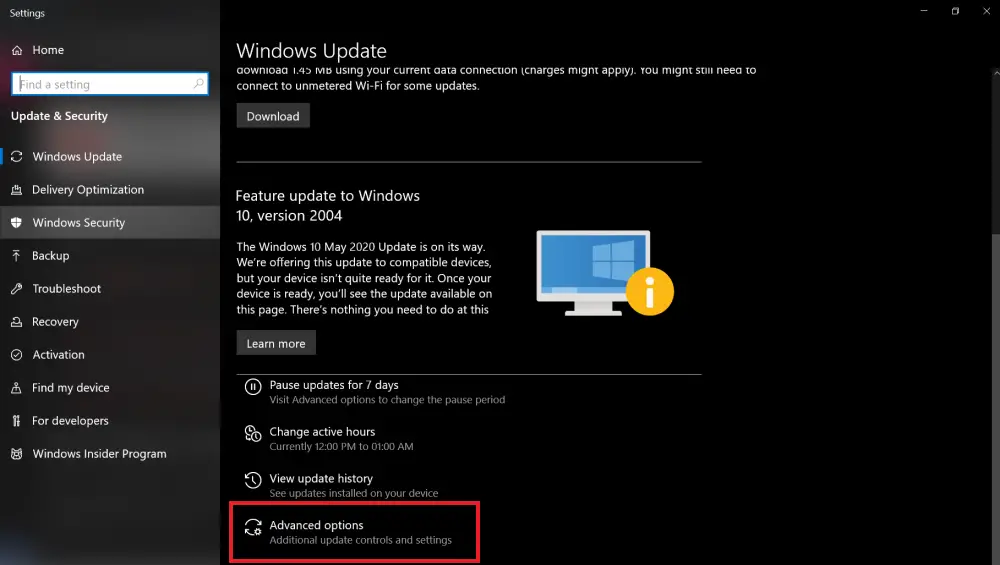
2] Here, click on Advanced Options.
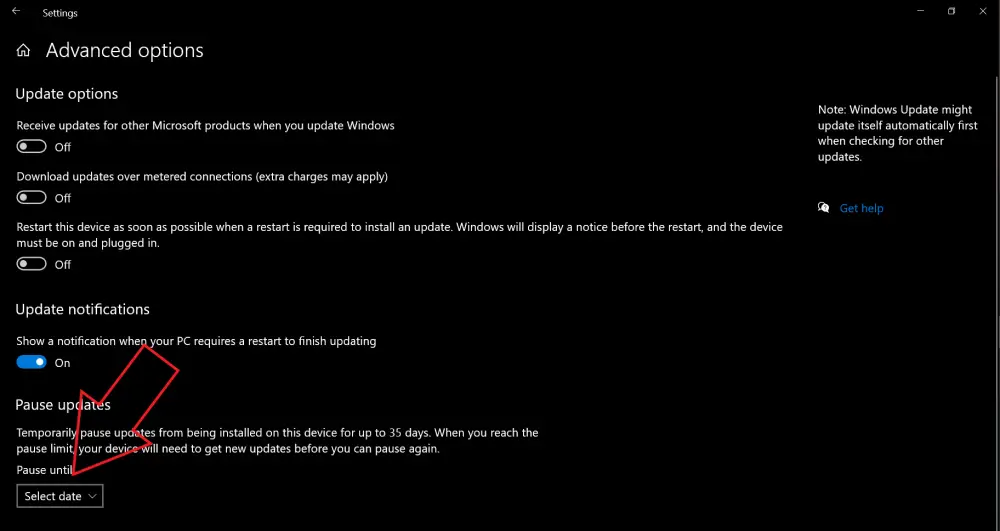
3] Now, scroll down and set the date till you want to stop automatic Windows updates under the ‘Pause Updates’ section.
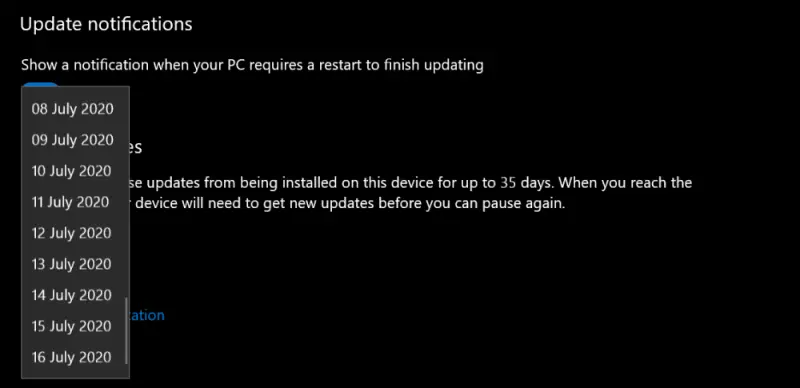
Windows will no longer try downloading updates in the background, whether you’re on WiFi or connected to Ethernet. Anyway, if you change your mind, you can always head back to the Update settings and click ‘Resume Updates.’
3. Disable Windows Update Service
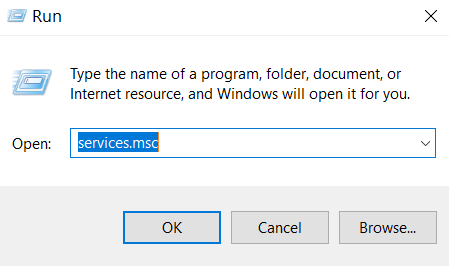
1] Press the Windows key + R simultaneously to toggle Run box.
2] Here, type “services.msc” and press Enter.
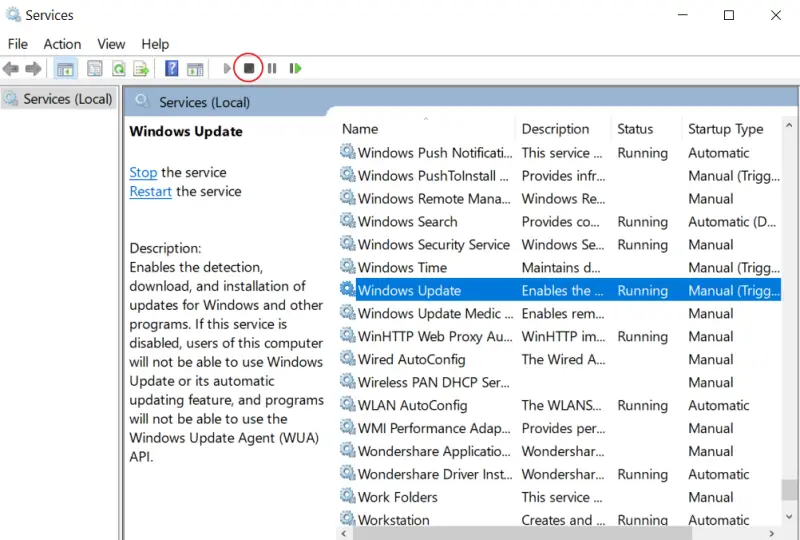
3] On the following screen, scroll down and select Windows Update. Click on the ‘Stop’ button on the top to halt the service.
4] After that, double-click on Windows Update and change “Startup type” to Disabled.
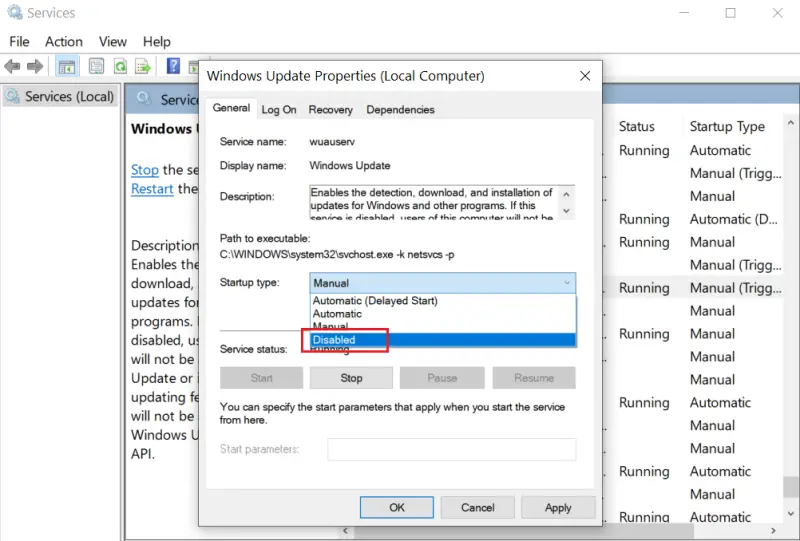
5] Click Apply, and then OK to save the settings.
This method will disable the Windows update service on your computer. You’ll need to revert the steps to be able to enjoy updates again on your computer.
Wrapping Up
So these were some quick methods to stop Windows from updating automatically on your computer. The metered connection method is the easiest of all and works the best for me. Anyway, which one did you use on your machine? Let us know in the comments below. Stay tuned for more such articles.
Also, read- How to Encrypt Files & Folders in Windows 10