Quick Answer
- If you have an iPhone X or a newer model with a Face ID, you can capture a screenshot using the steps below.
- If you have an iPhone SE 2020 or other older iPhones with a Touch ID, you can capture a screenshot using the steps below.
- All you need to do is say, “Hey Siri, take a screenshot,” and Siri will automatically save a snapshot of what’s on your screen.
Screenshots are a great way to capture a picture of anything on your screen. They are useful when you want to save an app screen or show something to others. Like Android, there are multiple ways to take a screenshot on the iPhone. So if you’re on iOS, here are the top three ways to take screenshots on your iPhone. Meanwhile, you can learn the 8 Ways to take a Screenshot on Any iPad.
3 Ways to Take Screenshot on iPhone
1. Using Hardware Keys
The most common way to take screenshots on the iPhone is using the hardware keys. However, the method slightly differs between iPhones with Face ID and iPhones with Touch ID, as mentioned below.
On iPhone X and Later
If you have an iPhone X or a newer model with a Face ID, you can capture a screenshot using the steps below.
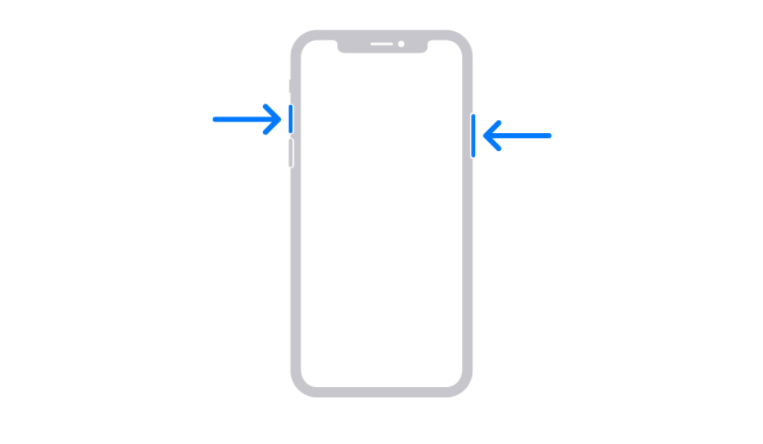
- Press and hold the Power button to the right side of your iPhone.
- Immediately tap the Volume Up button on the left and release all keys.
- To do it quickly, simultaneously press the Power + Volume Up button on your iPhone.
As you take a screenshot, a thumbnail of it will appear in the bottom-left corner of your phone’s screen. You can tap the thumbnail to edit the screenshot by adding drawings or text with markup. You can also press and hold the thumbnail to share it or swipe to dismiss.
On iPhone SE 2020 and Older iPhones
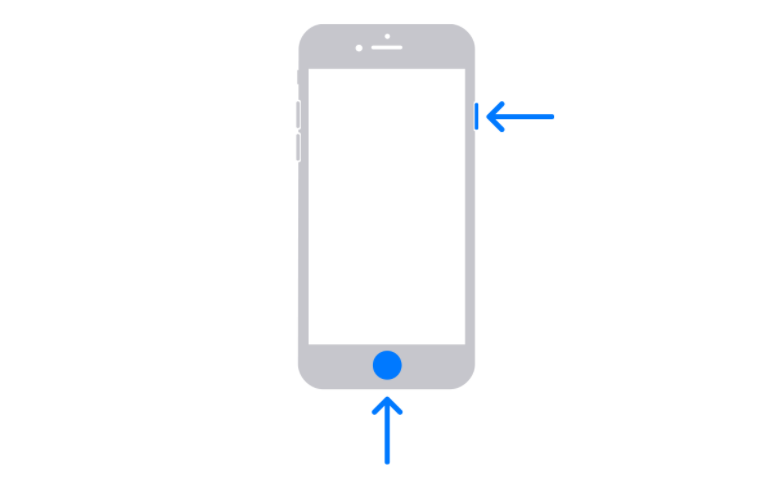
If you have an iPhone SE 2020 or other older iPhones with a Touch ID, you can capture a screenshot using the steps below.
- Press and hold the Power button on your iPhone.
- Immediately press the Touch ID to capture the screenshot and release all keys.
- To do it quickly, press the Power + Touch ID combination at the same time.
Once the screenshot is captured, its thumbnail will appear in the lower-left corner of the screen. You can tap the thumbnail to edit the screenshot or tap and hold it to share. To dismiss, swipe it to the left.
2. Using Assistive Touch
Assistive Touch is a floating ball that can be enabled from iPhone settings. You can use it to perform actions and gestures and even take screenshots.
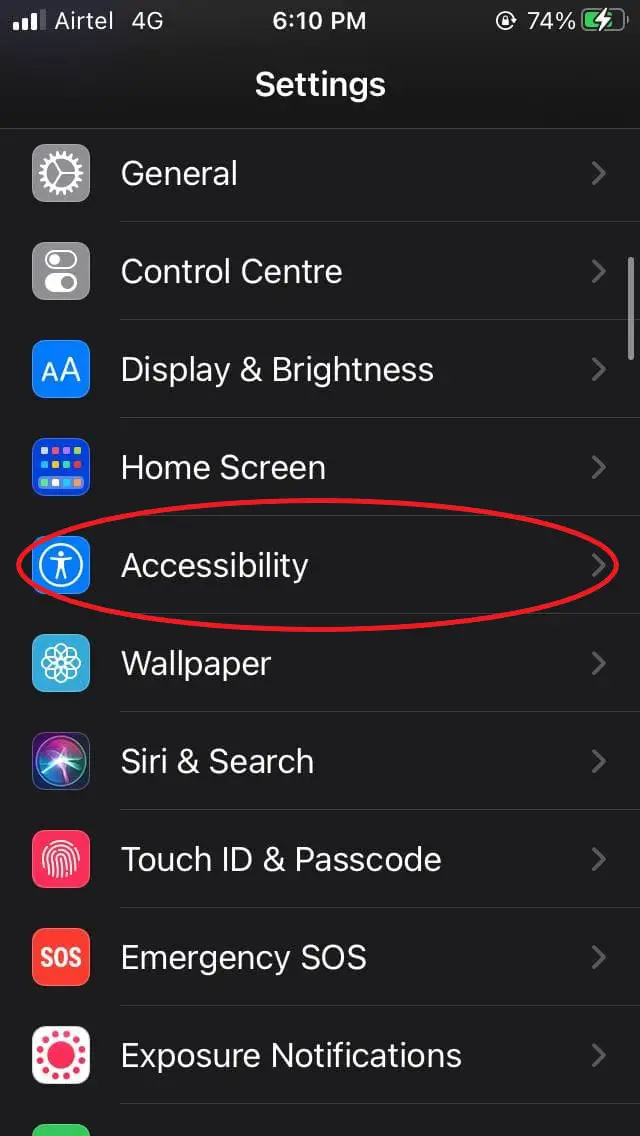
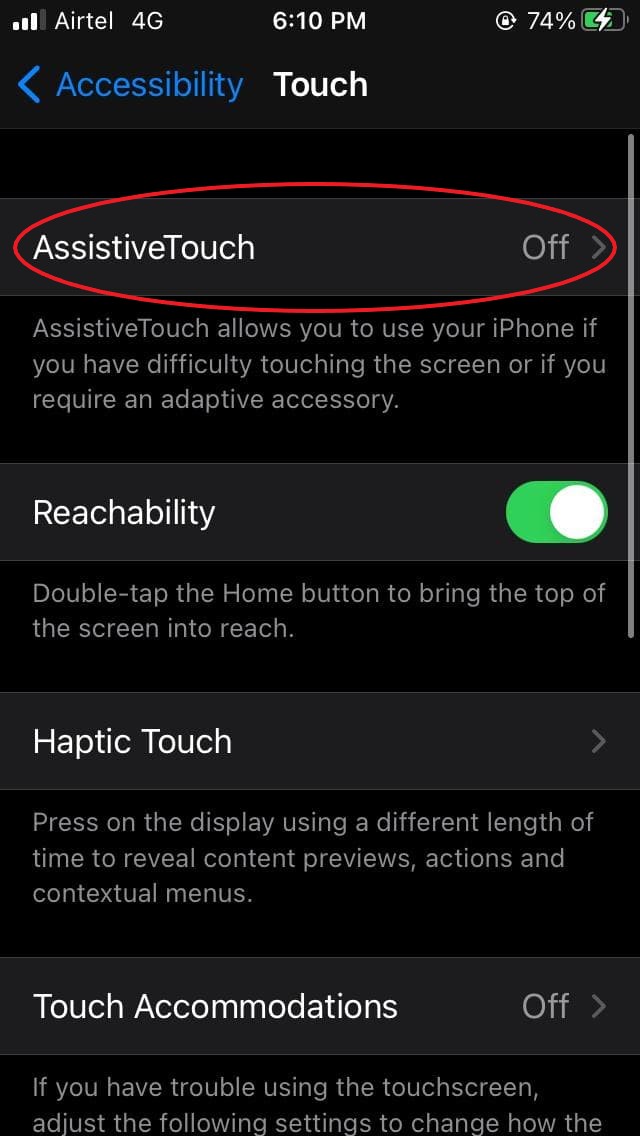
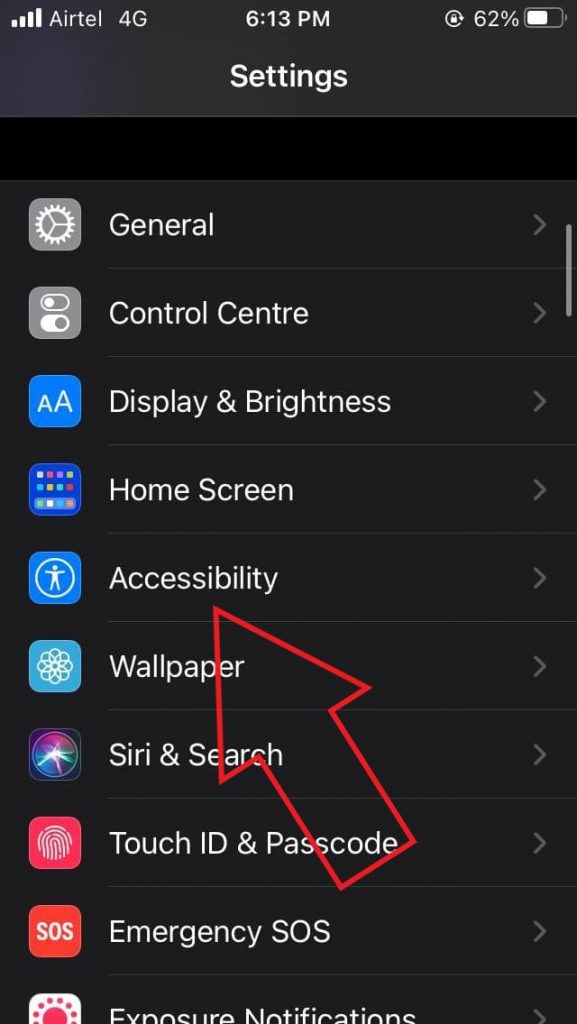
- Open Settings on your iPhone.
- Scroll down and click on Accessibility.
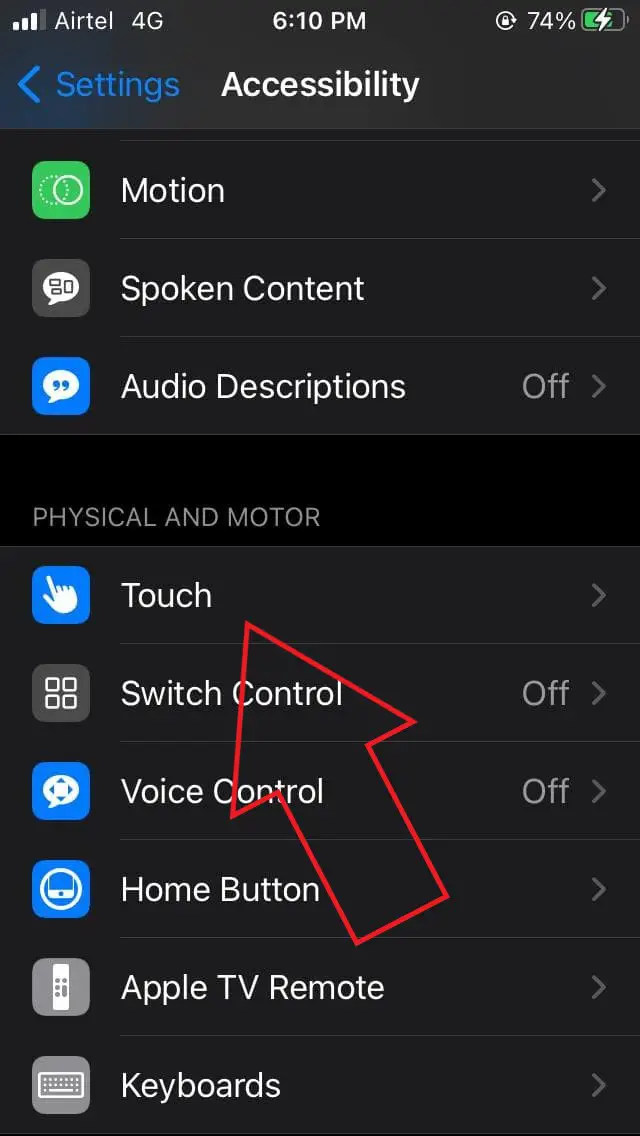
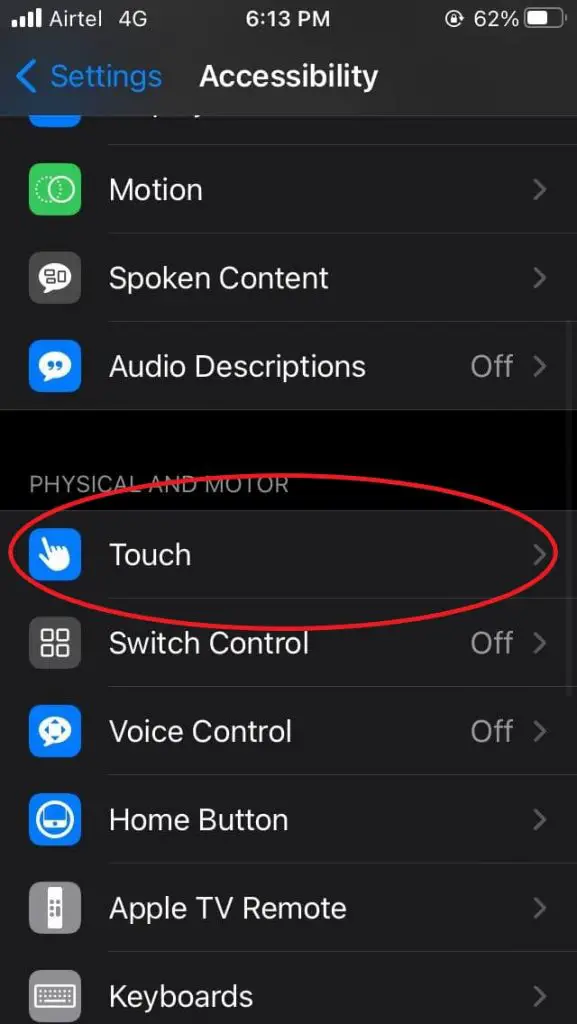
- Then click on Touch under Physical and Motor.
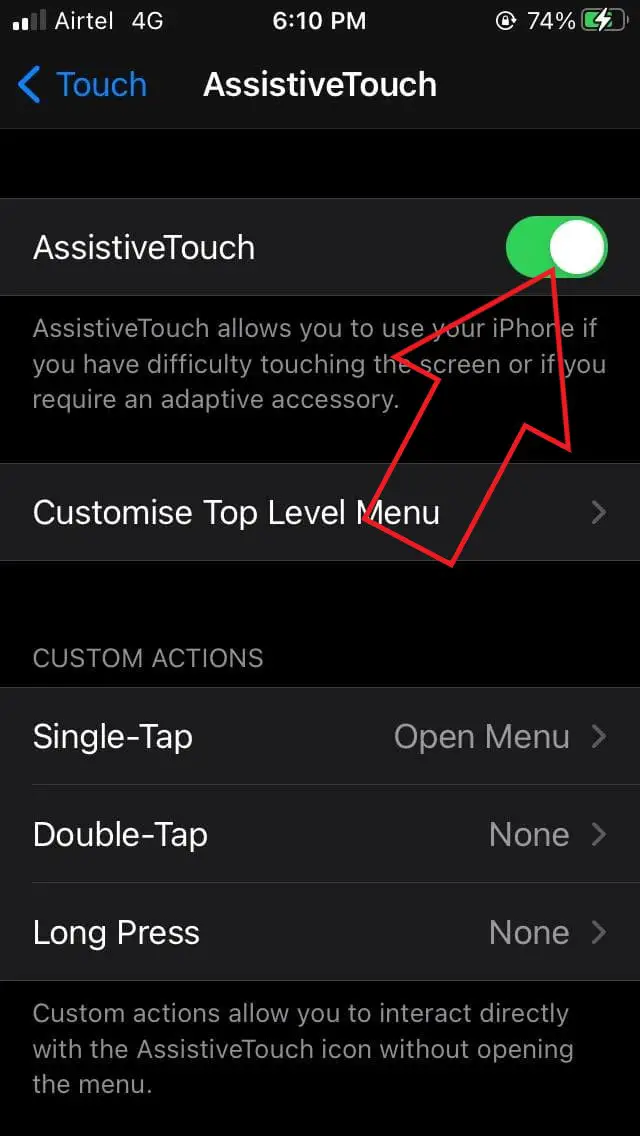
- Tap Assistive Touch and enable the toggle for Assistive Touch.
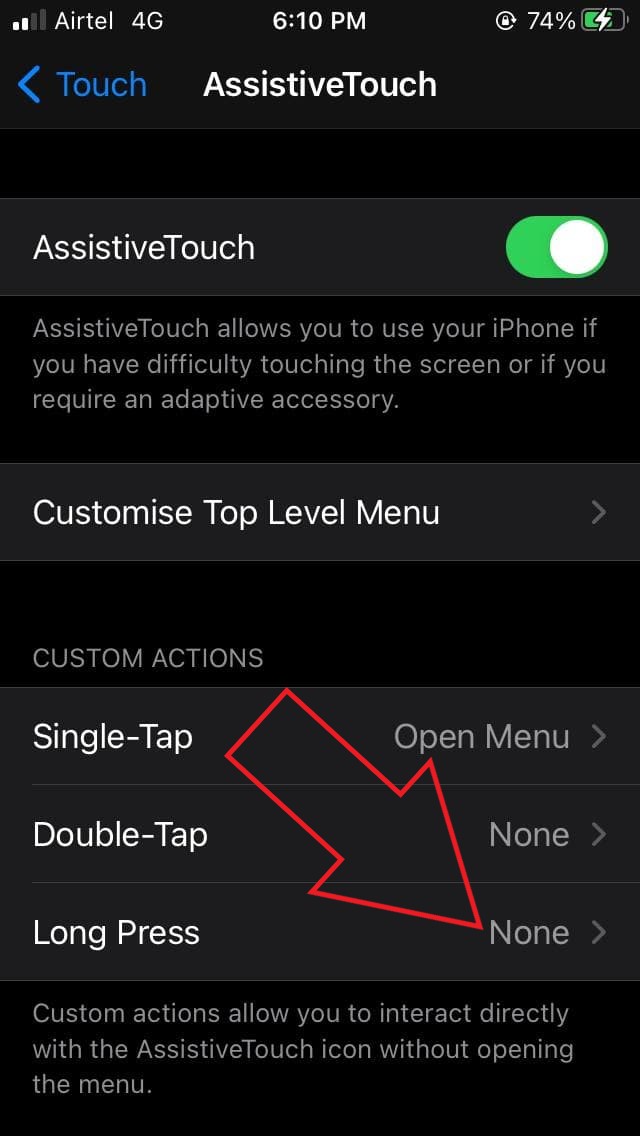
- Now, click on Long Press under Custom Actions.
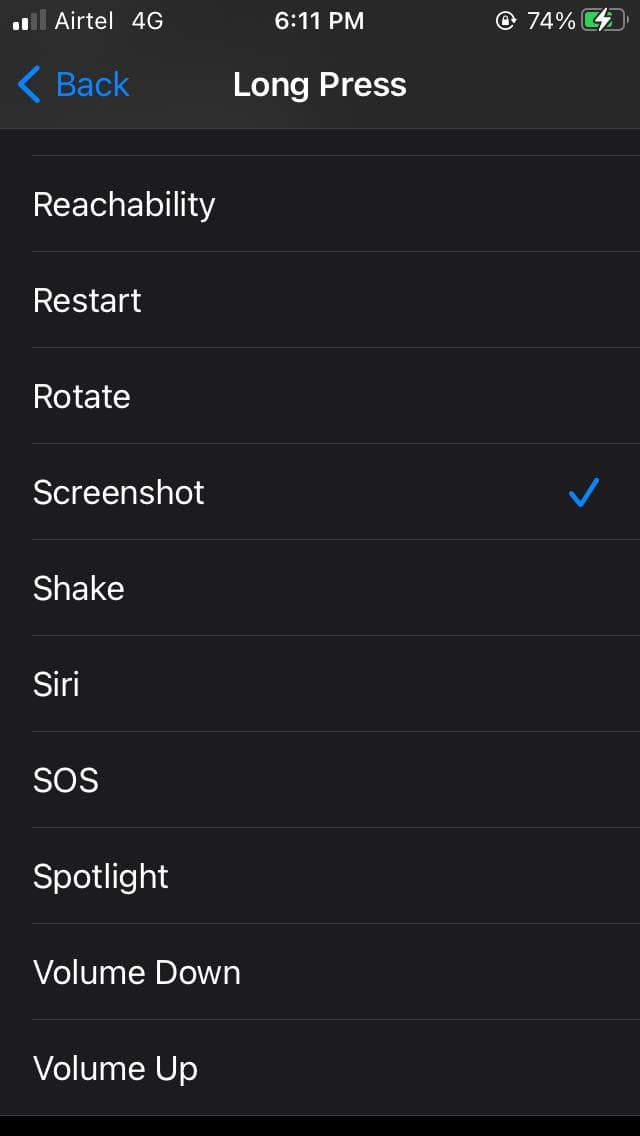
- Set the action to Screenshot.
You’ll now get a floating assistive touch ball on your screen that can be dragged around anywhere. To take screenshots, long-press the ball, and you’re good to go. You can also set other gestures like Double-Tap.
3. Using Back Tap Feature
The other option to take screenshots on the iPhone is using the Back Tap feature. Back Tap feature has been introduced with iOS 14, so your phone must be updated to the latest version.
To use Back Tap to take screenshots on the iPhone:

- Open Settings on your iPhone.
- Scroll down and click on Accessibility > Touch.
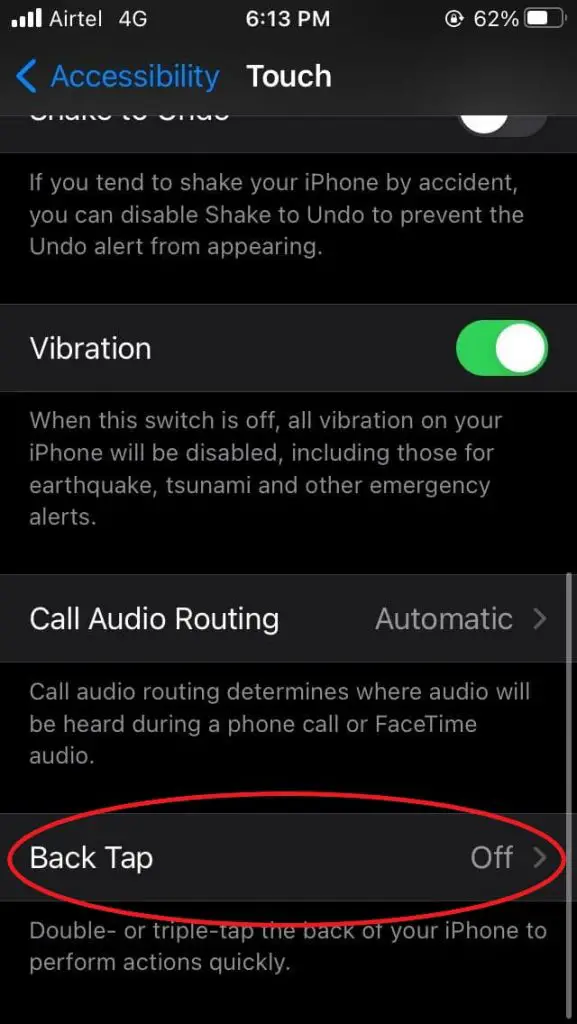
- Click on Back Tap at the bottom.
- Tap Double-Tap or Triple-Tap and select Screenshot.
That’s it. You can now double-tap or triple-tap the back of your iPhone (based on what you’ve set) to take screenshots instantly.
The Back Tap feature is available only on iPhone 8 and later models. This includes iPhone 8, iPhone 8 Plus, iPhone SE 2020, iPhone X, iPhone XS, iPhone XS Max, iPhone XR, iPhone 11-series, and iPhone 12-series.
Bonus Tip- Take Hands-Free Screenshot Using Siri
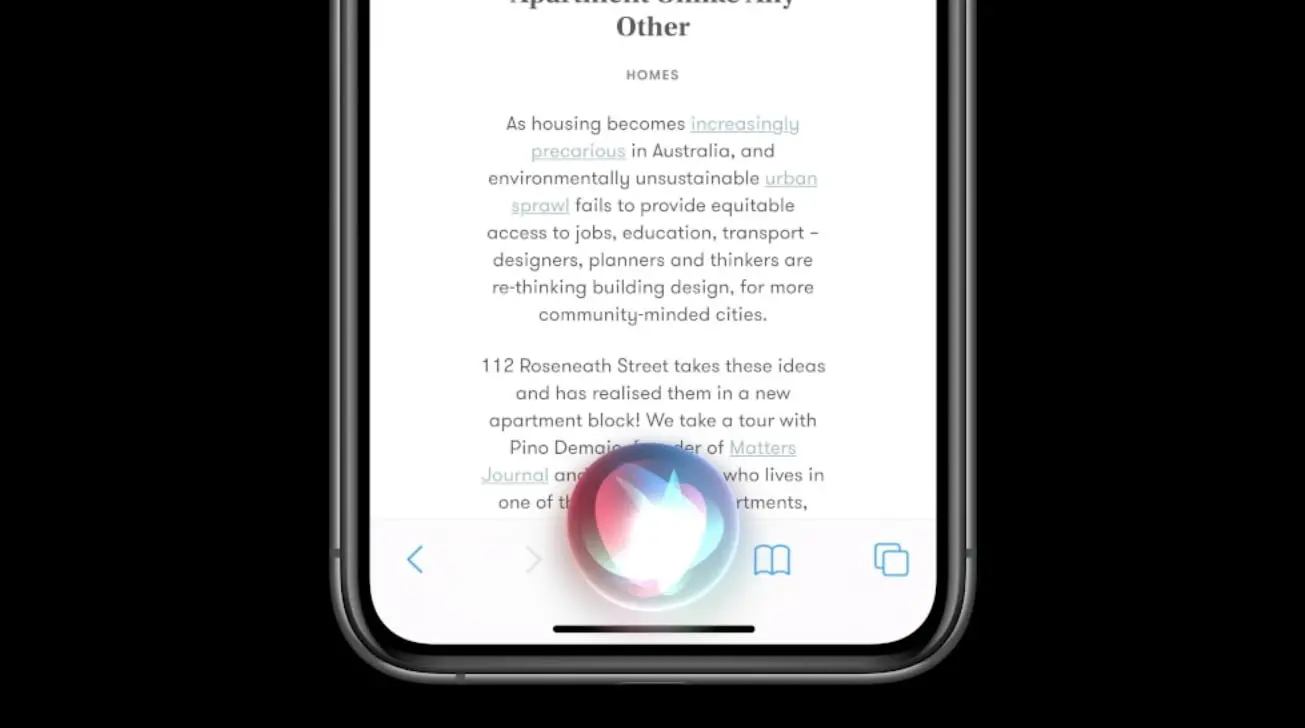
Feeling too lazy to take a screenshot? Or can’t touch your iPhone. All you need to do is say, “Hey Siri, take a screenshot,” and Siri will automatically save a snapshot of what’s on your screen. This will also work if you’re facing issues with the display or keys on your iPhone.
By the way, you can also control your iPhone using voice. Here’s how to do it.
Wrapping Up
These were three very easy and quick ways to take screenshots on the iPhone. Out of all, my favorite is the back tap feature for its convenience. Anyways, which one do you like the most? Do let me know in the comments below. Stay tuned for more tips and tricks on iOS.
Also, read- How to Get Full-Screen Caller ID for iPhone Calls on iOS 14