

Quick Answer
- Time Lapse Video is a free app on the Google Play Store to convert regular videos into time-lapse videos.
- This video editor comes with an option to increase the speed of the video, which you can use to your advantage.
- At any point, if you want to revert the video to its original speed, you can do that using the same process.
Timelapse videos look cool; with them, you can show your journey or a tutorial quickly. Most smartphones have this mode already built into the camera app. If not, you can install a third-party app to shoot videos in timelapse mode. But do you know you can convert your existing videos to time-lapse? Here, in this read, we will discuss how to convert your videos to a Timelapse Video. You can also learn to convert your videos to slow motion on any device.
How to Ways to Convert Regular Videos to Time Lapse Videos?
If you own a few videos with a very long duration or forget to put your camera in timelapse mode. You can convert those regular videos to time-lapse videos using these methods. We listed methods for every device and OS so that you can use this feature anytime on any device.
Method 1: Convert Videos to Time Lapse on Android
Time Lapse Video is a free app on the Google Play Store to convert regular videos into time-lapse videos. It lets you speed up the videos up to four times. This app also lets you shoot new time-lapse videos on your smartphone.
1. Download and install the Time-Lapse Video app from the Google Play Store.
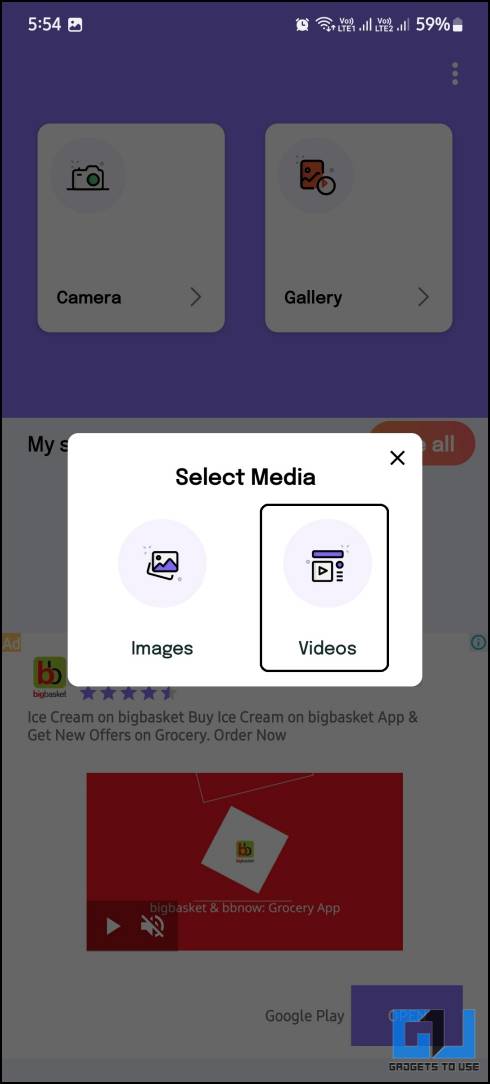
2. Open the App and select the Gallery option on the main screen.

3. Select the Videos option from the popup to select the videos from the gallery.
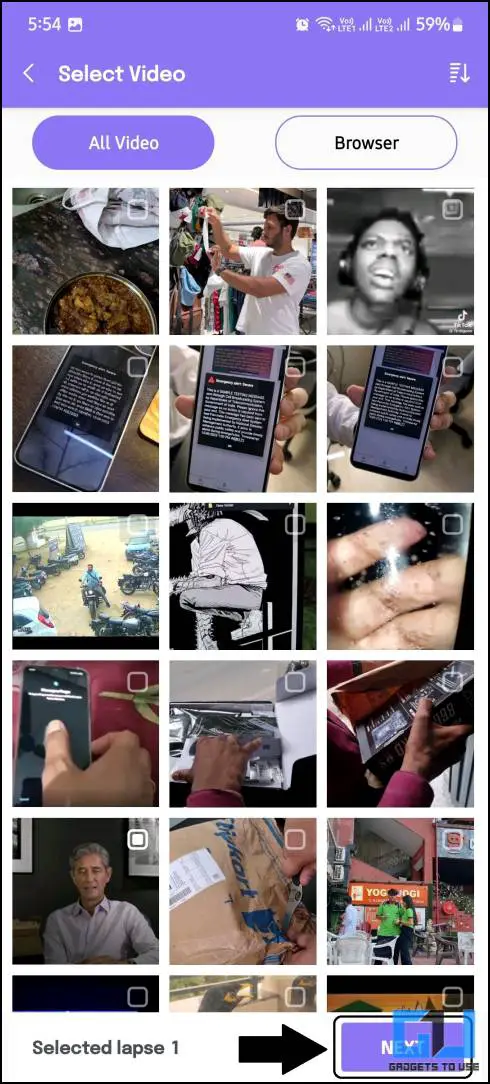
4. Select the video that you want to convert to time-lapse.
5. Select the time-lapse speed and tap the Create button in the top right.
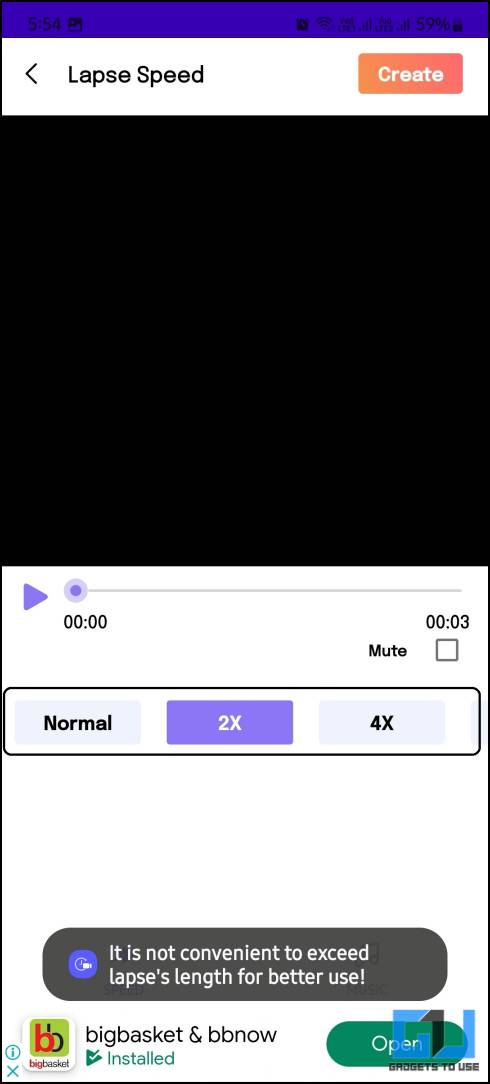
It will convert the video and save it in the phone’s gallery, and you can preview it from there. You can also use this app to make time-lapse videos using multiple image files.
Method 2: Convert Videos to Time Lapse On Samsung Galaxy Phones
The Gallery app on Samsung smartphones has a quick video editor. This video editor comes with an option to increase the speed of the video, which you can use to your advantage.
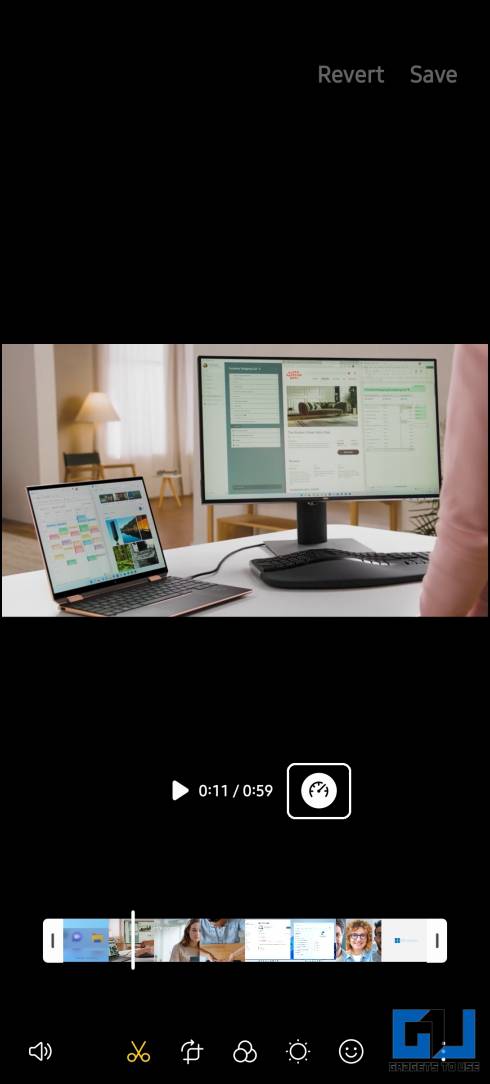
1. Open the Gallery app and open the video you want to convert.
2. Tap the Edit button to enter editing mode.

3. Tap the clock icon to access the speed settings.
4. Select 2x from the options to speed up the video.
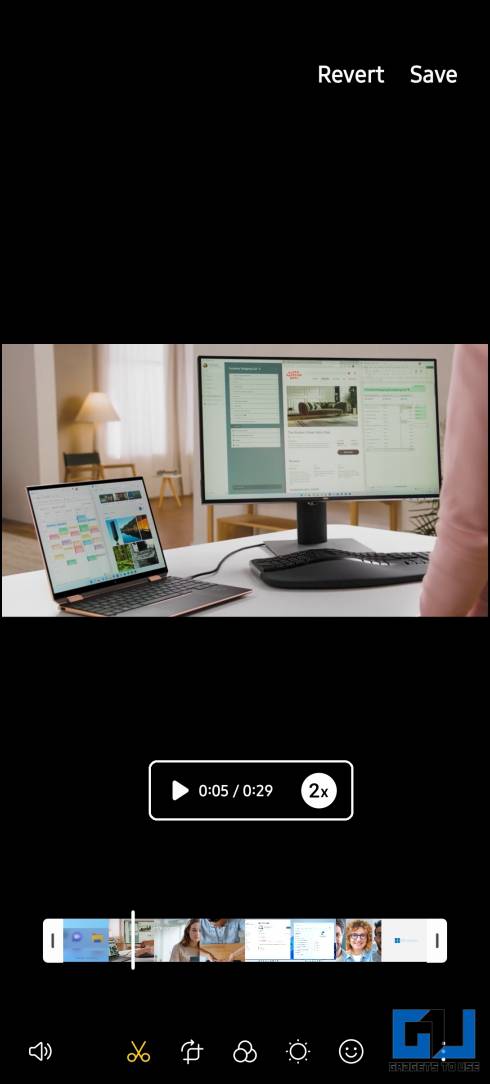
5. Tap Save in the top right corner to save the video.
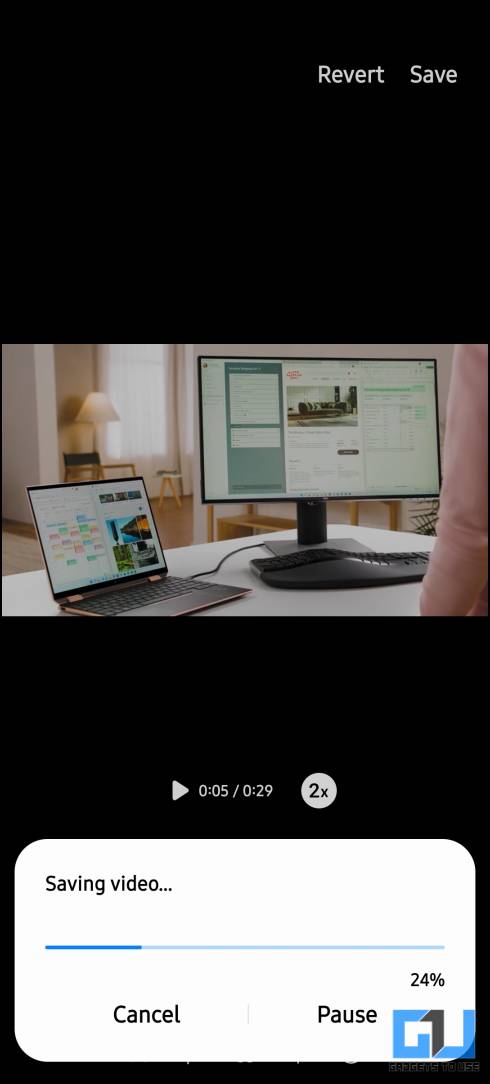
The video will be saved in the gallery, which you can use in any of your projects. At any point, if you want to revert the video to its original speed, you can do that using the same process.
Method 3: Convert Video to Time Lapse on iOS
Apple iPhones have a built-in video editor called iMovie to edit videos with a few basic features. You can use this tool to speed up your regular videos to convert them to time-lapse videos.
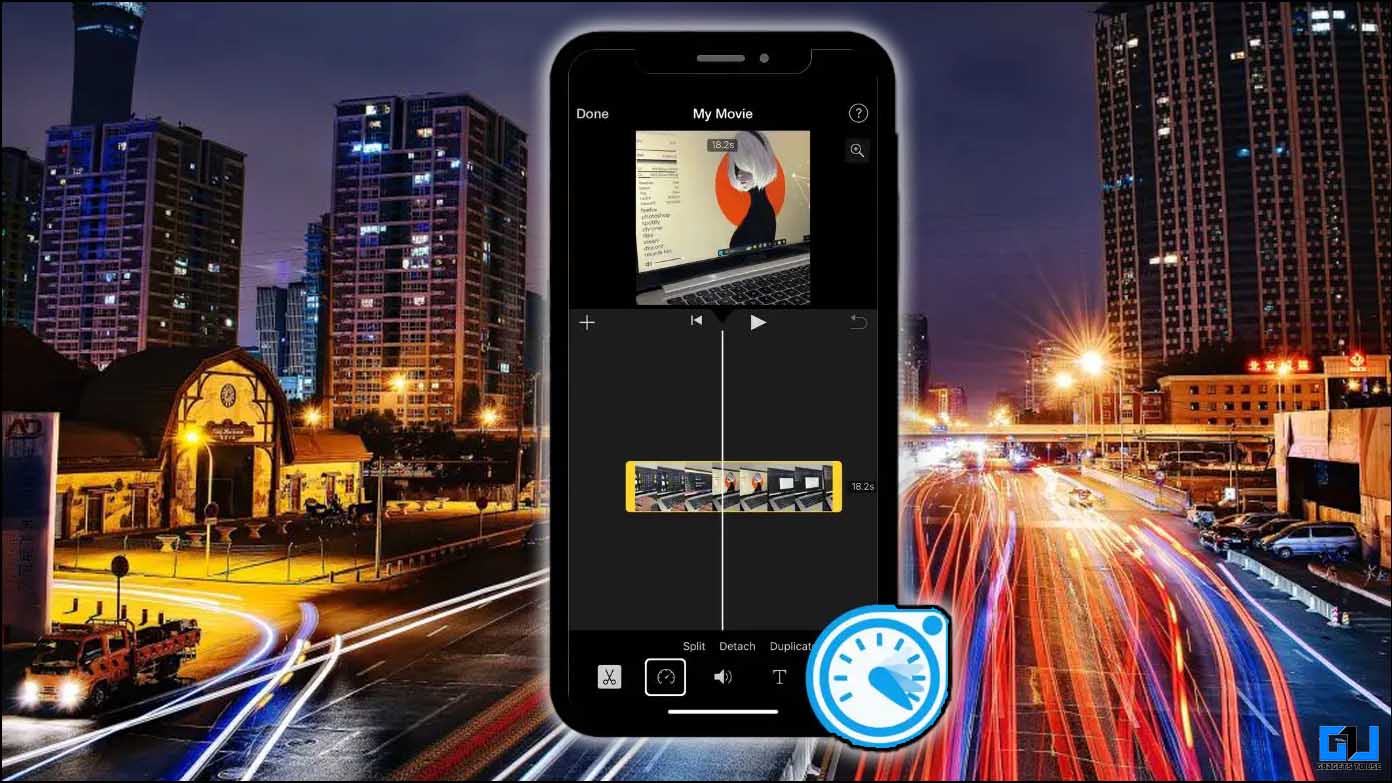
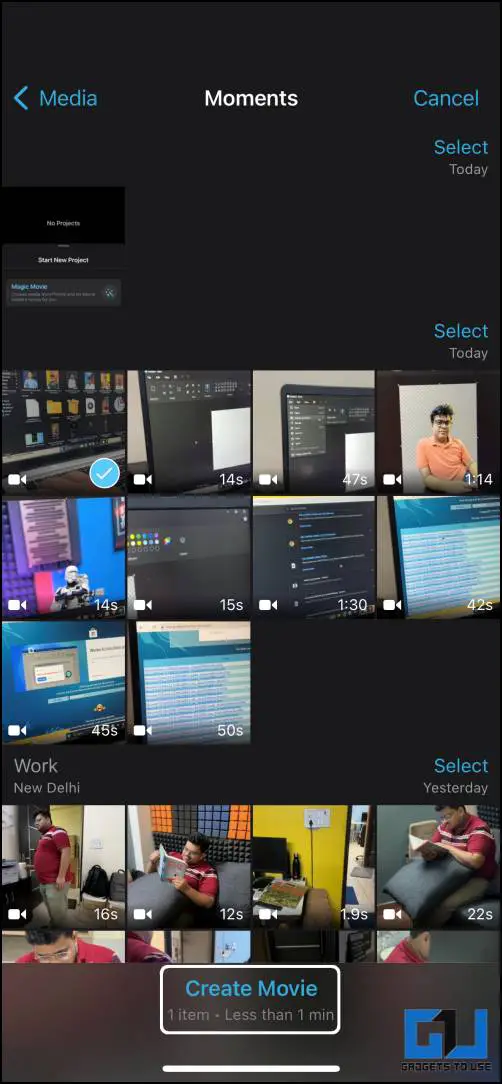
1. Open iMovie and select the Movie option on the home screen.

2. Select the video from the selection page and tap Create Movie.
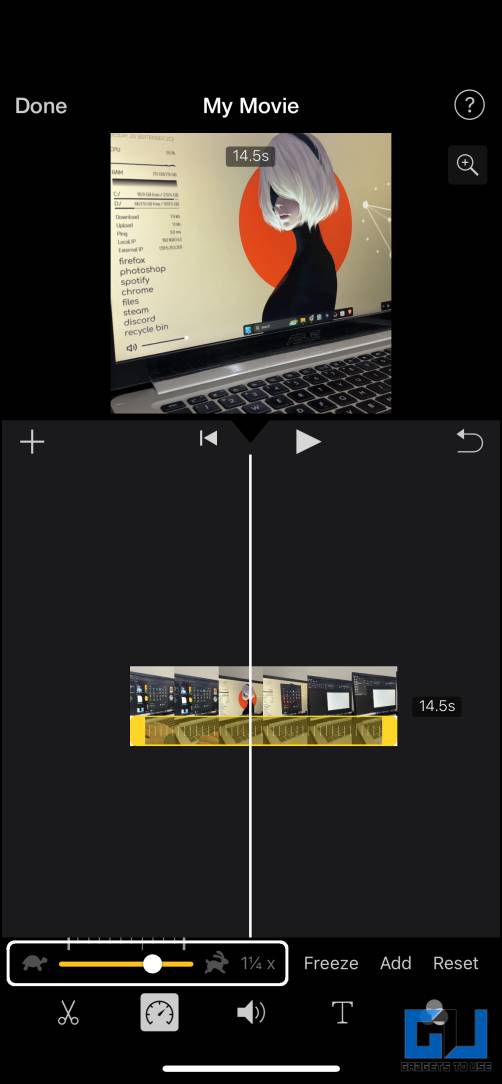
3. Tap the timeline clip and select the clock icon in the toolbar below.
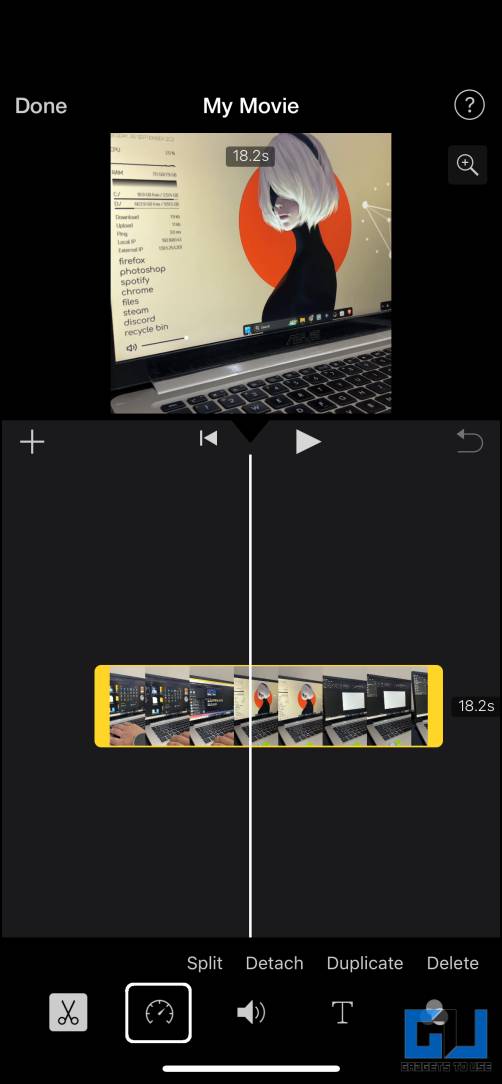
4. Adjust the slider to the rightmost position and tap Done.
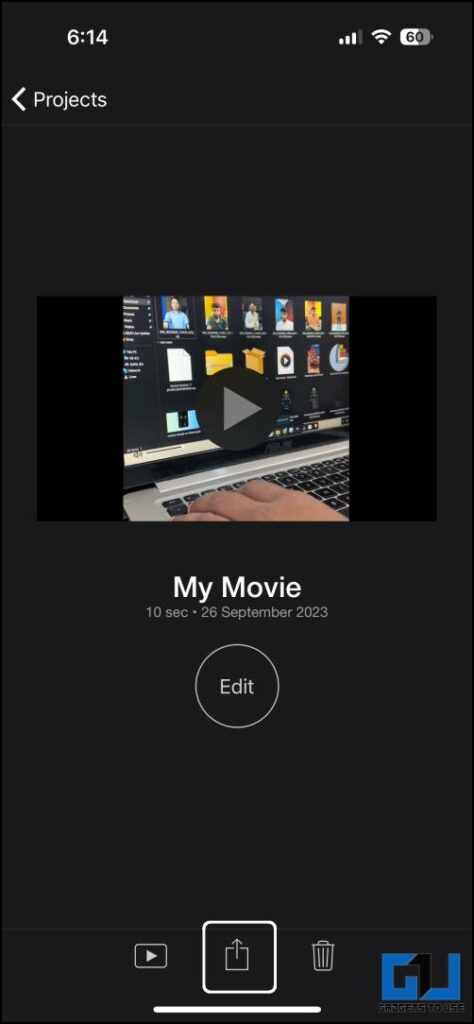
5. The video is ready, tap the share button to export the video.
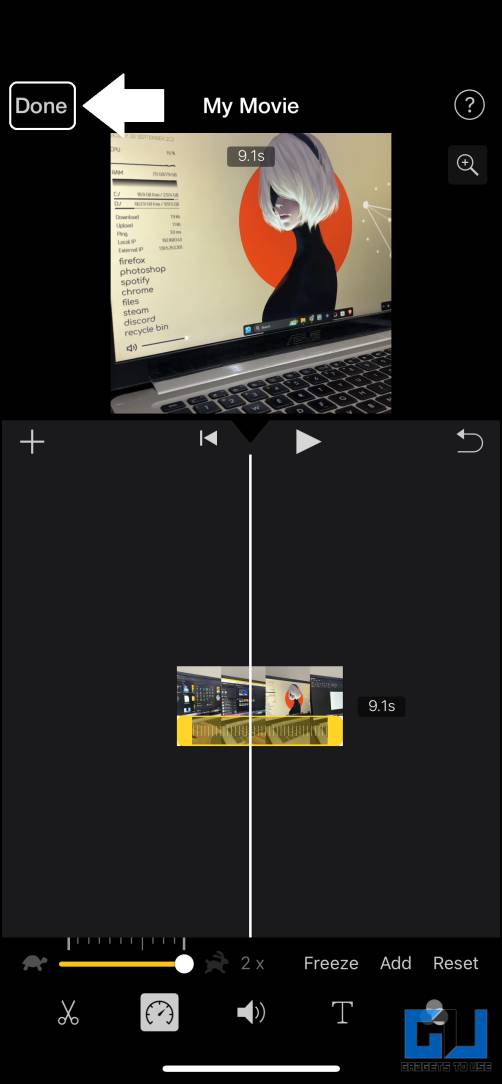
6. Select the Save Video option to save the video in the Photos app.

This is how you can quickly convert your videos to time-lapse using the built-in iMovie app on your iPhone. The only drawback of this method is that you can only speed the video up to 2x speed. If you want to speed up the video, download a third-party app.
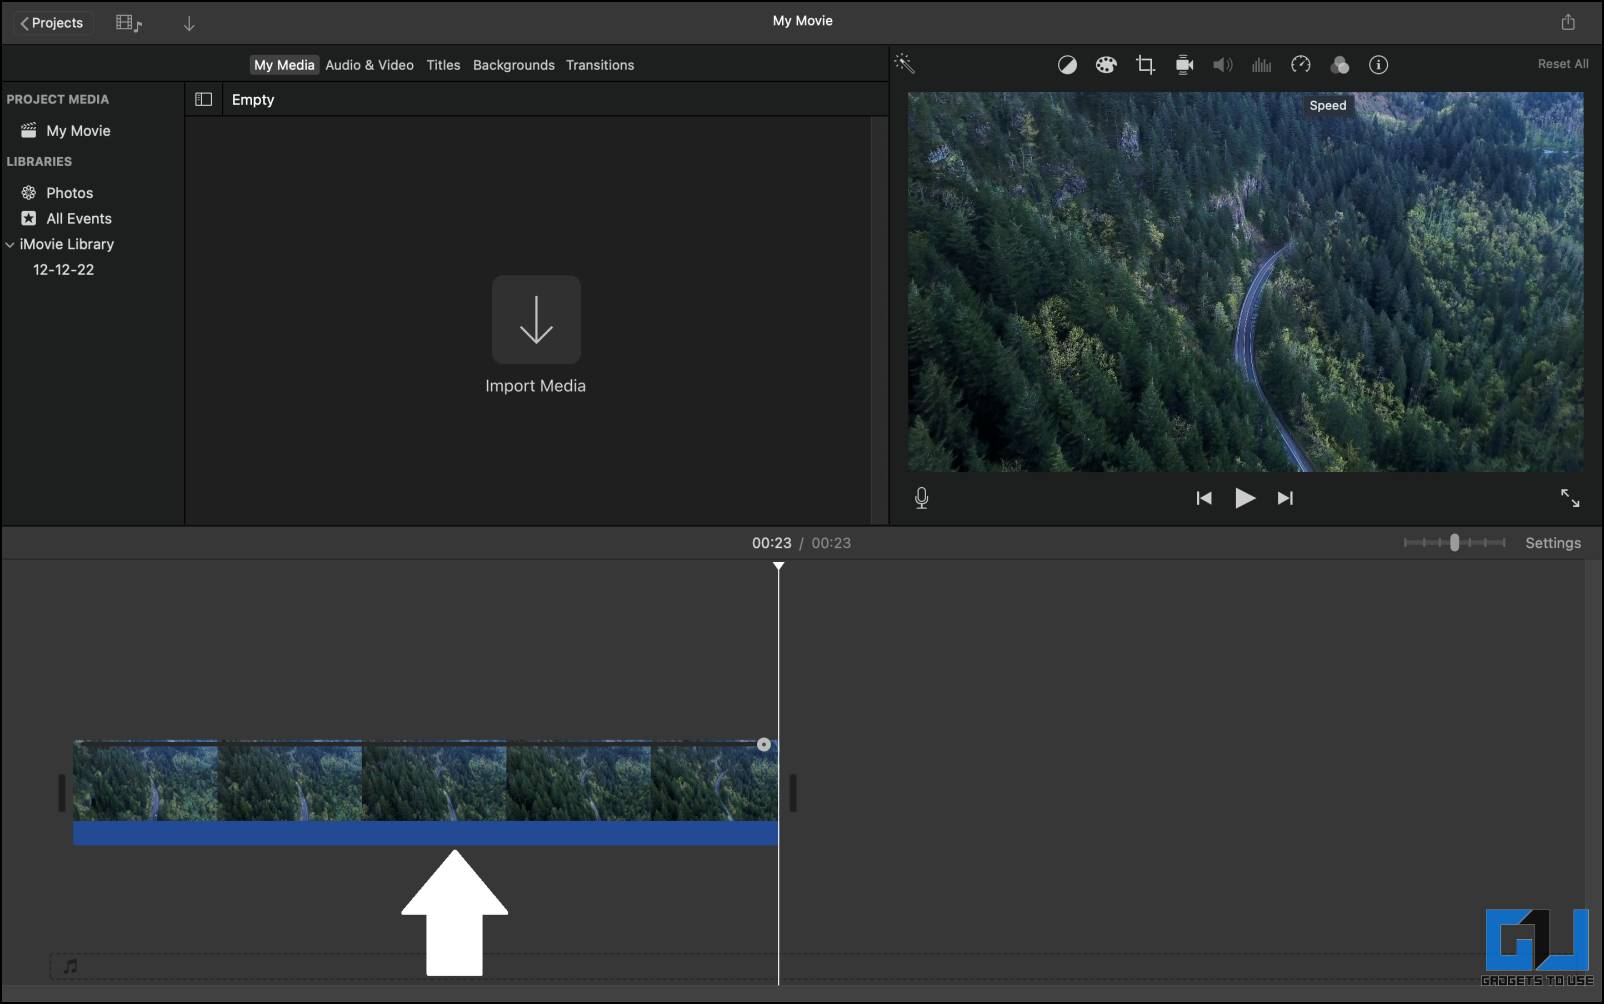
Method 4: Convert Video to Time Lapse on MacOS
MacOS also comes with a built-in video editor called iMovie, and you can easily use it to create time-lapse videos from regular videos. Here is a step-by-step guide to tell you how to do it.
1. Open iMovie on your Mac and import the video.
2. Click the clock icon above the preview window.
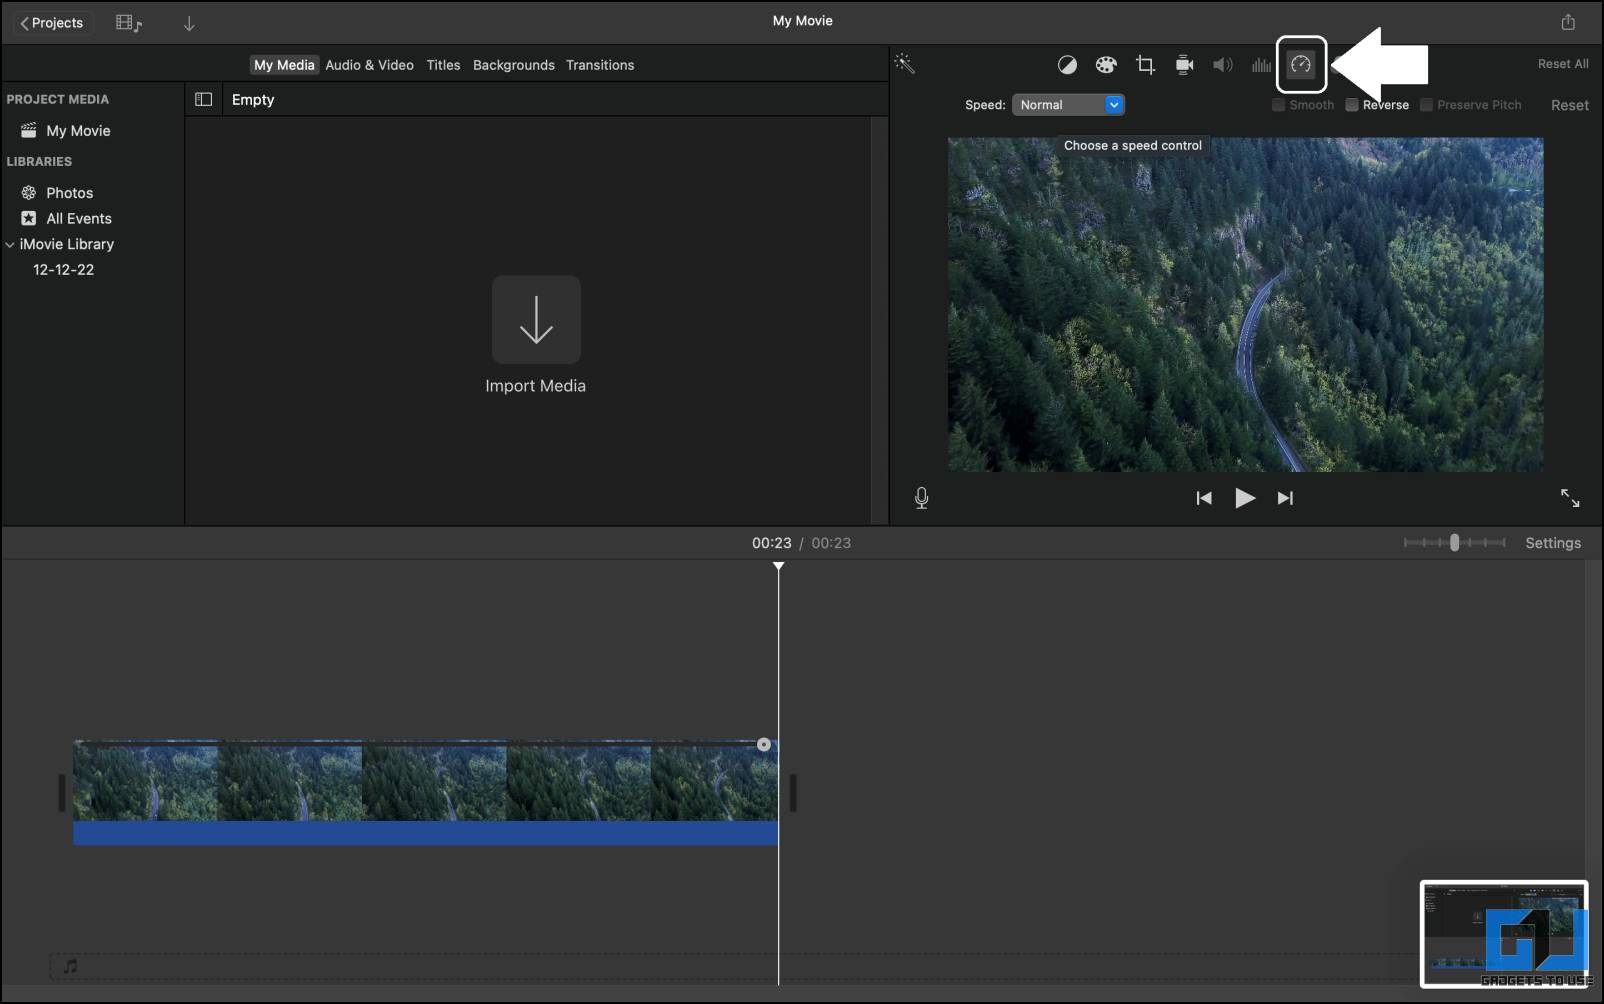
3. Select Custom in the drop-down menu.
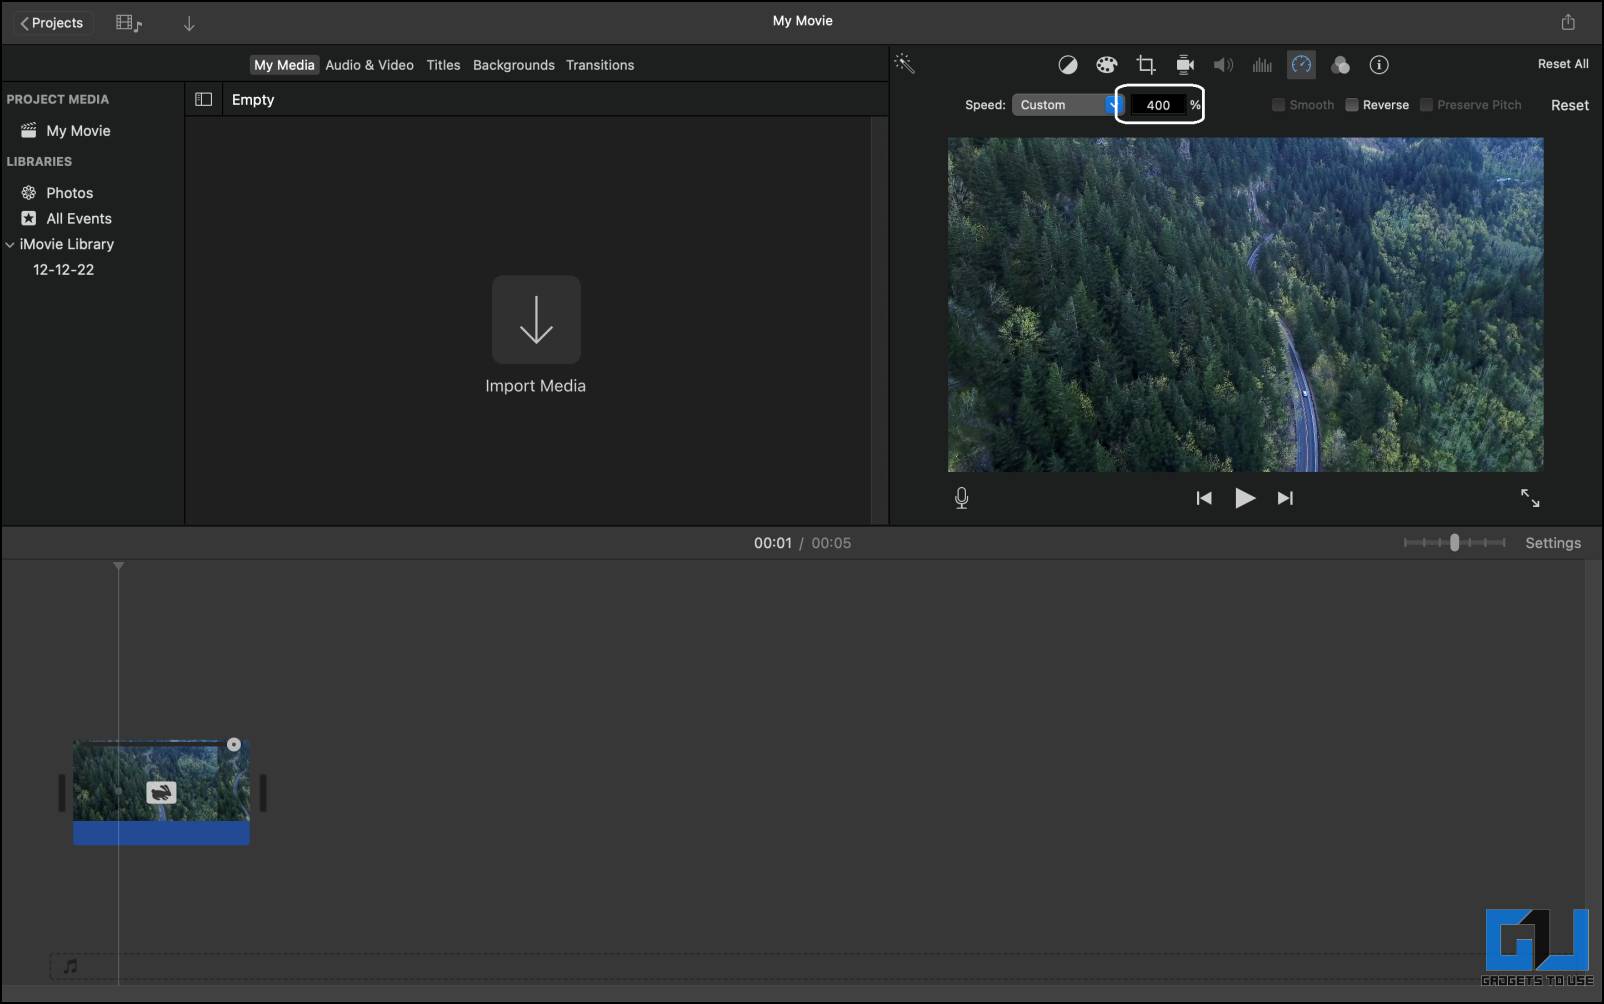
4. Now, replace 100% with a value that you need. Use the multiples of 100 to speed up the video, like 200, 400, etc.
5. Click the Share button and select the Export file option to save the video.
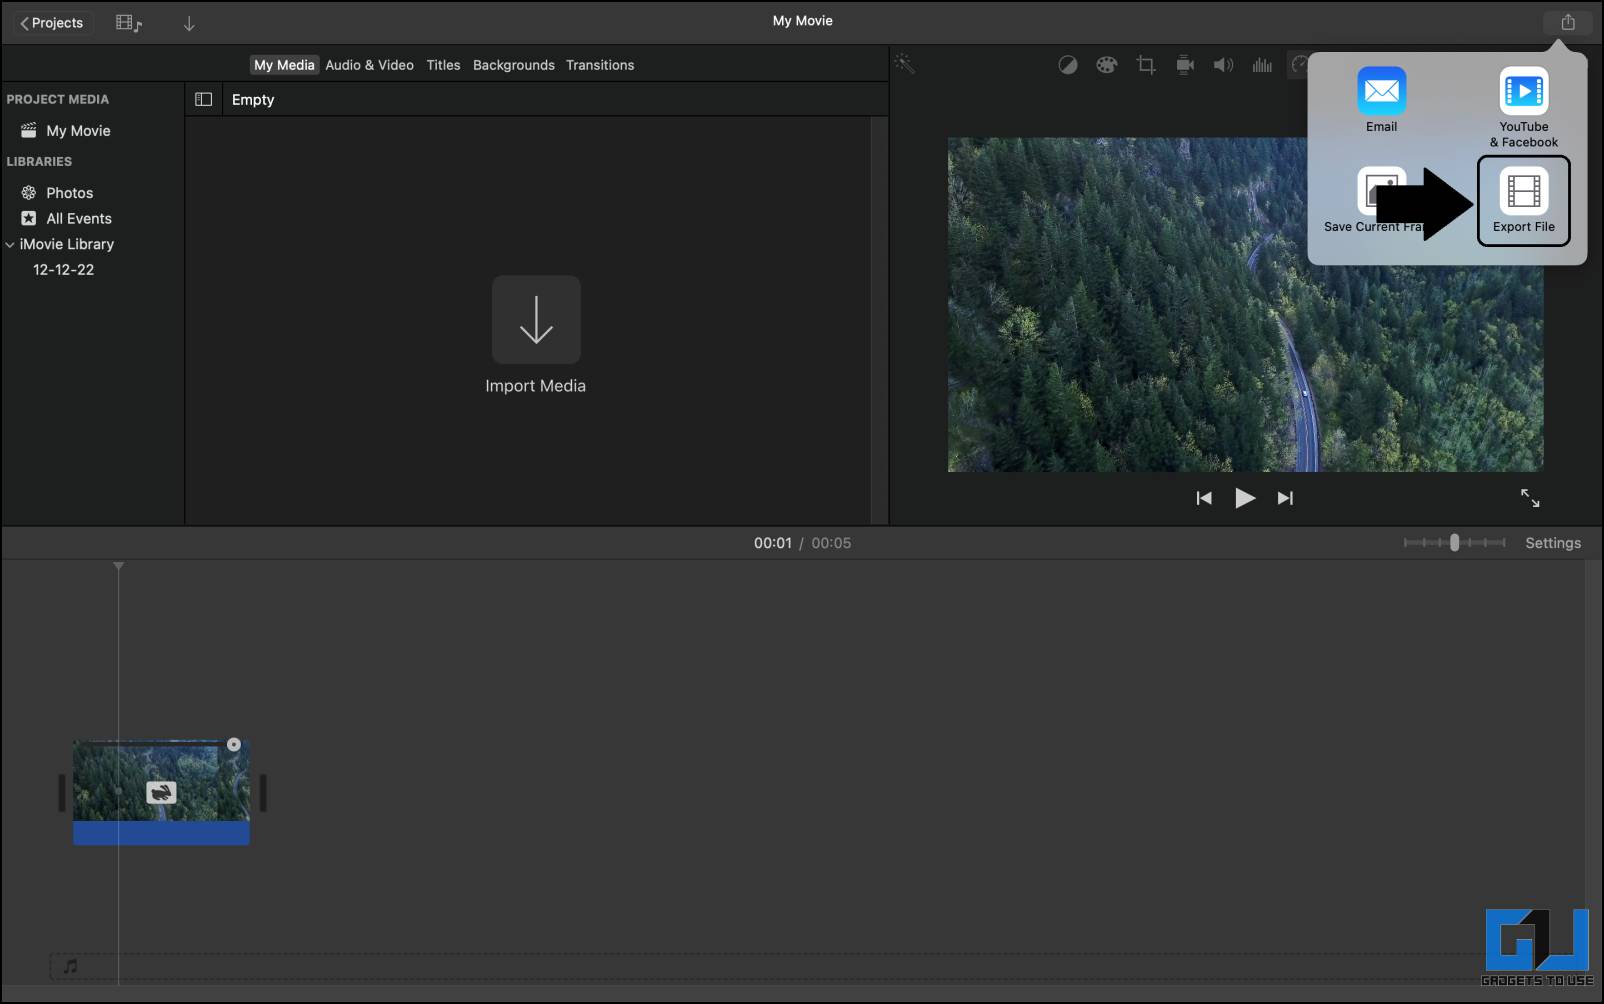
You don’t need any third-party app or tool to convert your videos to time-lapse on your Macbook. There is also no speed limit; you can select any value, and the video will be processed to that speed.
Method 5: Online Tools to Convert Videos to Time Lapse
Clideo is a web tool that lets you edit videos on a browser from any device. This web-based video editor has a tool that lets you speed up the videos and save them for free. Follow the step-by-step instructions.
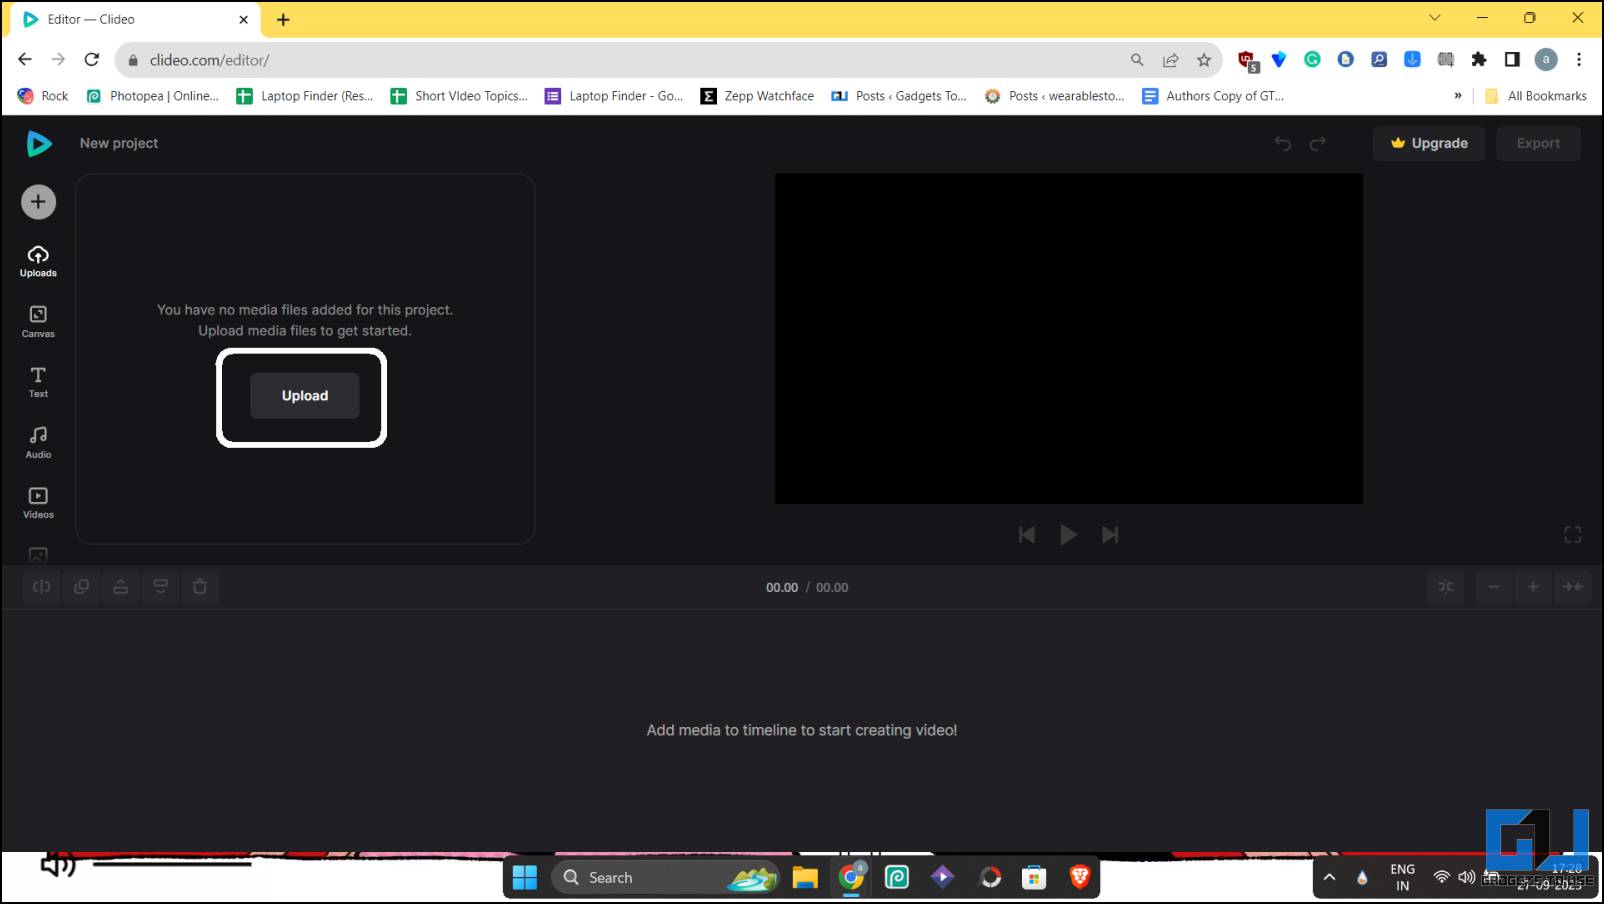
1. Open the Clideo editor website on a browser.
2. Click the Upload button and select the video to edit.
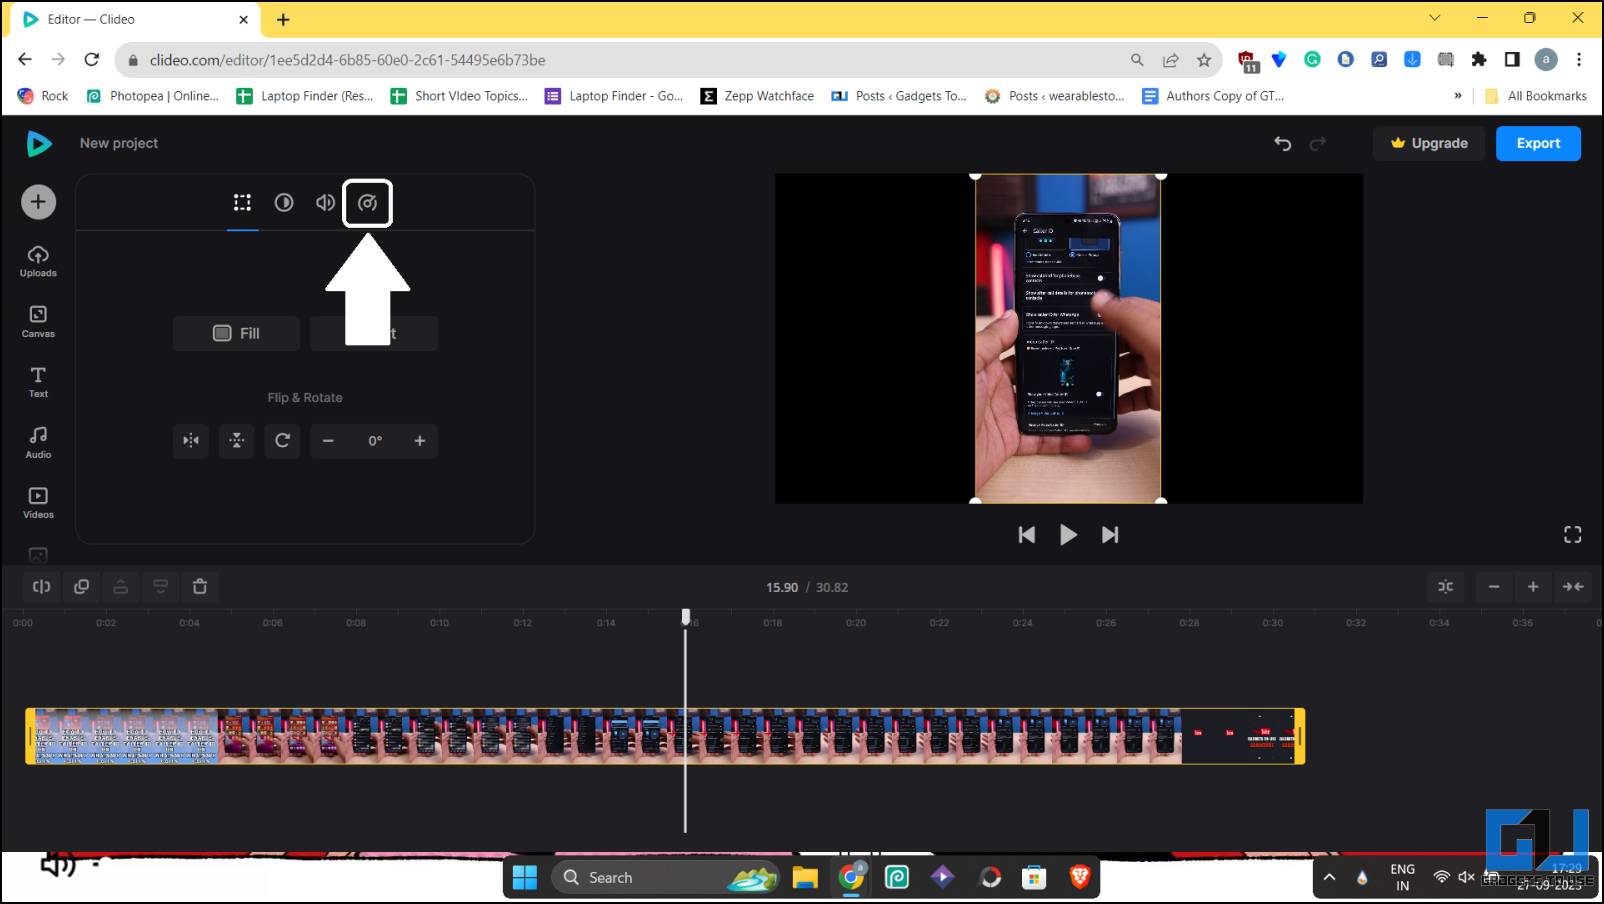
3. Select the video on the timeline to open the customization tools.
4. Click the clock icon to open the speed changer.
5. Adjust the slider to the rightmost position to speed up the video by 4x.

6. Now save the video by clicking the Export button.
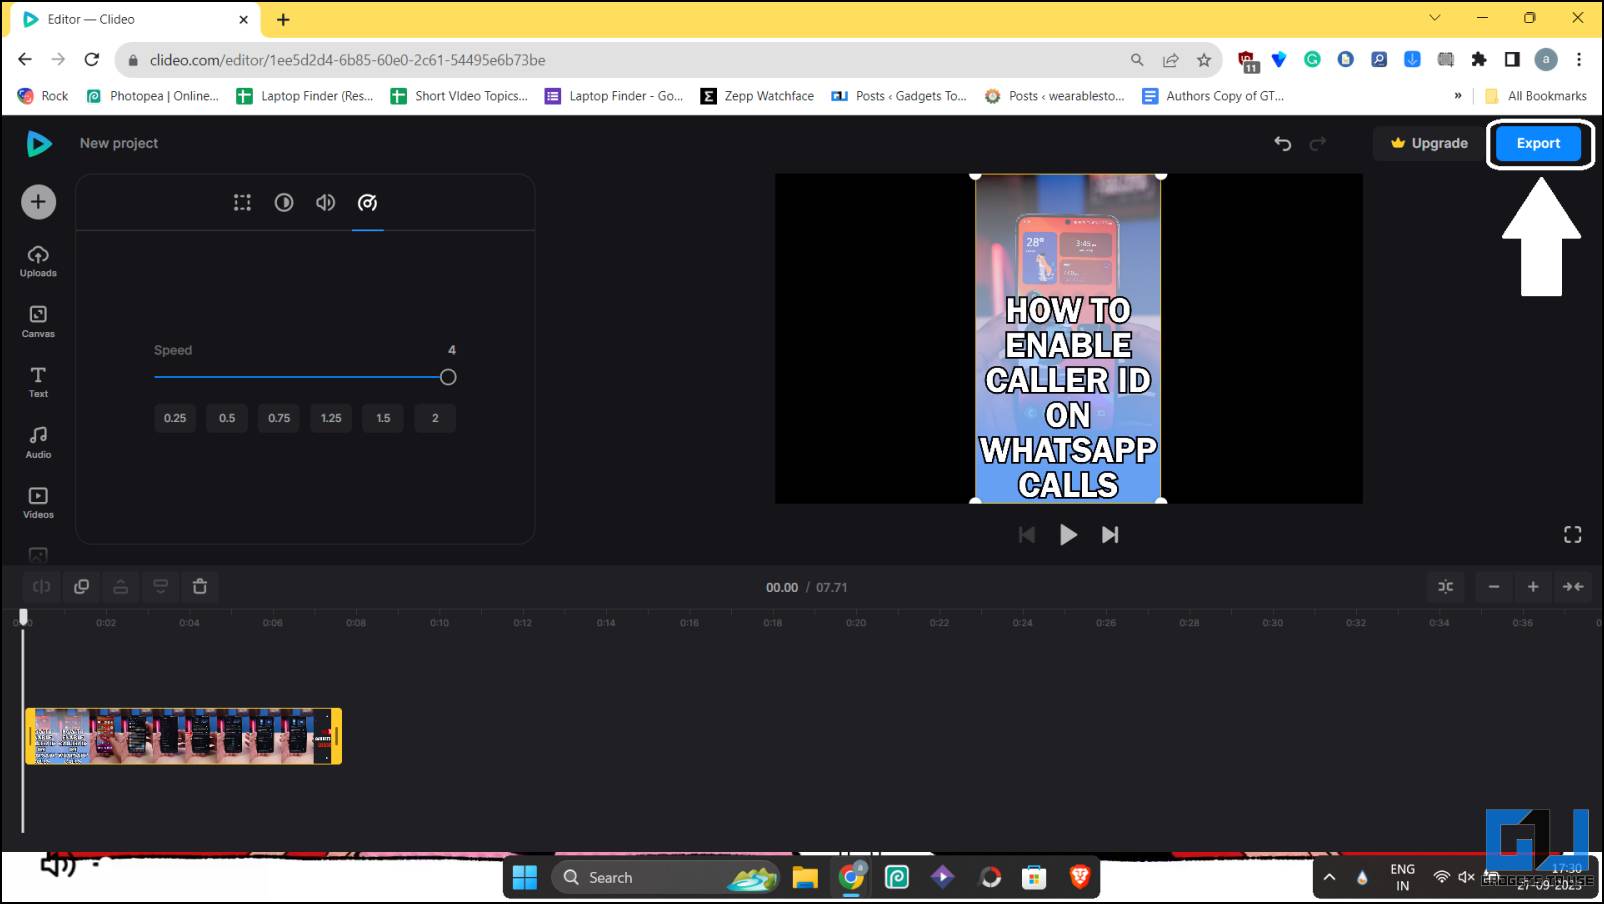
This tool will let you convert all your videos to timelapse, and if you want, you can also make a little bit of adjustments in the final video. The only limitation is that it lets you download the videos up to 720p for free.
Wrapping Up
This is how you can easily convert all your videos to timelapse without spending money. If you are all about privacy, then using the built-in tools will keep you at ease when editing your videos. Stay tuned to GadgetsToUse for more such reads.
Wrapping Up
- 4 Ways to Resize Your Videos for Instagram, WhatsApp, Facebook & Twitter
- [Working] Trick to Blur Faces in Video on Your Android Phone
- 3 Ways to Convert Recorded Audio to Waveform Video
- 4 Ways to Fix Blurry Low-Resolution Video Uploaded on Google Drive
You can also follow us for instant tech news at Google News or for tips and tricks, smartphones & gadgets reviews, join GadgetsToUse Telegram Group or for the latest review videos subscribe GadgetsToUse YouTube Channel.


