Quick Answer
- If you have a laptop with a higher refresh rate or an external monitor that runs at 120Hz or 144Hz, here’s how you can tweak the refresh rate on your Windows 11 machine.
- However, if you have a laptop or desktop with a higher 90Hz, 120Hz, or 144Hz refresh rate screen, you may want to enjoy it to the fullest, be it while gaming or browsing the web.
- For instance, it may use 60Hz when you’re reading a document or writing an email but may automatically switch to 120Hz when you open a video or start playing a game for a smoother experience.
Most laptop screens and external monitors have a standard refresh rate of 60Hz. However, if you have a laptop or desktop with a higher 90Hz, 120Hz, or 144Hz refresh rate screen, you may want to enjoy it to the fullest, be it while gaming or browsing the web. Thankfully, Windows 11 lets you quickly increase or decrease the screen refresh rate based on your display specification. In this article, let’s see how you can change the display refresh rate of your PC or laptop running on Windows 11.
Related | 5 Ways to Save Battery While Watching Movies, Videos on Windows 11
Change Display Refresh Rate in Windows 11
Refresh rate is the number of times a display updates its content per second. A higher refresh rate results in a smoother display. The on-screen contents update faster, resulting in enhanced motion graphics’ smoothness, which helps with fast-paced gaming.
If you have a laptop with a higher refresh rate or an external monitor that runs at 120Hz or 144Hz, here’s how you can tweak the refresh rate on your Windows 11 machine.
Method 1- Change Refresh Rate from Windows Settings
The easiest way to switch to a higher or lower refresh rate on Windows 11 is through system settings. The method also works for devices running Windows 10.
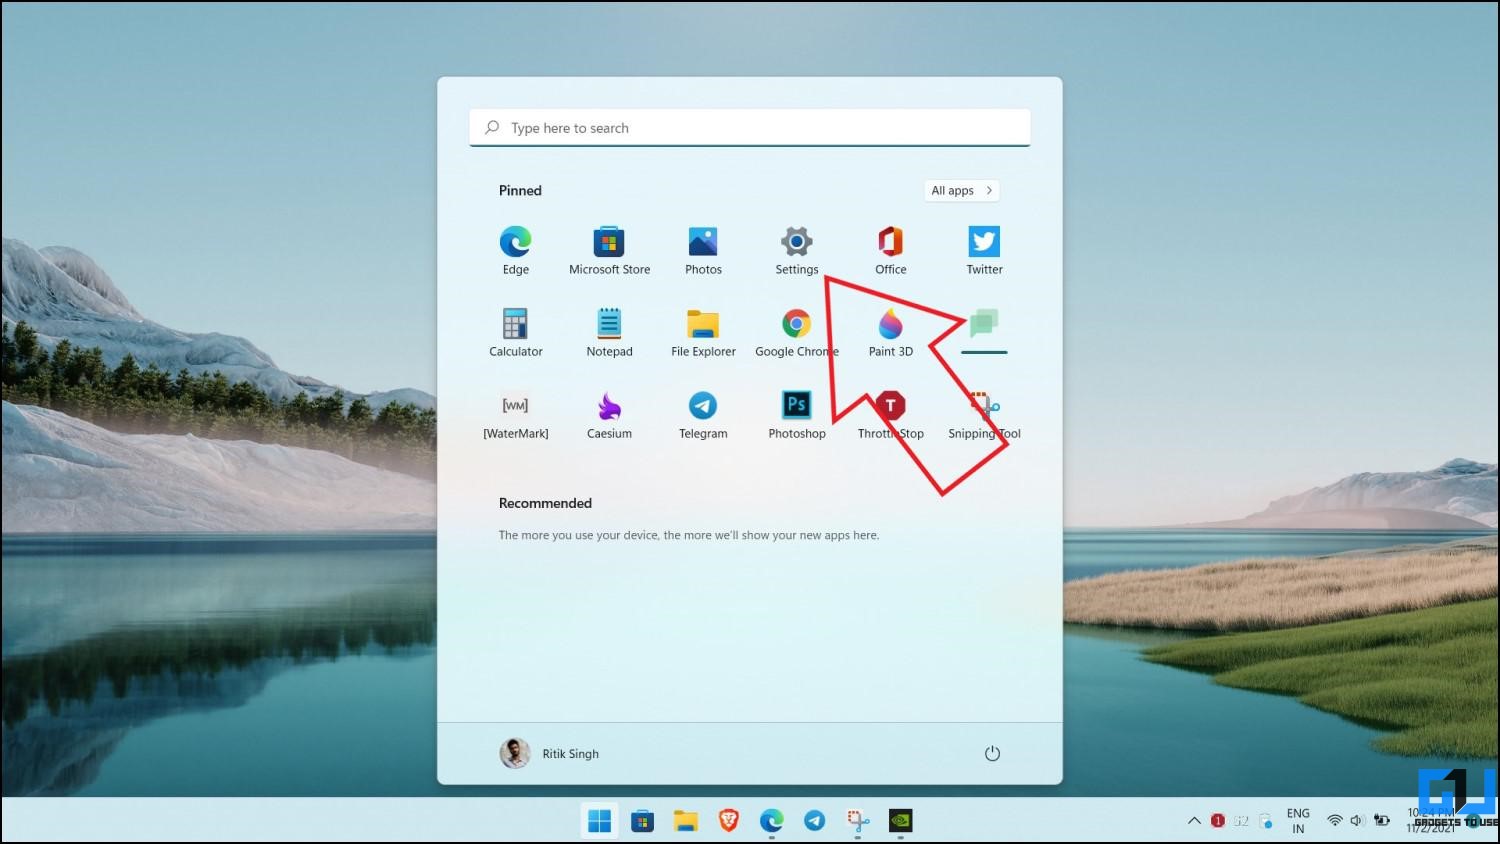
- Press Win + I to open Settings on your Windows 11 PC. Alternatively, you can open it from the Start menu.
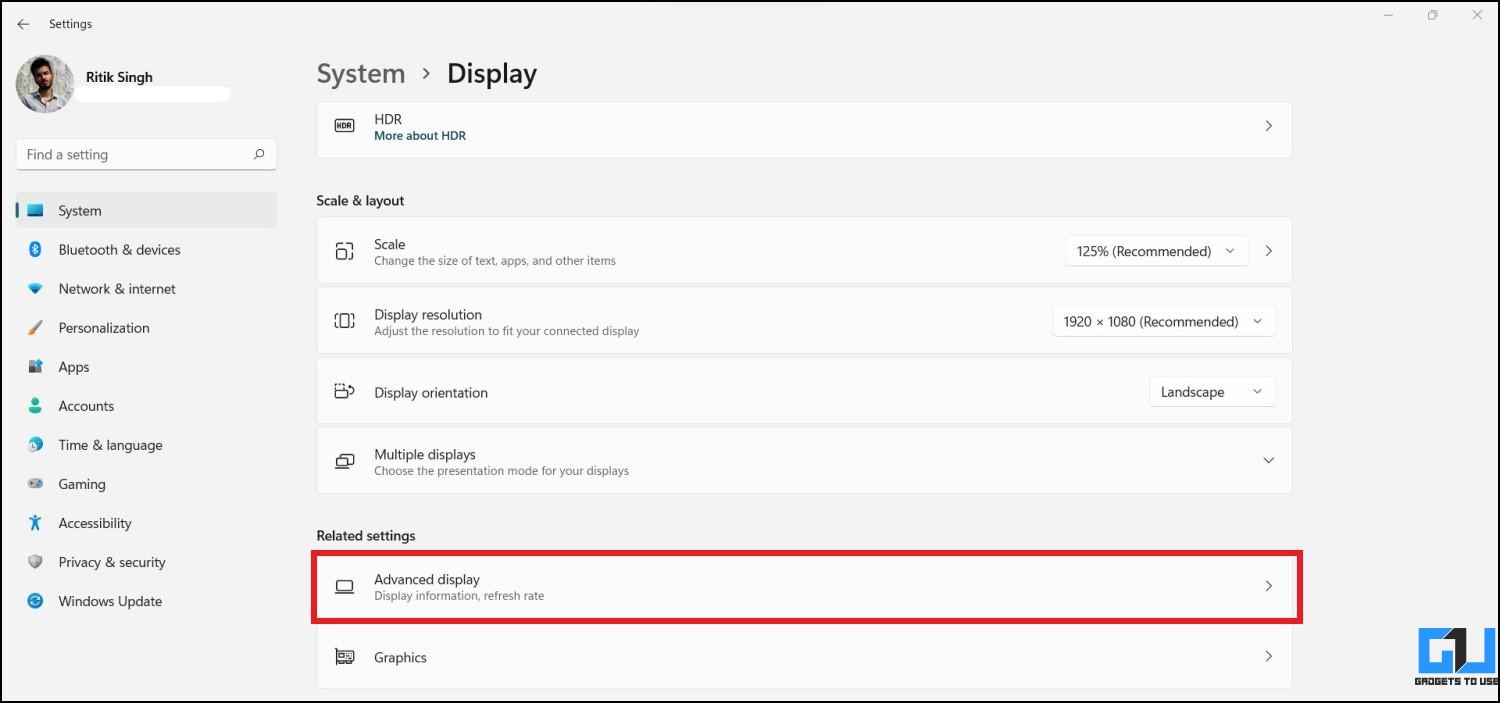
- Select System from the sidebar at the left and select Display.

- Then, tap Advanced Display.
- Click the drop-down menu next to Choose a refresh rate.
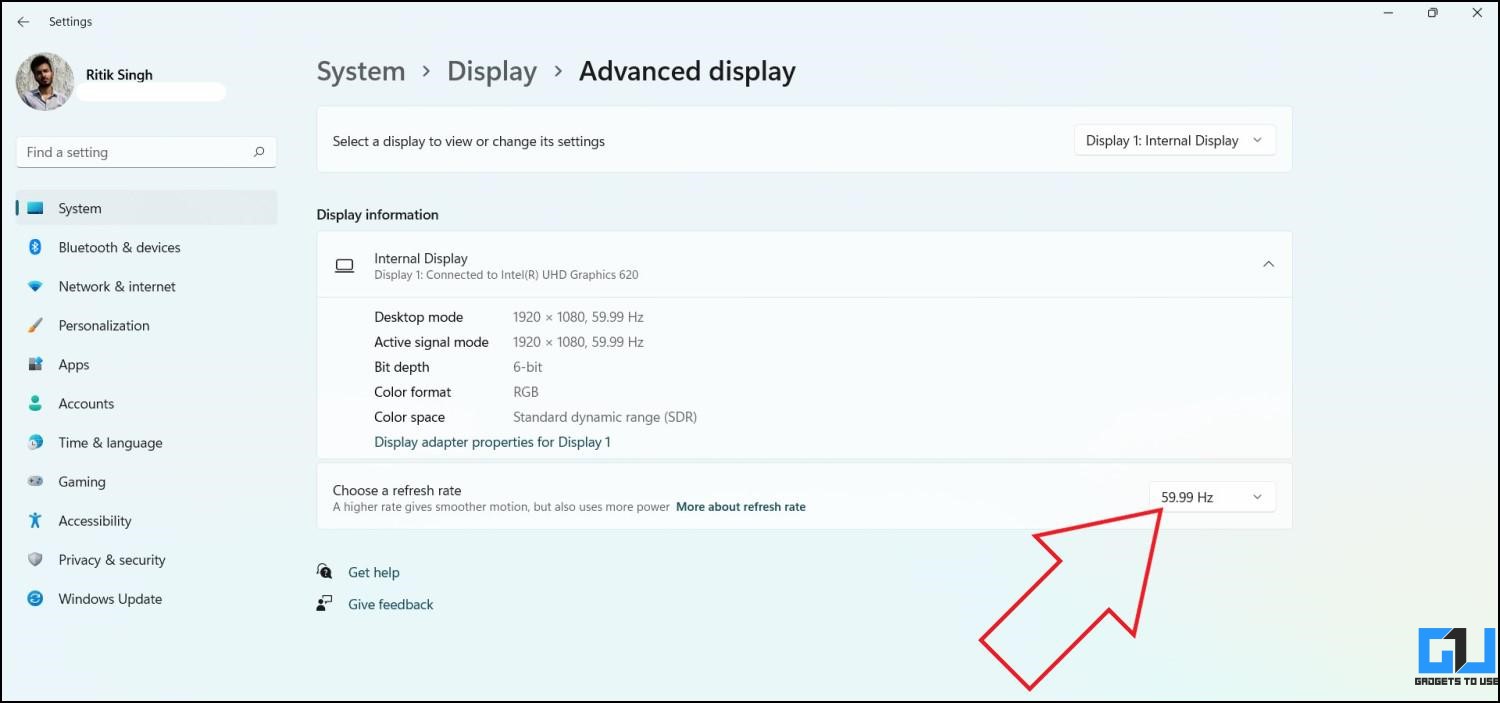
- It will show the refresh rates supported by your PC’s display or external monitor.
- Select the refresh rate of your choice. The change will take effect immediately.
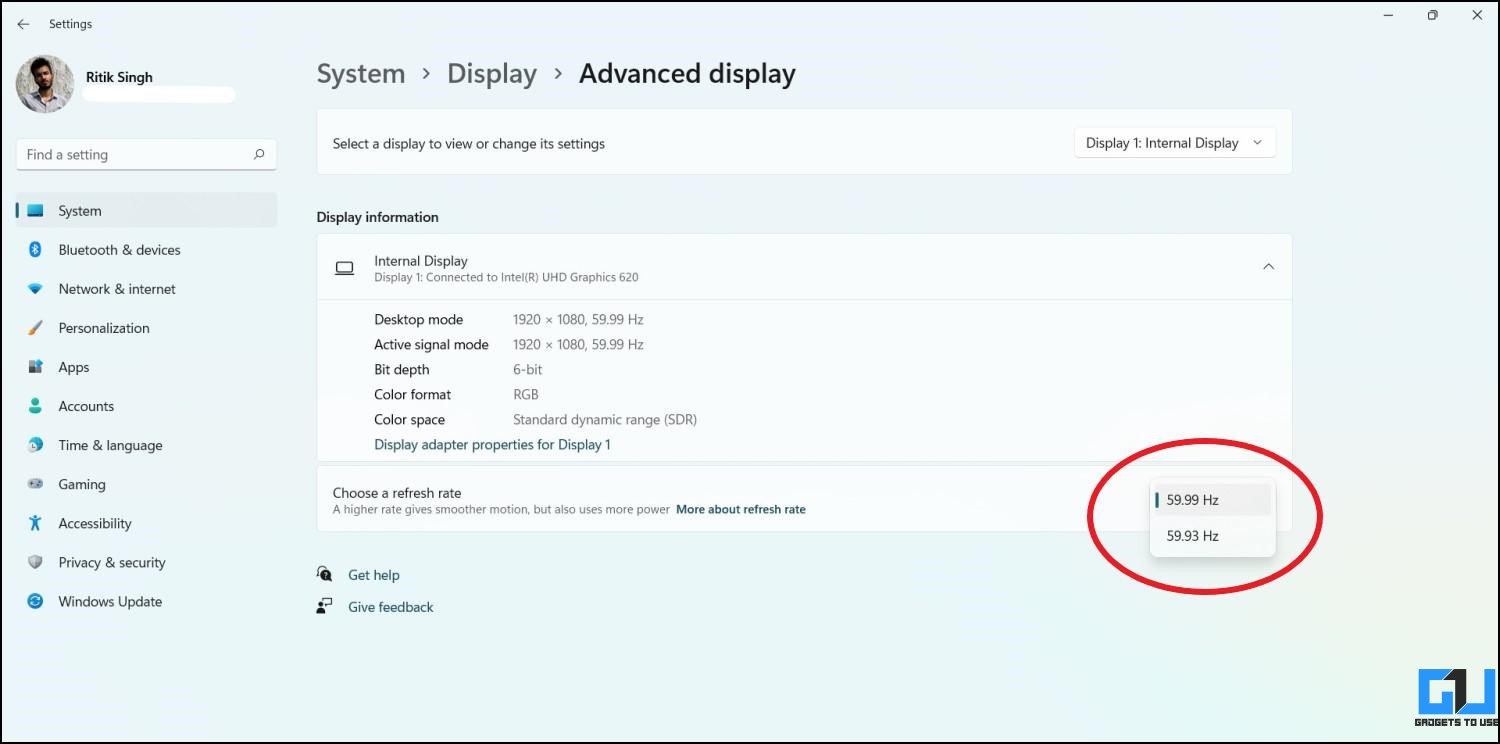
- Click Keep Changes if prompted by the confirmation dialog.
OR
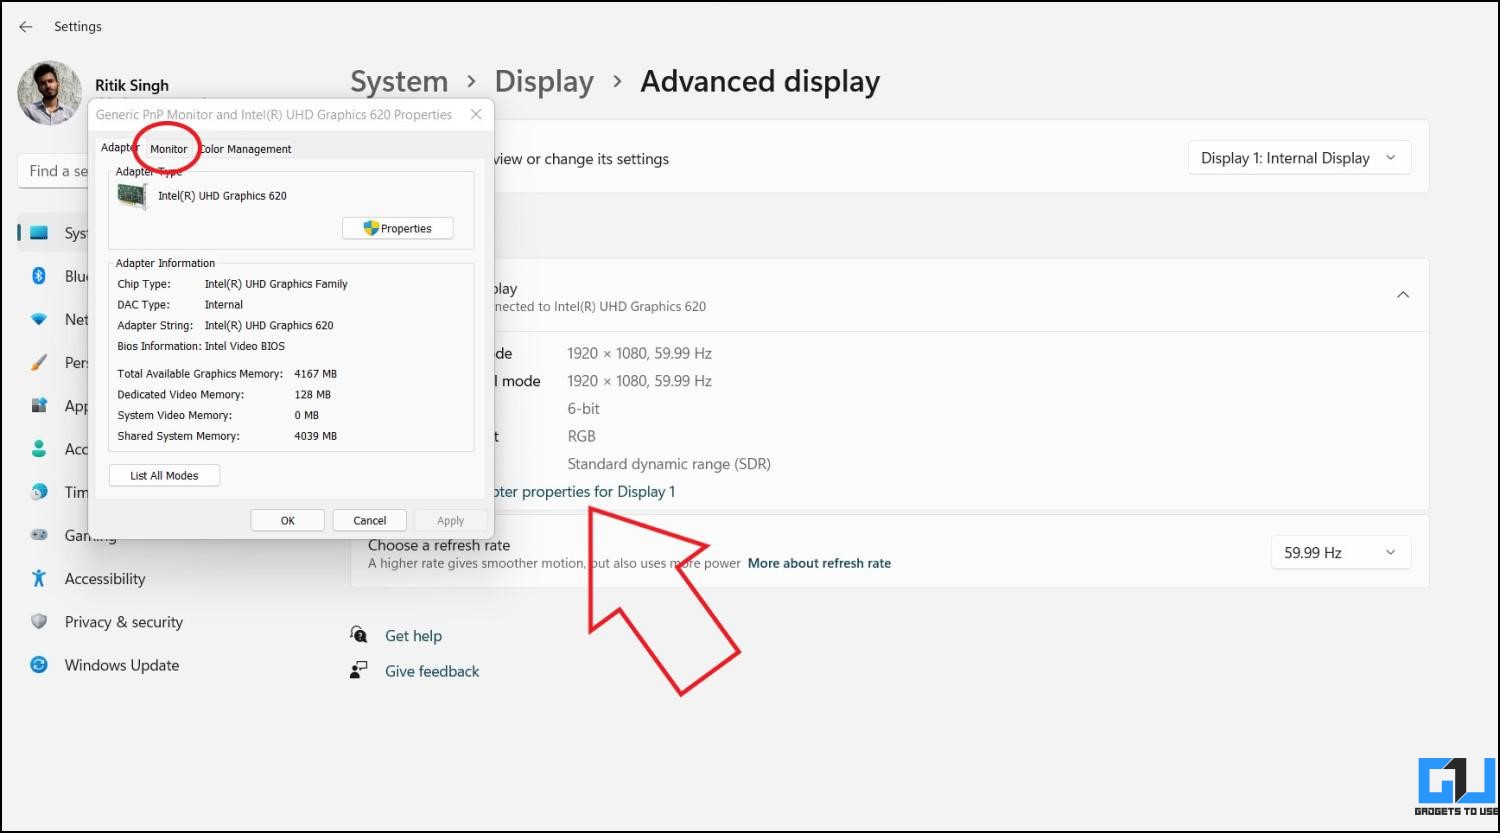
- Click on Change Adapter Properties for Display in Display > Advanced display page.
- Switch to the Monitor tab.
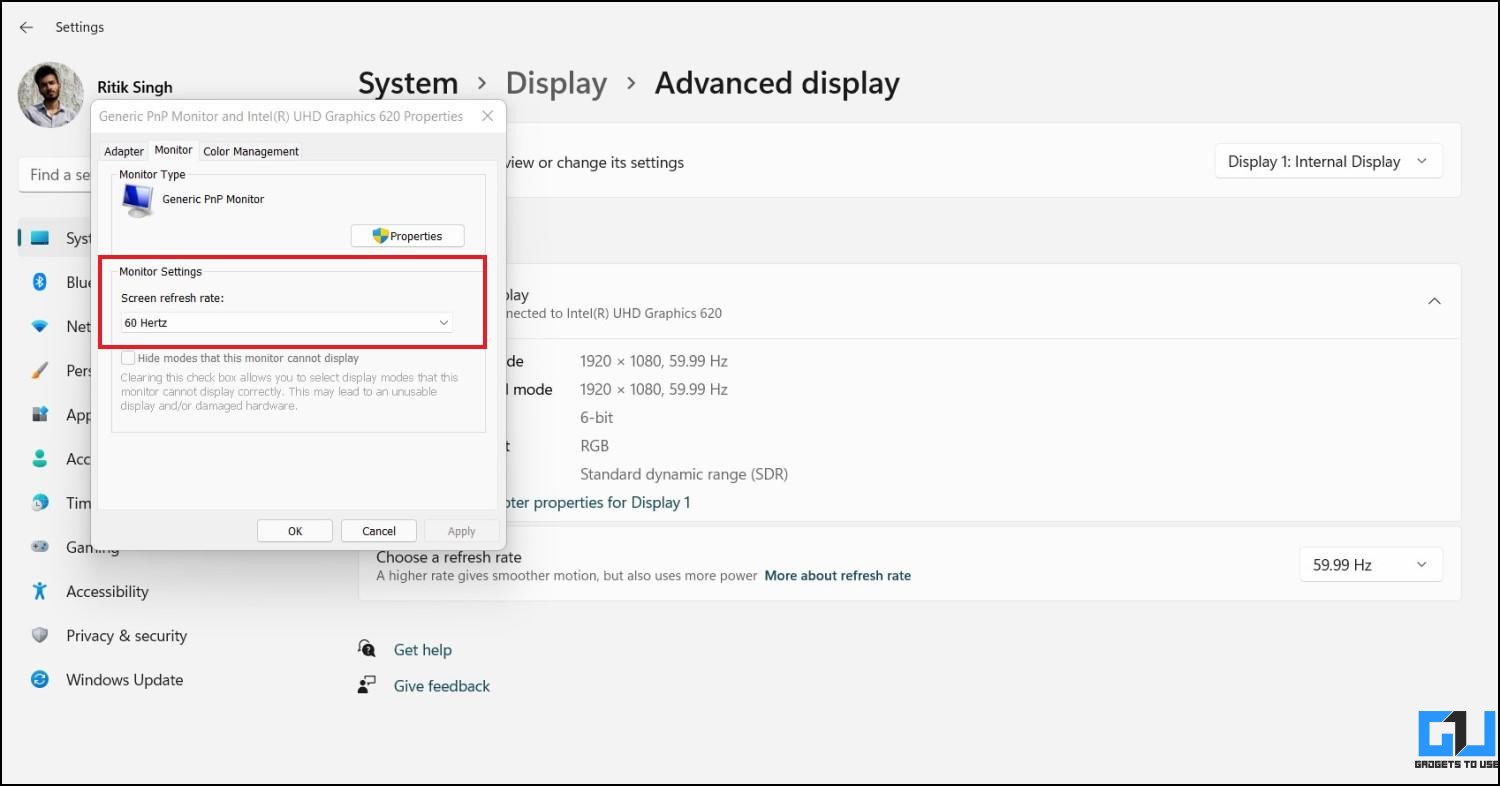
- Select the refresh rate from the given drop-down menu.
If you have multiple displays connected to your PC, you have the option to select the one you want to make changes for.
Method 2- Using Intel Graphics Control Panel
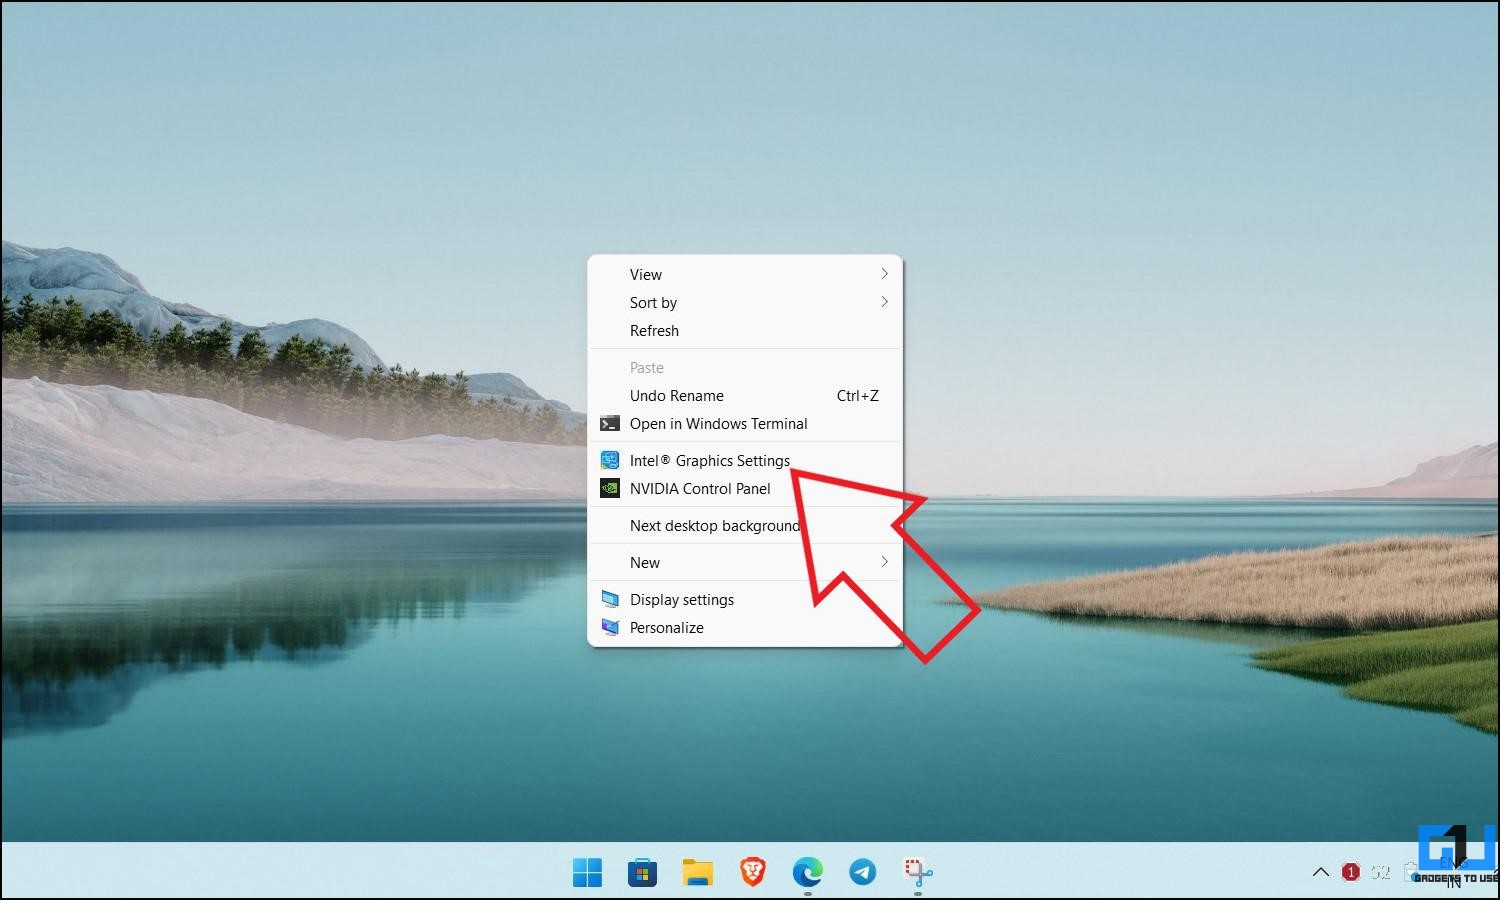
If your laptop comes with integrated Intel graphics, you can use Intel Graphics Control Panel to change the screen refresh rate, as shown below.
- Open the Intel UHD Graphics Control Panel. You can do so from the Start menu, right-clicking on desktop > Intel Graphics Settings, or pressing CTRL + ALT + F12.
- Click on the Display icon.

- If you have multiple displays, you can select from the selection menu at the top.
- Click the drop-down menu for Refresh Rate.
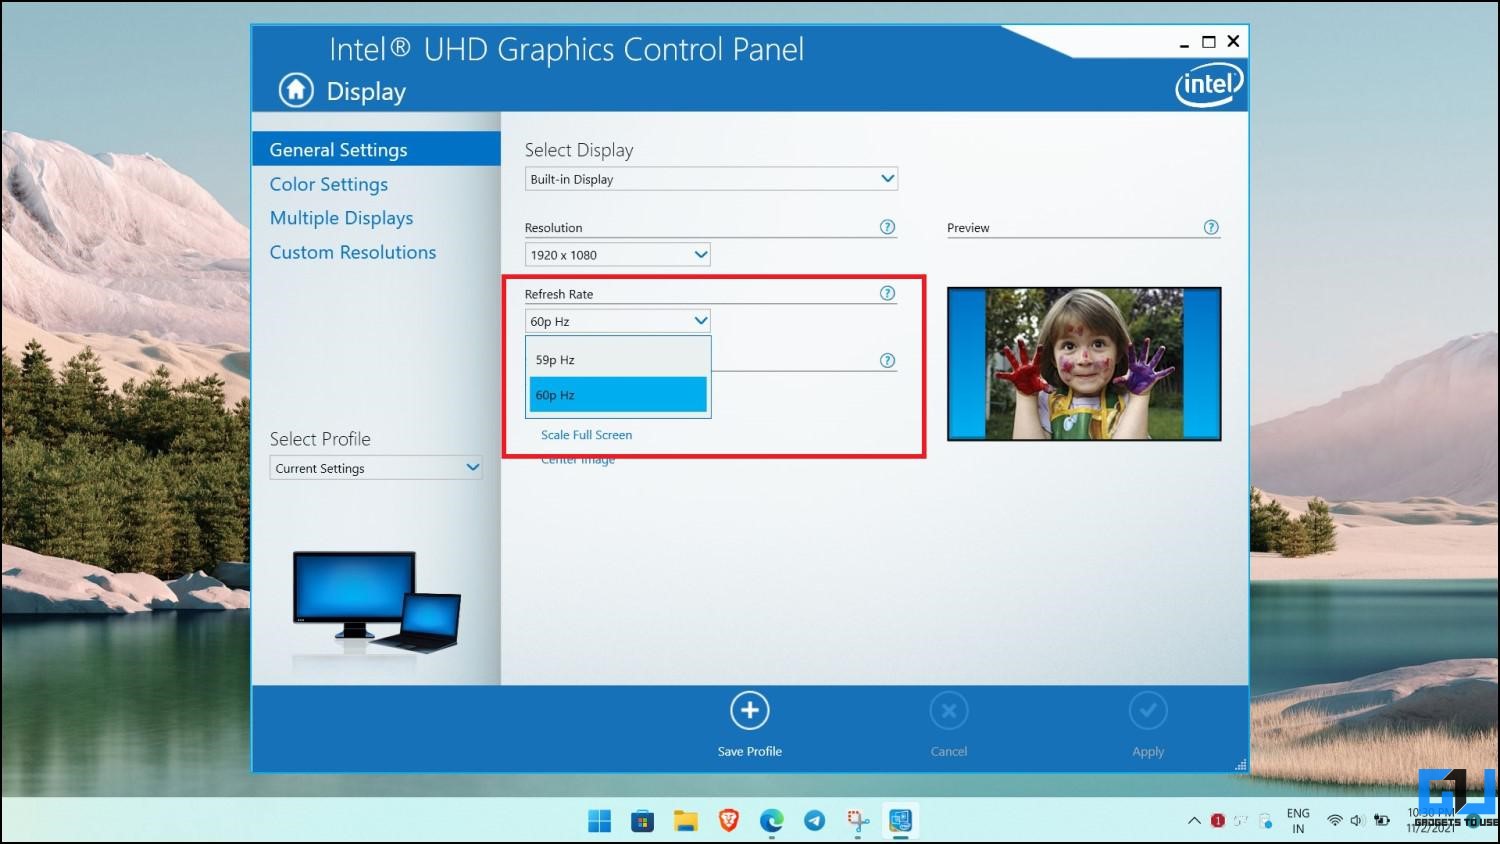
- Select the refresh rate of your choice.
Method 3- Change Refresh Rate via NVIDIA Control Panel
If your PC has an NVIDIA graphics card, you can also use the NVIDIA control panel to tweak the refresh rate. Follow the steps given below.
- Open Nvidia Control Panel either from the Start menu or by right-clicking on desktop > Nvidia Graphics Settings.

- Click on Change Resolution under Display in the sidebar at the left.
- Select the display you want to change the refresh rate for.
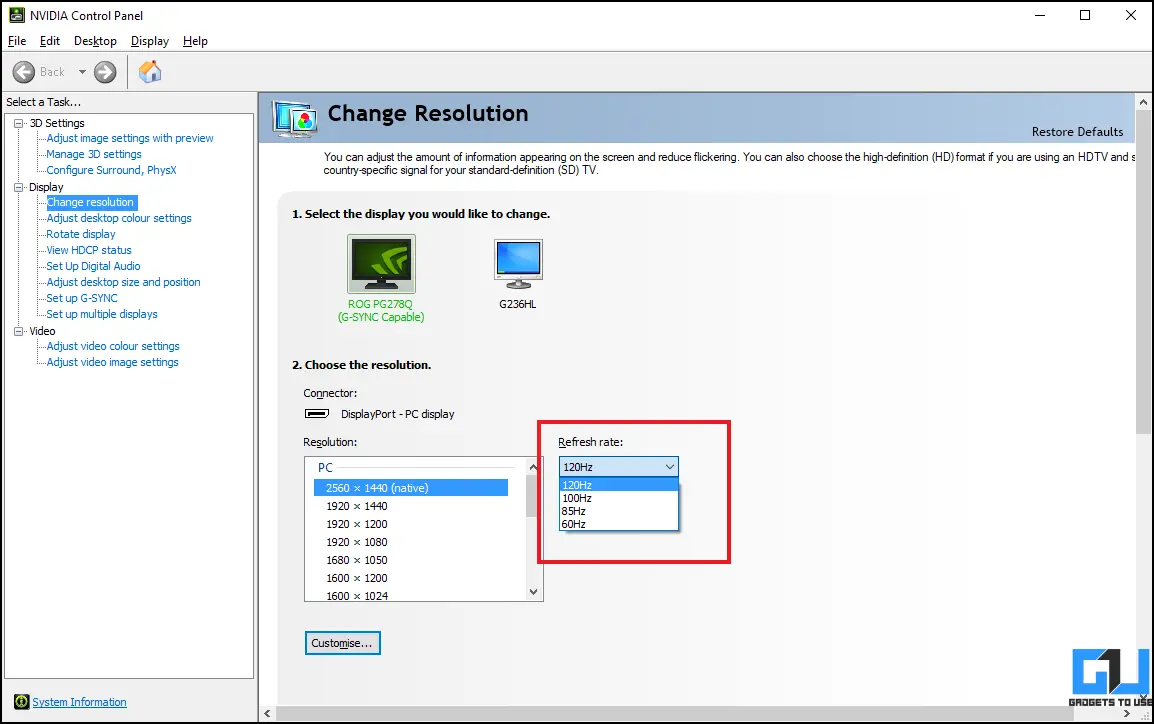
- Then, click the Refresh Rate drop-down menu and select your desired refresh rate.
Display Option Not Showing in NVIDIA Control Panel?
If the display option is not showing in the NVIDIA control panel, it could be because Intel drivers are handling the display. You can set your PC to not use the integrated Intel graphics processor as default from the BIOS menu.
Dynamic Refresh Rate on Windows 11
Windows 11 comes with DRR, i.e., Dynamic Refresh Rate for laptops having screens with high refresh rates. DRR lets your machine change the refresh rate dynamically based on what you’re doing.
For instance, it may use 60Hz when you’re reading a document or writing an email but may automatically switch to 120Hz when you open a video or start playing a game for a smoother experience.
This is better than choosing a fixed refresh rate as it helps preserve the battery life on laptops. Below is how you can enable dynamic refresh rate on Windows 11:

1. Open Settings on your PC.
2. Select System and go to the Display section.
3. Here, click on Advanced Display.
4. Besides Choose a refresh rate, select the option with Dynamic in the name.
Note: DRR requires a laptop with a display that supports a variable refresh rate (VRR) and a refresh rate of at least 120 Hz. Besides, it also requires a graphics driver (WDDM 3.0), which is available through Windows Update.
If you’re a gamer, you may want to shell out the maximum performance from your machine. In that case, don’t forget to check out the gaming mode on Windows 11.
Wrapping Up
These were three working methods to change the display refresh rate on your Windows 11 PC. The option to change the refresh rate in settings would suffice for most users. However, you can also use the other given methods to do so. Do let me know if you have any doubts or queries in the comments below. Stay tuned for more.
You can also follow us for instant tech news at Google News or for tips and tricks, smartphones & gadgets reviews, join GadgetsToUse Telegram Group or for the latest review videos subscribe GadgetsToUse Youtube Channel.