If you are using your mobile hotspot or a metered internet connection and wish to view or limit your data usage, then this article is for you. In this read, we have listed the top 3 ways to monitor your internet usage on Windows 11.
Also, Read | 5 Parental Control Settings in Windows 11 on your Child’s PC
Ways to View and Limit Internet usage on Windows 11
Use the Windows Settings app to View and Limit Your Internet Usage
Windows 11 offers the in-built tools to track and set limits to your internet usage. Follow these steps to view and set a limit on the data usage in your system.
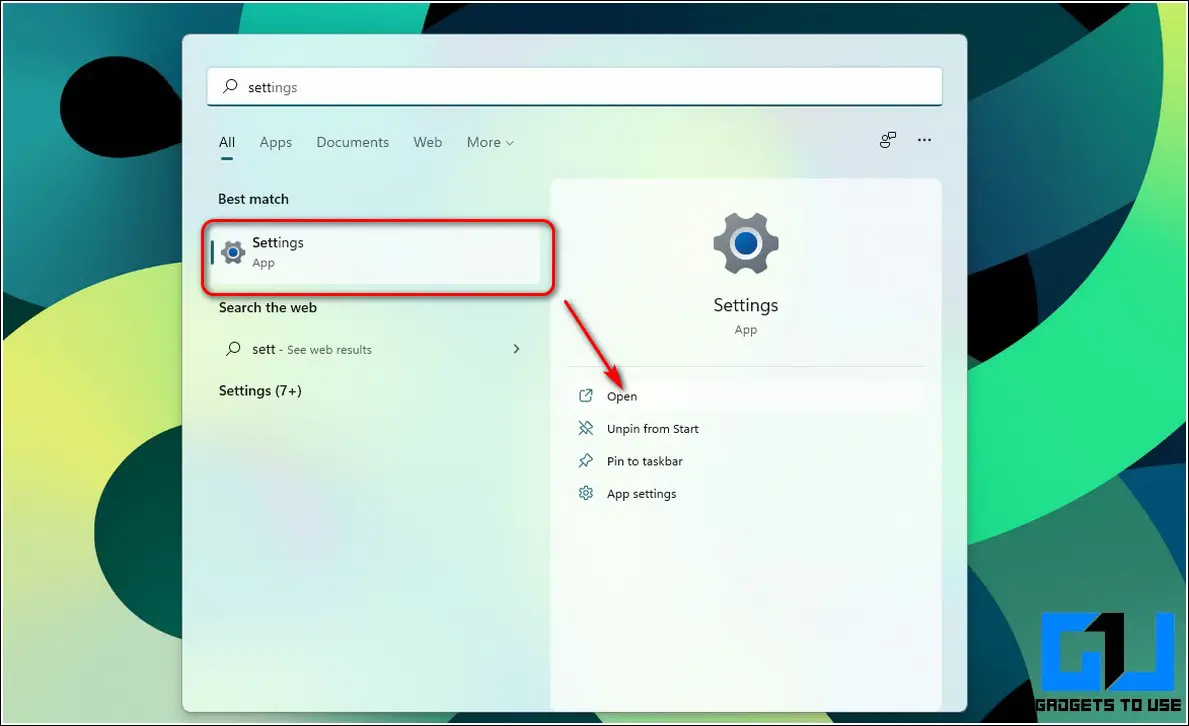
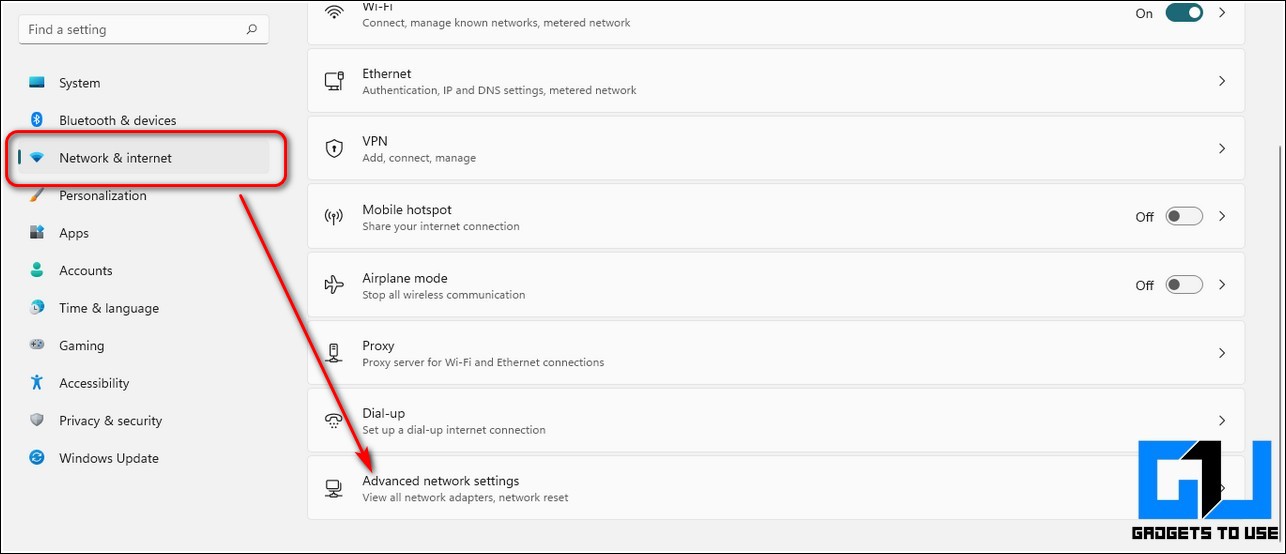
- Open the Settings app on your Windows 11 system.
- In the left sidebar, expand Network and Internet and click on the Advanced Network Settings.
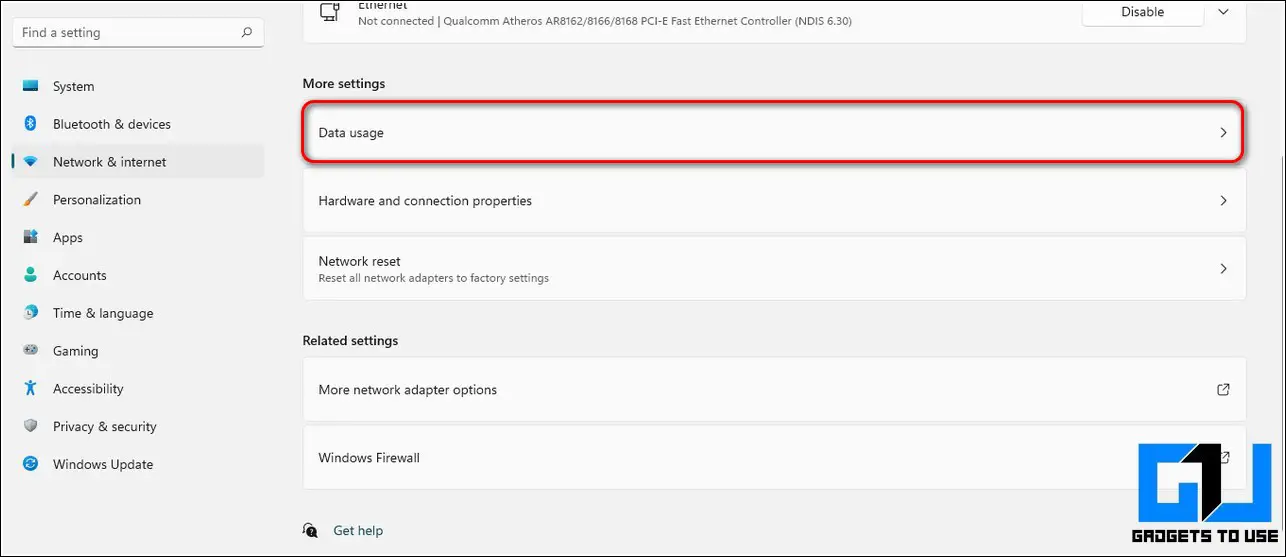
- On the next page, click on Data Usage.
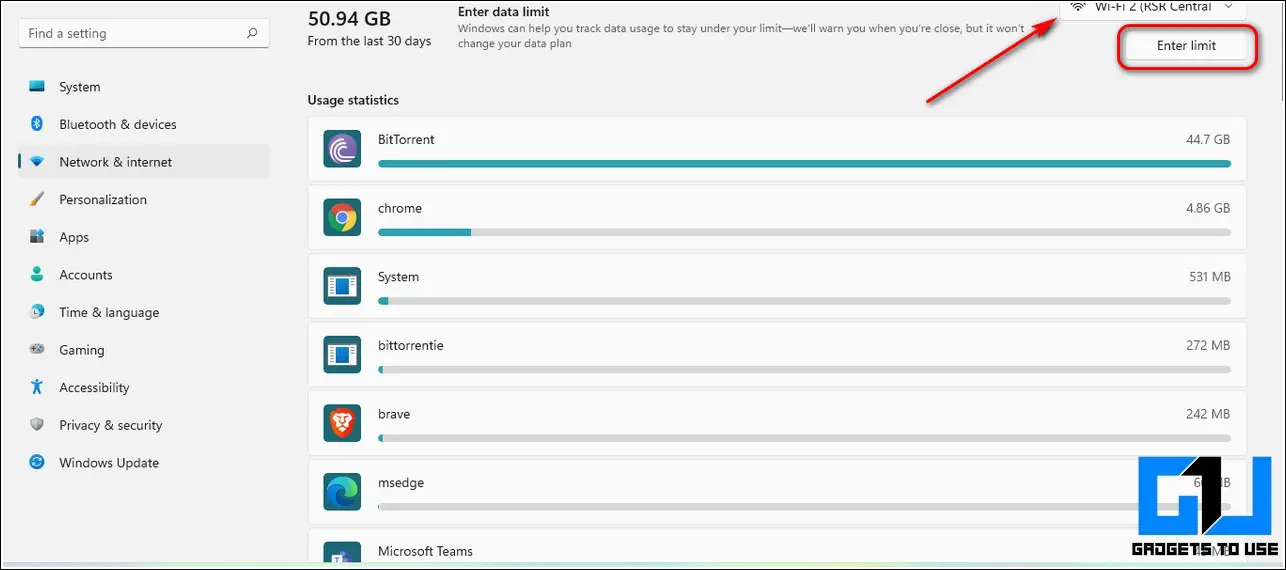
- You can now view your complete internet data usage on this page along with the data consumed by each running app on your Windows 11 system.
- To set a limit to your data consumption, click on the Enter limit button in the top right corner.
- Enter limits for your data consumption by setting your type, date, and data limit. Click on the Save button to save your data consumption limit.
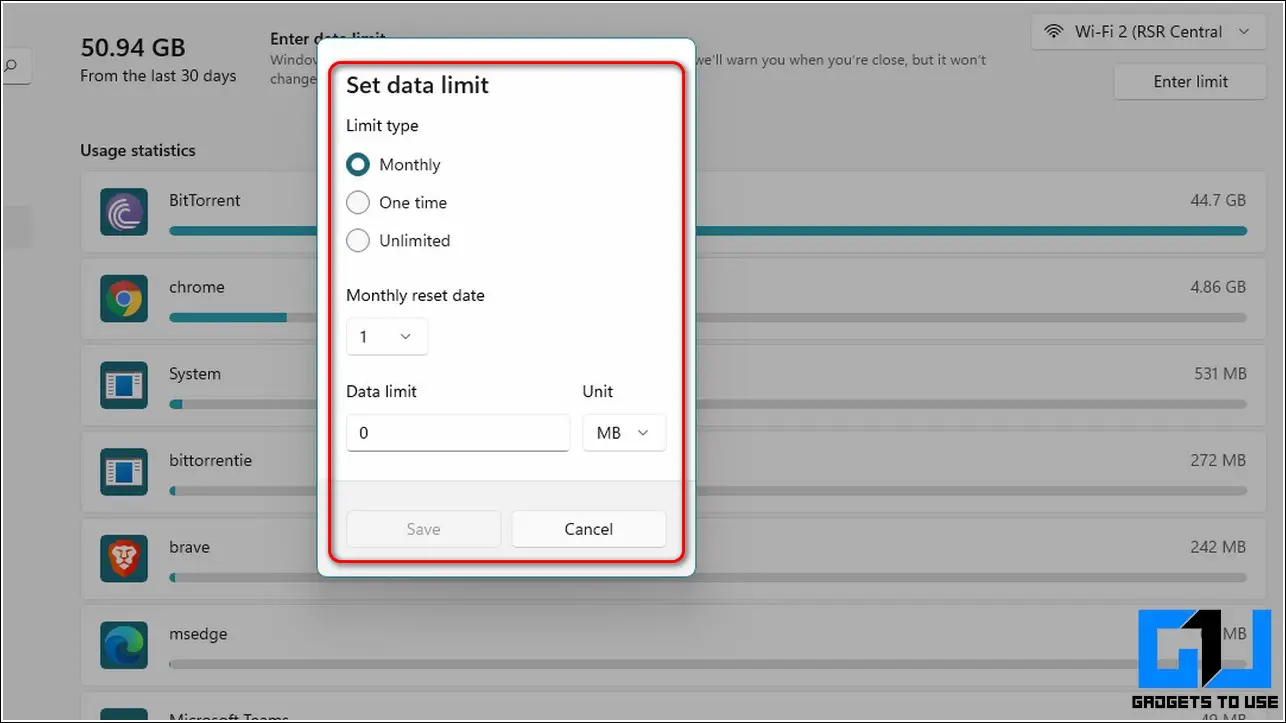
- Congrats. You have successfully set an internet usage limit on your Windows 11 system. Your system will automatically warn you with a notification when you reach close to your defined usage limit.
Install Third-Party Software to Track and Limit your Internet Usage
In addition to the in-built Windows tools to track internet usage, you can also use third-party software to track and limit your data. One such effective software goes by the name of NetWorx. Follow these steps to download and use this app to view and limit your internet usage on Windows 11.
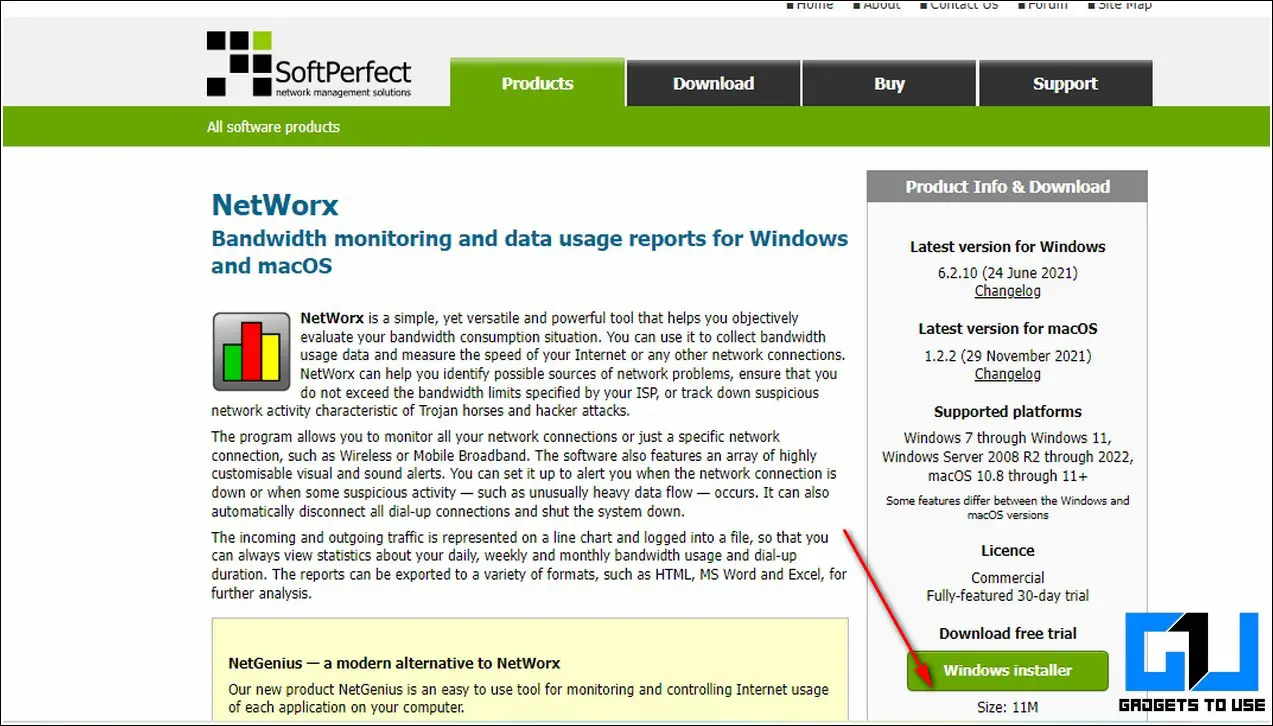
- Open a new tab in your web browser and access the NetWorx download page.
- Click on the Windows Installer button to download the Networx free tool.
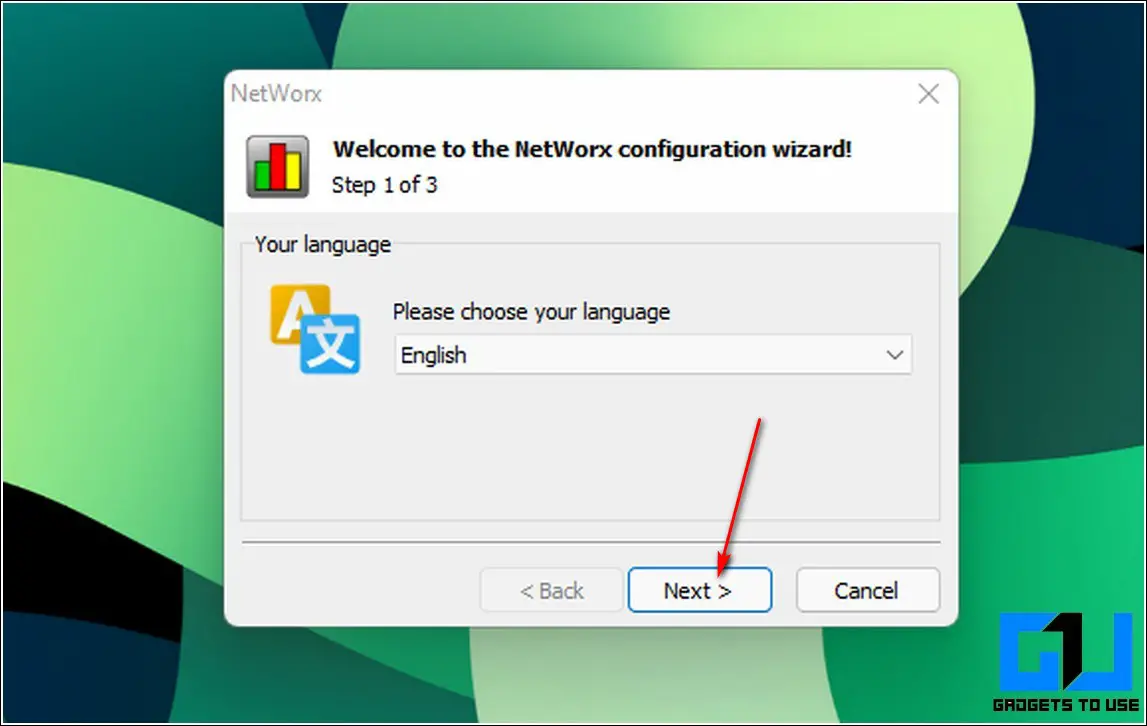
- Open the downloaded file and follow the installation wizard to install the NetWorx tool on your Windows 11 system.

- After the setup has completed installing the app, choose your preferred language and click on the Next button.
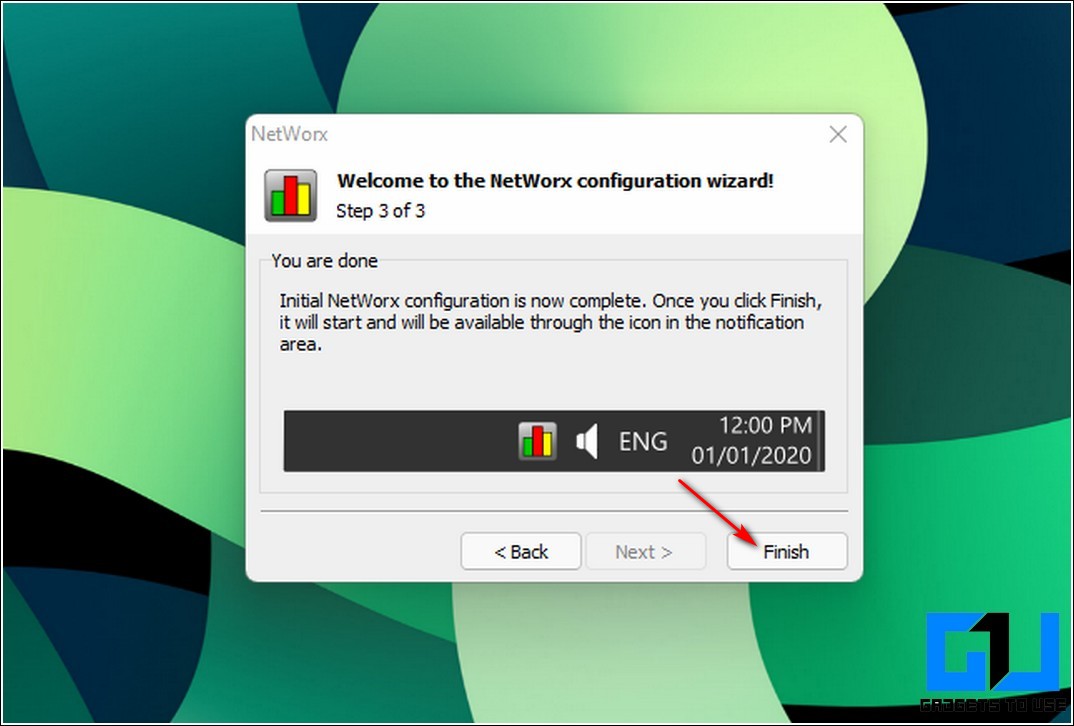
- Choose the internet connection that you wish to monitor with this app. You can also set this tool to monitor all the network connections on your system. Click on the Next button to proceed to the next page.

- Click on the Finish button to allow the NetWorx tool to start monitoring your preferred data connection.
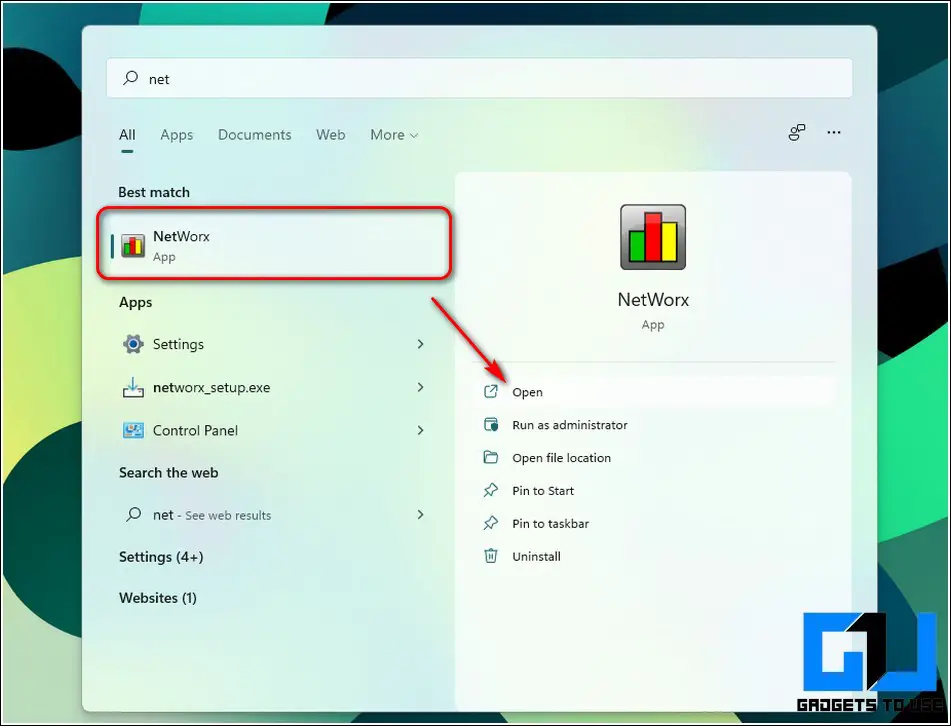
- Now, press the Windows key and search for the NetWorx app to open it.
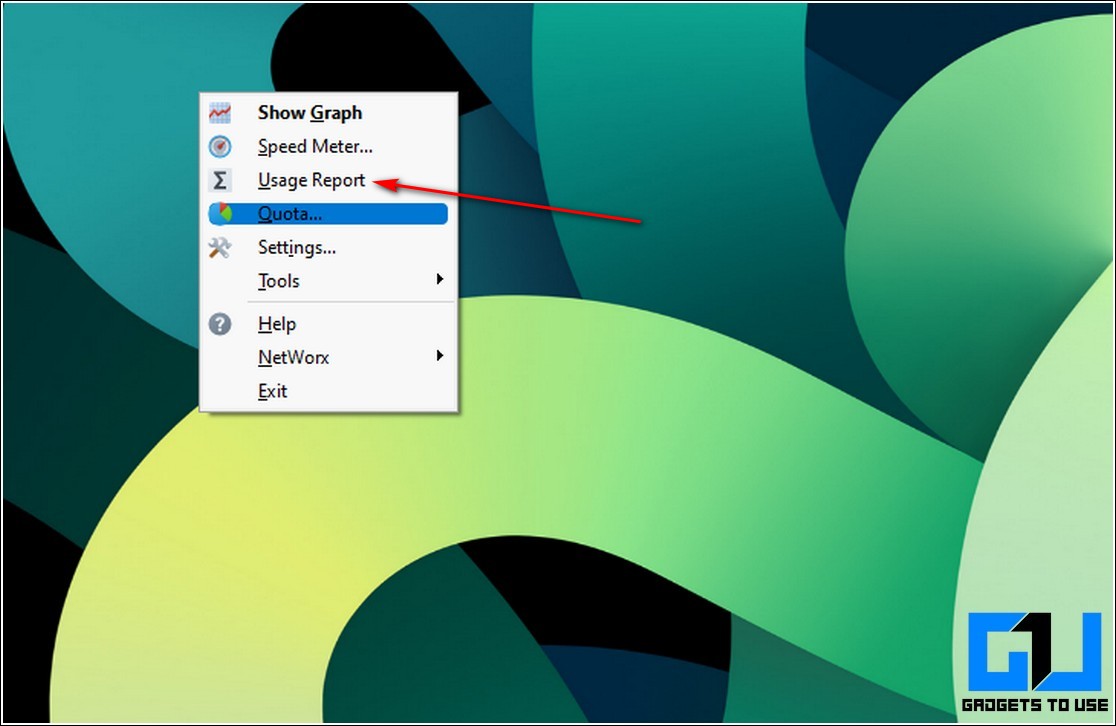
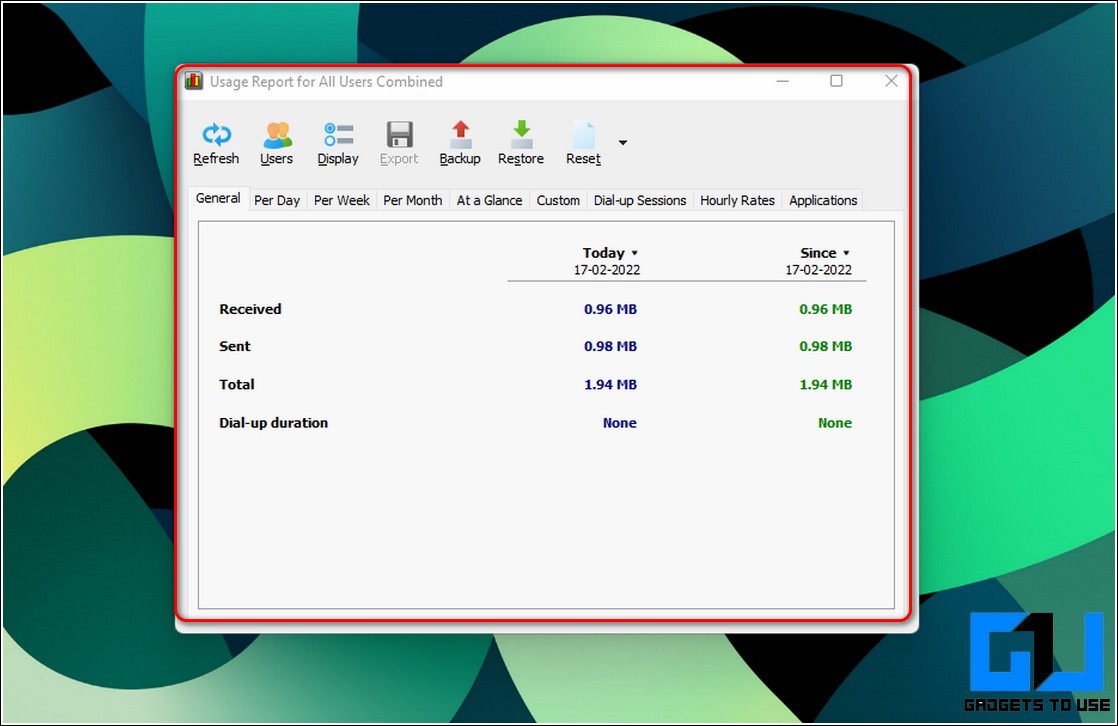
- Click on the Usage Report to view a detailed report of your data consumption.
- You can also export this report to your system for future reference.
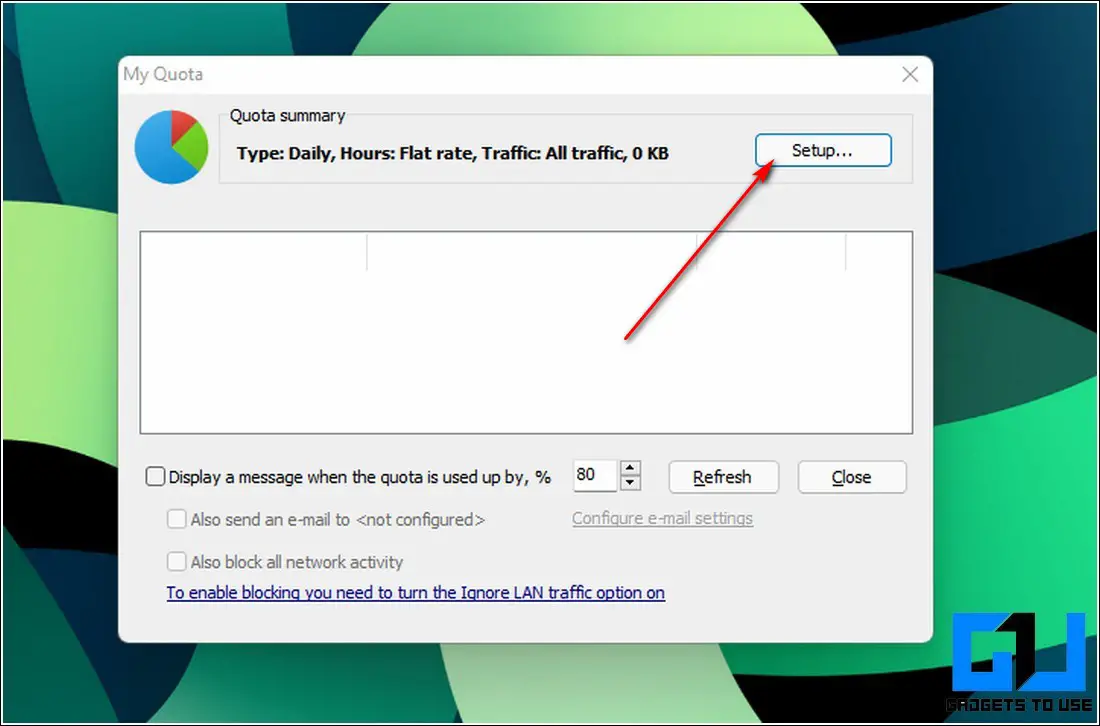
- The NetWorx tool also allows you to set limits to your internet usage through its Quota feature.
- Click on the Quota button to start setting your data usage limits.

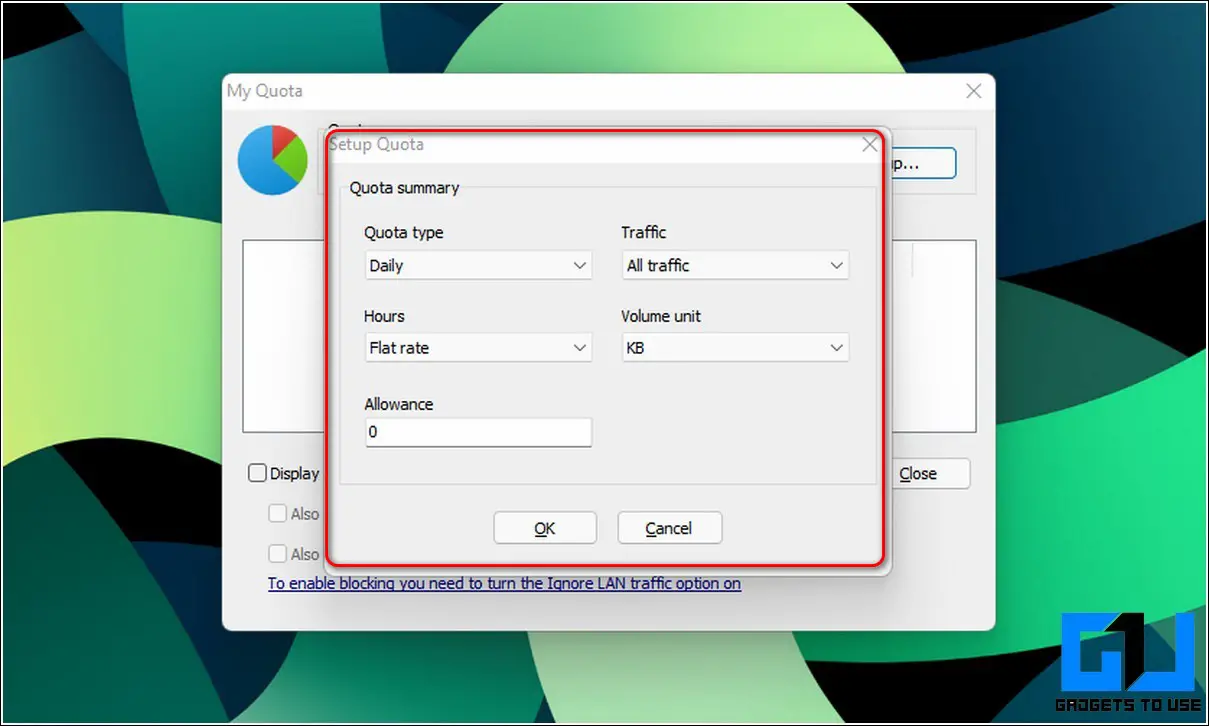
- Click on the Setup button to set your data consumption limits.
- Enter your preferred limits and click on the Ok button to save it.
- To display a warning message, turn on the Display a Message feature by entering your desired usage parameters.
- You can also send an email or block the network connections entirely on reaching your data threshold by turning on the associated toggle buttons.
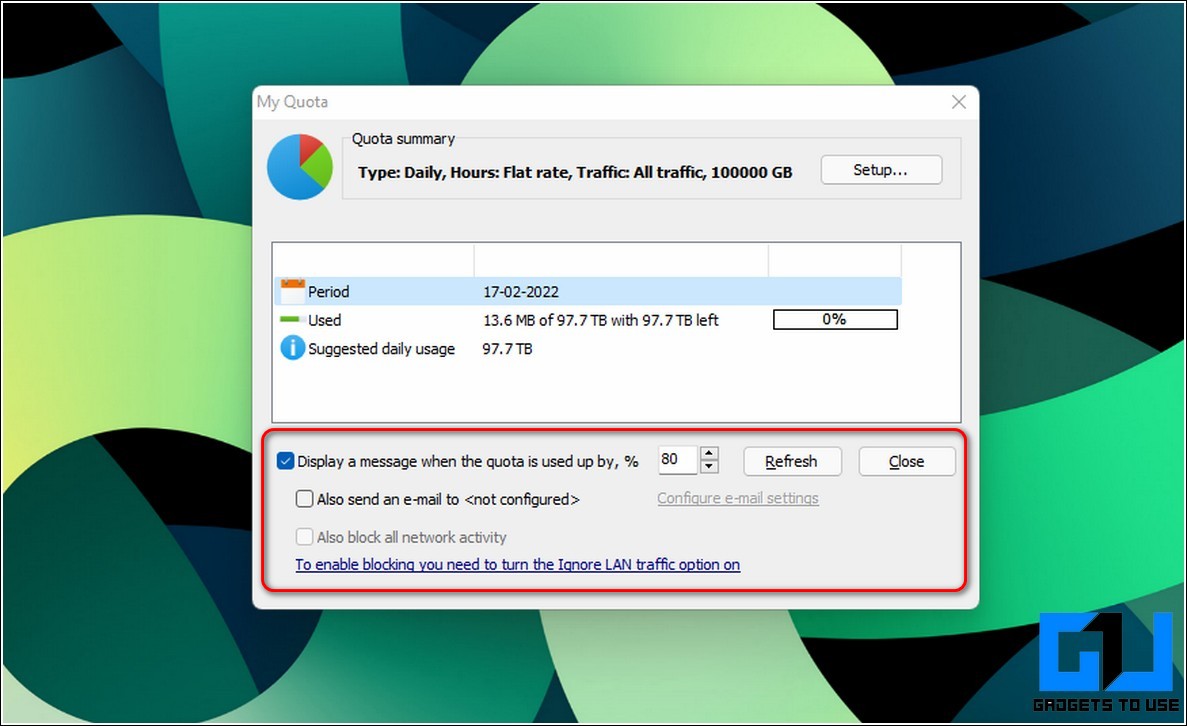
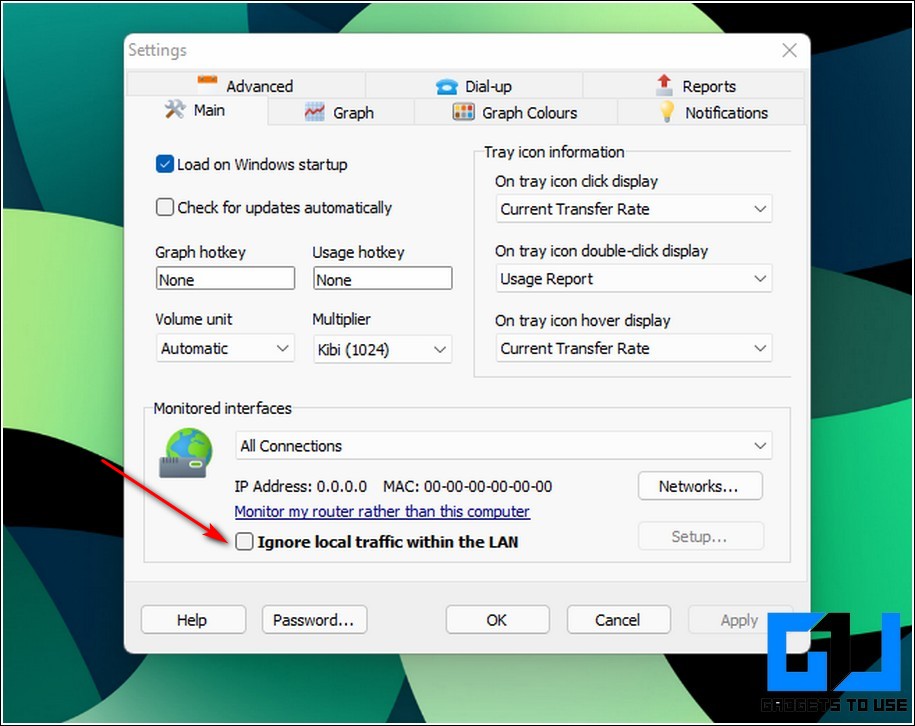
- To block your internet connection after crossing your set limits, you need to turn on the block internet connection option and check the Ignore local traffic within the LAN option.
Bonus Tip: Use Real-time Internet Speed Meter to Track Your Data
Microsoft Store also offers some good apps to monitor your internet speeds effectively. One such popular app in this segment goes by the name of the Net Speed Meter app through which you can easily track your internet upload and download speeds on Windows 11. Follow these steps to install and try this app on your system.
- Open the Microsoft Store app in your Windows 11 system and search for the Net Speed Meter app to install it.

- Click on the Open button to use the app after successful installation.
- On opening the app, you can now see a floating internet speed meter on your screen showing your incoming and outgoing network speeds. You can also drag this floating window anywhere on the screen to your convenience.

Also, Learn | 3 Ways to Add Command Prompt to Right-Click Context Menu in Windows 11
Wrapping Up: Monitor your Connections
So, that’s a wrap for the top 3 ways to monitor your internet connection on your Windows 11 system. If this 2-minute read has helped you in detecting and limiting your internet usage then hit the Like button and share this among your loved ones to help them avoid unnecessary data charges. Stay tuned for more informative reads.
You can also follow us for instant tech news at Google News or for tips and tricks, smartphones & gadgets reviews, join GadgetsToUse Telegram Group or for the latest review videos subscribe GadgetsToUse Youtube Channel.