Quick Answer
- If you don’t wish to uninstall OneDrive from your system but want to avoid it from running automatically, then you need to manually terminate the app and prevent it from running in the background.
- If you don’t wish to go into more technical details to uninstall the app, you can directly try to force close and uninstall the OneDrive process to remove it from Windows 11.
- One of the most effective ways to avoid unnecessary sync notifications from OneDrive is to uninstall the app from the system.
If you are a Windows 11 user, you must have often come across the annoying OneDrive sync message that pops out of nowhere. Fortunately, Microsoft allows you to disable or remove it entirely from the operating system. In this article, we will discuss the ways to disable OneDrive in Windows 11. You can further improve your productivity in Windows 11 by using its hidden features.
Disable Microsoft OneDrive in Windows 11
Unlike other system apps, you can disable the Microsoft OneDrive app on your Windows 10/11 machine using the following methods:
Remove Background Apps Permission and Terminate App
If you don’t wish to uninstall OneDrive from your system but want to avoid it from running automatically, then you need to manually terminate the app and prevent it from running in the background. Follow these steps for an easy fix.
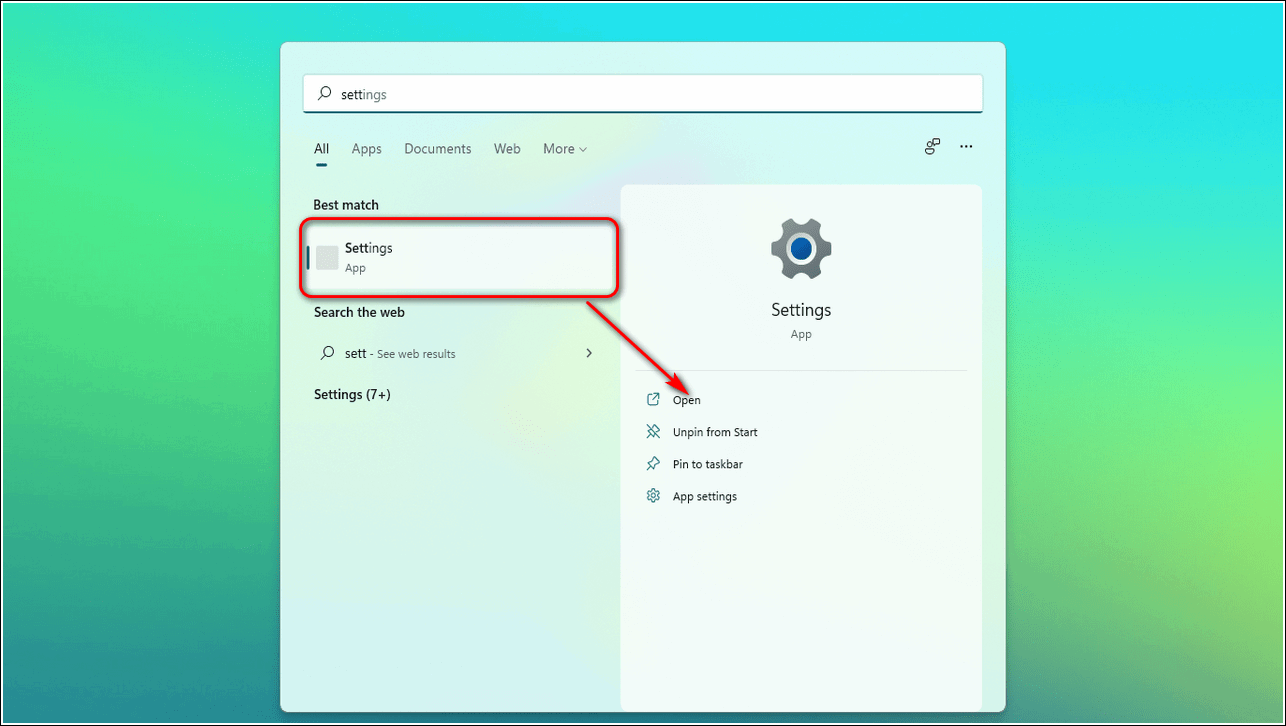
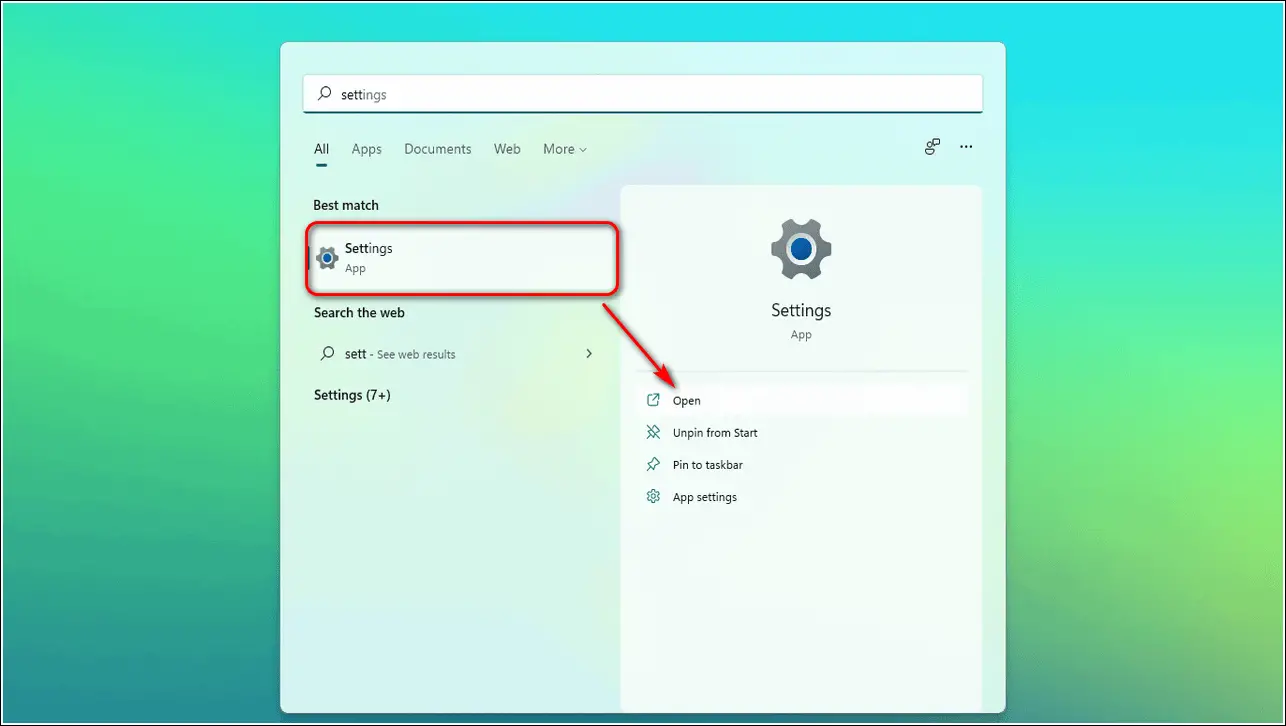
1. Open the Settings app.
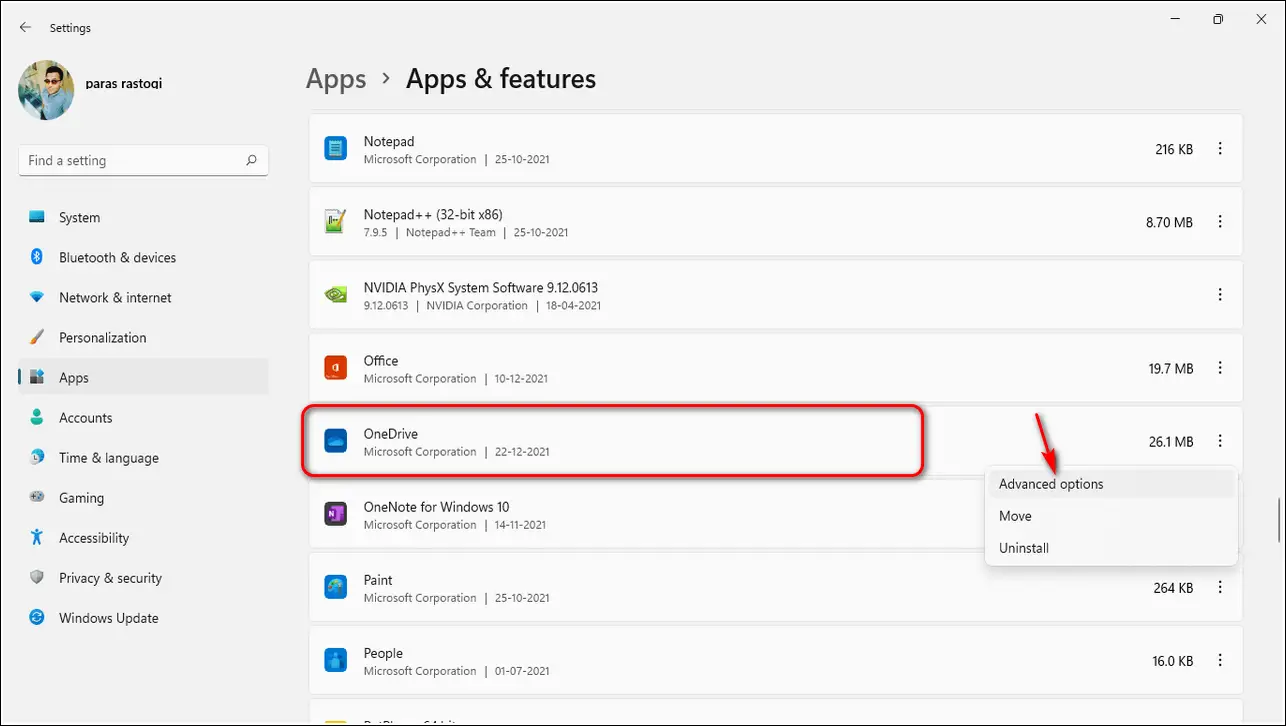
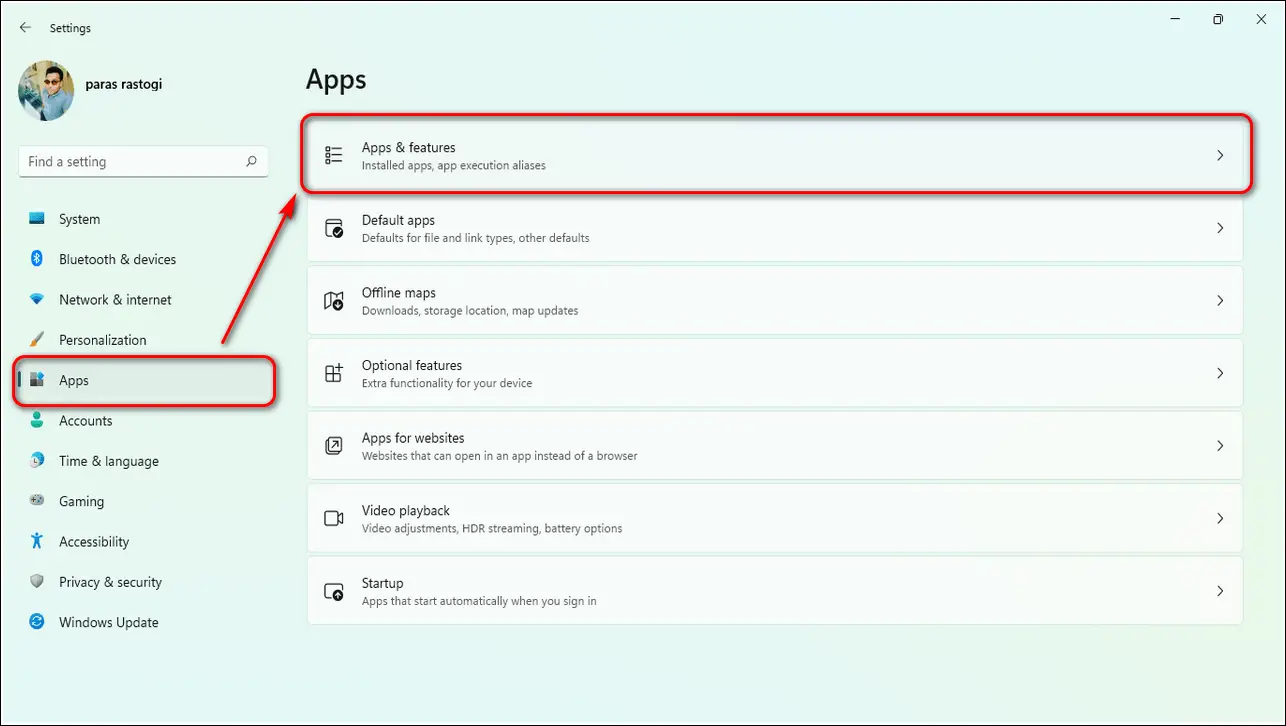
2. Expand Apps from the left sidebar and click on Apps and Features.
3. Search “OneDrive” and click on Advanced Options to open its properties.
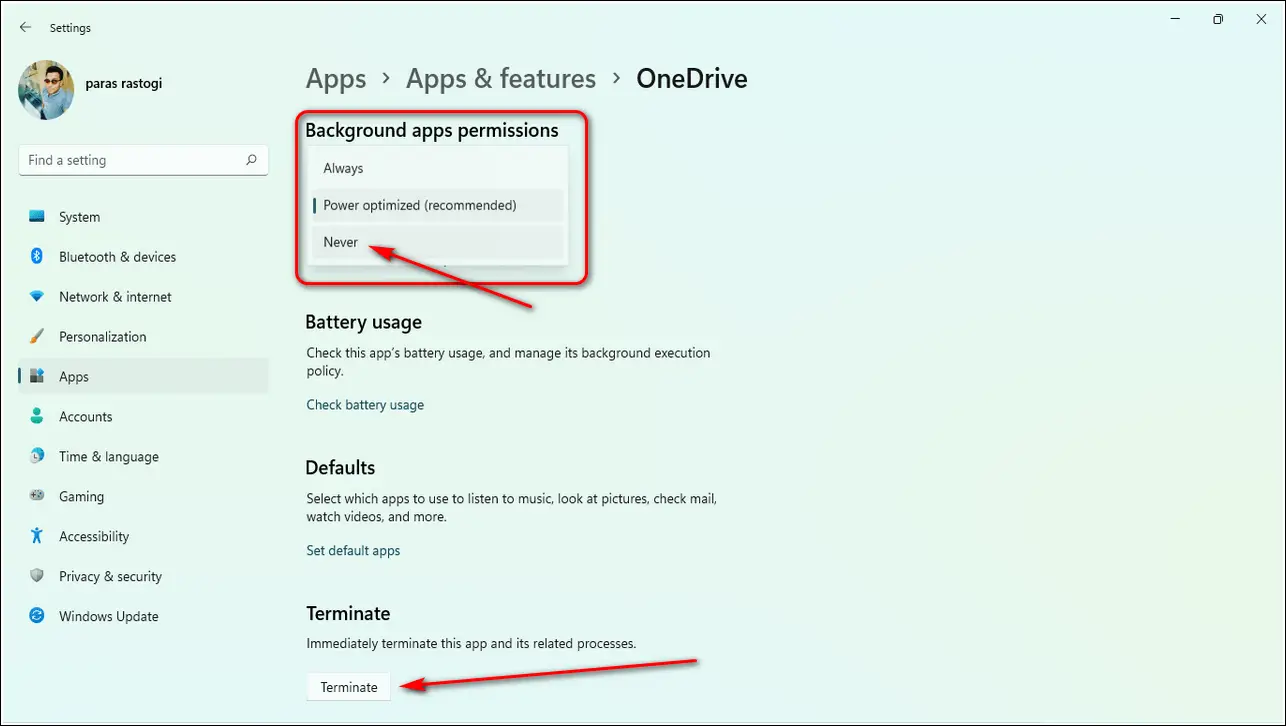
4. Set Background Apps Permission to Never.
5. Now, click on Terminateto exit any running instance.
That’s it. OneDrive will not run on its own now until you manually open it.
Remove OneDrive from Windows Startup Services
Windows Startup services include the list of apps that start as soon as the system boots up. Removing the OneDrive app from startup services will ensure that the app won’t automatically start at boot. Hence, it will prevent the app from sending any unnecessary sync notifications to the user. Follow these steps for a quick fix.
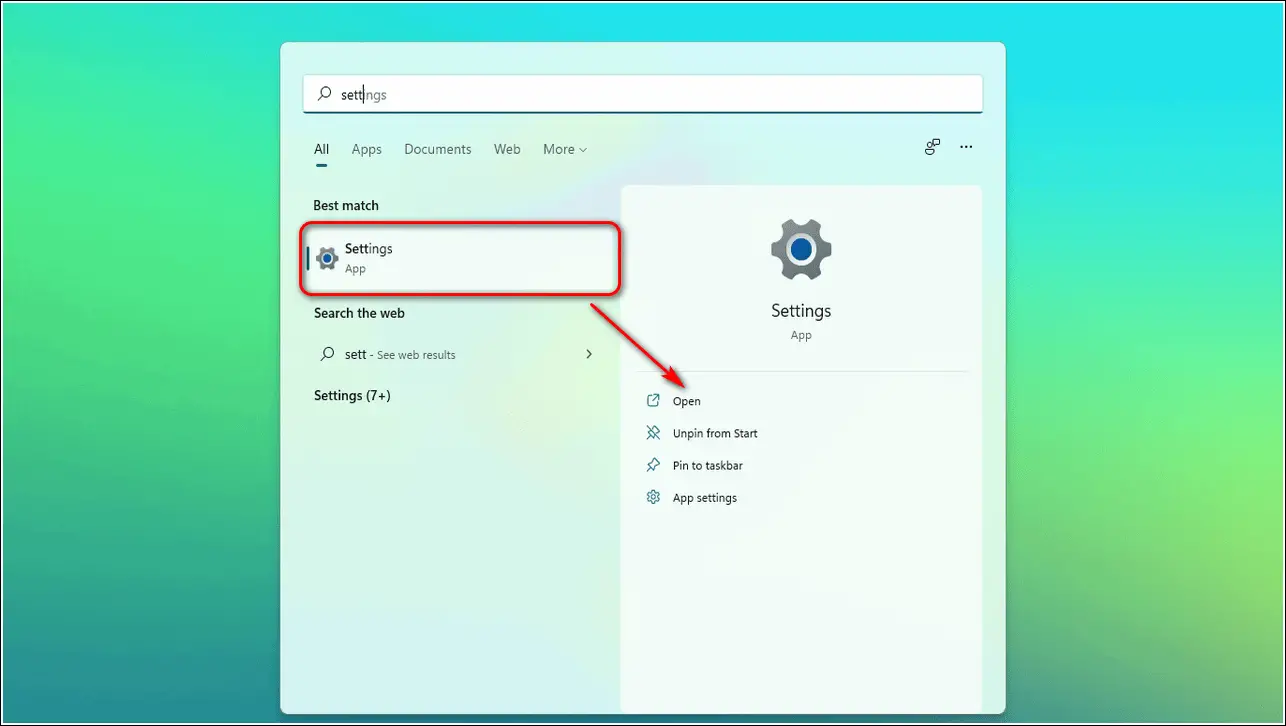
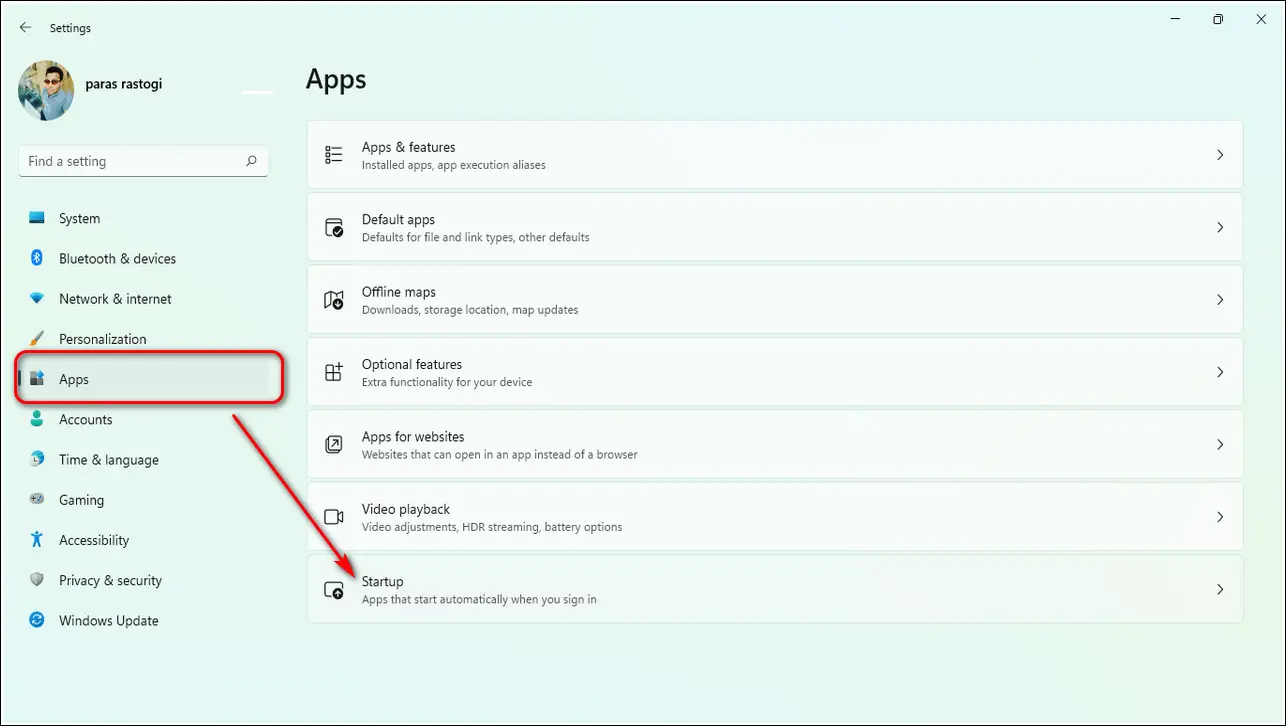
1. Go to the Settings app.
2. Click on Startup under Apps.
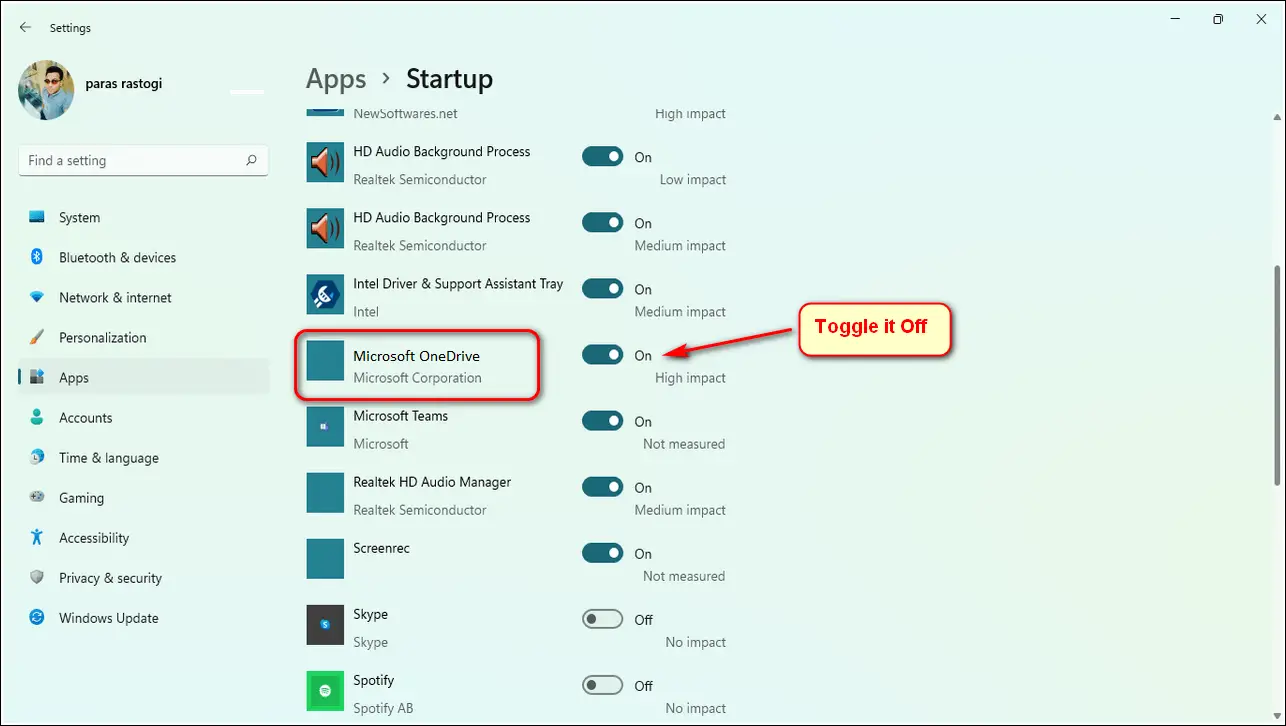
3. Now, turn off the toggle for OneDrive.
Uninstall Microsoft OneDrive on Windows 11
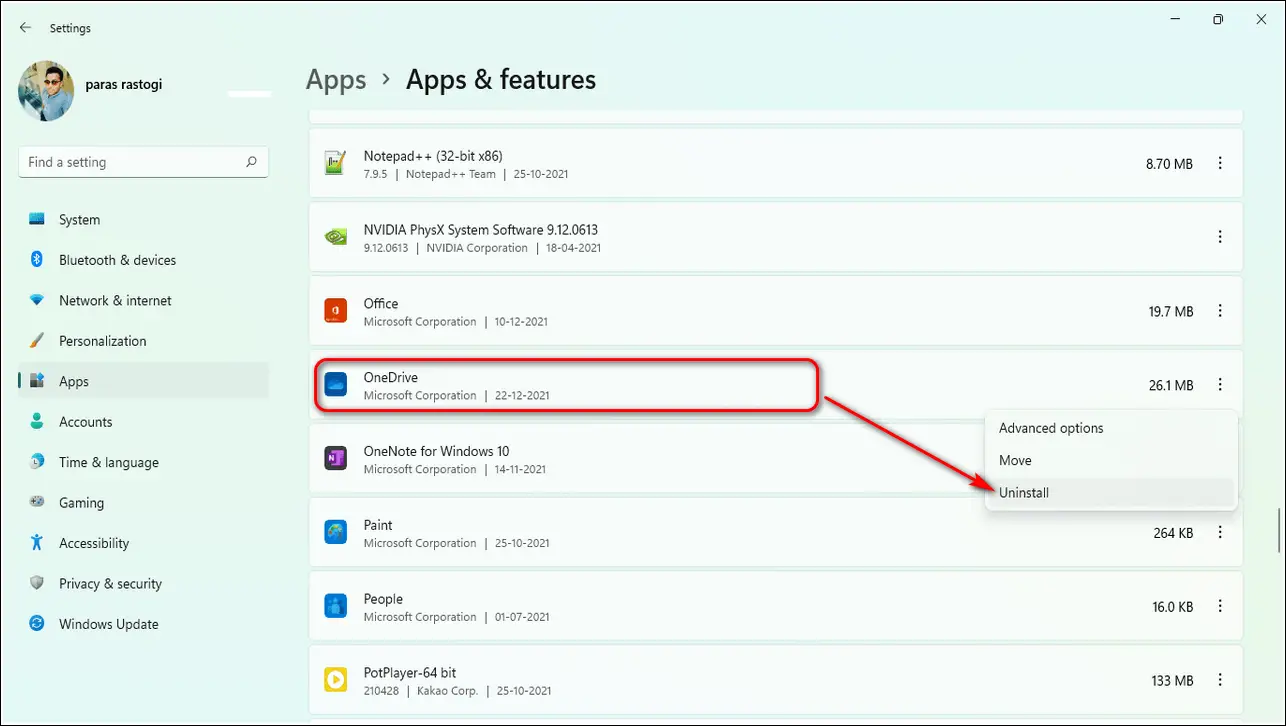
One of the most effective ways to avoid unnecessary sync notifications from OneDrive is to uninstall the app from the system. Follow these steps to remove Microsoft OneDrive app from Windows 11.
1. Open Settings on your computer.
2. Go to Apps and Features under Apps.
3. Now, click on the three dots in front of OneDrive.
4. Click on Uninstall to remove the app from your system.
Use Group Policy Editor to Disable OneDrive
Group Policy Editor is a Windows administrative tool that helps the user to personalize the Windows experience and important services. You can use this tool to disable OneDrive for file storage. This will prevent the app from sending any sync notifications.
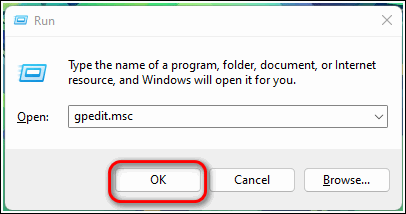
1. Open Run by pressing Windows key + R simultaneously.
2. Type ‘gpedit.msc’ and hit the enter key.
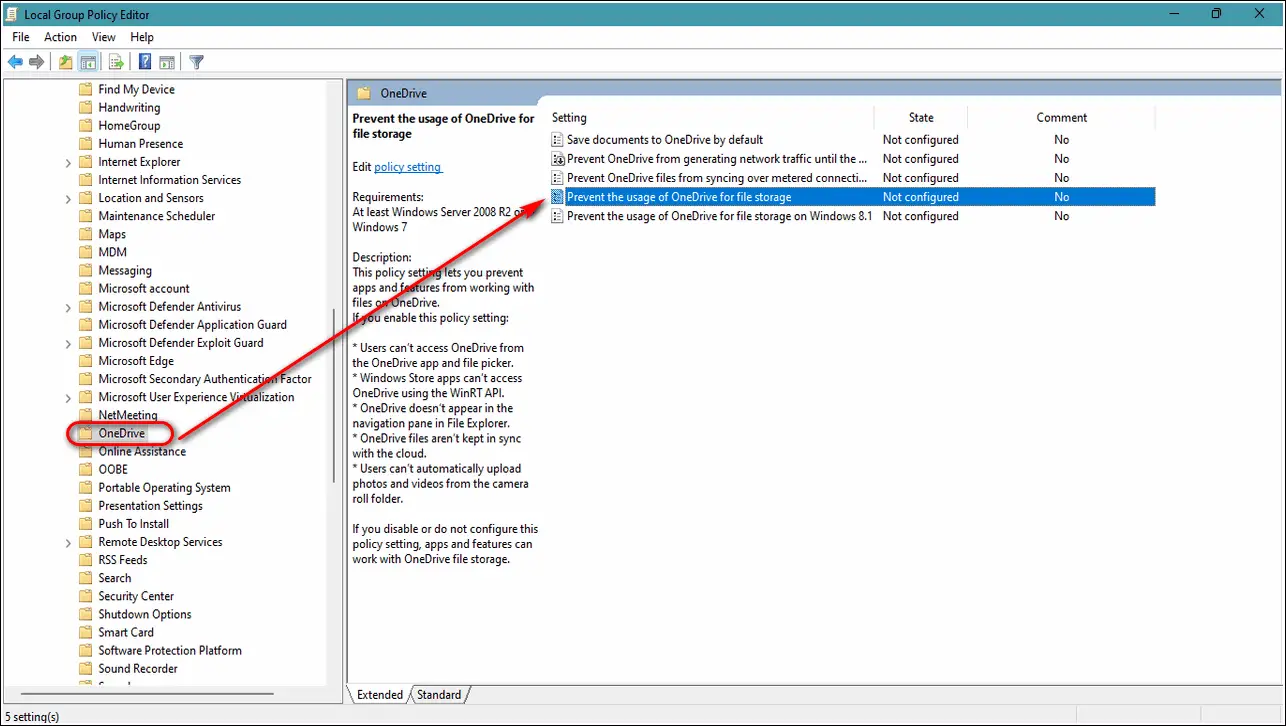
3. Navigate to the following path:
Computer Configuration> Administrative Templates> Windows Components> OneDrive
4. Click twice on Prevent the usage of OneDrive for File Storage to open settings.
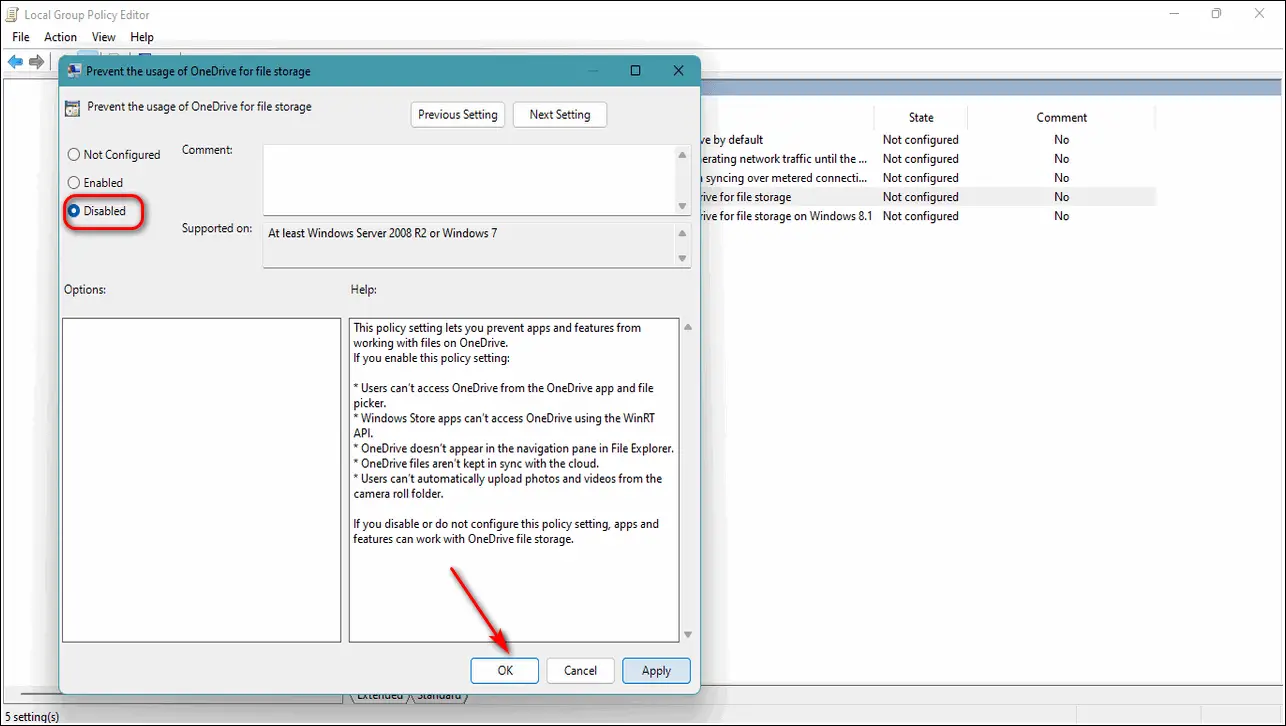
5. Change it to Disabled and then click OK.
Make use of Registry Editor to Disable OneDrive
Another effective way to disable Microsoft OneDrive app is with the help of Registry Editor. Follow these simple steps for a quick fix.
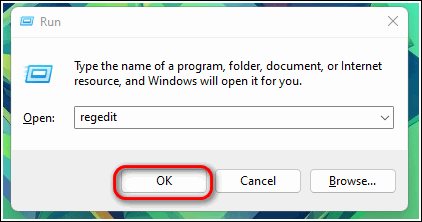
1. Open the Run, search ‘Regedit‘ and press enter key.
2. Click on Yes when prompted to provide administrative access privileges.
3. Navigate to the following path:
Computer>HKEY_LOCAL_MACHINE>SOFTWARE>Policies>Microsoft>Windows>OneDrive
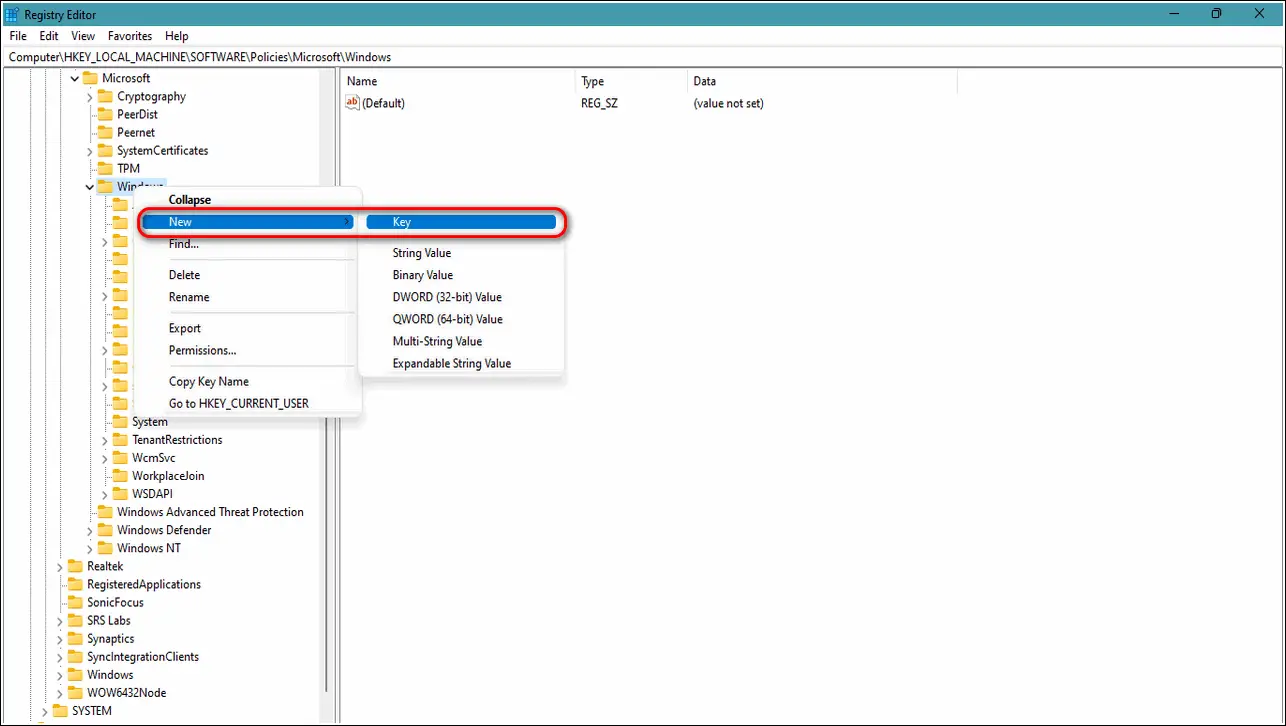
4. If you can’t find the OneDrive folder here, then you need to create one in the Windows directory.
- Right-click on the Windows folder and click on New and then select Key.
- Name the Key to OneDrive.
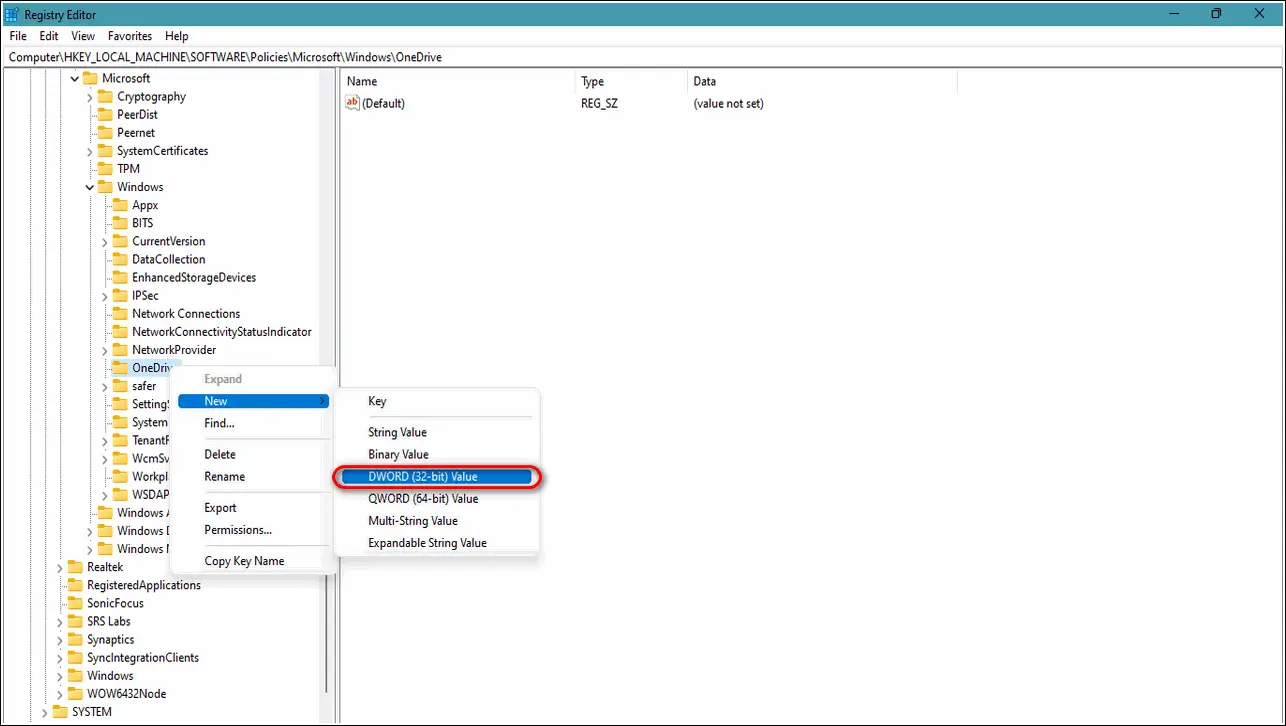
5. Right-click on this newly created key, click on New, and then select DWORD (32-bit value).
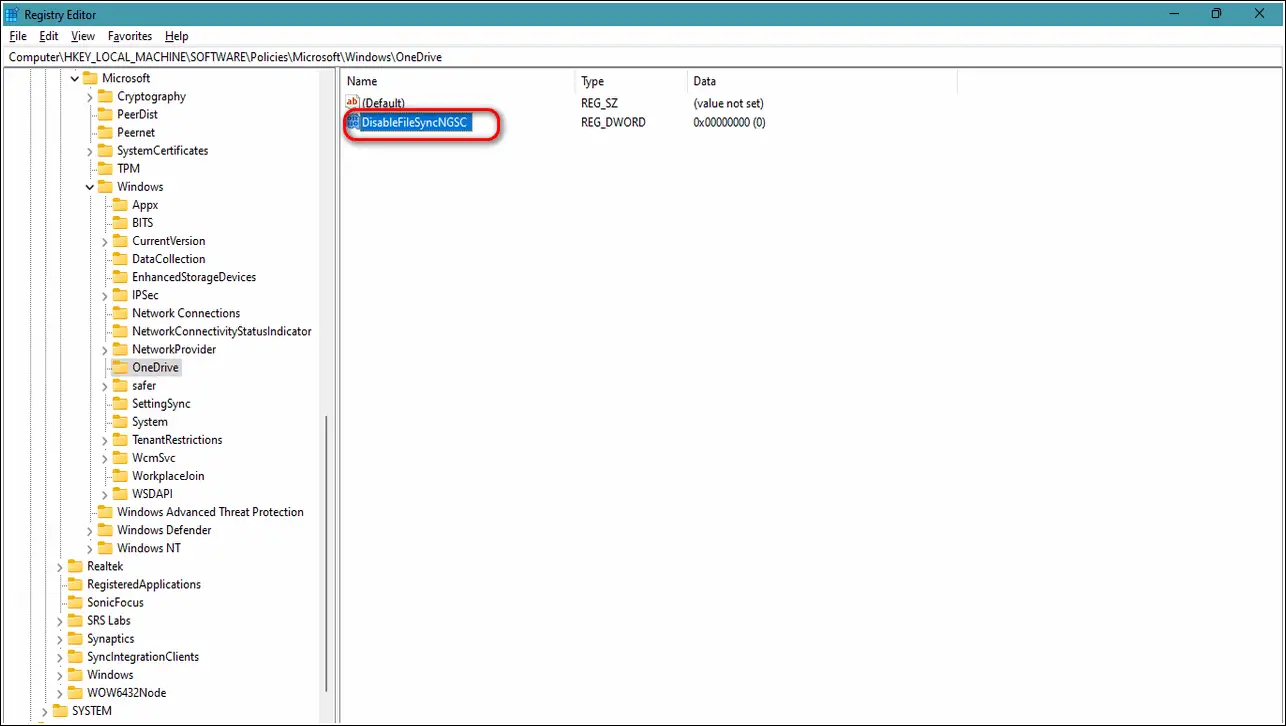
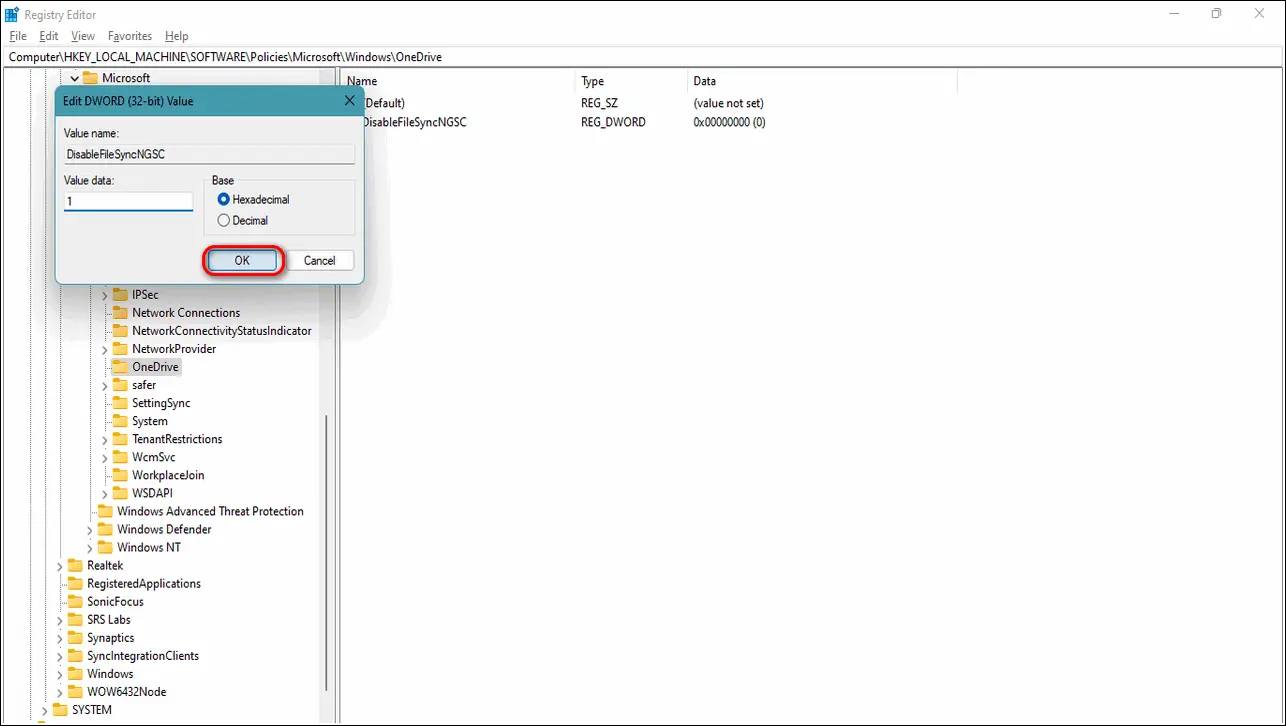
6. Rename this DWORD value to DisableFileSyncNGSC and then double-click on it to set its value.
7. Change the value to 1 and save changes.
That’s it. You’ve successfully disabled OneDrive file sync in Windows 11.
Use Command Prompt to kill and Uninstall OneDrive on Windows
If you don’t wish to go into more technical details to uninstall the app, you can directly try to force close and uninstall the OneDrive process to remove it from Windows 11.
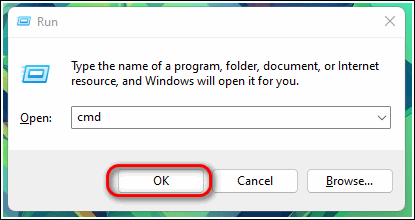
1. Open Run, type cmd, and hit the enter key.
2. Enter the following commands:
For 32-Bit System:
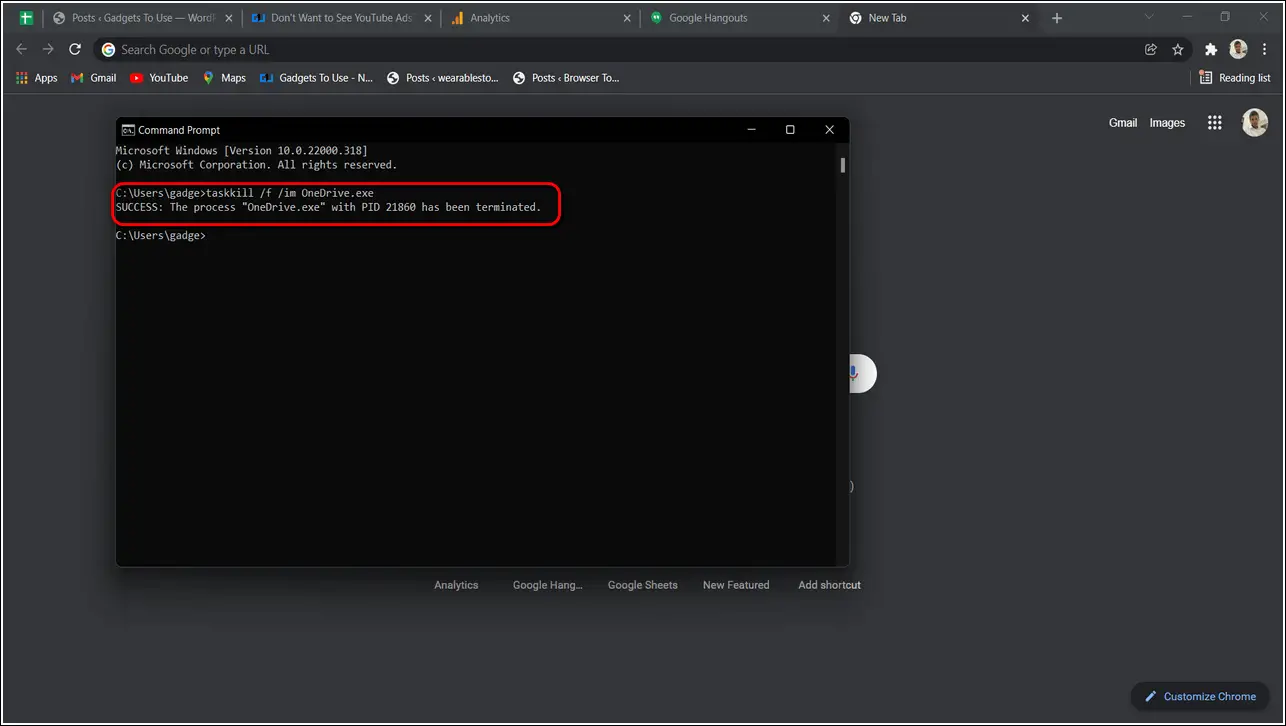
- taskkill /f /im OneDrive.exe
- %SystemRoot%\System32\OneDriveSetup.exe /uninstall
For 64-Bit System:
- taskkill /f /im OneDrive.exe
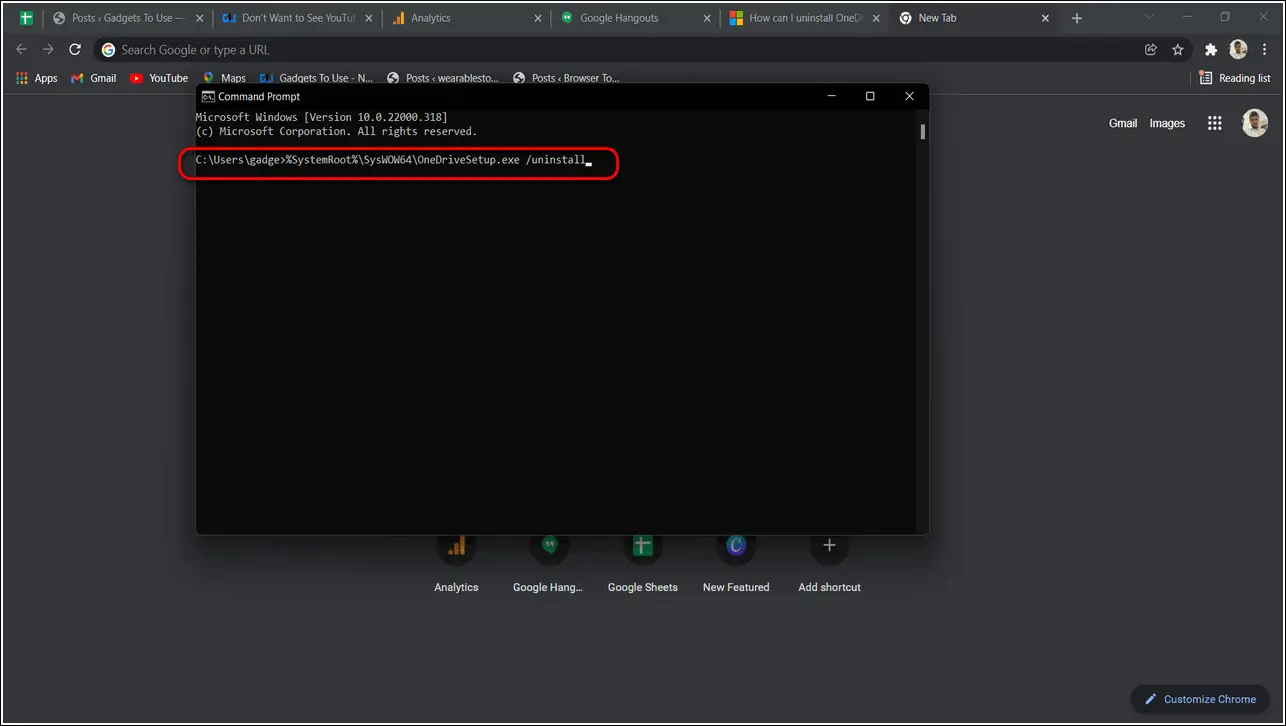
- %SystemRoot%\SysWOW64\OneDriveSetup.exe /uninstall
3. The first command will force close the process and the second command will uninstall it.
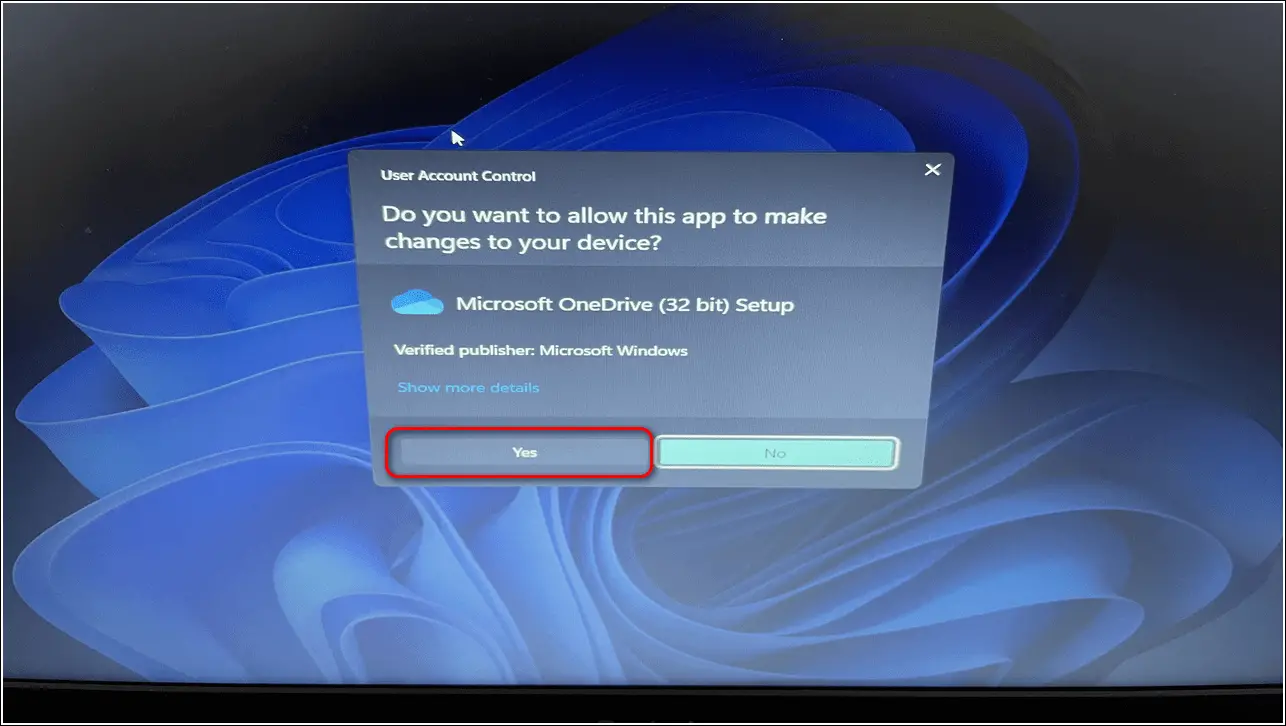
4. After executing these commands, you will receive an uninstaller popup from OneDrive to uninstall the app. Follow the on-screen process to uninstall the app completely.
Congratulations. You’ve successfully uninstalled OneDrive from Windows 11.
Utilize Windows PowerShell to Disable Microsoft OneDrive
Besides the command prompt, you can use the Windows PowerShell utility tool to disable Microsoft OneDrive on Windows 11. Here’s what you need to follow:
1. Press the Windows key and search for the Powershell app to open it as administrator.
2. Next, type the following command and hit the Enter key:
Winget Uninstall OneDrive
3. Wait for a few seconds to let the tool uninstall OneDrive. Type Y if you receive any prompt related to agreeing to terms and conditions. Finally, exit the PowerShell window.
That’s it! You’ve successfully disabled Microsoft OneDrive on your Windows system using PowerShell.
Bonus Tip: Disable Microsoft OneDrive with Batch Script
If you don’t wish to deal with the hassle of executing commands manually, you can run our batch script file on your Windows system to get rid of Microsoft OneDrive. Here’s how:
1. Download our OneDriveUninstaller batch file from the Google Drive link.
2. Right-click on the downloaded file and choose Run as Administrator.
3. Wait for a few seconds and approve the on-screen uninstaller popups to uninstall Microsoft OneDrive completely.
FAQs
Q: How do you turn off OneDrive in Windows 11?
A: You can either disable OneDrive temporarily by restricting background app permissions or uninstall it entirely from your Windows machine using the methods listed above.
Q: How to Stop Microsoft OneDrive from Syncing automatically on your Windows system?
A: You need to remove OneDrive from the Windows Startup Services to prevent it from syncing automatically.
Wrapping Up: Disable OneDrive in Windows 11
In this read, we discussed how to disable Microsoft OneDrive in Windows 11. I hope you have found this useful; if you did, then hit the like button and share this. Check out other useful tips linked below, and stay tuned for how-tos like this.
You might be interested in:
- 9 Ways to Fix Unable to Install Apps or Software in Windows 11
- 2 Ways to Recover Permanently Deleted Files on Windows 10 or 11
- 3 Ways to Make Windows 11 Start Menu show All Apps by Default
- 3 Ways To Completely Uninstall Any Program in Windows 10 and 11
You can also follow us for instant tech news at Google News or for tips and tricks, smartphones & gadgets reviews, join GadgetsToUse Telegram Group or for the latest review videos subscribe GadgetsToUse Youtube Channel.

