Quick Answer
- 1] Now that you’ve installed Beta version of Google Maps, simply open the app and tap on the hamburger menu on the top left corner to open the sidebar menu.
- 4] After the beta signup process is completed (takes around a couple of seconds), you’ll get a new update for the Google Maps app on Play Store.
- Following which, you just have to point your phone’s cameras at your surroundings, and the machine learning will identify the landmarks based on Street View imagery to pinpoint your location.
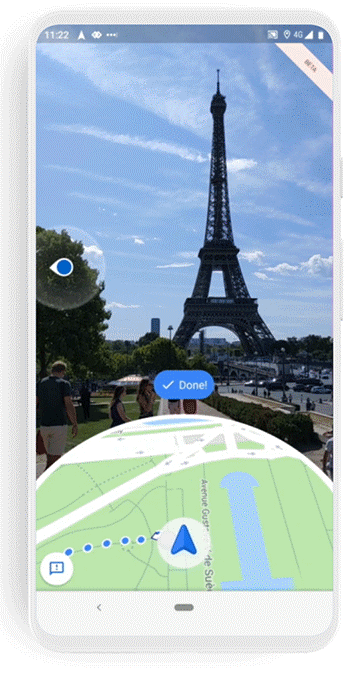
After testing the feature for months, Google has now finally started rolling out the AR Live View mode for all Google Maps users. For starters, Google Maps offers two types of views for walking navigation: the usual 2D map and Live View. With Live View, you’ll be able to see directions placed in the real world based on augmented reality. Having said that, here’s a simple guide on how to get Live View on Google Maps.
Get Live View on Google Maps
Google unveiled the Live View feature, dubbed as AR walking directions (back then) for the first time at Google I/O 2018. It was then made available for testing to Local Guides with Level 5 or above, followed by the availability for all Google Pixel users.
The Google Live View feature combines Visual Positioning Services with Street View and machine learning. Following which, you just have to point your phone’s cameras at your surroundings, and the machine learning will identify the landmarks based on Street View imagery to pinpoint your location. After that, it’ll accurately display necessary information, such as directions, over the real world, in the form of AR stickers.
Thankfully, Google has now made Live View available for all users, through the latest Beta version of its app. However, there are certain pre-requisites for the feature to work on your device:
- Your smartphone should have support for Google ARCore or ARKit. Now, most of the modern phones already have it, but in case your’s doesn’t, here’s how to enable ARCore on any Android Phone).
- The area needs to have proper Street View coverage. You’ll find Live View only if you’re at a location covered by Street View.
Steps to get Live View (AR Walking Directions) in Google Maps
1. Enroll in Google Maps Beta Program
1] Open Google Play Store on your phone and search for Google Maps.
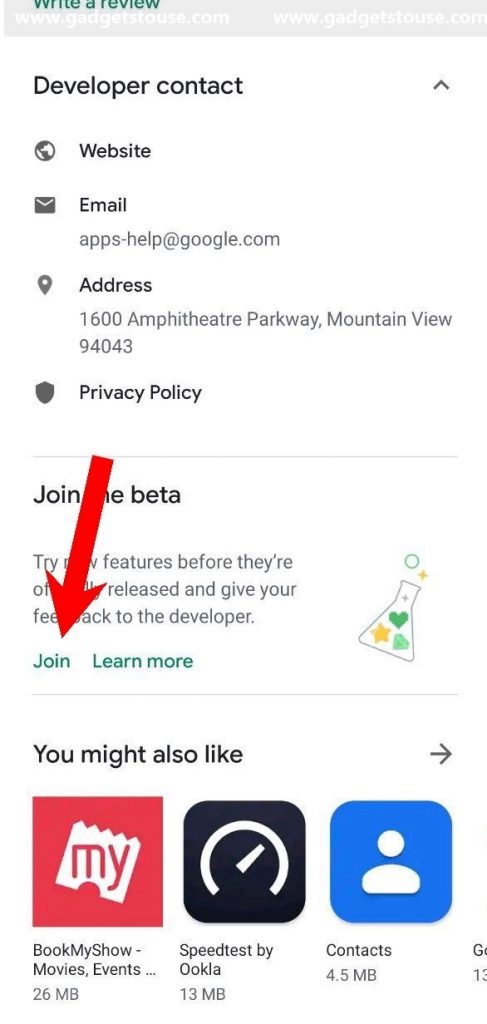
2] On the Maps app page, scroll down and look for Beta Sign Up option.
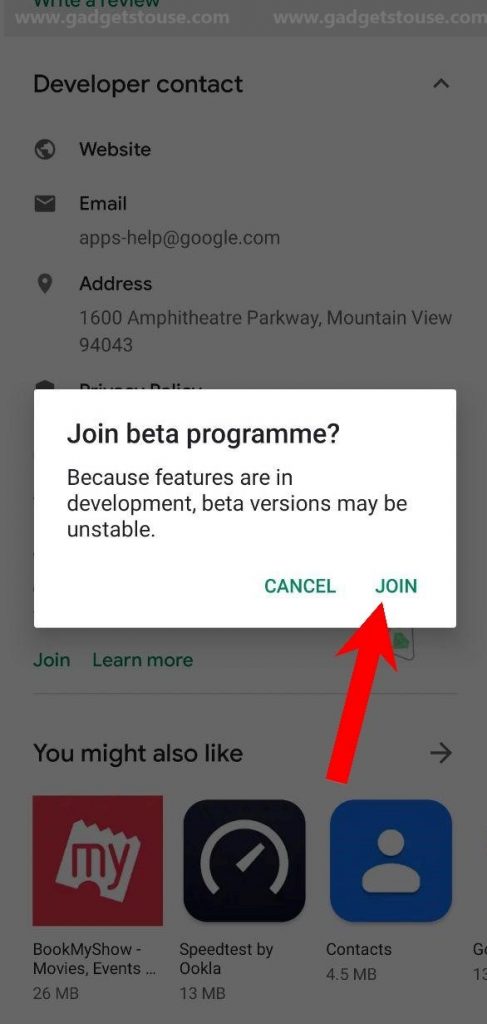
3] Tap on Join. Confirm the same again when prompted. After that, you’ll be able to see a message that reads “Beta sign-up in progress. It takes a few minutes.”
4] After the beta signup process is completed (takes around a couple of seconds), you’ll get a new update for the Google Maps app on Play Store. Tap on Update and wait for it to install the latest Beta version on your device.
2. Enable Live View in Google Maps Settings
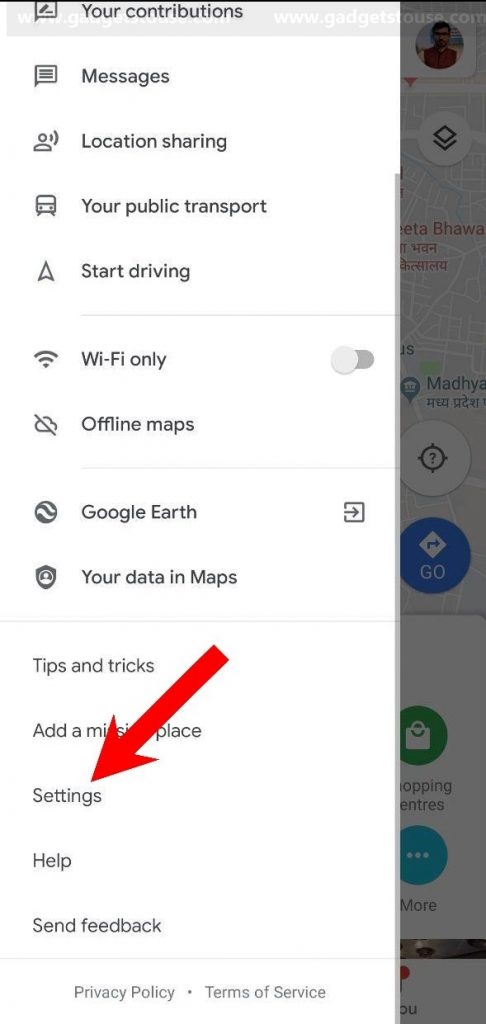
1] Now that you’ve installed Beta version of Google Maps, simply open the app and tap on the hamburger menu on the top left corner to open the sidebar menu.
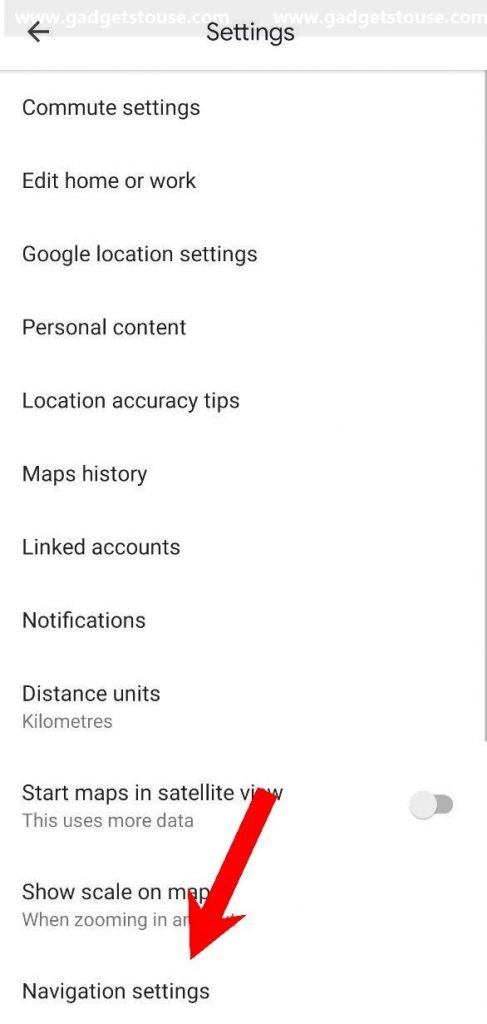
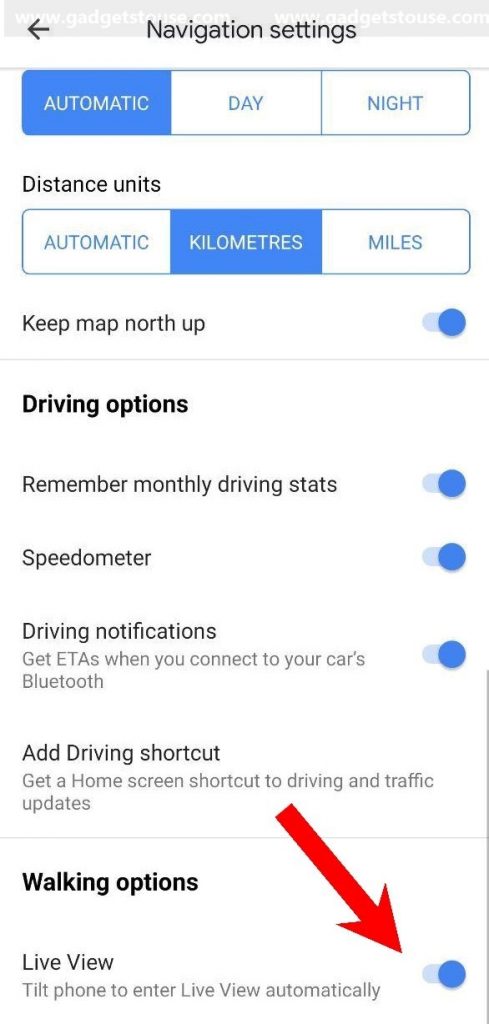
2] Select Settings and navigate to the Navigation Settings section.
3] Scroll down to the bottom of the following page and flick the toggle next to Live View option. This will activate the feature on your device.
3. Using Live View in Google Maps
1] Open Google Maps. Enter a destination in the location search pane or else just tap it on the map.
2] Tap on Directions.
3] In the travel mode selection toolbar, choose Walking.
4] Tap the Live View (Start AR) option located at the bottom center.
5] Now follow the on-screen instructions to help Maps find your exact location. Note that you have to tilt and point your phone’s camera at buildings and signs across the street instead of people or trees.
Once Maps knows where you are, it’ll start showing you realtime directions through the camera view on your screen. That being said, you’ll also see a 2D live map on the bottom of your screen for easier navigation. And, your phone will vibrate as you cross a navigation step or destination. To return to the standard map view, simply tilt your phone back to the vertical position or press the Live view button.
As mentioned, Live View will work only in countries/ regions where Google Street View is available. Also, it might not work buttery smooth as it’s currently in Beta stages.
Wrapping Up
So this was all about how you can enable Live View in Google Maps. By the way, how often do you see yourself using this feature? Let us know in the comments below. Also, feel free to reach us in case of any doubts or queries.
Also, read 5 Best Free Alternatives to CamScanner to Keep Your Smartphone Safe.
