Quick Answer
- It can identify what the photo is about, whether it’s a person, a pet, a monument, or a document.
- Google Photos is the go-to gallery app for most Android and iPhone users, thanks to free photo and video backups, quick sharing, and other features.
- Interestingly, Photos is much more than a plain photo-viewing app- it packs many quirks inside, which you should know to get the most out of it.
Google Photos is the go-to gallery app for most Android and iPhone users, thanks to free photo and video backups, quick sharing, and other features. Interestingly, Photos is much more than a plain photo-viewing app- it packs many quirks inside, which you should know to get the most out of it. Here, let’s look at some of the best Google Photos tips and tricks to use in 2022.
Related | 5 Google Photos Alternatives You Can Try For Free Storage
Best Google Photos Tips and Tricks to Use in 2022
Google Photos comes equipped with many useful features like face labeling, background blur, searching for objects, and more. Below we’ve detailed the ones you can use daily to enhance your Photos experience. Read on.
1. Search for People, Places, and Objects
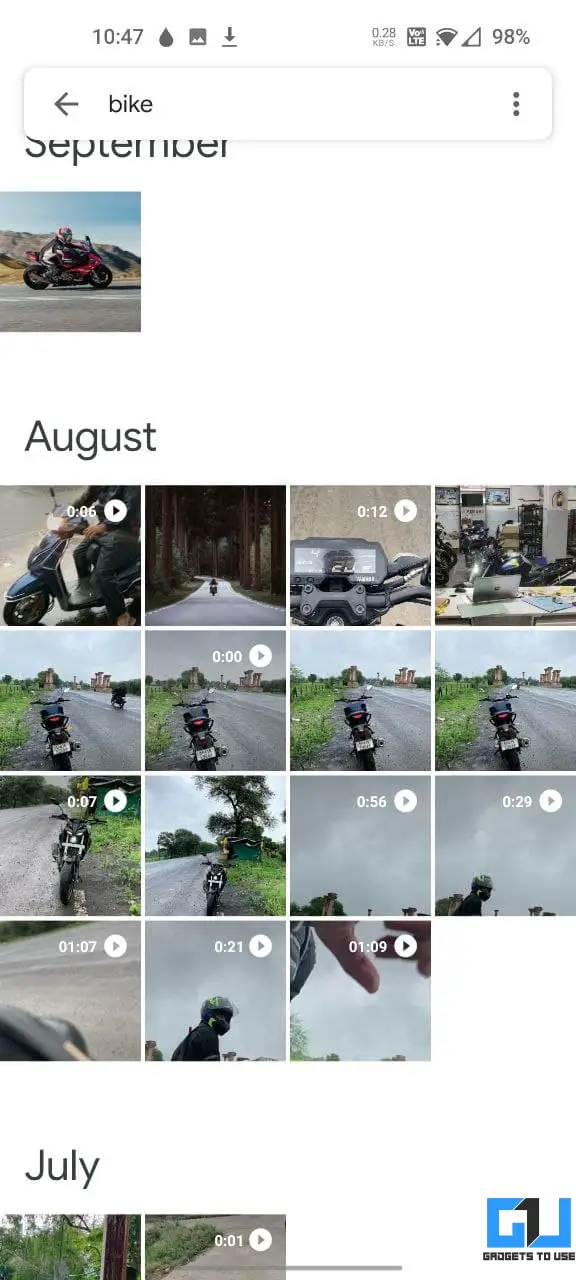
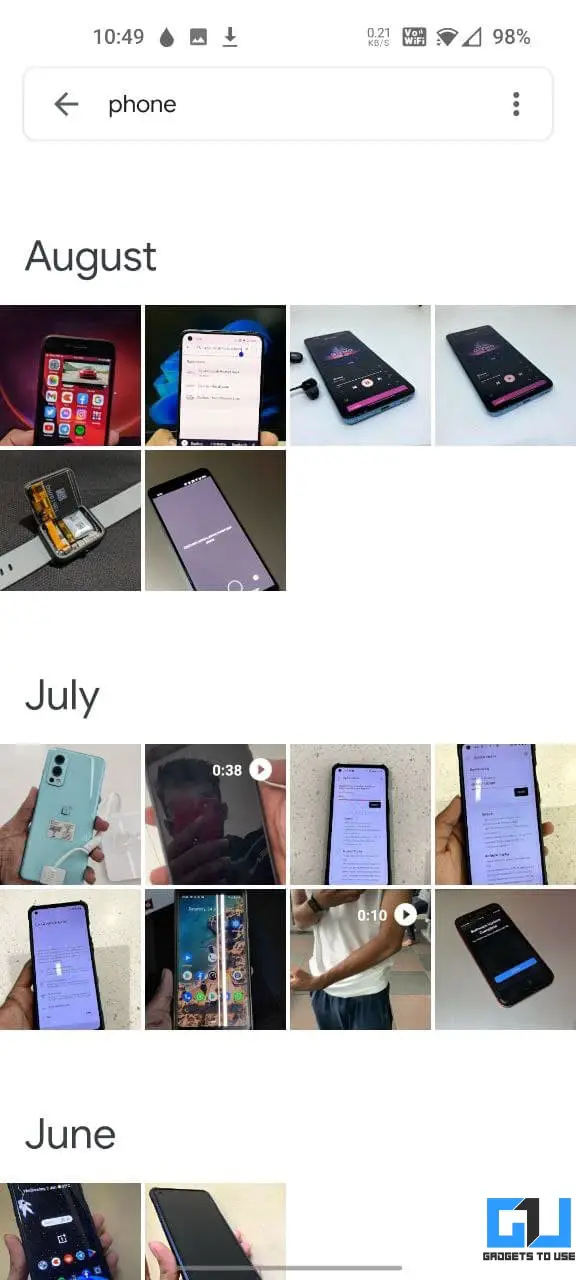
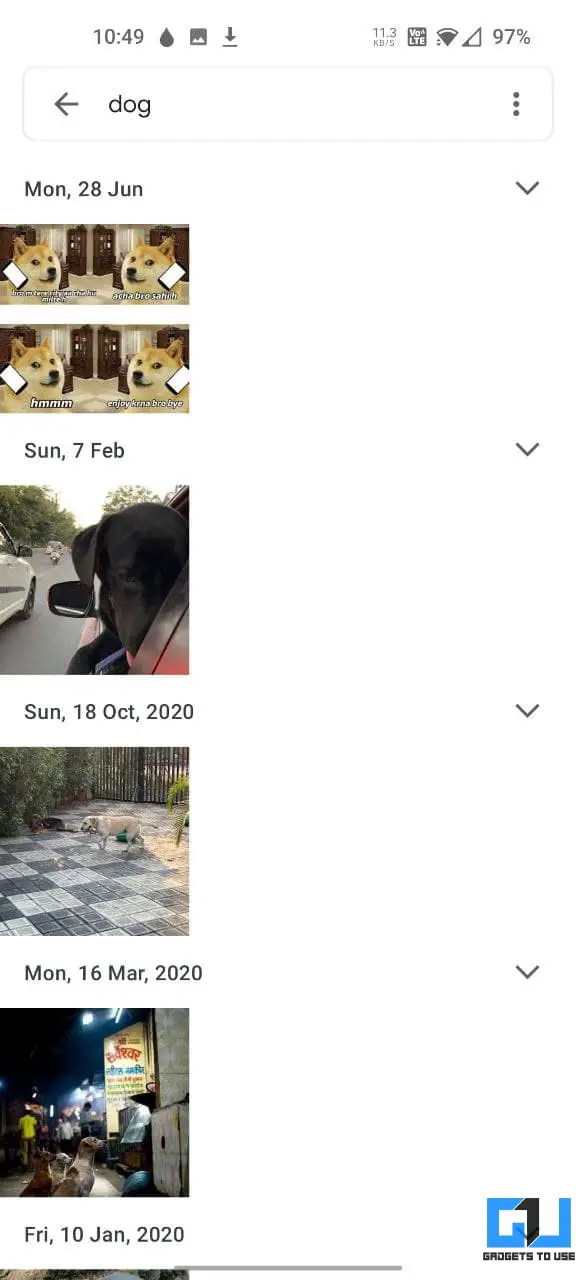
Google Photos uses machine learning to visually recognize and auto-tag images. It can identify what the photo is about, whether it’s a person, a pet, a monument, or a document. Its sheer ability to detect photos comes to the rescue while searching for photos.
If you’re looking for a picture of your dog, search for “dogs,” and it’ll show all dog-related pictures and videos even if you haven’t tagged them. Similarly, you can search for cars, bikes, receipts, memes, locations, events like birthdays and festivals, group pictures, and so on.
Besides, it also detects text in the images and shows them in results when you search for those keywords; it is creepy but useful at times.
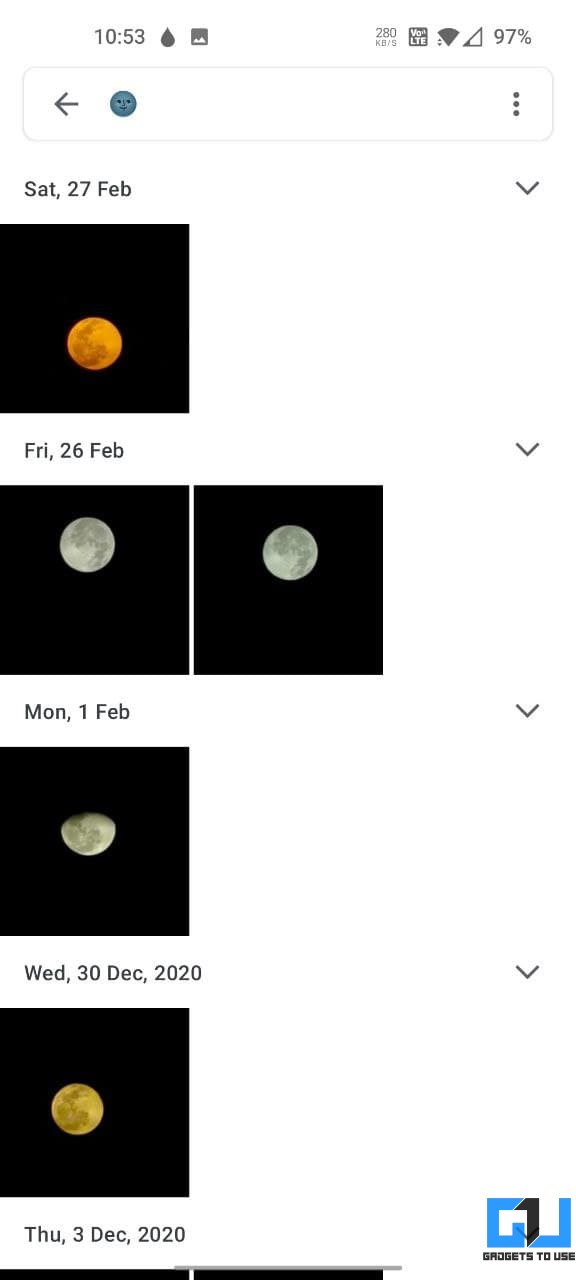
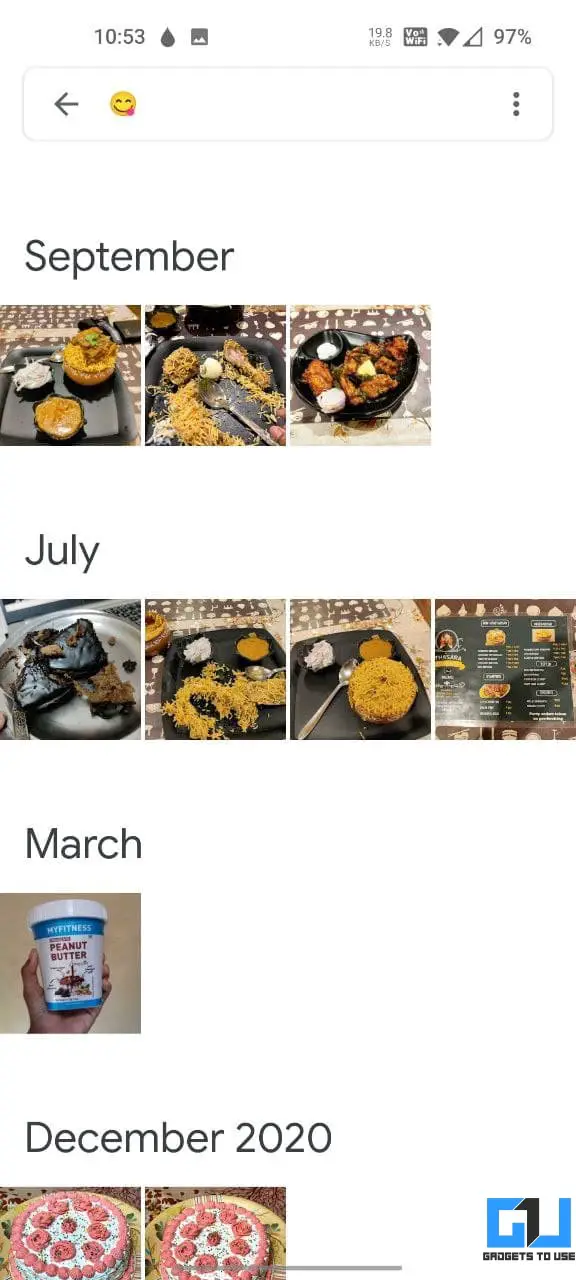
2. Search Photos by Emoji
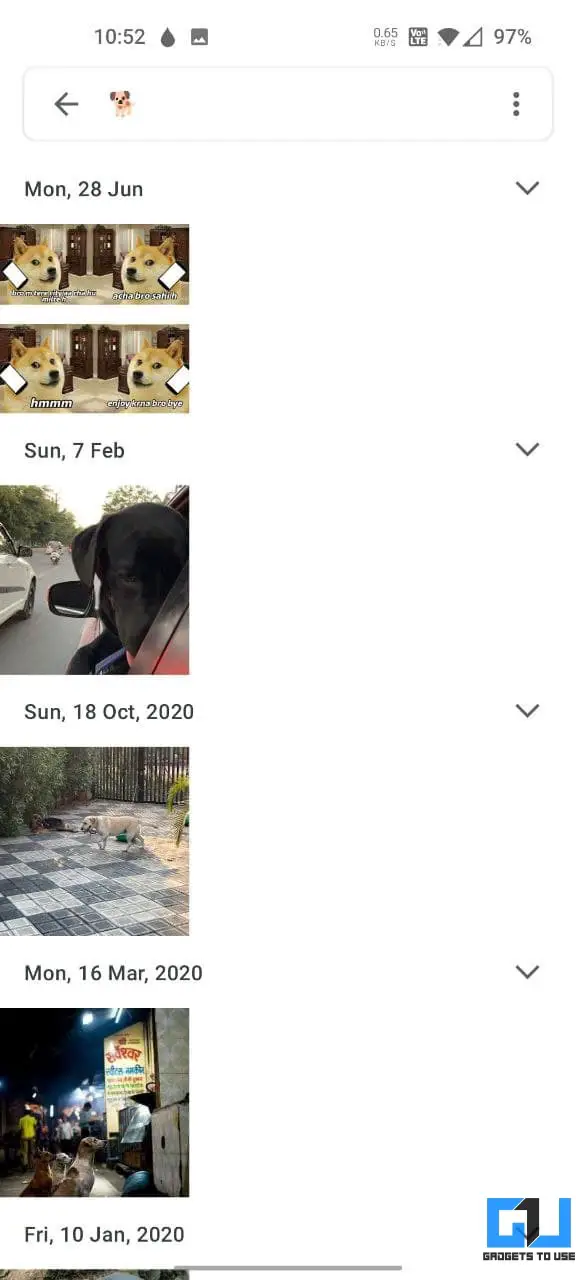
You can also search by emoji in Google Photos. Just go to the search bar and type an emoji- it will show you all related images.
The happy face emojis will yield pictures of smiling people, the cake emoji will pull up photos from birthdays, and similarly, the moon emoji will fetch photos of the moon from your library. It will not work for all emojis, but it’s fun to try.
3. Label People and Pets
Google Photos automatically groups similar faces. This helps find photos of a particular person or pet in one place. Furthermore, you can label it with their names, past which they’ll appear in the results when searched for.
To add labels, go to the Search tab. Here, click View all for People and Pets. Tap the face, click on Add a name, and give a name. That’s it. You can now find all photos of the person by simply searching for their name.
Here’s more on searching Photos by face on Google Photos on phone and PC.
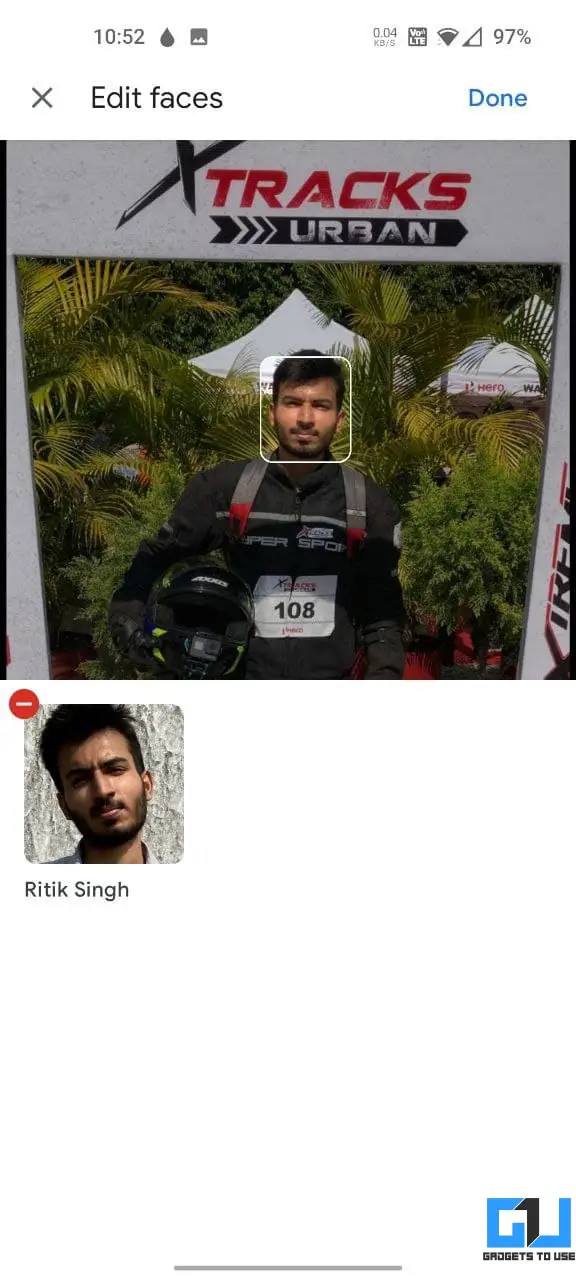
4. Manually Edit Labels
Google is usually quite accurate with recognizing faces. However, if in case it mislabels people:
- Open the Photo with the wrong labels.
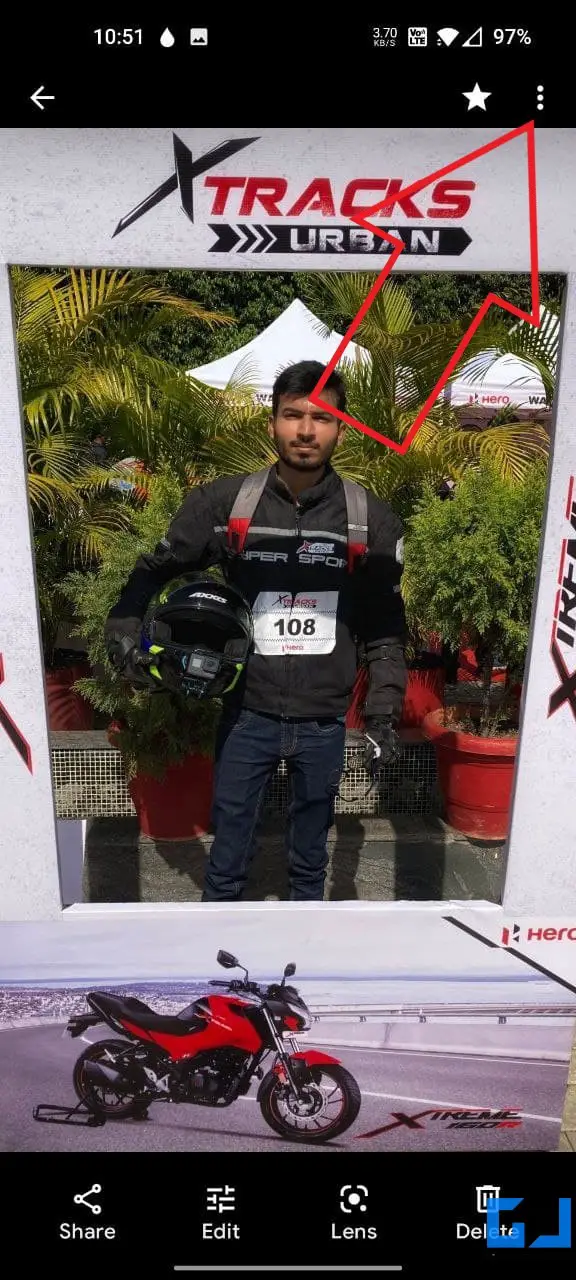
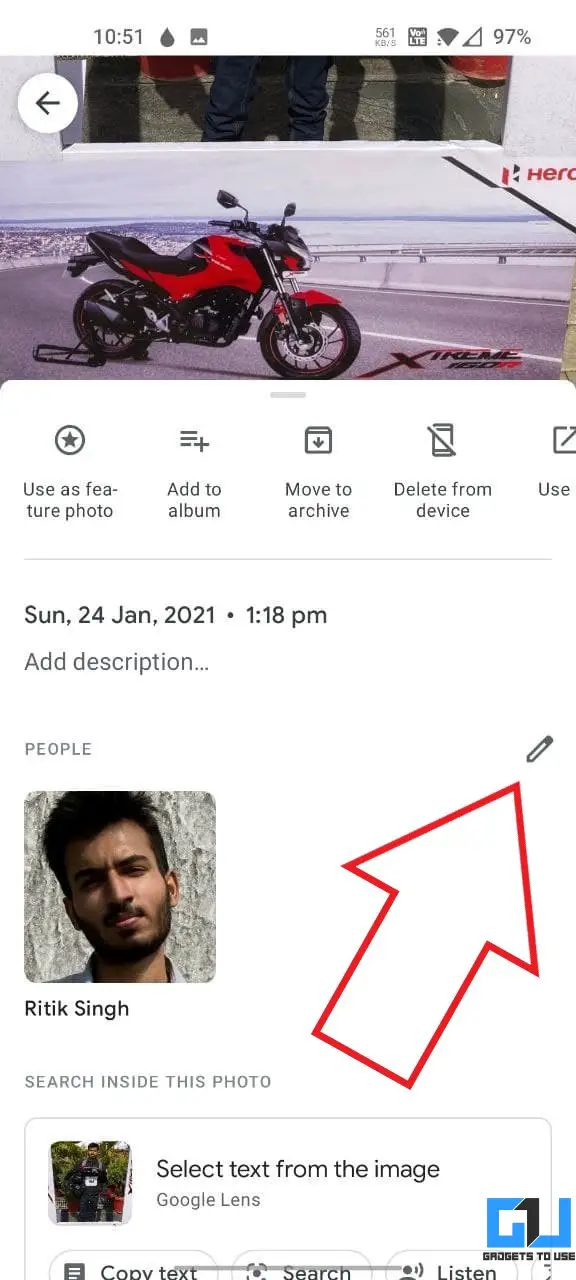
- Tap the three-dot menu at the top or swipe up from the bottom.
- In the menu bar, you’ll see the faces of people in the photo.
- Click the Edit (pen) icon next to them.
- You can now remove and change the labels.
5. Access Photos in Google Assistant
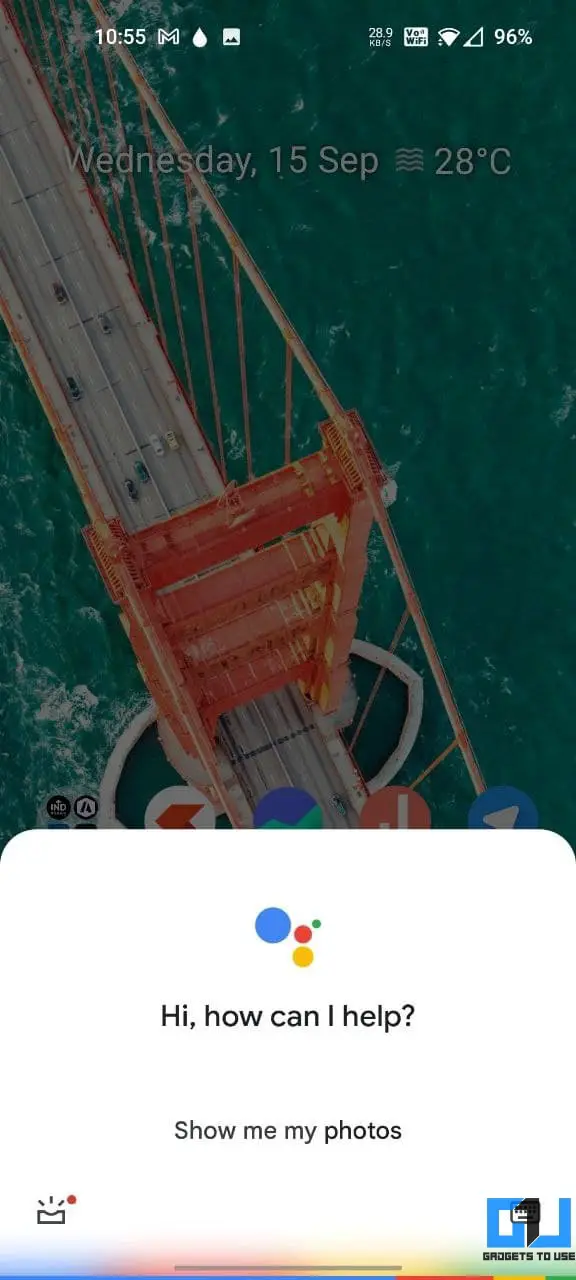
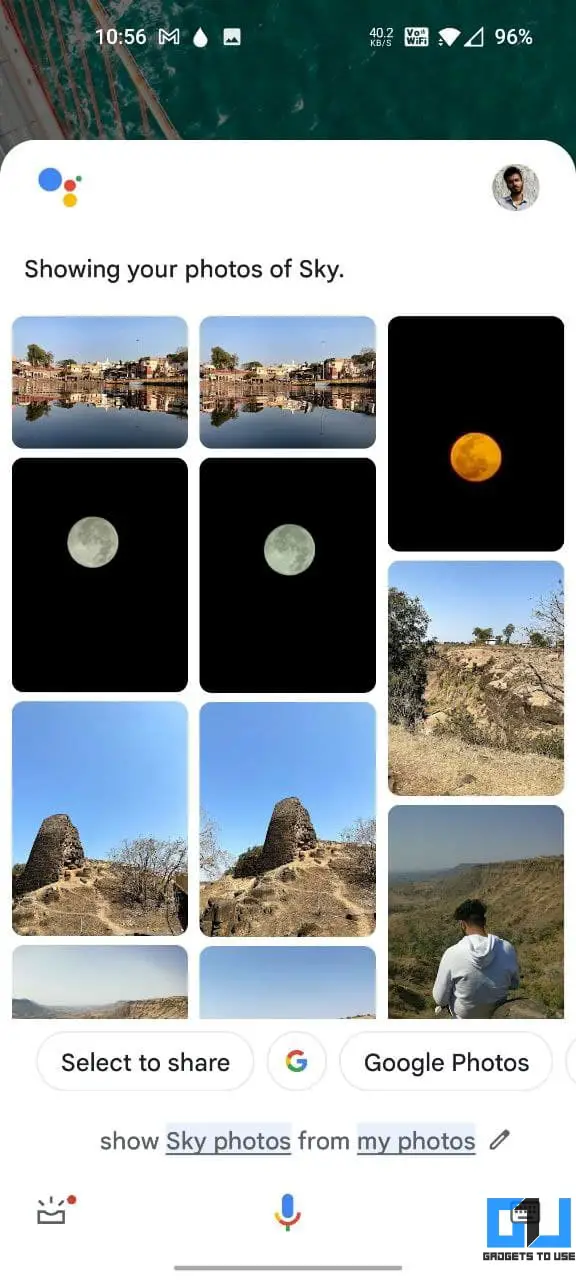
If you use Google Photos for backups, you can ask Google Assistant to see your photos. For example, I can say “Hey Google, show my photos” to see all the photos, or “Hey Google, show <name> photos from my photos” to see someone else’s.
Remember to include “my photos”; otherwise, it’ll show photos from the web results.
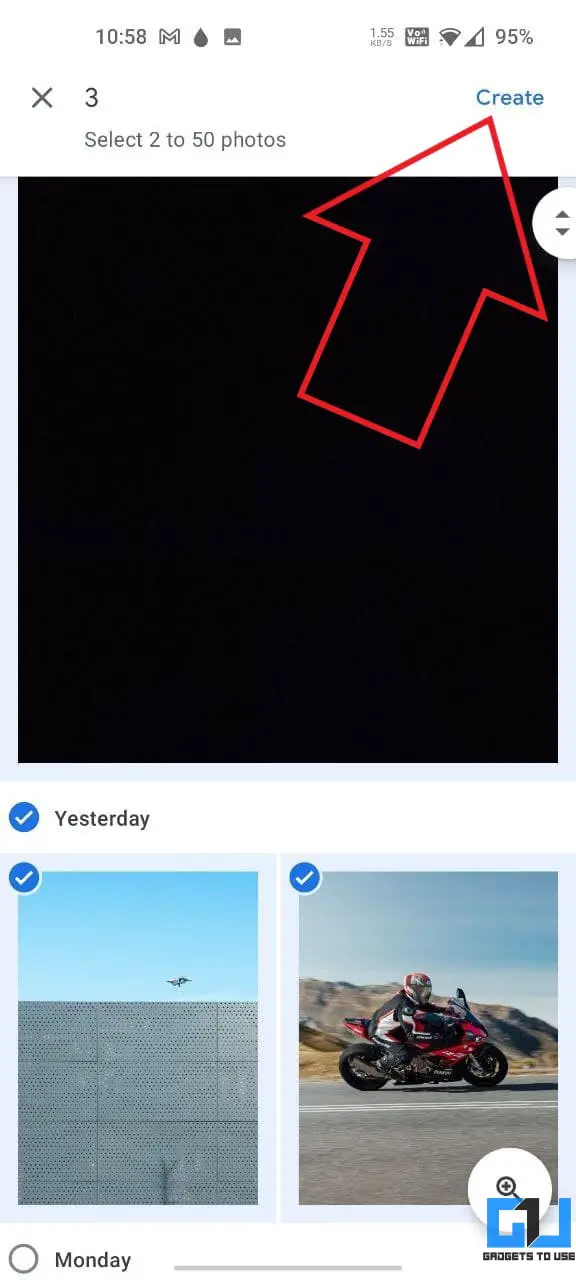
6. Create Collages and Animations
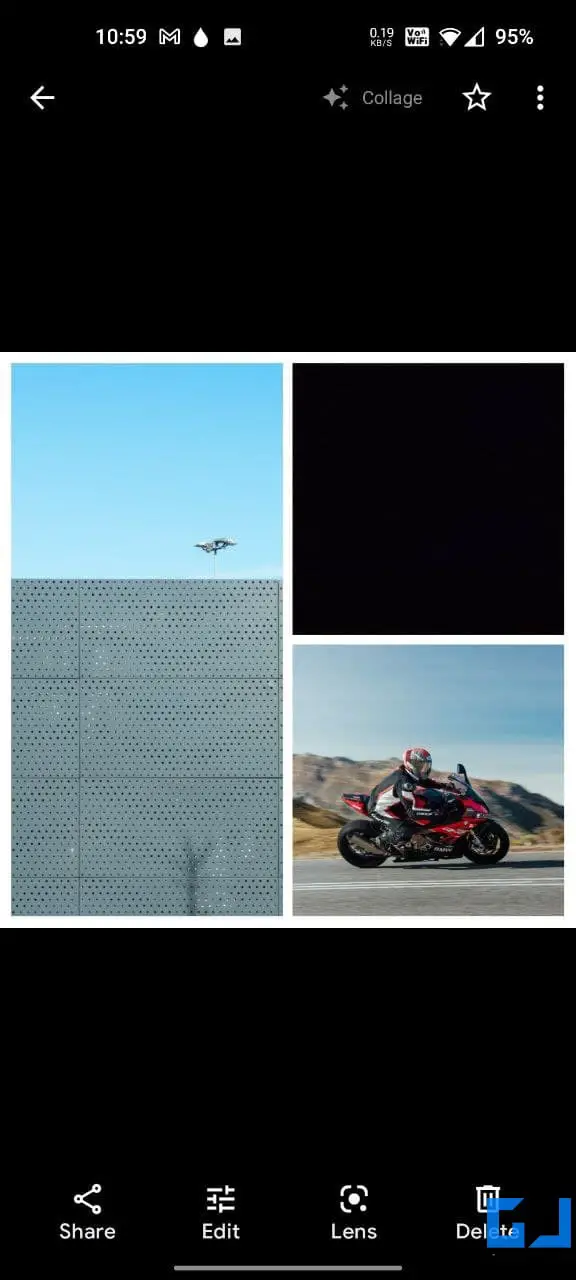
Usually, Google Photos automatically creates cool collages and animations from your photos. But if you want, you can also create them manually from the Photos app, as follows:
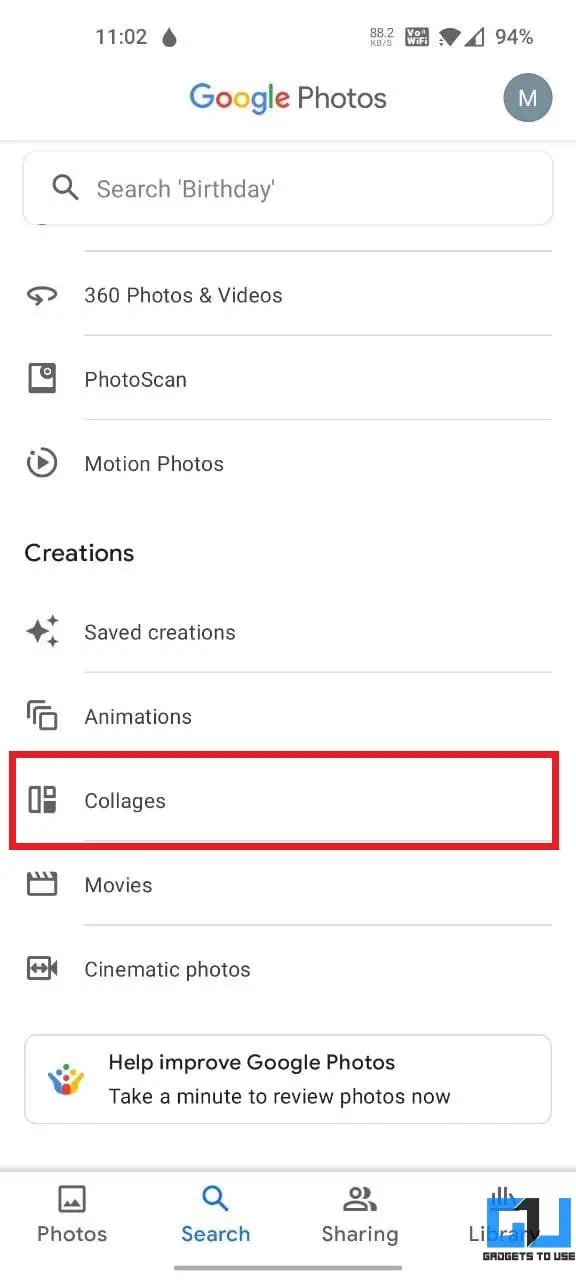
- Open the Google Photos app and head to the Search tab.
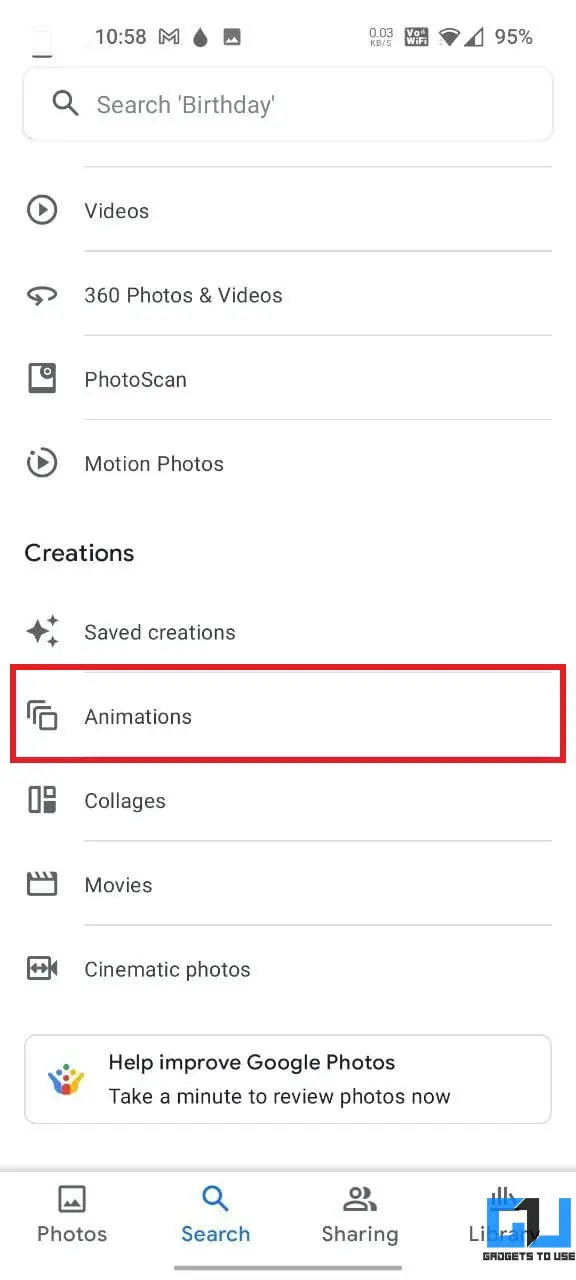
- Here, scroll down to Creations.
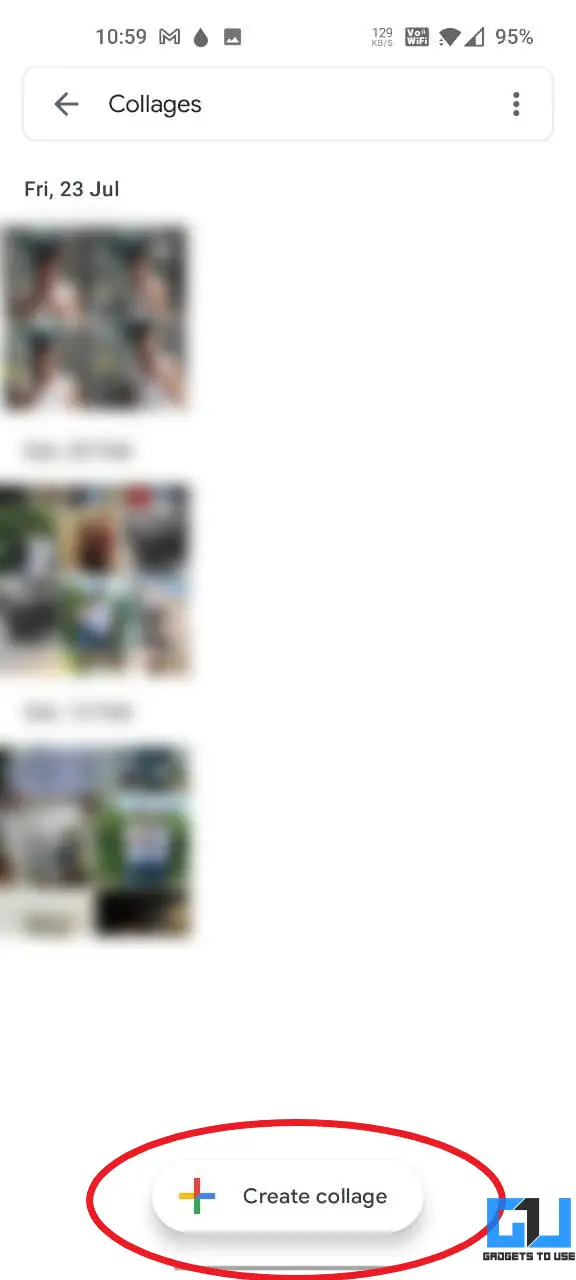
- To create a collage, click on Collages > Create Collage and select your photos.
To create an animation, click on Animations > Create Animation, select photos, and videos and it’ll automatically create one for you.
7. Make a Slideshow Movie from Templates
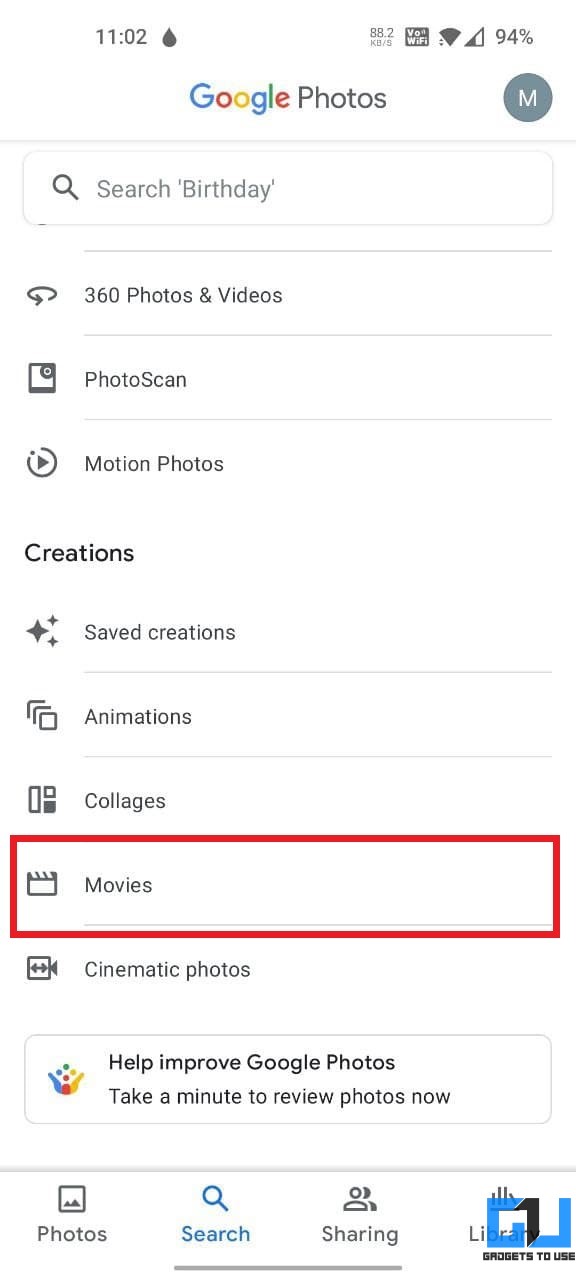
Google Photos uses machine learning to automatically create movies for you based on your recent trips or occasions. Thankfully, you can now create these movies on demand via the app or web.
- Open the Google Photos app on your phone.
- Head to the Search tab and scroll down to the bottom.
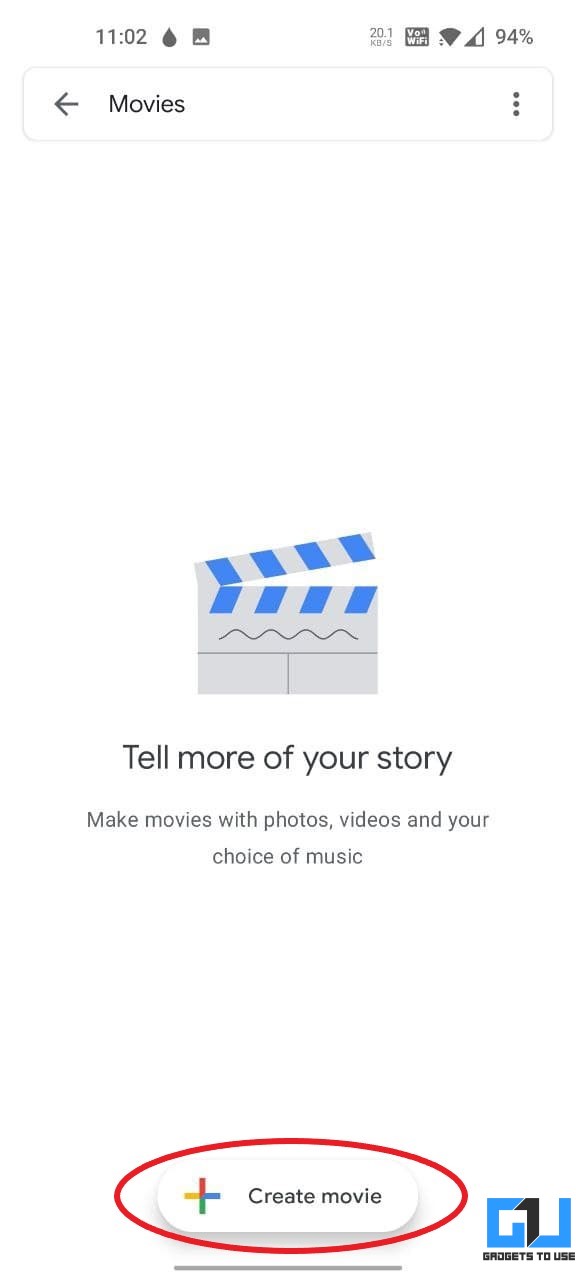
- Click on Movies under Creations.
- Tap Create movie.
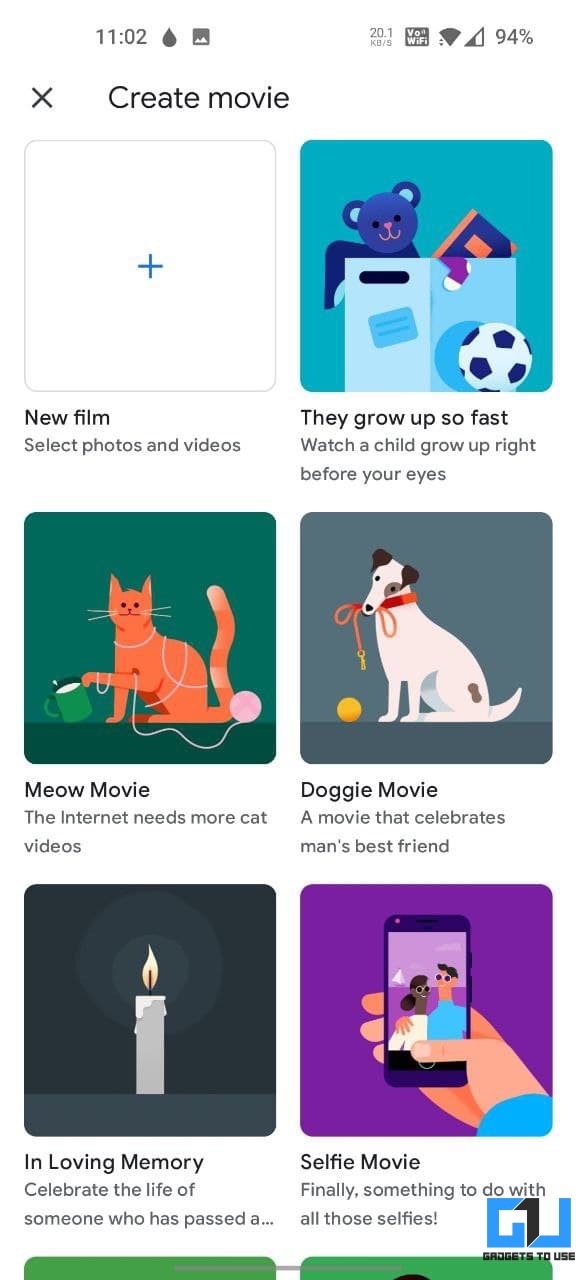
- Select between the preset themes for it to automatically create movies for you.
- You can also create your own by tapping New film and manually selecting photos and videos.
For preset themes, select the people or animals who should star in them. Google will automatically try to find the best images and videos, compile them with appropriate music and provide you with the full video within a few minutes.
8. Scan Images Using Lens, Copy Text from Photos
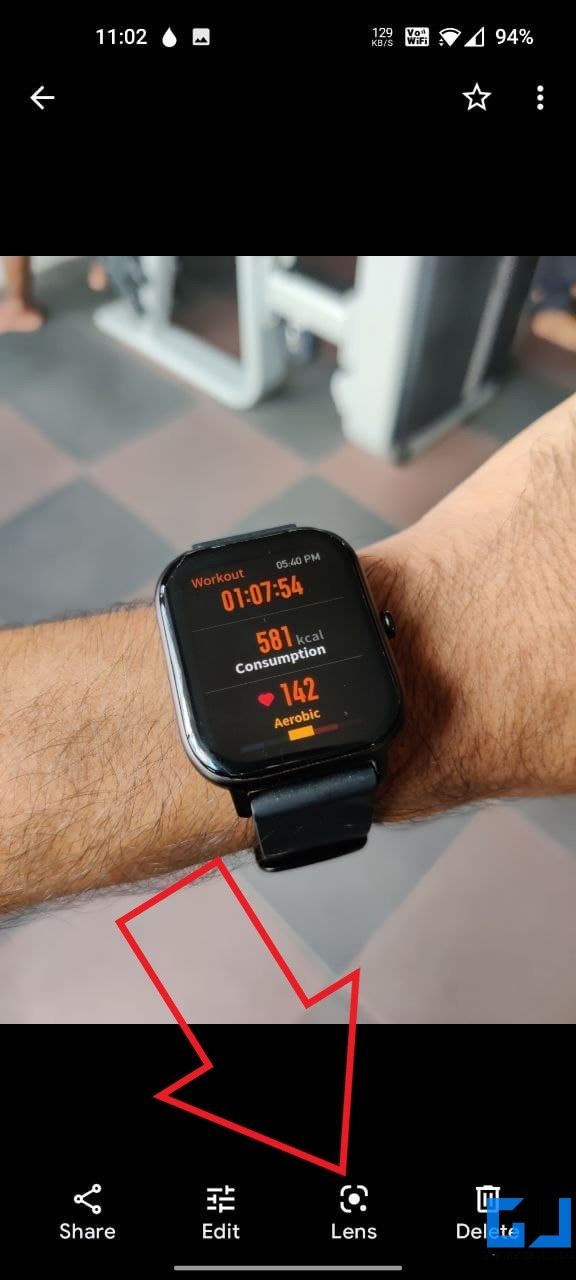
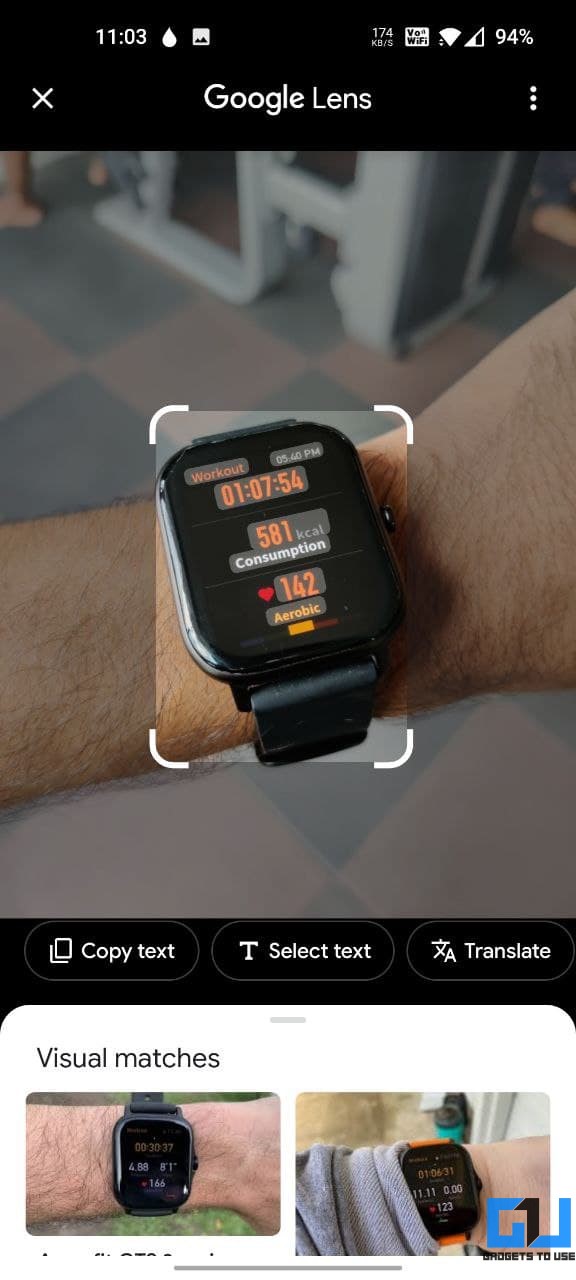
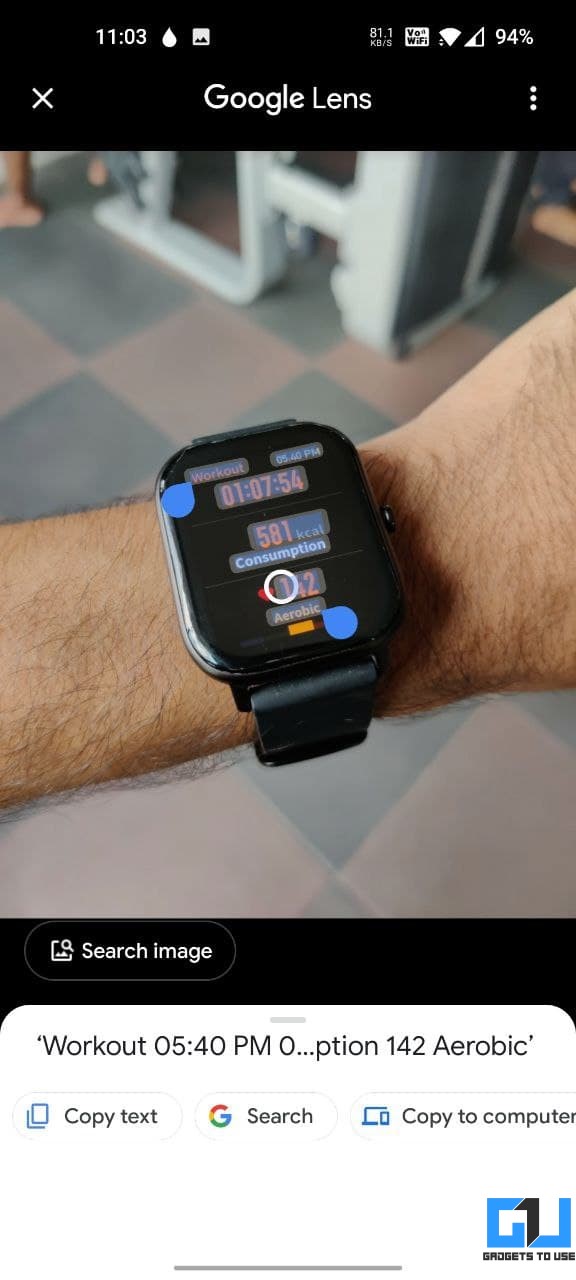
Google Photos now integrates the Lens feature. You can use it to scan your images and find visually similar results from across the web or copy and translate text from images.
To use the Lens feature, open any photo in Google Photos. Then, tap the Lens icon at the bottom and wait for it to scan the image. If you can’t find the option, update the Photos app to the latest version from Play Store or App Store.
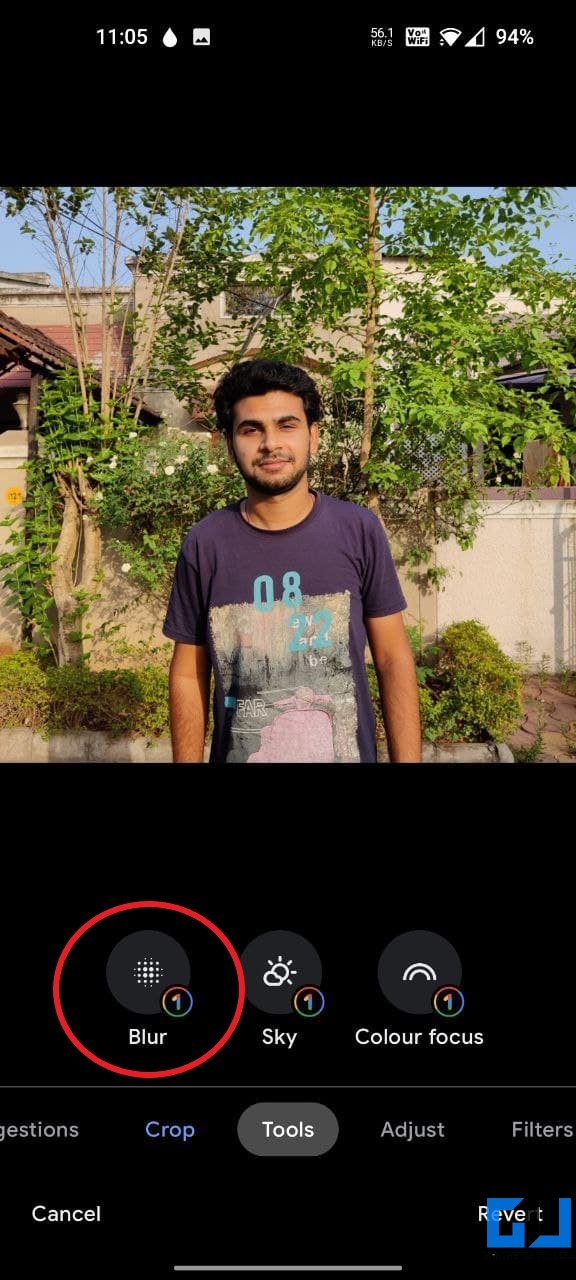
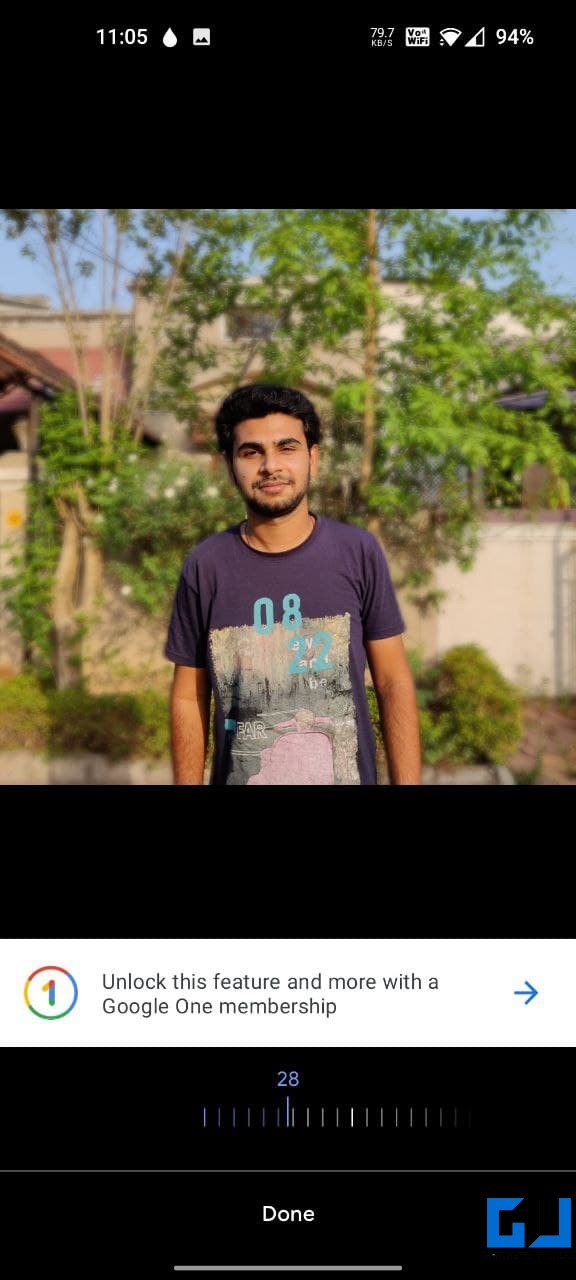
9. Add Background Blur to Portraits
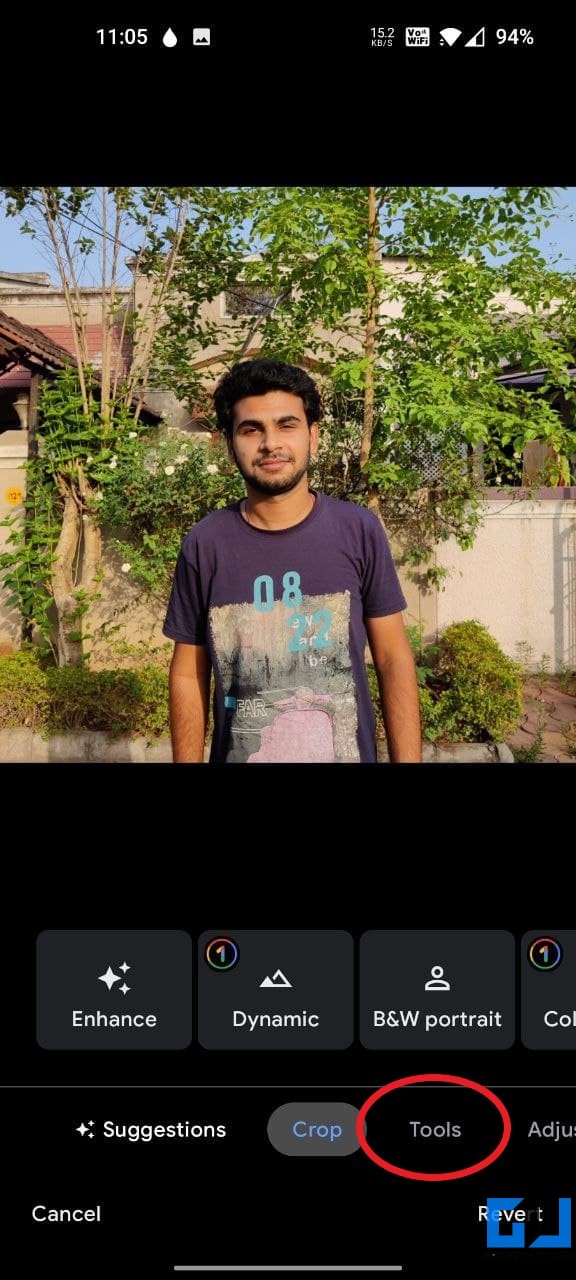
Google Photos intelligently detects portraits and gives you the option to add background blur to them. However, the option is currently available only for Google One members. Below is how to use it.
- Open the portrait photo in Google Photos.
- Click on Edit at the bottom.
- Scroll the toolbar and select Tools.
- Click on Blur and use the slider to adjust the intensity of the background blur.
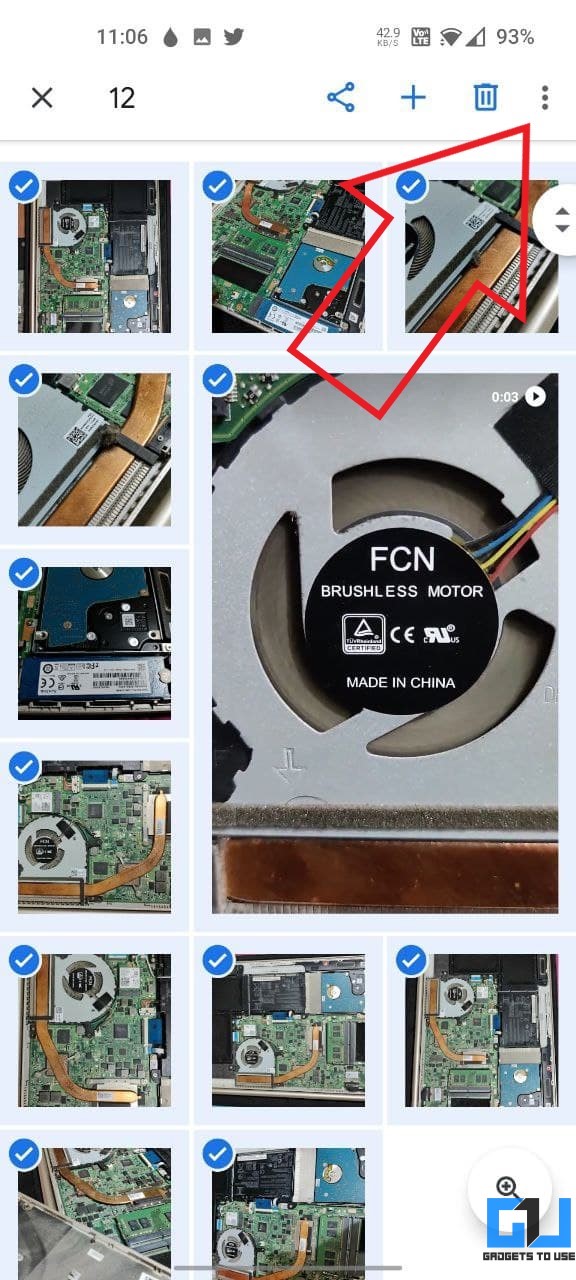
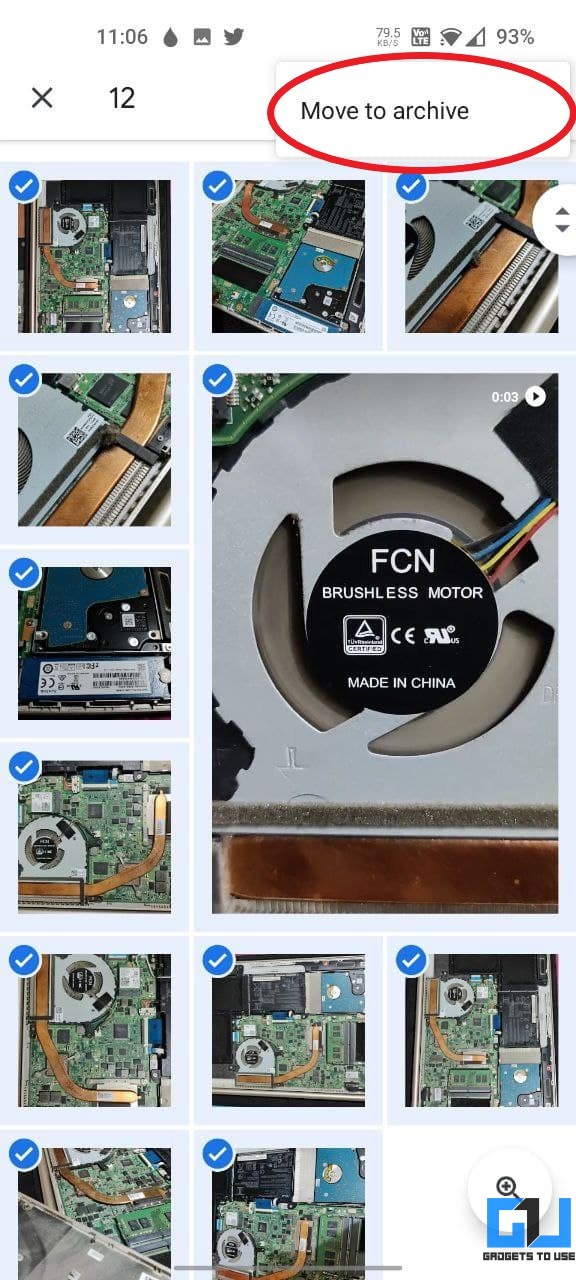
10. Move Photos to Archive
You may have hundreds or even thousands of photos on your phone. Some of these photos may include screenshots, street signs, receipts, notebook pages, restaurant menus, billboards, etc., cluttering up your gallery.
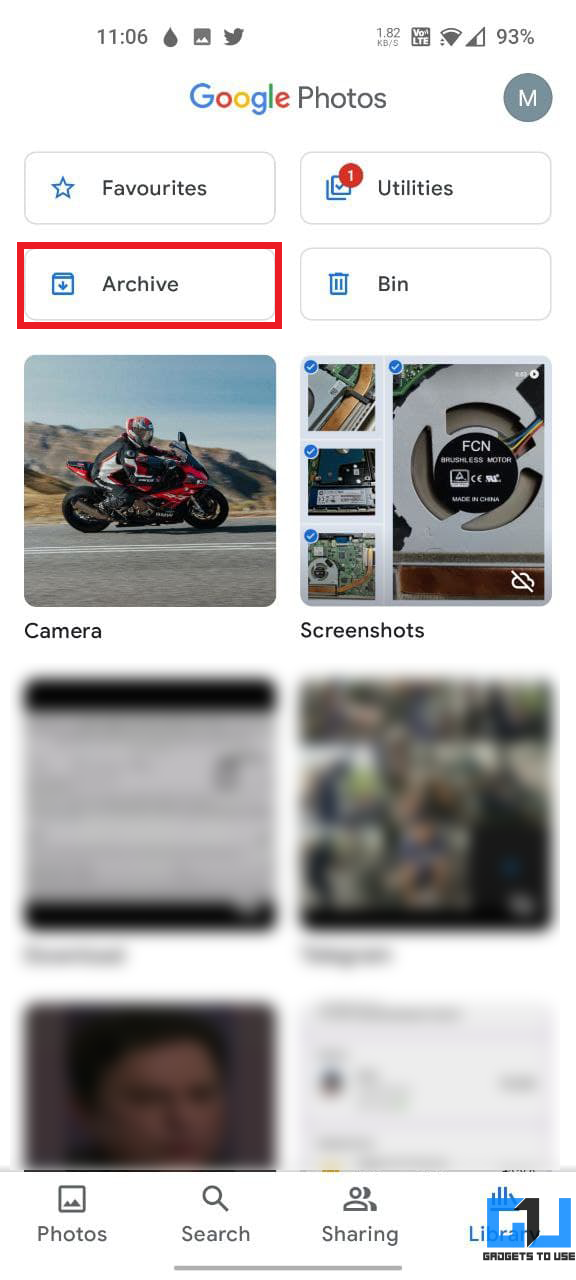
If you don’t want to see these photos and cannot delete them either, the best option would be to archive them in Photos. All you need to do is select the images, tap the three-dot menu and click on Archive.
They’ll be moved to the Archives folder, where you can access these images in the future. Plus, Google regularly reviews your photos and sends suggestions to archive unnecessary photos if you want to.
11. Share Photos Without Location Information
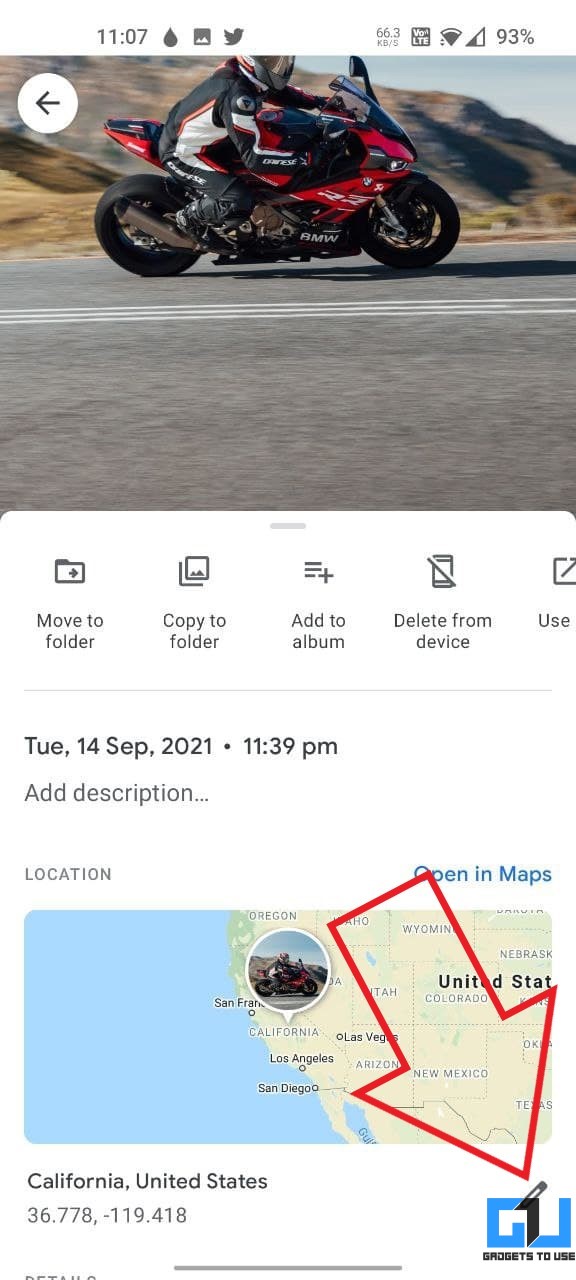
Your photos may have location data from the camera app. Plus, Google Photos can estimate your location from information such as your Google Location History or landmarks detected in your photo. It then uses it to organize and map your photos for easier searchability.
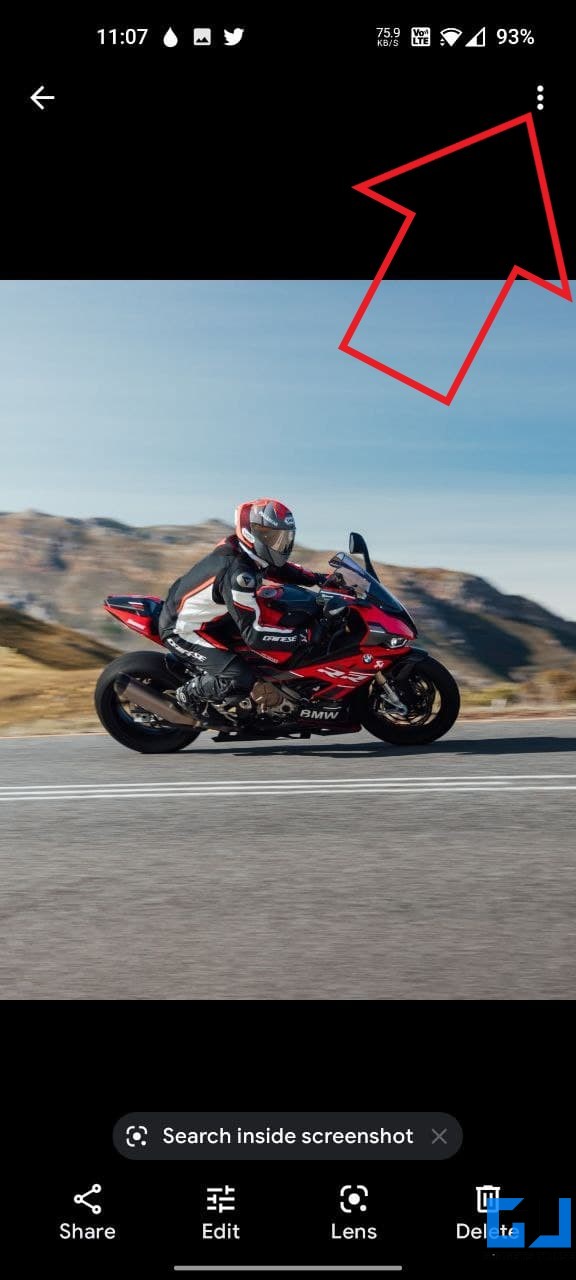
However, this also puts you at risk of revealing your location to people with whom you’re sharing the photos. If you’re a privacy-conscious person, follow the steps below to remove location information before sharing the photo:
- Open Google Photos app or web.
- Head to the photo you want to share without location.
- Open the menu by tapping three dots at the top.
- Click on Edit (pen icon) next to the location.
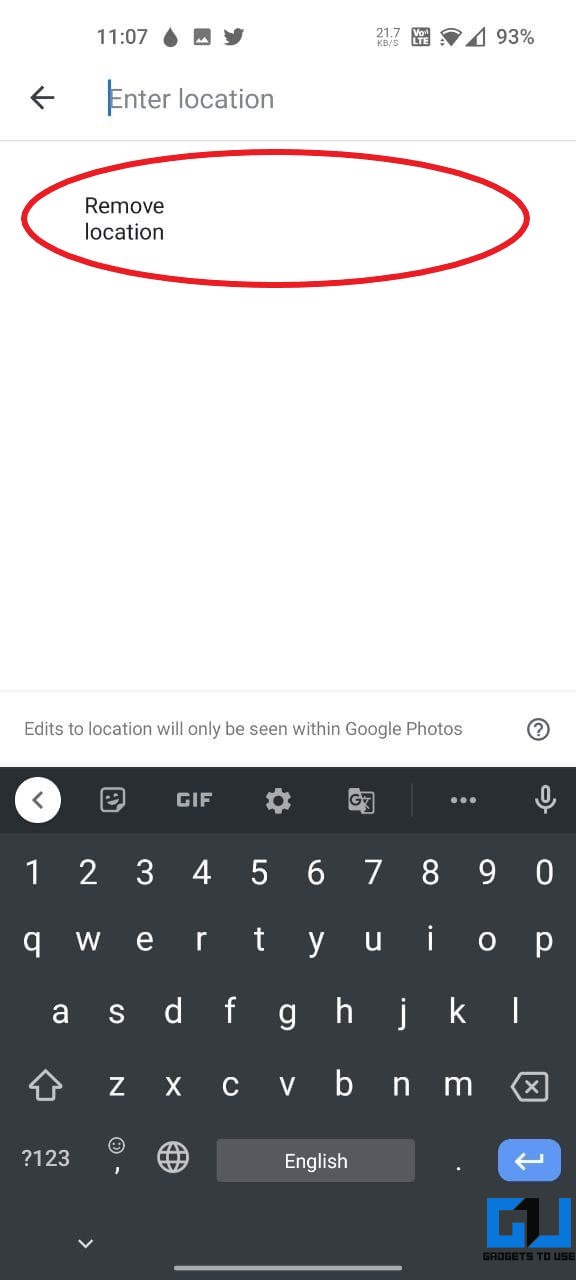
- Finally, tap on Remove.
- You can use the same steps to add location in photos.
Here are other ways to remove location data from photos or videos and stop your camera from saving GPS tags.
12. Pinch to Zoom in Videos
Earlier this year, Google Photos rolled out the ability to pinch or double-tap to zoom in or out in videos. So if you want to zoom in on a video, pinch your fingers apart or double-tap on the screen. Doing so will fill the screen with the video, allowing you to look at details.
Wrapping Up- Tips and Tricks for Google Photos App
These were some of the best Google Photos tips and tricks you can use to improve your experience and enjoy new features in the cloud gallery app. Anyways, what is your favorite thing about Google Photos? Have any other tips to add? Do let me know in the comments below. Stay tuned for more such articles.
You can also follow us for instant tech news at Google News or for tips and tricks, smartphones & gadgets reviews, join GadgetsToUse Telegram Group or for the latest review videos subscribe GadgetsToUse Youtube Channel.
