Quick Answer
- We all know that to erase a file from the system, you need to delete it from the recycle bin.
- In this article, you will learn to empty recycle bin with a schedule on Windows 11 PC.
- Windows 11 offers the feature to automatically delete the files present in the recycle bin with the help of Storage Sense.
We all know that to erase a file from the system, you need to delete it from the recycle bin. But, sometimes we forget to delete it from the bin as a result of which unnecessary space consumption occurs in the system. With Windows 11, you can automate this process to save time and space. In this article, you will learn to empty recycle bin with a schedule on Windows 11 PC. You can also learn about 6 important privacy features that you should enable in Windows 11 system.
Also, Read| 4 Ways to read Connected Wi-Fi Passwords on Windows 11
Empty Recycle Bin with a Schedule on Windows 11 PC
Use Windows 11 Storage Sense to Automate Recycle Bin
Windows 11 offers the feature to automatically delete the files present in the recycle bin with the help of Storage Sense. Once configured, you won’t have to worry about deleting files from recycle bin manually anymore. Follow these simple steps to achieve the same.
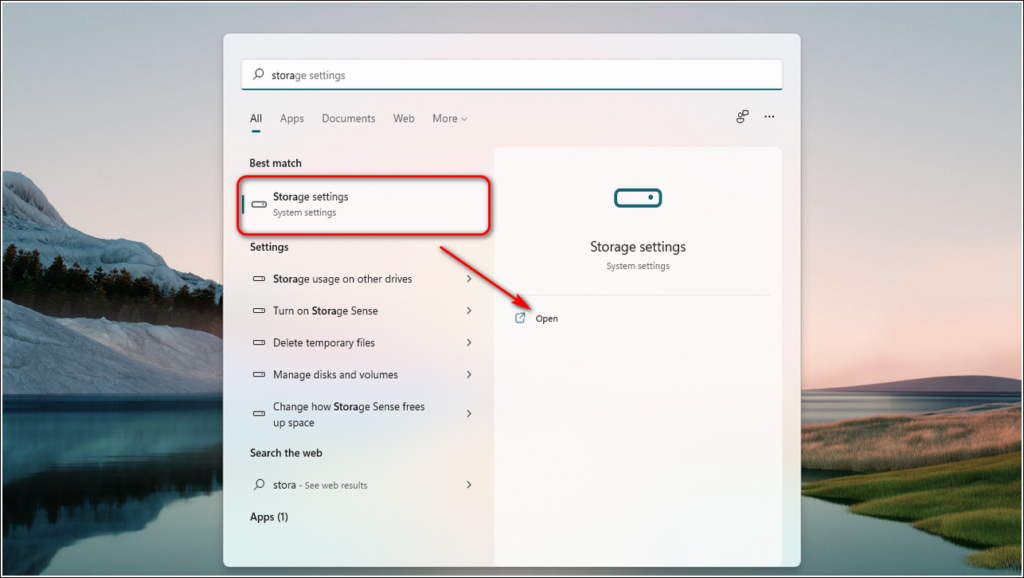
- Press the Windows button on your keyboard.
- Search for Storage Settings and open it.
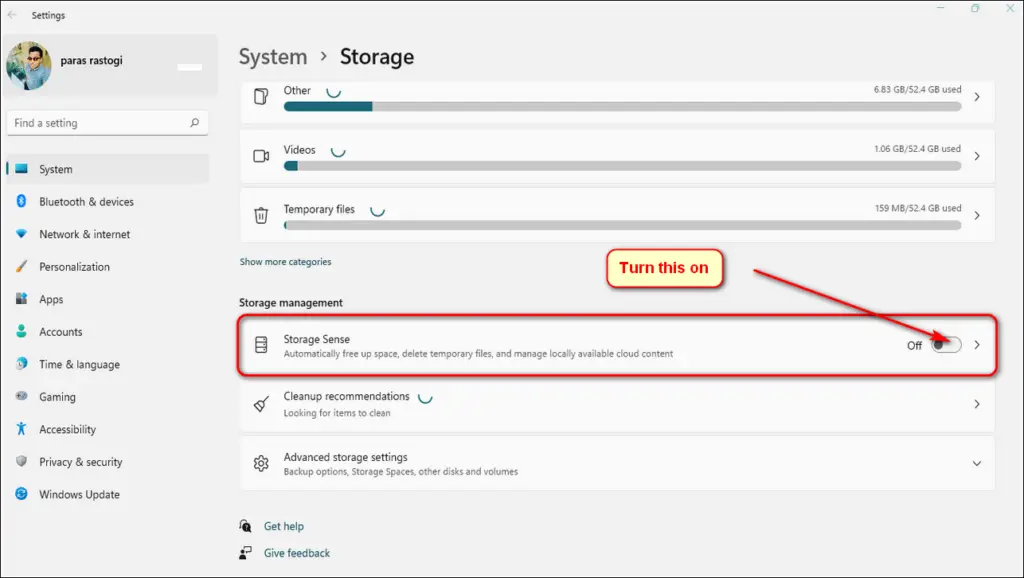
- Scroll down to locate Storage Sense and toggle it on.
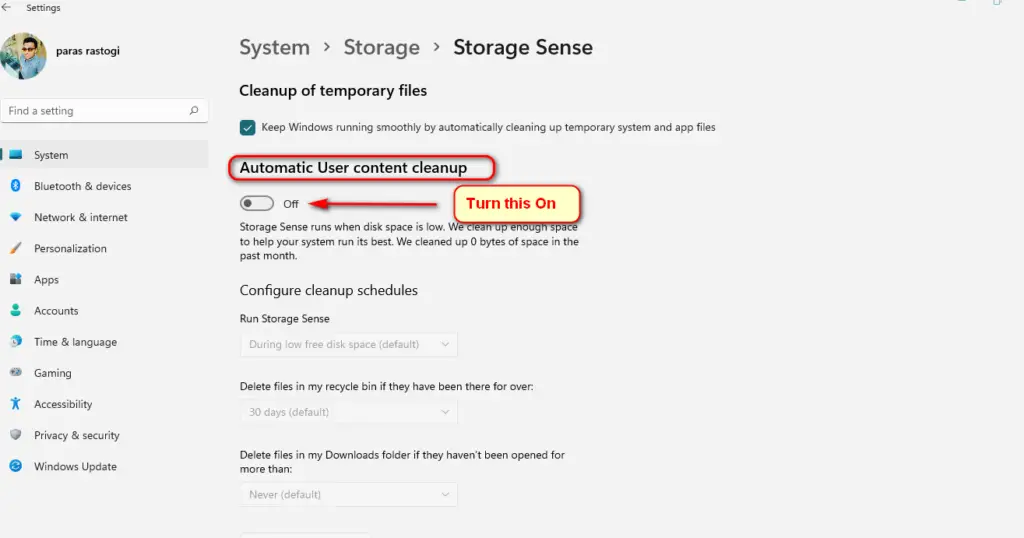
- Toggle on Automatic User Content Cleanup.
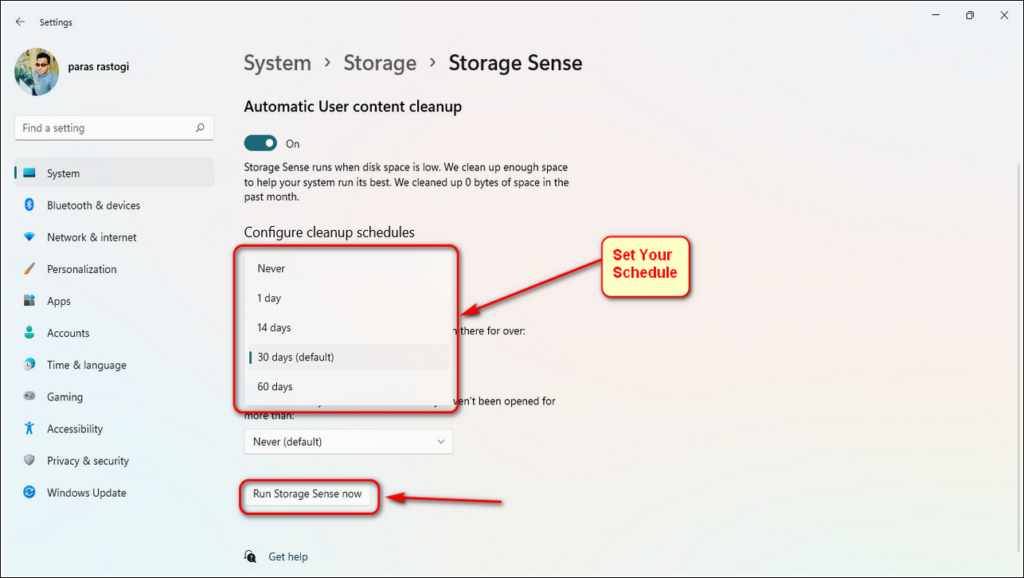
- Scroll down to configure Clean-Up Schedules.
- Choose when to run Storage Sense.
- Pick the time intervals to automatically clean up recycle bin.
- Click on Run Storage Sense now to start the process.
That’s it, the Storage Sense shall automatically run now with custom configurations to clean up files present in the recycle bin.
Use Windows Task Scheduler to schedule empty the Recycle Bin
You can also use the Windows Task Scheduler process to automatically empty the recycle bin as per your preference. Follow these easy steps to do the same.
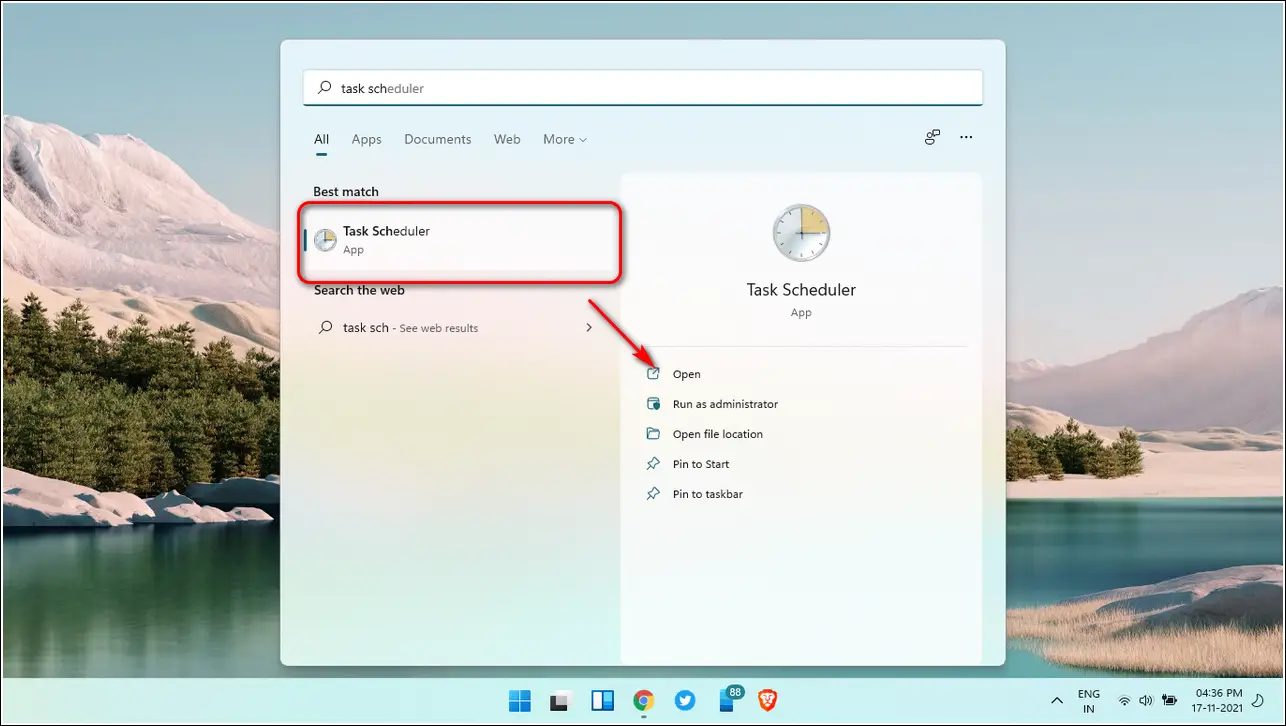
- Open the Task Scheduler App.
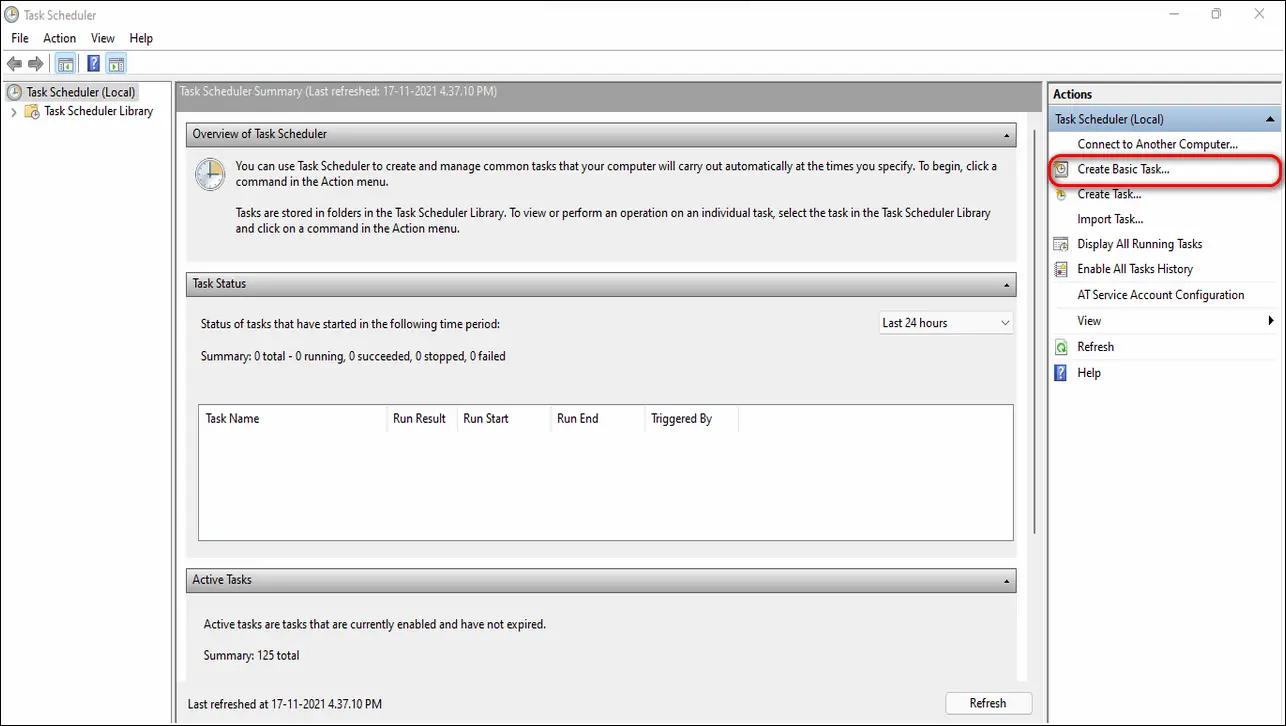
- Click on Create Basic Task.
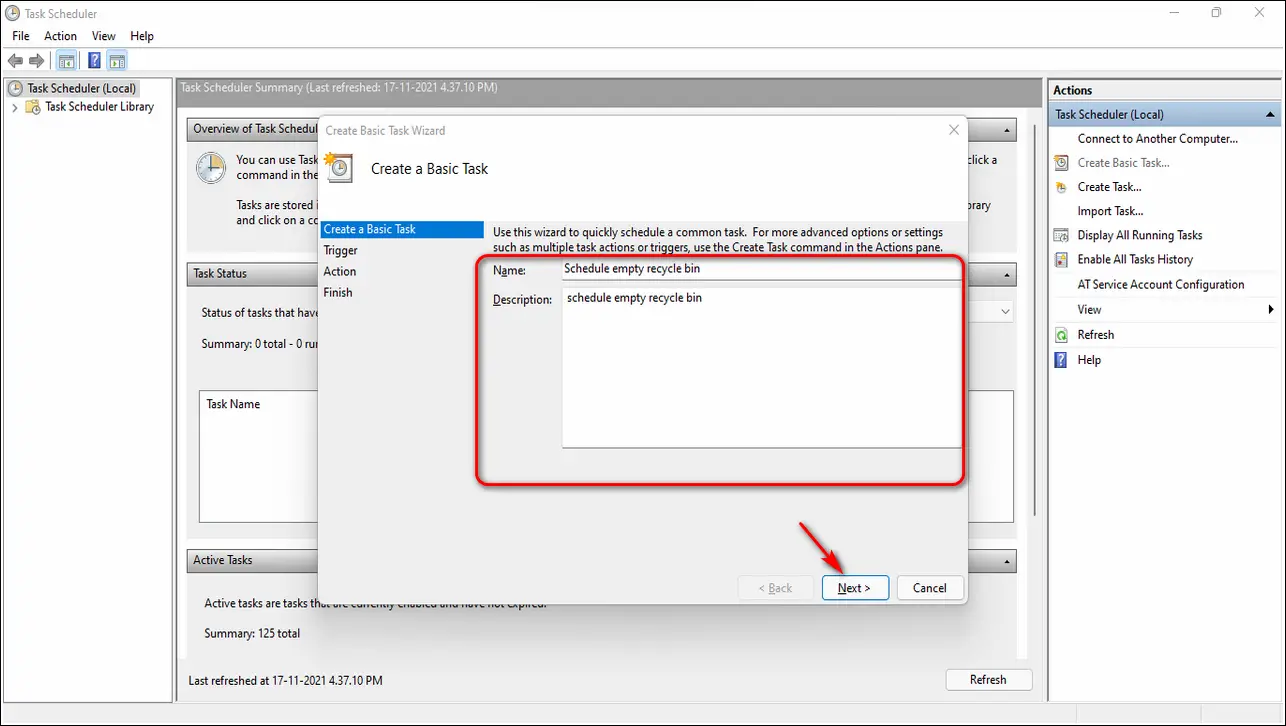
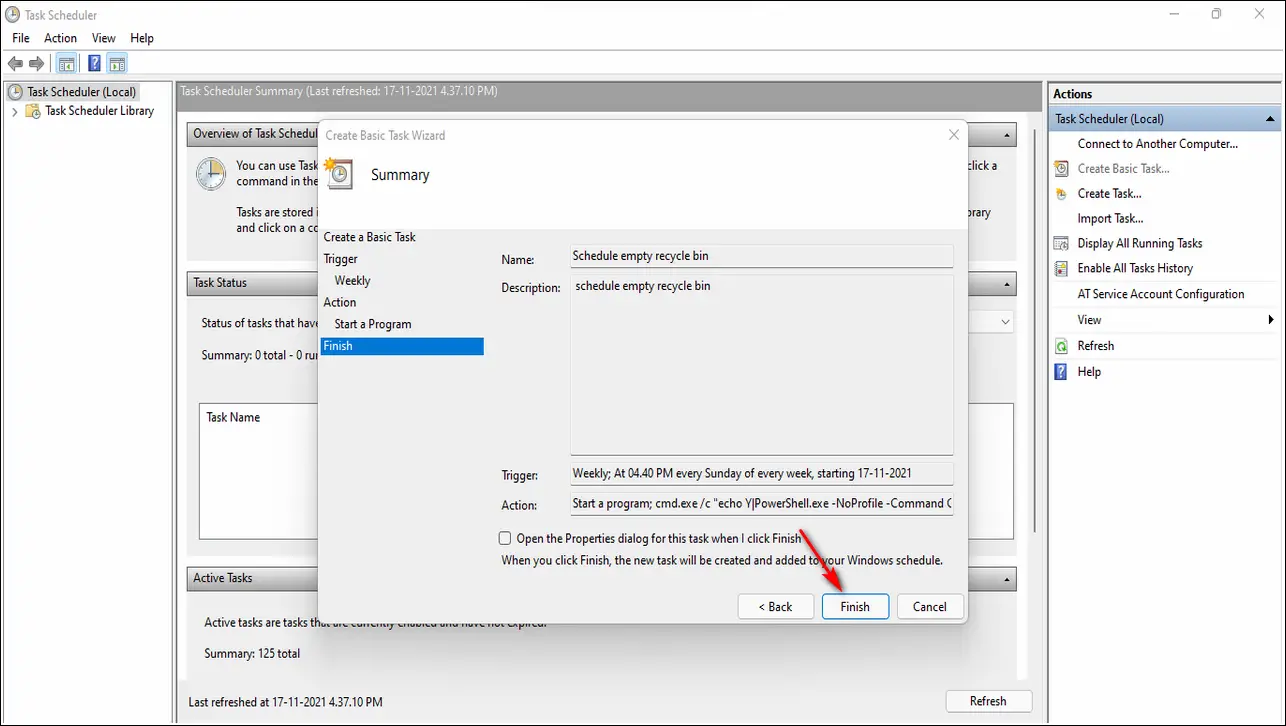
- Name your task as ‘Schedule empty Recycle Bin‘ and add relevant description so you can identify it.
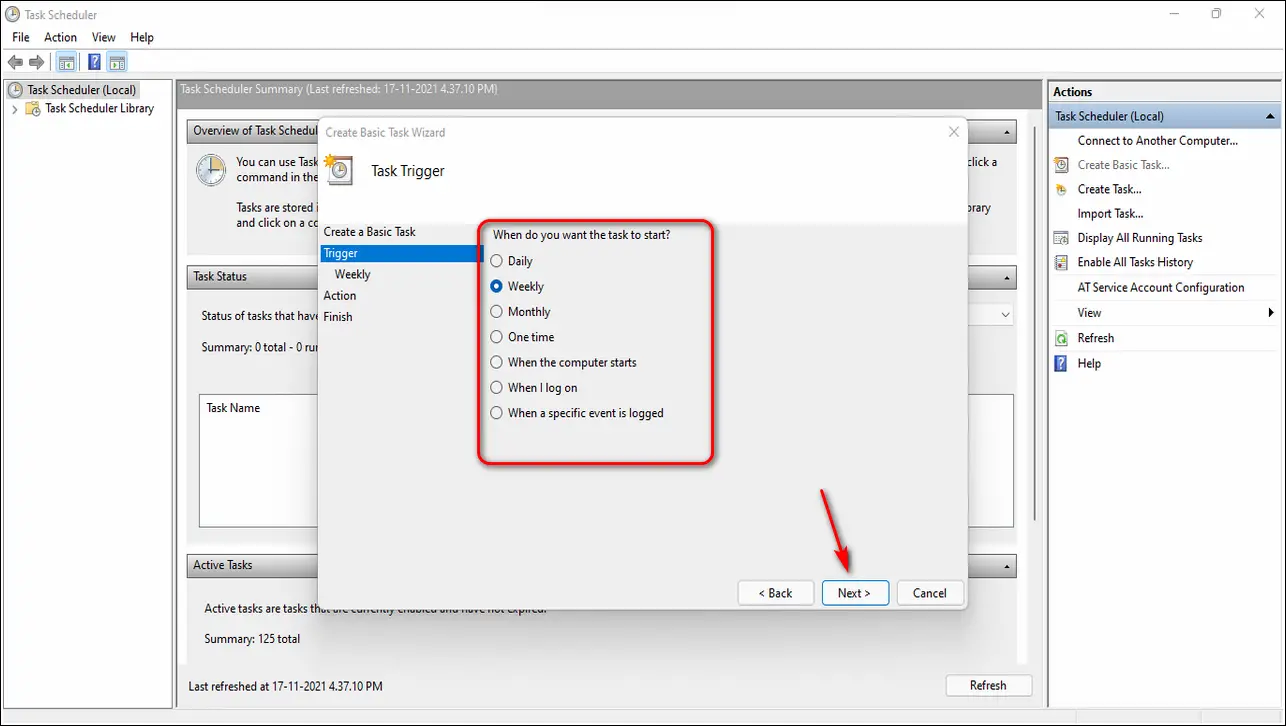
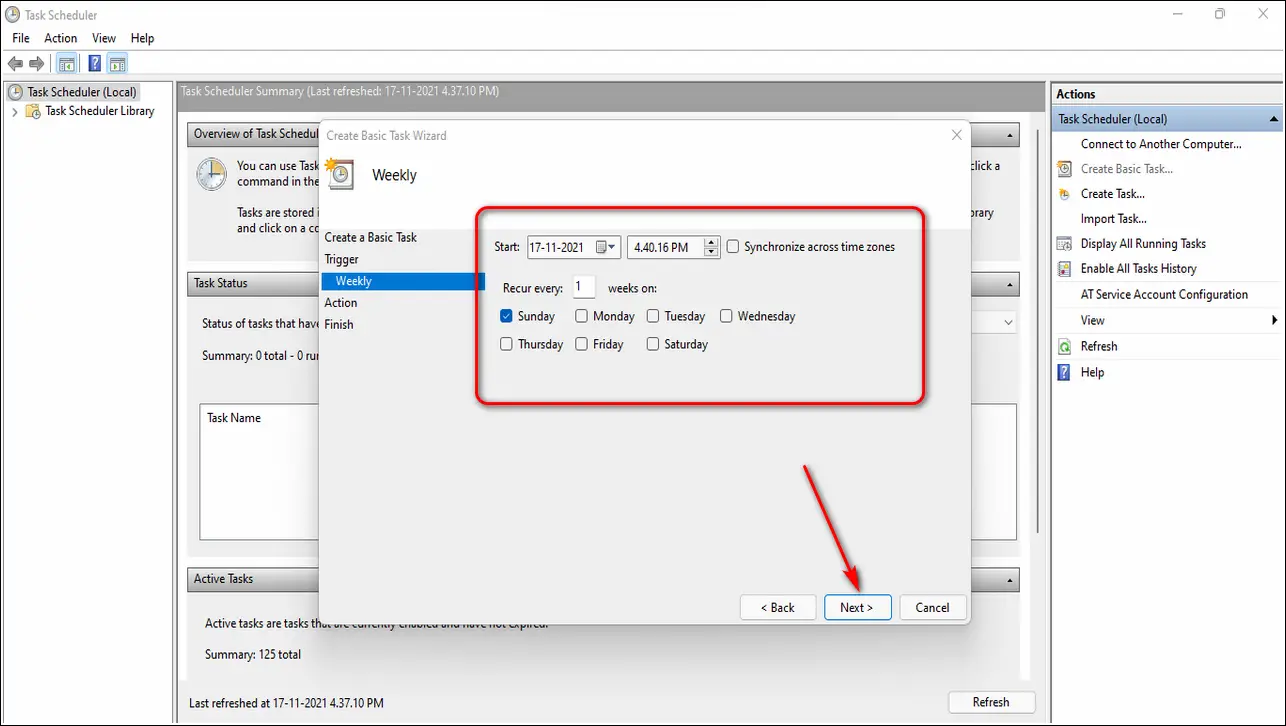
- Set the time interval between two consecutive automation say daily, monthly, weekly etc.
- Time the date and day to run the task.
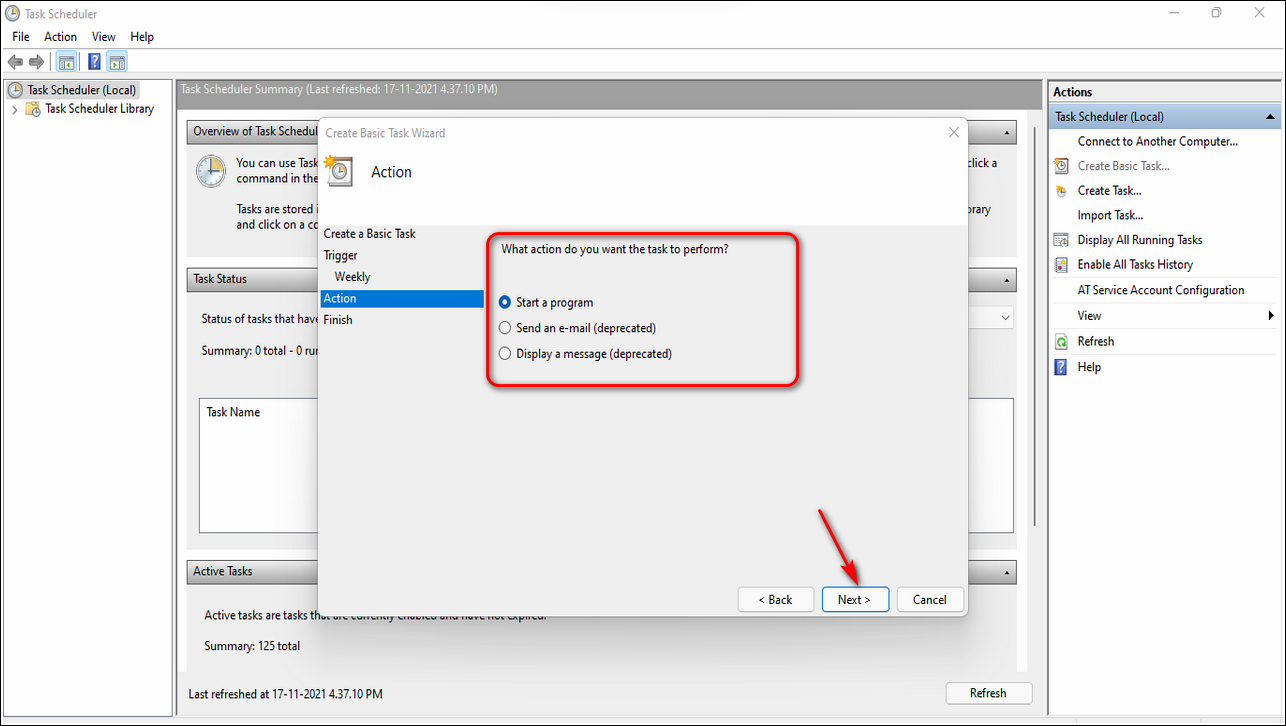
- Choose on Start a Program.
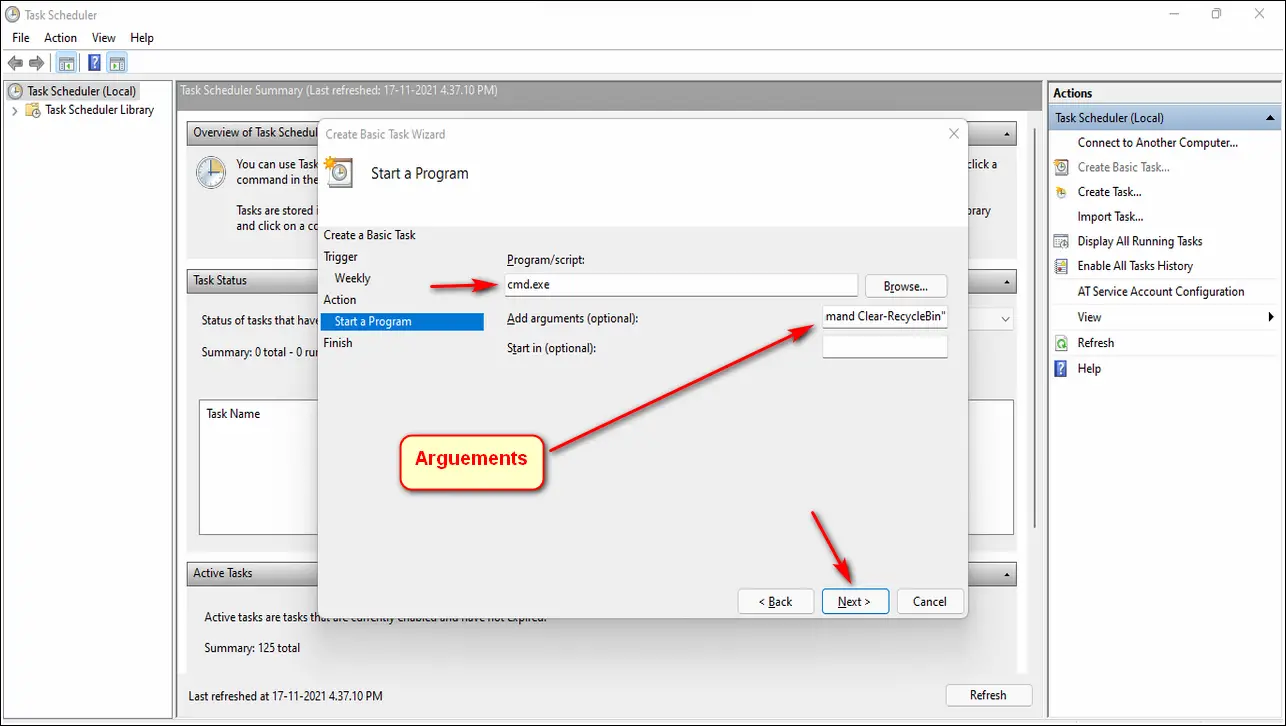
- Type cmd.exe and add /c “echo Y|PowerShell.exe -NoProfile -Command Clear-RecycleBin” in Add arguments tab.
- Review all the settings and click on Finish.
- Click on Run Button to start the scheduled task.
Wrapping Up
In this article, you have learned to empty recycle bin with a schedule on Windows 11 PC. If you find this article useful, then hit the Like button and share this with your friends. As always, stay tuned for more useful articles like this one.
You can also follow us for instant tech news at Google News or for tips and tricks, smartphones & gadgets reviews, join GadgetsToUse Telegram Group, or for the latest review videos subscribe GadgetsToUse Youtube Channel.
