

Quick Answer
- Having a backup of your phone is a must these days to ensure you do not lose data, be it while resetting the phone or tackling unforeseen situations.
- The easiest method to backup your OnePlus phone to a PC or any other device is via the OnePlus Switch (now called Clone Phone) application.
- This method can be used when you want to back up the photos, videos, documents, downloaded files, or offline music from your OnePlus phone to PC.
Having a backup of your phone is a must these days to ensure you do not lose data, be it while resetting the phone or tackling unforeseen situations. Particularly with OnePlus, several people have reported instances wherein the phone went into brick state or Qualcomm Crash Dump mode after an update. In such cases, most people lose all the data, including photos, videos, and documents. Thankfully, there are several ways you can backup and save your OnePlus phone data to your PC. Read on.
Related | 4 Ways to Stop Unwanted Notifications, Data Collection on OnePlus
Backup and Restore OnePlus Phone Data to PC
There are multiple ways you can backup and restore your phone to or from your Mac or Windows PC. OnePlus has its own app called Clone Phone that lets you create offline backups. Besides, you can also copy the data directly over USB or third-party tools.
These methods will work on all recent OnePlus phones, including the OnePlus 9-series, OnePlus 8-series, and the OnePlus 6 and 7-lineup running OxygenOS 10, 11, or 12. Check them in detail below.
Method 1- Using OnePlus Switch App
The easiest method to backup your OnePlus phone to a PC or any other device is via the OnePlus Switch (now called Clone Phone) application. Using it, you can backup your phone’s data and then store it safely on your PC, shown below.
Create a Backup of OnePlus Data
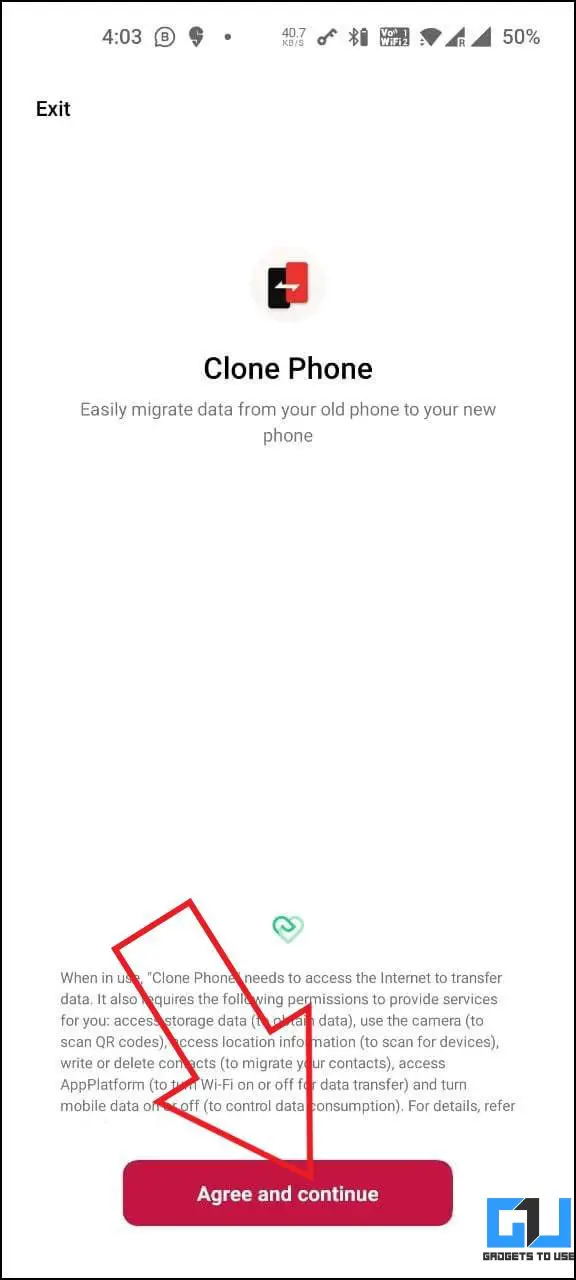
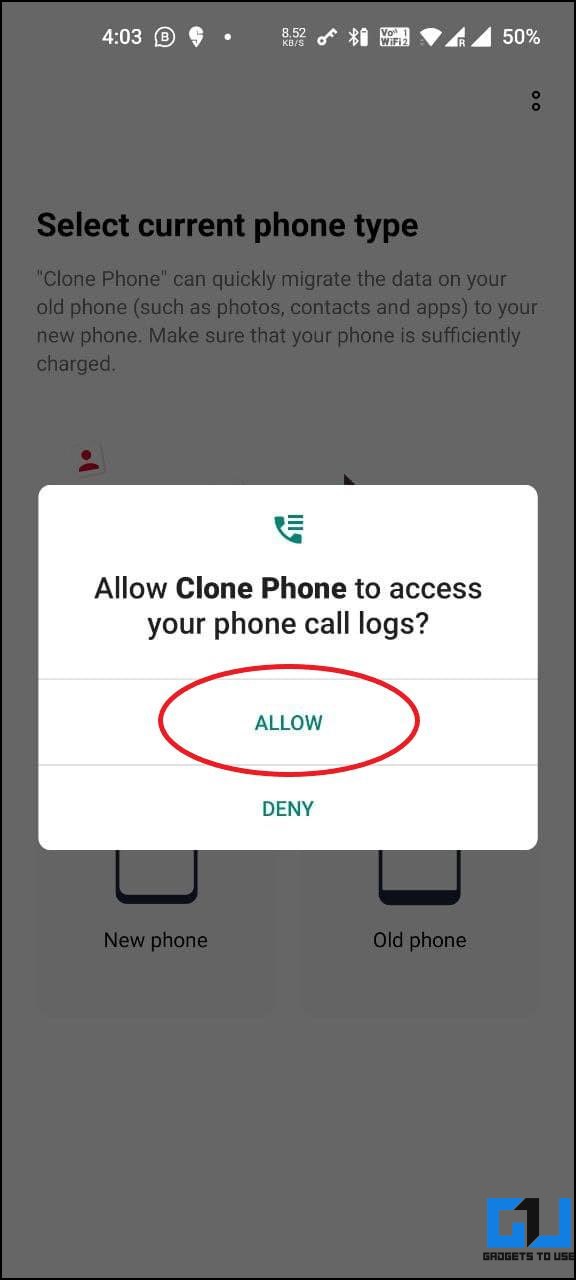
- Open the OnePlus Clone Phone app on your phone. If you cannot find it, install it here.
- Tap Agree and allow permissions to access the data.
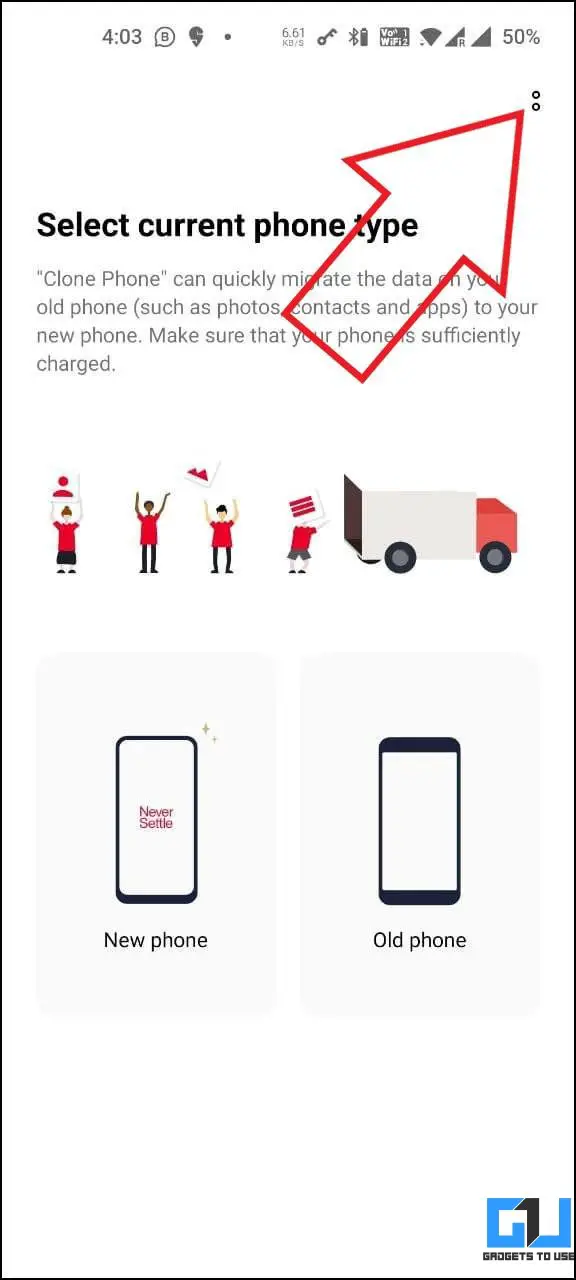
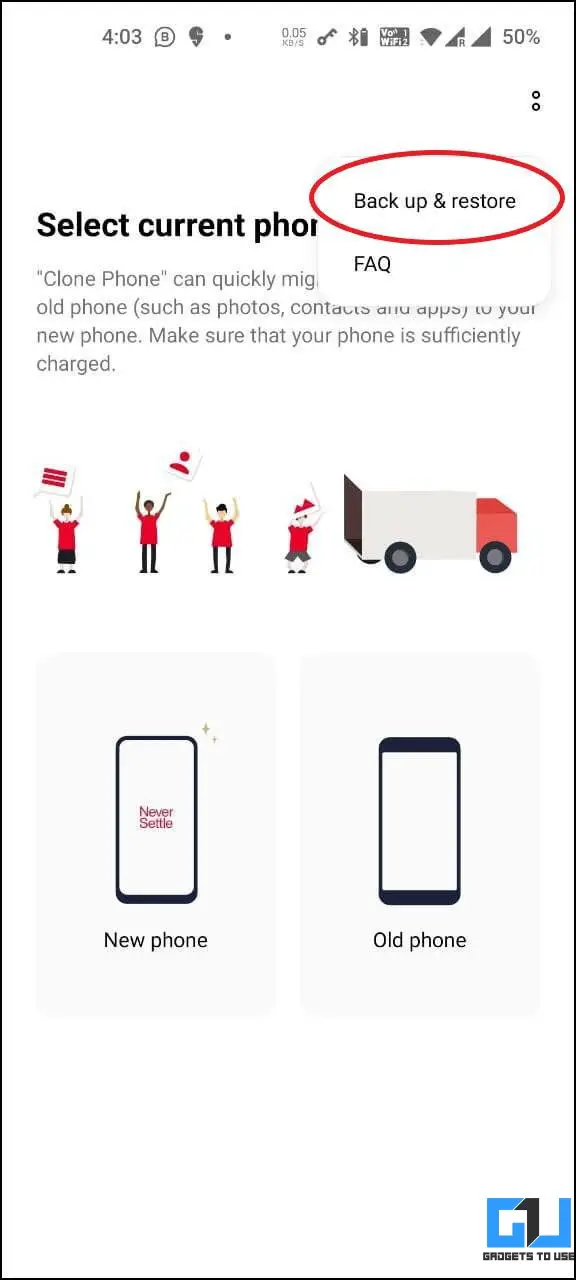
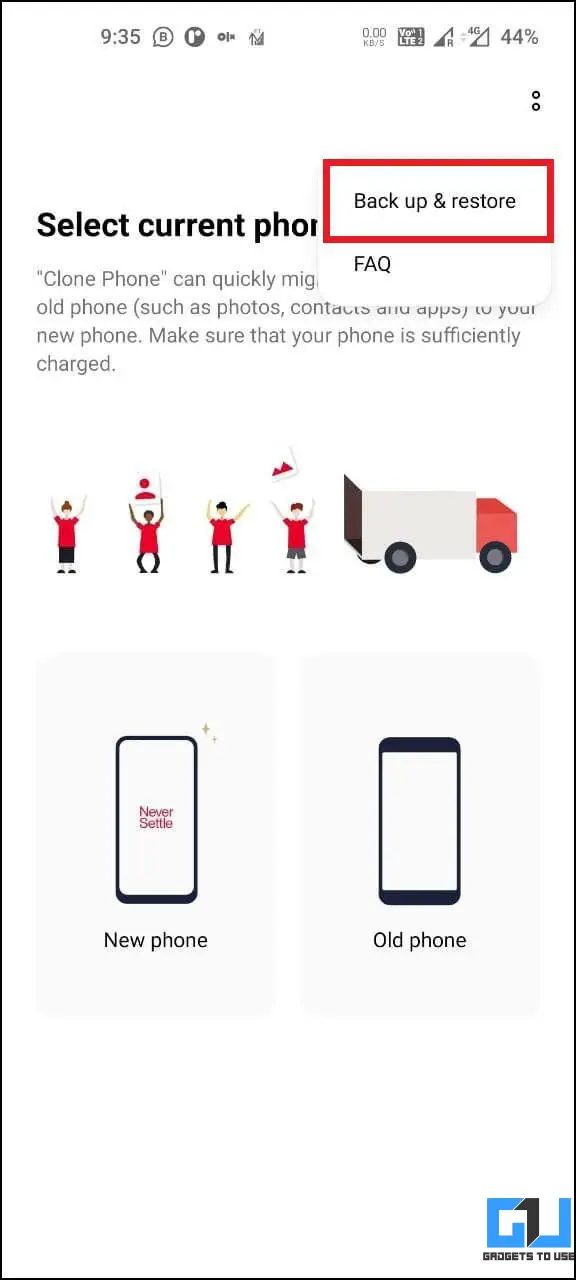
- Now, click the three-dot menu at the top right corner of your screen.
- Select Backup & Restore.
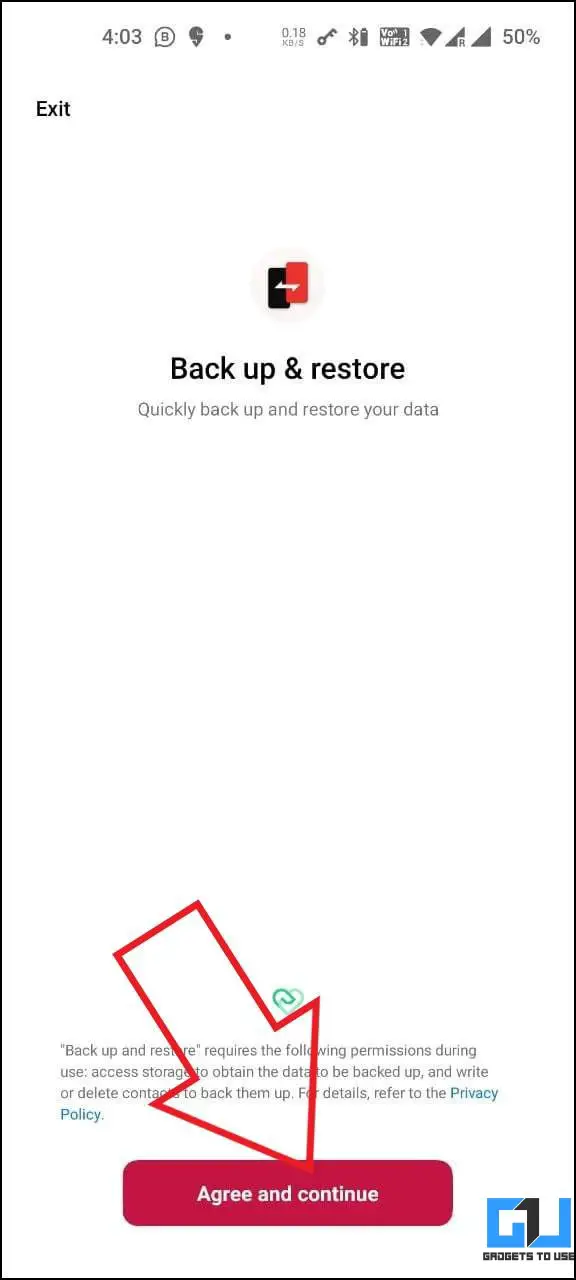
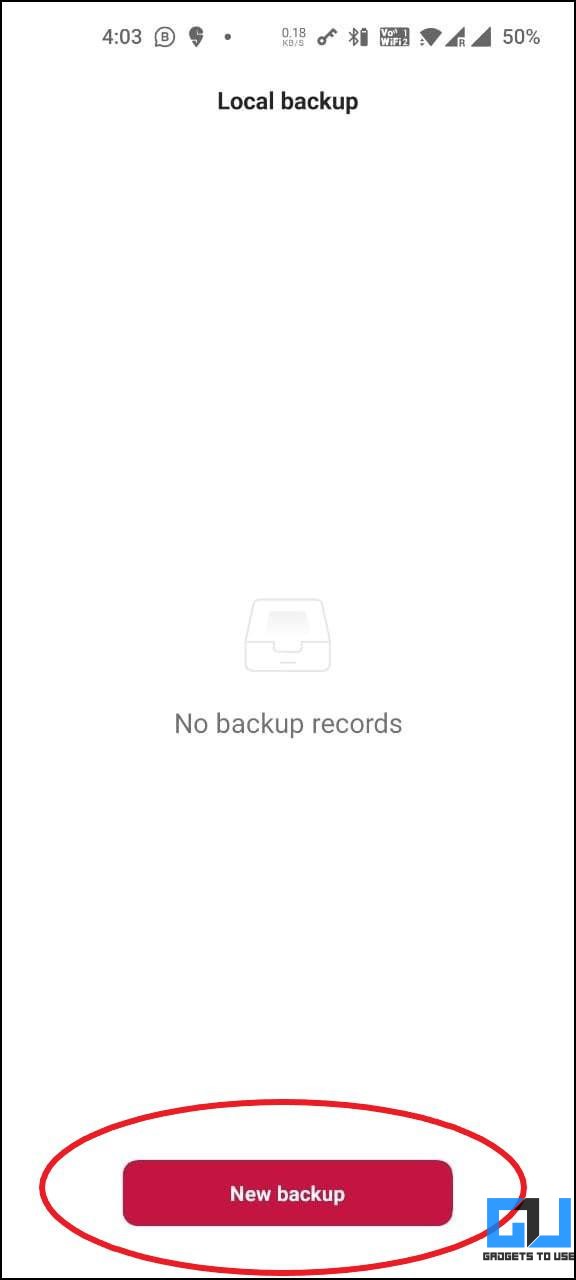
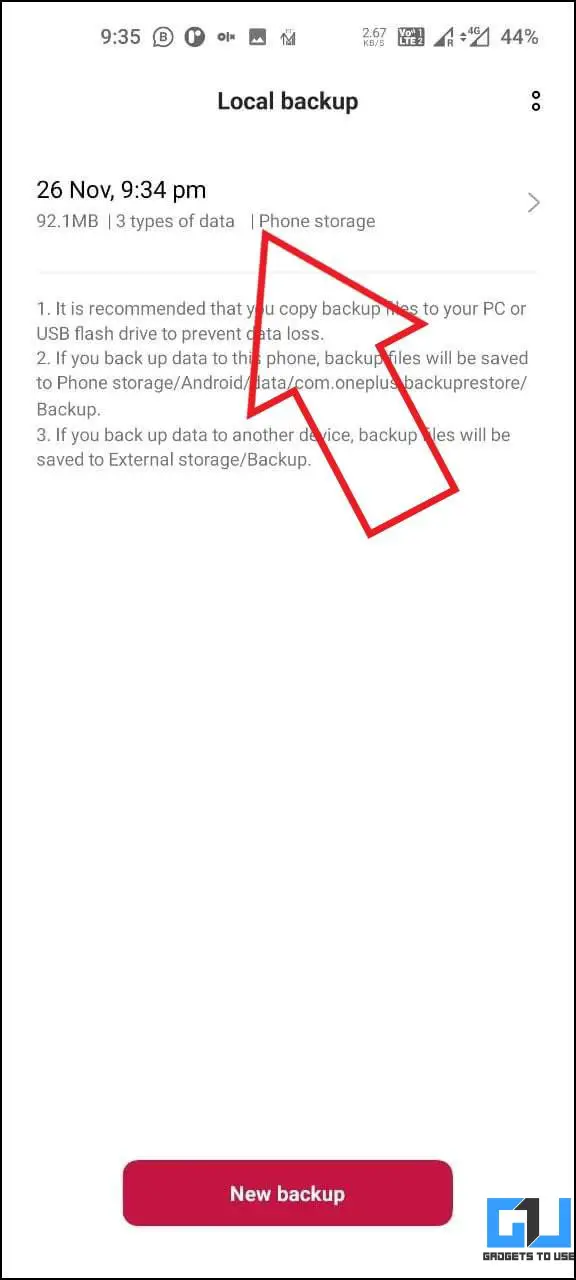
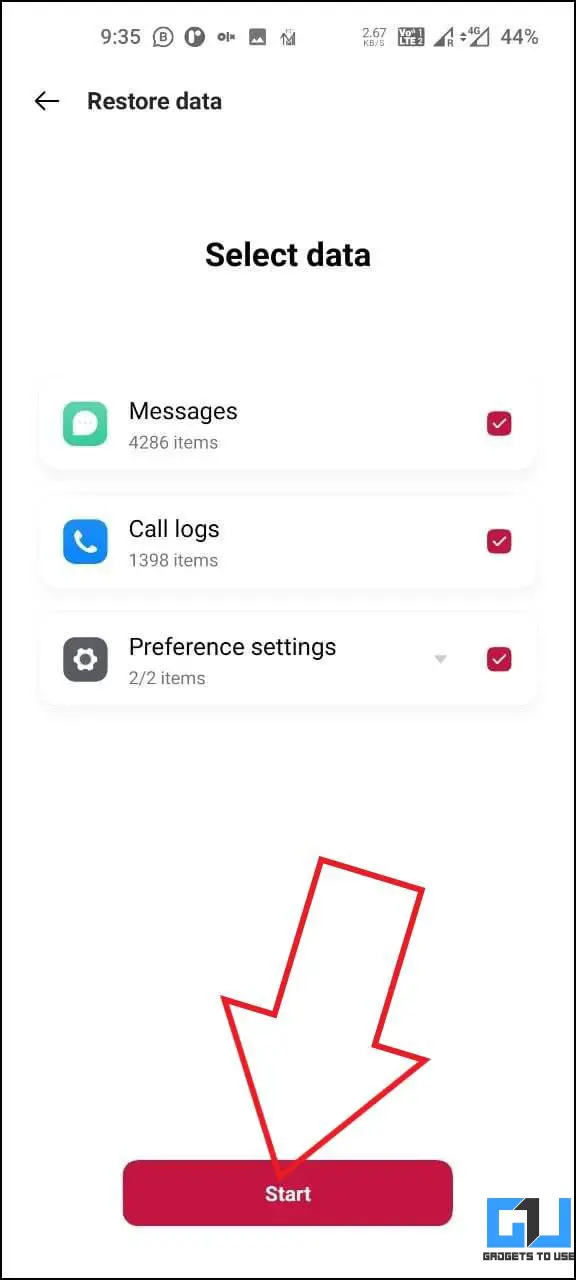
- Here, select the data you want to backup. This includes Contacts, Messages, Call Logs, Preference Settings, and Apps without data.
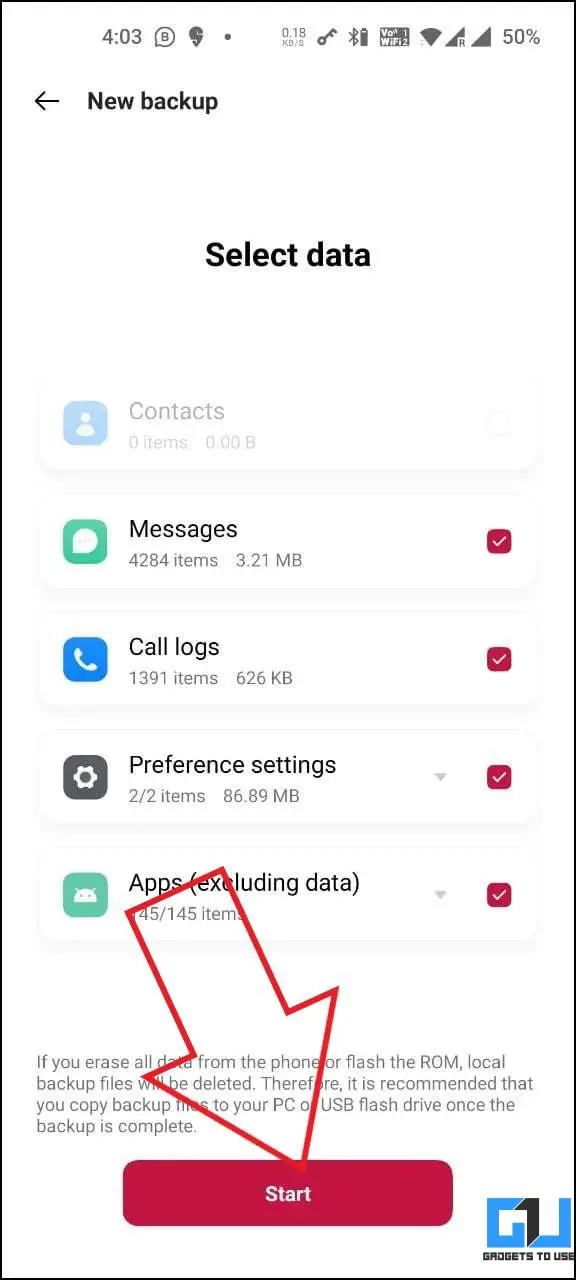
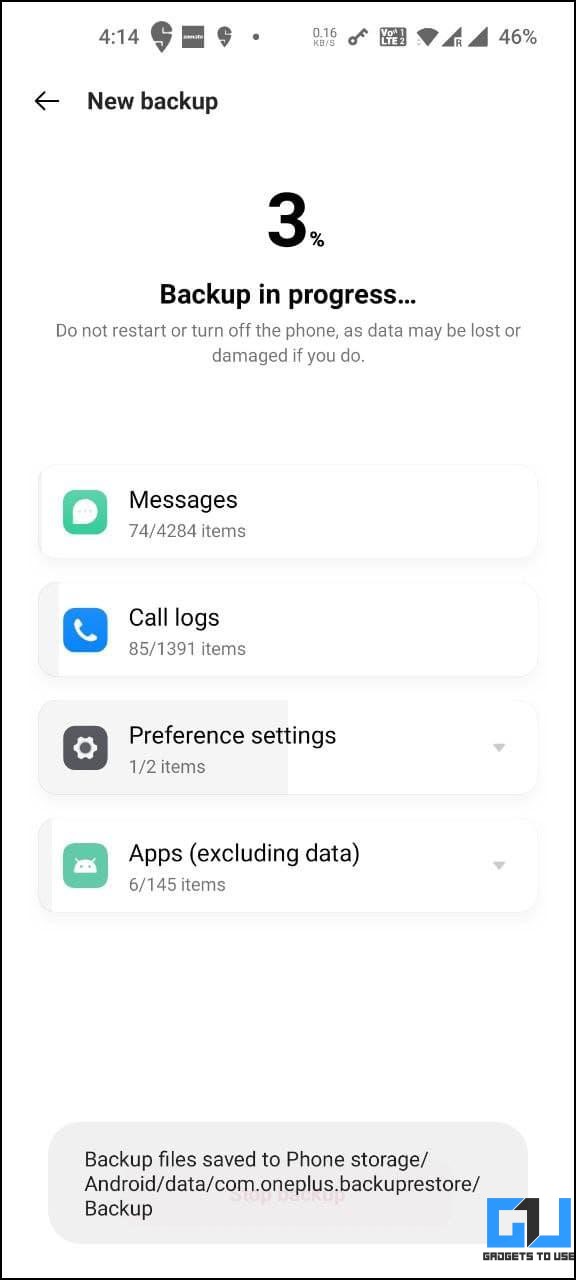
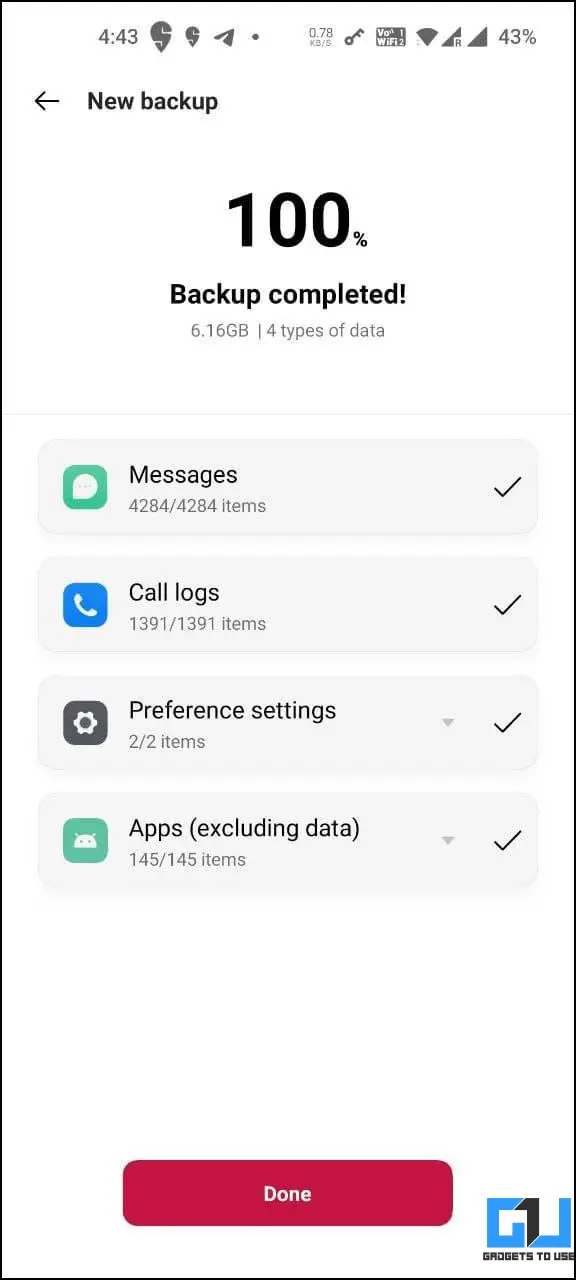
- Then, click on Start and wait for the backup to complete.
Transfer the Backup to PC
- Connect your OnePlus phone with a compatible USB Type-C cable to your PC.
- Swipe down the notification panel, click on Tap for more options for USB mode. Change it to File Transfer.
- Open File Explorer on your computer and tap your phone.
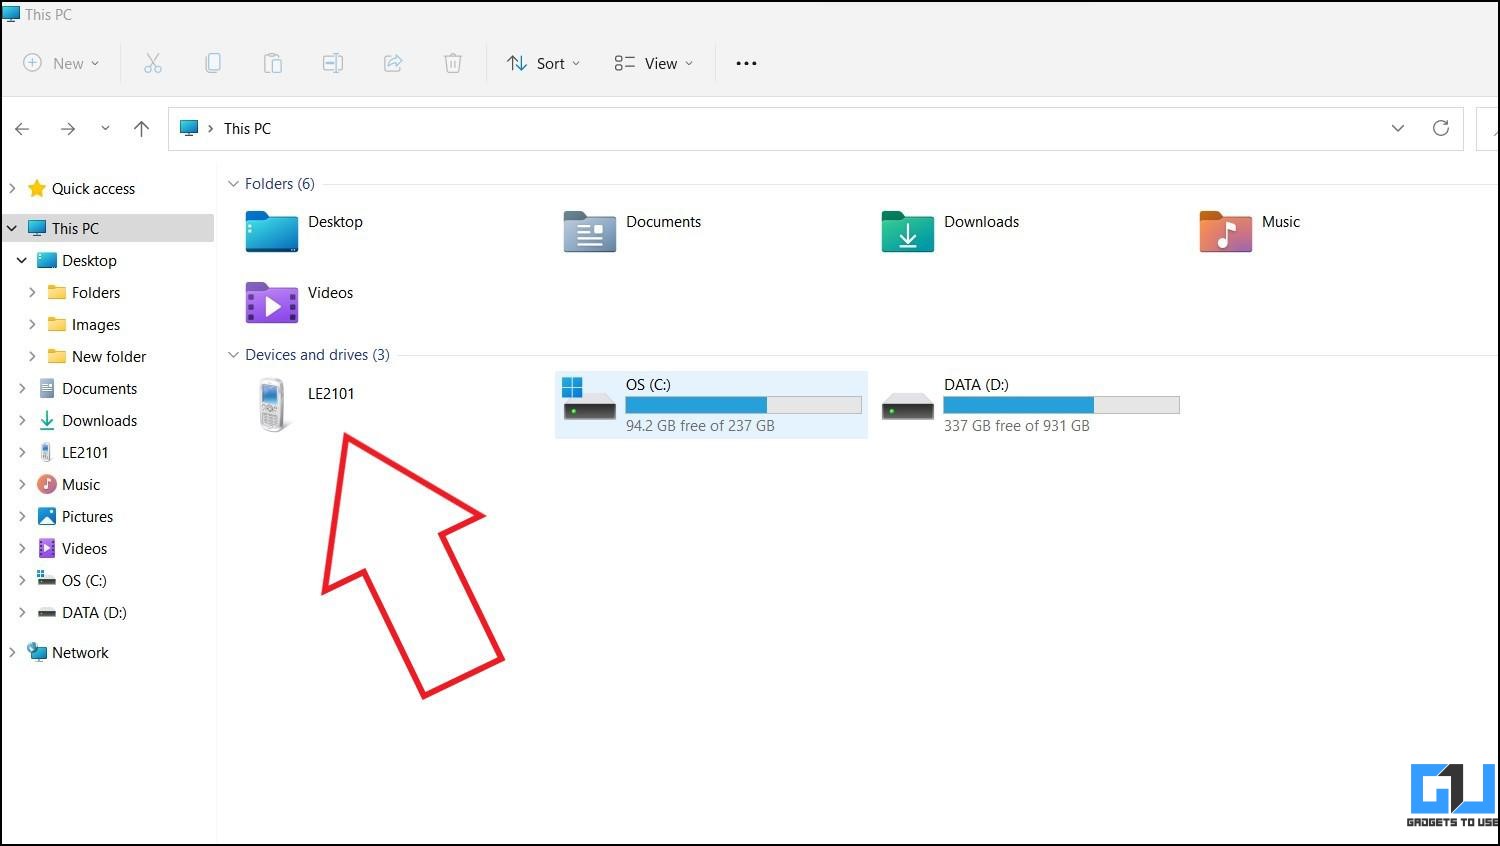
- Navigate to Internal storage > Android > data > com.oneplus.backuprestore.
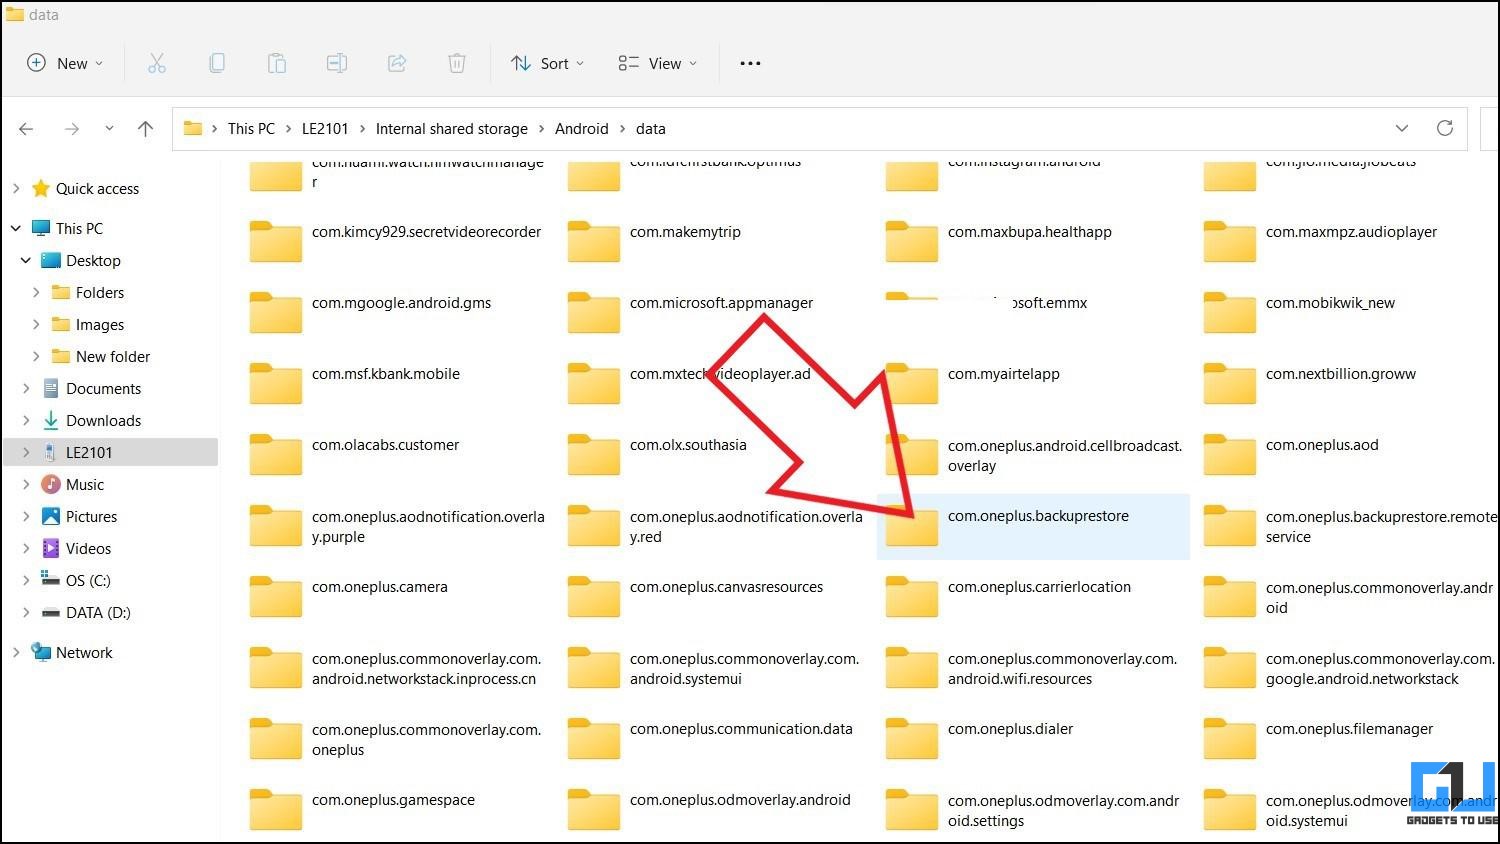
- Here, you will find a folder called “Backup,” which includes the backed-up data.
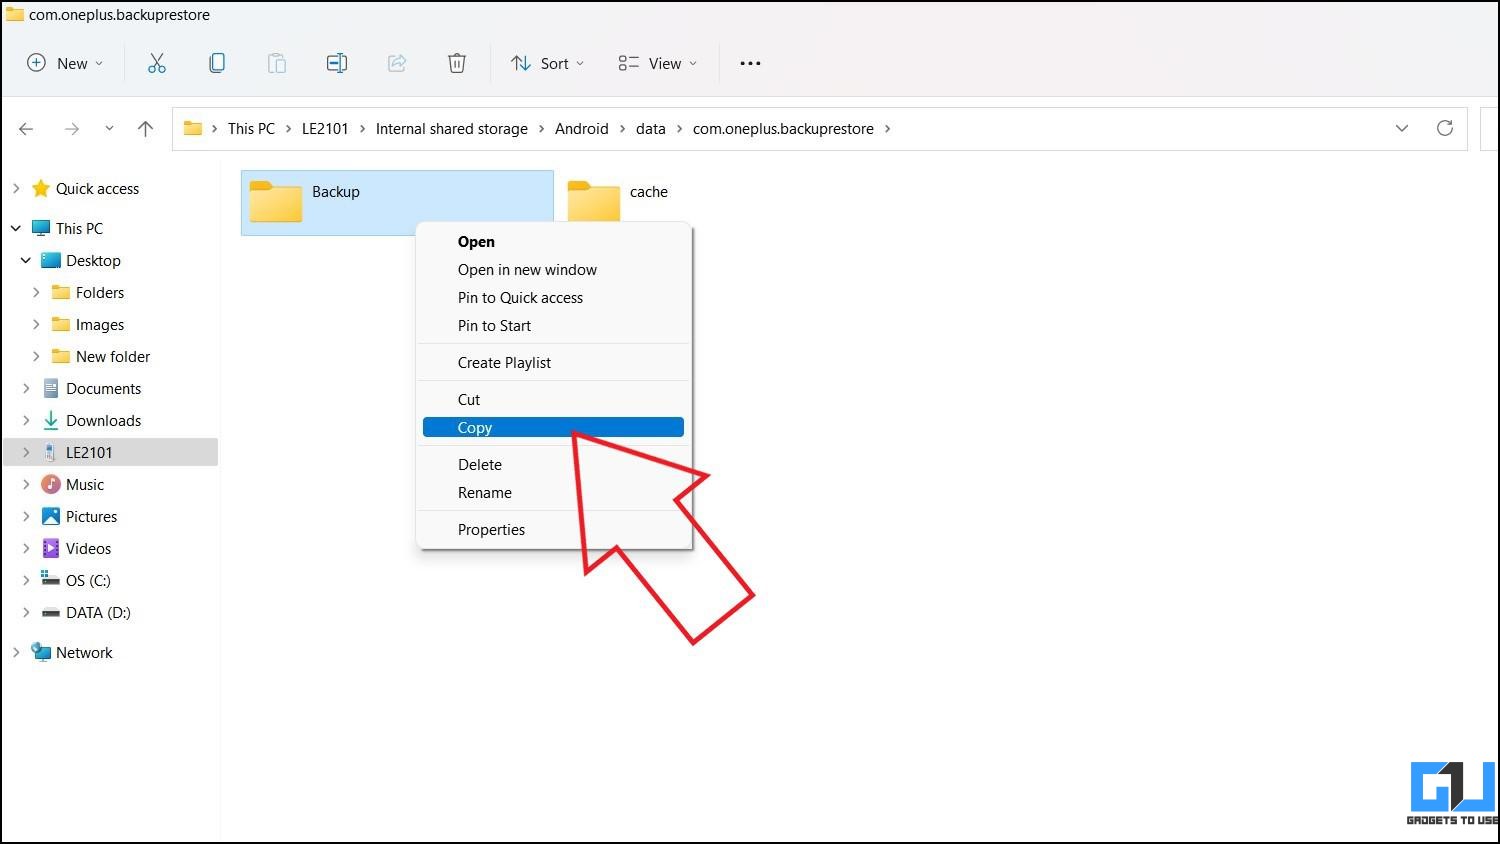
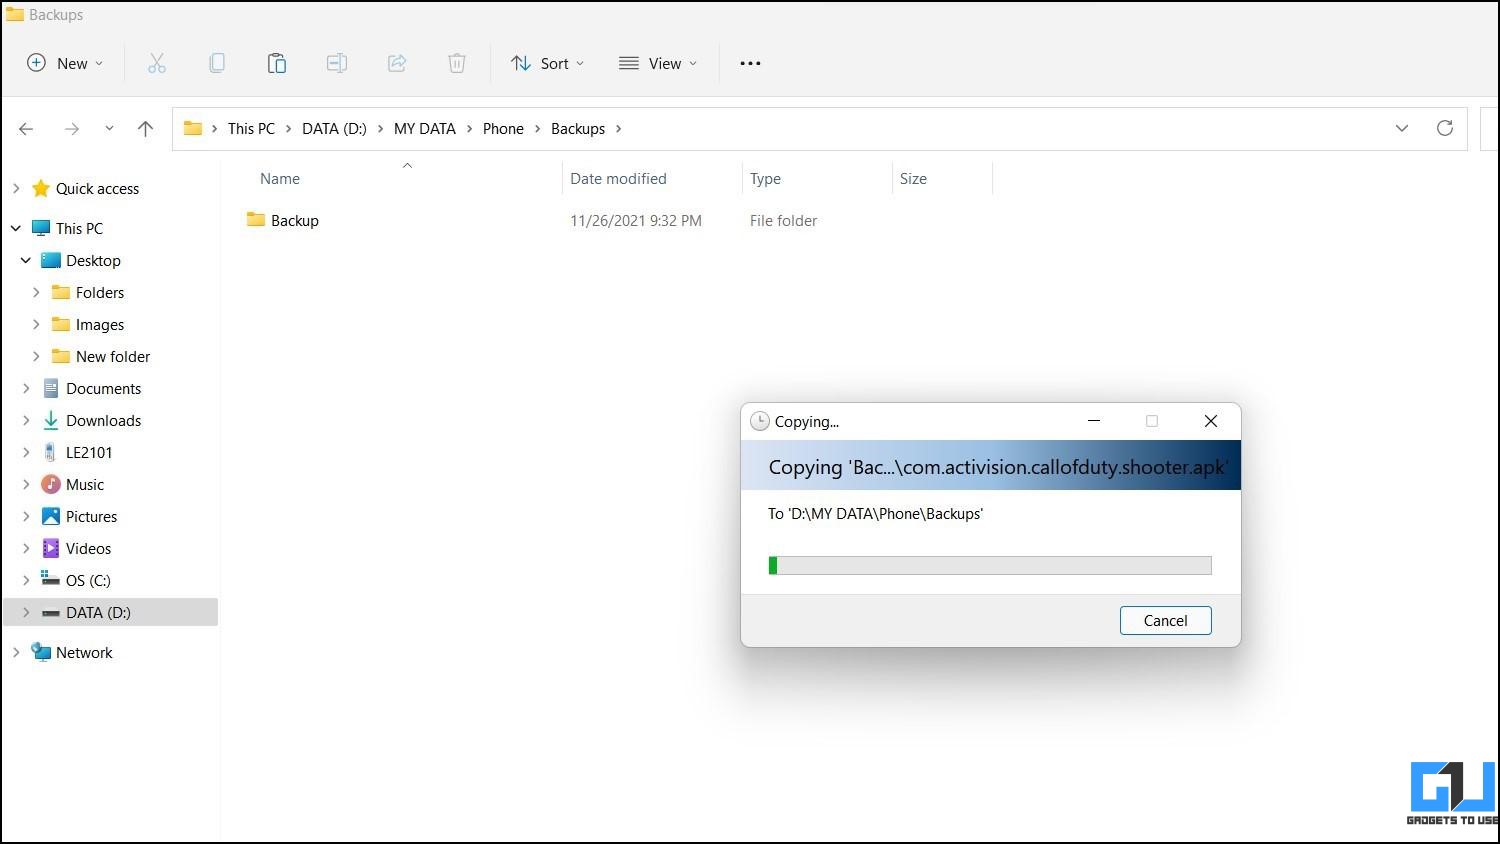
- Copy the whole Backup folder to an accessible place on your PC’s drive.
Restore the Backup When Needed
- Connect your OnePlus phone to the PC via USB cable. Please set it to the File Transfer mode.
- Copy the Backup folder you saved on your PC.
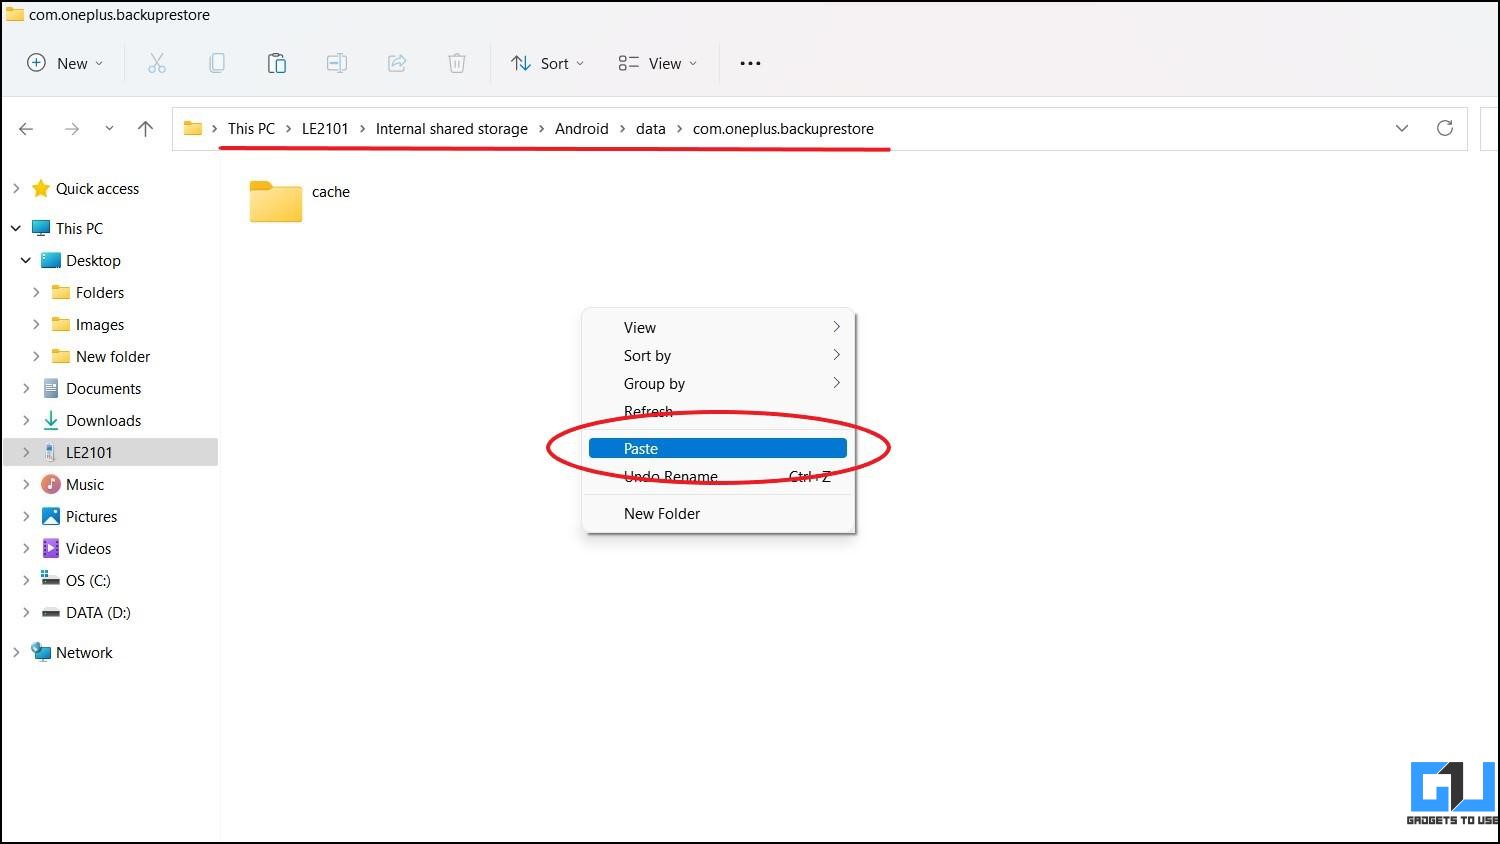
- Now, open the phone’s storage on PC and head to Android > data > com.oneplus.backuprestore. Paste the copied folder in this directory.
- Then, open the Clone Phone app.
- Tap the three-dot menu at the top and select Backup & Restore.
- Click on the backup and select the data you want to revive.
- Then, tap Start and wait for it to restore the data on your OnePlus phone.
Method 2- Manually Copy the Data to PC
The other way is to manually copy all the files from internal storage to your PC. This method can be used when you want to back up the photos, videos, documents, downloaded files, or offline music from your OnePlus phone to PC.
- Connect your OnePlus smartphone via a USB Type-C cable to the computer.
- Swipe down to open the notification panel, change the connection to File Transfer mode.
- Now, open your phone’s shared storage via File Explorer on the PC.
- Press CTRL + A to select all the files. You can also manually pick which files to backup.
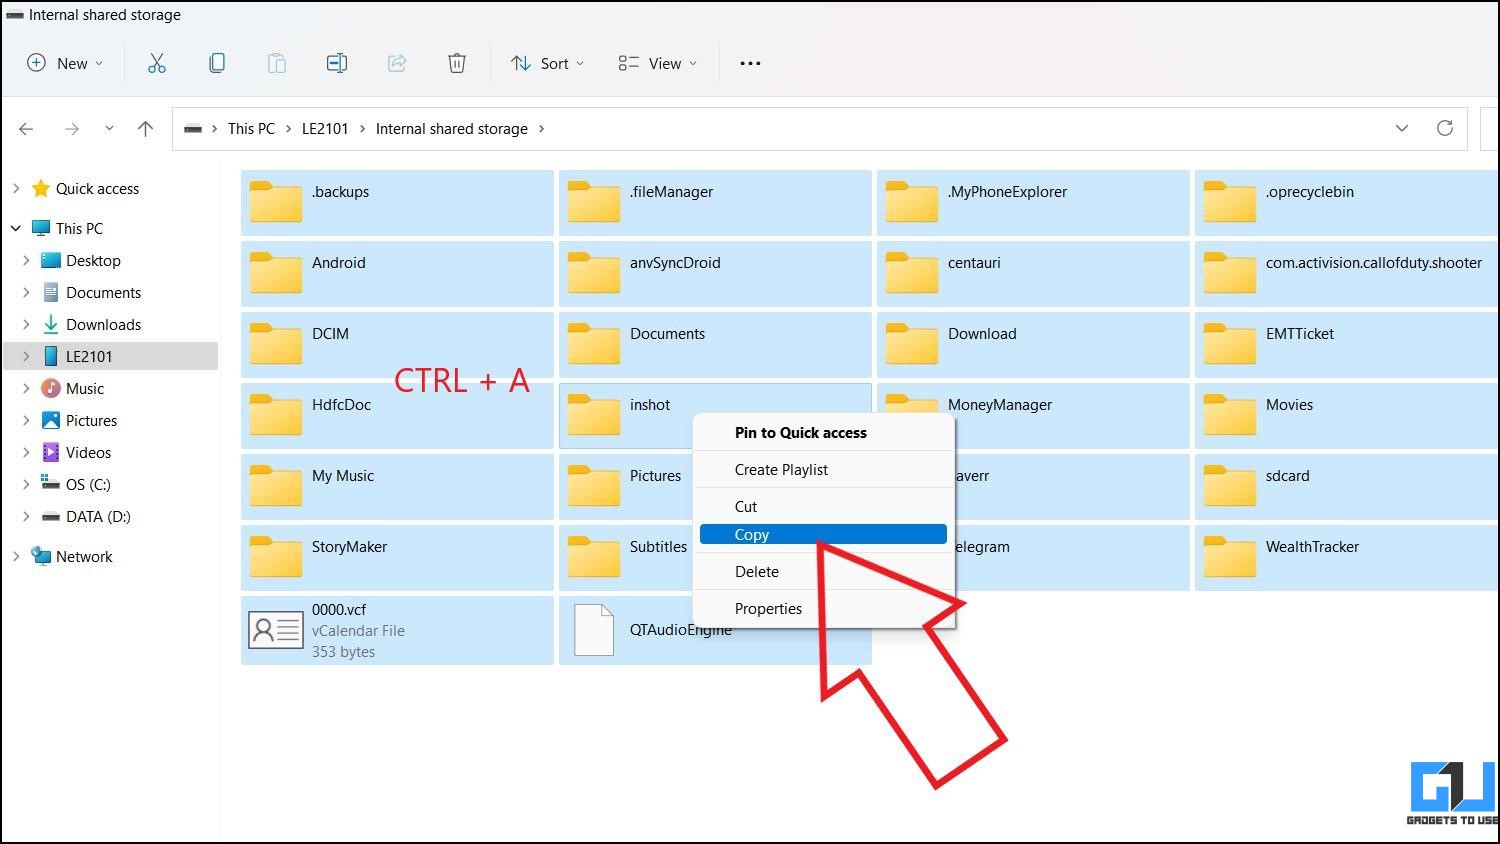
- Then, right-click and tap Copy or press CTRL + C.
- Paste the copied data to an easily accessible folder on your PC.

That’s it. The majority of your files are now saved safely on your computer. You can copy them back to the phone anytime you want.
Don’t want to use a USB cable? Check these five ways to transfer data from your phone to PC over Wifi.
Method 3- Using Third-Party Backup Tools
Several third-party tools in the market let you create a full backup of your Android phone on Mac or Windows PC. MyPhoneExplorer is one such free tool that you can use to backup important data from your OnePlus phone to Windows, using the steps below.
- Download and install the MyPhoneExplorer tool on your PC.
- Connect your phone via USB cable and enable USB debugging. You can follow the instructions given on this page to enable USB debugging.
- Now, open MyPhoneExplorer and allow it to connect to your phone over USB.
- It will automatically install its client on your phone- unlock your phone and grant it permissions to access data.
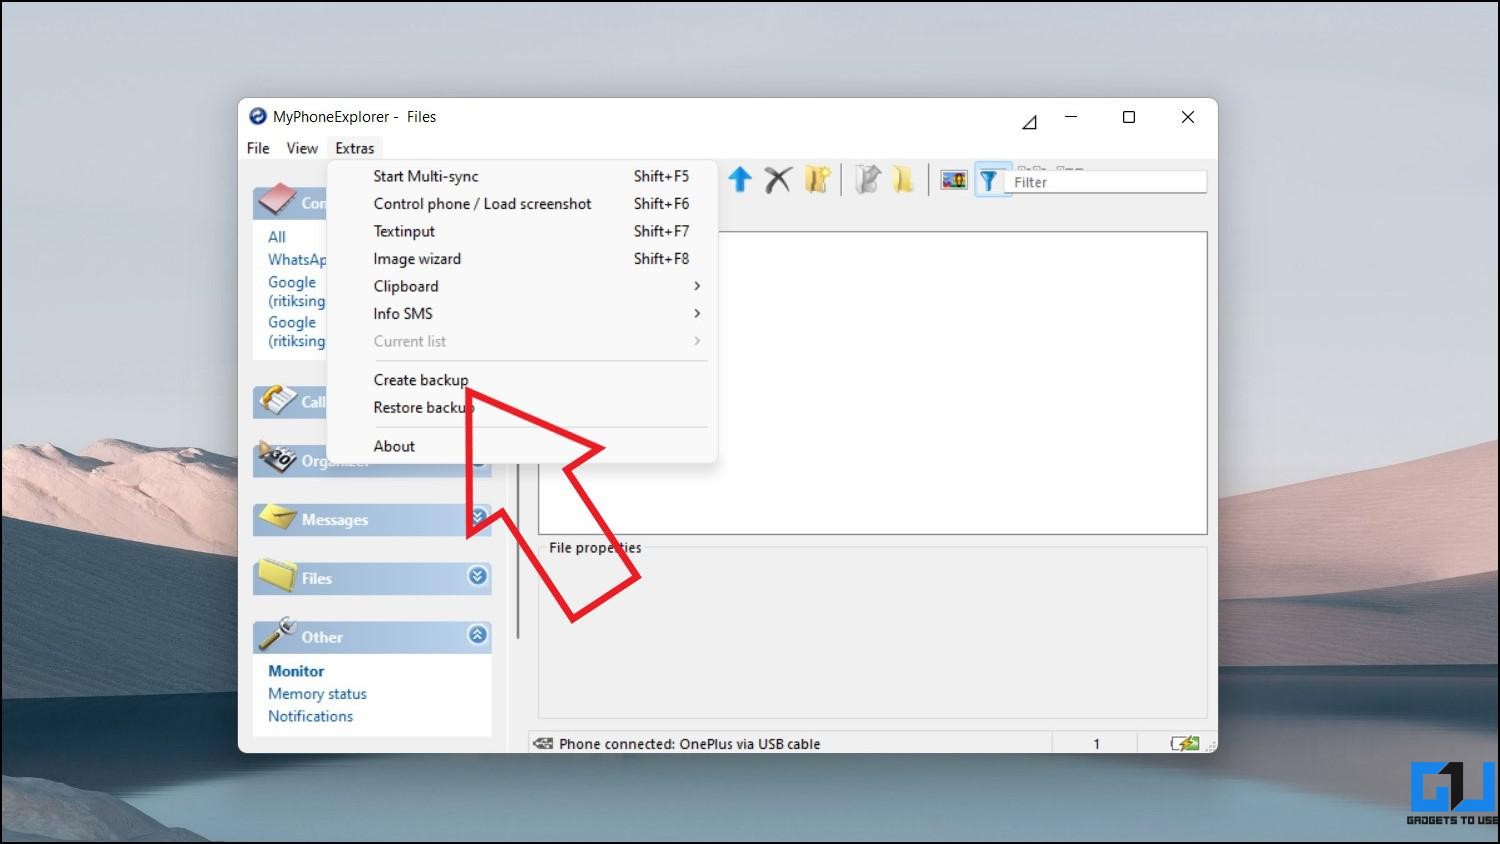
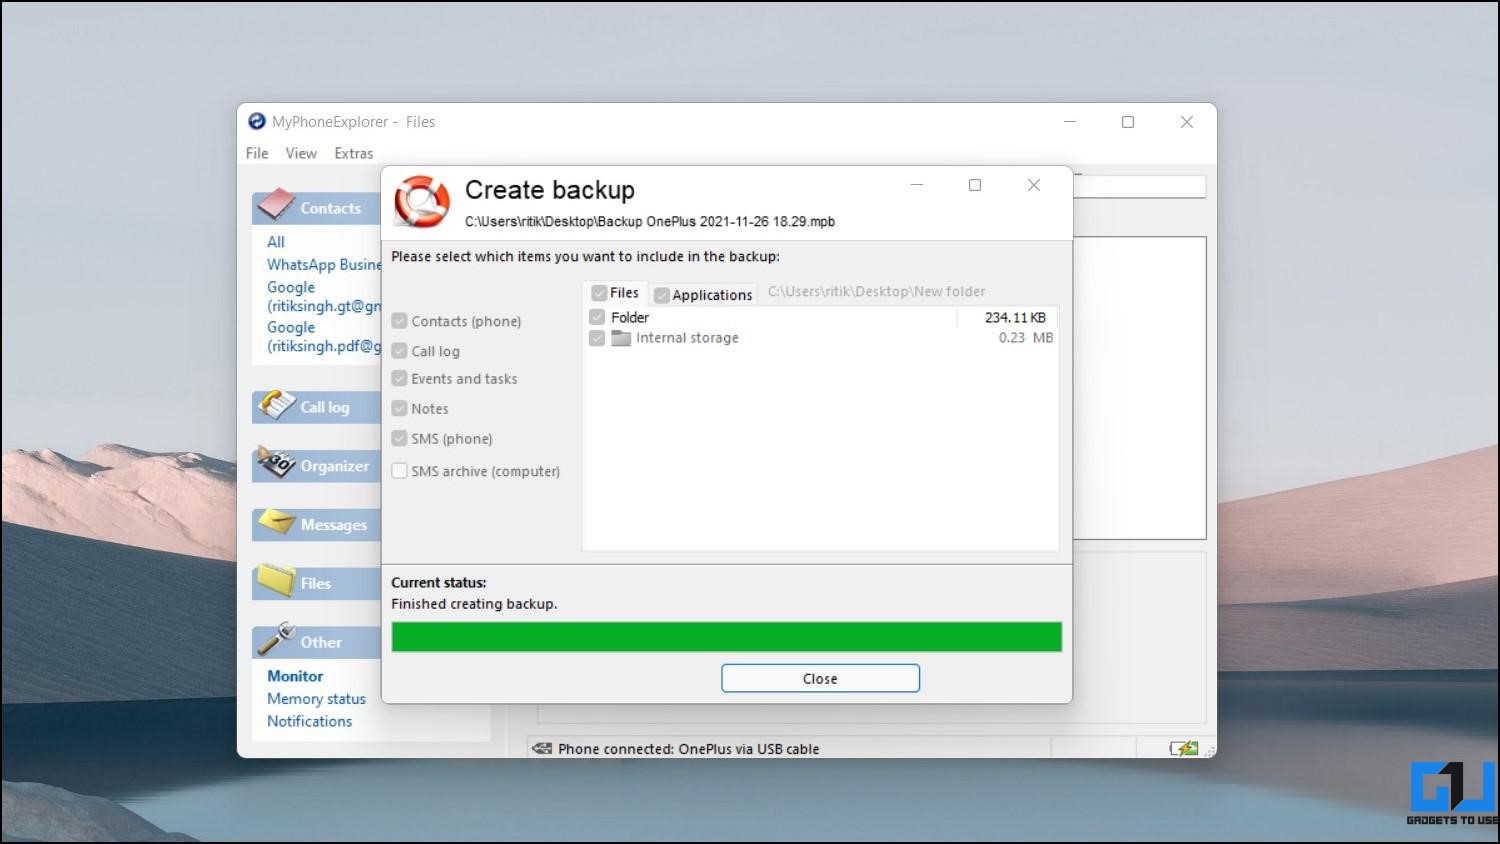
- On your PC, click on Extras > Create Backup.
- Select a folder to save your backup.

- Select the data you want to backup like Contacts, Call Logs, Notes, SMS, Applications, Files, etc.
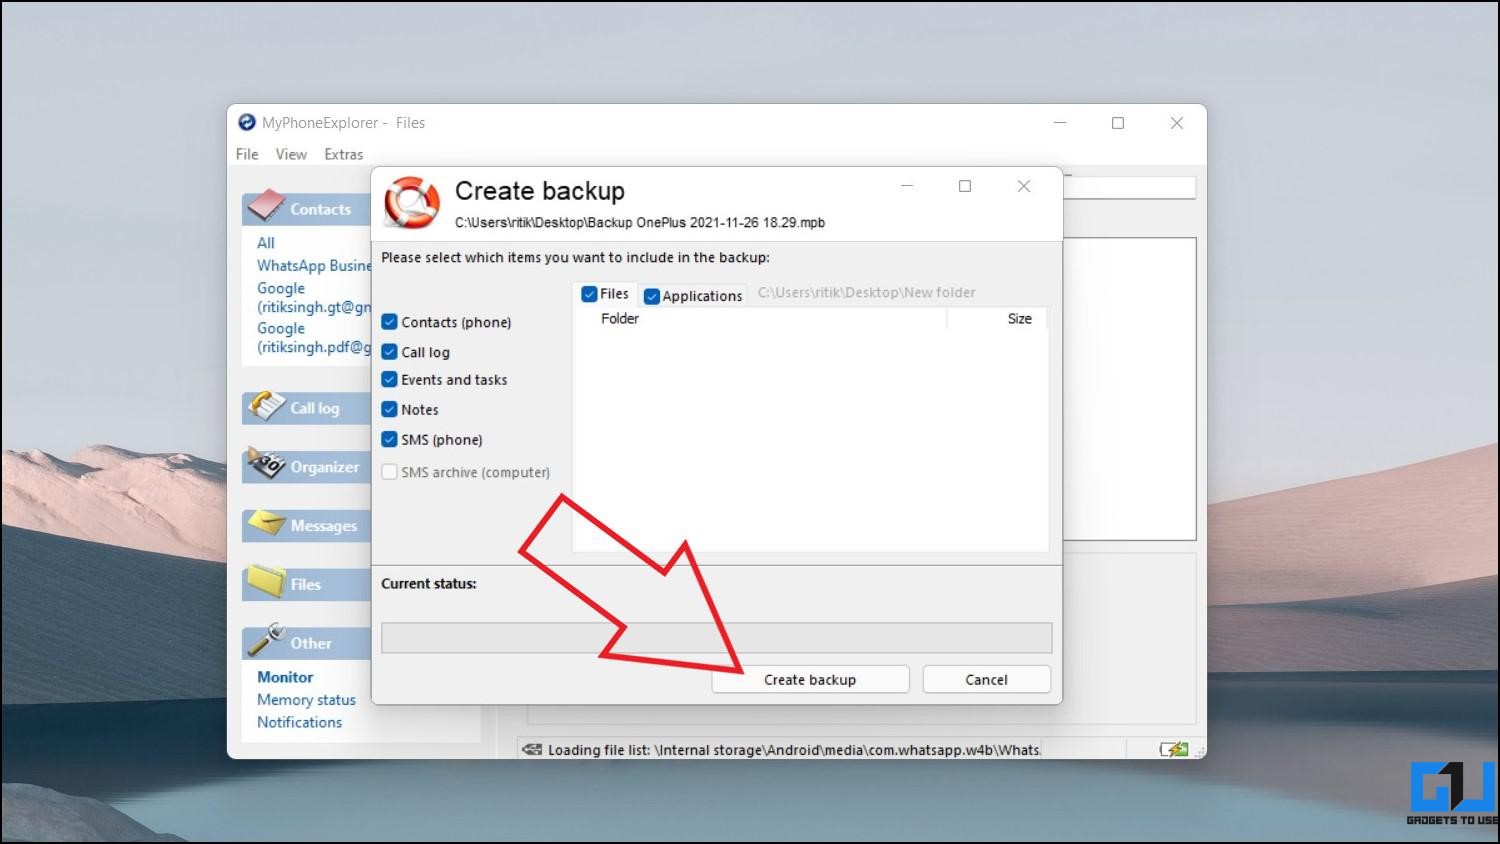
- Click Create Backup and wait for it to finish.
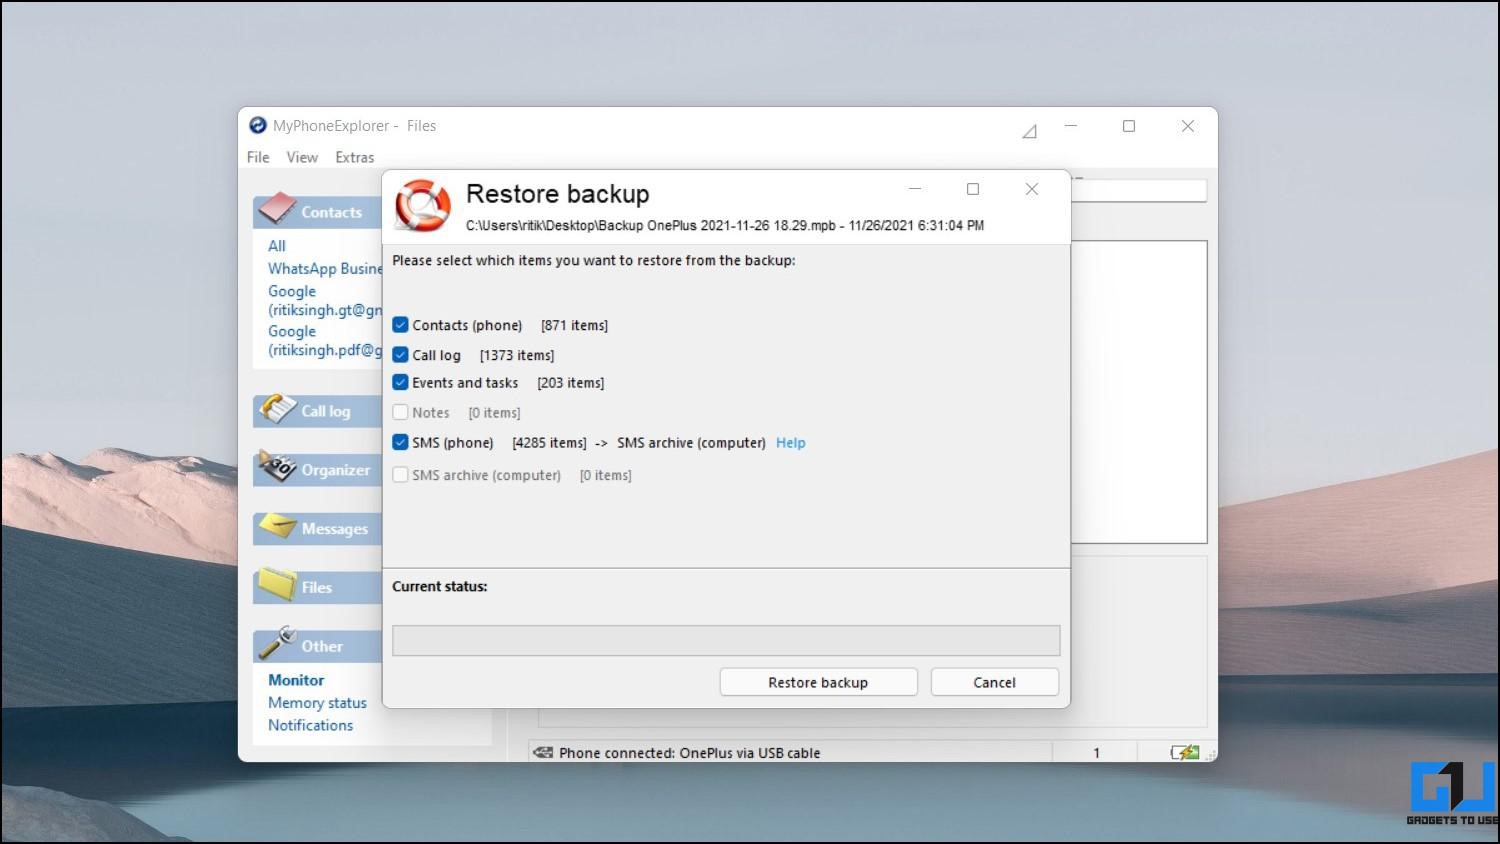
You have now successfully backed up your OnePlus phone’s data to your laptop or desktop. Whenever you want to restore it, open the tool, select Extras > Restore Backup, and select the backup file.
Note: Before relying completely on any third-party backup software, try the whole backup and restore process once to ensure that it works properly with your phone.
Other Ways to Backup Your OnePlus Phone Data
Besides the methods mentioned above, we have several other ways to back up the data individually on your OnePlus or any other Android phone.
You can sync all the contacts to your Google account, use SMS Organizer or other SMS apps to backup messages, and use WhatsApp’s drive backup for cloud backups. Whereas, for photos and videos, you can rely on Google Photos.
Furthermore, you can check our detailed guides on backing up important data below.
- How to Backup Contacts on Any Android Phone
- How to Backup SMS Messages on Your Android Smartphone
- How to Backup Your WhatsApp Pictures in Google Photos and Texts in Google Drive
Wrapping Up
These were three handy ways to backup all your OnePlus phone data to the PC. I hope this helps you safely backup your data and restore it when required after doing a factory data reset or flashing a ROM. That said, feel free to reach out if you have any related doubts or queries. Stay tuned for more such tips and tricks.
You can also follow us for instant tech news at Google News or for tips and tricks, smartphones & gadgets reviews, join GadgetsToUse Telegram Group or for the latest review videos subscribe GadgetsToUse Youtube Channel.


