Quick Answer
- So, if you prefer keeping the MacBook plugged in all the time for convenience, it would be a better option to limit the charging to between 65 and 80 percent using the methods given below.
- In this article, let’s look at different methods to limit or stop the MacBook charge to 80 percent or any other level.
- While it’s natural for the MacBook battery to deteriorate, you can prolong its life by limiting the charging percent in macOS.
Many people prefer keeping their MacBook plugged in all the time. However, doing so negatively impacts the longevity of the battery. While it’s natural for the MacBook battery to deteriorate, you can prolong its life by limiting the charging percent in macOS. In this article, let’s look at different methods to limit or stop the MacBook charge to 80 percent or any other level.
How to Stop or Limit MacBook Charging to 80 Percent?
Like any other laptop, MacBooks have lithium-ion batteries that chemically degrade over time. The 20-80 percent is an ideal range for these batteries. And hence, you should avoid letting it charge over 80 percent or discharge to less than 20 percent.
Charging the battery to its maximum capacity causes chemical wear and tear due to high voltage and temperature. Other factors like battery cycles, too, determine the battery degradation.
Why Limit the Battery Charge on MacBook?
As mentioned, charging or discharging to the extremes stresses and degrades the lithium battery. Hence, pushing it to charge from 80 to 100 will cause faster aging. It will reduce its charge-holding capacity and may even cause it to swell for a long time.
So, if you prefer keeping the MacBook plugged in all the time for convenience, it would be a better option to limit the charging to between 65 and 80 percent using the methods given below.
Method 1- Limit MacBook Charging Using AlDente
AlDente is a popular application that limits the maximum charge level on Mac. These third-party apps can do so by modifying the “Battery Charge Level Max” (BCLM) parameter in the SMC. Here’s how to use AlDente on Mac:
1. Download AlDente using the link below.
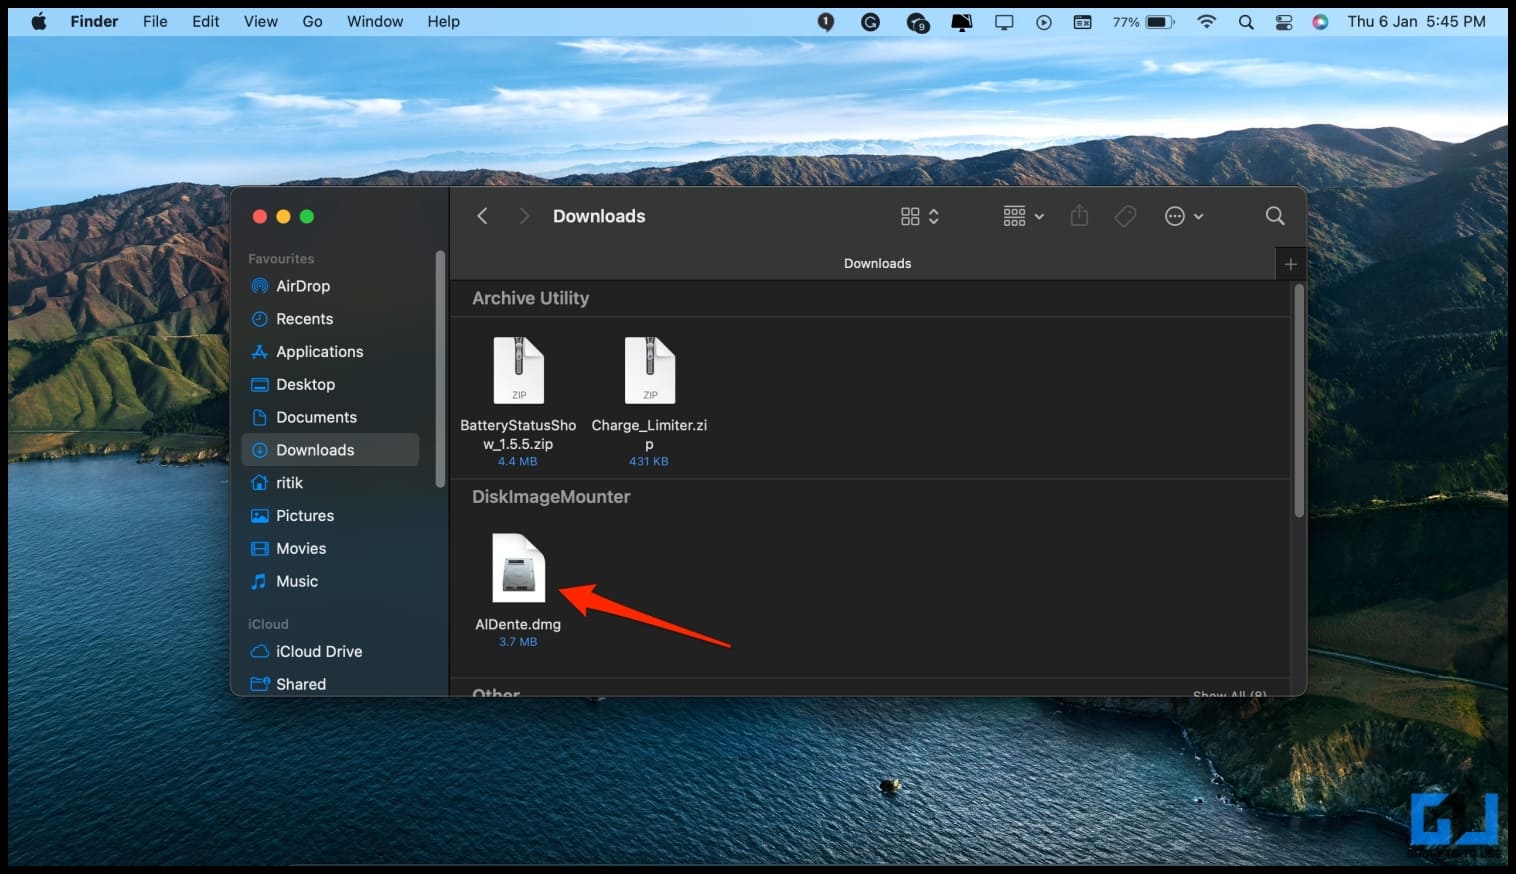
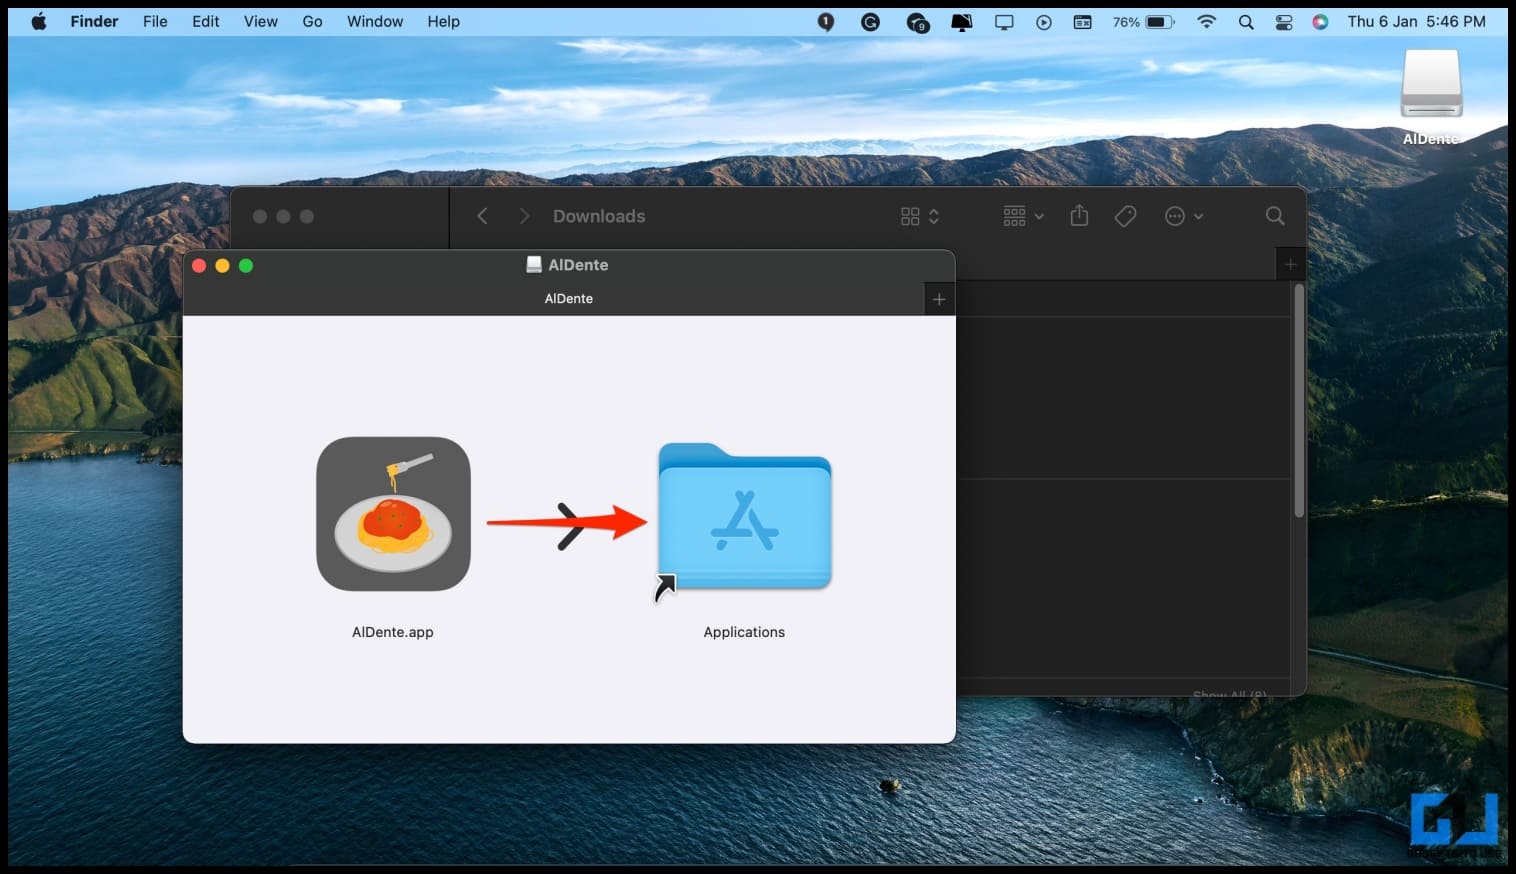
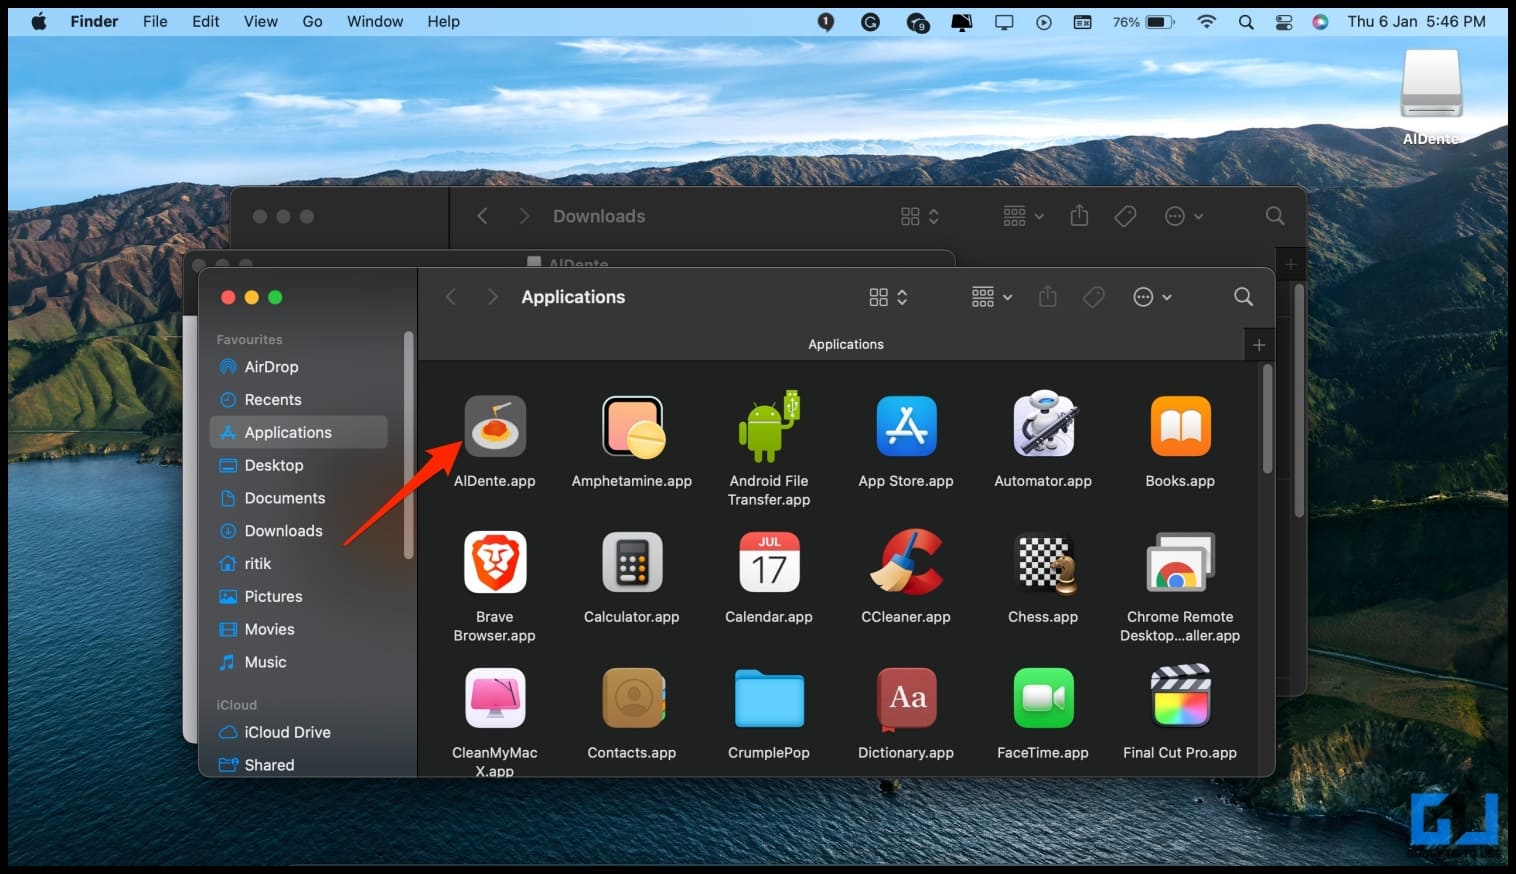
2. Open the dmg file and drag it into Applications.
3. Click the app icon in Applications. You can also open it from the Launchpad.
4. Tap Open when the “Are you sure you want to open it?” warning appears.

5. The app will prompt you to install a Helper tool to control MacBook’s charging behavior.
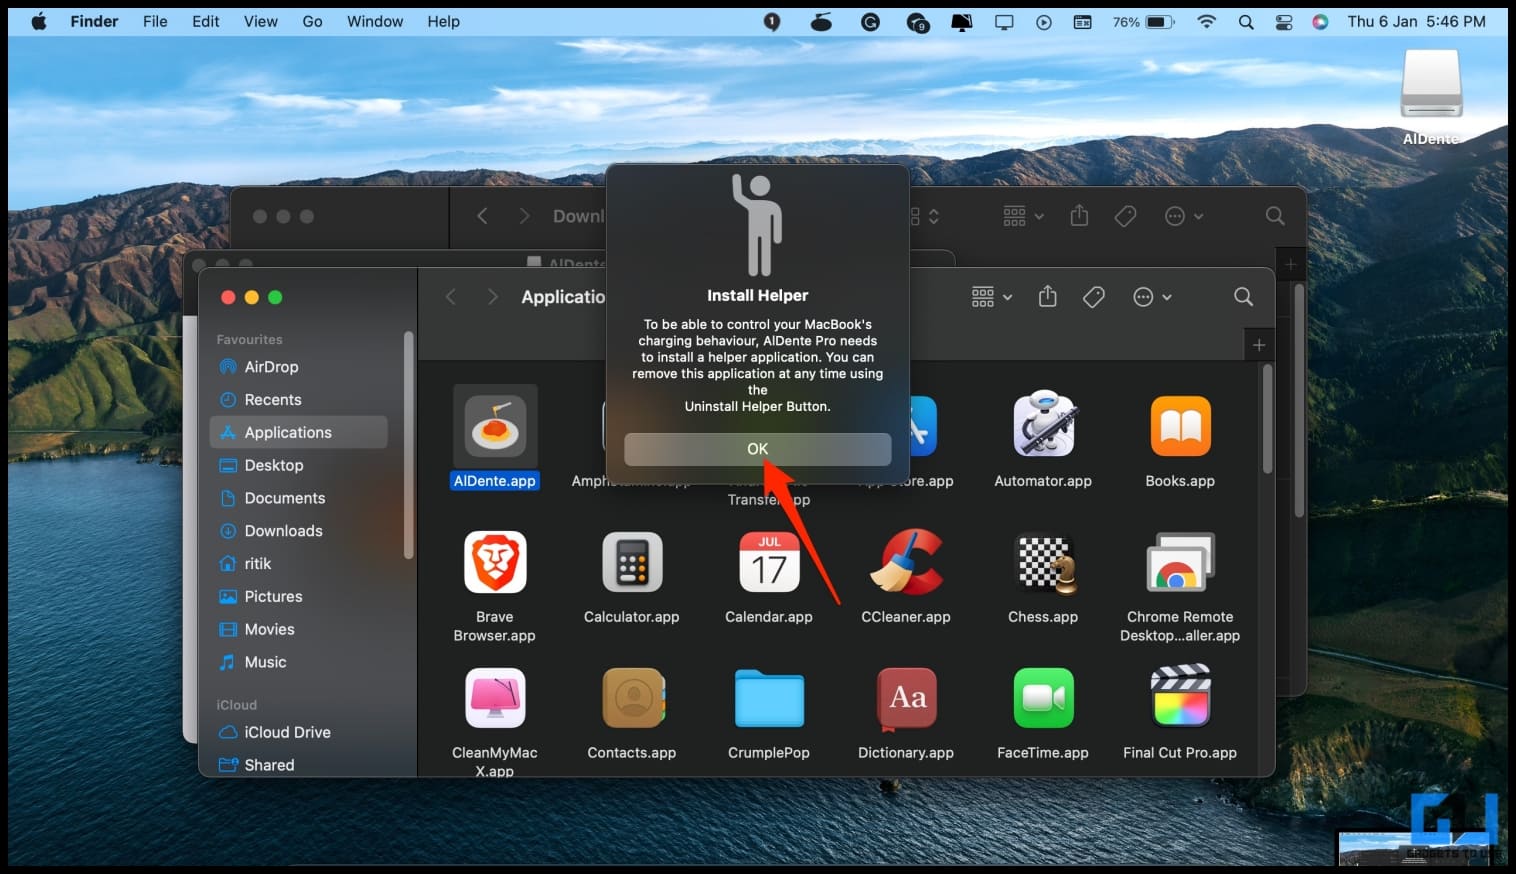
6. Click OK. Then, enter your MacBook password and tap Install Helper.

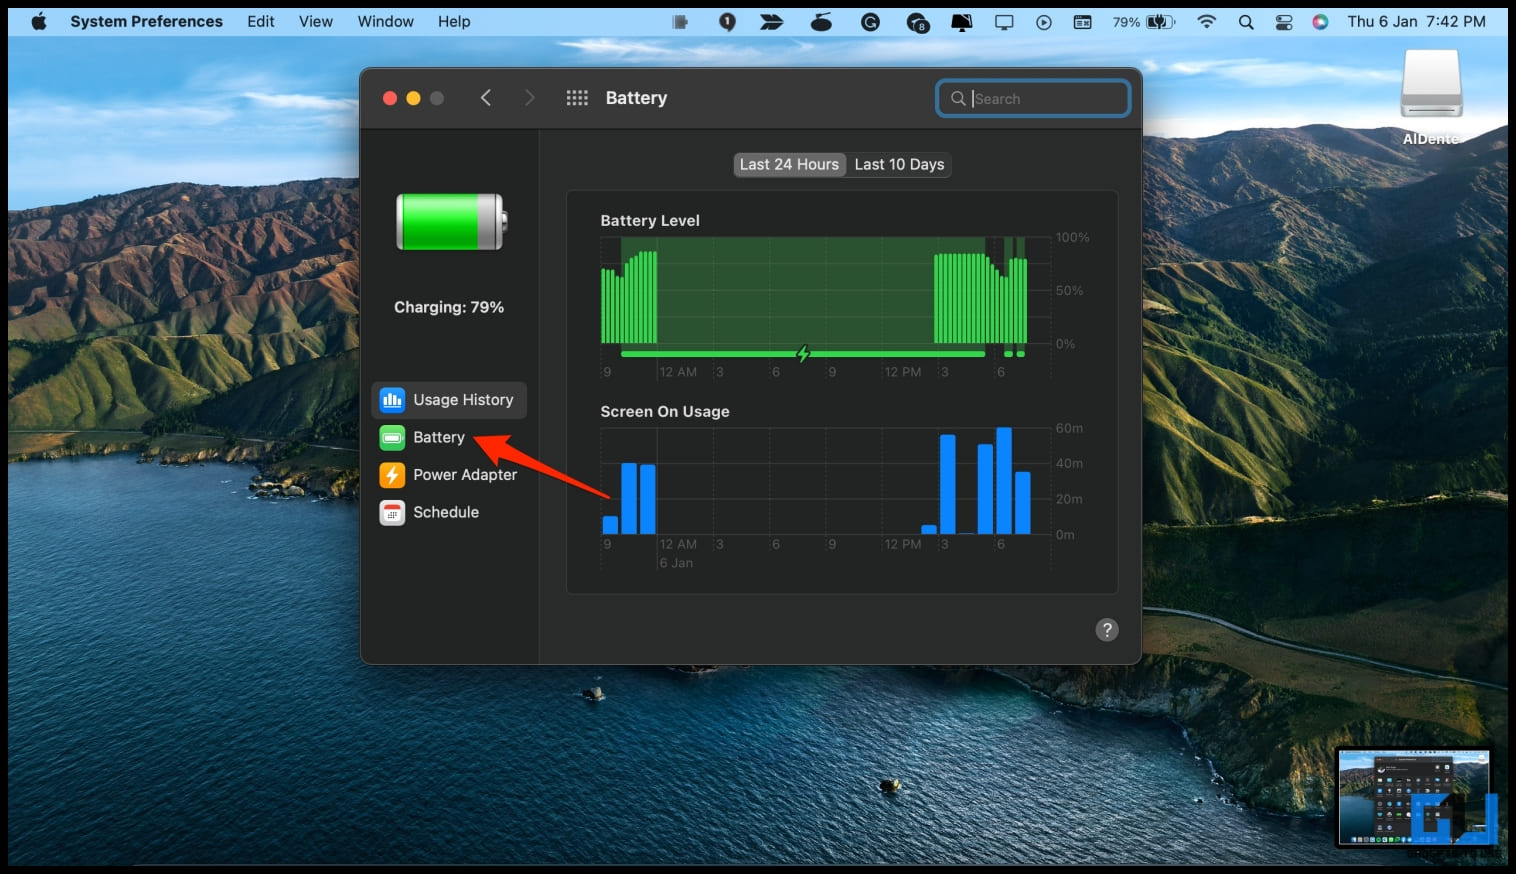
7. Next, go to System Preferences > Battery > Battery on your Mac.
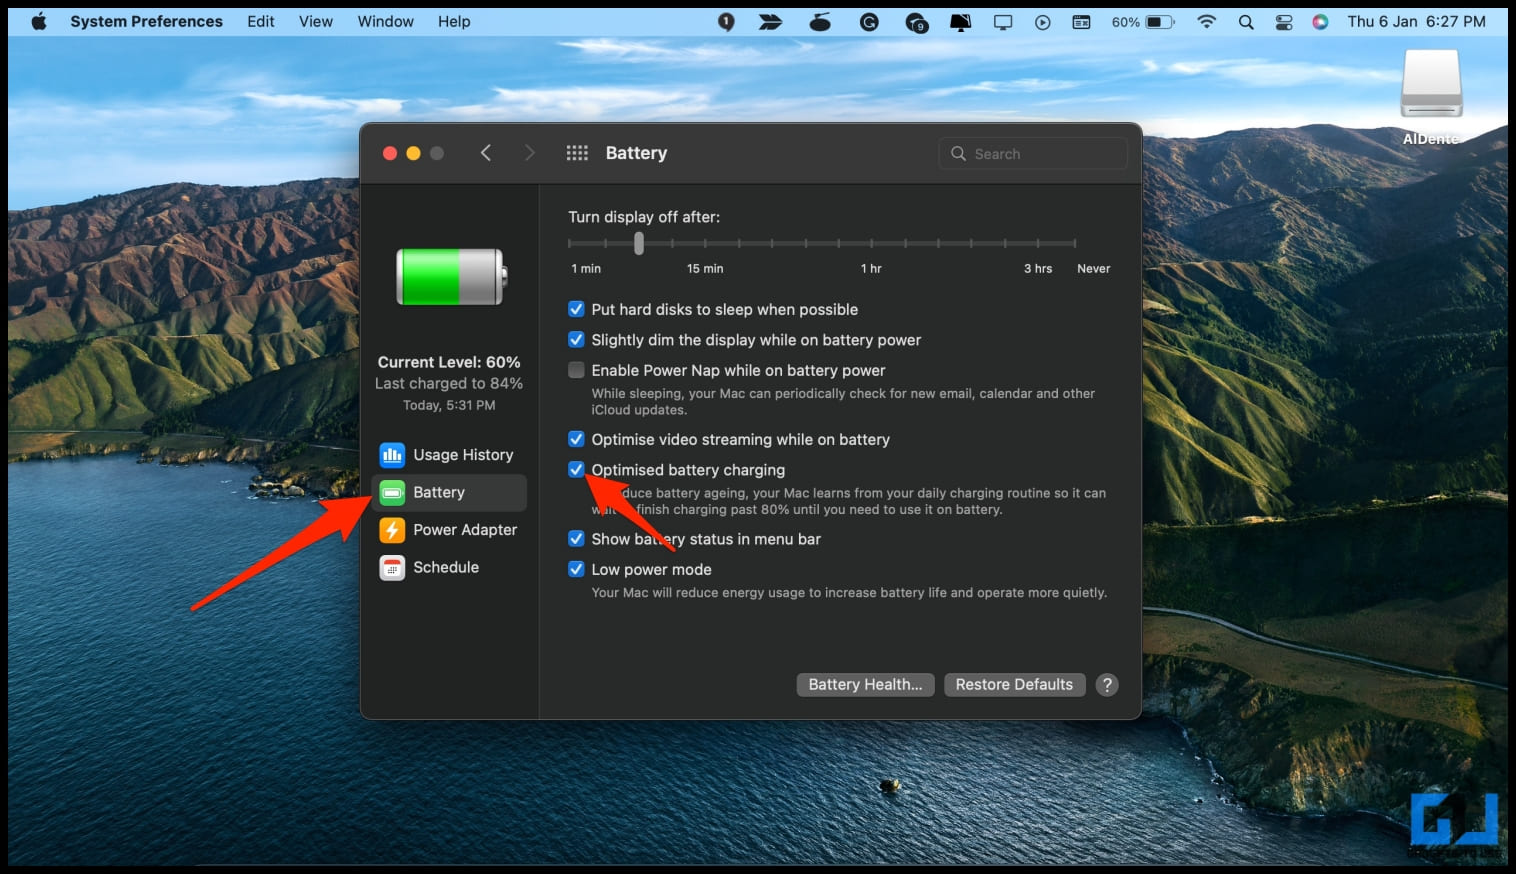
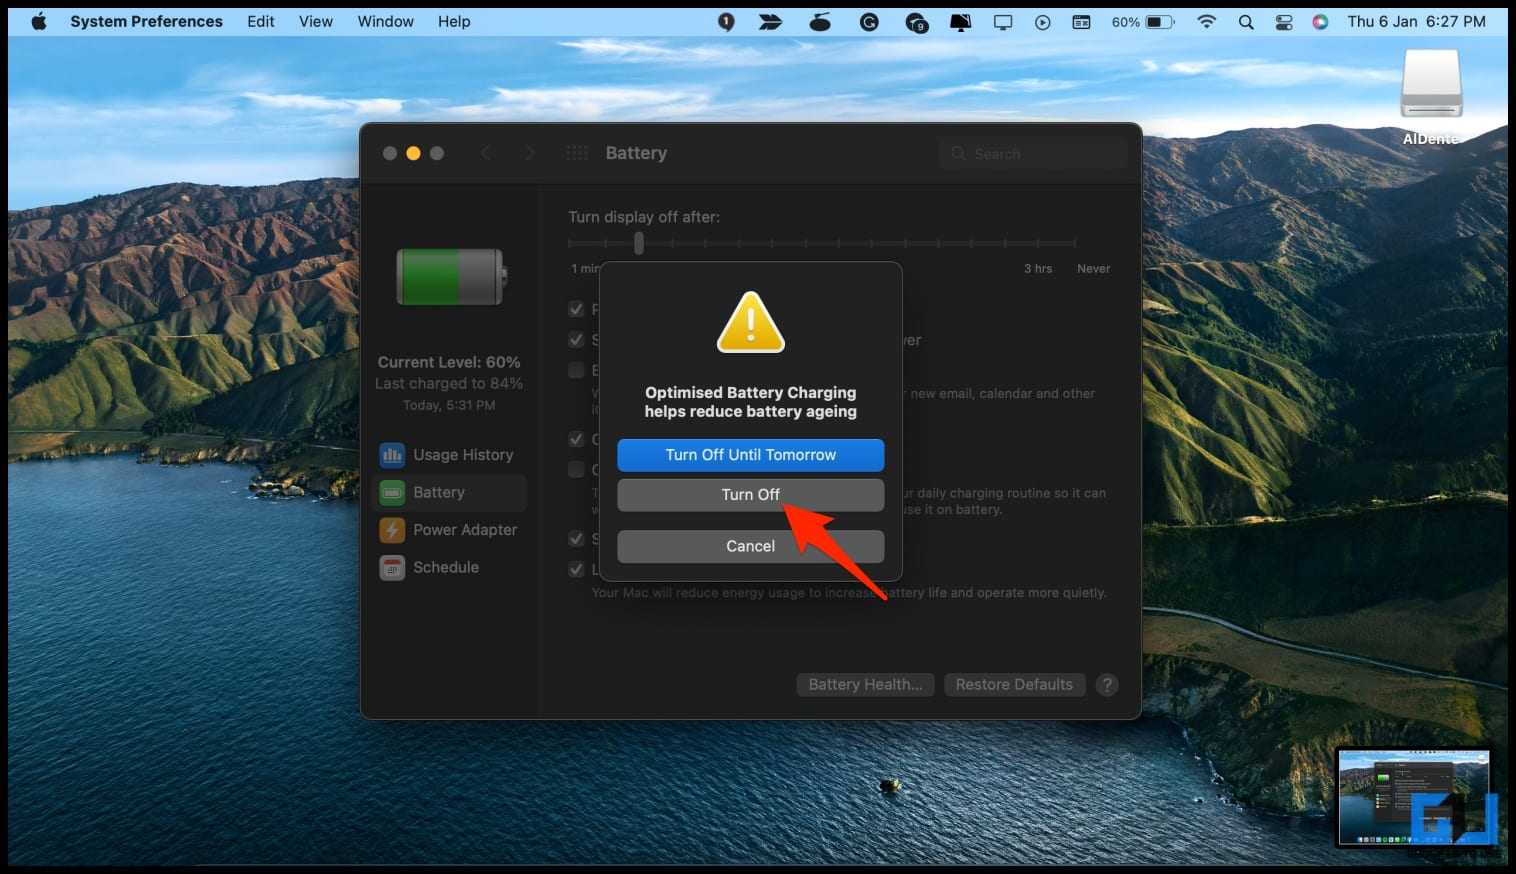
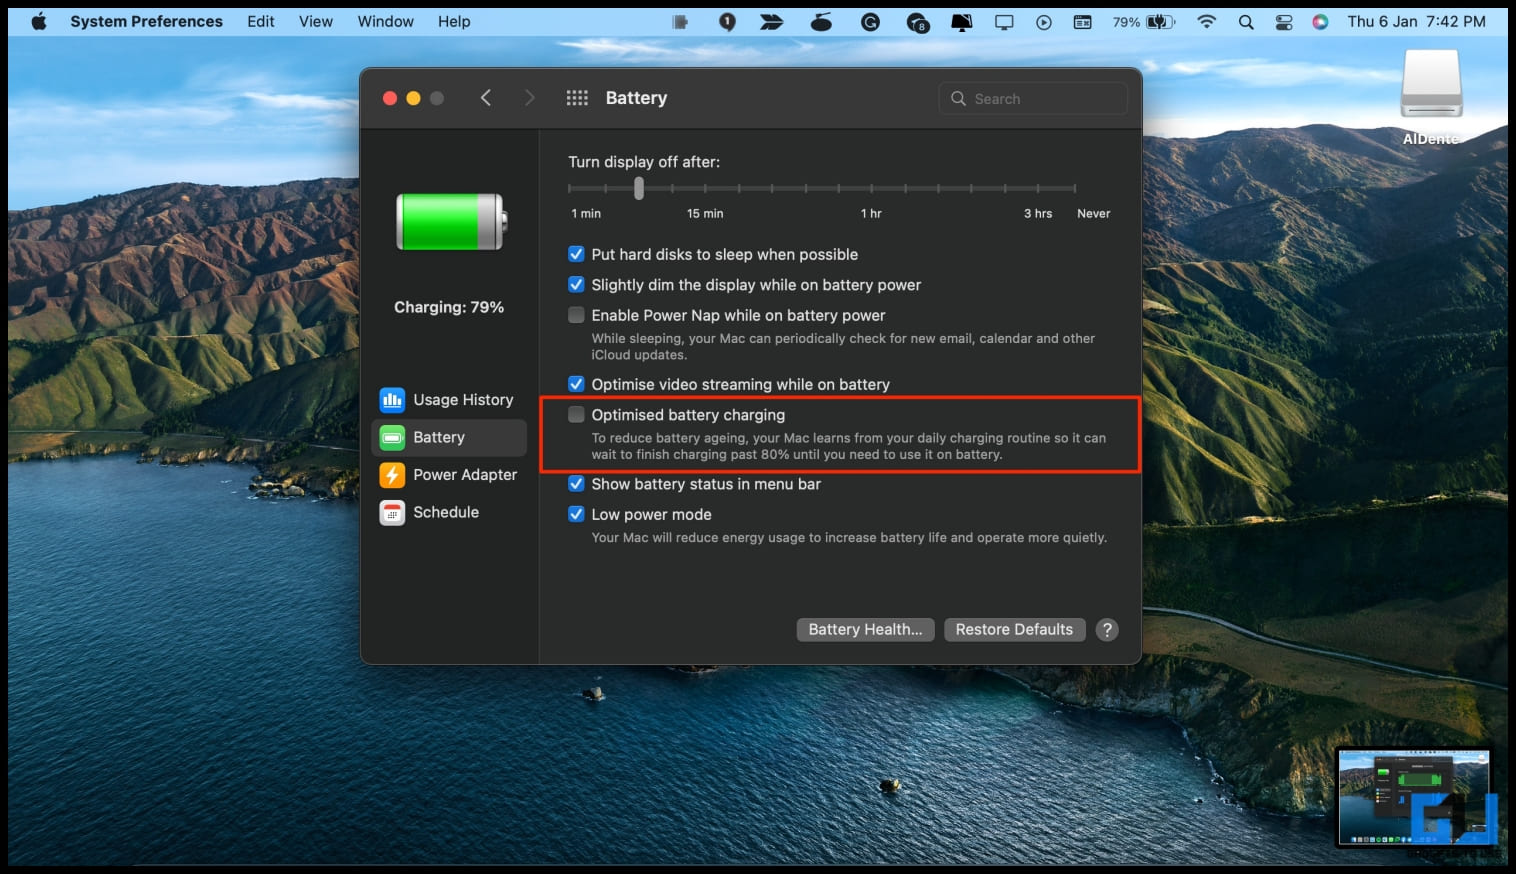
8. Here, uncheck the box for Optimized Battery Charging and click Turn Off.
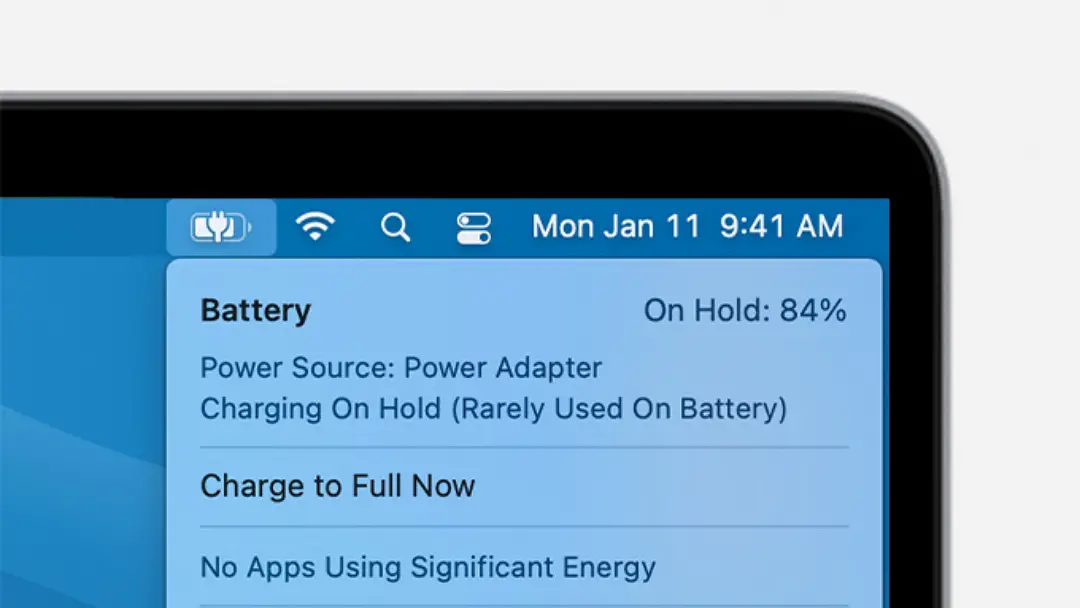
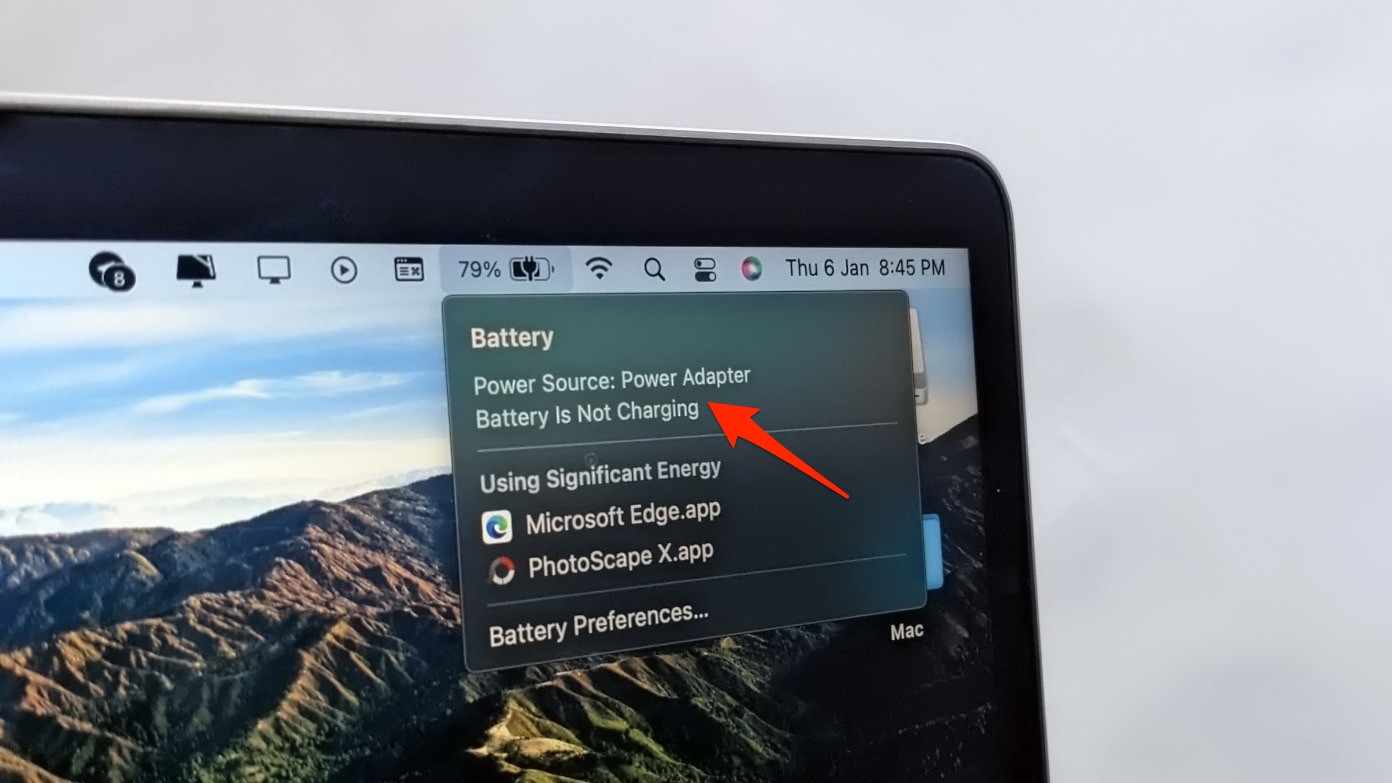
9. AlDente will now appear in the menu bar at the top. Set the percent you want to limit your charge at.
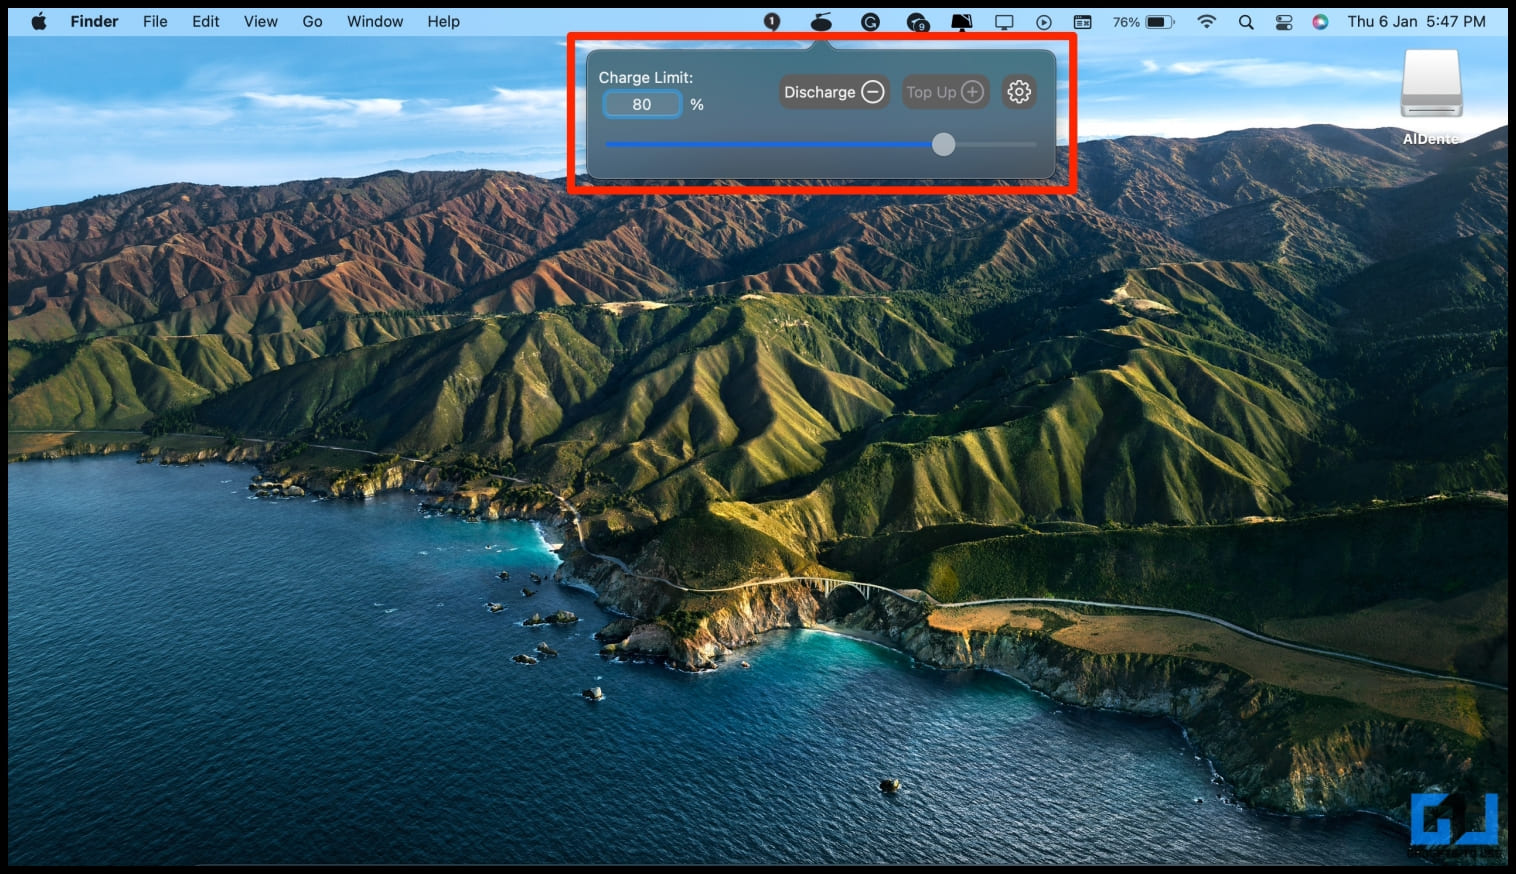
Here, we’ve set it to stop the MacBook from charging at 80 percent automatically. Once it reaches the set percentage, the MacBook will say, “Battery is Not Charging,” and stay at that particular level.
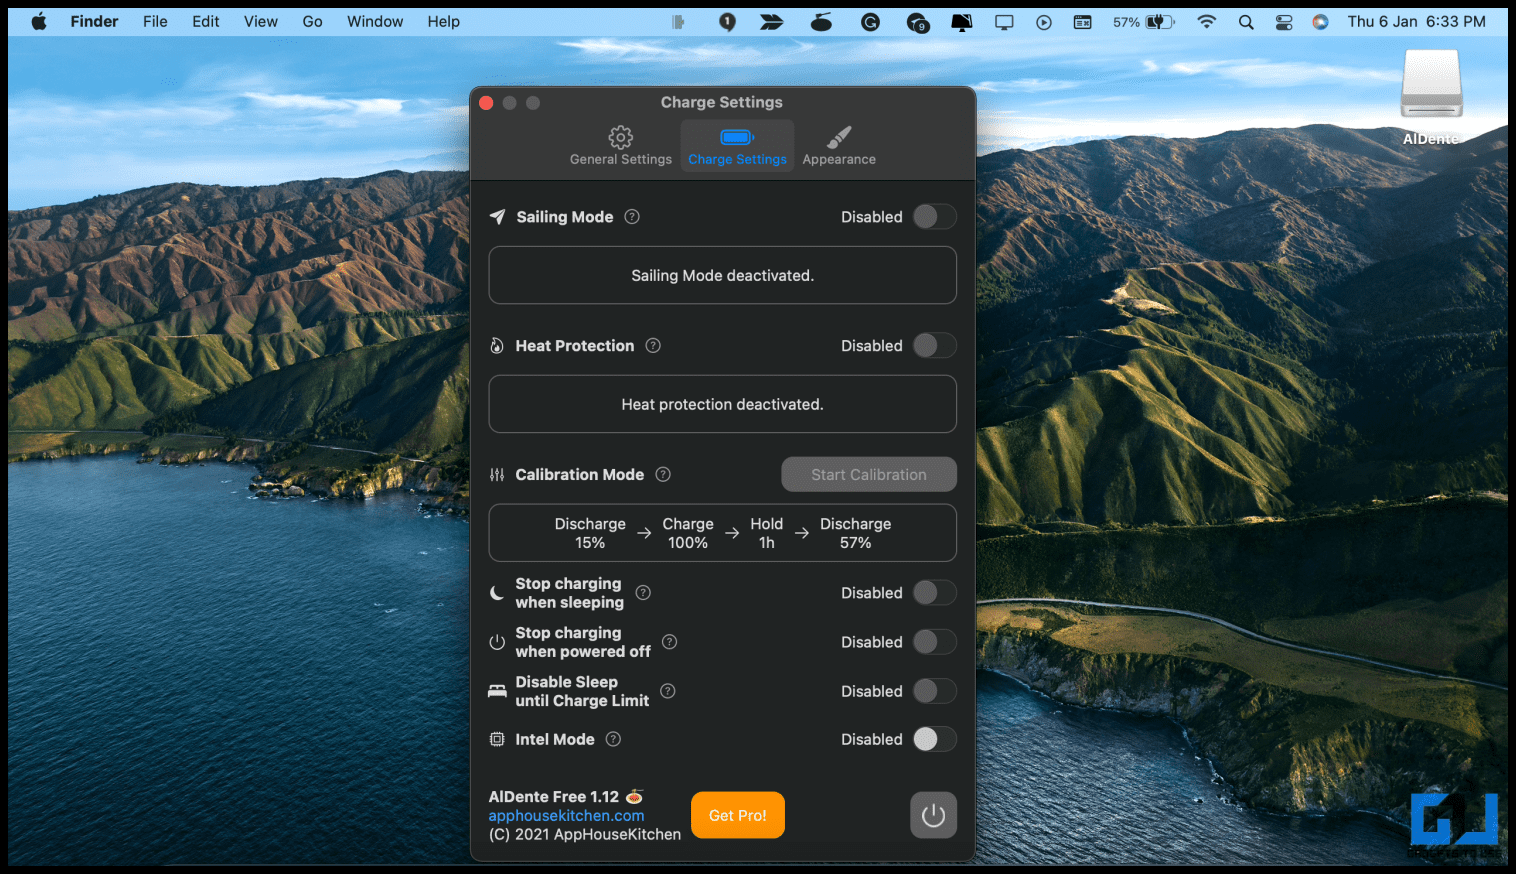
You can explore other options in tweaking AlDente settings. However, most of them require the Pro version. You can turn on or off AlDente anytime by clicking the Power icon in the app settings.
Download: AlDente
Method 2- Using BatteryStatusShow
BatteryStatusShow is a similar charge-limiting application. However, it comes in a portable version, meaning you don’t have to install it. All you need to do is open the downloaded app, make the changes, and you’re ready to go.
1. Download BatteryStatusShow using the link below.
2. Click the downloaded BatteryStatusShow.app to open the app.

3. Once the app opens, click Change next to the charge level.
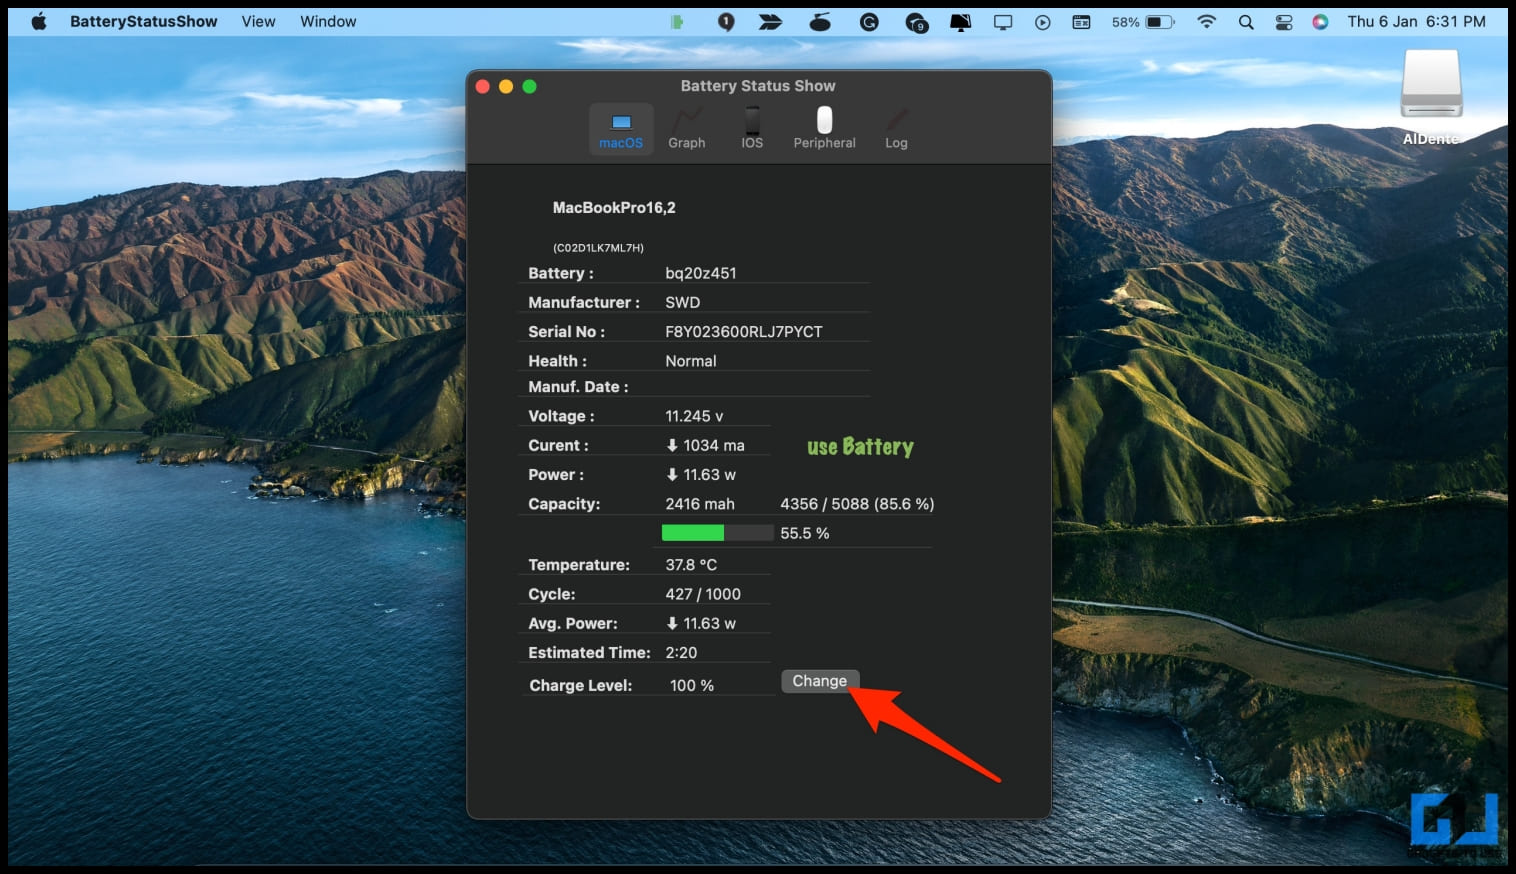
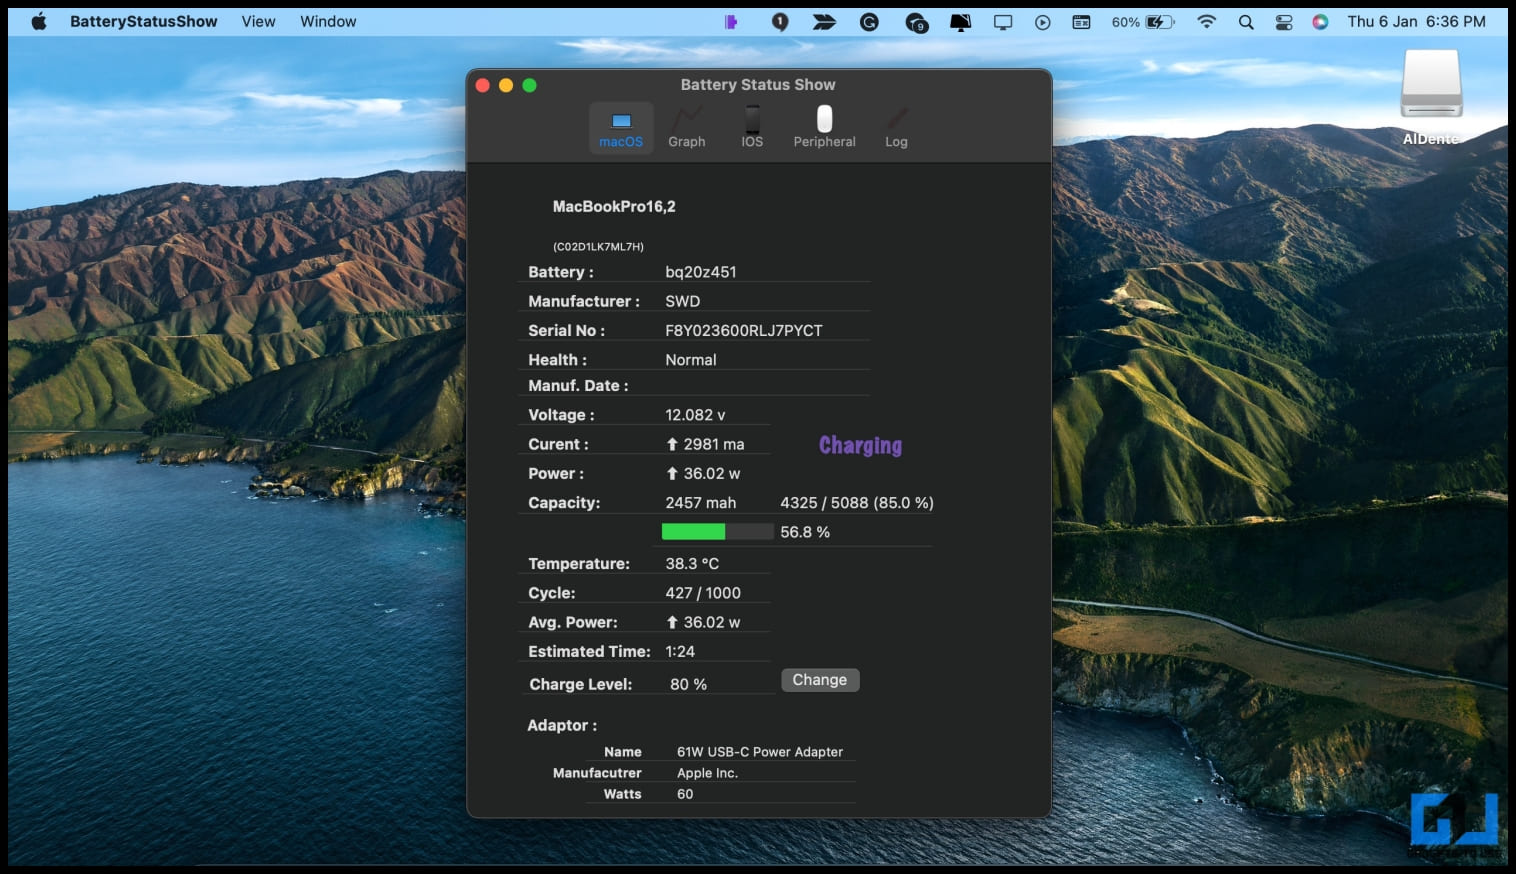
4. Drag the slider to 80% or any level you want your MacBook to stop charging.

5. Now, click the grey OK button.

6. Then, enter your device password and tap OK.
Download: BatteryStatusShow
Method 3- Using Charge Limiter for MacBook
Like AlDente, Charge Limiter is an open-source application that stops MacBook from charging above a certain level automatically. To use it, follow the steps below.
1. Download Charge Limiter on your MacBook via the link given below.
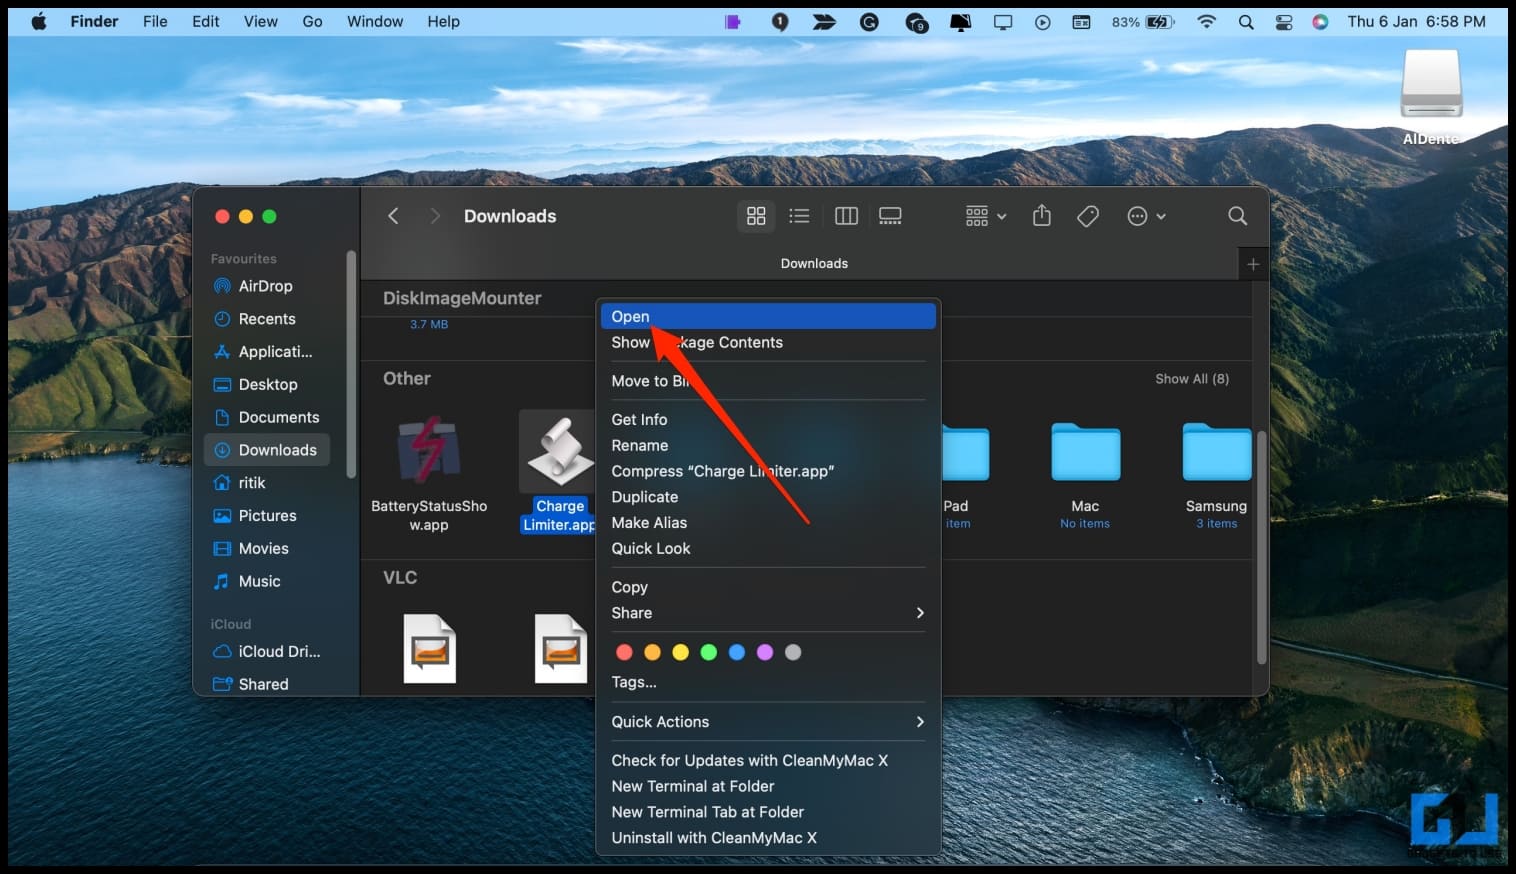
2. When opening the app for the first time, GateKeeper will stop you because the app is not code-signed. To bypass this warning, right-click on the app and select Open.

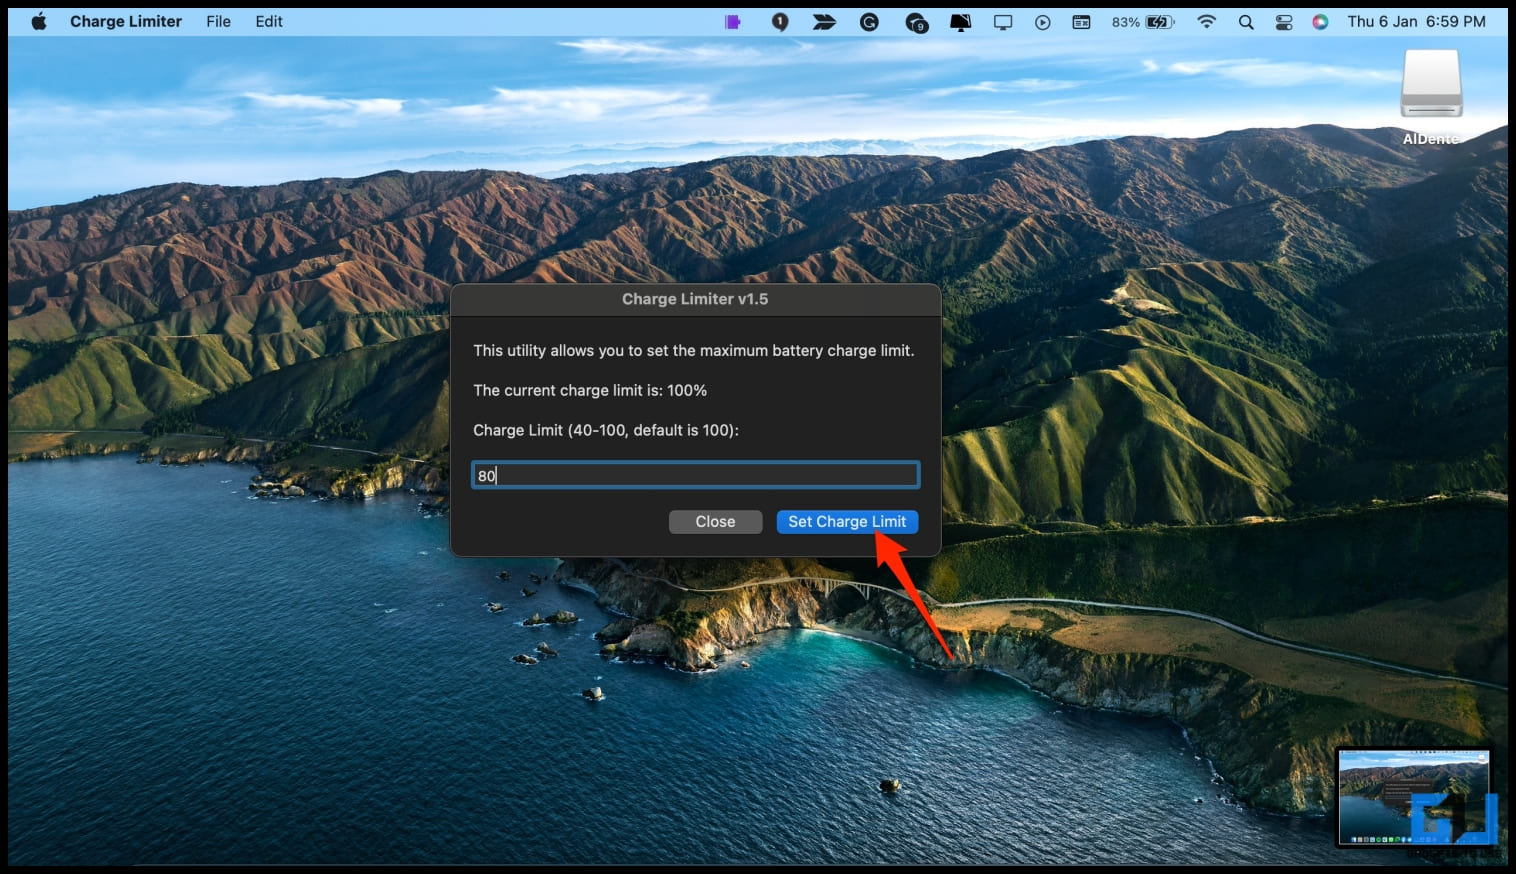
3. Once it opens, enter the charge limit. To limit the charging to 80 percent, enter 80. Click OK.
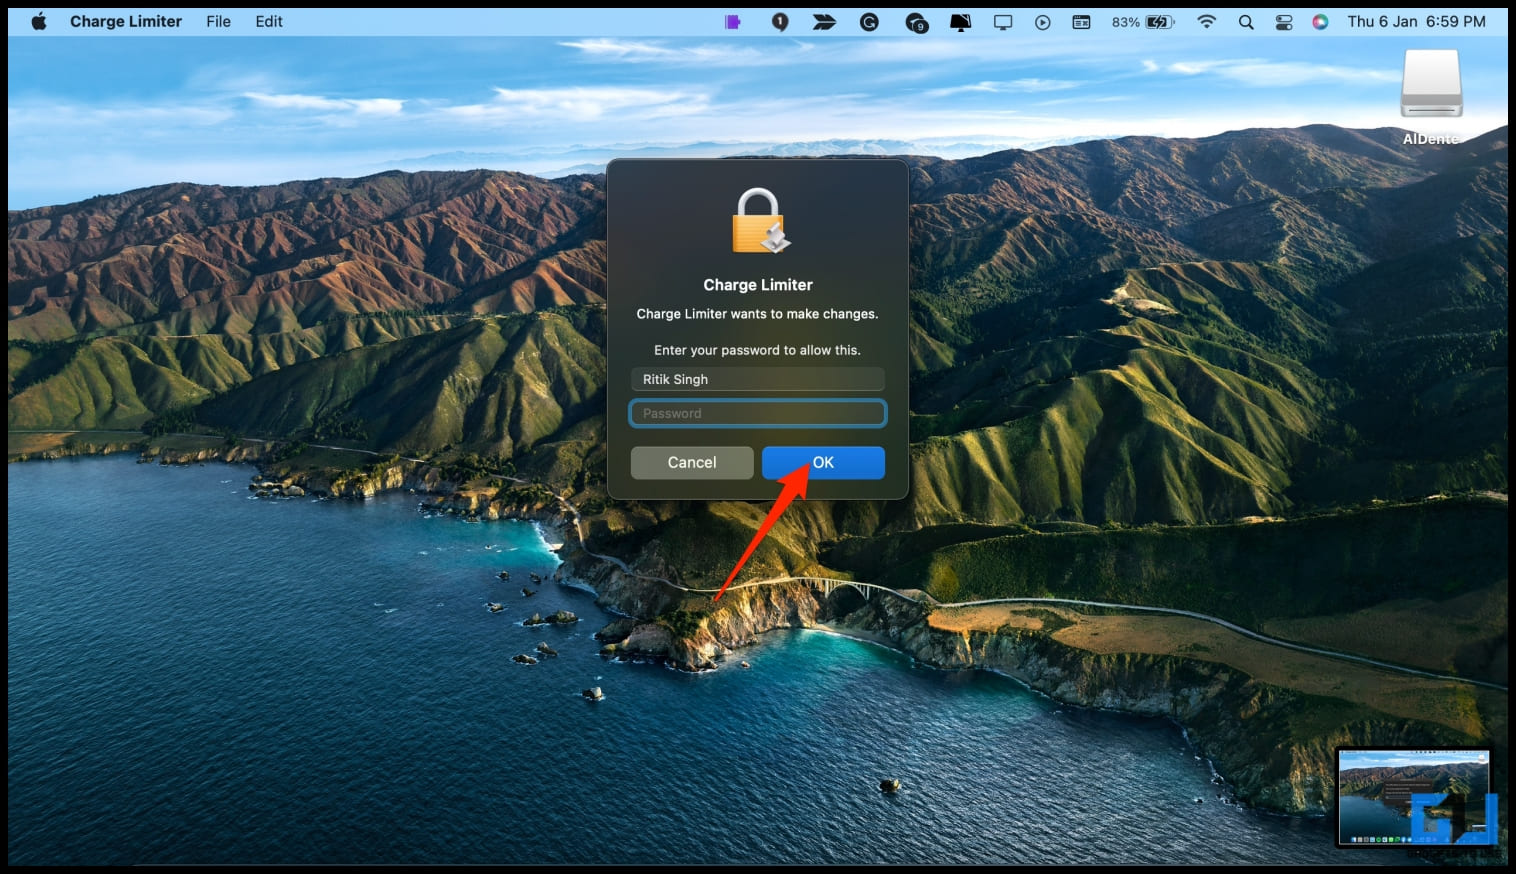
4. Enter the Mac password and click on OK.
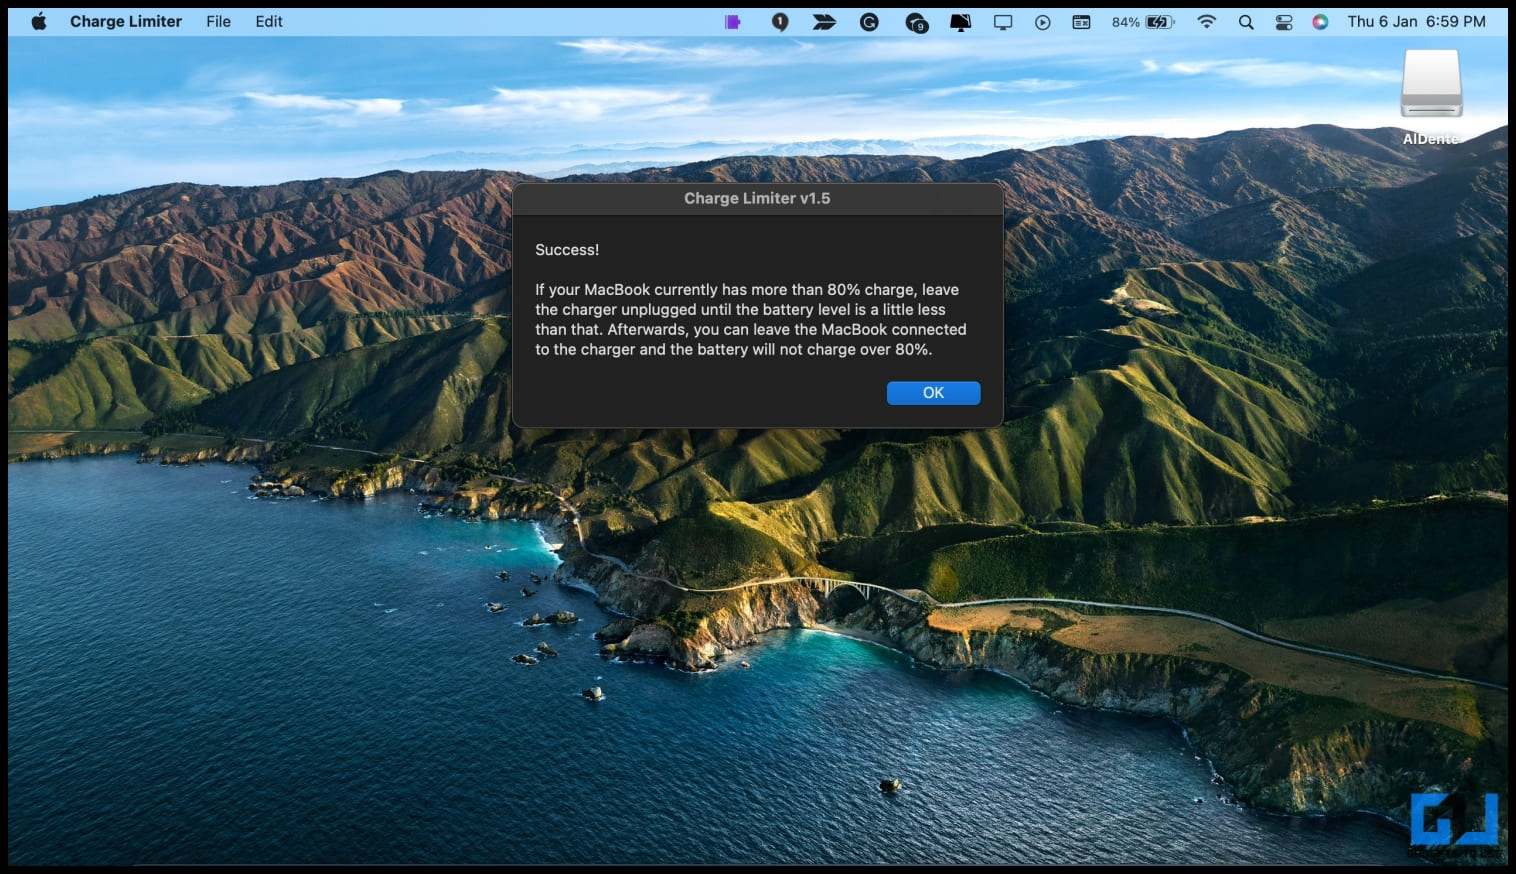
The Charge Limiter will now limit your MacBook’s maximum charging level. If your battery is currently higher than the set level, unplug it from the charger. Once it comes down below the set level, plug it back in.
Download: Charge Limiter
Method 4- Optimize Battery Charging on MacBook
With macOS 10.15 Catalina, Apple introduced a Battery Health Management option to Mac laptops with Thunderbolt 3. When turned on, it would throttle the charging to reduce the premature wear of the battery.
Later, on macOS 11 Big Sur, Apple added “Optimized Battery Charging,” which learns your daily charging routine and tries to keep the battery at 80 percent by delaying the charging. The same feature has been carried over to macOS 12 Monterey.
To enable optimized battery charging on MacBook:
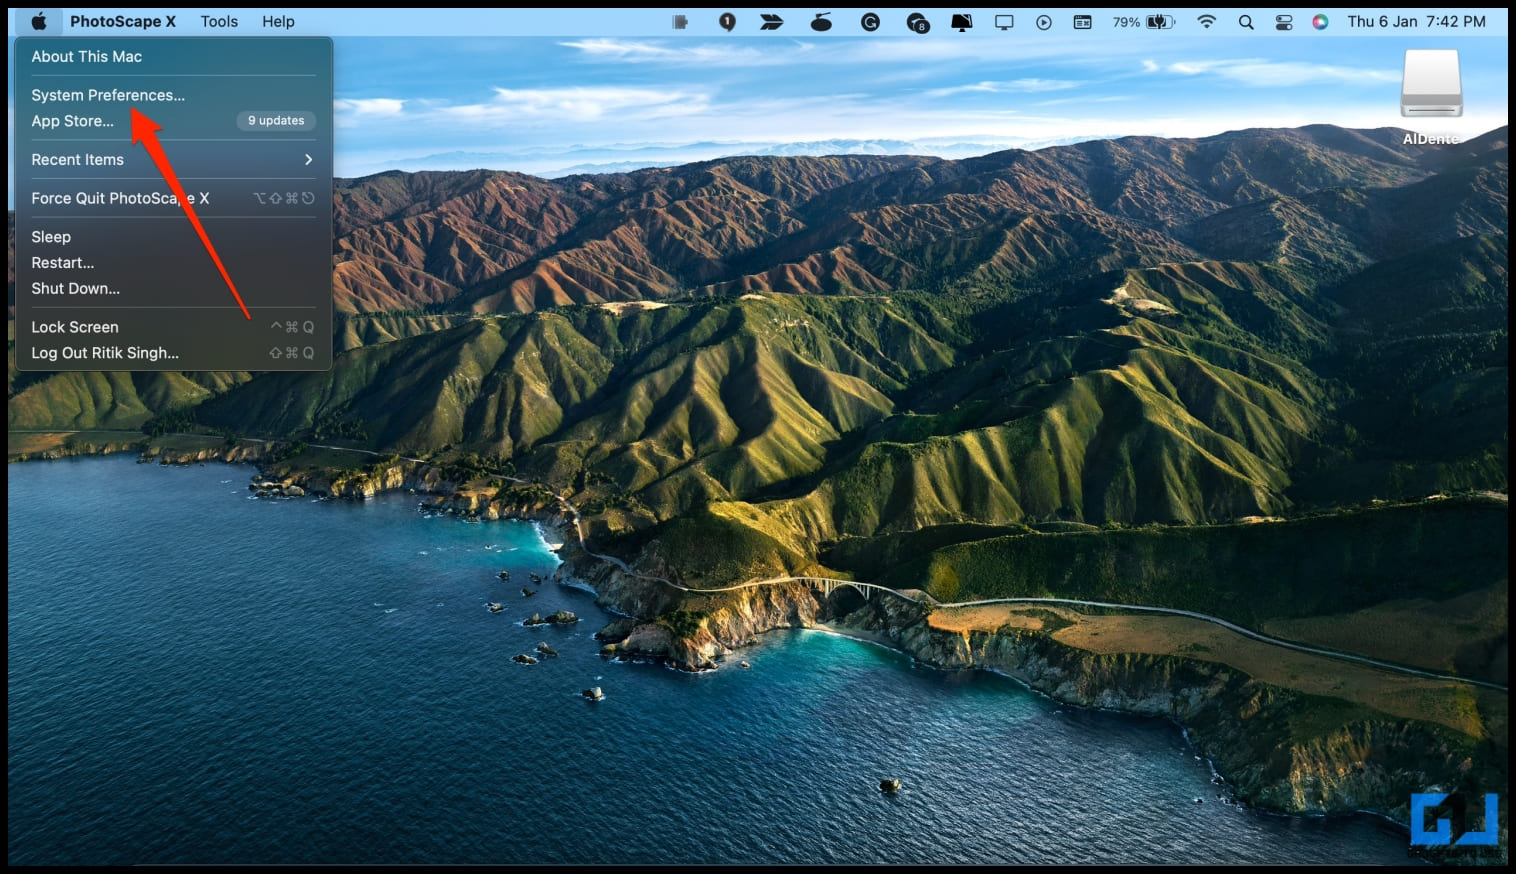
1. Click the Apple logo at the top left. Select System Preferences.
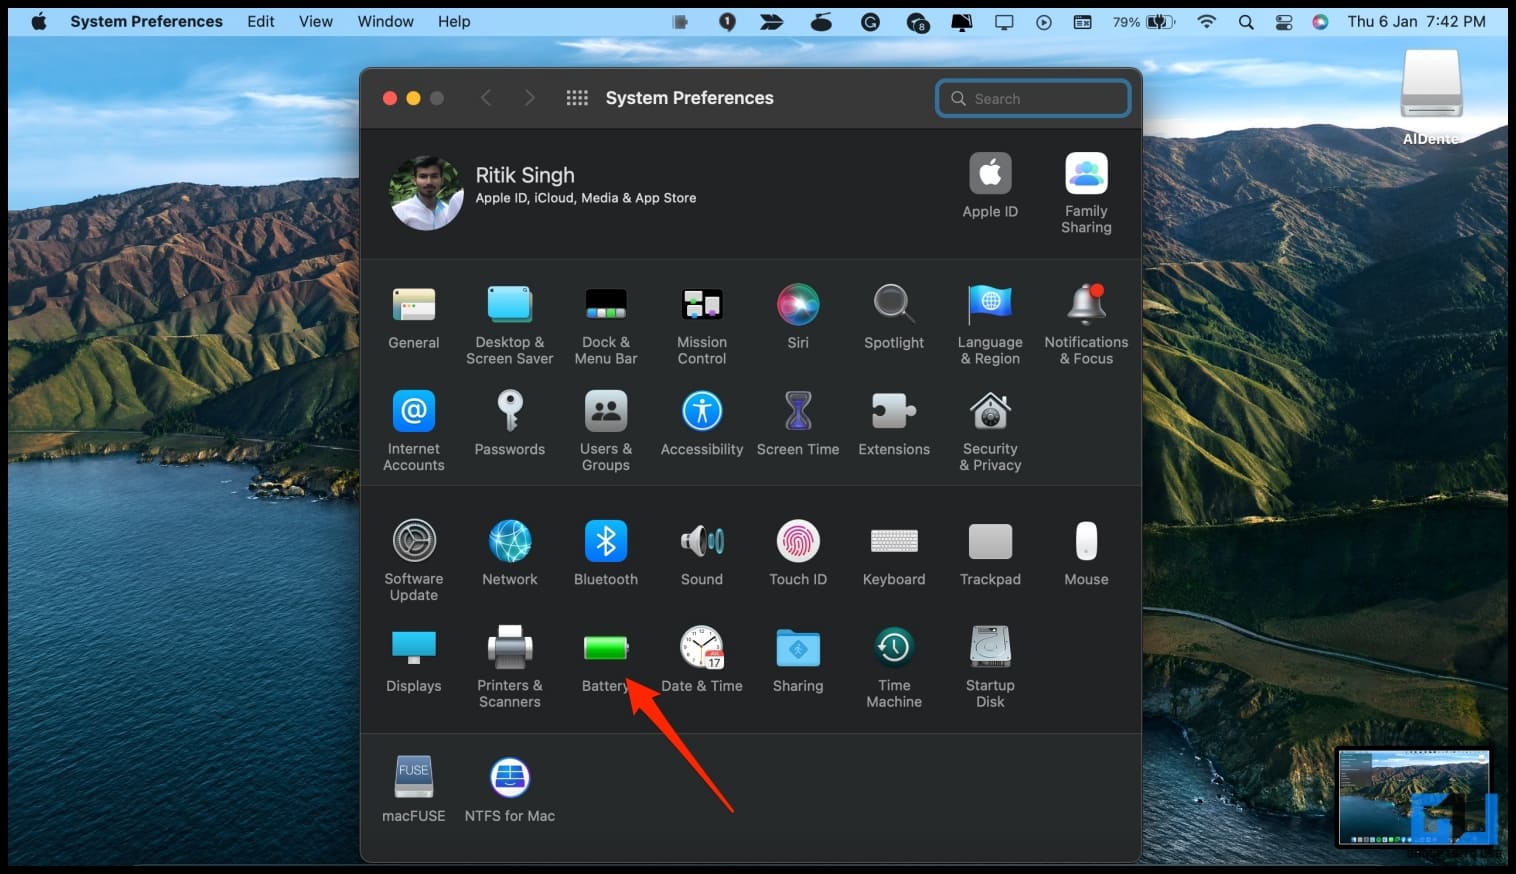
2. Next, click on Battery and select Battery from the sidebar.
3. Then, check the box for Optimized battery charging.
However, the feature can be finicky at times. Since it learns based on how you charge the MacBook, it may not always limit the charge to 80 percent, making you think optimized battery charging is not working on your MacBook.
It would have been great if Apple allowed users to set the maximum charge level manually. Anyways, you can always do it via the third-party apps mentioned above.
macOS Can’t Verify These Apps?
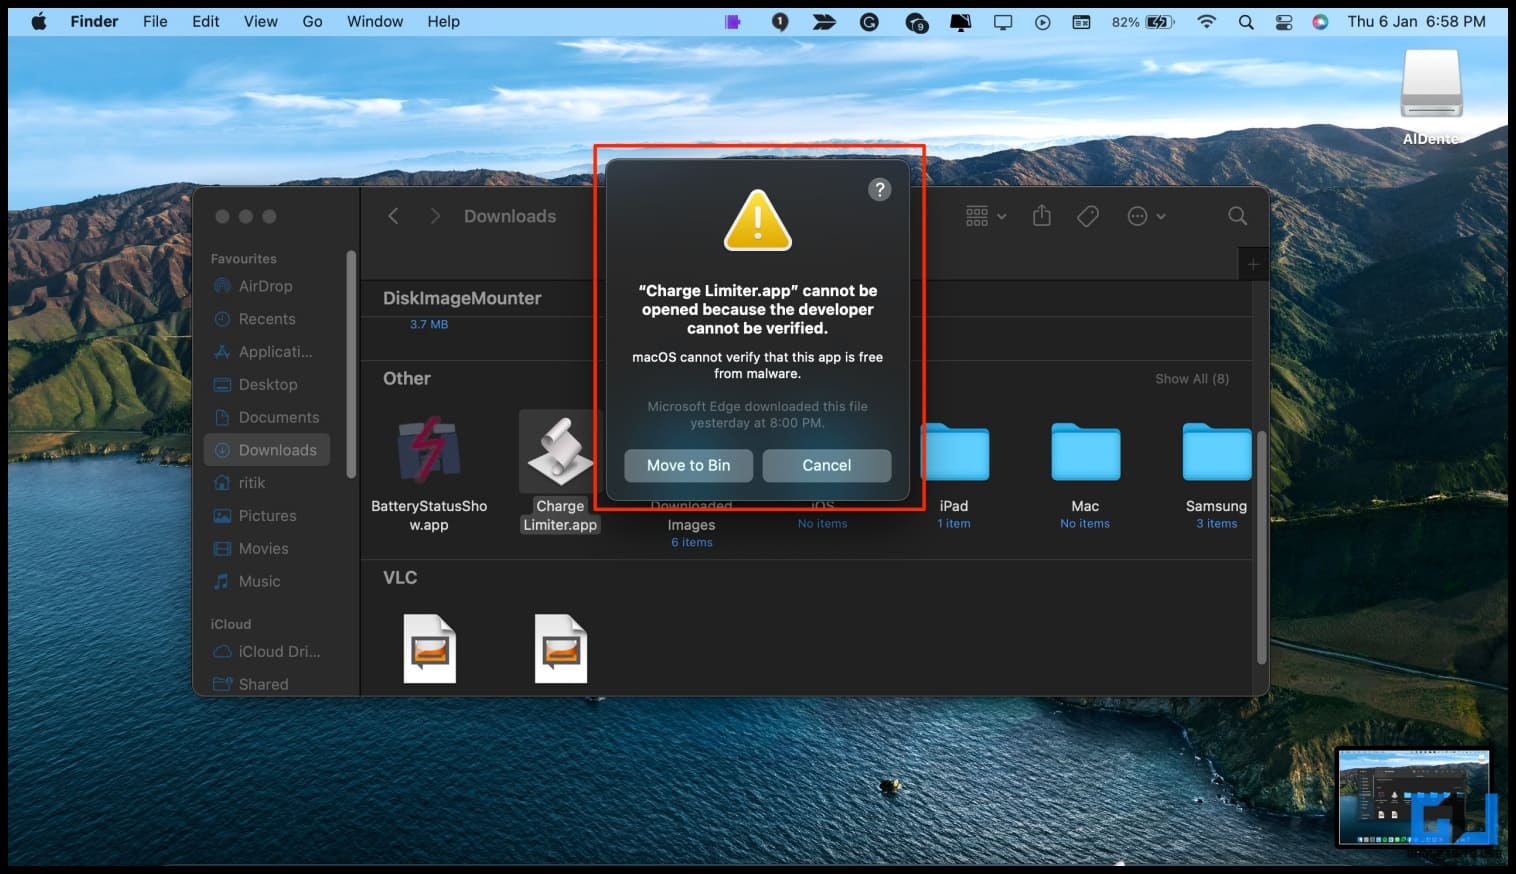
While trying to install or use the above apps, GateKeeper on macOS can show you errors like “macOS cannot verify that this app is free from malware” or “cannot be opened because the developer cannot be verified.”
To get rid of these warnings, open the app from the right-click menu or go to System Preferences > Security & Privacy > General and click Open Anyway. Here are ways to fix macOS can’t verify this app is free from malware.
Bonus- Check Battery Health and Cycle Count on MacBook
According to Apple, the MacBook battery is designed to retain up to 80 percent of its original capacity at 1,000 complete charge cycles. You can check your MacBook’s current battery condition and cycle count through System Report in macOS.
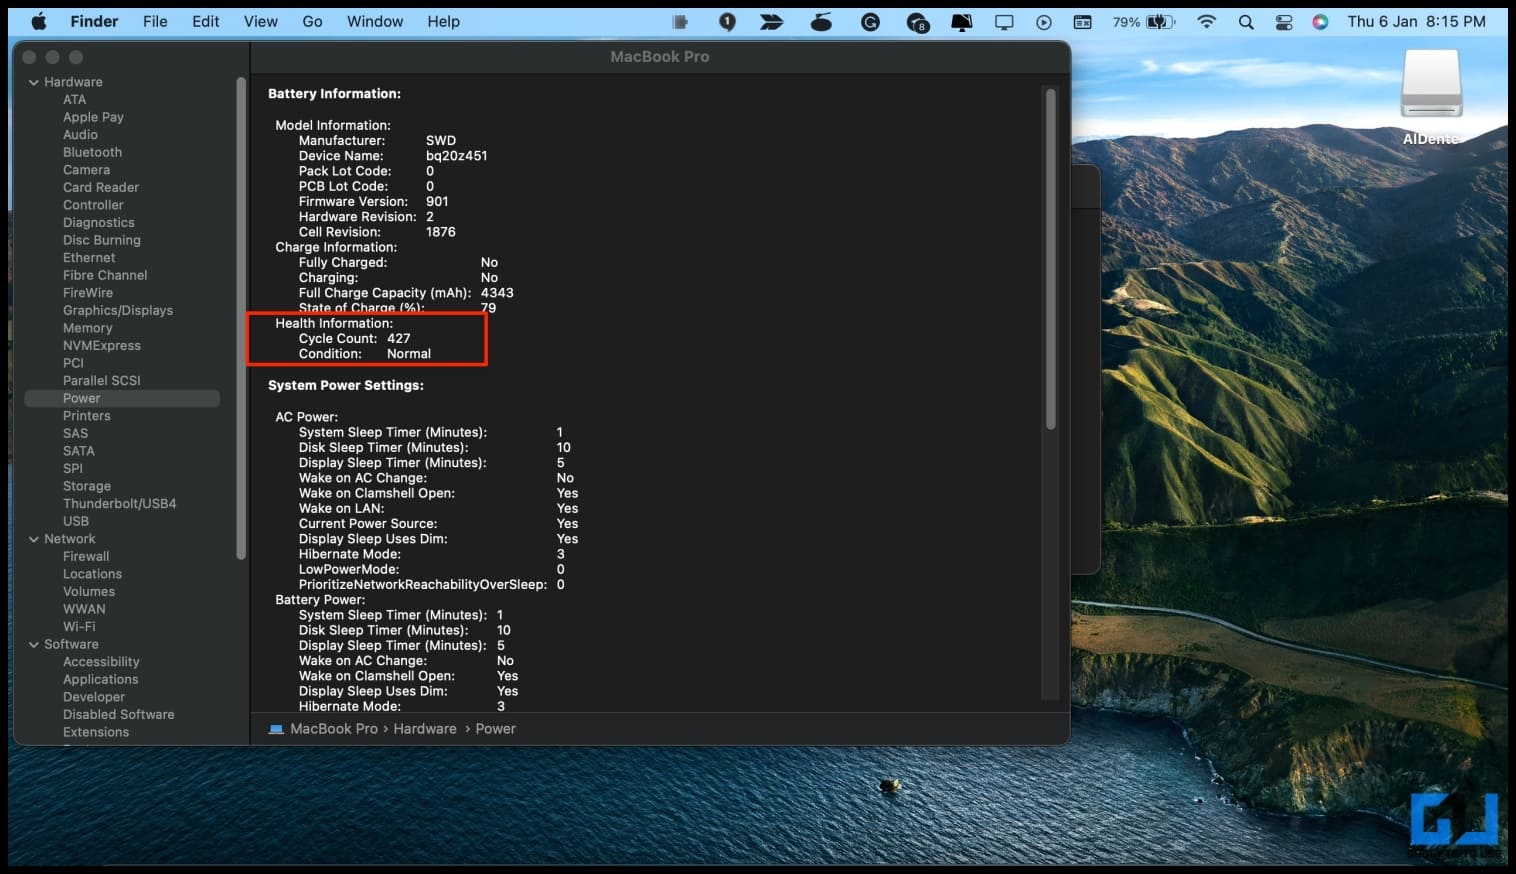
All you need to do is click the Apple icon in the menu bar > select About this Mac > click on System Report. Select Power and check the Battery Health column to find the battery condition and how many times it has been charged to its entire capacity.
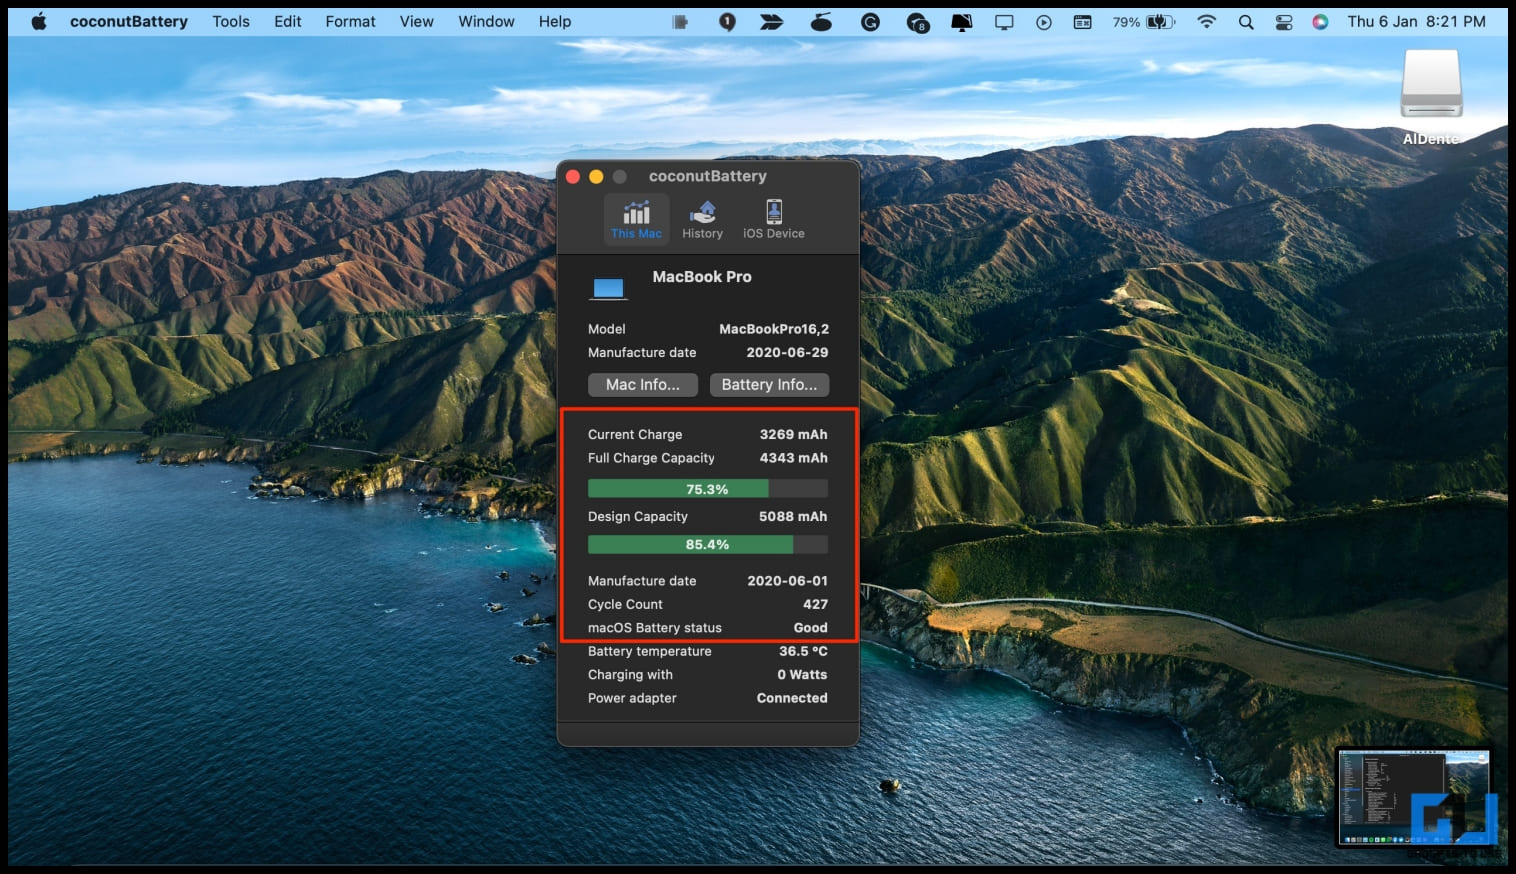
Here’s a detailed guide to check battery health on iPad wherein we have explained what battery cycle count is and why it is important. Besides, you can use the mentioned third-party apps to check your MacBook battery’s health and cycle count.
Wrapping Up
This was all about how you can limit your MacBook charge to 80 percent or any other level to prolong its battery health. I hope the above guide helps you keep your MacBook plugged in without worrying about battery degradation or wear. Stay tuned for more tips and tricks around gadgets you use.
You might be interested in:
- 10 Tips to Save Battery on Your Samsung Galaxy Watch 4
- 9 Tricks to Fast Charge Your Android Phone or iPhone
- 6 Ways to Fix iPhone Not Charging Above 80%
- 9 Tips to Charge Your Phone Faster With or Without a Fast Charger
You can also follow us for instant tech news at Google News or for tips and tricks, smartphones & gadgets reviews, join GadgetsToUse Telegram Group or for the latest review videos, subscribe GadgetsToUse Youtube Channel.