Quick Answer
- If the touchpad on your laptop has recently stopped working after you’ve updated your Windows 11 system, then it might be due to an incompatible touchpad driver installation that came with the Windows Update.
- If you have a touch screen laptop and are facing issues with using your physical touchpad buttons, it might be due to the conflict between the drivers of both input devices.
- To fix this issue and bring your touchpad back in its proper working condition, you need to manually enable the touchpad by accessing related settings.
After the new Windows 11 update, lots of users have reported issues with the touchpad on their laptops. This can happen due to a variety of underlying reasons. In this article, we have addressed the touchpad not working issue to bring back proper touchpad functionality on your laptop. You can also learn to fix File Explorer issues on your Windows 11 system.
Also, Read | 6 Ways to Switch User Accounts in Windows 11
Reasons for Touchpad Not Working Issue
While this issue with the touchpad on Windows 11 can arise due to a variety of reasons, some of the most prominent ones are as follows:
- Your Touchpad Drivers must have malfunctioned due to any recent application installation.
- Presence of too much dust or debris under the touchpad keys.
- Your touchpad must have become unresponsive due to unidentified malware.
- Windows must have downloaded and installed incompatible touchpad drivers.
- Your laptop’s touchpad is physically/internally damaged.
Ways to Fix Touchpad Not Responding in Windows 11
Use Device Manager to Update Drivers and Fix Touchpad
Device Manager is an effective management tool inside Windows through which you can easily update and fix your obsolete touchpad drivers. This way you can bring back proper touchpad functionality to your Windows 11 system. Follow these steps for an easy fix.
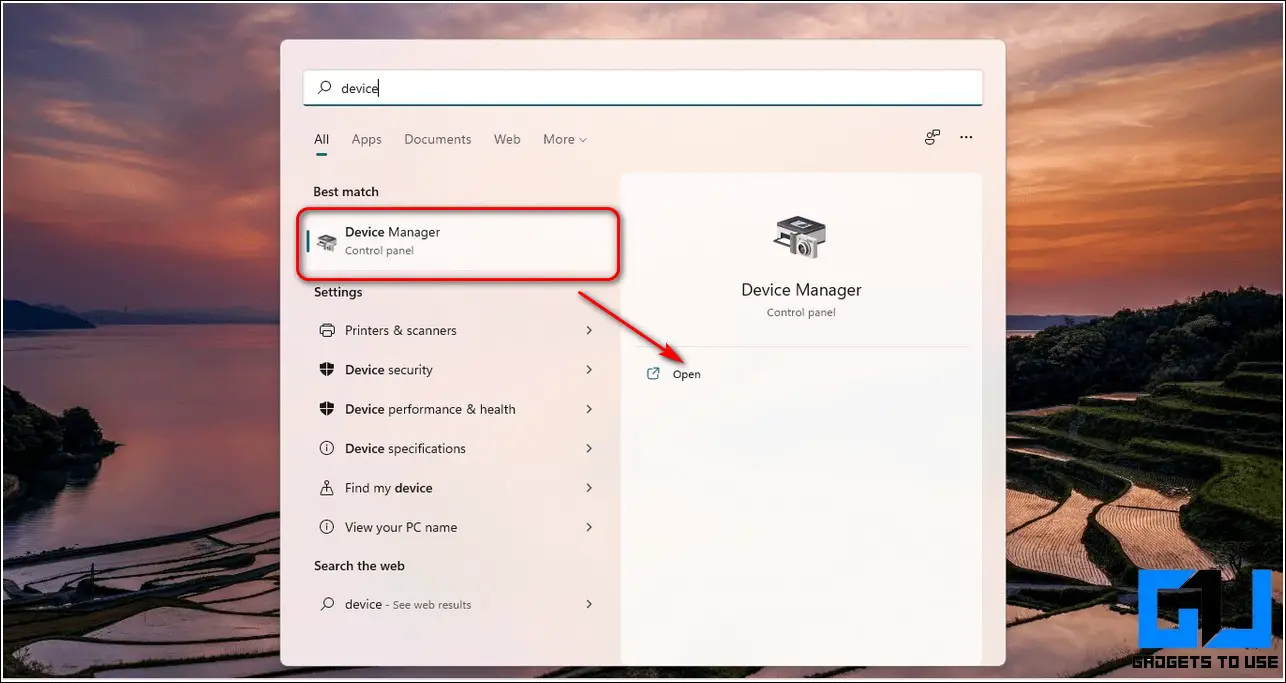
- Press the Windows key and search for the Device Manager app to open it.
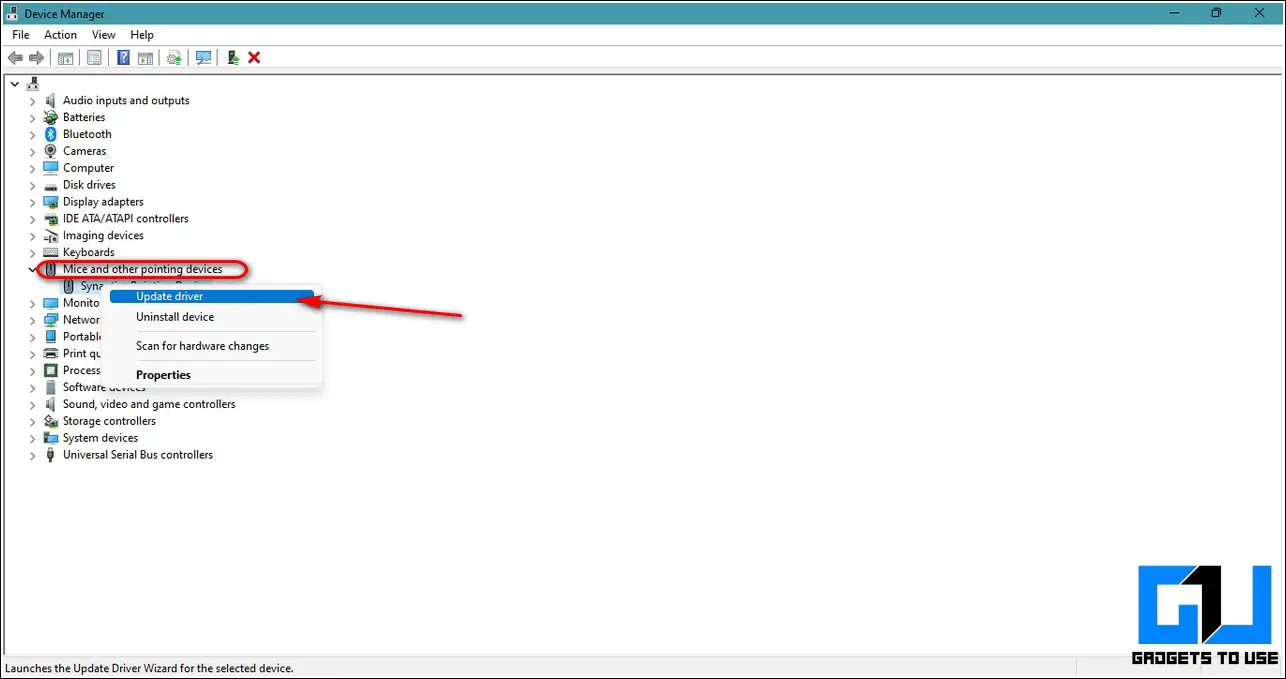
- Inside the Device Manager window, locate and expand Mice and other pointing devices.
- Right-click on your touchpad device name and click on Update Driver.
- You can either choose to update your drivers online or browse through the system to update it manually.

- Choose your preferred option to update the touchpad drivers and restart your system when the update installation completes.
Reset Touchpad Configuration by Restoring Defaults
It is possible that your touchpad has malfunctioned due to the change in its pre-defined configurations by your recent app install/update. To fix this issue, you need to manually restore the default settings for your touchpad. Follow these easy steps to achieve the same.
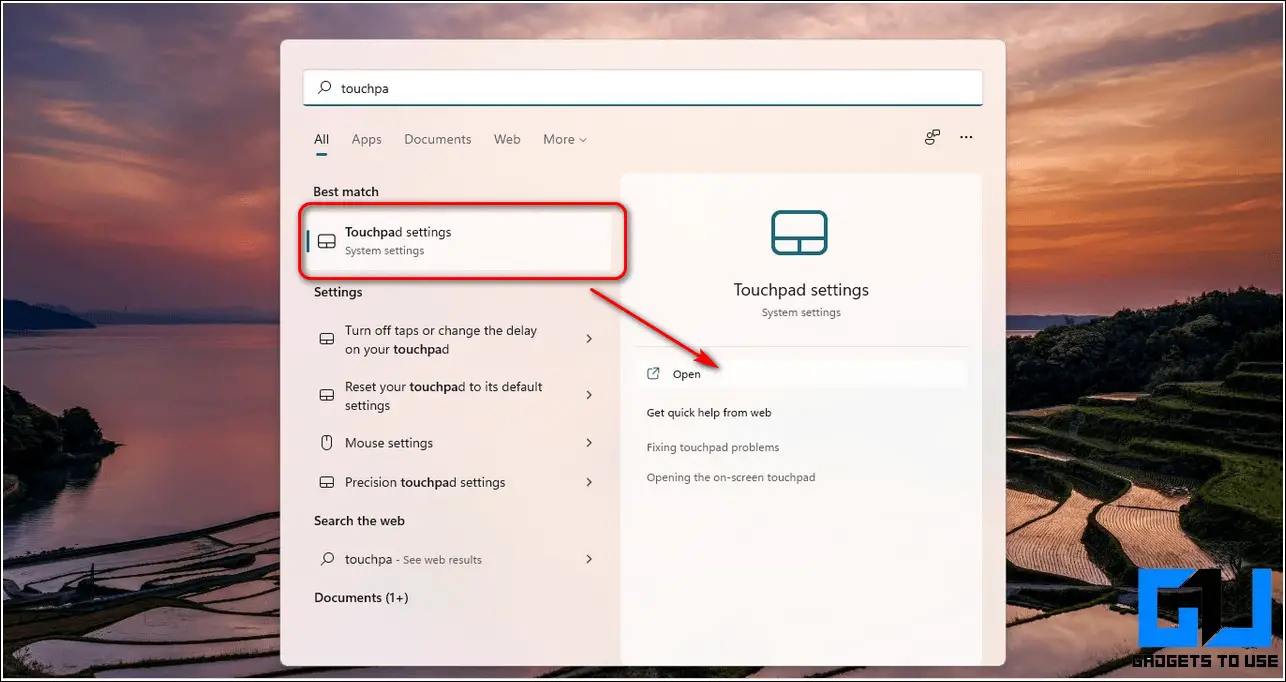
- Press the Windows key and search for the Touchpad Settings to open it.
- Click on the More Touchpad Settings option.

- Select your Touchpad name and click on Settings.

- Click on the Restore All Defaults button to restore the factory configurations for the touchpad.

- Congrats. You’ve successfully restored factory configurations for your touchpad to fix it.
Ensure that the Touchpad is Enabled
Some Windows users have reported that their touchpad got automatically disabled after updating their system to Windows 11. To fix this issue and bring your touchpad back in its proper working condition, you need to manually enable the touchpad by accessing related settings. Follow these steps for an easy fix.
- Press the Windows key and search for the Touchpad settings to open it.
- Further, click on the More Touchpad Settings button.
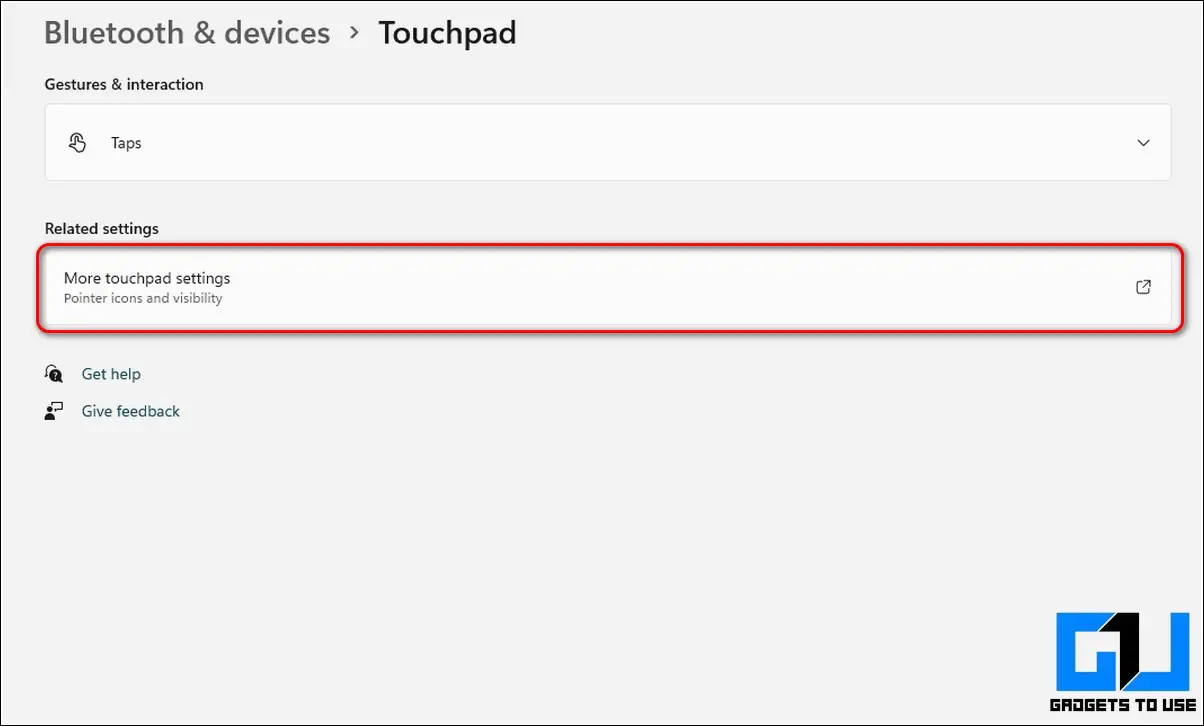
- Select the name of your Touchpad and click on the Enable button below it to enable it again in Windows 11.
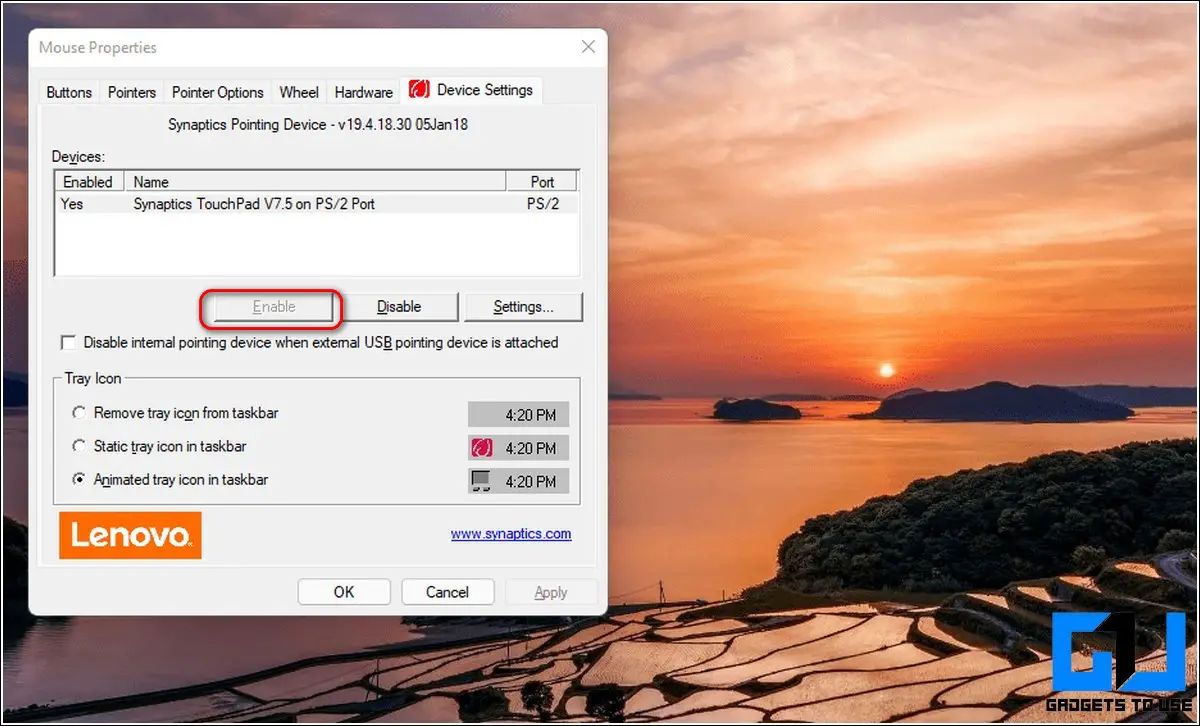
- Reboot your system to apply changes.
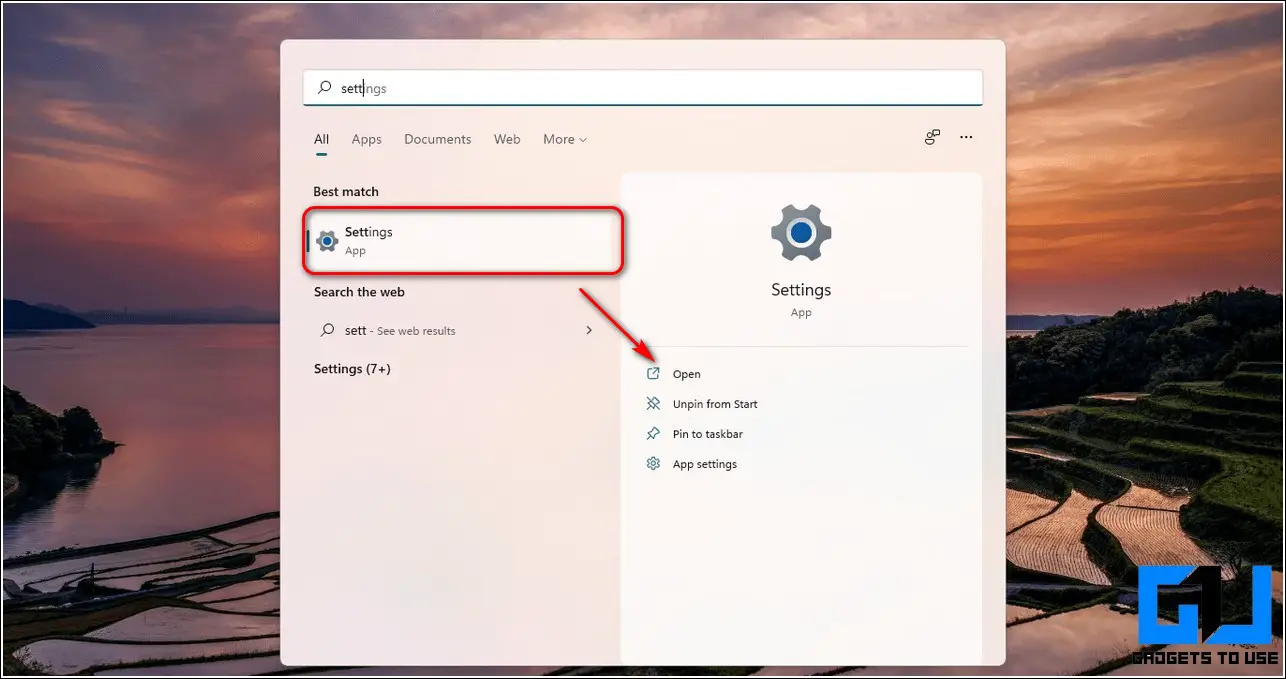
Uninstall/Rollback Recent Windows Update
If the touchpad on your laptop has recently stopped working after you’ve updated your Windows 11 system, then it might be due to an incompatible touchpad driver installation that came with the Windows Update. To fix this issue, you need to manually rollback/uninstall the latest update that you’ve applied to your Windows 11 system.
Follow these steps to do the same:
- Open the Settings app on your Windows 11 laptop.
- Click on the Windows Update in the left sidebar and further click on the Update History option.
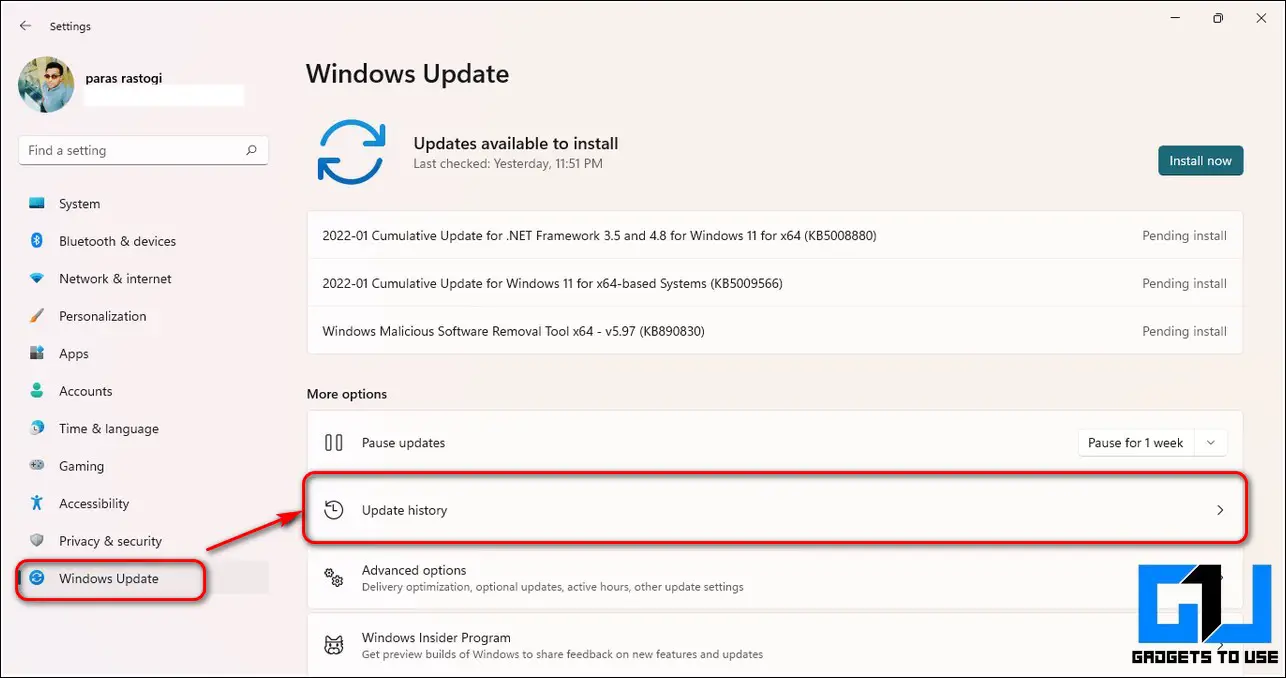
- Click on the Uninstall Updates option.

- Select the latest update by looking at the timestamp and then click on Uninstall.
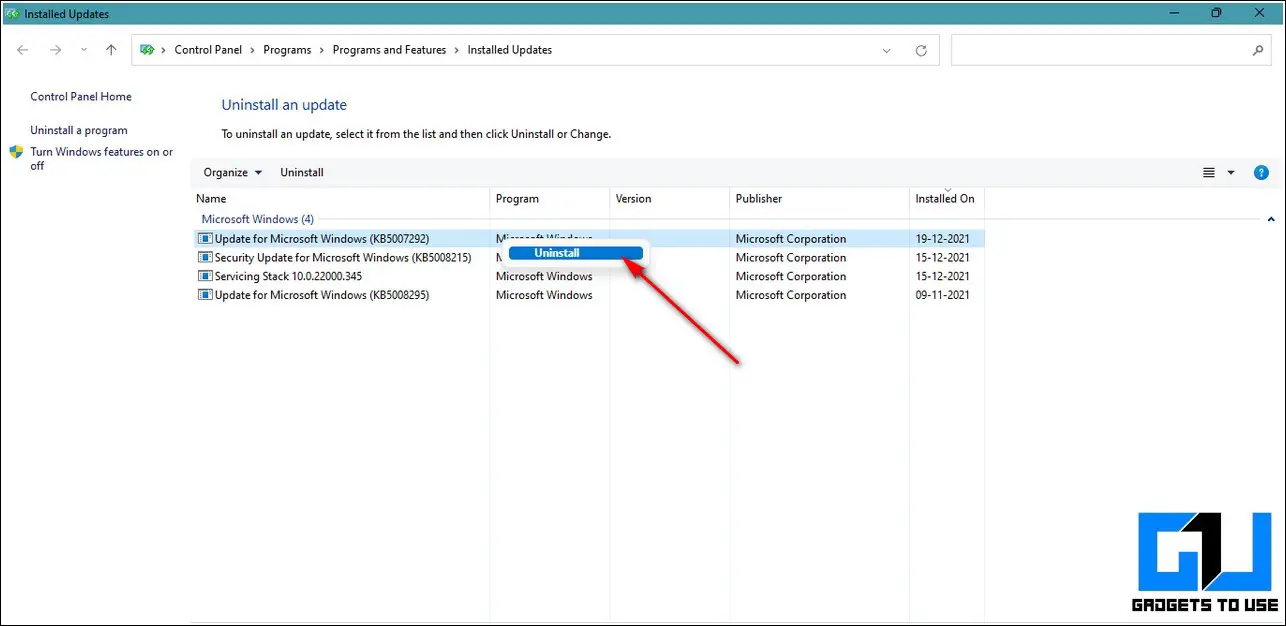
- Restart your system to apply the changes.
Bonus: Disable Tablet Mode on Your Windows 11 System
If you have a touch screen laptop and are facing issues with using your physical touchpad buttons, it might be due to the conflict between the drivers of both input devices. To solve this issue, you need to manually disable the TabletInputService in Windows 11 which causes this conflict to happen.
- Open the Run window by simultaneously pressing Windows + R Key.
- Type ‘ Regedit ‘ and hit the enter button.

- Navigate to the following path:
Computer\HKEY_LOCAL_MACHINE\SYSTEM\CurrentControlSet\Services\TabletInputService
- Click on the Start attribute and change its value from 3 to 4 to disable this service.
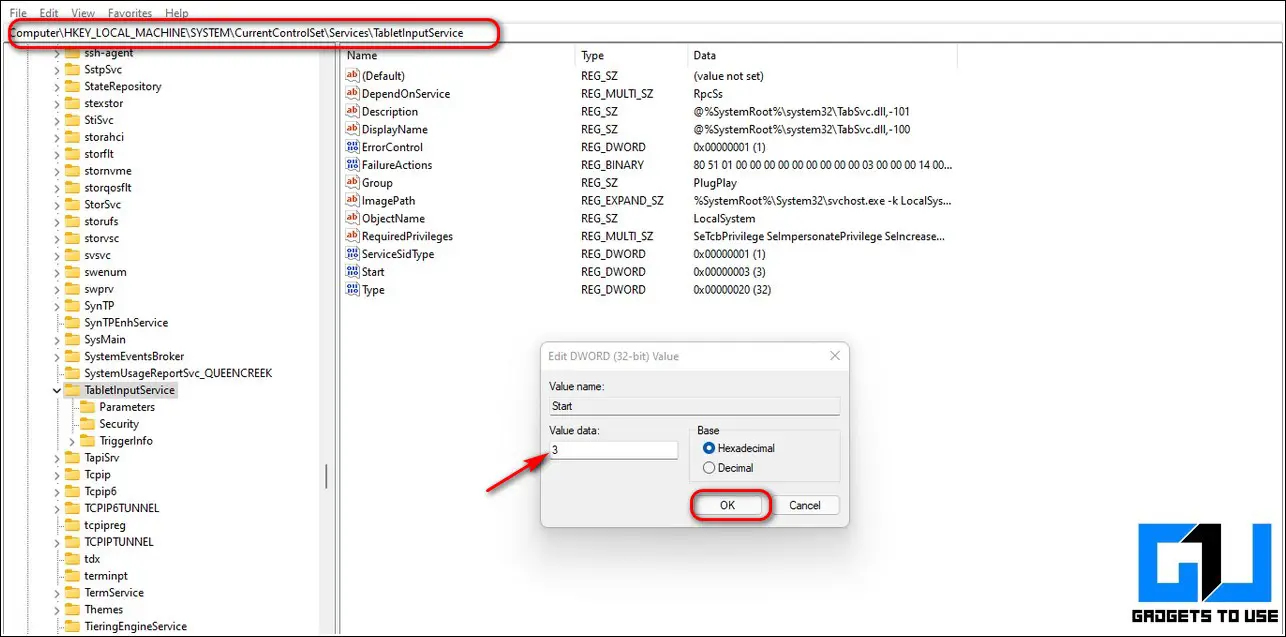
- Reboot your system.
- If the problem still persists, repeat this step and change the value back to 3 from 4 and then restart your system again to check for touchpad functionalities.
Wrapping Up
We hope you’ve now resolved your touchpad issues with the help of the above-tested methods. If this article has helped you in troubleshooting your issue successfully, then hit the like button and share this with your friends to assist them with their touchpad issues in Windows 11.
You can also follow us for instant tech news at Google News or for tips and tricks, smartphones & gadgets reviews, join GadgetsToUse Telegram Group, or for the latest review videos subscribe GadgetsToUse Youtube Channel.