Quick Answer
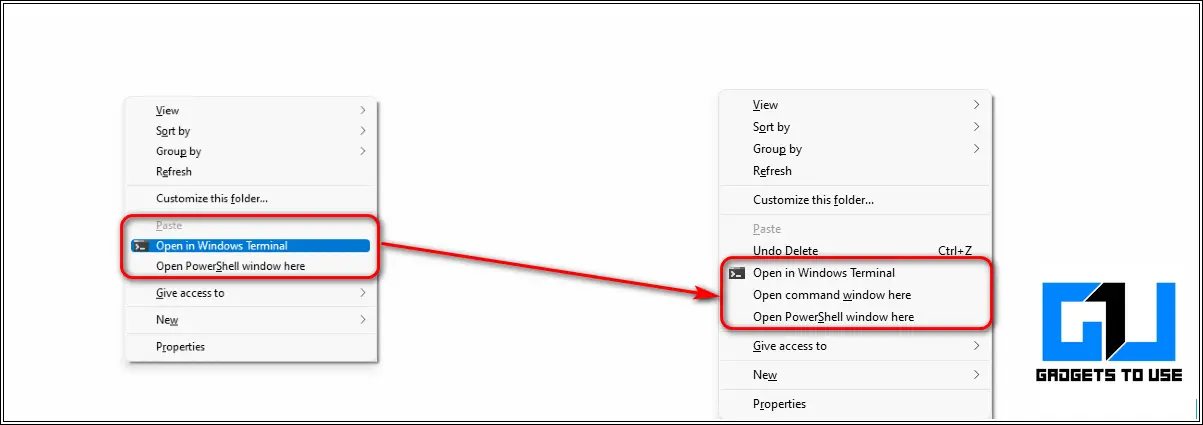
- With the recently updated Windows 11, Microsoft has removed the default option to use the command prompt window while pressing the shift+right click combination and replaced it with the Windows Terminal/Powershell window.
- To provide you with a quick fix, we have created a registry script for you to add the command prompt feature back to your Windows 11 system.
- If you don’t wish to add CMD to your context menu, you can try this easy trick to open the command prompt window from the Windows Terminal itself.
If you’ve recently upgraded to Windows 11 then, you must have noticed the absence of the Command Prompt option in the shift+right-click context menu. This feature has now been replaced by Windows Powershell. In this article, we have listed 3 ways to add the command prompt feature back to the right-click context menu. You can also learn to fix slow startup time in Windows 11.
Ways to Add Command Prompt to Right-Click Context Menu
With the recently updated Windows 11, Microsoft has removed the default option to use the command prompt window while pressing the shift+right click combination and replaced it with the Windows Terminal/Powershell window. If you prefer to use the Command Prompt over PowerShell and wish to bring it back into your Windows 11 system, then follow these 3 effective methods.
Edit Windows Registry to Add Command Prompt to Right-Click Menu
The simplest method to bring back the command prompt feature in the right-click context menu is to edit the Windows Registry file. To provide you with a quick fix, we have created a registry script for you to add the command prompt feature back to your Windows 11 system. Follow these easy steps to achieve the same.
- Click on this download link to download the CMD Registry file to your Windows 11 system.
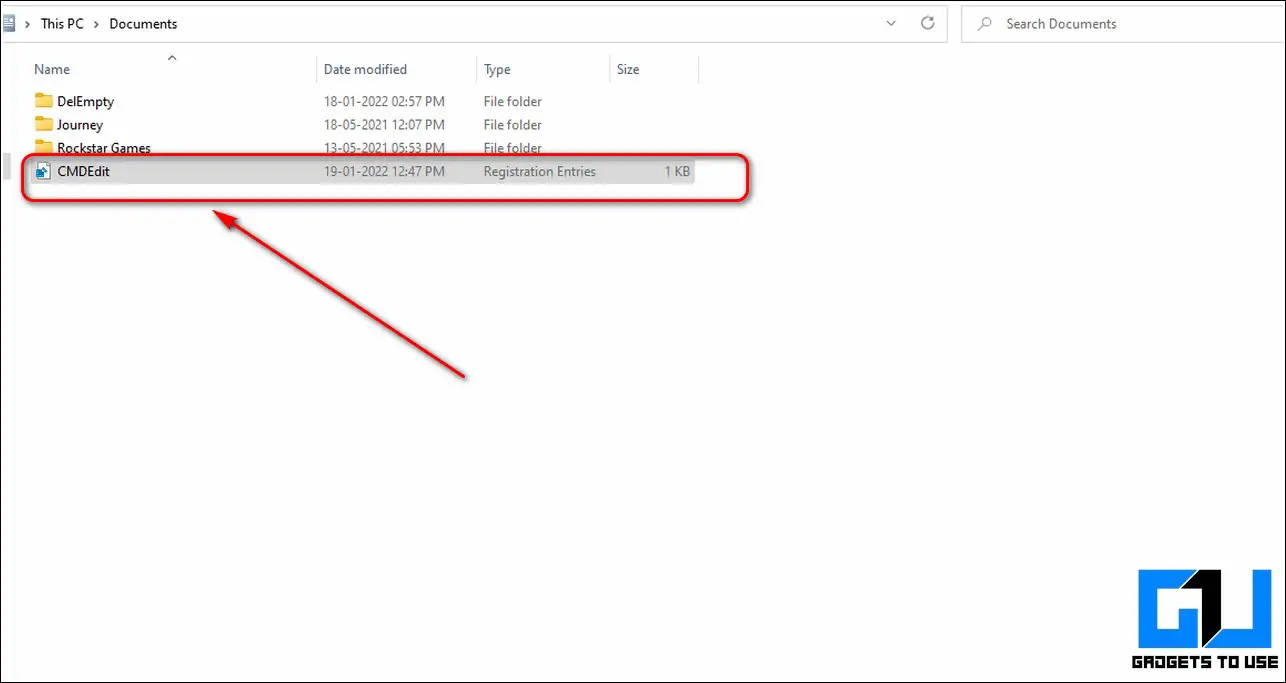
- Double-click on the downloaded registry file to initiate its installation. Click on the yes button to provide the user control access to it.
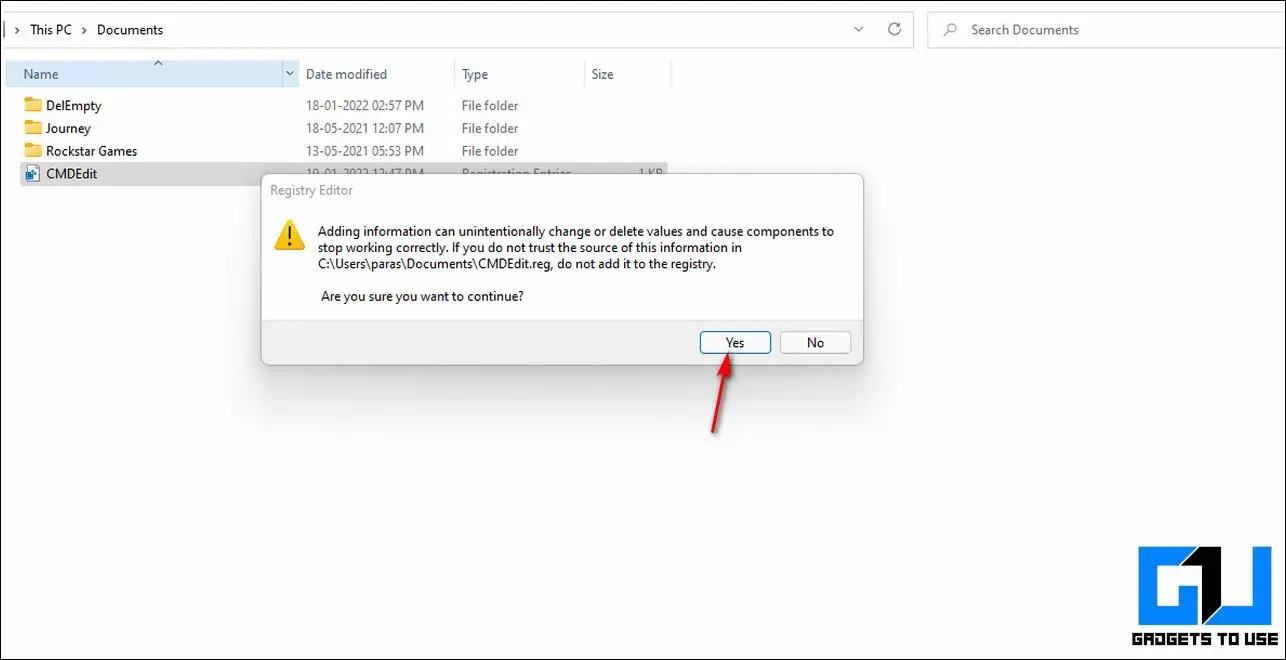
- Further, click on the Yes button to install the registry file to your system when prompted by the registry editor.
- Restart your File Explorer in Windows 11.
- That’s it. You’ve successfully added the Command Prompt feature to your shift+right-click context menu.
Use Windows Terminal to Open Command Prompt Window
If you don’t wish to add CMD to your context menu, you can try this easy trick to open the command prompt window from the Windows Terminal itself.
- Navigate to the file directory in which you wish to open the Command Prompt window.
- Right-click here and click on the Open in Windows Terminal option.
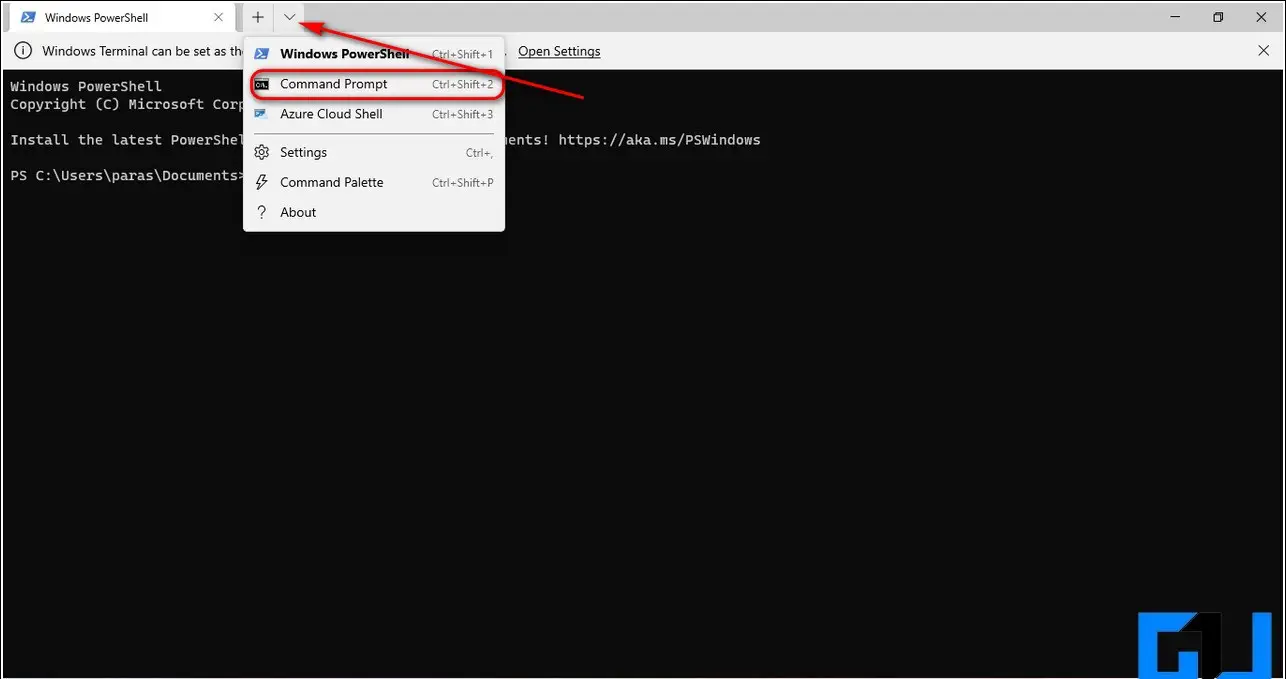
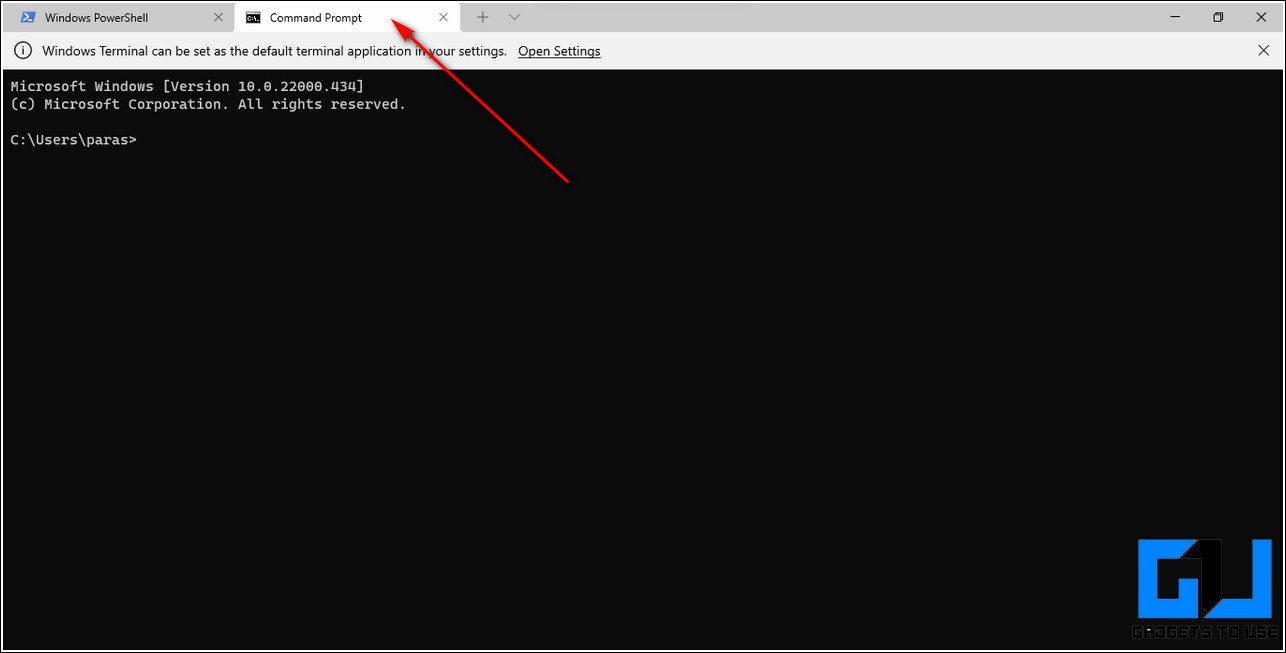
- Click on the Down Arrow present at the top of the toolbar and choose Command Prompt.
- The Command Prompt Window shall instantly open in a new tab with the same directory location.
- Alternatively, you can simultaneously press Ctrl+Shift+2 keys to instantly launch the Command Prompt window.
Bonus Tip: Change Default Windows Terminal Settings
If you are uncomfortable editing your Windows Registry, then you can follow these easy steps to quickly change your startup defaults for the Windows Terminal. This way, you will be able to launch the command prompt window whenever you click on the Windows Terminal option.
- Navigate and open the file directory where you wish to open the command prompt window.
- Right-click here and click on the Open in Windows Terminal Here option.
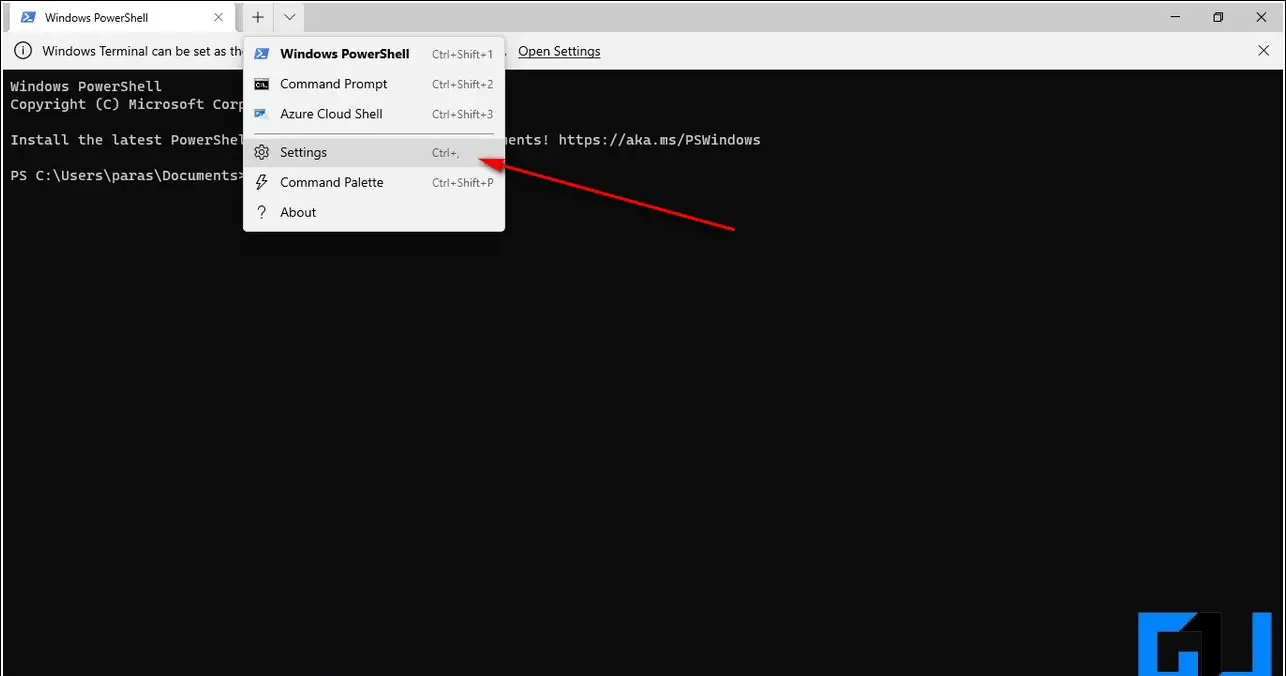
- Click on the Down arrow and choose Settings.
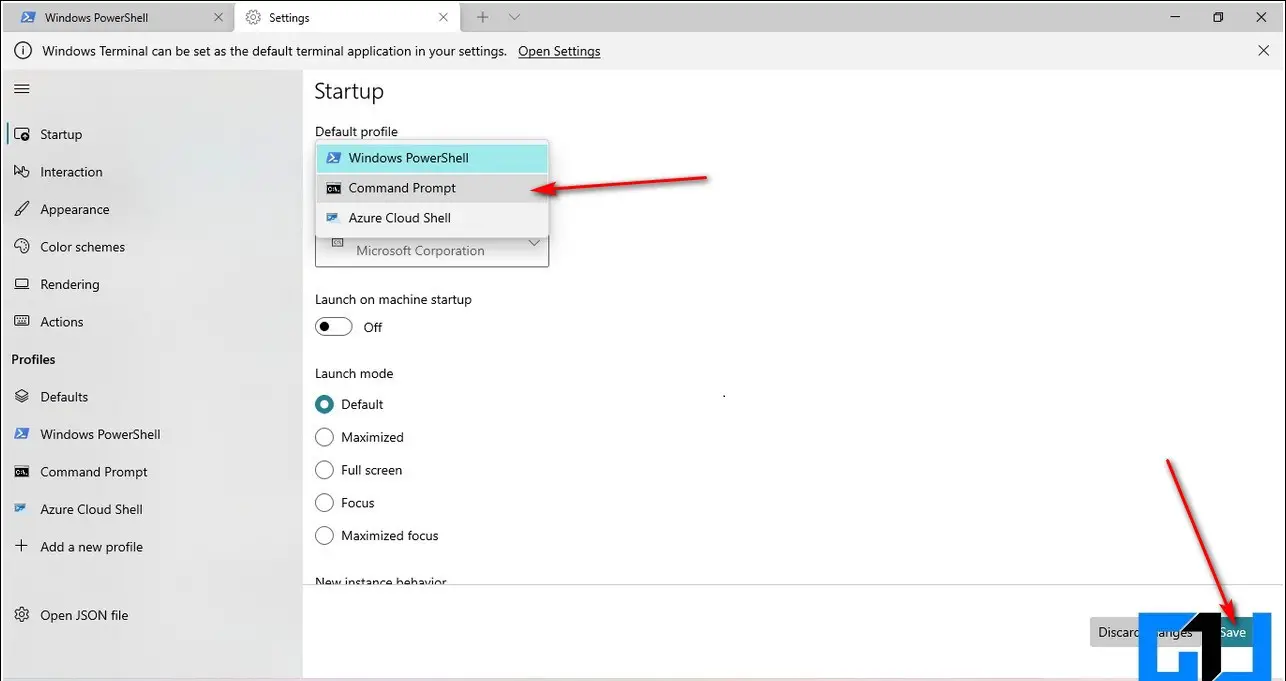
- Under the Default Profile option, choose Command Prompt and click on the Save button to save changes.
- That’s it. You can now directly open the command prompt window in any directory by clicking on the Windows Terminal option.
Also, Check| 5 Ways to Find and Delete Empty Folders in Windows 10 and 11
Wrapping Up: Bring Back CMD
We hope that you’ve now successfully learned to bring back the command prompt option to the right-click context menu in your Windows 11 system. If this article has helped you in making your Windows 11 experience better, then hit the Like button and share this 2- minute read with your friends to assist them while using Windows 11.
You can also follow us for instant tech news at Google News or for tips and tricks, smartphones & gadgets reviews, join GadgetsToUse Telegram Group, or for the latest review videos subscribe GadgetsToUse Youtube Channel.
