Quick Answer
- One of the quickest methods to disable the Microsoft Defender service temporarily in Windows 11 is to toggle it off using the Settings App.
- Another effective method to turn off the Windows Defender service on your Windows 11 system is to turn it off using the service app.
- To disable the tamper protection feature on your Windows 11 system, press the Windows key and search for the Tamper Protection feature to disable it.
Windows 11 users have often reported issues with the Microsoft Defender while installing certain third-party software. If you are experiencing a similar problem, then follow this guide to disable Microsoft Defender in your Windows 11 system. You can also learn how to stop Windows 11 automatic updates.
Also, Read | 6 Ways to Switch User Accounts in Windows 11
Ways to Disable Microsoft Defender in Windows 11
Use Settings App to Turn Off Microsoft Defender Temporarily
One of the quickest methods to disable the Microsoft Defender service temporarily in Windows 11 is to toggle it off using the Settings App. However, rebooting your system will enable it again. Follow these easy steps to achieve the same.
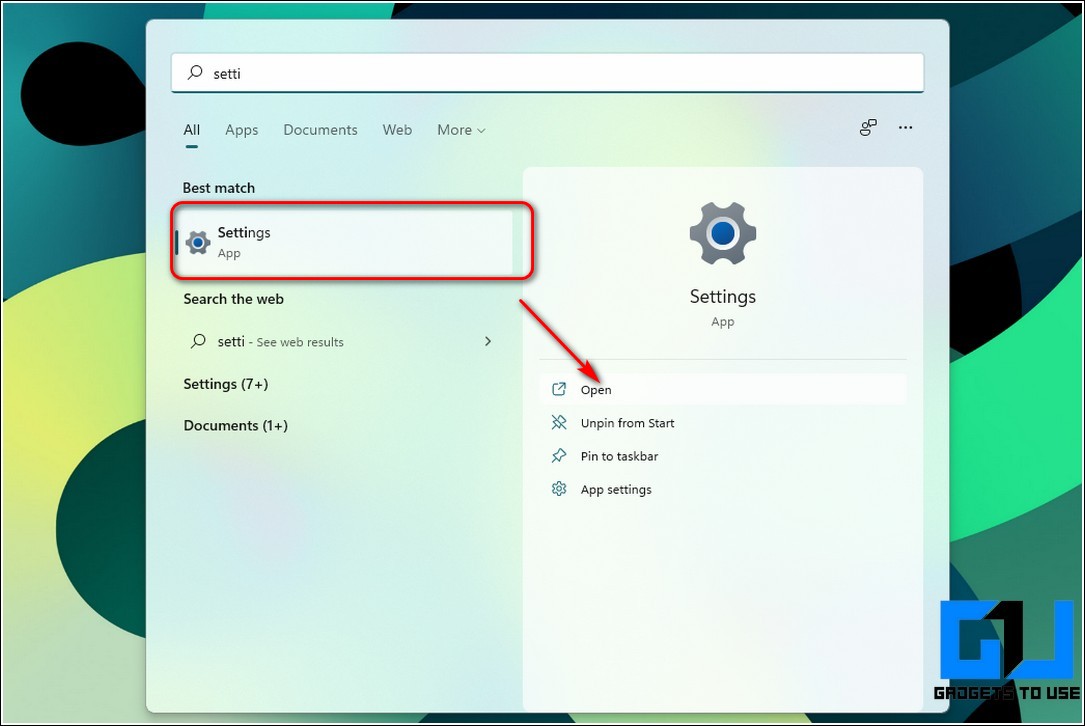
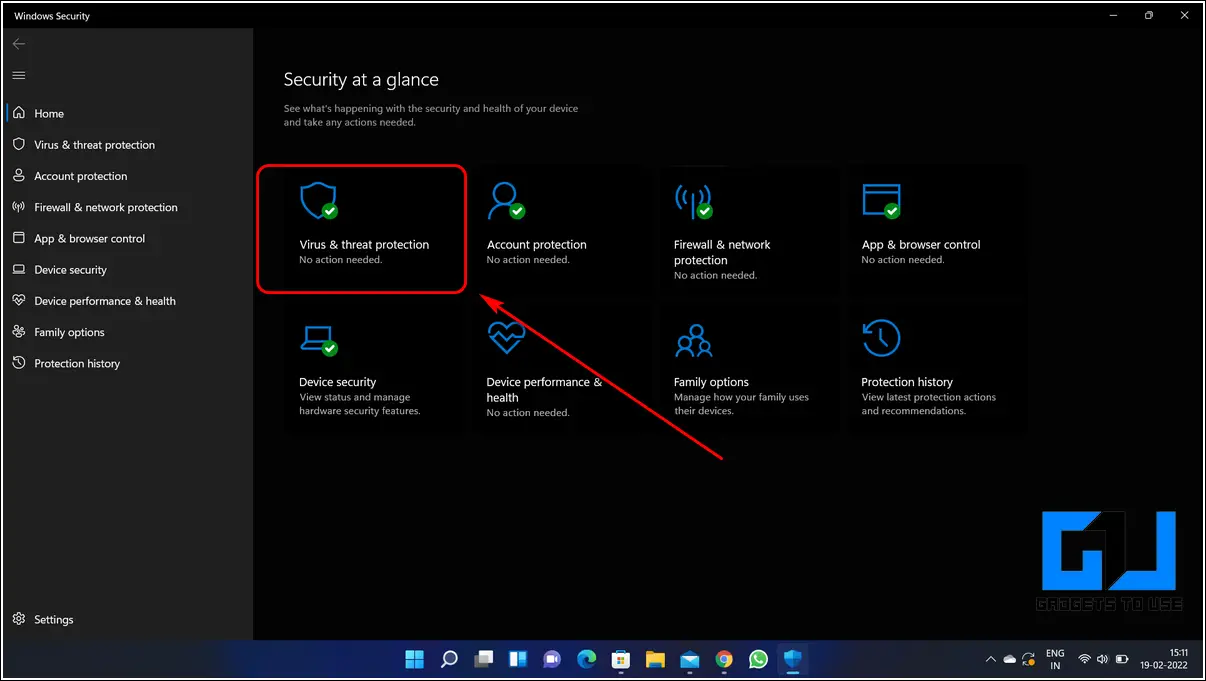
- Press the Windows key and search for the Settings app to open it.
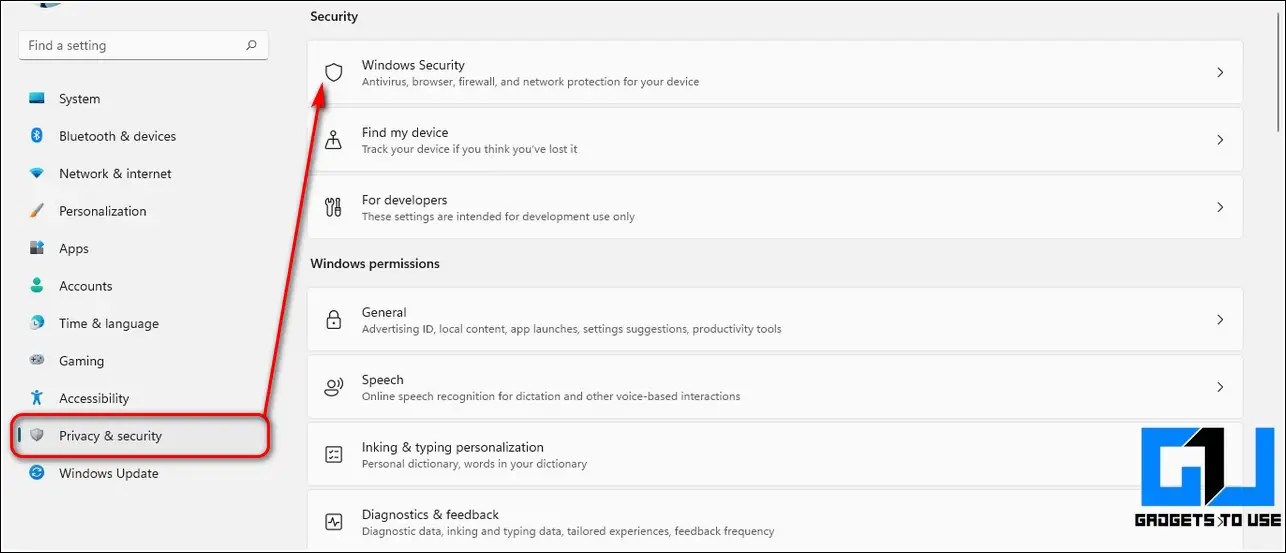
- In the left sidebar, expand Privacy and Security and click on the Windows Security option to open it.
- Further, click on Virus and Threat Protection.
- On the next page, click on the Manage Settings option to alter Defender settings.
- Toggle Off Real-Time Protection from the available options.
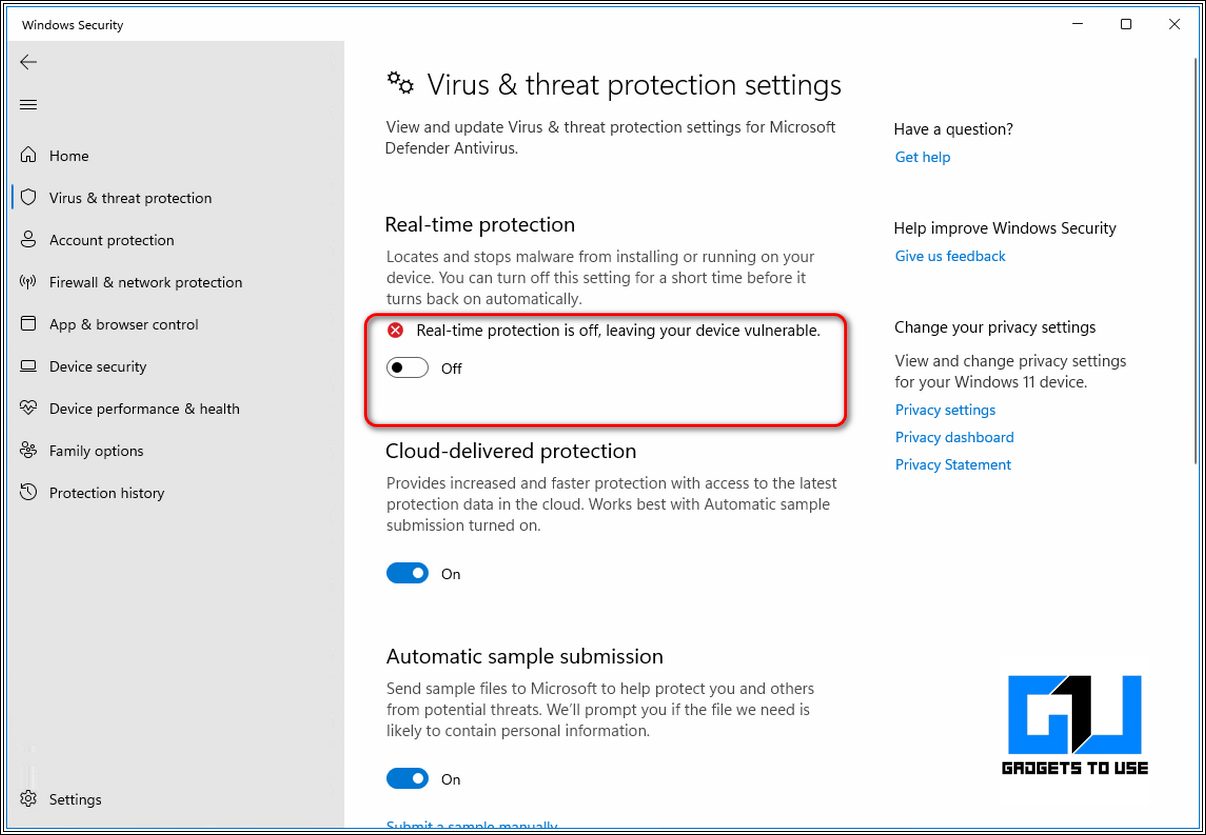
- That’s it. You’ve temporarily disabled the Microsoft Defender service on your Windows 11 system.
Turn Off Windows Defender Using Services App
Another effective method to turn off the Windows Defender service on your Windows 11 system is to turn it off using the service app. Follow these steps for an easy fix.
- Open the Run Window in your system by simultaneously pressing the Windows key+R.
- Type services. msc and hit the enter key.

- Inside the Services window, scroll down to locate Windows Defender Advanced Threat Protection and Windows Defender Firewall services.
- Right-click on each service and press the Stop option to terminate the running services.
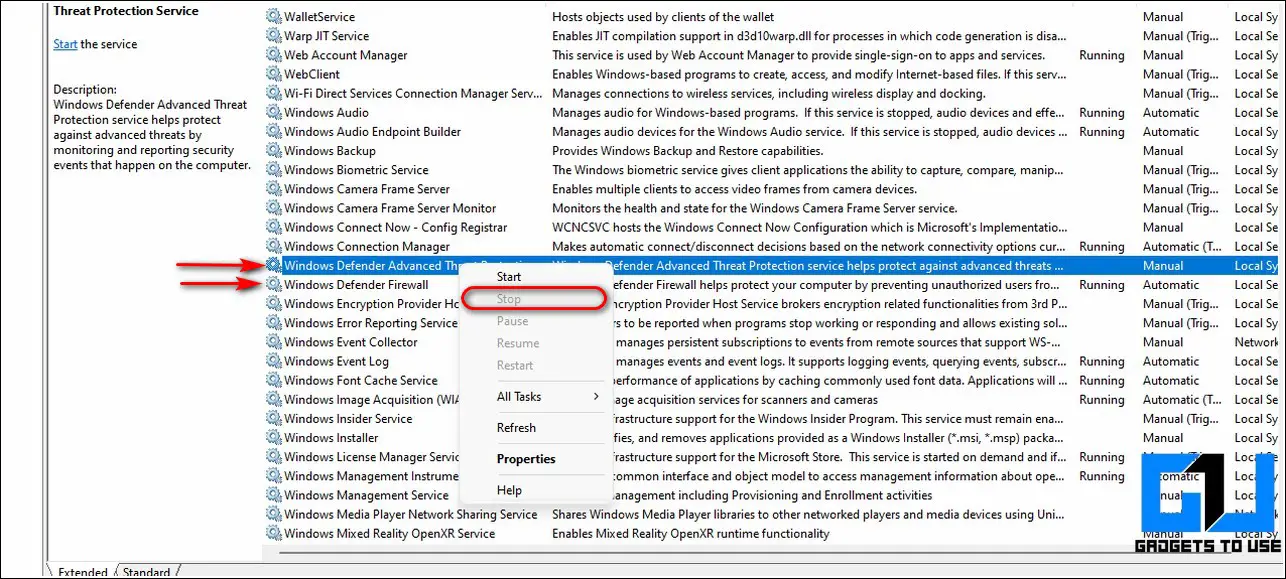
- That’s it. You’ve successfully disabled the Microsoft Defender service running on your system.
Use Group Policy Editor to Turn Off Microsoft Defender
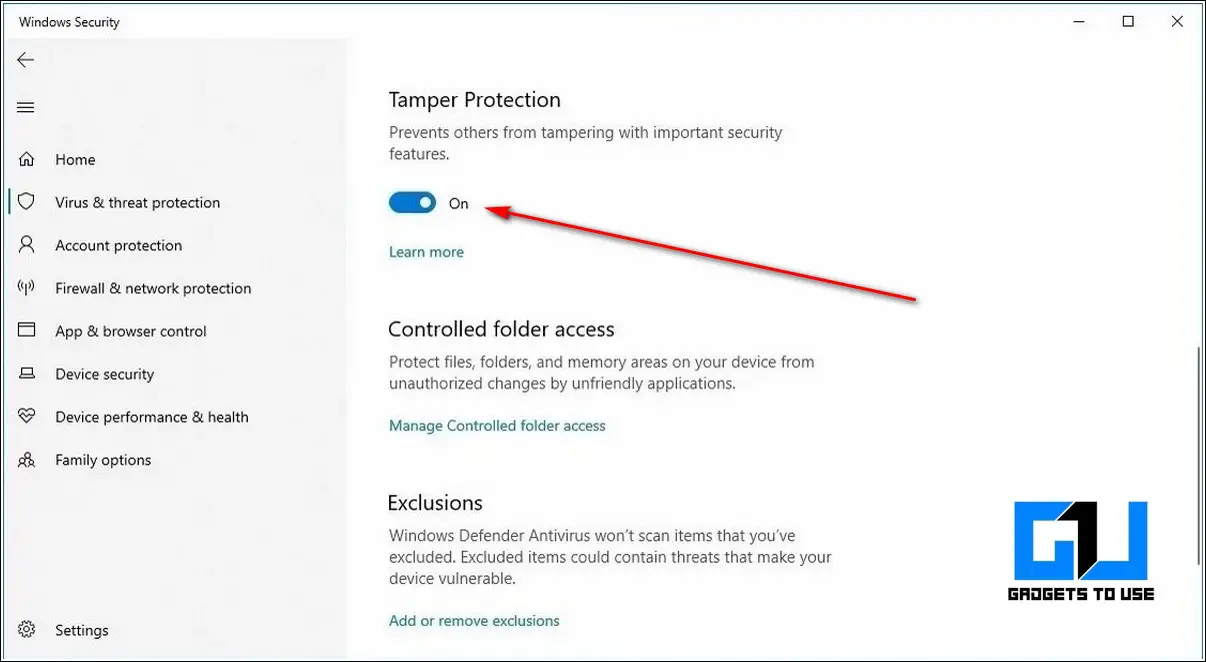
Before turning off Microsoft Defender with the help of the Group Policy Editor, you need to disable Tamper Protection in your Windows 11 system. Follow these steps to disable tamper protection and then use the group policy editor to disable Windows Defender.
- To disable the tamper protection feature on your Windows 11 system, press the Windows key and search for the Tamper Protection feature to disable it.
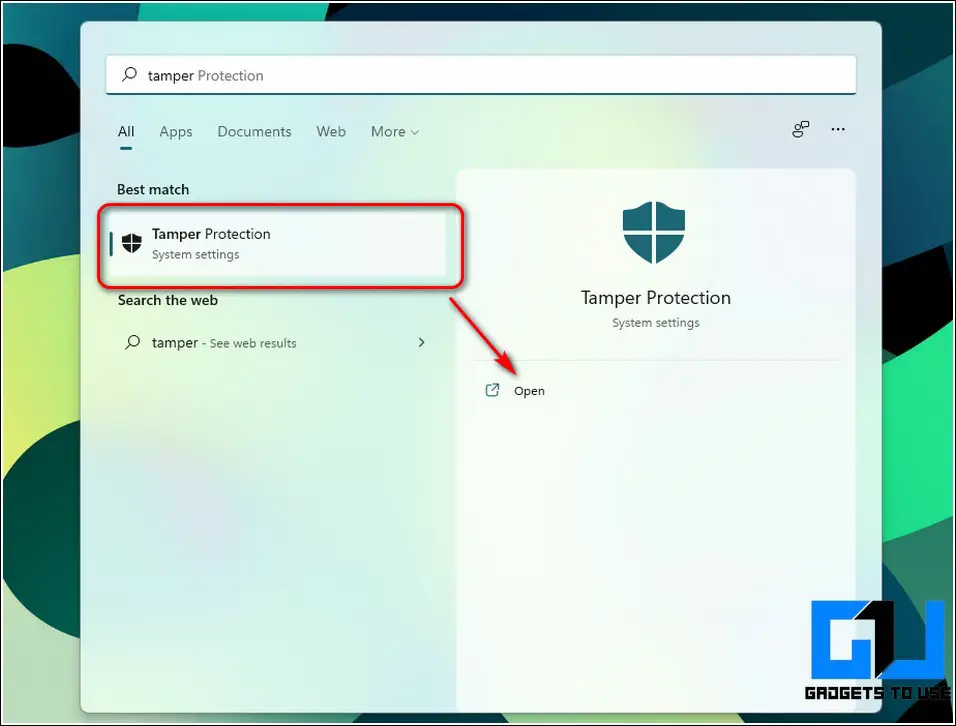
- Scroll down to locate the Tamper Protection section and toggle it off.
- Now, press the Windows key+R to open the Run window in your system.
- Type gpedit. msc and hit the enter key to open the Group Policy Editor Window.

- Inside the Group Policy Editor window, navigate to the following path:
Computer Configuration> Administrative Templates> Windows Components >Microsoft Defender Antivirus
- Double-click on the Turn Off Microsoft Defender Antivirus to configure it.

- Toggle on the Enabled Option and click on the Apply button to save changes.
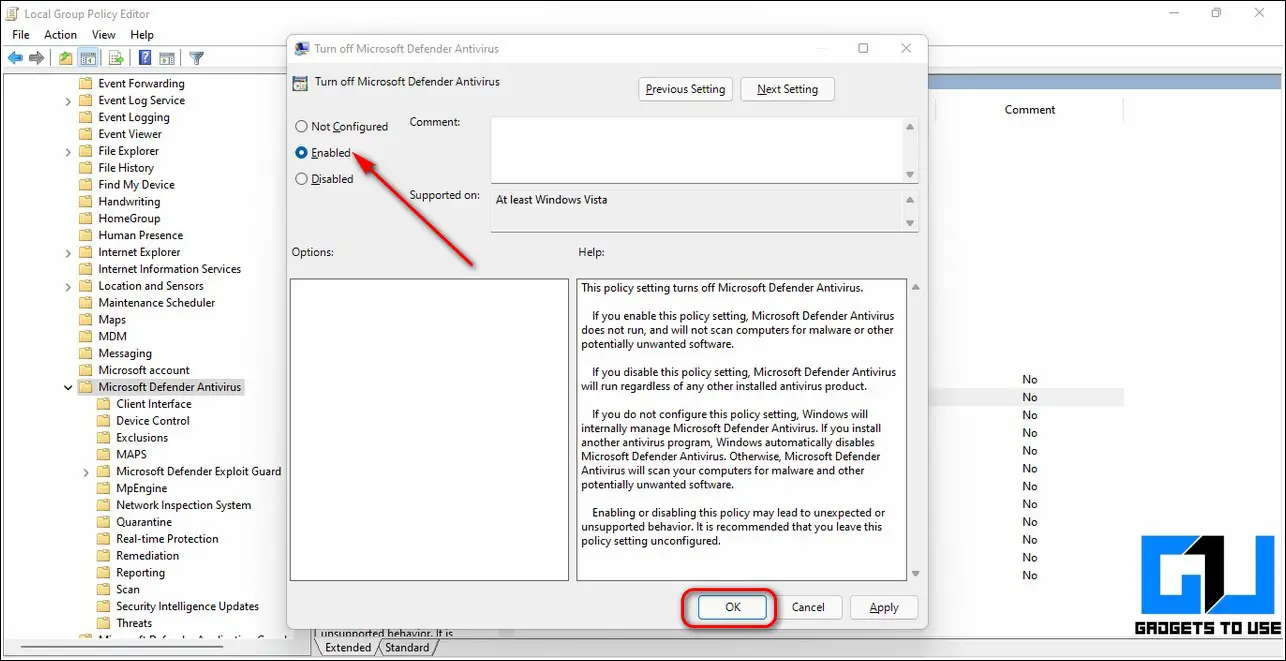
- That’s it. You’ve successfully disabled Microsoft Defender on your Windows 11 system.
Use Windows Registry Editor to Disable Defender in Windows 11
Another working method to disable the Windows Defender service on your system is to turn it off using the Windows Registry Editor tool. Follow these steps for an easy fix.
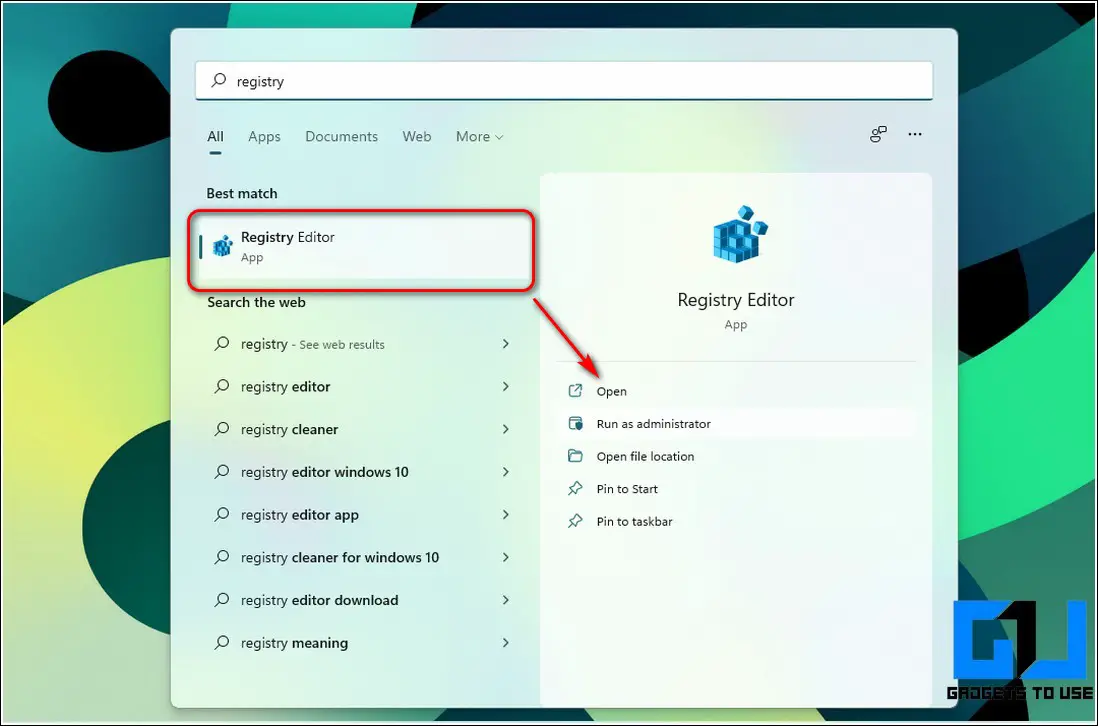
- Press the Windows key and search for the Registry Editor tool to open it in administrator mode.
- Navigate to the following path inside the Registry Editor window:
HKEY_LOCAL_MACHINE\SOFTWARE\Policies\Microsoft\Windows Defender
- Double-click on the DisableAntiSpyware key to configure it.
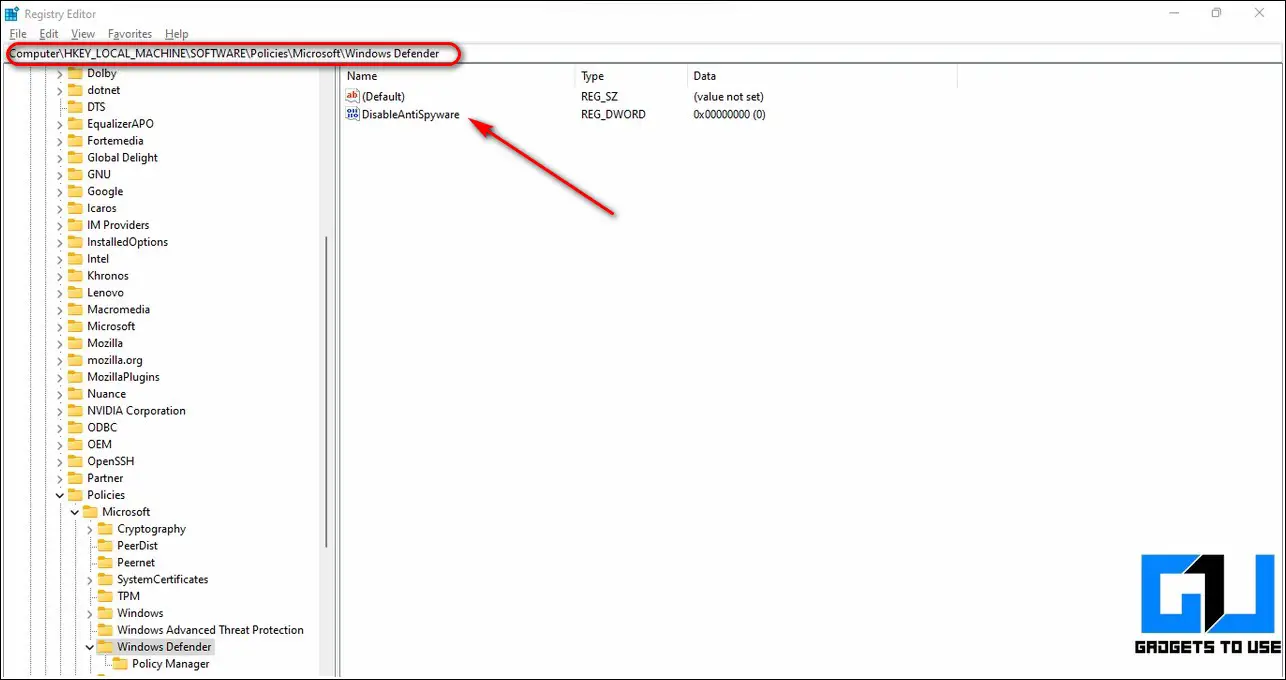
- Set the value data to 1 and click on the OK button to save changes.

That’s it. You’ve successfully disabled Windows Defender on your Windows 11 system.
Bonus Tip: Exclude Windows Defender Service from Running Using AutoRuns
Another effective workaround to disabling the Windows Defender service is to prevent it from starting automatically in your system. Follow these steps to achieve it using this working trick. For this method to work, you need to disable the tamper protection on your system as listed in the second method above.
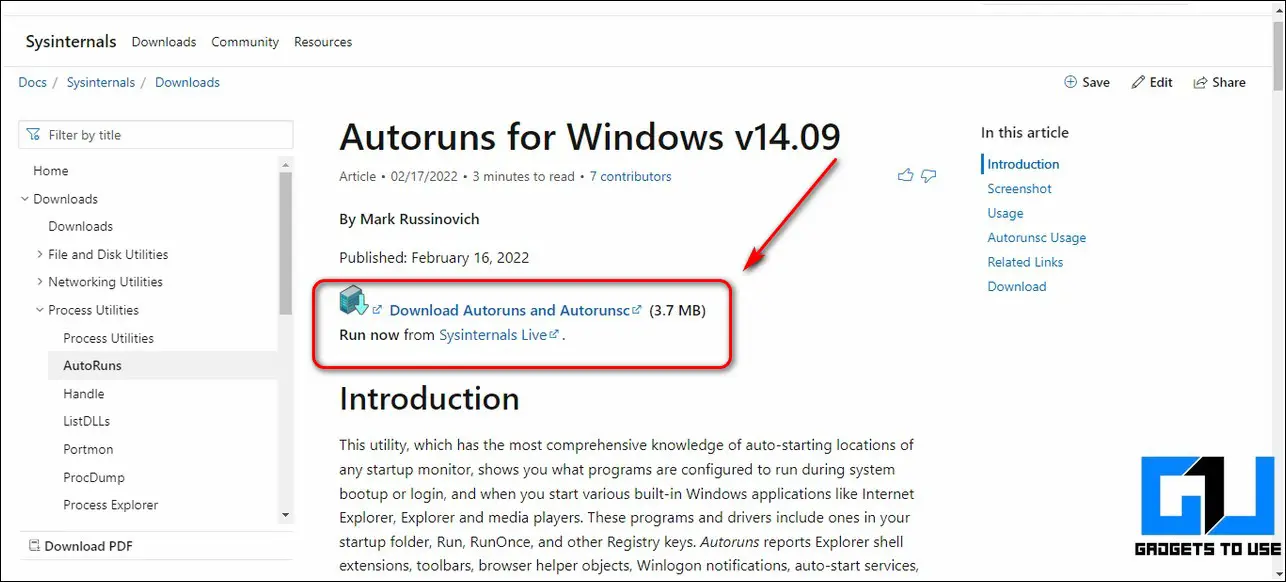
- Open a new tab in your web browser and download Autoruns for Windows.
- Extract the downloaded file and right-click on the Autoruns64.exe file to run it as an administrator.

- Click on the Agree button to accept the terms and conditions.

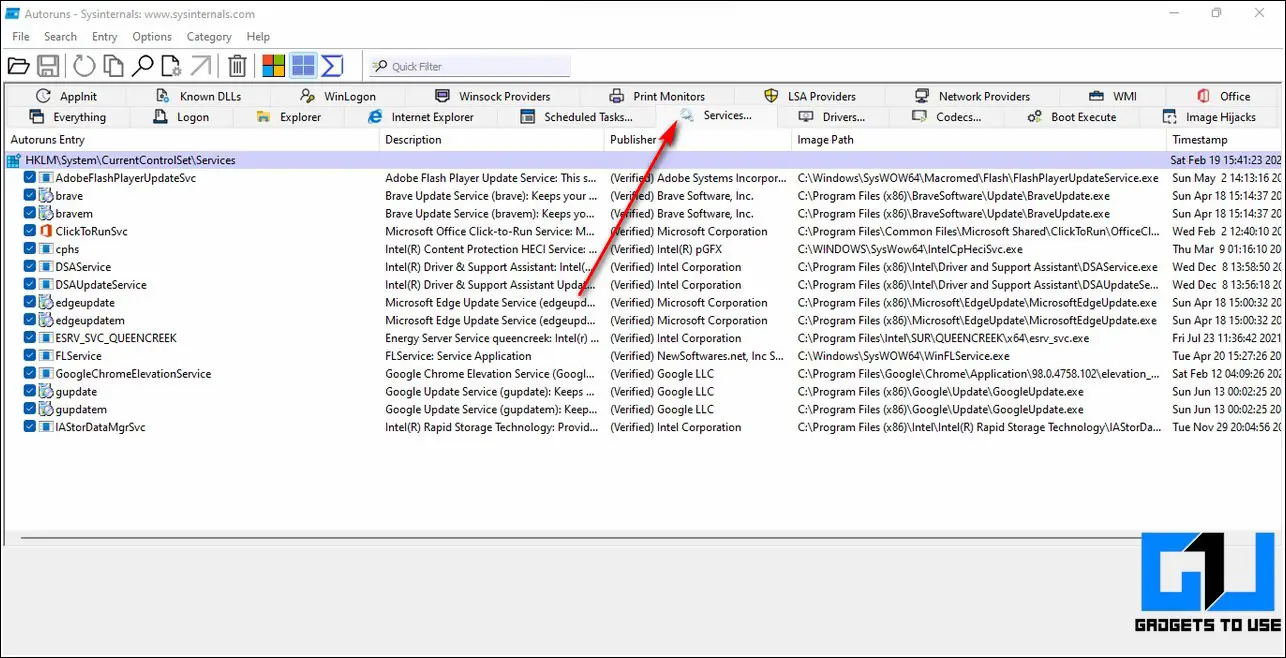
- Next, click on the Services button to list all the running services.
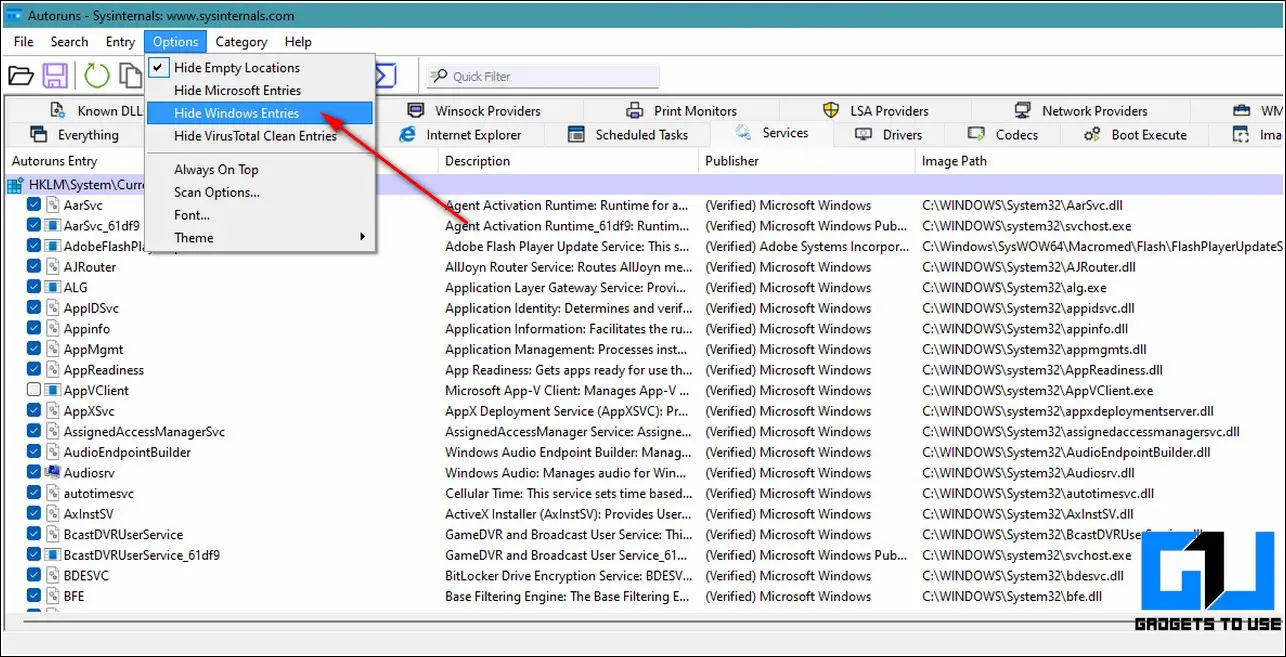
- Click on the Options button located in the toolbar at the top and uncheck Hide Windows Entries.
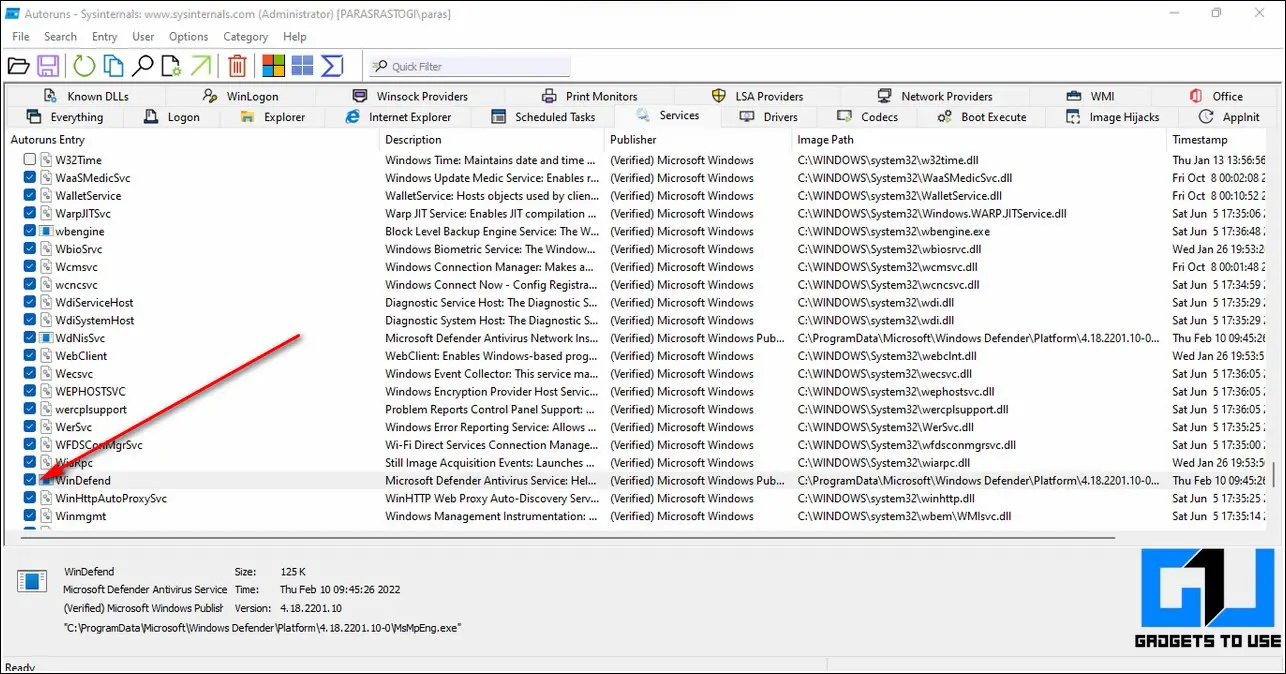
- Search for the WinDefend service and uncheck it from the list to prevent it from starting automatically.
- That’s it. You’ve successfully prevented Windows Defender from running automatically inside your Windows 11 system.
Also, Learn | 6 Ways to Disable Microsoft OneDrive in Windows 11
Wrapping Up: Disabling the Defender
So, that’s a wrap for the best ways to disable Microsoft Defender in your Windows 11 system. If this 2-minute read has helped you to fix your existing problems with Microsoft Defender then hit the Like button and share this read among your friends to assist them as well. Stay tuned for more awesome troubleshooting guides.
You can also follow us for instant tech news at Google News or for tips and tricks, smartphones & gadgets reviews, join GadgetsToUse Telegram Group, or for the latest review videos subscribe GadgetsToUse Youtube Channel.