Quick Answer
- Similar to creating arrows, you can also add a circle to your text using the Shapes button in Microsoft Word to highlight certain text or create an illustration.
- In addition to simple arrows, you can also add a wide variety of different kinds of arrows to your text such as block, curved, or connector arrows using the Shape feature inside Microsoft Word.
- Once you click on your desired arrow shape, your mouse pointer will convert to a crosshair pointer and you can simply drag it over your text to easily create an arrow.
If you frequently use Microsoft word to draft your documents and require the use of arrows and circles in your text, then this guide will be your true savior. In this read, we have listed 3 ways to add arrow or circle text inside a document using Microsoft Word. You can also learn how to change default font in Microsoft Word.
Also, Read | 3 Best Ways to Protect PDF Files with Password for free
Ways to Add Arrow or Circle Text in Microsoft Word
Add Arrows to Document Using Microsoft Word
Microsoft Word allows you to add a variety of different arrows to your text using several methods. Using these methods, you can conveniently create an illustration or add impact to plain text inside a document. Follow these simple techniques to achieve the same.
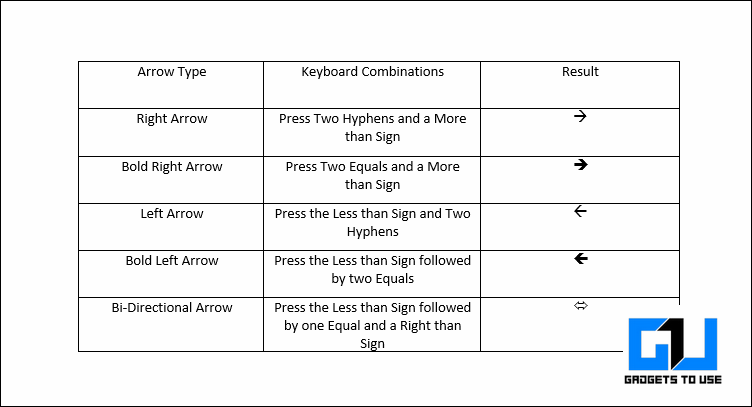
Try Keyboard Shortcuts to Add Arrows to Text
To quickly add arrows to your text inside a Word document, you can follow these nifty keypress combinations.
Use Unicode to Insert Arrows in Your Text
Another quick method through which you can easily add arrows to your text inside a word document is through the help of the Arrow Unicodes. To create arrows using this method, you need to press the Alt key on your keyboard and type the corresponding numbers using the numeric keypad. As soon as you release the Alt key after pressing the Unicode, the desired arrow will appear at your inserted position. Follow this quick chart to use the arrow Unicode.

Insert Arrows in Document as Shapes
If you wish to create long custom arrows in your text, you can simply create them by dragging the desired one using the Shapes feature in Microsoft Word. Follow these steps to achieve the same.
- Open the word document using Microsoft Word in which you wish to add arrows.
- Expand the Insert option present in the toolbar at the top and click on the Shapes button to find and choose your desired arrow.
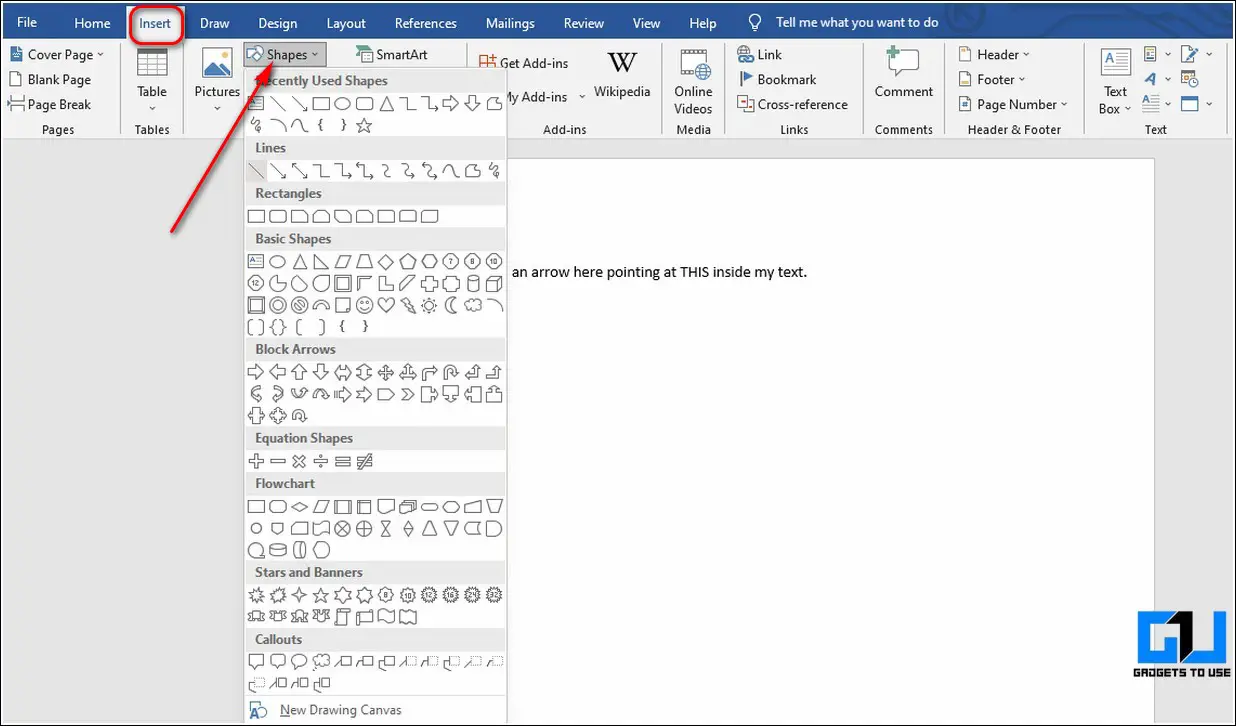
- Once you click on your desired arrow shape, your mouse pointer will convert to a crosshair pointer and you can simply drag it over your text to easily create an arrow.
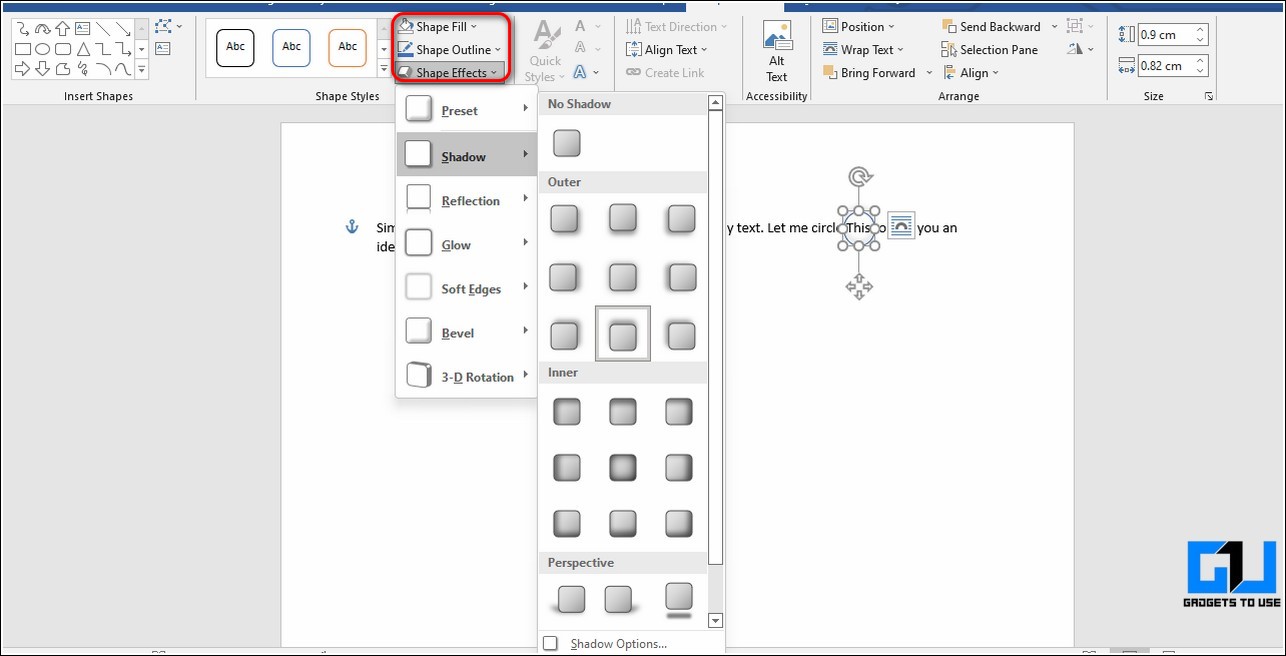
- You can also format the look and provide a custom appearance to your arrow by formatting it using style, outline, and effects.
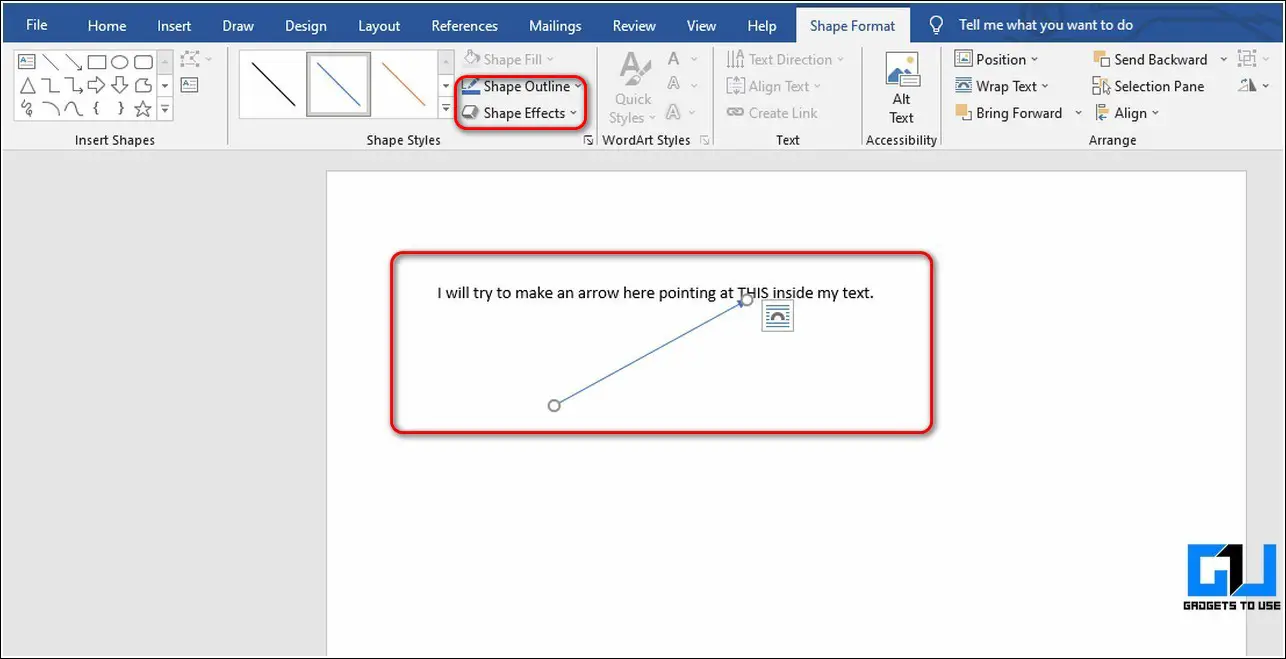
- That’s it. You’ve successfully added an arrow to your text using this method.

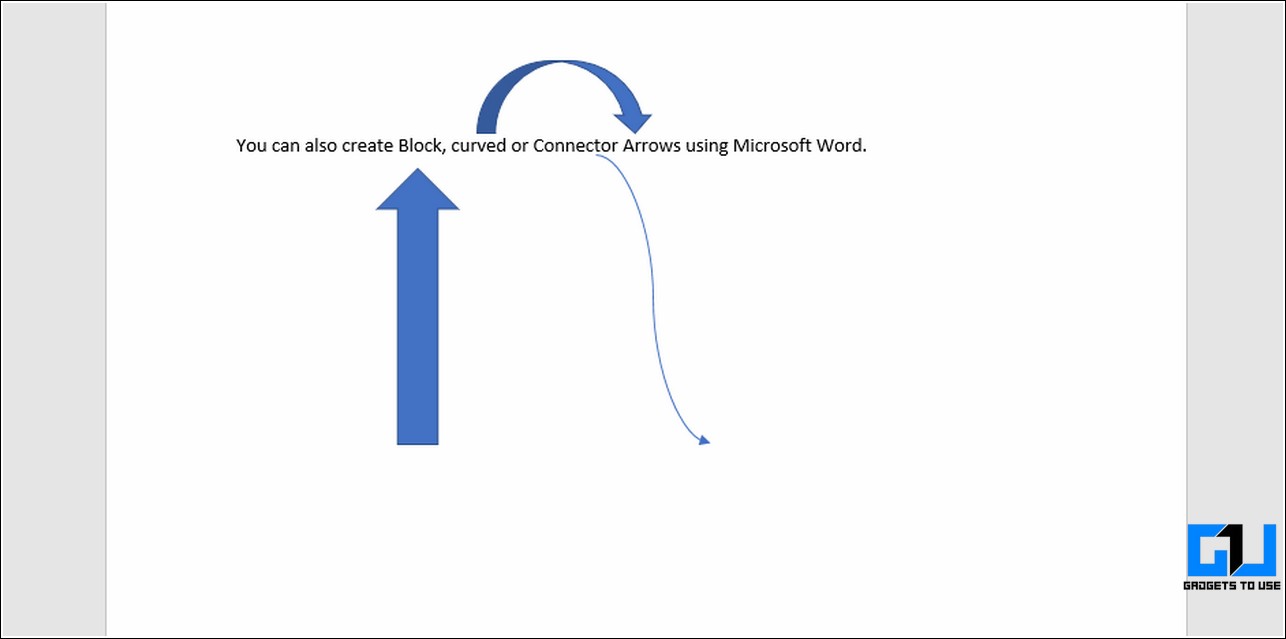
Use Block, Curved, and Connector Arrows to Create Impactful Illustrations
In addition to simple arrows, you can also add a wide variety of different kinds of arrows to your text such as block, curved, or connector arrows using the Shape feature inside Microsoft Word. Follow these steps to add all such arrows using this method.
- Open your desired document using Microsoft word to which you wish to add arrows.
- Expand the Insert option in the toolbar and click on the Shapes button to choose your desired arrow.
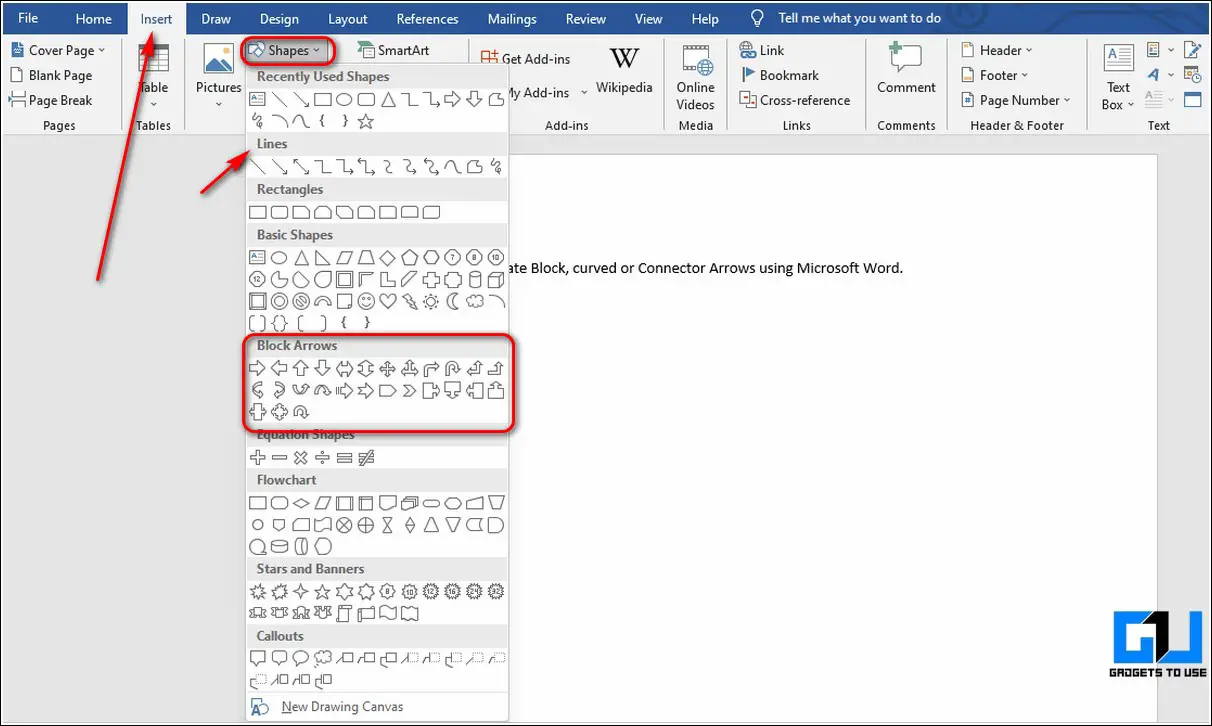
- Drag your chosen (block, curved, or connector) arrow over the text to get the preferred results.
Circle and Text Inside Word Document Using Shapes
Similar to creating arrows, you can also add a circle to your text using the Shapes button in Microsoft Word to highlight certain text or create an illustration.
- Expand the Insert option in the toolbar located at the top and press the Shapes button.
- Under the Basic Shapes section, you can find the circle shape. Click on this shape and drag it over the text to create a circle.

- By default, the circle is filled with a solid color. To make it transparent with visible circle boundaries, click on the Shape Fill option at the top.

- Inside the Shape Fill option, press the No Fill option to create a transparent circle around your text.

- You can also customize this circle by formatting it using Outline and Shape Effects.
Congrats. You’ve successfully added a circle to your text using this method.
Bonus Tip: Create a Flowchart Diagram in Word using SmartArt
Microsoft Word also offers you the feature to use different varieties of charts instantly using the SmartArt feature. Follow these simple steps to create a ready-to-use flowchart using this method.
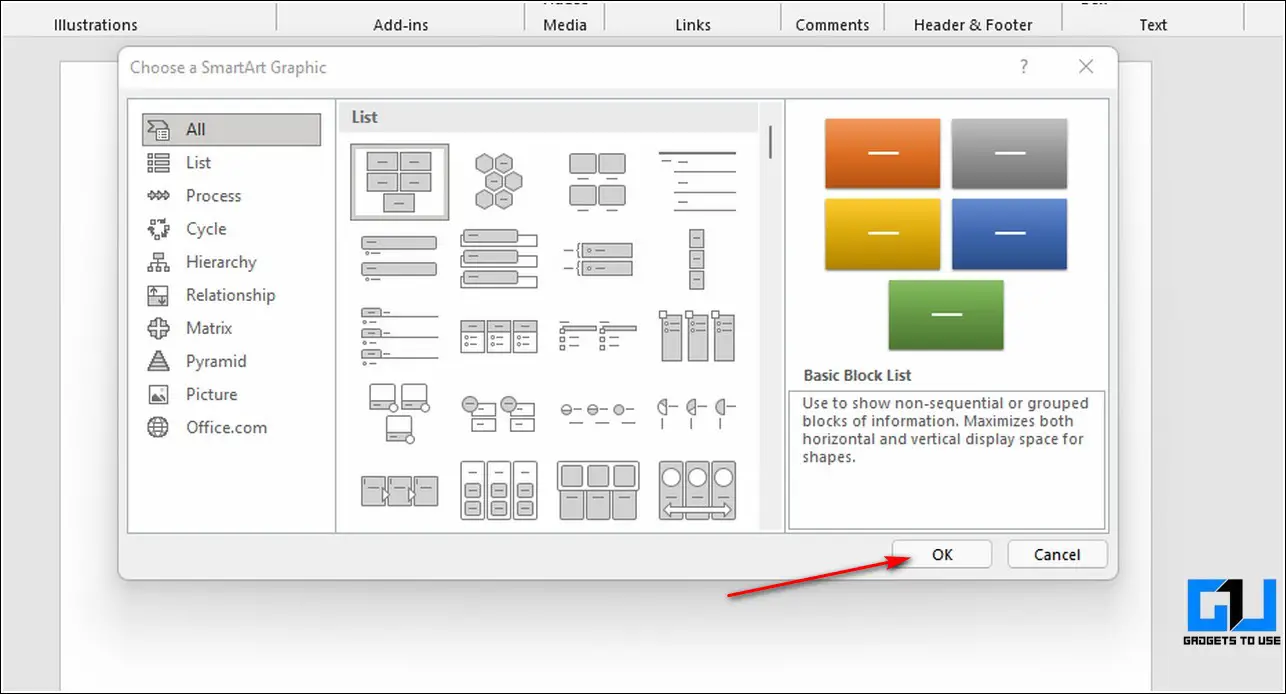
- To create a chart inside a word document, expand the insert option in the toolbar at the top and click on the SmartArt button.

- You will now see a popup window containing different varieties of ready-to-use charts. Browse and choose your preferred chart from the window. Click on the OK button to add it to your word document.
- Add your desired labels to the chart. You can also delete a label here to dynamically make adjustments to your chosen chart.

- That’s it. You’ve successfully created a flowchart diagram using SmartArt.

Related | How to Protect your Office Documents with a Password.
Wrapping Up: Creating Impactful Documents using Word
So, that’s a wrap for the top 3 ways to add arrow or circle text using Microsoft Word. If this quick read has helped you to create impactful documents by adding required arrows and circles, then hit the Like button and share this read among your friends to assist them as well. Stay tuned for more helpful reads.
You can also follow us for instant tech news at Google News or for tips and tricks, smartphones & gadgets reviews, join GadgetsToUse Telegram Group, or for the latest review videos subscribe GadgetsToUse Youtube Channel.