Quick Answer
- Once done, you can check for the results and follow up on the links, but you might be required to pay a little to do this.
- If you have come across such a photo and wish to know the details of the person in it, then you’ve come to the right place.
- Hence, if you aren’t satisfied with the results obtained through Google Lens, then you can use other free online facial recognition tools to gather details on the unknown person in your face photo.
Often while browsing the internet, we come across random faces that we have no idea about. If you have come across such a photo and wish to know the details of the person in it, then you’ve come to the right place. In this read, we have demonstrated three effective ways to search for anyone with a face photo apart from Google Lens. You can also learn Google Lens hidden features and tricks to get the best of it.

Search people with online ‘Facial Recognition’ tools
While many people resort to Google Lens to identify people, Google’s latest policy doesn’t allow you to search extensively for people or faces unless they are public figures. Hence, if you aren’t satisfied with the results obtained through Google Lens, then you can use other free online facial recognition tools to gather details on the unknown person in your face photo. Below are a few tools to do this and steps on how you can use them.
Method 1: Using Lenso.AI tool
The first tool is an AI powered tool called the Lenso.AI tool, which runs a reverse image search to get the results. Here’s how to use it.
1. Head over to the AI Reverse Image on the Lenso.AI website.
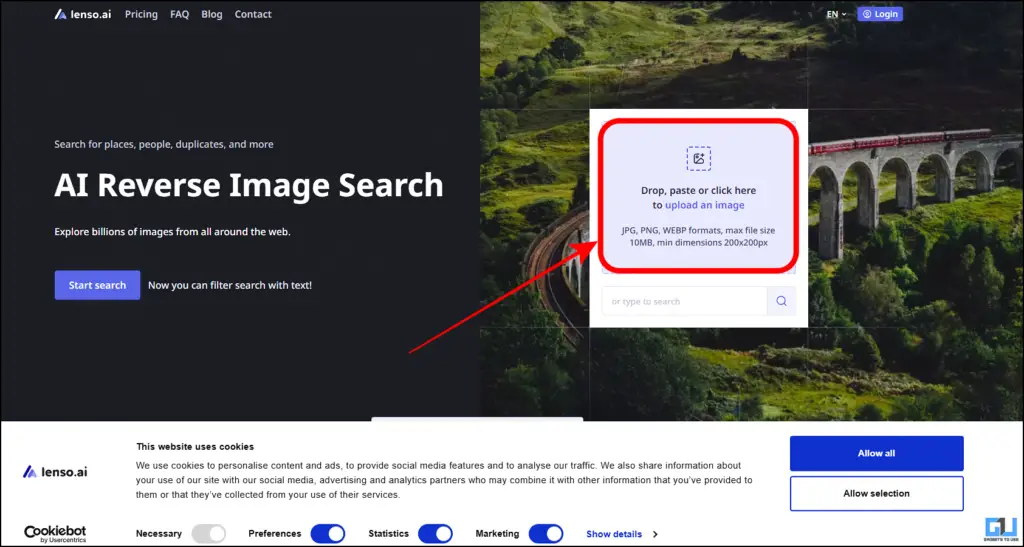
2. Upload your image, and the search will immediately begin.
3. Once completed, you will be able to see the results
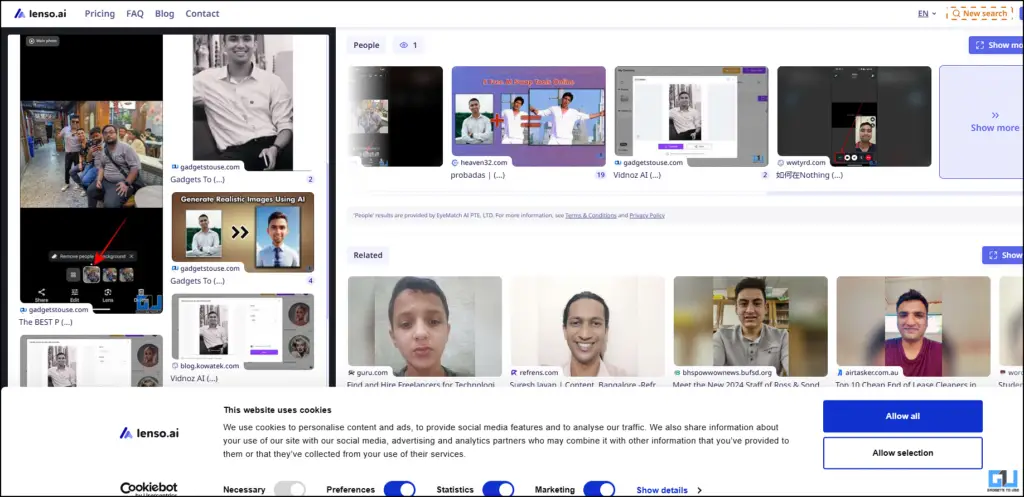
4. You can also check the links for the results upon clicking. However, you might be required to pay for the same. Otherwise, you can look at the domain (example YouTube or website and search there for more info).

Method 2: Using FaceCheck ID tool
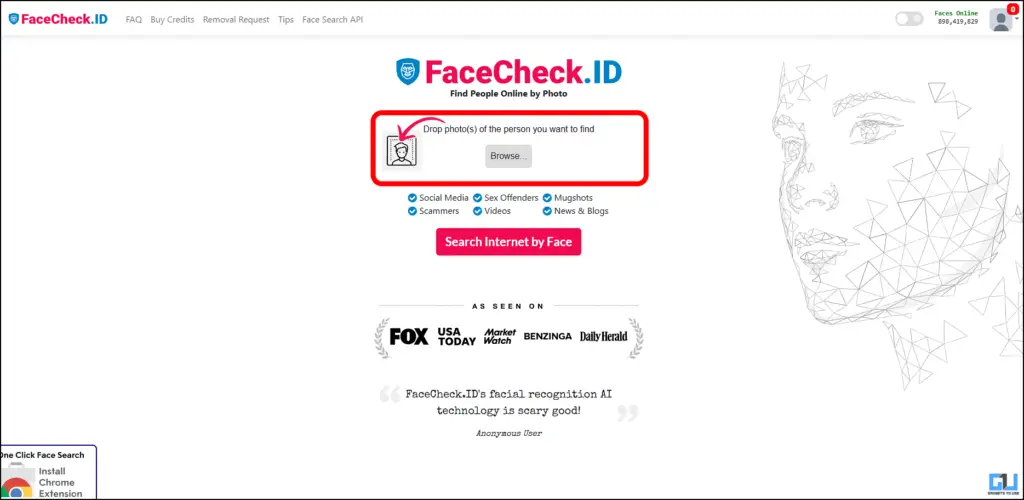
The second tool discussed is the FaceCheck ID tool. Interestingly, it comes with a dedicated Chrome extension on the Web Store. Here’s how to use it.
1. Go to the FaceCheck ID website on your browser and upload the photo you want to search.
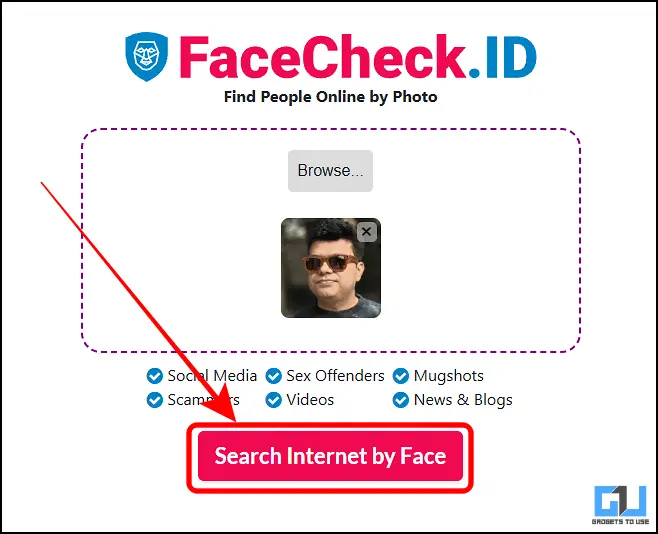
2. Then, click on the button “Search Internet by Face” to begin.
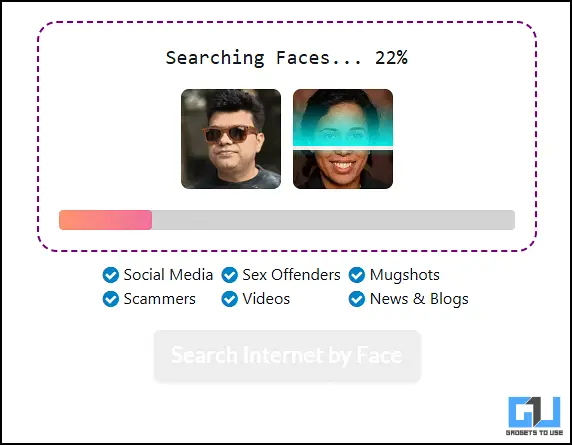
3. The tool will then scan the internet and compile the results for you.
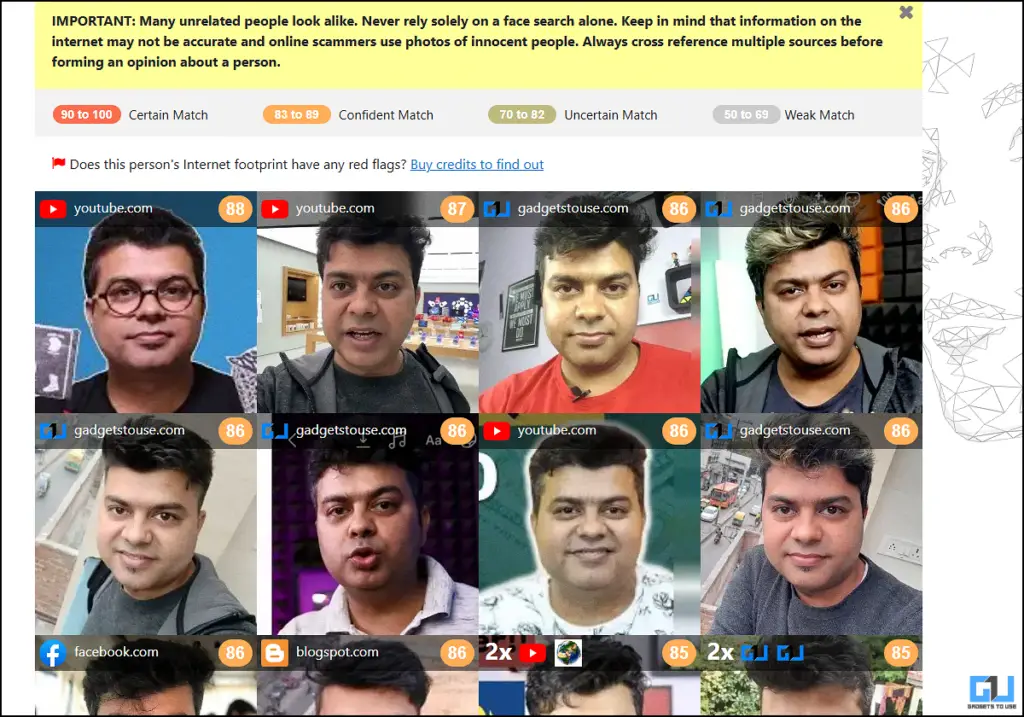
4. Once done, you can check for the results and follow up on the links, but you might be required to pay a little to do this. Otherwise, feel free to look up to the domain such as YouTube or website – GadgetsToUse in this example to find out more about the person.
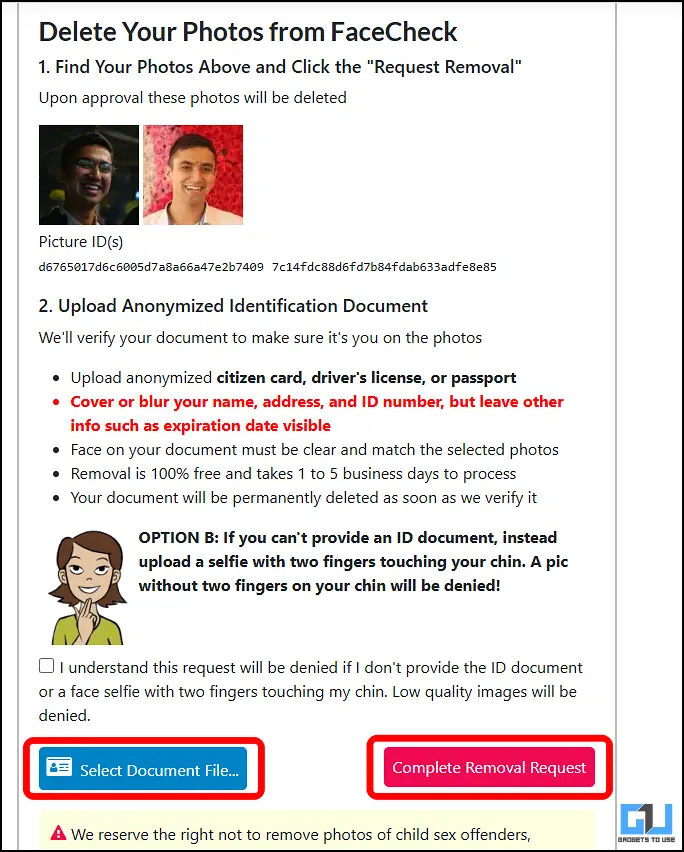
You can also request to remove your data from their database by submitting a blurred valid document (such as driver’s license) and your latest image.
Method 3: Using PimEyes tool
Another popular tool in this domain is PimEyes, which uses a reverse image search technique to grab details on your uploaded face photo.
1. Access the PimEyes official website and click on the Upload a Photo button to upload your preferred face photo.

2. Wait for a few seconds to view all the results related to your uploaded face photo.

3. You can click on any result to know details about its source.

Wrapping Up
We hope that you’ve now learned to successfully identify a face photo with multiple online tools other than Google Lens using the methods listed above. If this quick read has assisted you in achieving the same, then hit the Like button and share this guide with your friends to help them identify unknown face photos easily. Stay tuned for more quality write-ups.
You can also follow us for instant tech news at Google News or for tips and tricks, smartphones & gadgets reviews, join the GadgetsToUse Telegram Group, or subscribe to the GadgetsToUse Youtube Channel for the latest review videos.


