Quick Answer
- On macOS Monterey and earlier versions, you could click the Apple icon on the top left menu, select About This Mac, and then select Software Update to check for the latest system and security updates on your Mac computer.
- With the new OS, Apple has renovated the Settings app with a sidebar on the left, like the one on iPhone and iPad.
- The Software Update option no longer appears in the “About This Mac” window which might make it difficult for you to download future updates.
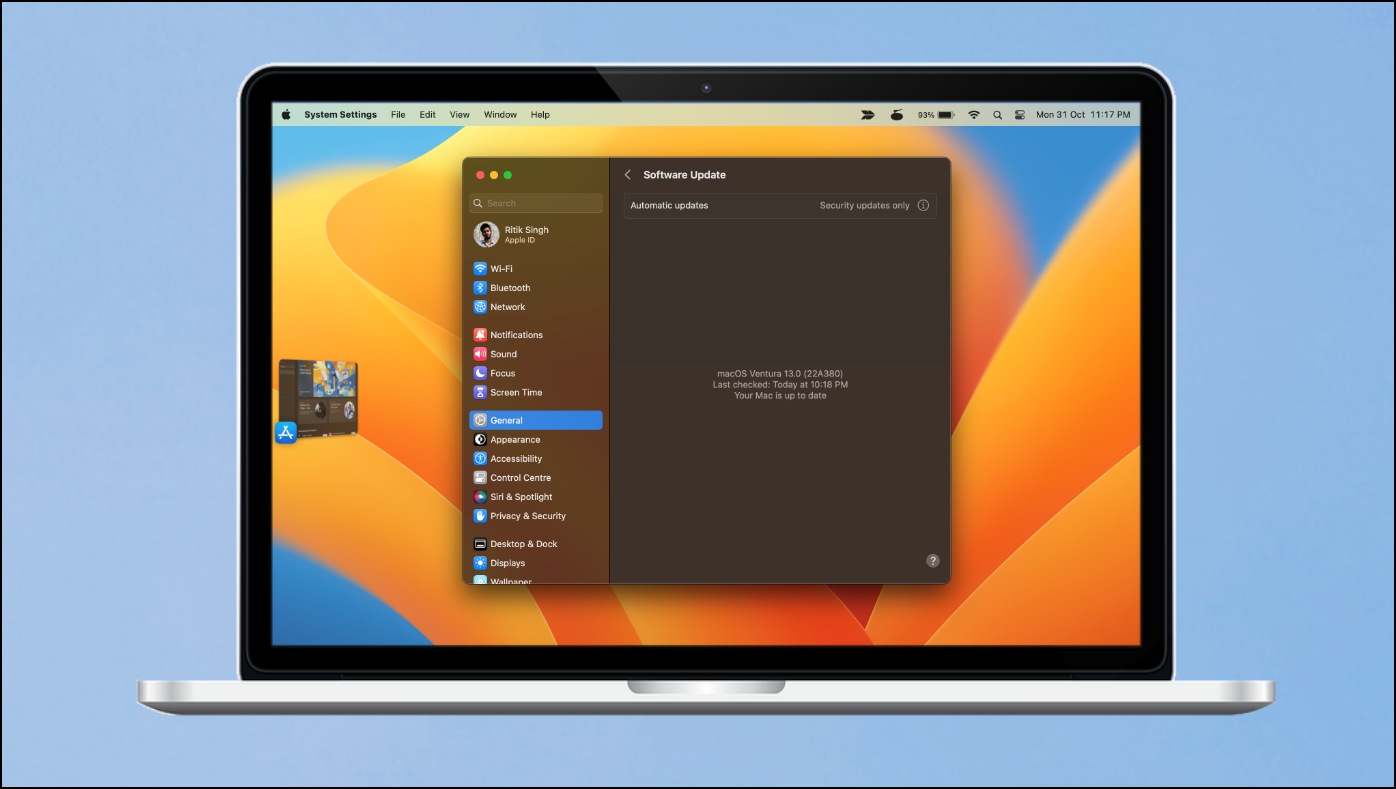
Besides adding new features like Stage Manager and Continuity Camera, Apple has also changed how the settings look and feel on the macOS Ventura. The Software Update option no longer appears in the “About This Mac” window which might make it difficult for you to download future updates. And therefore, we’re here with the steps to find Software Update settings on the new macOS Ventura.
How to Find Software Update on macOS Ventura
On macOS Monterey and earlier versions, you could click the Apple icon on the top left menu, select About This Mac, and then select Software Update to check for the latest system and security updates on your Mac computer.
However, the option is no longer available on the macOS Ventura. It has now been moved to System Settings (renamed from System Preferences) and adopts an iPadOS-like design. Read on to learn how to find and check for software updates on the new macOS 13 Ventura.
Steps to Check and Download Updates on macOS Ventura
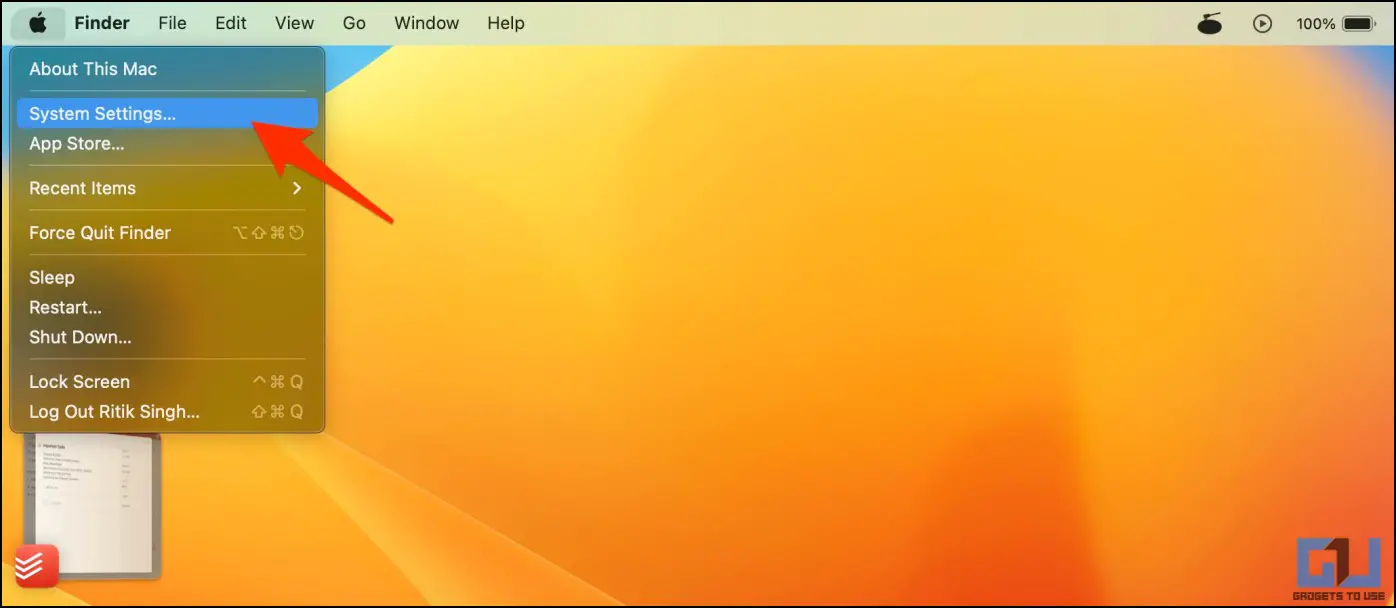
1. Click the Apple icon in the top left corner.
2. Select System Settings (yes, it’s the same System Preferences with a new name).
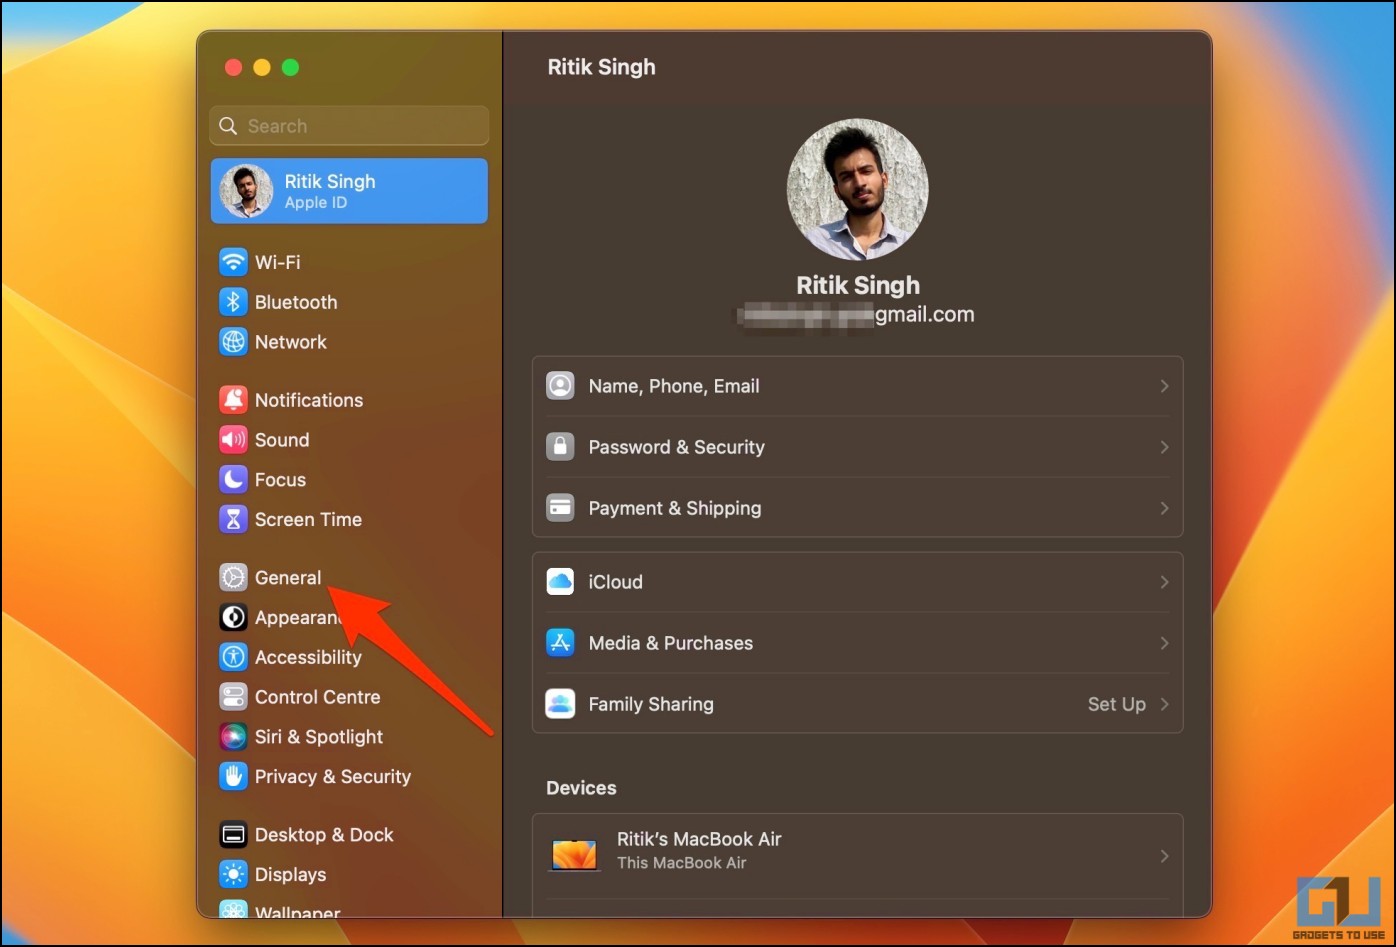
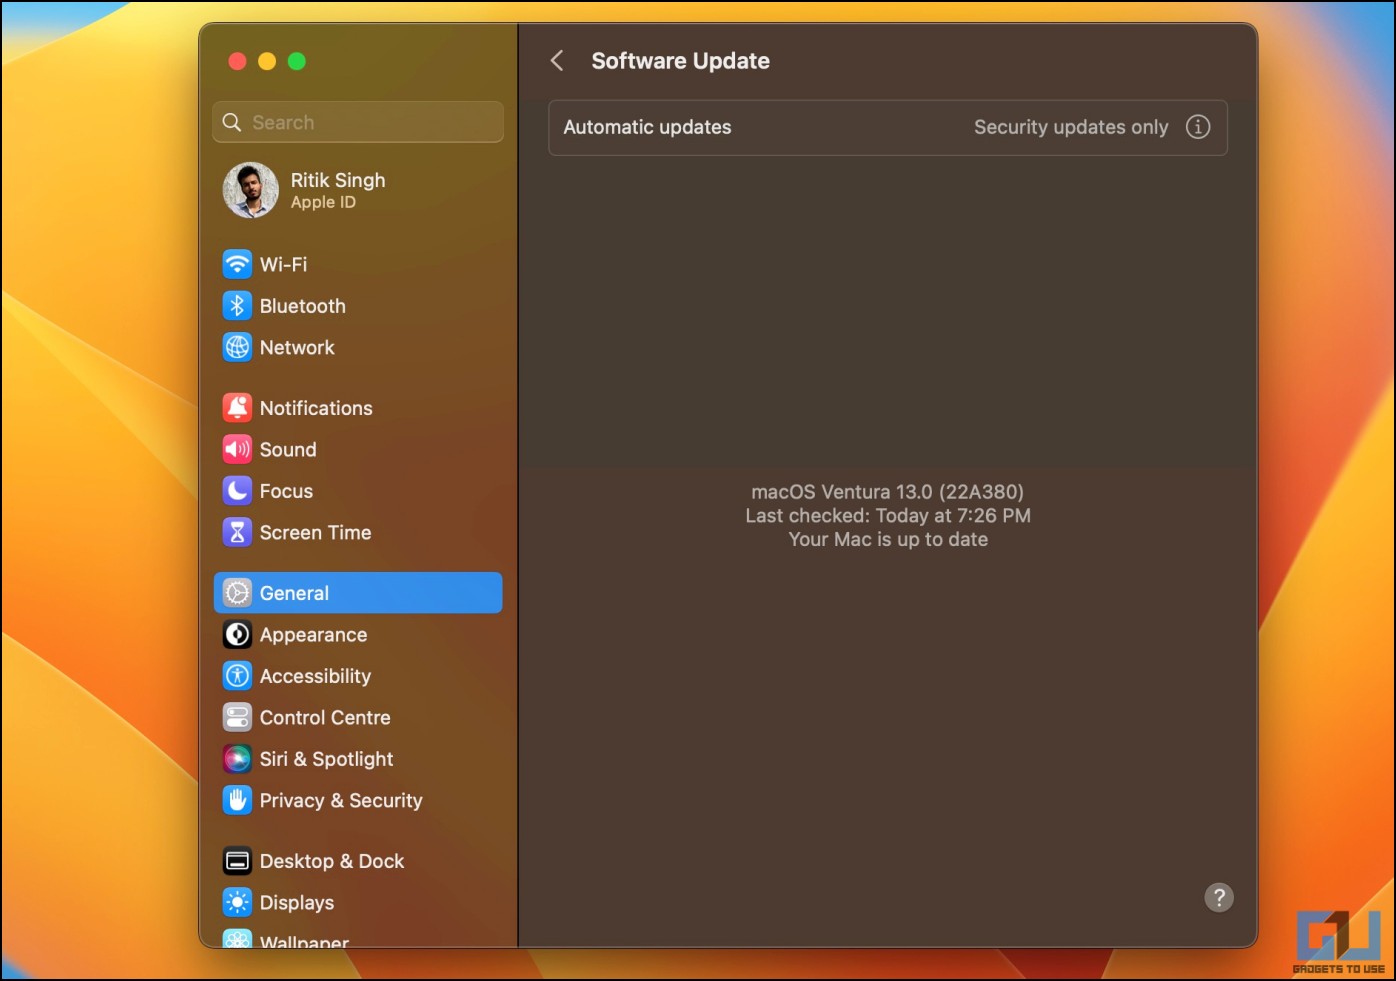
3. On the next screen, select General from the sidebar.
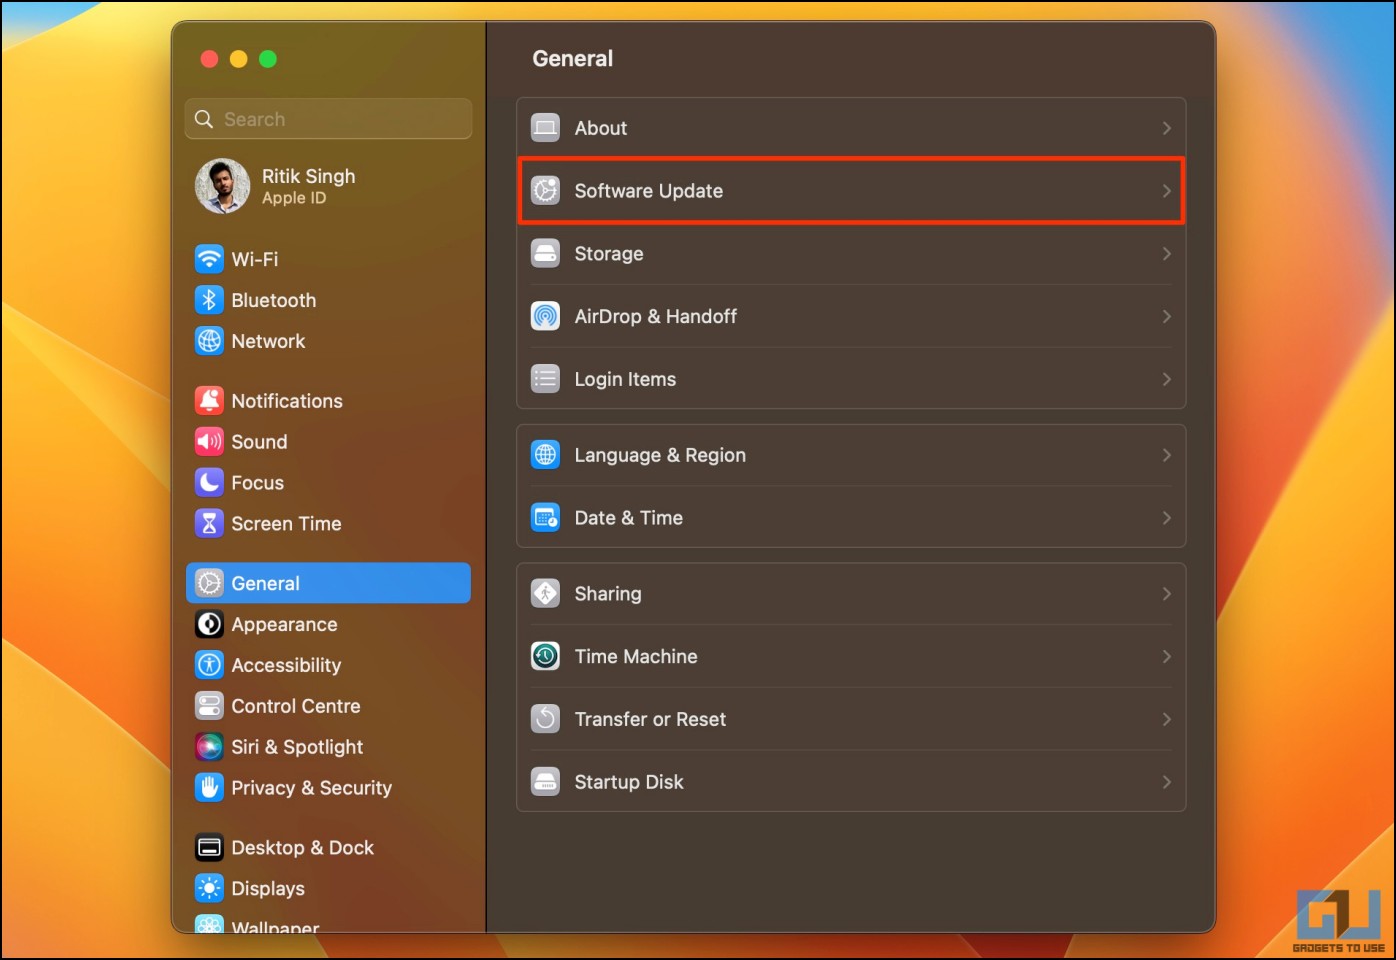
4. Here, select Software Update.
5. Your Mac will now automatically check and tell if a software update is available for download. You can click on Install Now to proceed.
Alternatively, you can follow the quicker method below:
1. Open System Settings on your Mac.
2. In Settings, type and enter “update” in the search bar.
3. Select Software Update or Check for Software Update from the search results that appear.
Which Macs Can Download the New Ventura Update?
- MacBook Pro (introduced in 2017 or later)
- MacBook Air (introduced in 2018 or later)
- MacBook (introduced in 2017 or later)
- Mac Mini (introduced in 2018 or later)
- iMac (introduced in late 2017 or later)
- iMac Pro and Mac Studio
- Mac Pro (introduced in 2019 or later)
Enable or Disable Automatic Software Updates
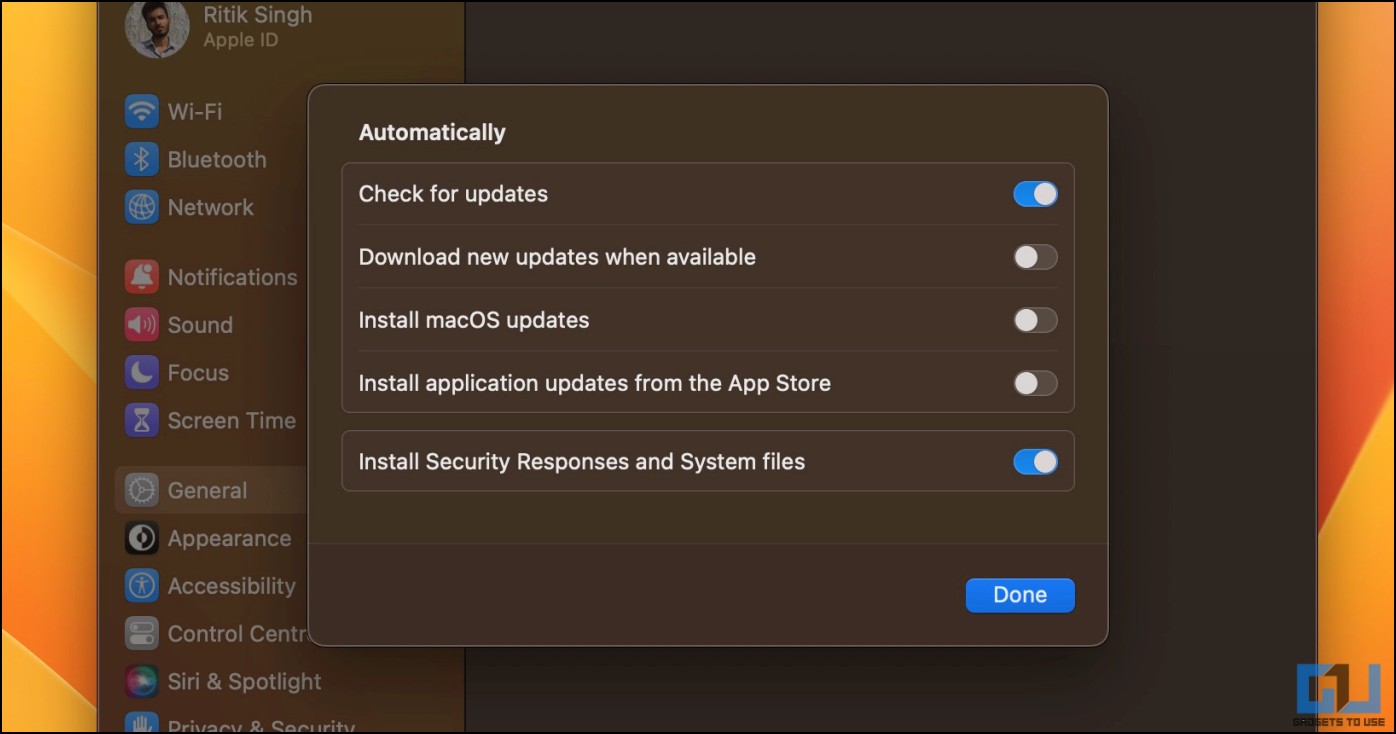
Head to System Settings > General > Software Update. Here, click the exclamation icon next to Automatic Updates. You can now turn on or off the automatic check for updates, automatic OTA downloads, app store updates, and more. Here’s what each option means:
- Check for updates: When turned on, your Mac will automatically check and notify you of any updates if available.
- Download new updates when available: When new updates are available, your Mac will automatically download them in the background. Keep this option turned off if you have limited internet bandwidth.
- Install macOS updates: Once turned on, your Mac will automatically install OS updates.
- Install application updates from the App Store: Enable this if you want your Mac to install app updates automatically from the App Store.
- Install Security Responses and System files: Your Mac will automatically install security and system files. Security configuration updates help identify malicious software and prevent its installation. At the same time, System data files provide new word lists, speech-recognition assets, voice assets, suggestions for contacts and events, etc.
Wrapping Up
This is how you can find the Software Update option in the settings on macOS Ventura. With the new OS, Apple has renovated the Settings app with a sidebar on the left, like the one on iPhone and iPad. While some users liked the recent change, others feel it makes it harder to use with a mouse. Anyways, what are your thoughts on it? Let us know via comments.
You might be interested in:
- How to Install Mac Updates Without Upgrading to MacOS Ventura
- MacOS Ventura Stage Manager Tricks: Hide Recent Apps, Show Desktop Files, and More
- 2 Ways to Use Continuity Camera on Mac and iPhone
- How to Delete Downloaded Update on Mac Without Installing
You can also follow us for instant tech news at Google News or for tips and tricks, smartphones & gadgets reviews, join GadgetsToUse Telegram Group or for the latest review videos subscribe GadgetsToUse Youtube Channel.
