Quick Answer
- If you don’t wish to buy the Google One subscription but want to remove unwanted objects from your desired image, you can check our detailed explainer to remove unwanted photo objects on Android and iPhone.
- As the name suggests, the magic eraser feature, originally exclusive to Pixel 6 and Pixel 7 series, offers this mind-blowing capability to remove or blend in any object photobombing the main subject in the image.
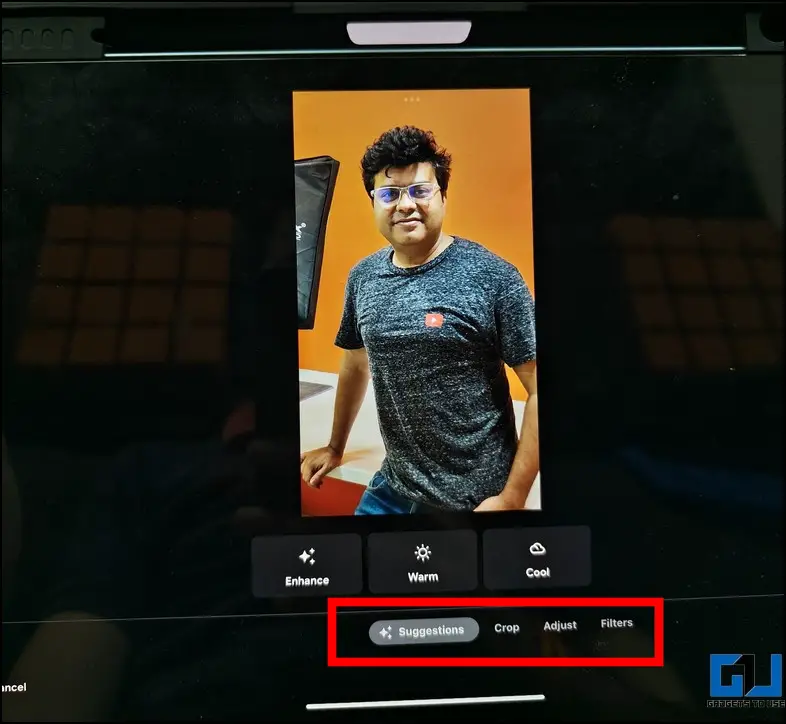
- We tried using the Google Magic Eraser feature on our iPad, but unfortunately, it is currently unavailable for the Google Photos app on iPad (even with an active Google One subscription).
Google Pixel 7’s Magic Eraser feature has finally made its way to iOS devices, but it comes with a catch. Users with Google One subscription can now use this image enhancement feature to remove or blend in photobombing entities from your desired image like they never existed. Here, let’s look at how to use the Google Magic Eraser feature to remove objects from photos on your iPhone or iPad.
What is Google Magic Eraser?
As the name suggests, the magic eraser feature, originally exclusive to Pixel 6 and Pixel 7 series, offers this mind-blowing capability to remove or blend in any object photobombing the main subject in the image. This is done by using computational photography to identify objects in an image that may be blocking the subject in focus. With the newly updated Google One subscription benefits, iOS users can finally experience the magic eraser feature directly through the Google Photos app.
Erase the distractions in YOUR photos with Magic Eraser. Get the Google Pixel 6 today.
— Made by Google (@madebygoogle) February 1, 2022
Requirements
To use the Google Magic Eraser feature inside the Photos app on your iPhone, you must adhere to the following requirements:
- An active Google One Subscription. You can pick up the basic plan offering 100 GB of cloud storage.
- The latest Google Photos app on your iOS device.
We have learned that the Google Magic eraser can be used on iOS and the requirements you need to follow. Let’s look at the steps to use Magic Eraser on your iPhone and iPad.
How to Use Google Photos Magic Eraser on iPhone
Using the Google magic eraser to erase the photobombers from your photos is pretty straightforward. Here’s what you need to follow on your iPhone.
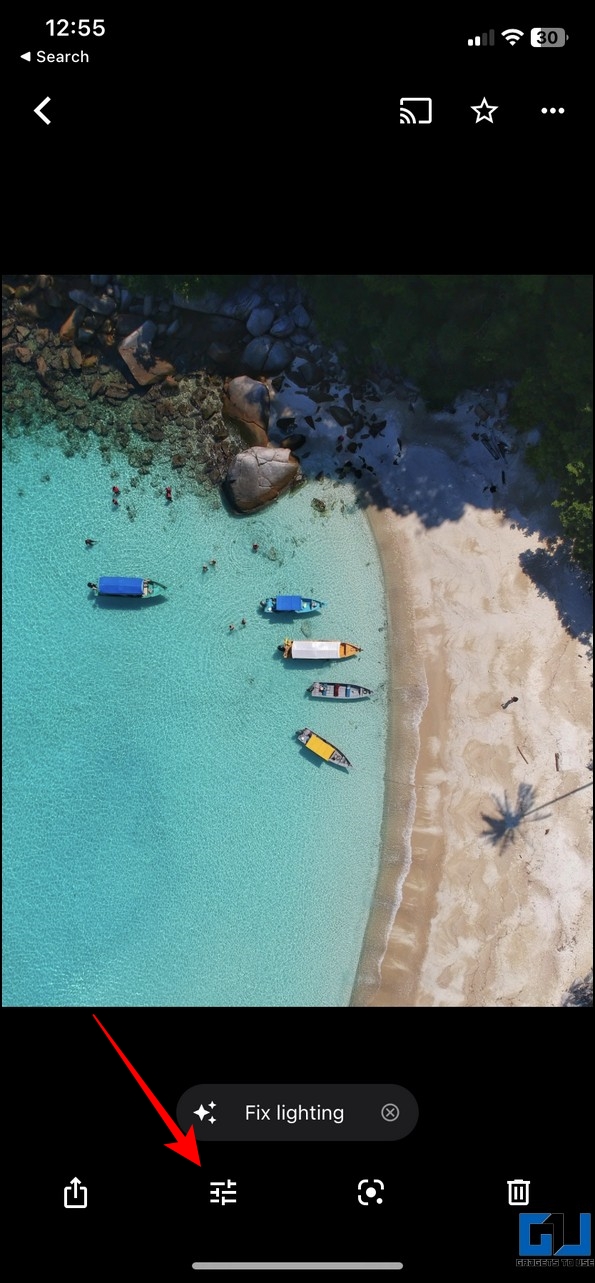
1. Install/Update the latest Google Photos app from the Apple App Store, and navigate to the image you want to fix.
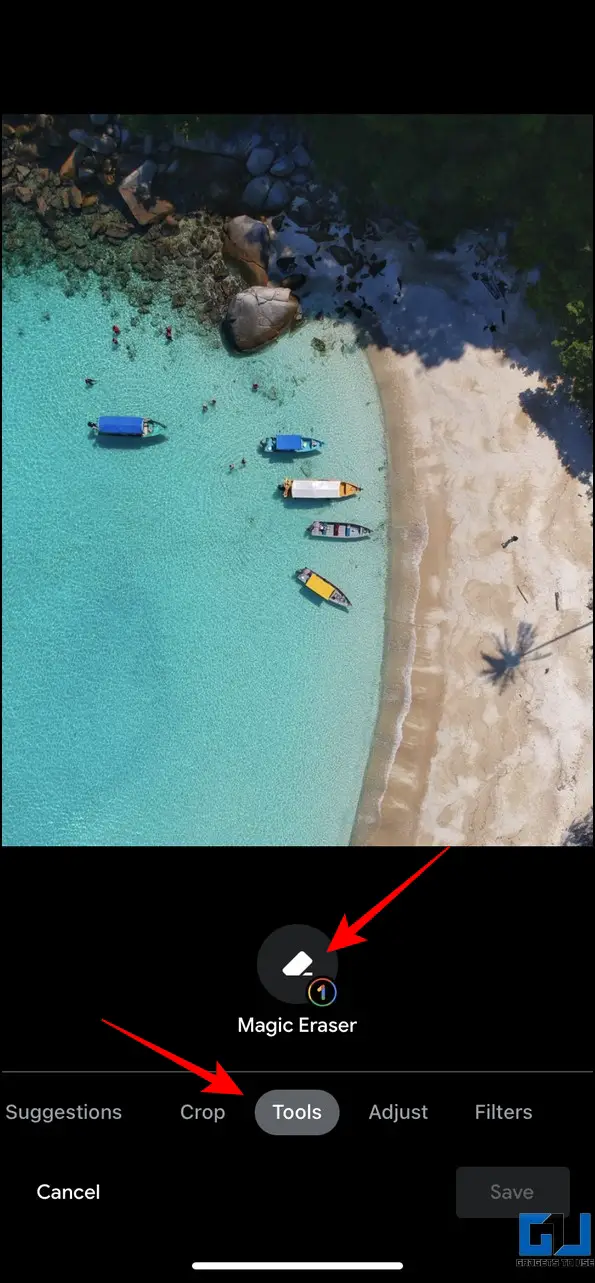
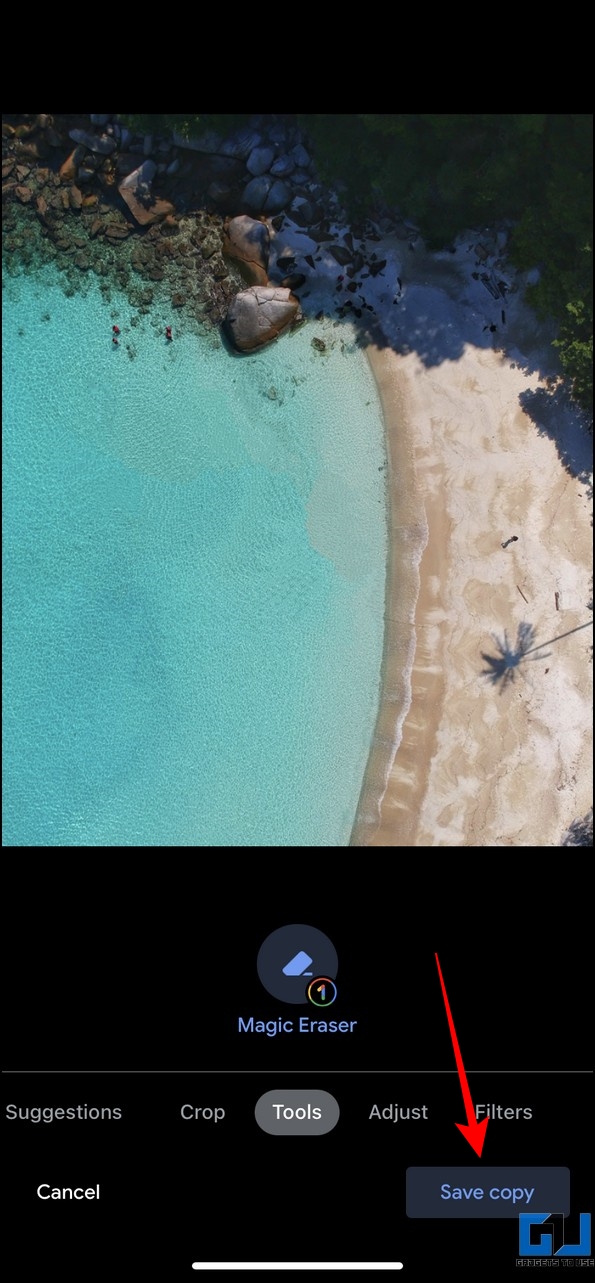
2. Next, press the Edit button and switch to the Tools tab to use the Magic Eraser feature.
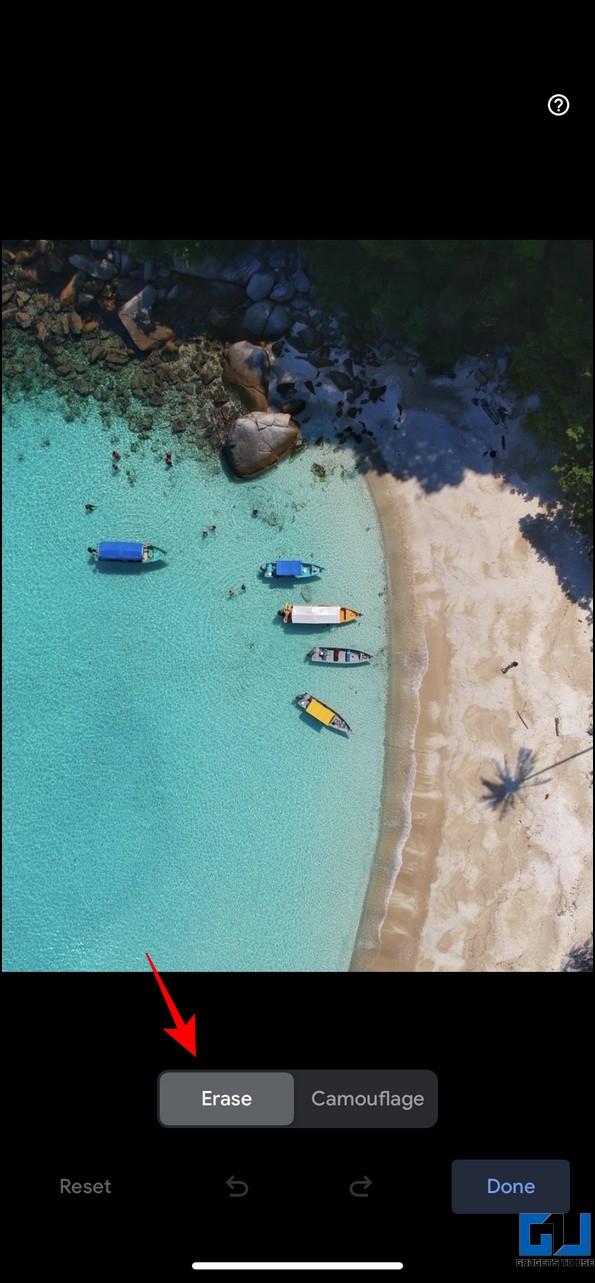
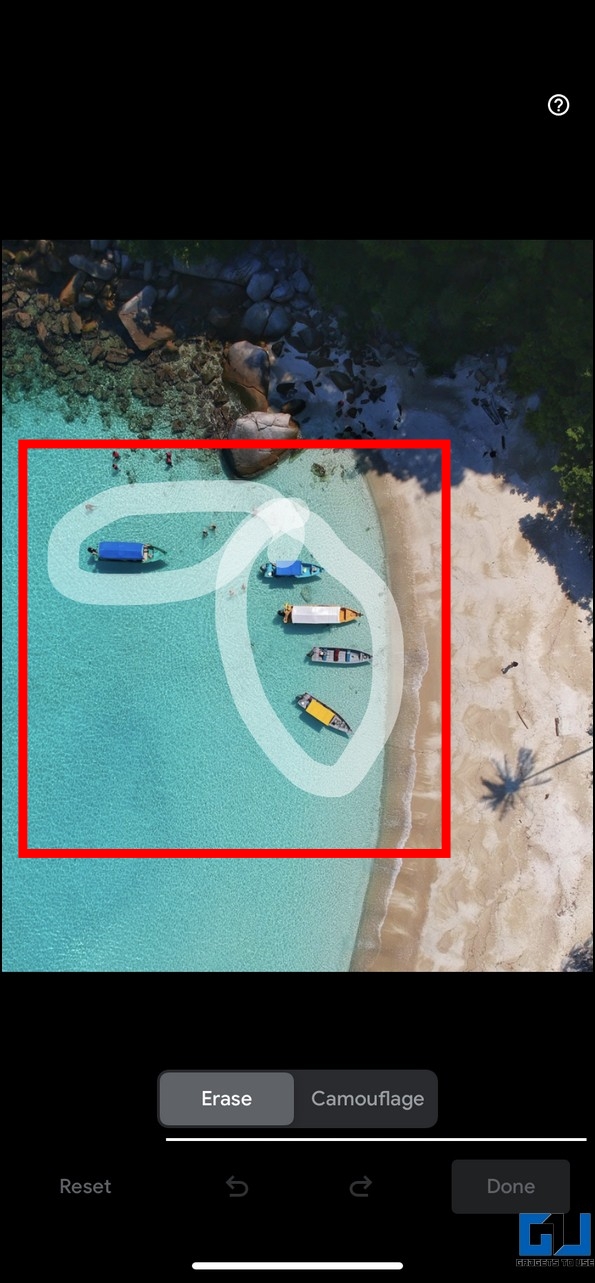
3. To erase the unnecessary objects, pick the Erase option and encircle or mark them to vanish. Alternatively, you can use the app’s suggestions to hide unnecessary objects in the photo.
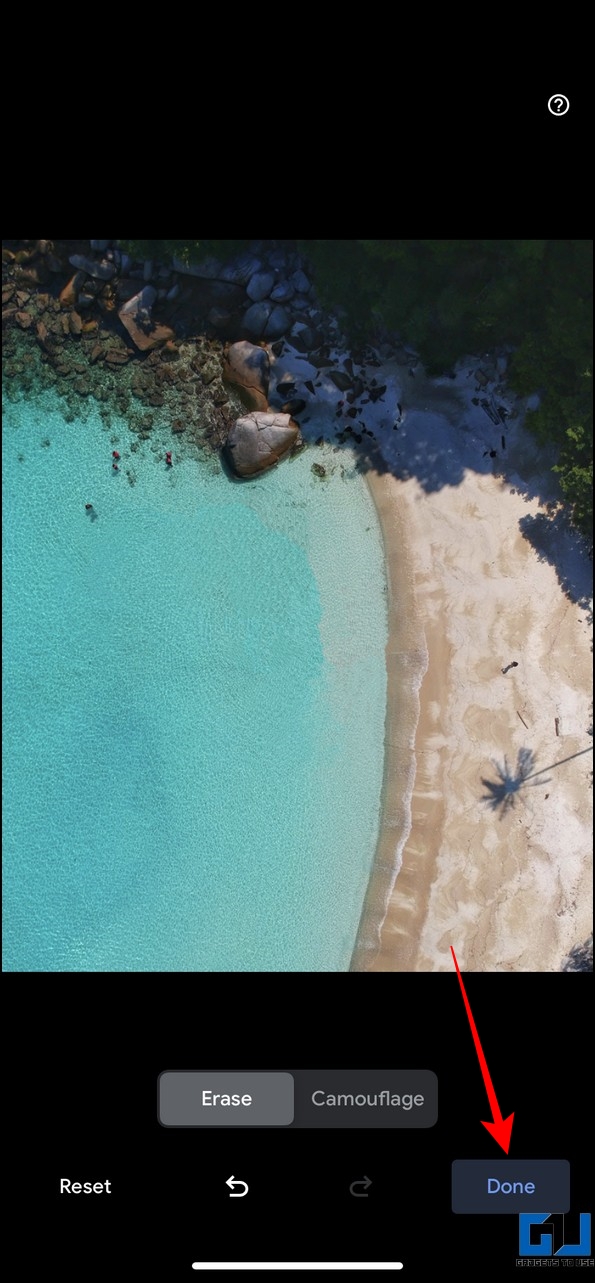
4. Once processed, the magic eraser tool will remove the marked objects like they never existed in your photo.
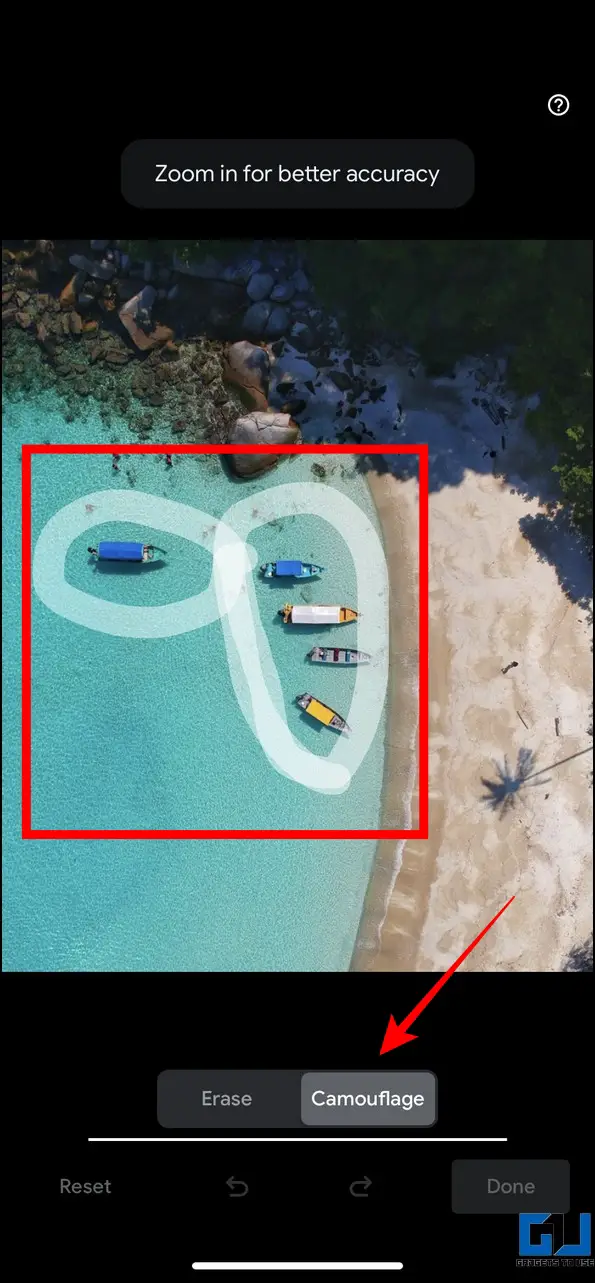
5. On the other hand, if you wish to blend in/ camouflage particular objects in your photos, so they don’t steal the subject’s attention, you can disguise them with the Camouflage option.
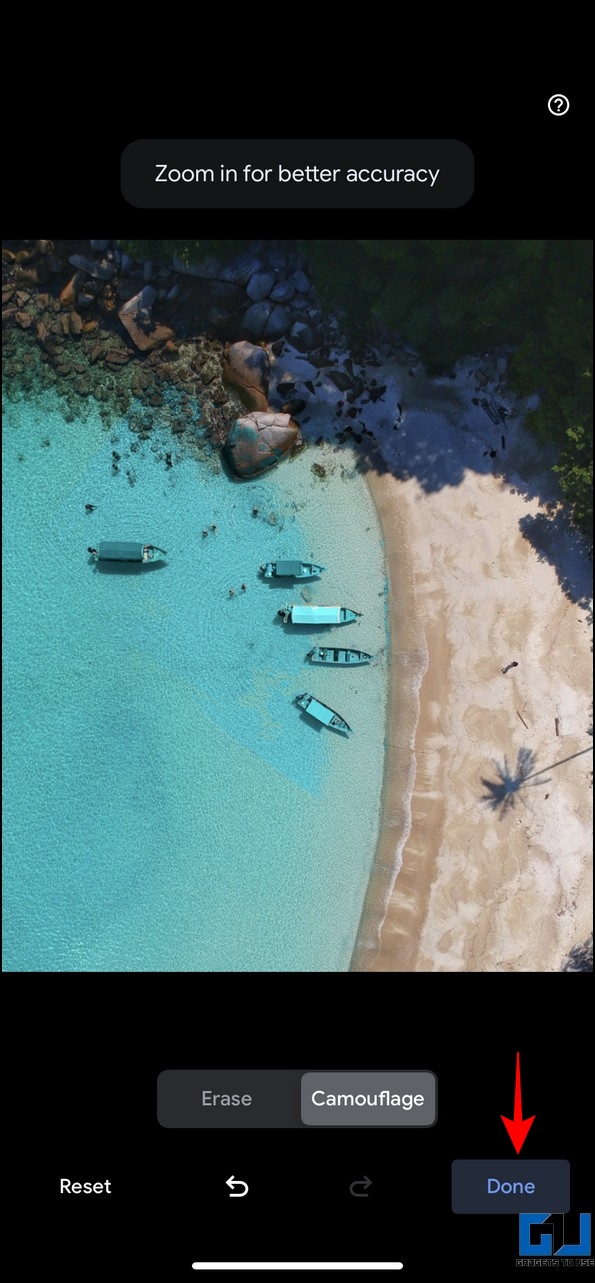
6. Once processed, the marked objects will be concealed in the image’s background.
7. Finally, press the Save Copy button to save a new copy of your processed image to Google Photos.
How to Use Google Photos Magic Eraser on iPad (or Can You?)
We tried using the Google Magic Eraser feature on our iPad, but unfortunately, it is currently unavailable for the Google Photos app on iPad (even with an active Google One subscription). You need to resort to third-party alternatives to use magic eraser on iPad.
Bonus: Remove Objects from Images without Google Photos
If you don’t wish to buy the Google One subscription but want to remove unwanted objects from your desired image, you can check our detailed explainer to remove unwanted photo objects on Android and iPhone.
FAQs
Q. How to Use Google’s Magic Eraser for Free on iPhone/iPad?
With an active Google One plan, you can use Google’s Magic Eraser app on your iPhone. Follow the steps mentioned above to do so.
Q. How to Use the Magic Eraser App in the Google Photos App?
A: Press the Edit button, switch to Tools, and select the Magic Eraser feature. For more details, check the steps mentioned above.
Q. Do You Need a Google One Subscription to Access the Magic Eraser Feature?
Yes, you must have a Google One subscription to experience the magic eraser feature inside the Google Photos app. However, if you have a Google Pixel 6 or 7 series phone, you can use Magic Eraser without subscribing to Google One.
Wrapping Up: Erase Objects from Images Like a Pro!
We hope this guide has helped you to enable and use the Google Photos Magic Eraser feature on your iPhone or iPad. If you find it useful, forward this read to your iPhone friends. Check the below links for more exciting walkthroughs, and stay tuned to GadgetsToUse for more such reads.
You might be interested in the following:
- 3 Ways to Remove Animoji Video Background on iPhone
- 7 Ways to Remove Background from Images on Mac
- 6 Ways to Convert Live Photos to Still Images on iPhone
- 3 Ways to Search using Text inside Image on Android and PC
You can also follow us for instant tech news at Google News or for tips and tricks, smartphones & gadgets reviews, join GadgetsToUse Telegram Group, or for the latest review videos subscribe GadgetsToUse Youtube Channel.
