

Quick Answer
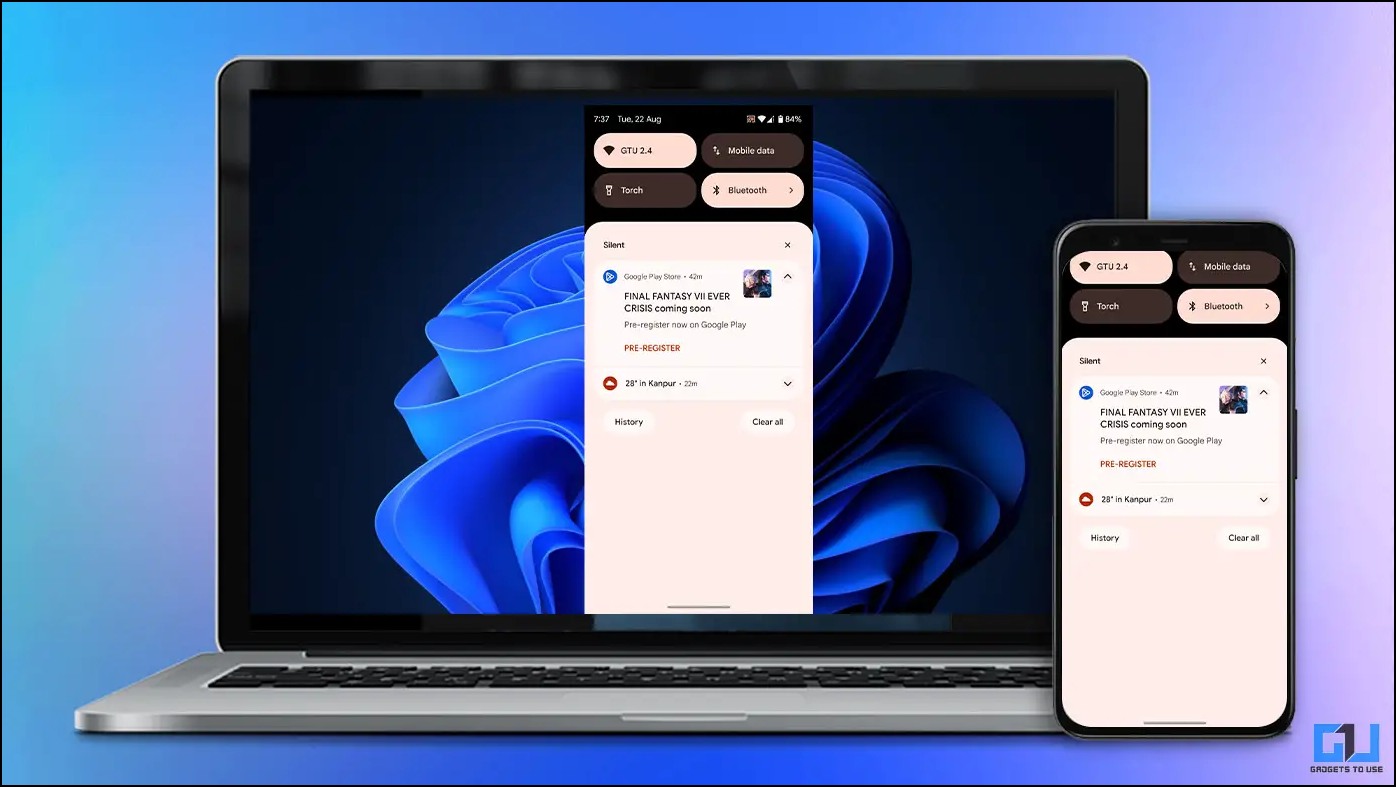
- Sharing the display of your Android smartphone to your Windows PC can come in quite helpful, especially to view your nostalgic photos and videos or present a document stored on your phone.
- Given it is a wireless connection, there is a bit of a delay while performing specific actions.
- Scrcpy is a free app that allows screen mirroring from Android to Windows or Mac over a wired connection.
Sharing the display of your Android smartphone to your Windows PC can come in quite helpful, especially to view your nostalgic photos and videos or present a document stored on your phone. Given the options to mirror your phone’s screen with or without an app, we discussed both ways in this article. Let us look at how you can mirror your Android phone’s display on Windows 10/11. Meanwhile, you can also learn to mirror your phone to LG WebOS TV.
How to Mirror Android Phone Display on Windows 10/11?
There are several ways to mirror your Android phone’s screen on your Windows PC’s monitor. However, for this article, we will keep it simple and discuss three ways to do the same. This includes wired and wireless methods that might or might not require using a third-party app.
Method 1 – Cast Android Phone Display to Windows
The older Windows version did not support Miracast, missing out on wireless mirroring. But that changed with the release of Windows 8, as it came with Miracast support. So, that means you can easily share the screen from your phone to your desktop computer without requiring any third-party app. The process is relatively seamless and does not require any wires.
Step 1: Configure Window for Wireless Display
Before we look at the steps to cast, we must install the Wireless Display plugin in our system. This allows us to cast or mirror other devices to the Windows PC. Here are the steps to install Wireless Display on Windows 10/11.
1. Open Windows Settings using the Windows key + I keyboard shortcut.
2. Go to the Apps section using the sidebar menu.
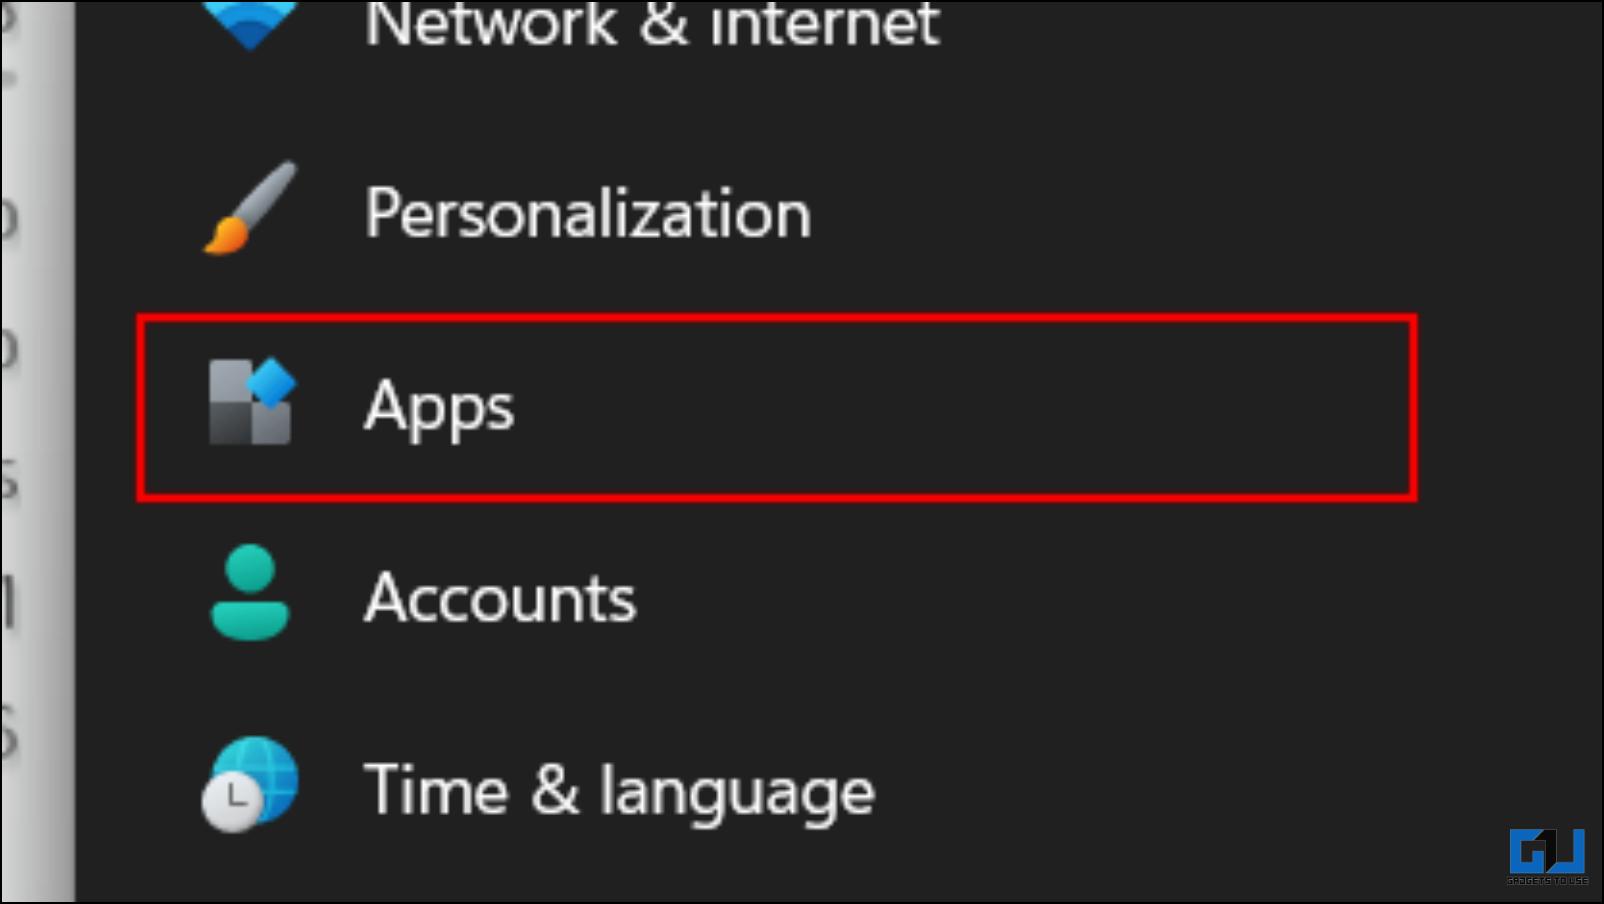
3. Click on the Optional Features.

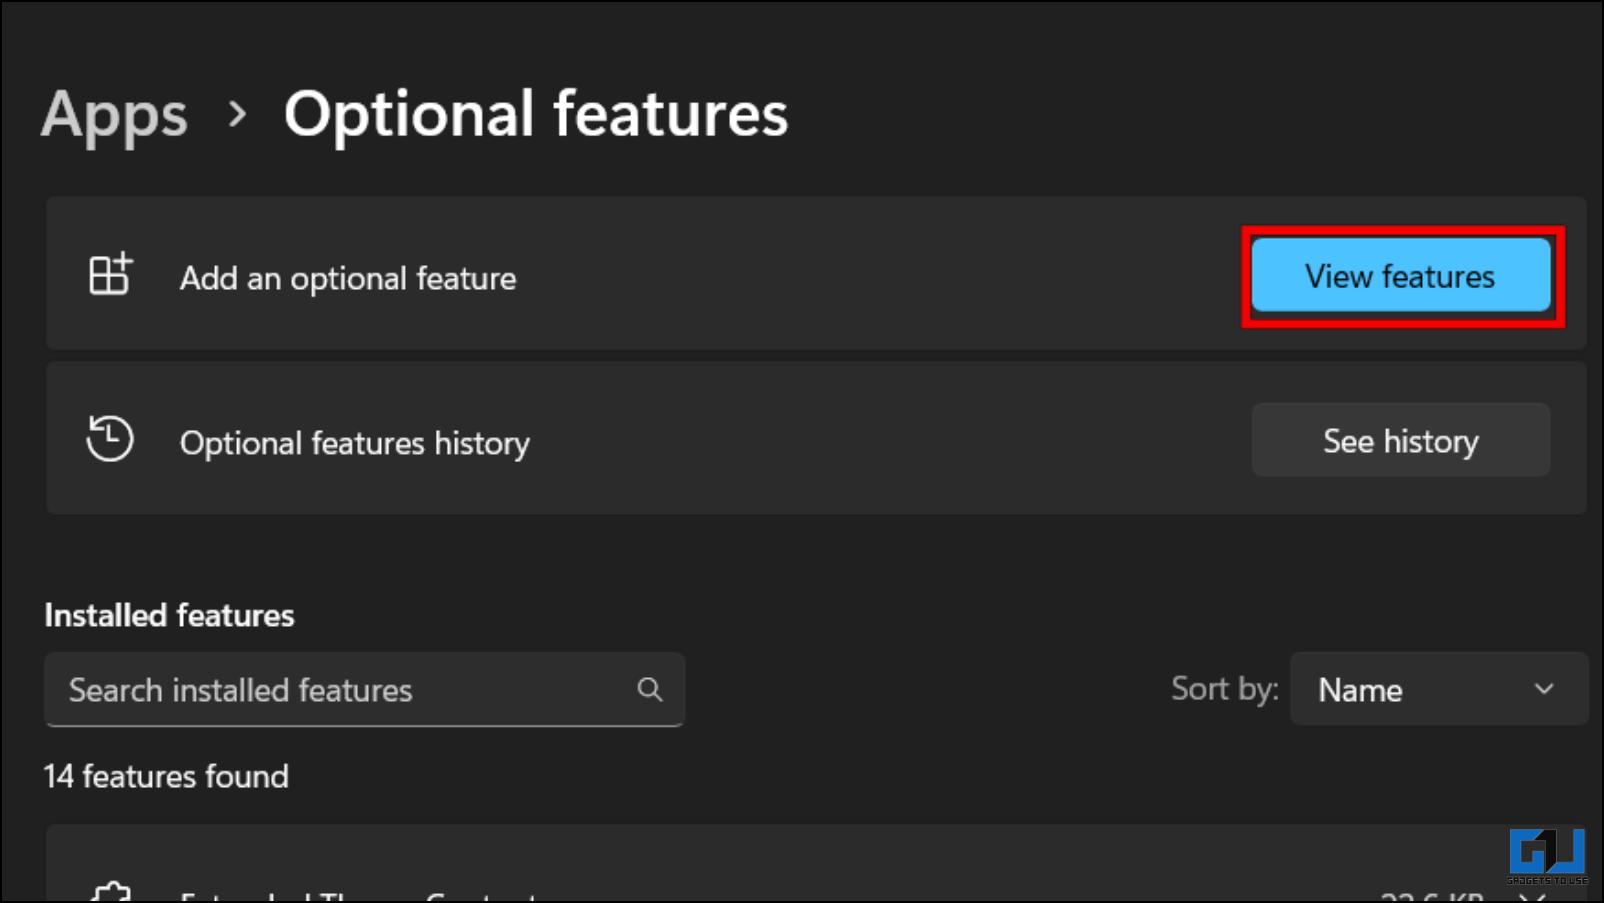
4. Here, click on View Features next to Add an optional feature.
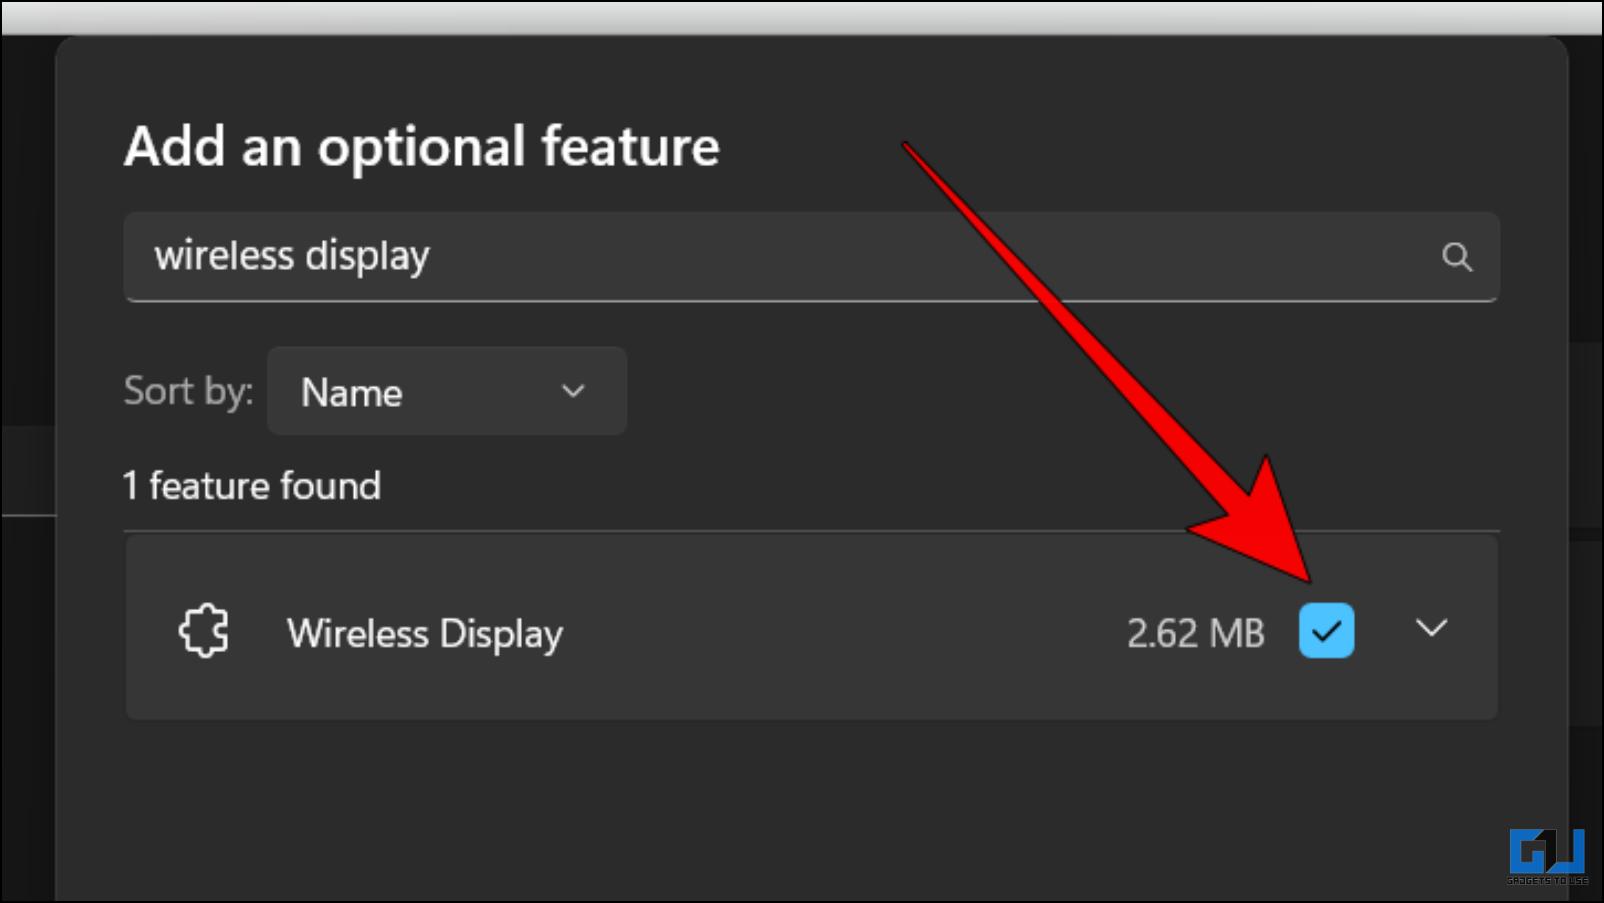
5. Using the search bar above, look for Wireless Display.
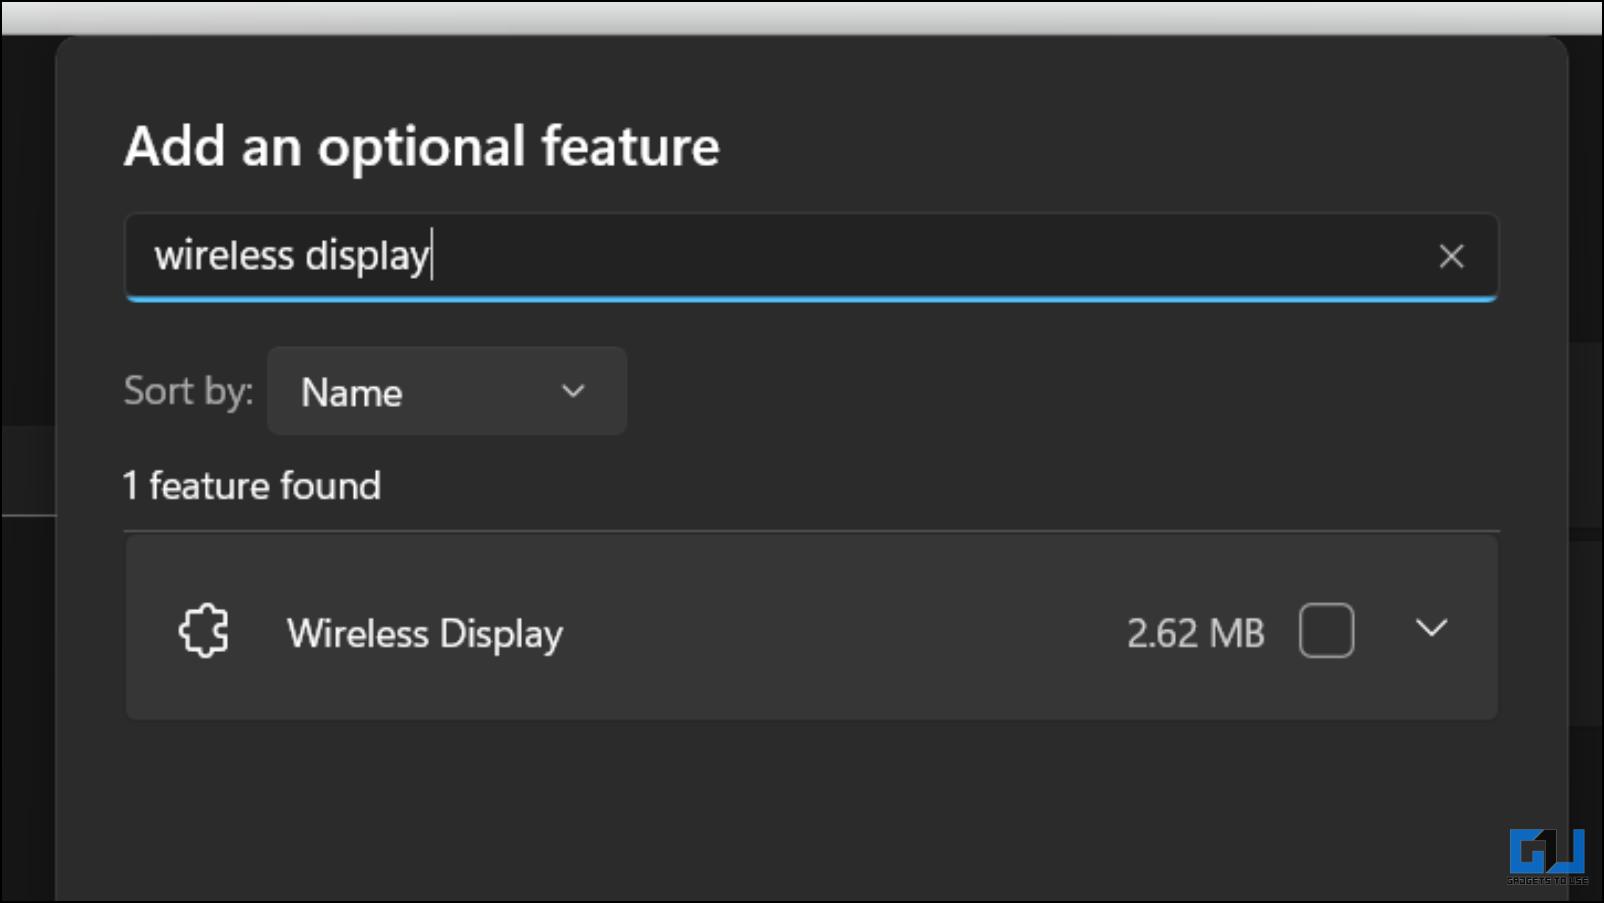
7. Tick the box next to the Wireless Display option, followed by Next.
This will start installing the plugin on your system. Once installed, restart your computer.
Step 2: Enable Project This PC on Windows
After installing Wireless Display, let’s move on to the next step, i.e., enabling the Project on this PC. We need to make some minor adjustments mentioned below before we start mirroring.
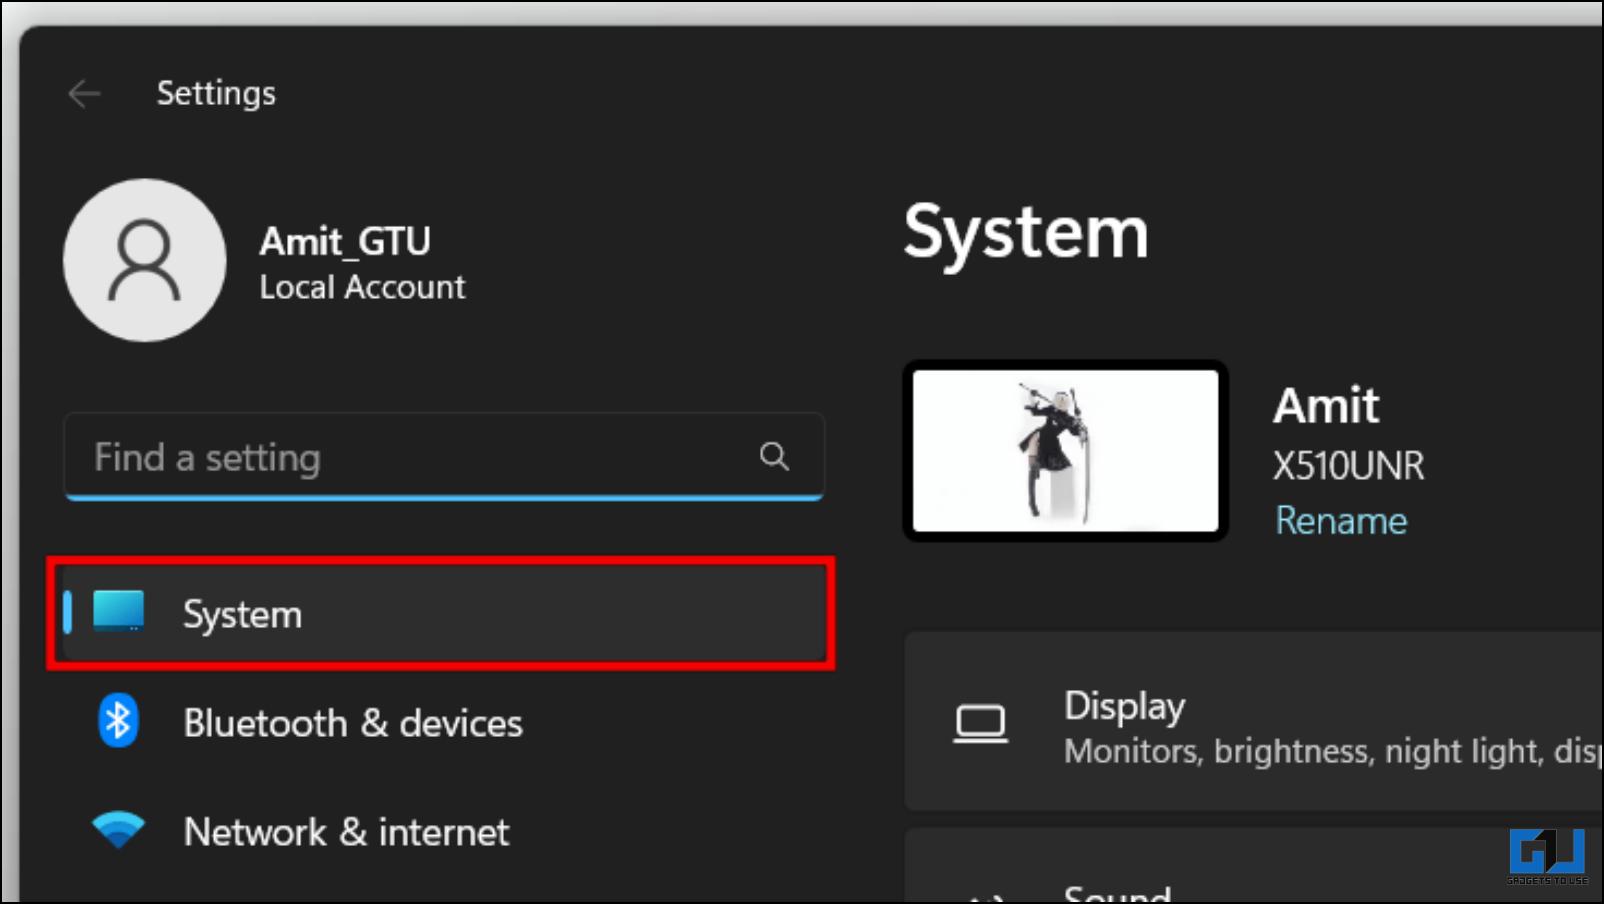
1. On Windows Settings, go to the System section.
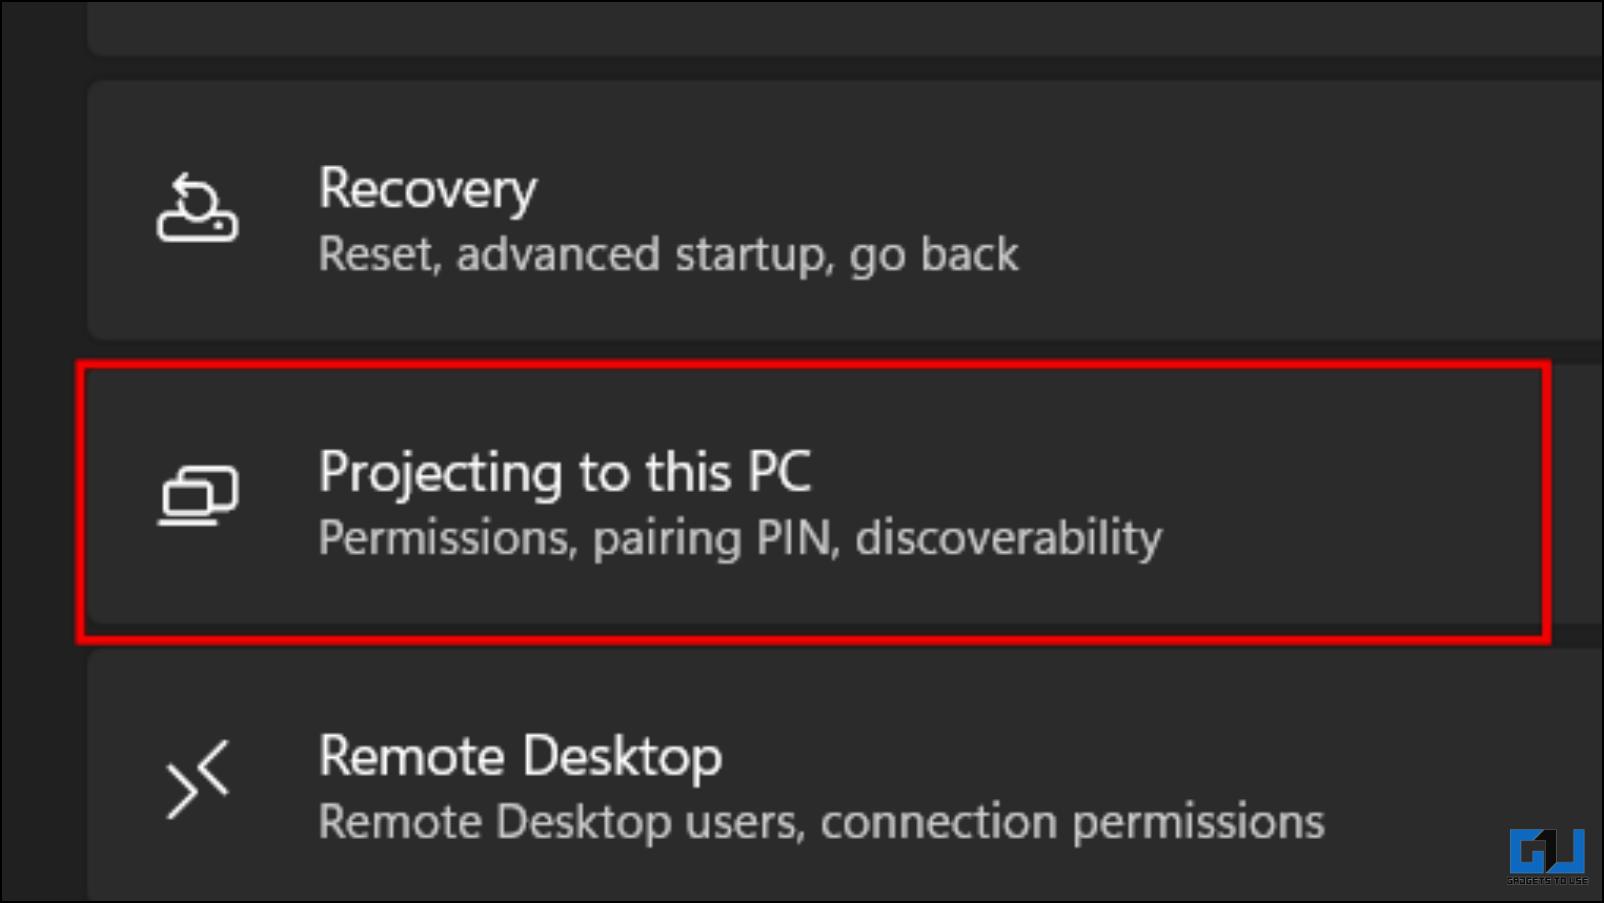
2. Scroll down and click on Projecting this PC.
3. Here, change the following settings as shown below.
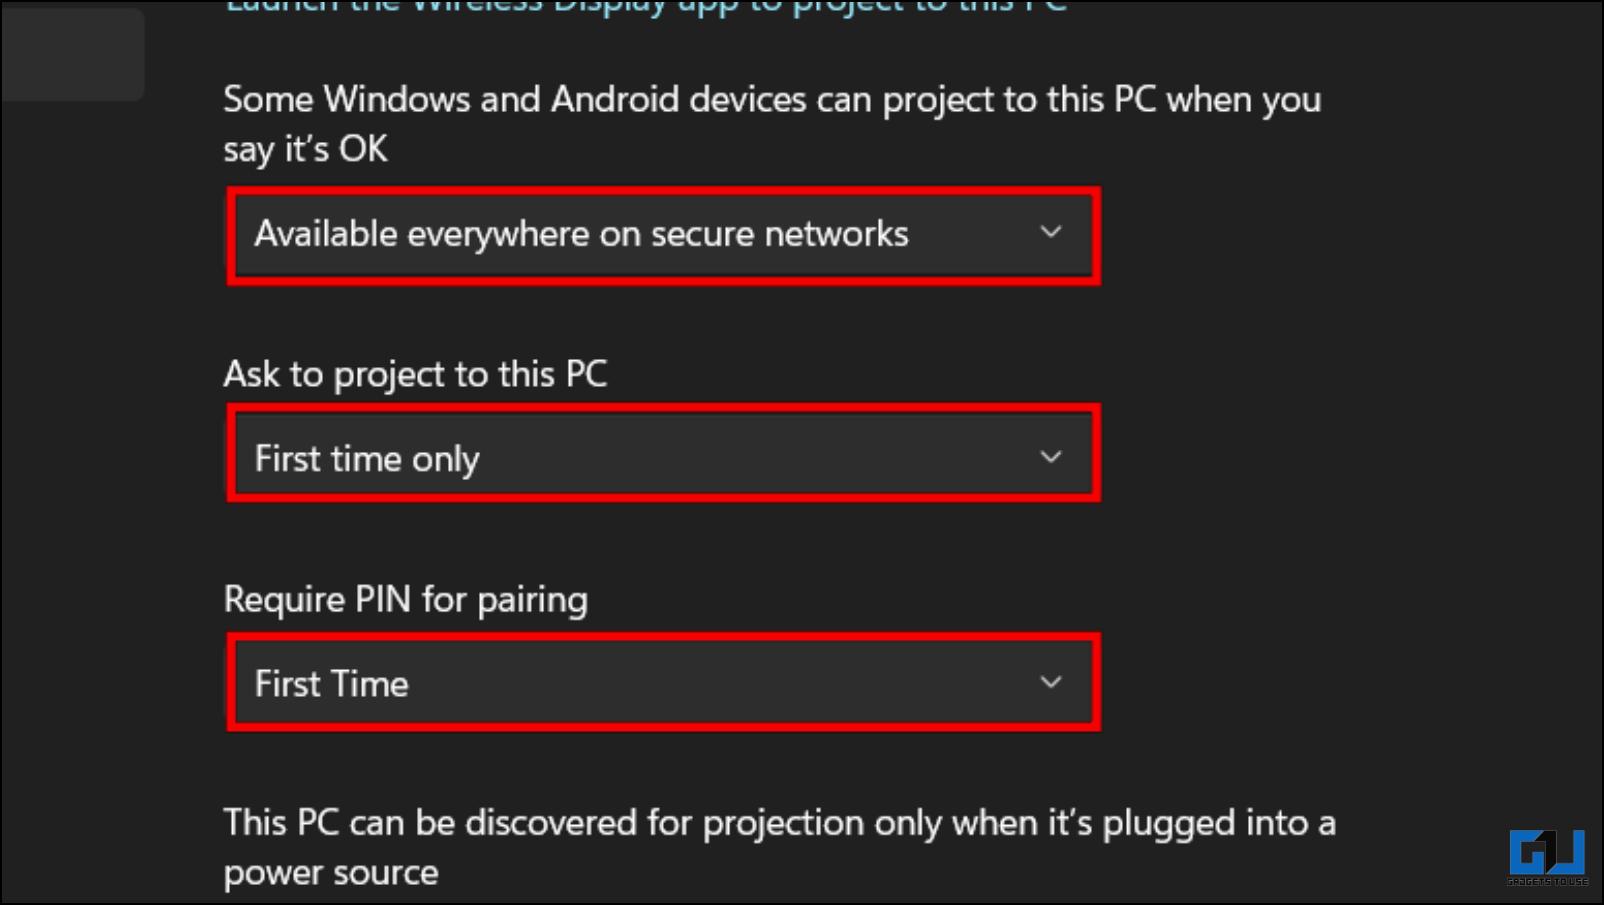
4. Next, click on Launch the Wireless Display app to project to this PC.
You should now see a blue screen stating your device is ready for wireless connection. Now, we can move on to connecting the Android smartphone.
Step 3: Setup and Connect Your Android Smartphone
We must set up our Android devices for the next step to ensure they connect with the Windows system properly. Here are the steps to do so.
1. Go to the Settings app on your phone.
2. Tap on Connected Devices.
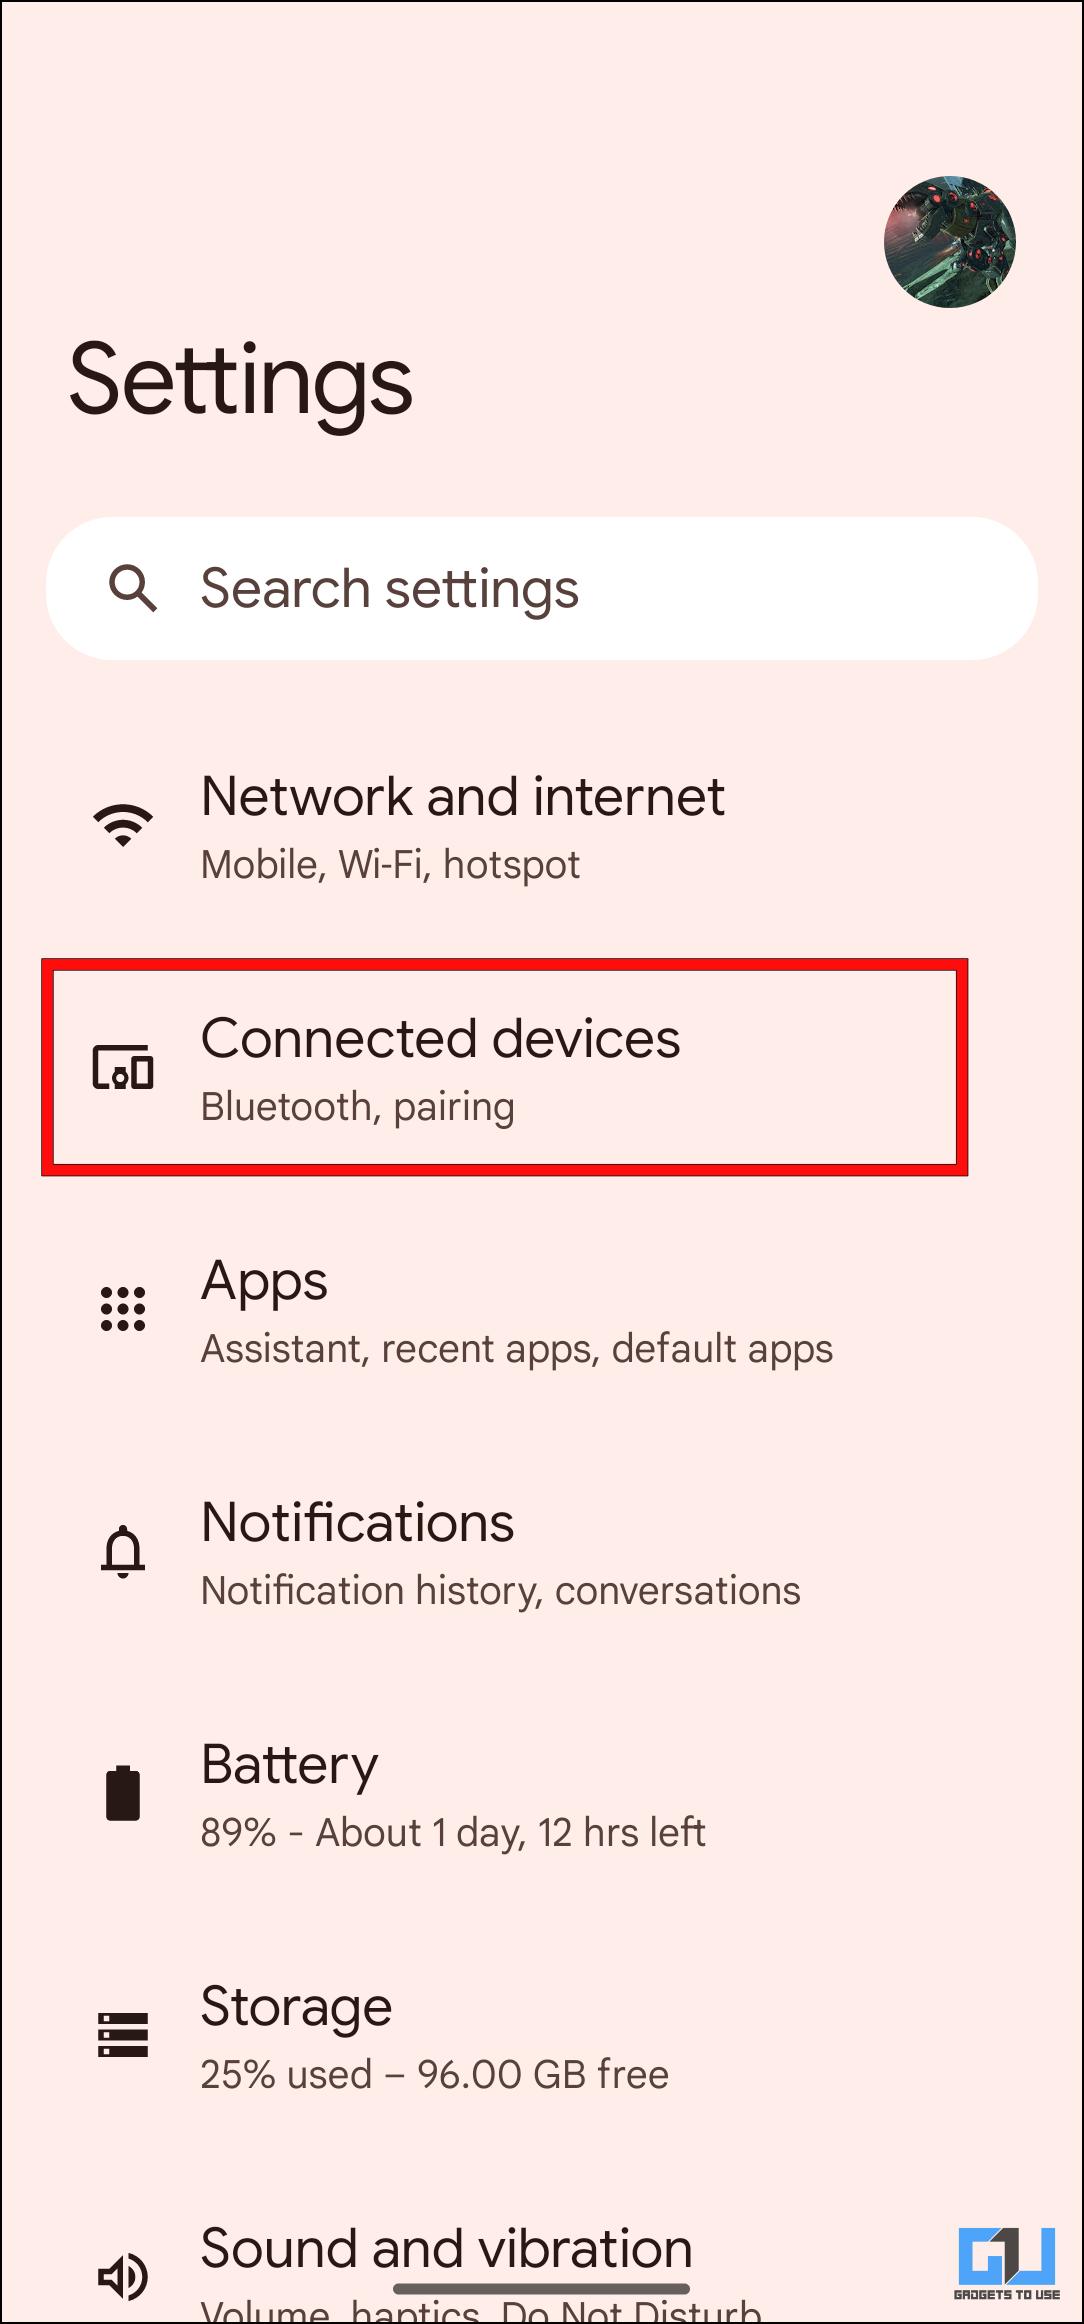
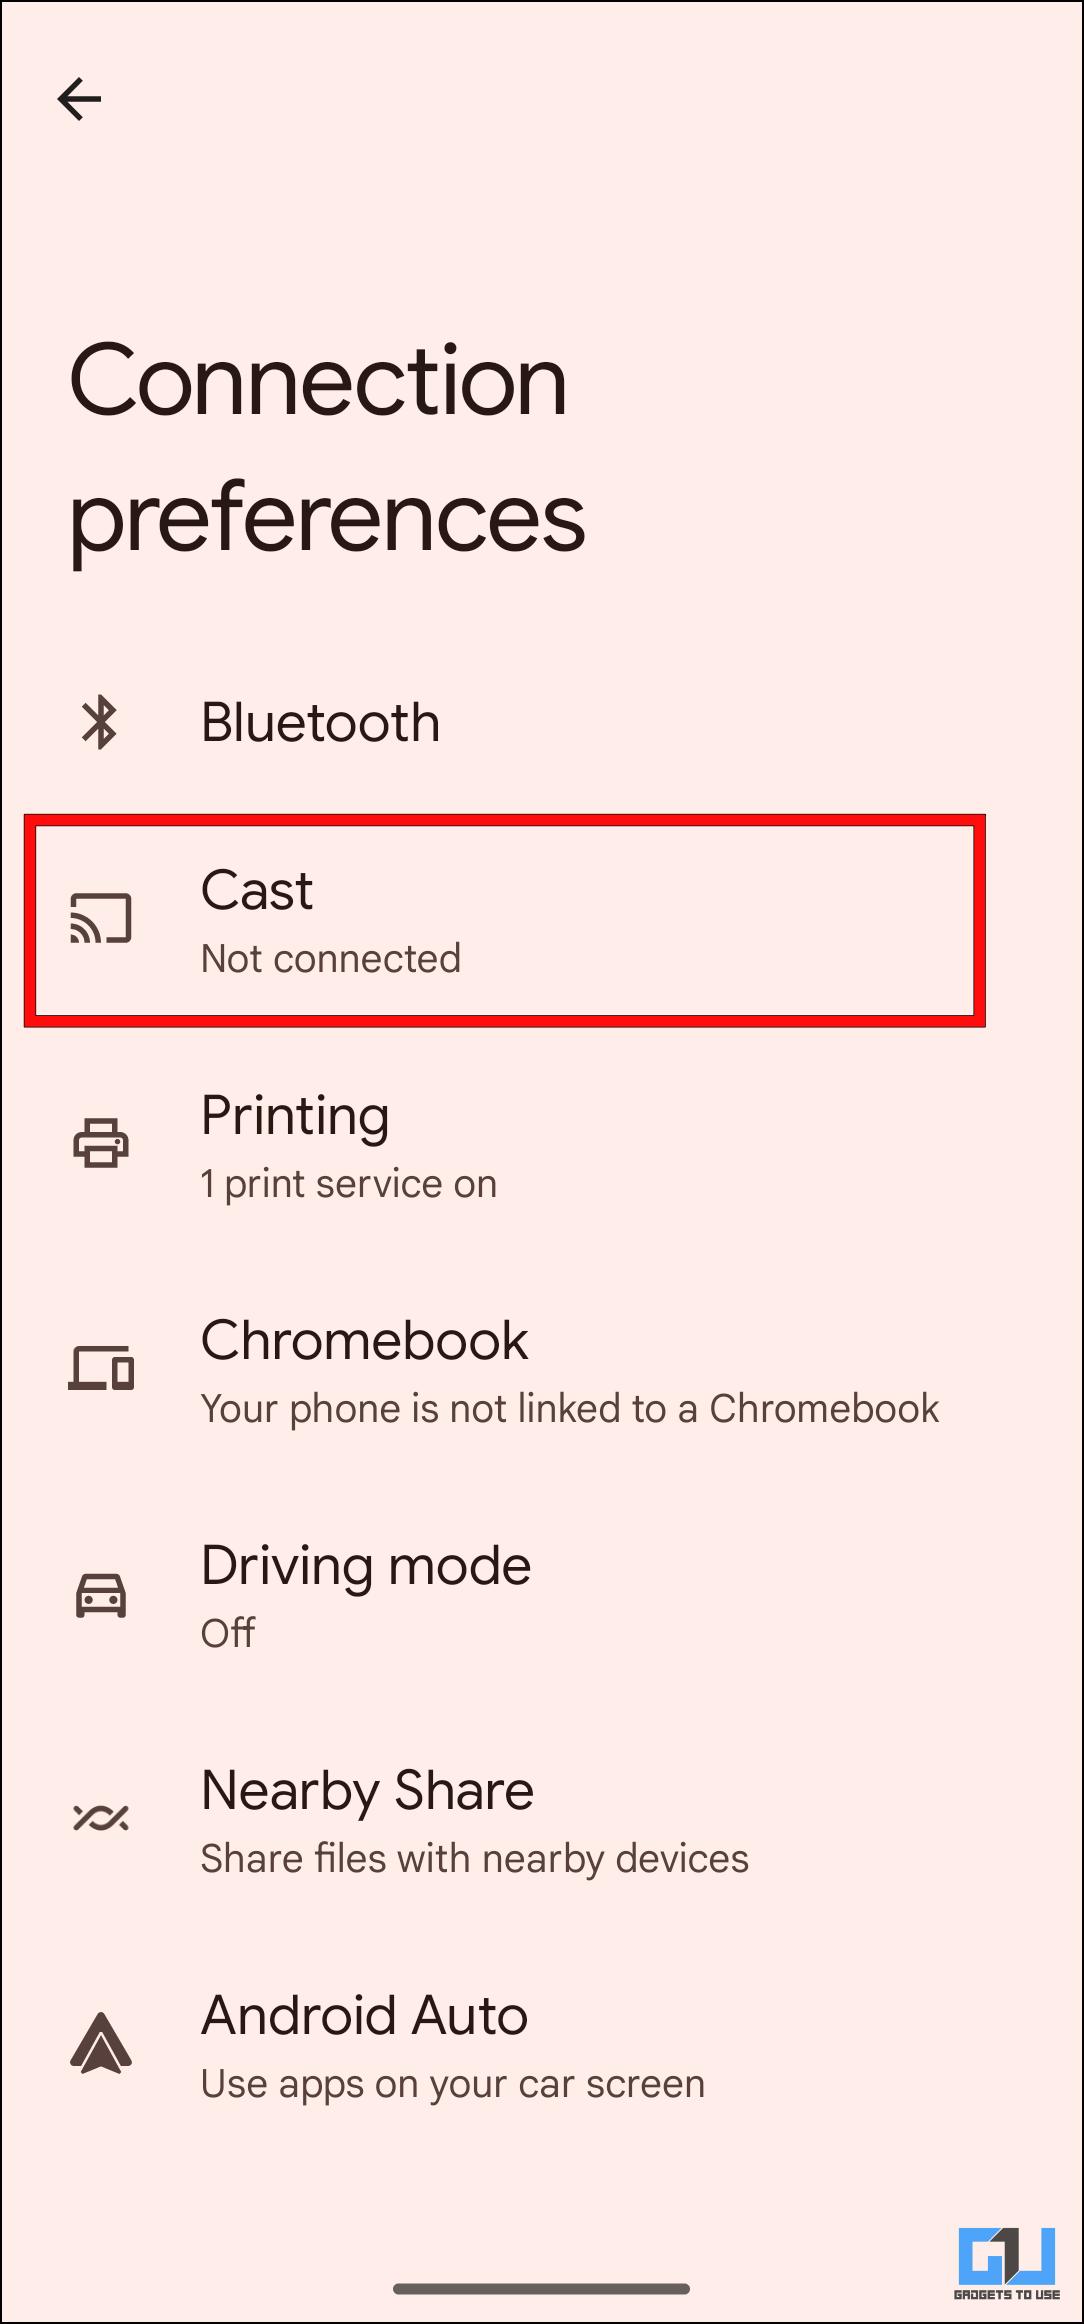
3. Then click on Connection preferences.
4. Click on the Cast option.
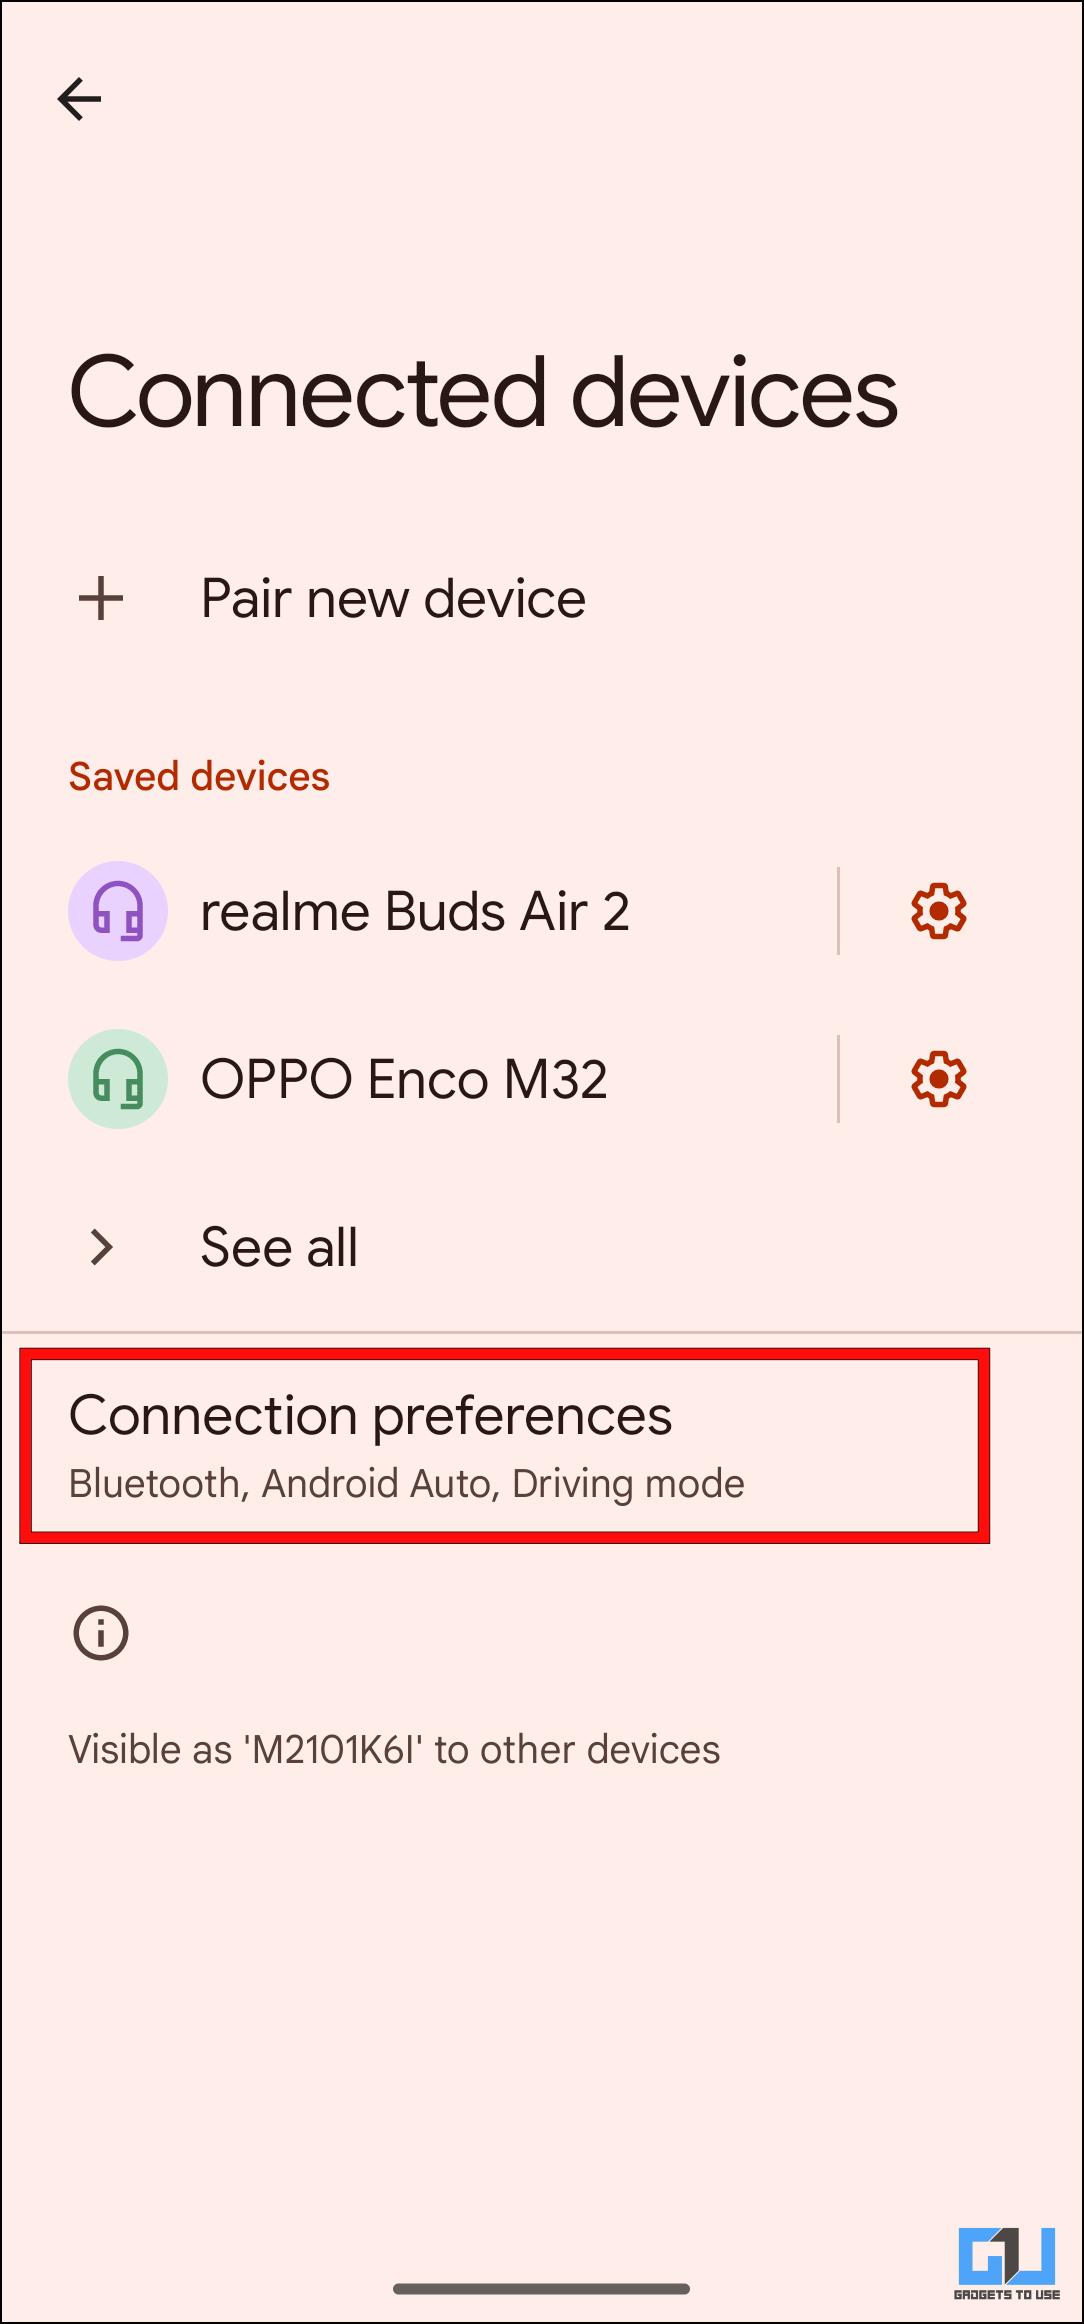
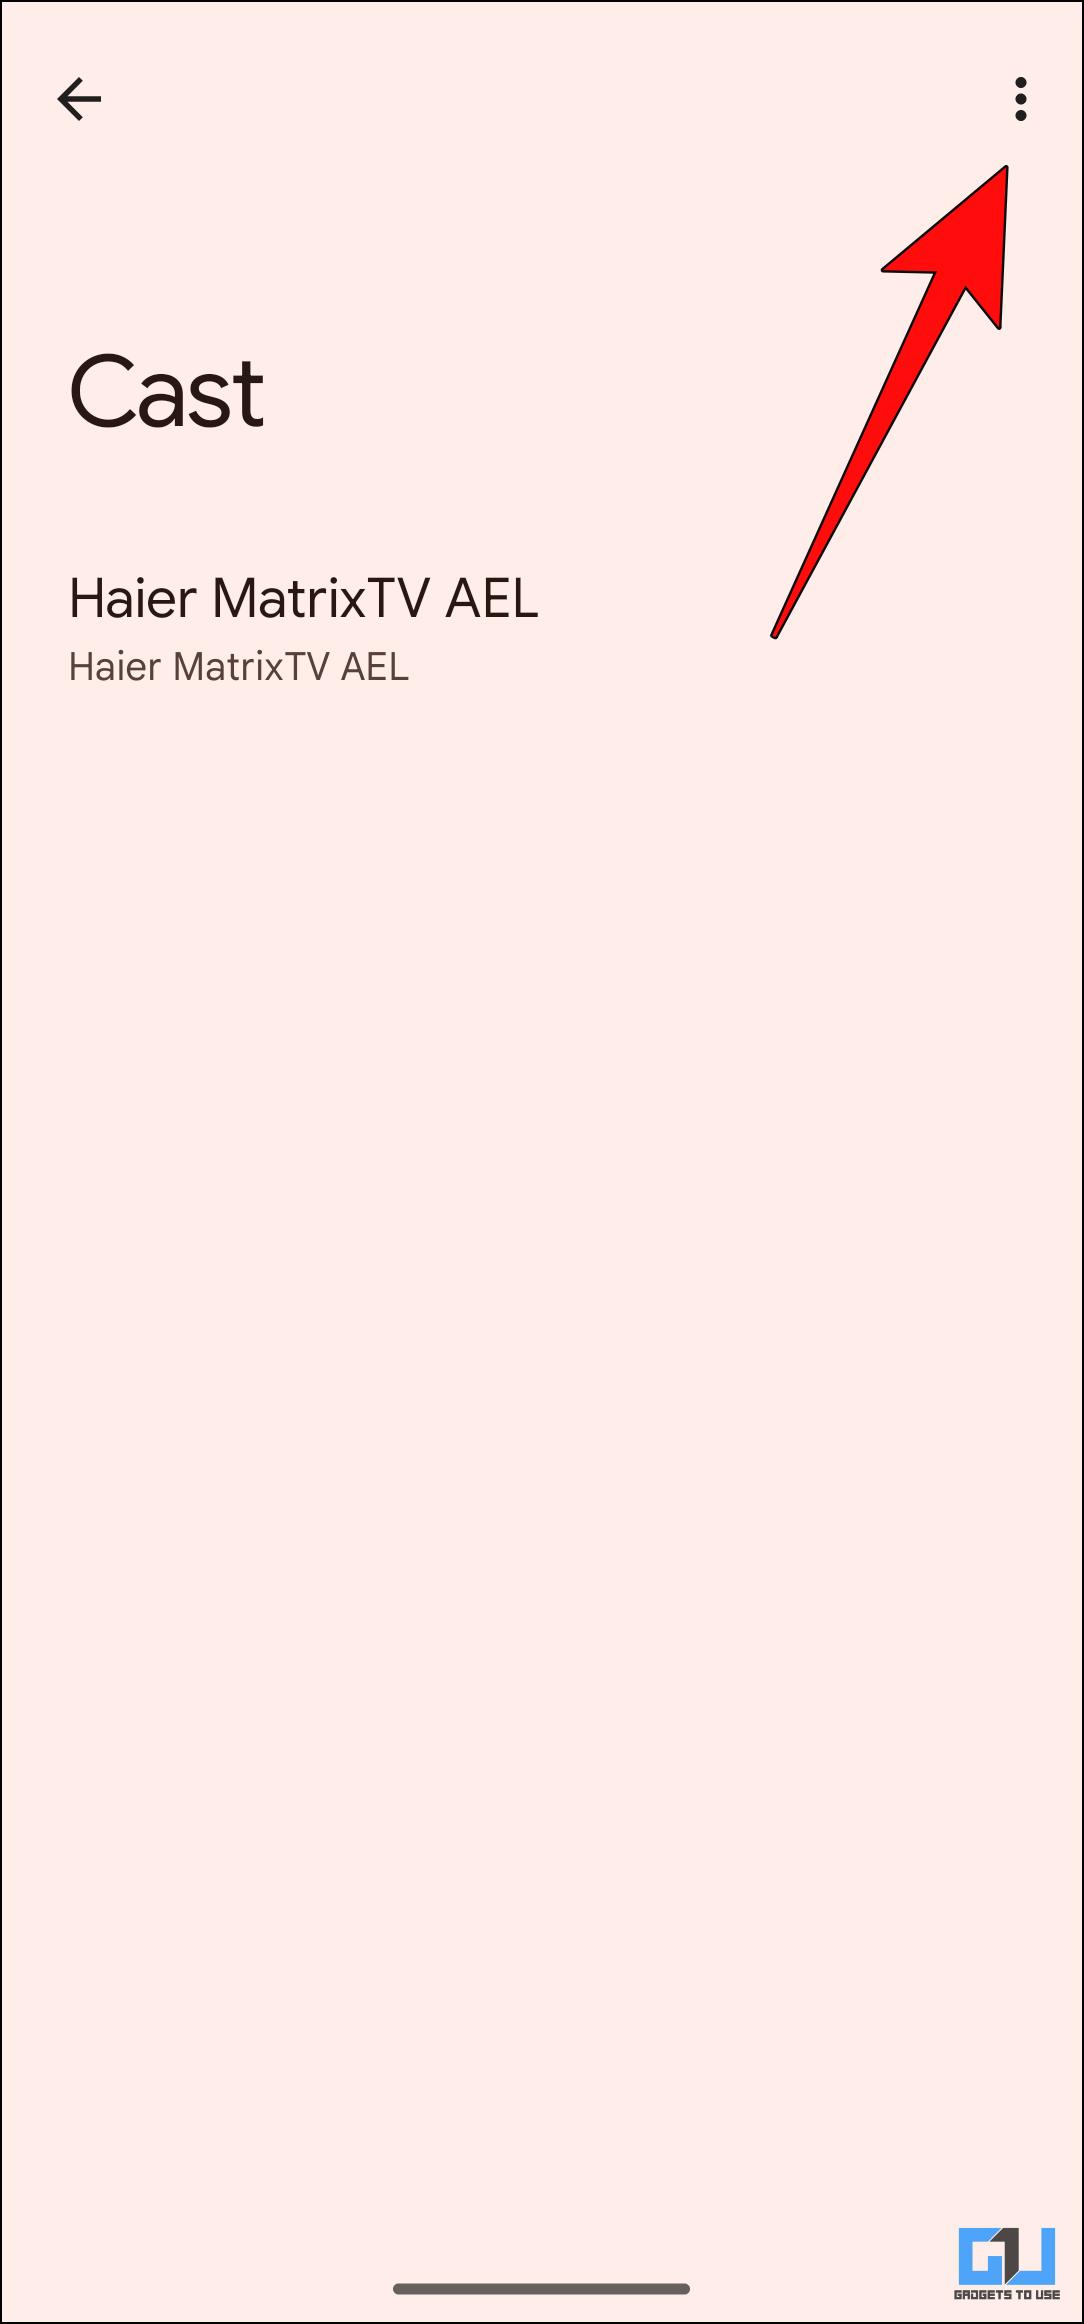
5. Tap on the three-dot menu in the top right corner.
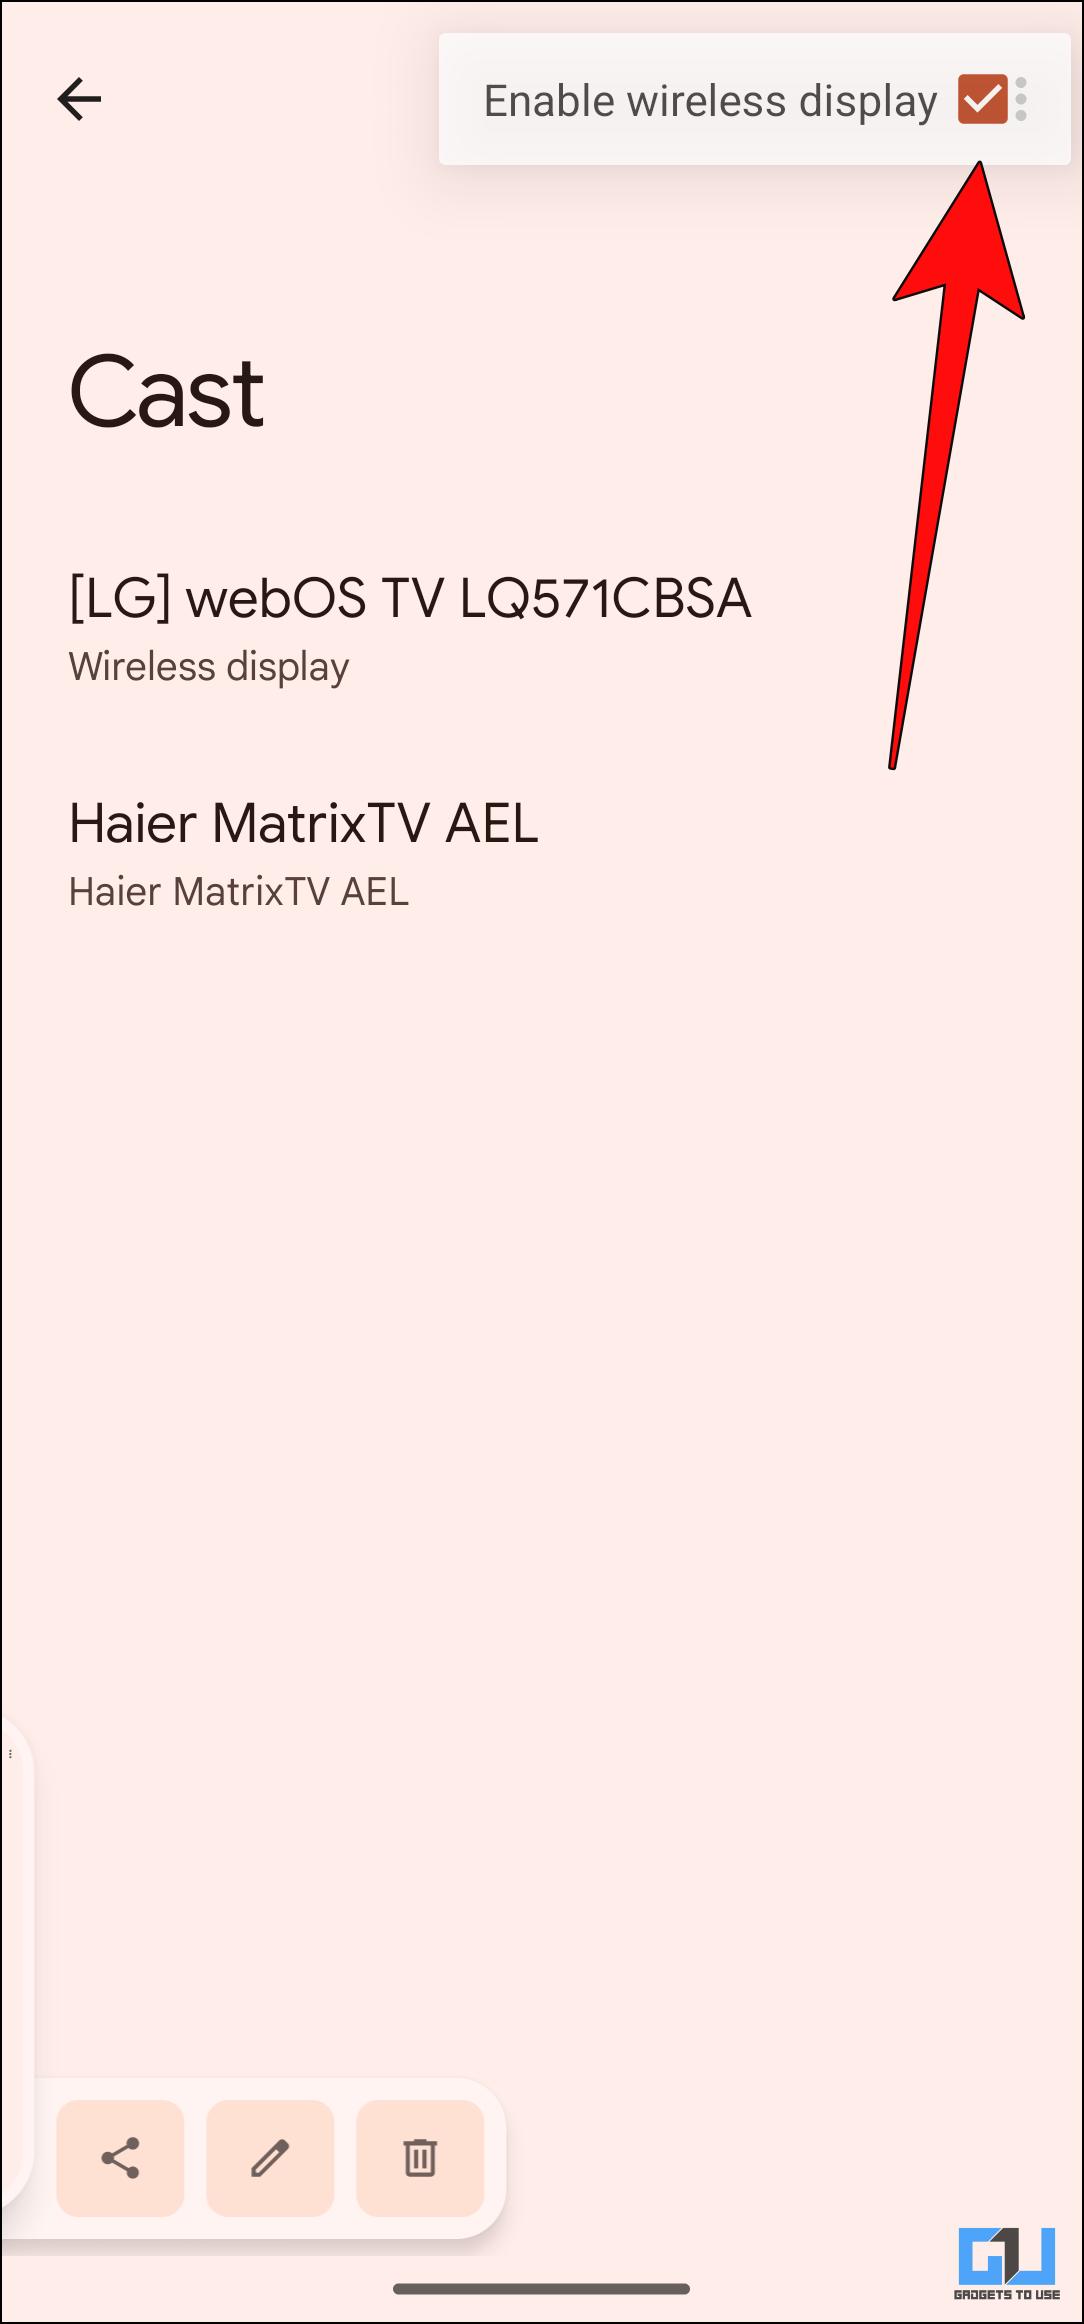
6. Tick the box next to Enable wireless display. Your device should now display available devices to cast.
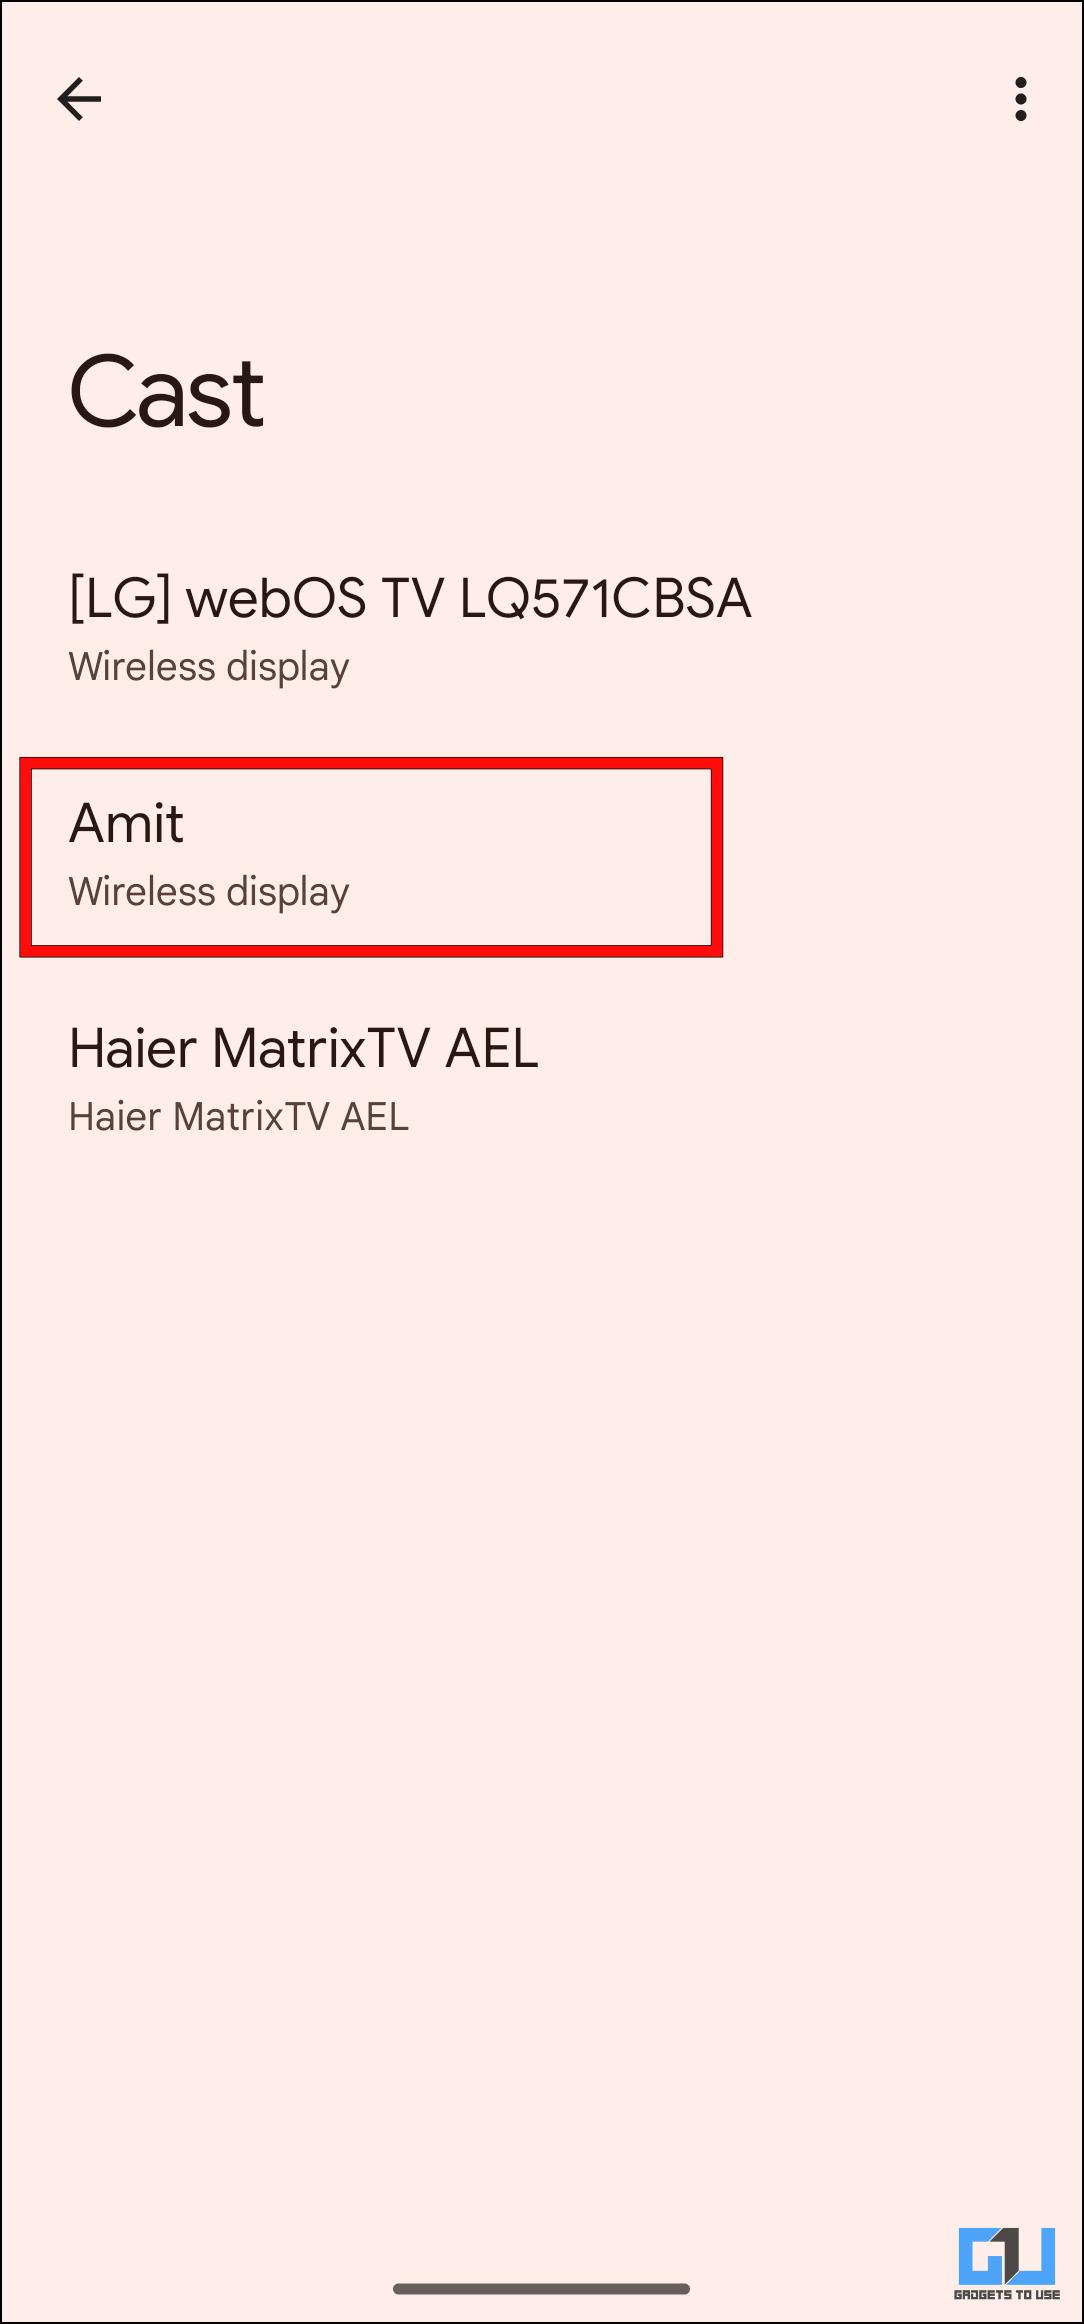
7. Select your Windows PC from the list.
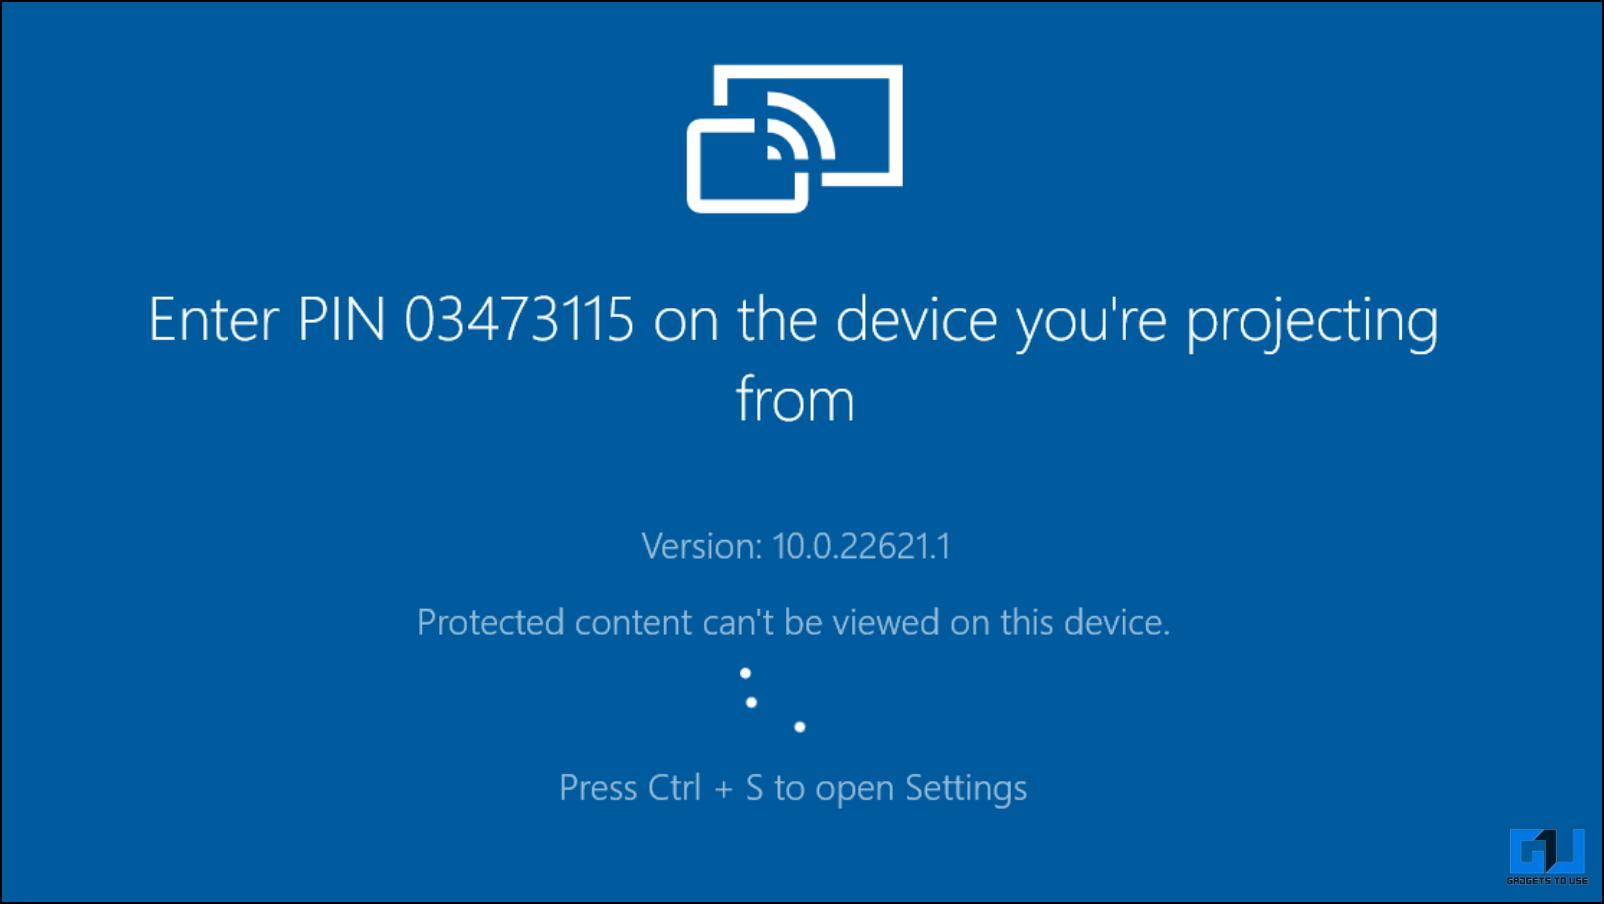
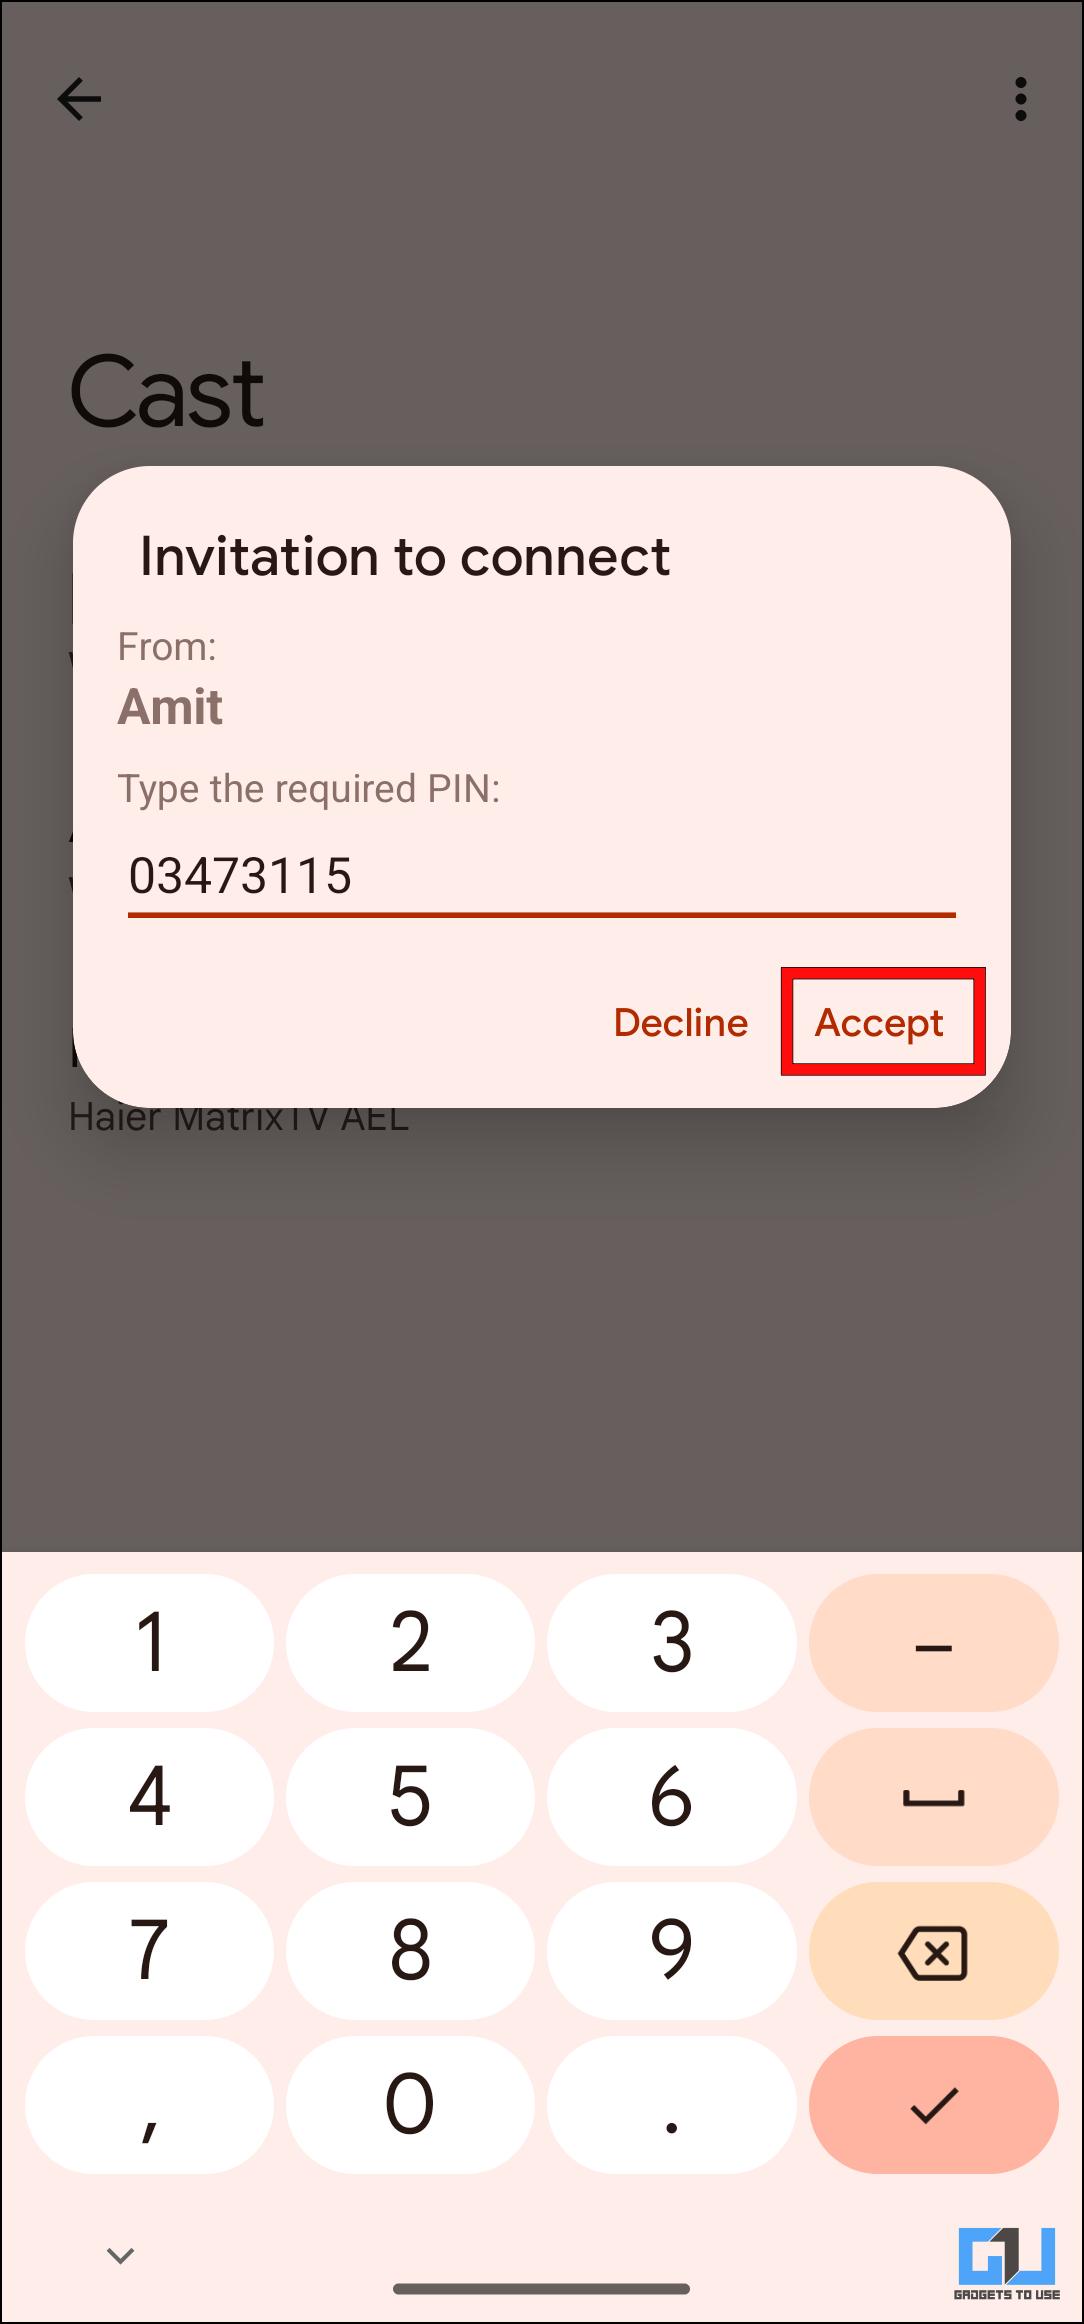
Your smartphone will now ask for an eight-digit PIN.
8. Enter the code displayed on your Windows computer and click on Accept.
Your phone’s display should be mirrored on your computer’s large display. Given it is a wireless connection, there is a bit of a delay while performing specific actions. But it is a good official way to mirror the display of your Android smartphone.
Method 2 – Download Scrcpy to Mirror Android on Windows (Wired)
Scrcpy is a free app that allows screen mirroring from Android to Windows or Mac over a wired connection. It works by utilizing a TCP/IP protocol over a USB connection. The best part about this method is that there is less latency than the wireless option. Though this method is a bit involved, we have broken it down into simple steps to help you.
Step 1: Enable USB Debugging on Android
To use Scrcpy, you must first enable USB debugging on your Android smartphone. To do this, follow these steps.
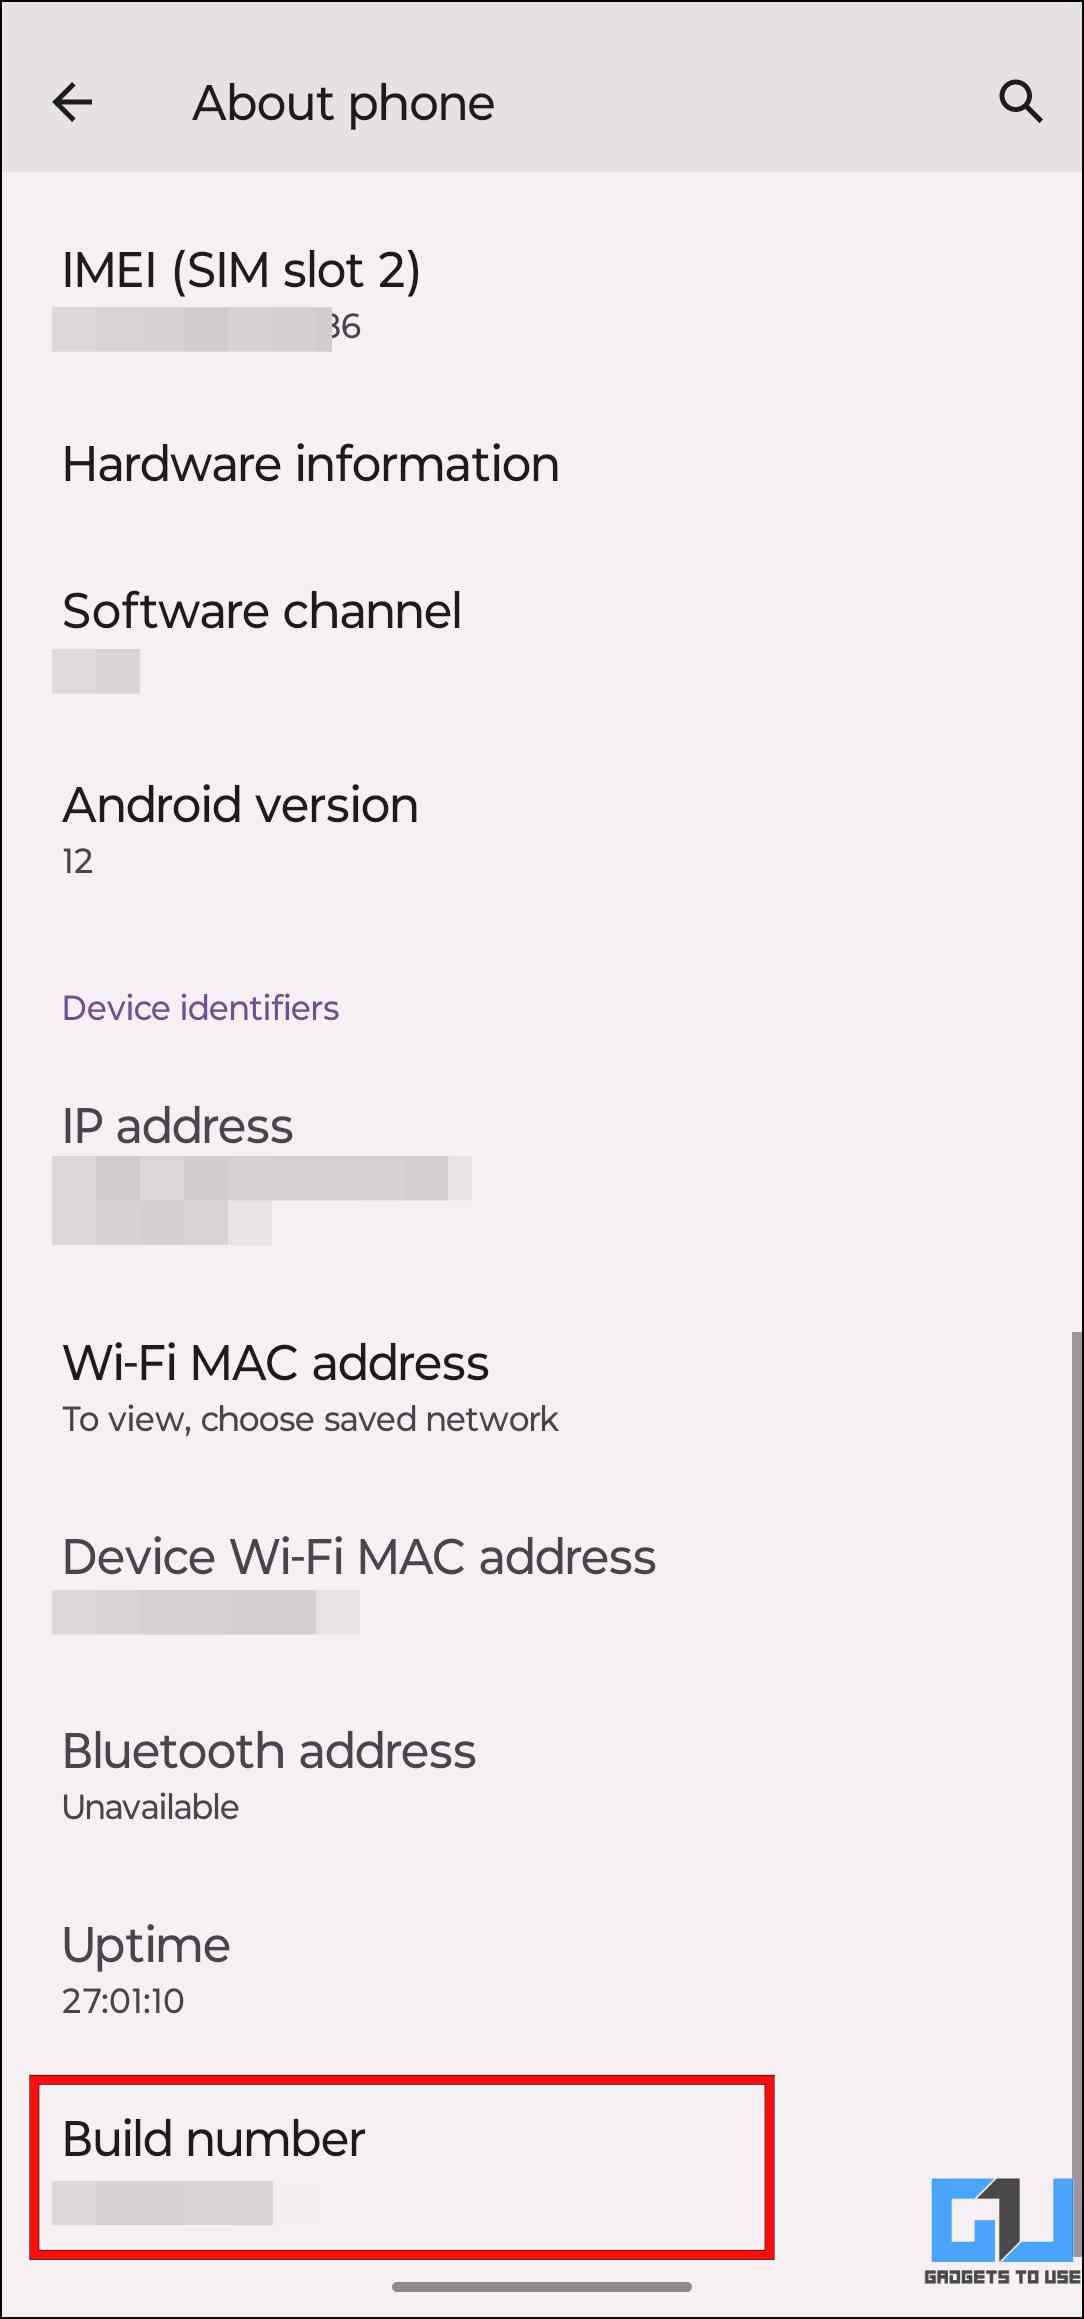
1. Open Settings and scroll down to About phone.
2. Here, tap on the Build number seven times.

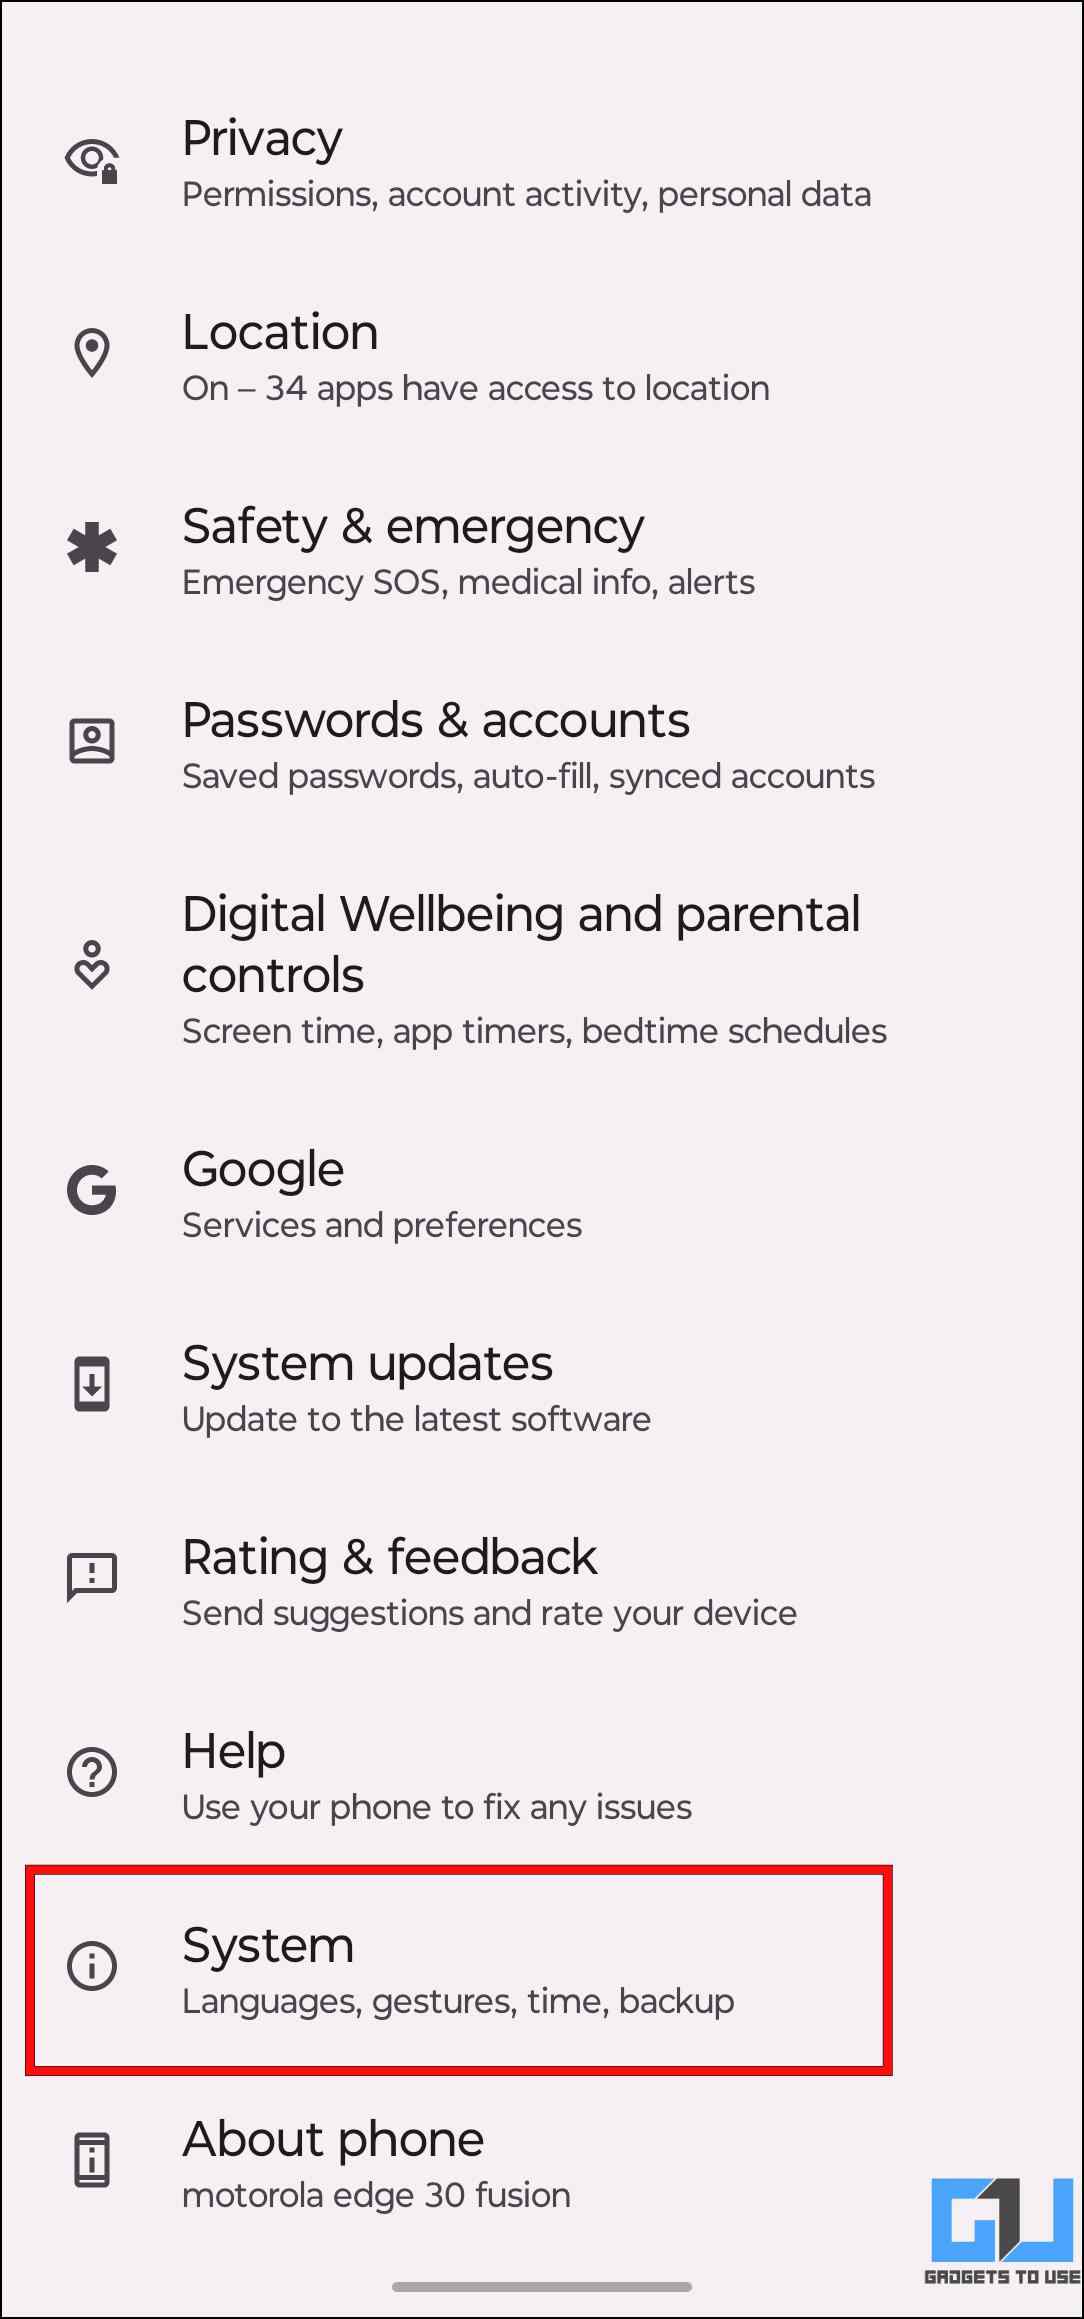
3. Now head back to Settings and go to System.
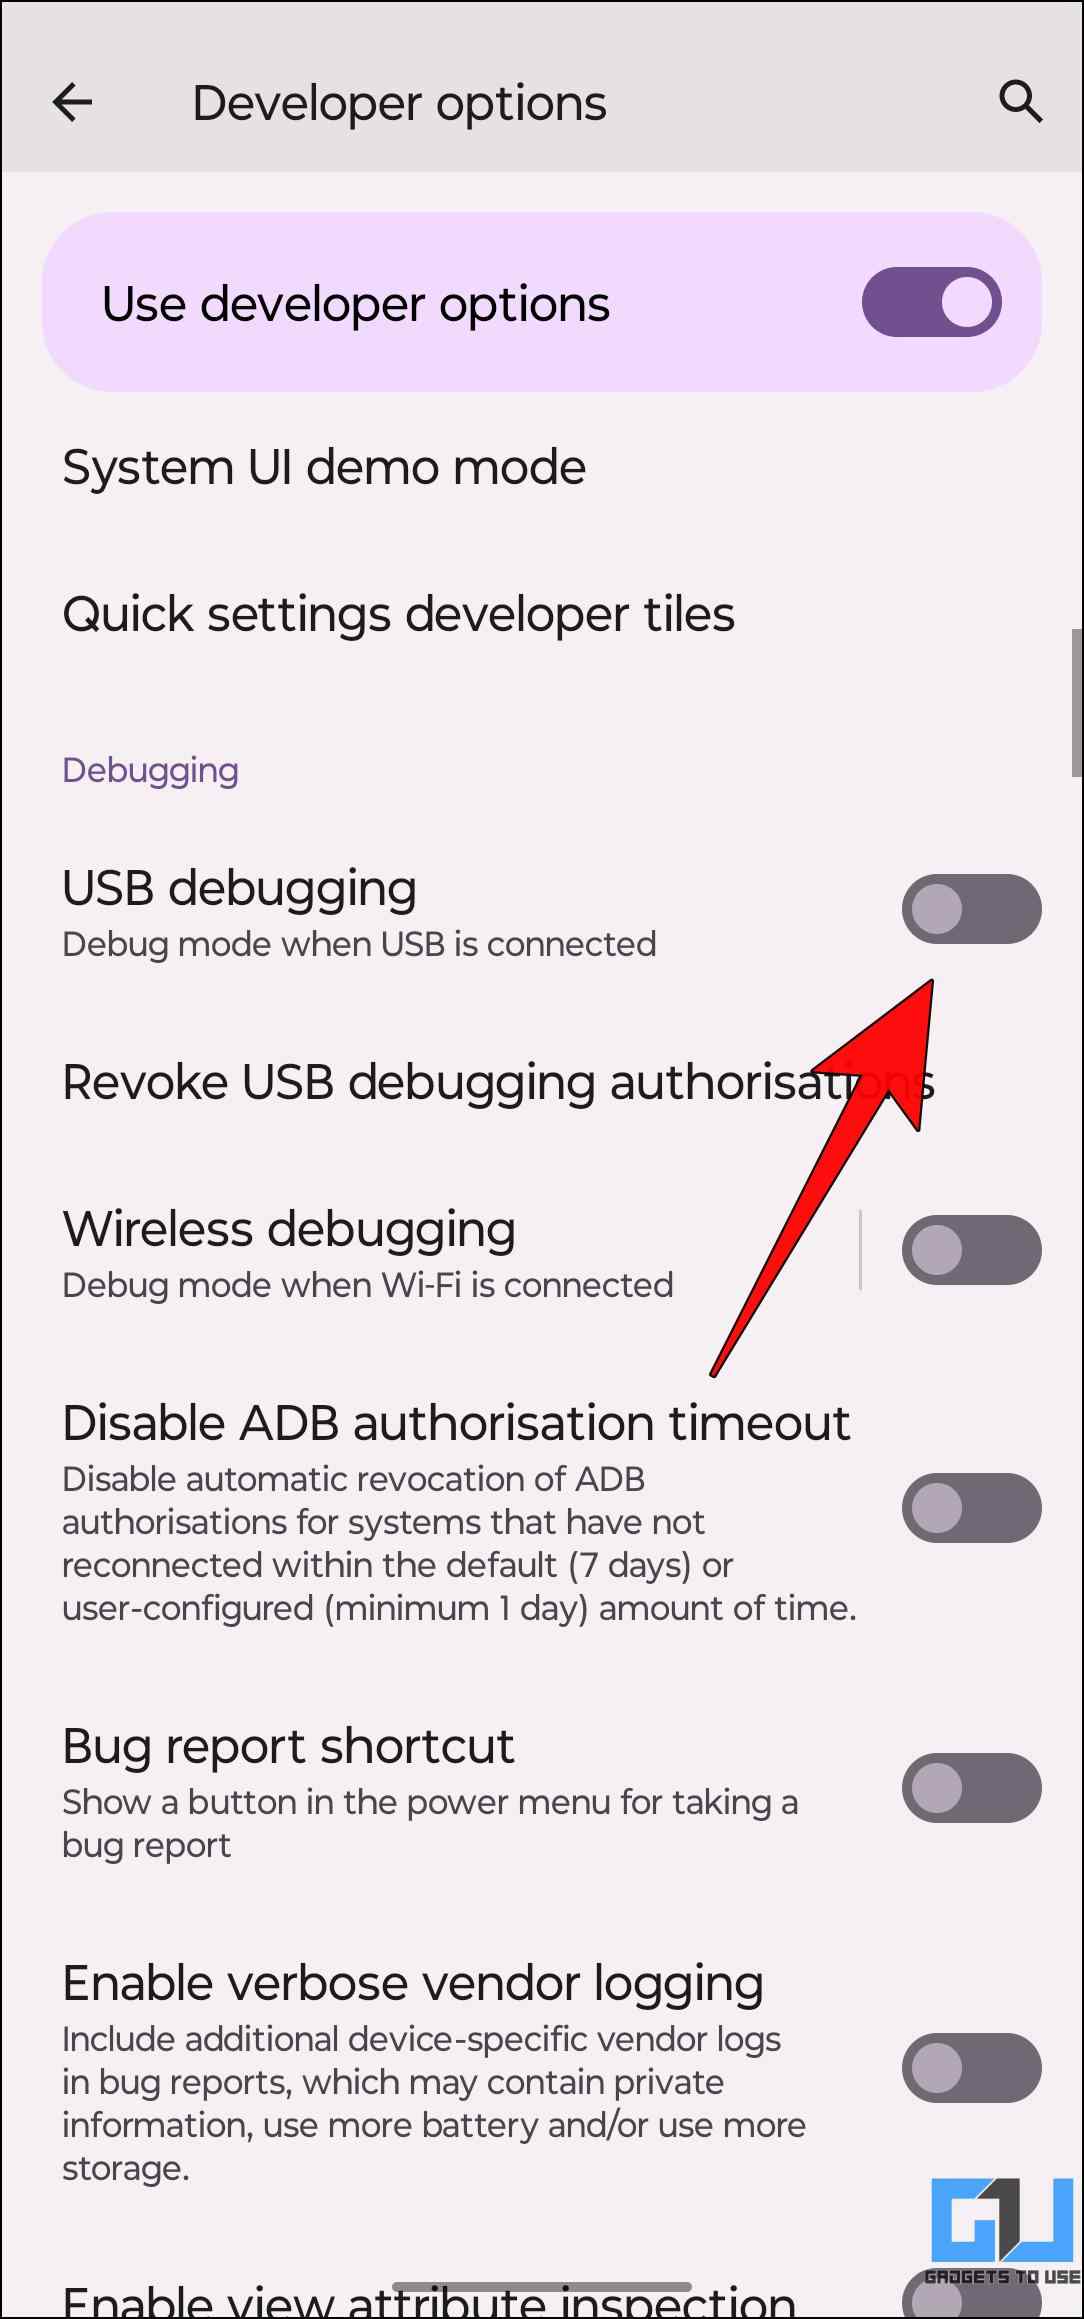
4. Tap on the Developer options.
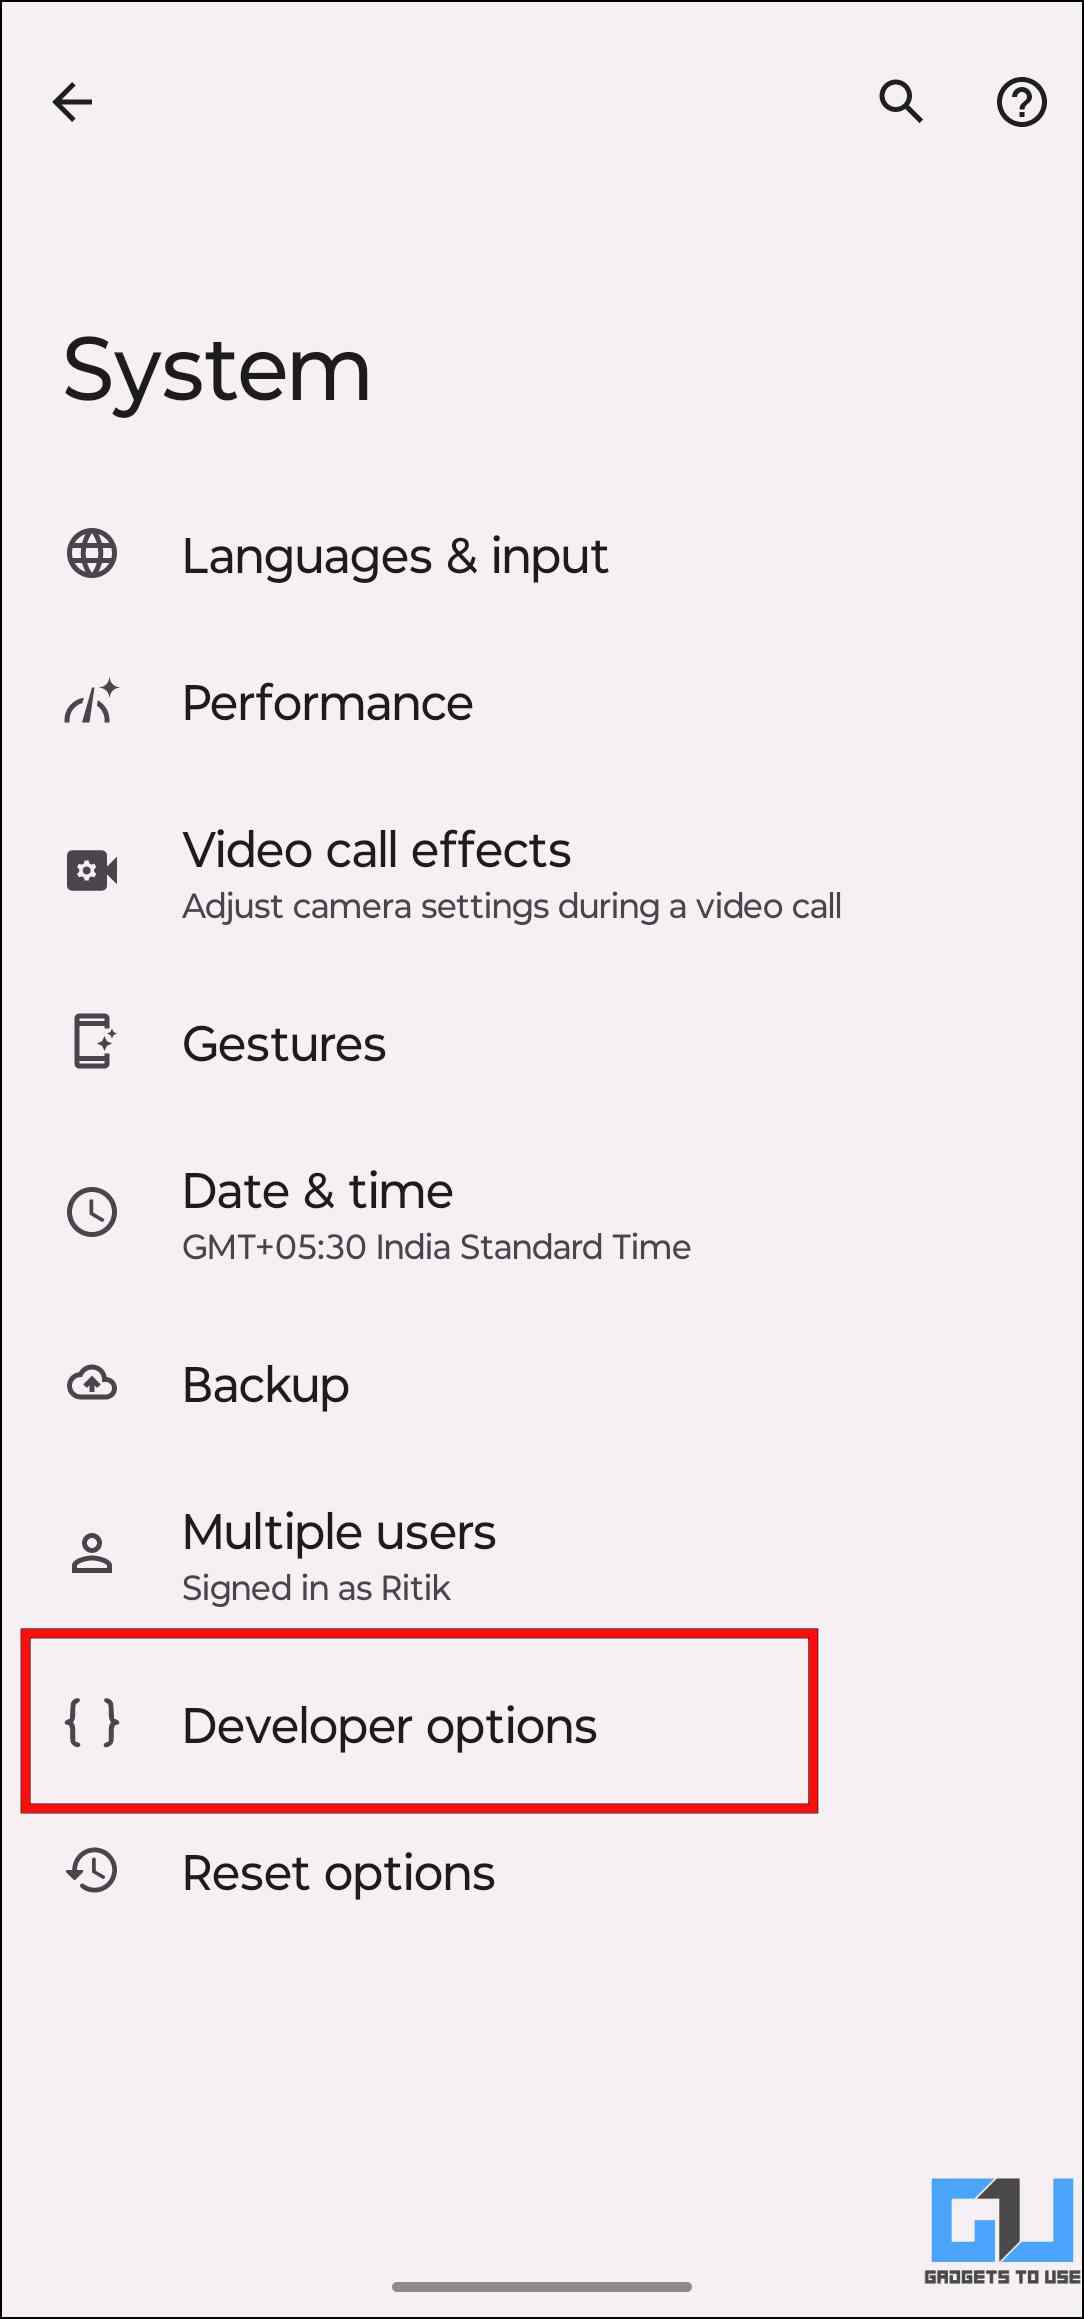
5. Under the Developer options, turn on the toggle for USB debugging.
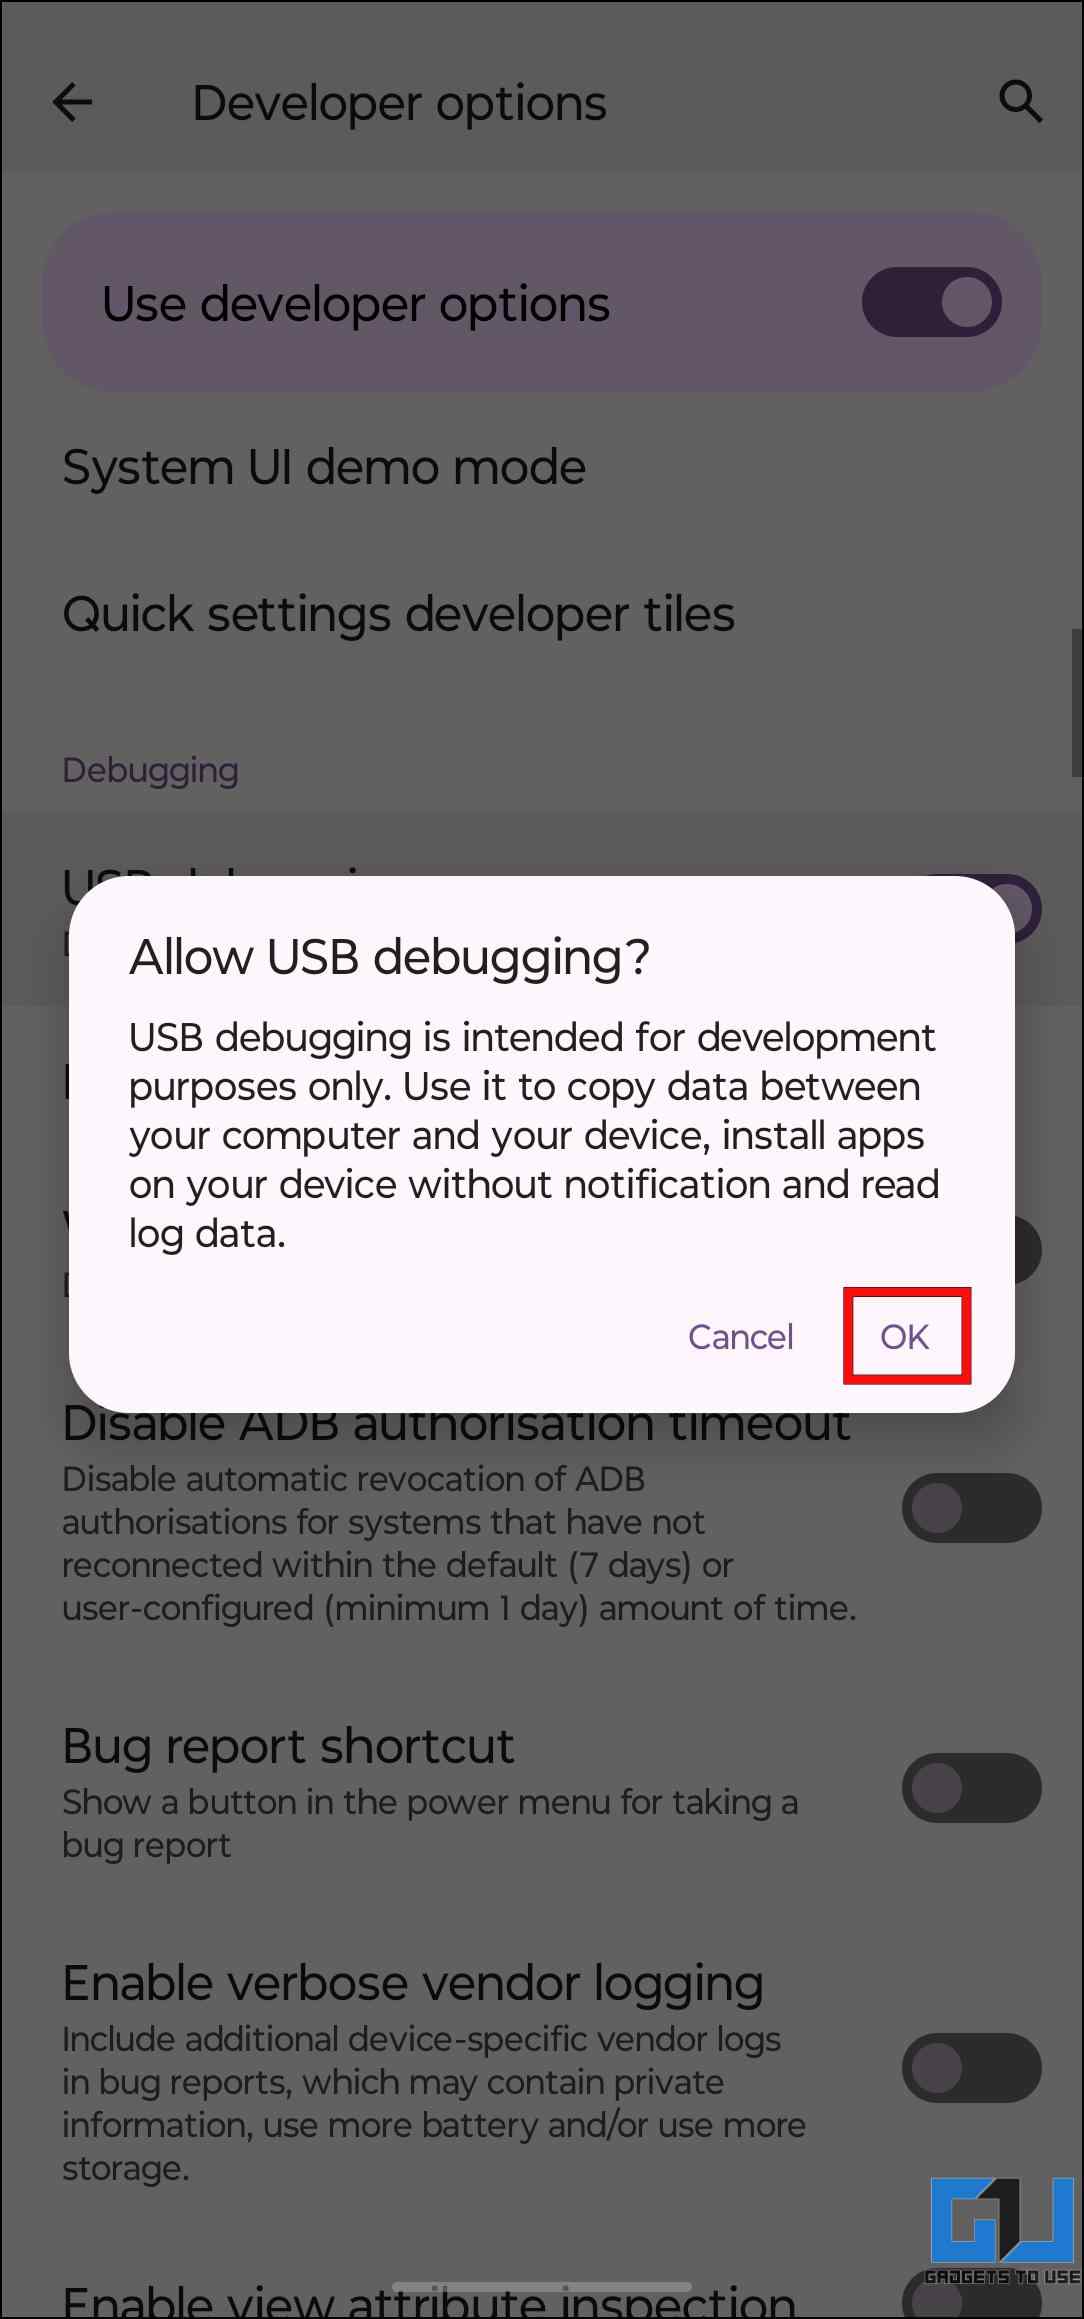
6. Tap OK on the confirmation prompt to enable USB debugging on your Android phone.
Step 2: Configure Scrcpy on Windows PC
We now have to set up the Scrcpy service on our Windows desktop. Let us look at the steps to install Scrcpy on Windows.
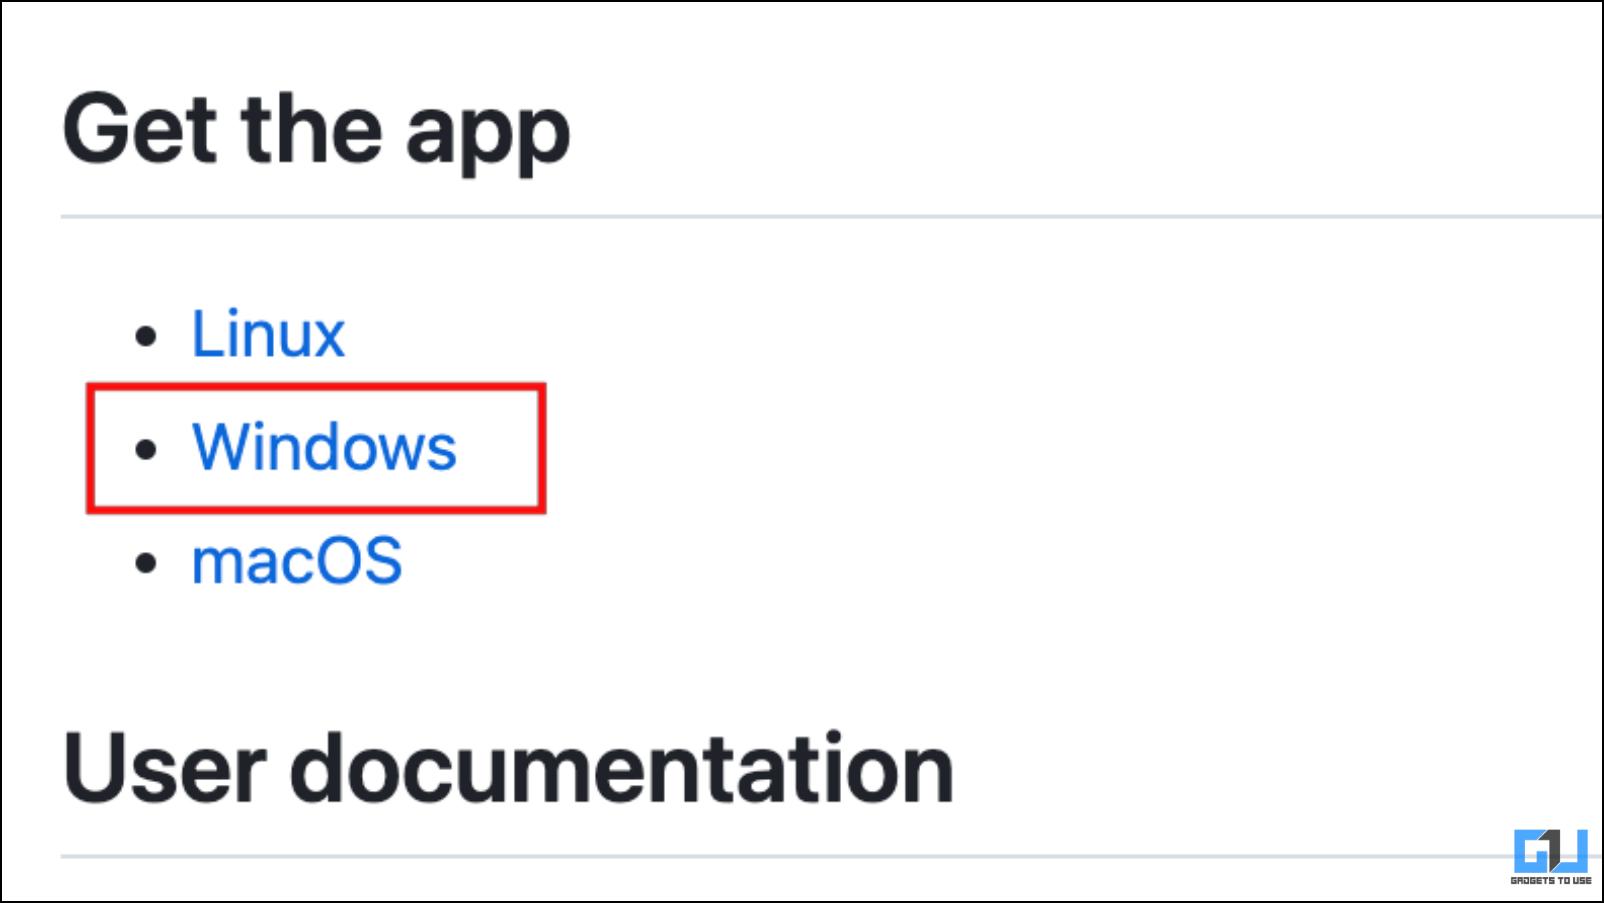
1. Head over to the Scrcpy GitHub page.
2. Click on Windows under the option, Get the App.
3. Here, select the latest version for your PC and click on it to begin the download.
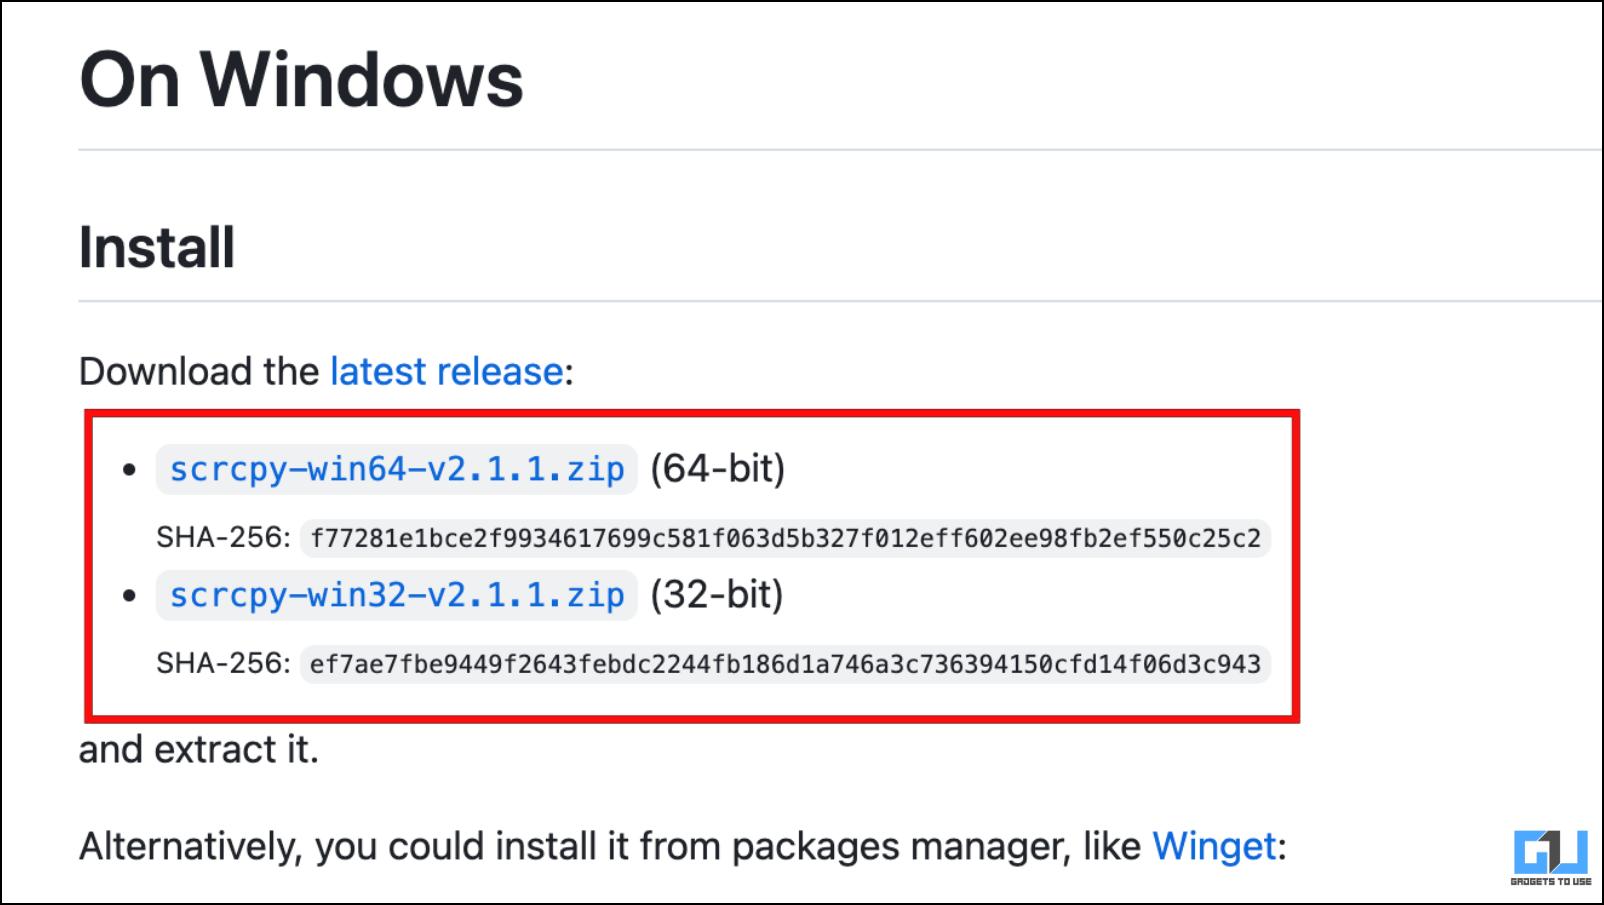
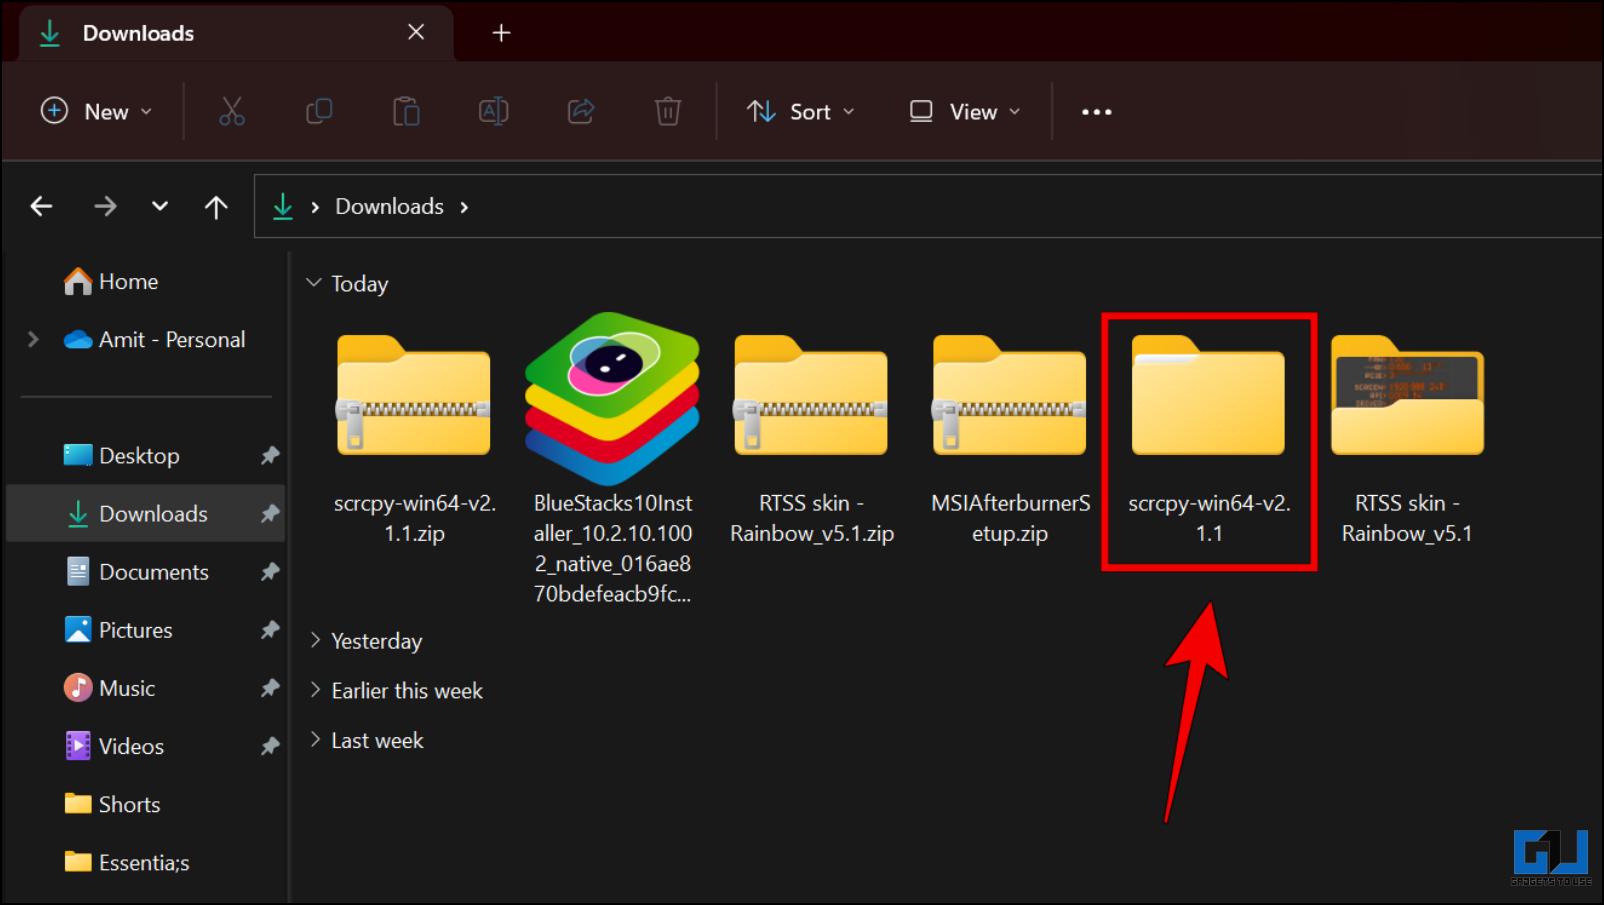
The downloaded file will be available under the Downloads folder in Windows File Manager.
4. Extract the contents of the downloaded .zip file.
5. Go to the extracted file and double-click on open_terminal_window-here.bat.
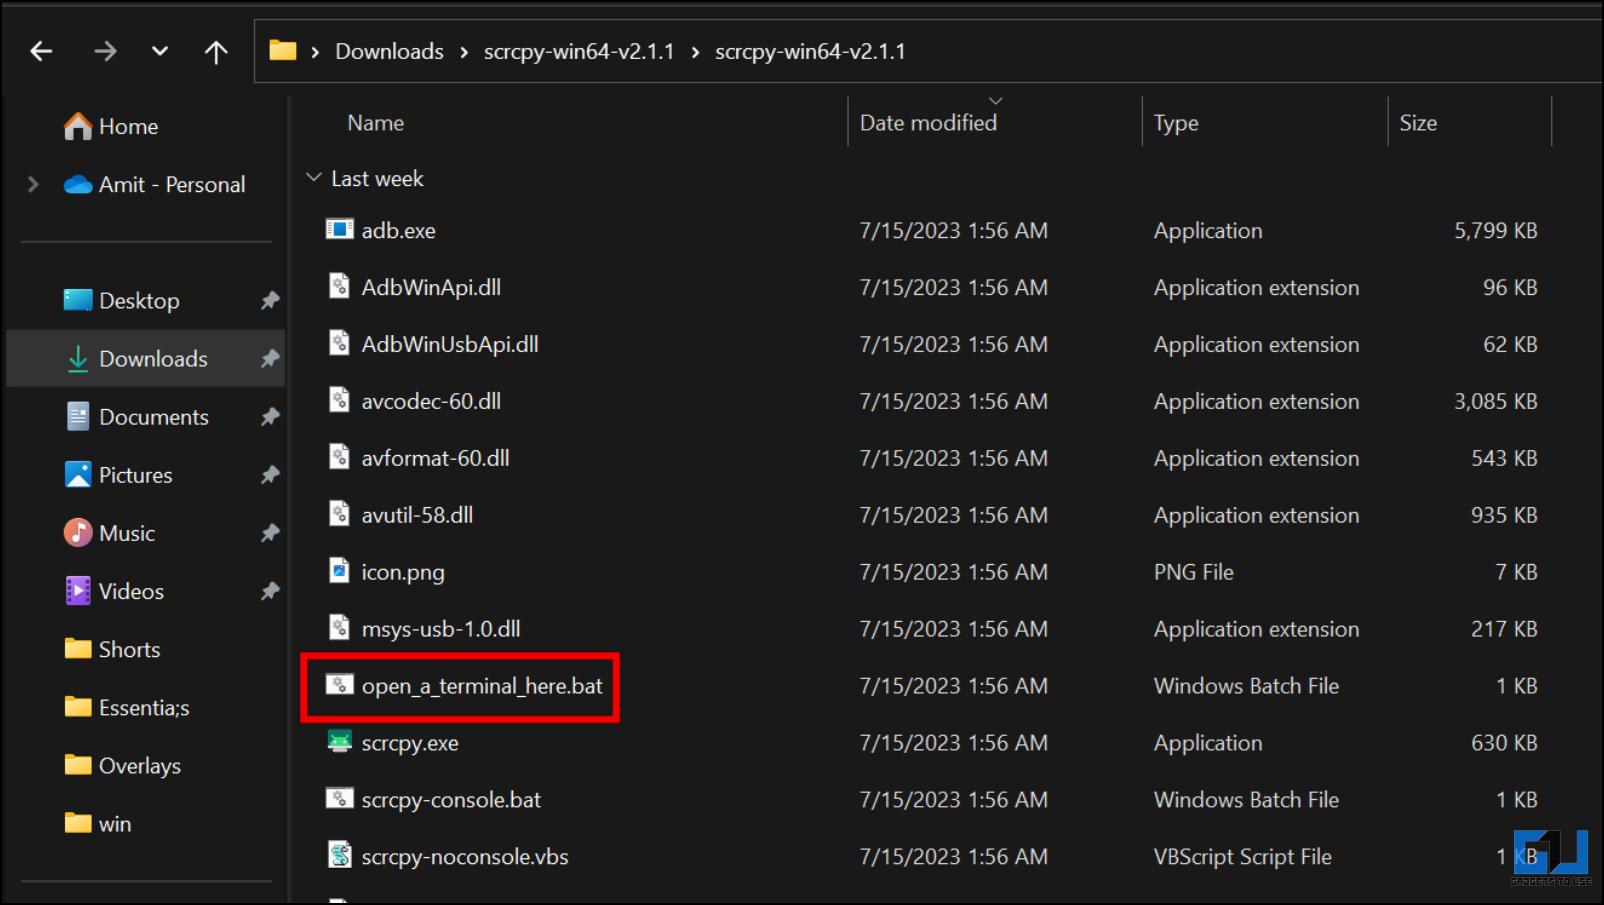
This will open a Terminal window within this folder. Keep it running, as we will require it later.
Step 3: Connect Android Phone with Windows
Finally, connect both devices over a USB to mirror the phone’s contents to the Windows PC.
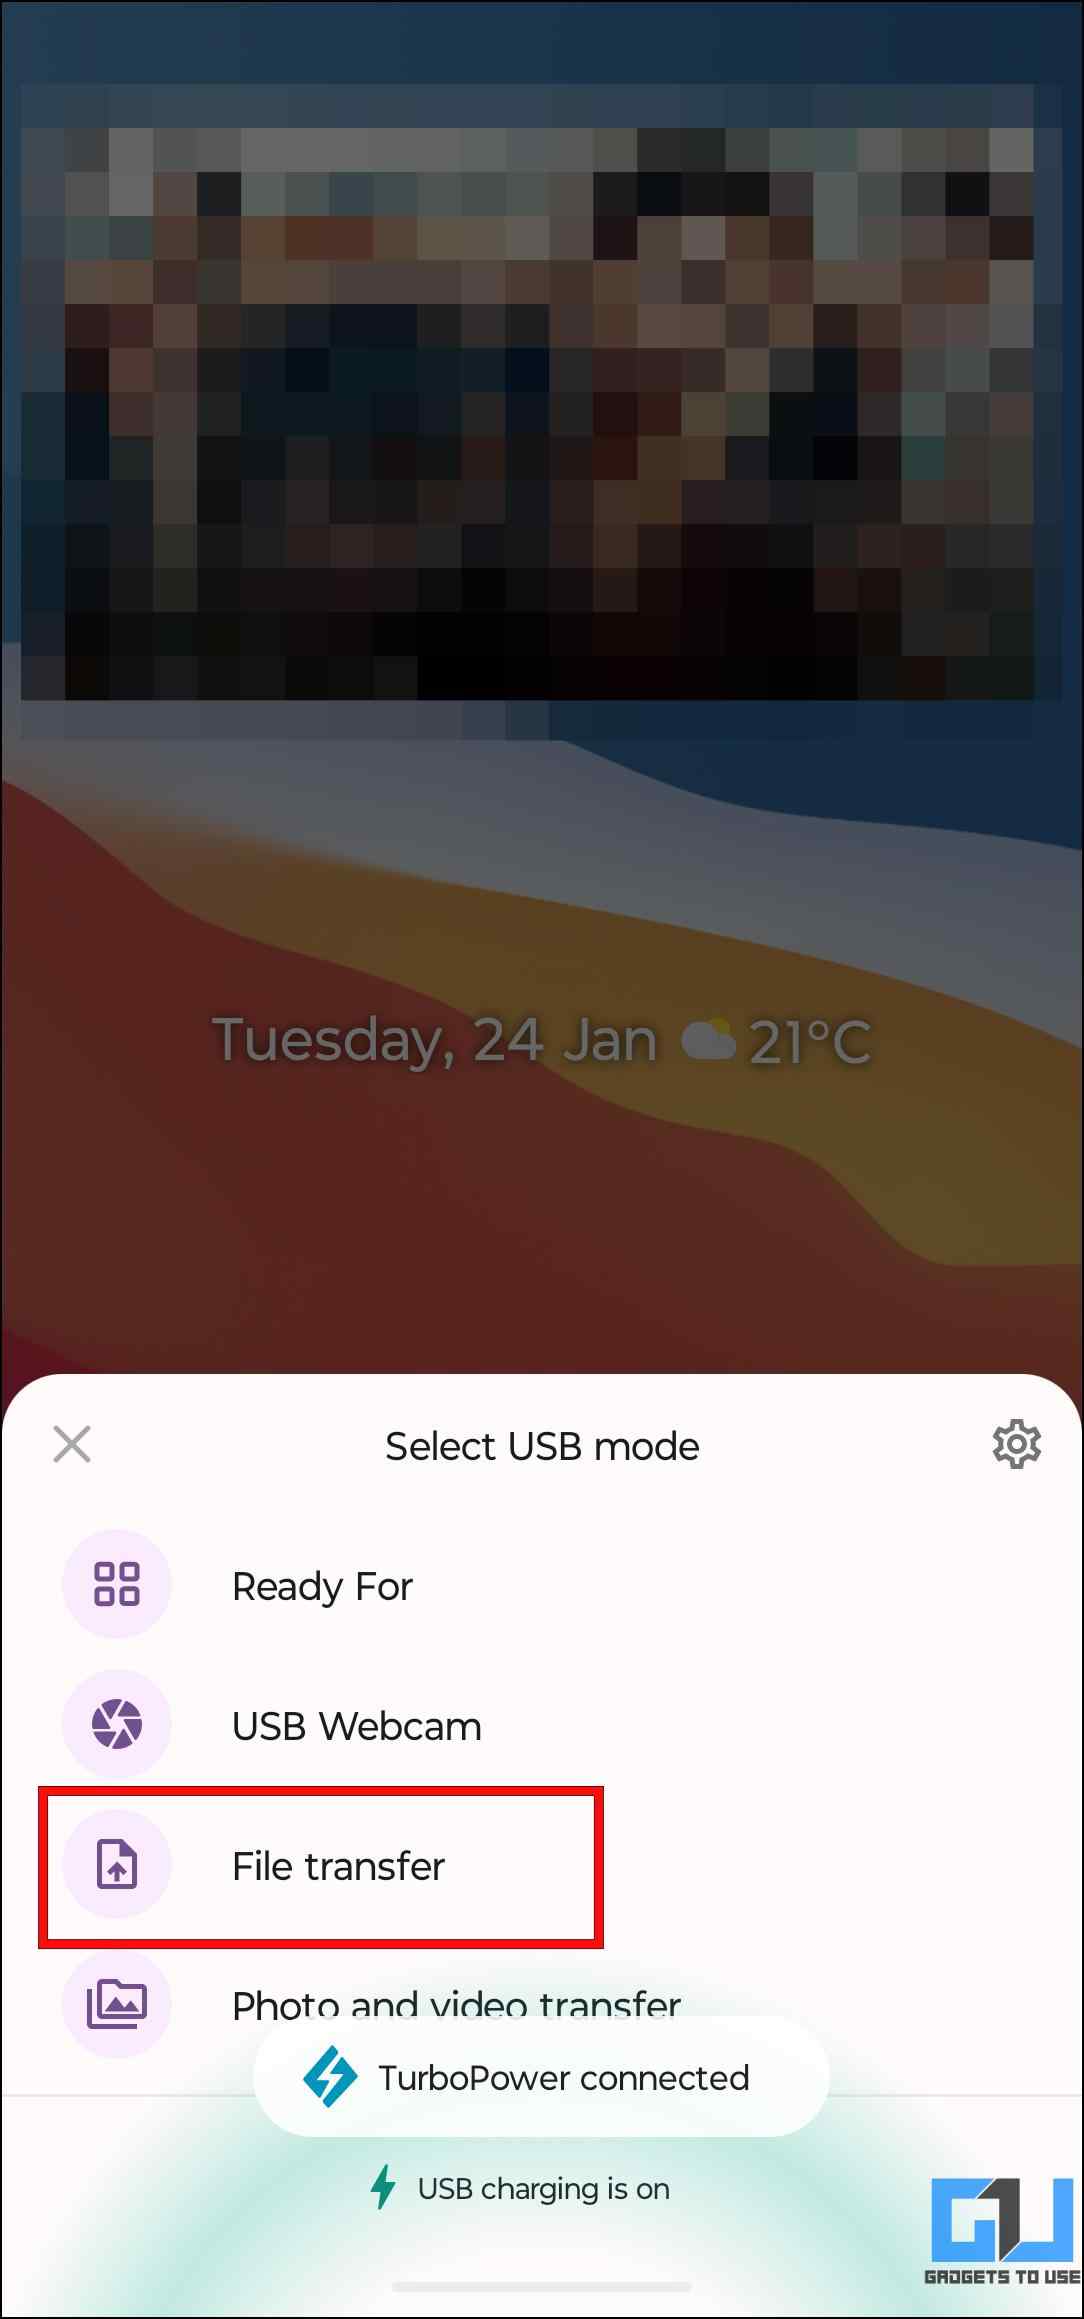
1. Plug your Android smartphone into your PC with a USB cable.
2. Change the connection mode to File Transfer whenever prompted.
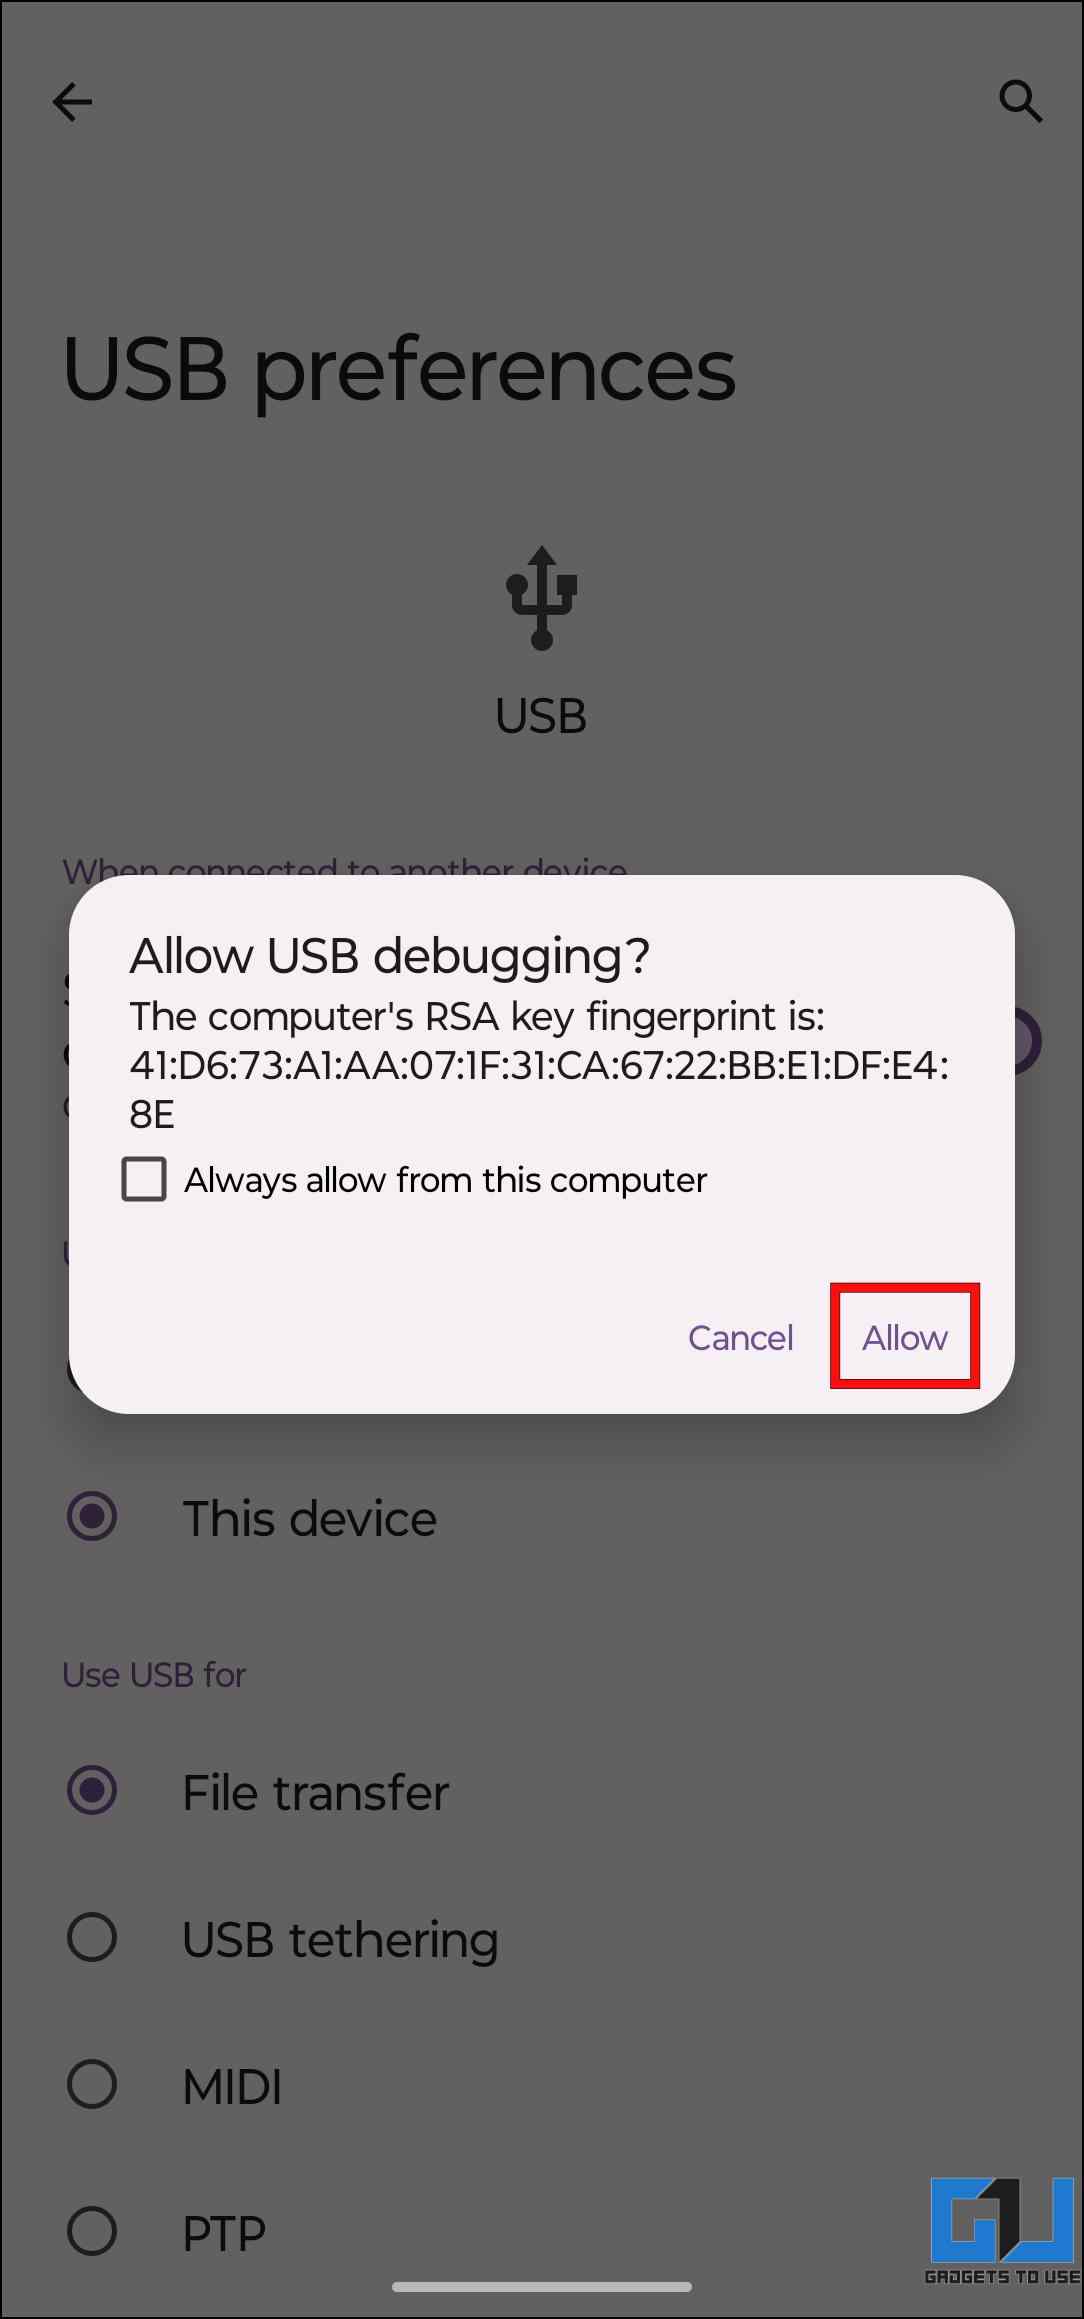
3. Select Allow USB Debugging on the next prompt once plugged in.
4. Return to the Terminal window opened earlier within the Scrcpy folder. In this window, type the following command.
type: scrcpy and press Enter
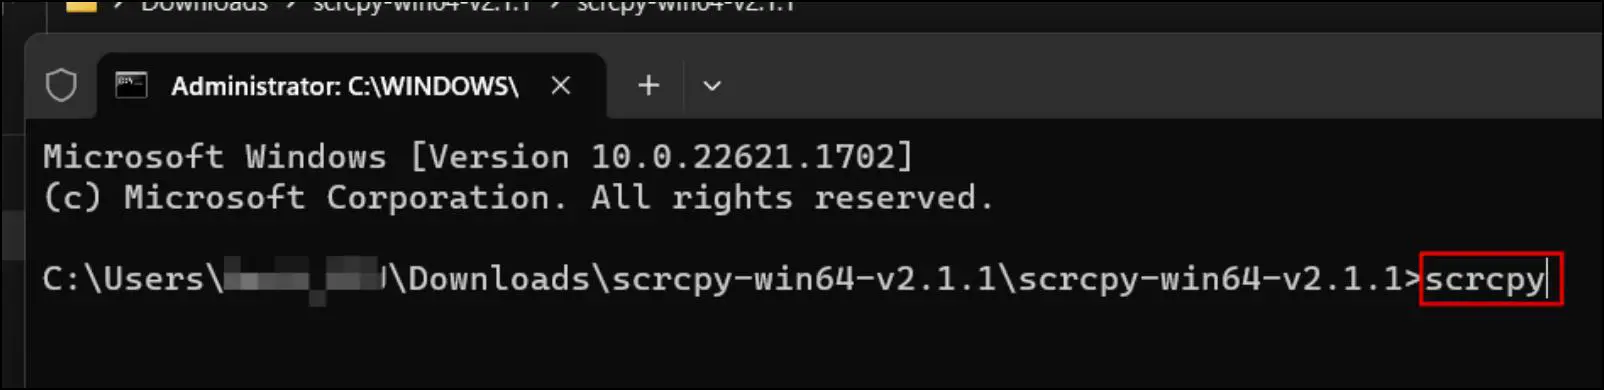
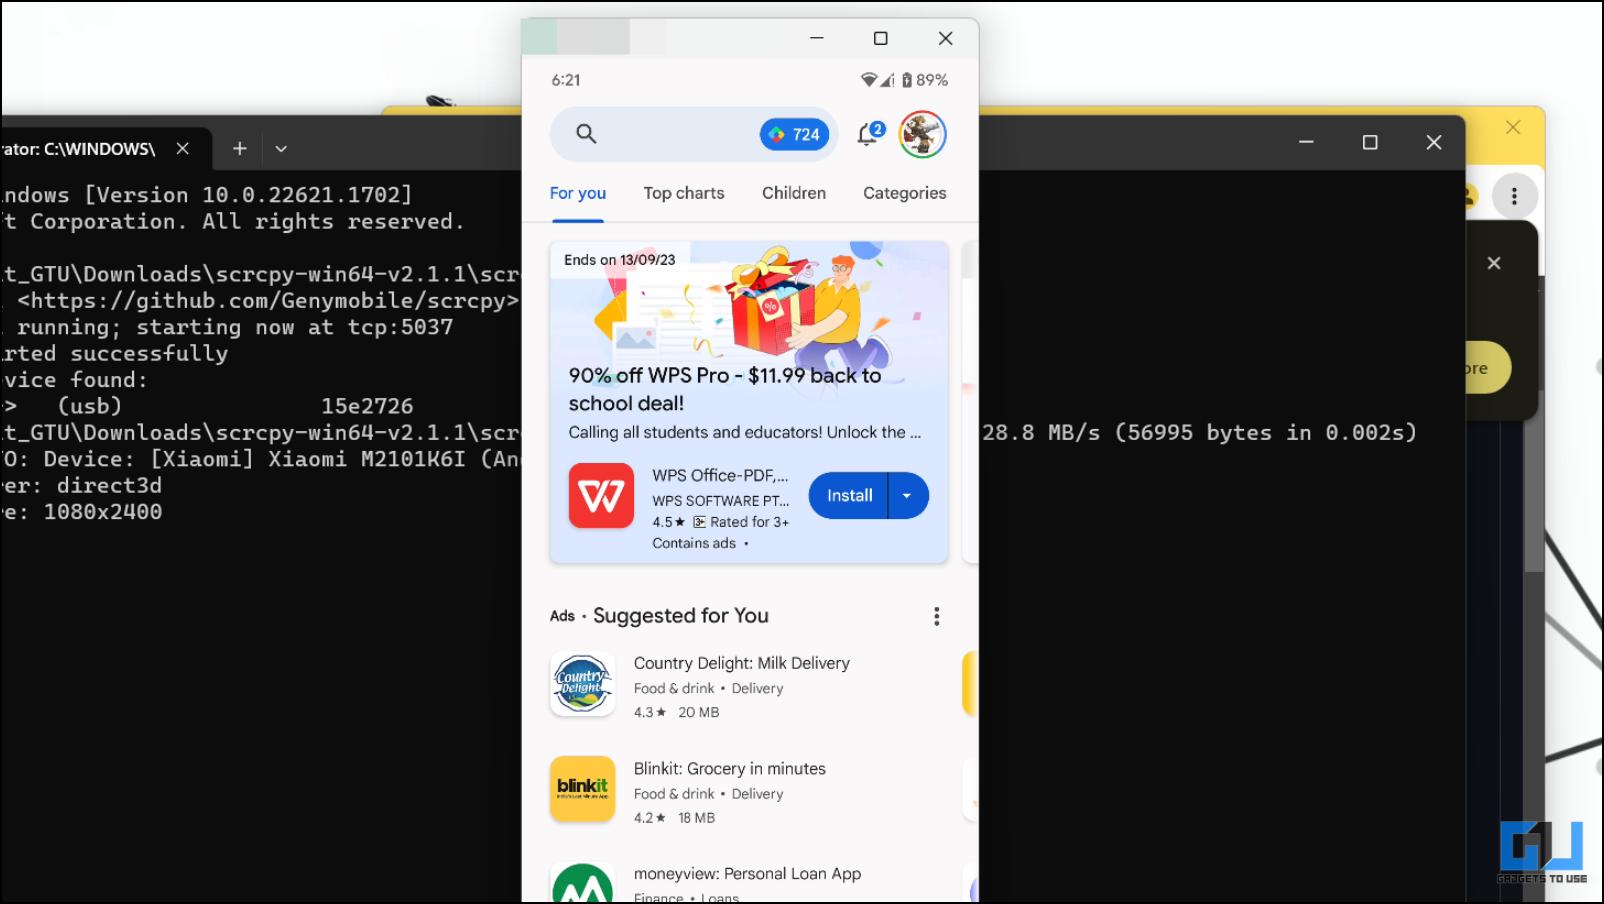
Running this command should start mirroring your phone’s current display to your computer.
Method 3 – Use the Link to Windows on Samsung Smartphones
Windows and Samsung have partnered to allow Samsung user to seamlessly cast their screens on a Windows 10 or 11 system. This is possible with the Link to Windows app pre-installed on every Samsung phone. So, let us look at how you can mirror the screen of your Samsung Android smartphone on your computer.
Step 1: Configure Phone Link App On Windows
You must first configure the Phone Link app to mirror your phone on your Windows desktop. Here’s how it can be done.
1. Open the Phone Link app using the Start menu.
If it is not installed on your system, you can download it from the Microsoft Store.
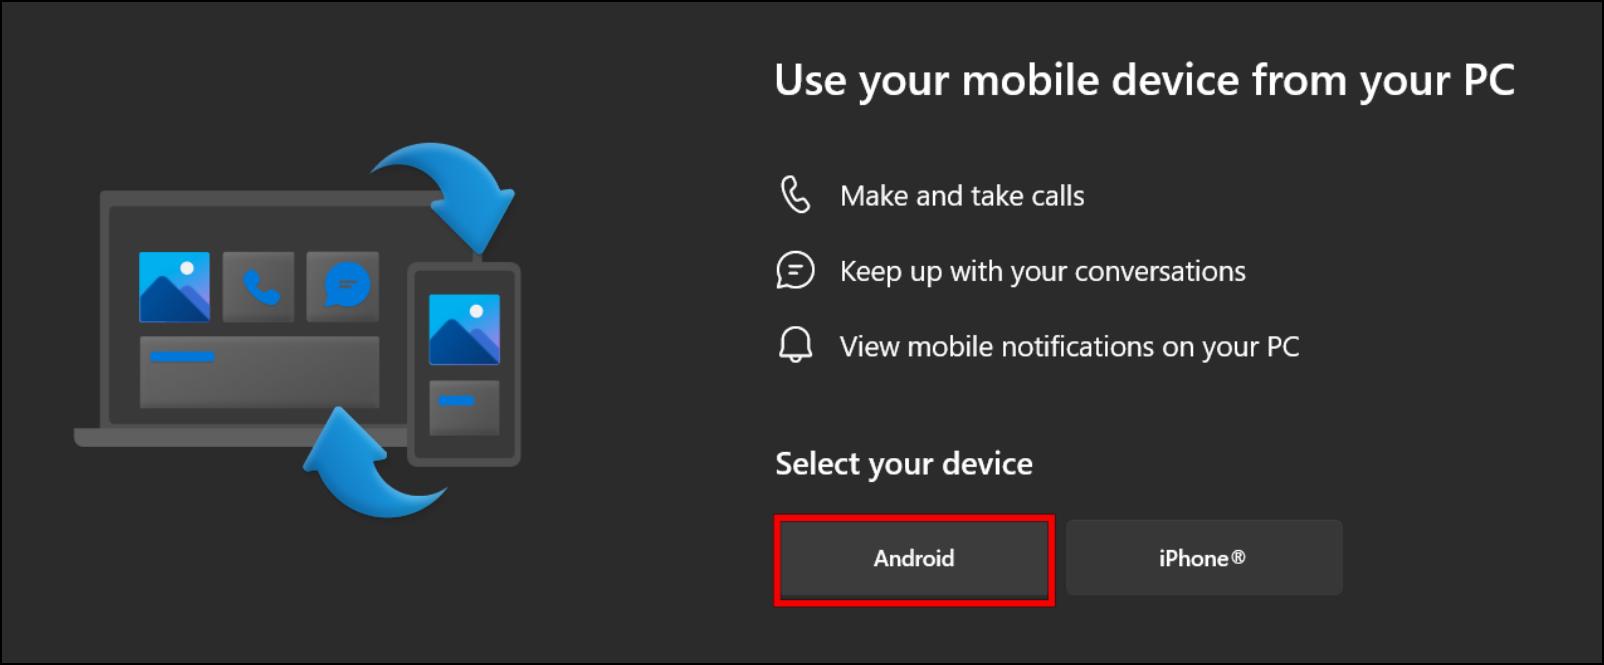
2. Select Android under the “Use your mobile device from your PC” option.
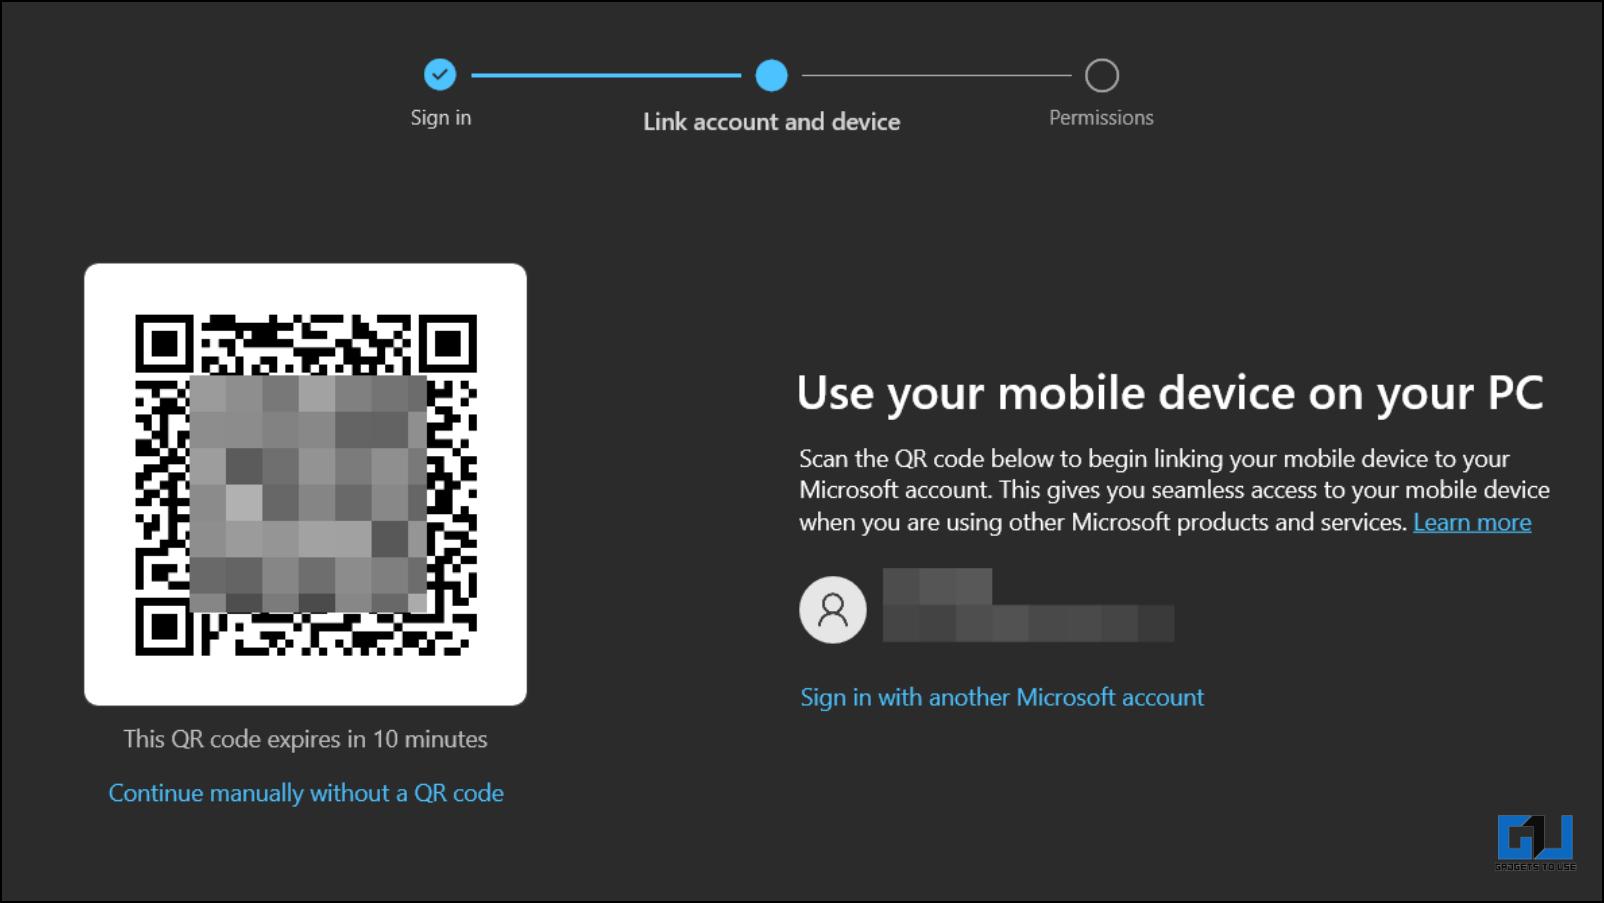
3. Next, sign in with your Microsoft account.

4. Once you are signed in. Scan the QR code displayed on the app to proceed further.
Step 2: Setup Link to Windows on Samsung Android Phone
For the next step, you must set up the Link to Windows on your Samsung smartphone. You can find the service within settings.
1. Open your phone’s Settings app, then tap the search icon.
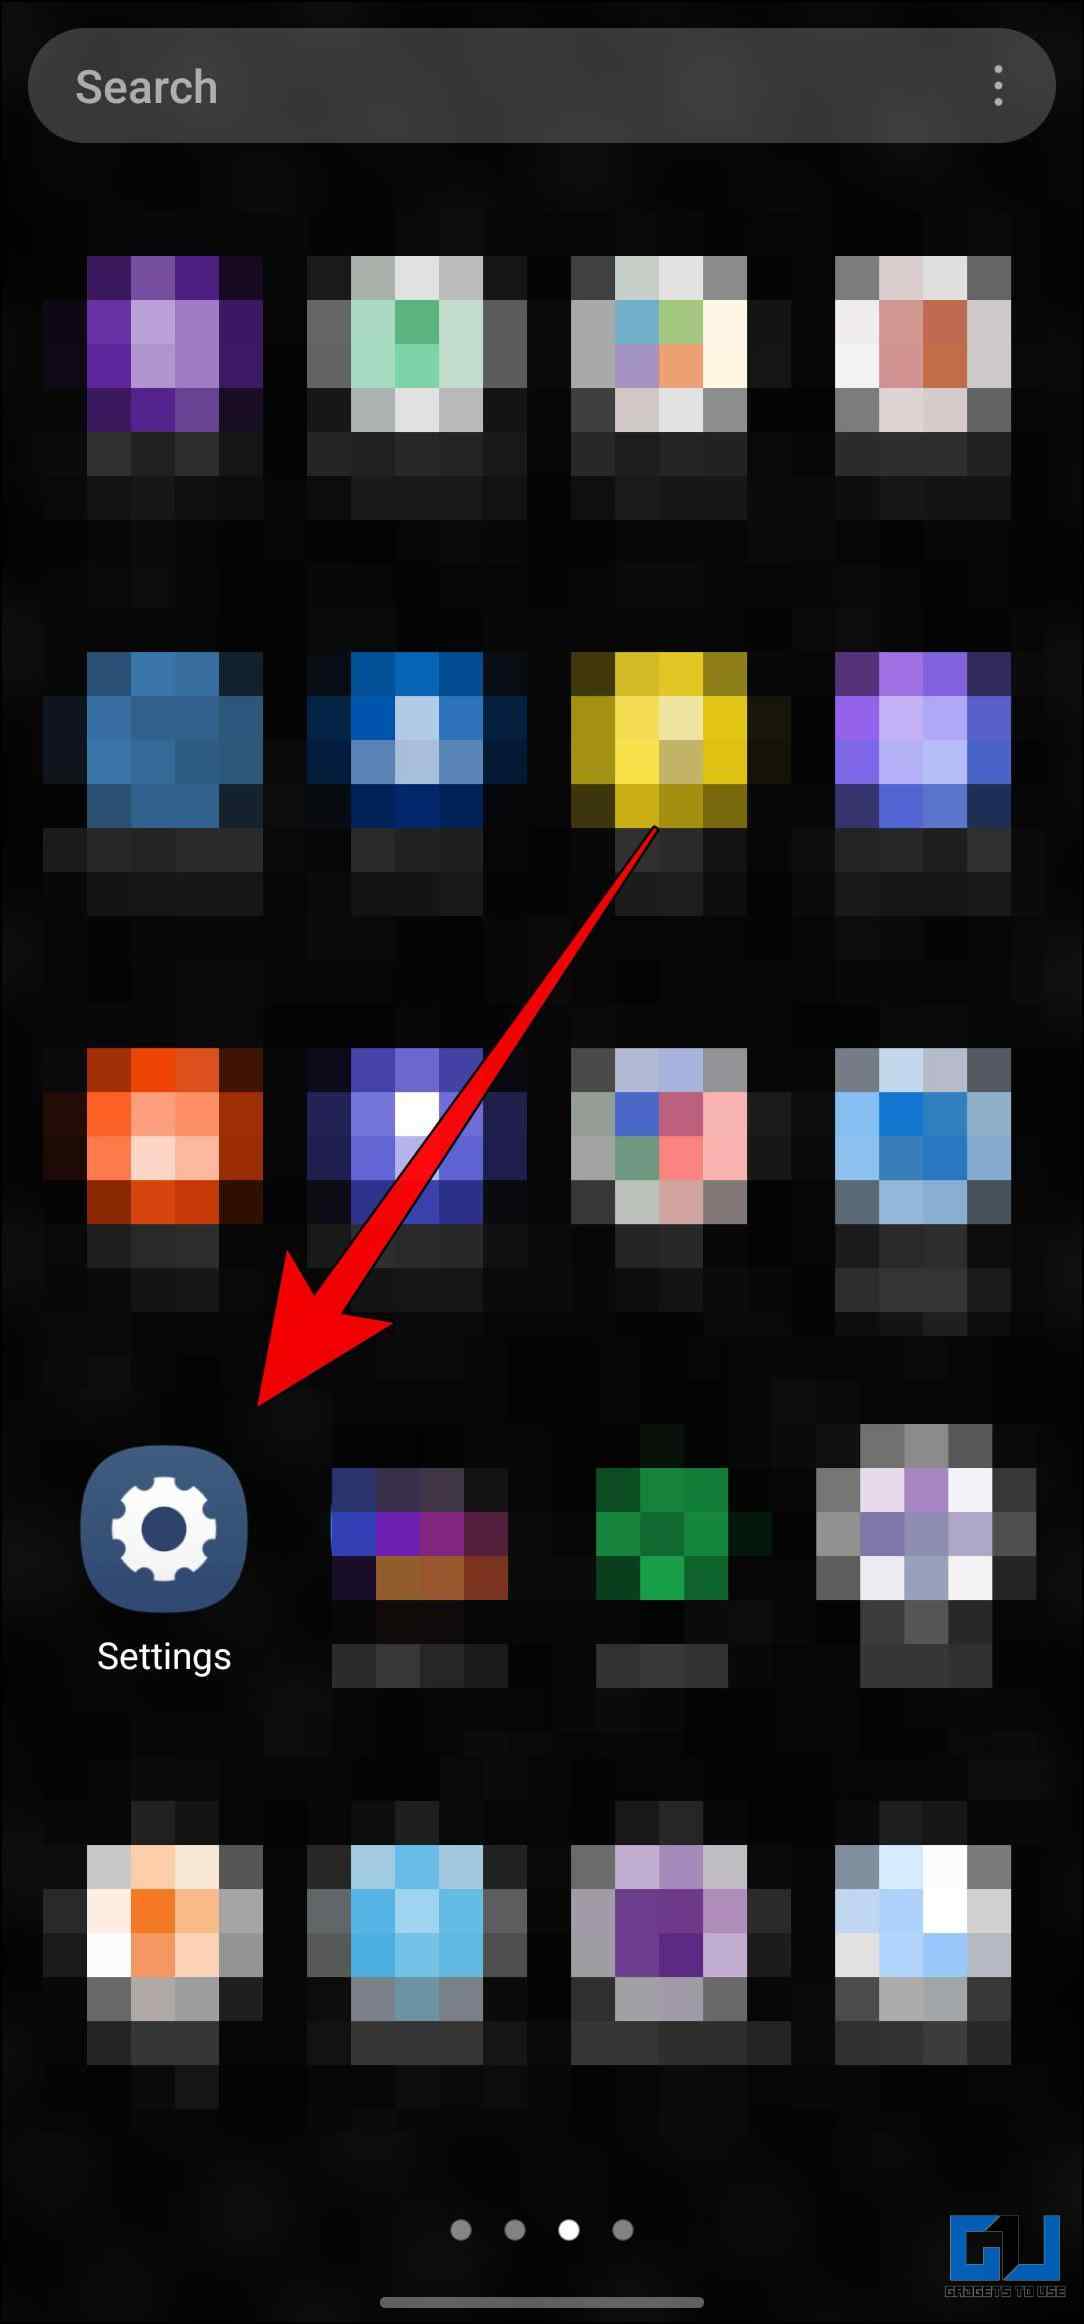
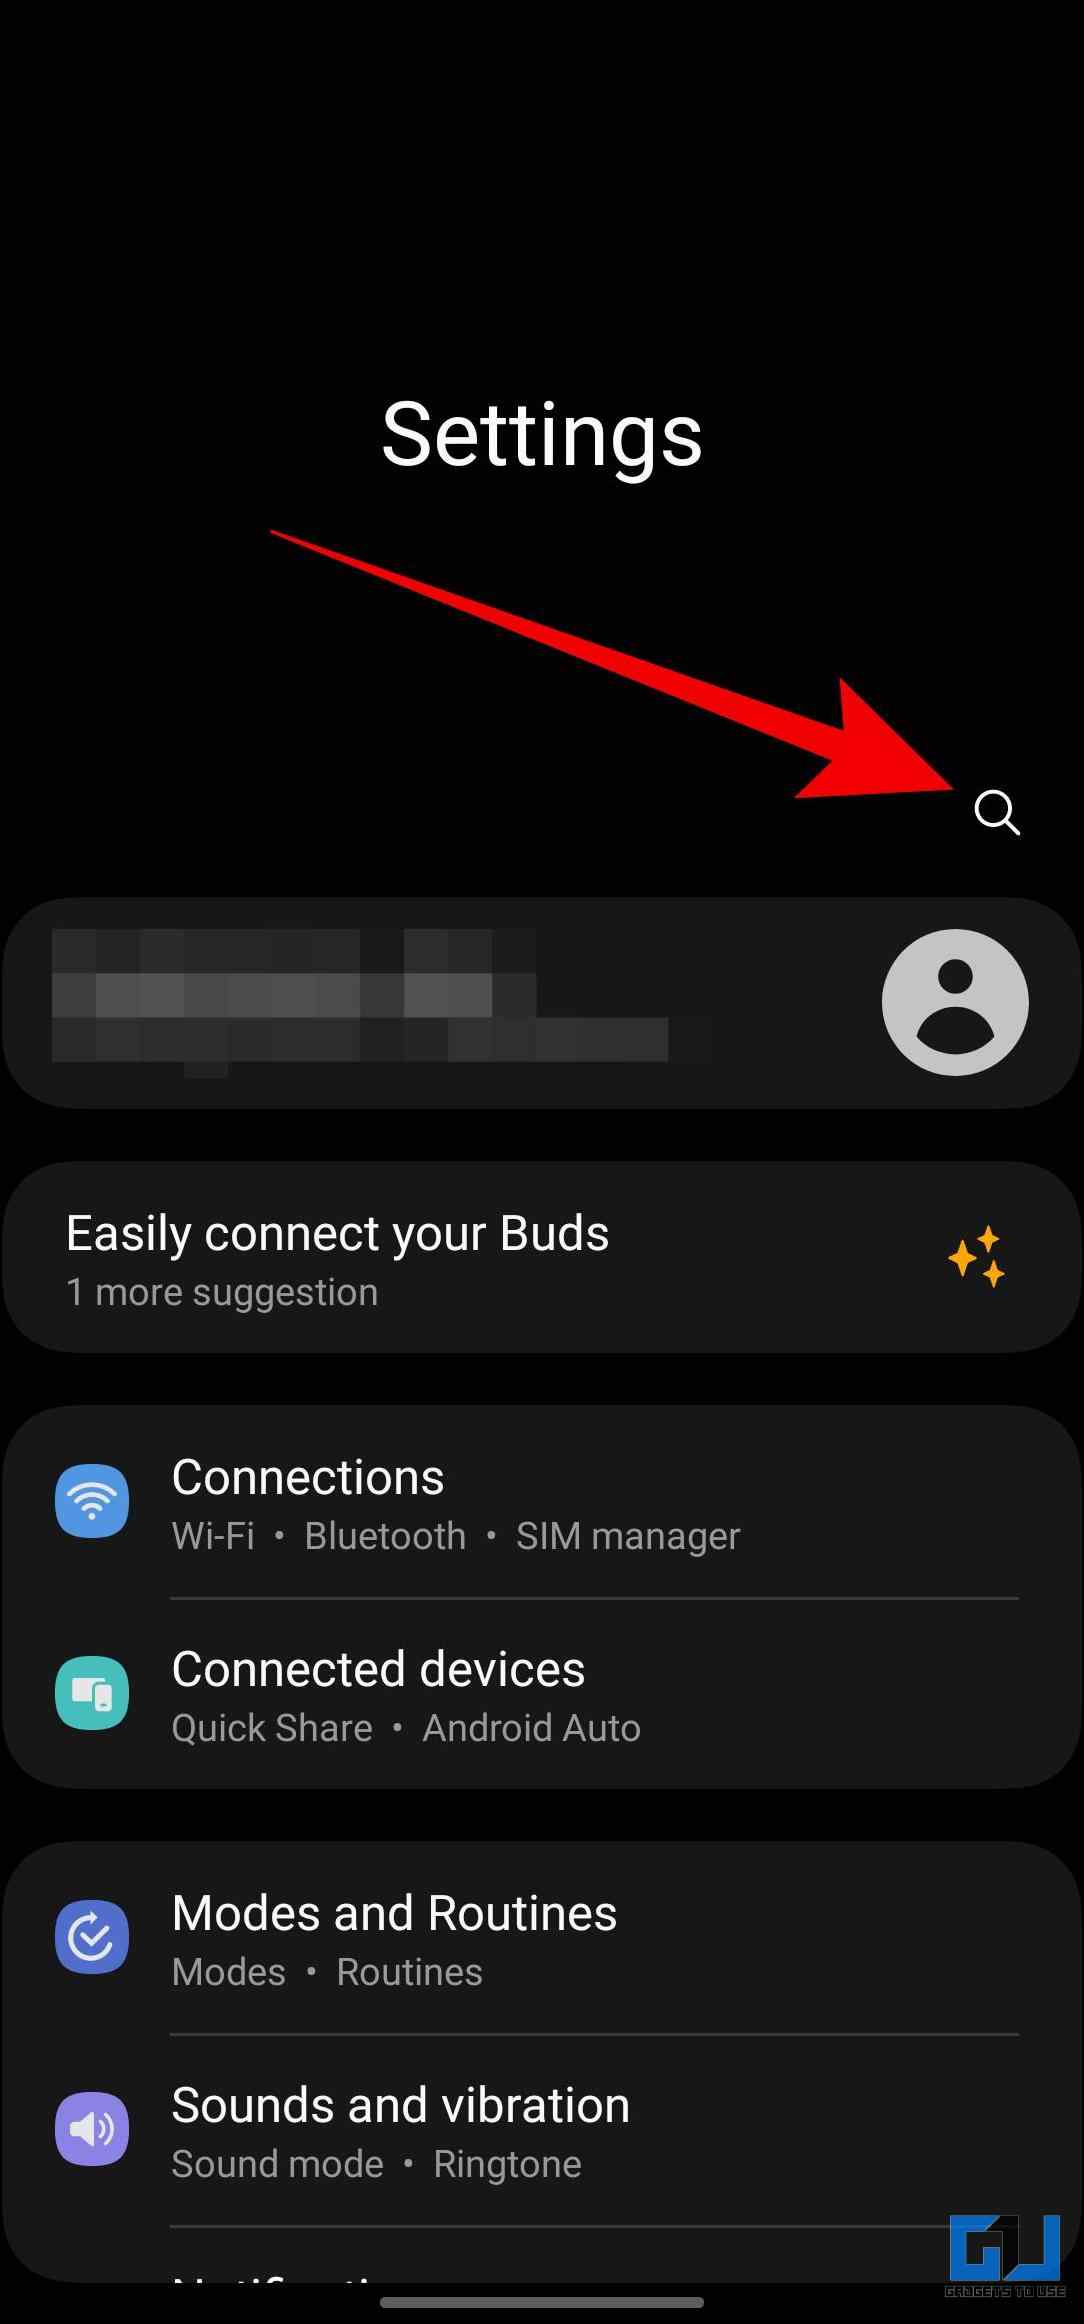
2. Search for the Link to Windows and tap on the first result.
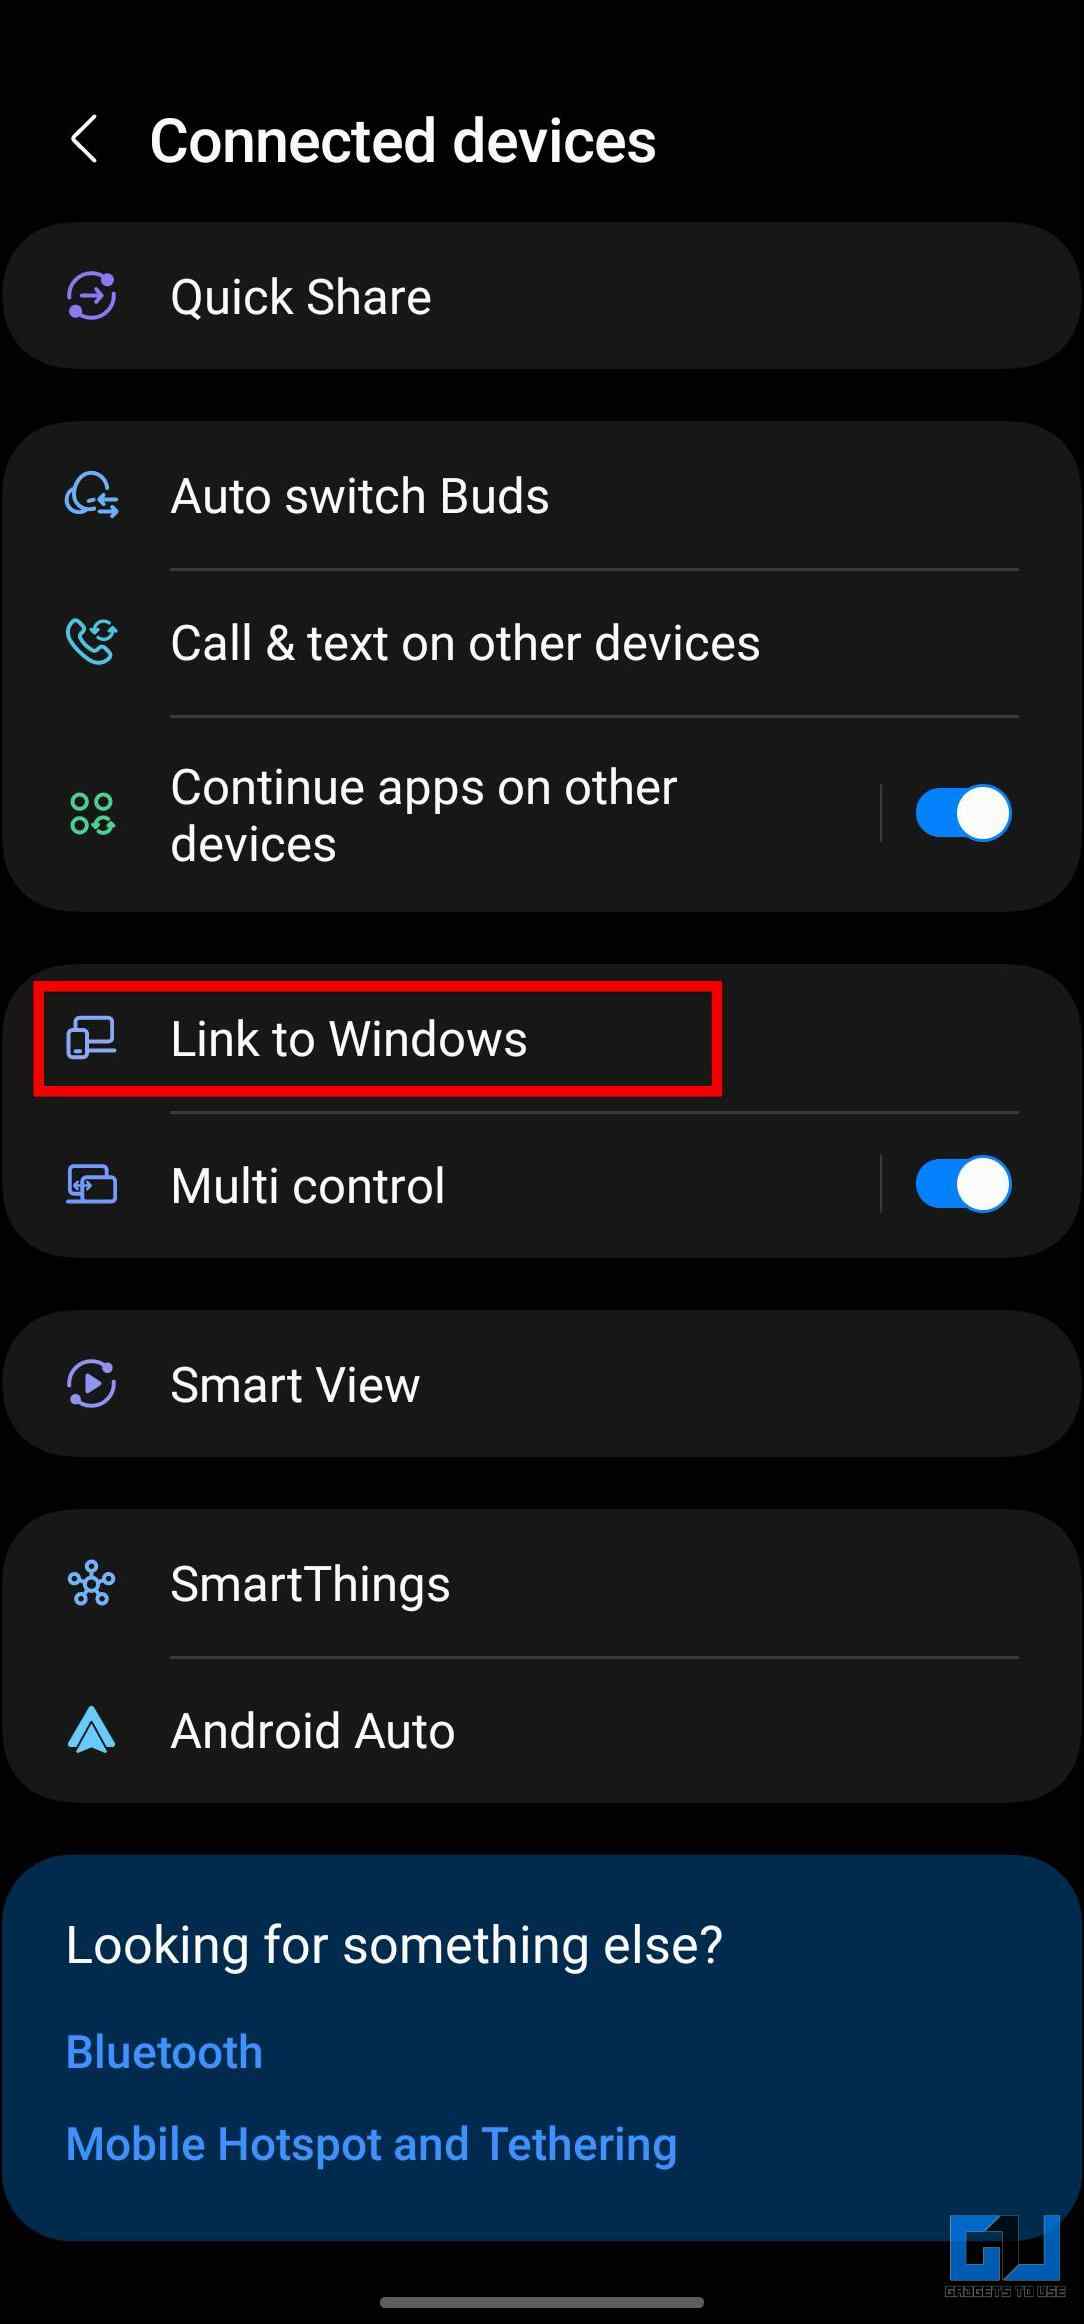
3. Under Connected Devices, tap on Link to Windows.

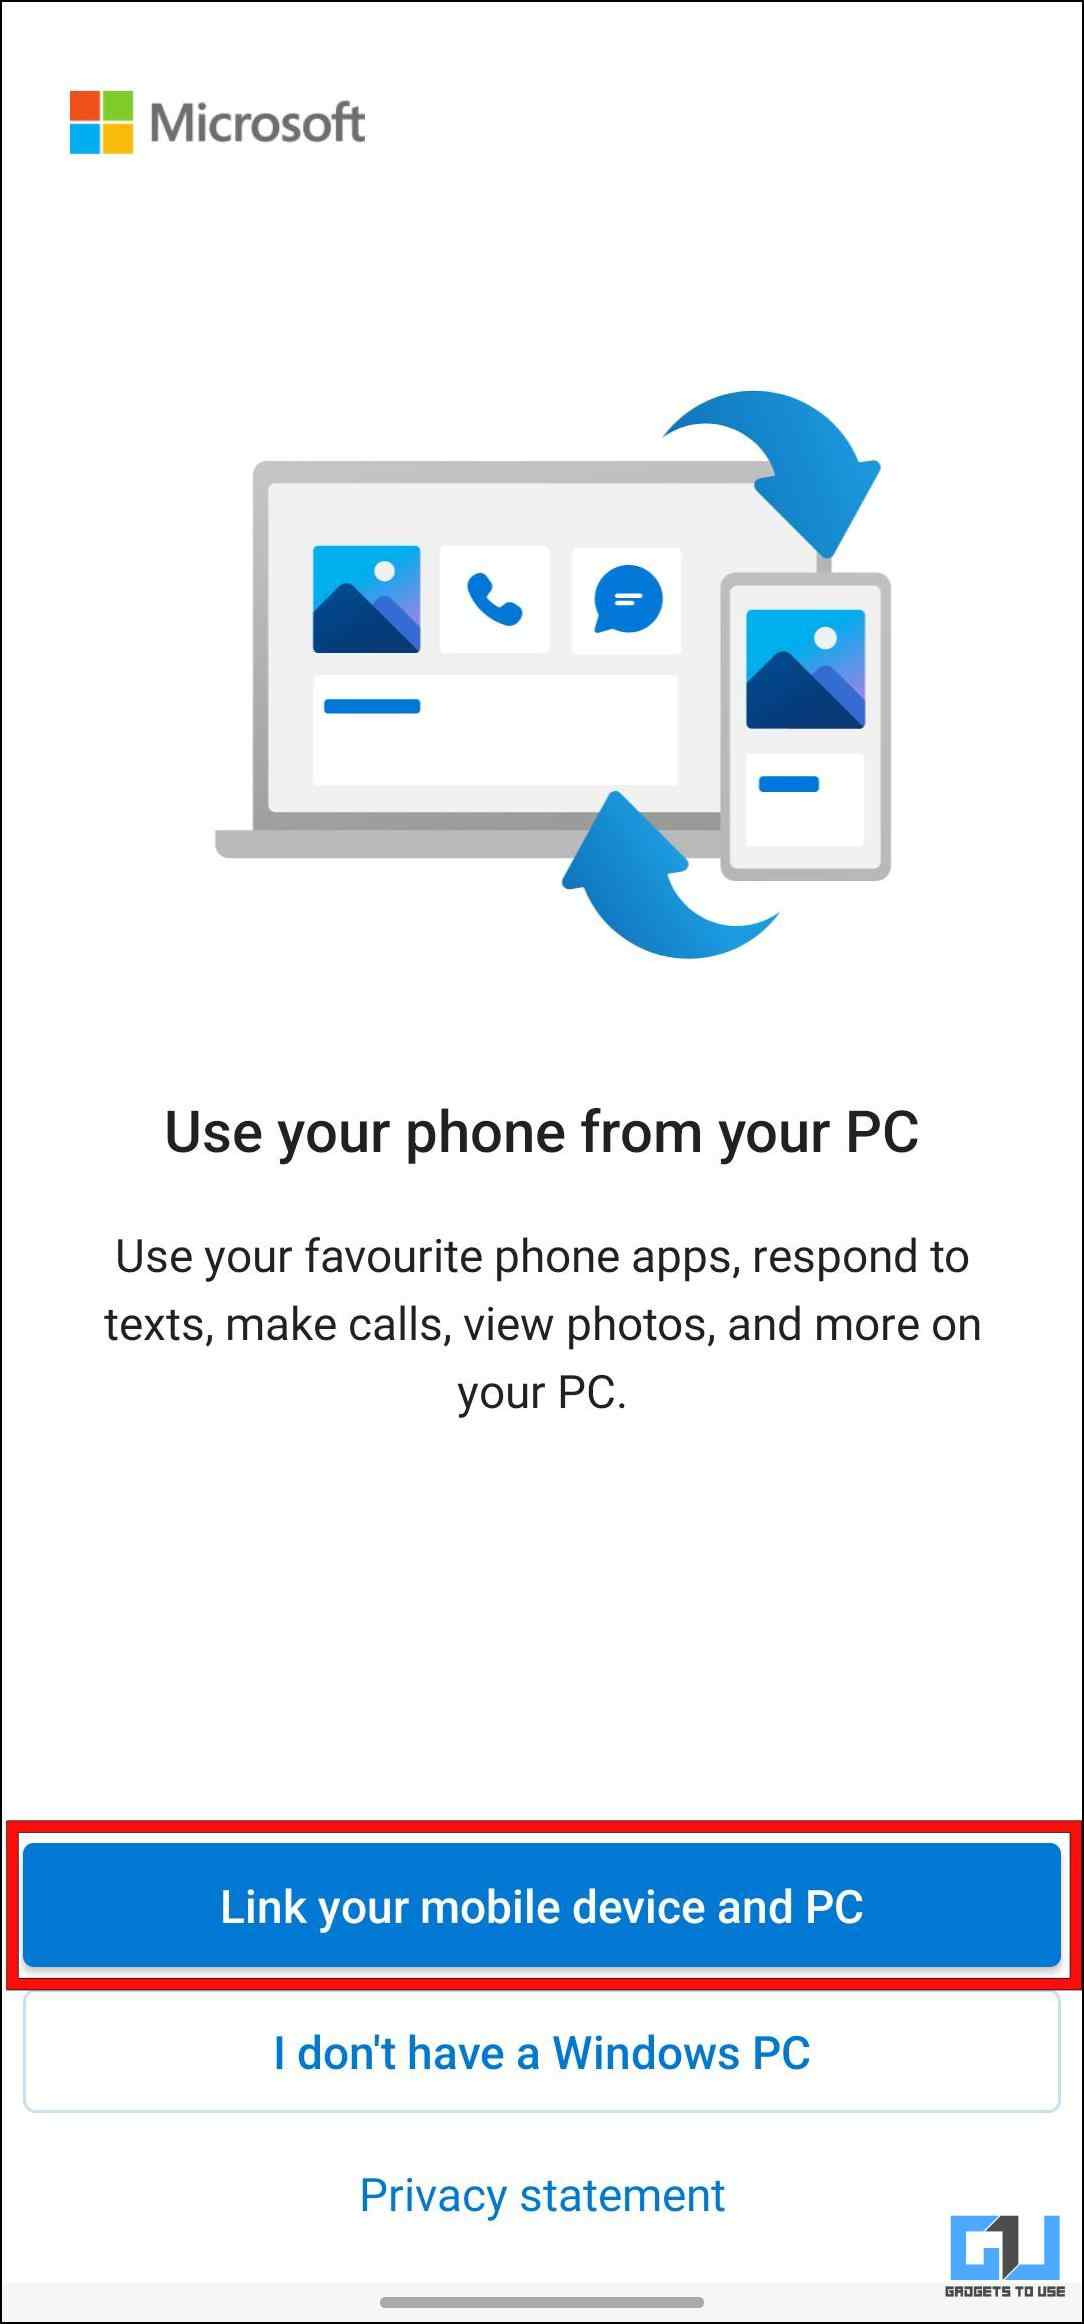
4. Tap the “Link your mobile device and PC” option to use this service.
5. Tap Continue on the next screen.
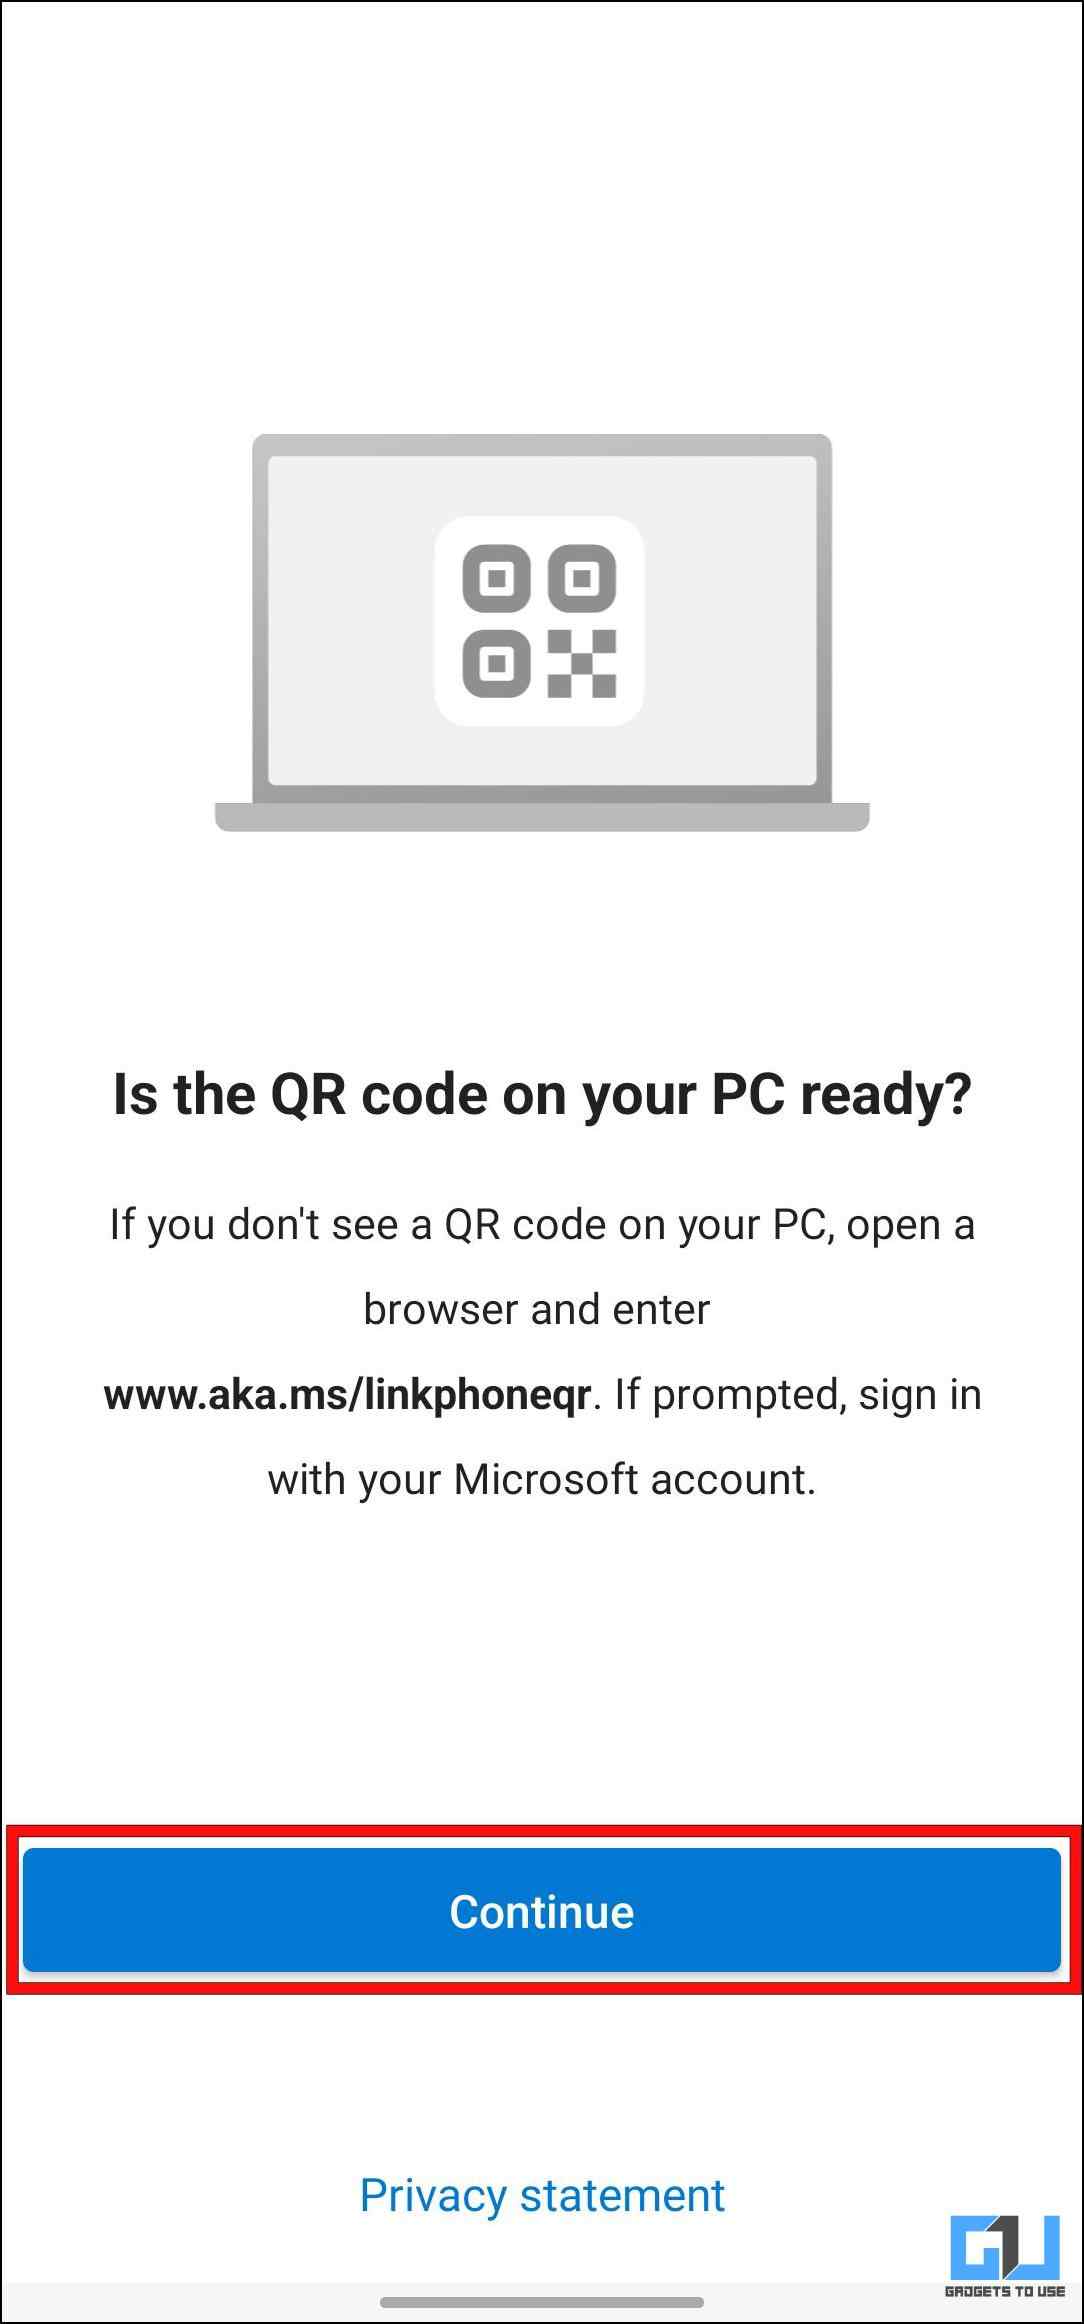
Allow necessary Camera permissions when prompted.
6. Now scan the QR code displayed on your computer.
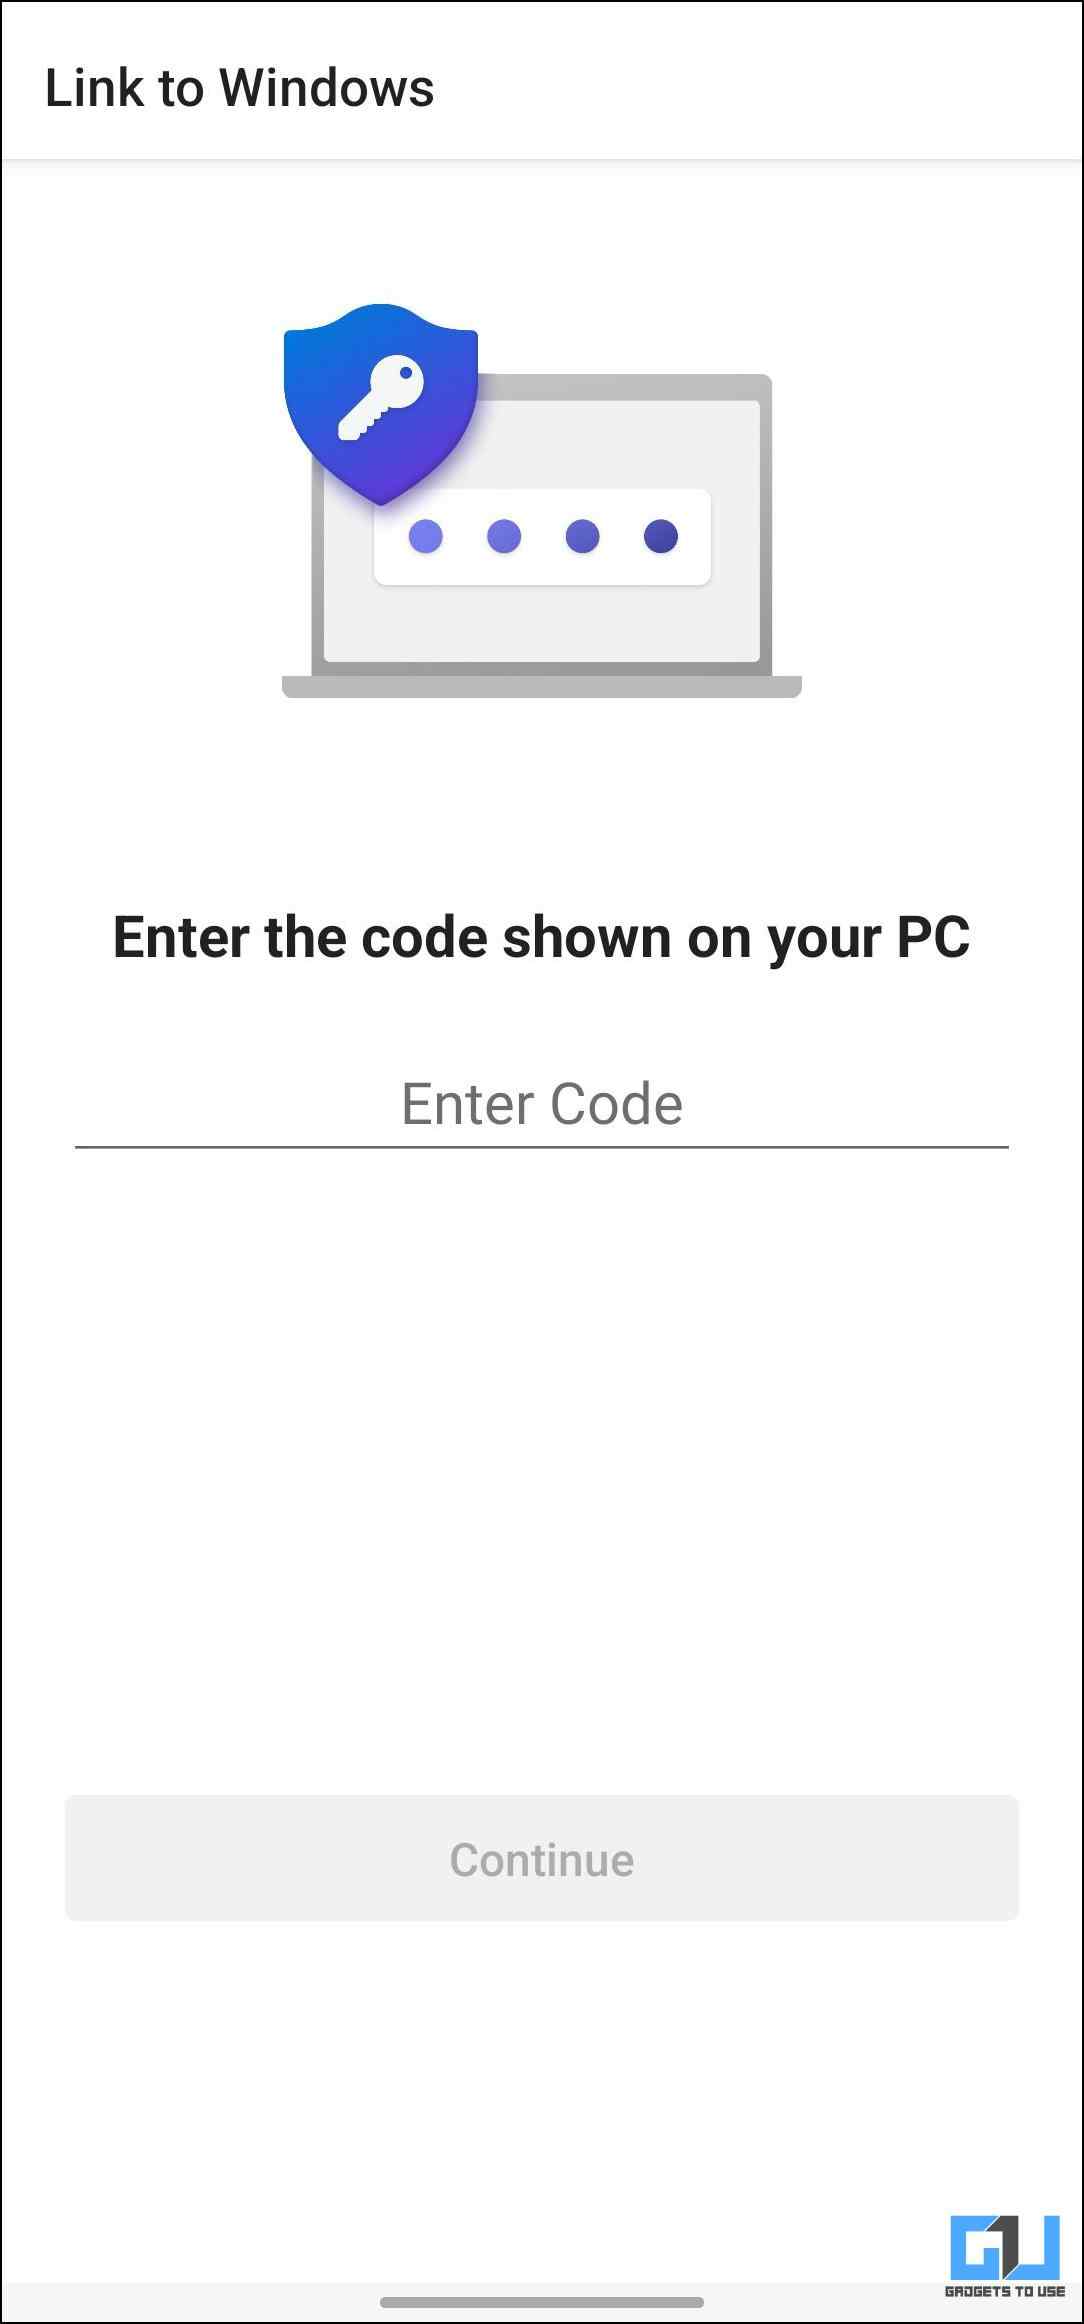
7. Enter the six-digit code shown on the PC on your smartphone, then tap on Continue.
8. The app will redirect you to sign in to your Microsoft account.
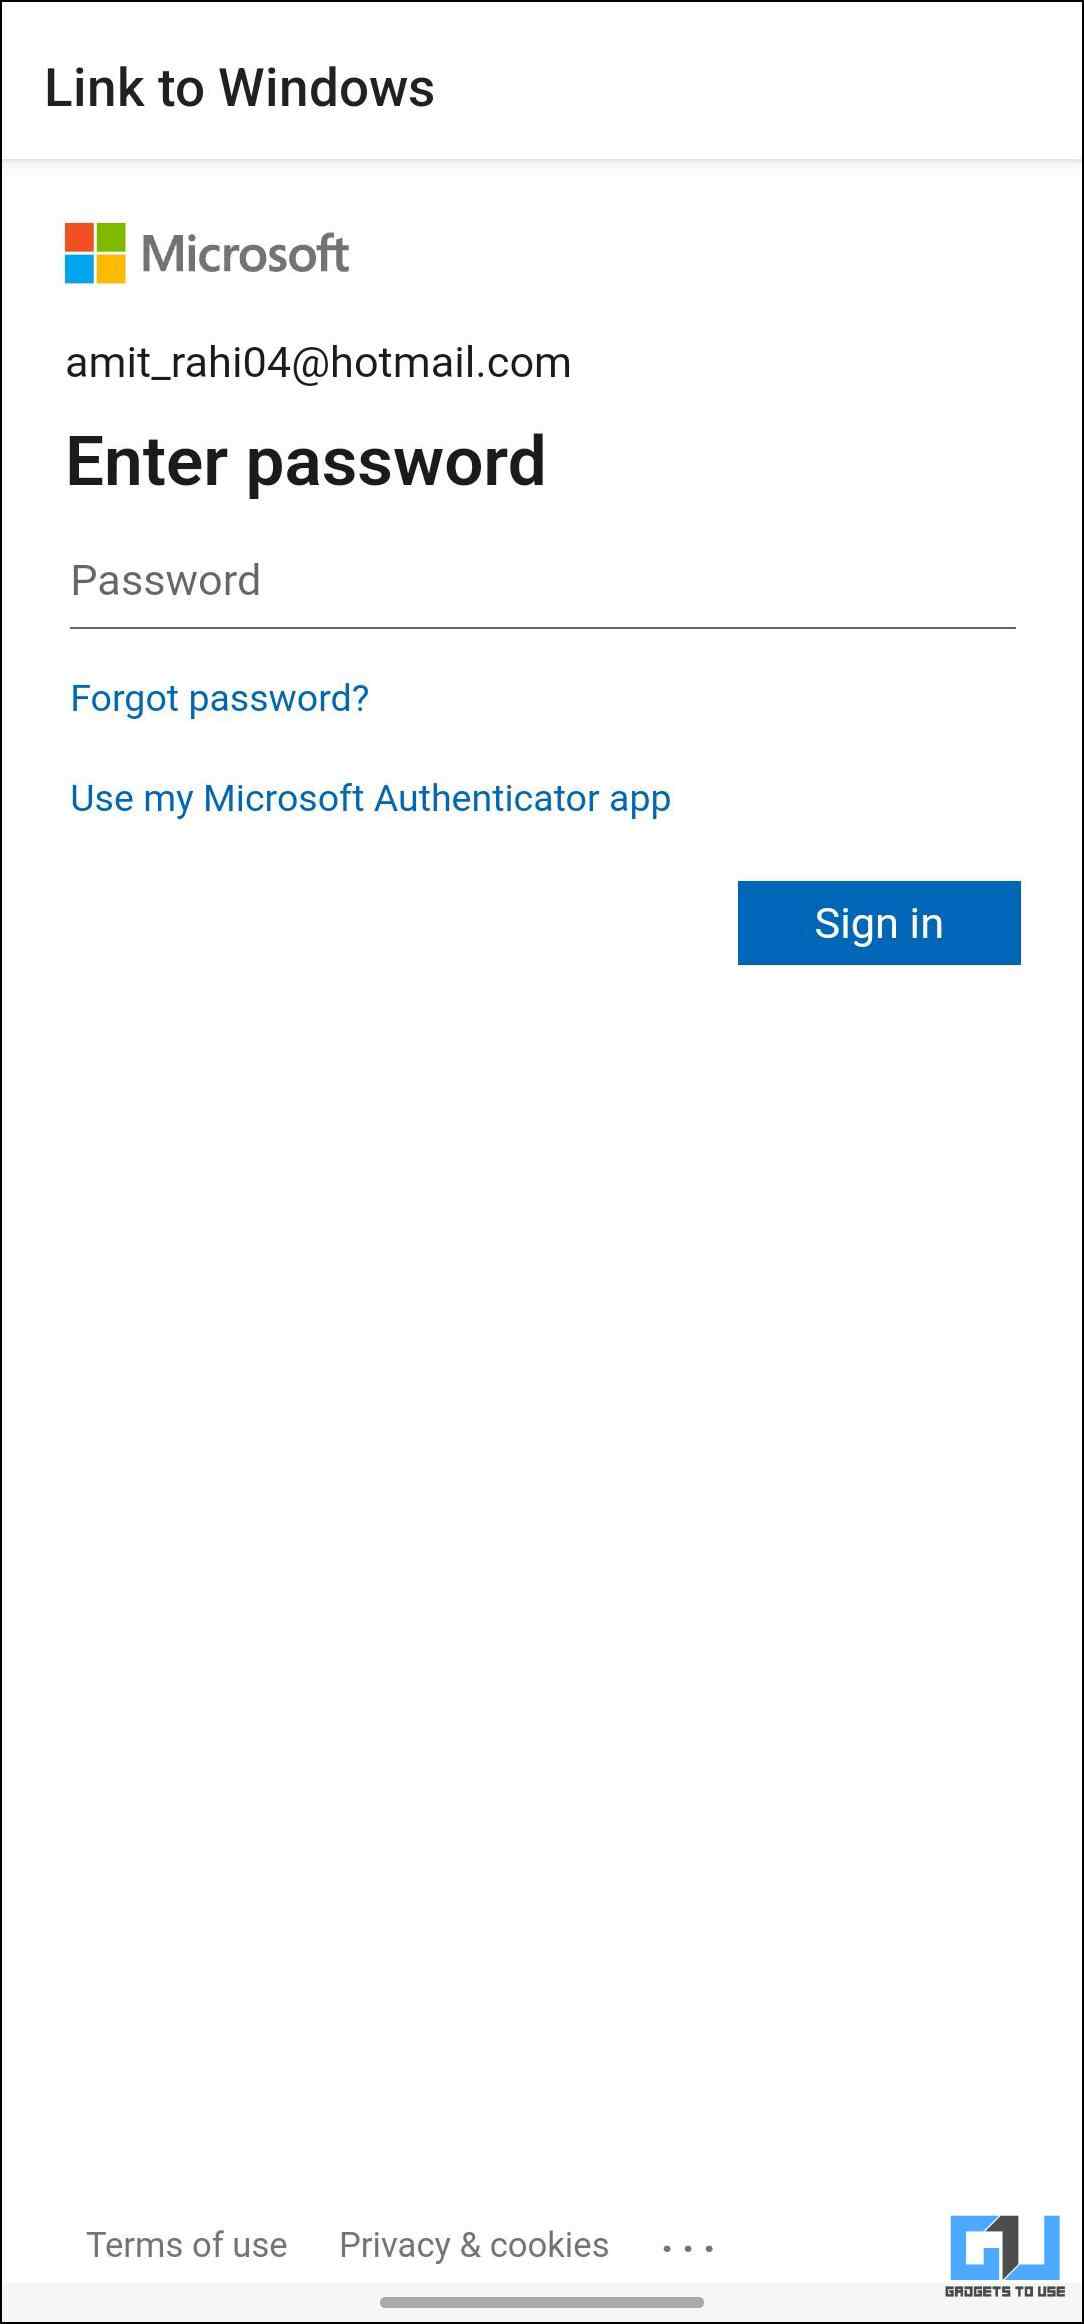
Use the same account that you used to sign in to Phone Link.
Allow the few permissions asked on your phone, including access to photos, videos, messages, and notifications, to use the service.
9. Tap on Done to finish setup for Link to Windows on your smartphone.
Step 3: Mirroring Screen With Phone Link
With the setup for both PC and phone completed, let’s discuss how to mirror your Samsung phone screen on the PC.
1. Open the Phone Link app on your Windows PC once paired.
2. Go to the Apps section.
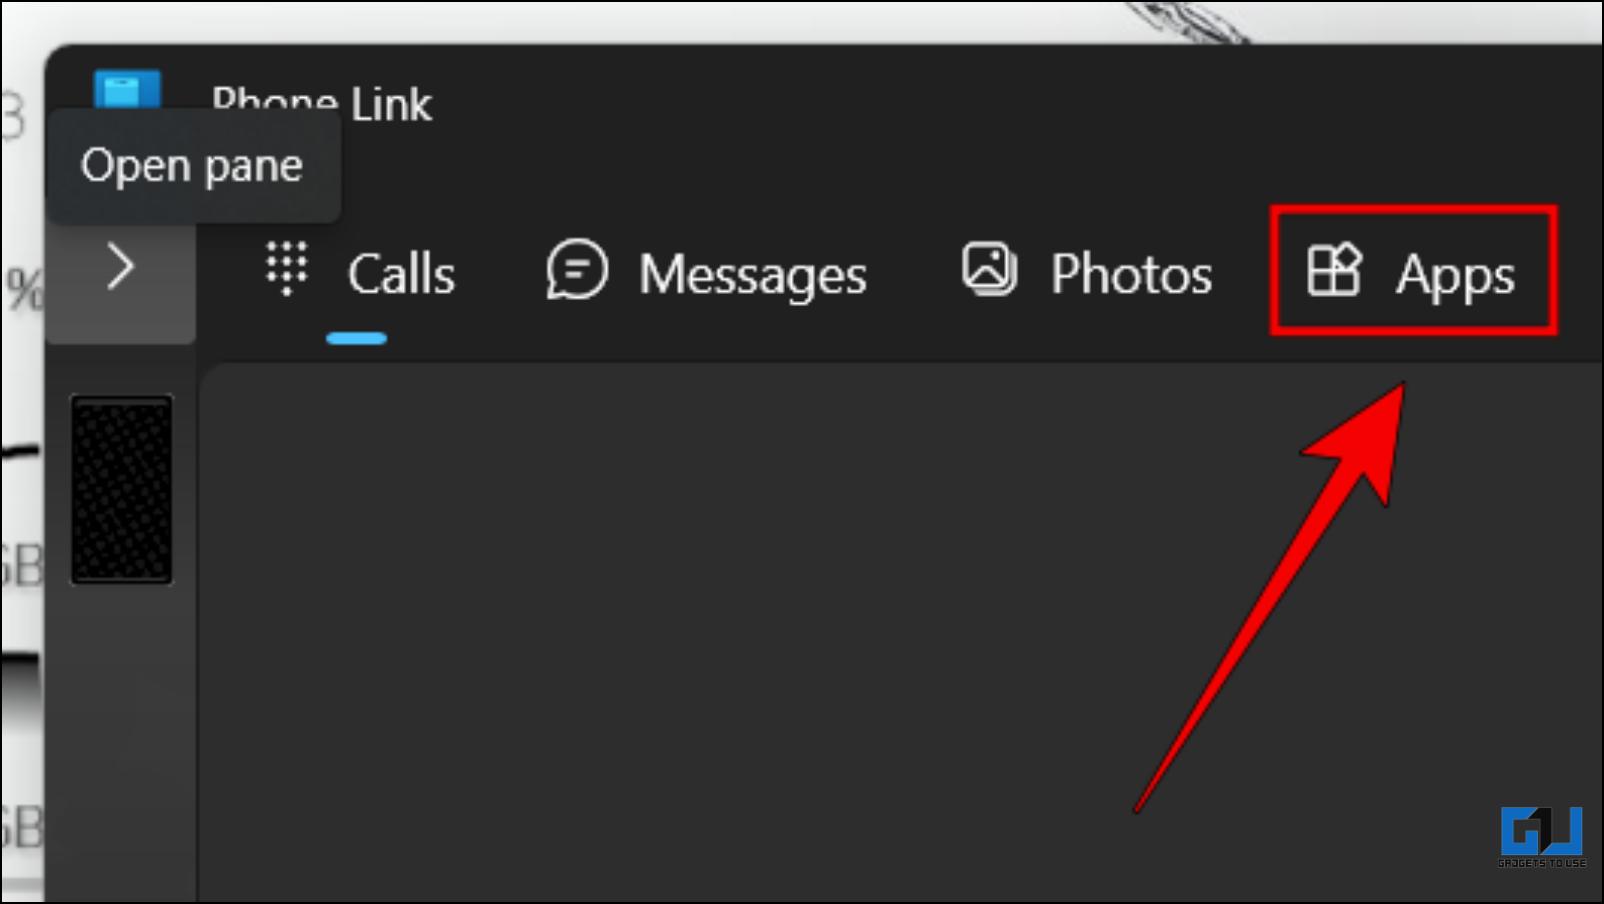
3. Here, click on Open phone screen.

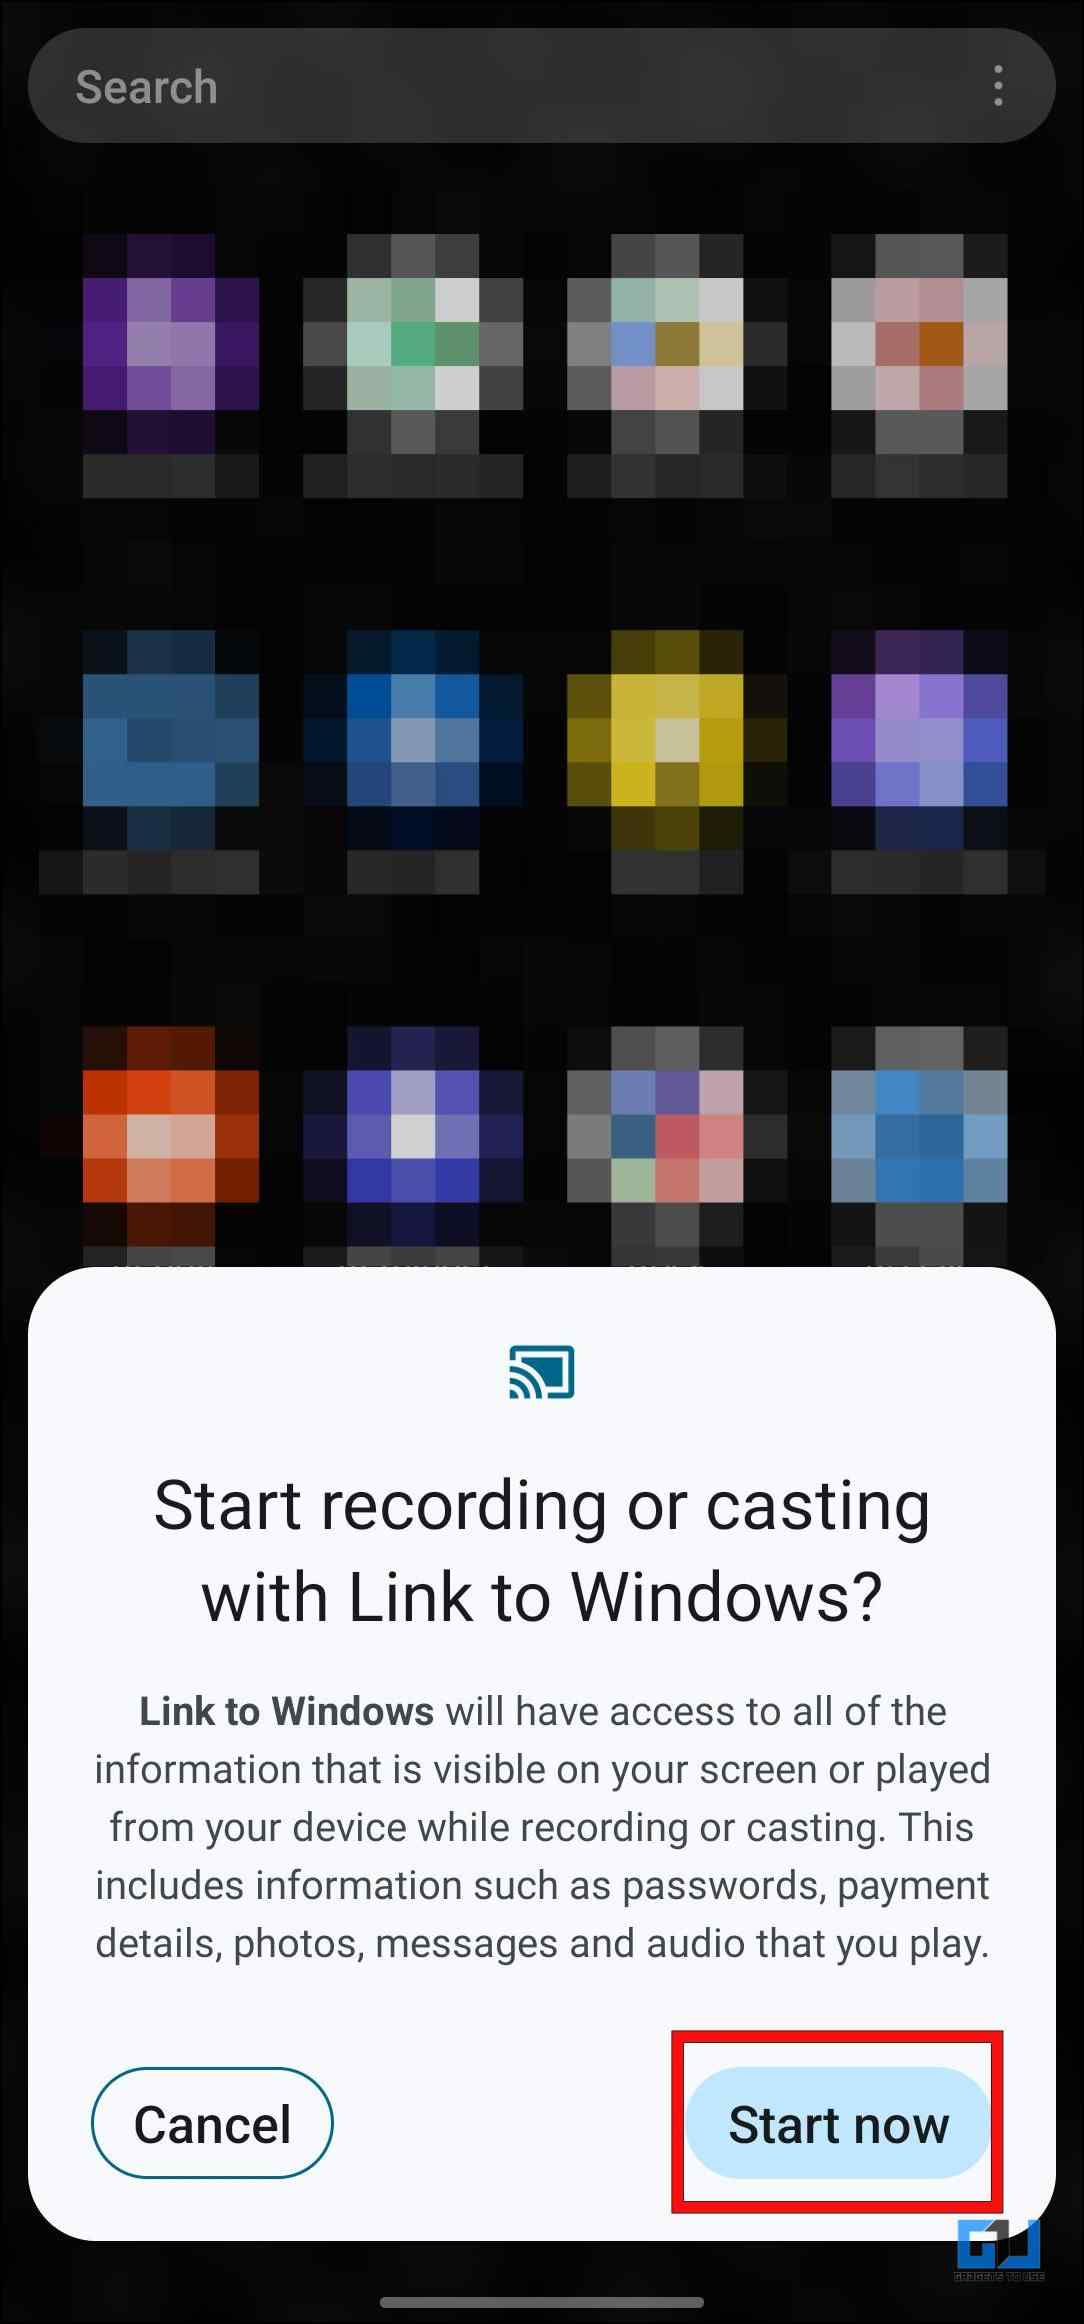
4. It will request your phone to “Start recording or casting with Link to Windows.” Tap on Start now.
Your phone’s display should now be visible on the desktop.
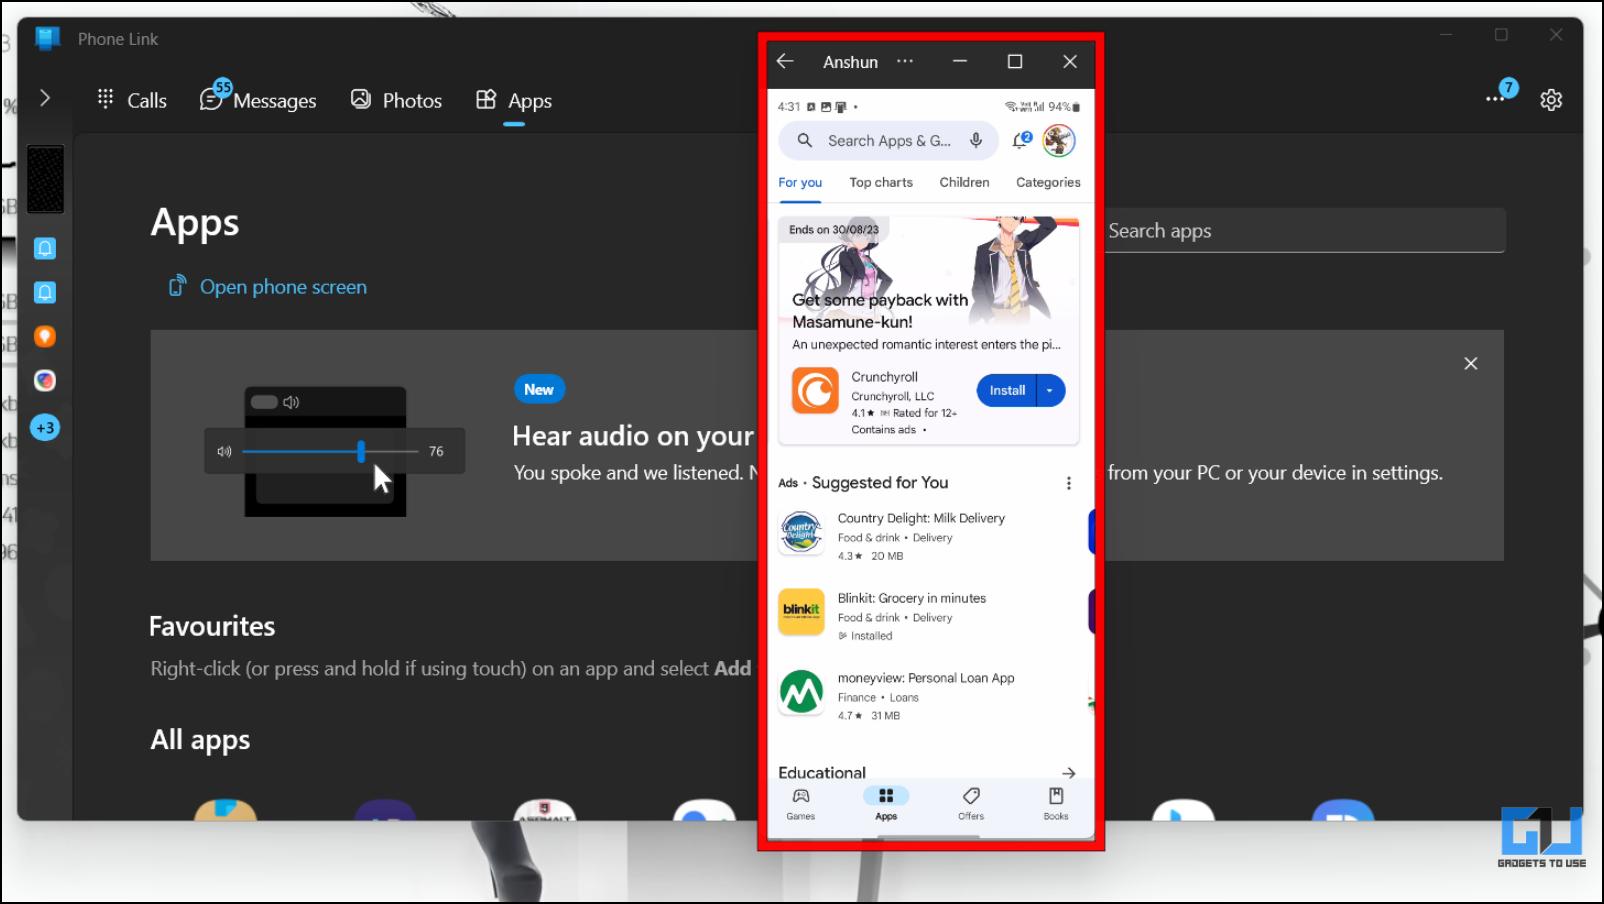
The best part about this method is that it appears as a floating window, which can be dragged across the screen. You can also open apps installed on your phone individually.
Wrapping Up
Though rare for many, there can be instances where you want to use your smartphone on the big screen. This is why it is good that both ecosystem, for the most part, provide their way to cast or mirror your Android phone to Windows 10 or 11 displays. Since I own a Samsung smartphone, I prefer the Link to Windows option. But you can go with any other if you prefer. Stay tuned on GadgetsToUse for more such articles, reviews, and How-Tos.
You might be interested in the following:
- Windows Phone Link vs Intel Unison: Which is Better?
- How to Connect Your iPhone to Windows Phone Link
- Top 5 Ways to Cast or Mirror Content on Android TV From Your Phone
- 6 Ways to Fix Android TV Appearing Twice in the Cast Option
You can also follow us for instant tech news at Google News or for tips and tricks, smartphones & gadgets reviews, join GadgetsToUse Telegram Group or for the latest review videos subscribe GadgetsToUse YouTube Channel.


