

Quick Answer
- When you search for an image with Google Lens, it shows you an option on top of the image preview to Find the Image Source.
- However, it does not help you get to the source of the image like the old reverse image search in Google used to do.
- That’s why we have looked up methods to bring back the old image search or to find the image sources easily in Google search.
Google Lens serves as a great way to find text in images, translate it, or look for similar photos on the web. However, it does not help you get to the source of the image like the old reverse image search in Google used to do. So, if you prefer the old Google image search and are trying to get it back, then you’re in luck. In this article, we will discuss various ways to use old Google image searches on PC and Android.
How to Use Old Google Image Search on PC and Android?
The legacy image search was basic in its approach but did the job well. It only previewed results for the image in question and served as an effective tool for finding the original image source. This explains why several users would prefer it over Google Lens. That’s why we have looked up methods to bring back the old image search or to find the image sources easily in Google search.
Method 1 – Remove Google Lens with Chrome Flags (PC and Android)
Within Chrome’s experimental feature page, you can find an option to disable the Google Lens image search. Once you have disabled Lens, the browser automatically switches back to the old image search. Here are the steps to disable Google Lens.
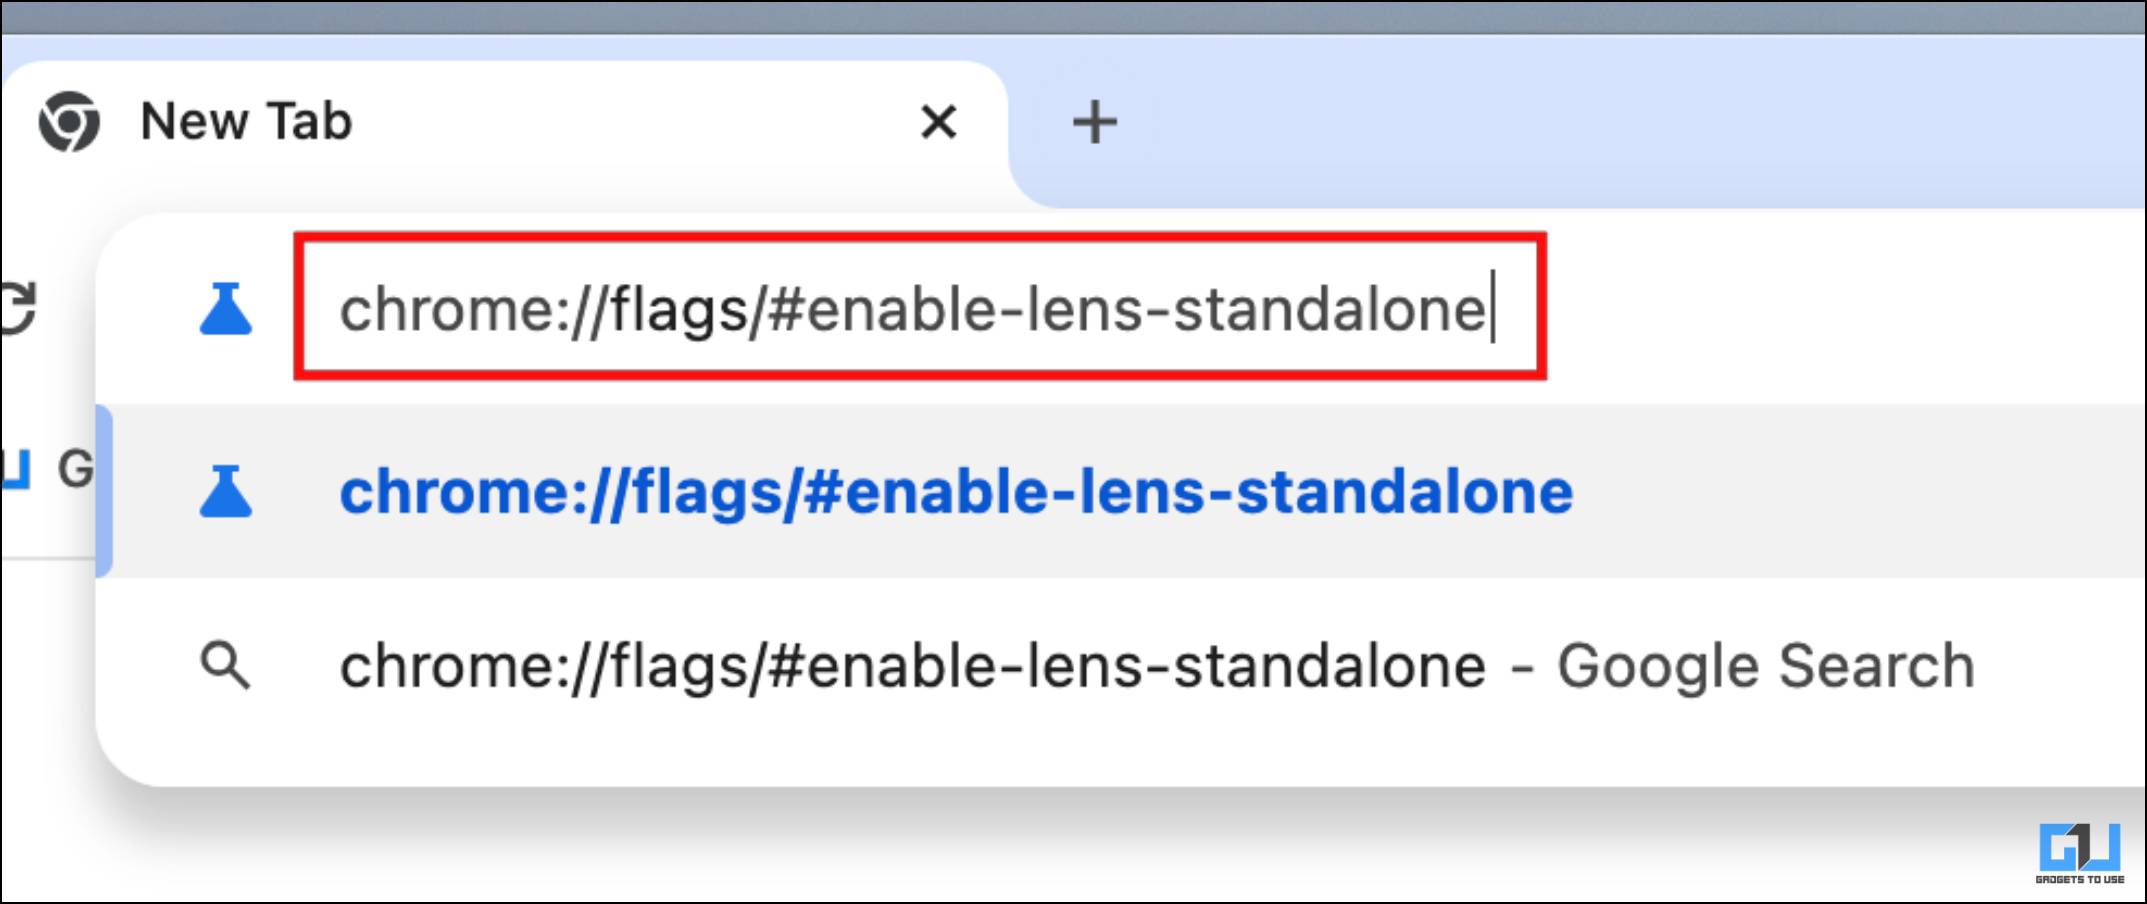
1. On the Chrome address bar, type the following URL and press enter.
chrome://flags/#enable-lens-standalone
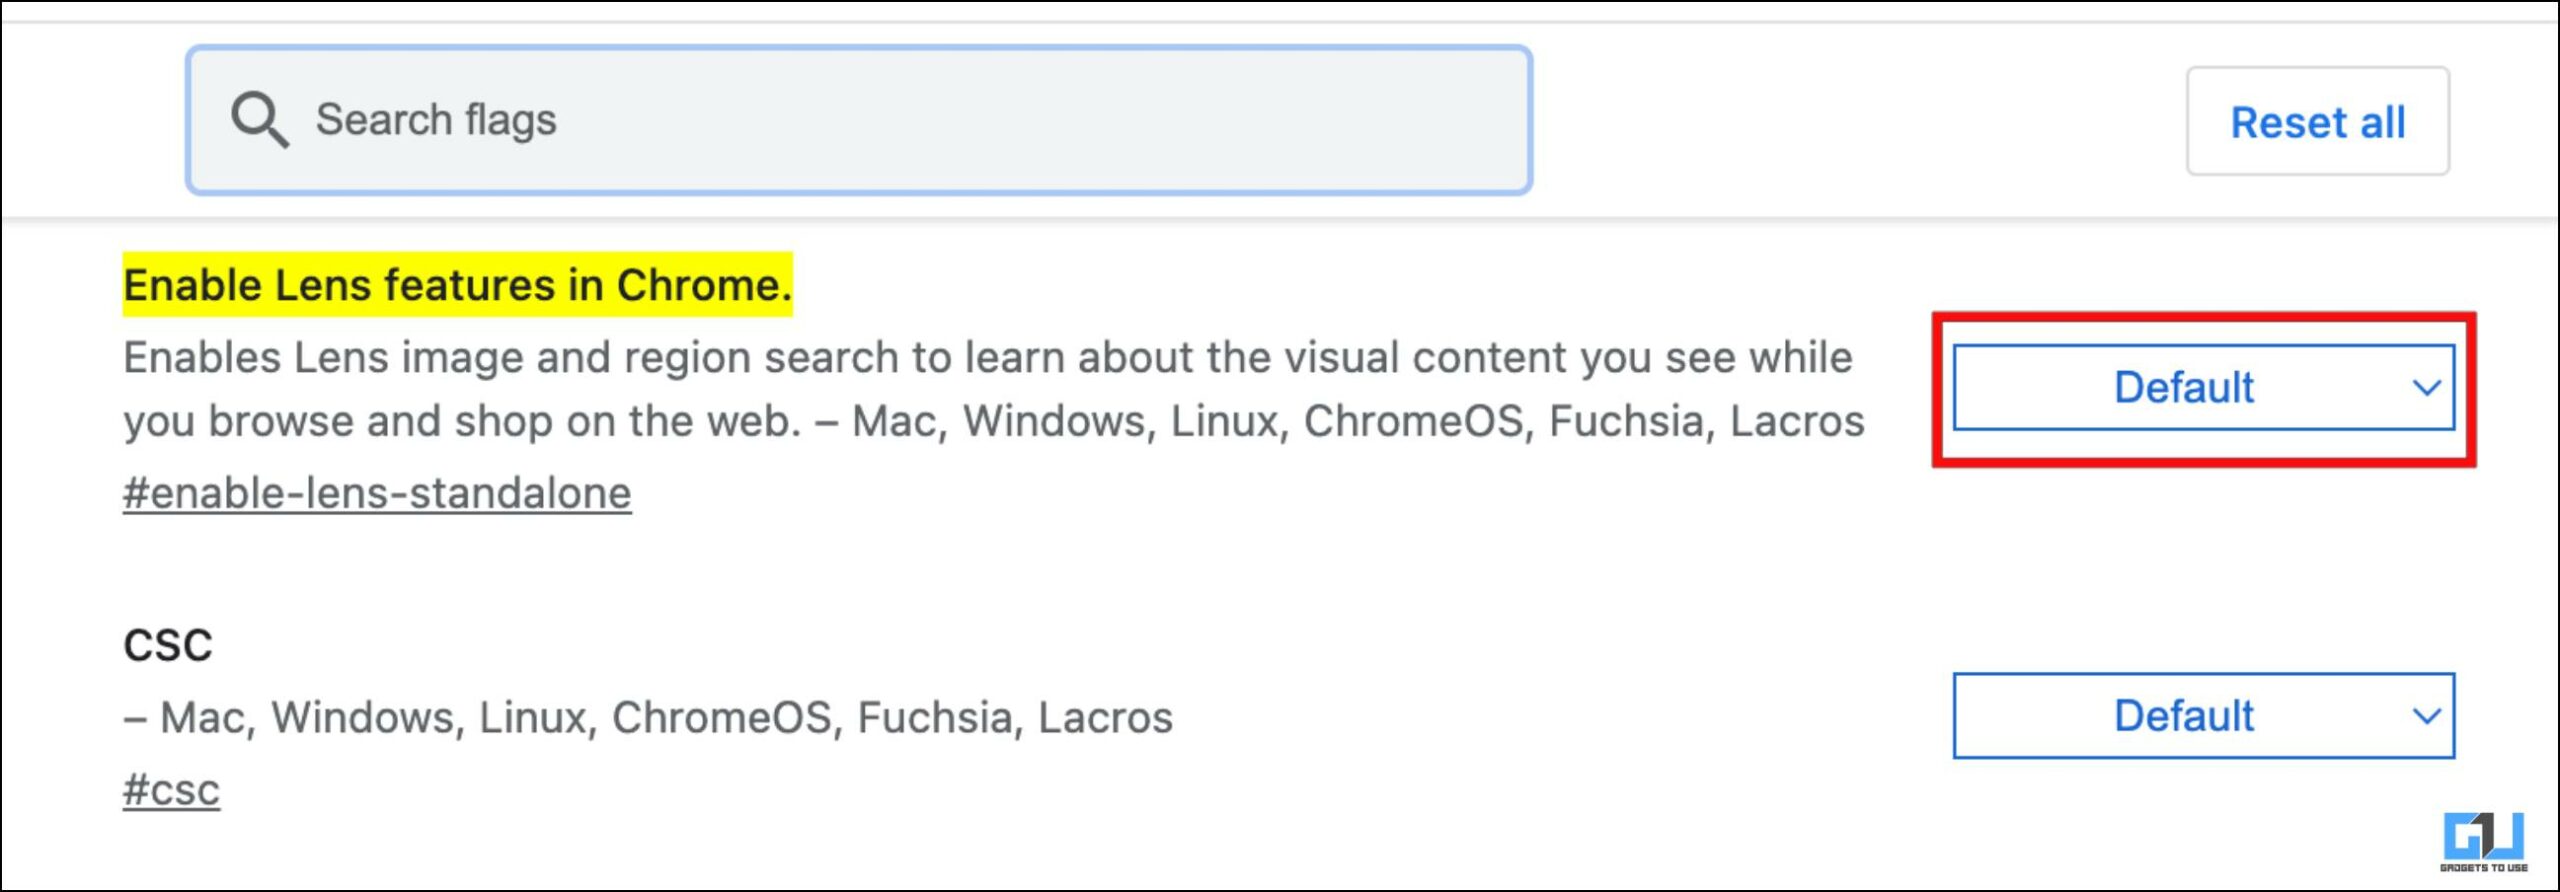
Head over to this URL. It will take you to Chrome’s experimental features page with the “Enable Lens features” in Chrome highlighted in yellow.
2. Click the drop-down menu next to it.
3. Choose the Disabled option.
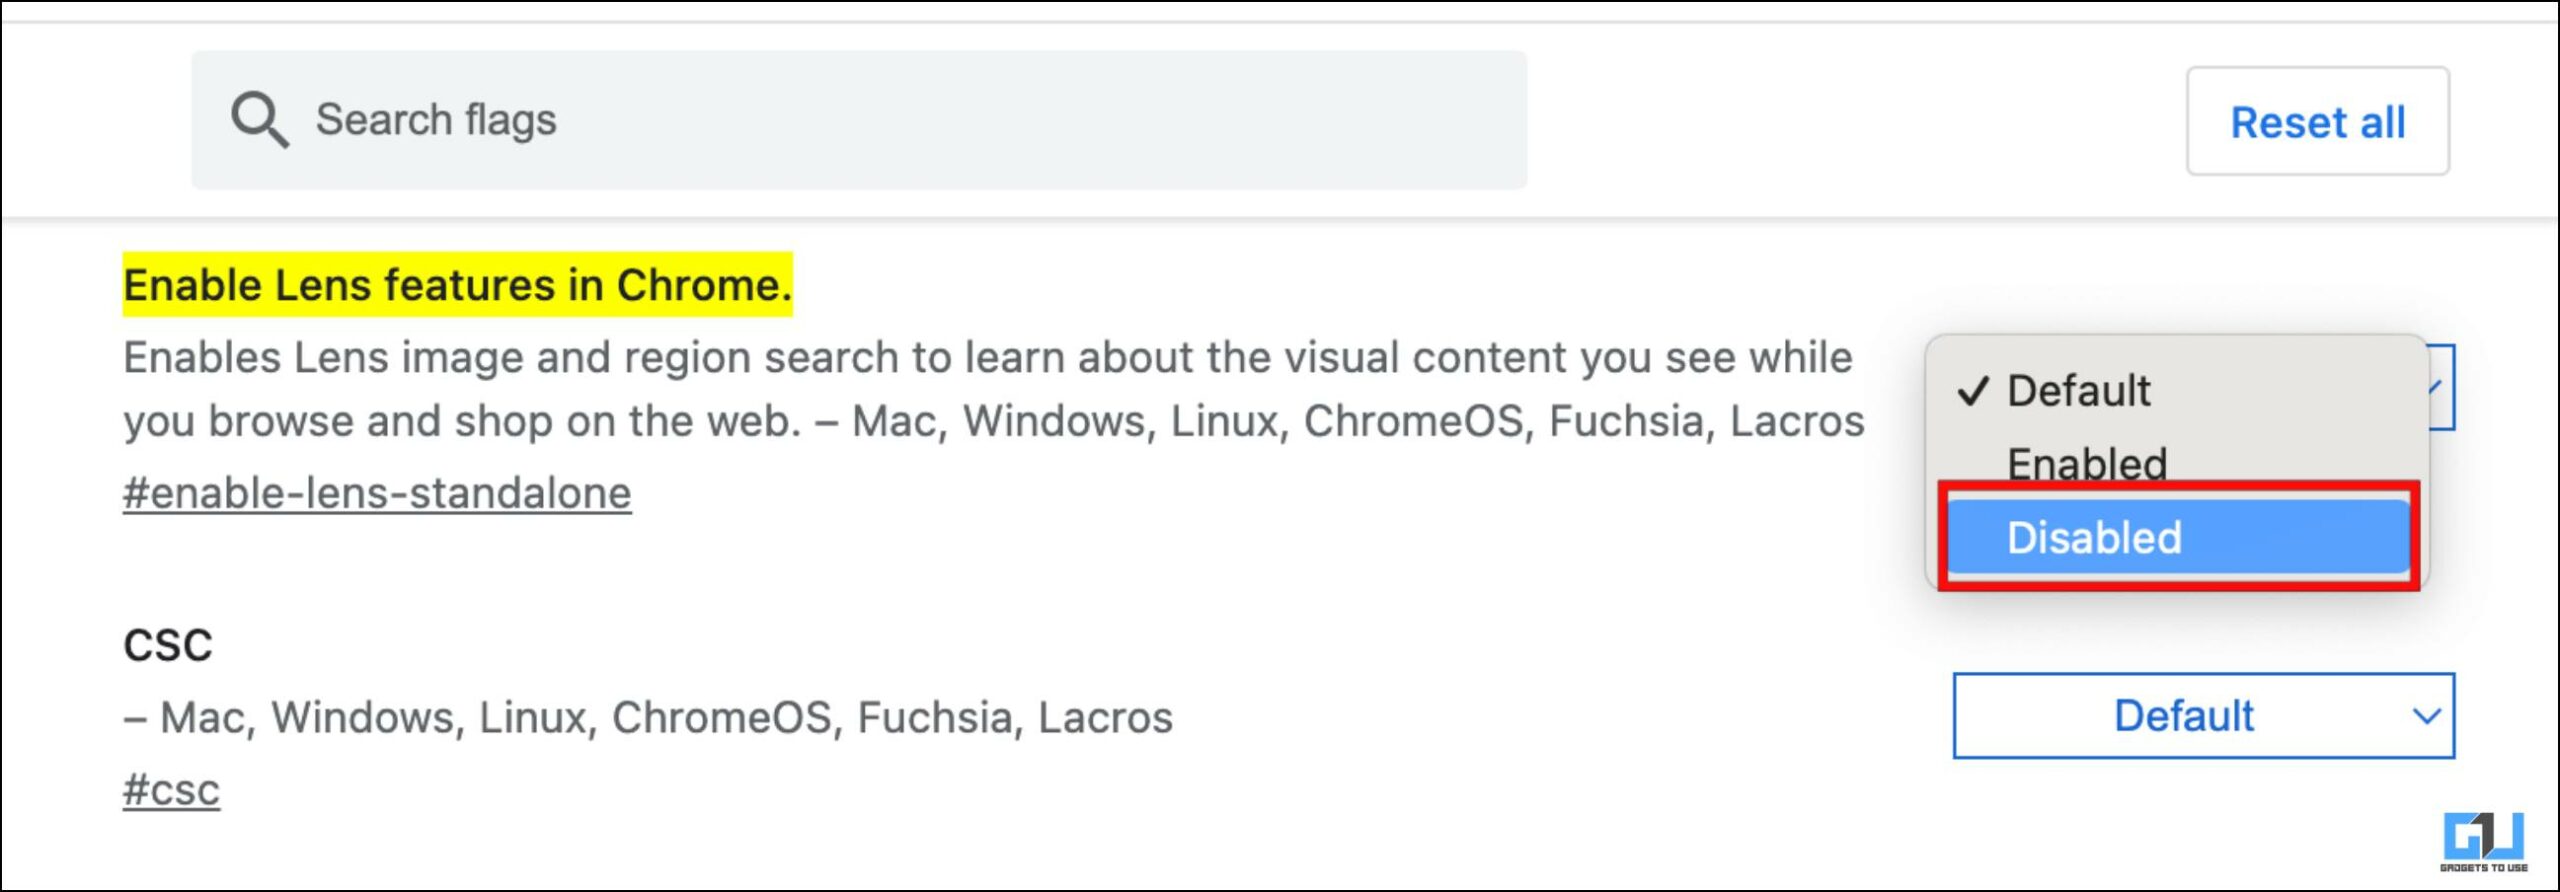
4. Now click on the Relaunch button.
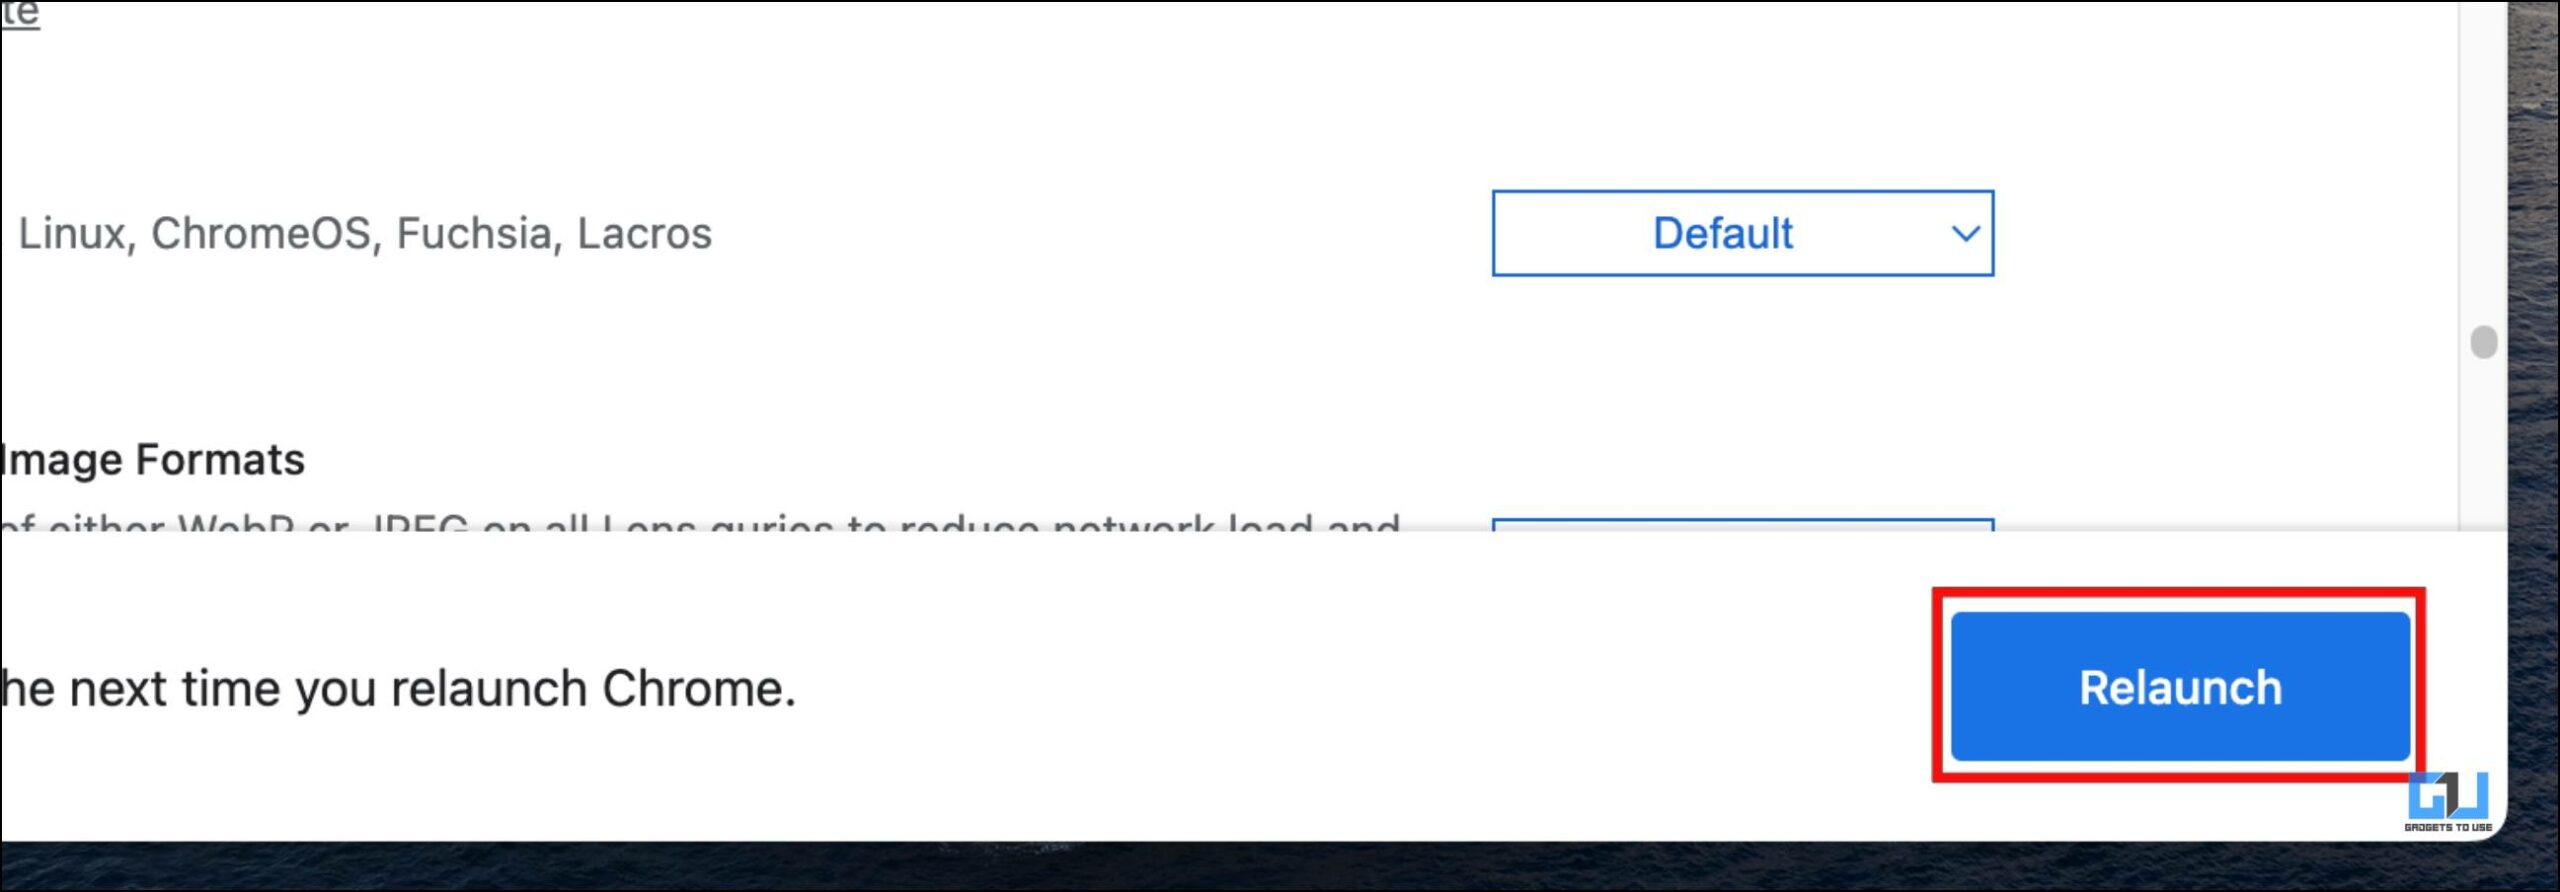
This will replace Google Lens with the legacy Google image search.
Method 2 – Find Image Source Using Google Lens
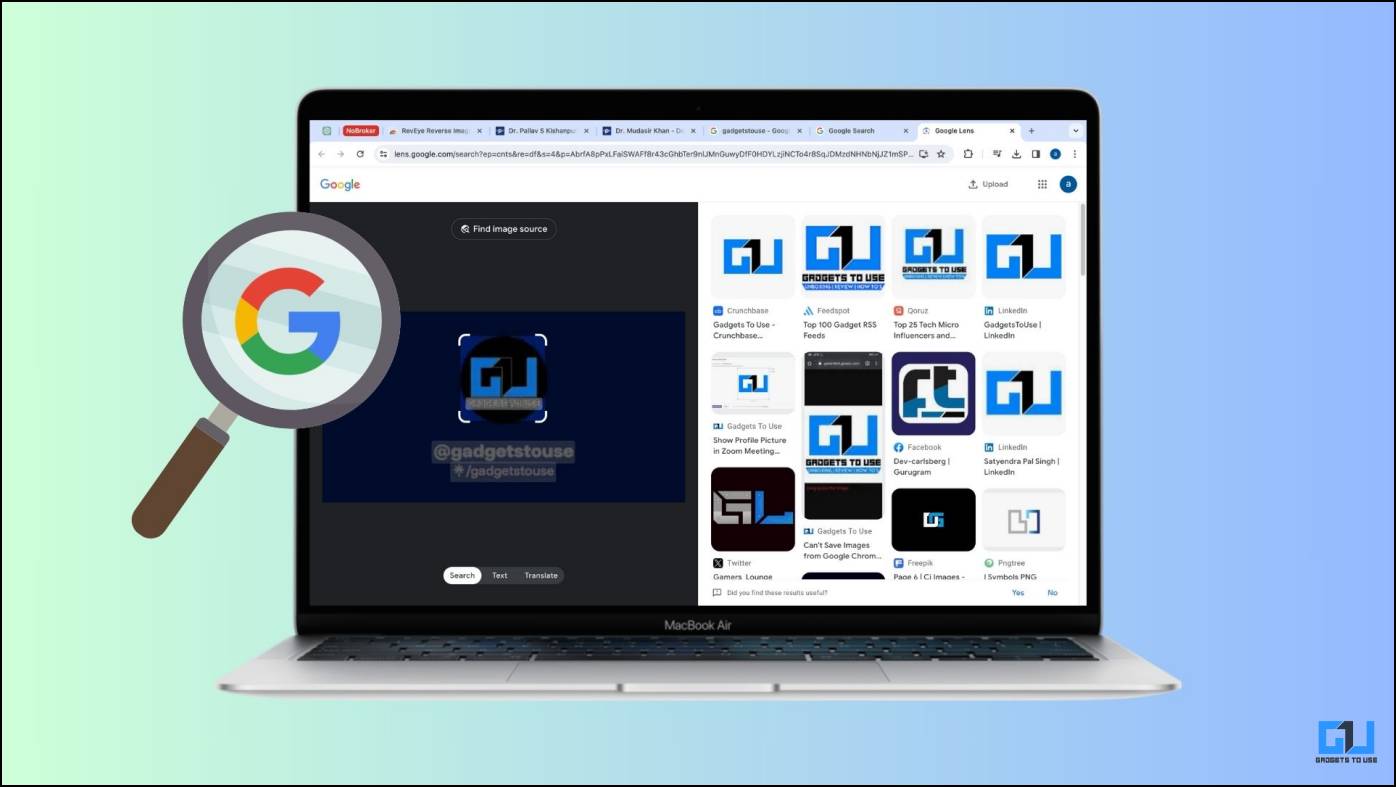
In case you want to look up the source of an image and don’t mind sticking with Google Lens, then you can try out this trick. When you search for an image with Google Lens, it shows you an option on top of the image preview to Find the Image Source. This option uses the good old Google image search to check who originally uploaded the image. Here is how you can use it.
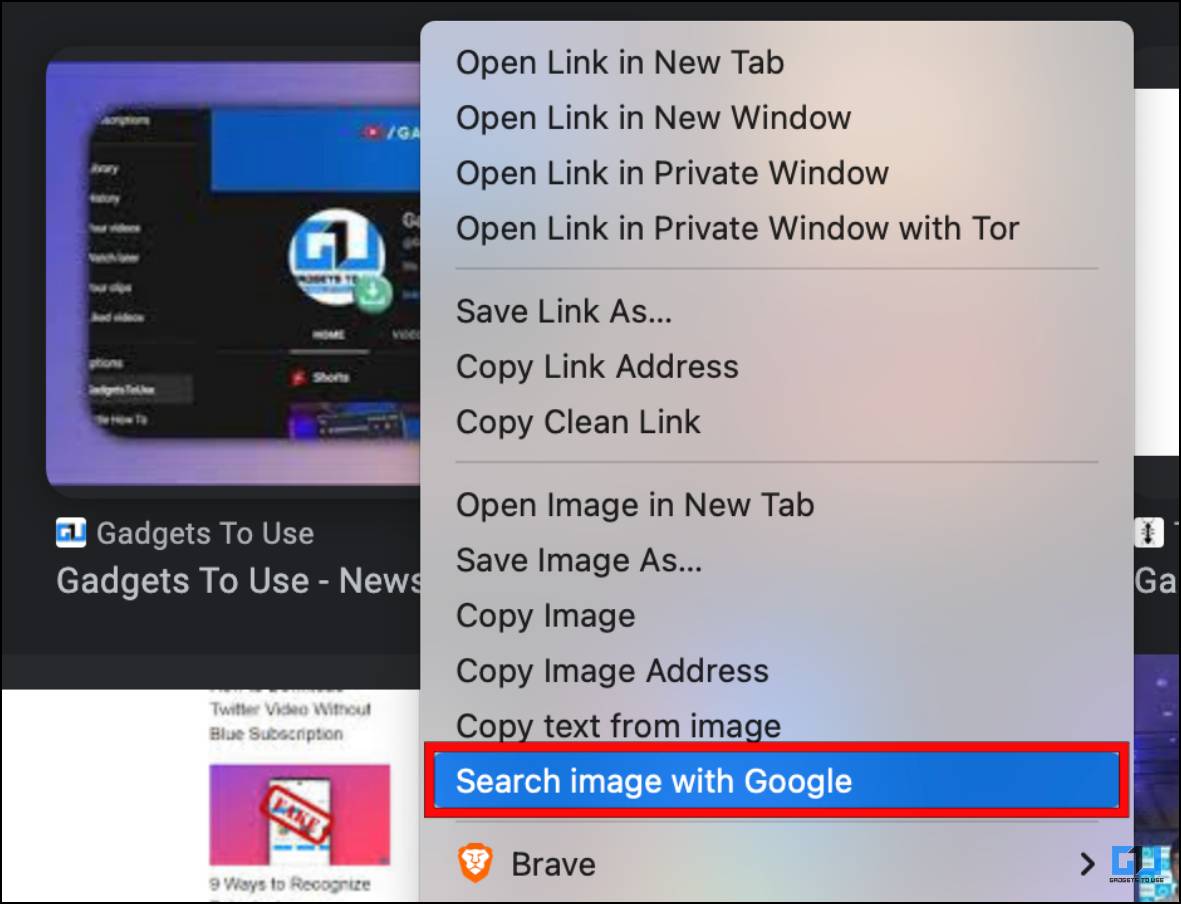
1. Choose an image and right-click on it.
2. Using the context menu, click on the “Search for Image with Google” option.
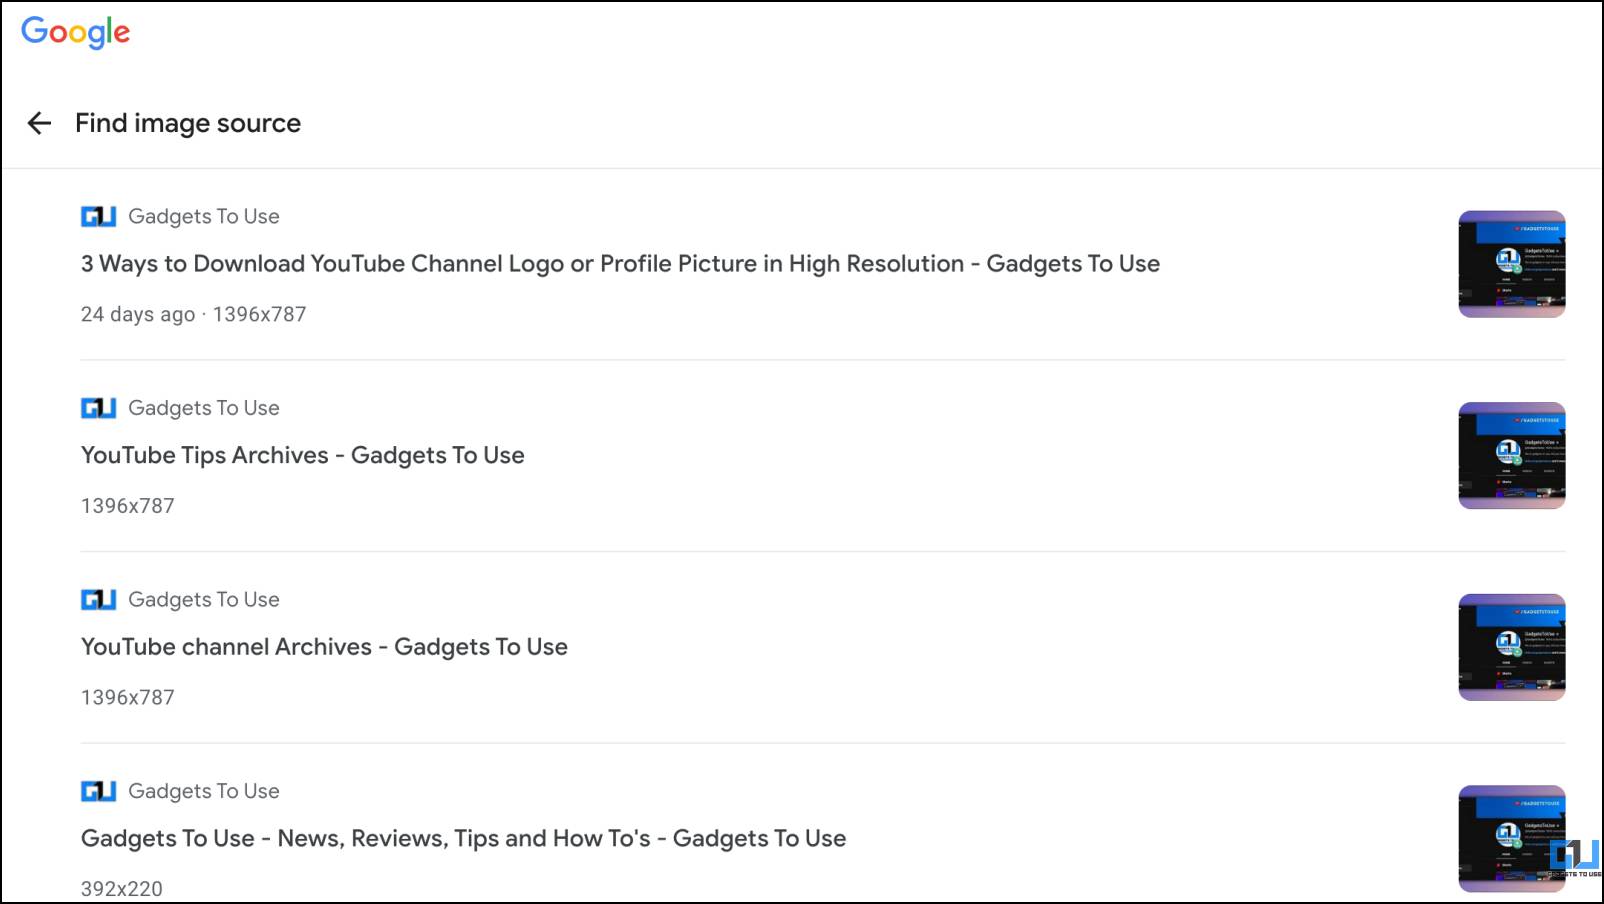
3. This will launch the Google Lens. Here, click on the “Find Image Source” option.
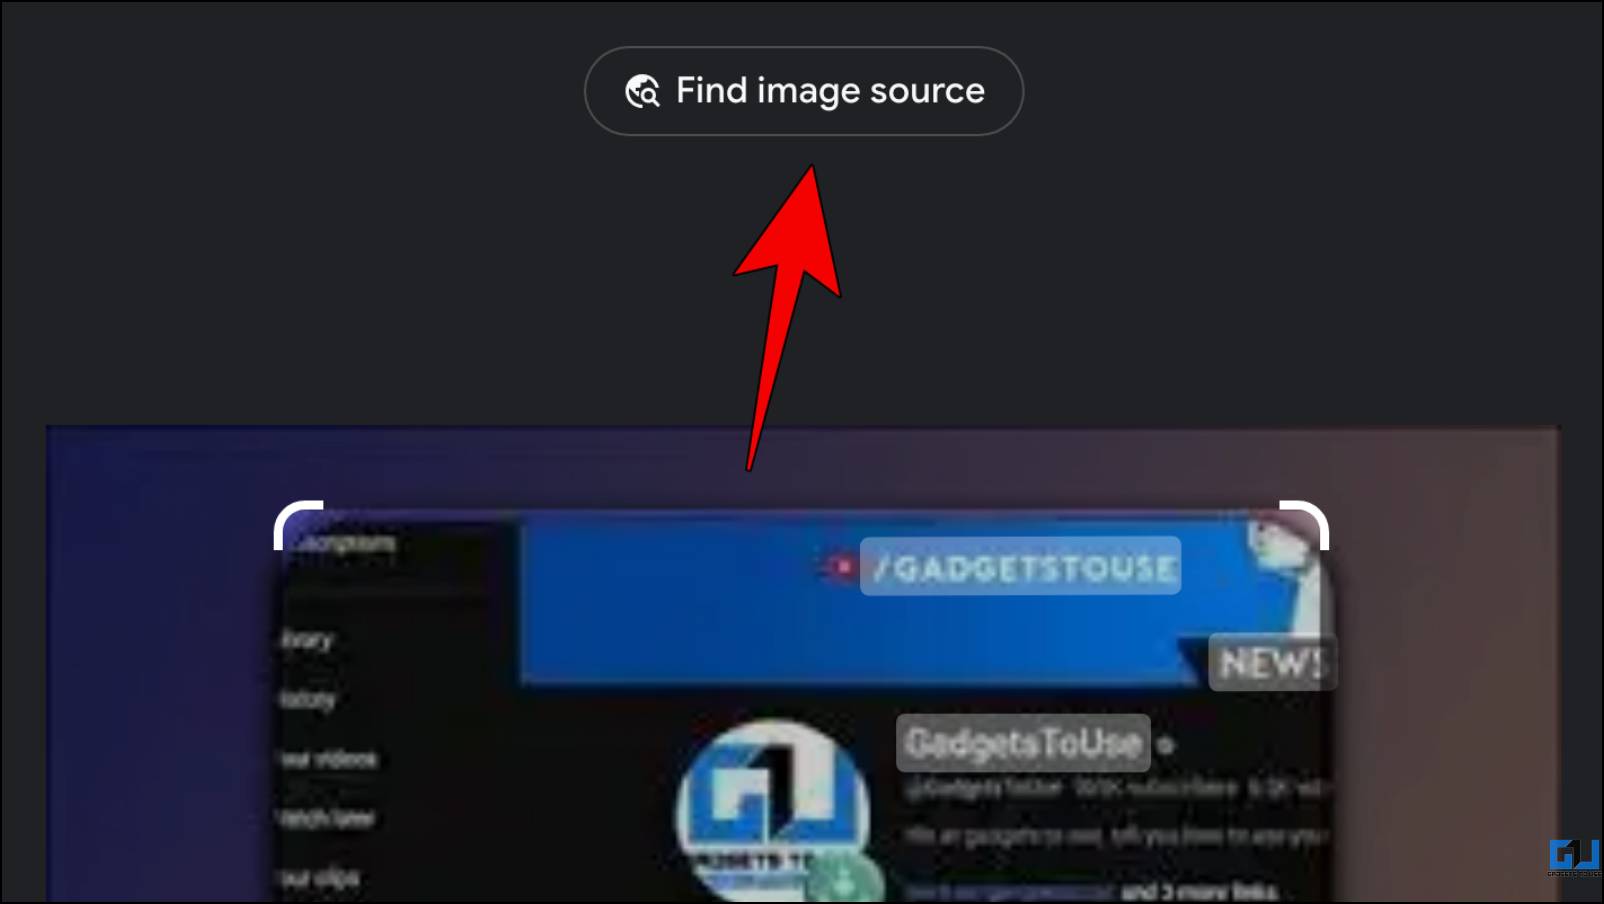
It will open a new tab with a list of credible sources who might have uploaded the original image.
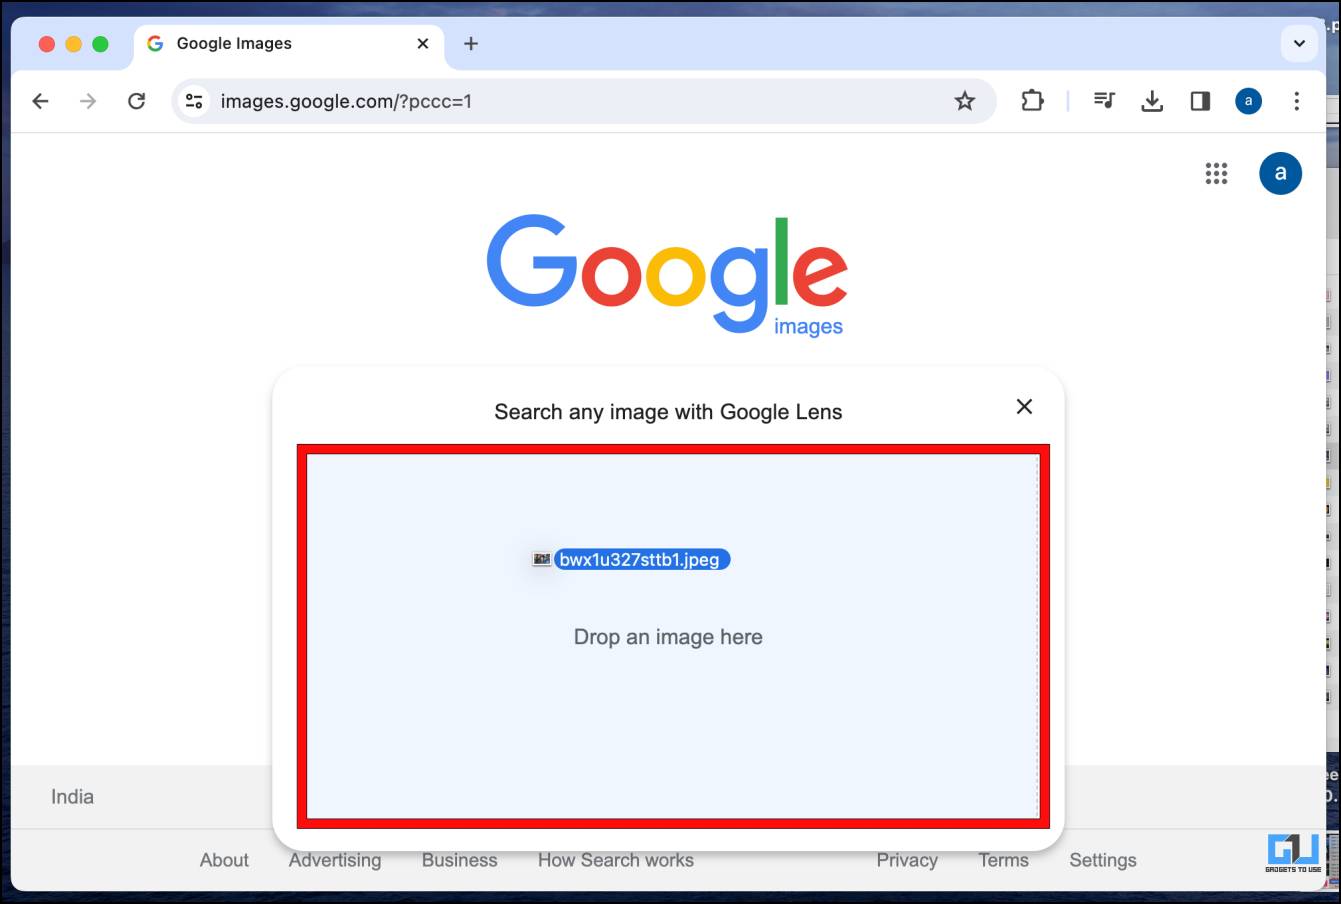
Method 3 – Directly Reverse Search Images on Google
You can also directly visit images.google.com to reverse-search images or find their source. The page will look identical to the default Google search page, but you can drag and drop images here to search for them. This makes things a lot more convenient as you do not have to upload the image in question and can directly look them up on Google.
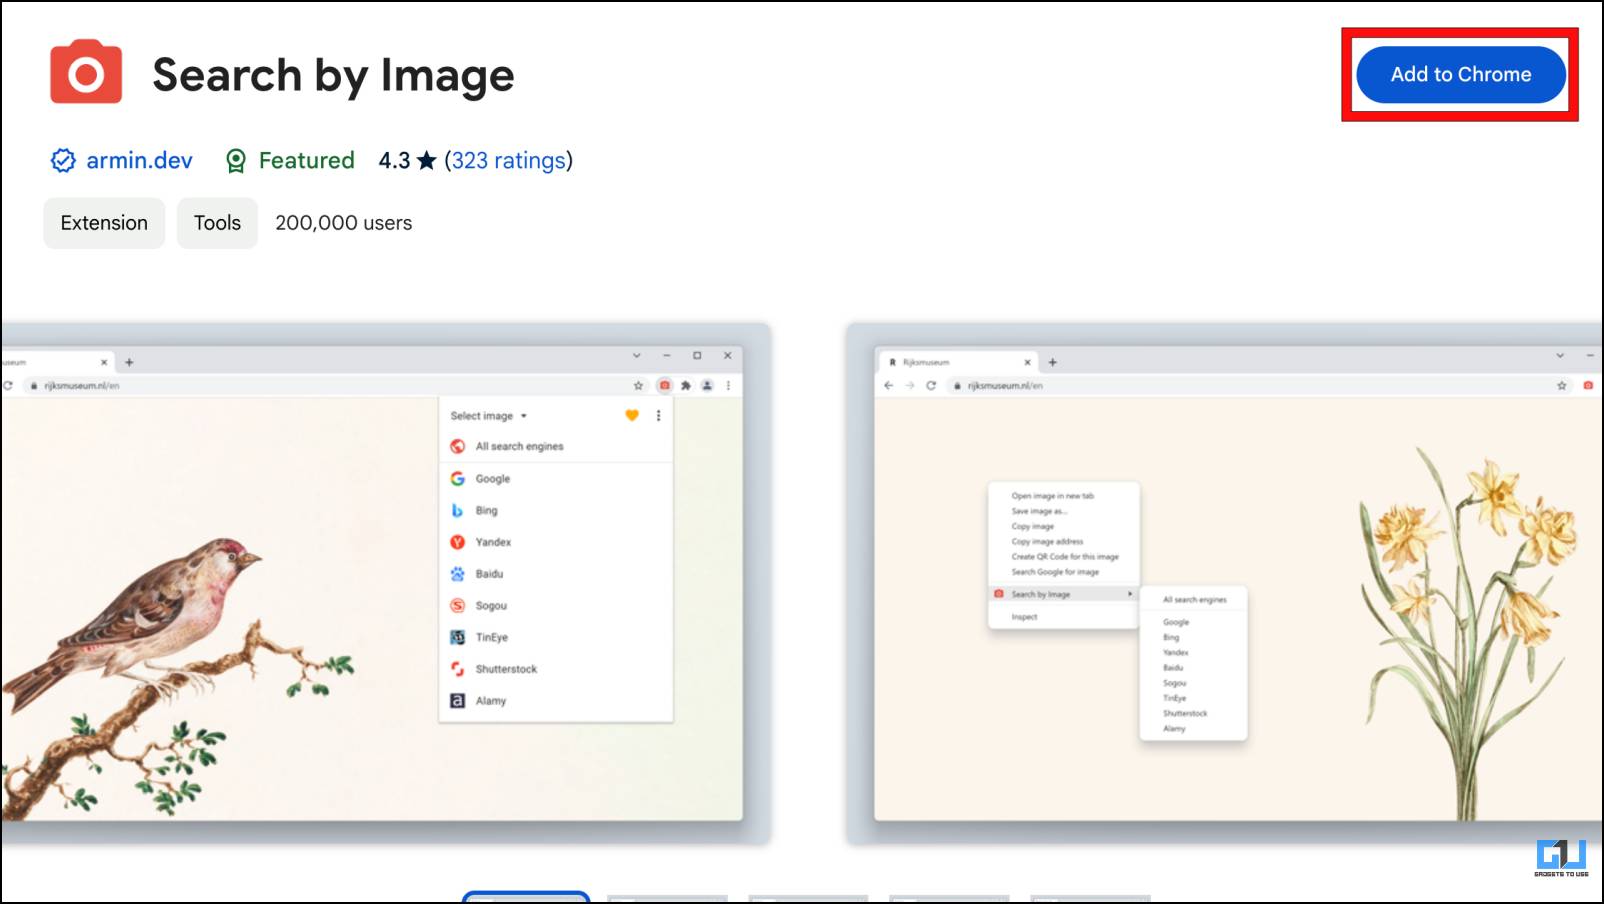
Method 4 – Install Search by Image Extension on Chrome
If the above methods aren’t satisfactory, then you can always go for an extension like Search By Image. This is a powerful tool that lets you reverse search images not just on Google but on a variety of image search engines. This makes it quite easier to find the true source of an image, as Google is not always accurate with its results. It is free to use, and you can refer to the steps below to learn how to use it.
1. Download the Search By Image extension from the Chrome Web Store.
2. Once downloaded, right-click on any image.
3. From the contextual menu, select the Search by Image option.
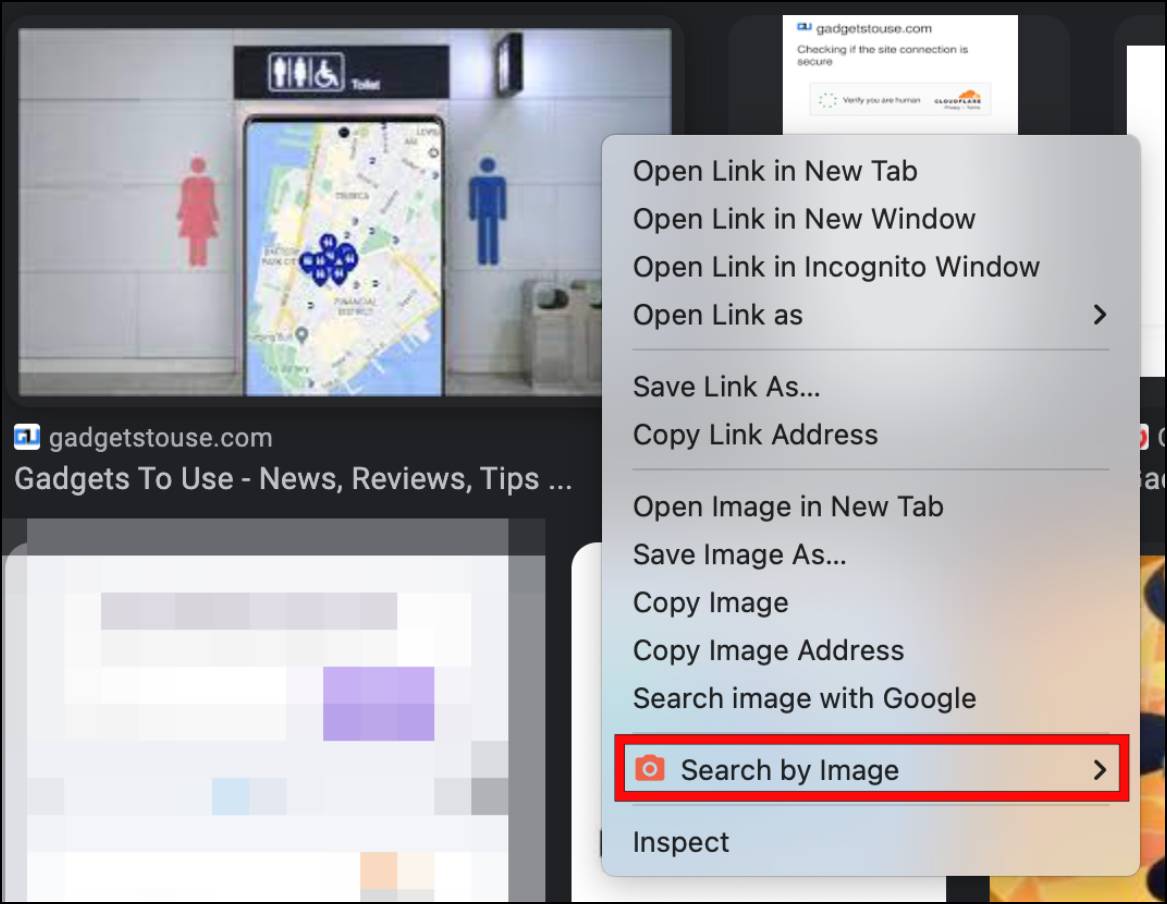
4. Now, pick the search engine you want to use to look up the image.
You can also choose the All Search Engines option to search the image on all search engines at once.
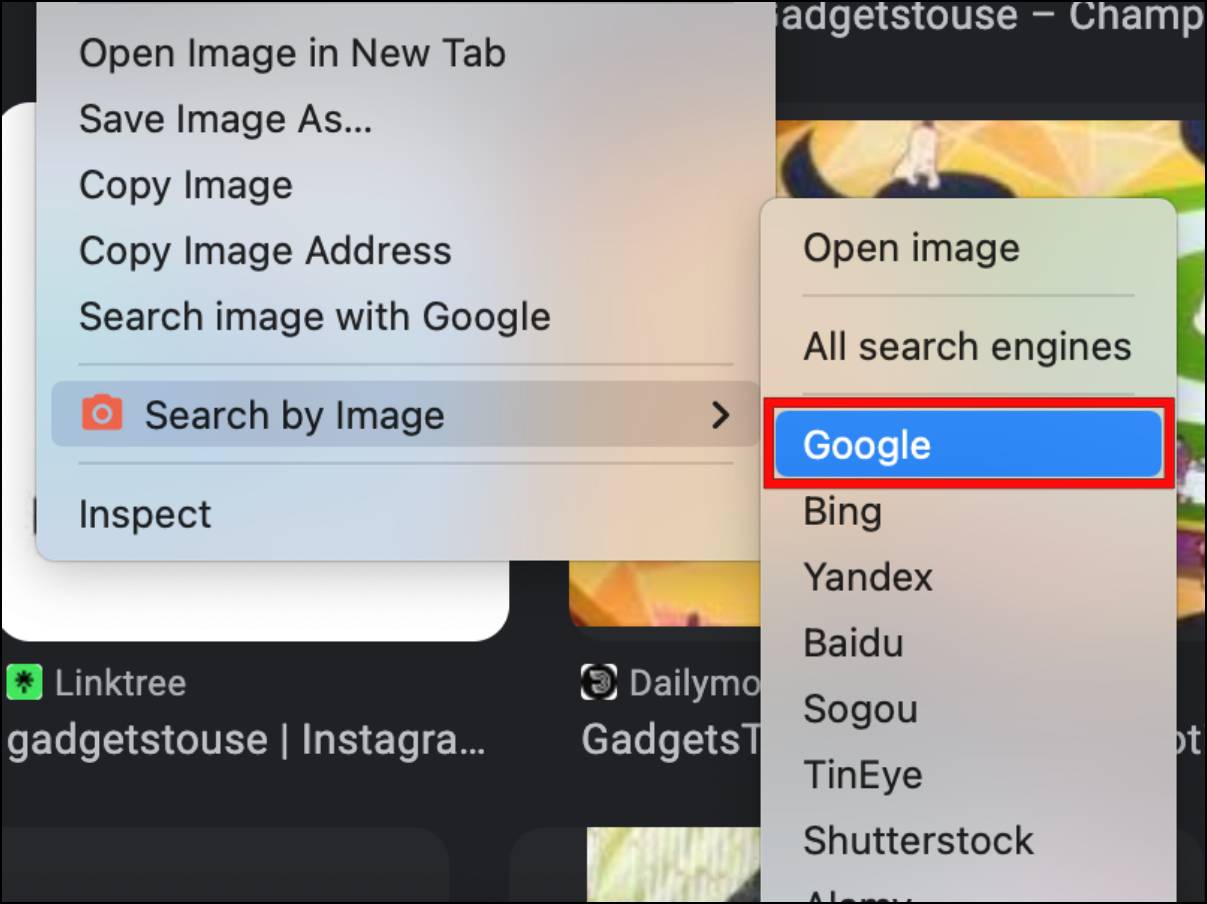
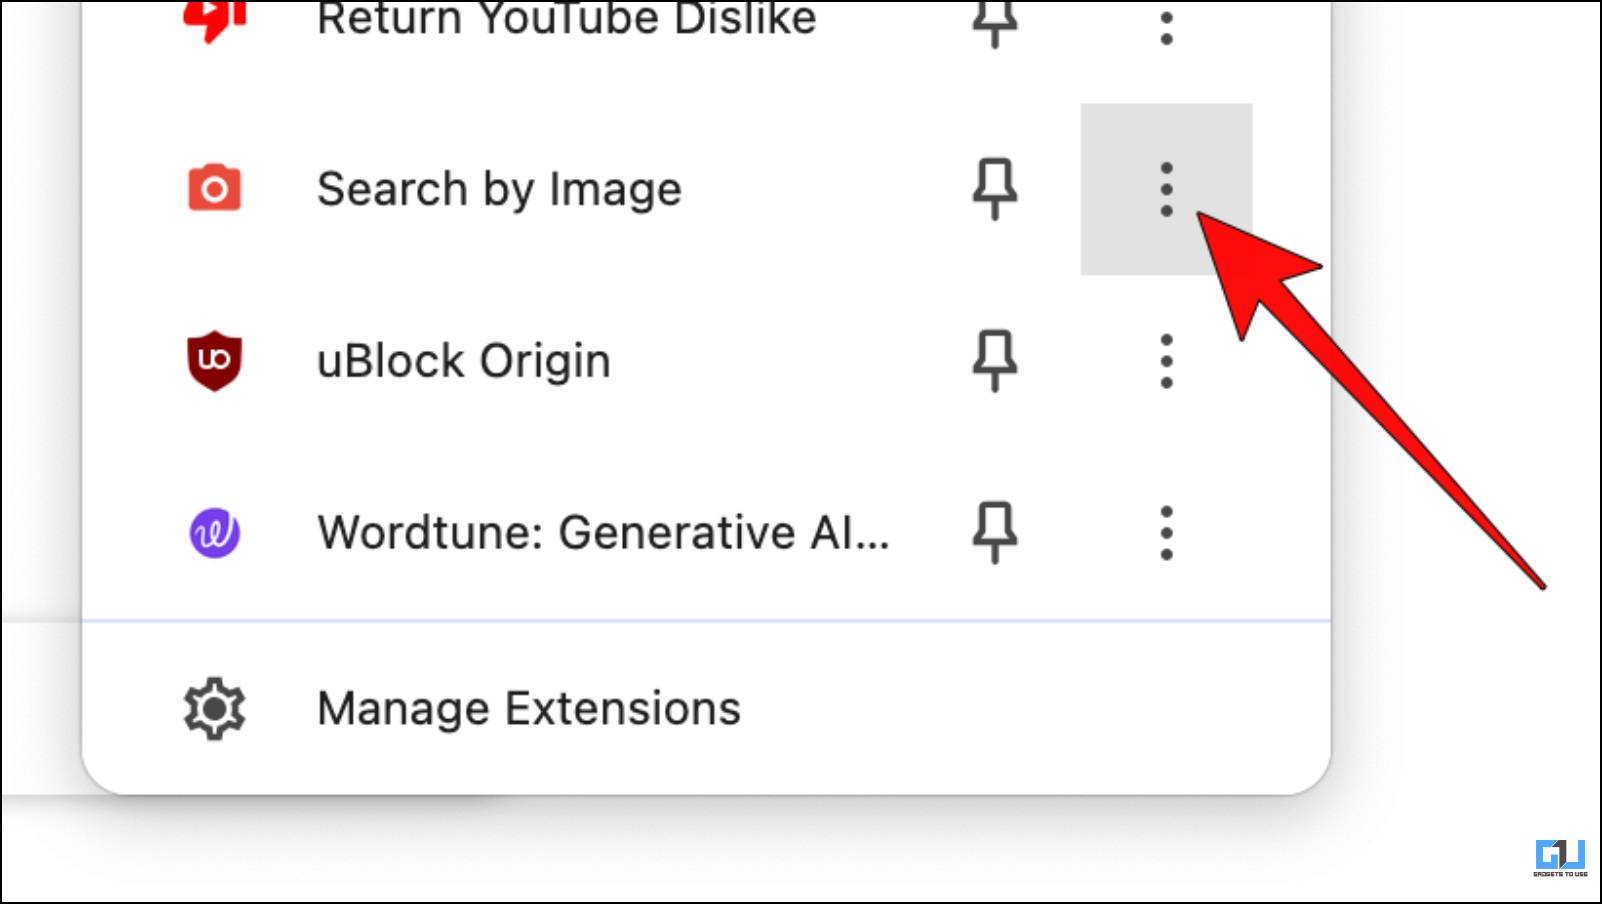
5. If you only want to use Google image search, then click on the extension icon in the Chrome toolbar.
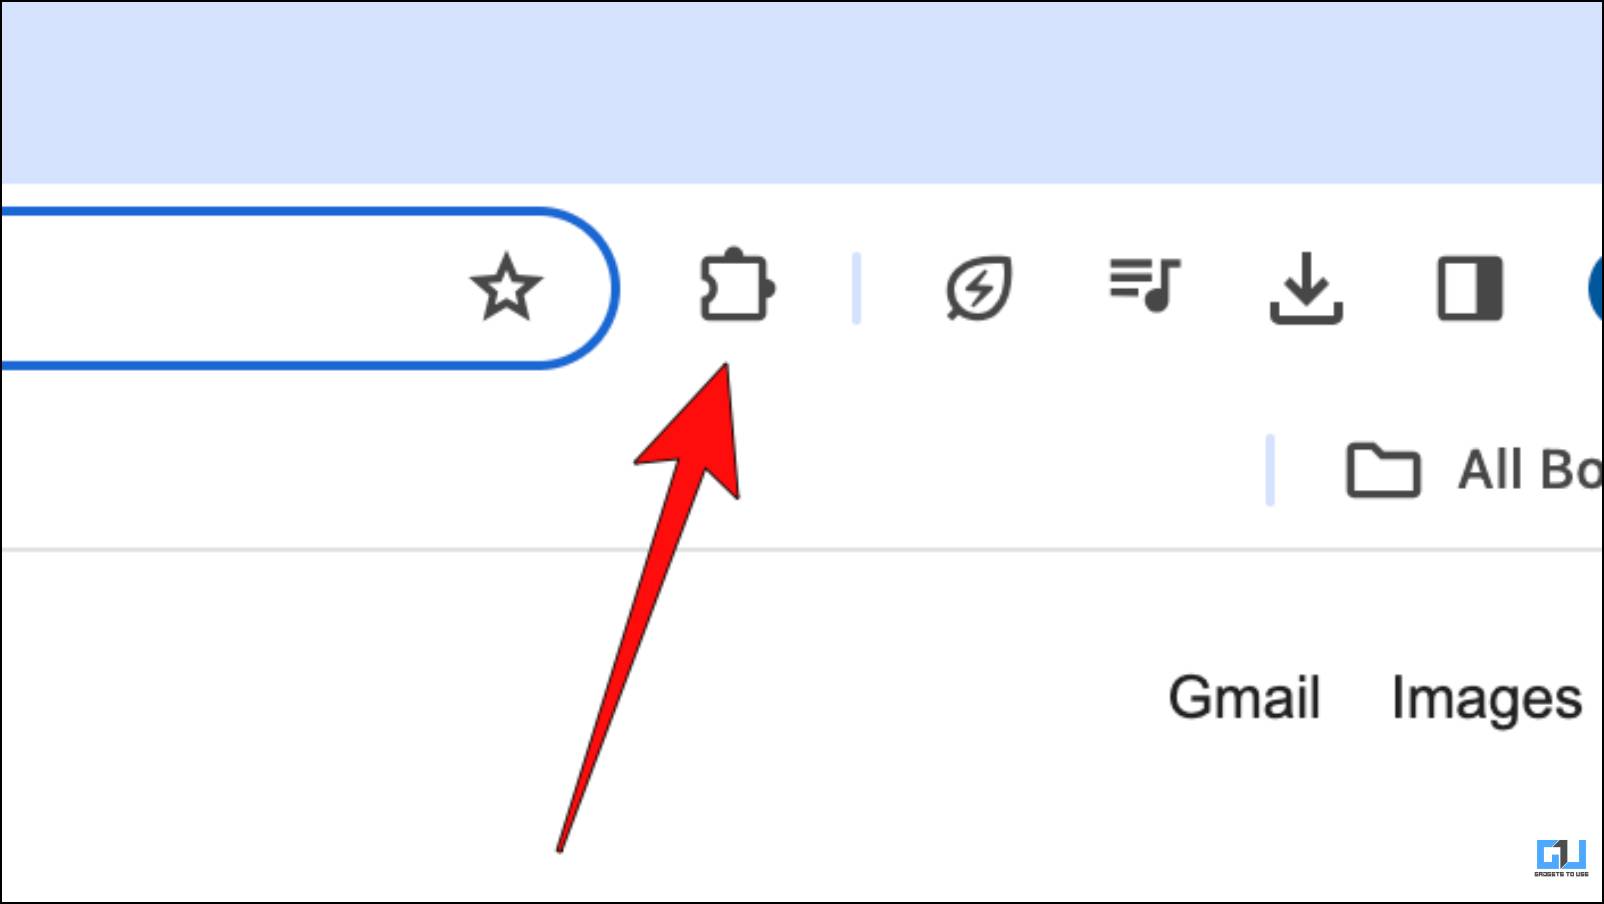
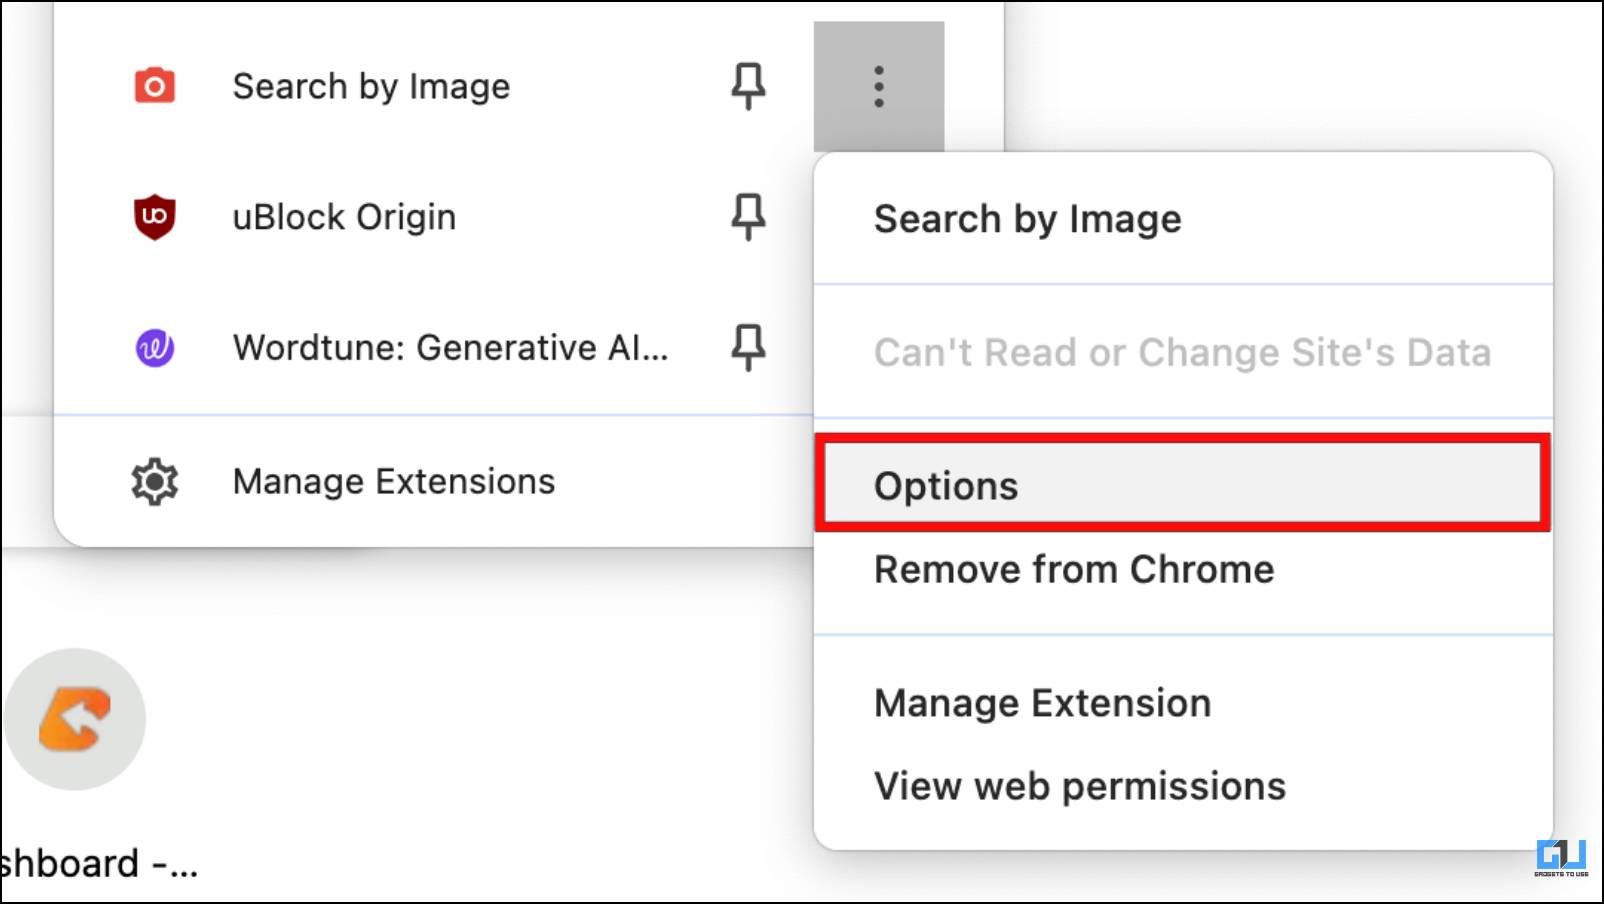
6. Click on the three-dot menu next to the Search By Image extension.
7. Go to Options.
8. Here, untick all the other search engines except for Google.
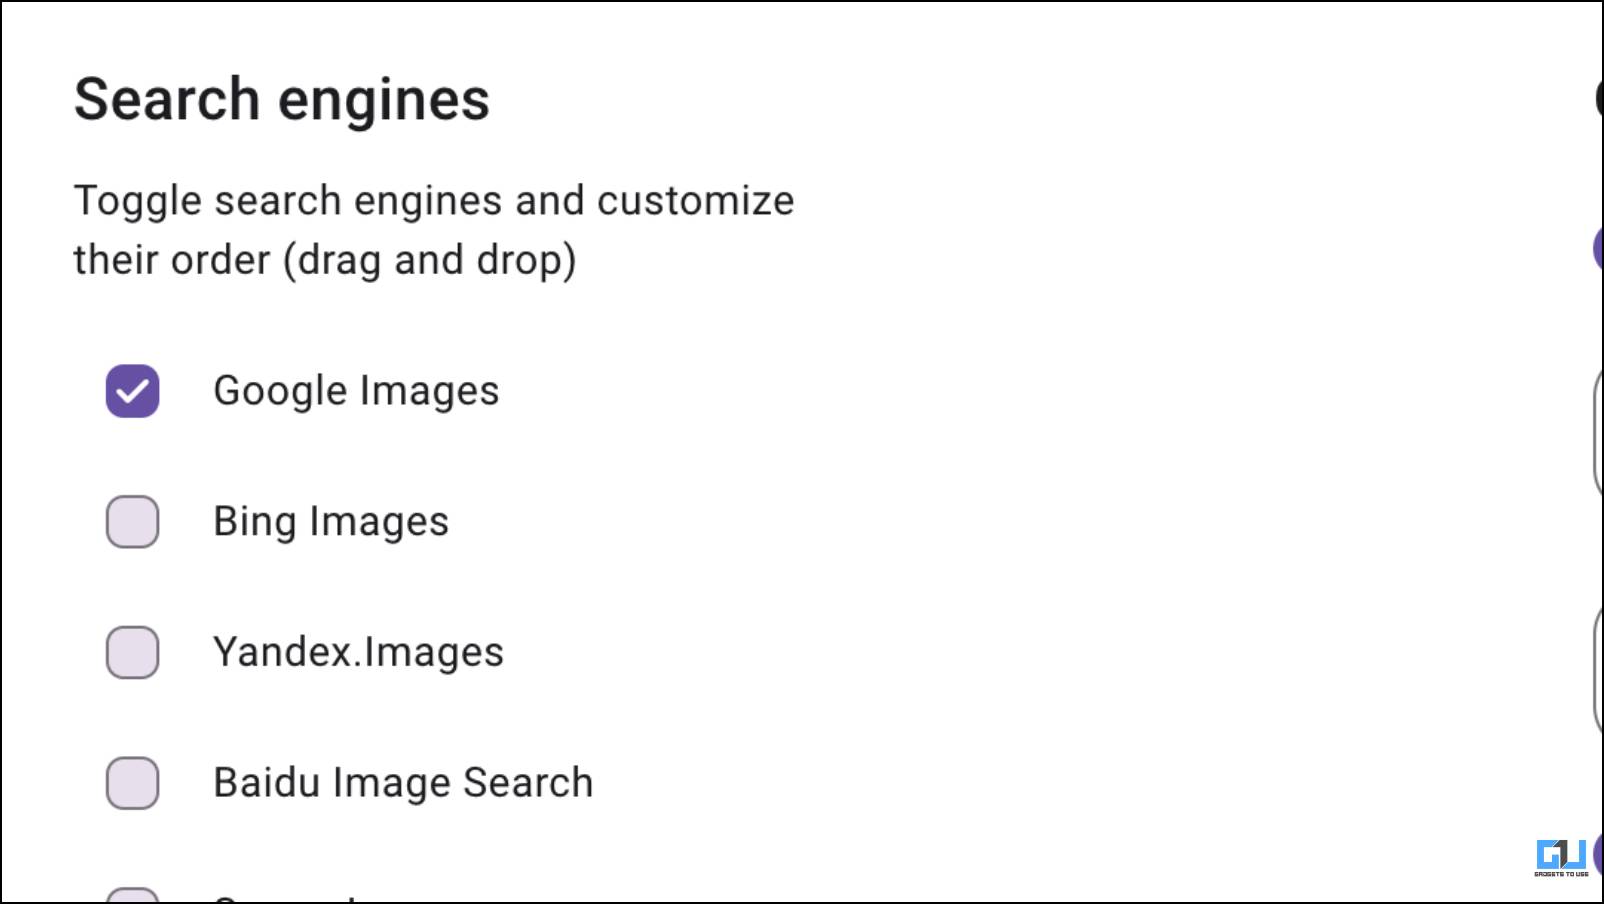
Now, the extension will use Google by default, removing the extra steps in the process.
Wrapping Up
These are a few of the methods that you can use to not only get back the old Google image search but also a few alternative methods to search for images using the search giant. I hope these methods were able to help you out; you can reach out to us in case you have any queries related to this guide. Stay tuned on GadgetsToUse for more such guides, articles, reviews, and How-to’s.
You might be interested in the following:
- 7 Ways to Remove YouTube Video Results From Google Search
- 3 Ways to Use Google Generative AI Search
- 5 Ways to Reverse Search a Video or Image On Google (2023)
You can also follow us for instant tech news at Google News or for tips and tricks, smartphones & gadgets reviews, join the GadgetsToUse Telegram Group, or subscribe to the GadgetsToUse Youtube Channel for the latest review videos.


