Quick Answer
- Another way to enable captions on Google Chrome is to use the extensions available on the Chrome web store.
- The Live Caption feature is only available on the latest version of Google Chrome, so before proceeding further, ensure that you update the Google Chrome browser.
- Enabling Live Captions on Google Chrome for mobile is as easy as doing so on a desktop.
Google introduced the Live Caption feature in its Chrome browser some time ago, which has proven beneficial. Enabling Live Caption in Chrome browser is straightforward, regardless of the platform. This article details how to enable Live Captions in Google Chrome to make your video watching more seamless.
Why You Should Use Live Captions in Google Chrome
The live caption feature speaks for itself (literally). Still, plenty of use cases make sense and will encourage using live captions on Google Chrome.
- Captions can help you understand the content context where language or sound quality is a barrier.
- Live caption can give a new life to content with low audio volume, making it easy to understand.
- You can watch content in public places without disturbing others by keeping the volume low.
- It even enables you to watch content in languages you aren’t familiar with or well versed with, as it can transcribe content into any language.
How Do I Enable Live Captions on Google Chrome?
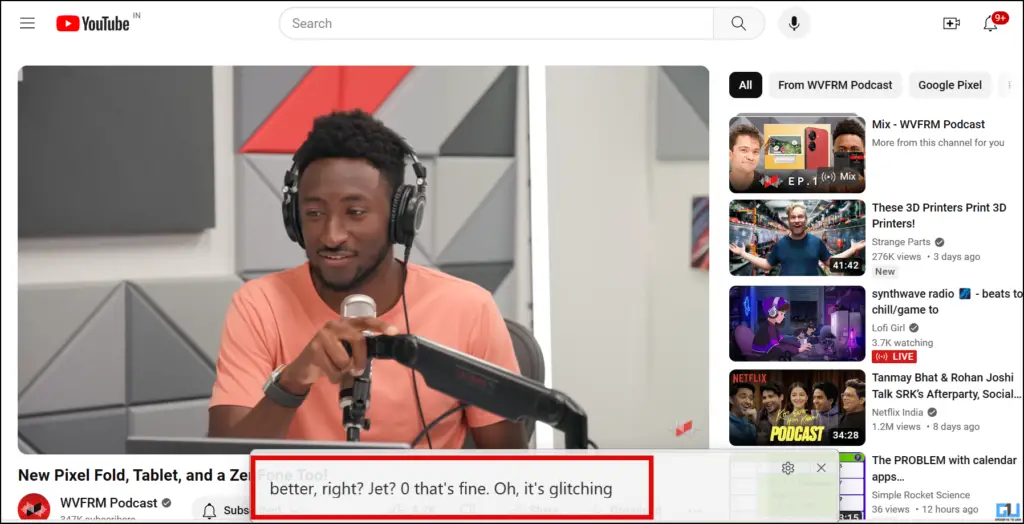
Live Captions on Chrome automatically generates real-time captions for any media that has audio. The feature works across all social media and video-sharing sites, podcasts, personal video libraries like Google Photos, embedded video players, etc.
The Live Caption feature is only available on the latest version of Google Chrome, so before proceeding further, ensure that you update the Google Chrome browser.
Method 1 – Enable Live Captions From Chrome’s Settings
You can enable the Live Captions feature within the Chrome browser’s settings from mobile and desktop. Here’s how it can be done:
On Desktop
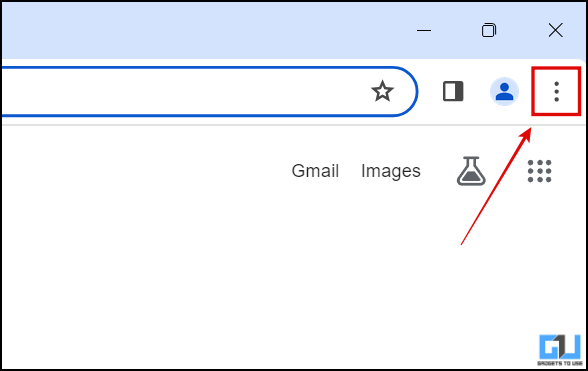
1. Go to Chrome Settings by clicking the three dots in the top right corner.
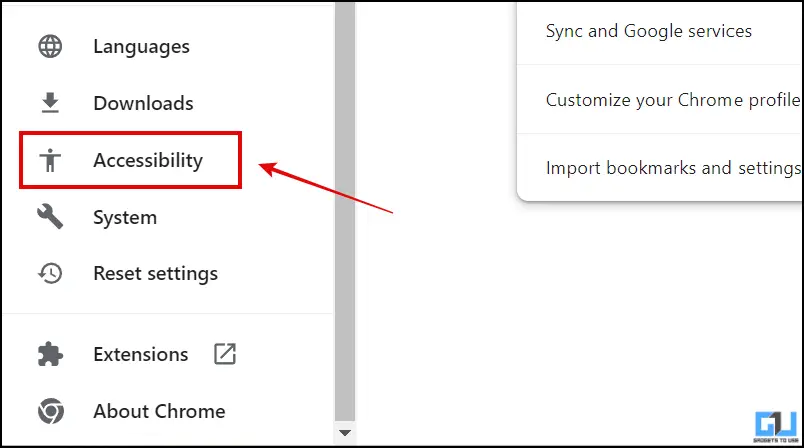
2. Click on the Accessibility tab from the left menu panel.
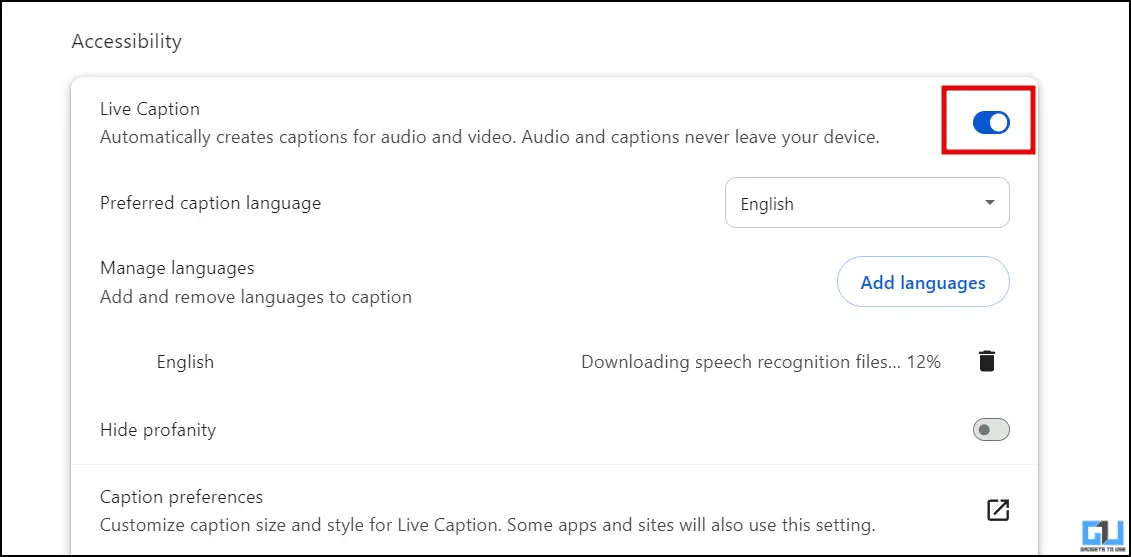
3. Within the Accessibility menu, toggle on the Live Caption option.
The Live Caption in Chrome takes some time to download speech recognition files, which will be enabled. Once you have enabled the feature on your browser, restart Chrome.
Now, open and play any video or audio file, and click the music icon near the Extensions tab to activate it. A pop-up box with the Live Captions will appear on your browser window.
On Mobile
Enabling Live Captions on Google Chrome for mobile is as easy as doing so on a desktop. Let’s check out how to enable smartphone Live Captions on Google Chrome.
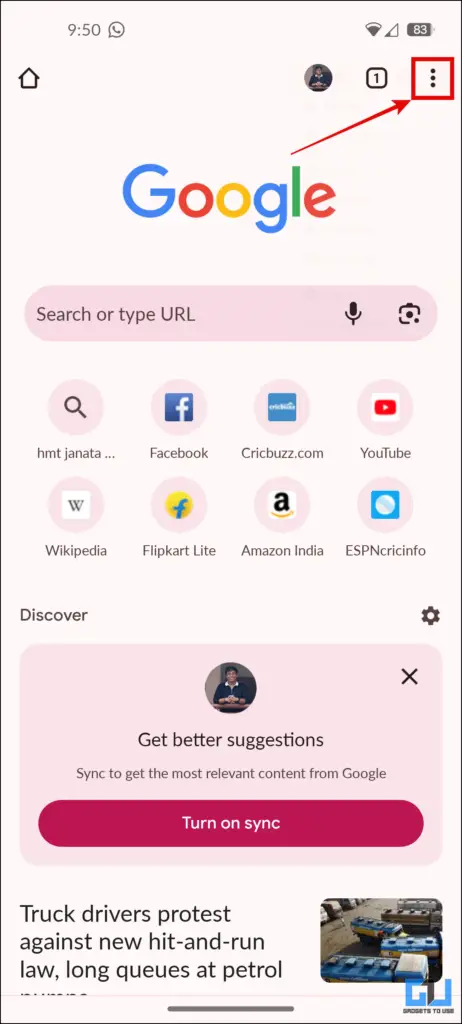
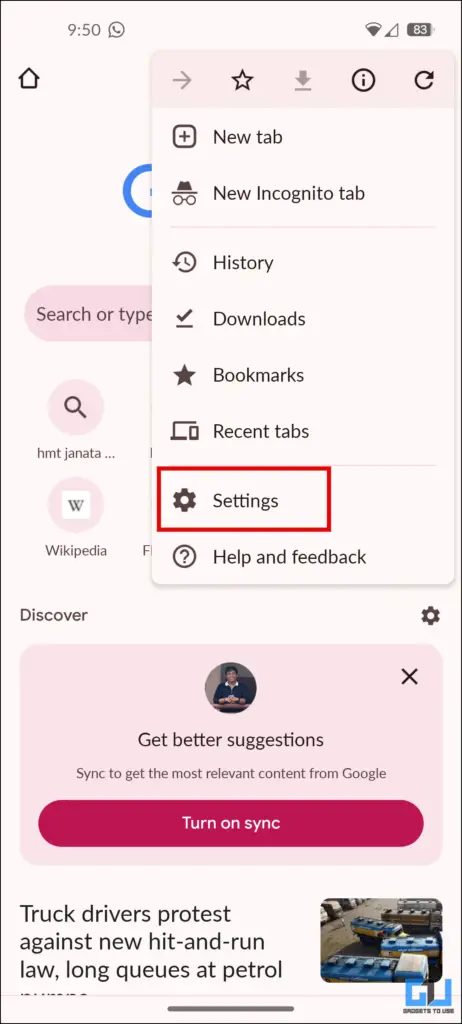
1. Tap the three dots menu in the top right to access Chrome settings.
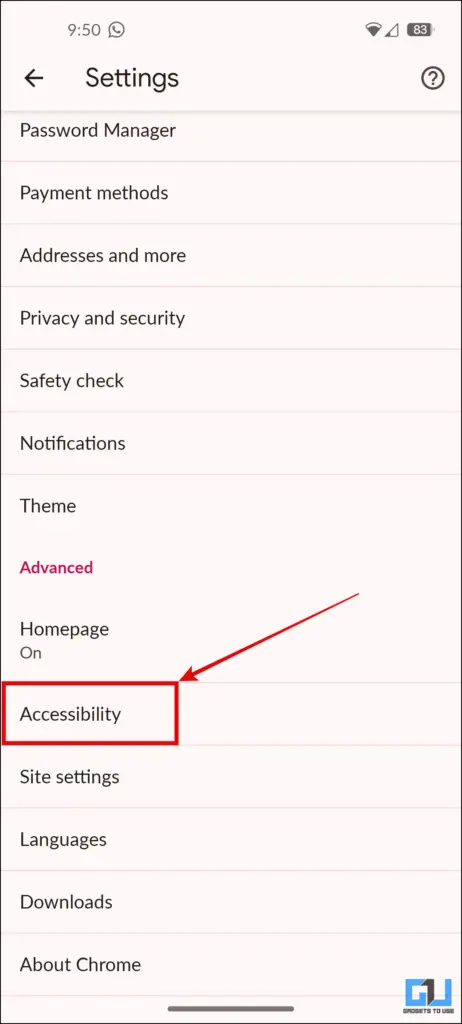
2. Scroll down and tap on Accessibility under Advanced Options.
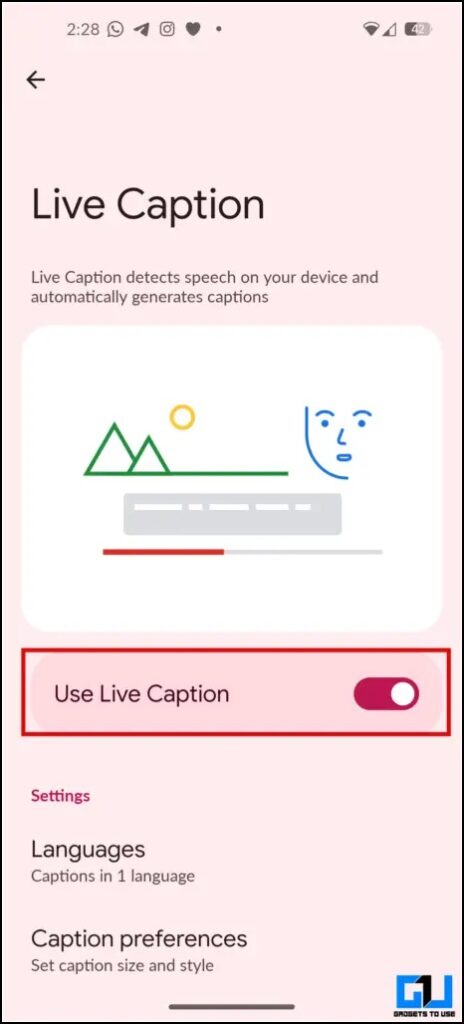
3. Toggle on the Live Caption.
The language model will automatically start showing captions on your phone as soon as it is downloaded. This process might take some time, depending on your data speeds.
Method 2 – Use Chrome Extensions For Captions
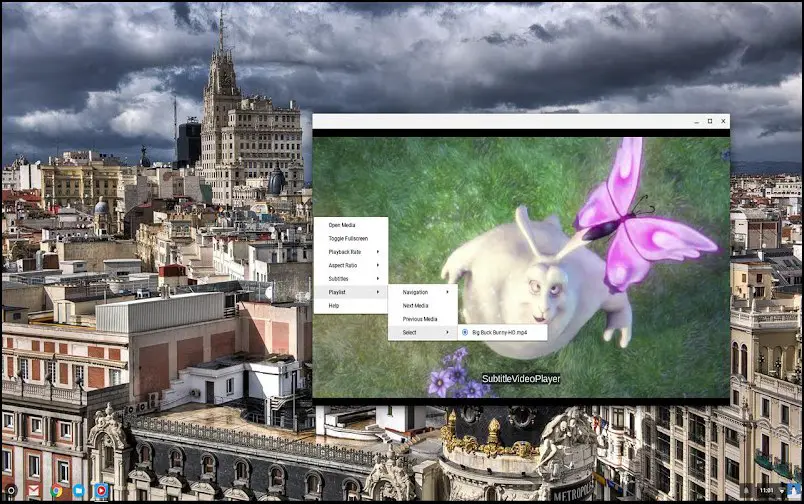
Another way to enable captions on Google Chrome is to use the extensions available on the Chrome web store. One such useful extension for PCs running on ChromeOS is Subtitle Videoplayer. For users without a ChromeOS PC, the Substital extension works similarly to get live video captions.
Method 3 – Use the Windows Default Live Caption
If you don’t want to use any of the extensions, go through the Chrome settings to do so. You can enable the default Live Captions available on Windows to watch any online or offline content with subtitles.
1. Go to Windows settings and search for Live Captions.
2. Toggle on the Live Captions option.
3. Allow the permission to set up on your screen.
That is it! Live captions will now appear on your screen automatically. You can also use the following shortcut to trigger live captions on your computer.
Windows key + Ctrl Key + L
Customize Live Captions on Windows
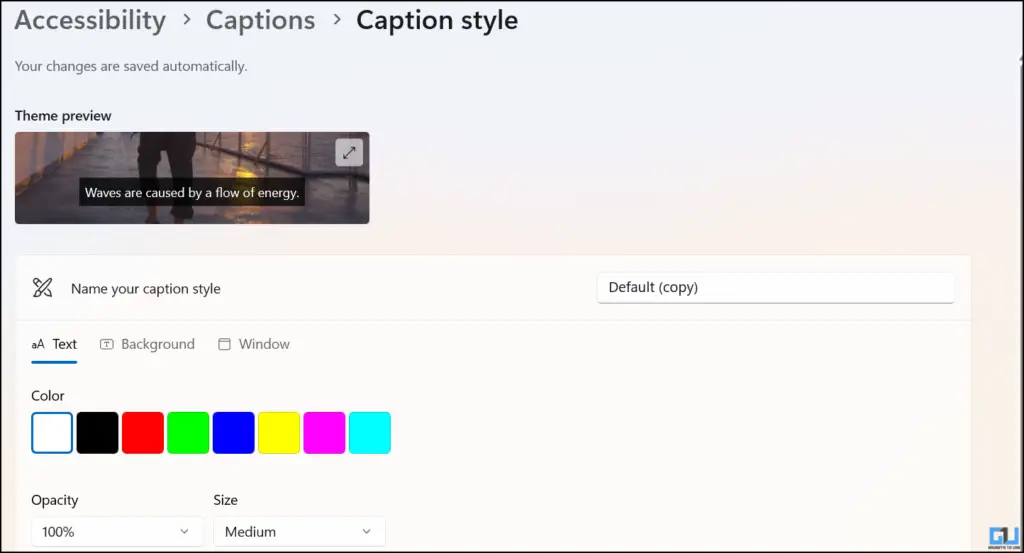
You can also customize how captions look on your computer’s screen. Go to the Live Captions settings as mentioned above and follow these steps:
1. Click on the button next to Caption preferences.
2. A new window will open for customizing the captions.
3. Click the respective buttons to change the caption color, size, transparency, background, etc..
That’s it. You will be able to use customized captions for any audio or video.
FAQs
Q. Can I Change the Live Caption’s Language?
Yes. You can change the language of the captions, but only once that is officially supported. So, make sure to select the correct language while setting up captions.
Q. Do I Need the Internet for Captions to Work on My Computer?
Not exactly, but you will be required to access the internet while the language models get downloaded.
Wrapping Up
Captions make audio or video content more accessible, especially in a noisy environment or for those with difficulty hearing. Stay tuned to GadgetsToUse for useful tech tips, and check the ones linked below.
You might be interested in the following:
- 3 Ways to Add Closed Captions to Zoom Meetings
- 5 Ways to Add Captions and Subtitles to Your Instagram Reels, Stories, and Videos
- 5 Ways to Stop Search Engines from Changing in Chrome
- 5 Ways to Stop Suggested Videos and Recommendations on YouTube in Chrome
You can also follow us for instant tech news at Google News or for tips and tricks, smartphones & gadgets reviews, join GadgetsToUse Telegram Group or for the latest review videos subscribe GadgetsToUse Youtube Channel.
