Quick Answer
- Now tap “Select destination” and choose the streaming service to which you want to transfer the playlists.
- Using a single music streaming platform over the years would mean that all your precious playlists would prevent you from moving to another platform.
- Wait for the transfer to complete and enjoy your favorite playlists on the streaming service of your choice.
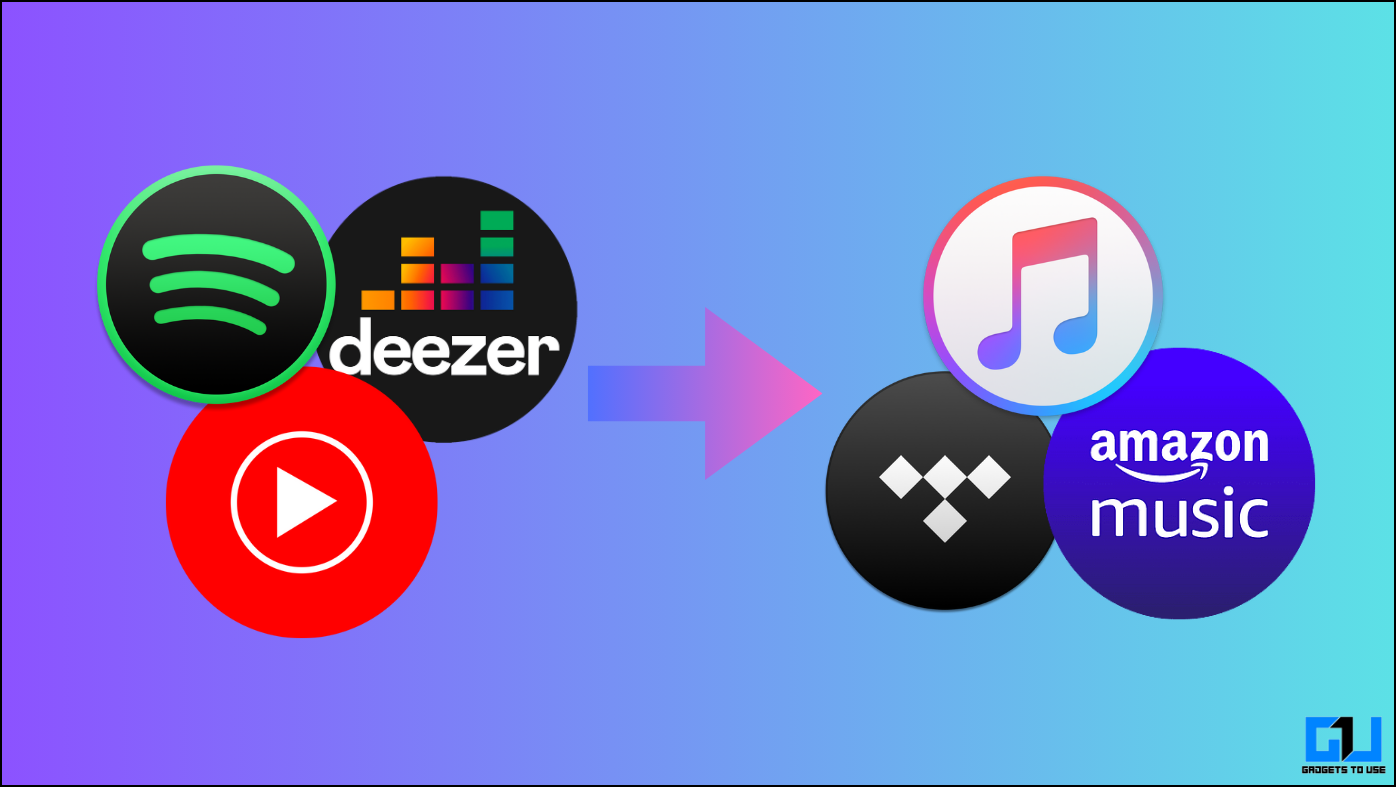
If you are a melophile, you will have one or more carefully curated playlists made over a long time. Transferring all these playlists can be a hassle when moving from one streaming platform to another. Some websites automatically transfer entire playlists from one streaming service to another to simplify this process. This blog post will check out a few methods that help transfer playlists from one streaming platform to another for free.
How Do I Transfer My Playlist From One Streaming Platform to Another?
Using a single music streaming platform over the years would mean that all your precious playlists would prevent you from moving to another platform. Transferring all these playlists individually or per song is tedious, and you would not move. Moreover, none of the streaming platforms supports transferring playlists across different platforms. Thankfully, there are other ways to get the job done. Here, we will go through three methods by which you can transfer playlists from one streaming service to another for free.
Method 1 – TuneMyMusic
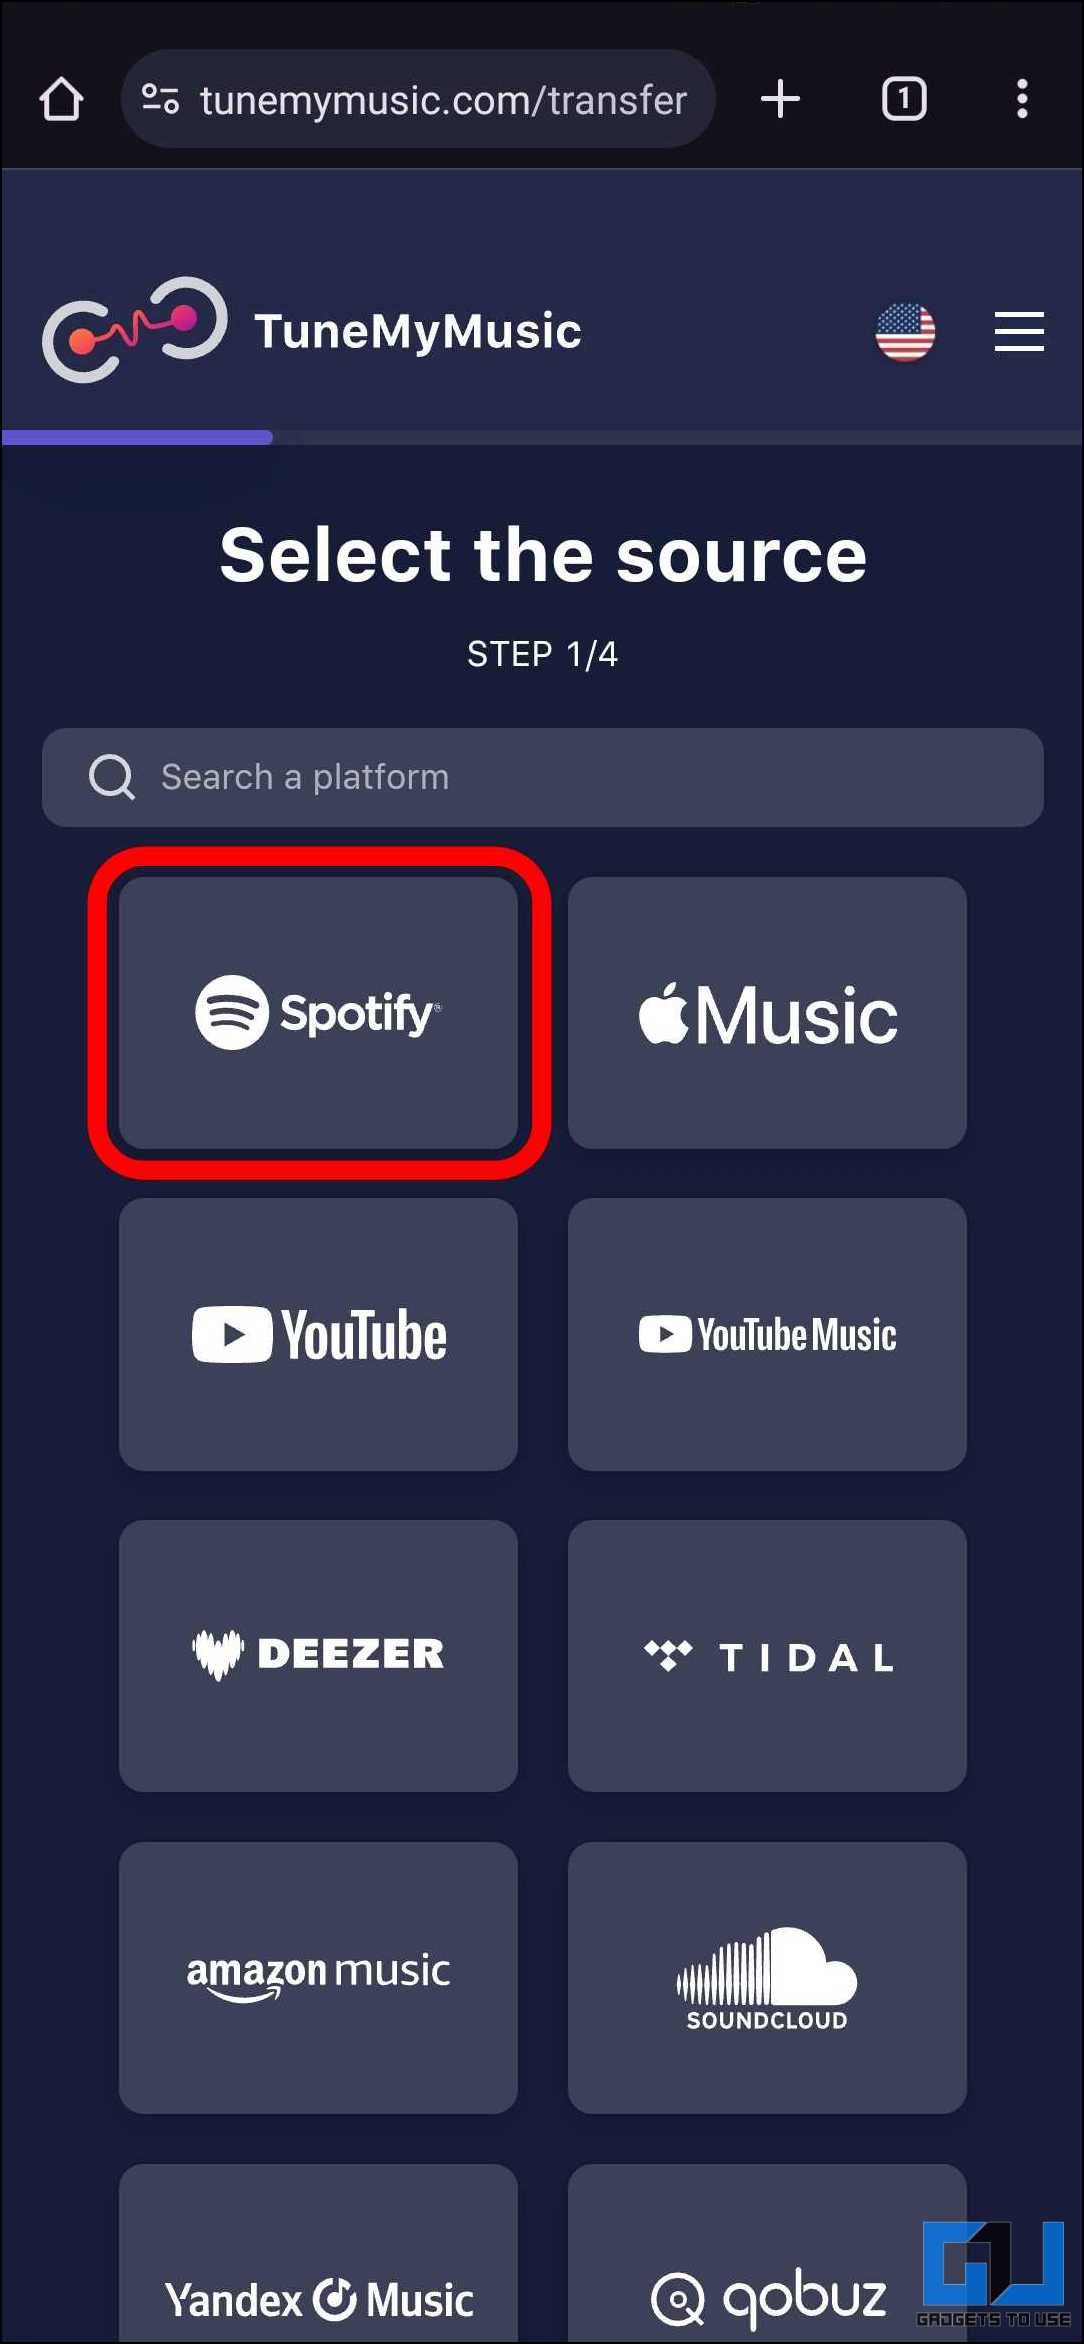
TuneMyMusic is a web-based tool for transferring playlists with a simple-to-use experience. It covers many platforms, including the more popular ones like Spotify, Apple Music, YouTube Music, etc. To use TuneMyMusic, follow these steps.
1. Go to the TuneMyMusic website and tap “Let’s start.”

2. Select the source from which you want to transfer the playlists. Here, we will be using Spotify as the source.
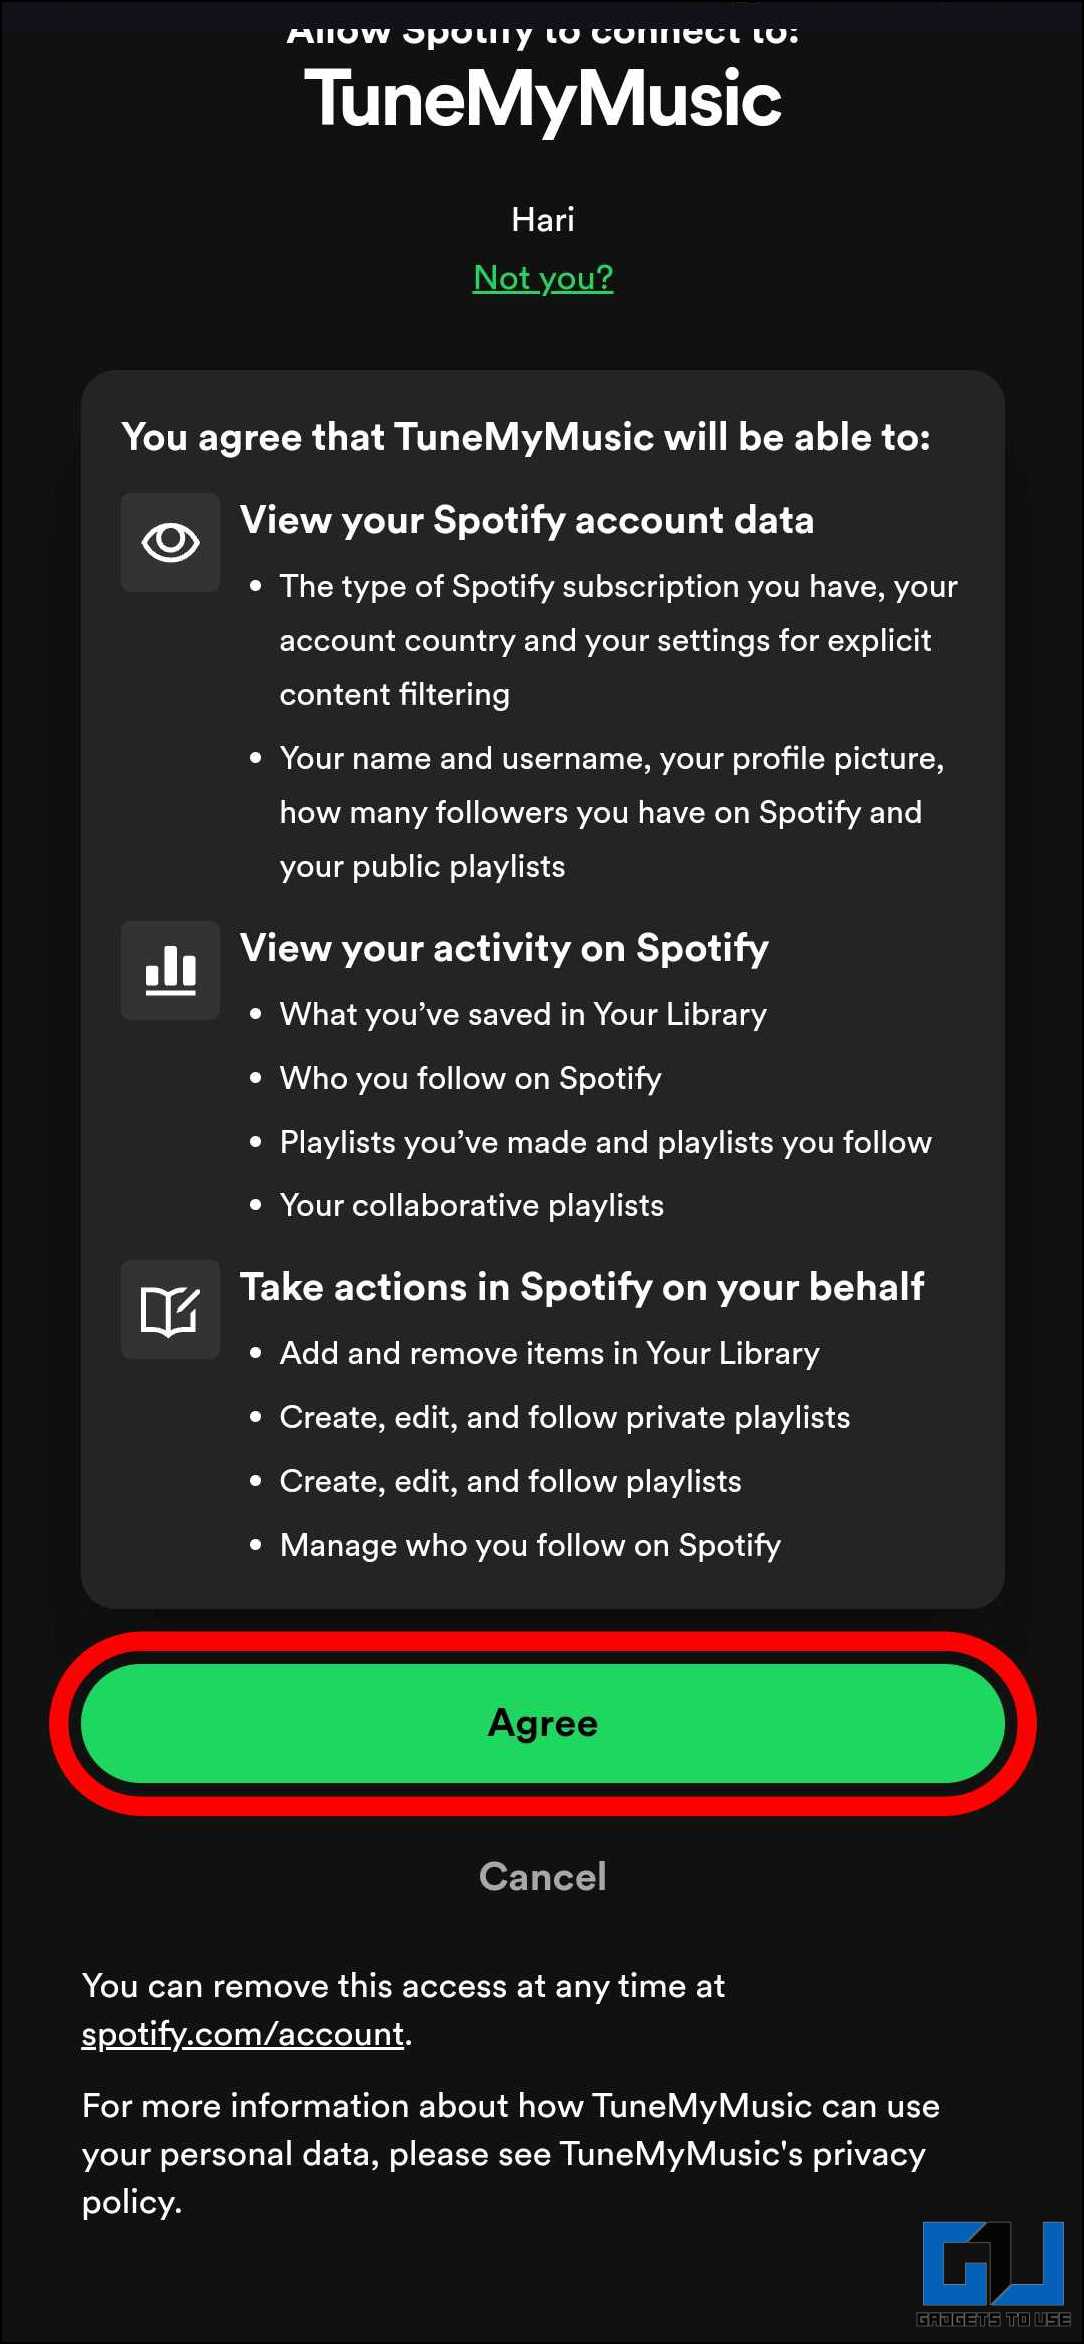
3. Log into your Spotify account and tap “Agree” to allow TuneMyMusic to access your playlists.
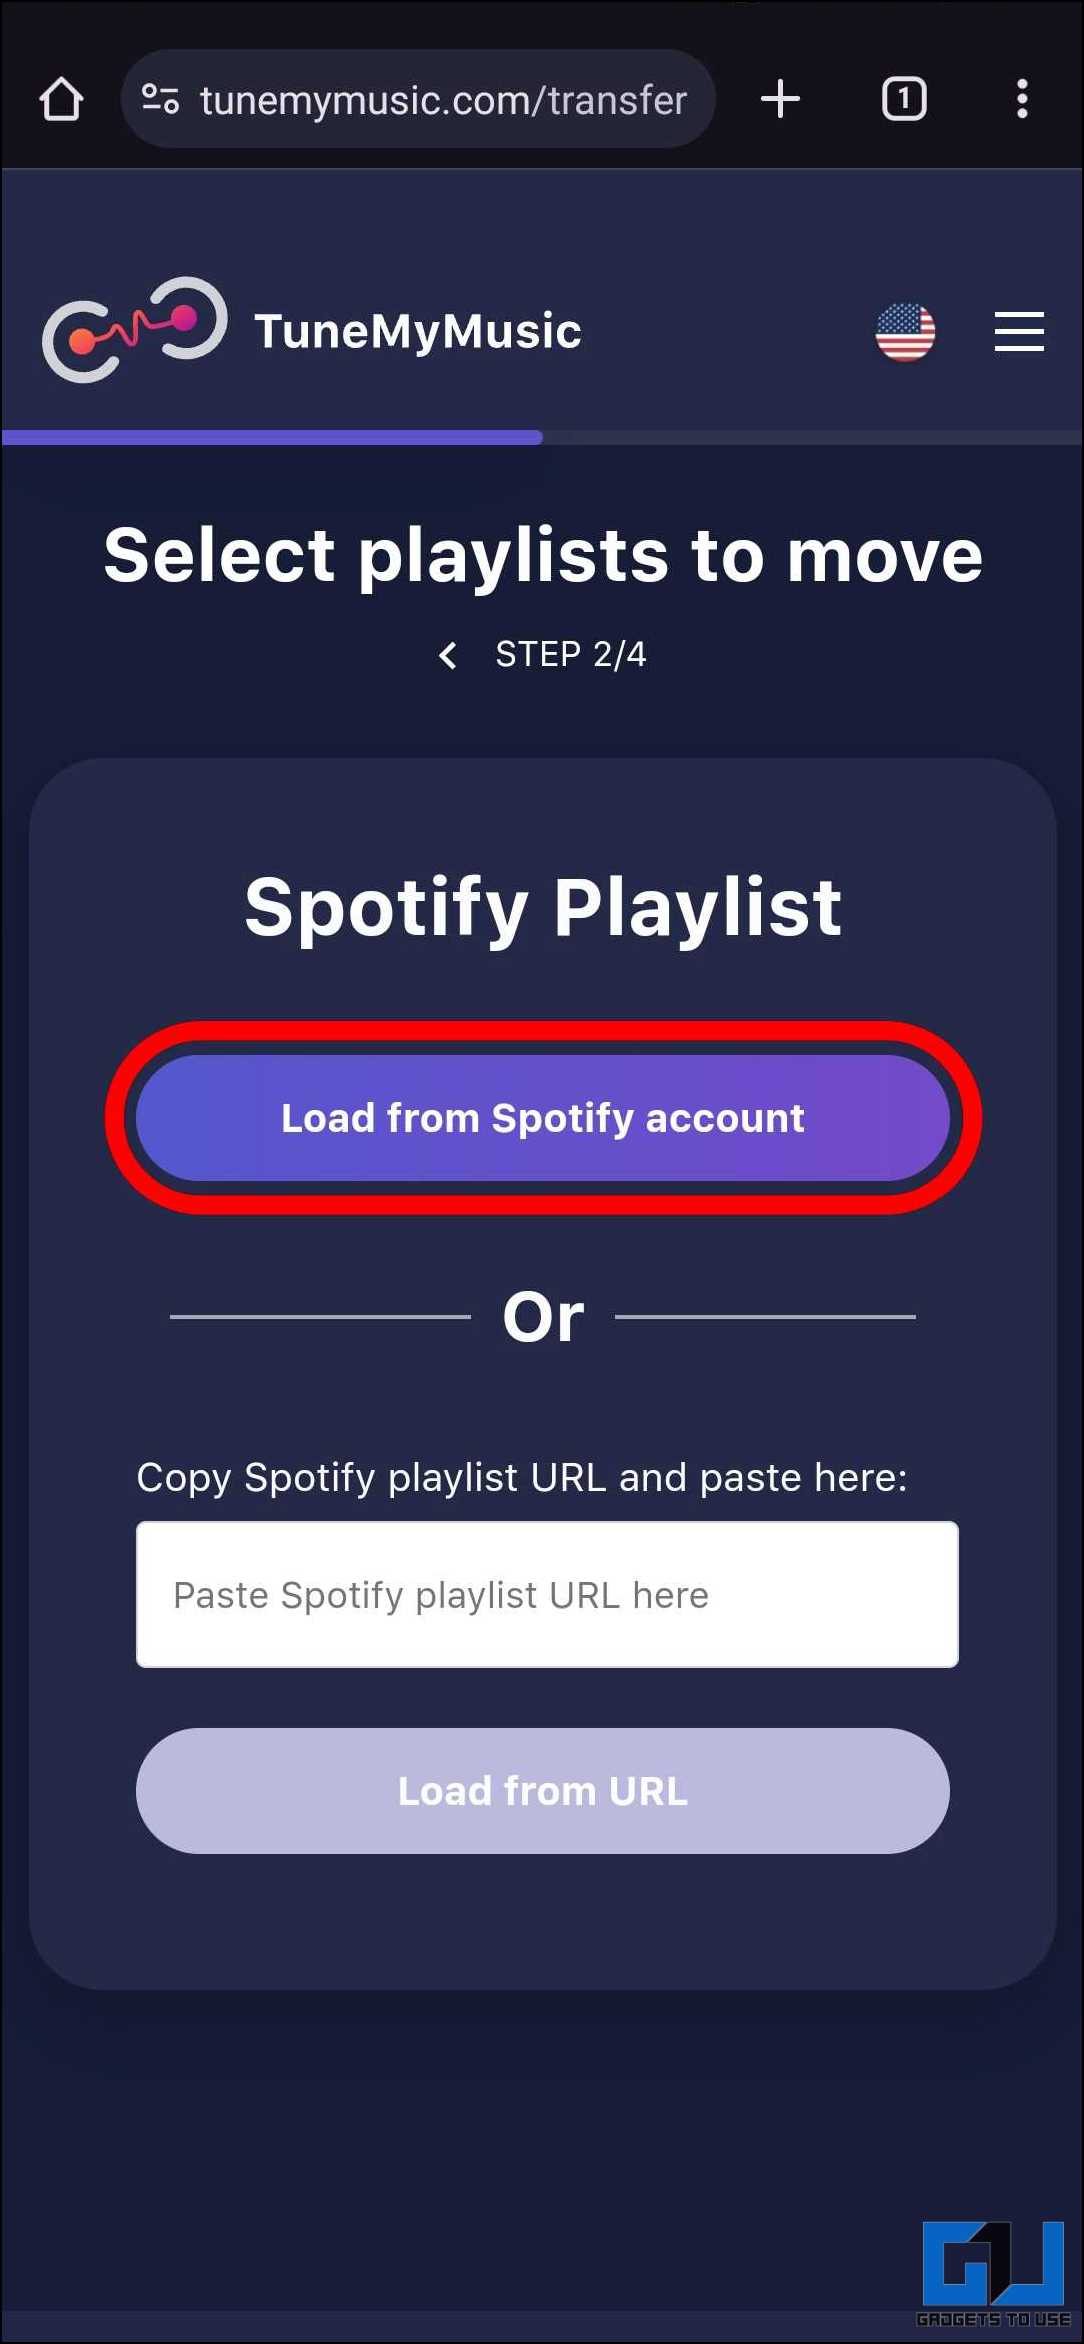
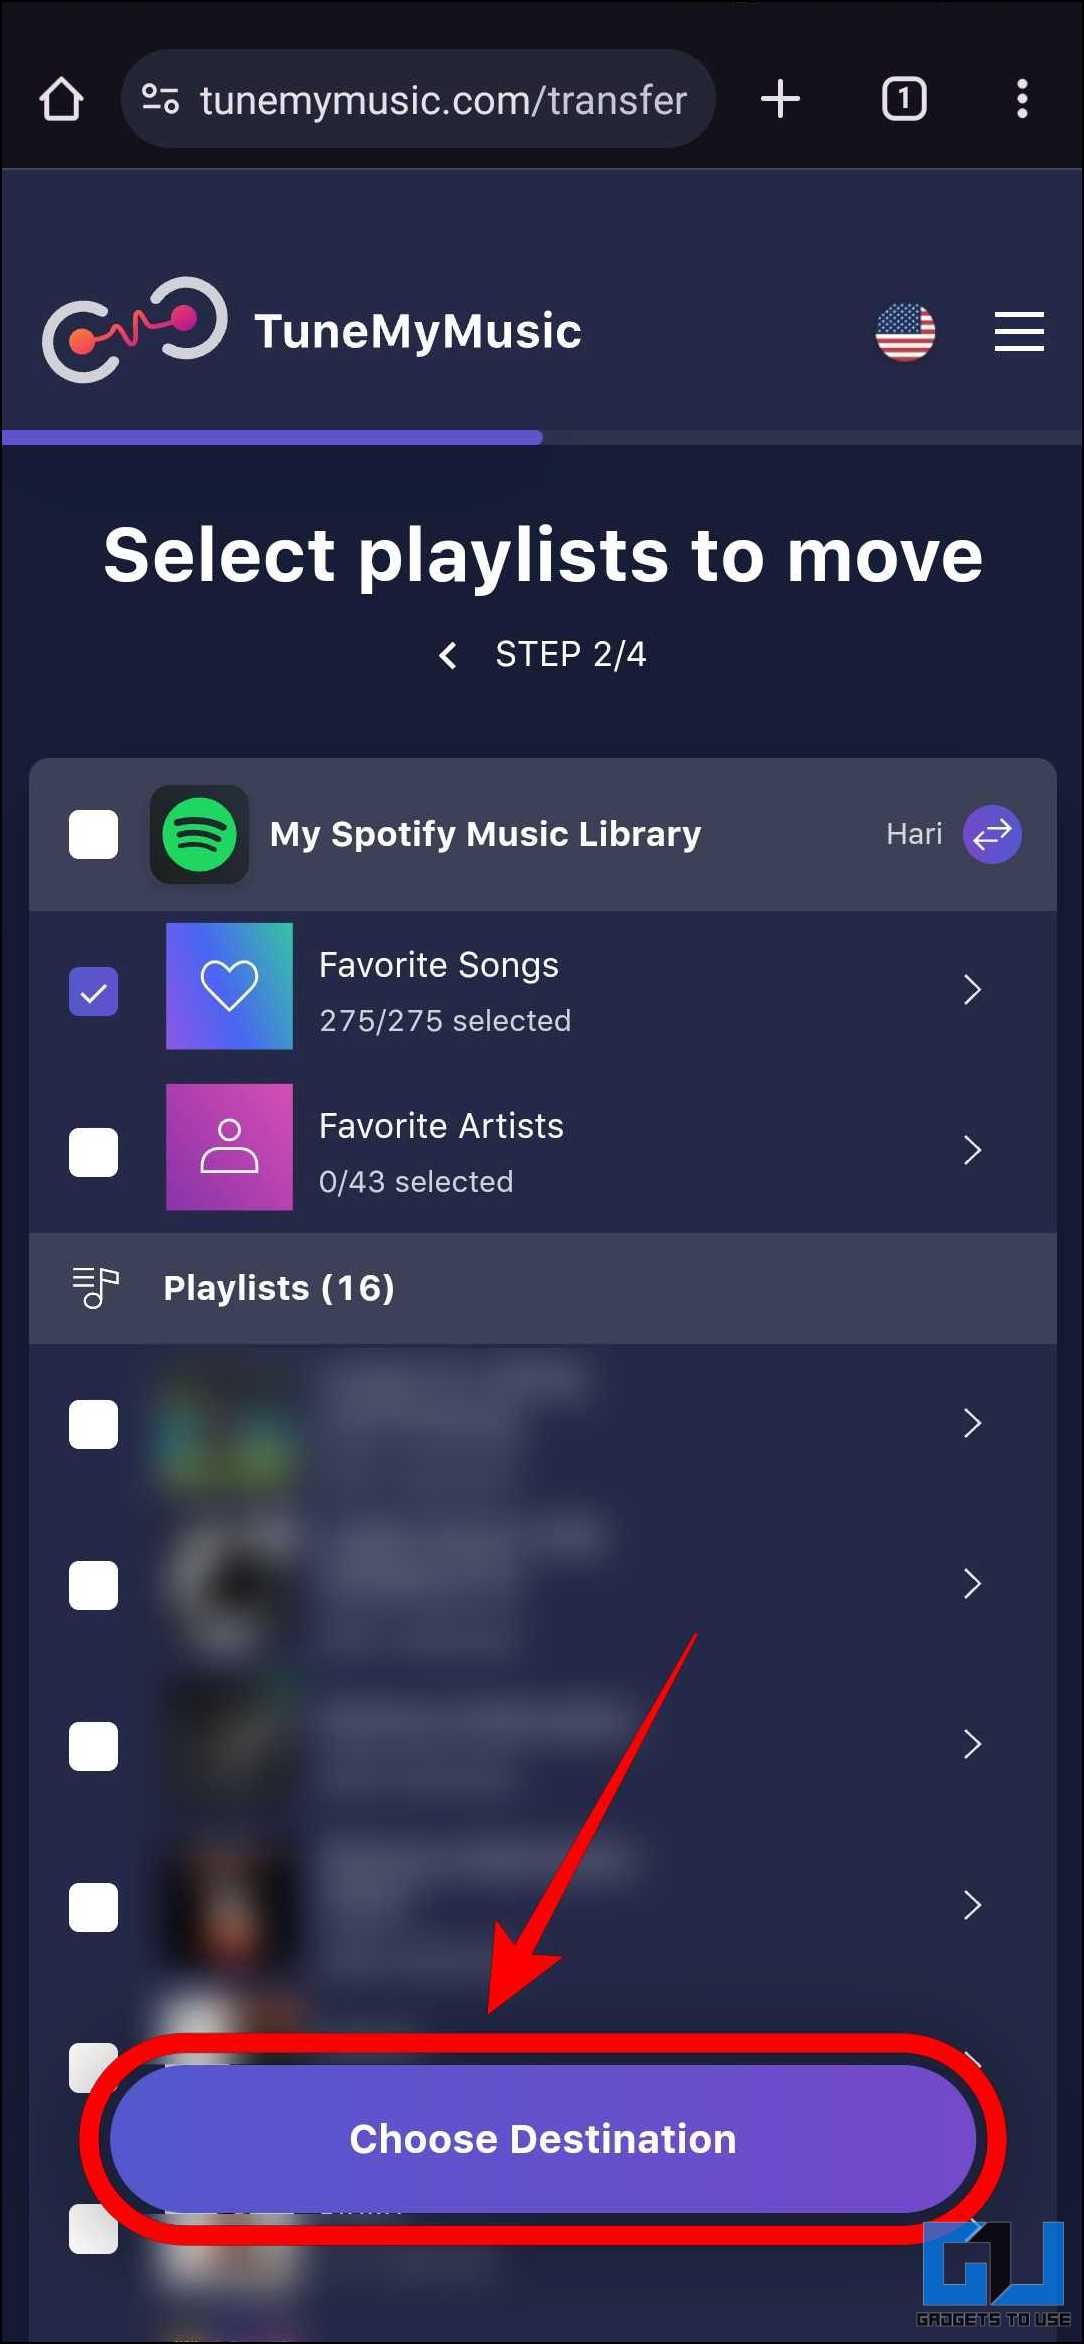
4. Tap “Load from Spotify Account” and select the playlist to be transferred. Then, tap “Choose Destination.”
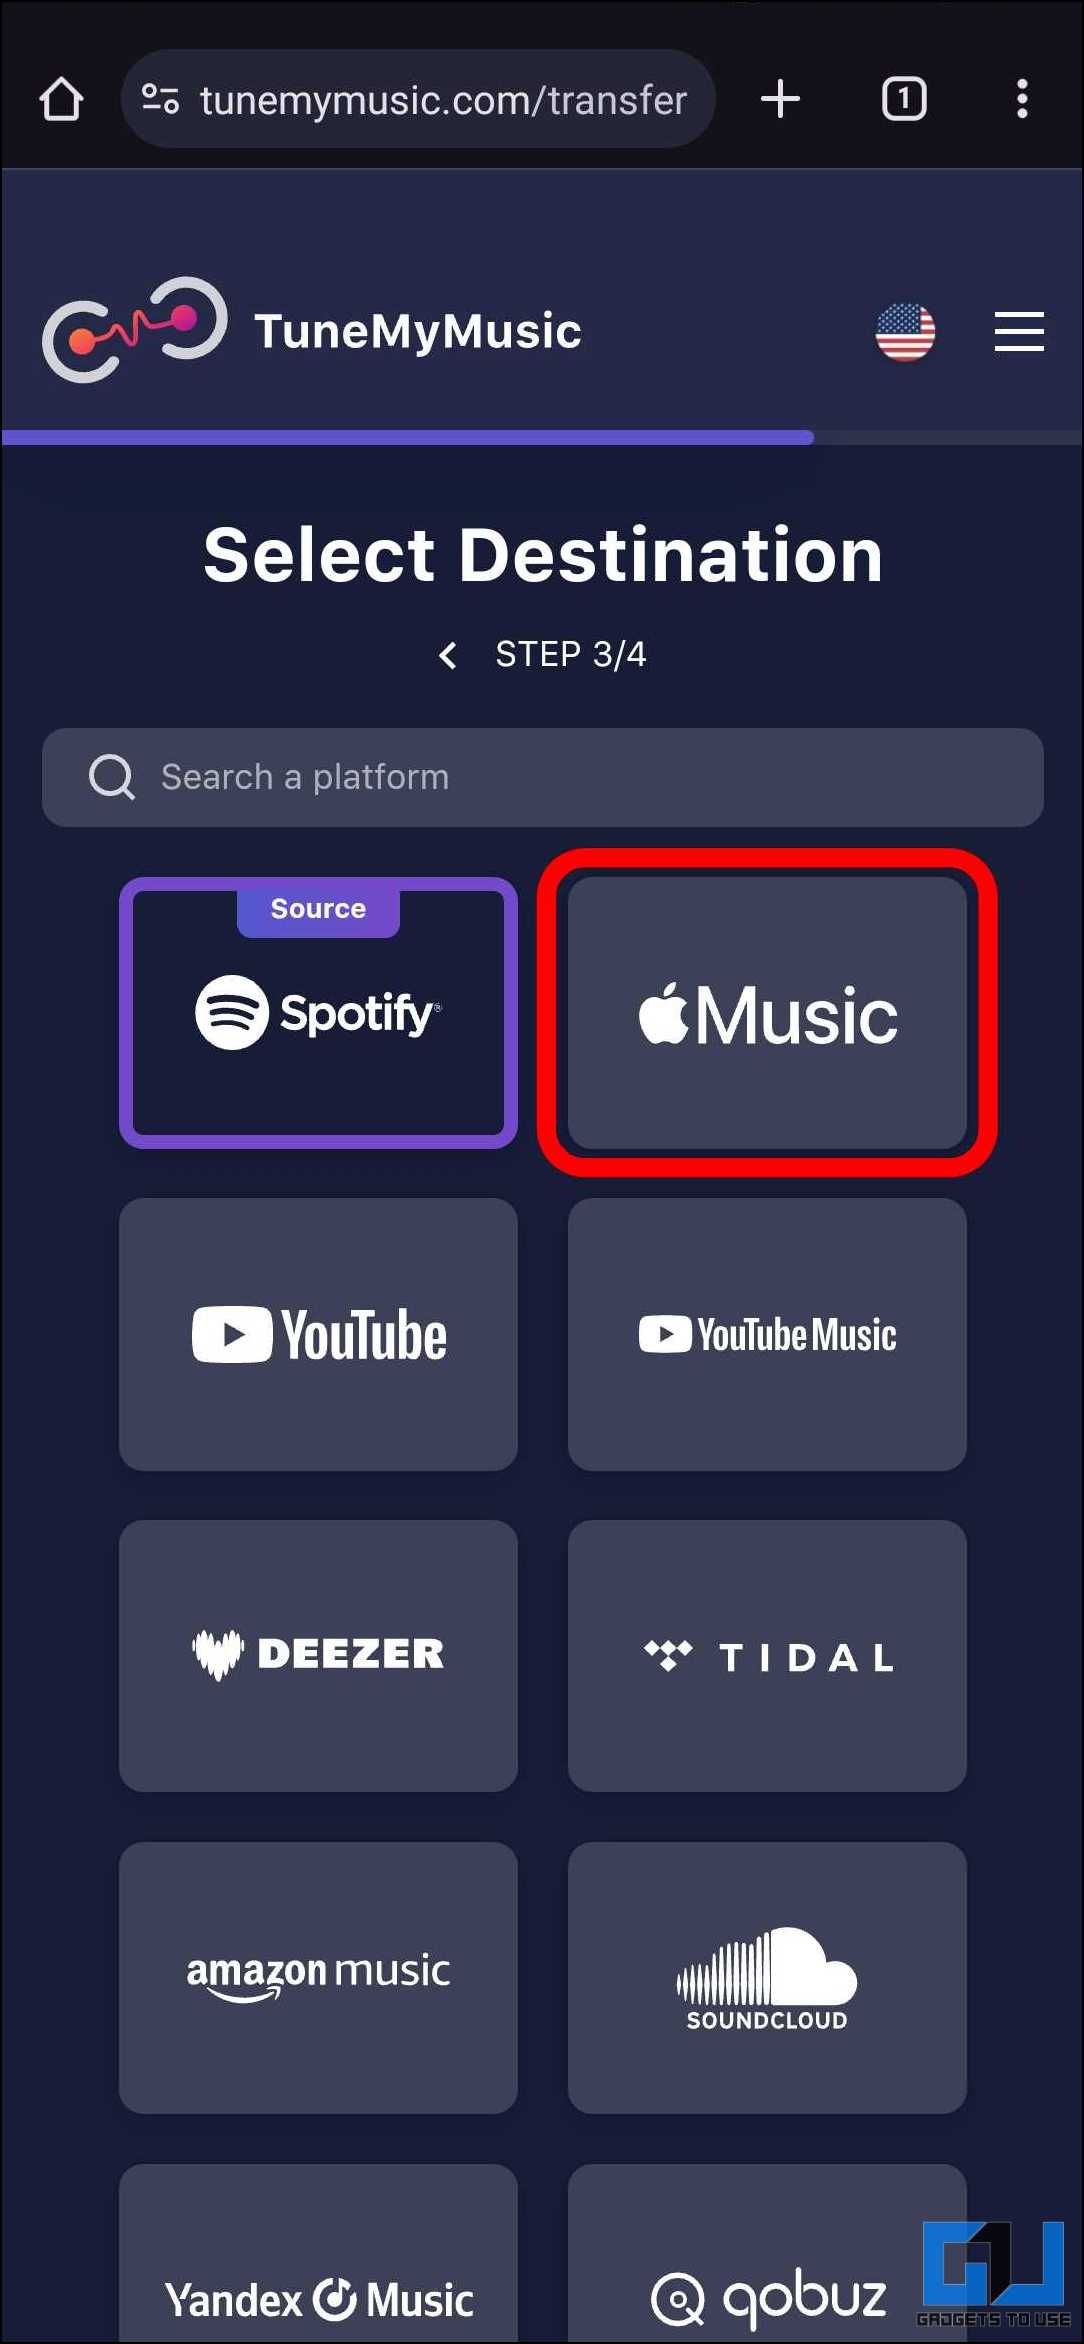
5. Select the destination to which you want to transfer the playlists. Here, we will be using Apple Music as the destination.
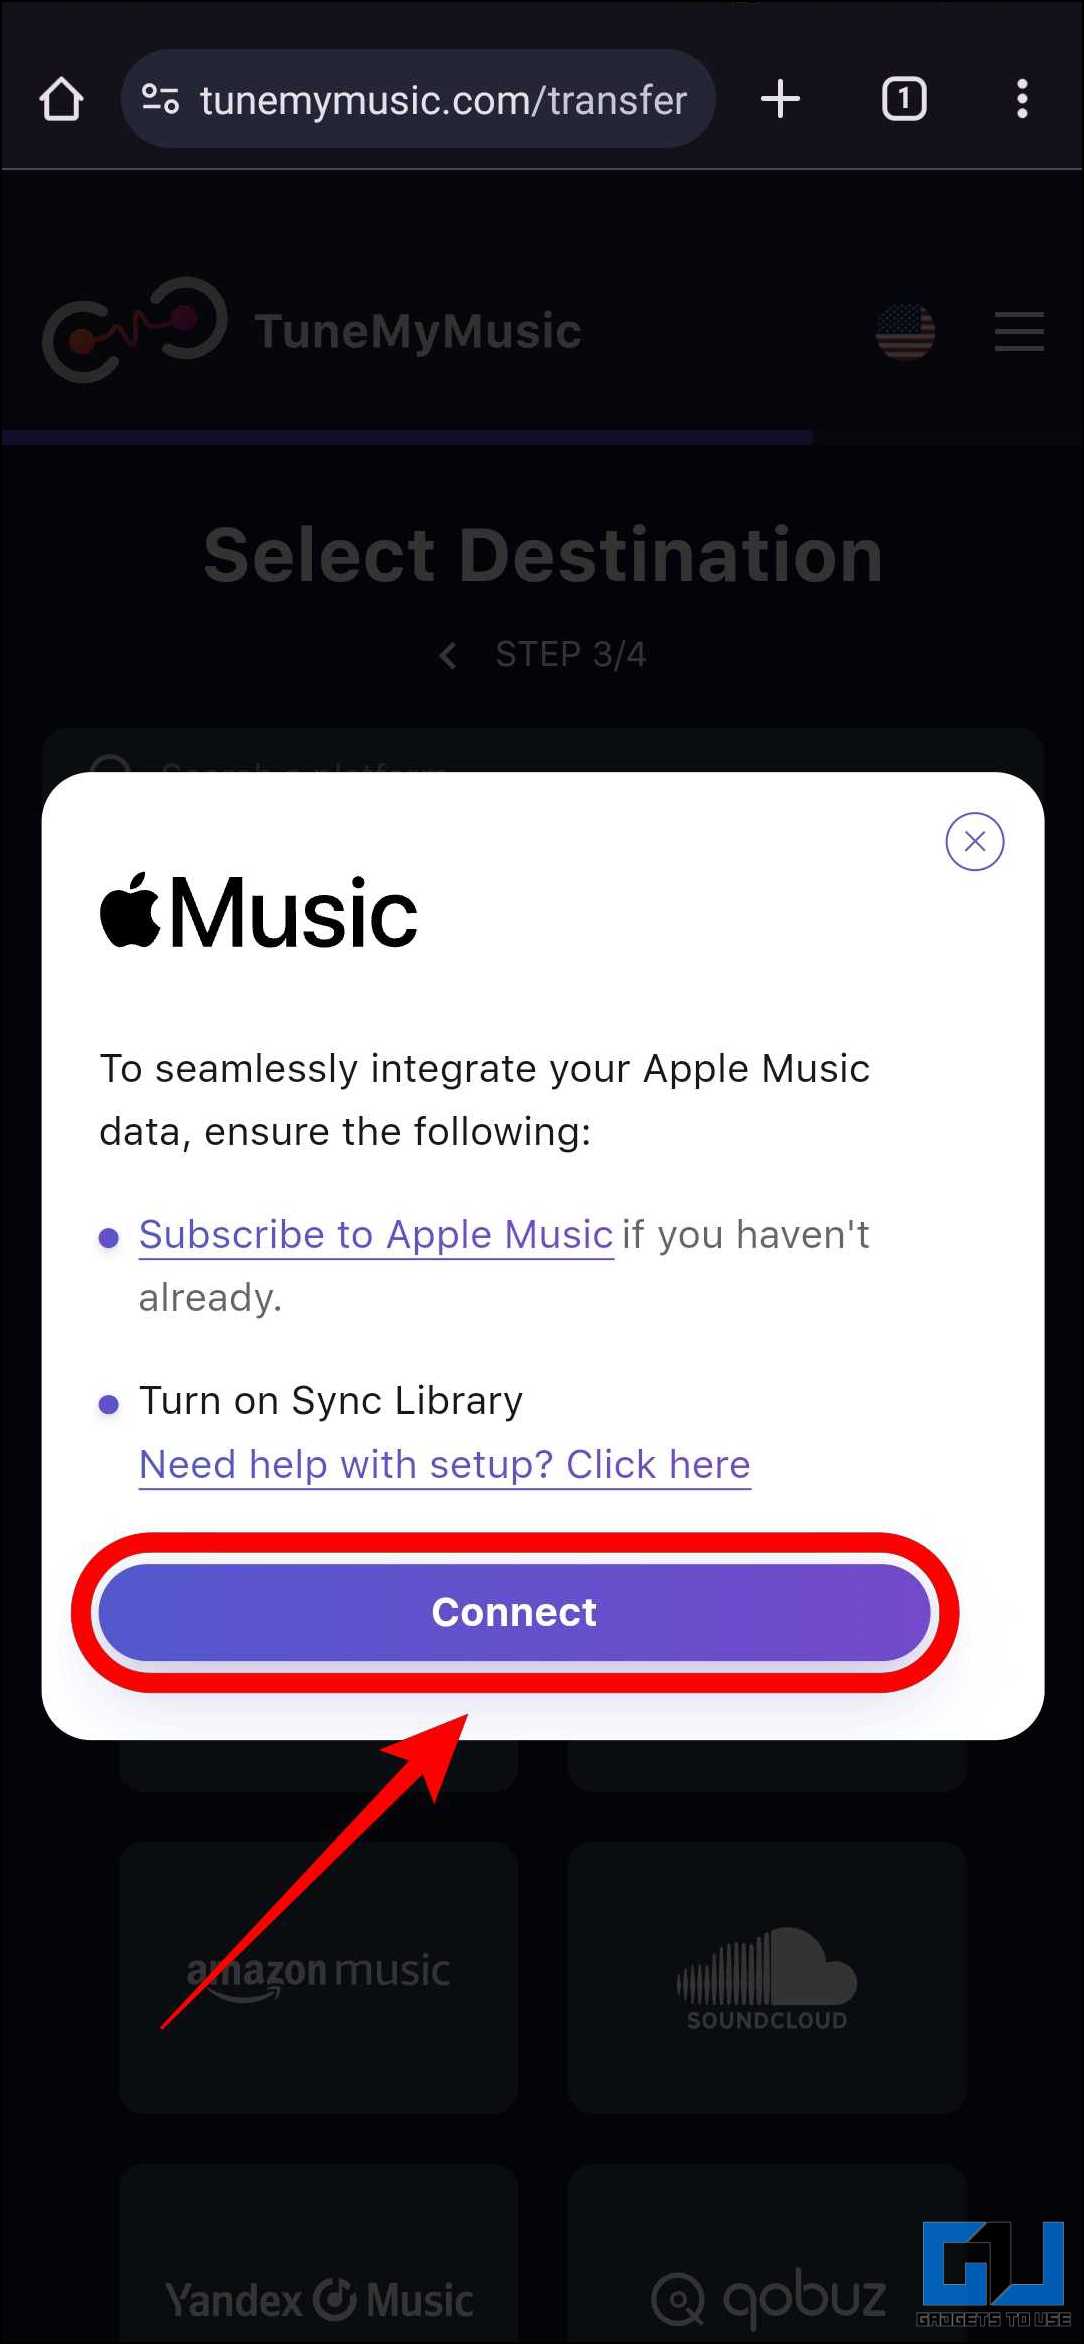
6. Tap on “Connect” and log in to your Apple Music account. Then, tap “Allow” to let TuneMyMusic access your playlists.

7. Tap on “Start Transfer” to initiate the transferring process.
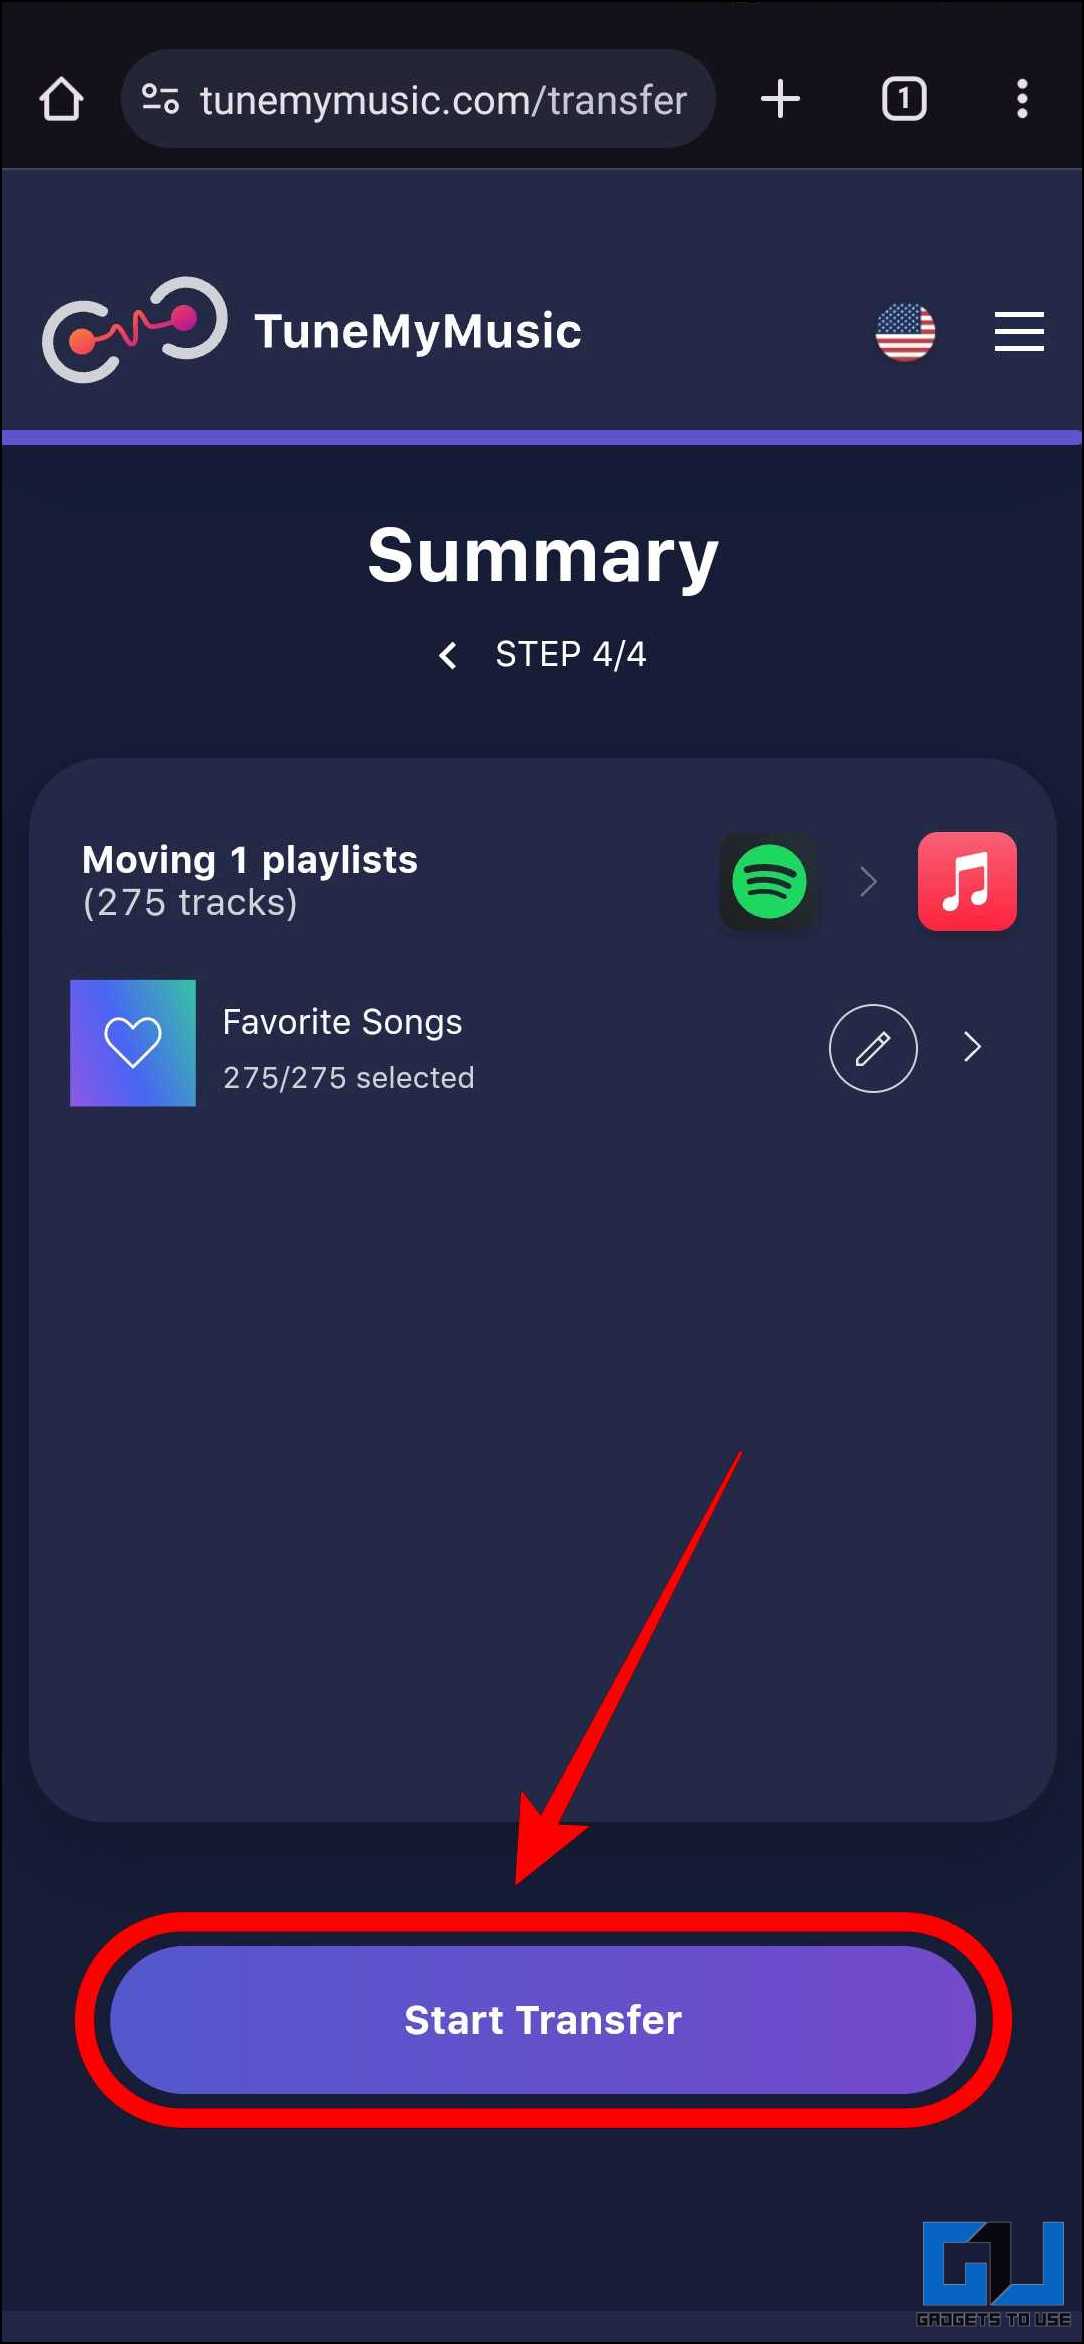
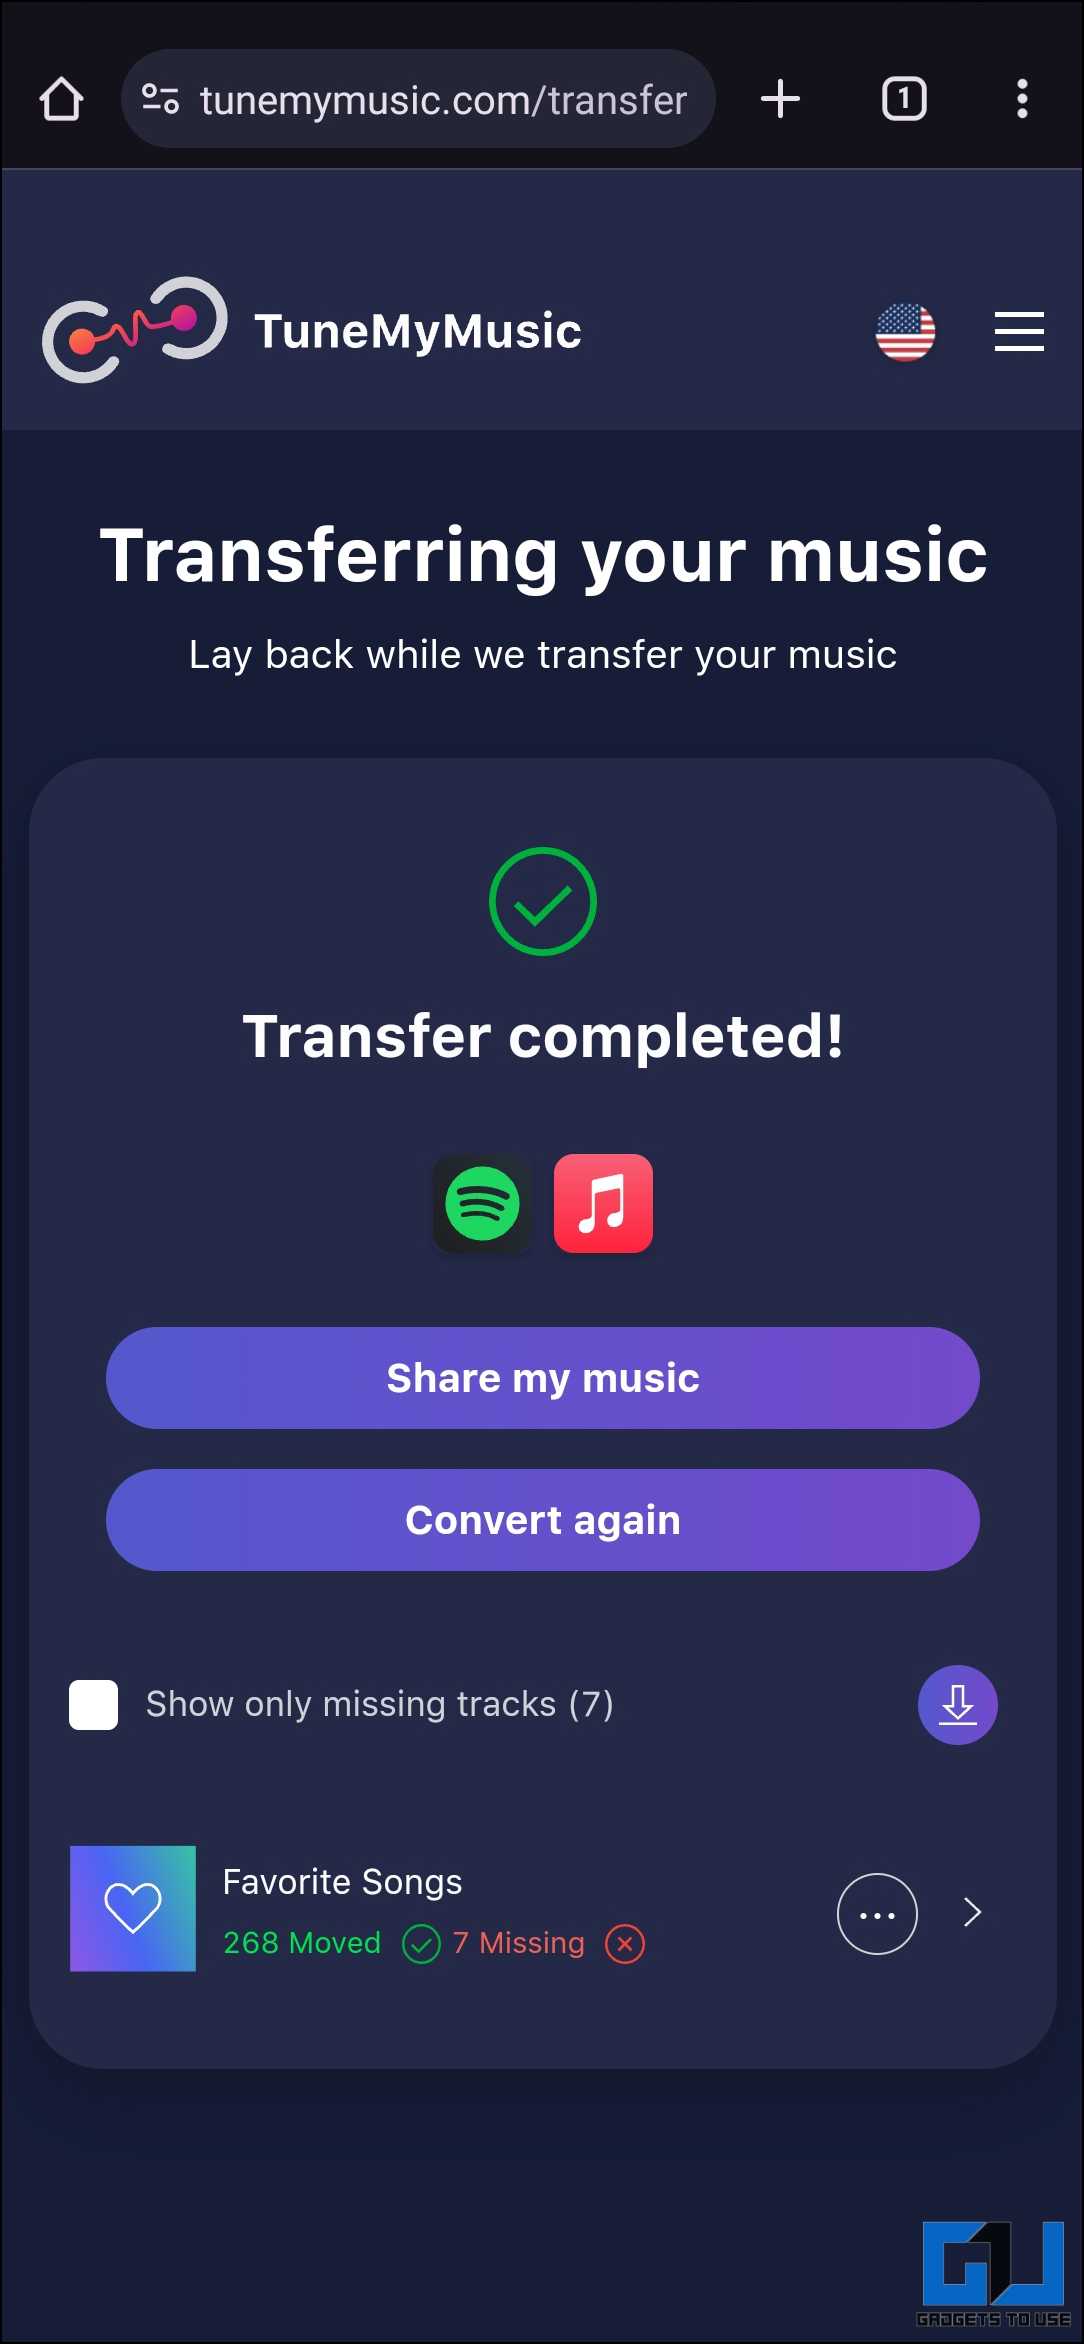
8. Wait for the transfer to complete. Some songs might not be available at your destination, which will be shown as “Missing.”
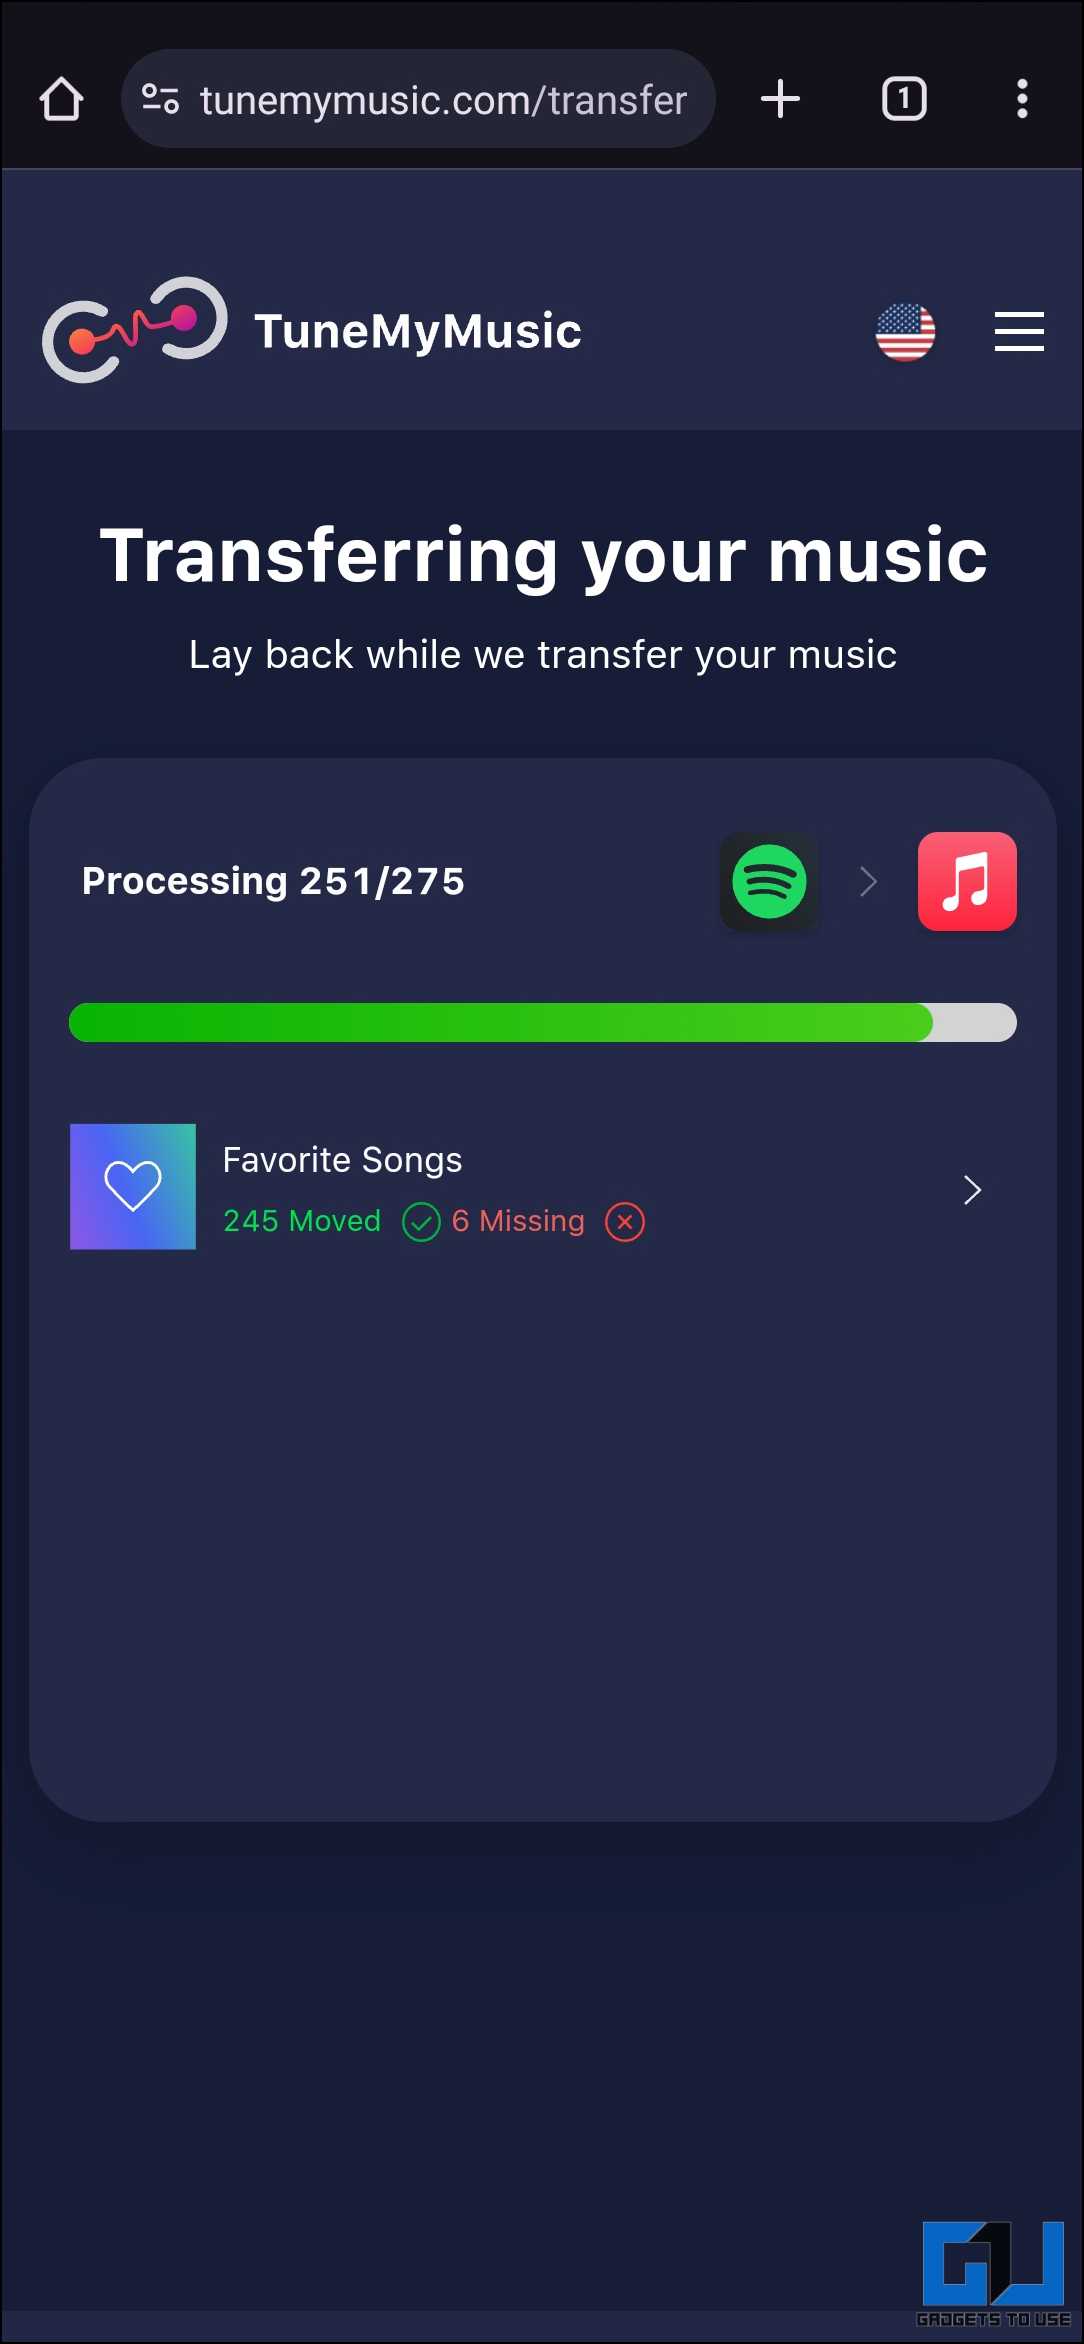
9. Once the transfer is complete, you can enjoy your favorite playlists on the streaming service of your choice.
Method 2 – Sounddiiz
Sounddiiz is a popular web-based tool that helps transfer playlists from one platform to another. It offers compatibility with all the essential platforms. The user experience is good; follow these steps to transfer your playlist using Sounddiiz.
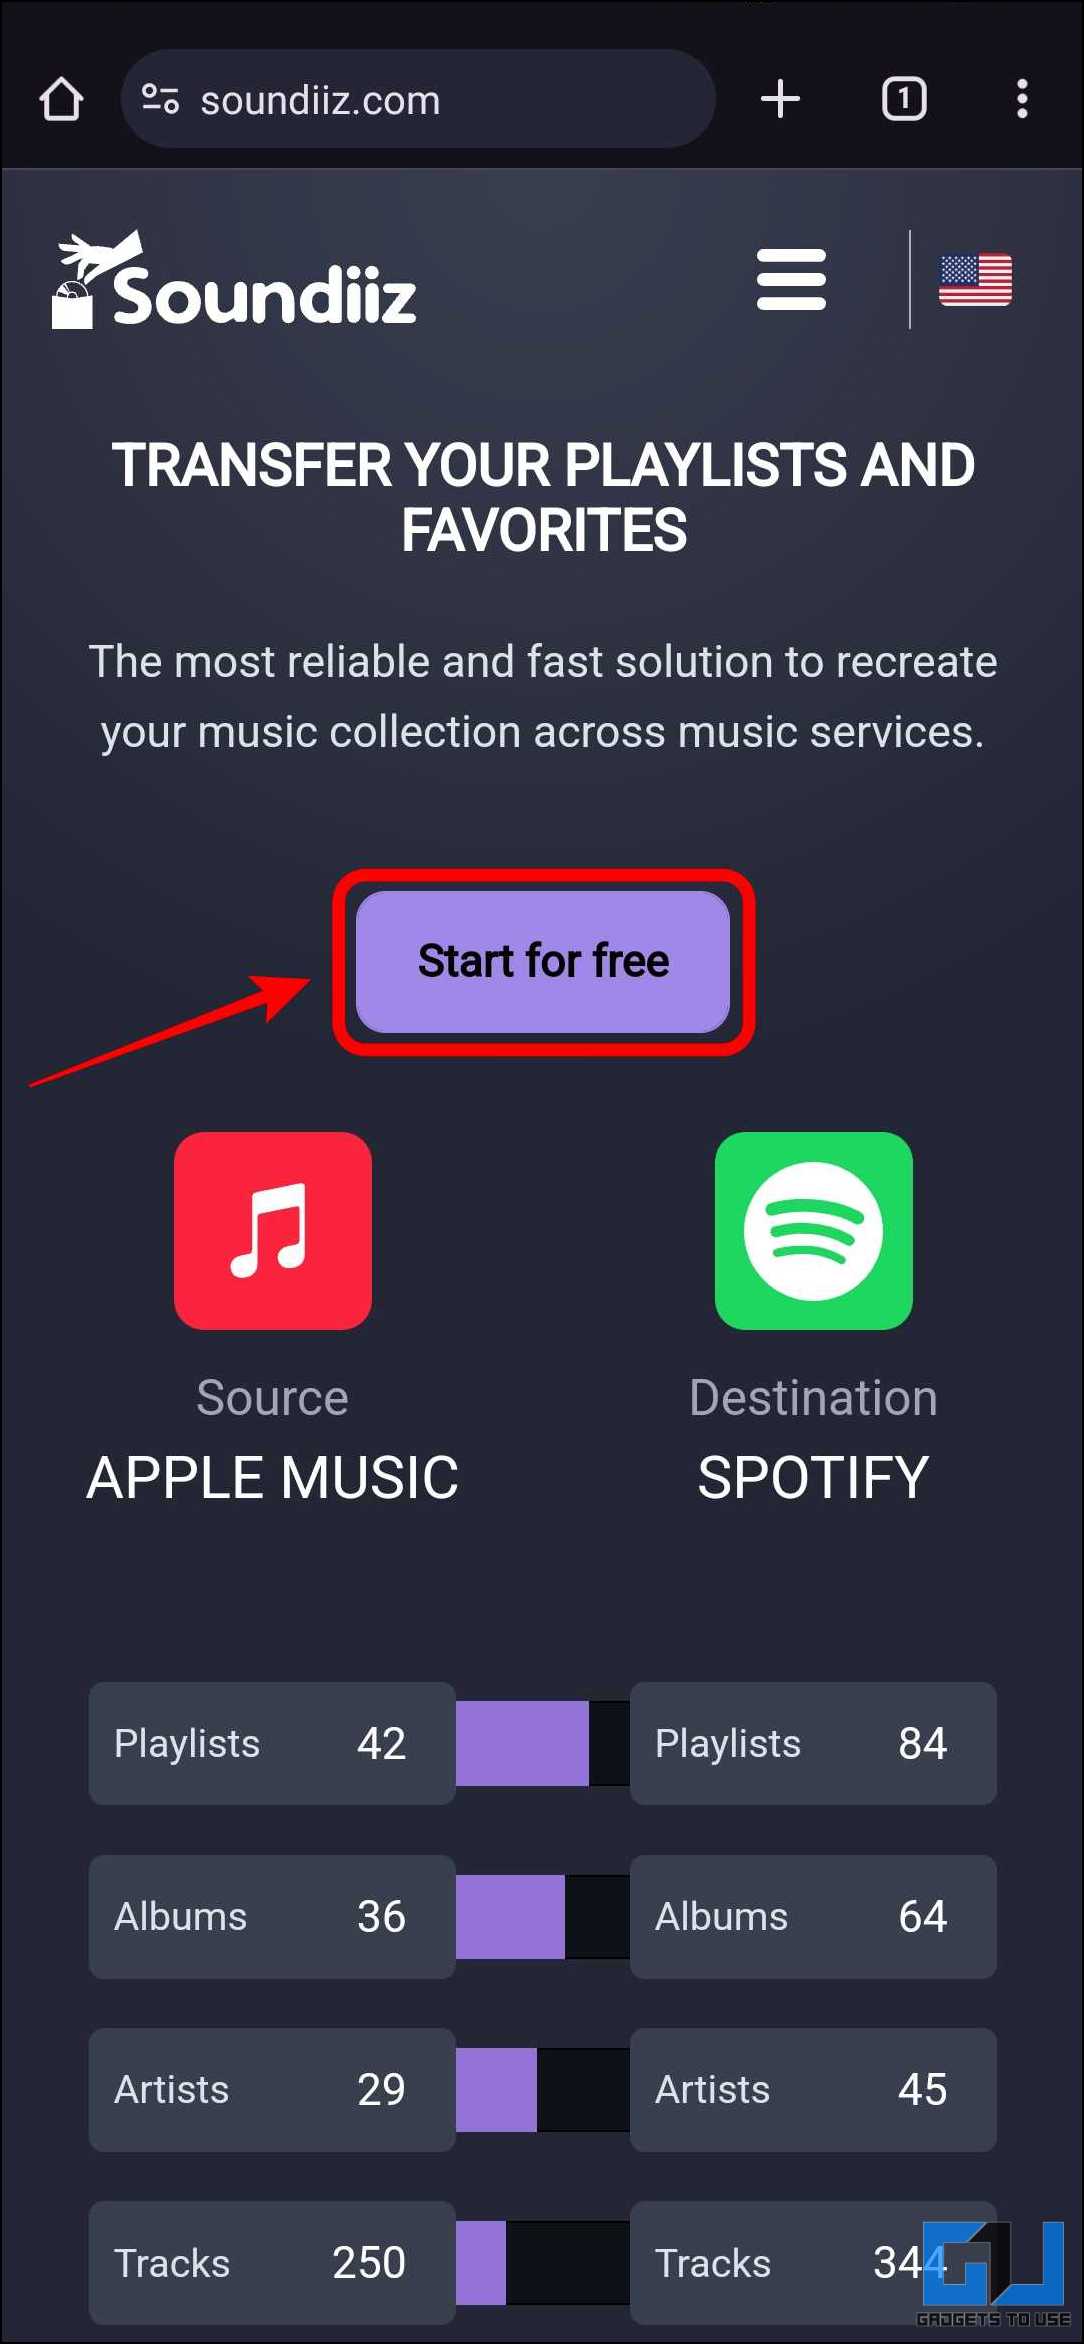
1. Go to the Soundiiz website and tap on “Start for free.”
2. Create a new account using the given options.
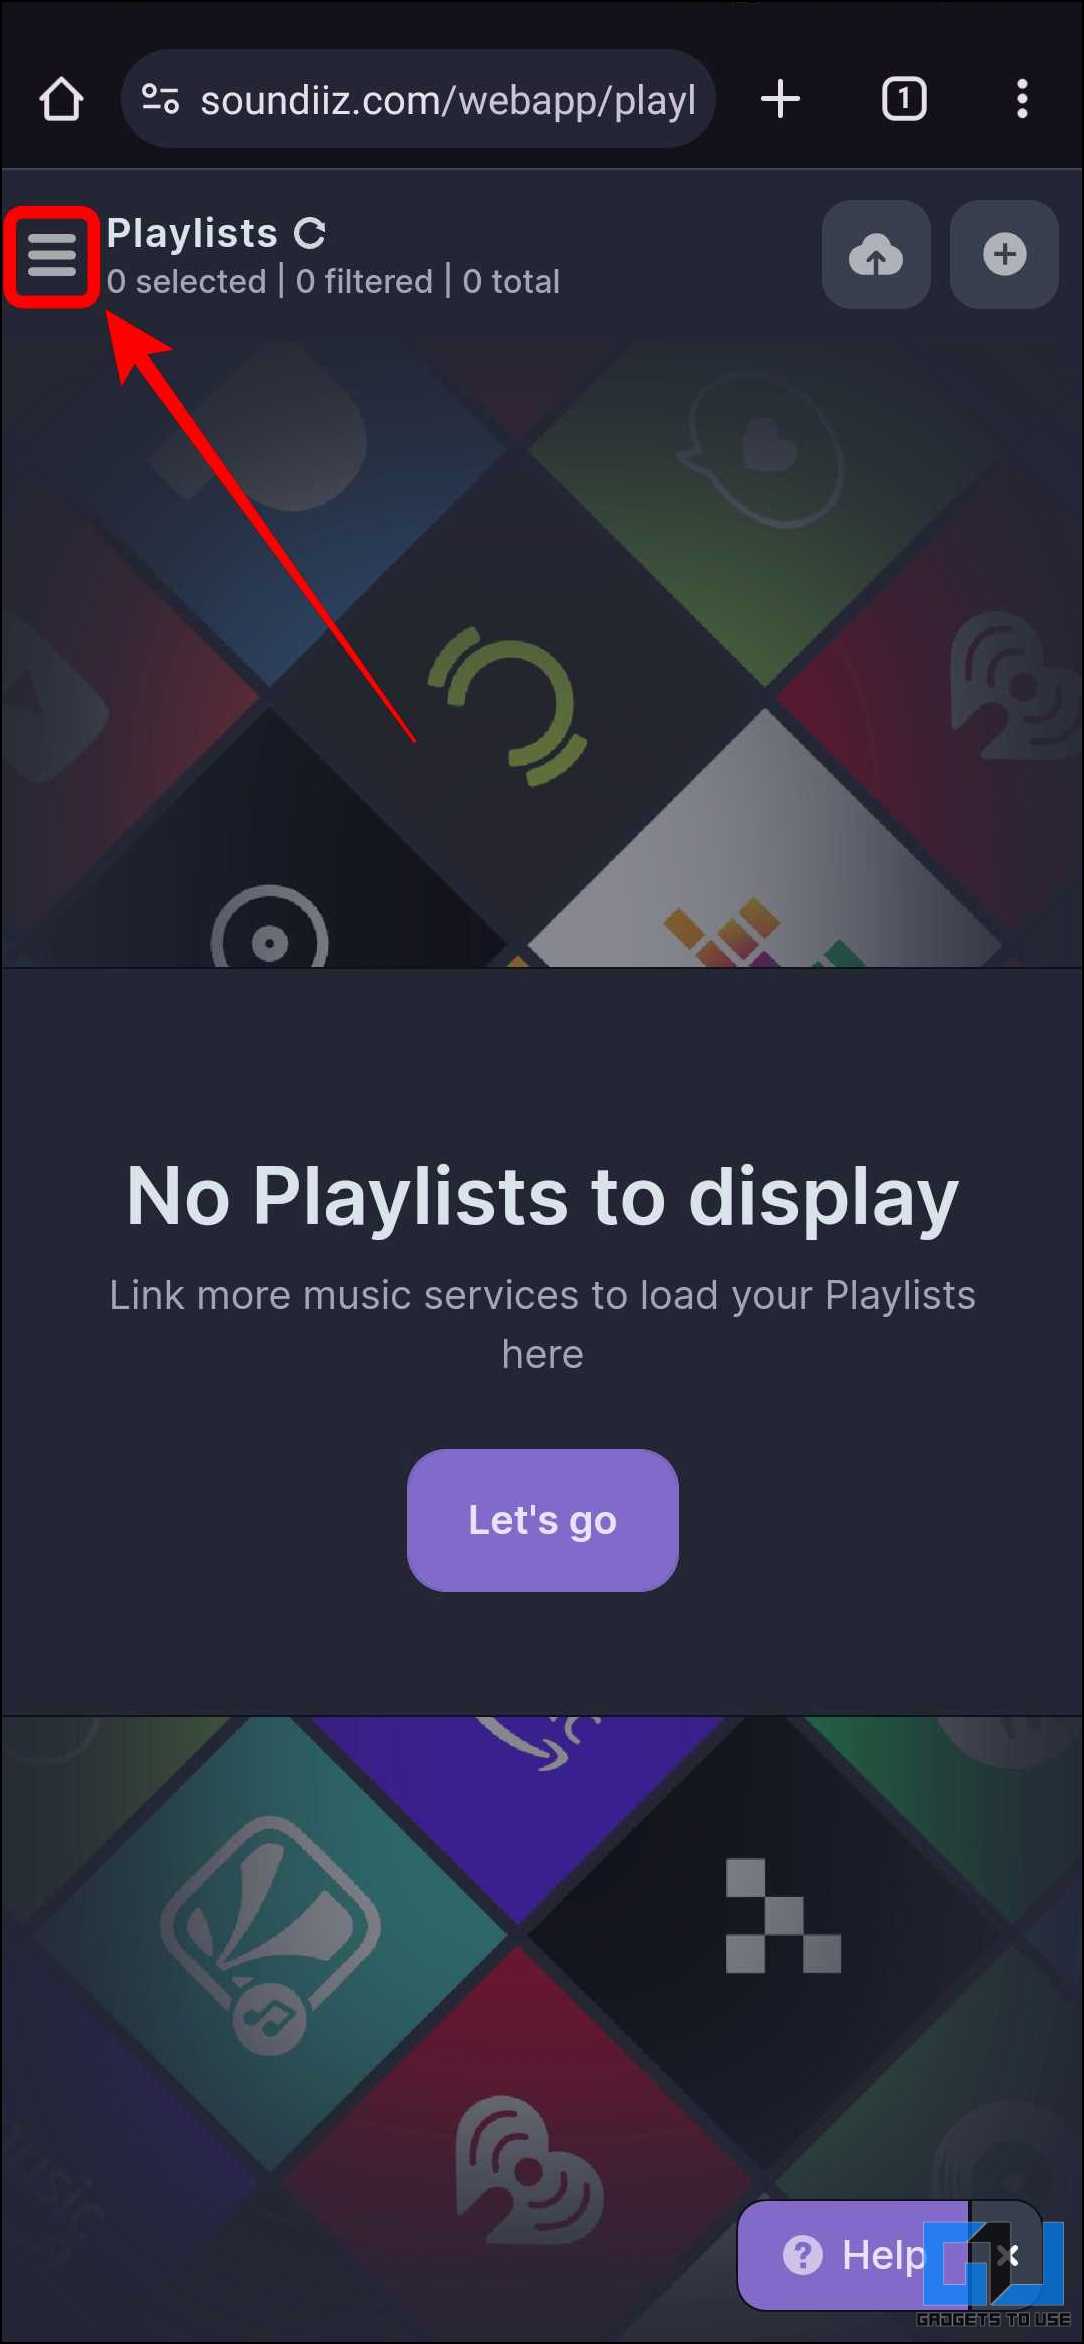
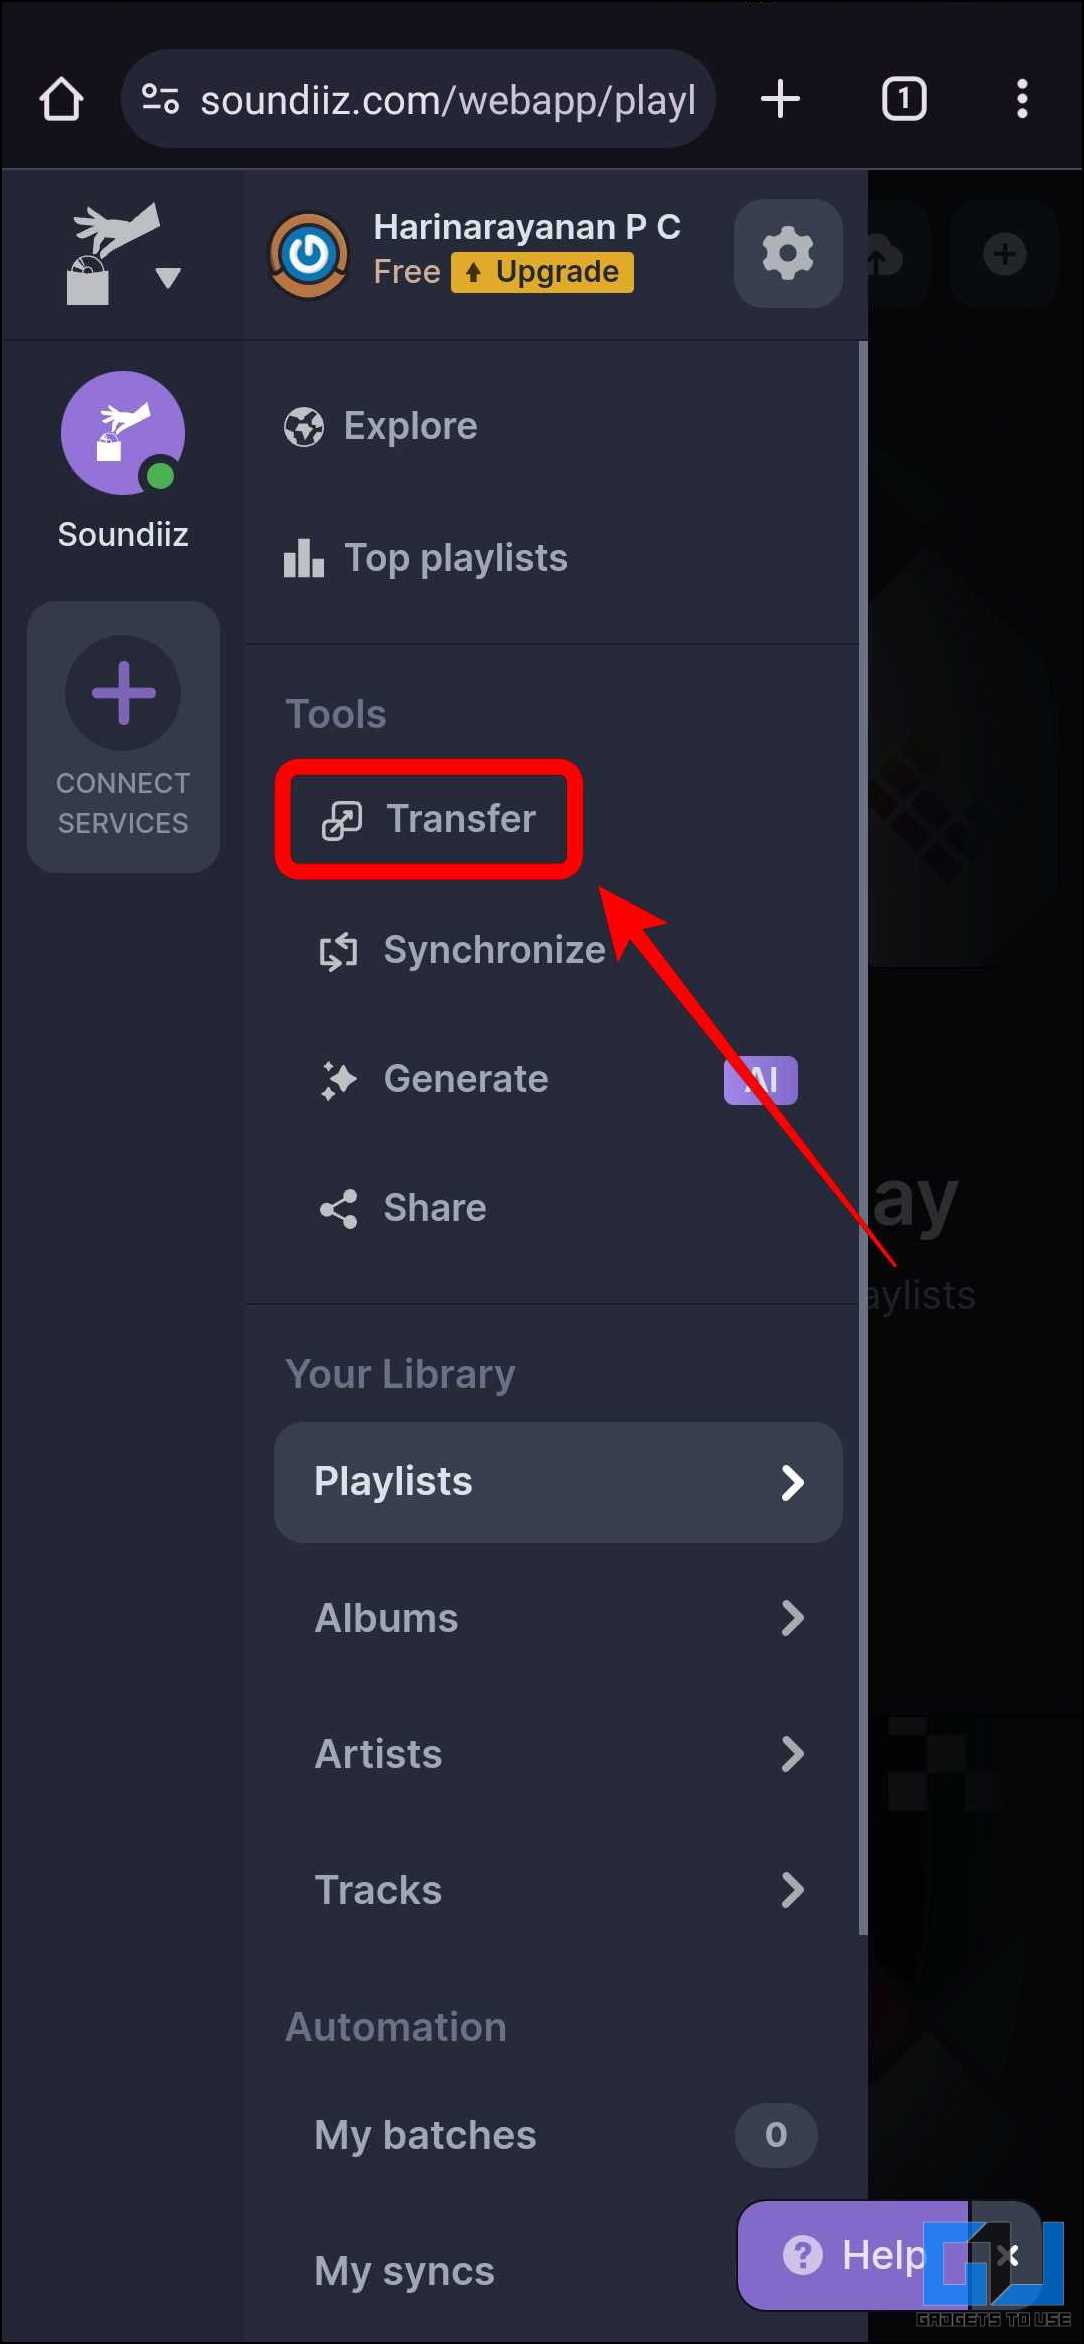
3. Once logged in, tap hamburger “Menu” and select “Transfer.”
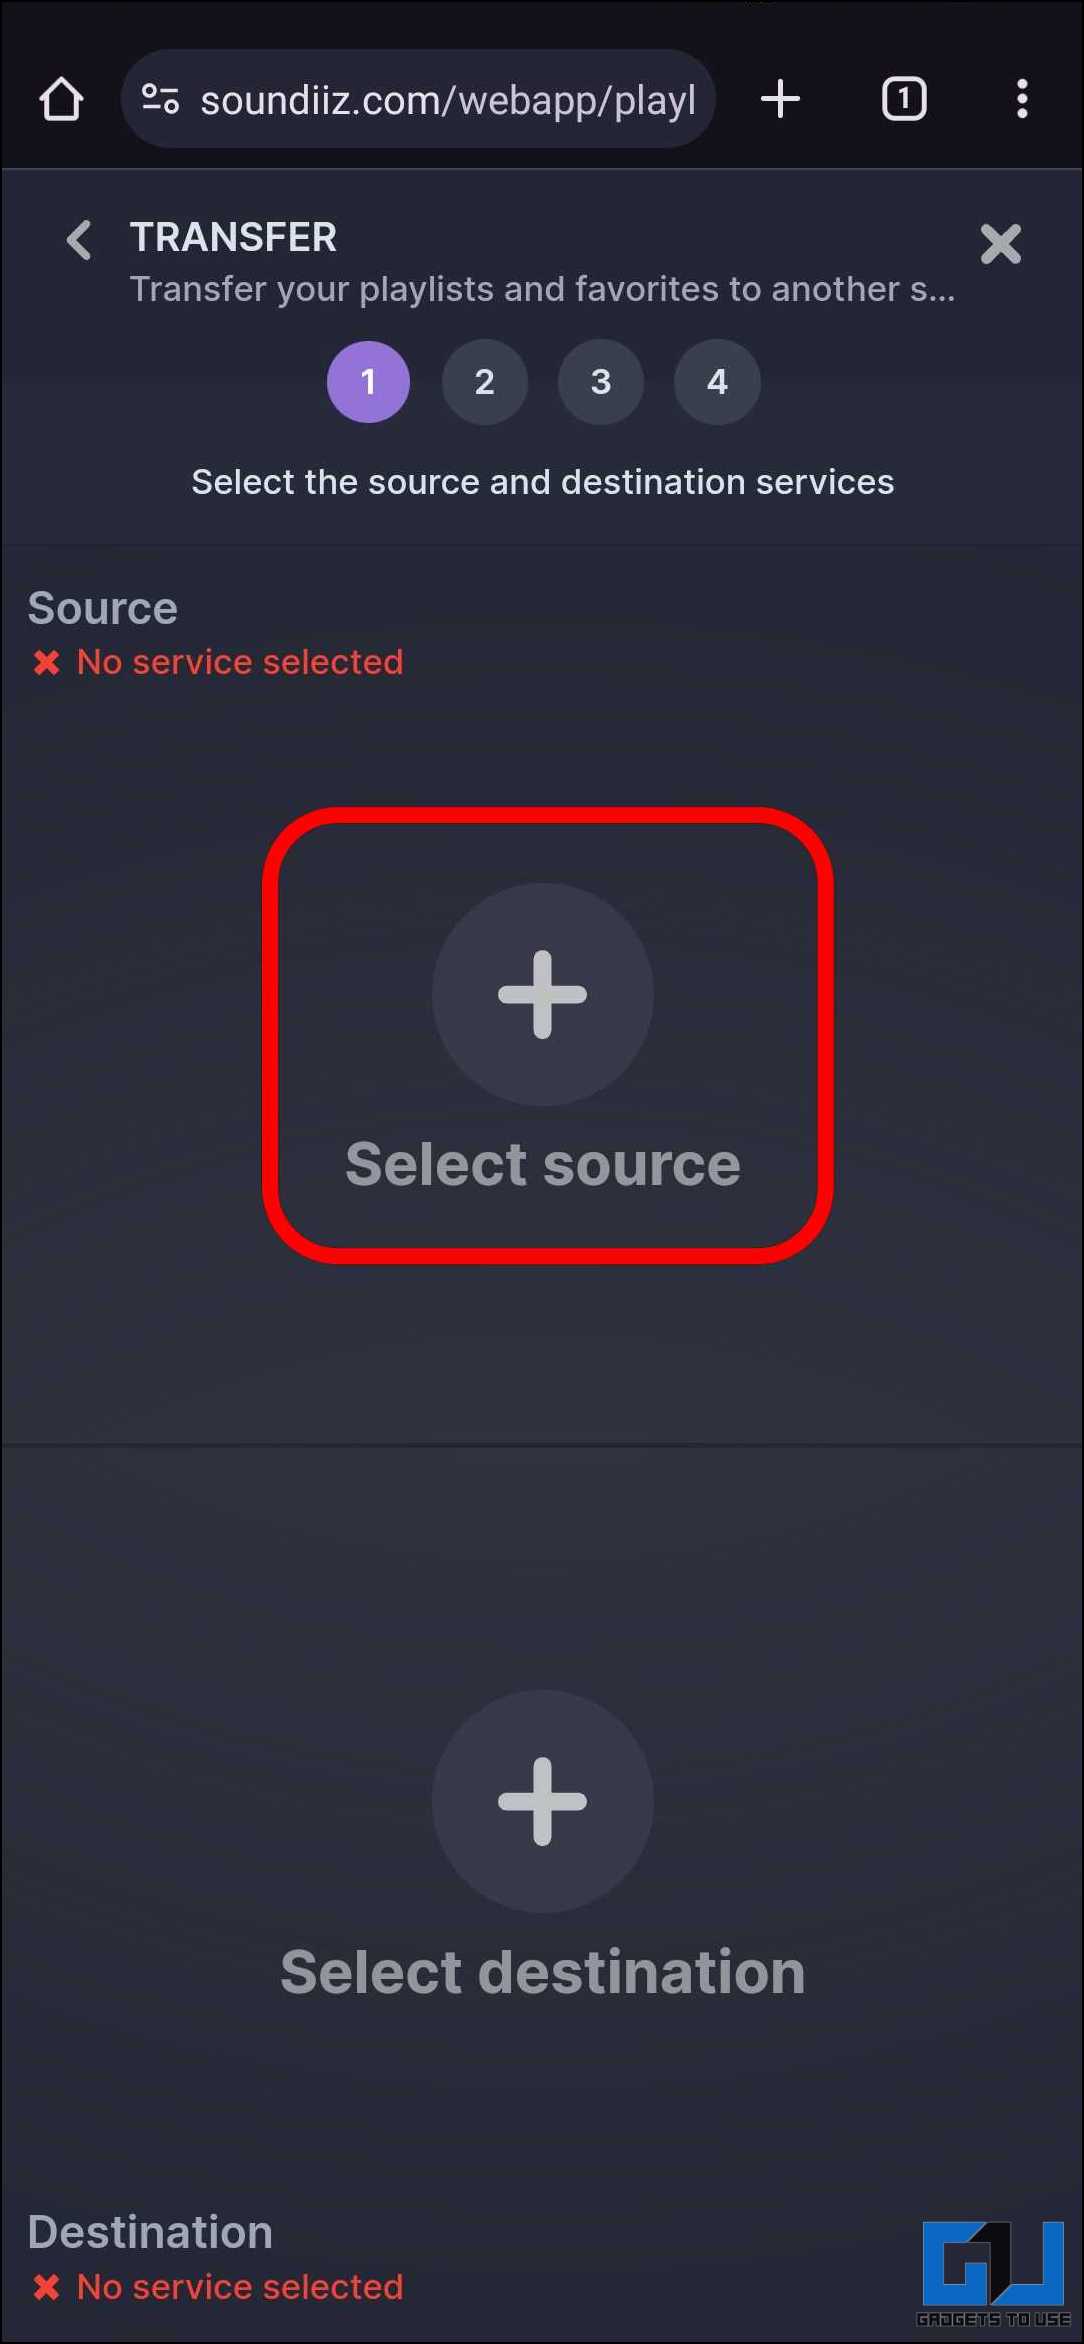
4. Tap “Select source” and select the streaming service from which you want to transfer the playlists. Here, we are selecting Spotify.

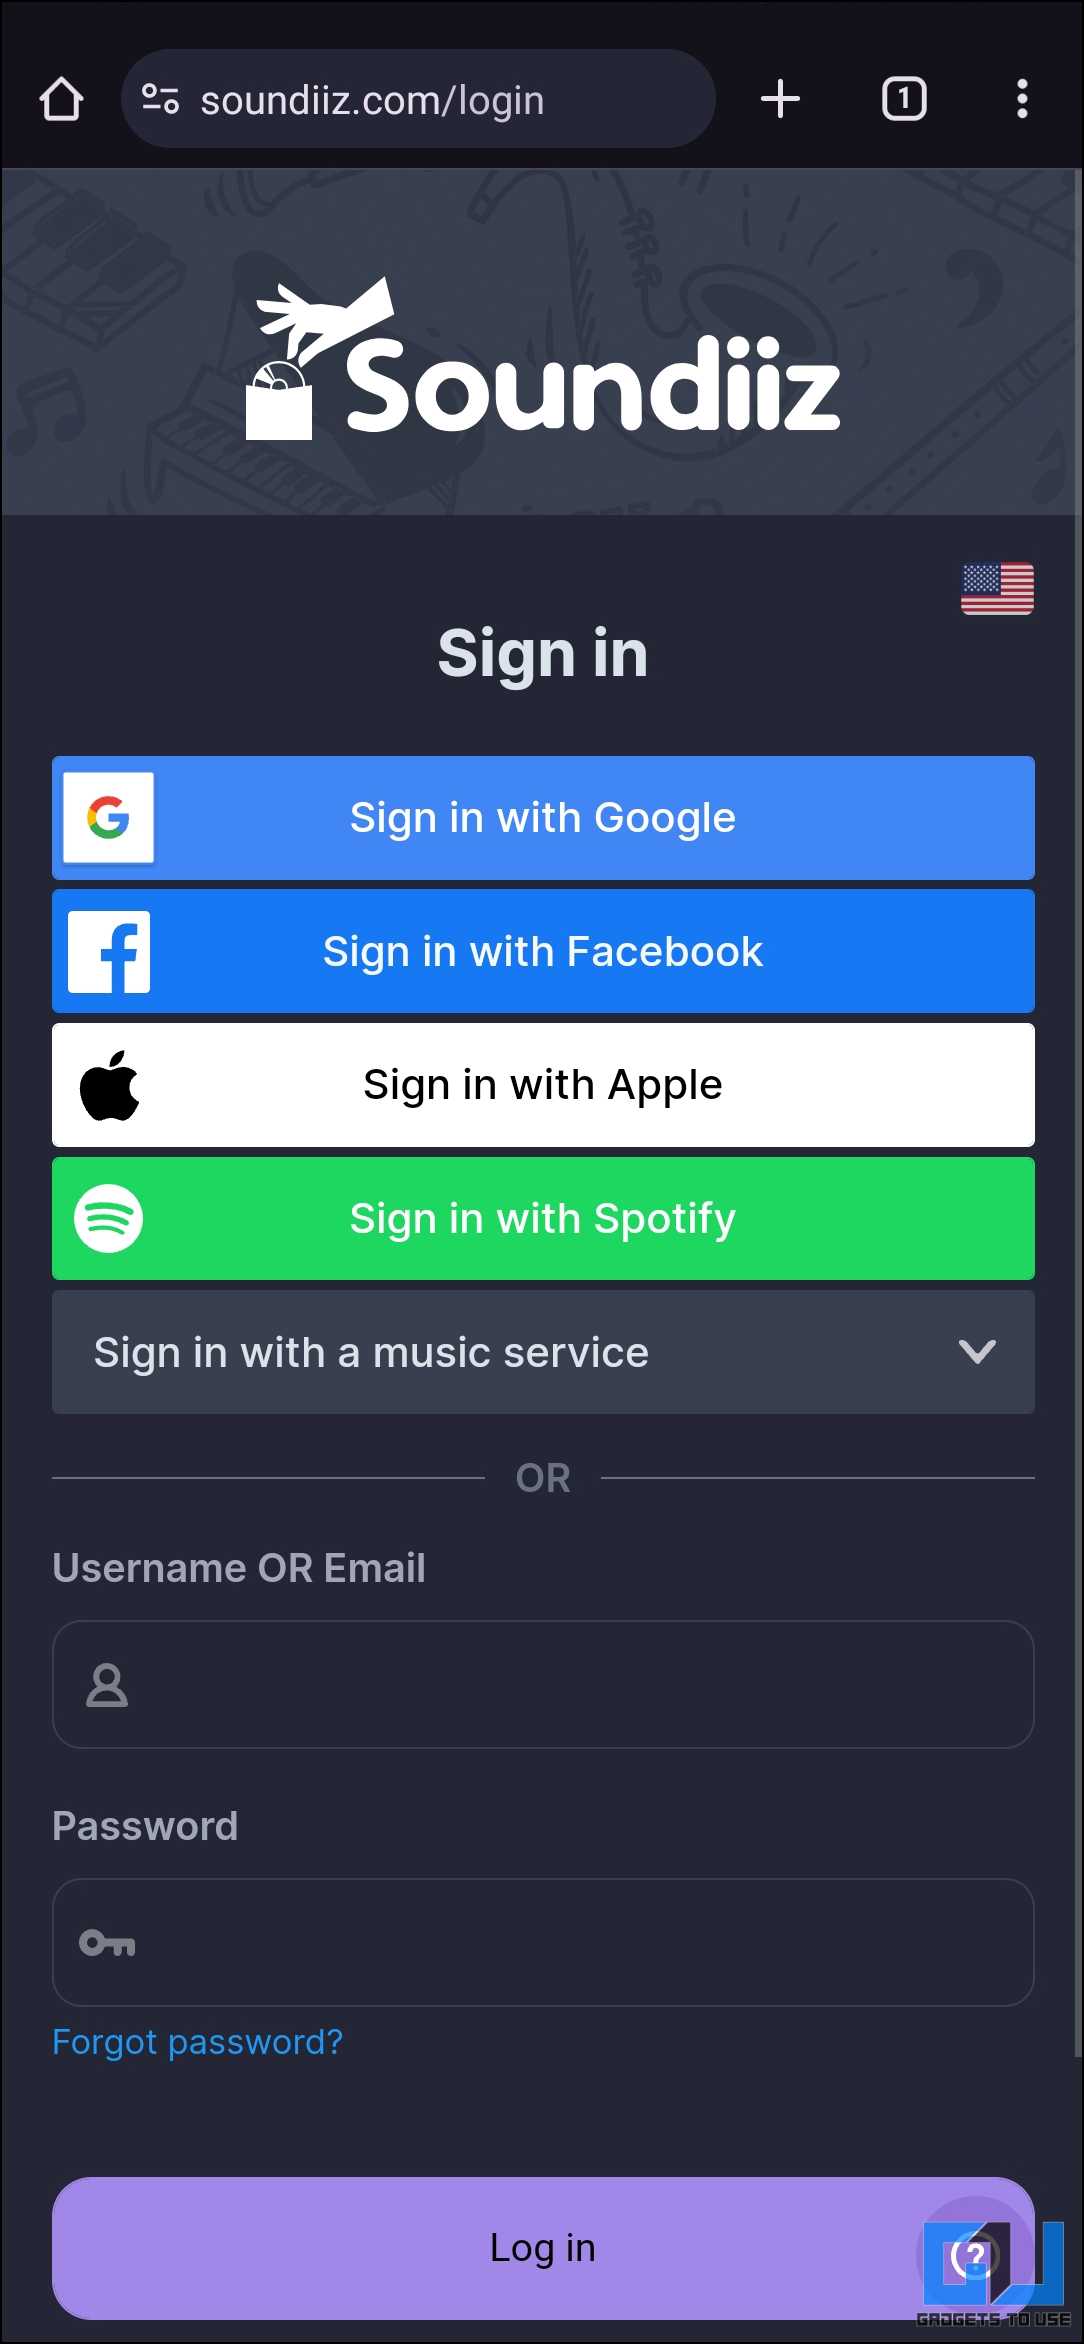
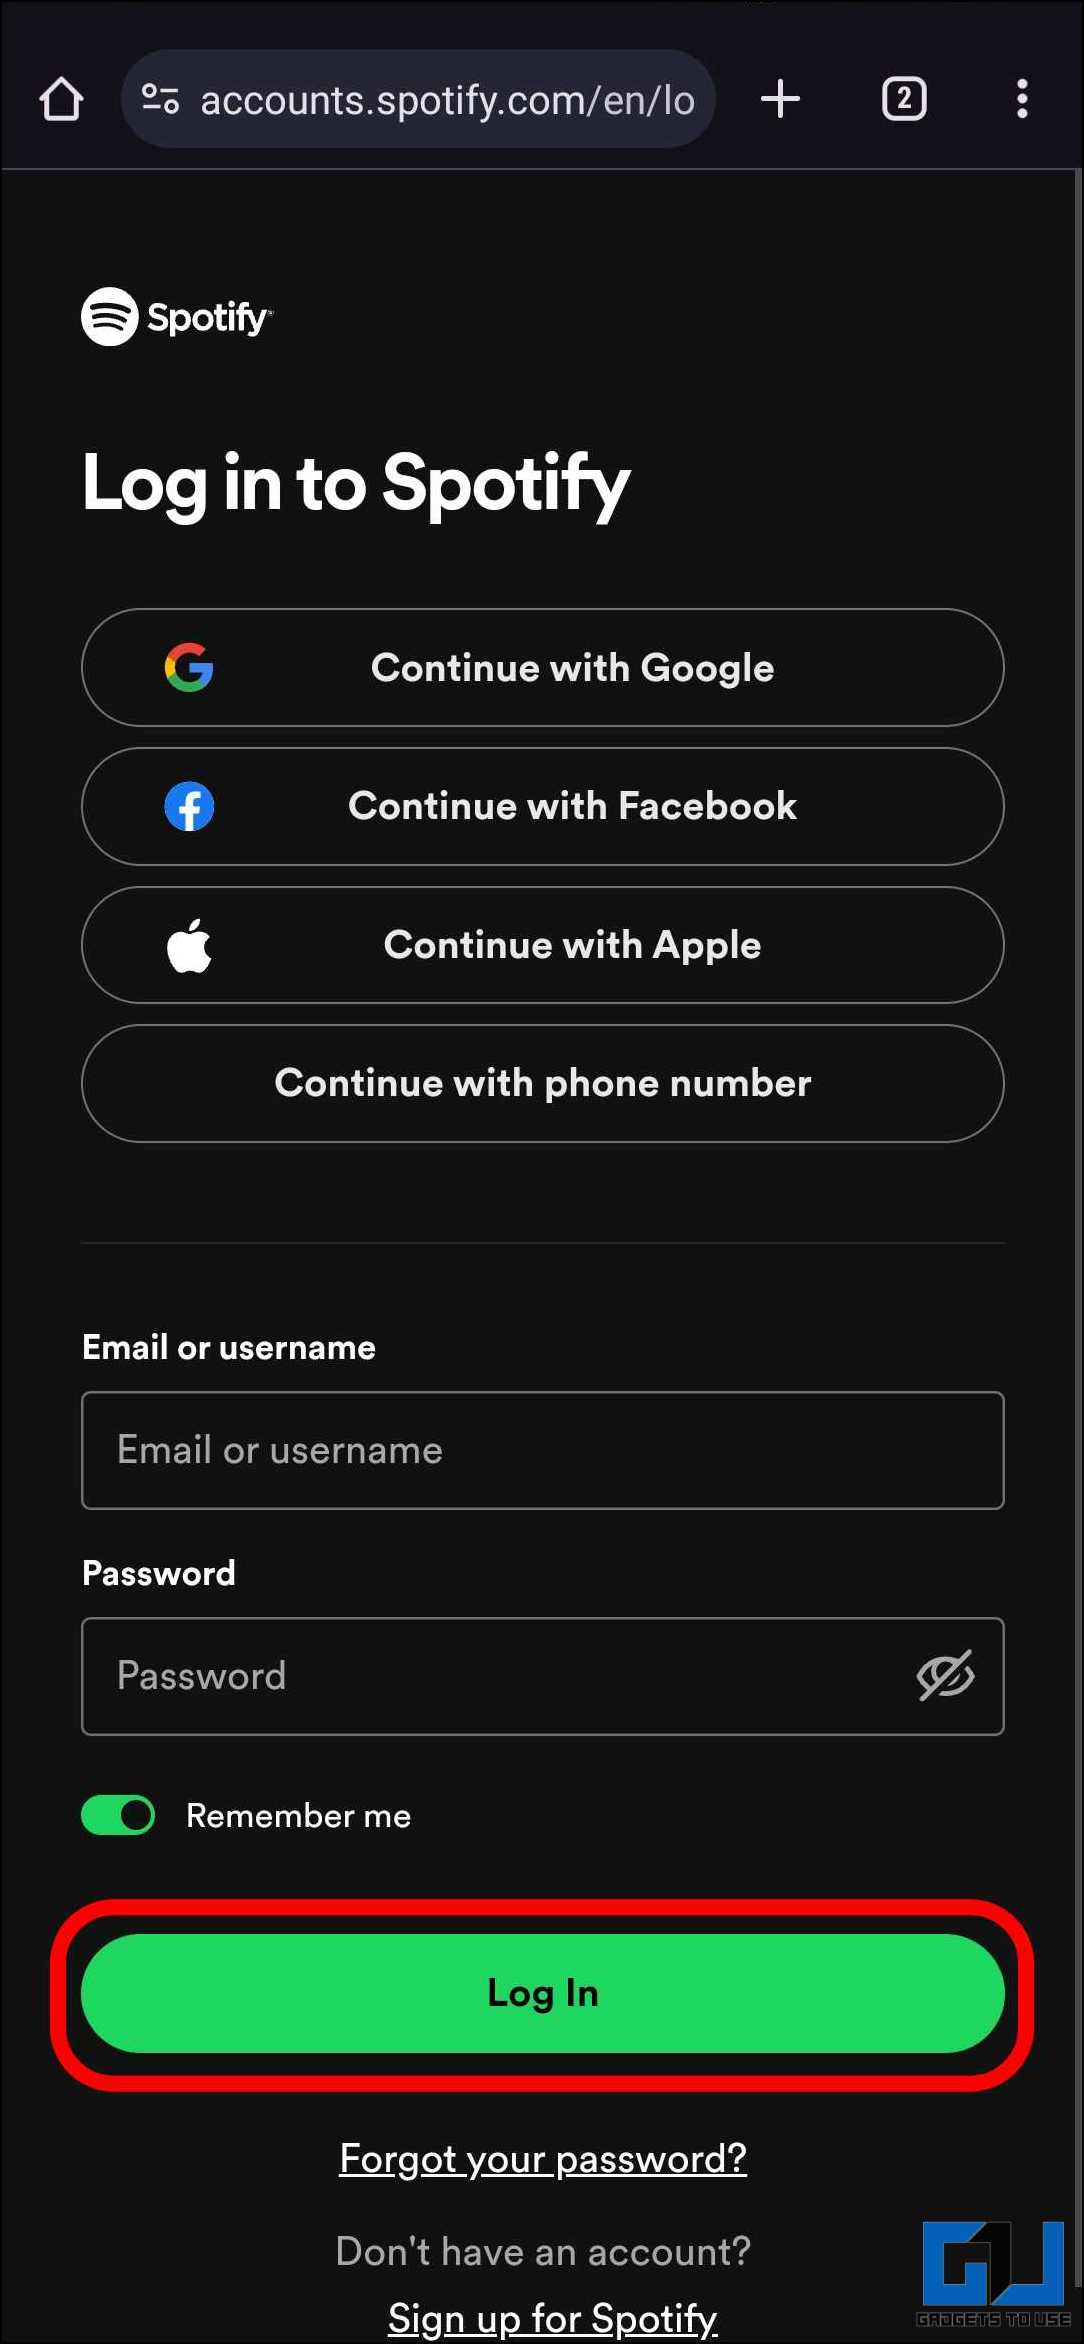
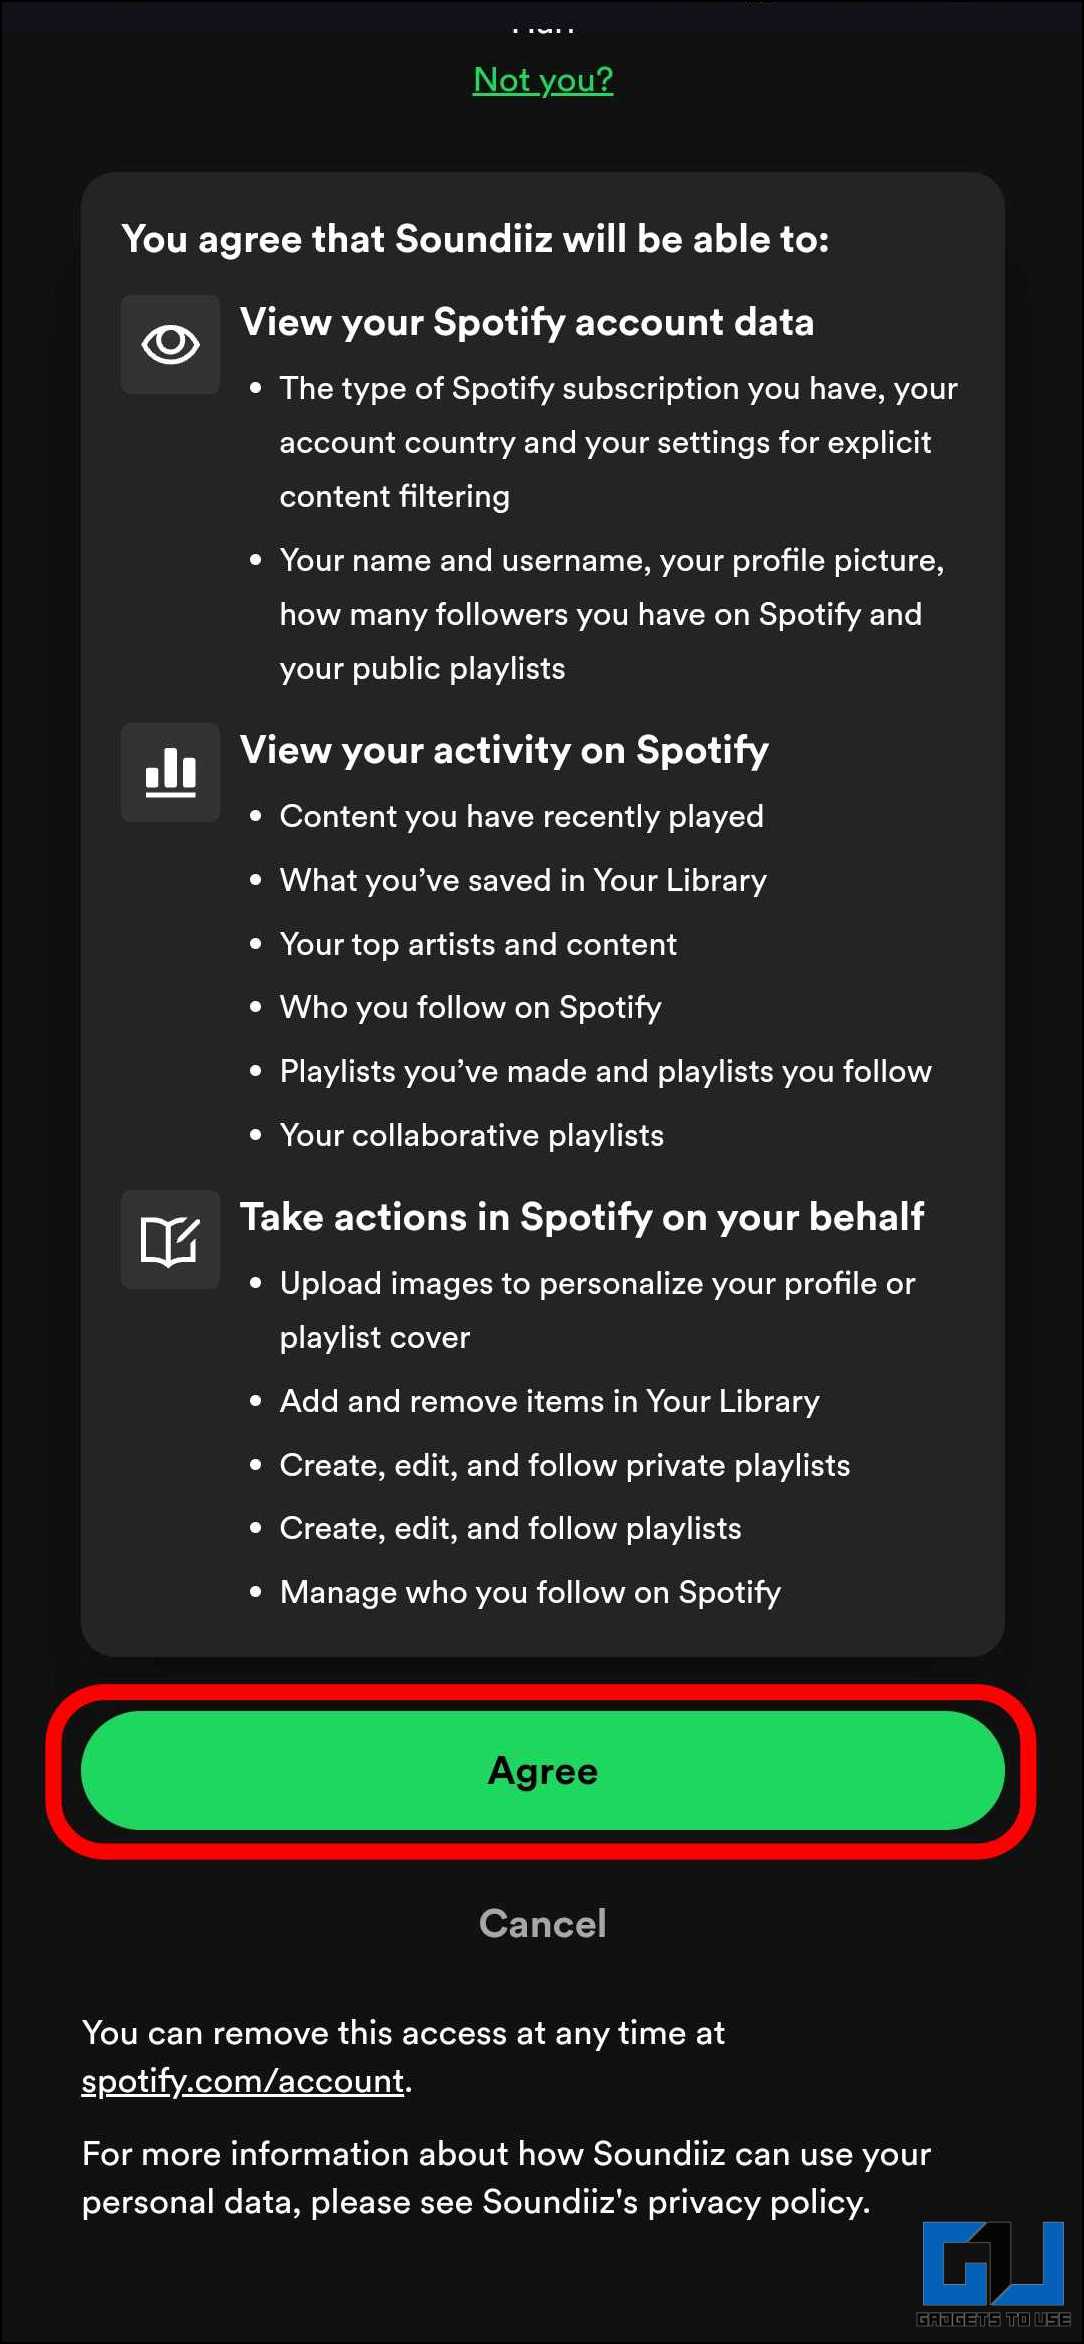
5. Log into your Spotify account and tap “Agree” to allow Sounfdiiz access to your playlists.
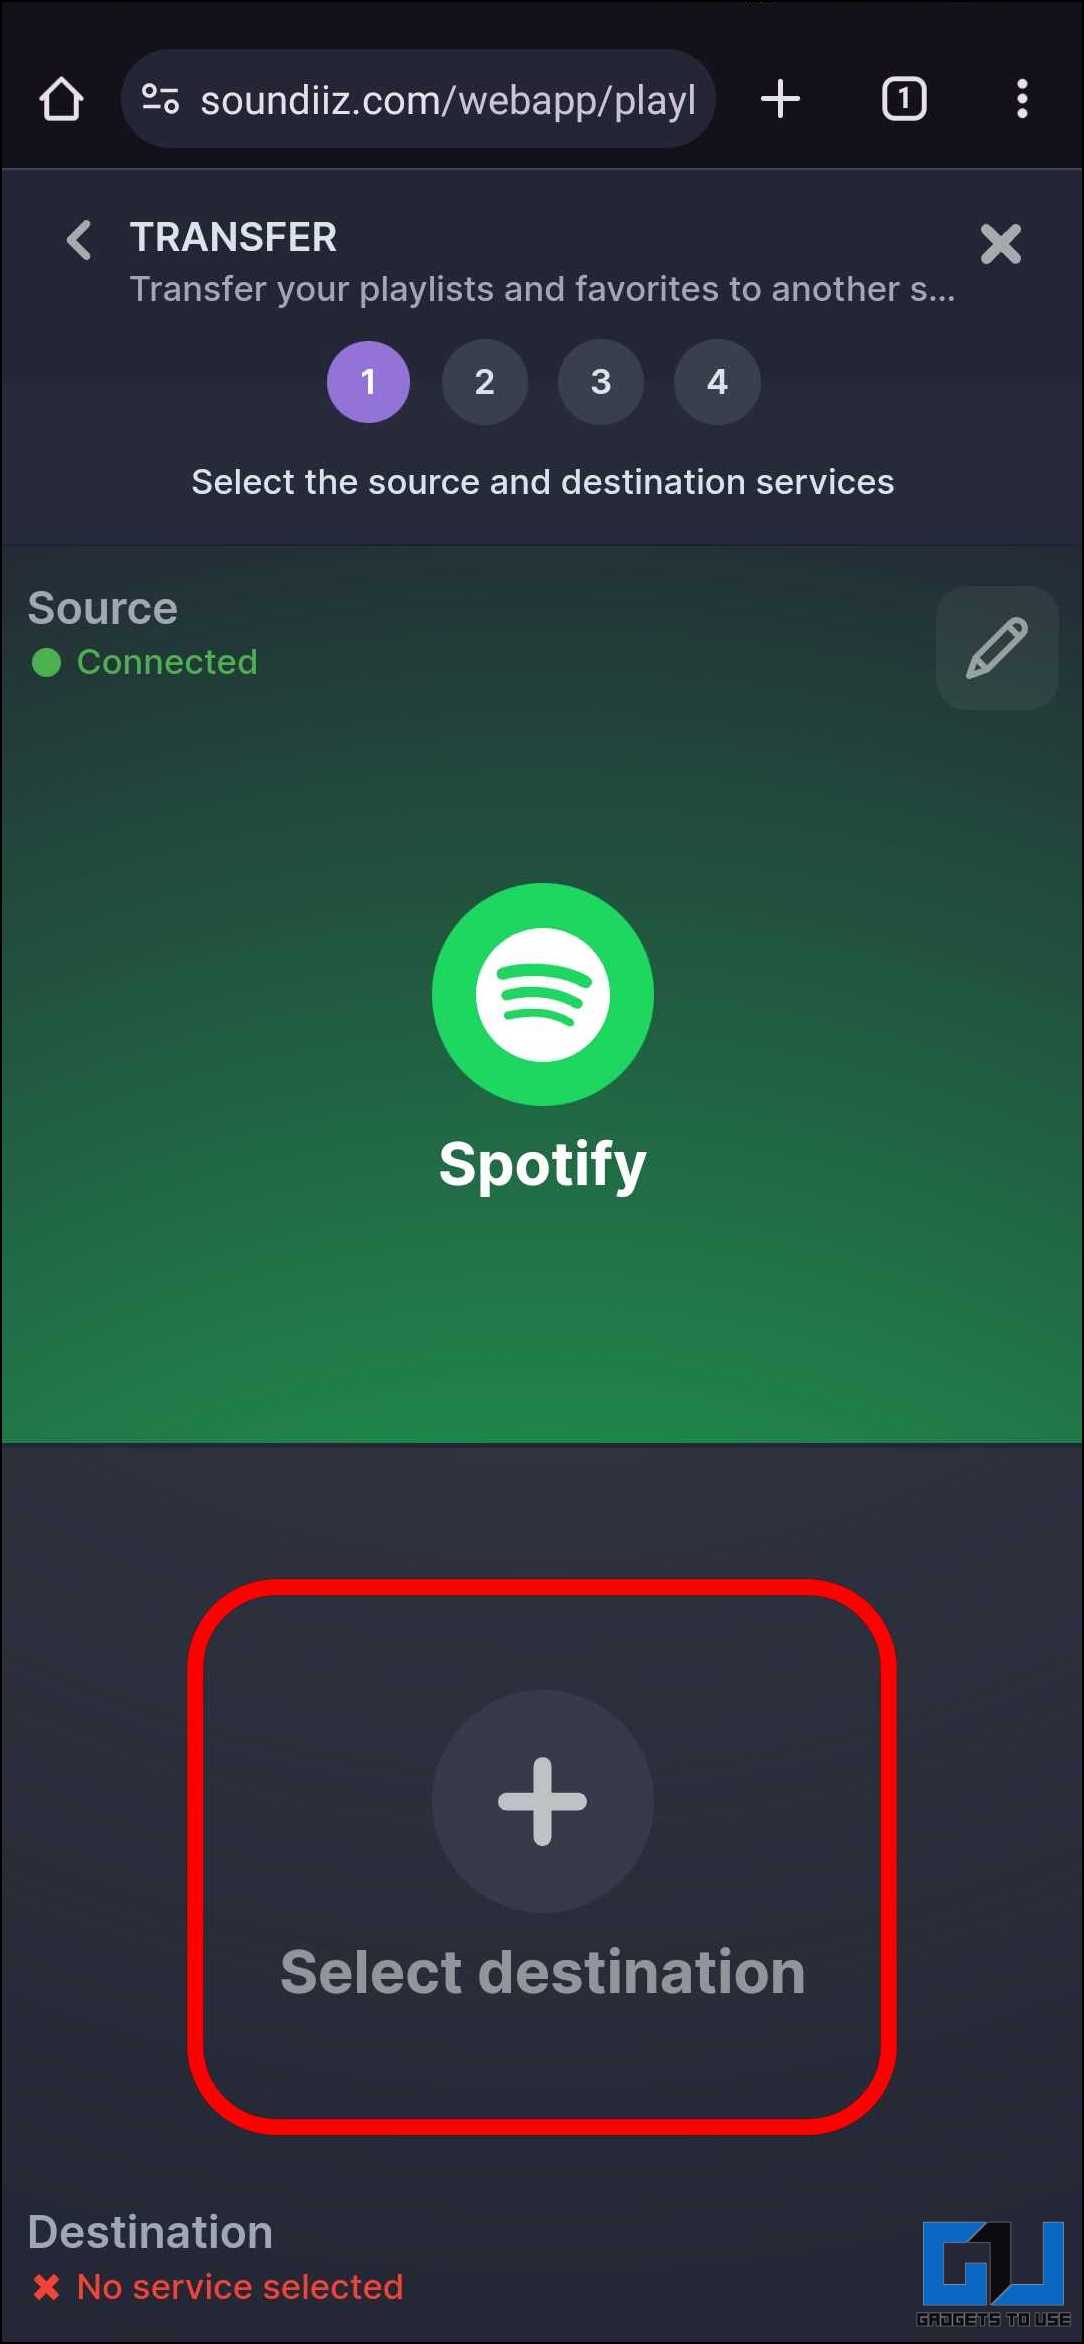
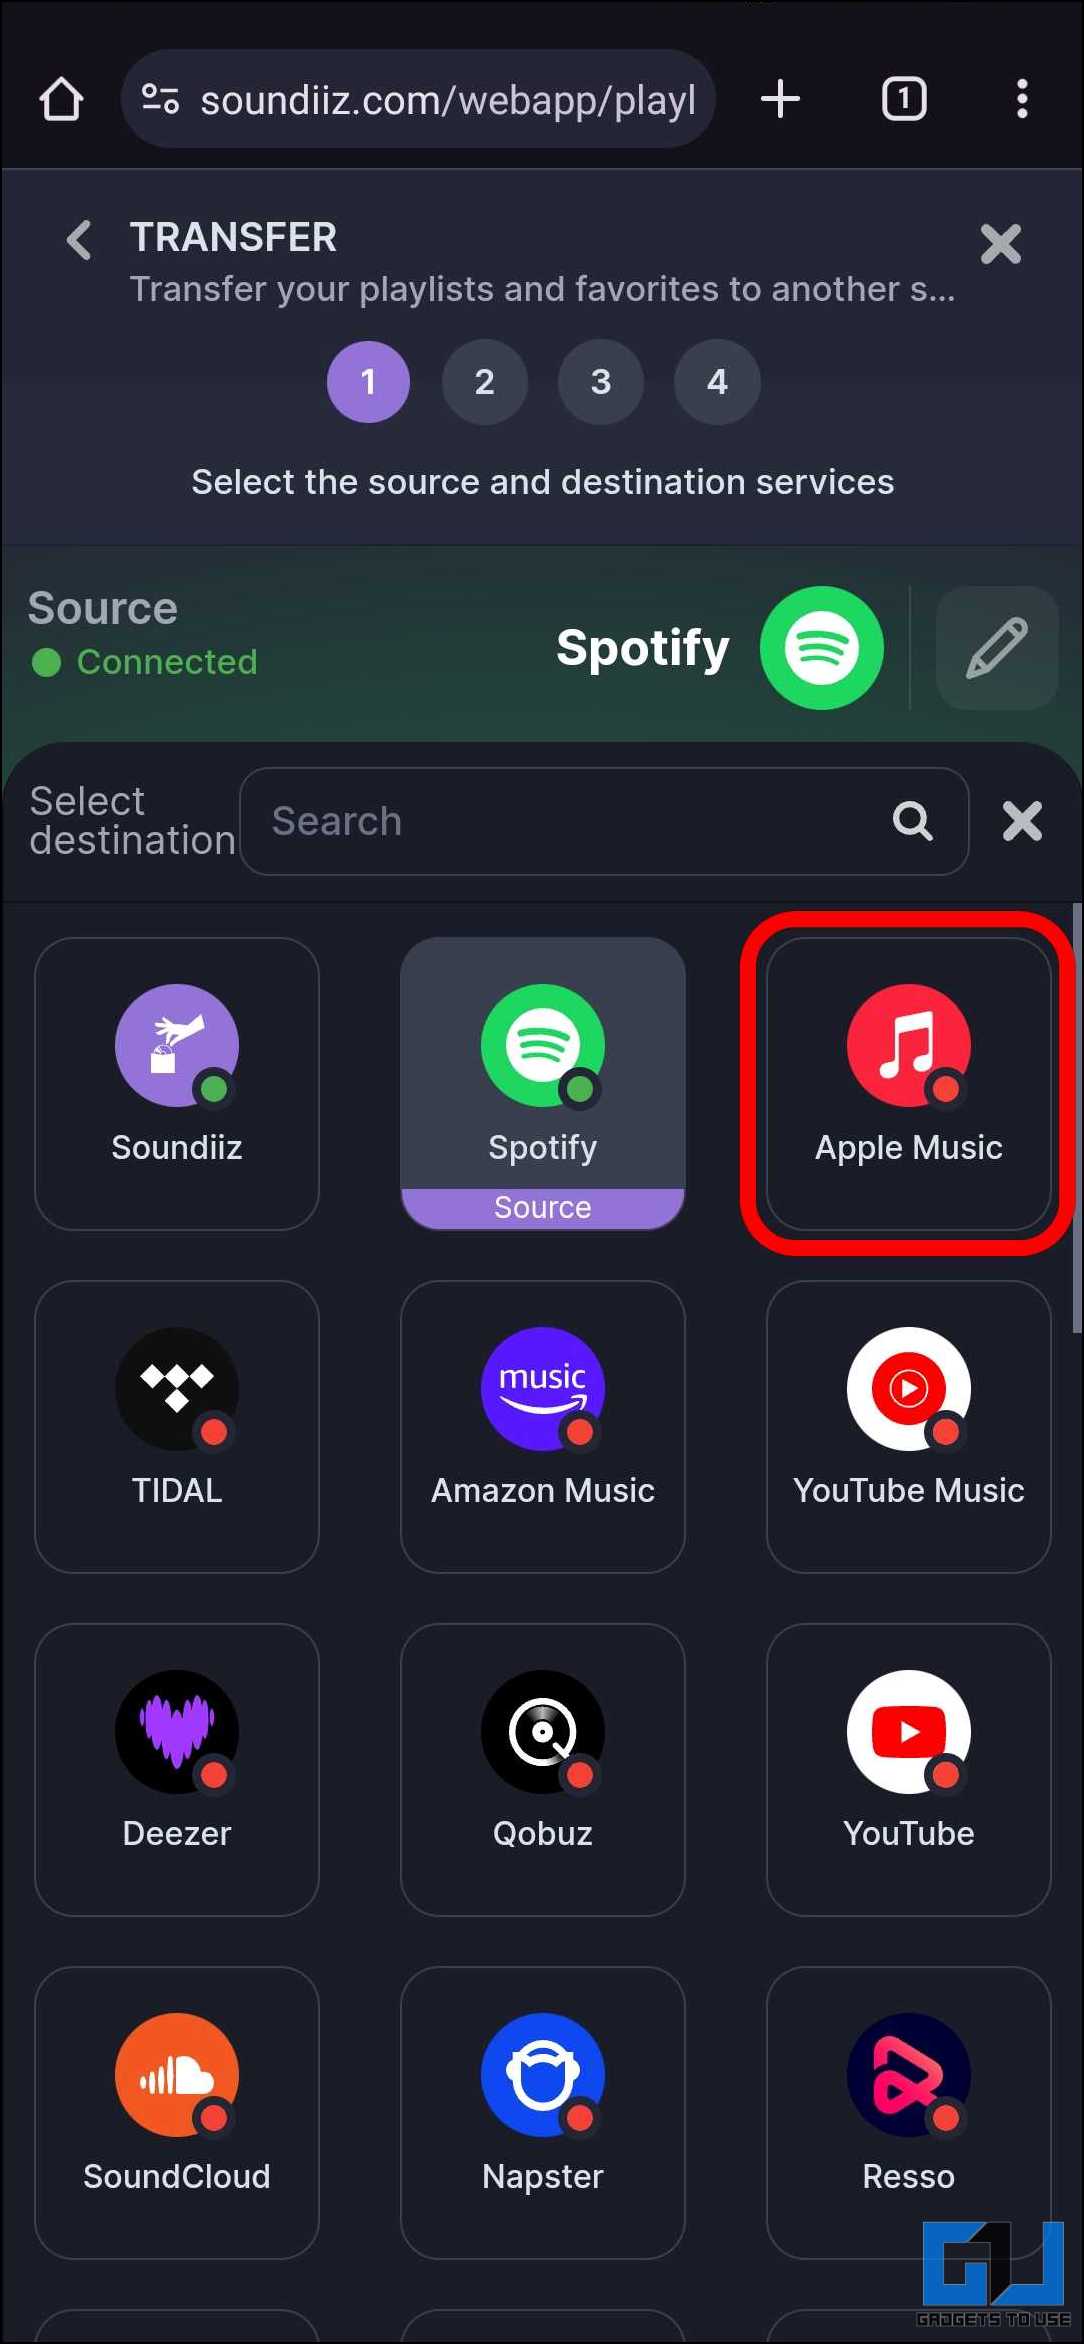
6. Now tap “Select destination” and choose the streaming service to which you want to transfer the playlists. Here, we are using Apple Music.
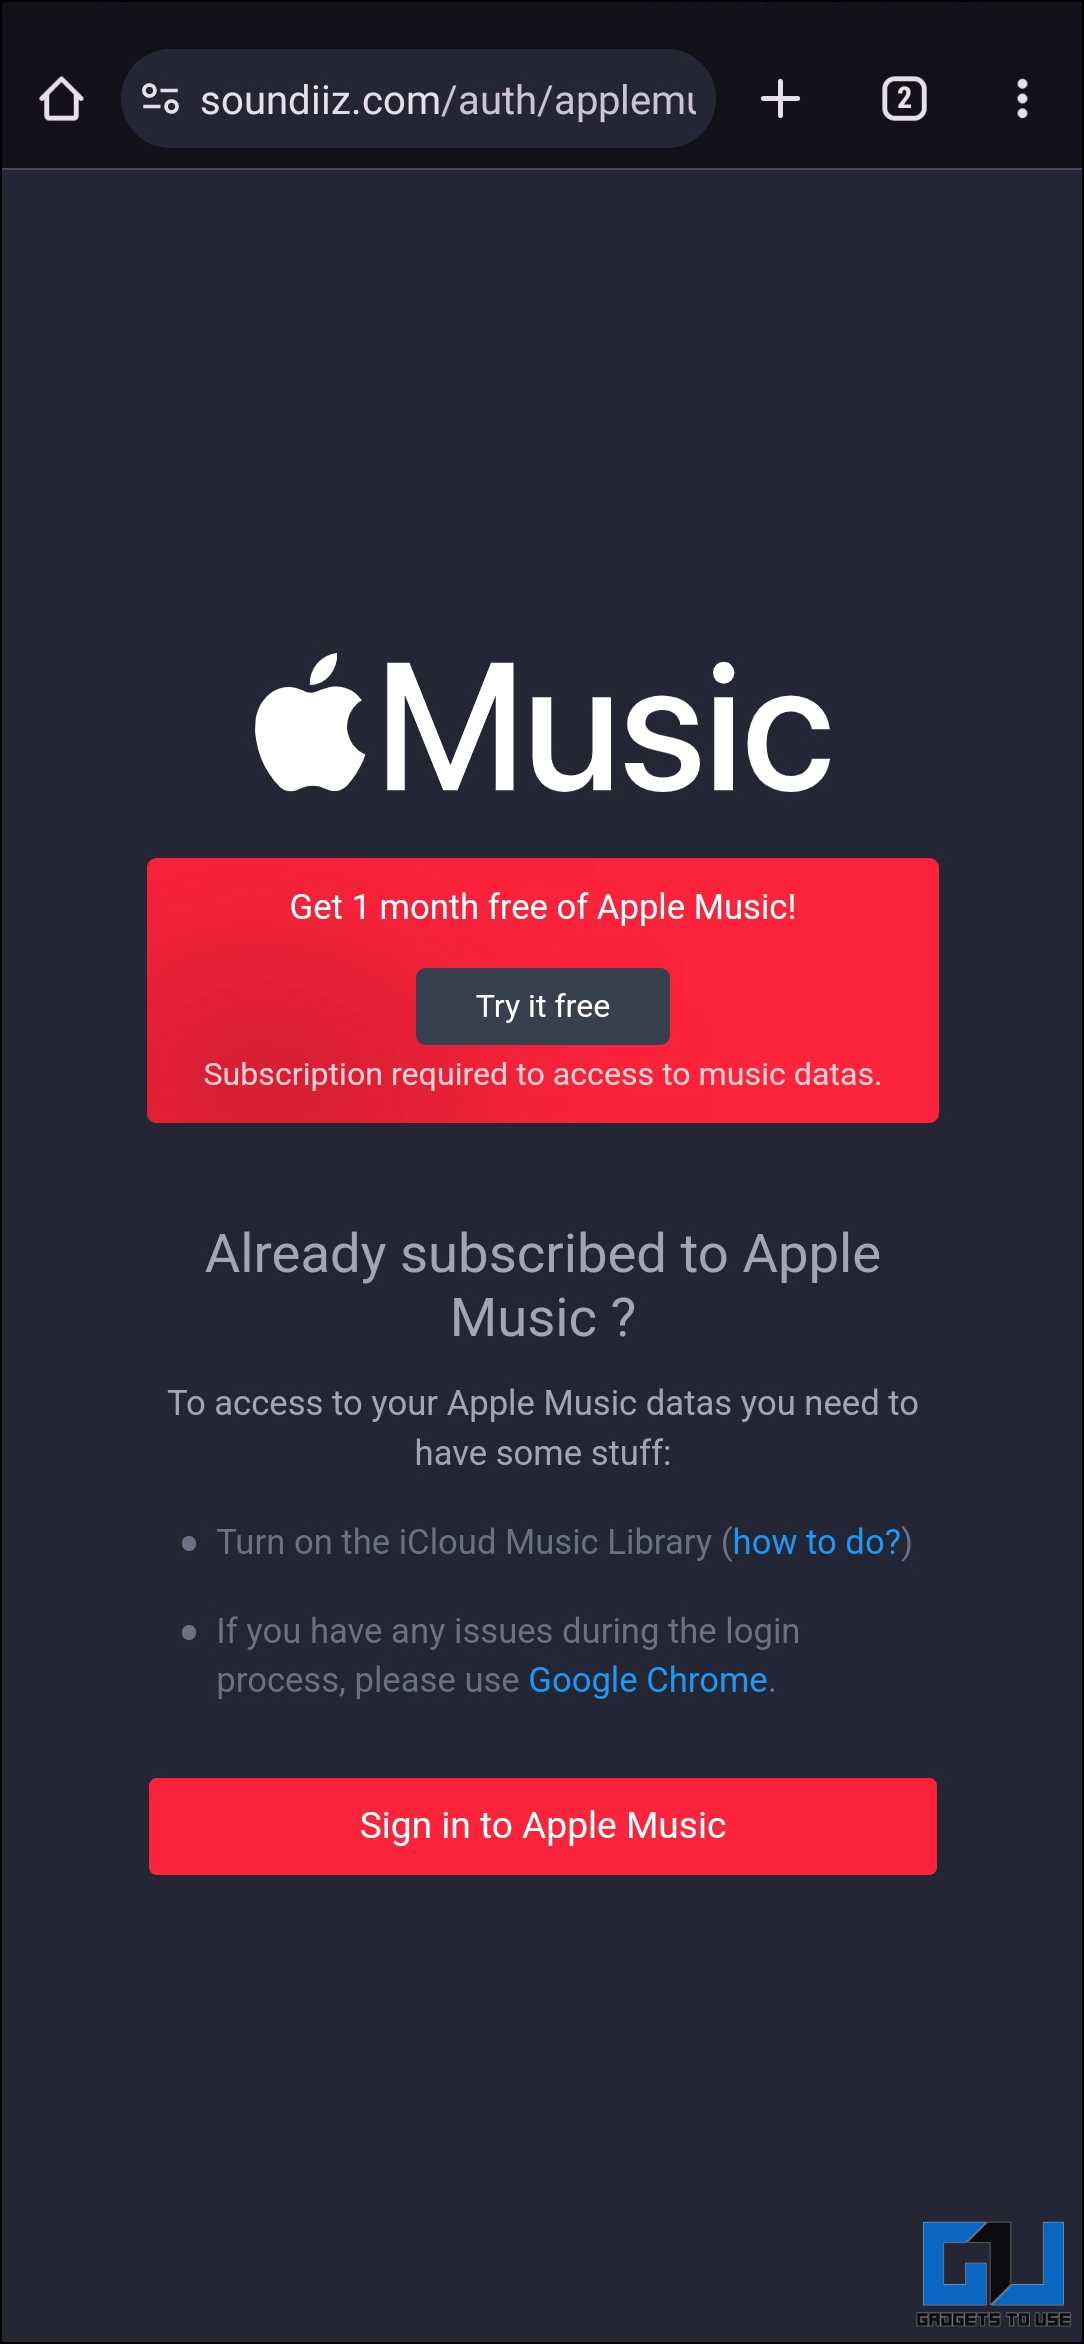
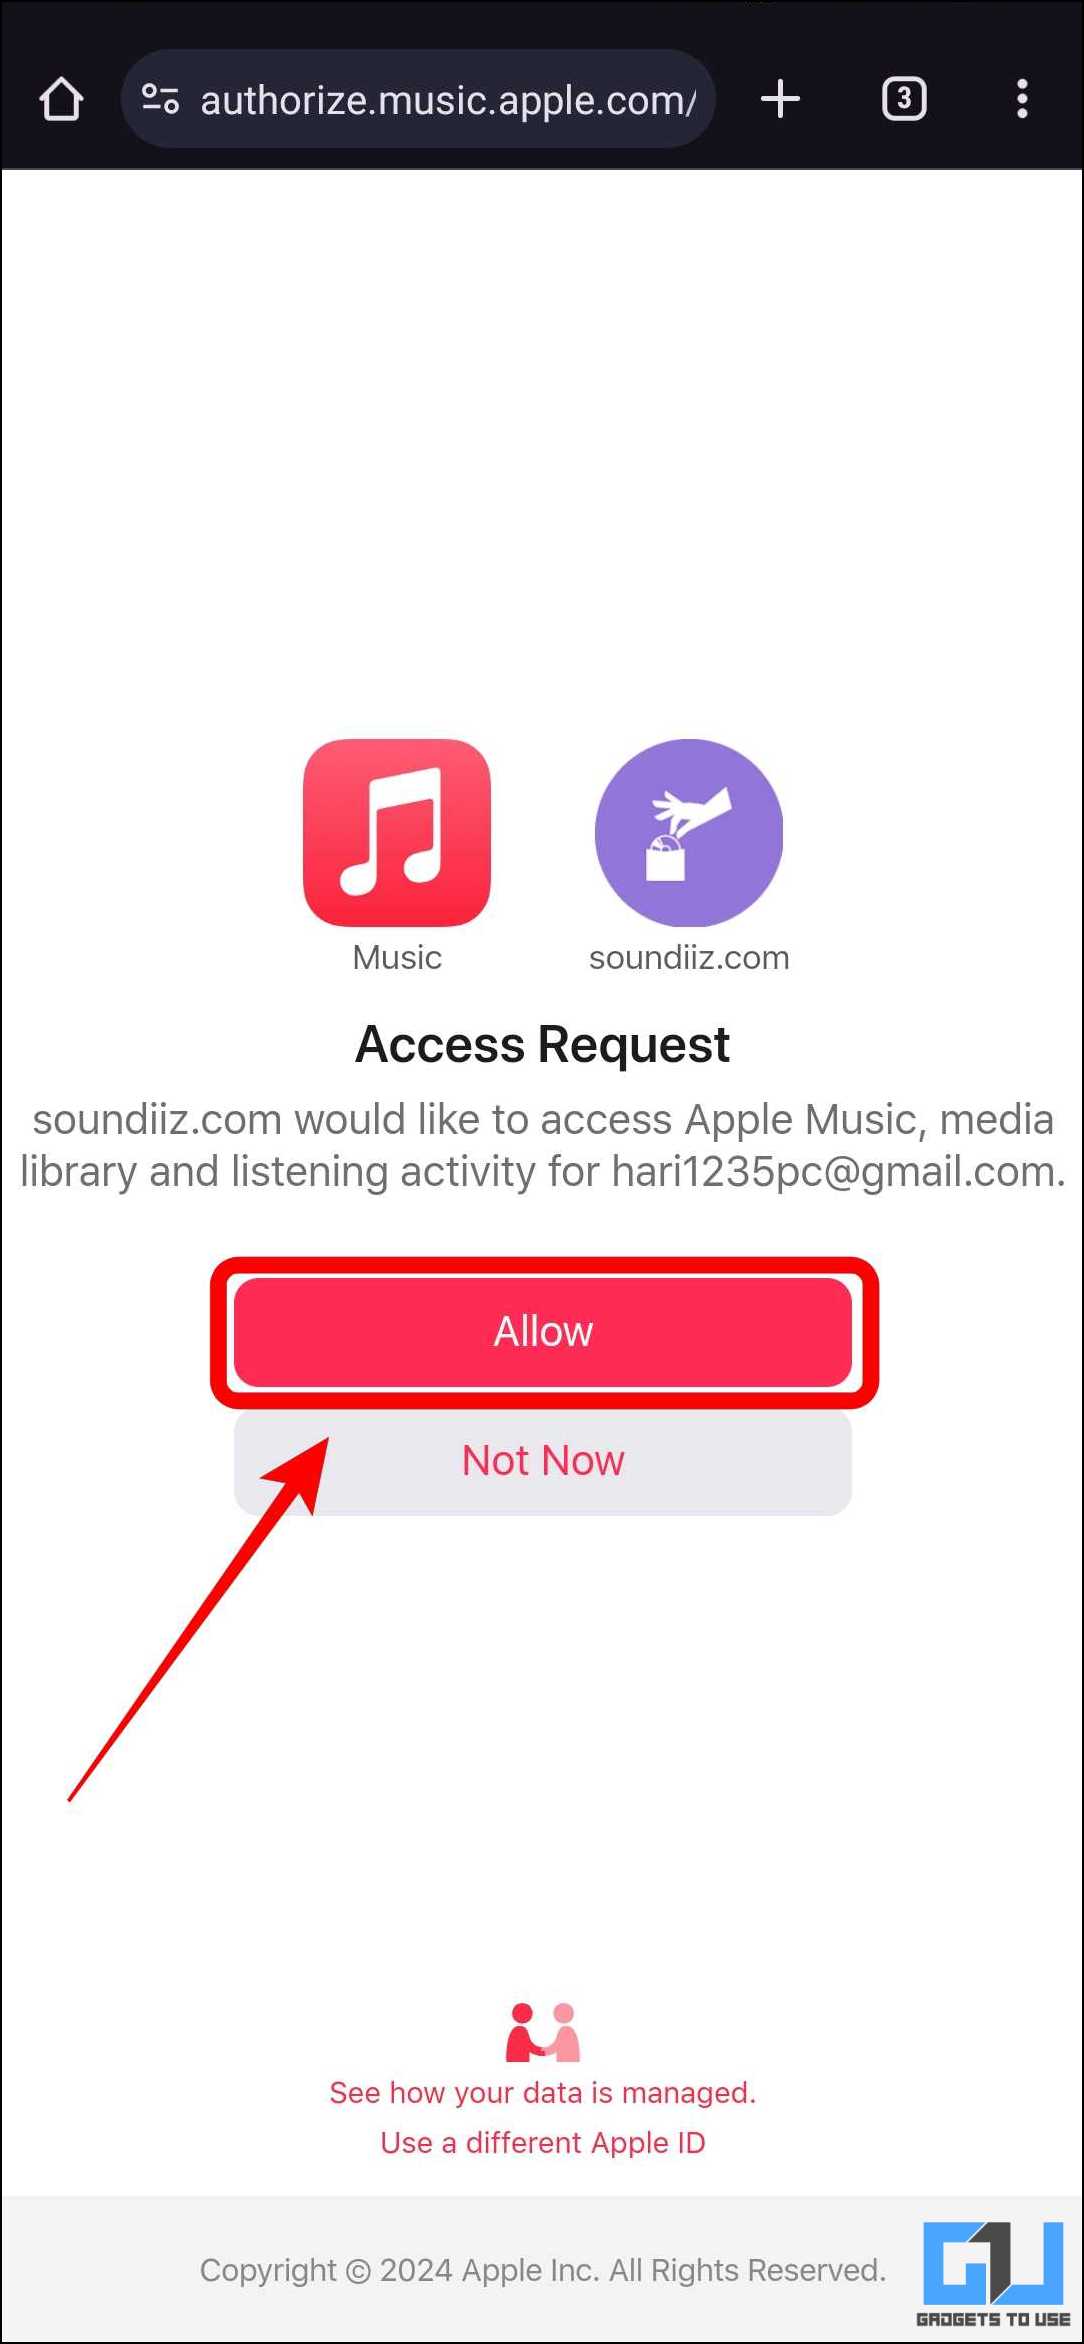
7. Log into your Apple Music account and tap “Allow” to allow Sounfdiiz access to your playlists.
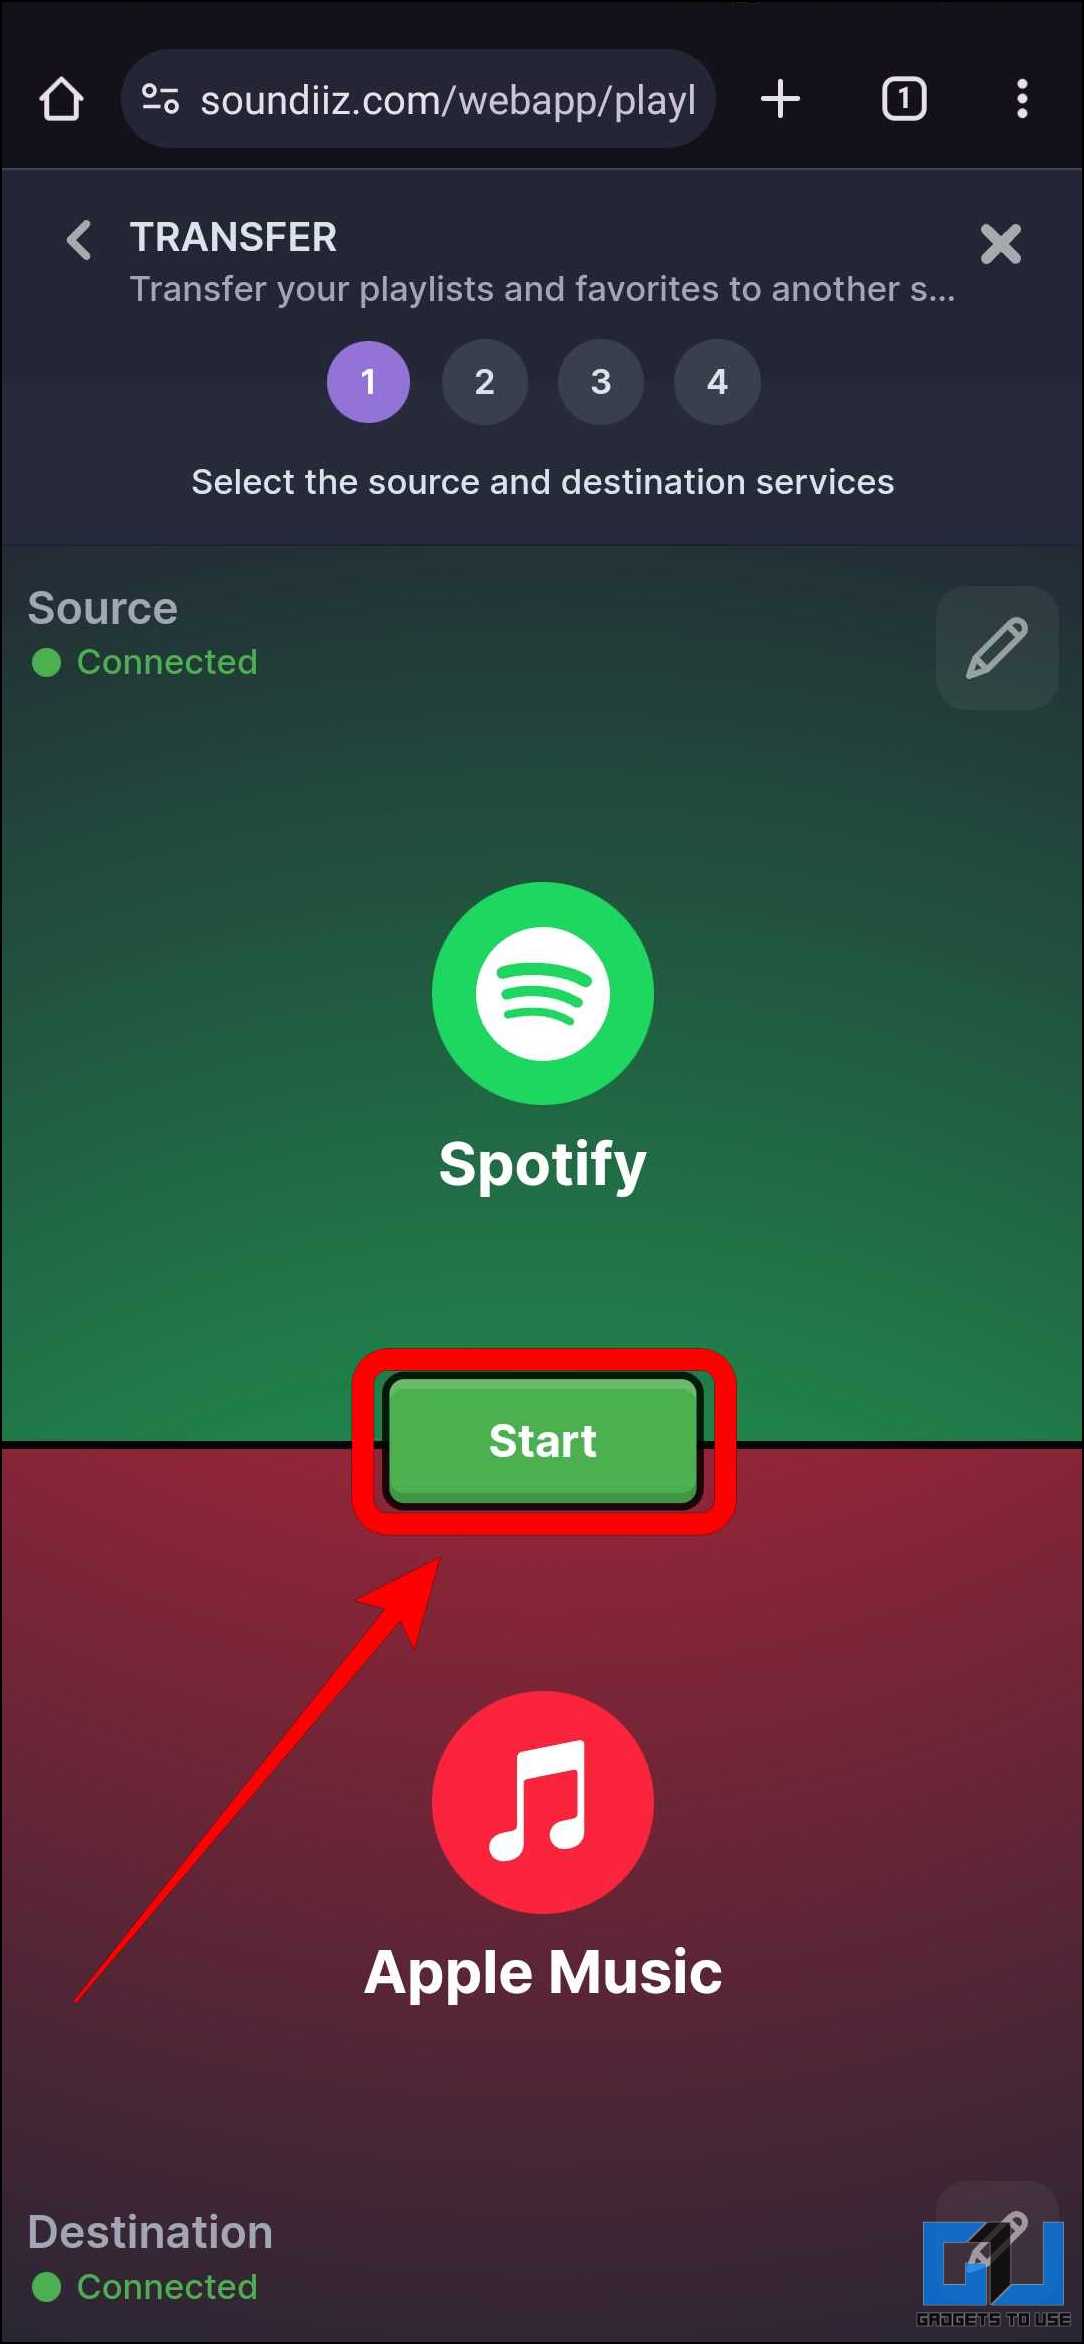
8. Tap on “Start” to begin the transfer process.
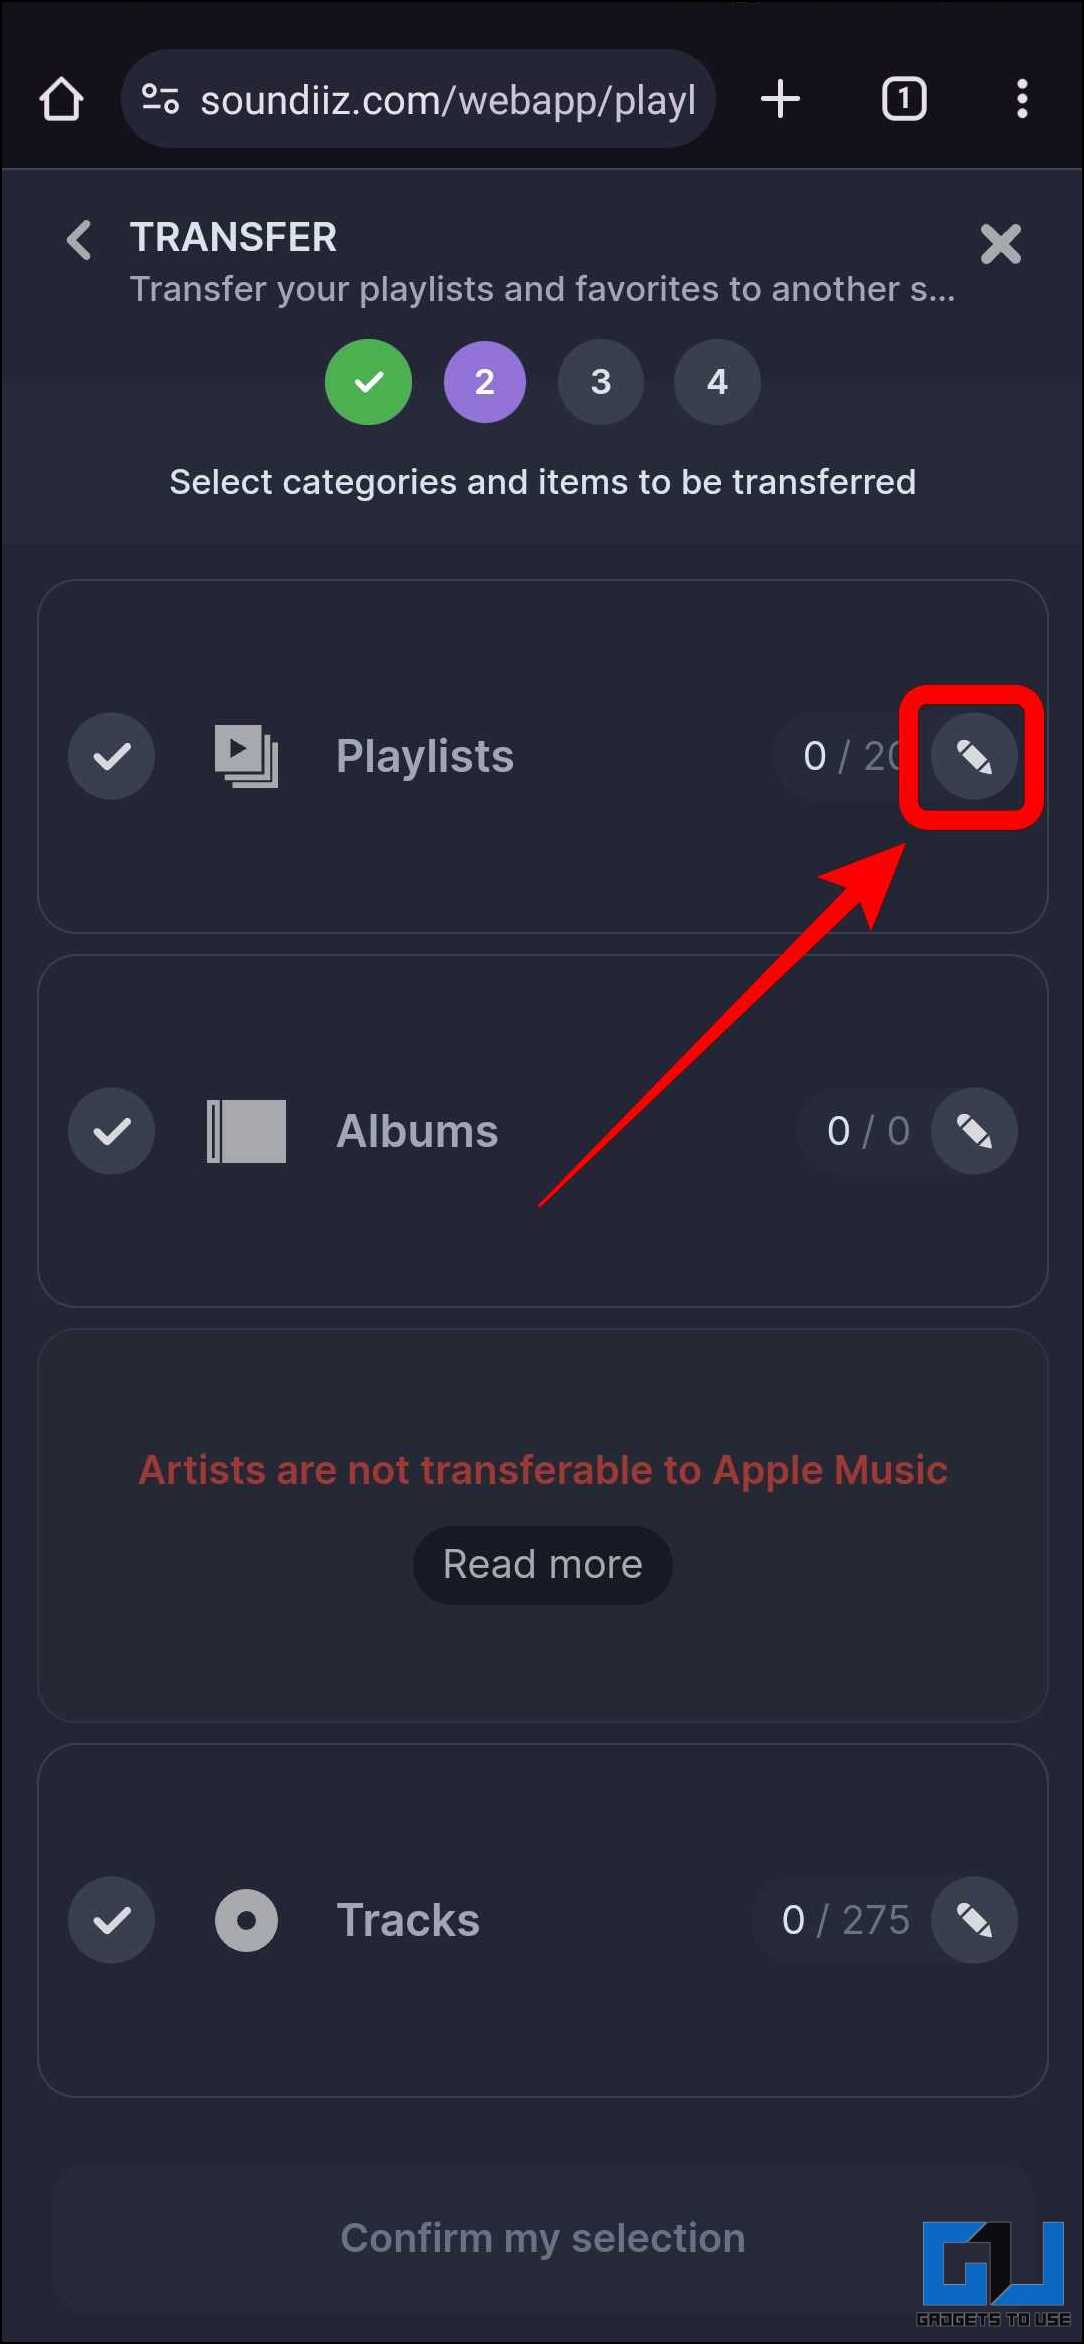
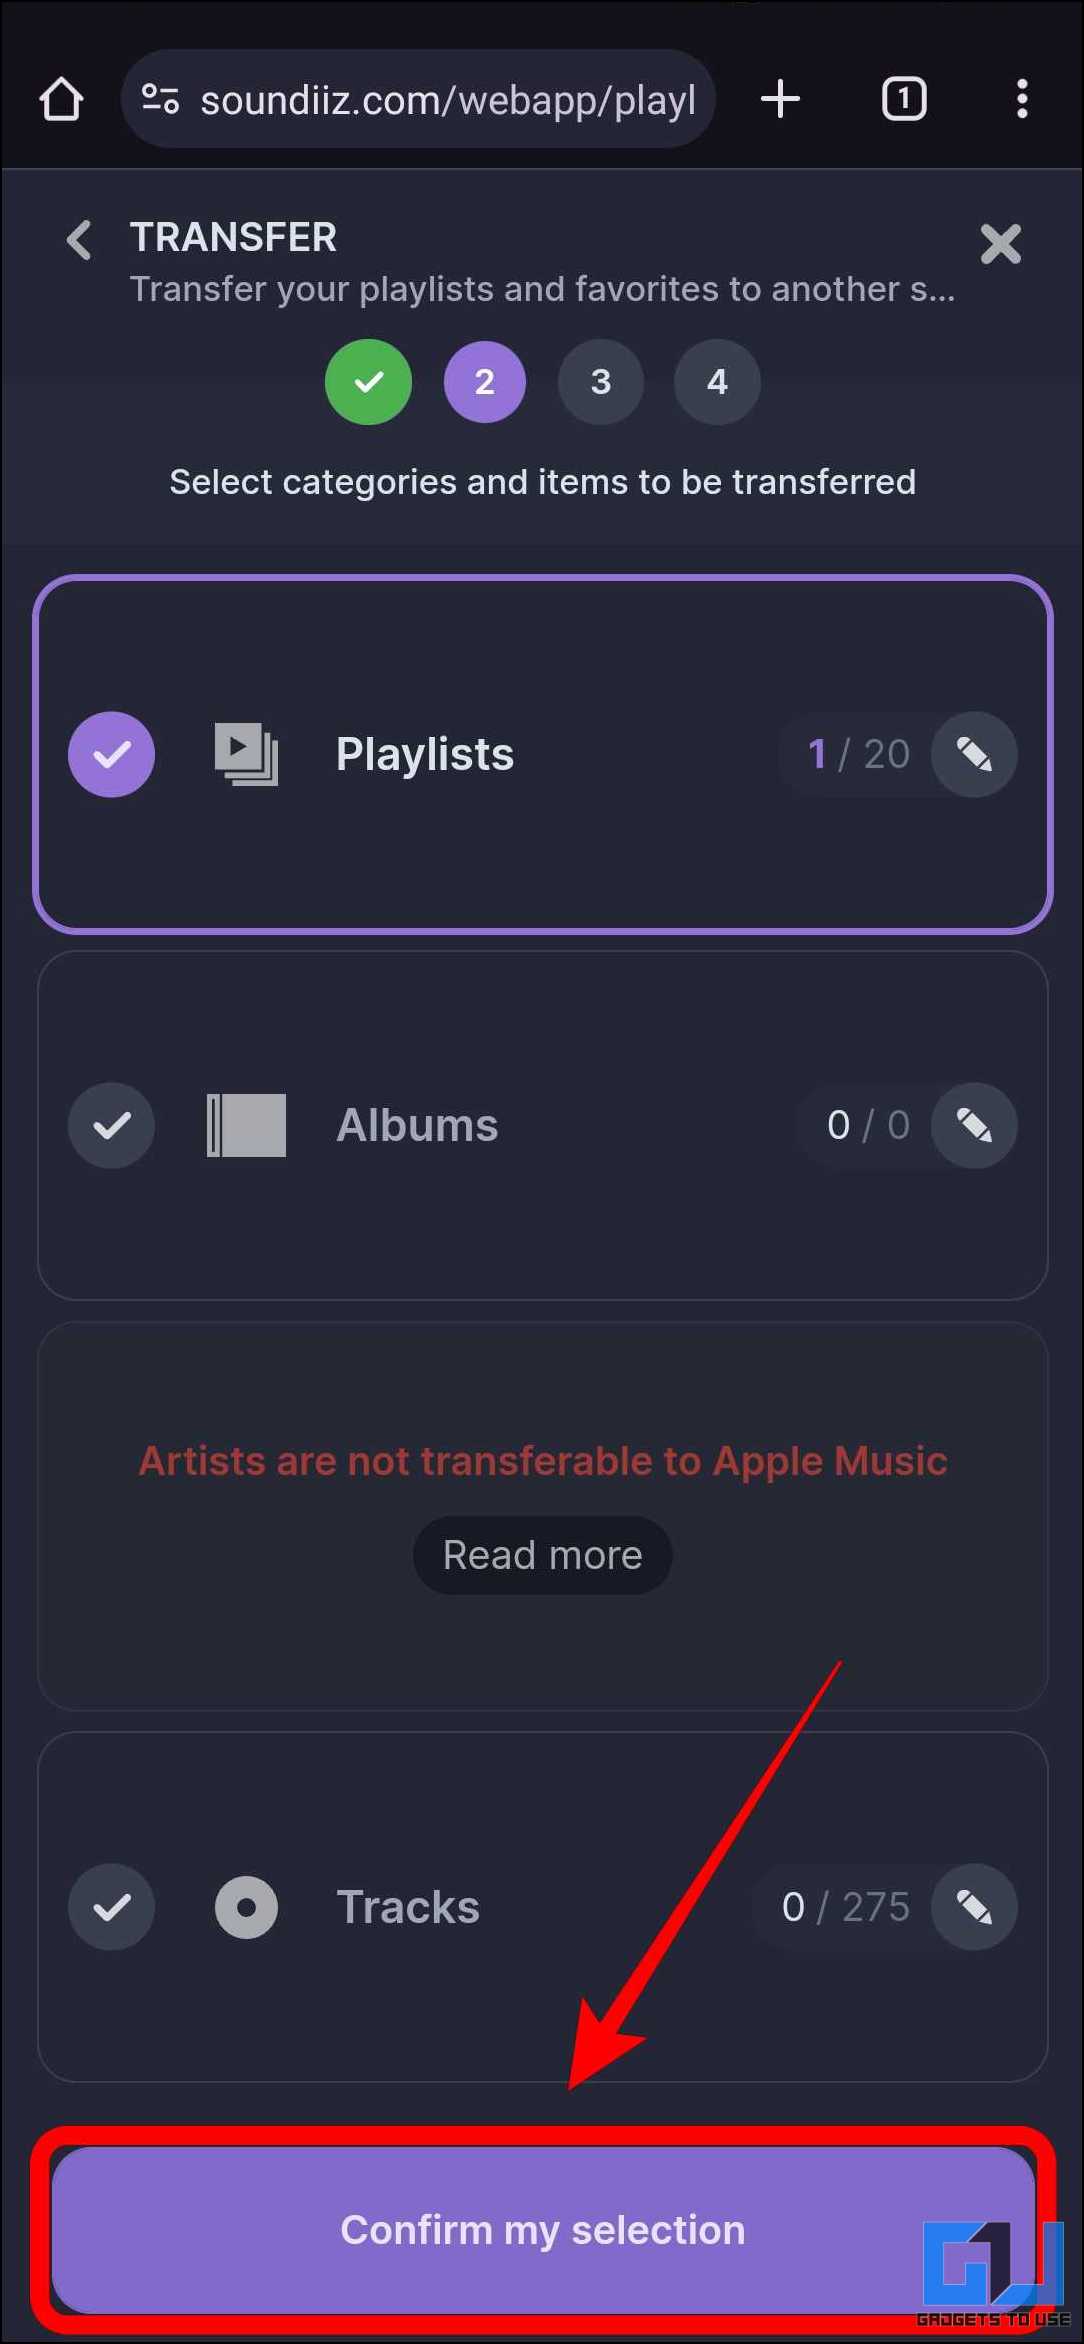
9. Tap the “pen” icon near Playlists to choose the preferred playlist.
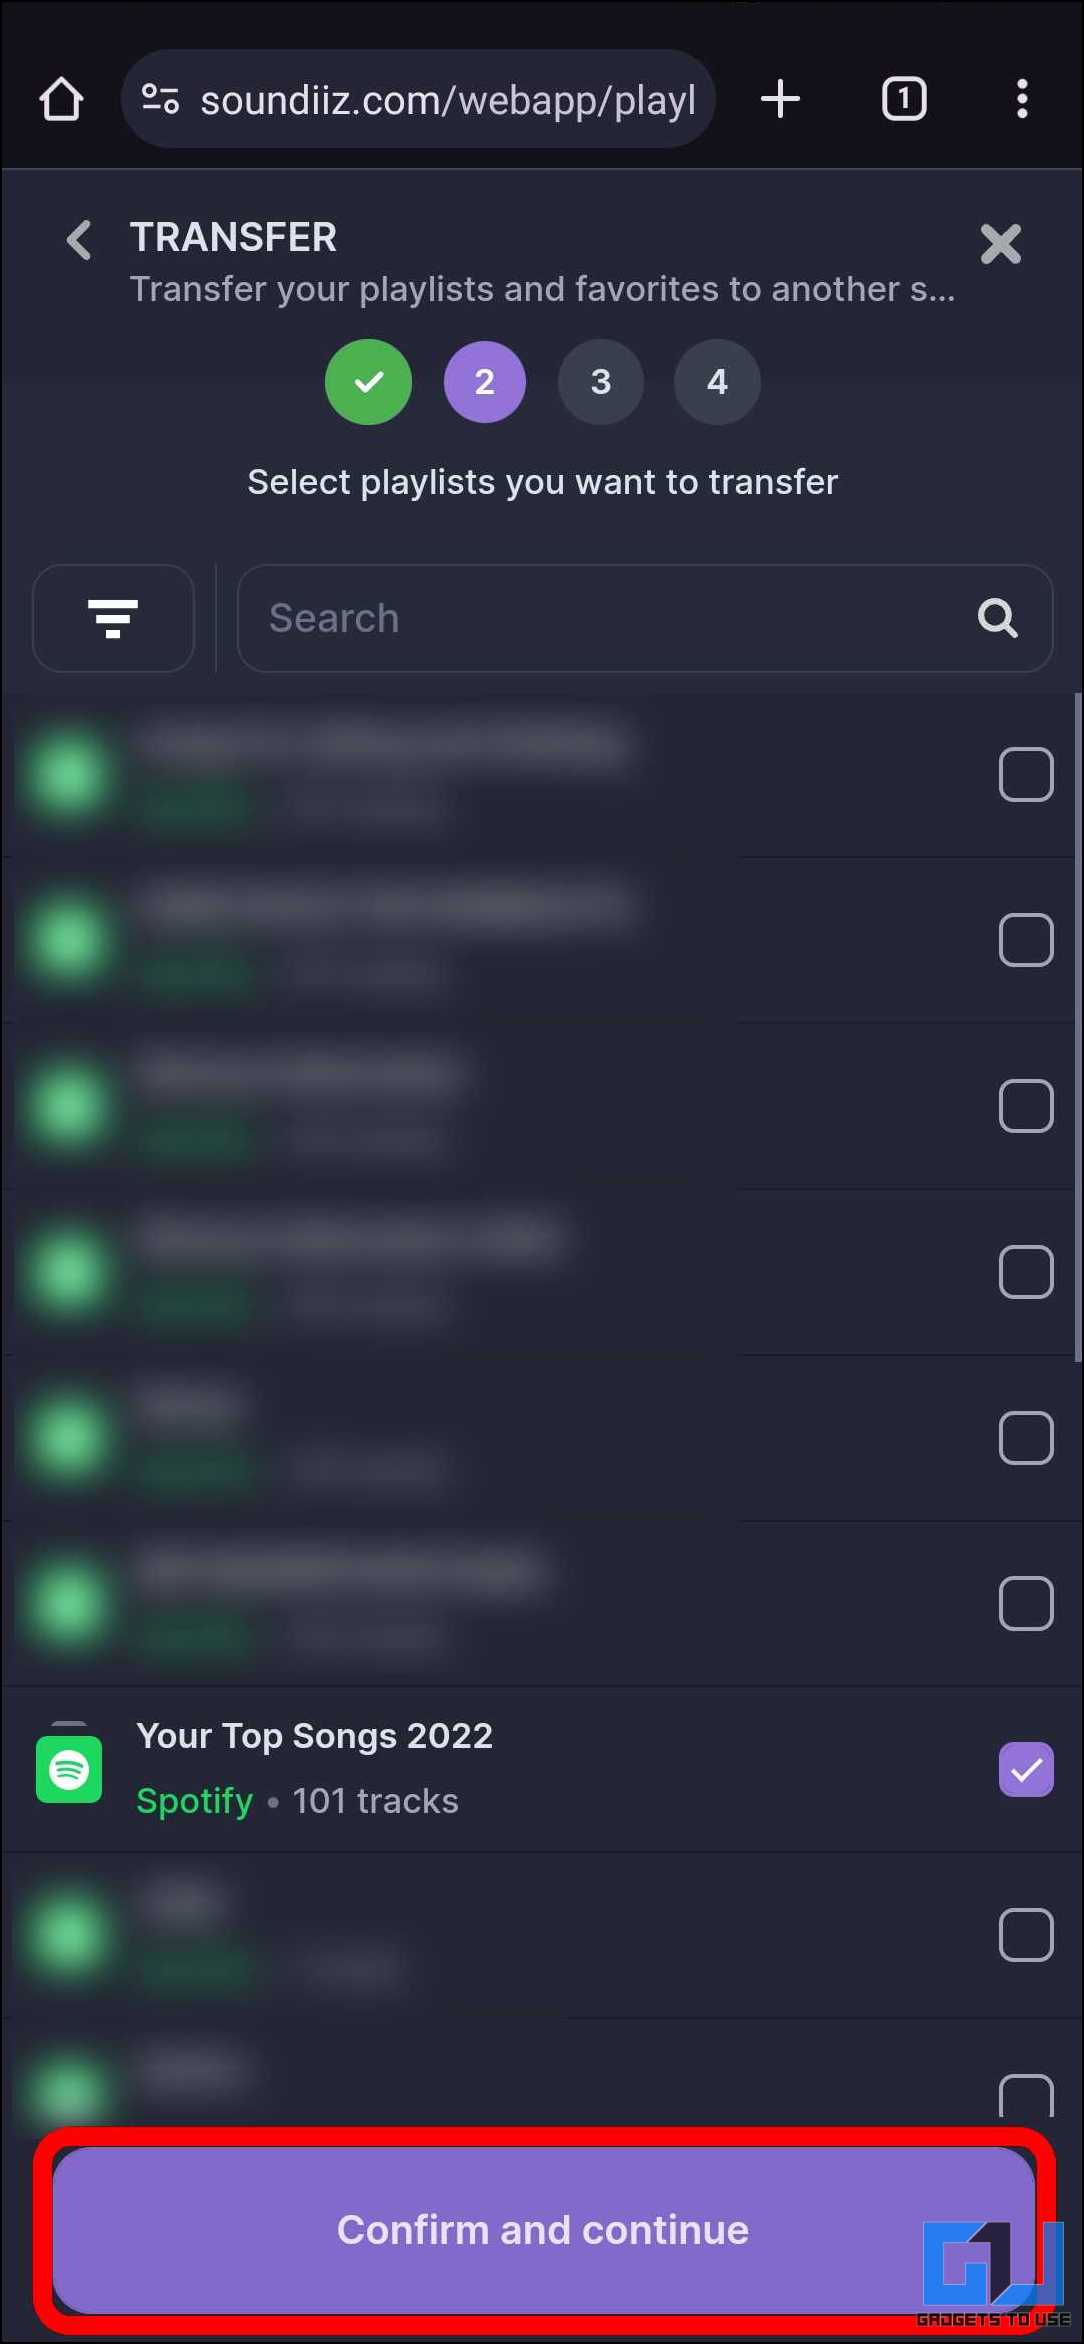
10. Choose the playlist you want to transfer. You can only choose one playlist for free. Tap “Confirm and continue” to proceed.
11. Tap on “Confirm my selection.”
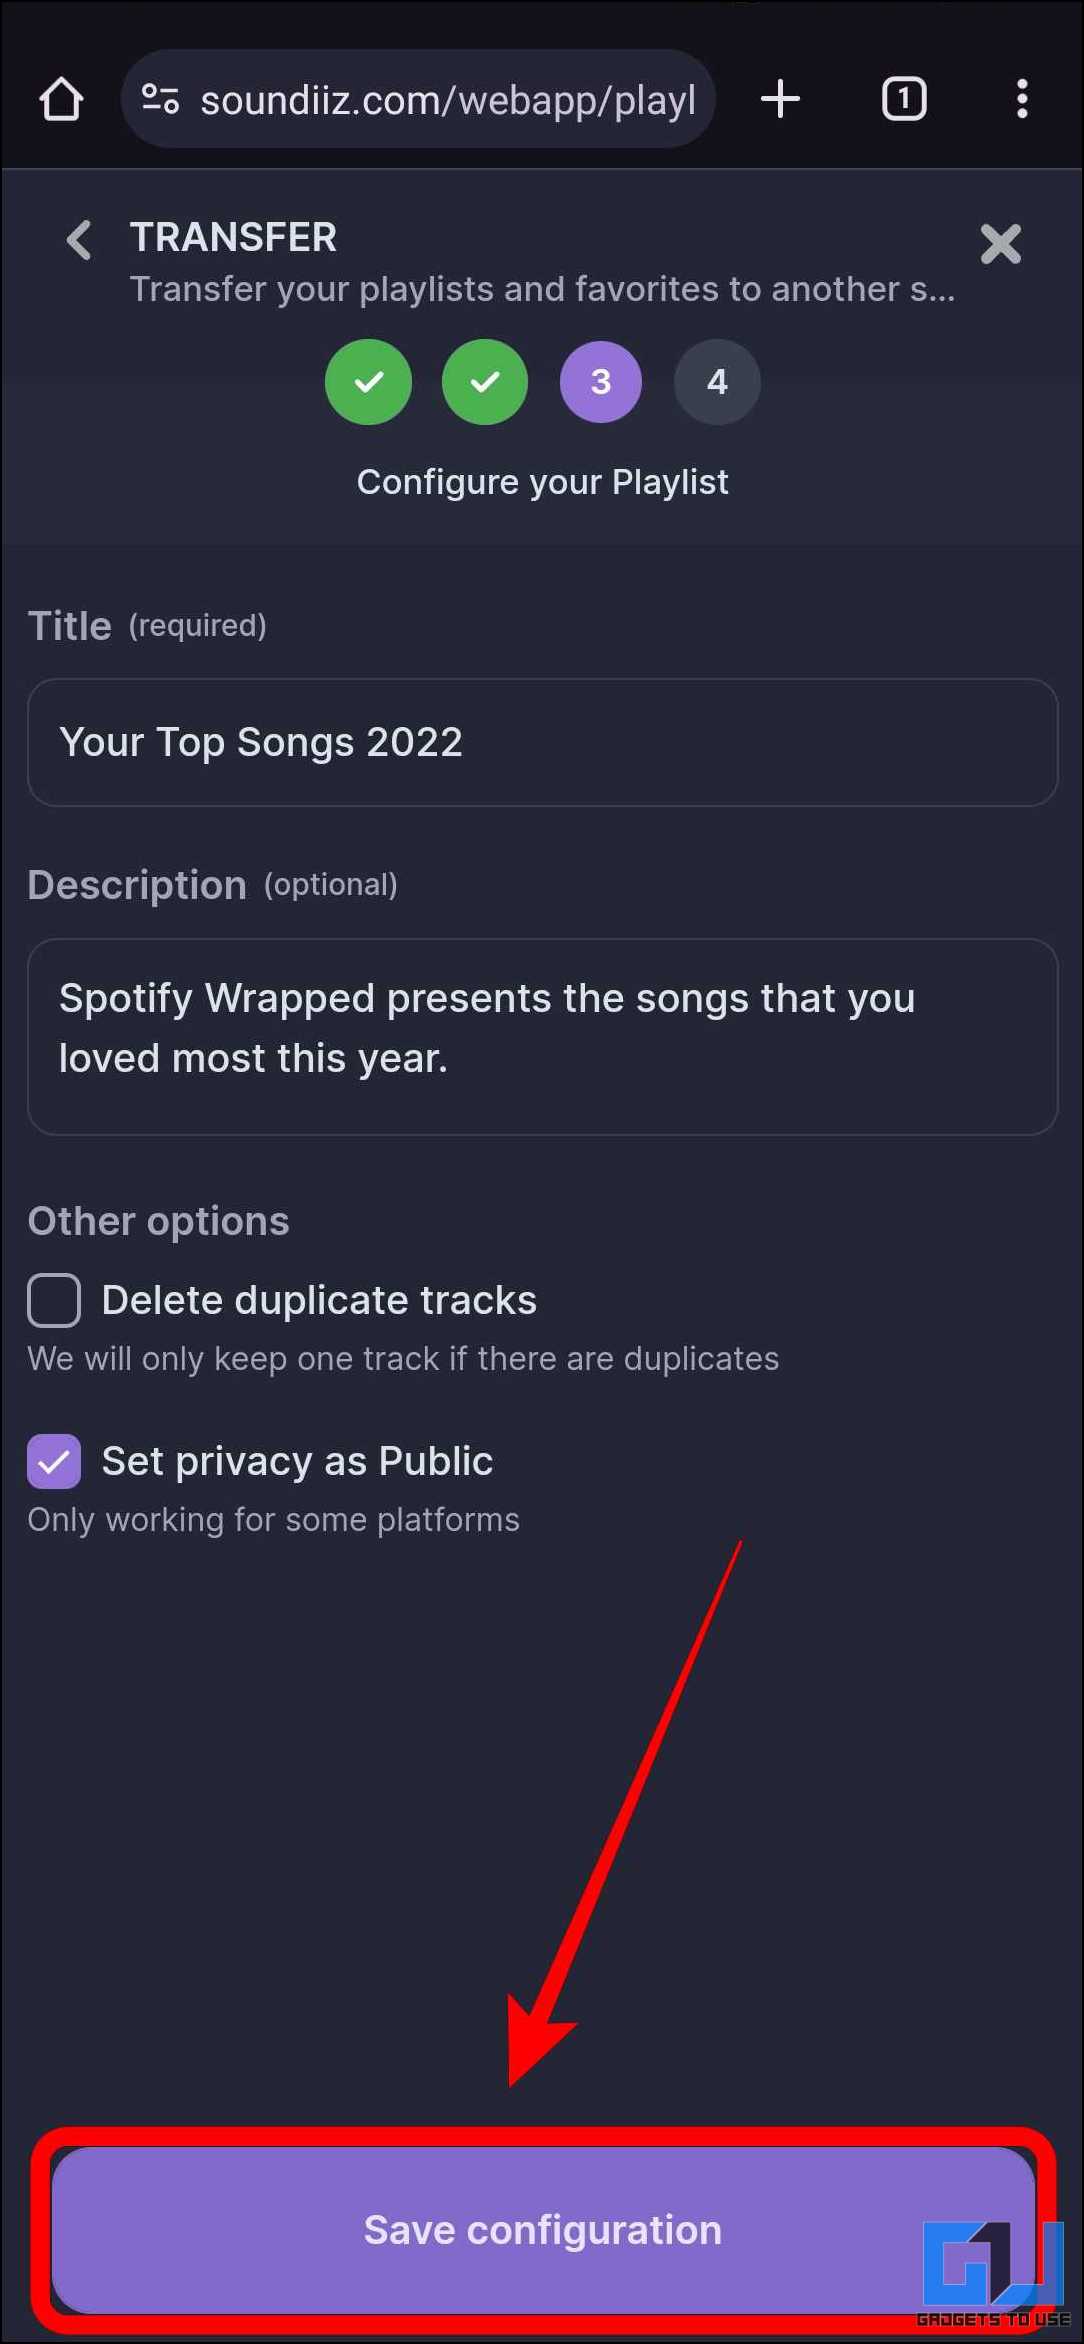
12. You can change the title and description. After that, tap “Save Configuration.”
13. Next, you can select the preferred tracks to be transferred or select all. Then, tap “Confirm“.

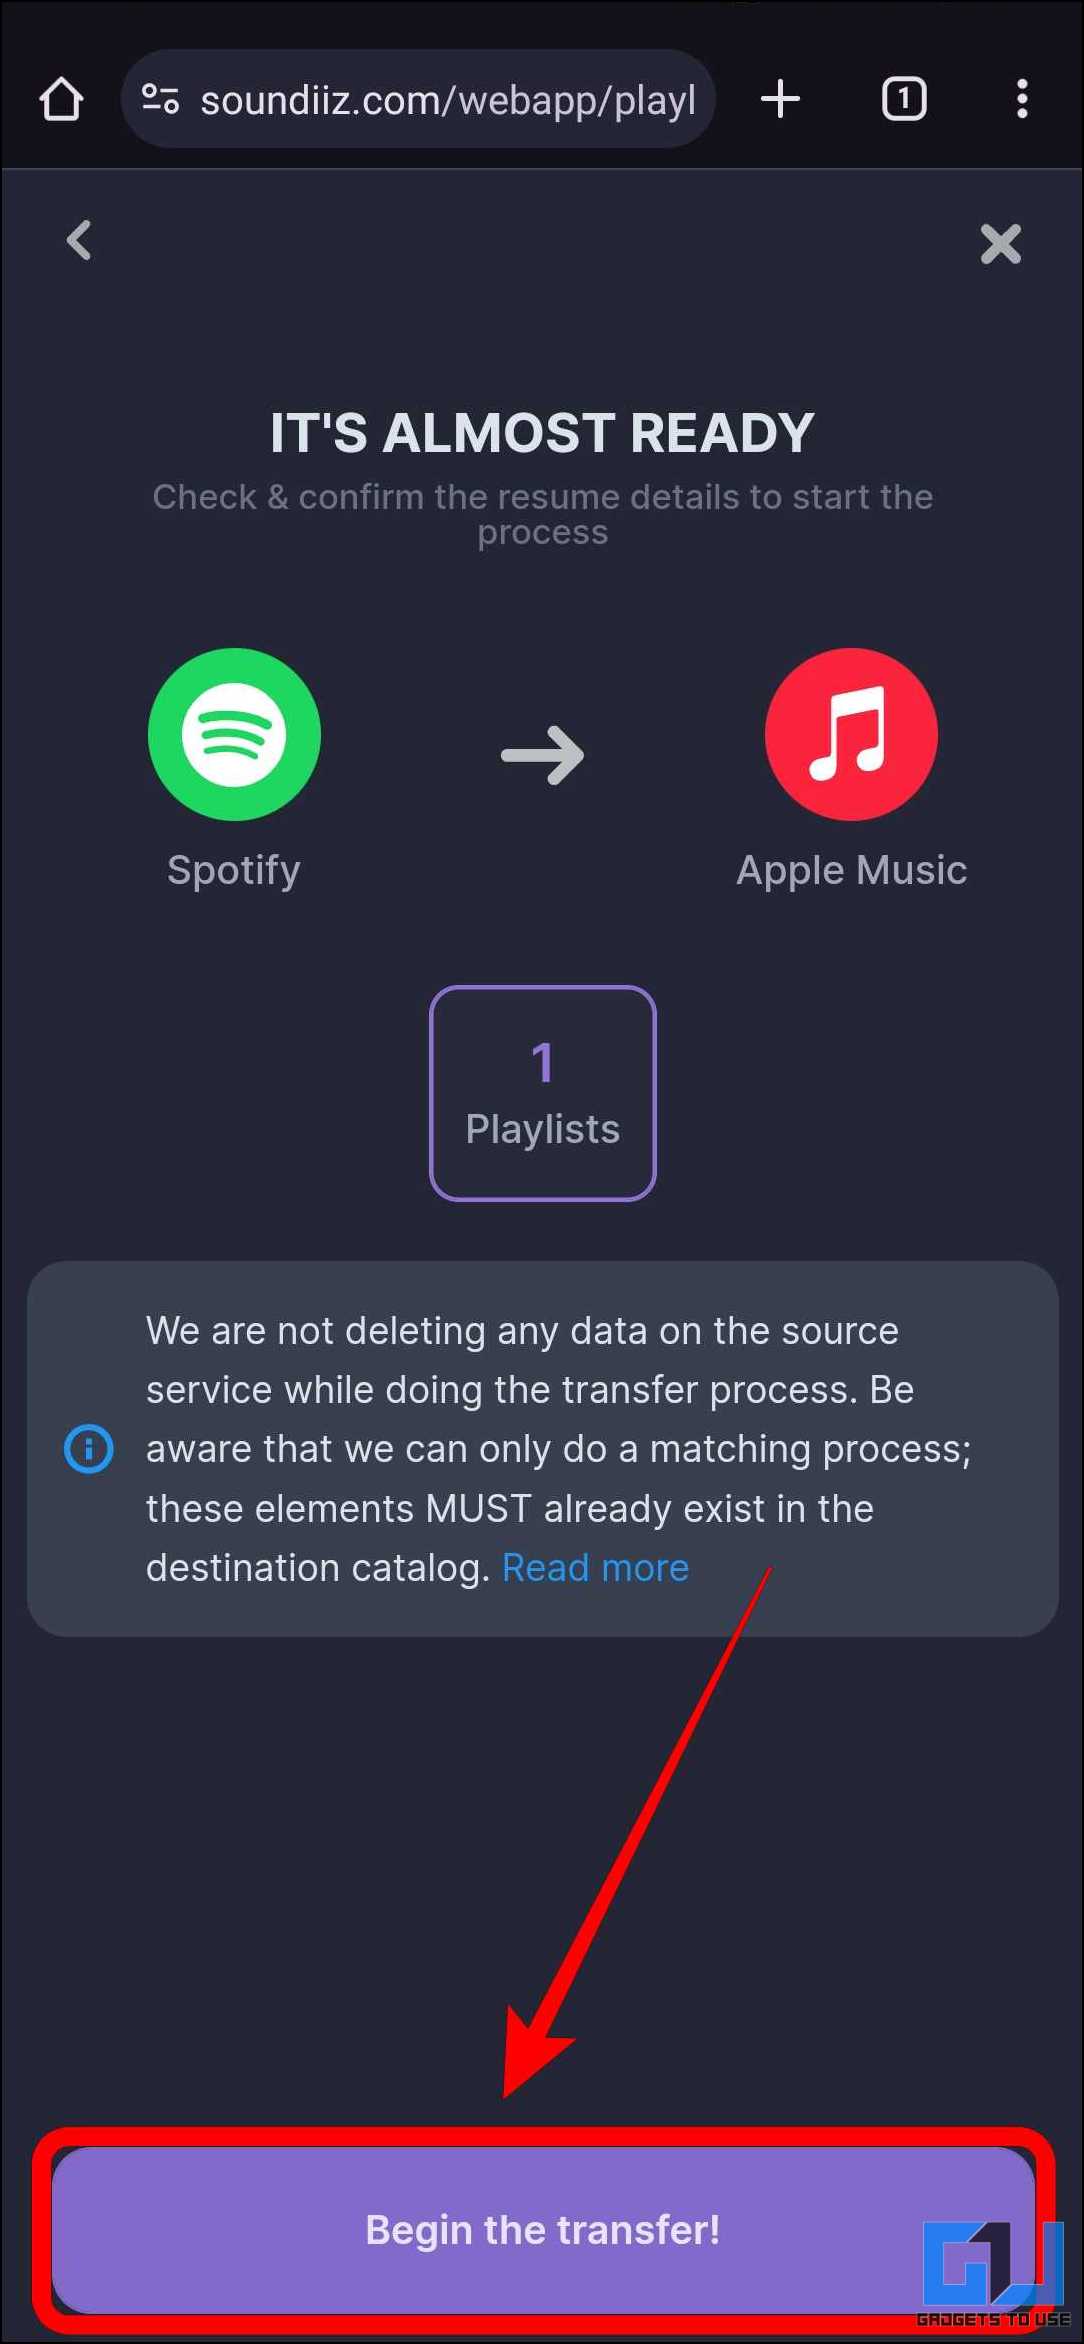
14. To initiate the transfer, tap “Begin the transfer.”
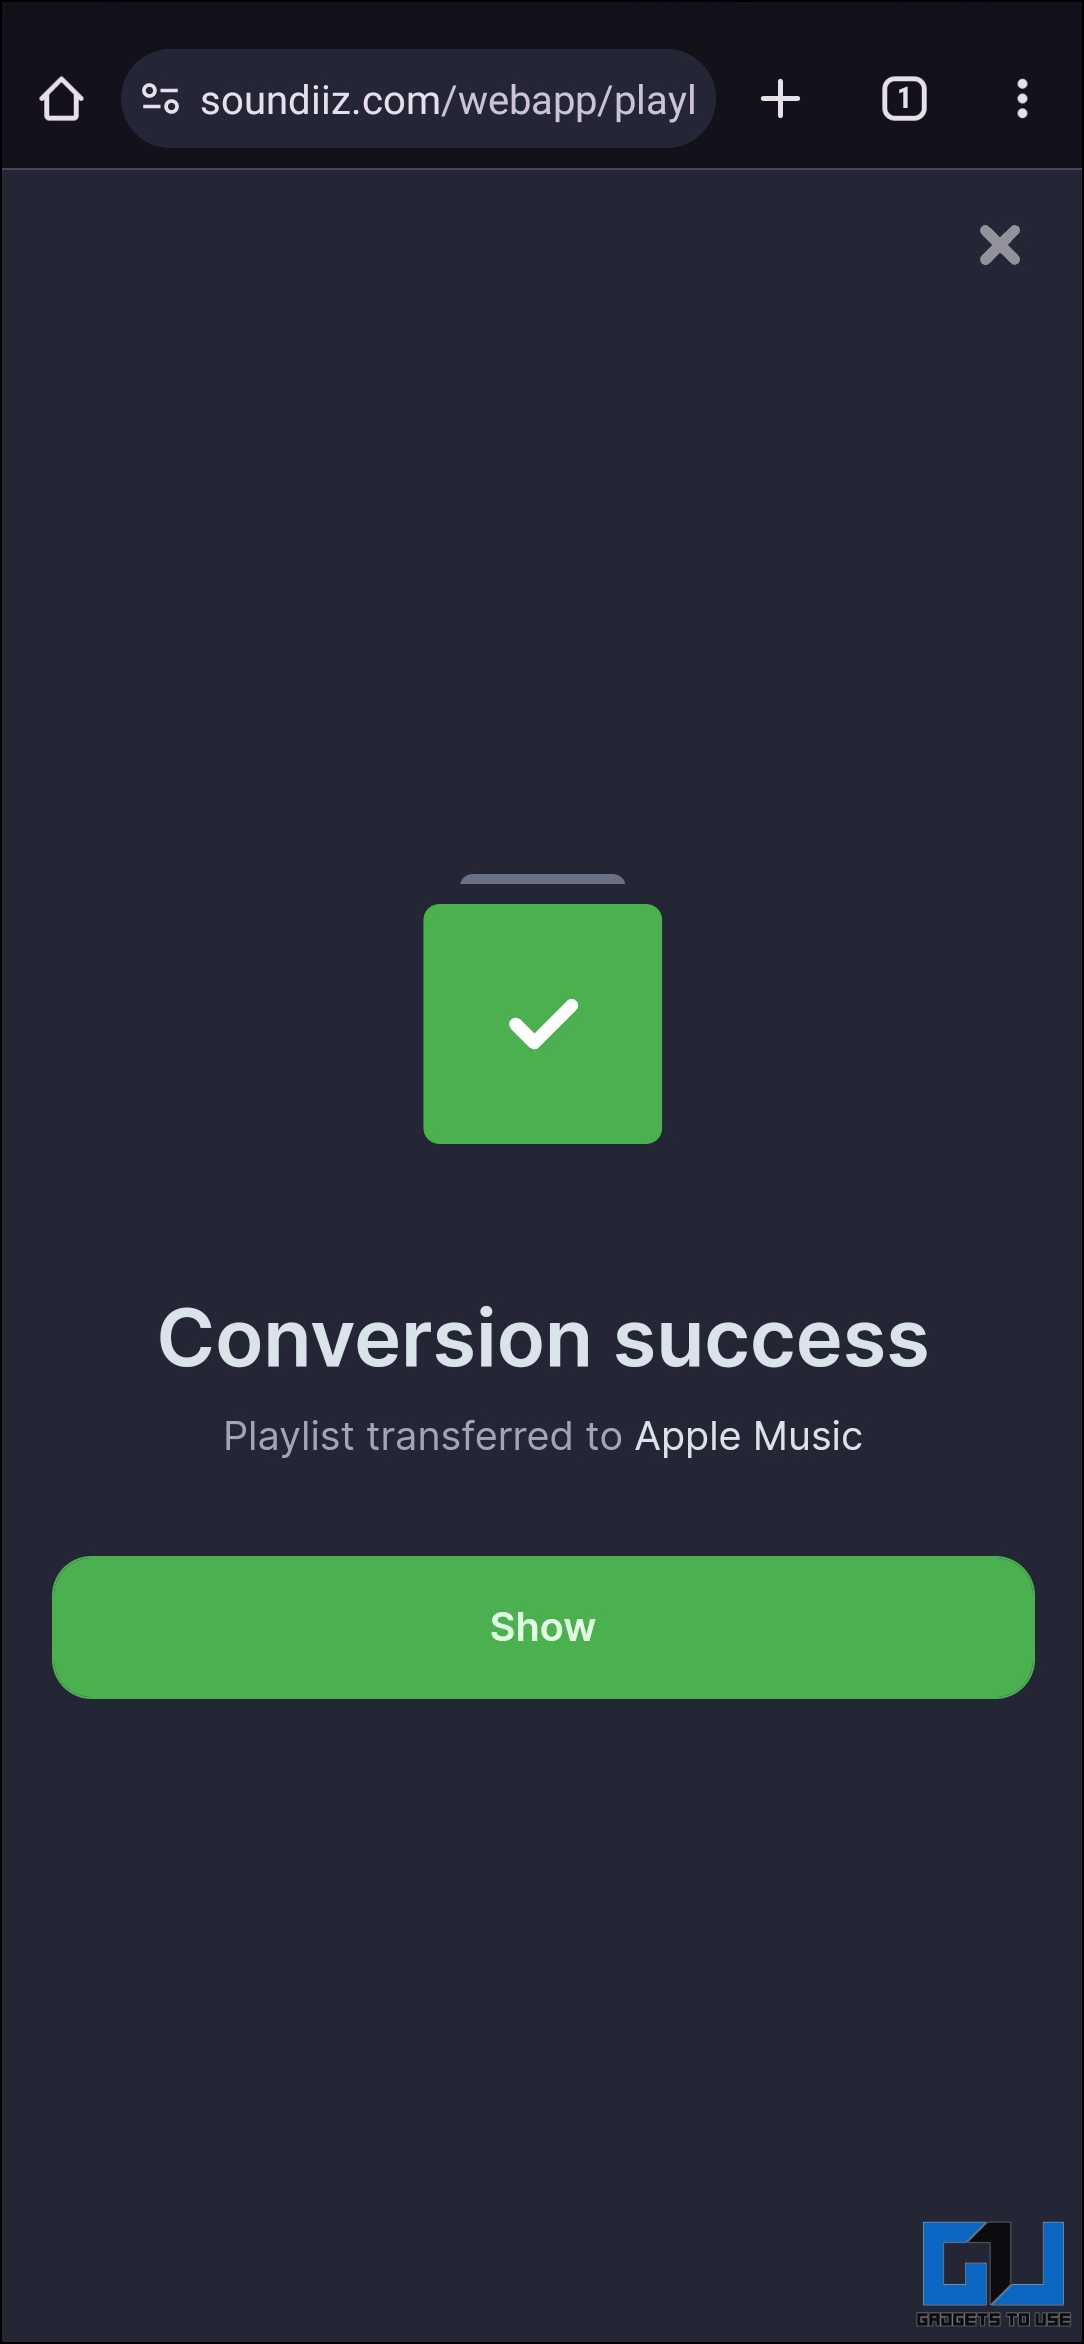
15. Wait for the transfer to complete and enjoy your favorite playlists on the streaming service of your choice.
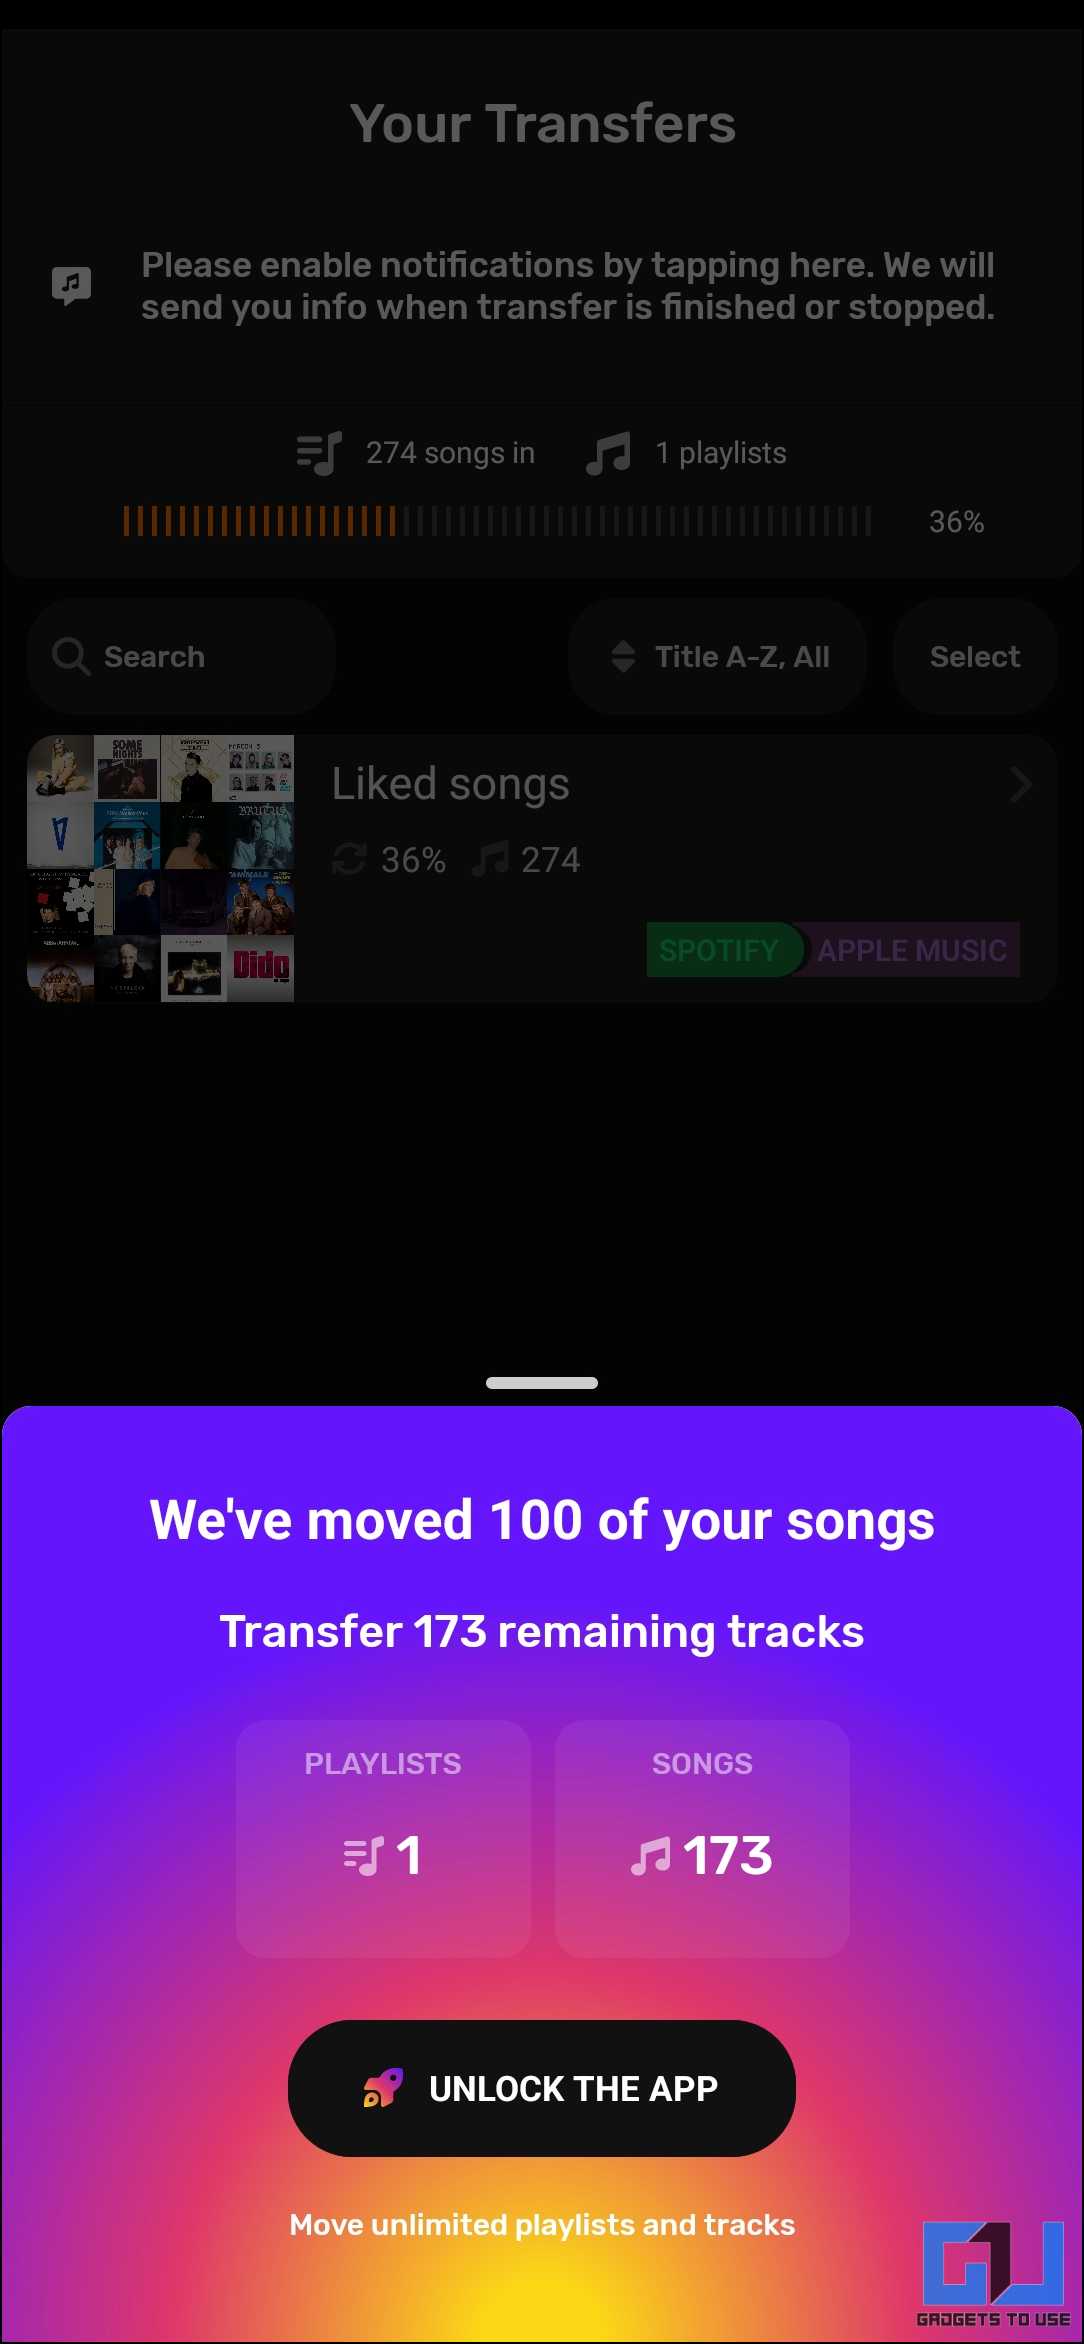
Method 3 – FreeYourMusic (App)
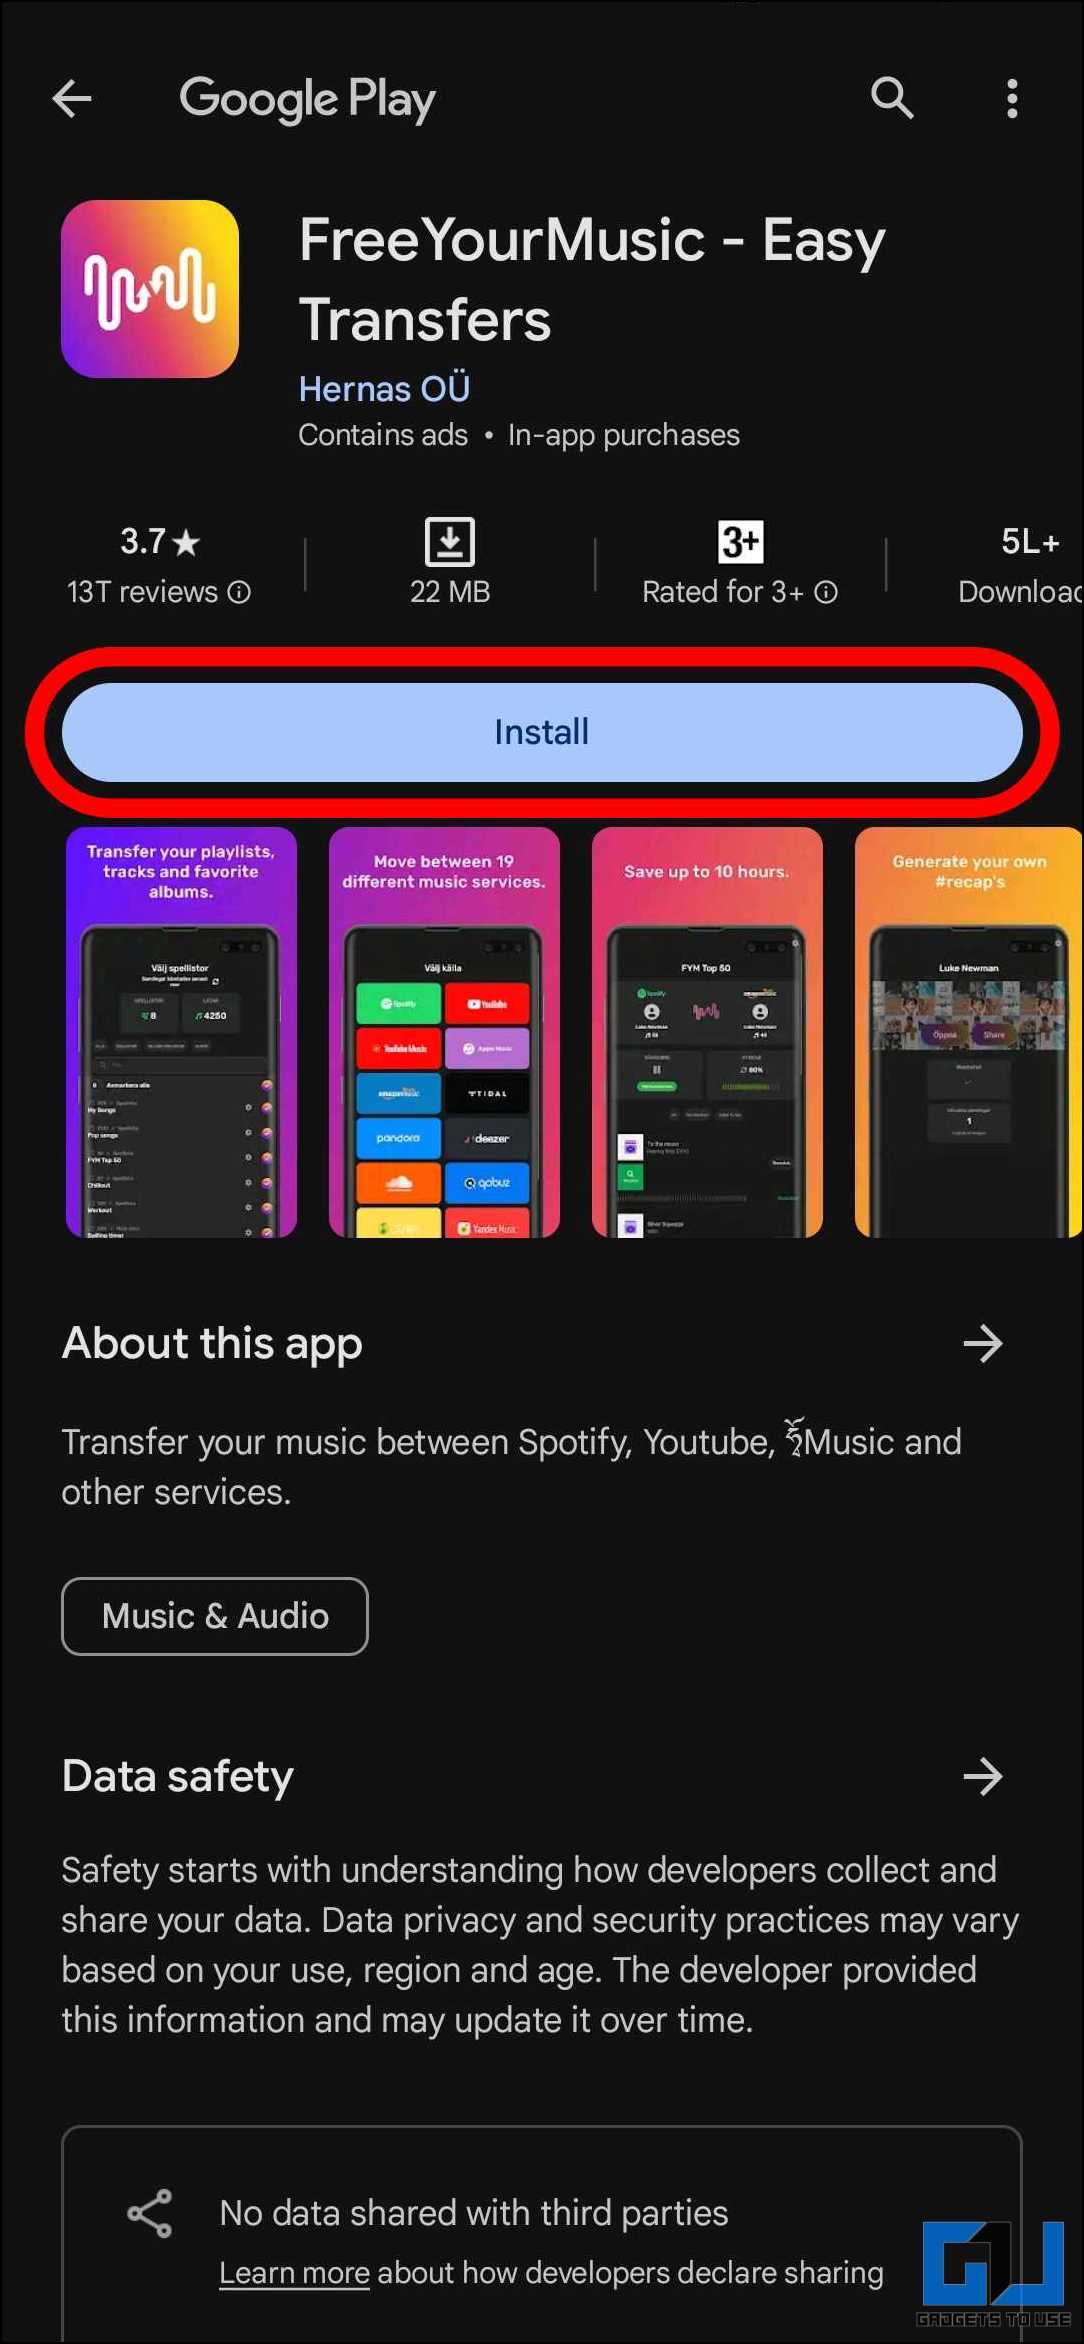
FreeYourMusic is an application available across different platforms, like Windows, Android, iOS, and even Linux. The app has easy-to-follow instructions that can guide you through the transfer process. It is free to use and supports 100 songs per playlist. The following steps will help you get through the process:
1. Go to the Google Play Store and install the FreeYourMusic app.
2. Open the app and tap on “Let’s Go.”
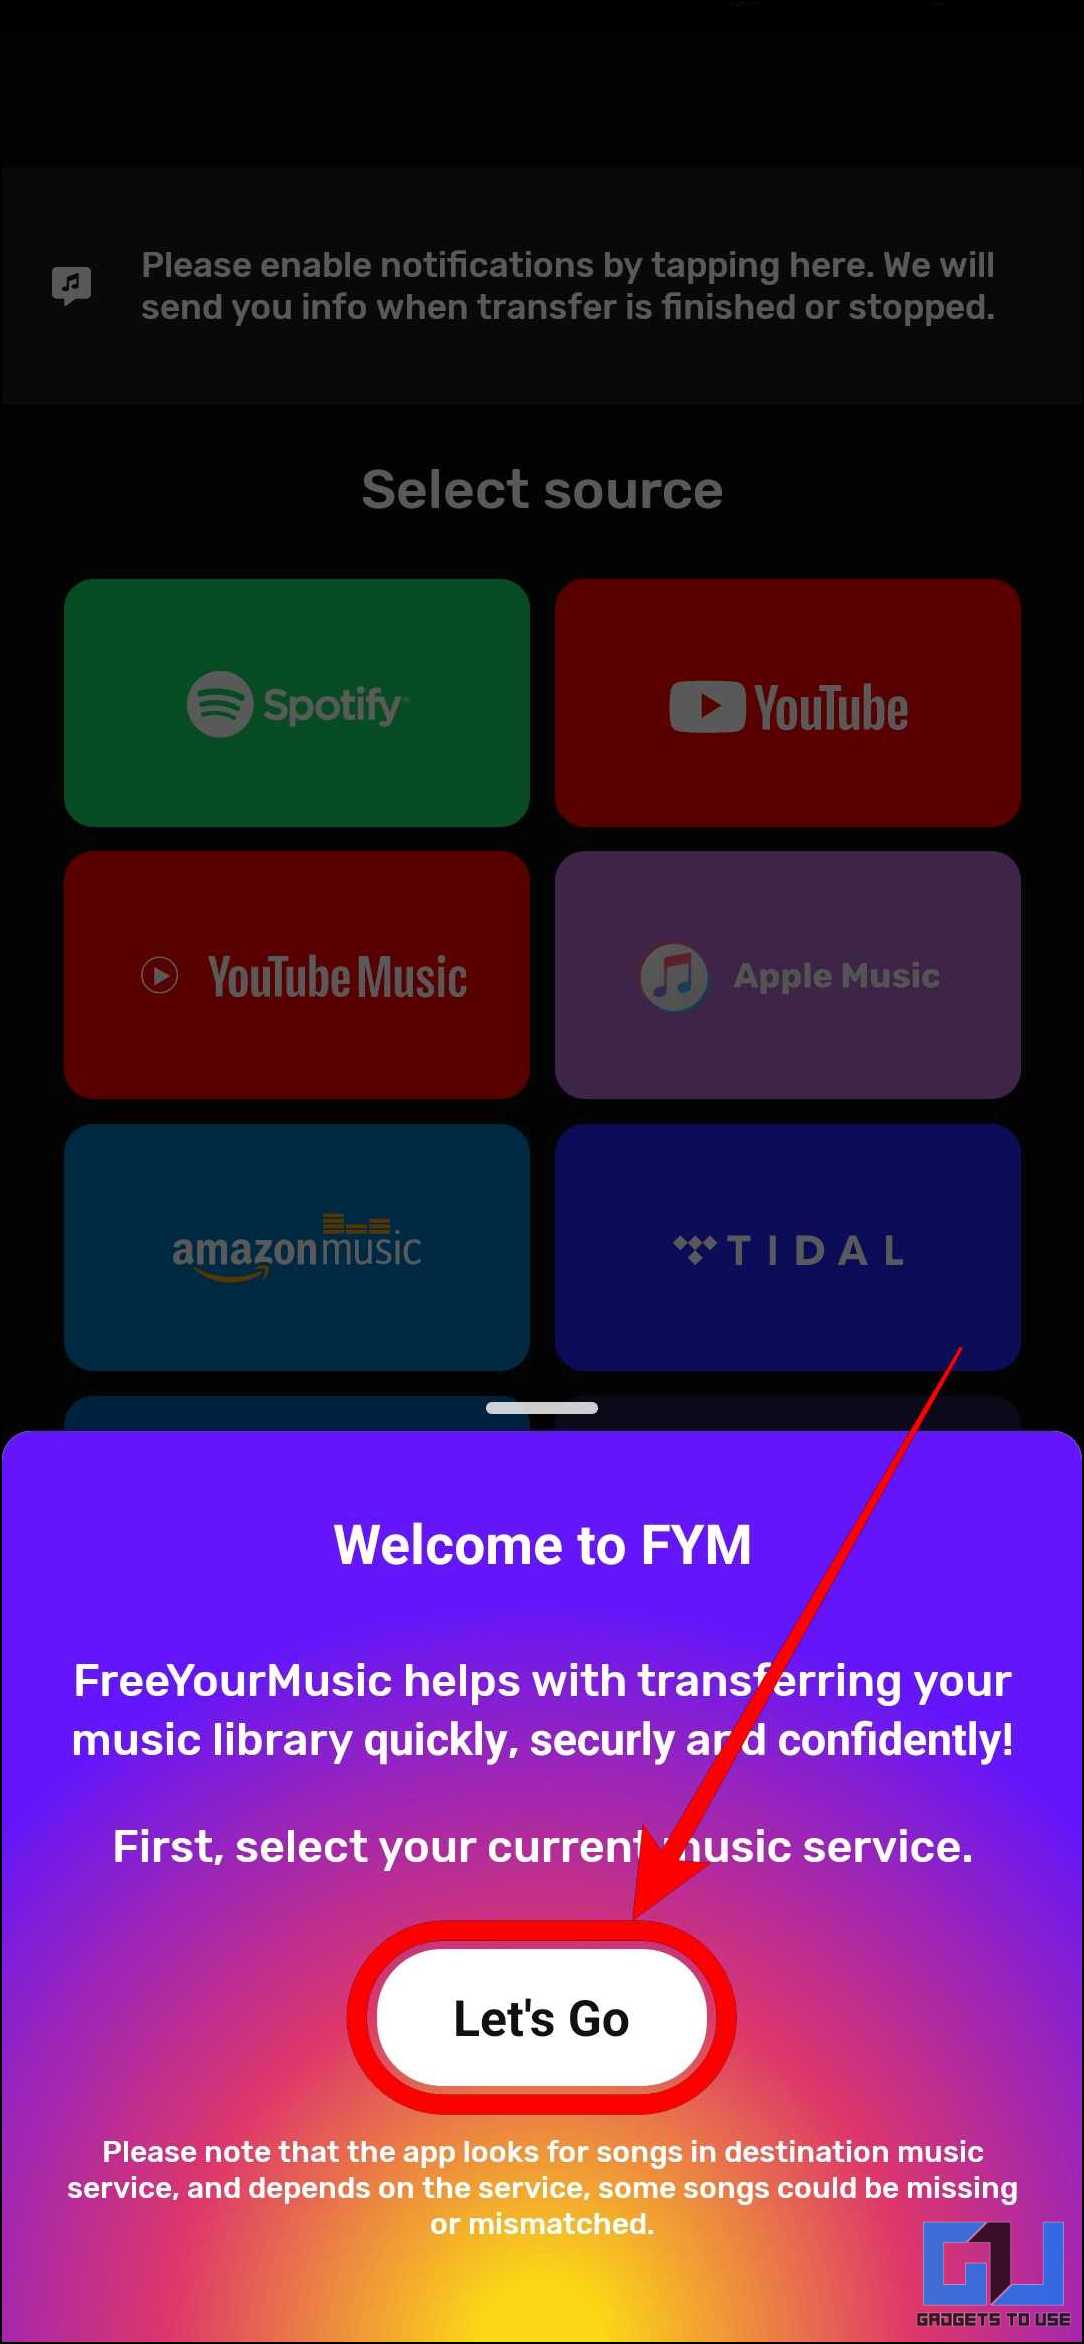
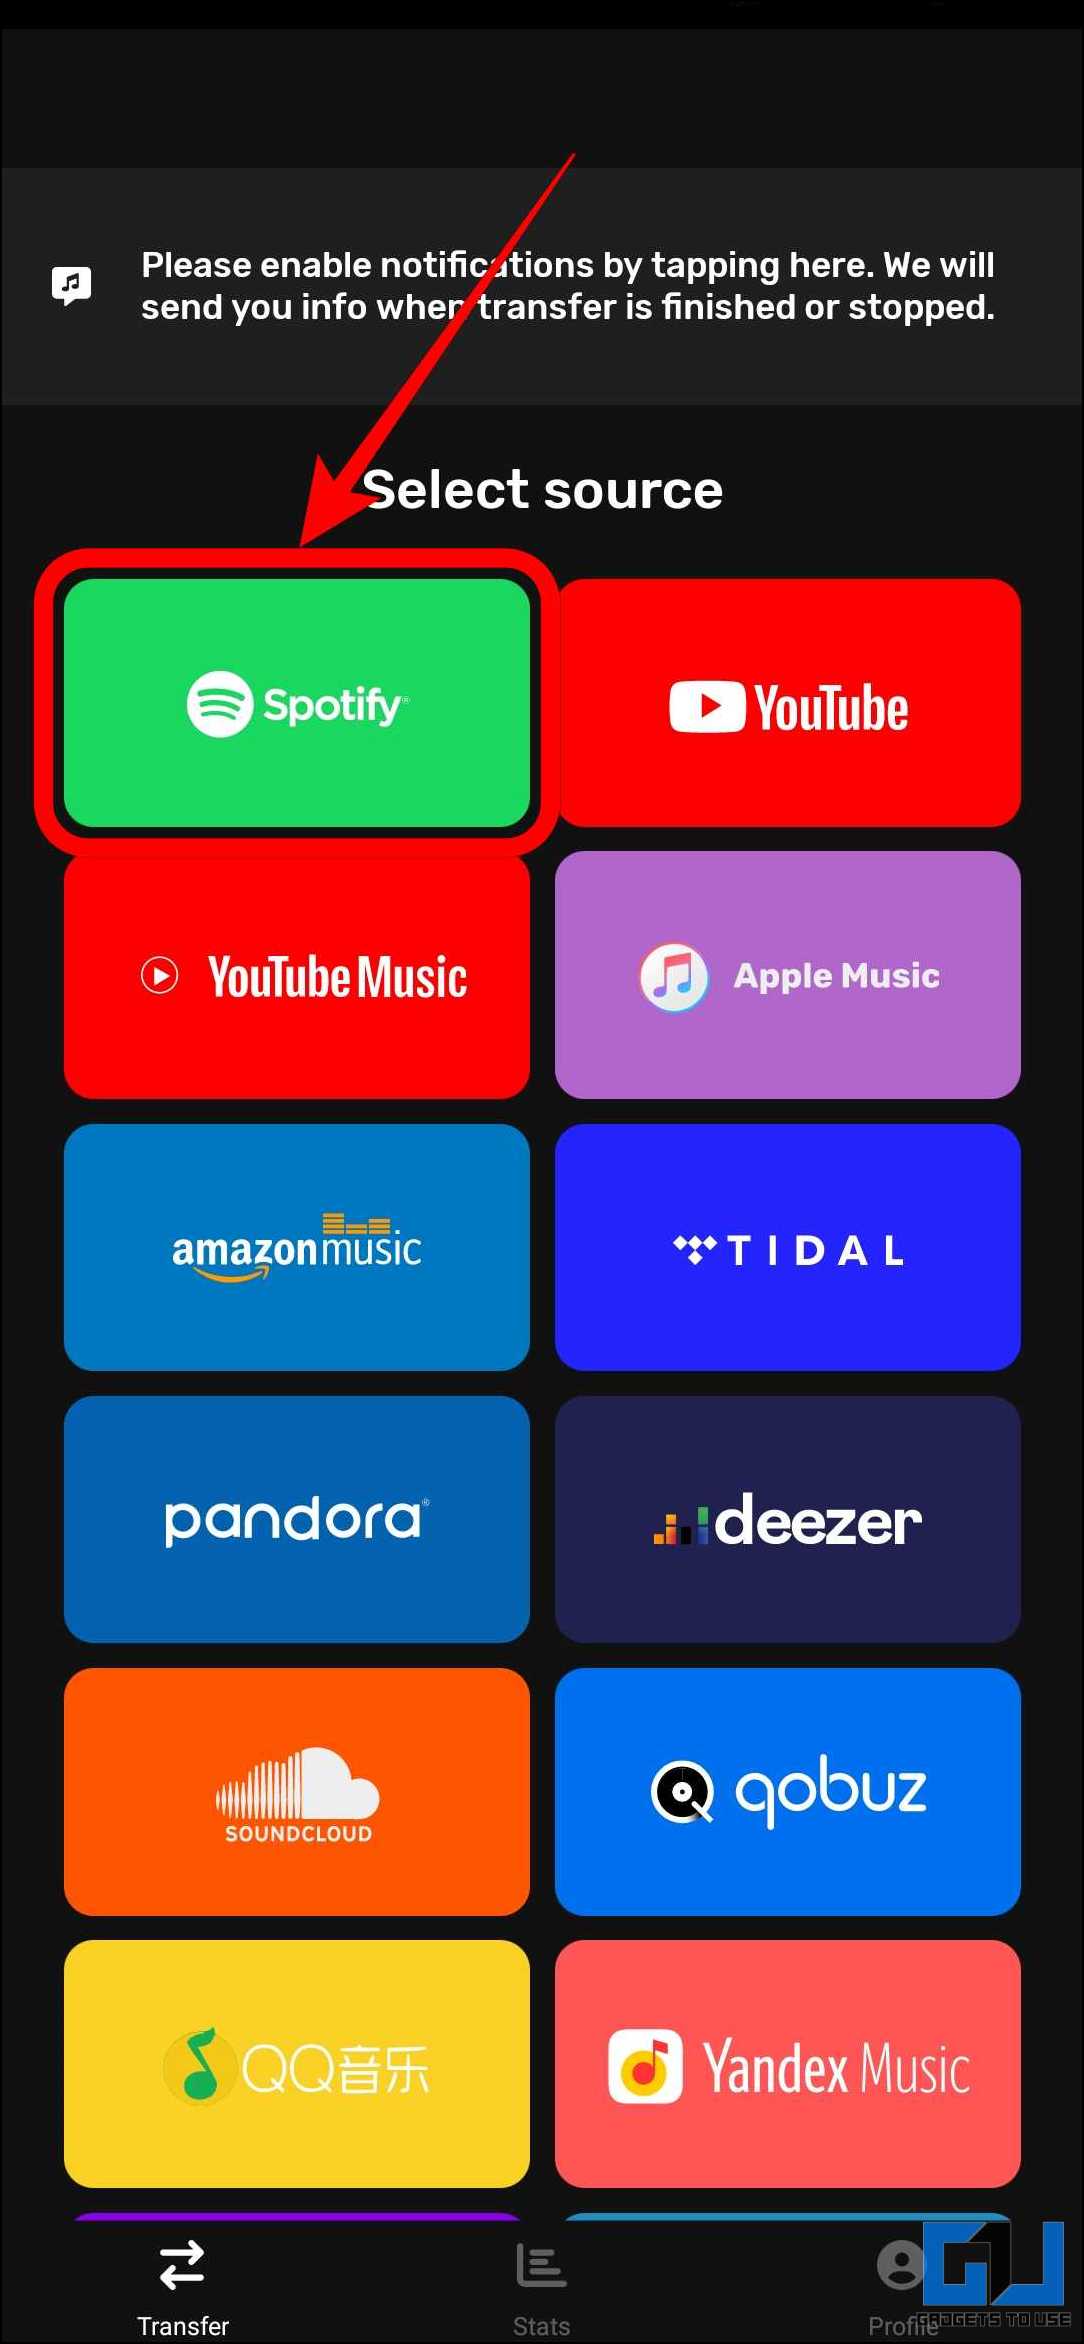
3. Select the source from which you want to transfer the playlists. Here, we will use Spotify as the source.
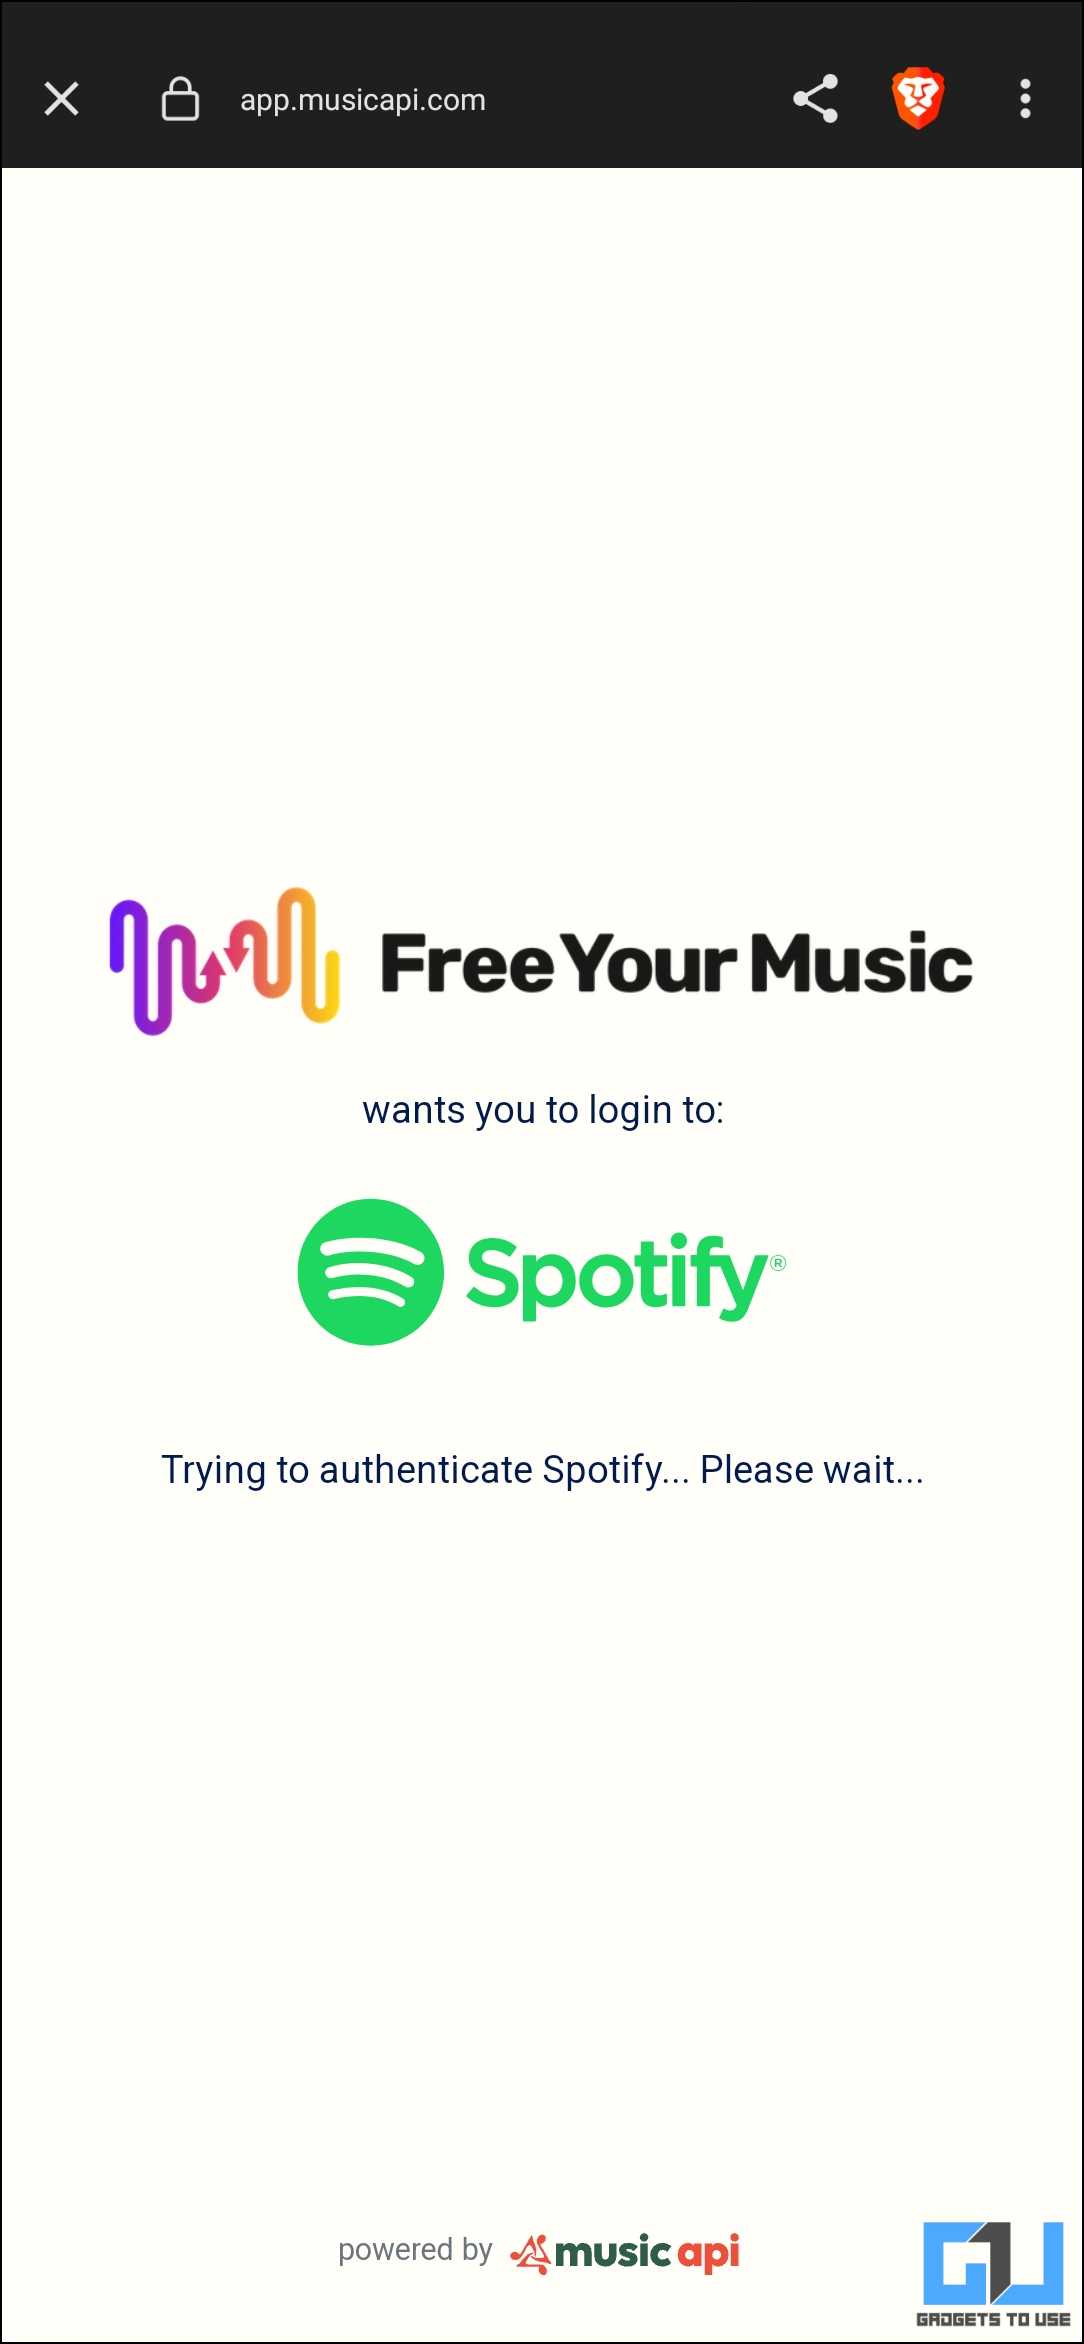
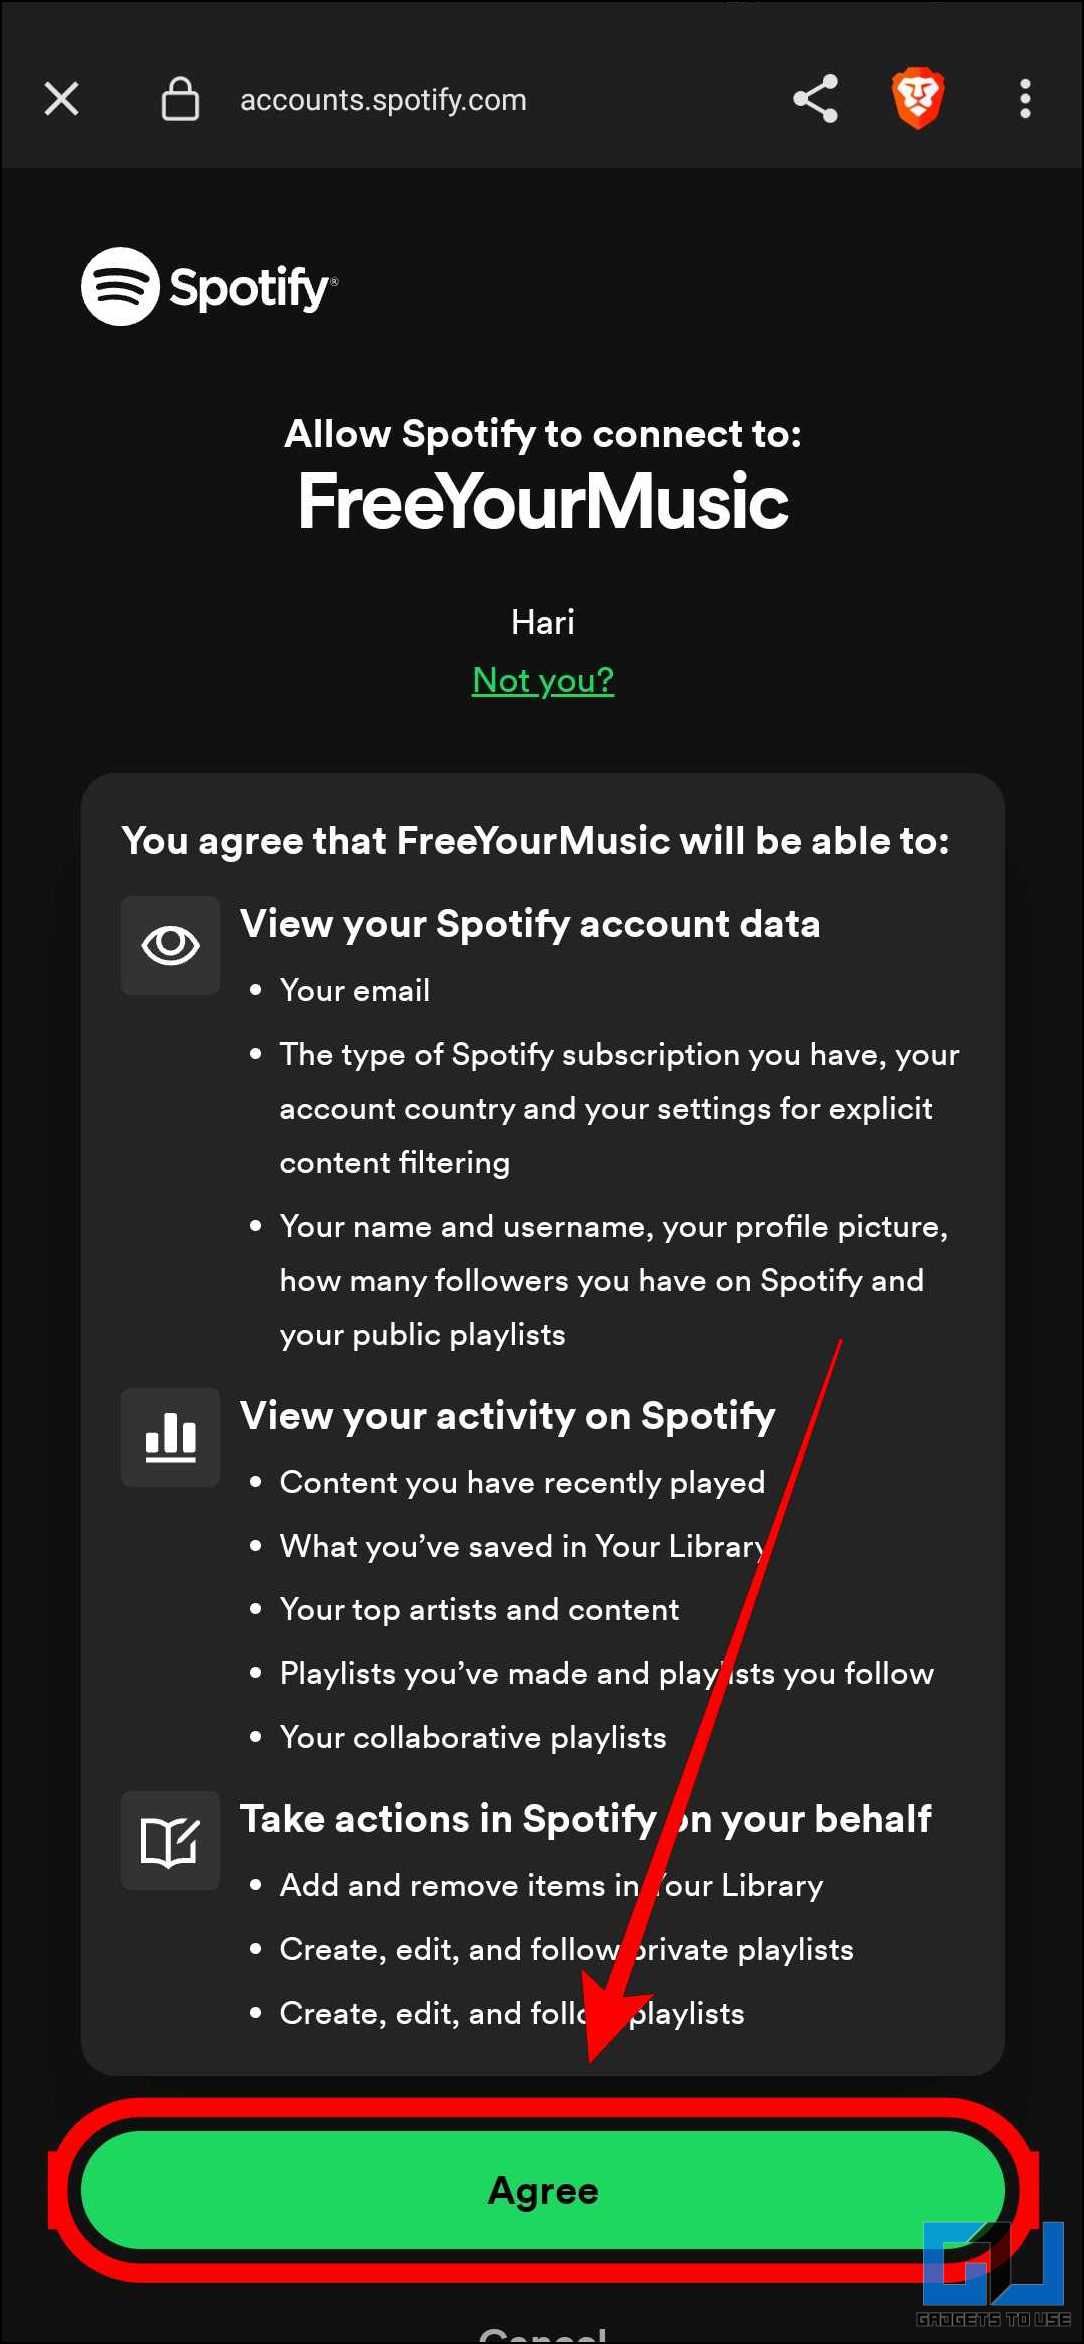
4. The app will automatically authenticate Spotify by tapping “Agree.”
5. Tap on “Continue.”
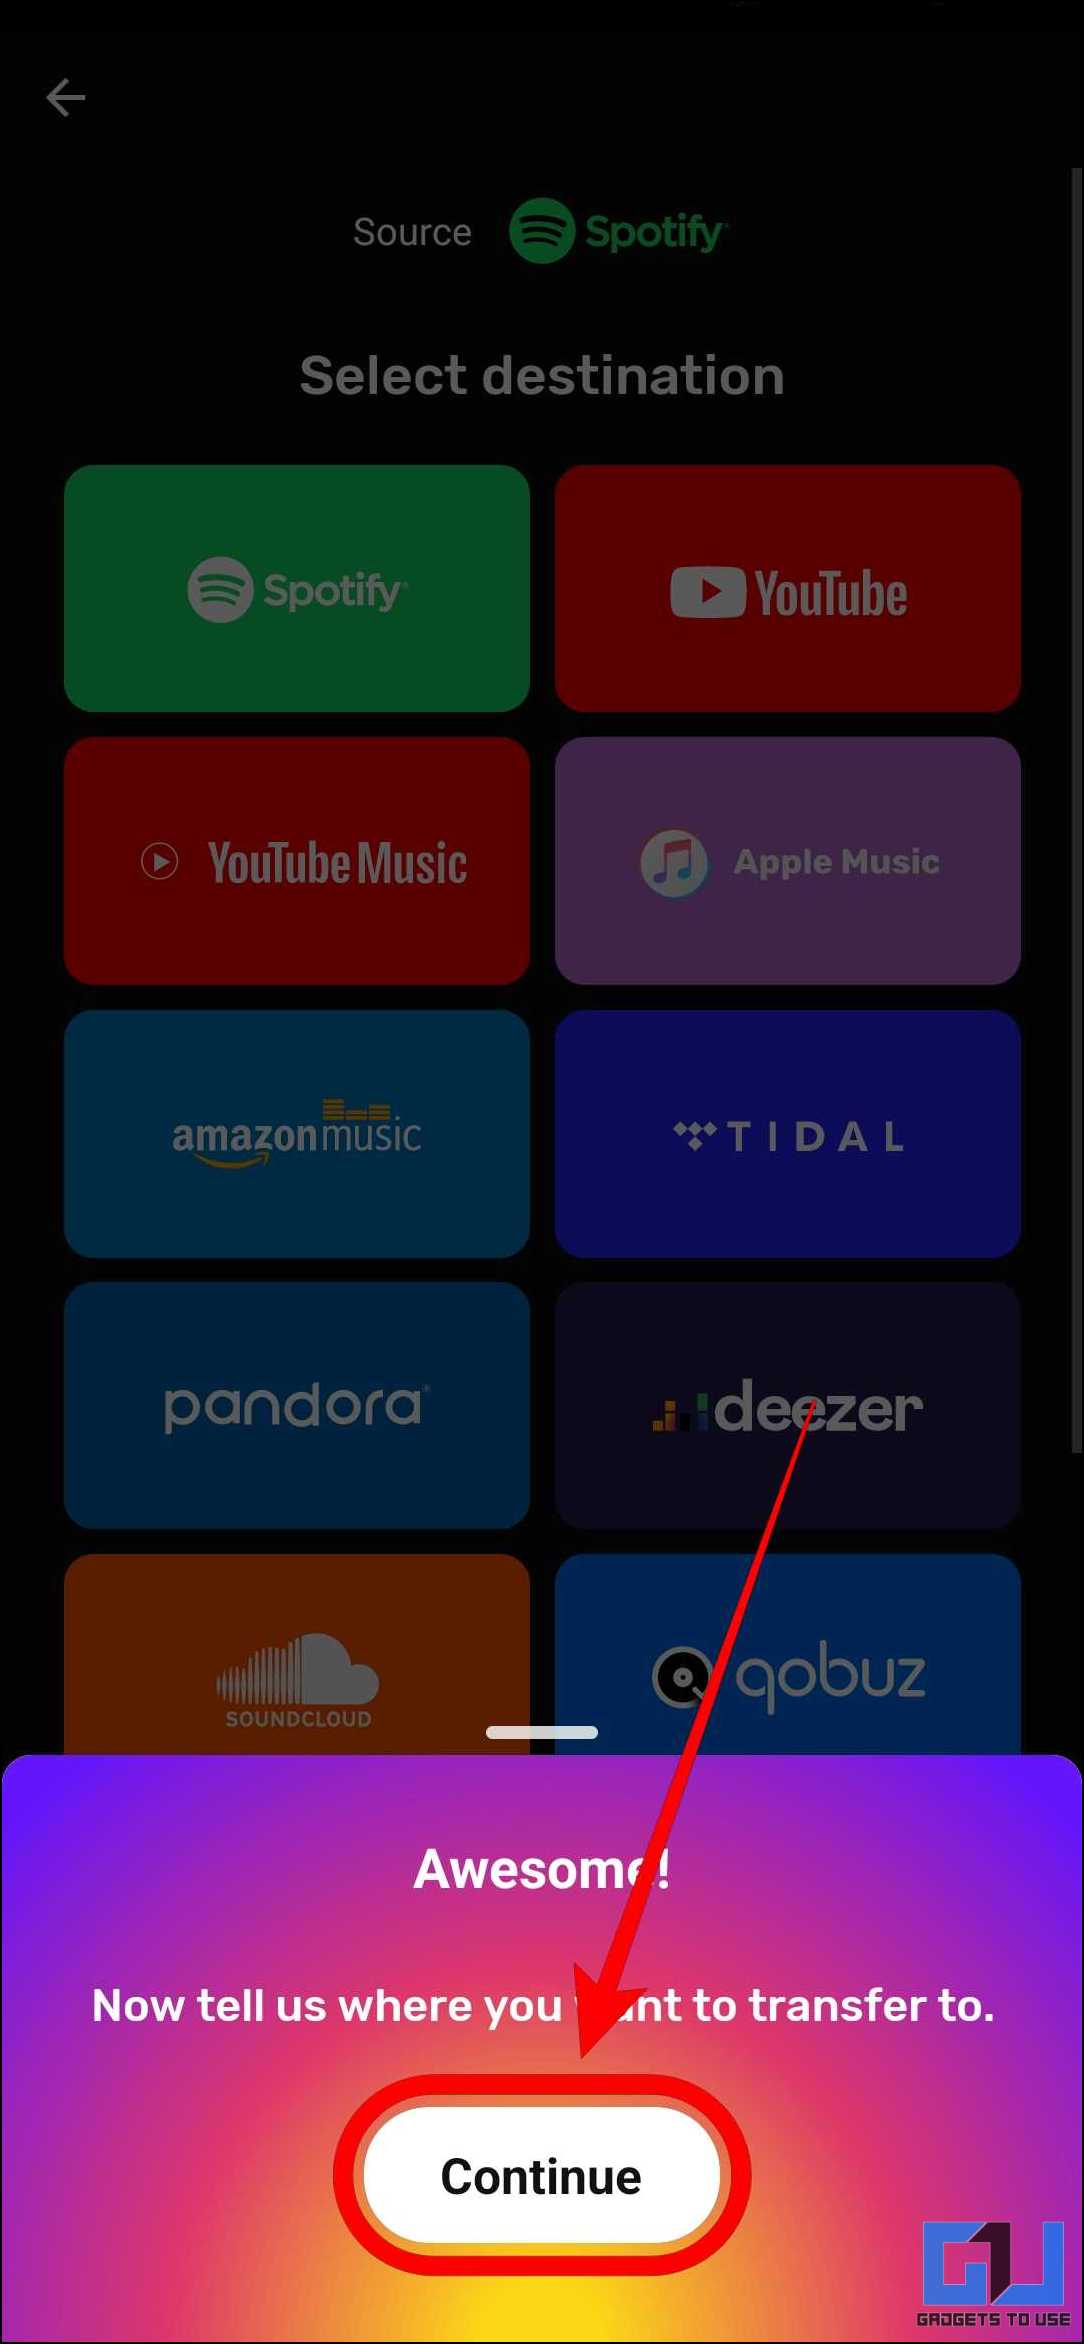
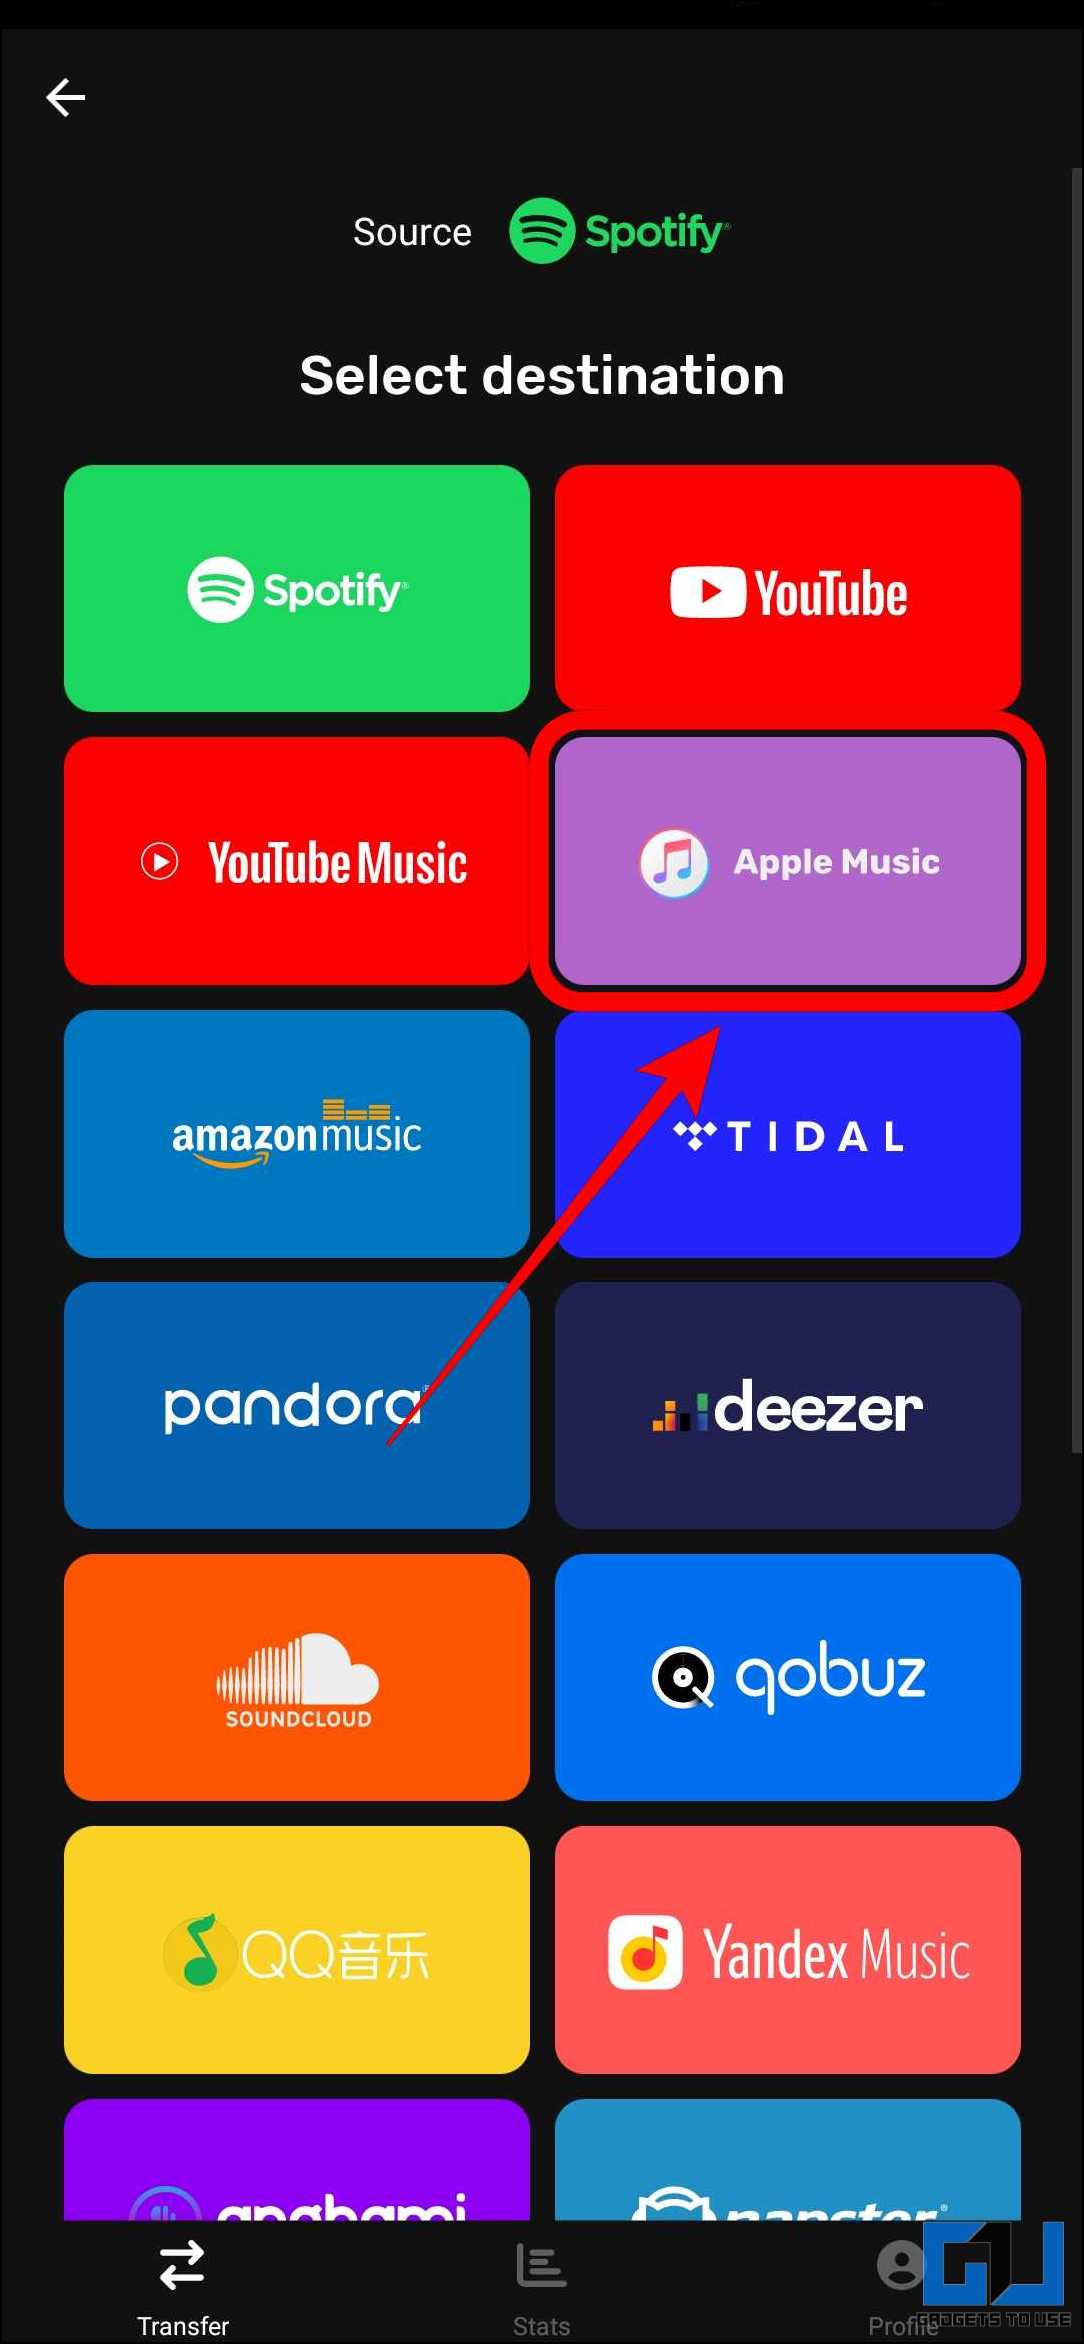
6. Select the destination to which you want to transfer the playlists. Here, we will use Apple Music as the destination.
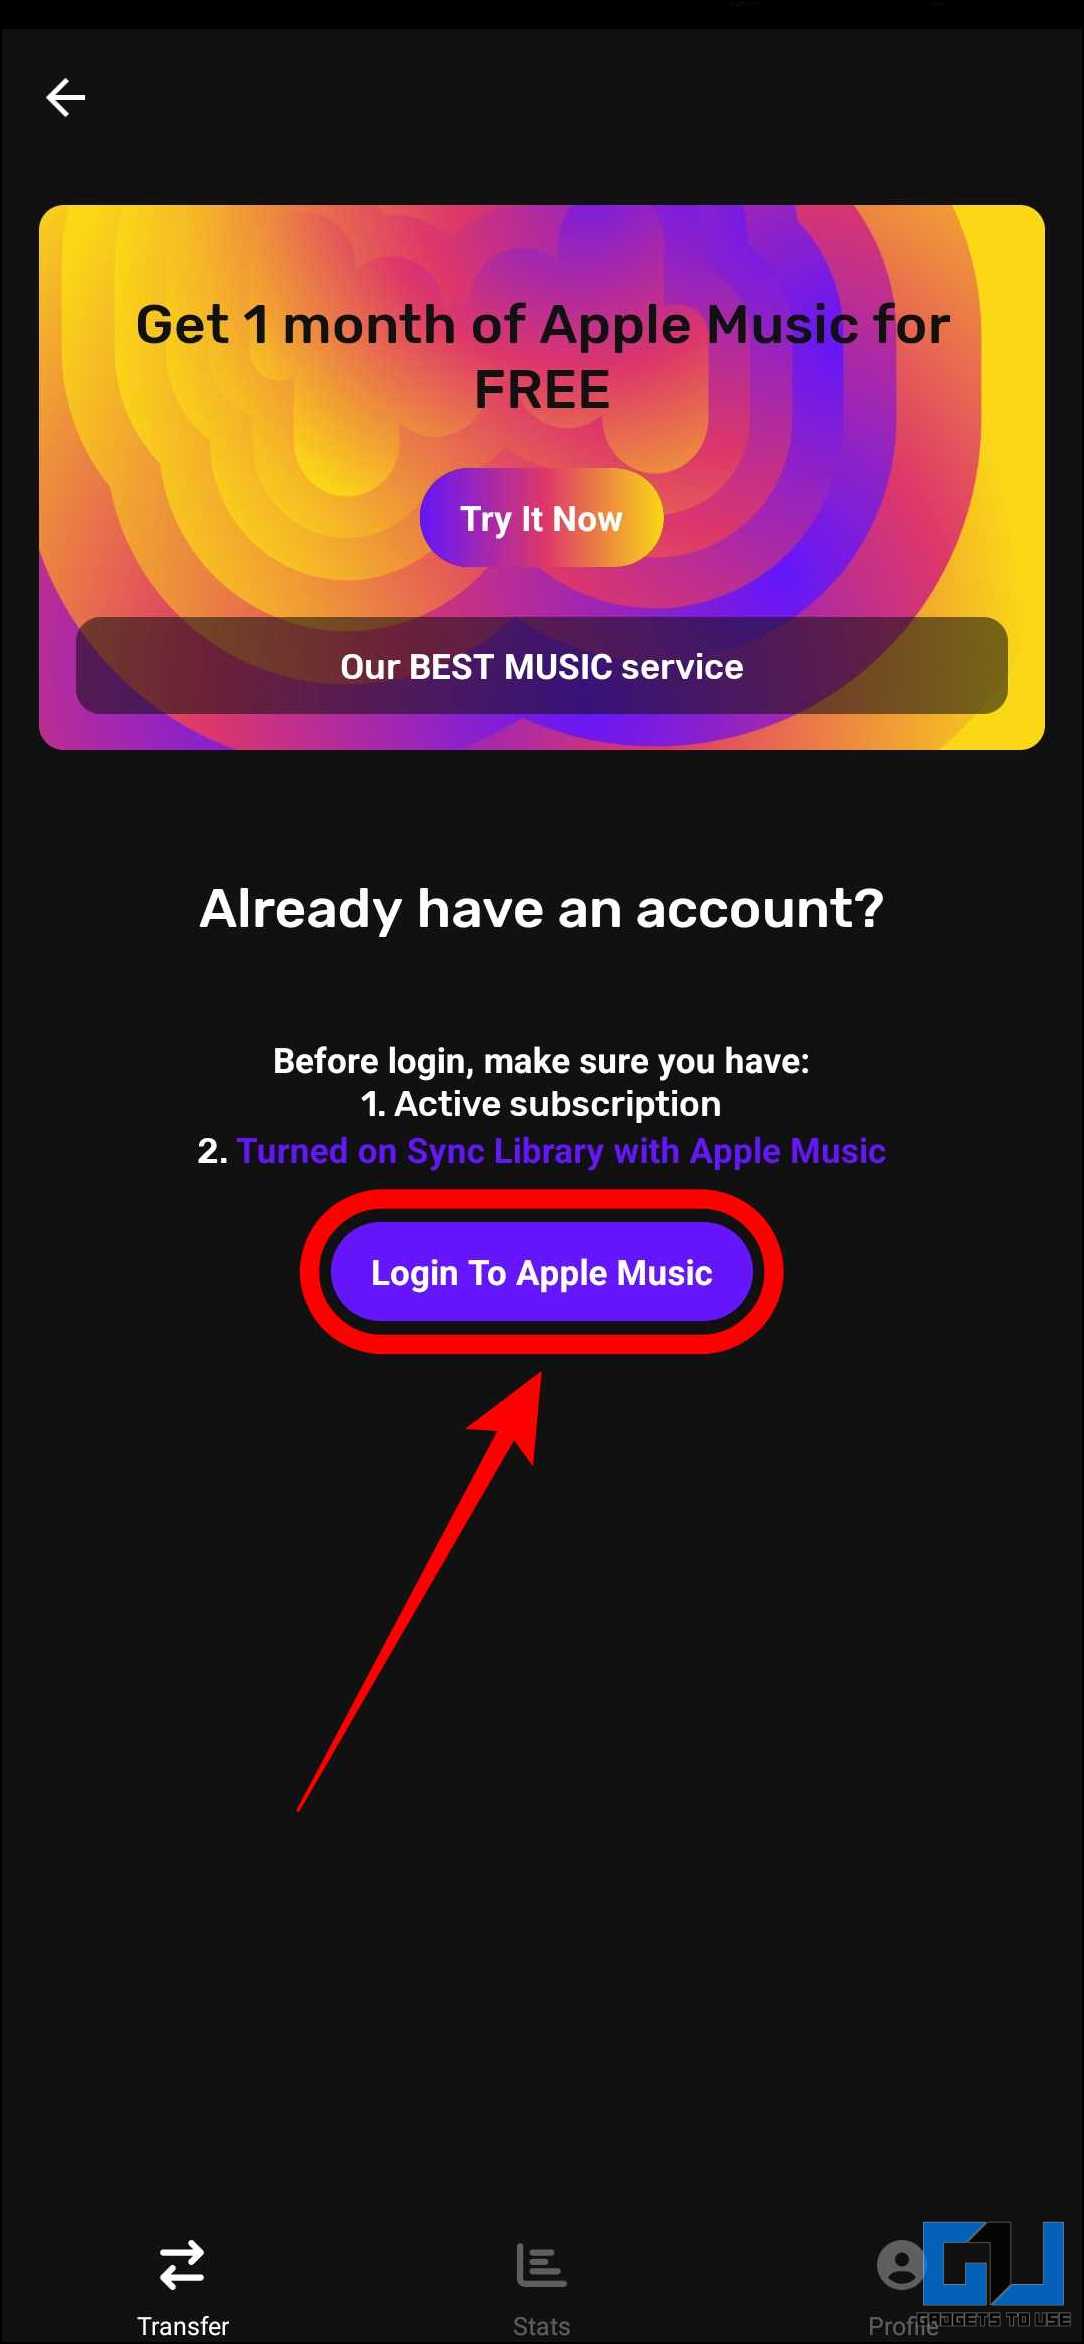
7. Now log in to your Apple Music account.
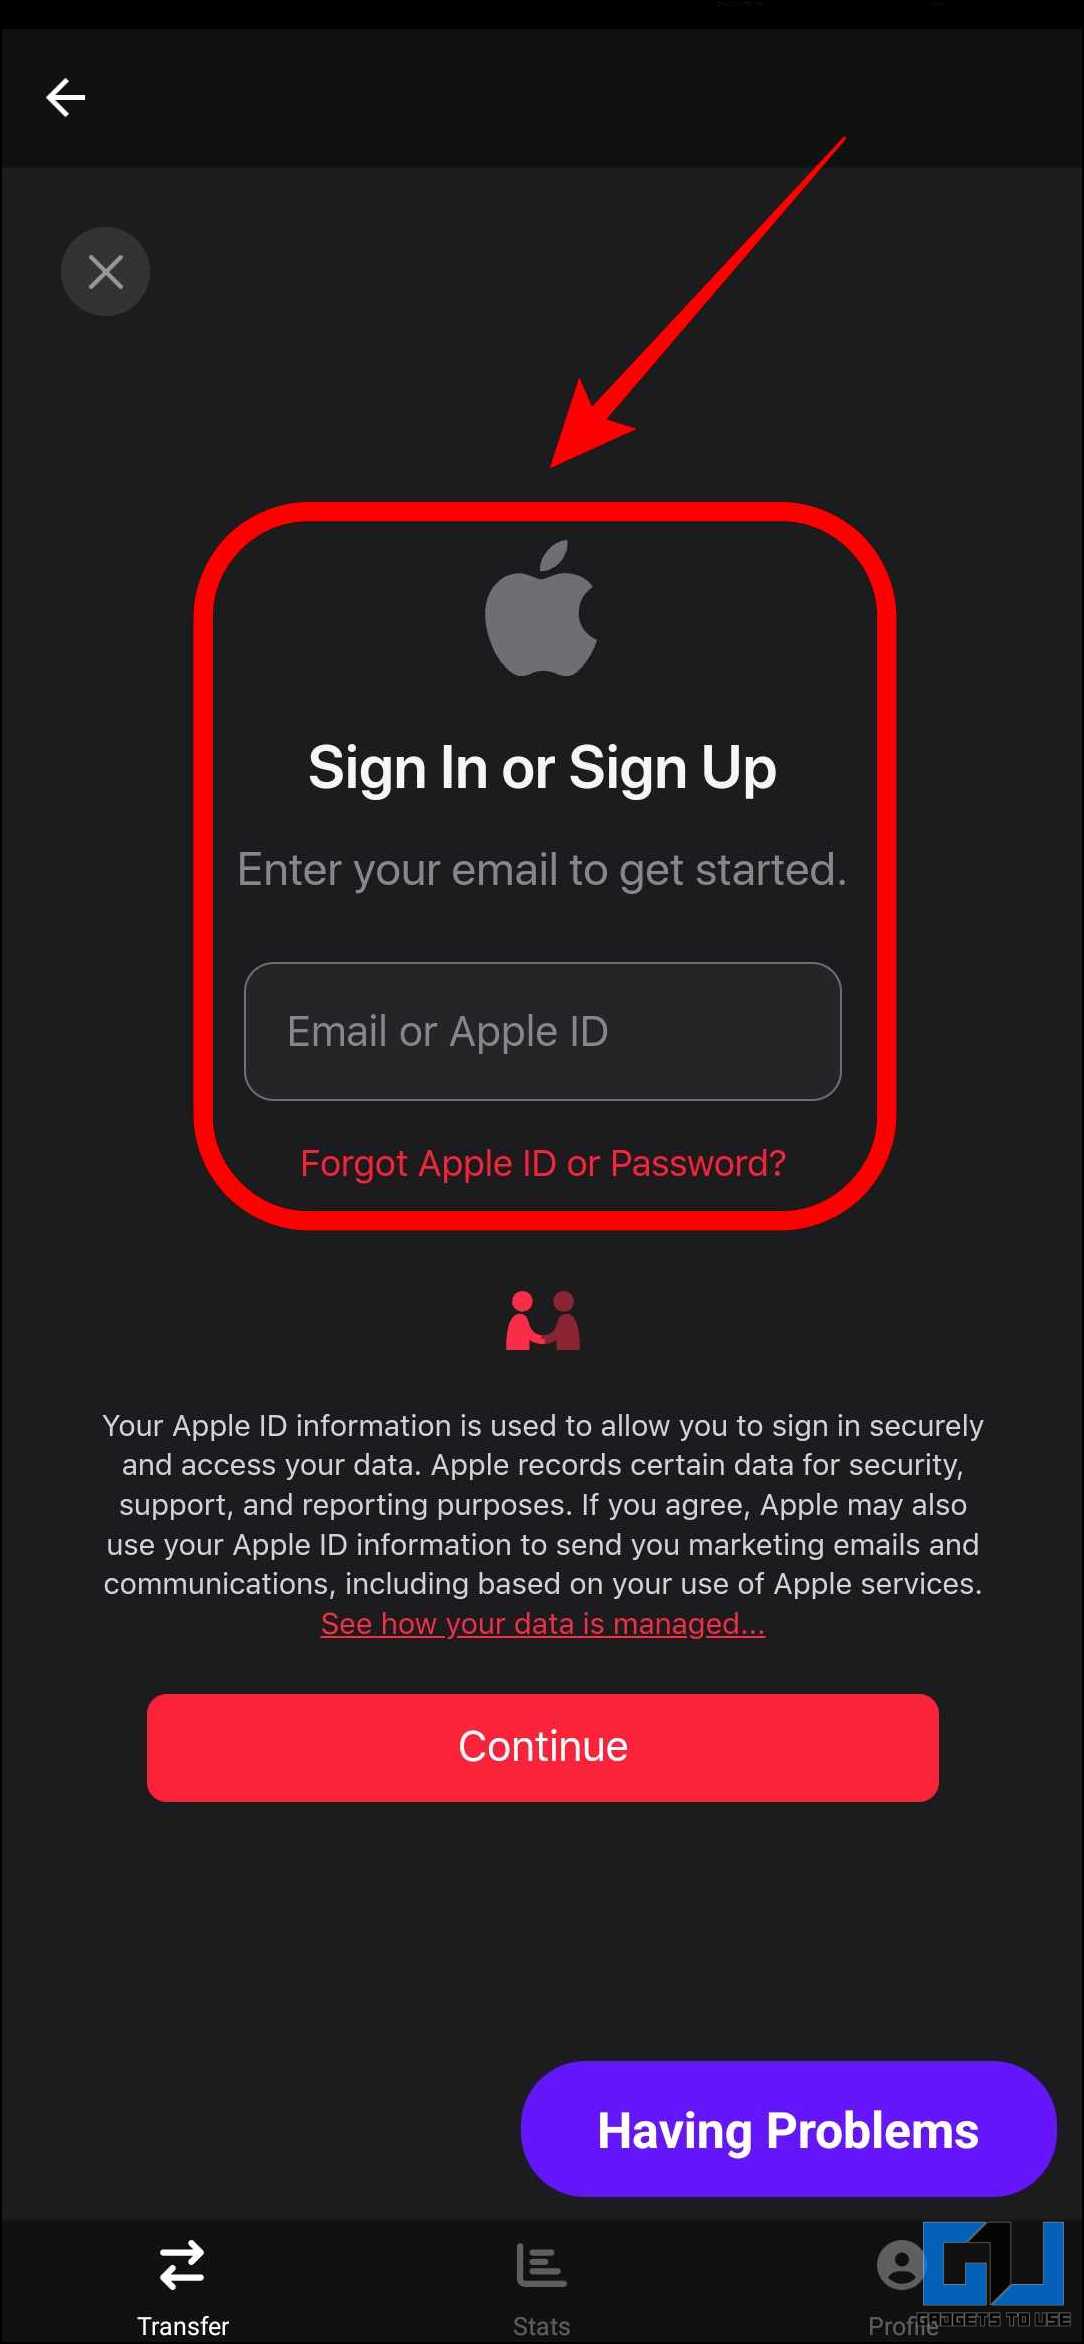
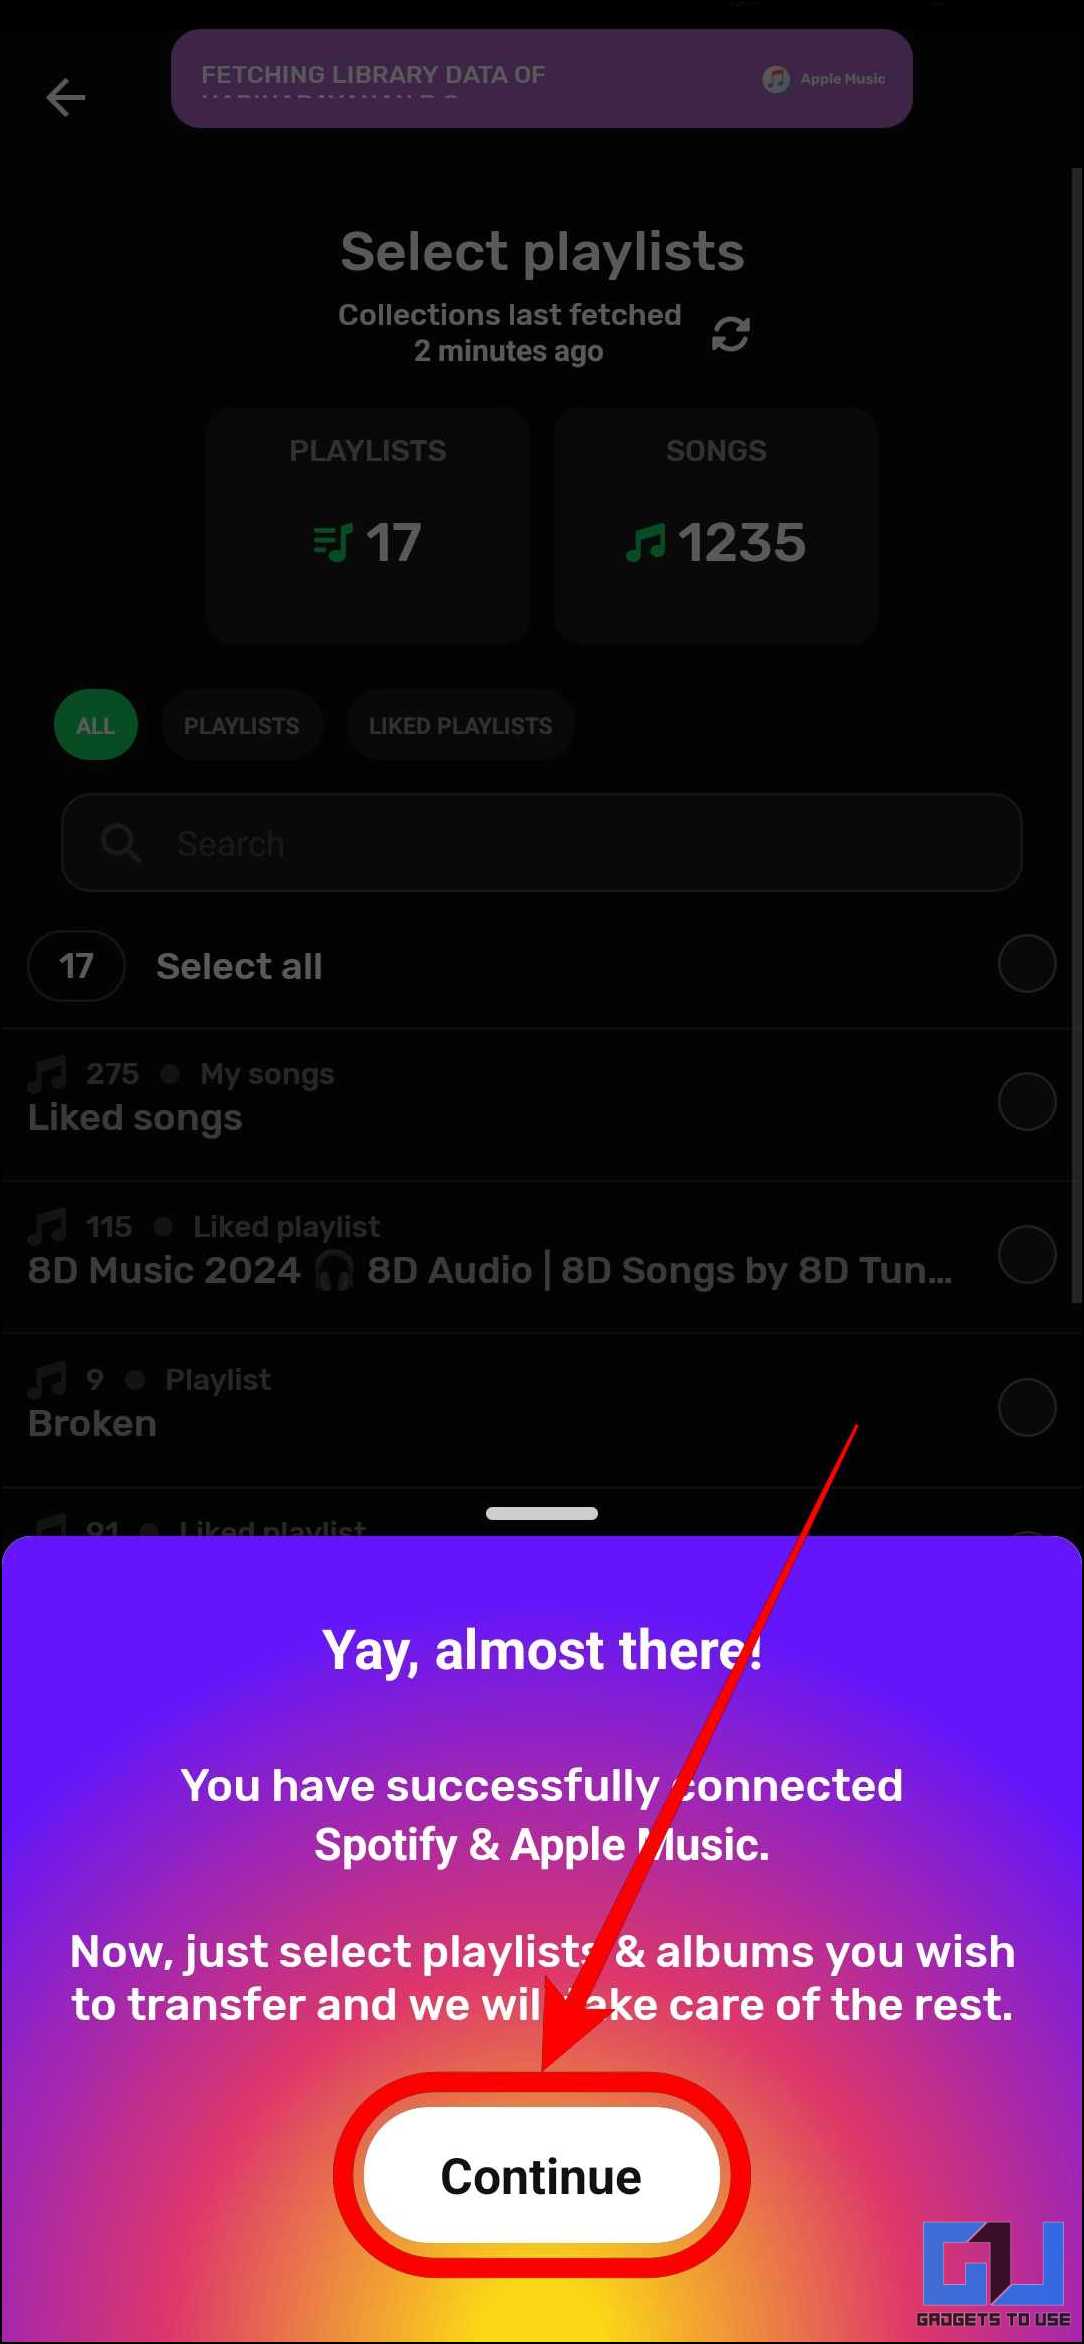
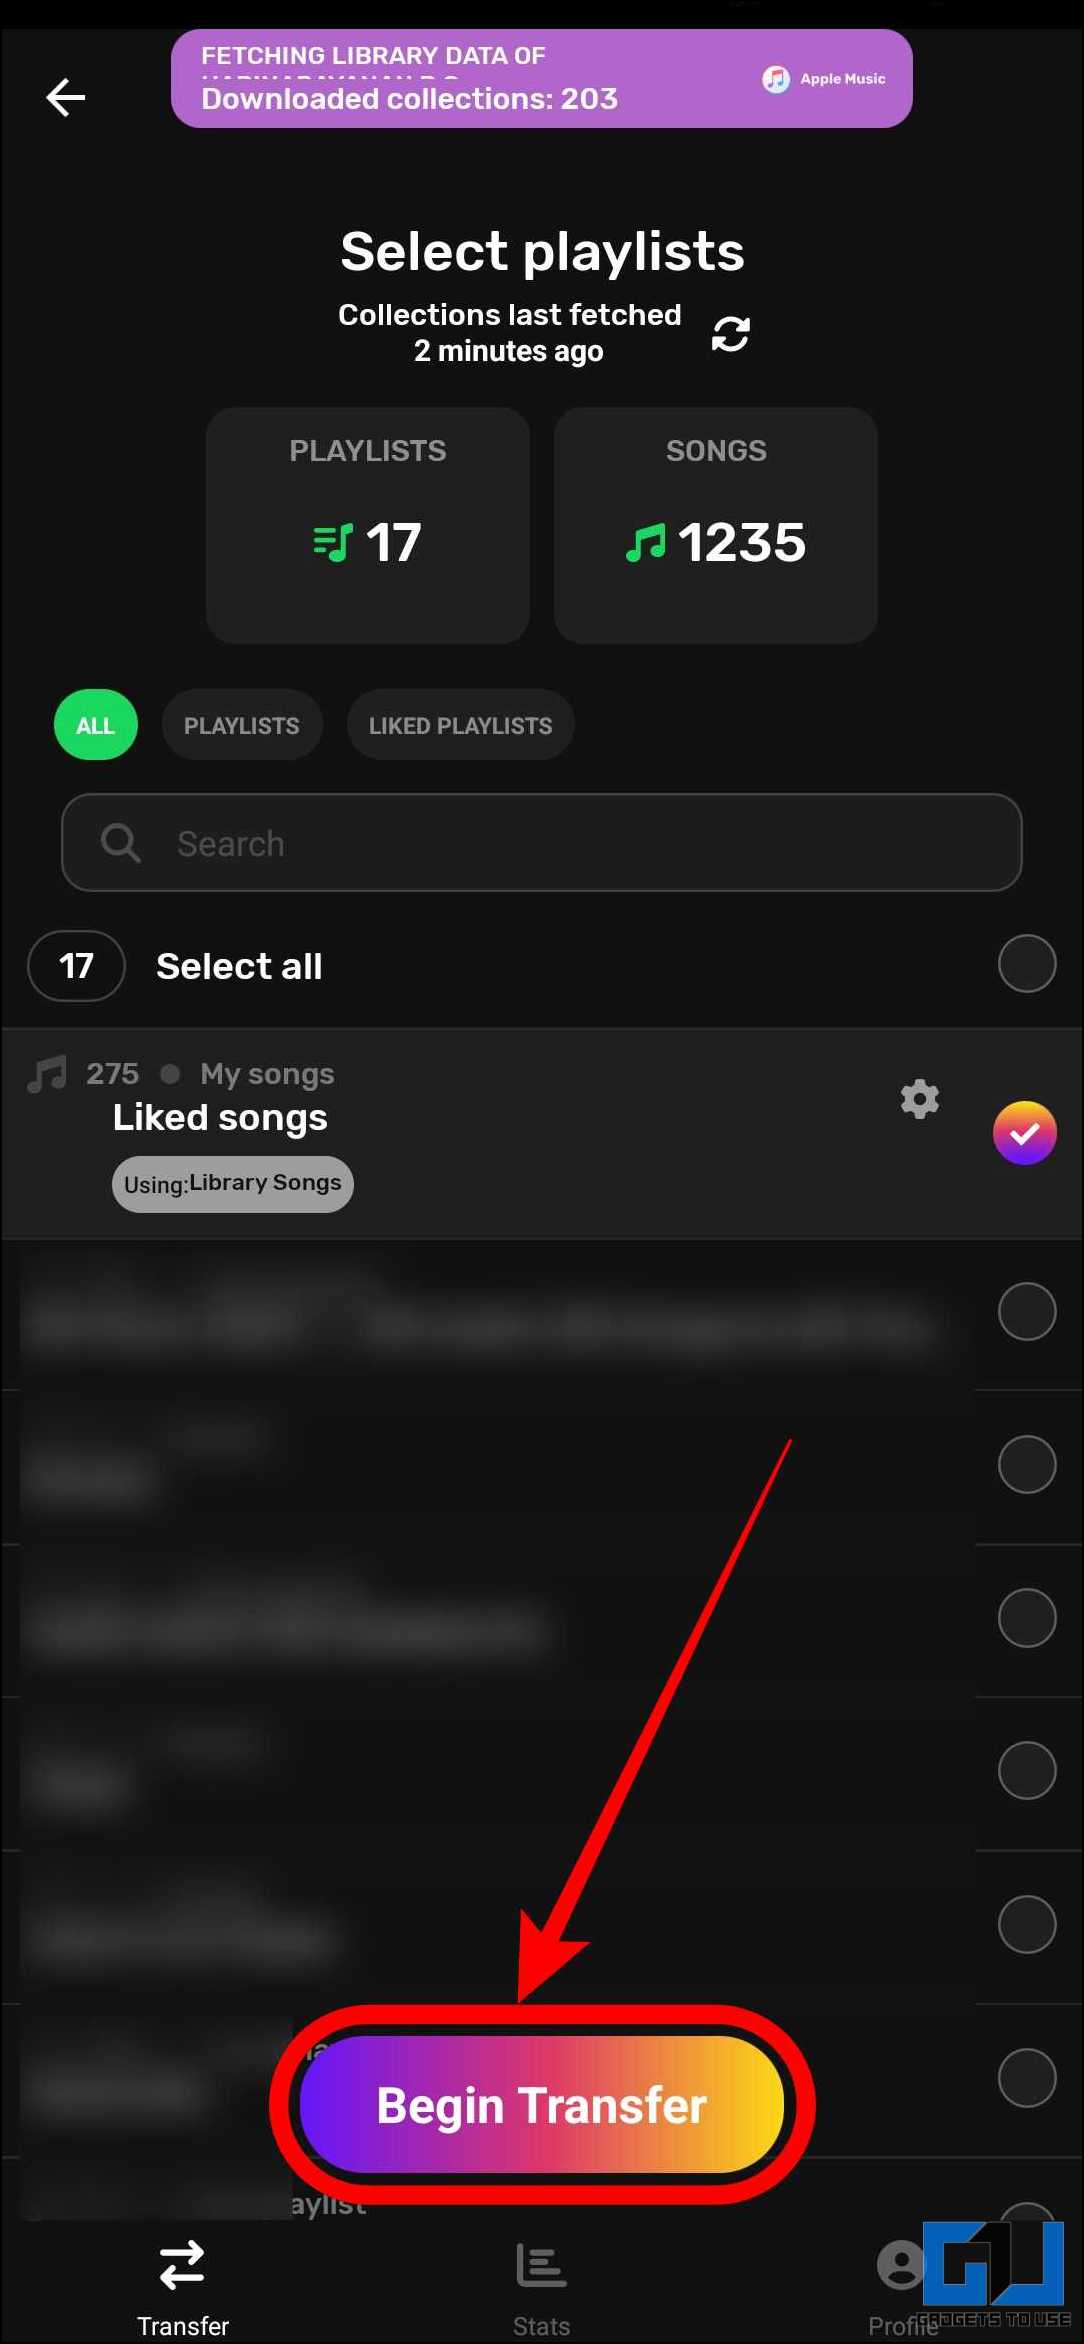
8. Tap “Continue,” select the playlist to be transferred, and tap “Begin Transfer.”
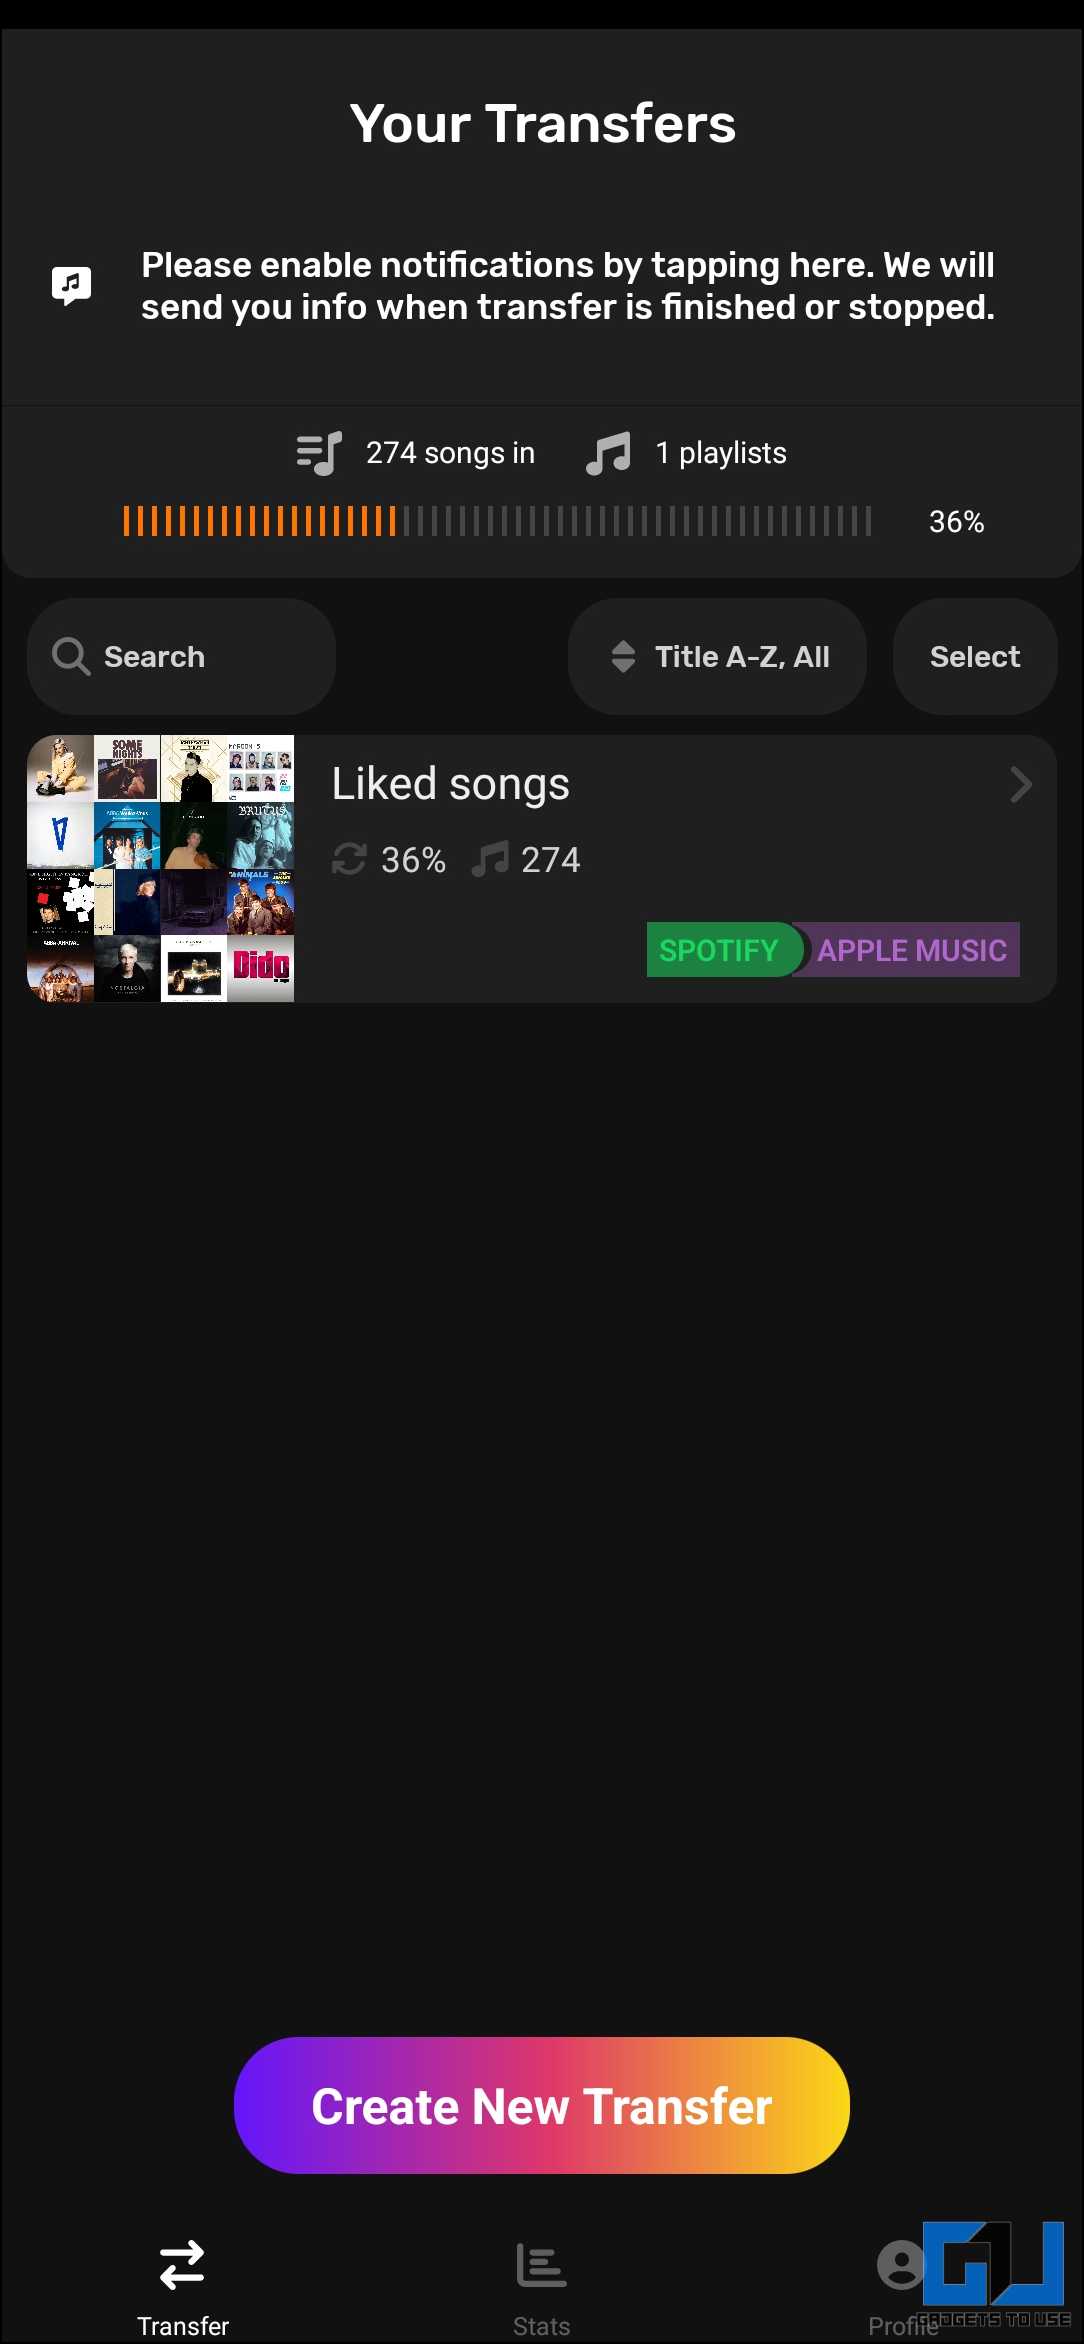
9. Wait for the transfer to complete.
10. You must pay for a subscription to move over a hundred songs.

FAQs
Q. Can I Transfer Playlists From One Streaming Service to Another?
Yes. You can transfer playlists from one streaming service to another using online tools like TuneMyMusic, FreeYourMusic, or Sounddiiz. These tools are easy to use and free, and they support the most popular streaming platforms, such as Spotify, Apple Music, YouTube Music, Amazon Music, etc.
Q. How Do I Transfer My Spotify Playlist for Free?
Any of the abovementioned tools can help you transfer your Spotify playlist for free. They are all free to use and help ensure the seamless transfer of playlists.
Conclusion
Thanks to the availability of various tools, transferring your music playlists from one streaming platform to another is now easy. Whether you want to switch to a new service or listen to your playlists on various platforms, you can transfer any of the methods mentioned in this blog post for free and without any hassle. Stay tuned to GadgetsToUse for more such reads.
You might be interested in the following –
- How to Buy Apple Music Subscription on Your Android Phone?
- How to Enable Music Visualisation on Nothing Phone (2)?
- 4 Ways to See YouTube Music Lyrics on Phone and Web
- Spotify AI DJ: What Is It and How to Set It Up on Your Phone
You can also follow us for instant tech news at Google News or for tips and tricks, smartphones & gadgets reviews, join the GadgetsToUse Telegram Group, or subscribe to the GadgetsToUse Youtube Channel for the latest review videos.