Quick Answer
- Once you have extracted the audio using the above methods, you can upload the audio file to the Adobe Podcast website to remove any unwanted noise, as follows.
- VLC is one of the most popular media players available on Windows and Mac, so irrespective of which platform you are on, you can use it to extract the audio from the desired video file easily.
- If you prefer to edit your content on the go or your phone, this website can come in handy to directly upload any video and automatically extract the audio.
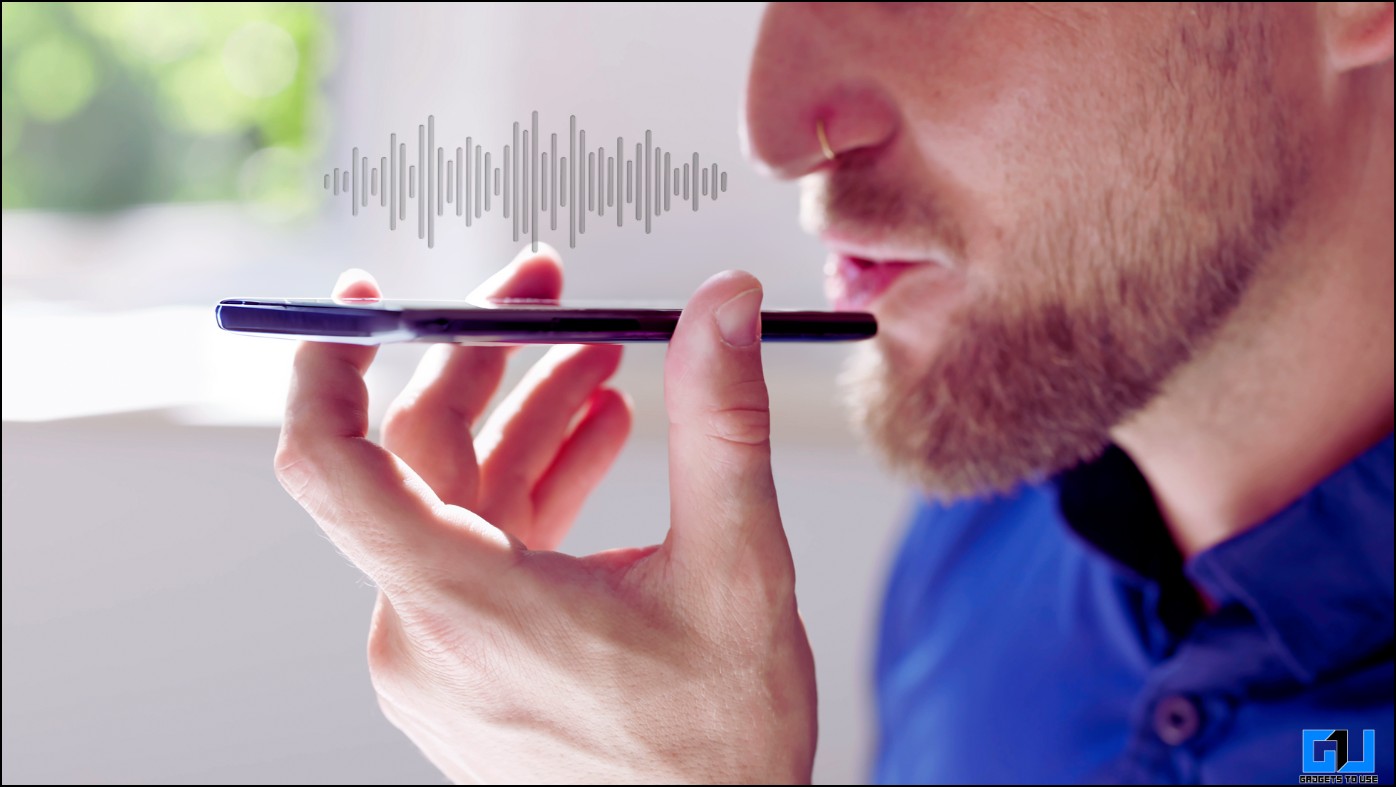
With an ever-growing number of creators, content must be leveled up in visuals and audio to stand out. A familiar problem creators face is that while recording outdoors or in a boisterous environment, the audio quality gets hampered as it captures disturbances. This read will help you remove noise using AI from the video you have recorded.
How to Enhance Speech Using Adobe AI?
To remedy this, Adobe’s podcast tool uses AI to help you clean the audio, making it sound like a studio recording. All this is free of cost!! Below, we have discussed the complete process to remove any unwanted noise from your video using Adobe Podcast:
Step 1 – Extract Audio From the Video File
Adobe Podcast filters only audio files, so you can’t upload your video file directly to the tool. Firstly, you must extract audio from the video file to make it compatible, and depending on your platform, this can be done for free using the software mentioned below.
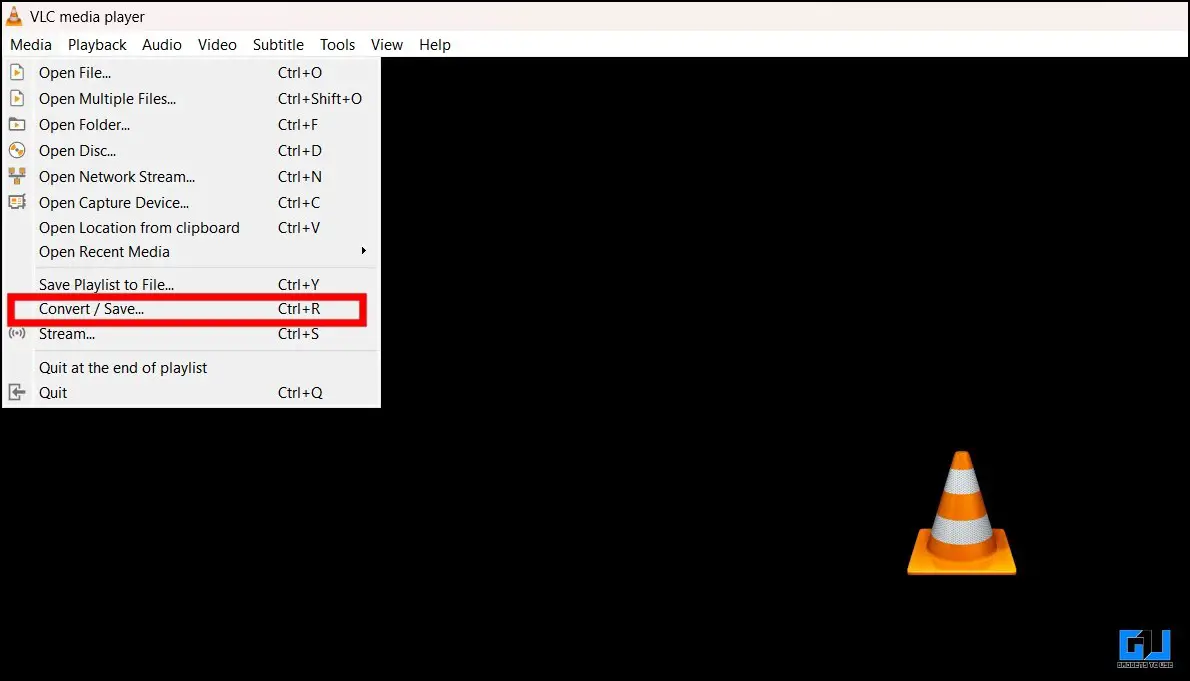
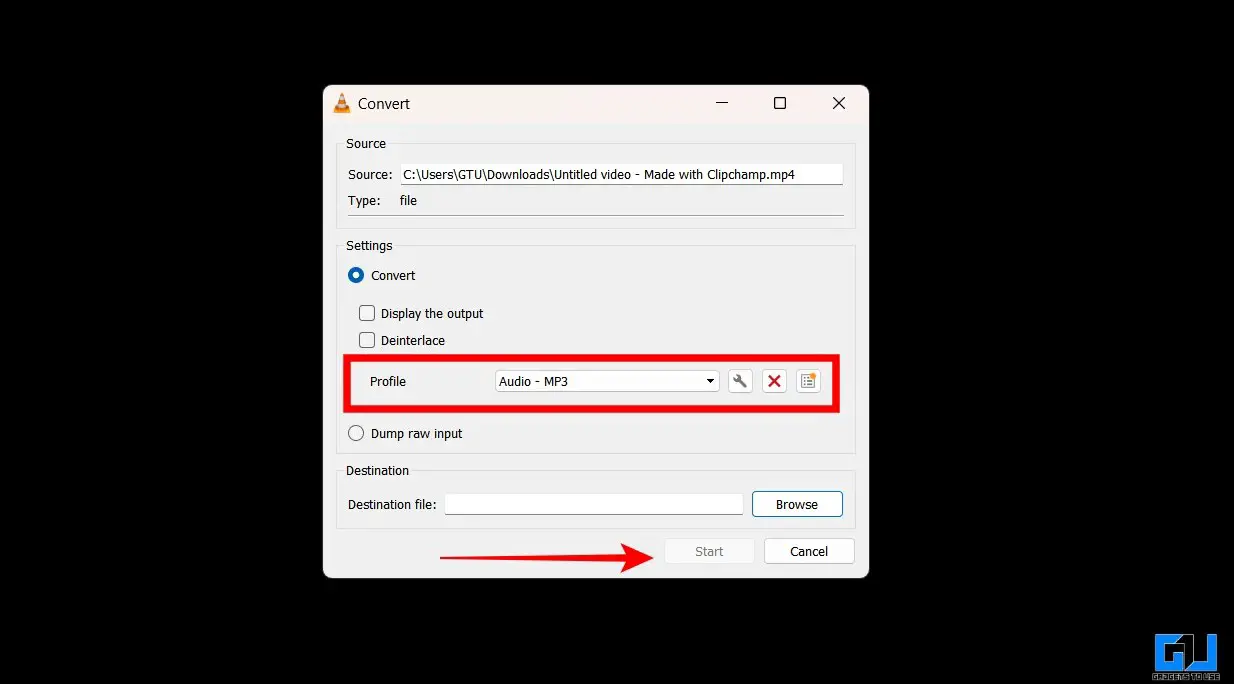
Method 1 – Using VLC Media Player
VLC is one of the most popular media players available on Windows and Mac, so irrespective of which platform you are on, you can use it to extract the audio from the desired video file easily. Follow these steps to do so:
1. Launch the VLC media player and click “Media.”

2. From the drop-down menu, click on “Convert/Save.”
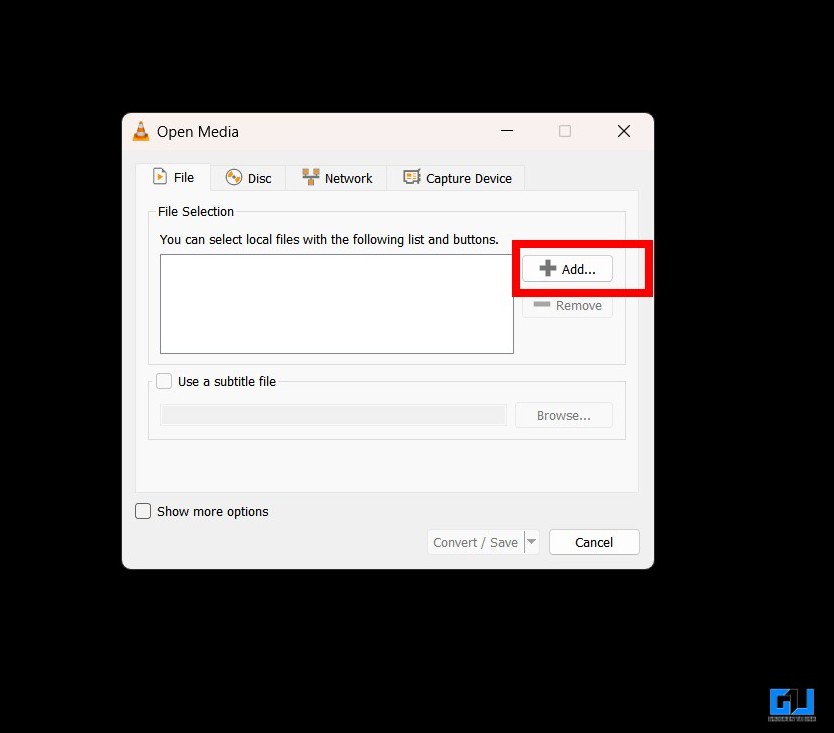
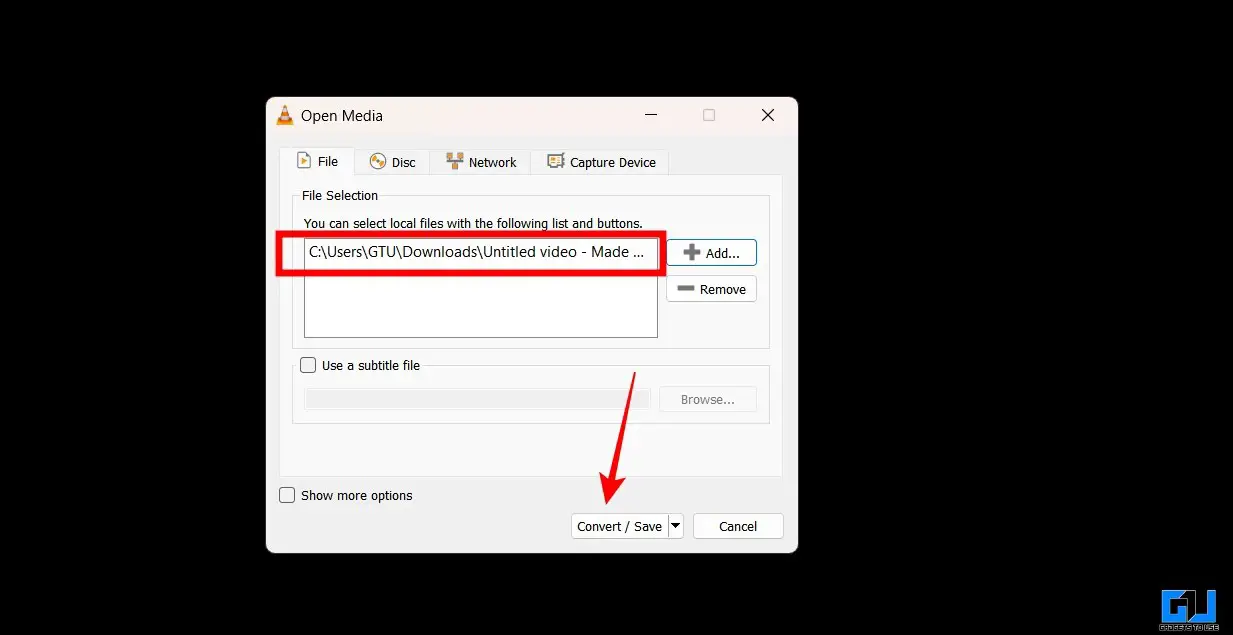
3. Click “Add” in the window that pops up, and select the video file from which you want to extract the audio.
4. Once you have selected the file, click “Covert/Save.”
5. Next, set the profile to “Mp3” and choose the destination where you want the file to be stored.
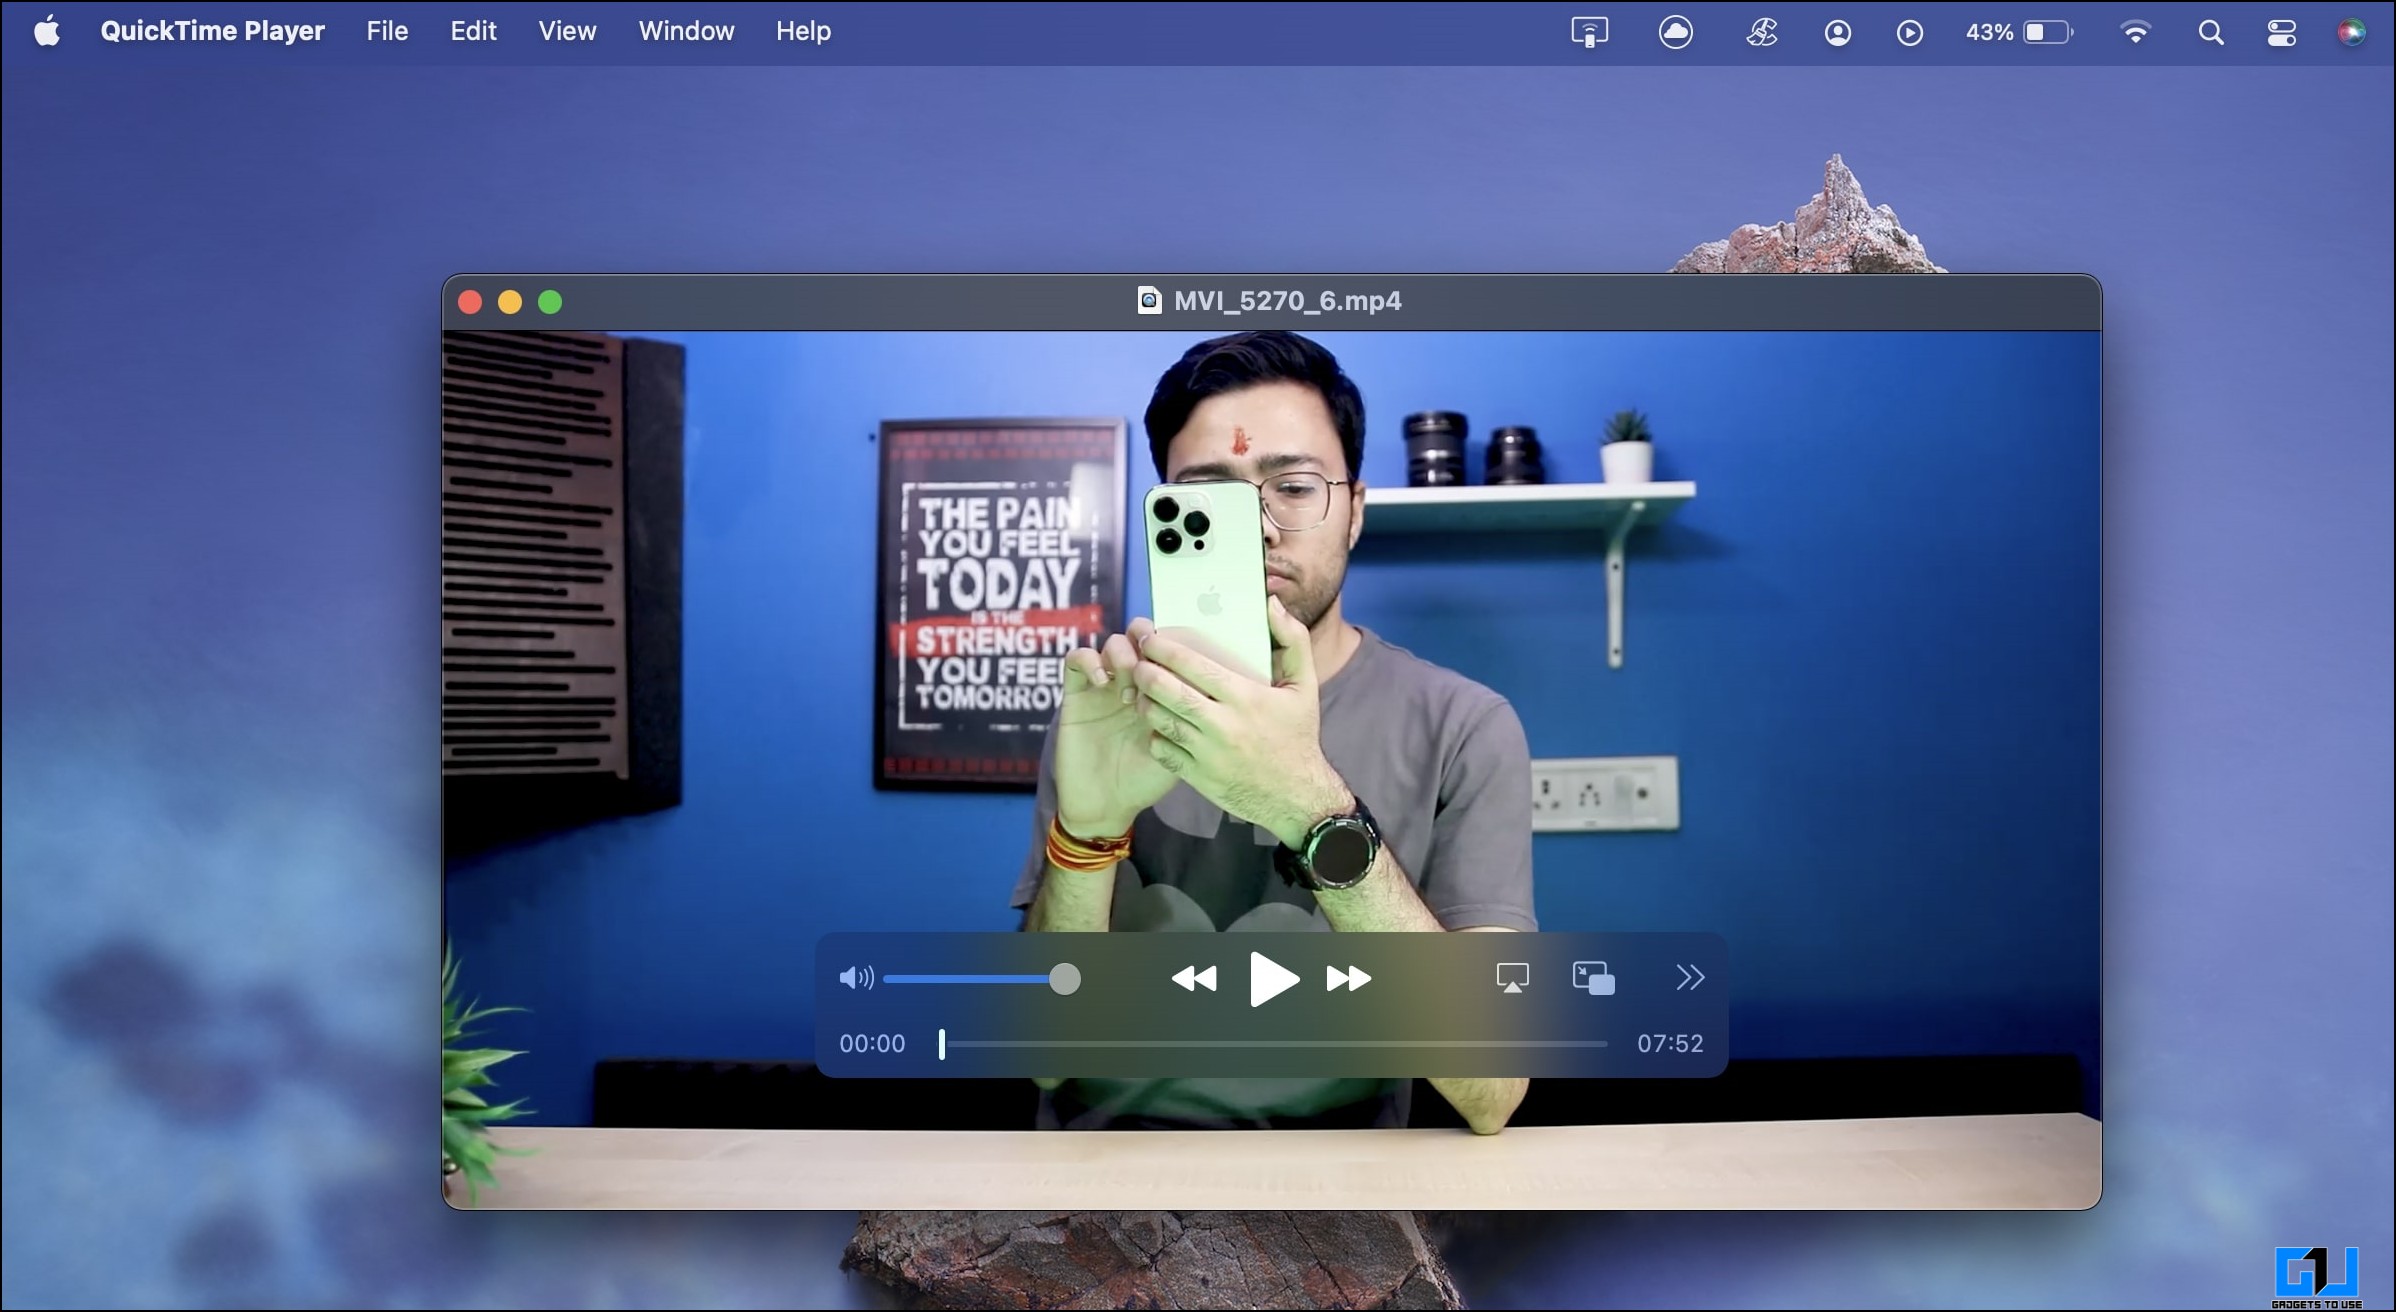
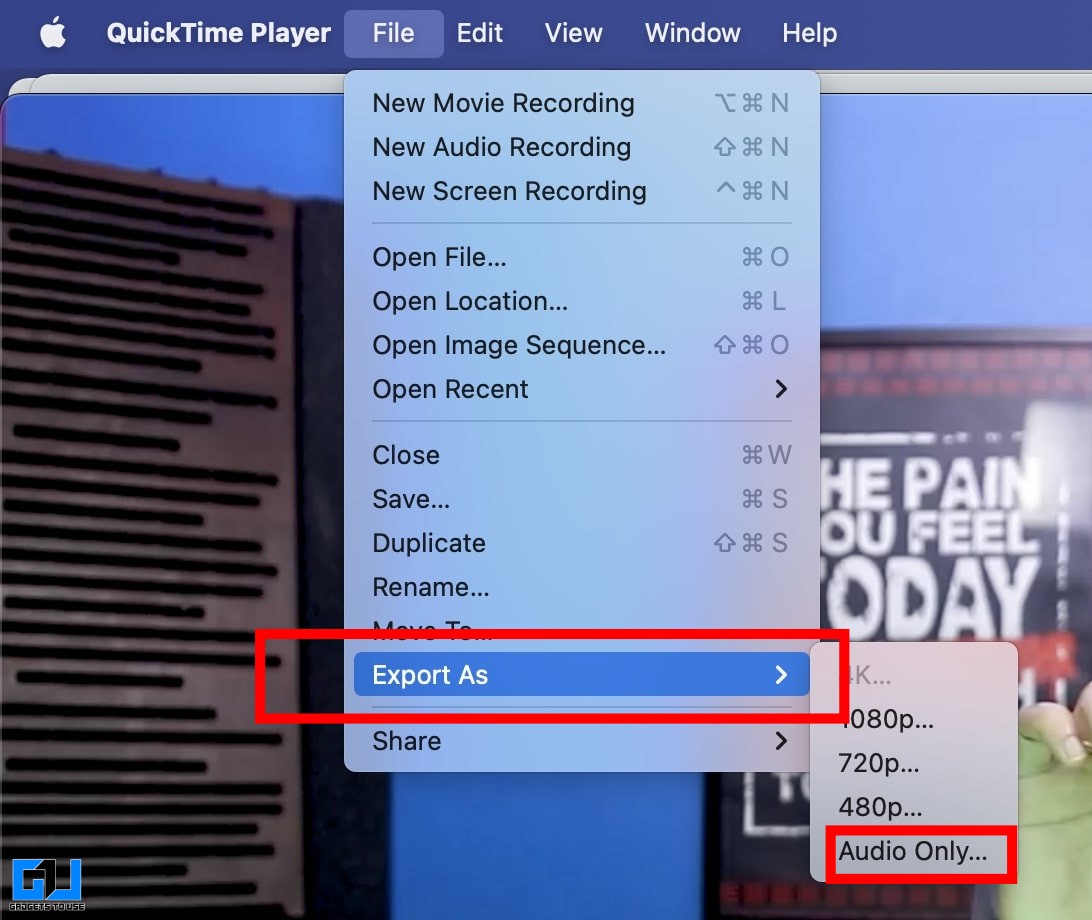
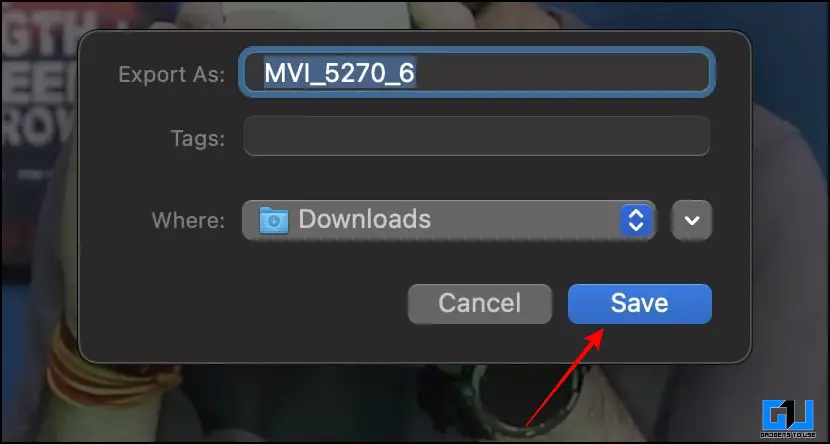
Method 2 – Using Quick Time Player (MacOS)
Mac users can also efficiently extract audio from video files using the built-in Quick Time Player; simply follow the steps below to do so on your Mac computer.
1. Open the media you want to convert in the Quick Time Player.
2. Go to “File” and select “Export as” as “Audio only.”
3. A new window will open up, where you can rename the file and choose the audio file’s save location.
Method 3 – On Smartphone
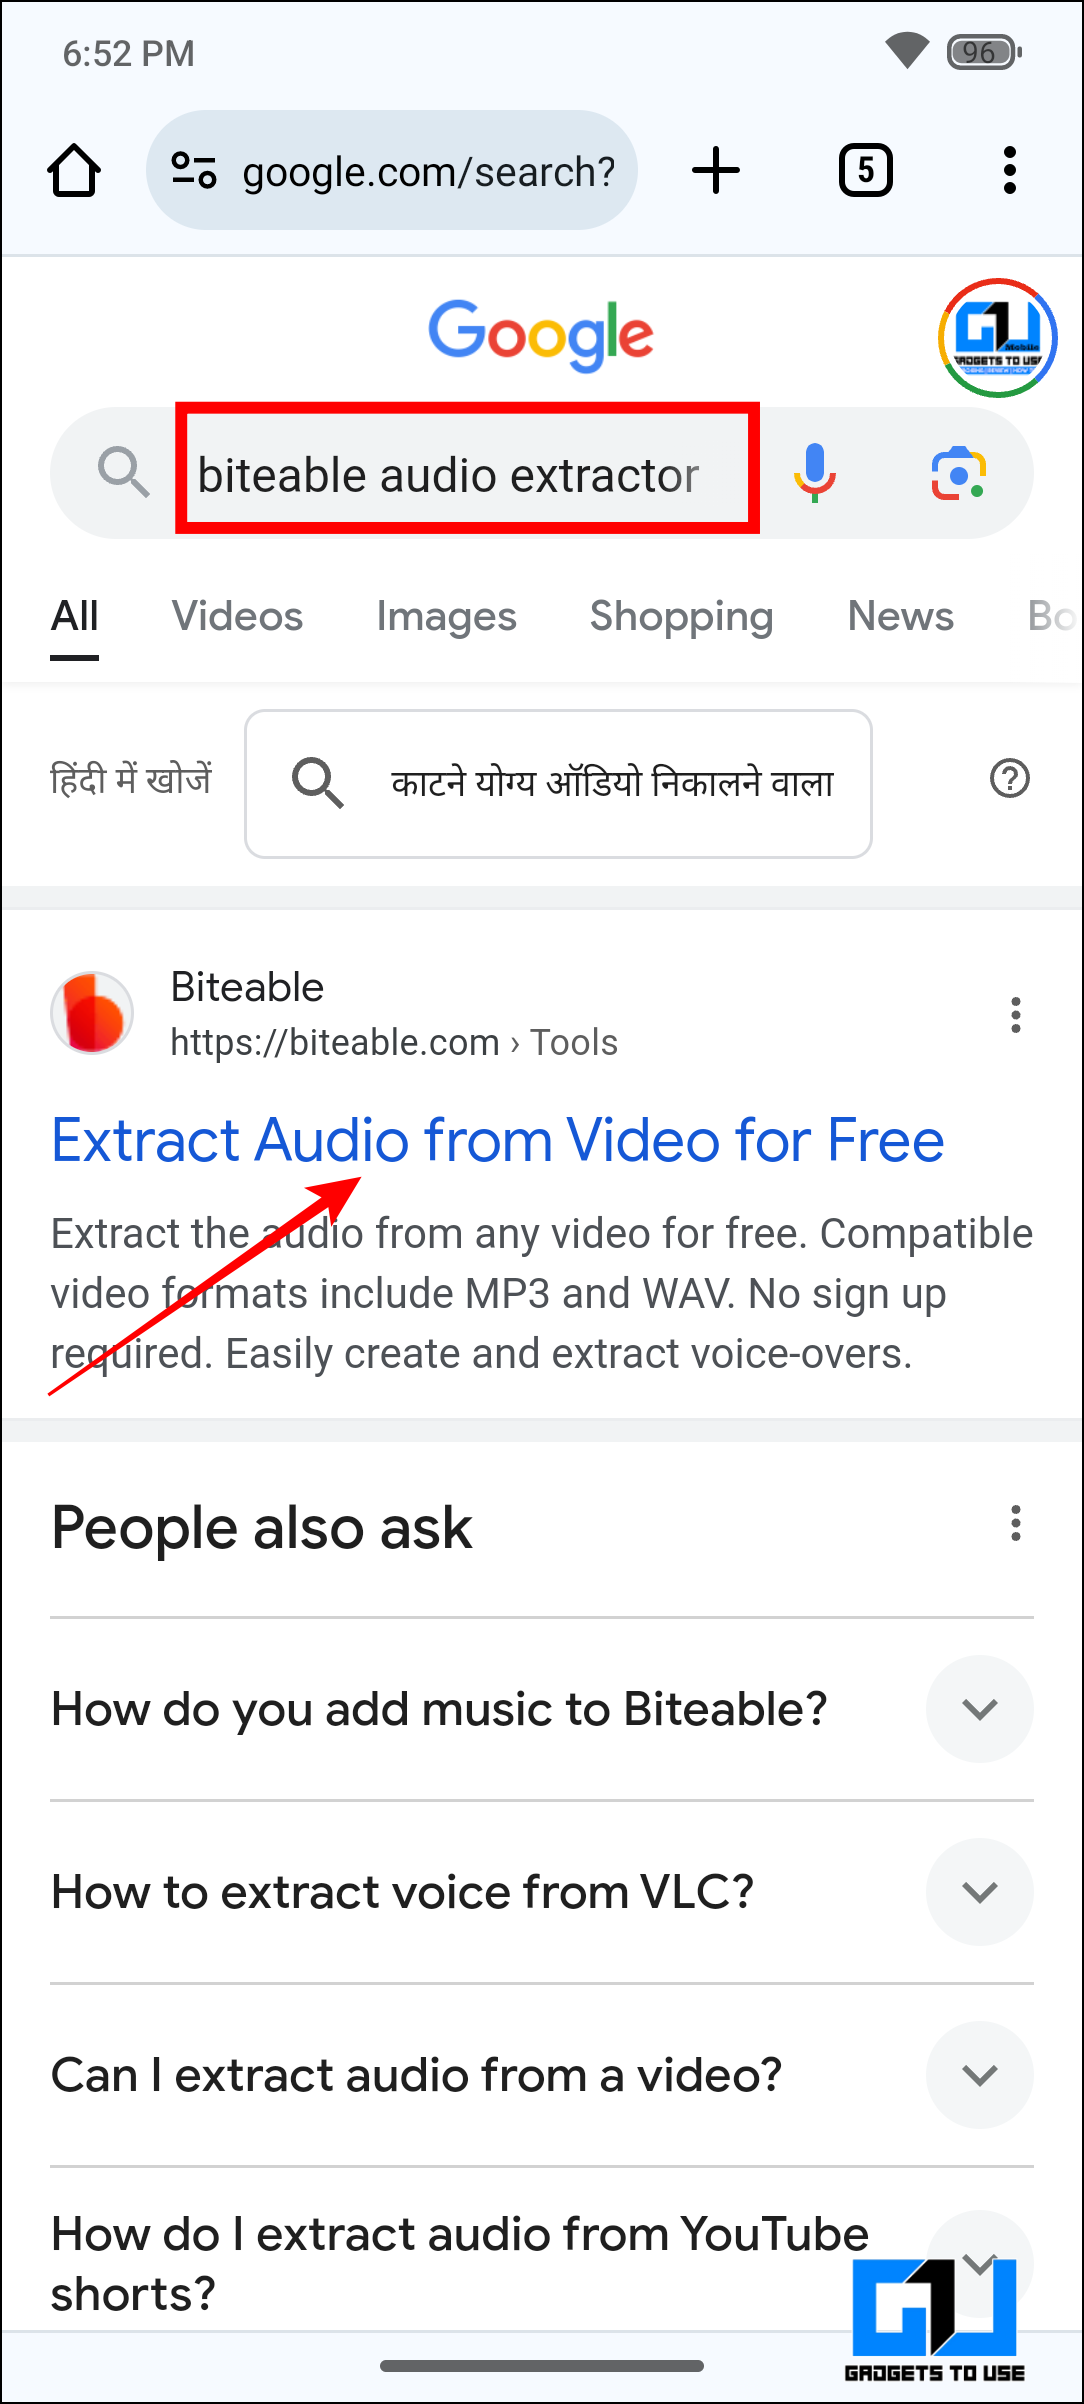
If you prefer to edit your content on the go or your phone, this website can come in handy to directly upload any video and automatically extract the audio. Follow the steps mentioned below to do so:
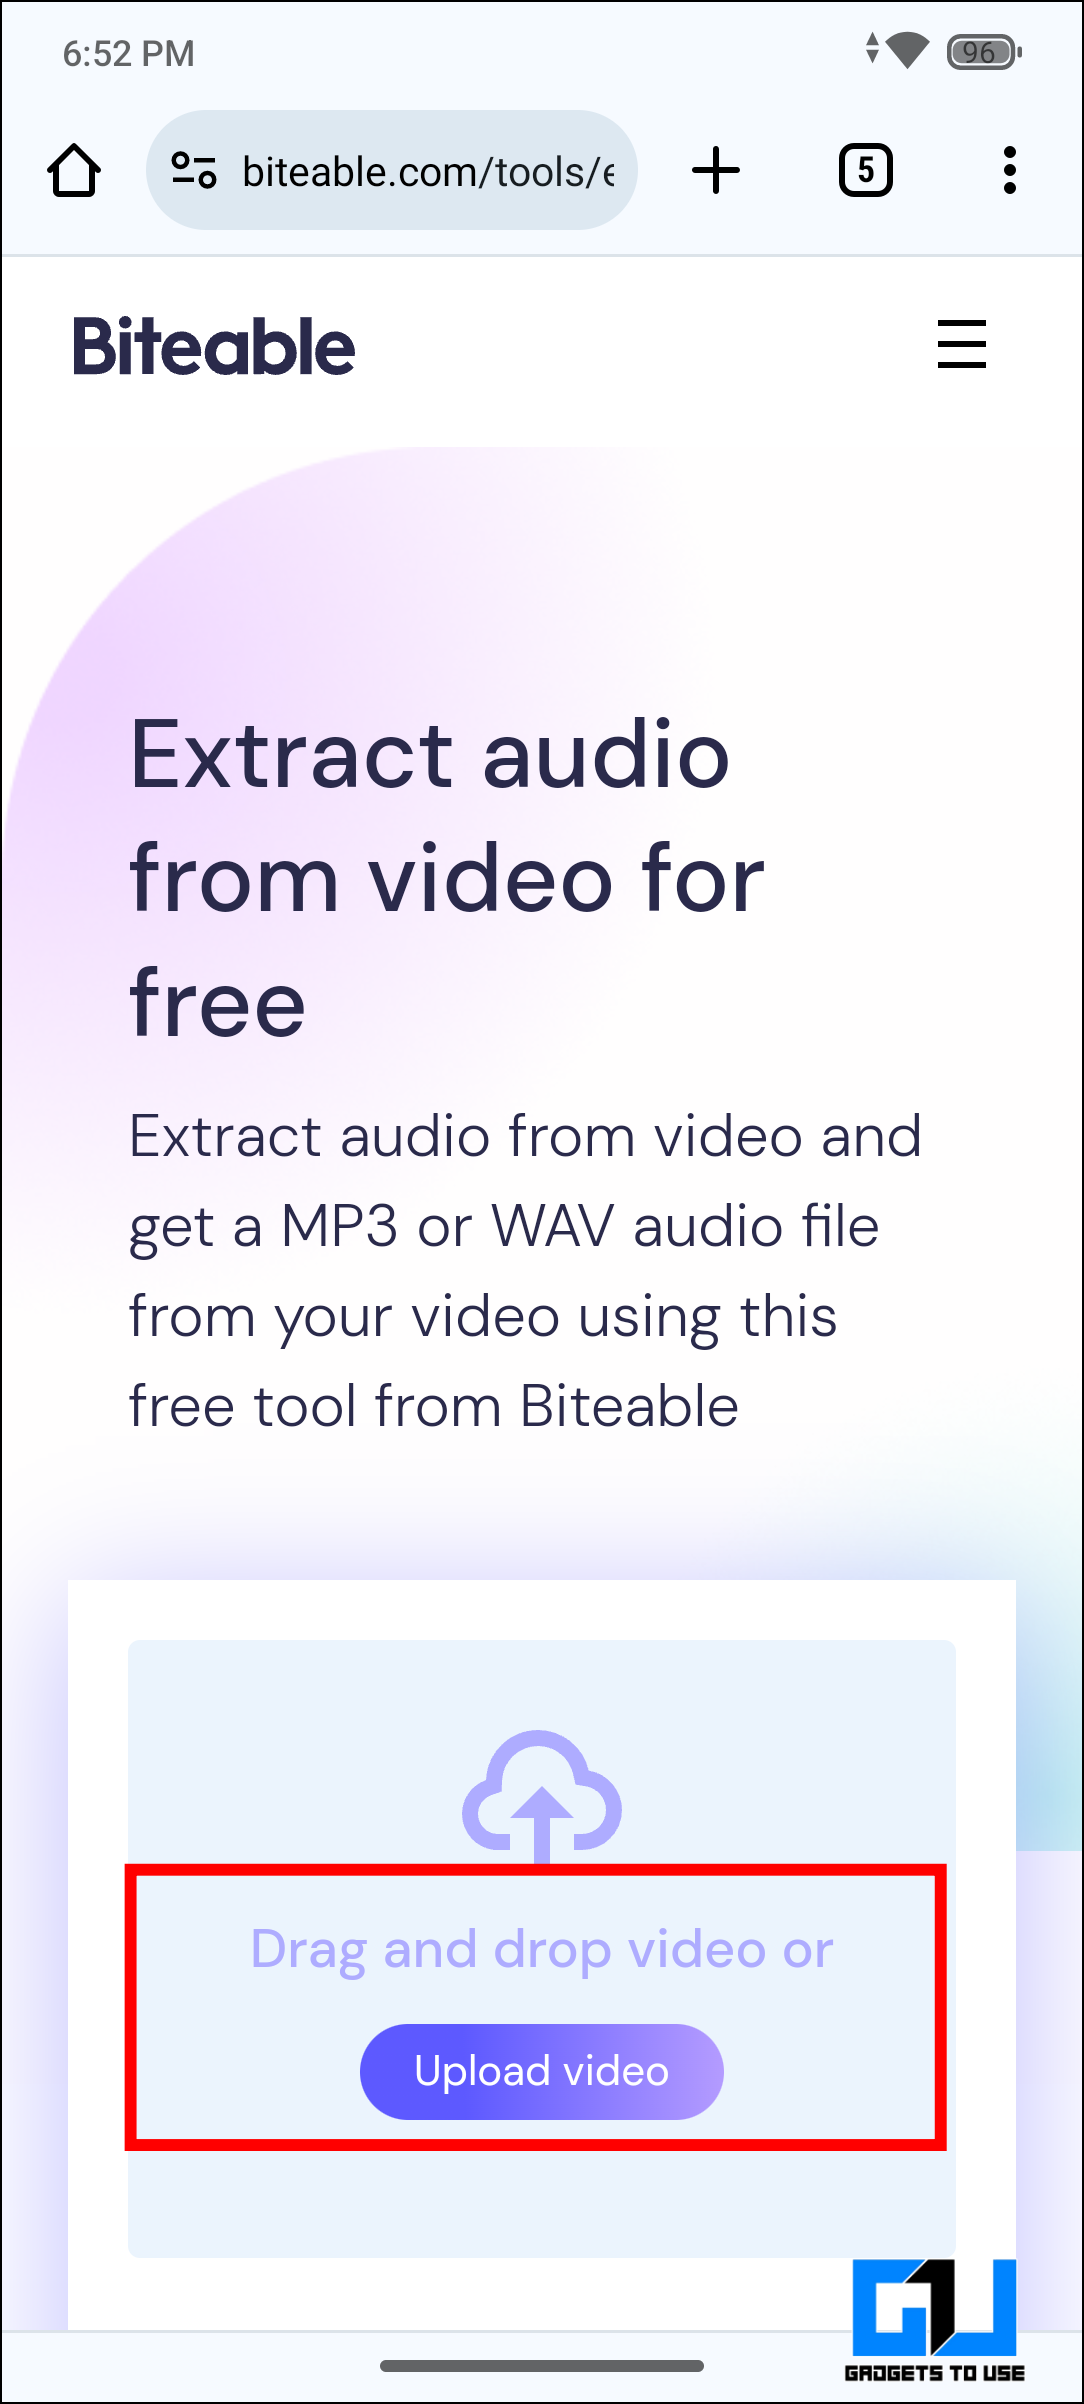
1. Visit the Biteable Audio Extractor website on a web browser.
2. Once on the homepage, click the “Upload Video” option and choose the video file.
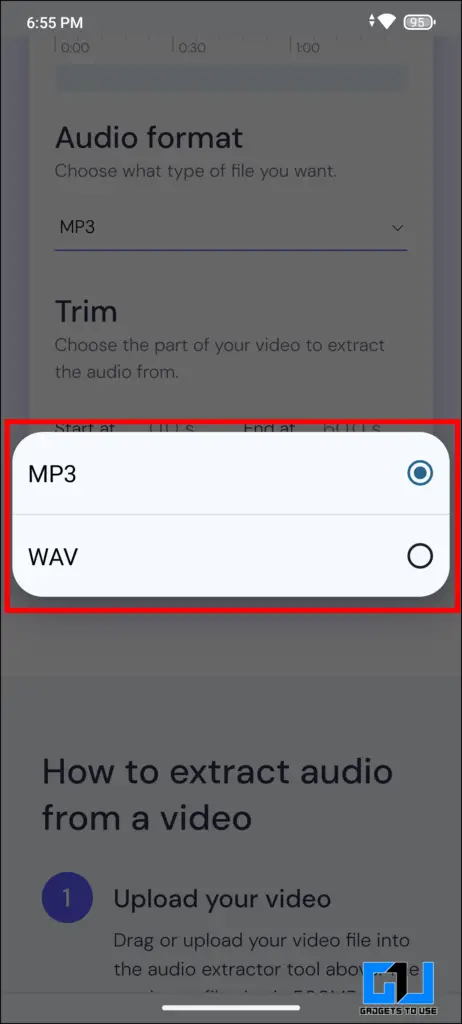
3. You can have the audio extracted in MP3 or WAV format and can also choose the audio duration.

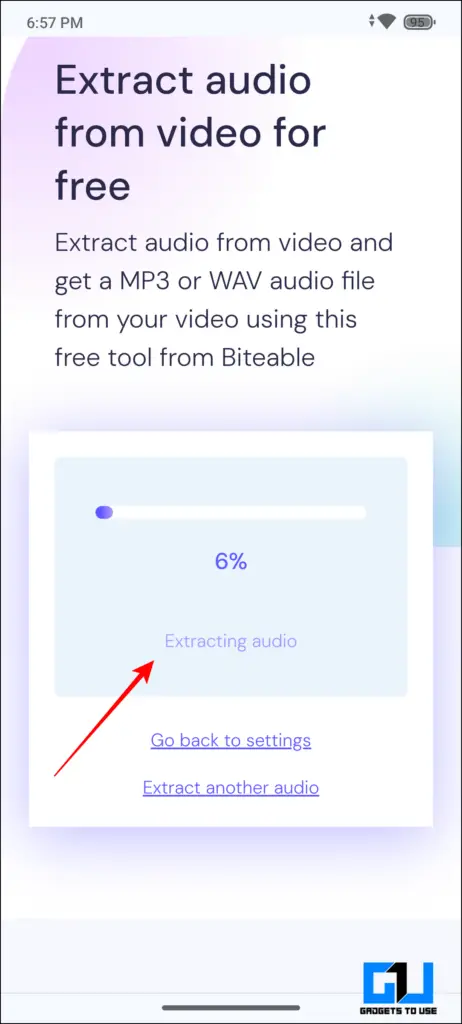
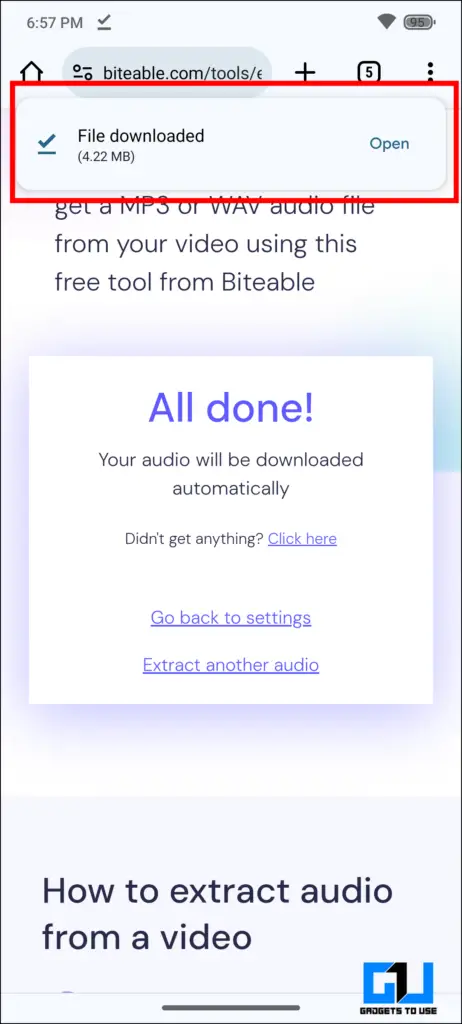
4. Once you have uploaded the file, wait for it to process. Then, it will be downloaded.
Step 2 – Enhance the Audio Using Adobe Podcast
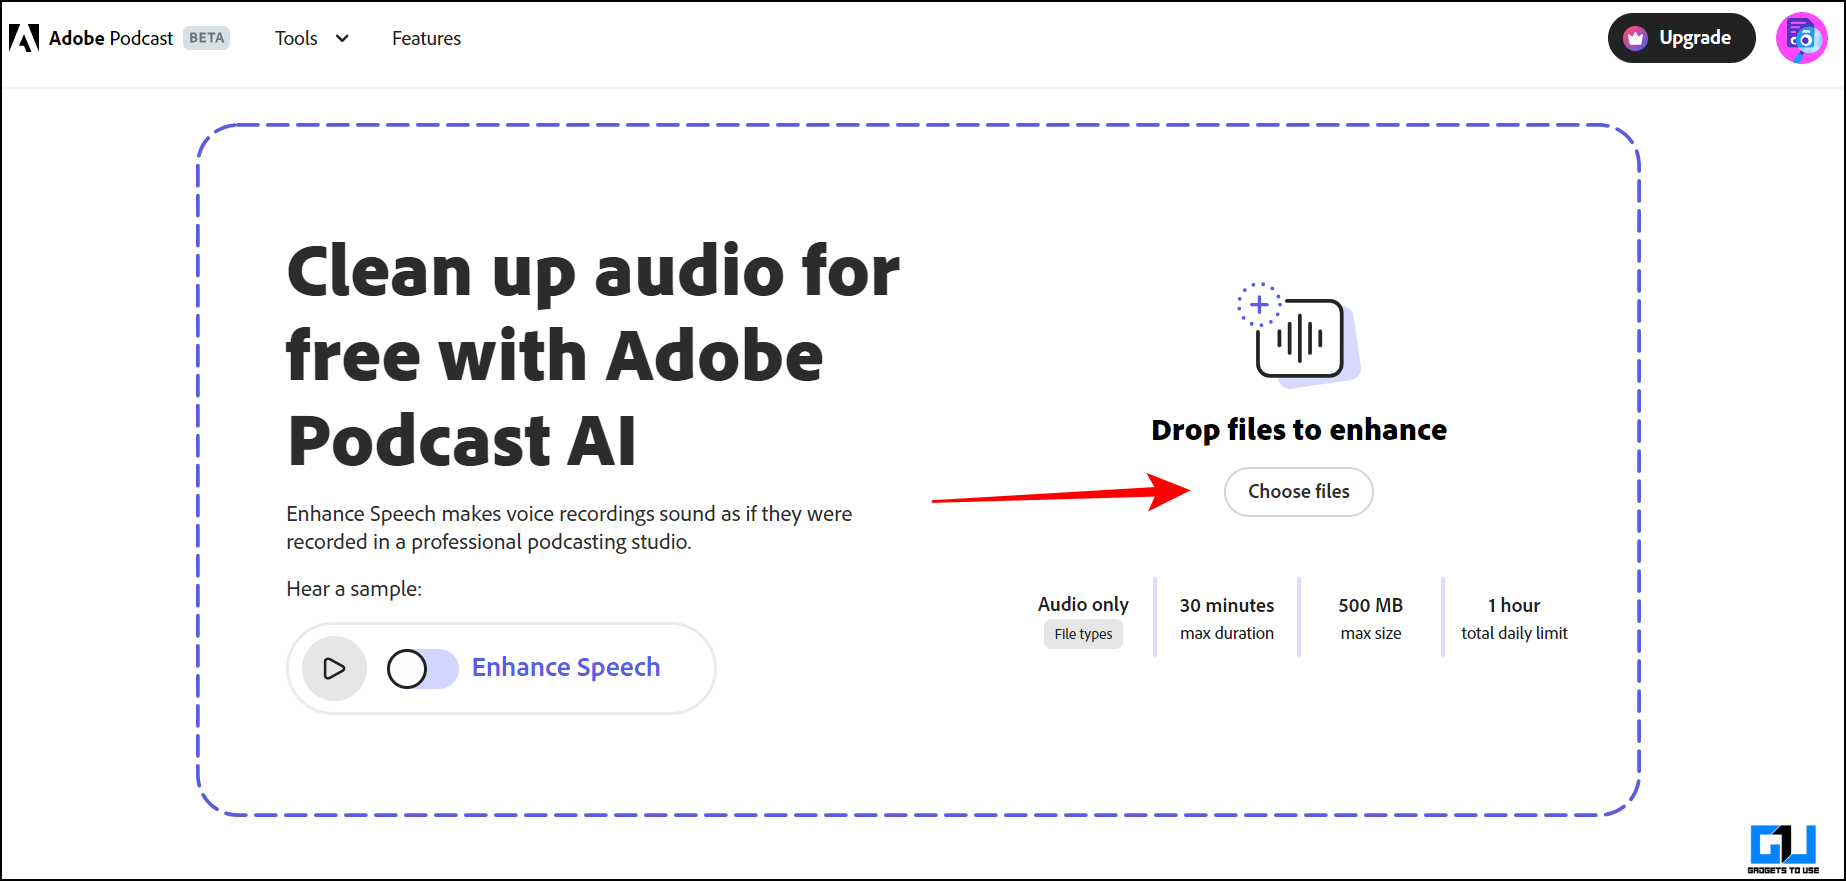
Once you have extracted the audio using the above methods, you can upload the audio file to the Adobe Podcast website to remove any unwanted noise, as follows.
1. Go to the Adobe Podcast website on a web browser.
2. Upload the audio file you want cleaned; the audio sample can be up to thirty minutes long.
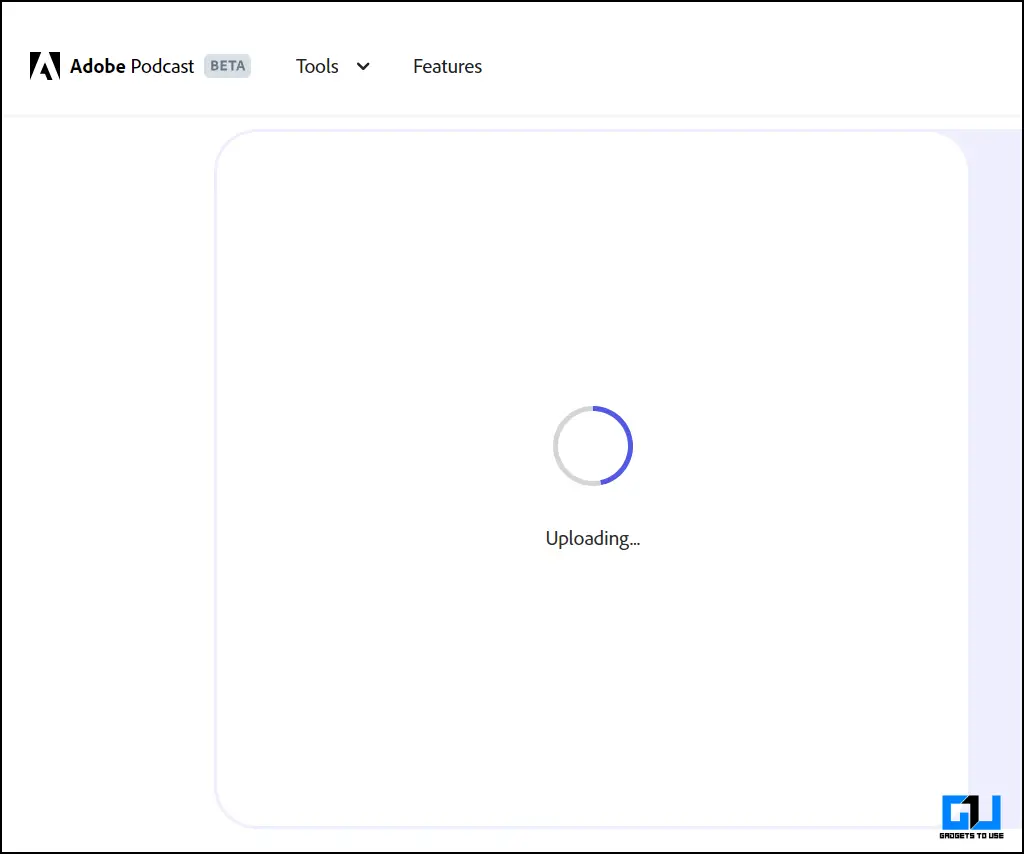
3. Once the audio is uploaded, wait for it to do magic and clean your audio file.
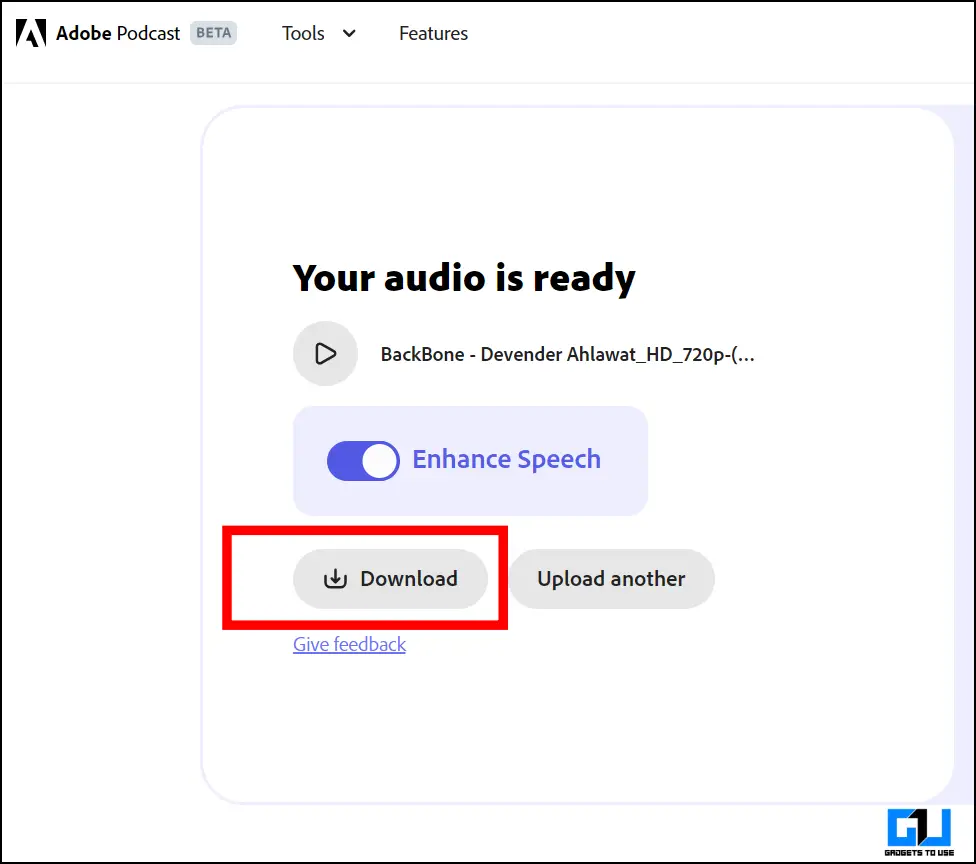
4. Once completed you can “Download” the file to the local storage.
Step 3 – Merge the Cleansed Audio
Once we have the enhanced audio, the final step is to merge the audio file back with the video file. Let’s discuss how to do this on Windows, Mac, and mobile.
Method 1 – Using Clipchamp Editor
We will use Clipchamp on Windows, which integrates well with the default Windows Media Player.
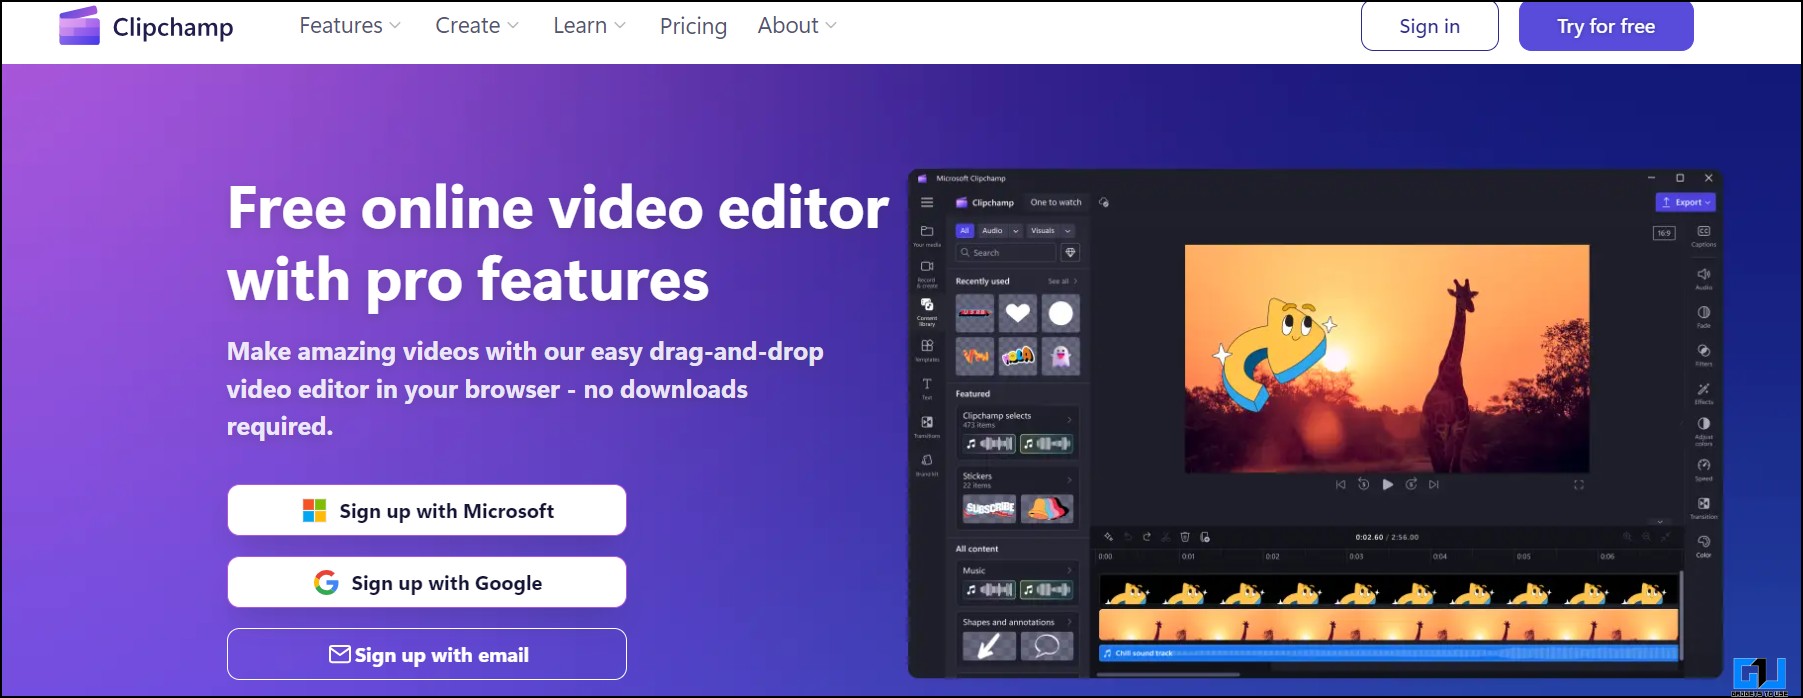
1. Go to the Clipchamp online video editor on a web browser.
2. Sign up using your Microsoft or Google account or email.
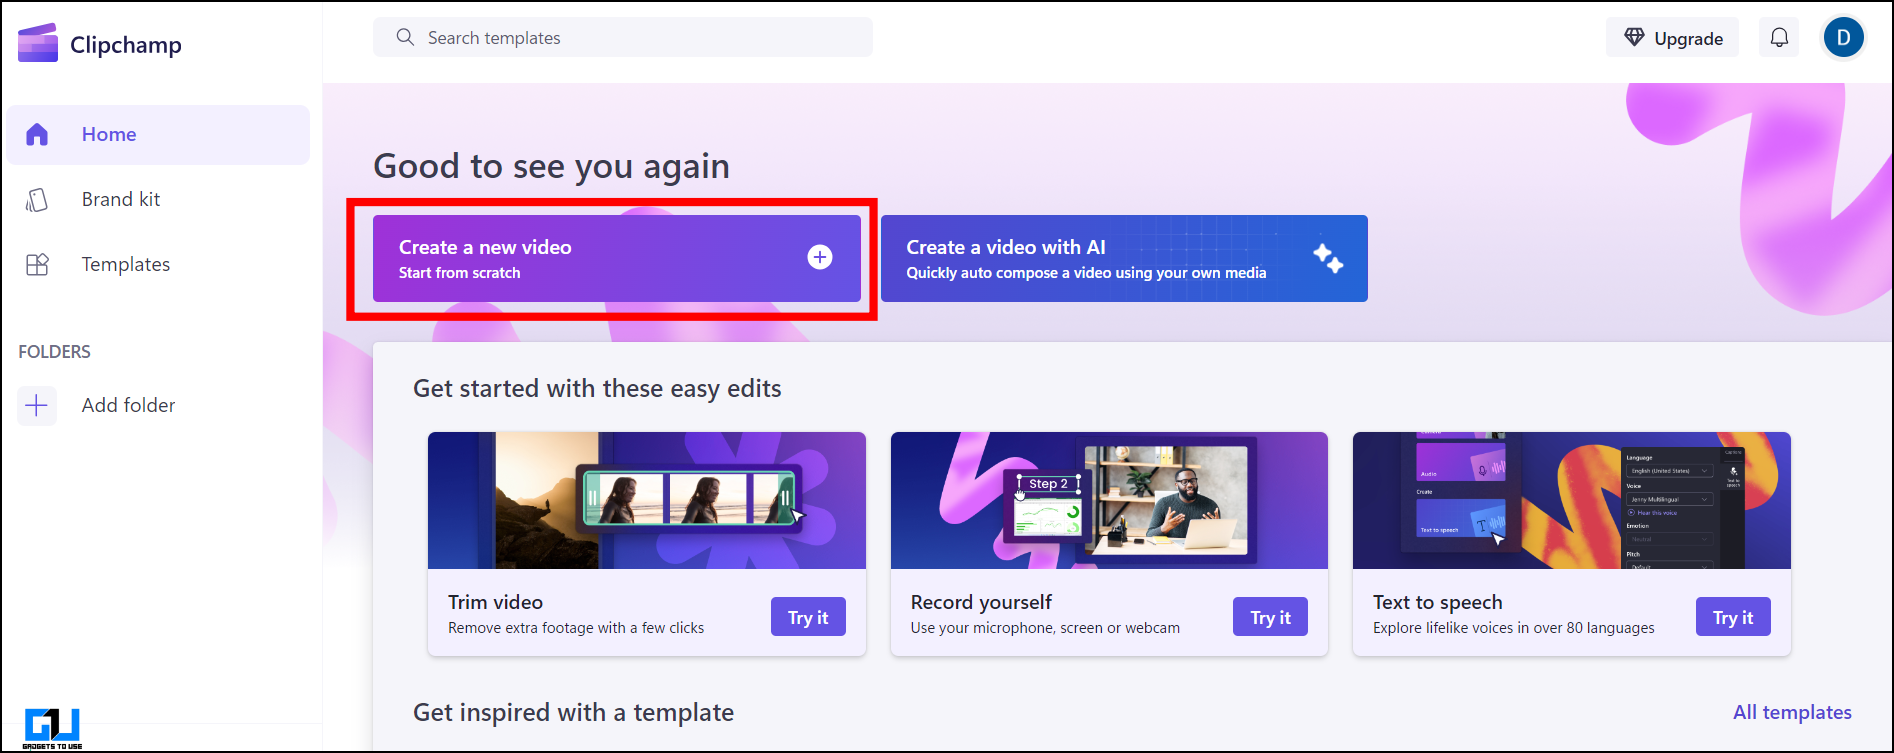
3. Click on “Create a new video.”
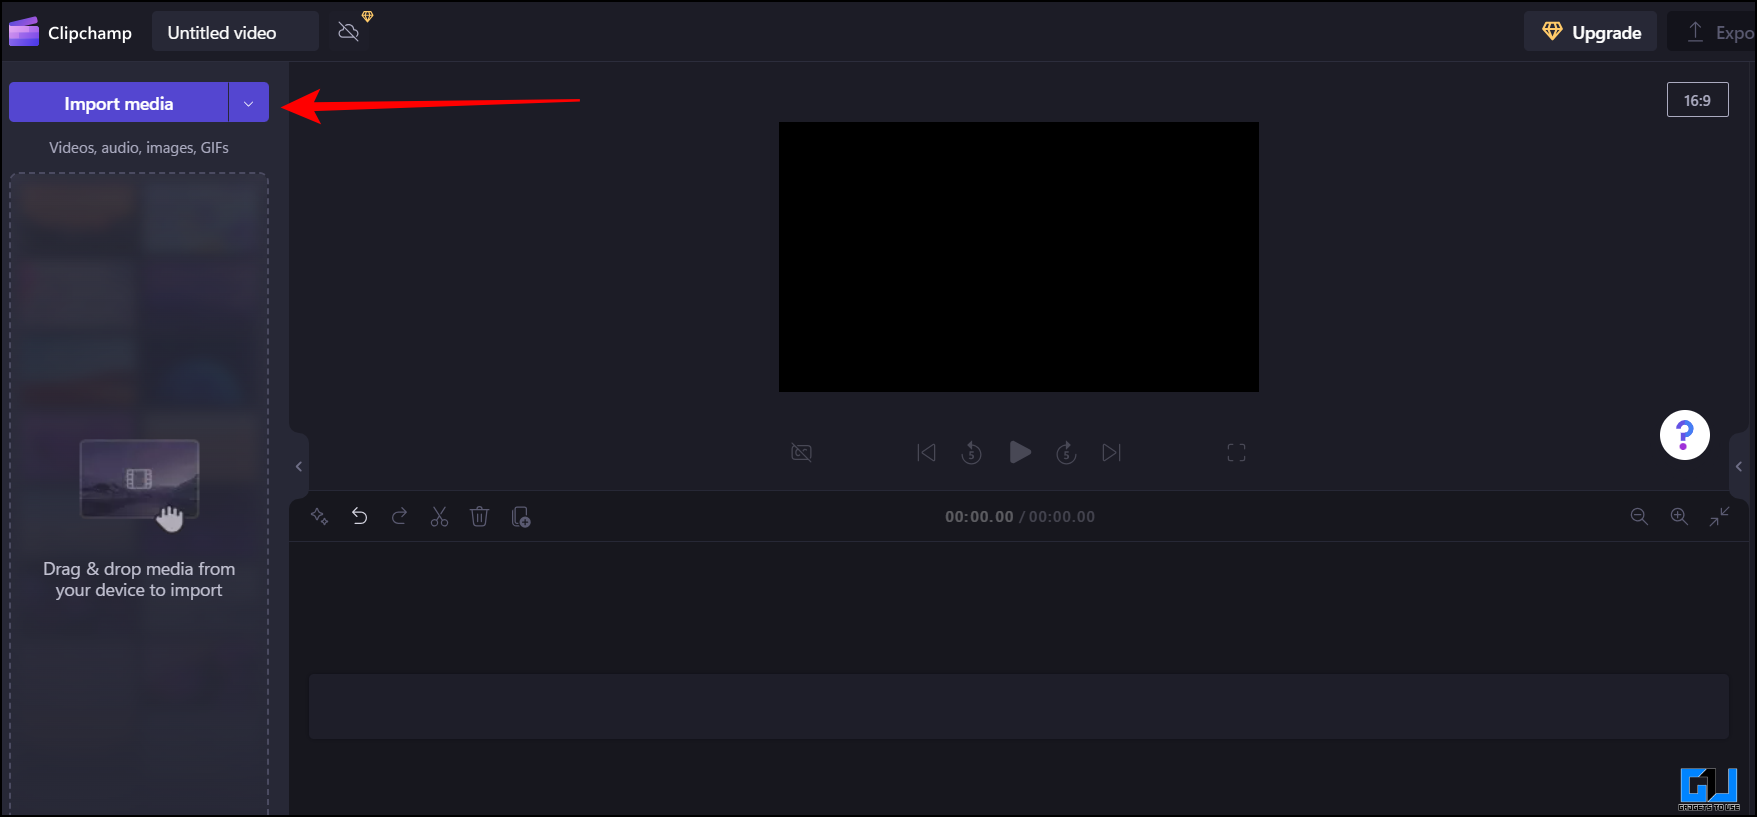
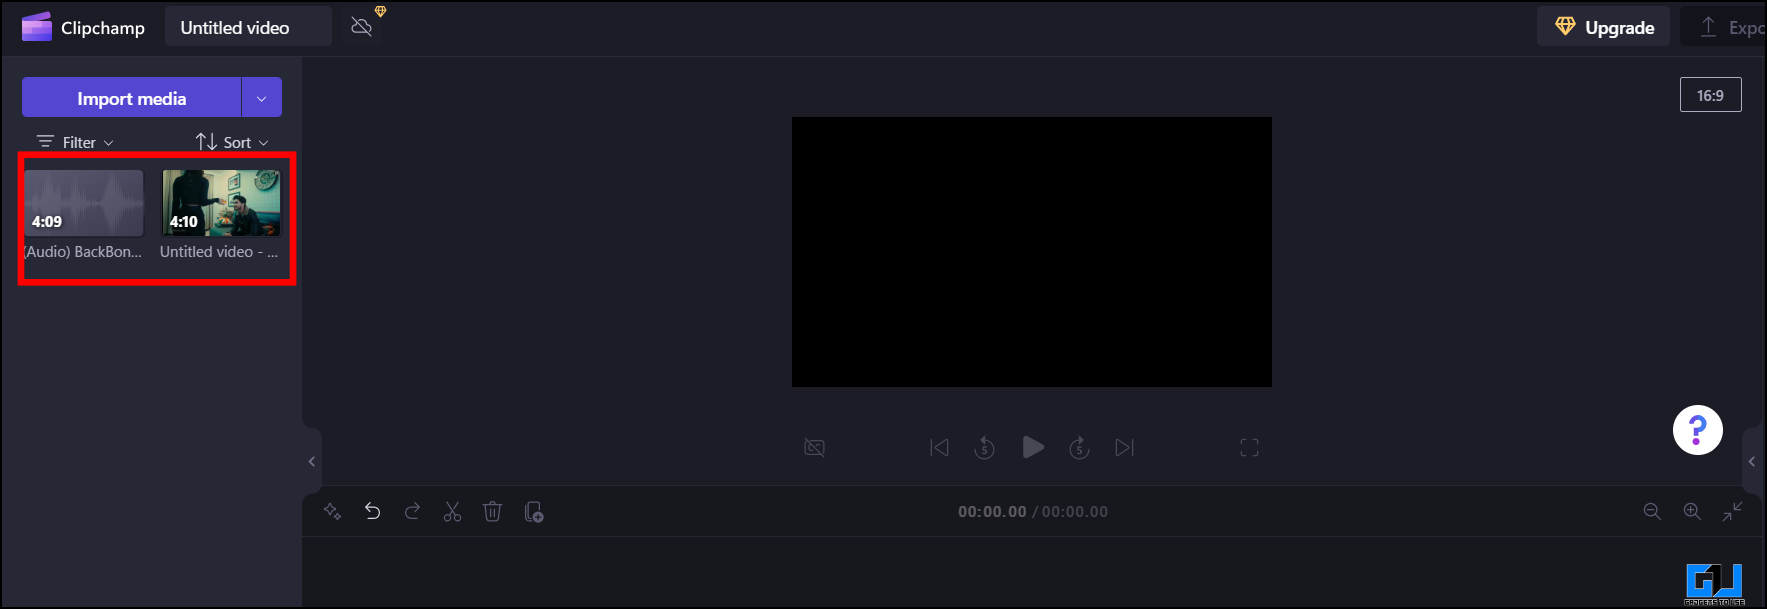
4. In the newly created project, click “Import media” and select your audio and video files.
5. Drag the video file to the timeline.
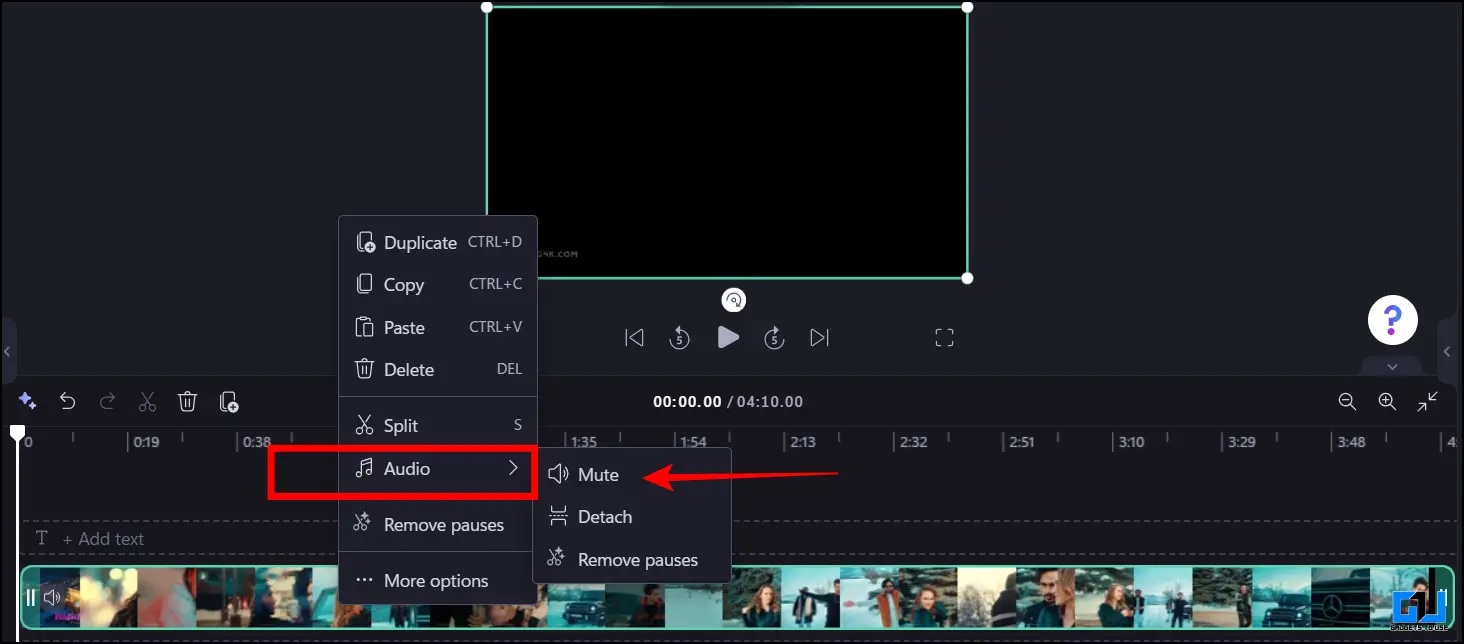
6. Right-click the video file and select “Mute” under “Audio” properties to remove the clip’s original audio.
7. Now, add the “Enhanced audio” to the timeline and overlap over the video’s original sound.

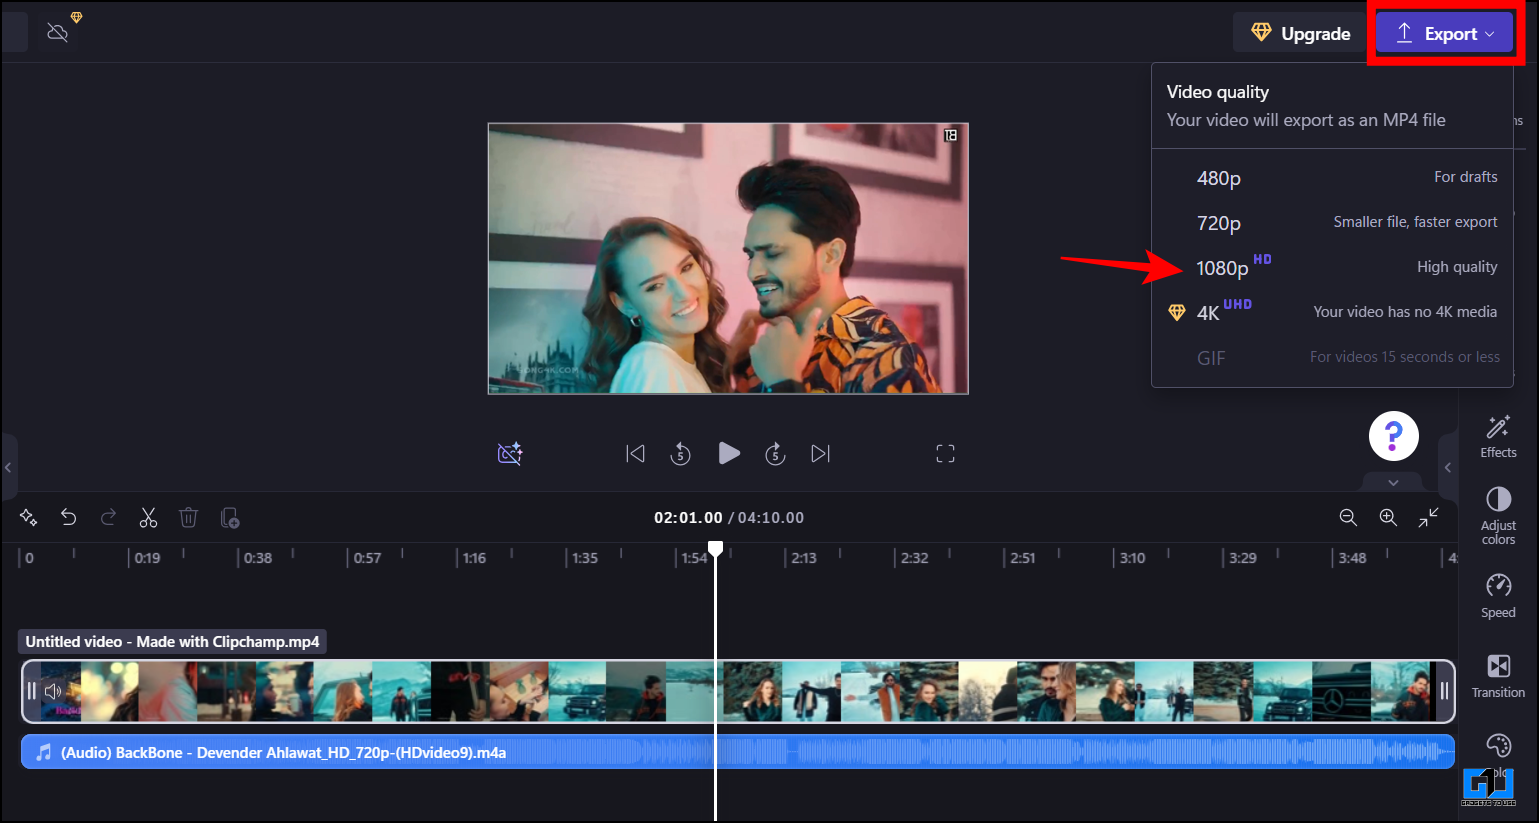
8. Finally, click “Export” and save the file to your desired quality.
Method 2 – Merge Audio Using iMovie Editor
On Mac, use the iMovie editor, which comes for free, to merge the cleansed audio file with the video. Follow these steps to do so:
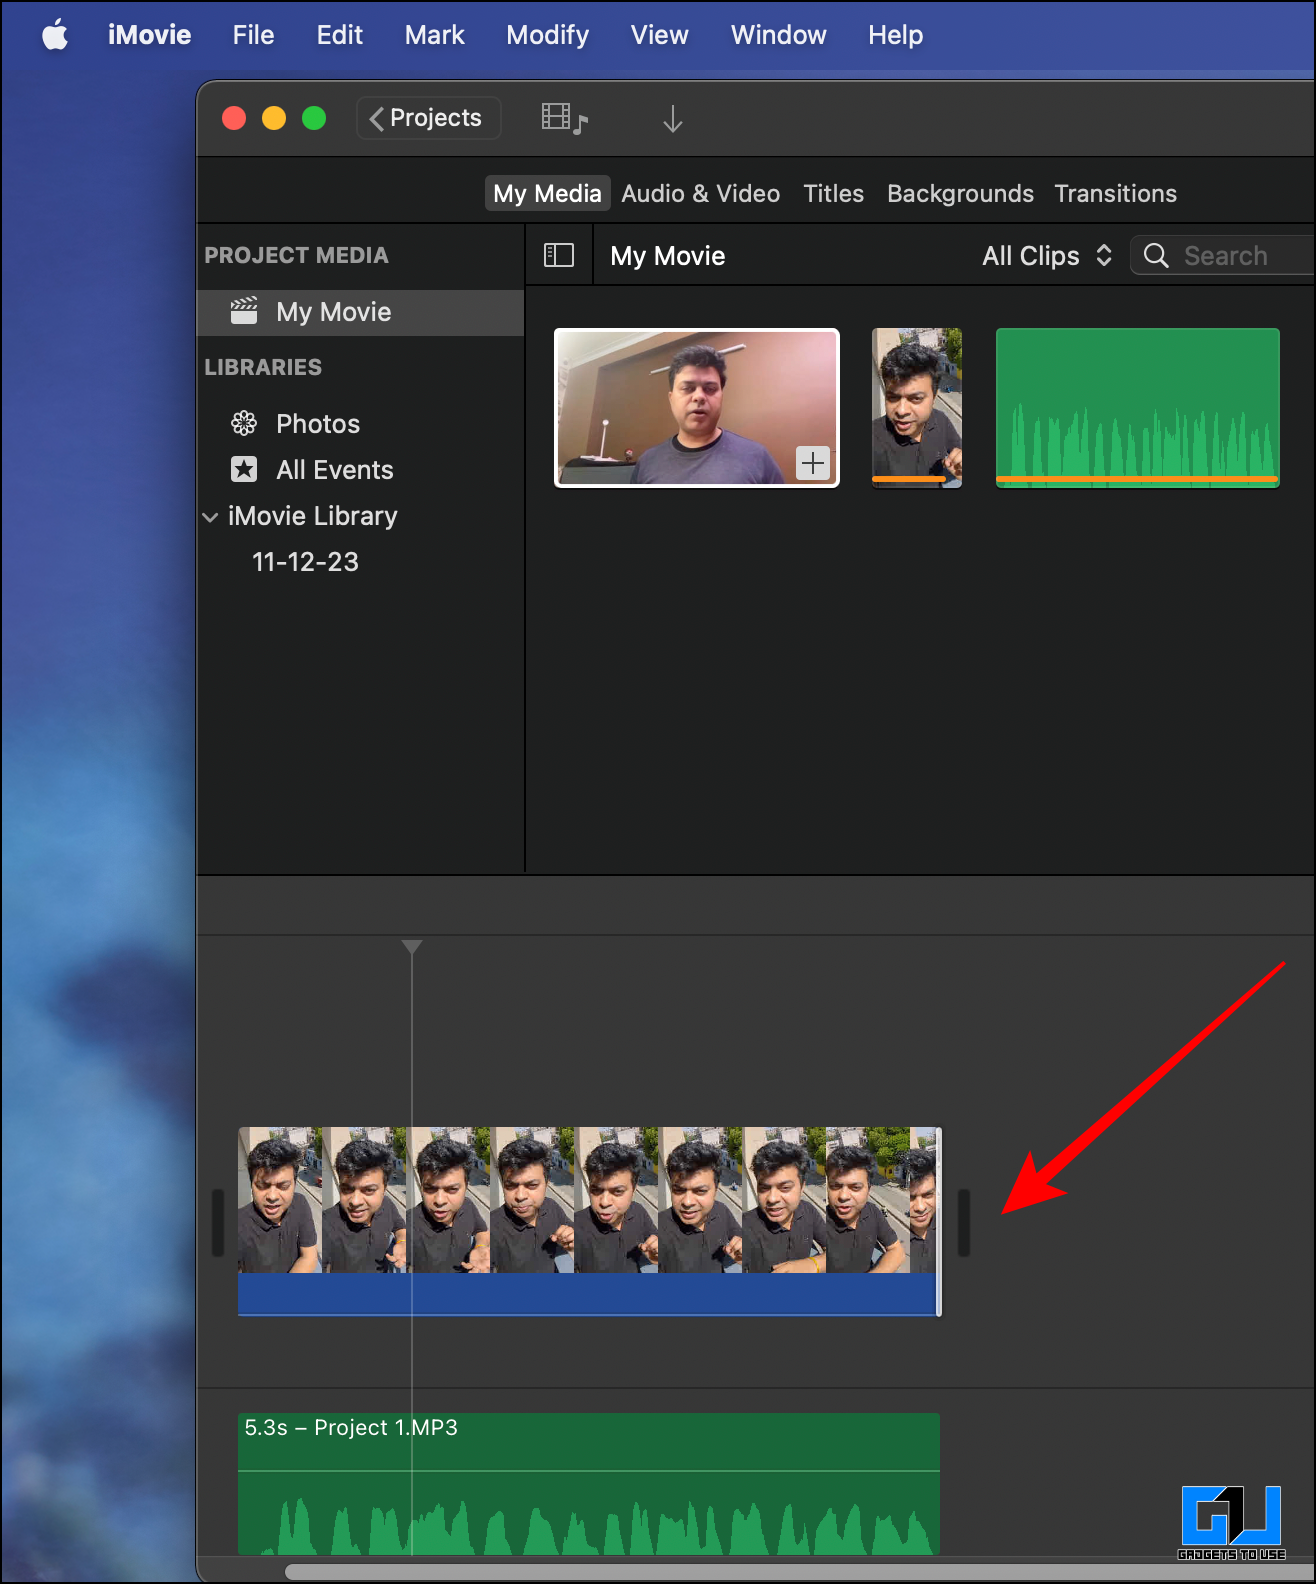
1. Import both the video and enhanced audio file to the Editor.
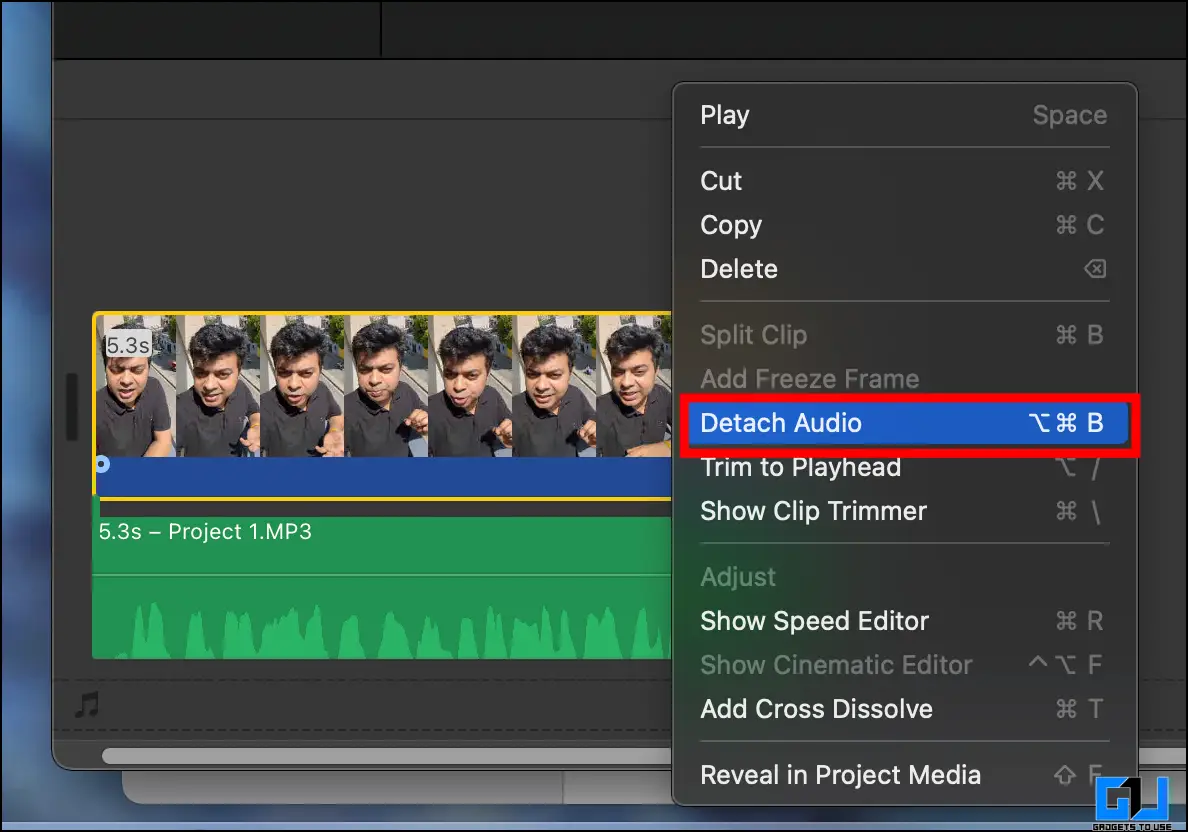
2. Now, right-click the video on the timeline select “Detach Audio” to remove the original audio from the video, and “Delete” it.
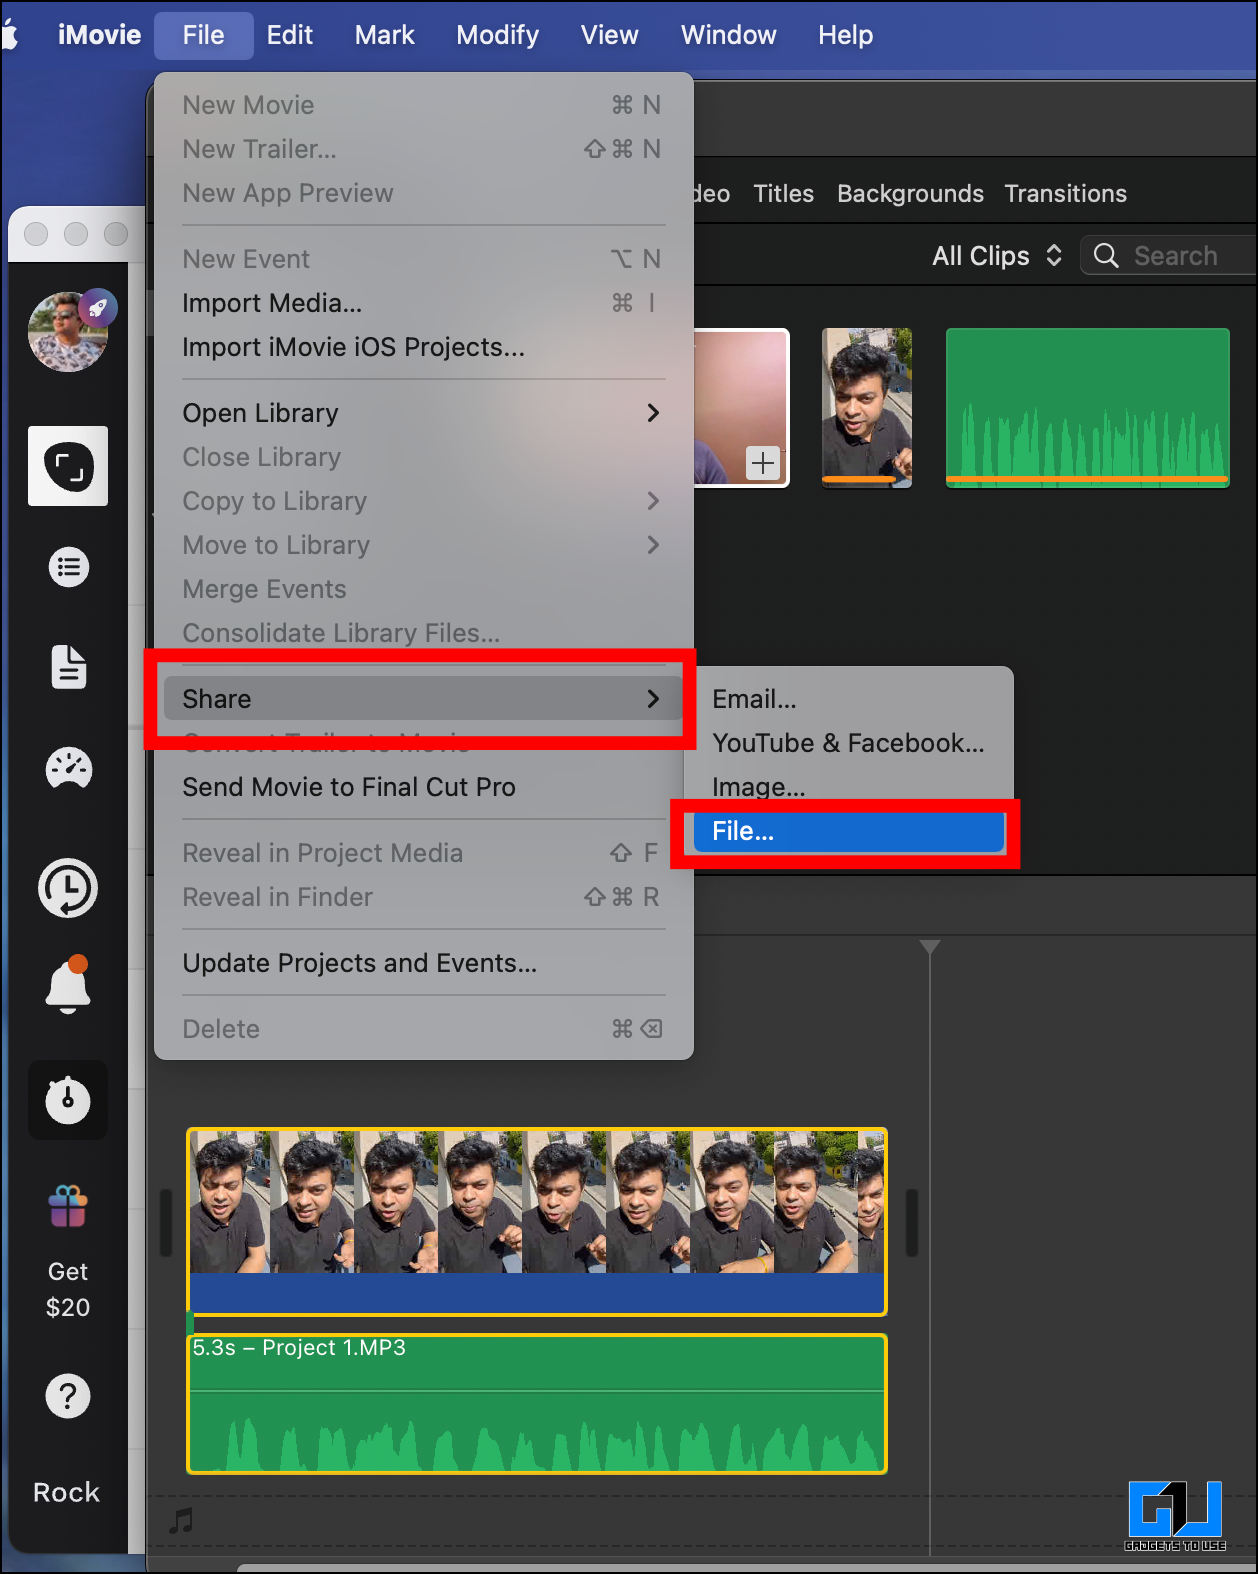
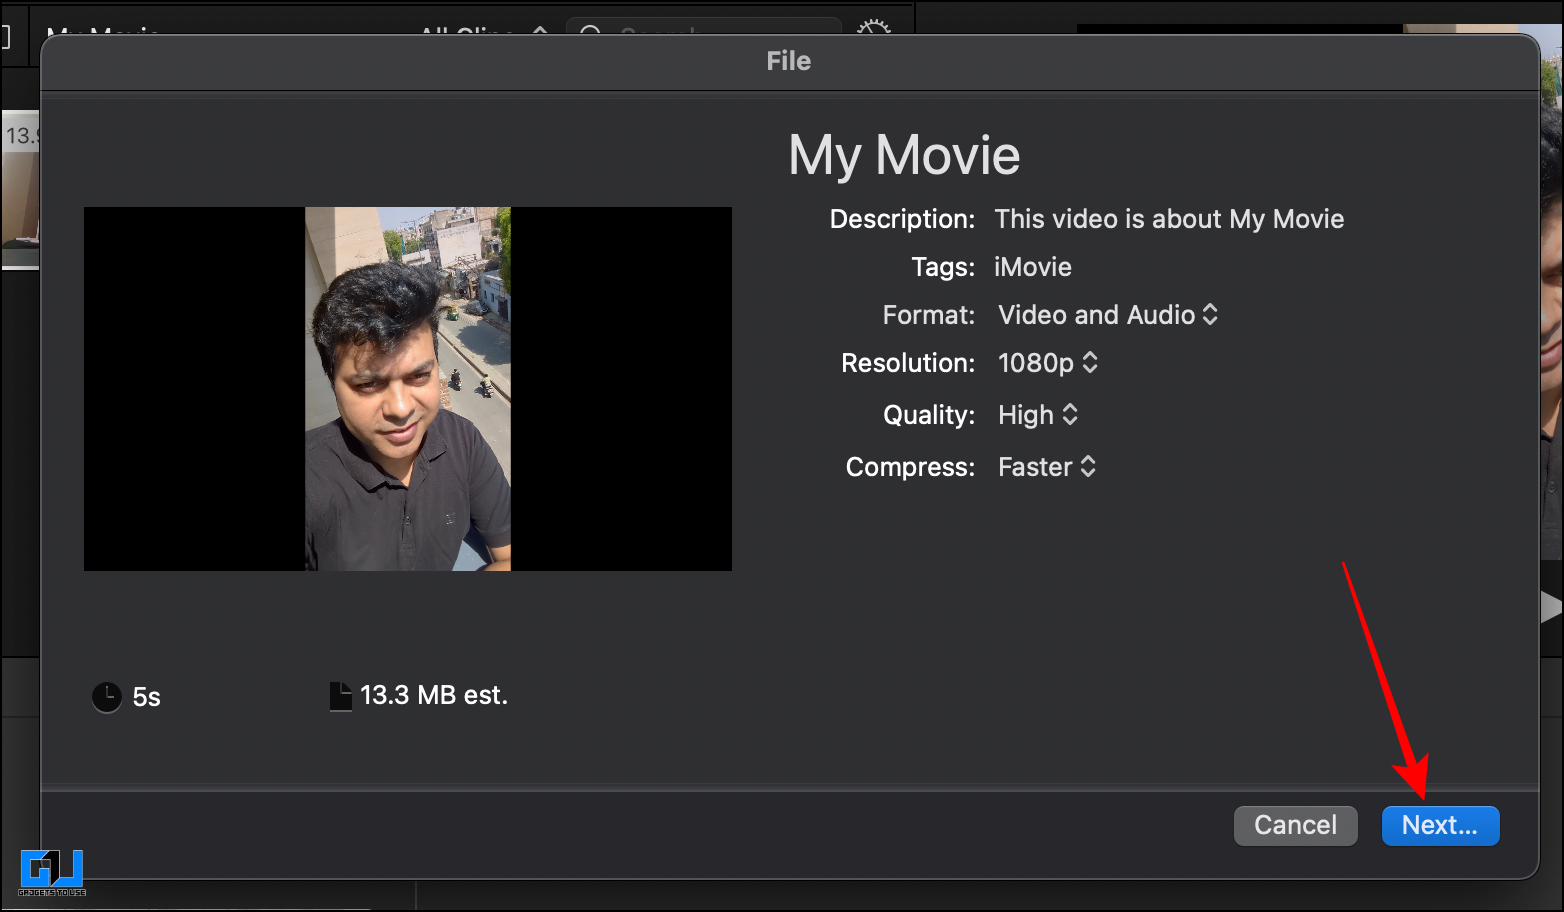
3. Click on “File” from the menu bar and share as a “File.”
4. The video with the cleansed audio will then be saved on your device.
Method 3 – Third-Party Mobile Editors to Merge Audio
Once you have the enhanced audio downloaded from the Adobe Podcast tool. You can use any of the free video editors available on Google Playstore or Apple App Store to merge back the media accordingly. Examples of such editors are:
FAQs
Q. What Is the Maximum File Size We Can Clean Using Adobe AI?
Using Adobe Podcast, you can clean up an audio file up to 30 minutes long.
Q. Is Adobe Enhance Speech-Free?
Yes. The “Enhance speech” feature of Adobe Podcast is free to use and works great.
Q. How Can We Extract the Audio From Any Video?
You can use free software like VLC Player on Windows and Quick Time Player on Mac to extract audio from any video and save it as a separate MP3 file.
Wrapping Up
Adobe Podcast is a great tool in your arsenal, as it is very easy to use and delivers excellent results. The steps mentioned above can be used to clean and remove noise from video files for free; you can even use it for podcasts. Stay tuned to GadgetsToUse for more such tips and tricks.
You might be interested in the following:
- 3 Ways to Convert Recorded Audio to Waveform Video
- 5 Ways to Change Audio Speed Without Changing Pitch
- 5 Ways to Improve Audio & Boost Bass On Windows 10 or 11
- 4 Free Ways to Auto-Dub Videos to Another Language Using AI
You can also follow us for instant tech news at Google News or for tips and tricks, smartphones & gadgets reviews, join the GadgetsToUse Telegram Group, or subscribe to the GadgetsToUse Youtube Channel for the latest review videos.