Quick Answer
- This is one of the most effective methods in which you have to manually access the command prompt tool in Windows Safe Mode so that you can provide the missing administrator privileges to the account to fix the UAC Yes button issue.
- If you are facing the UAC Yes button issue in your Windows 11 system, you will find yourself unable to find or click the Yes button when the Administrator access prompt pops up.
- This command shall activate the in-built administrator account in Windows 11 which you will see as a separate account when you restart the system.
Some existing Windows users who have recently upgraded to Windows 11 have reported the UAC Yes button missing or greyed out on their system. Due to this issue, users were unable to access and open any app that needed admin privileges. In this read, we will list 4 effective methods to fix this issue with the User Account Control (UAC) in Windows 11.
Also, Read | Top 10 Ways to Fix Mobile Hotspot Not Working on Windows 11
Reasons behind the UAC Yes Button Issue
If you are facing the UAC Yes button issue in your Windows 11 system, you will find yourself unable to find or click the Yes button when the Administrator access prompt pops up. While there could be several underlying reasons for this issue to occur, some of the most prominent ones are as follows:
- Issues with the Administrator Privileges of the existing Windows account.
- The administrator might have disabled his account.
- Your administrator account might have shifted to the Standard/Guest account.
With that being said, let’s look at the top 4 ways to fix this issue in your Windows 11 system.
Ways to Fix UAC Yes Button Missing or Greyed Out in Windows 11
Use Safe Mode to Provide/Restore Administrative Access
This is one of the most effective methods in which you have to manually access the command prompt tool in Windows Safe Mode so that you can provide the missing administrator privileges to the account to fix the UAC Yes button issue. Follow these steps to do the same.
- Open the Settings app in your Windows 11 system.
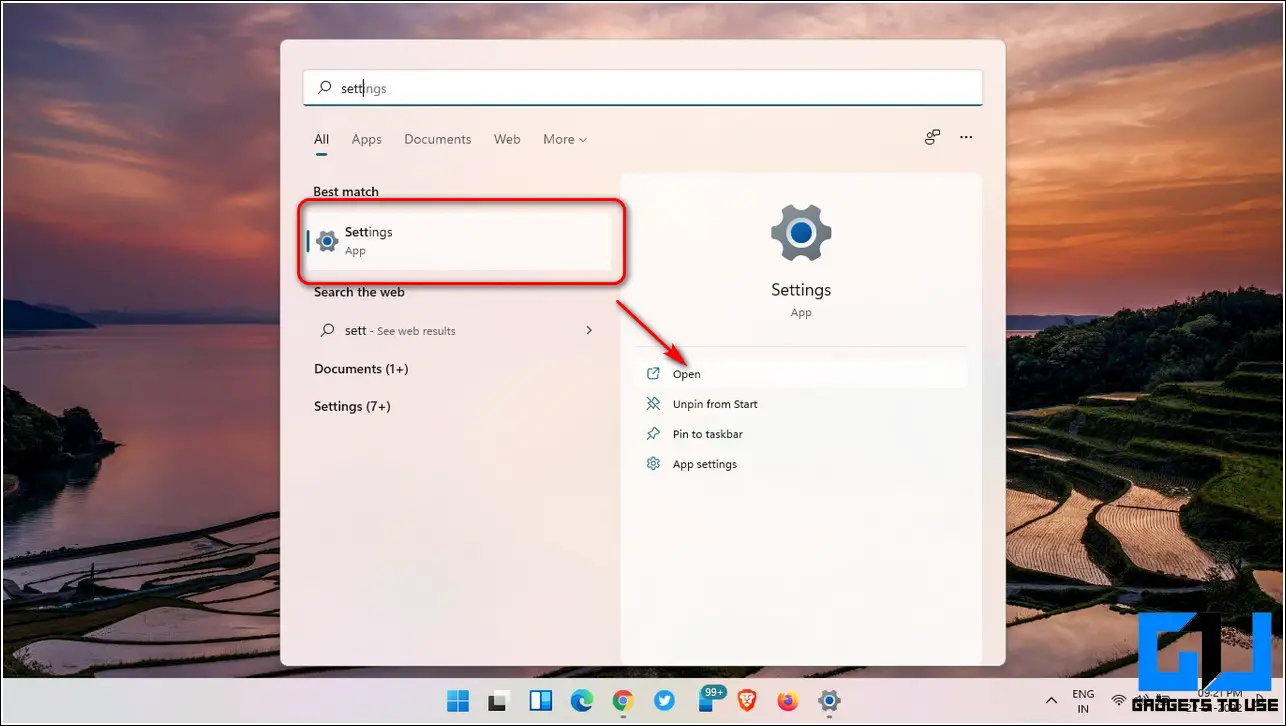
- In the left sidebar, expand Windows Update and click on Advanced Options.

- Scroll down and click on Recovery.
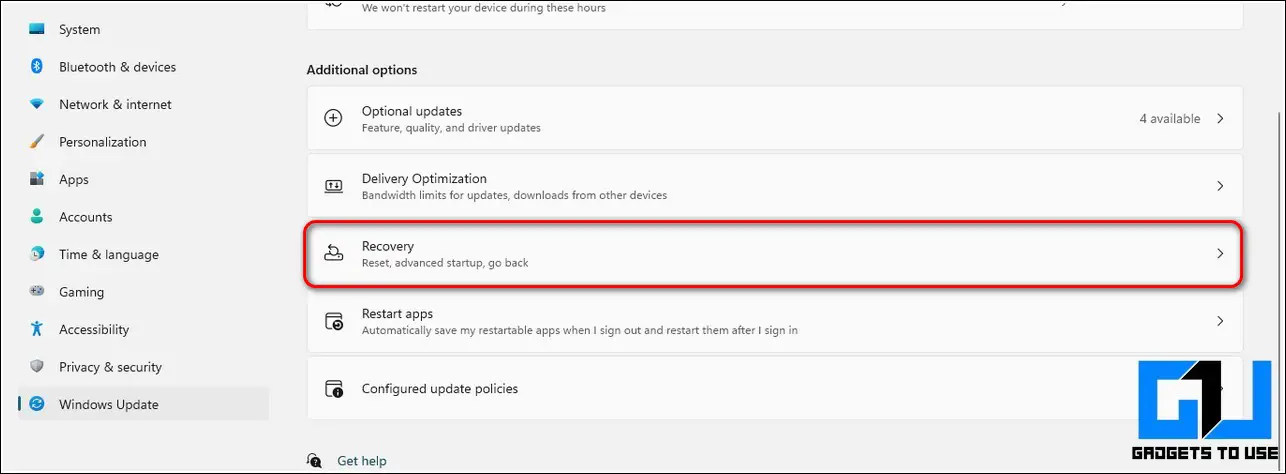
- Click on the Restart Now button in front of the Advanced Startup option.

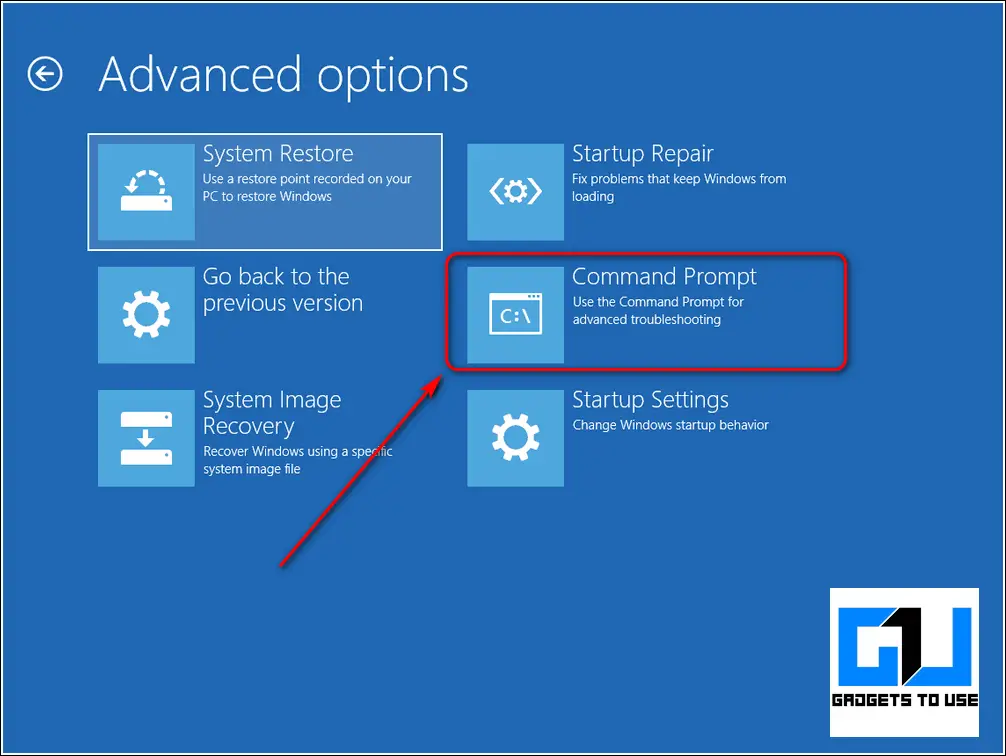
- Your Windows 11 system will restart in recovery mode.
- Inside the recovery mode, click on the Troubleshoot option. Further click on the Advanced Options, and open Command Prompt.
- In this window, type the following command:
net localgroup administrators <accountname> /a
- For example, net localgroup administrators abcpc /a
- Restart your system and check if the error has been resolved.
Switch Your Group Membership Using In-Built Administrator Account
This method is divided into two steps. First, you need to enable the in-built administrator account using the safe mode. Secondly, when the administrator account is active, you need to use the local account to gain admin access privileges. This shall fix the UAC approval issue in Windows 11. Follow these steps to do the same.
- Gain access to the Windows Safe mode using the above-mentioned steps in method 1.
- Inside the recovery mode, open the command prompt window and type the following command:
net user administrator /active: yes
- This command shall activate the in-built administrator account in Windows 11 which you will see as a separate account when you restart the system.
- Restart your system and sign in with your local account on the sign-in page.
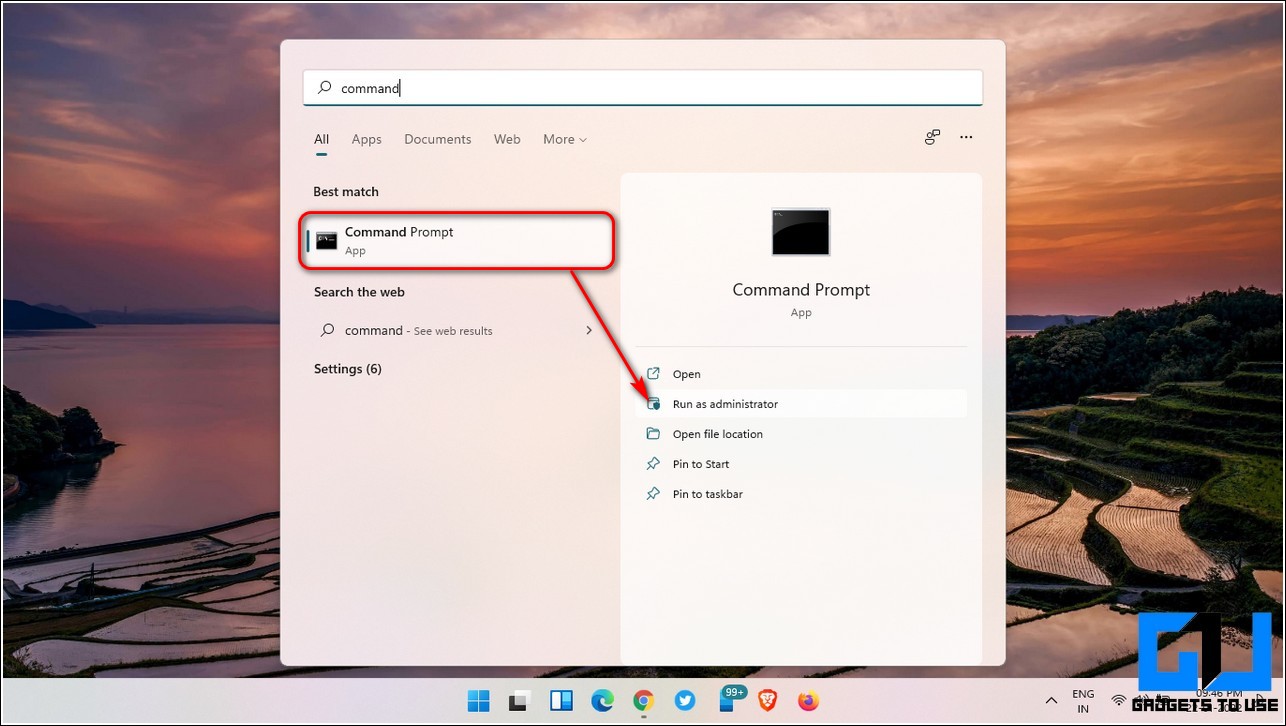
- Press the Windows key and search for Command Prompt tool. Click on the Run as Administrator option to open the CMD with admin privileges.
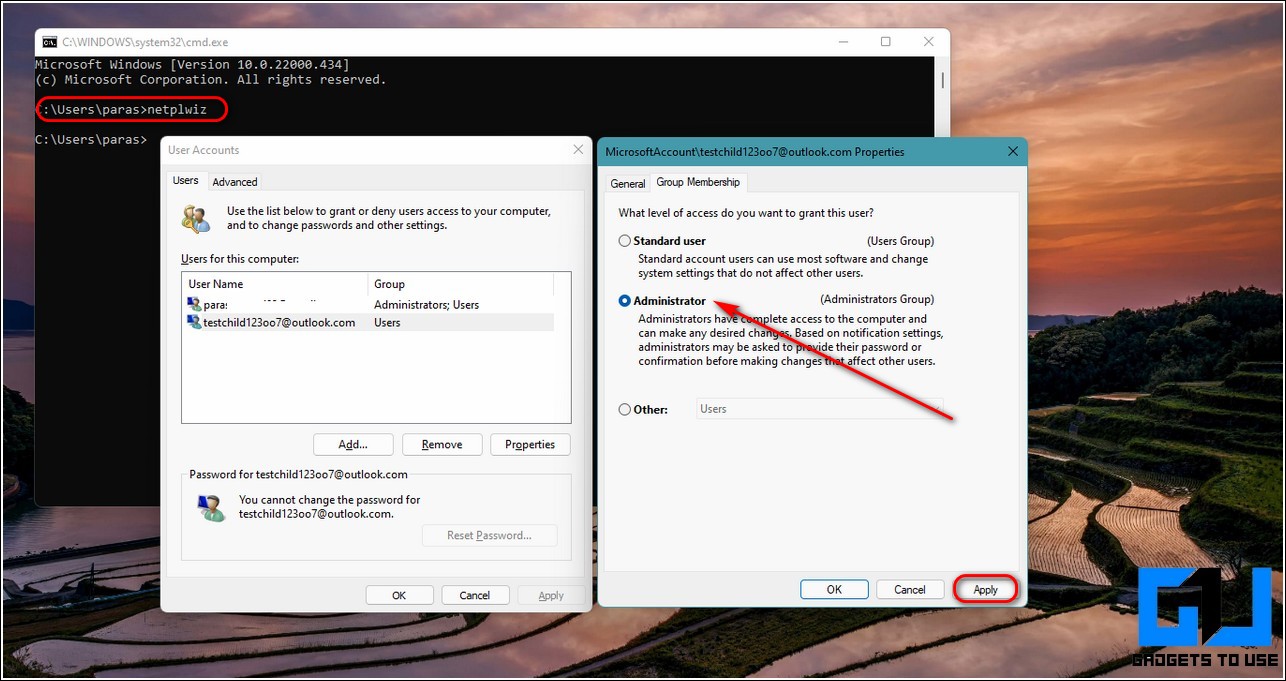
- Type netplwiz inside the window and hit the enter key. This command shall open the User Account Control window.
- Double-click on your local account name and set its Group Membership to Administrator.
- Click on the Apply button to save changes.
- Restart your Windows 11 system and check if the error has been resolved.
Set Admin Rights for Your Account from Sign-In Page
This method is one of the fastest methods to gain administrative privileges by making changes in some system files. Follow these easy steps to do the same.
- Navigate to C:/Windows/System32 folder and open it.
- Find and locate sethc.exe and make a copy in the same directory. Rename this copy to sethc1.

- Likewise, find cmd.exe and make a copy in the same directory. Rename this copy to cmd1.exe.

- Now, delete the original sethc.exe find and rename the original cmd.exe to sethc.exe.
- Restart your Windows 11 system and press shift 5 times repeatedly till the CMD window shows up.
- Type control userpasswords2 and press the enter key.
- User Accounts Window shall instantly open up. Change your local account privileges to Administrator and apply changes.

- Reboot the system again to check if the issue has been fixed.
Bonus Tip: Reset Your PC to Fix the UAC Yes Button Issue
If you are still not able to fix the existing UAC problem with the help of the above-mentioned methods then, you need to reset your Windows 11 system. Follow this simple 2-minute read to quickly reset Windows 11 without losing any files.
Wrapping Up: Get Back UAC Privileges
We hope that you’ve now learned to fix UAC Yes button issue on your Windows 11 system. If this article has helped you to fix your existing bugs and improve Windows 11 experience then, hit the Like button and share this among your friends to assist them in resolving their issues. Stay tuned for more informative reads.
You can also follow us for instant tech news at Google News or for tips and tricks, smartphones & gadgets reviews, join GadgetsToUse Telegram Group, or for the latest review videos subscribe GadgetsToUse Youtube Channel.