

Quick Answer
- Safety Check, as mentioned before, was designed to prevent and restrict sharing of all data and permissions to protect the data and privacy of someone in a tough situation.
- Now that we understand the need and importance of the Safety Check let us learn how you can access and set it up on your iPhone.
- Press Continue, and on the next page, tap on Done to finish the setup process.
Apple has been focusing on health and personal safety for the past few years, which was most apparent this year as they released Car Crash Detection and Emergency SOS via Satellite with the iPhone 14 series. But one crucial feature that went unnoticed was Safety Check which was introduced with iOS 16. This article will help you understand Safety Check on the iPhone and what happens when you use it.
What is Safety Check on iPhone?
Safety Check is a helpful feature, especially for those concerned and possibly at risk of danger from digital harassment, stalking, or their partner. The feature helps victims sign out of iCloud on all other devices they were signed into for their safety.
It also lets them limit or completely revoke any access given to others, turns off location sharing with Find My and other apps, and reset permissions for all other apps. All this is from the Safety Check settings, and one does not need physical access to other devices to revoke any permissions.
When to Use Safety Check on iOS?
Safety Check, as mentioned before, was designed to prevent and restrict sharing of all data and permissions to protect the data and privacy of someone in a tough situation. These are the likely situations where you should use Safety Check.
- If you are facing digital abuse.
- Suspect an online stalker.
- Do not want your partner or someone close to access your data.
- Risk of a virus or malware attack. You can even use the Lockdown mode here to preserve your data.
- A victim of online harassment and at risk of a data breach.
How to Use Safety Check on iPhone
Now that we understand the need and importance of the Safety Check let us learn how you can access and set it up on your iPhone. Safety Check offers two options- Emergency Reset and Manage Sharing & Access. We will take a look at the setup process for each option individually.
Setup for Emergency Reset
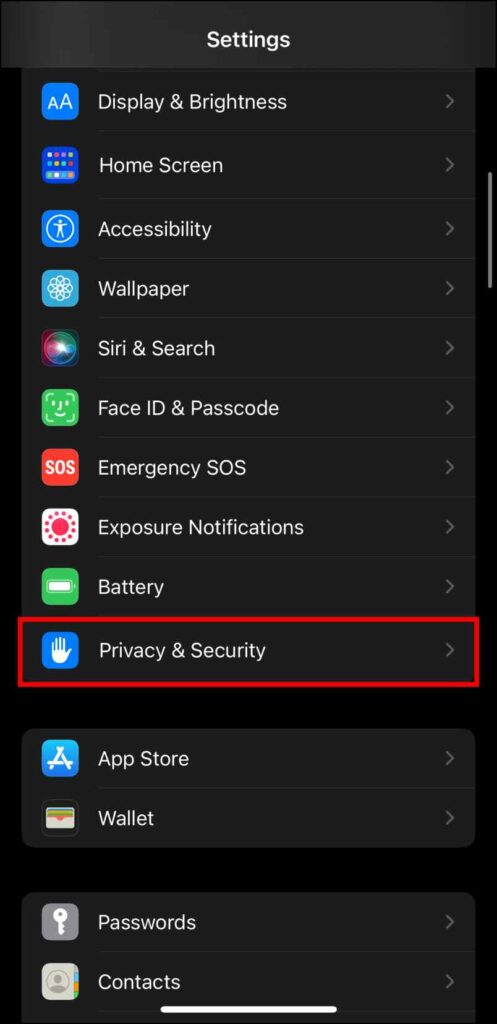
Step 1: Open Settings and scroll down to Privacy & Security.
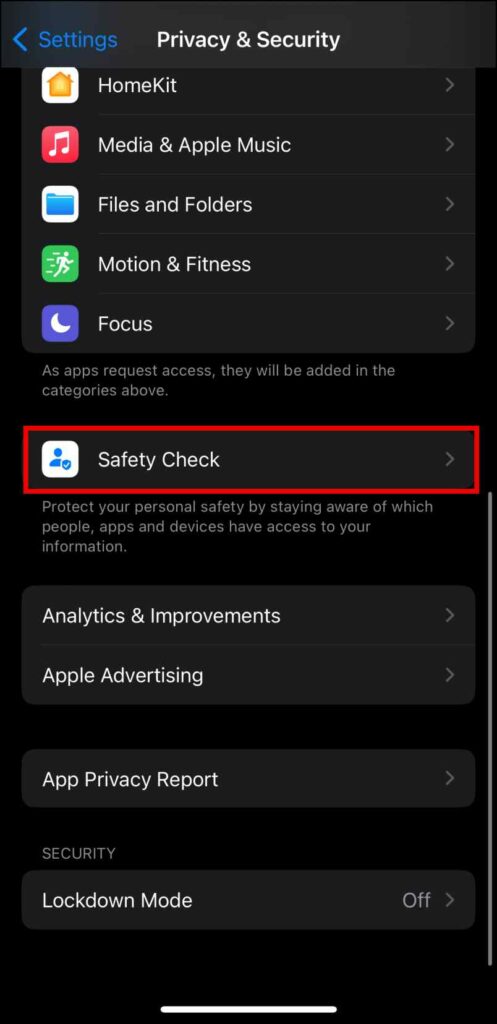
Step 2: Again, scroll down and tap on the Safety Check option.
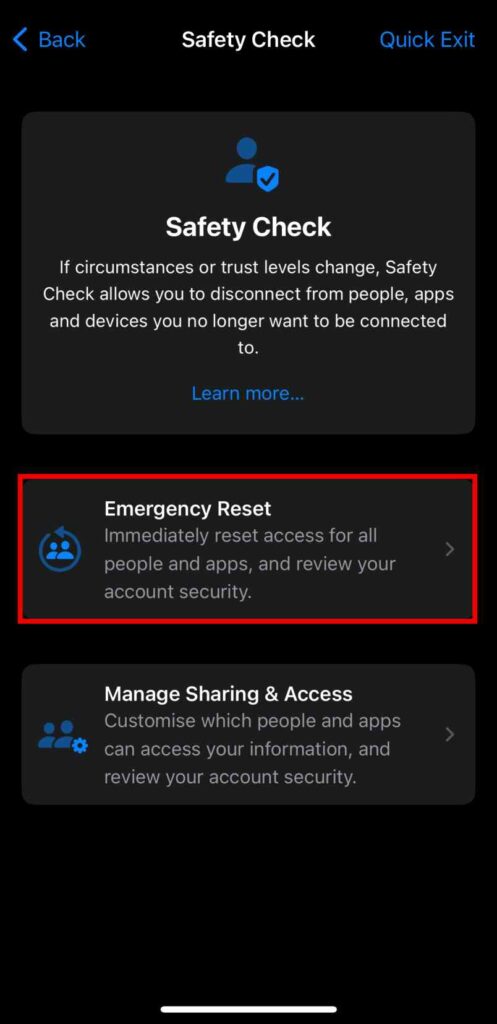
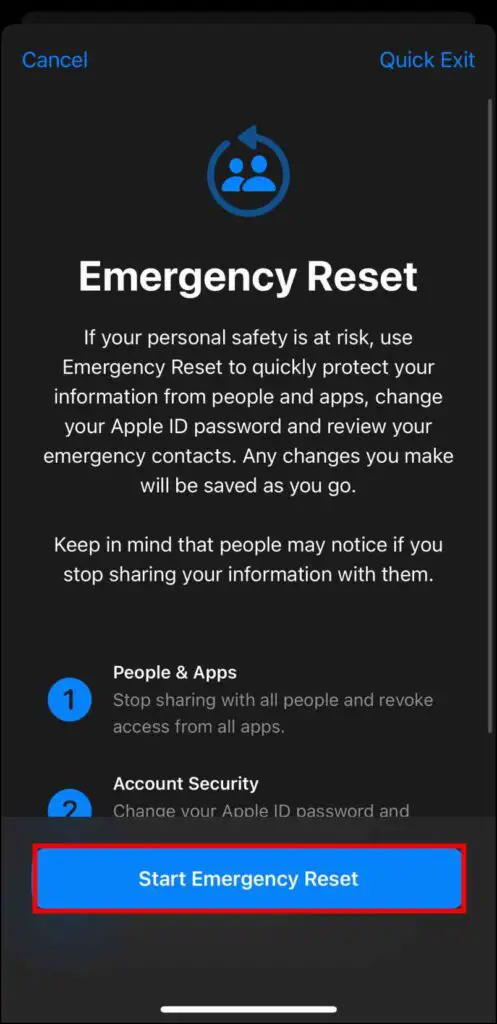
Step 3: Tap on Emergency Reset.
Step 4: Select the option Start Emergency Reset.
Step 5: Next, tap on Reset People & Apps, and press Reset again to confirm.
Step 6: Select the devices you want to log out of your AppleID. Once selected, press Remove Selected Devices.
You will be asked to add Trusted Phone Numbers. These numbers will be able to receive OTPs and verification codes, so make sure it is yours or the ones you can trust.
Step 7: Tap on Continue. Click Update Password to update your current Apple ID password, or select Update Later in Settings.
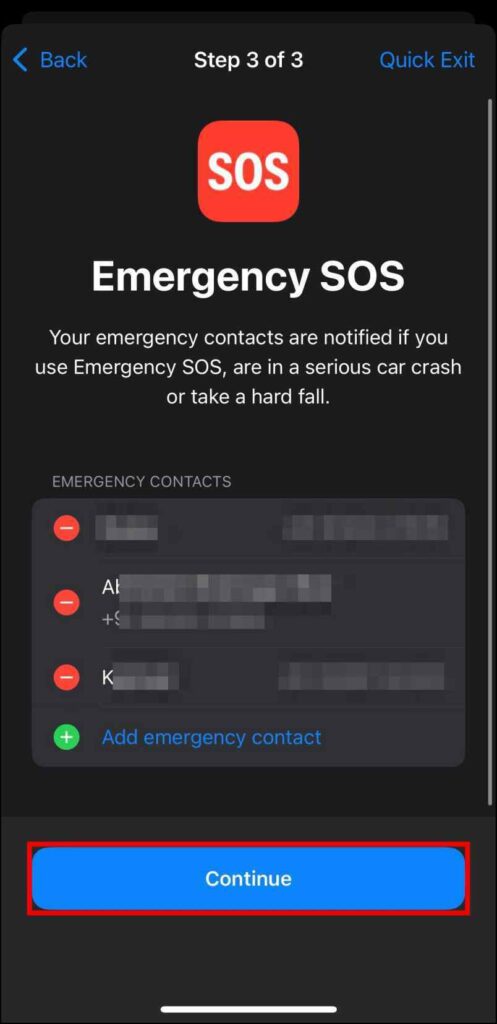
Step 8: You get the option to Add Emergency Contacts. Here you can add or remove current emergency contacts.
Step 9: Press Continue, and on the next page, tap on Done to finish the setup process.
Setup for Manager Sharing & Access
Step 1: Go to Settings and Select Privacy & Security.
Step 2: Scroll down and tap on Safety Check.
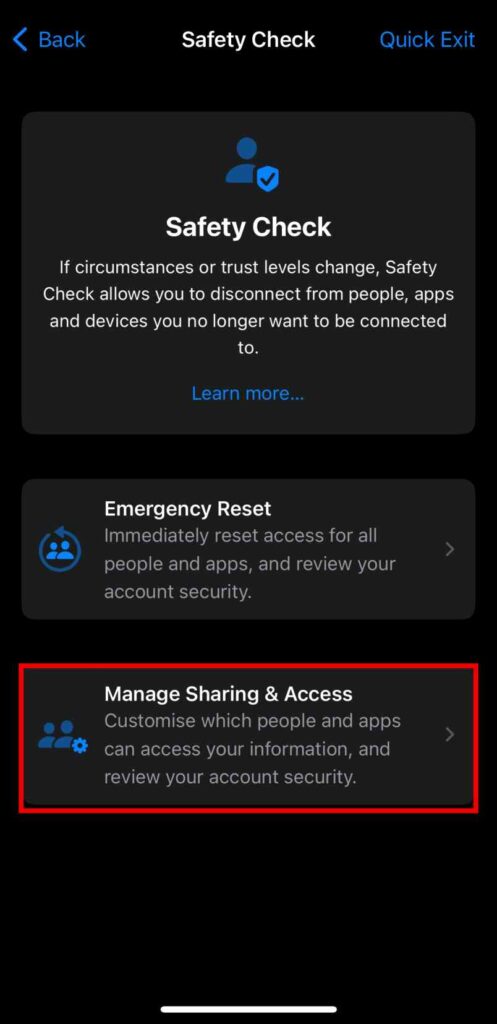
Step 3: Tap on the Manage Sharing & Access option.
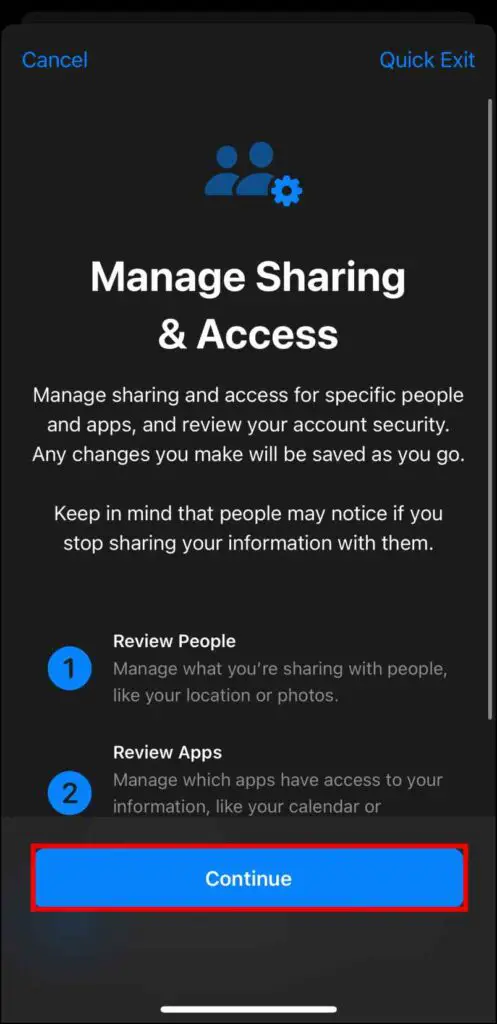
Step 4: Tap on Continue.
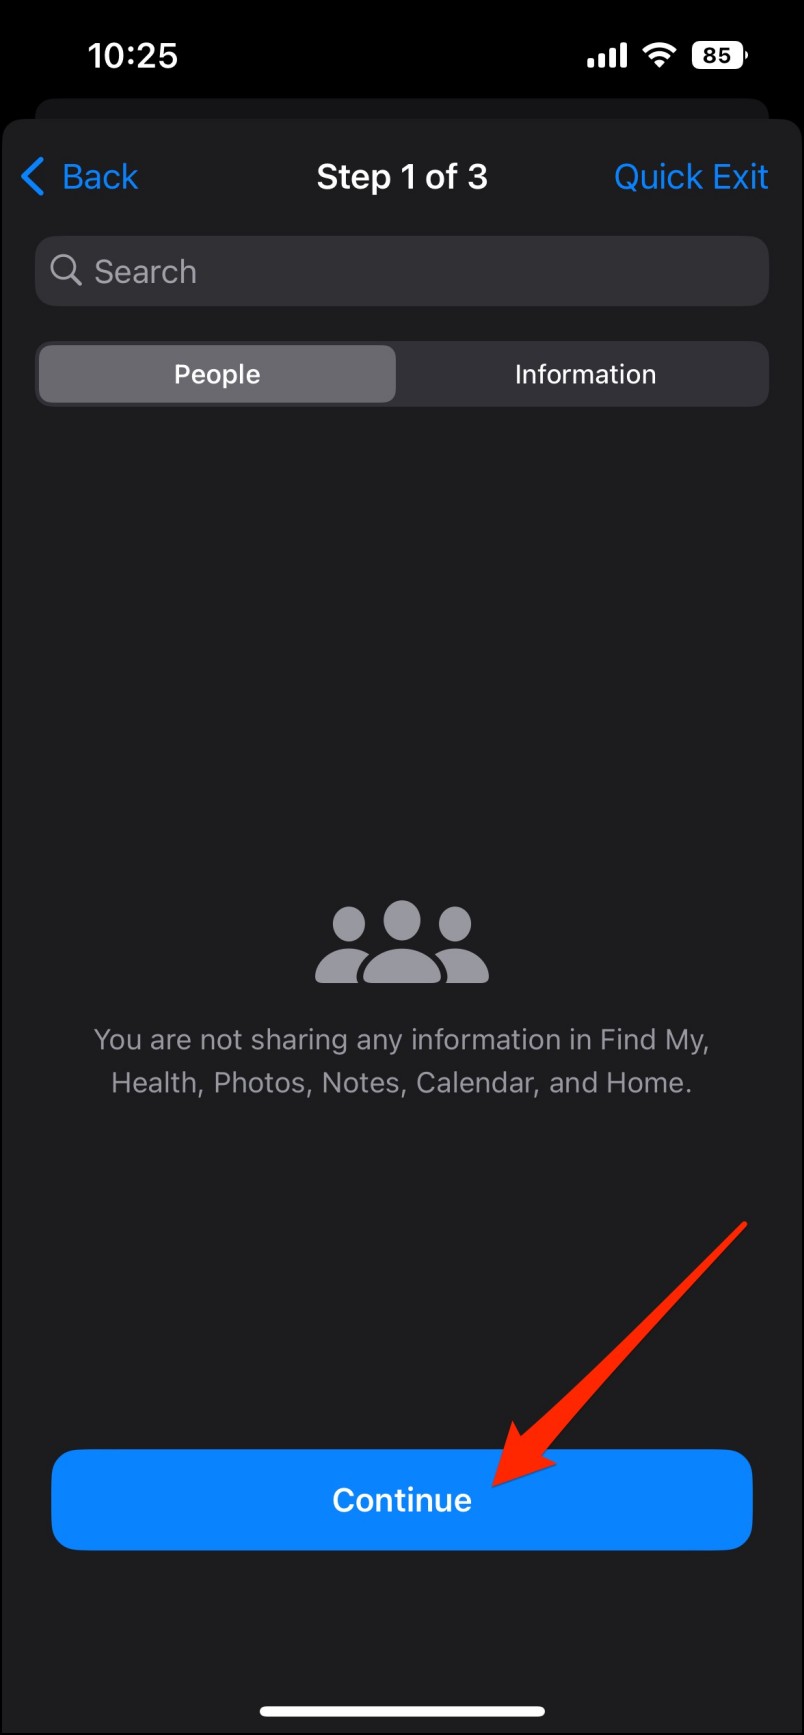
Step 5: It will show you a list of your contacts. Select the contacts you want to stop sharing your data with. Alternatively, you can click on Select All & Stop Sharing if you wish to stop sharing data with all contacts.
Step 6: Tap on Review Sharing if you have selected contacts, or press Continue.
Step 7: On the next page, select the type of information and permission you do not want to share.
Step 8: Now, press Stop Sharing and tap Stop Sharing again to confirm the selection.
Step 9: Press Continue to move on to Step 2.
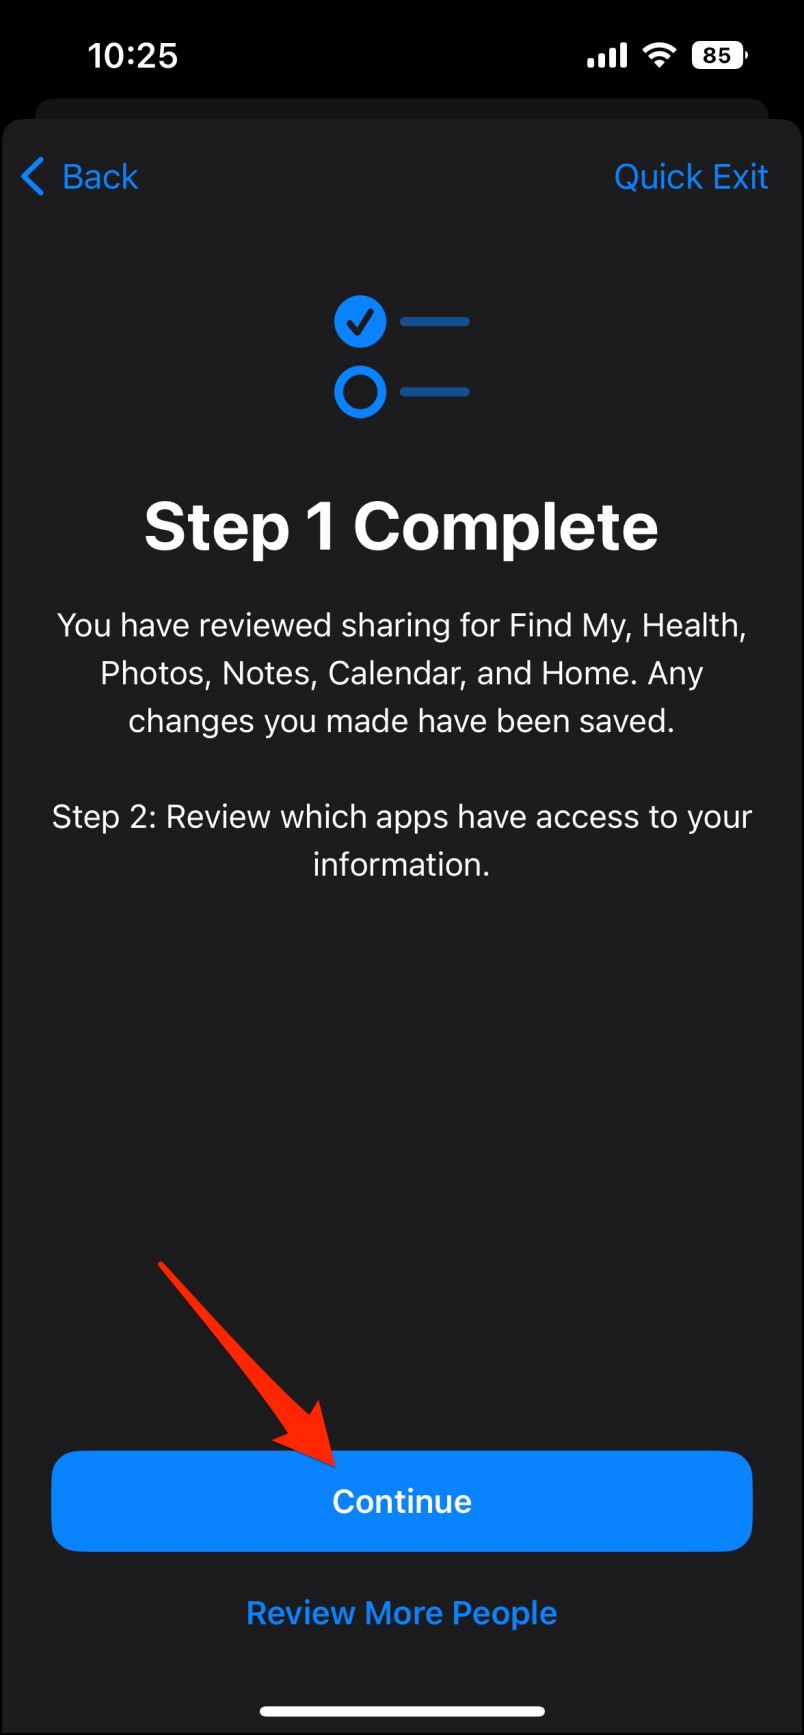
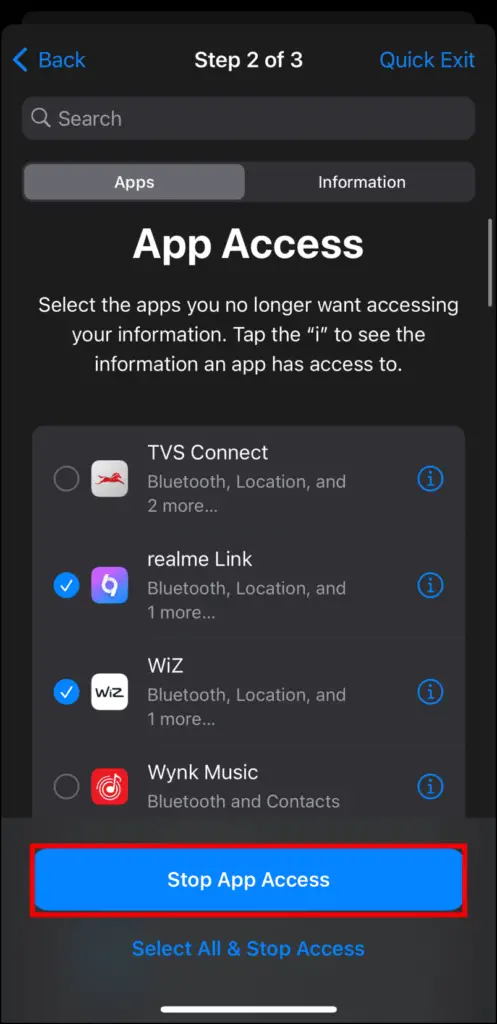
Step 10: Select apps you do not want to access your information and tap on Stop App Access.
Step 11: Press Continue to move on to Step 3.
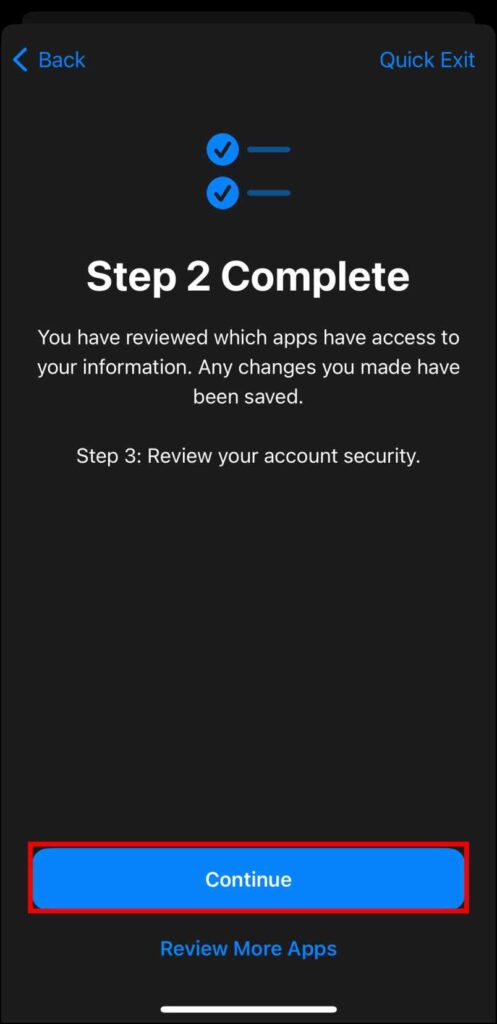
Step 12: Select devices to remove from your AppleID.
Step 13: Tap on Remove Selected Devices and then Remove Devices to confirm.
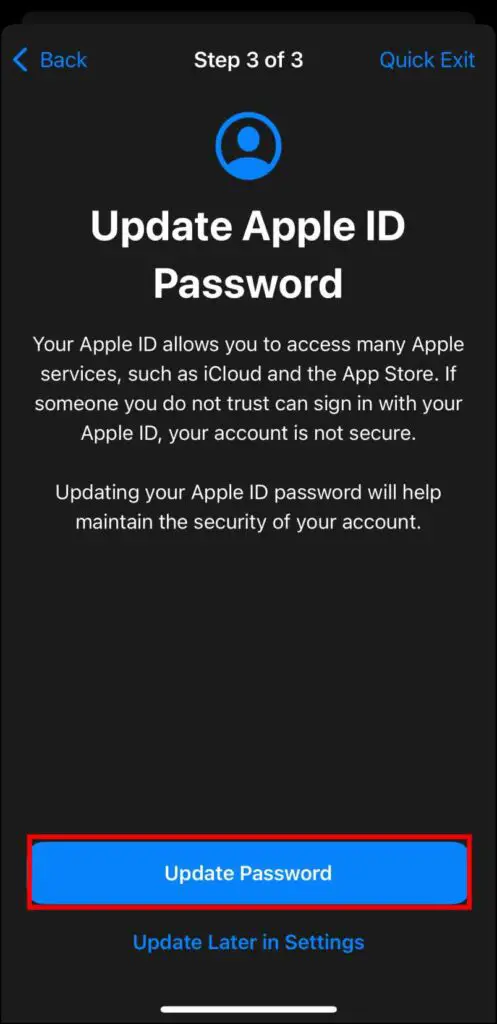
Step 14: You will get an option to change your Apple ID password. If you want to change your password, select Update Password.
Step 15: On the next page, you can select Emergency Contacts. Press Continue when you have updated your emergency contacts.
Step 16: Now you will get an option to Update your Passcode. You must enter your old passcode first to create a new one.
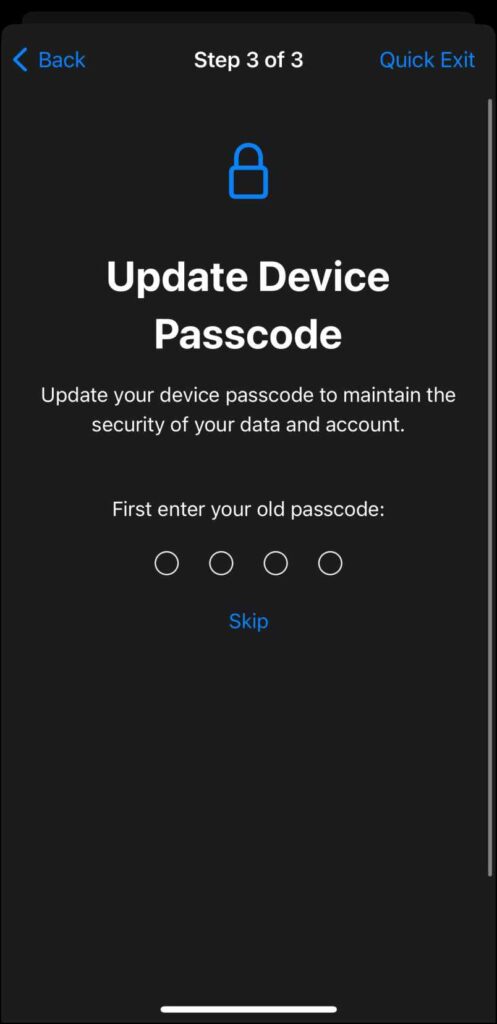
Step 17: Press Skip if you don’t want to change your Passcode and tap on Done when you have made all required selections.
If anywhere during the setup process someone asks you to see what you are doing on your phone, you can press the Quick Exit option that quickly lets you exit Safety Check.

It saves your progress so you and also closes the Settings app. Quick Exit is located at the top right corner of the display.
Frequently Asked Questions
Q. What Happens When you Use Safety Check?
When you use Safety Check, people and apps you have removed will not be able to access your location or any other data that you were sharing with them. Selected devices will be remotely logged out of your Apple ID. And your emergency contacts, AppleID password, and device passcode will be changed based on your selections.
Q. Which iPhone Models have Safety Check?
Any iPhone running the iOS 16 update should have the Safety Check feature as an option. This means that Safety Check is available on iPhone 8 and newer models.
Q. Where Can I Find Safety Check on my iPhone?
To access Safety Check, go to Settings > Privacy & Security > Safety Check. Then you can choose from two different setup options—Emergency Reset, which revokes permissions for all apps and contacts. Or Manage Sharing & Access lets you select apps and contacts with which you want to stop sharing your data.
Q. Do I Need to Reset my Apple ID Password to Setup Safety Check?
No, you will be given the option to reset your Apple ID password and device passcode in case your Apple ID is vulnerable to malicious access by someone else, but you can skip that process if your Apple account is not at risk.
Wrapping Up
This is how you can setup and use Safety Check on your iPhone. Safety Check removes the hassle of navigating through the settings to add or remove permissions individually and offers a one-stop solution that is quite useful in emergency scenarios. Do let us know if you have any questions related to Safety Check, and stay tuned to iTipsToUse for more such articles, guides, and How To’s.
You might be interested in:
- 4 Ways to Check if a Call Is Spam or Fraud
- 8 Ways to Fix AirDrop Transfer Failure on iPhone or iPad
- 4 Easy Ways to Merge or Remove Duplicate Contacts on iPhone
- Top 13 Ways to Hide Apps on iPhone and iPad (2022)
You can also follow us for instant tech news at Google News or for tips and tricks, smartphones & gadgets reviews, join GadgetsToUse Telegram Group or for the latest review videos subscribe GadgetsToUse Youtube Channel.


