Quick Answer
- All you have to do is create a virtual disk using VMware on your system and install macOS on it to experience the same.
- To install macOS as a virtual machine on your Windows PC, you must ensure that the Virtualization Technology is enabled in your device’s BIOS.
- Since we are using third-party virtualization software (VMware) to run our ‘Virtual macOS’, which offers far more customization features, you need to disable Hyper-V on your machine to avoid conflicts between the two.
Getting macOS to run on a Windows machine has always been a tiresome job. Unlike Windows, macOS relies heavily on hardware compatibility to function properly on any machine. But what if we tell you there’s an easy way to install and experience the same alongside your Windows operating system? In this explainer, we have demonstrated easy steps to install macOS on Windows 11 or 10. Additionally, you can try macOS’s Quick Look feature on your Windows machine.
How to Install macOS on a Windows Computer
For this demonstration, we will install macOS Catalina on Windows 11 using a third-party virtualization software called VMware Player. The advantage of using this software is that you don’t have to format or relocate your system data to install it. All you have to do is create a virtual disk using VMware on your system and install macOS on it to experience the same.
Installation Pre-Requisites
Let’s have a look at the prerequisites to install it.
- Enable Virtualization
- Disable Hyper V
- Download macOS Image
Step 1- Enable Virtualization Technology on Windows
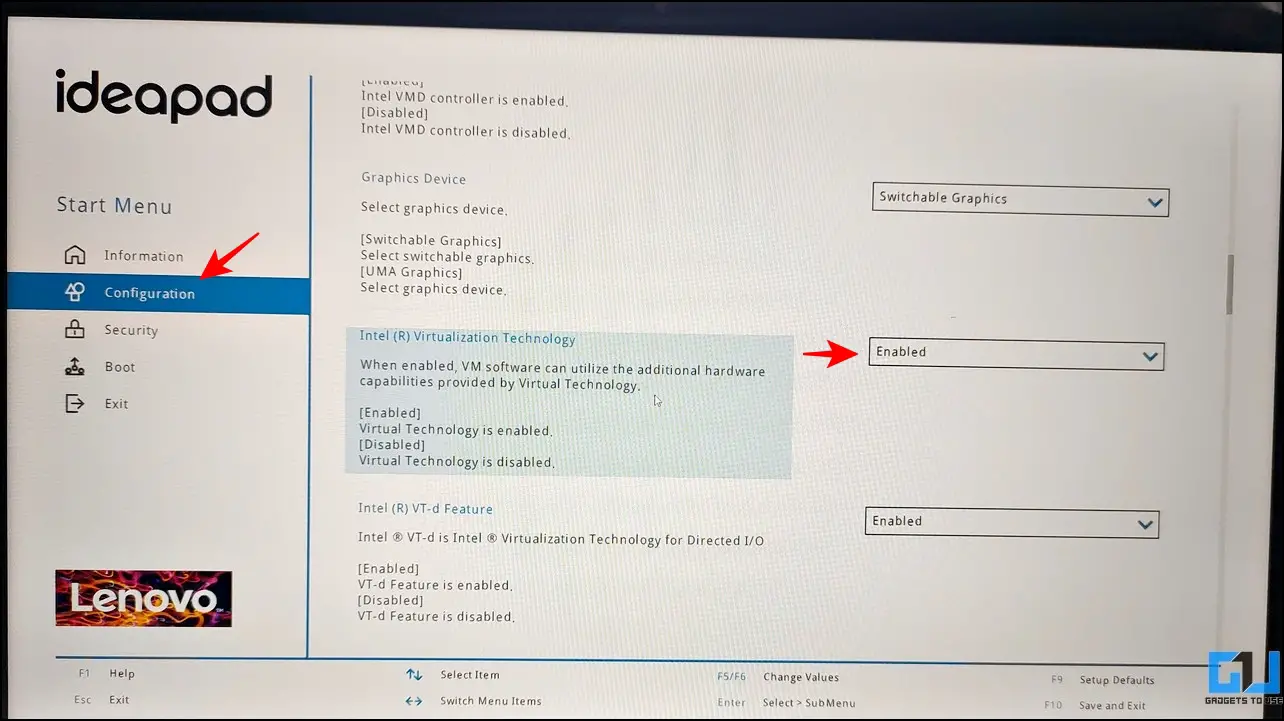
Virtualization Technology helps users emulate and run different operating systems on a single machine. To install macOS as a virtual machine on your Windows PC, you must ensure that the Virtualization Technology is enabled in your device’s BIOS. Here’s how you can check the same:
1. Restart your Windows PC and press the dedicated Function key at boot to enter your system’s BIOS. If you’re unsure about the key, you can search for the same by searching your system’s model number on Google.
2. Switch to the configuration tab and locate Virtualization Technology to enable it. Once done, save the changes and reboot your system.
Step 2- Disable Windows Hyper-V to install Virtual Machines
By default, Microsoft Windows comes with its native virtualization product called the ‘Hyper-V’ that lets you create and run virtual machines. Since we are using third-party virtualization software (VMware) to run our ‘Virtual macOS’, which offers far more customization features, you need to disable Hyper-V on your machine to avoid conflicts between the two. Here’s what you need to follow.
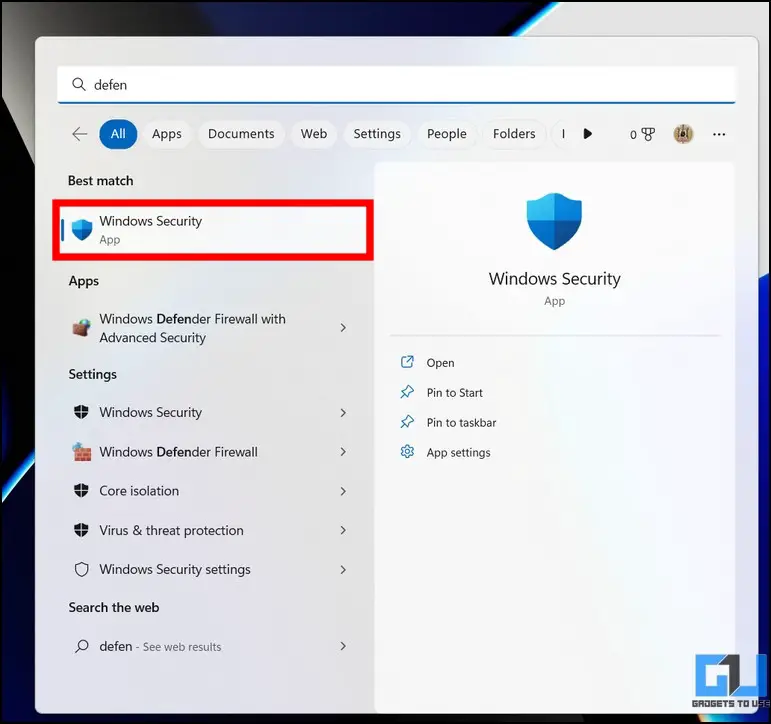
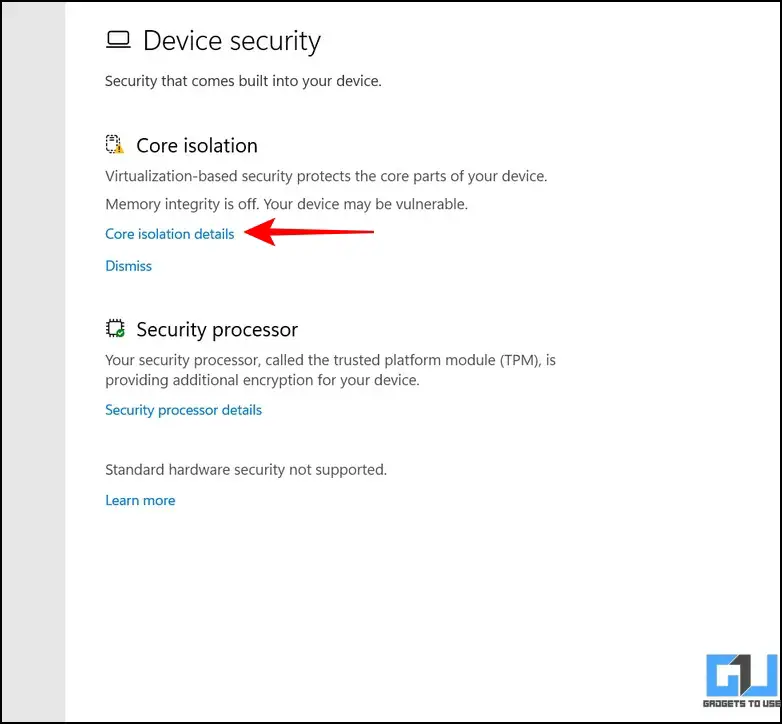
1. Press the Windows key and access Windows Security settings.
2. Next, click on the Device Security option to configure it.
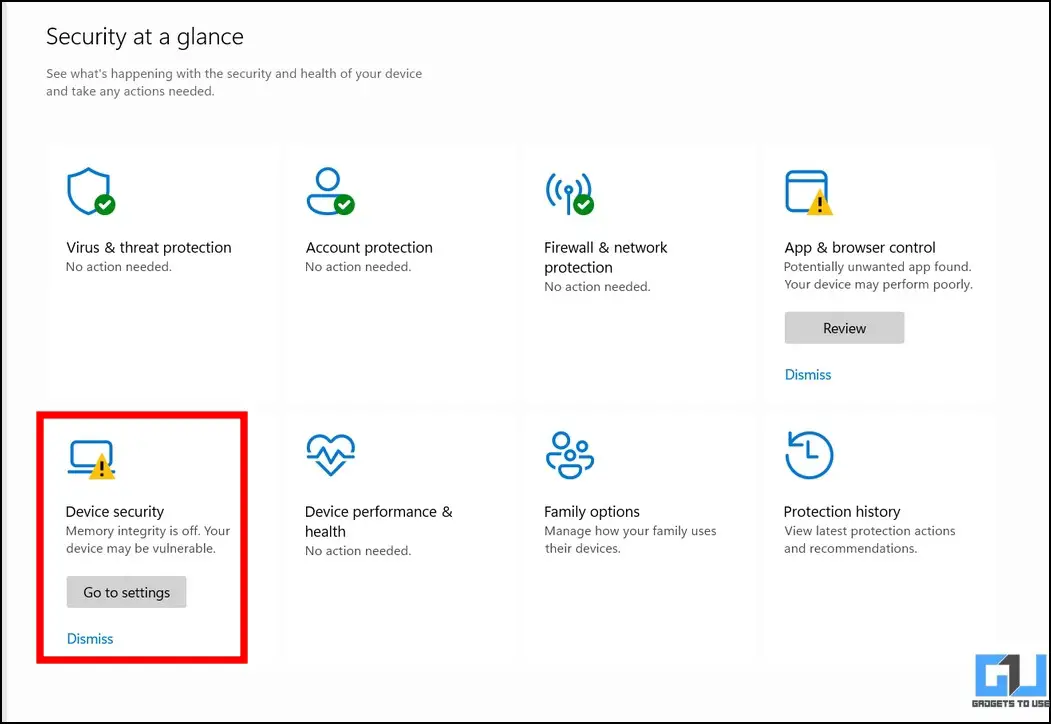
3. Further, tap on the Core Isolation feature to access its settings.
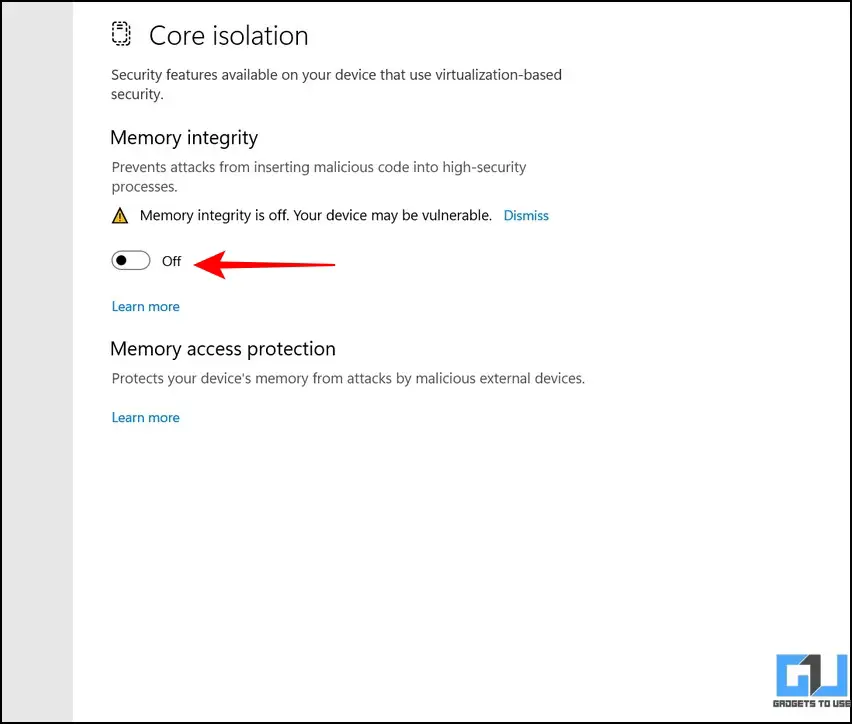
4. Finally, turn off the toggle for Memory Isolation to disable it. This will prevent Windows Security from interrupting while making changes to the system product (Hyper-V in this case).
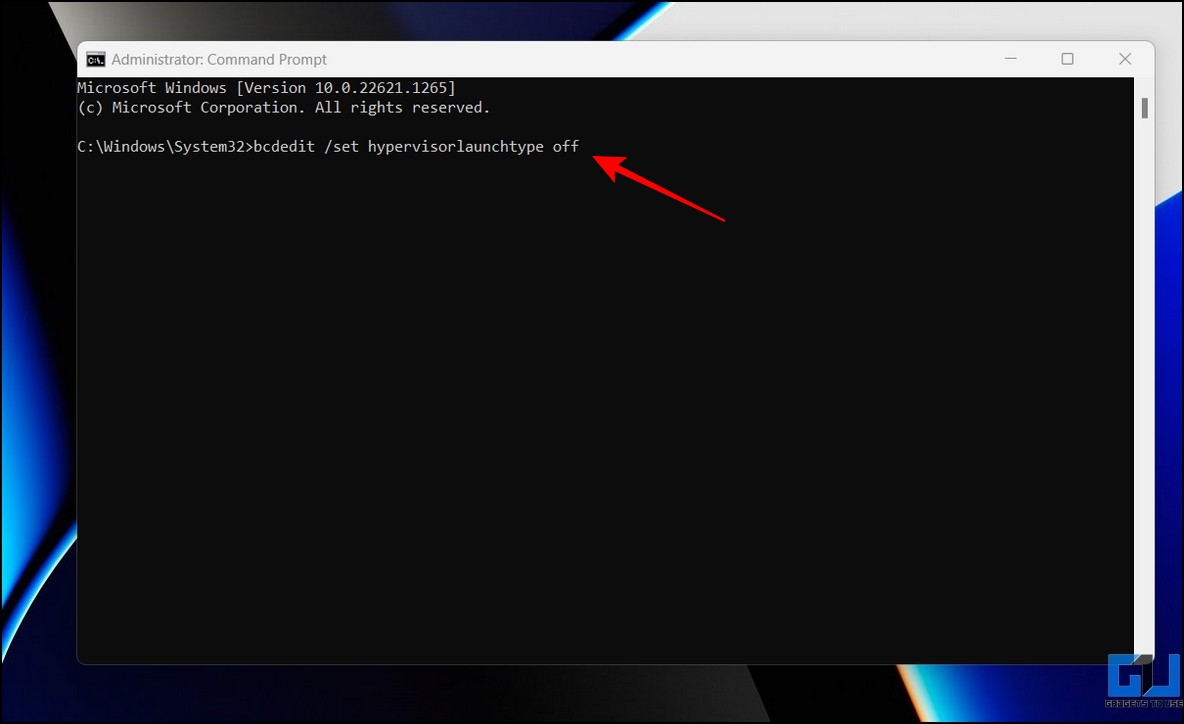
5. Now, launch Command Prompt with Administrator privileges.

6. Execute the following command on the terminal to turn off the Windows Hypervisor (Hyper-V):
Set hypervisorlaunchtype off
7. Reboot your system to apply changes.
Step 3- Download the macOS Catalina VMware Image
The final pre-requisite to install macOS Catalina is its VMware image. Follow these steps to download the same.
1. Download the macOS Catalina VMware image from the Google Drive Link.
2. Extract the downloaded compressed file to your system via native or third-party decompression tools such as WinRAR.
Tip: The password for extracting the compressed file is Geekrar.com
3. Once extracted, you will see the .vmdk file that will be used for installation.
Steps to Install macOS on Windows 11/10
Now that you’ve fulfilled the prerequisites, let’s look at the steps to install macOS on Windows 11/10.
1. Download and install the VMware Workstation Player from its official website.
2. Next, download the VMware Unlocker tool and extract the downloaded file to a new folder.

3. Locate the win-install.cmd in the list of extracted files and right-click on it to run it as administrator.
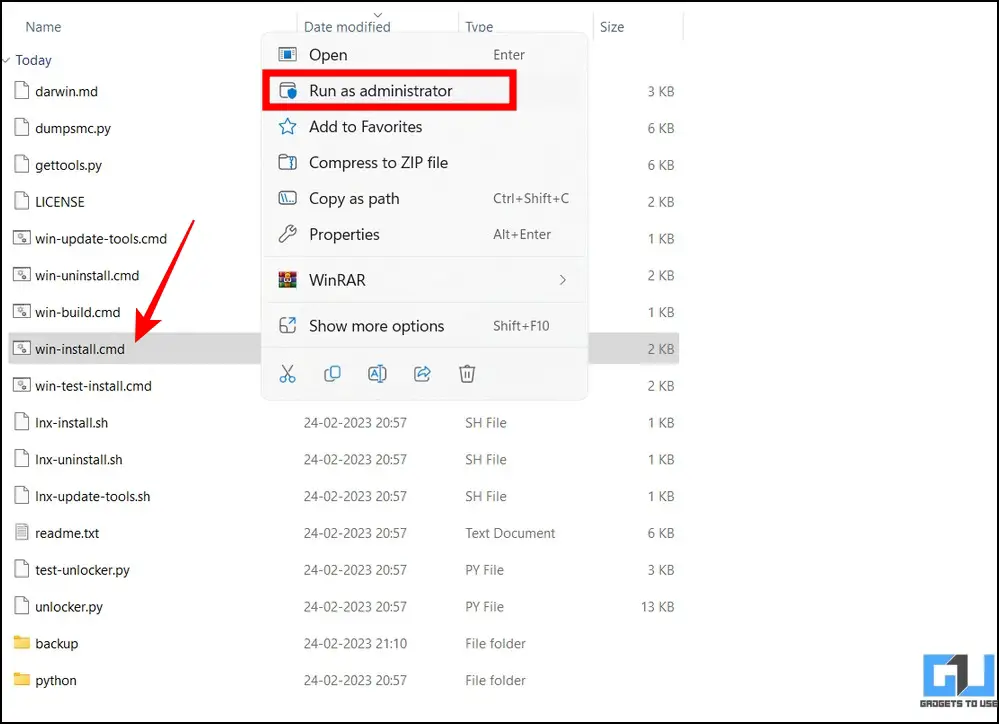
4. The commands in the win-install.cmd file will patch the installed VMware Workstation Player to add an entry for Apple macOS during installation.
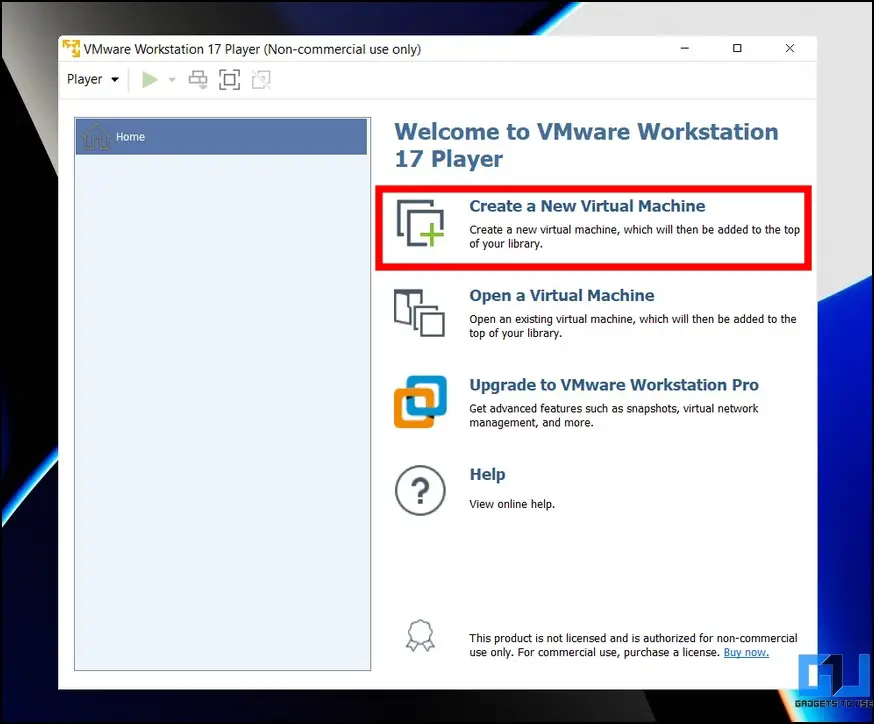
5. Open the VMware Workstation Player and create a New Virtual Machine.
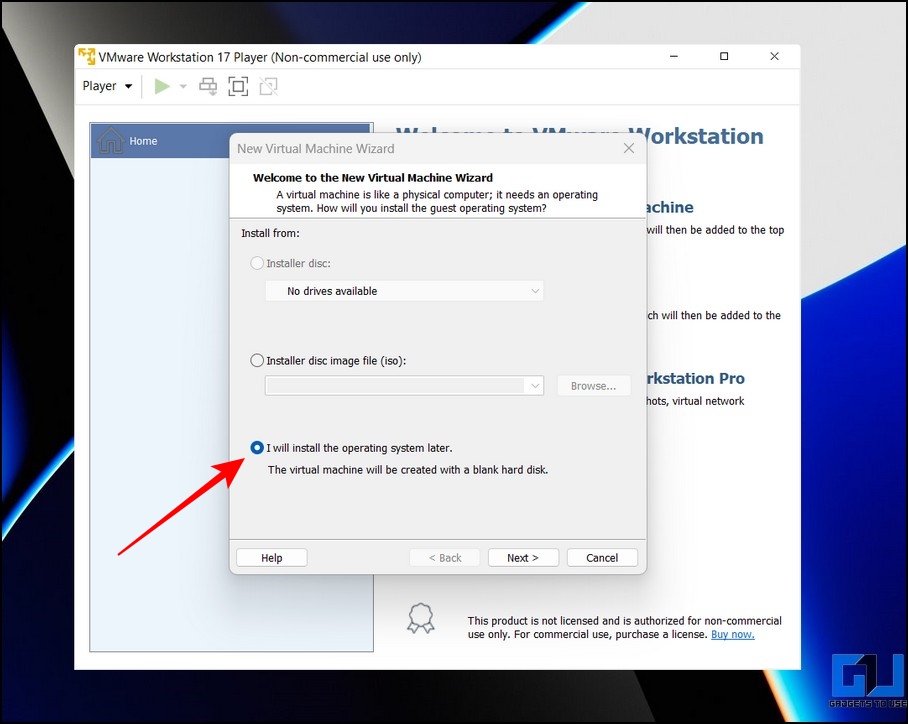
6. Next, pick ‘I will install the operating system later‘ and click the Next button.
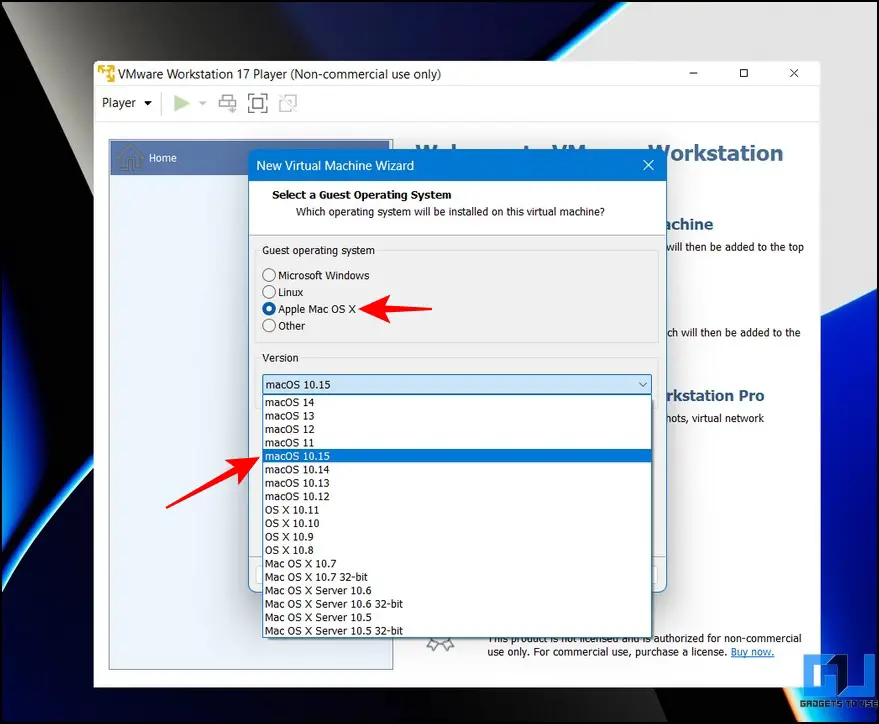
7. Select Apple Mac OS X from the list and pick macOS 10.15 to install macOS Catalina.
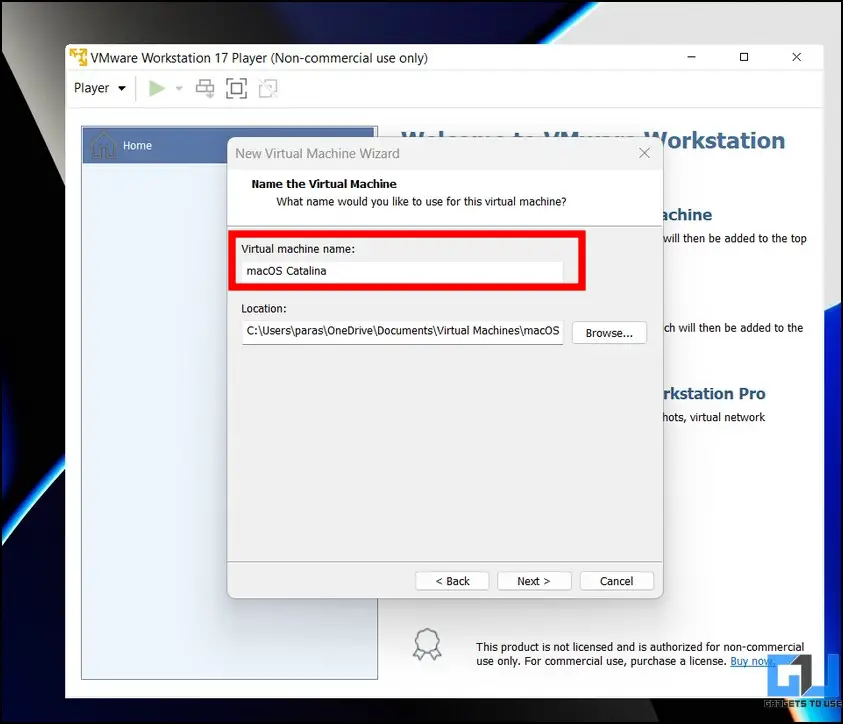
8. Provide a new name to your virtual machine and click the Next button to proceed.
9. Allocate at least 80GB of disk space and click the Next button to finish setting up the configuration.

10. Click the Finish button to complete the creation of a new virtual machine.

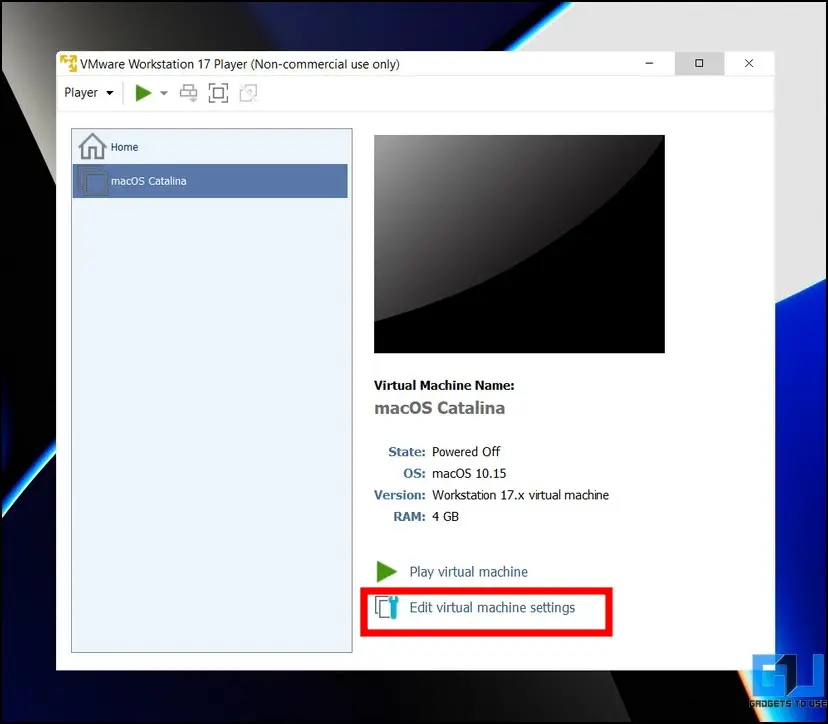
11. Now, click Edit Virtual Machine Settings to edit the configuration of the created VM.
12. Here, select the Hard Disk in the left sidebar and click the Remove button to delete it.
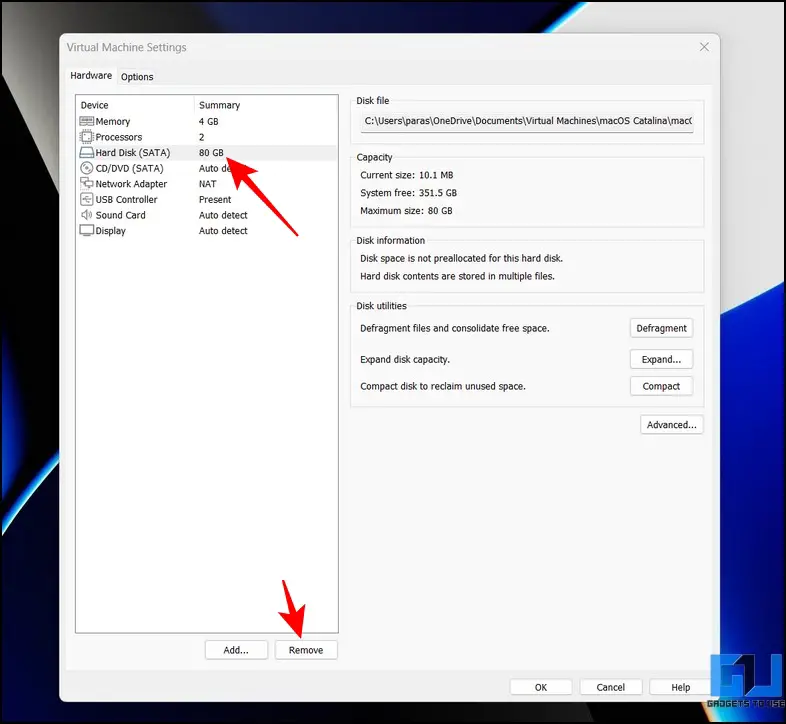
13. Once removed, click the Add button to add new virtual hardware to your machine.

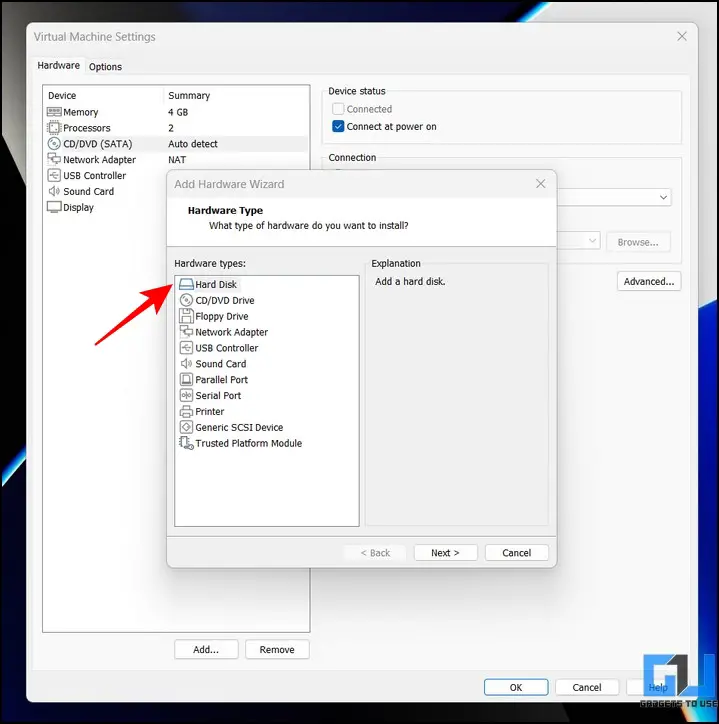
14. Select Hard Disk under the Hardware types list.
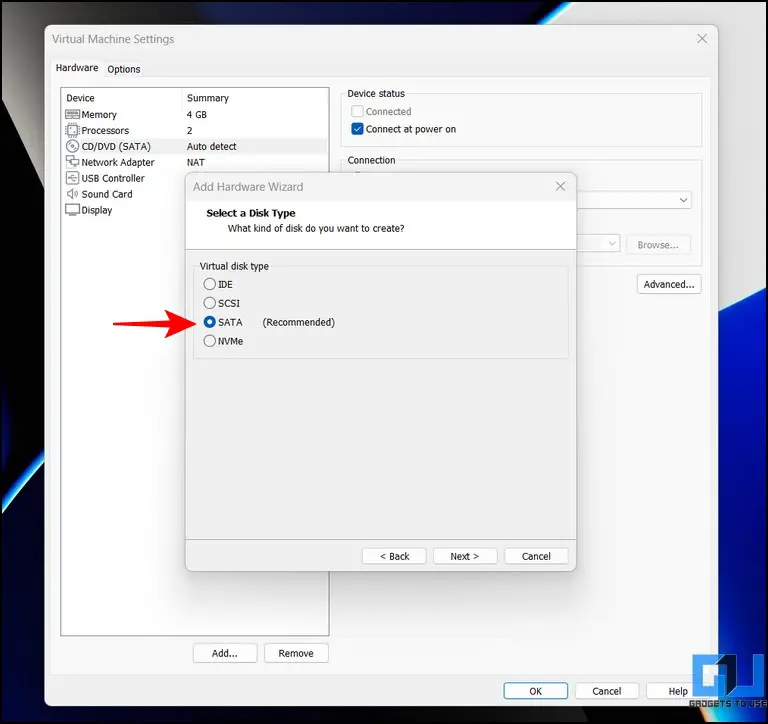
15. Pick the SATA disk drive under the virtual disk type.
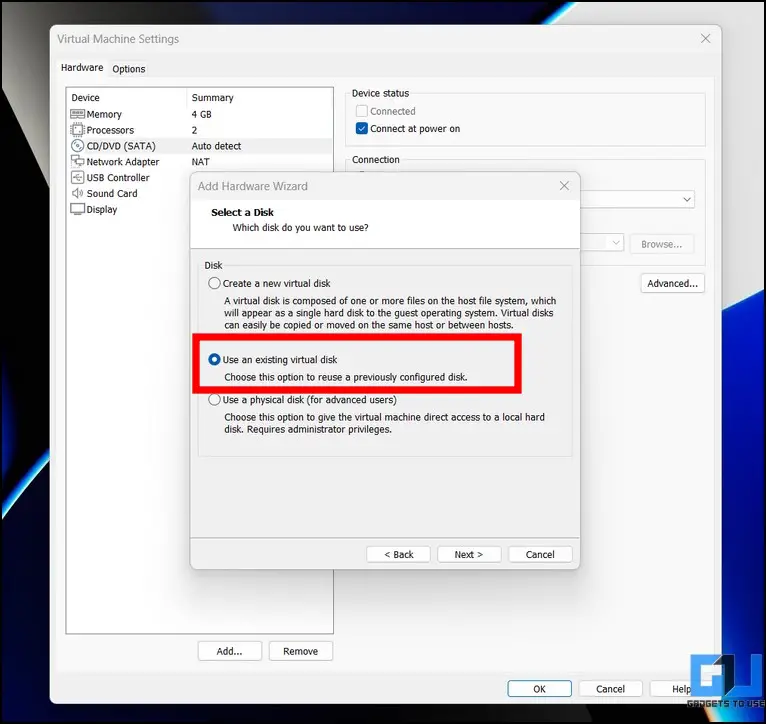
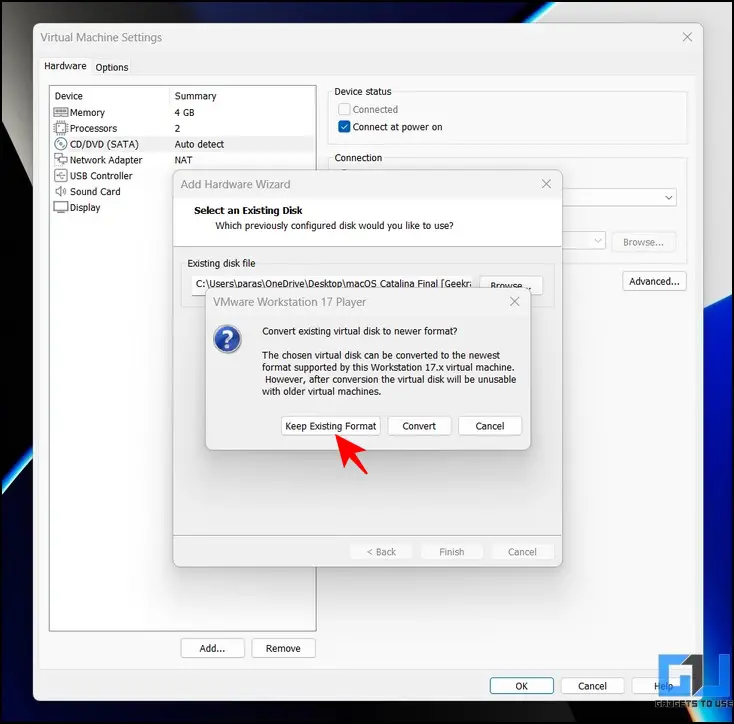
16. Next, select the ‘Use an Existing Virtual Disk‘ option.
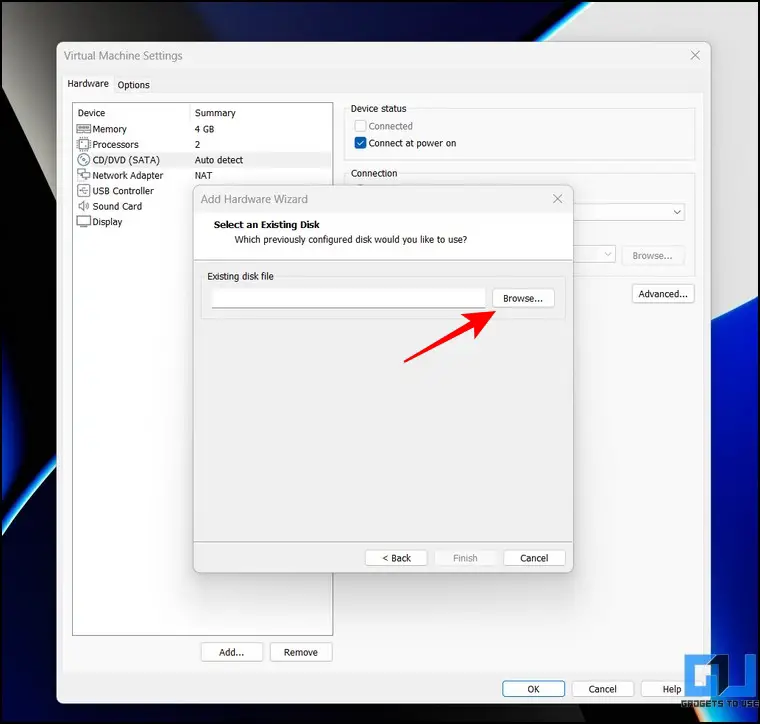
17. On the next page, click the Browse button to locate the .vmdk file extracted earlier from the downloaded file.
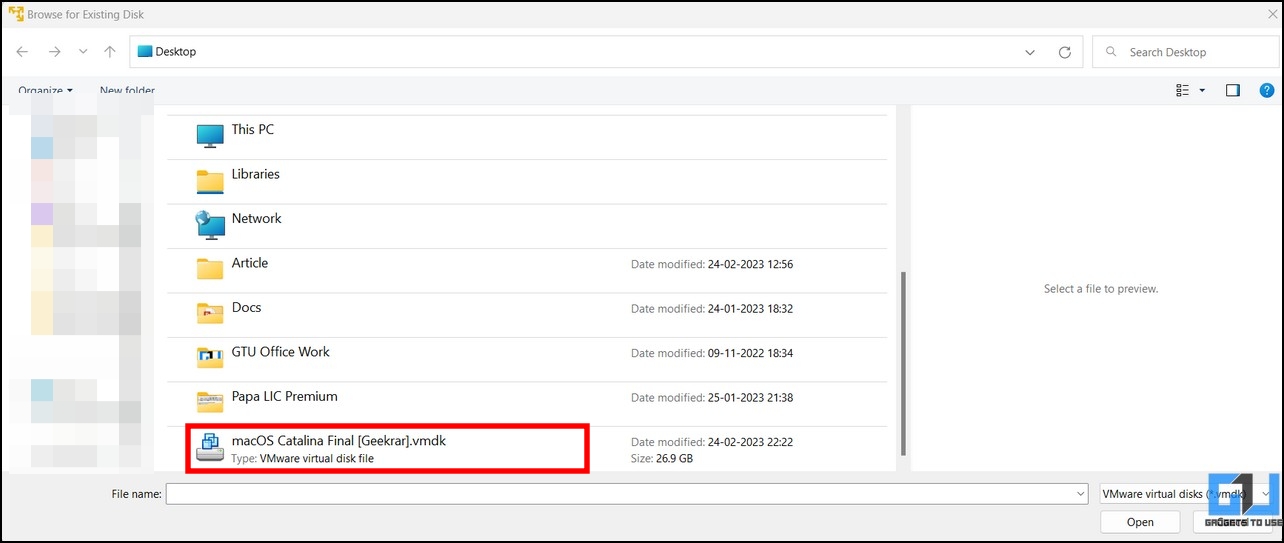
18. Select the macOS Catalina Final .vmdk file and click the open button to allocate it to your virtual machine.
19. Press the Finish button to save your changes.
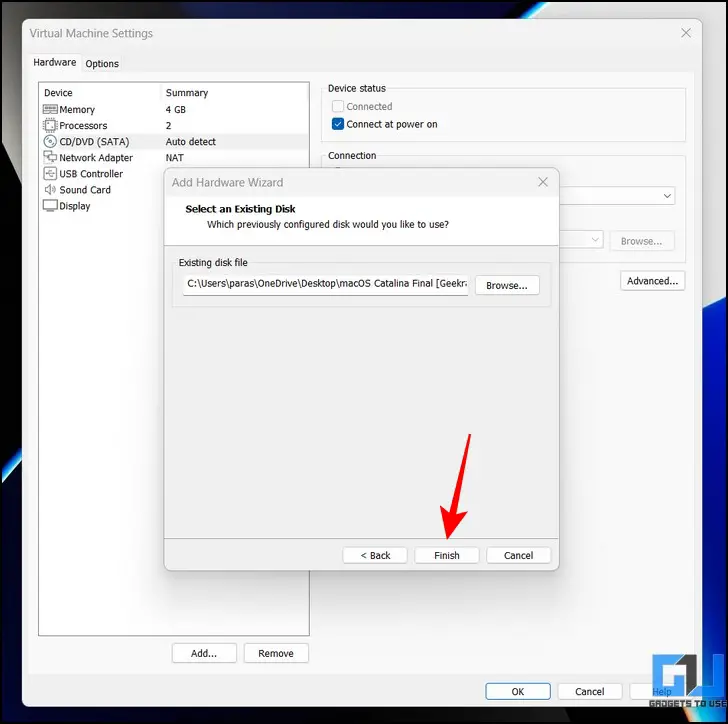
Pro-Tip: If you get a prompt asking to convert the existing virtual disk to a newer format, click the Keep Existing Format button to retain the original disk format.

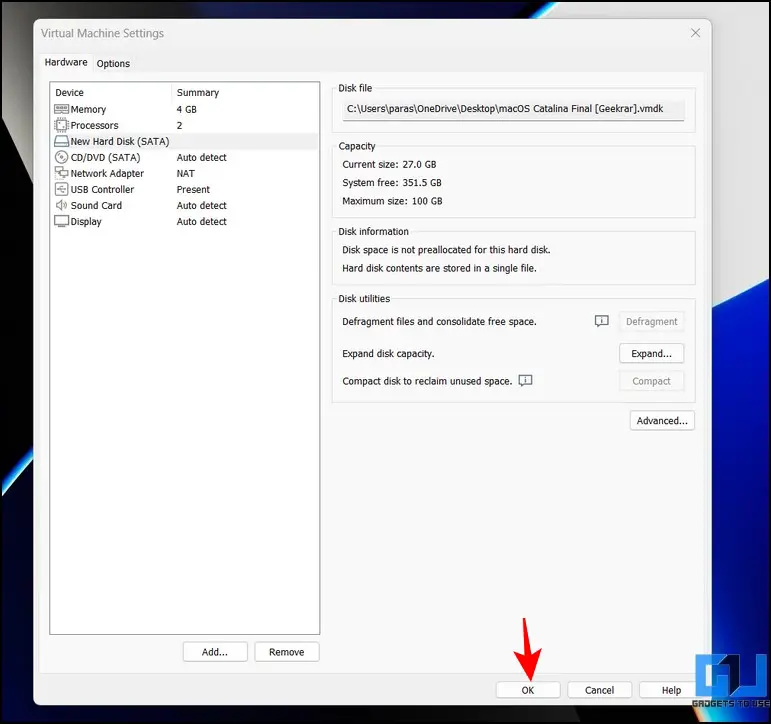
20. Click the OK button to save changes.
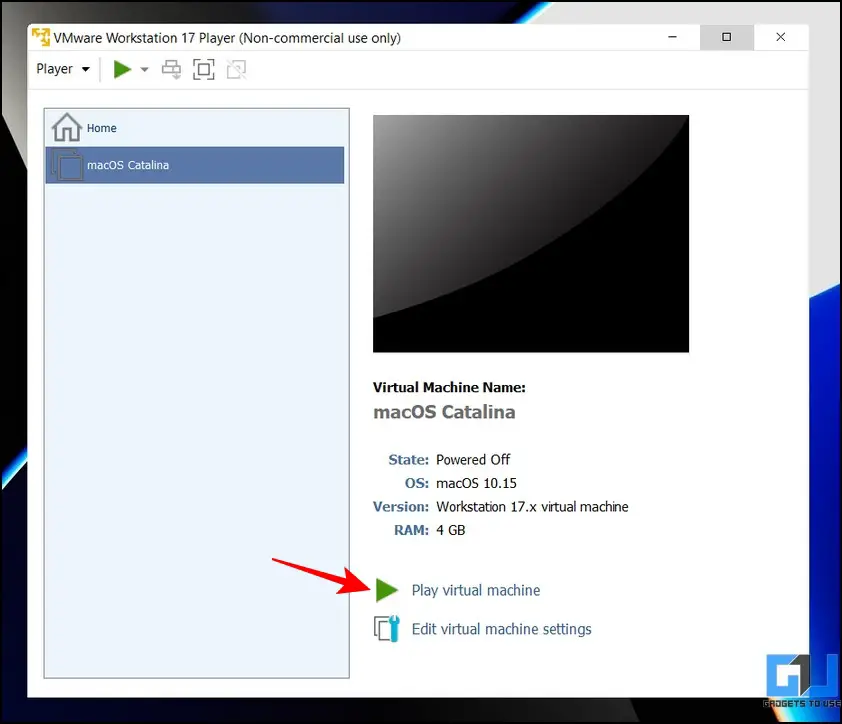
21. Finally, press the Play Virtual Machine option to boot into the macOS virtual machine.
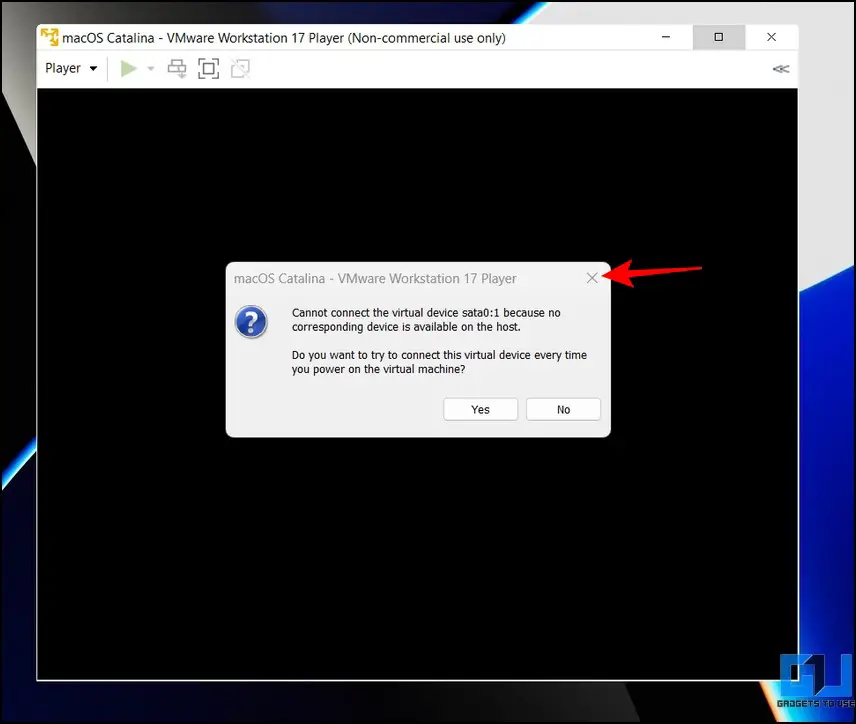
Pro-Tip 2: If you get the ‘cannot connect the virtual device sata0:1 warning, simply close the popup to ignore it.
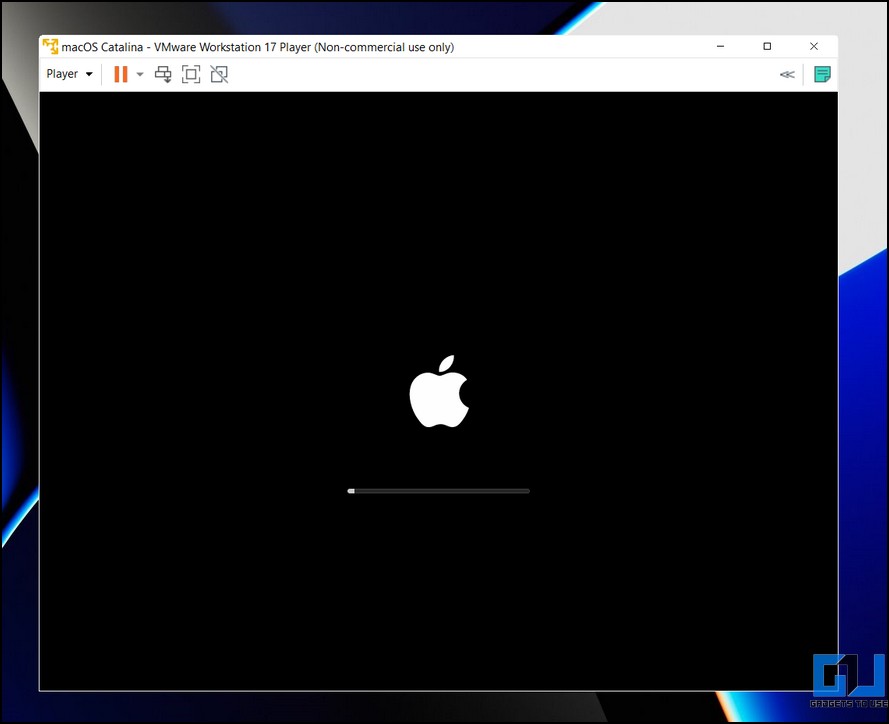
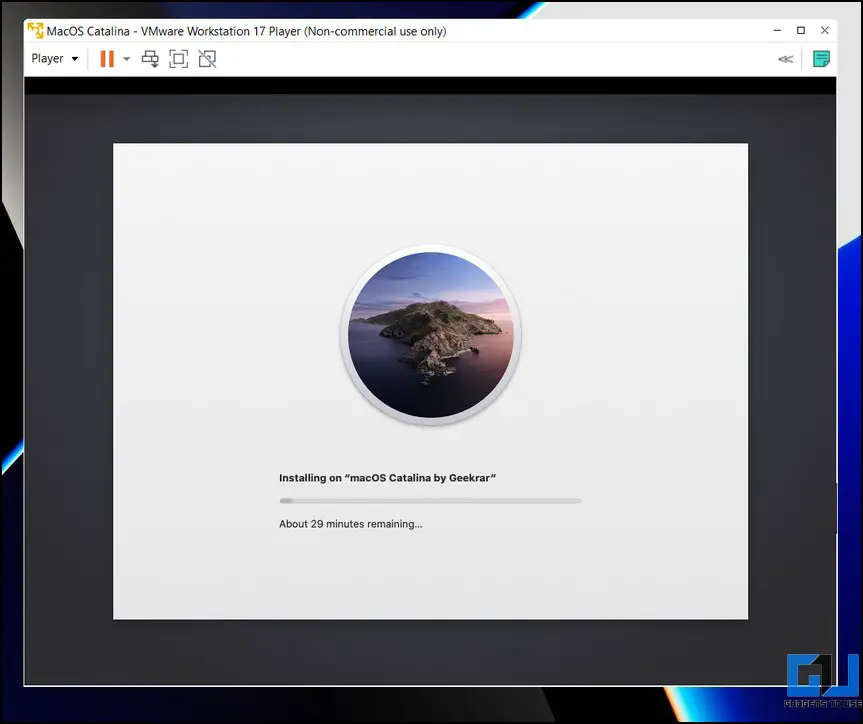
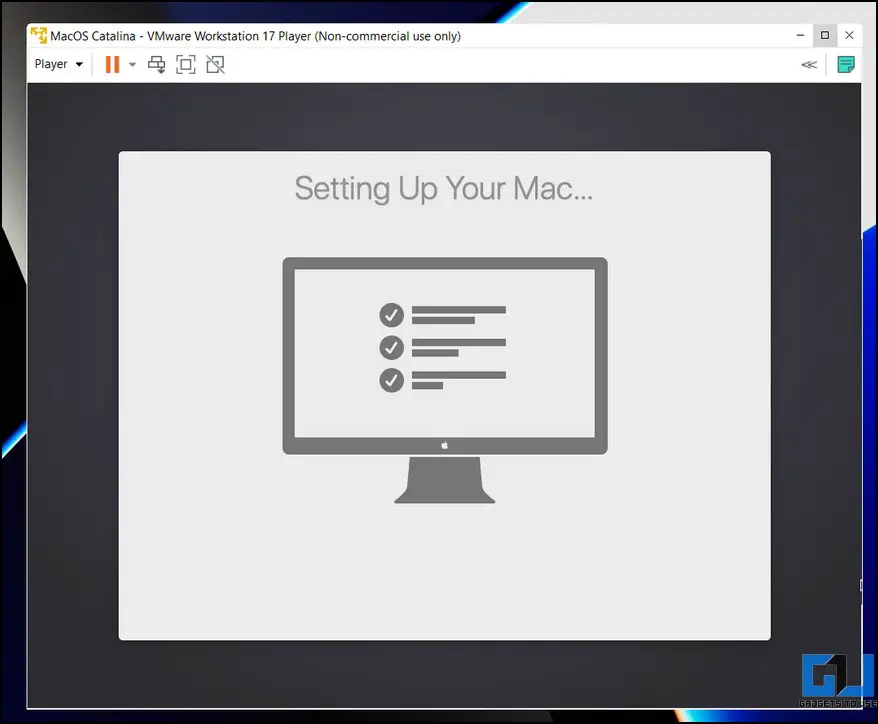
22. You will now boot into macOS Catalina, where you will see the Apple logo.
23. Wait a few minutes to let macOS install on the allocated virtual disk. The virtual machine will restart automatically once the installation completes.
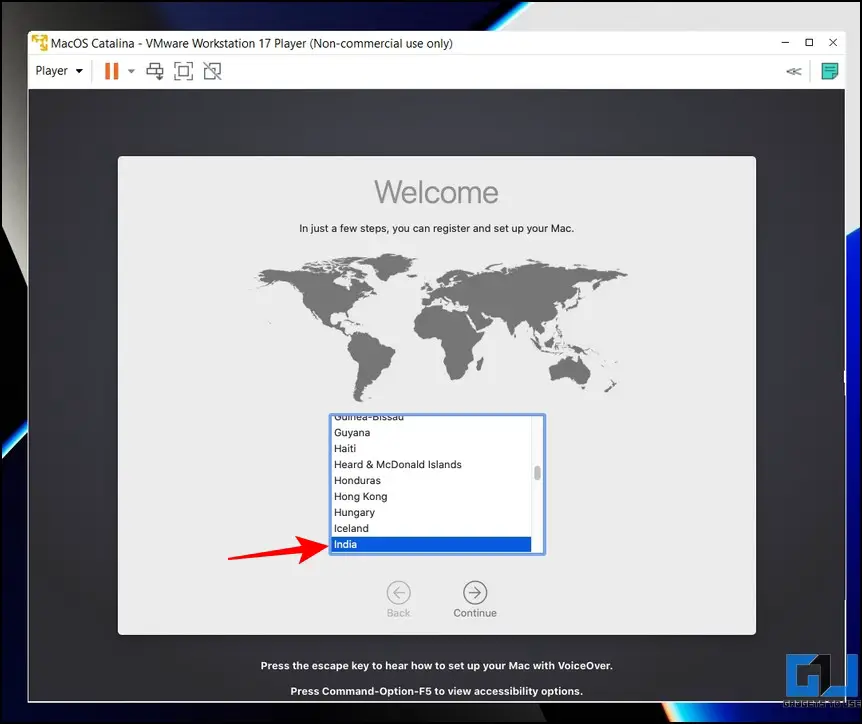
24. After reboot, pick your desired region to set up the macOS. You can also press the Escape key to set up your Mac with Voiceover.
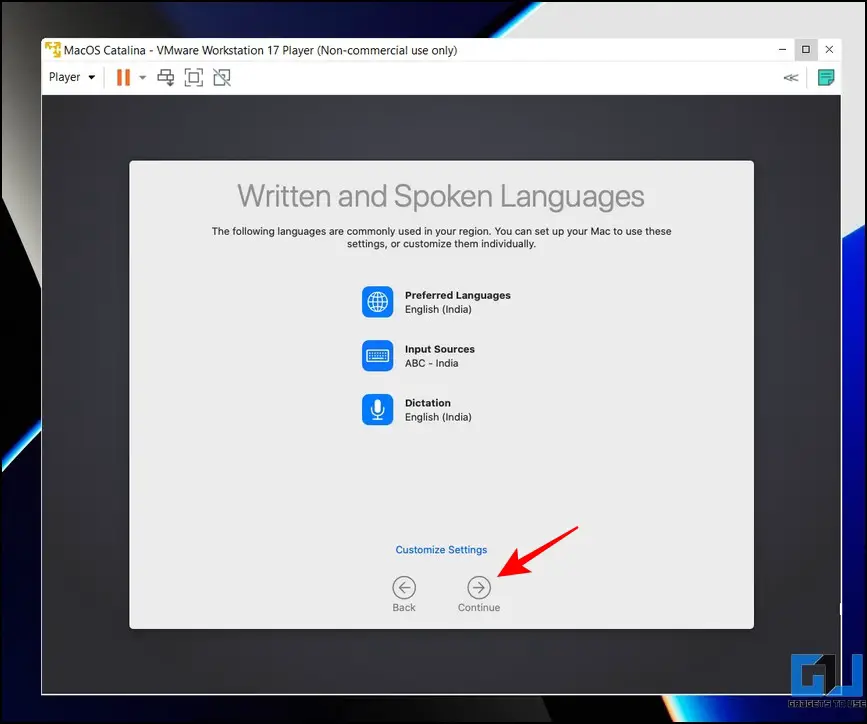
25. Next, pick your written and spoken language and press the Continue button.
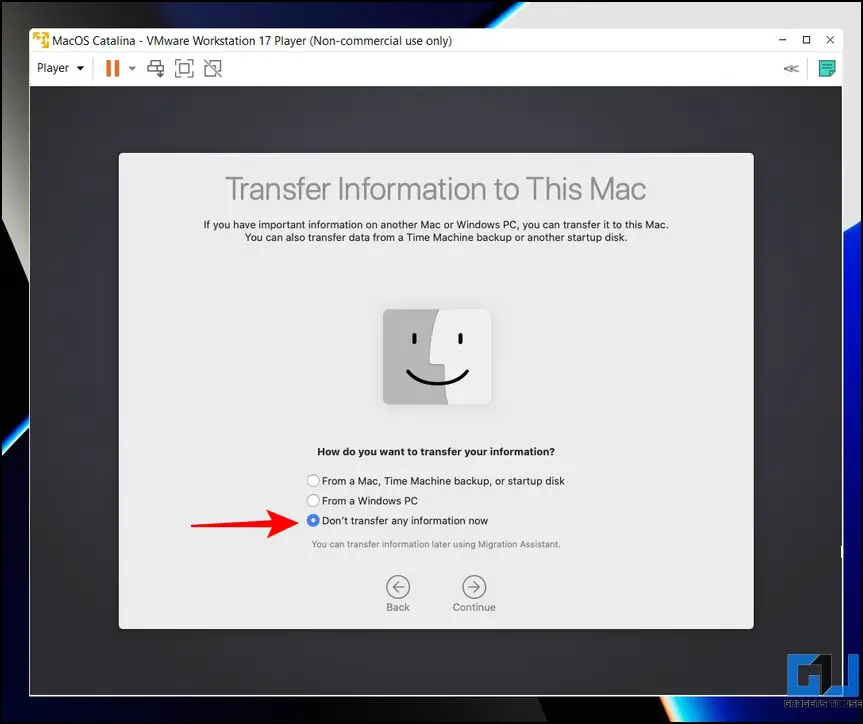
26. You will now see the page to transfer information from your old Macbook or Windows PC. Alternatively, if you desire to set macOS afresh, pick the ‘Don’t Transfer any Information now‘ option.
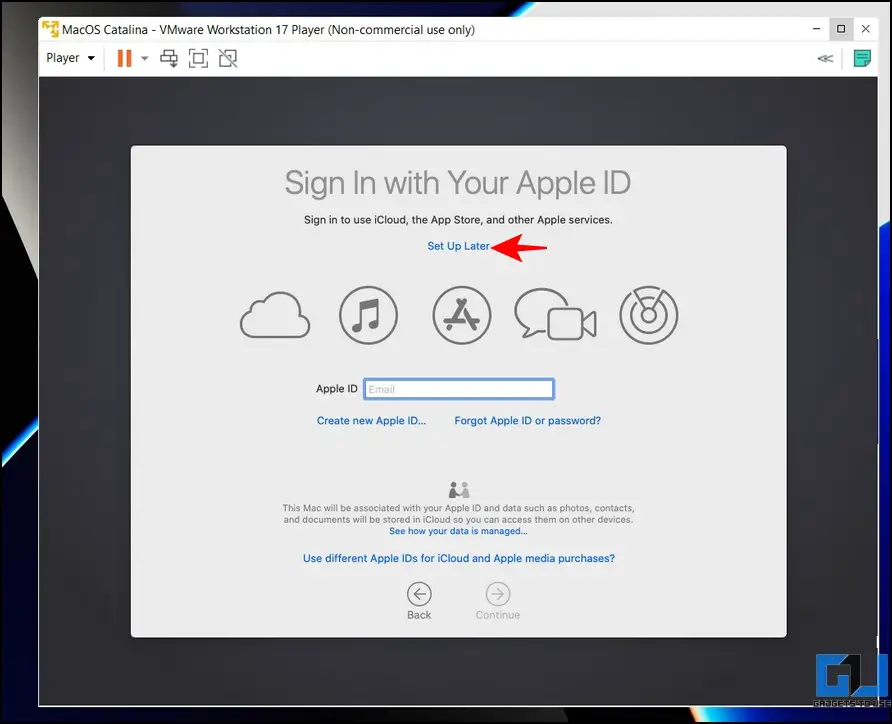
27. Next, skip the option to set up iCloud by clicking the Set Up Later button. (This is because users have often reported issues completing the setup after signing into iCloud during the initial setup. You can sign in to iCloud later after booting the macOS)
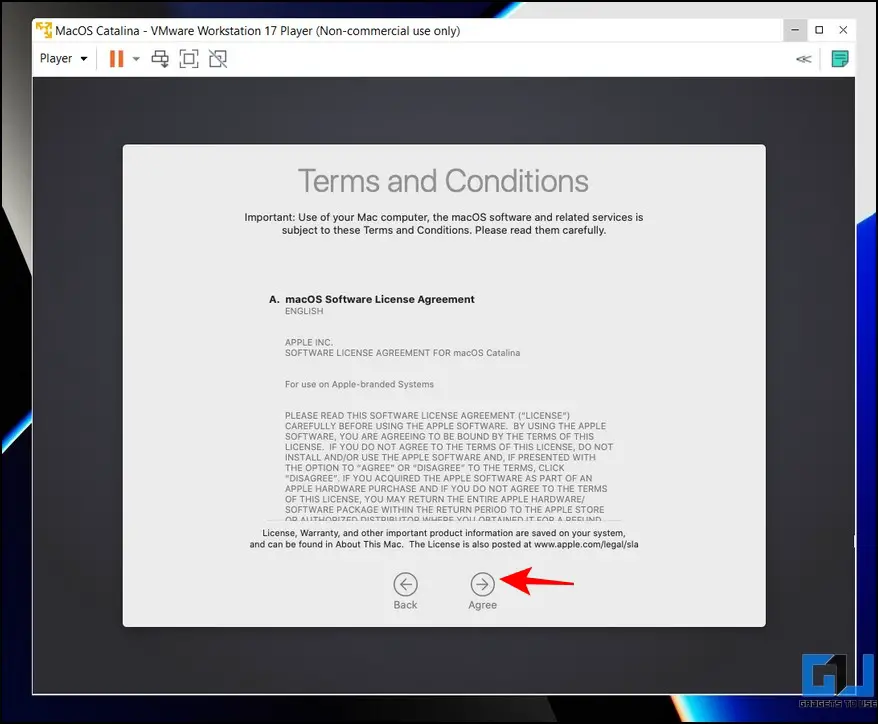
28. On the next page, press the Agree button to accept the Terms and Conditions.
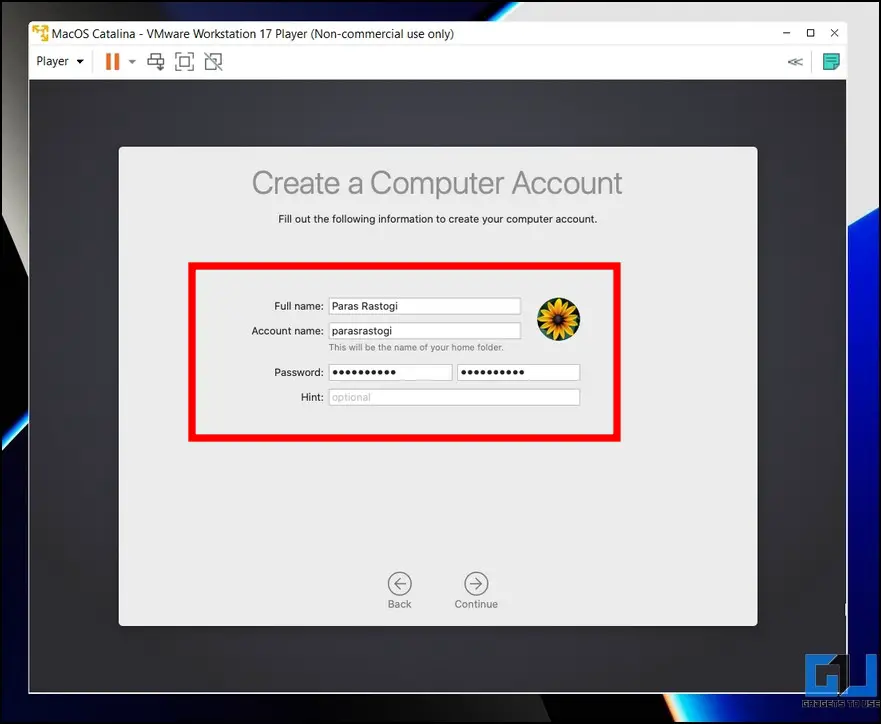
29. Enter your desired Account Name and Password for the virtual machine and hit the Continue button.
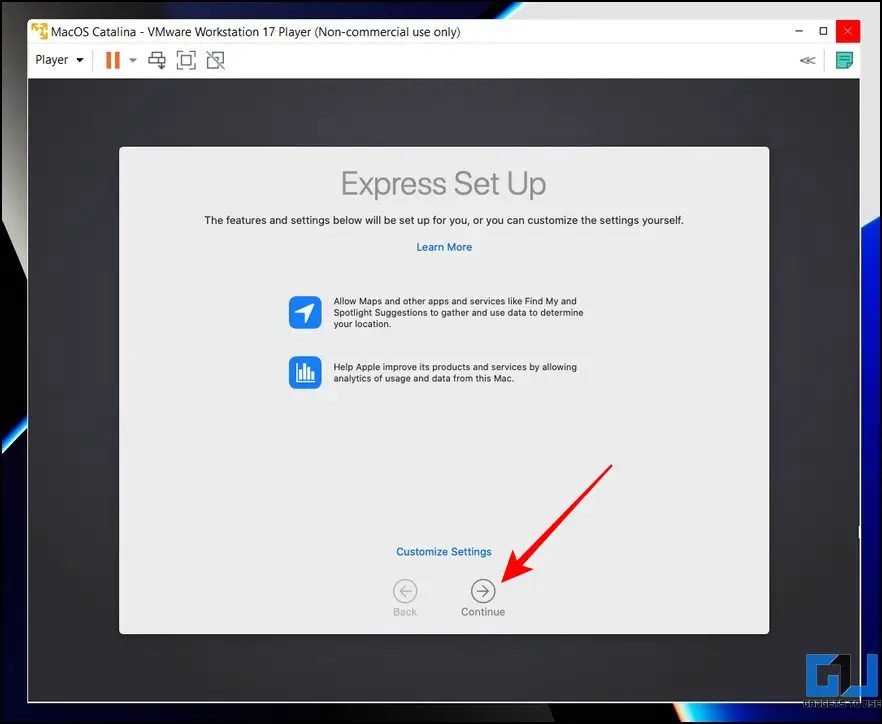
30. Pick Express Setup and press the Continue button. If you wish to customize some features during installation, you can click the Customize Settings button.
31. Select your theme appearance for the macOS and press Continue.

32. That’s it! Wait a few seconds to finalize setting up your Mac.
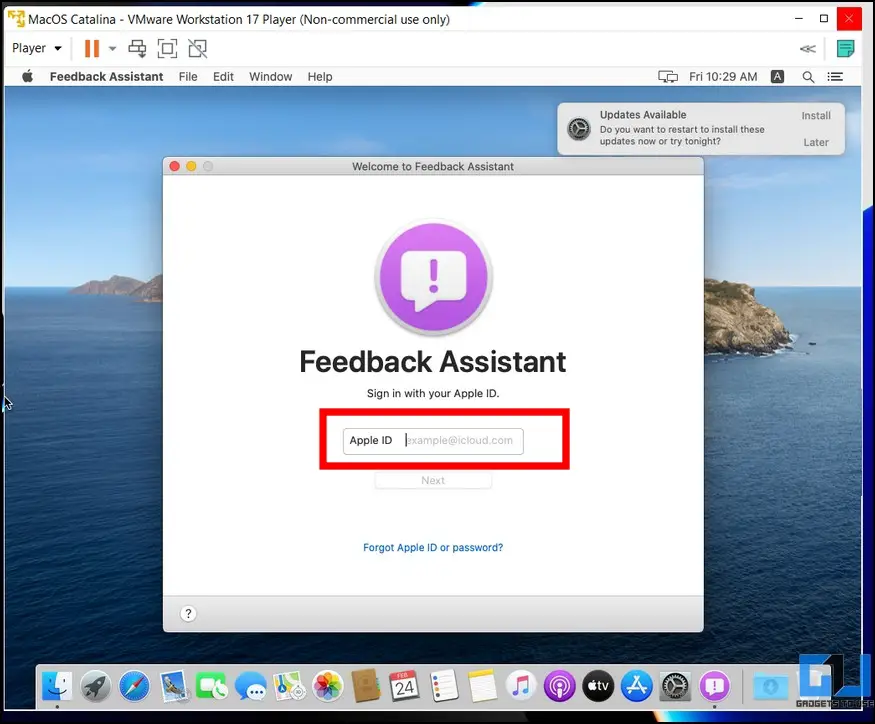
33. Once booted, accept the Feedback Assistant terms and conditions and sign in with your Apple ID to access all iCloud features on your virtual machine.
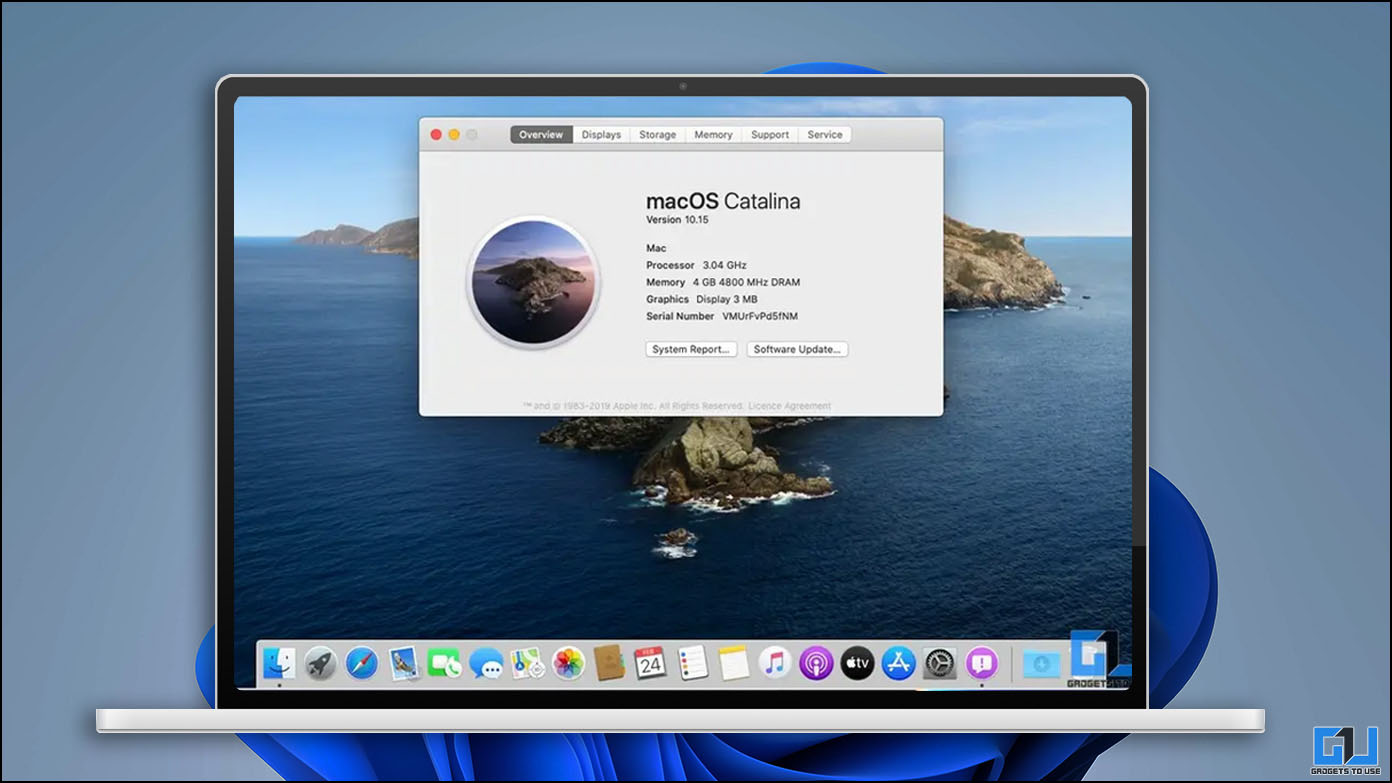
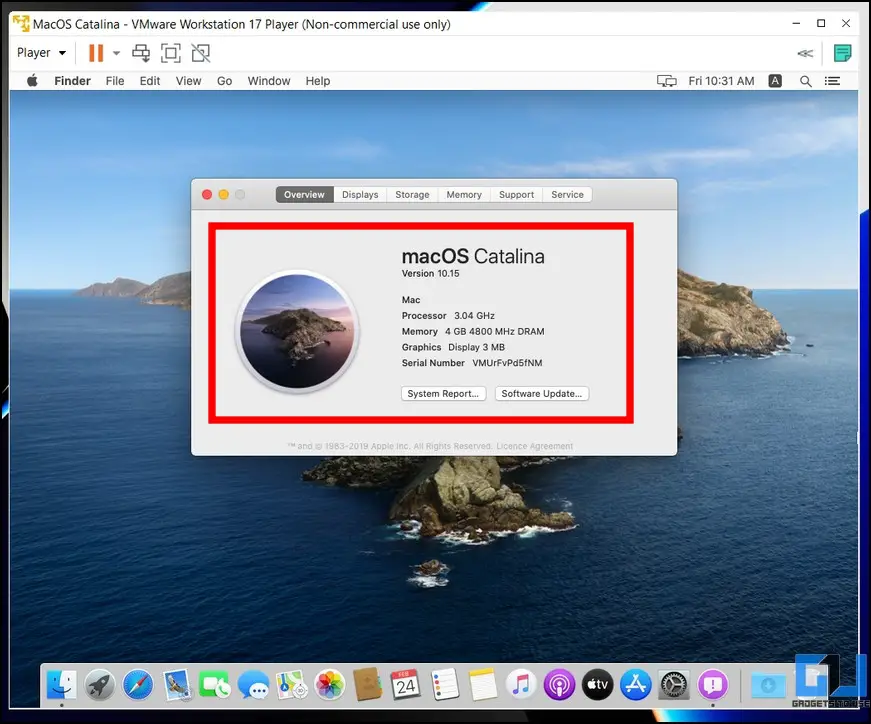
34. Congrats! You’ve successfully installed macOS Catalina on Windows 11/10 using VMware. You can head over to the ‘About this Mac‘ option to see details of your ‘Virtual Mac’.
35. We’ve tested most features of the virtual Mac, and they seem to work fine without any major bugs or crashes. You can also update the system to the latest version by installing the available updates.
Troubleshooting Issues When Installing macOS on Windows
If you’re facing issues while installing macOS Catalina on your Windows PC, we have compiled common error fixes in this section to help you troubleshoot them easily.
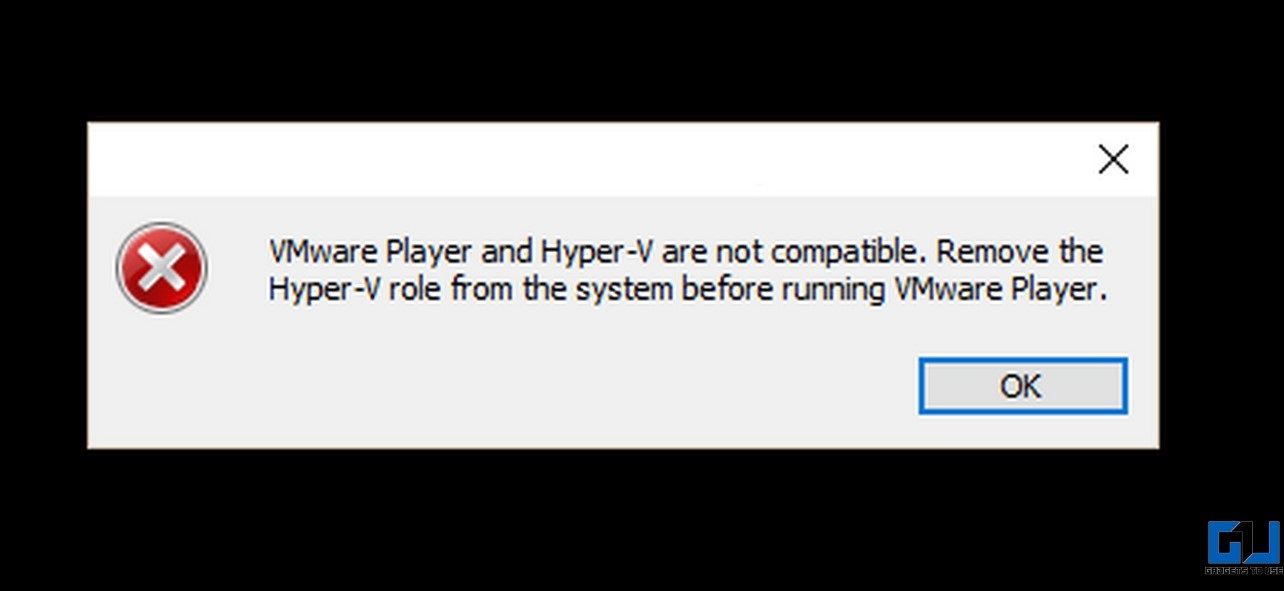
Error 1: VMware Player and Hyper-V are Not Compatible
You need to disable Hyper-V on your system to run the virtual machine on the VMware Workstation Player. Follow the steps in the pre-requisite section above to troubleshoot the same.
Error 2: No Apple MacOS X Option in Virtual Machine Installation Wizard
Download and run the ‘unlocker CMD installation‘ file to patch VMware for adding an entry for Apple Mac OS X while installing the virtual machine. For more details, refer to the pre-requisites section.
Warning 1: Convert Existing Virtual Disk to New Format
Retain the original image format by clicking the ‘Keep Existing Format‘ button. Converting the image to a new format might corrupt it.
Error 3: Vmware Workstation Unrecoverable Error
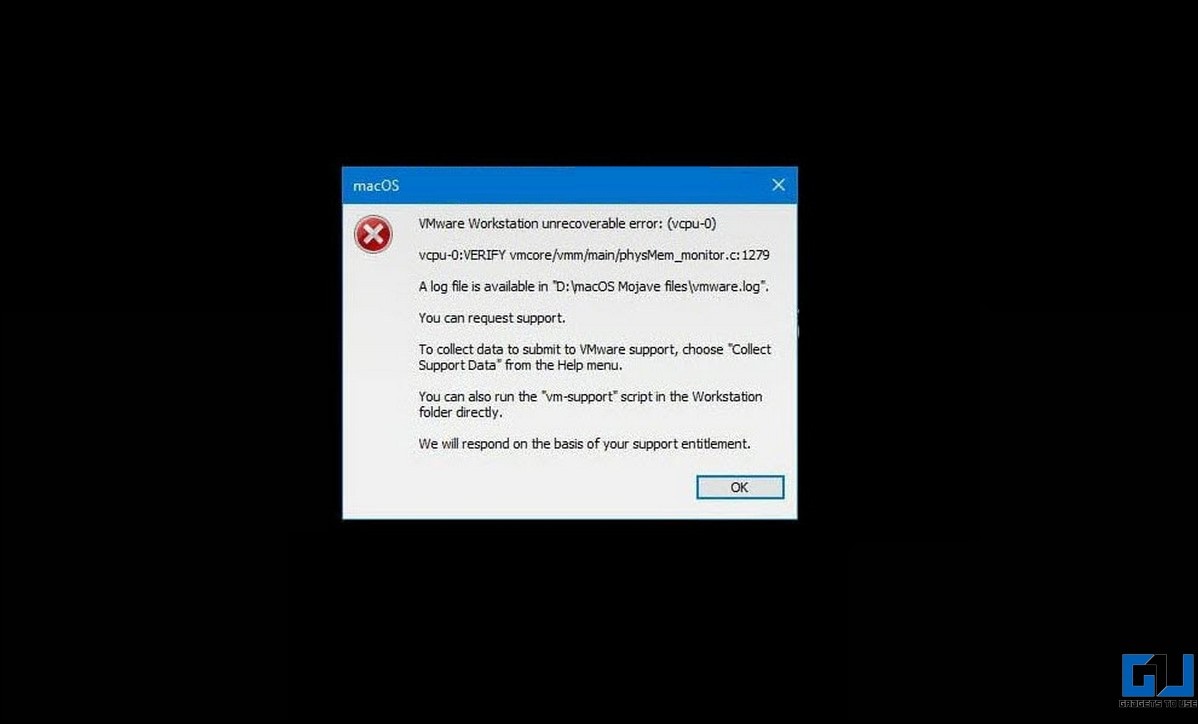
Follow these easy steps to fix the VMware Workstation Unrecoverable error:
1. Head over to your system’s Document> Virtual Machines> MacOS Catalina folder and locate the .vmx file to edit it with Notepad.

2. Next, add the following line at the end and save the changes:
smc.version = “0”

3. Play the Virtual Machine to verify if the issue is fixed.
Warning 2: Can’t connect the Virtual device Sata0:1
The easiest method to eliminate this warning and run the macOS without errors is to ignore it. Simply close the warning popup by clicking the X button.

FAQs
Q: How to install macOS on Windows PC without Mac?
A: You need to create a virtual machine on your Windows PC to install macOS on Windows. Follow the easy steps in this guide to install macOS on your Windows PC.
Q: Can you install macOS on Windows 11?
A: Yes, you need third-party virtualization software such as VMware to create a virtual macOS on Windows 11. For more details, refer to the steps above.
Q: How to install macOS on VMware Workstation Player?
A: Check out VMware installation steps in this explainer to install macOS without errors.
Wrapping Up: Experience macOS without paying a Fortune!
We hope this explainer has assisted you in installing macOS on your Windows 11/10 system. If you find it useful, spread the word with your friends, and check the below links for more helpful articles on macOS. Stay tuned to GadgetsToUse for more such reads.
Also, Read:
- MacOS Ventura Stage Manager Tricks: Hide Recent Apps, Show Desktop Files, and More.
- How to Unblock AirDroid to run on macOS.
- Guide to Install ADB on Your Mac and Connect Android
- How to Install macOS Dynamic Wallpapers on Windows 11/10.
You can also follow us for instant tech news at Google News or for tips and tricks, smartphones & gadgets reviews, join GadgetsToUse Telegram Group, or for the latest review videos subscribe GadgetsToUse Youtube Channel.