Zipping files is a great way to save space on your computer. However, compressing them only makes them difficult to access but not secure. If you’re storing sensitive files or data with private information, it would be best to secure the archive with a password. In this article, let’s see how to password-protect a zip file on Mac with or without Terminal.
How to Password Protect a Zip Archive File on Mac OS?
You may want to password-protect a zip file for various reasons. This includes protecting sensitive data from unauthorized access, preventing unauthorized sharing of files, or complying with organization regulations.
For starters, Mac allows you to password-protect a Zip file via Terminal. However, it can be a little tricky for those unfamiliar with commands. Here, we’ll show you how to use Terminal to add passwords to zip files, followed by alternative third-party tools that let you do so. Read on.
Method 1- Add Password to Zip Using Mac Terminal
The easiest way to password protect a zip file on Mac without using any third-party tool or software is via Terminal. All you need to do is type two lines of command and boom; the zip file is ready. Here’s how to do it:
1. Open Terminal on your Mac.
You can do it directly from Launchpad, via Finder > Applications > Utilities, or using Spotlight Search.
2. Type cd, followed by the location of the file or folder you want to compress and add a password to. Press Enter.
For instance, type cd downloads if the file is in Downloads or cd desktop if saved to the desktop.
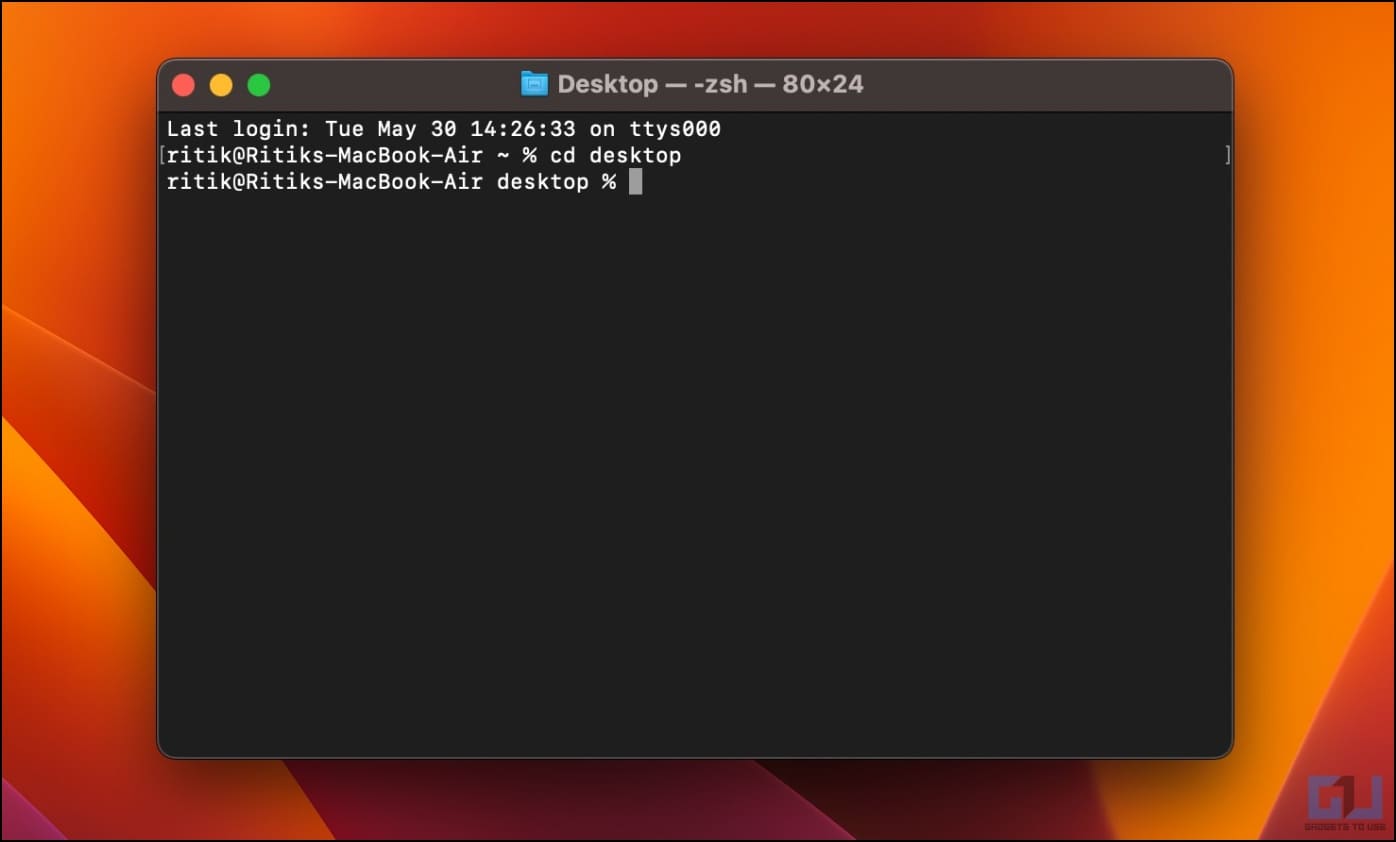
3. Next, type this command: zip -er filename.zip where filename is the name you want for your zip file. Do not press enter yet.
4. To this command, add the name of the file (along with its file extension) or folder you’re compressing.
Note: If you see the “too many arguments” error, press Enter after the cd <folder> command.
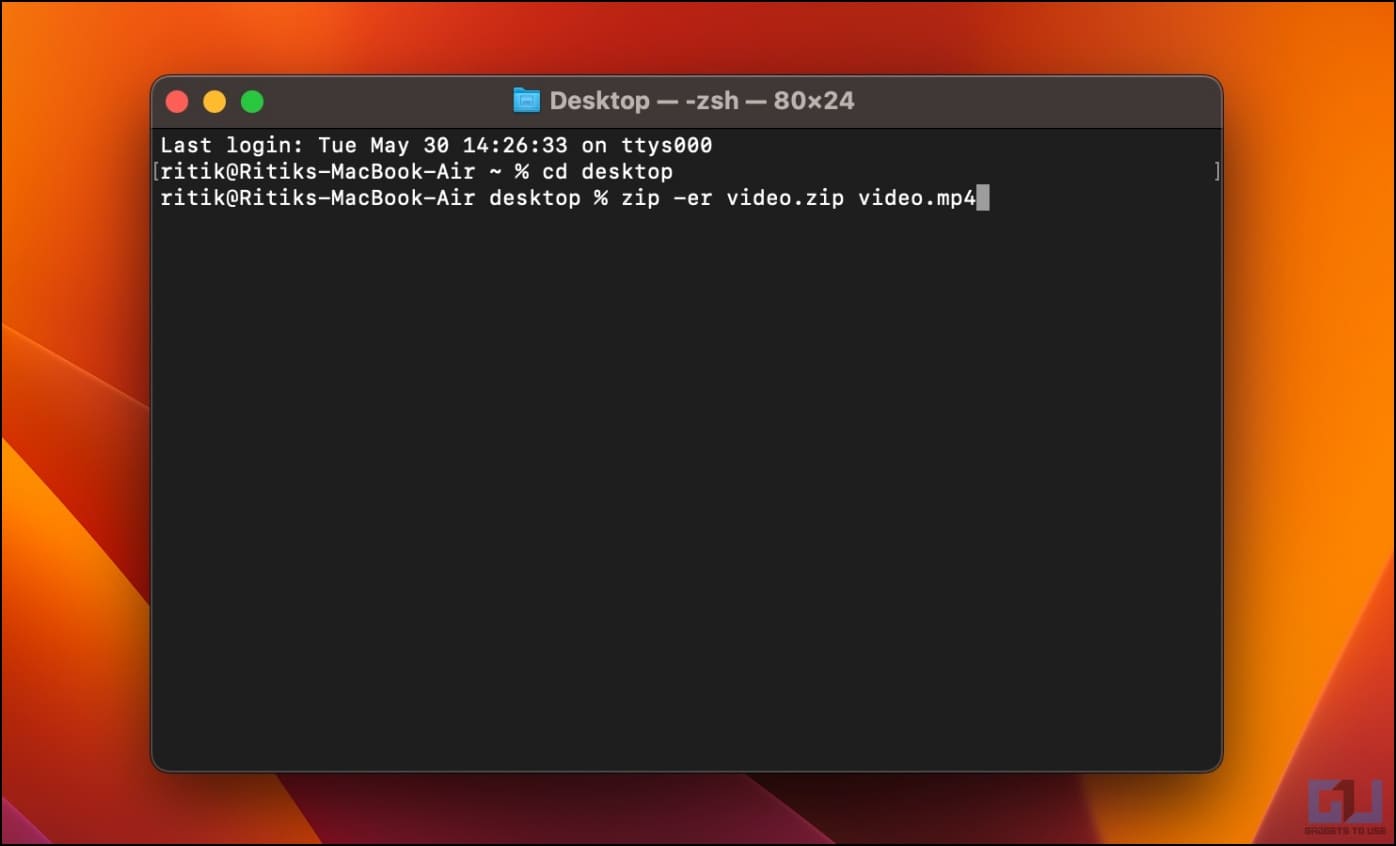
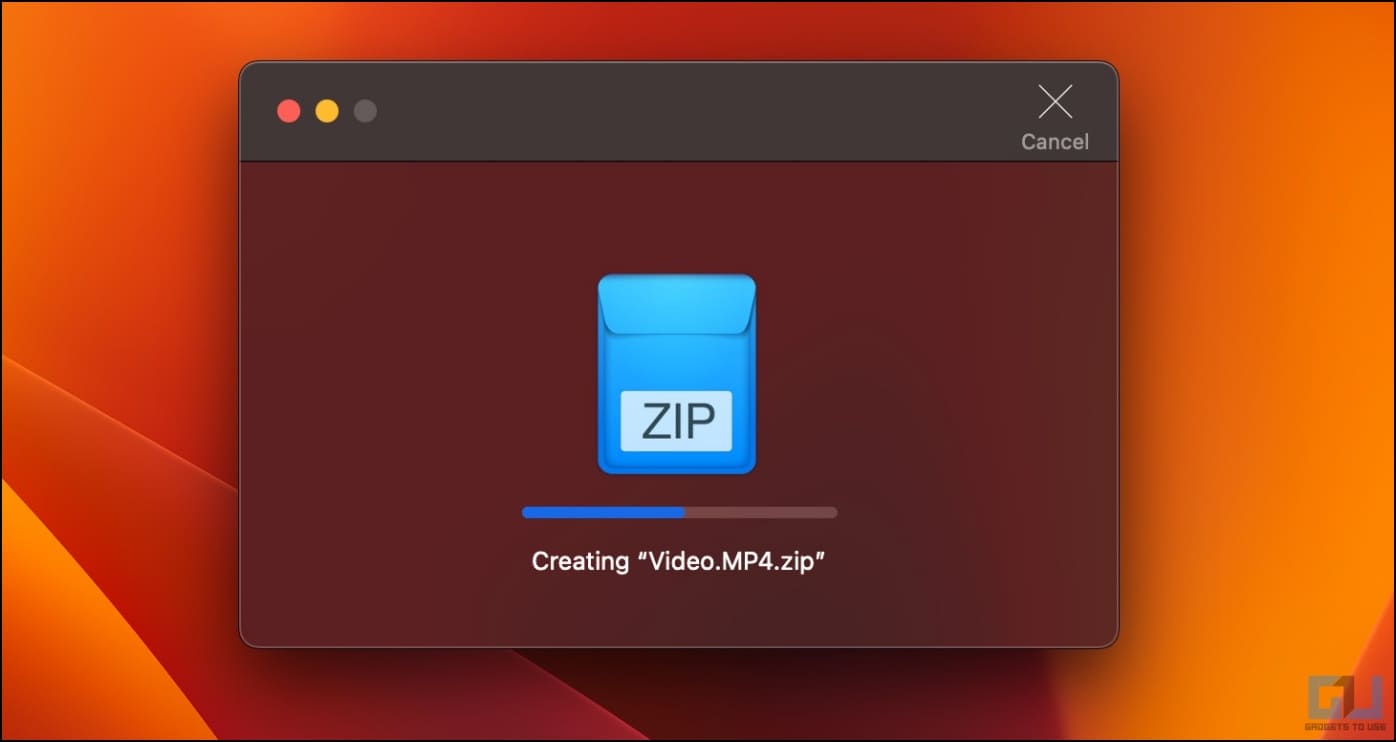
Here, our file name is “Video.mp4,” hence, the final command would be: zip -er Video.zip Video.mp4.
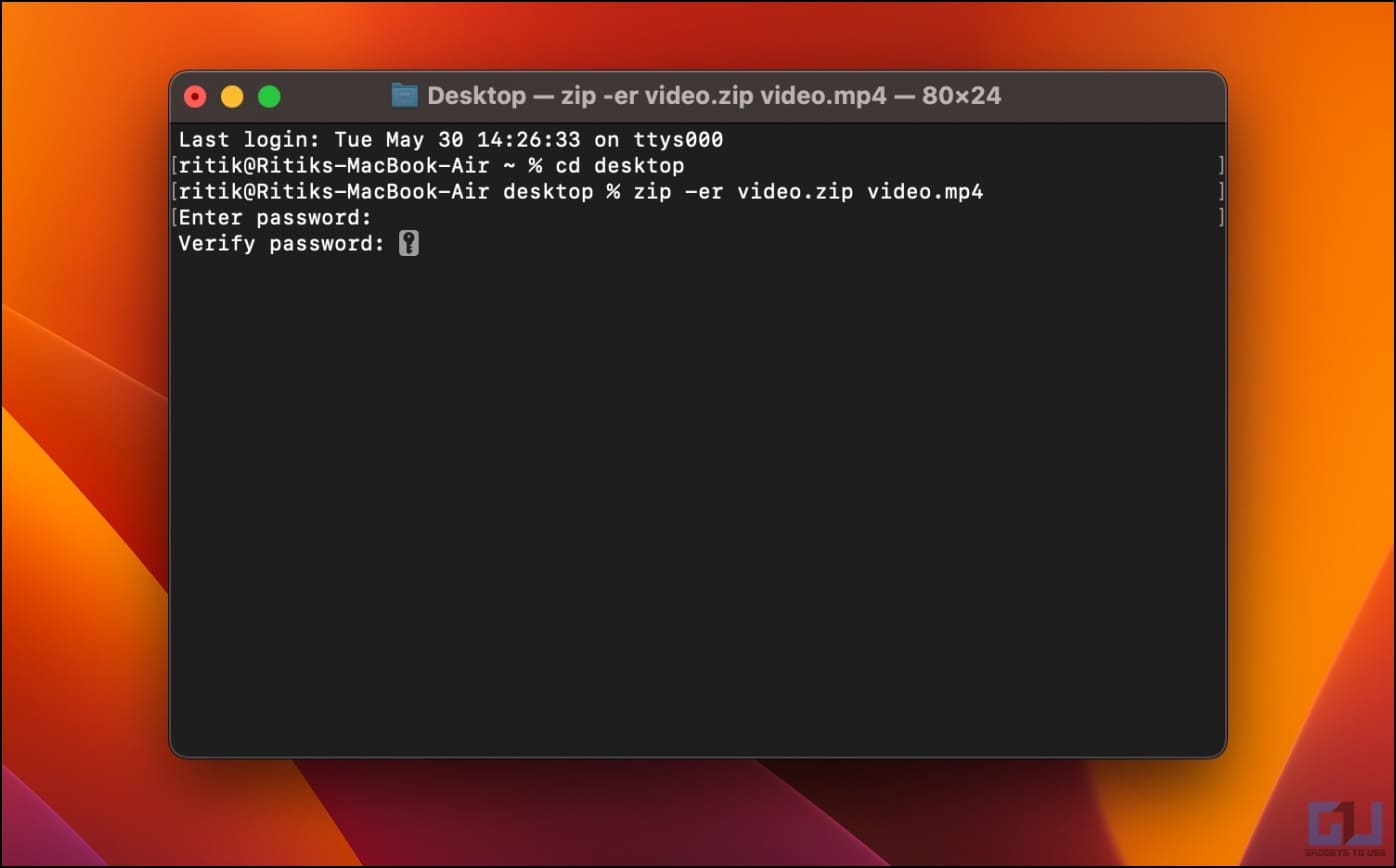
5. Enter and verify the password you want to set for the zip file. Note that the password won’t be visible during typing.
Wait for it to compress the file.
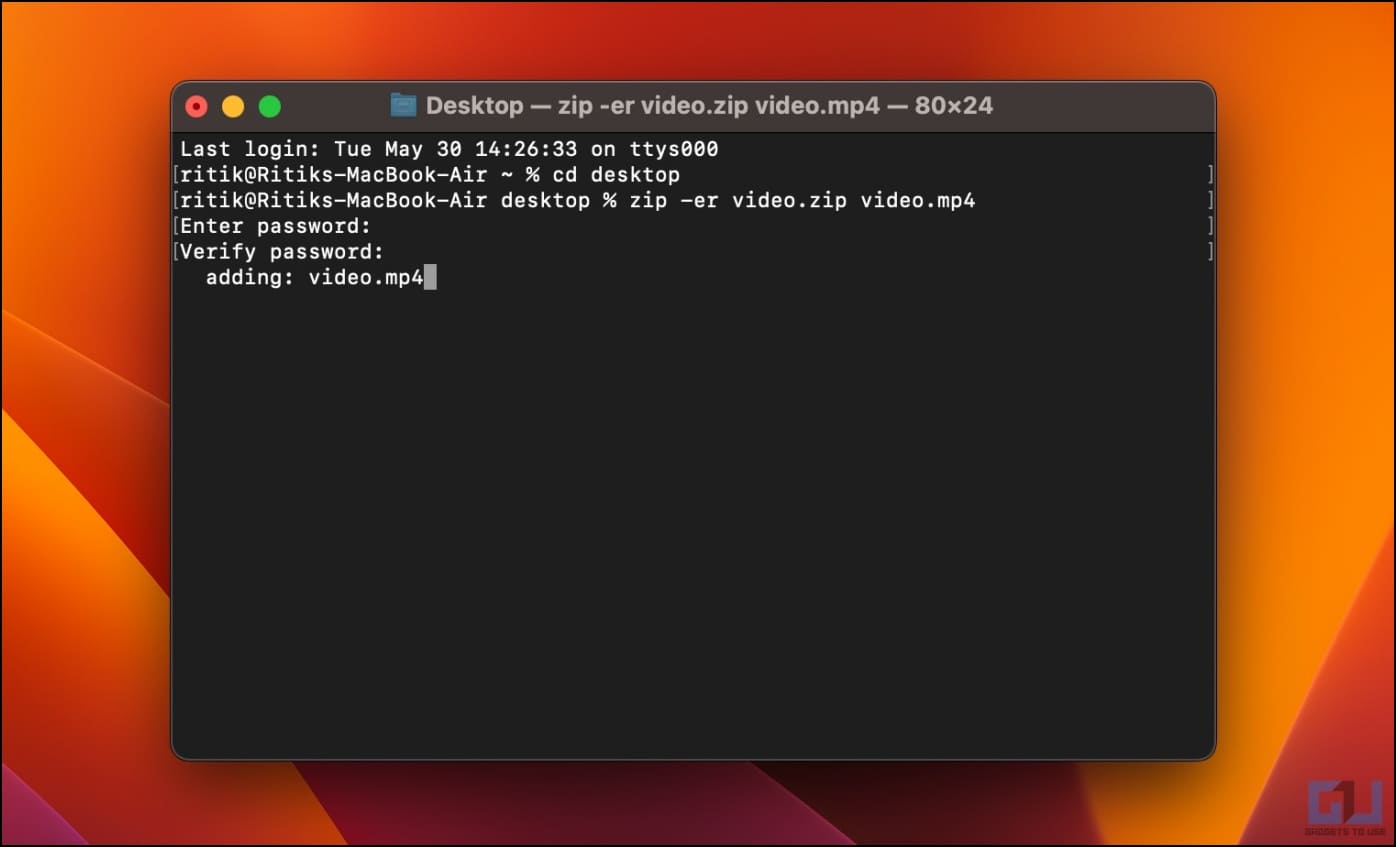
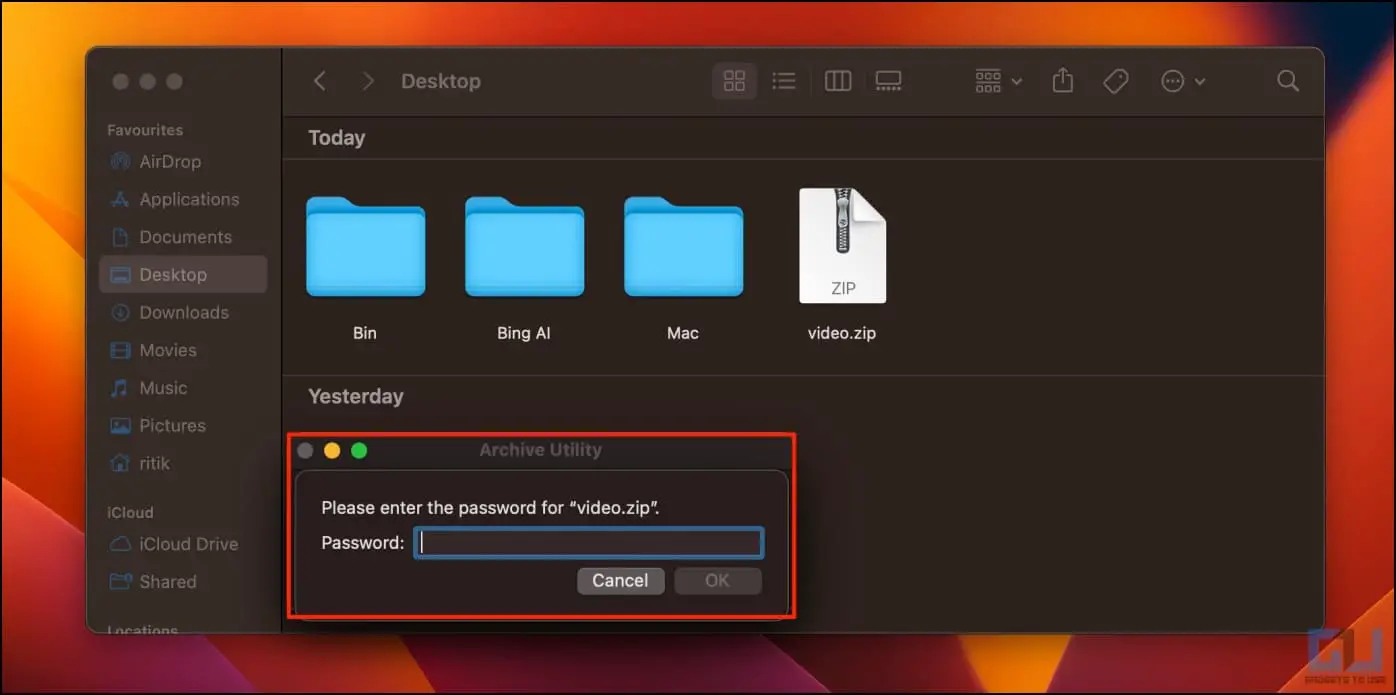
Once done, you’ll see a compressed file on your desktop. Double-clicking the file would prompt you to enter the password you set in Terminal. Only after then you’d be able to access its contents.
How to Fix “Zip Error: Nothing to Do!”
You might see the “zip error: nothing to do!” error when creating a password-protected zip on your Mac. It usually happens when you have not specified what to compress or use an incorrect file name.
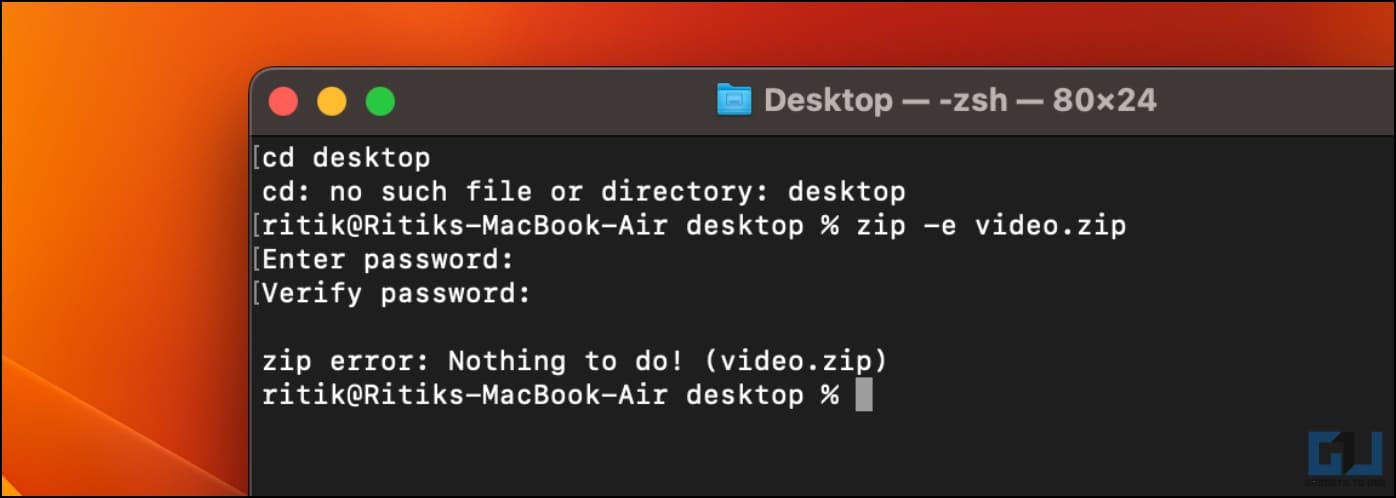
To resolve it, make sure you’re typing the command correctly. For example:
cd desktop
zip -e FTPGH.zip FTPGH.txt
Here, FTPGH.zip = the name you want to keep for the final zip file
and FTPGH.txt = the file you want to compress
This command will compress the FTPGH.txt file on your desktop into a password-protected zip file named FTPGH.zip.
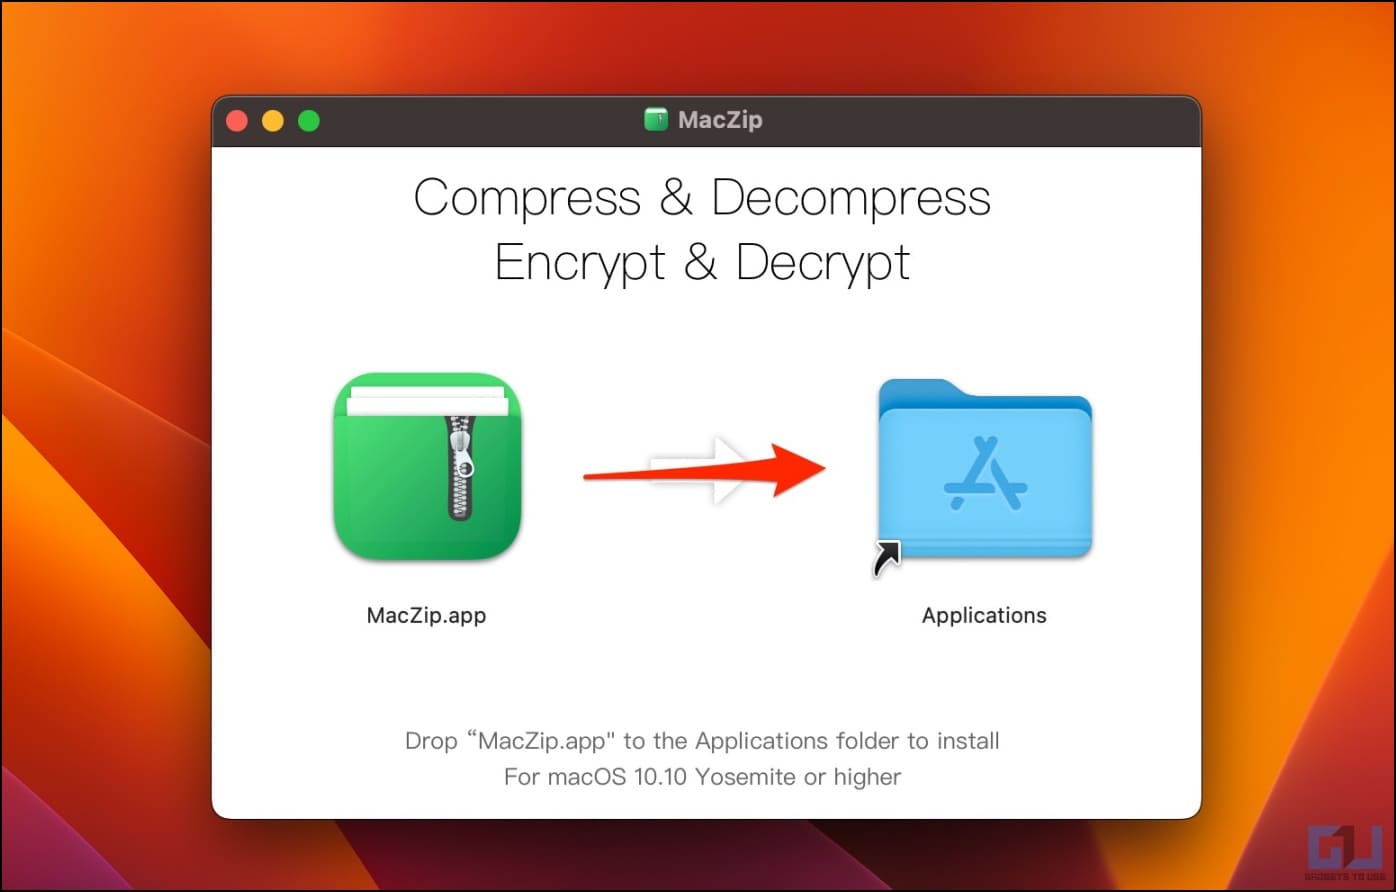
Method 2- Password Protect Files Using MacZip (Free) on Mac
MacZip (formerly called eZip) is a free forever utility for macOS. It supports over 20 popular archive formats, such as rar, zip, 7z, tar, etc., and supports encryption and decryption functions. Here’s how you can use it to compress files with encryption on your Mac computer:
1. Download MacZip.dmg from the official website.
2. Open the downloaded file and drag the app icon into the Applications folder to finish installation.
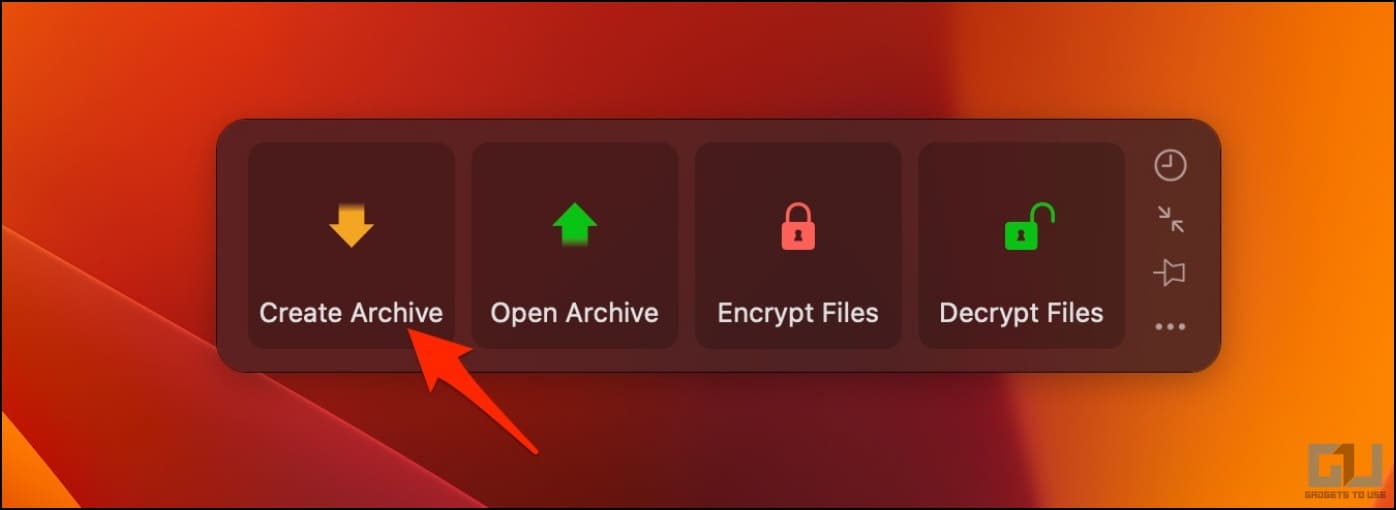
3. Now, open MacZip and click on Create Archive.
4. Select the file or folder you want to compress.
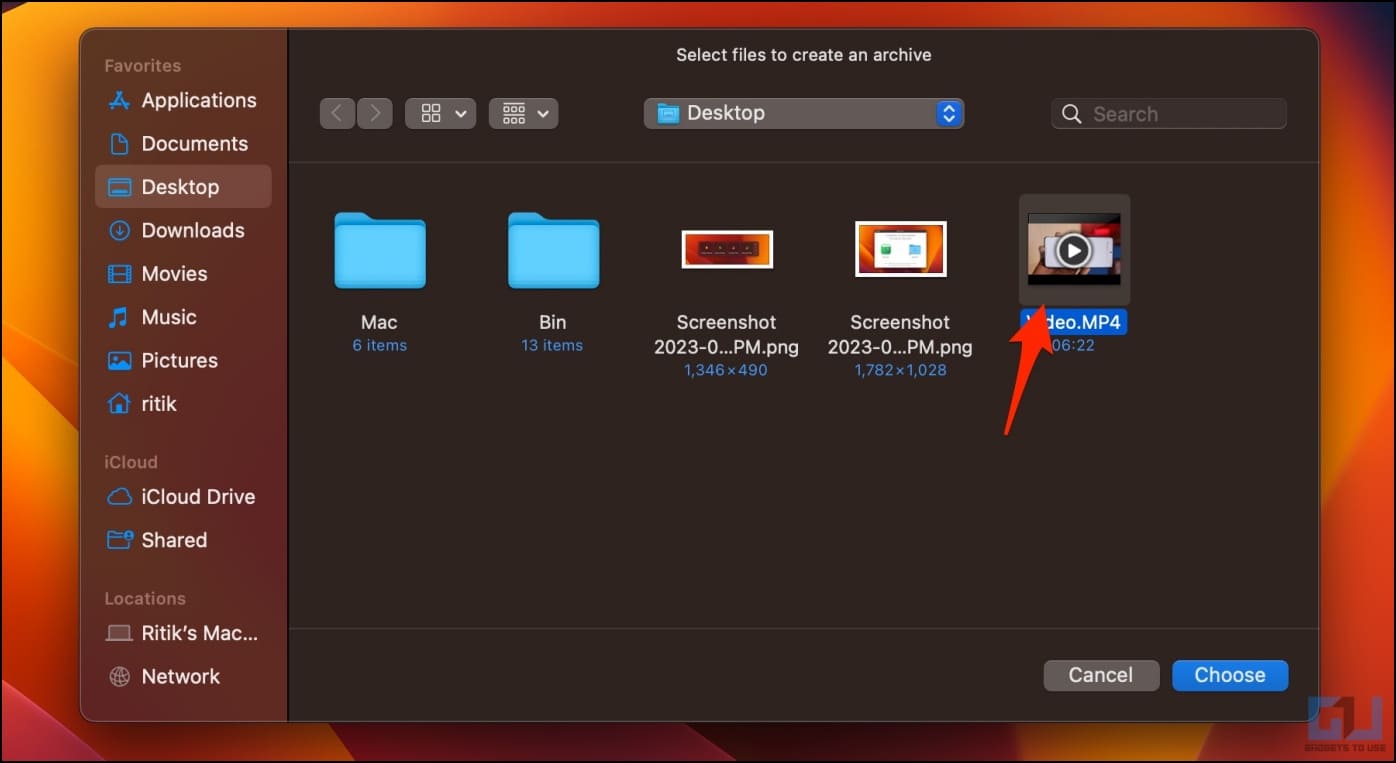
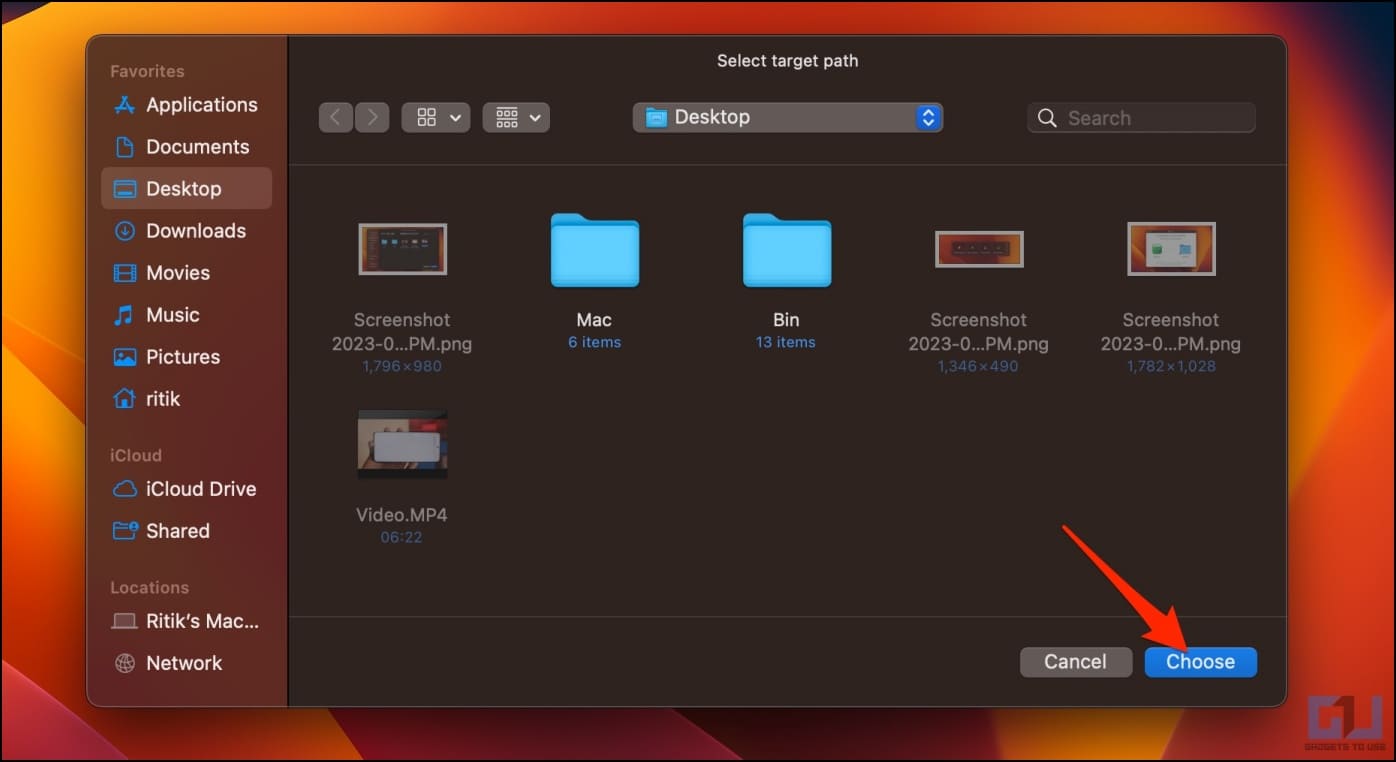
Then, select the target path (where you want to store the zip) and hit Choose.
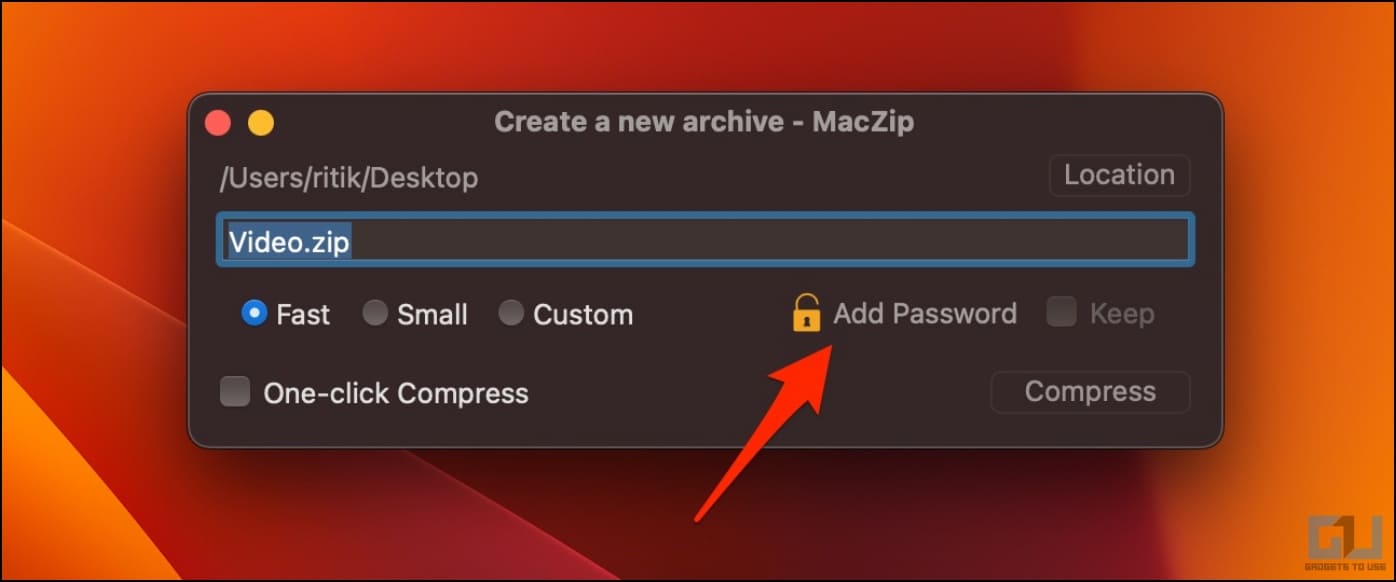
5. Choose the file name and compression level. Then click on Add Password.
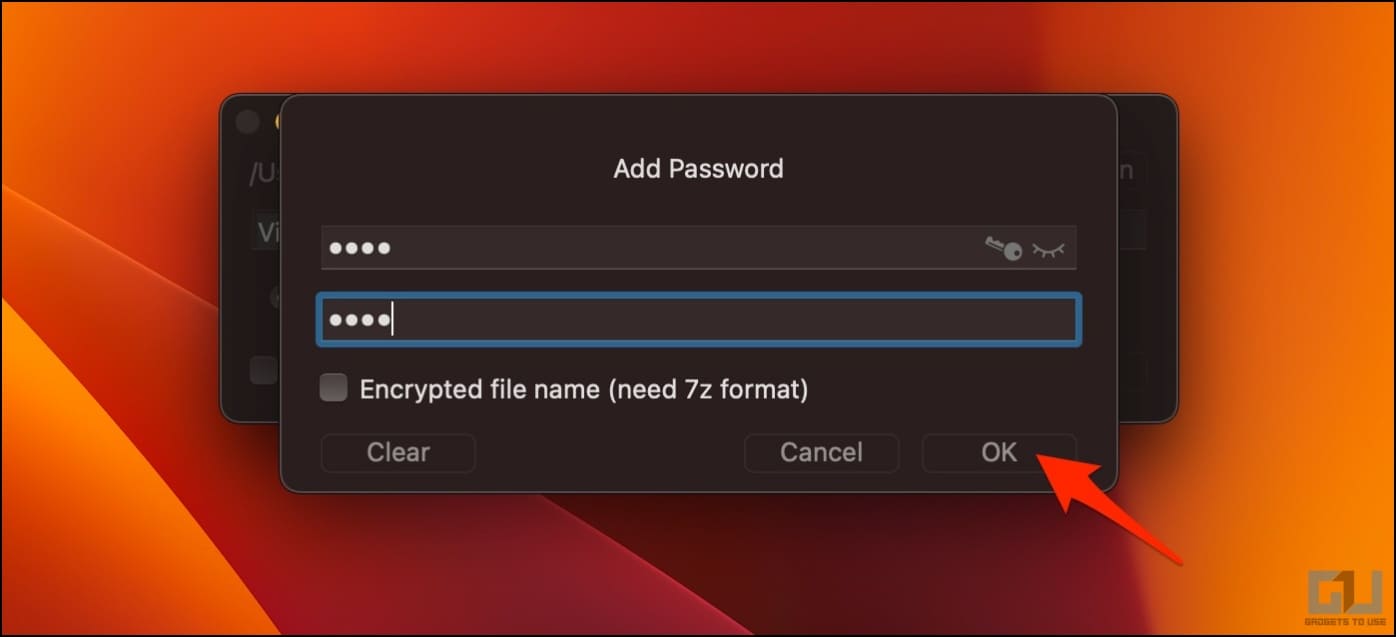
6. Enter and verify the password. Press OK.
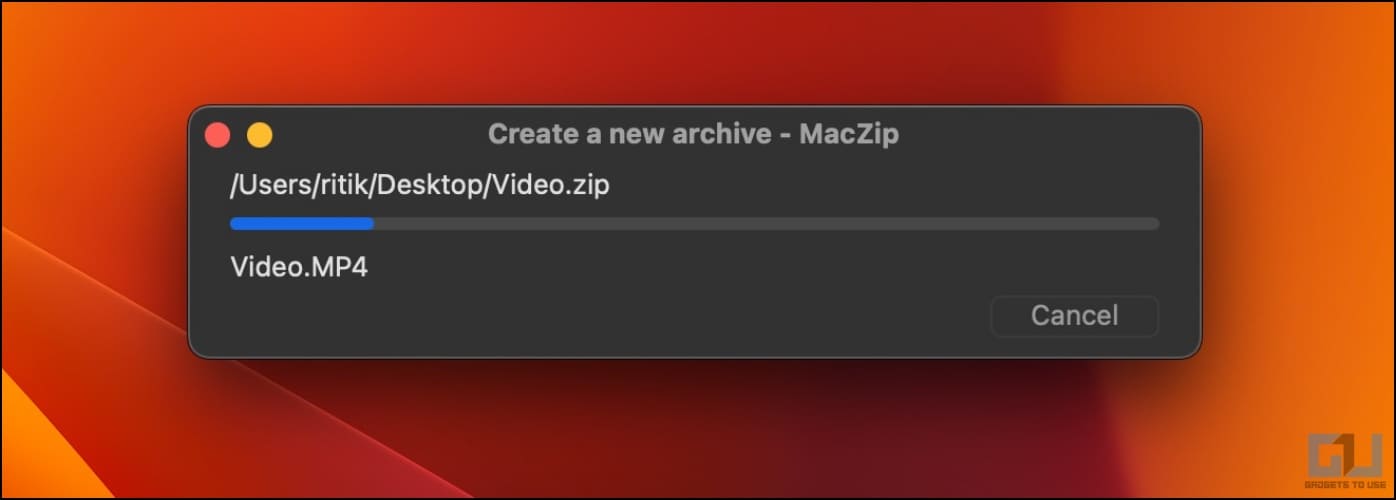
7. Lastly, click on Compress to create an encrypted archive file.

Wait for the process to complete. Once done, you’ll find the password-protected zip archive on the target folder.
Method 3- Encrypt Zip Files On Mac Using Archiver 4
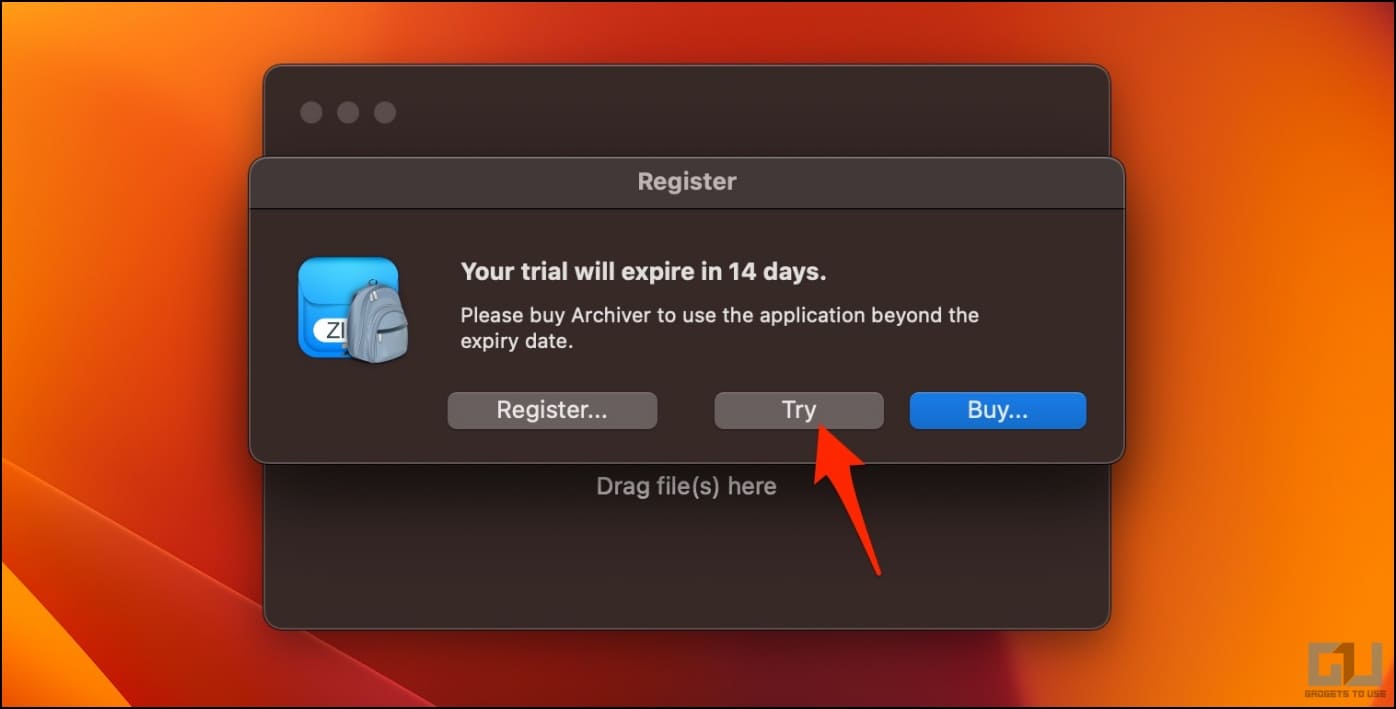
Archiver is a premium archive utility that offers a free 14-day trial on Mac. Here’s how you can use it to compress and encrypt files into zip, 7zip, or rar archives on your computer:
1. Download Archiver from its official website.
2. Extract the downloaded zip file and double-click on Archiver.app.
3. Give it the required permission when prompted. Click Try when prompted for a free trial.
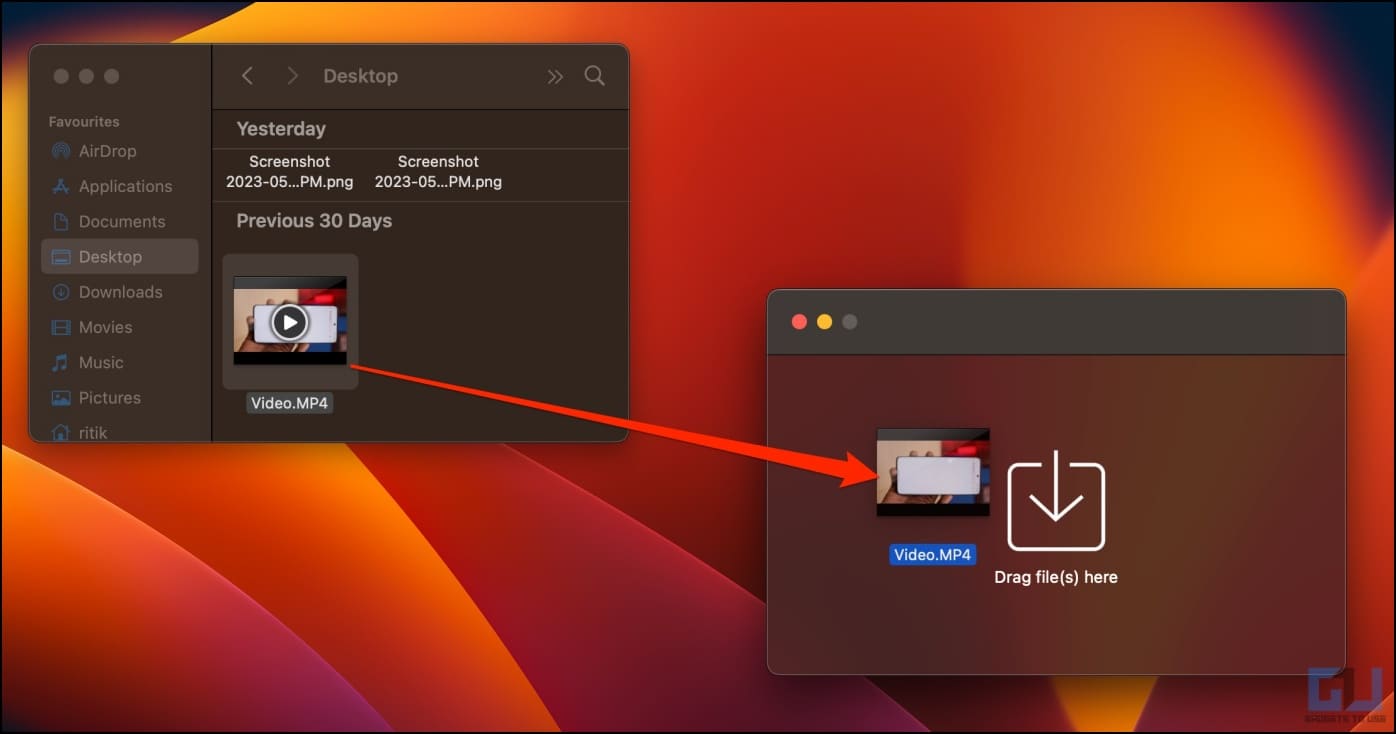
4. Drag and drop the file or folder you want to compress from Finder to Archiver.
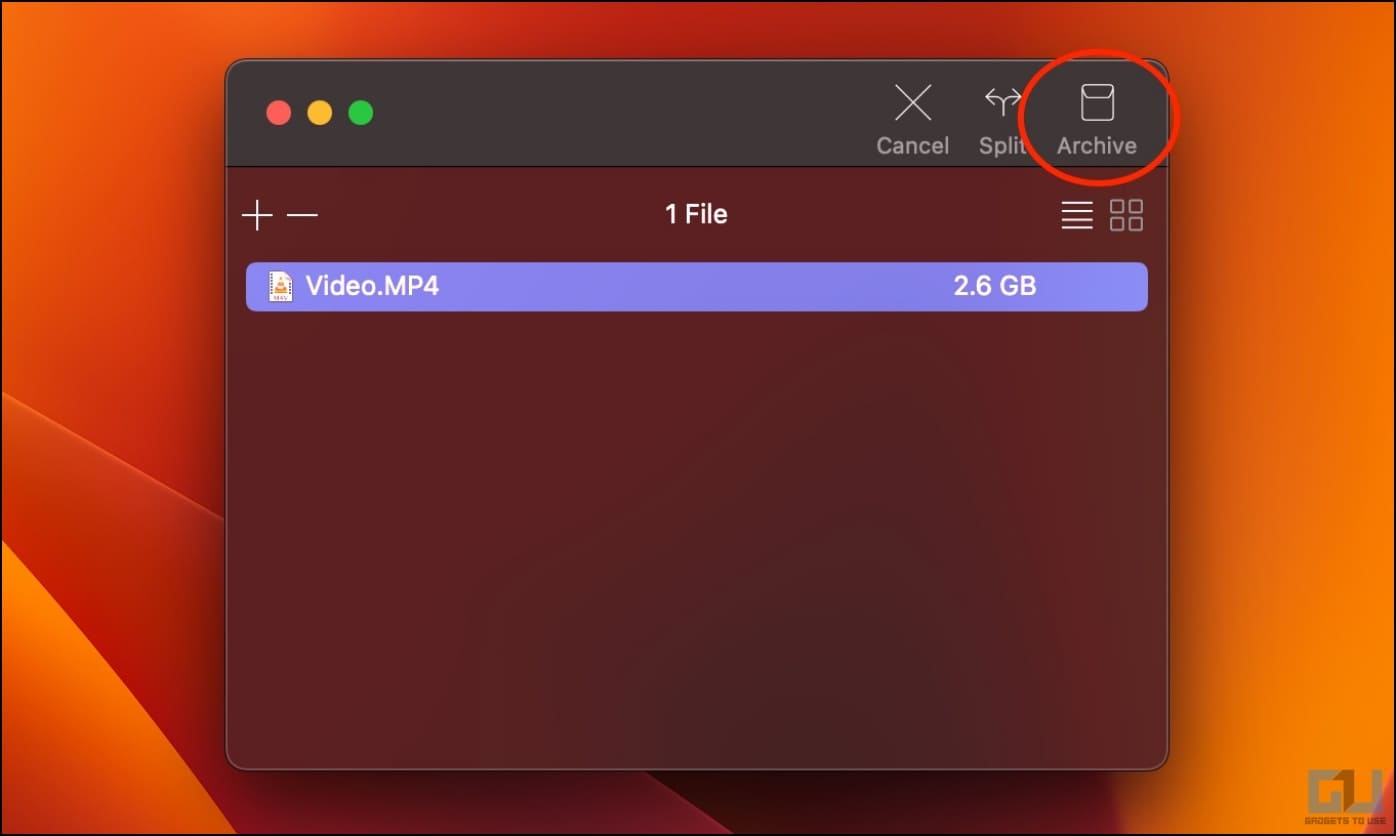
5. Click on Archive.
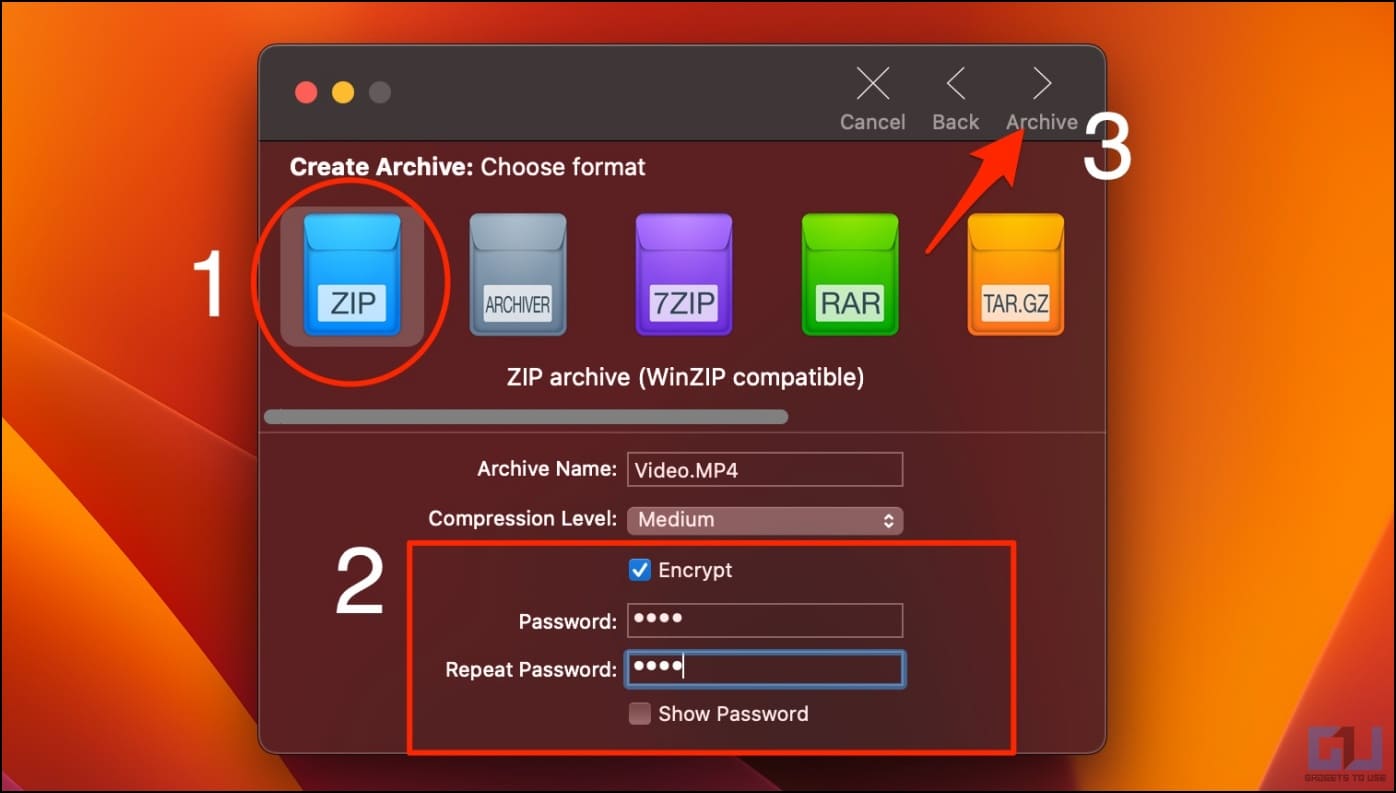
6. Choose Zip as the archive format and select your file name and compression level.
7. Check the box for Encrypt. Enter and verify the password.
8. Finally, tap the Archive button on the right corner of the window.
Wait for it to compress your files into an encrypted zip archive.
Alternative Tools for Encrypting Zip Files on Mac
- Keka File Archiver (paid)
- Betterzip 5 (free)
- WinZip (freemium)
- Encrypto (free)
Bonus: Preview an Encrypted Zip File in Terminal
We often download zip files from the internet. And given the risk of viruses and malware, knowing exactly what you’re opening is important. Thankfully, using Terminal, you can check the contents of a zip file without unzipping or opening it on your Mac. Here’s how to do it:
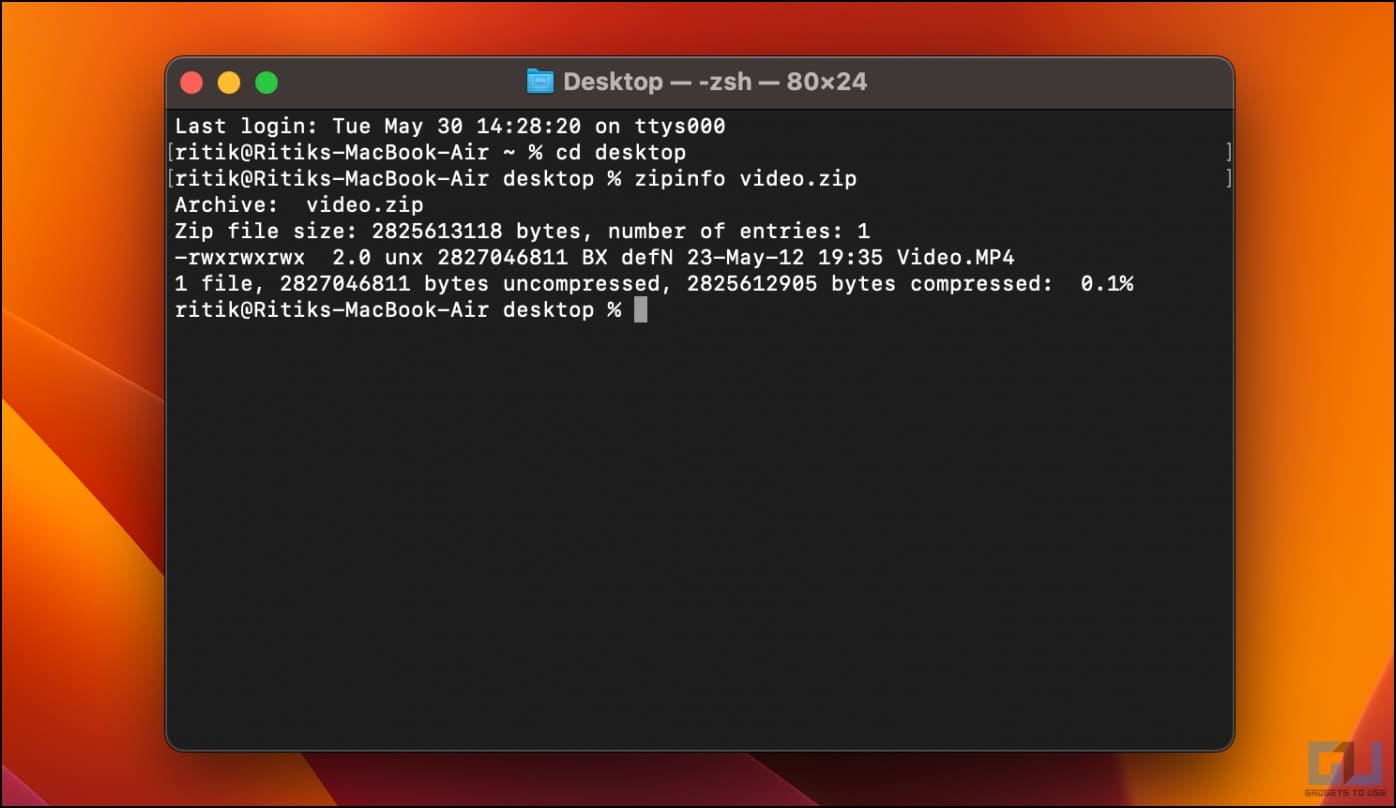
1. Open Terminal on your Mac.
2. Type where the zip file is located and press Enter/ Return. For example- cd desktop or cd downloads.
3. Next, type zipinfo filename.zip – replace filename.zip with the name of your archive file. Press Enter.
The Terminal will now return the basic information of the contained files in the zip archive.
FAQs
Q. Why Choose Mac Terminal Over Third-Party Apps For Compressing Files?
Compressing files using Terminal is completely free and private. It doesn’t require the internet, and there’s no need to worry about privacy regarding sensitive data.
Q. Can You Password Protect Zip Files Without a Terminal on Mac?
Yes, you can use third-party apps like MacZip, Archiver, and Keka to compress and encrypt files with passwords on your Mac.
Q. How Do I Password Protect an Existing Zip File?
While some tools let you password-protect an existing zip file, extracting it and creating a new encrypted archive would be the easiest option.
Q. What’s the Best Encryption Standard for Zip Files?
We’d advise compressing your files with 128-bit AES or 256-bit AES encryption, giving more preference to the latter.
Wrapping Up
This is how you can password-protect a zip file on your Mac. As mentioned, you can add a password to a zip file via Terminal commands or rely on third-party tools. Anyways, what do you prefer? Have any doubts or queries? Feel free to reach out via email or social media. Stay tuned for more such how-tos.
You might be interested in:
- 3 Ways to Extract ZIP Files Using Google Drive and Download Them
- 2 Quick Ways to Open & Create RAR, ZIP Files on Android for Free
- 5 Ways to Delete App Data, Cache, and Leftover Files on Mac
- How to Install Mac Updates Without Upgrading to Ventura
You can also follow us for instant tech news at Google News or for tips and tricks, smartphones & gadgets reviews, join GadgetsToUse Telegram Group or for the latest review videos subscribe GadgetsToUse Youtube Channel.