Quick Answer
- In addition to the above native methods, you can try the Wi-Fi Analyzer app on your Windows PC to know the accurate details of the Wi-Fi strength in dBm units.
- To get a better idea of the WiFi signal details, you can run a query on the command prompt window to view the same.
- Like the taskbar method, you can access the Network and Sharing center on your Windows system to view the WiFi signal quality in terms of a graphical network bar.
When it comes to high-speed wireless connectivity, the signal strength of Wi-Fi matters the most. However, interference from other devices, distance from the Wi-Fi, and unknown connections might affect your Wi-Fi signal quality in dire times of need. Worry not; this explainer demonstrates several ways to help you find Wi-Fi signal strength on Windows and Mac so you can take the required steps to get better Wi-Fi signals.

Find Wi-Fi Signal Strength on Windows and Mac
Honestly, you don’t need to download any third-party app if you’re looking to measure the WiFi signal strength. As both Windows and macOS provide plenty of native options to help you find out the same with a few clicks. Let’s look at each of these methods:
Use Windows Taskbar to Find Wi-Fi Signal Strength
The easiest method to measure the Wi-Fi signal strength is to glance at its icon in the Wi-Fi option under the taskbar’s notification center. The Wi-Fi icon will have complete dark curves if the signal strength is strong, while it may lose a few if the wireless connection’s signal weakens. Here’s how you can access it.
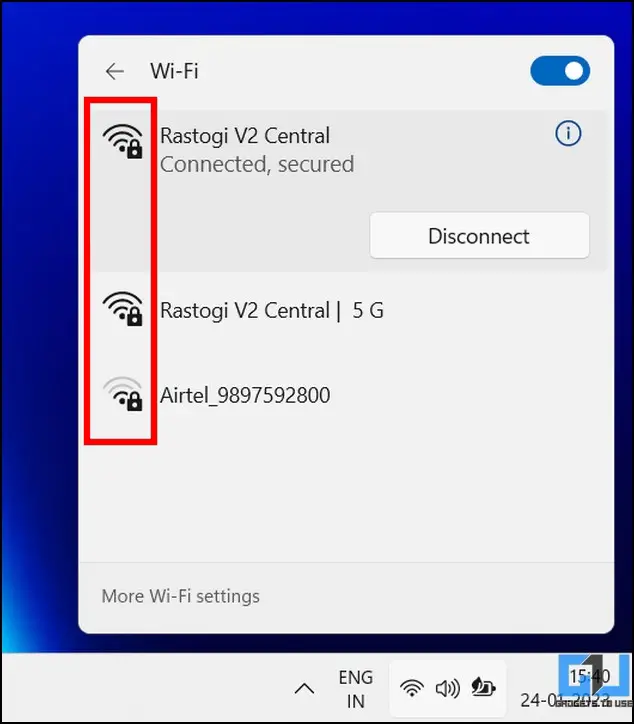
1. Tap the right side of your taskbar to open the Notification Center.
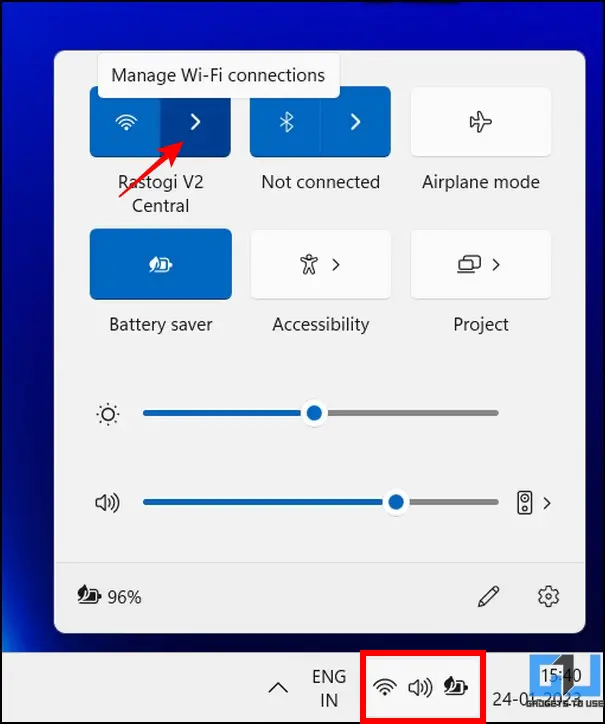
2. Next, tap on Wi-Fi to view all the available wireless connections. Pay attention to each Wi-Fi icon of the wireless network denoting the signal strength.
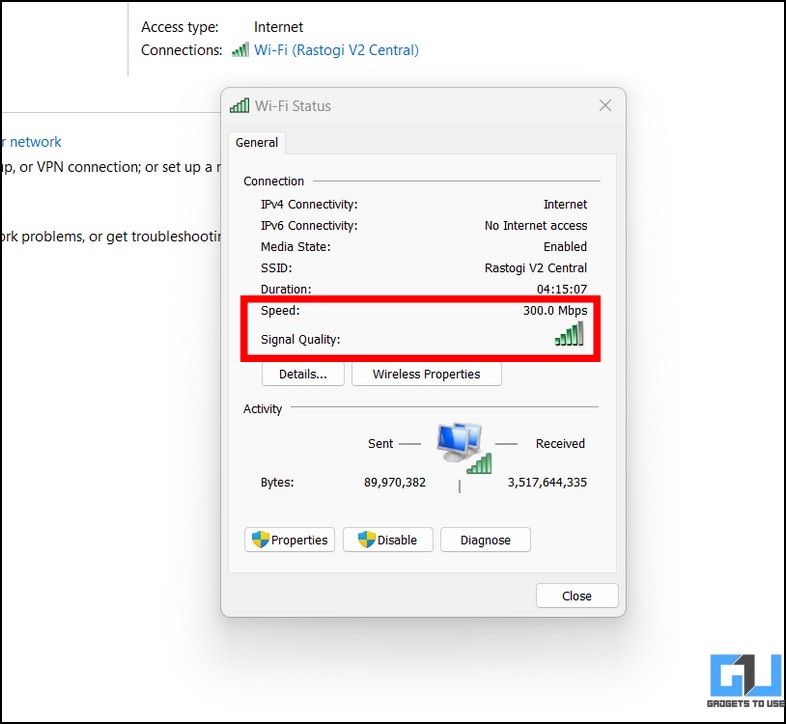
Check Wi-Fi Signal Strength From Network and Sharing Center
Like the taskbar method, you can access the Network and Sharing center on your Windows system to view the WiFi signal quality in terms of a graphical network bar. Follow these easy steps to view the same.
1. Press the Windows key and search for the network status keyword to open Network and Sharing Center.
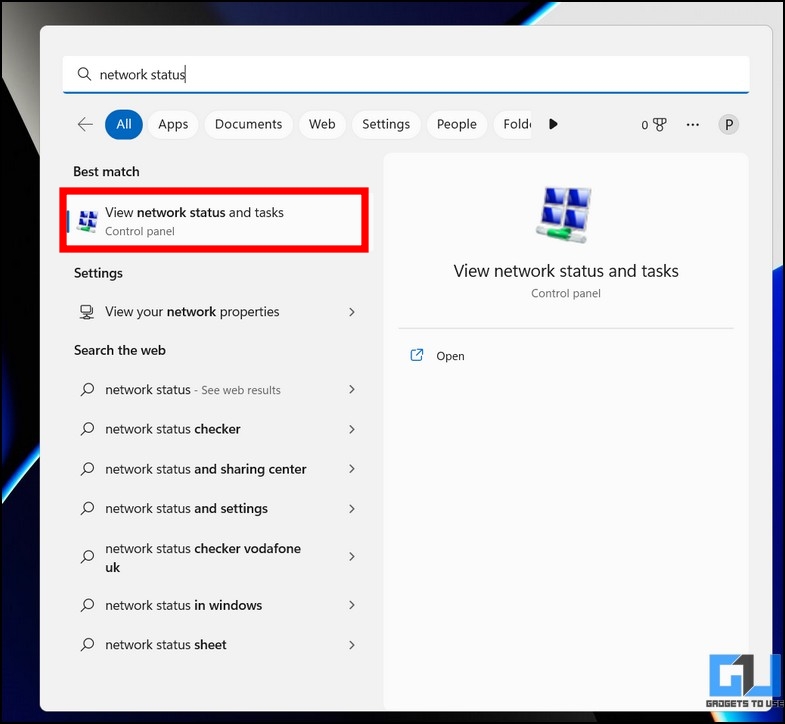
2. Next, tap on your connected Wi-Fi name to view more details.
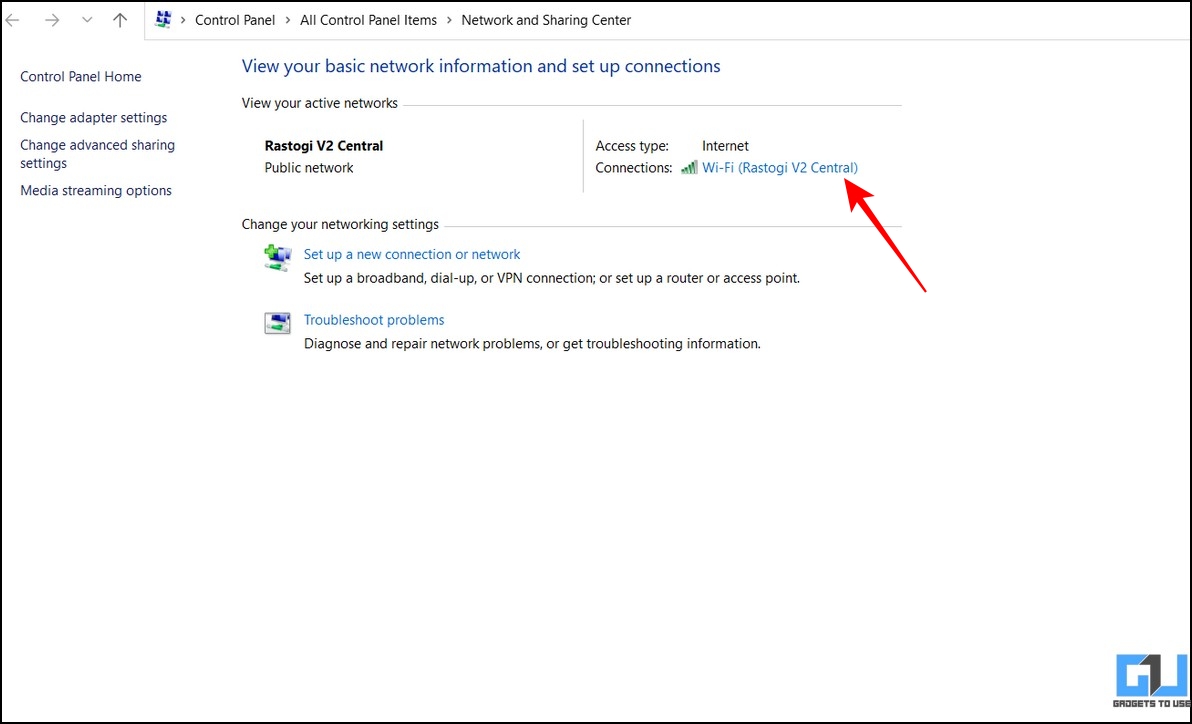
3. Finally, pay attention to the signal bar denoting the signal quality of the connected Wi-Fi. You can check other parameters here, such as speed and total bytes exchanged.
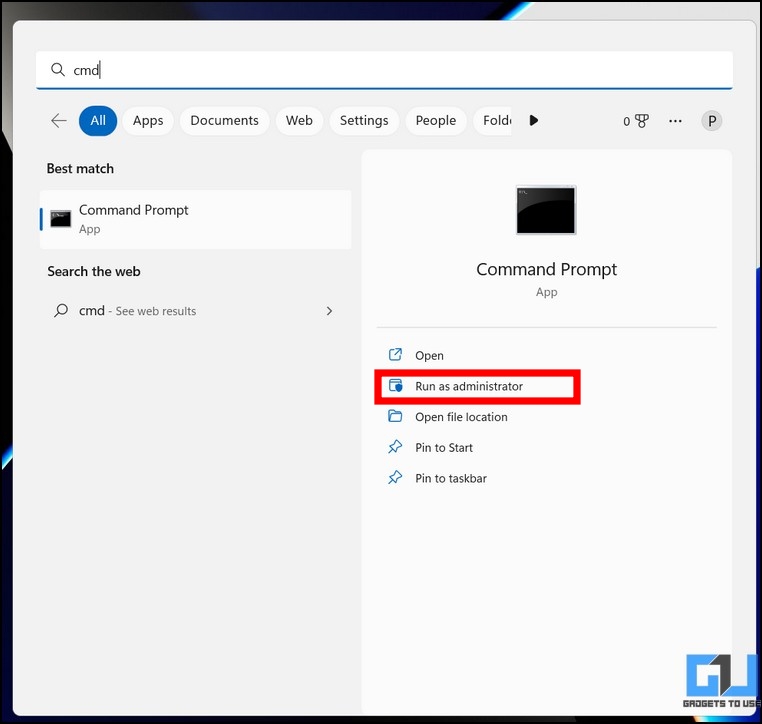
Measure Wi-Fi Signals Using Command Prompt
Graphical representation gives only an idea of the signal strength. To get a better idea of the WiFi signal details, you can run a query on the command prompt window to view the same. Here’s what you need to do.
1. Press the Windows key and search for Command Prompt to run it with elevated permissions.
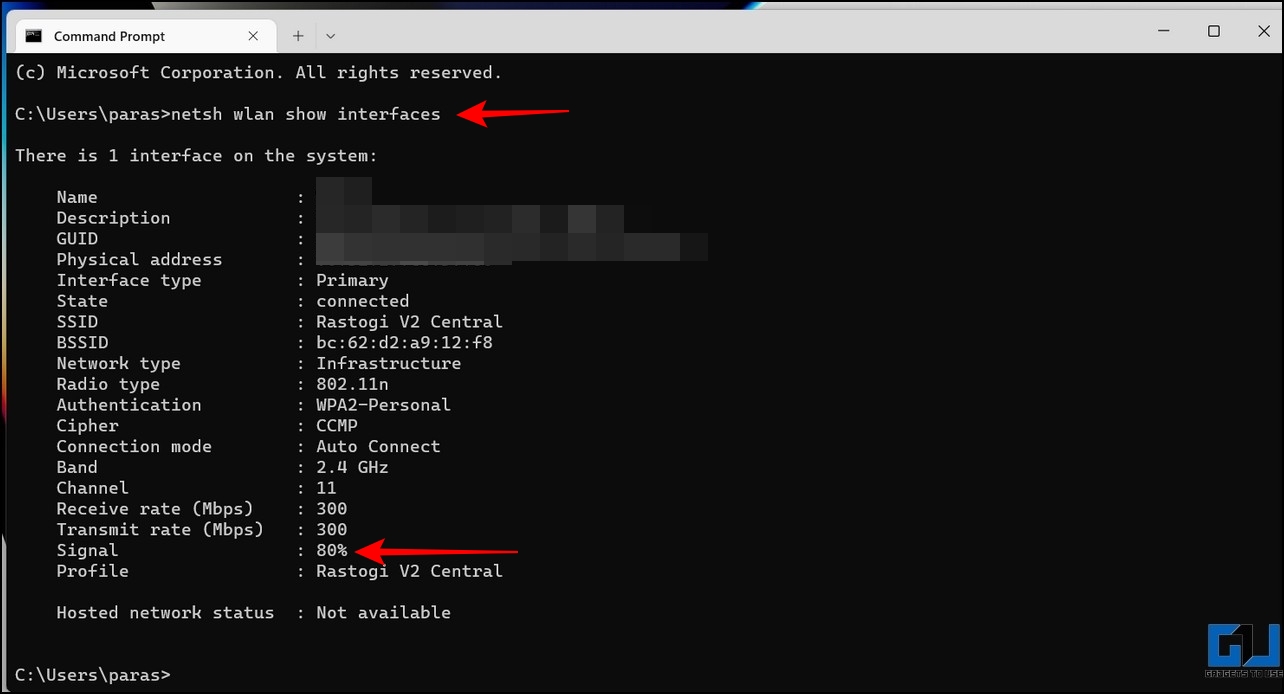
2. Next, copy-paste the following command and execute it inside the terminal window:
netsh wlan show interfaces
3. Finally, pay attention to the third entry from the bottom, displaying the signal percentage of the connected Wi-Fi network. You can repeat this process with other Wi-Fi networks by connecting and checking their signal strengths.
Use Windows Powershell to Check the Wi-Fi Signal Strength
Besides the command prompt, you can also run a dedicated query on Windows PowerShell to find the Wi-Fi signal strength in numeric percentages. Here’s how:
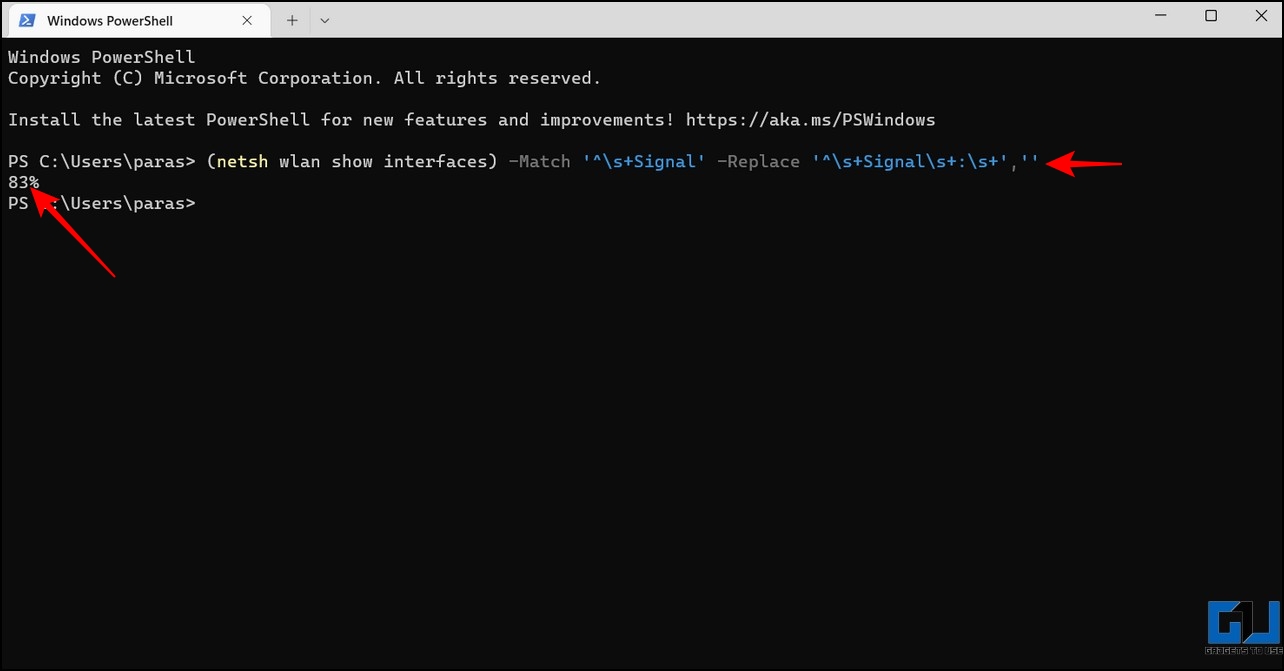
1. Press the Windows key and search for the PowerShell tool to run it with administrative privileges.
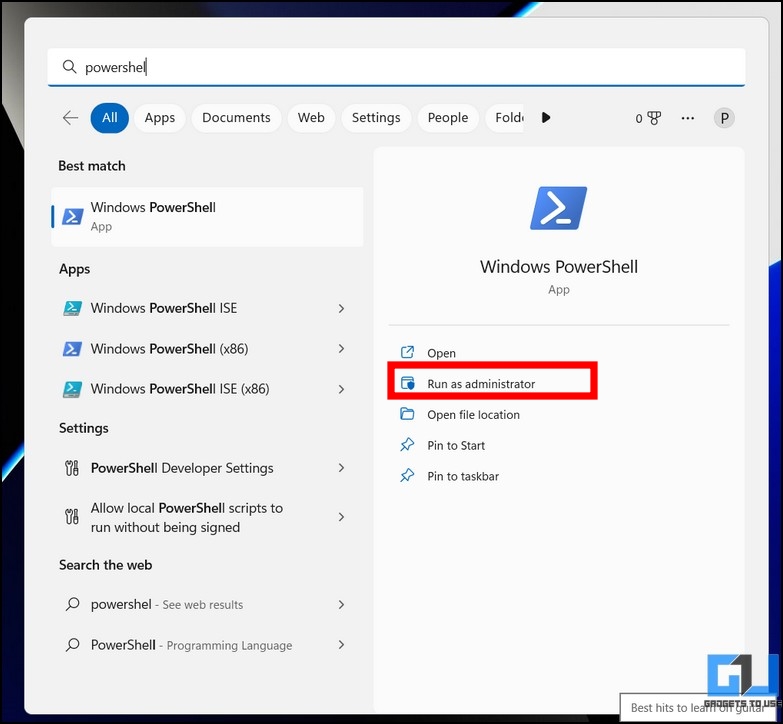
2. Next, copy-paste the following command into the terminal and hit the enter key to execute it:
(netsh wlan show interfaces) -Match ‘^\s+Signal’ -Replace ‘^\s+Signal\s+:\s+’,”
3. You will instantly get the Wi-Fi signal percentage as a command reply on the terminal.
Use Wi-Fi Analyzer App
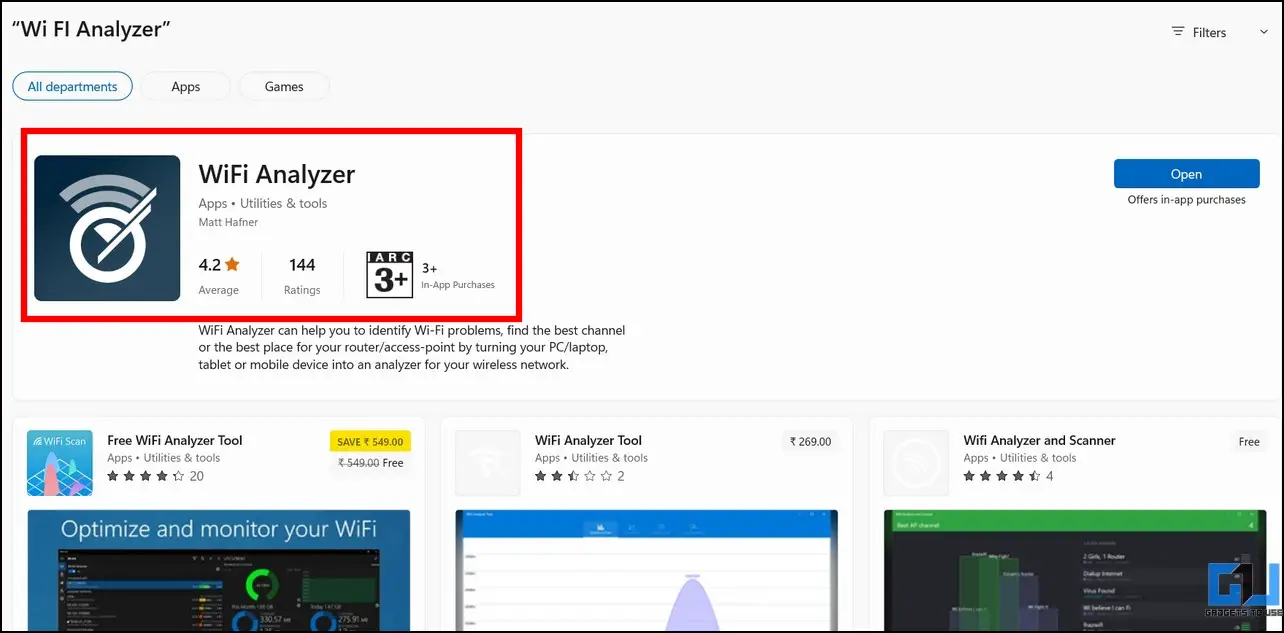
In addition to the above native methods, you can try the Wi-Fi Analyzer app on your Windows PC to know the accurate details of the Wi-Fi strength in dBm units. As a bonus, this app also lets you scan all the nearby wireless connections to display their respective signal strengths in dBm.
1. Install and launch the Wi-Fi Analyzer app from the Microsoft Store.
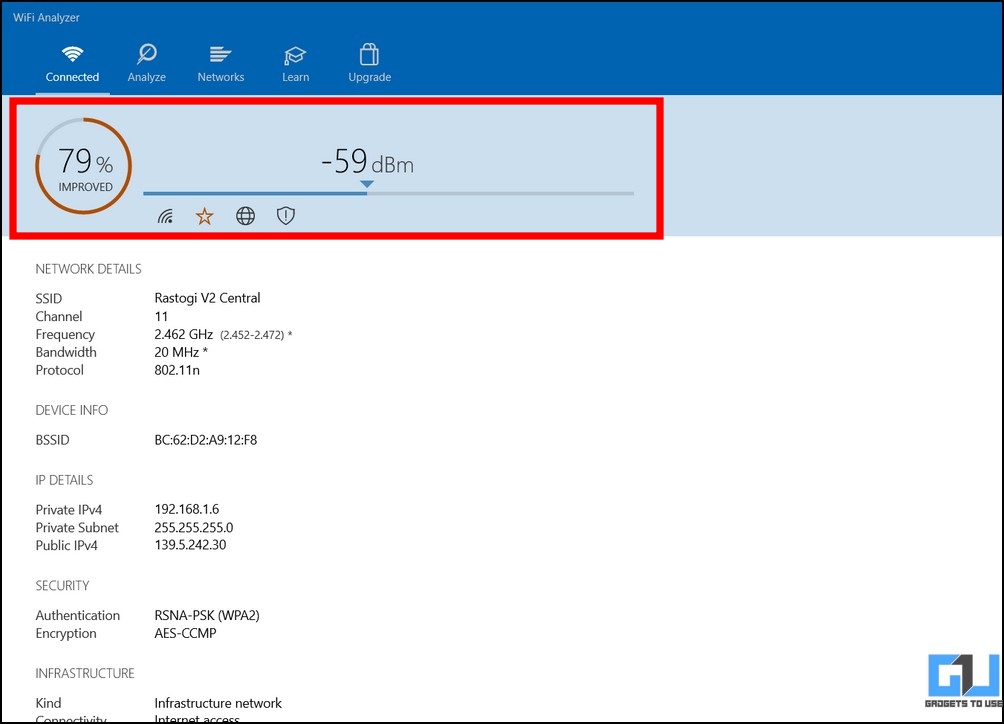
2. Wait a few seconds to let the app analyze your connected Wi-Fi signals. Once processed, you will see your current Wi-Fi connection’s signal in dBm and other related info below.
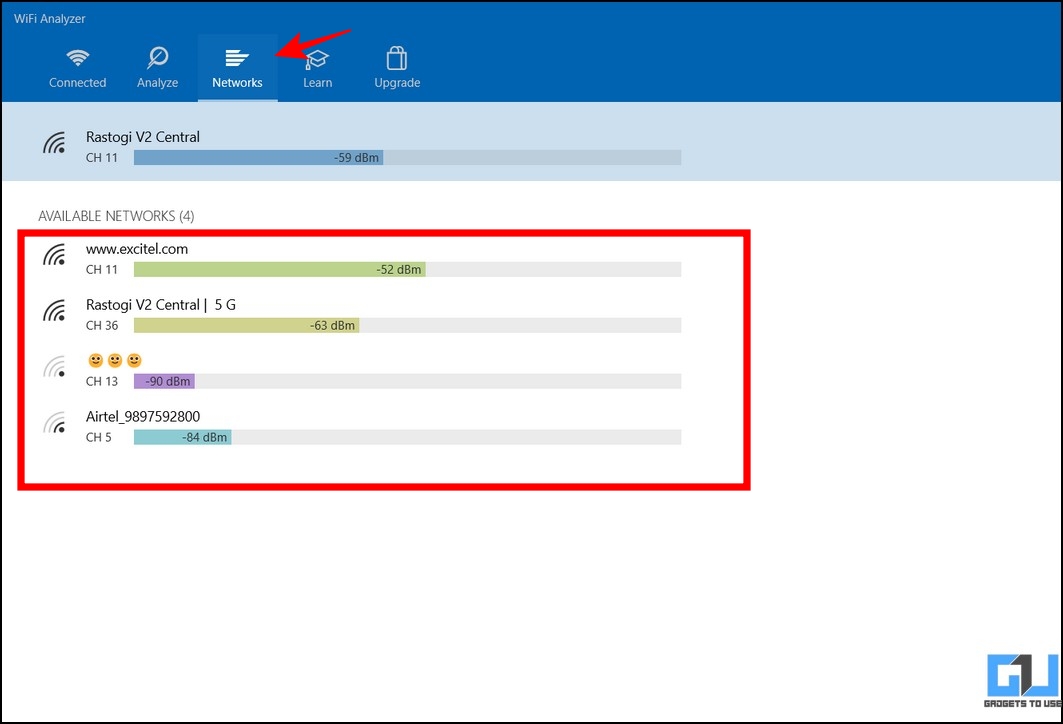
3. You can click the Networks button in the toolbar to view the signal quality (in dBm) of available wireless networks around you.
Utilize Vistumbler App
Vistumbler is another remarkable third-party tool designed to find signal strengths of all the Wi-Fi networks around you. Here’s how you can configure and use this tool.
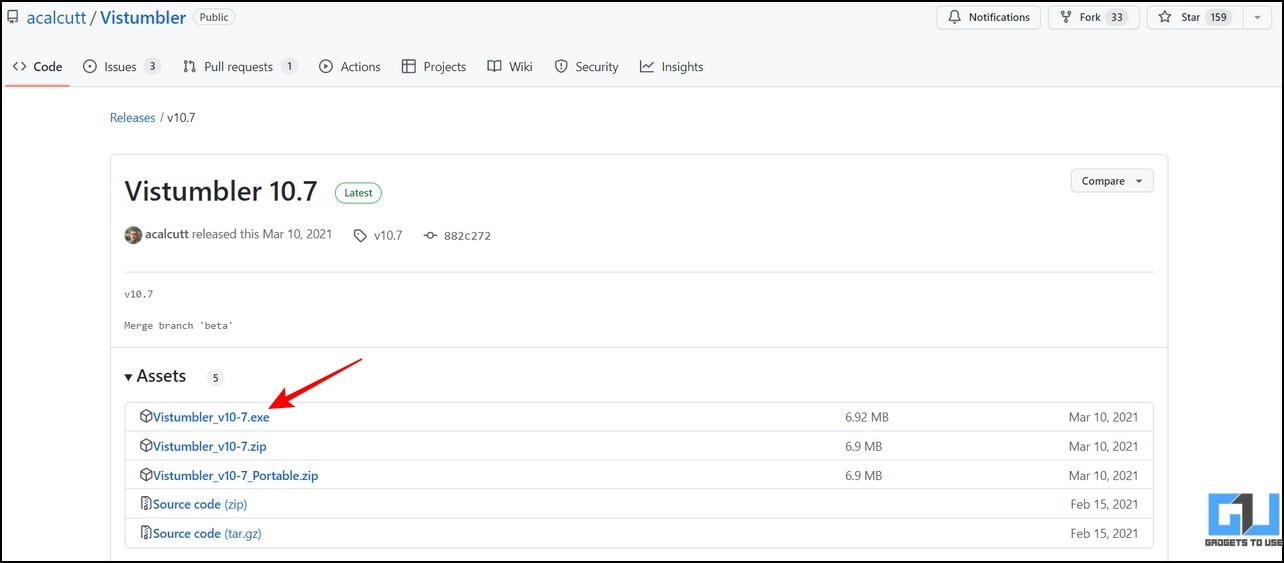
1. Download and install the Vistumbler tool from Github.
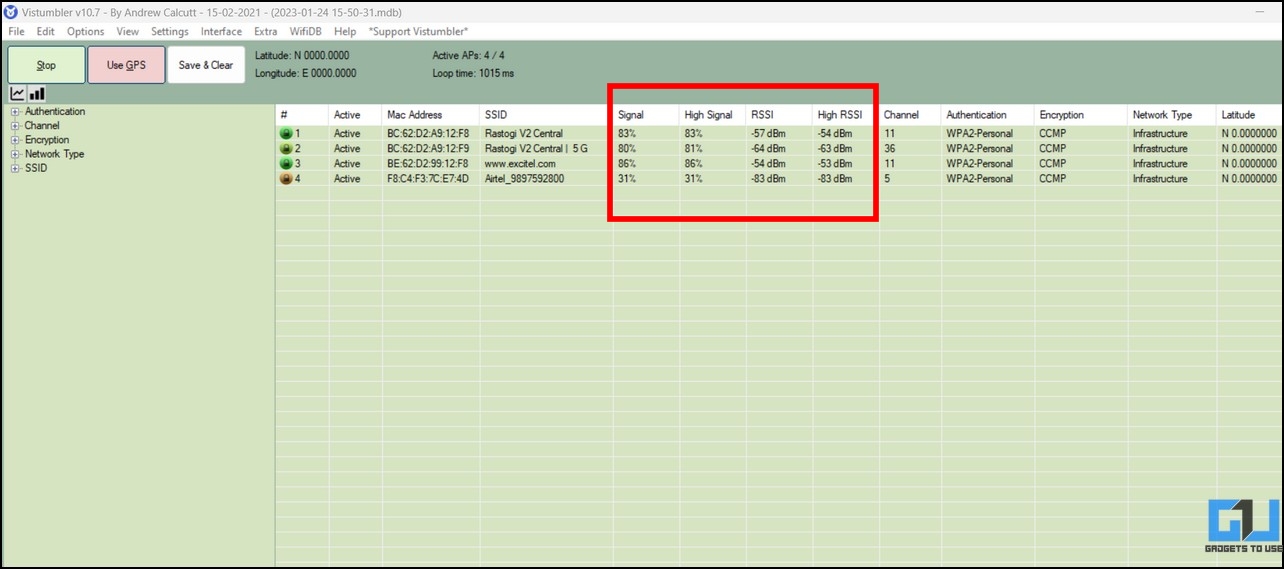
2. Launch the Vistumbler app and click the Scan APs button to allow the app to scan all wireless networks around you.

3. You can now view the details of all the wireless networks around you, such as Signal and RSSI values denoting the quality of Wi-Fi networks available to your device.
Measure Wi-Fi Signal Strength on Mac
Finding the Wi-Fi signal strength on macOS is as easy as eating a cake. Here’s how you can check the signal strength of your WiFi.
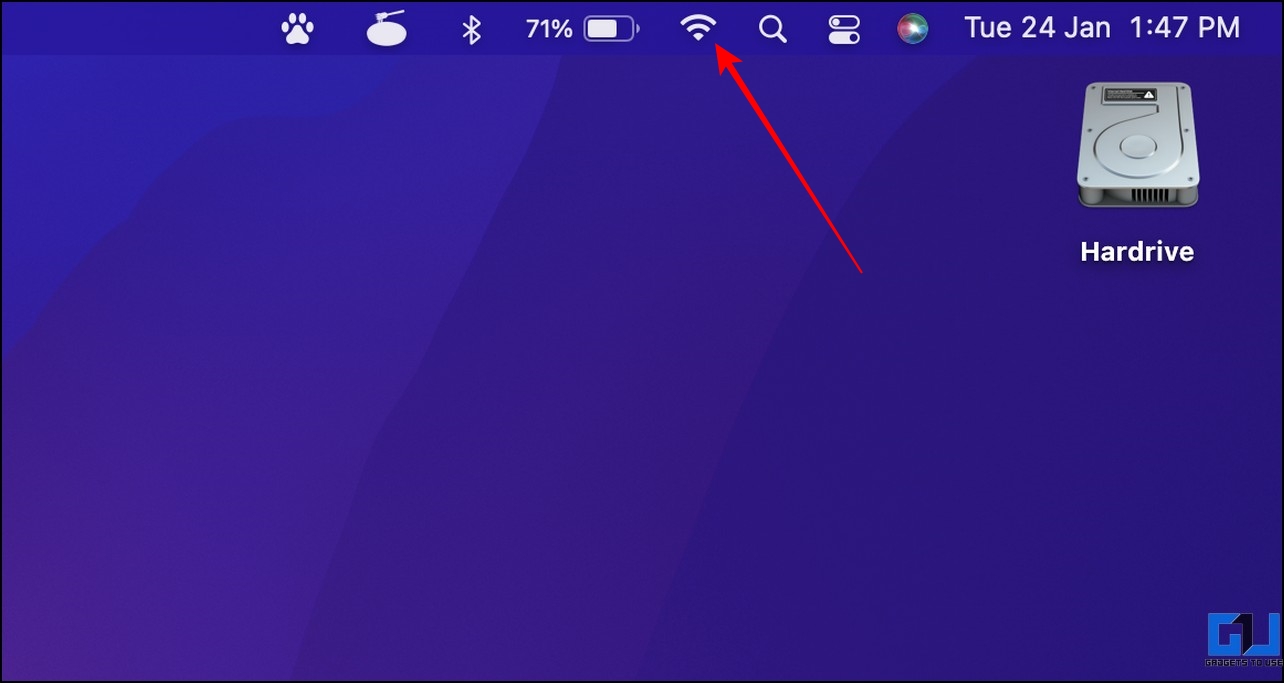
1. Press and hold the Option Key on your Mac while clicking the Wi-Fi icon in the Menu bar at the top.
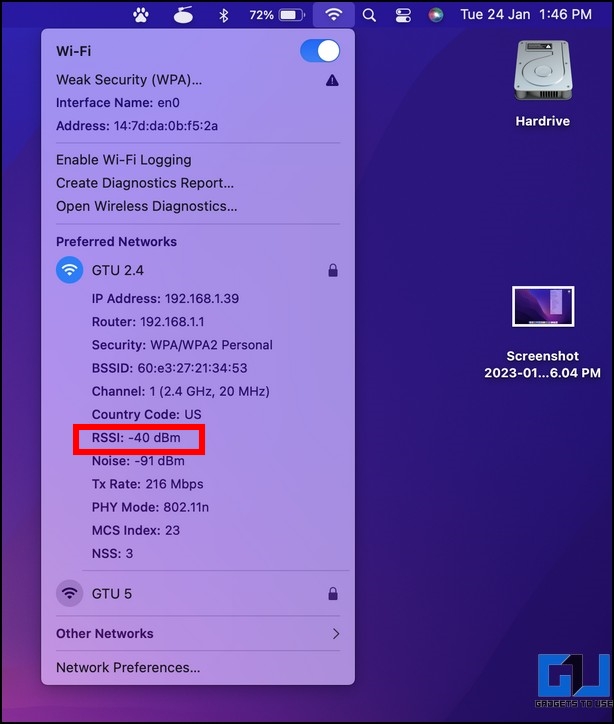
2. You will now see the Wi-Fi signal strength (via RSSI in dBm) and other crucial details linked to the connected Wi-Fi network. A dBm range of -30 to -60 dBm is good signal strength.
Bonus: Improve Wi-Fi Range, Speed, and Connectivity
Now that you’ve learned to analyze your Wi-Fi signal strength, we have crafted a useful guide to improving your Wi-Fi range, speed, and connectivity.
FAQs
Q. How to Check Wi-Fi Signal Strength on Windows 10/11?
There are multiple ways to check the WiFi signal strength on a Windows PC, like from Network and sharing central, Command Prompt, Windows Powershell, and more. Follow the above guide to check the Wi-Fi signal strength on Windows 10 and 11.
Q. How Can I Check the Signal Strength of My Wi-Fi in Dbm on Mac?
Hold the option key while expanding the Wi-Fi menu on Mac to view your connected Wi-Fi signal strength. For more details, refer to the steps mentioned above.
Wrapping Up
We hope you’ve successfully learned to measure your connected Wi-Fi signal strength using the above-listed methods on Mac or Windows. If you found it useful, forward it to your friends and check the below links for more helpful reads. You can also check our other guide to measure Wi-Fi strength on Android.
You might be interested in the following:
- How Google uses your Wi-Fi Connection to access your location?
- 9 Ways to Fix Android Connected to Wi-Fi but No Internet
- 4 Ways to Read Connected Wi-Fi Passwords on Windows 11
- 4 Ways to use your Android Phone as Wi-Fi Repeater
You can also follow us for instant tech news at Google News or for tips and tricks, smartphones & gadgets reviews, join GadgetsToUse Telegram Group, or for the latest review videos, subscribe GadgetsToUse YouTube Channel.