Quick Answer
- And for all those who wonder, wait – if this setting makes Timeline a device-only feature, how will I recover it if I lose my phone or switch to another one.
- In this guide, we will explore more about the update and how you can save your Google Map location history on your phone, and more.
- To fix this, Google has now released an update that lets you choose if you want to store your Map History Timeline on your device.
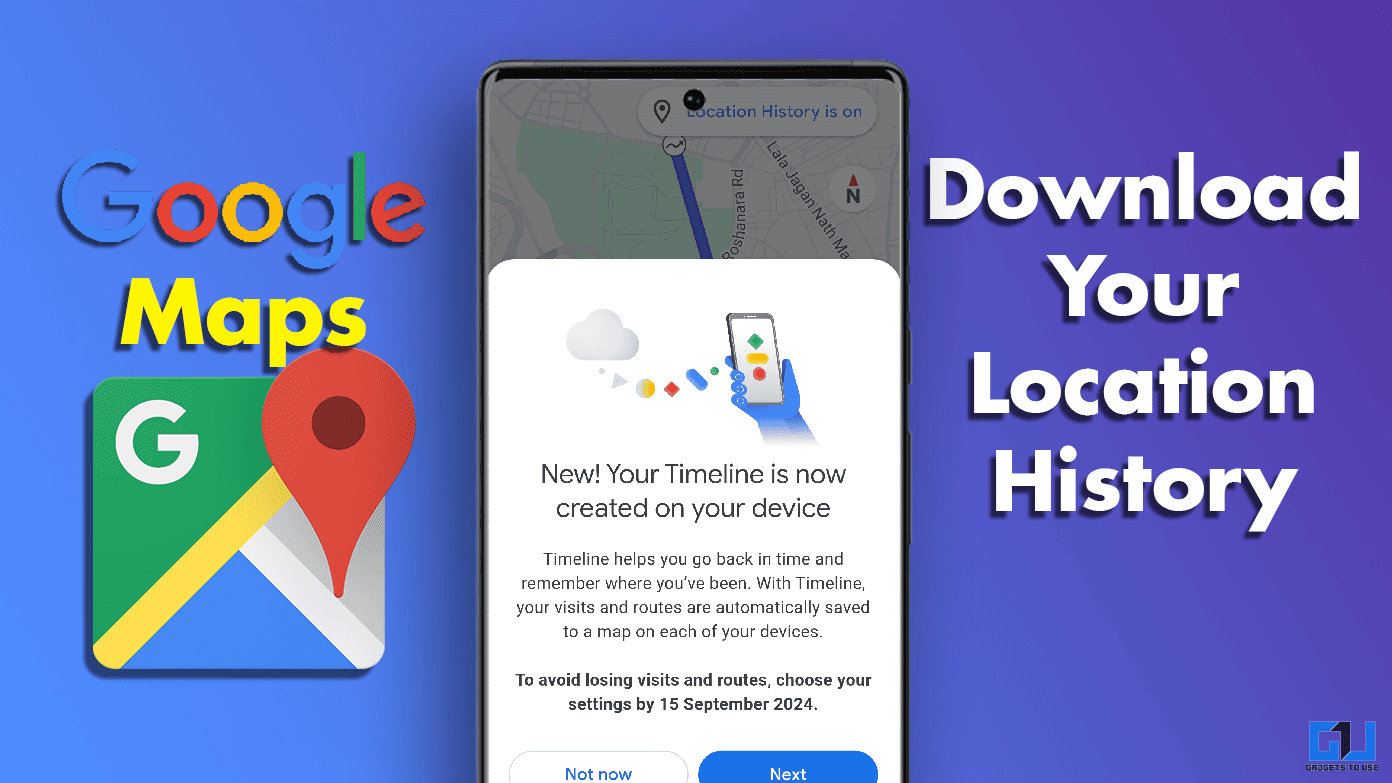
Back in 2015, Google introduced the Timeline feature on Maps. Since then, the tool has become a rather useful tool for tracking your trips, routes you’ve taken, and more to help you go back down memory lane. Proving to be much like a digital travel diary, the Google Maps Timeline was much welcomed by users. However, it also raised questions about privacy regarding data stored on Google servers. The data could be used by law enforcement agencies through geofence warrants, which raised questions about privacy and misuse of data.
To fix this, Google has now released an update that lets you choose if you want to store your Map History Timeline on your device. In this guide, we will explore more about the update and how you can save your Google Map location history on your phone, and more.
Steps To Save Google Map Location History on Your Device
In the new update, Google aims to empower its users with the choice to save their complete history locally on their devices rather than (Google’s) servers. This also means that the users will no longer be able to access their location timelines from their desktops or web platforms with this update. I believe that this option would greatly enhance privacy for all of us who like to keep track on their trips, travel logs, and relive memories. Here is how you can get started.
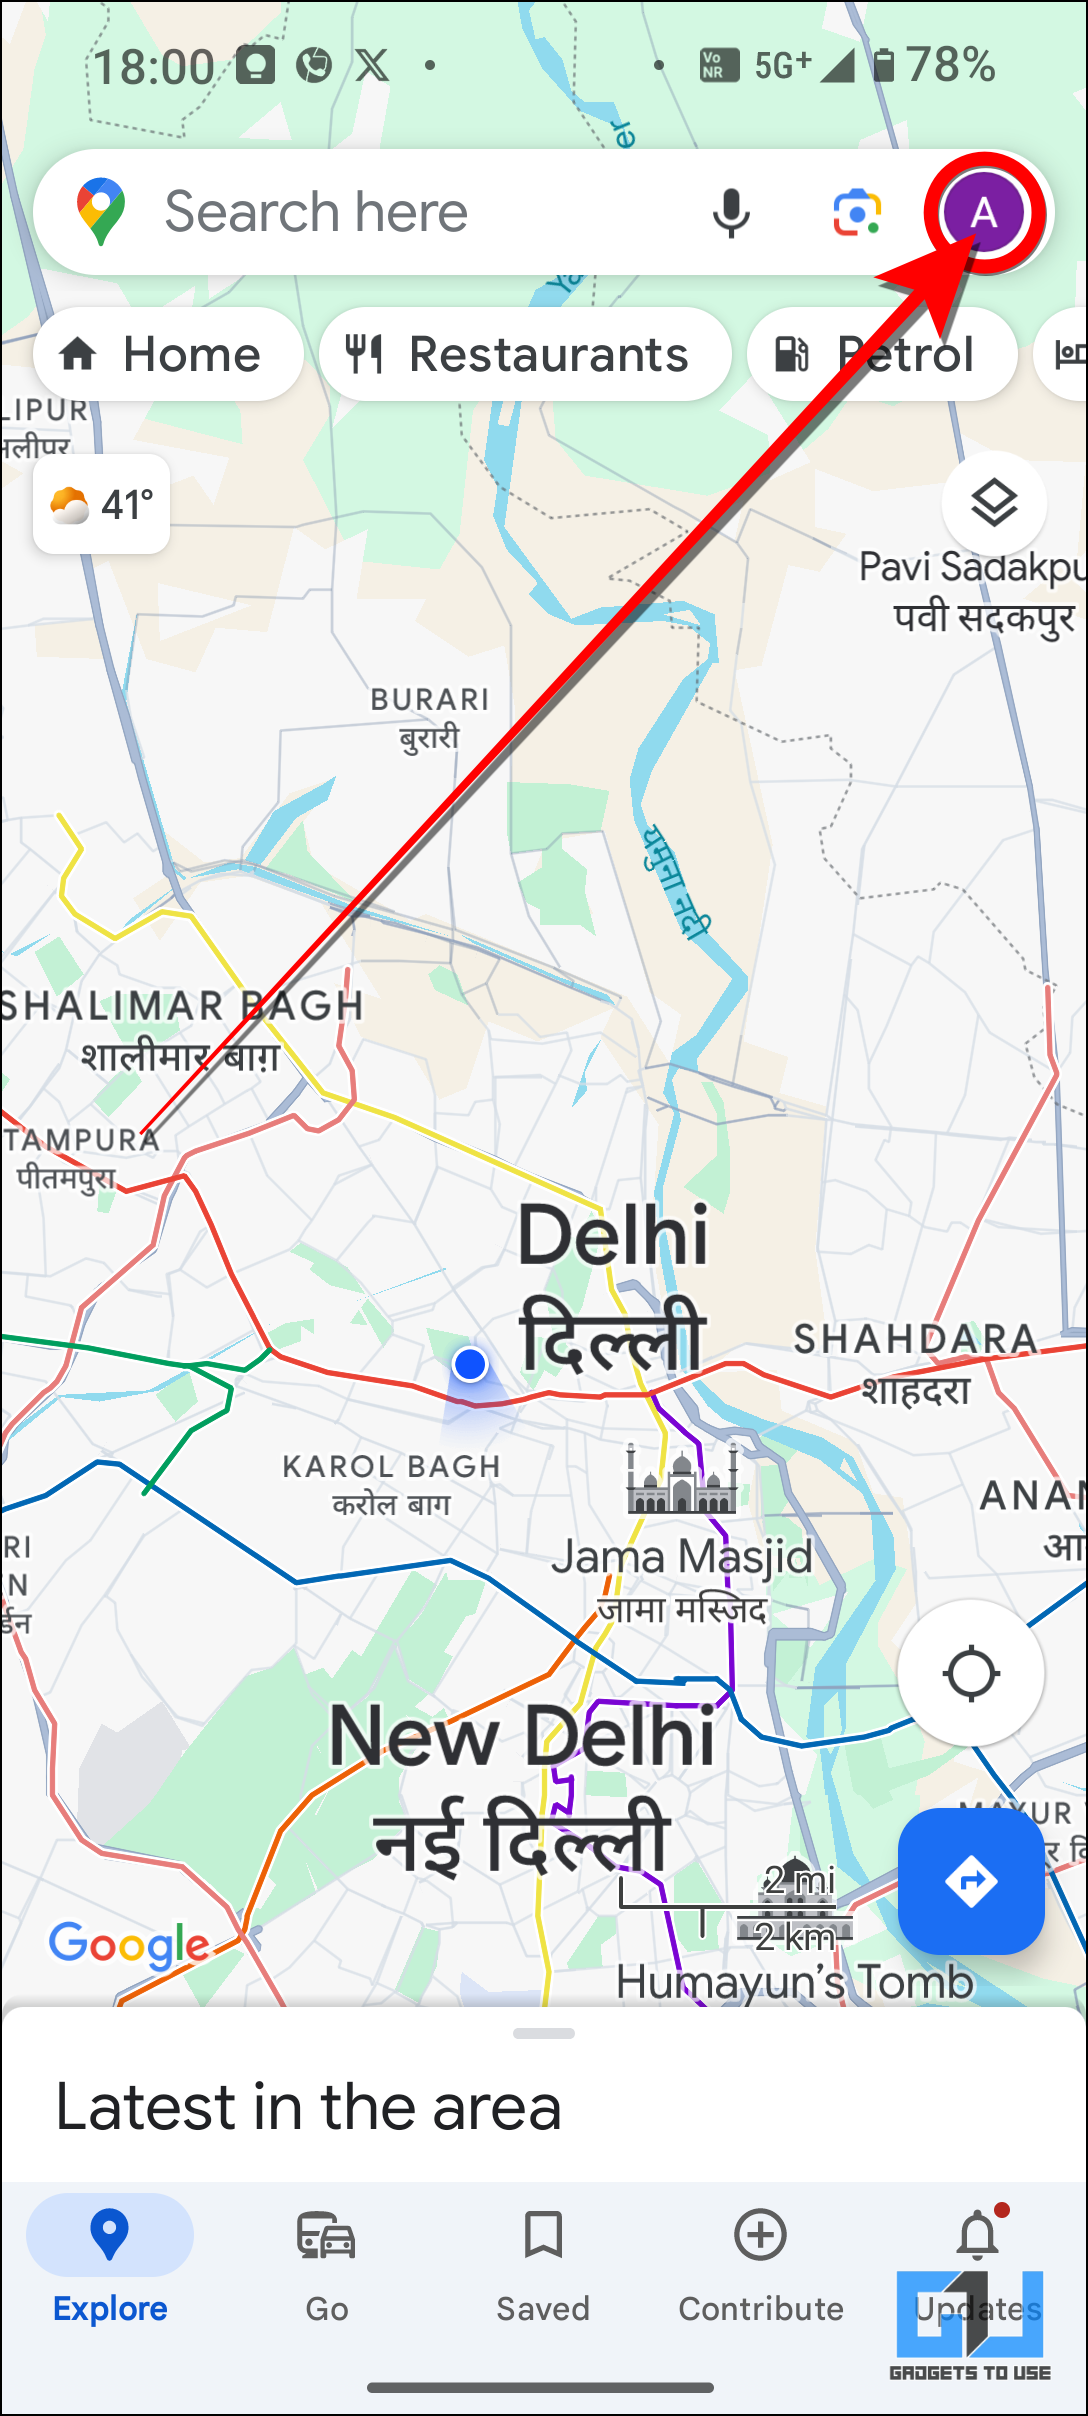
1. Launch Google Maps and tap on your Profile account to open the menu.
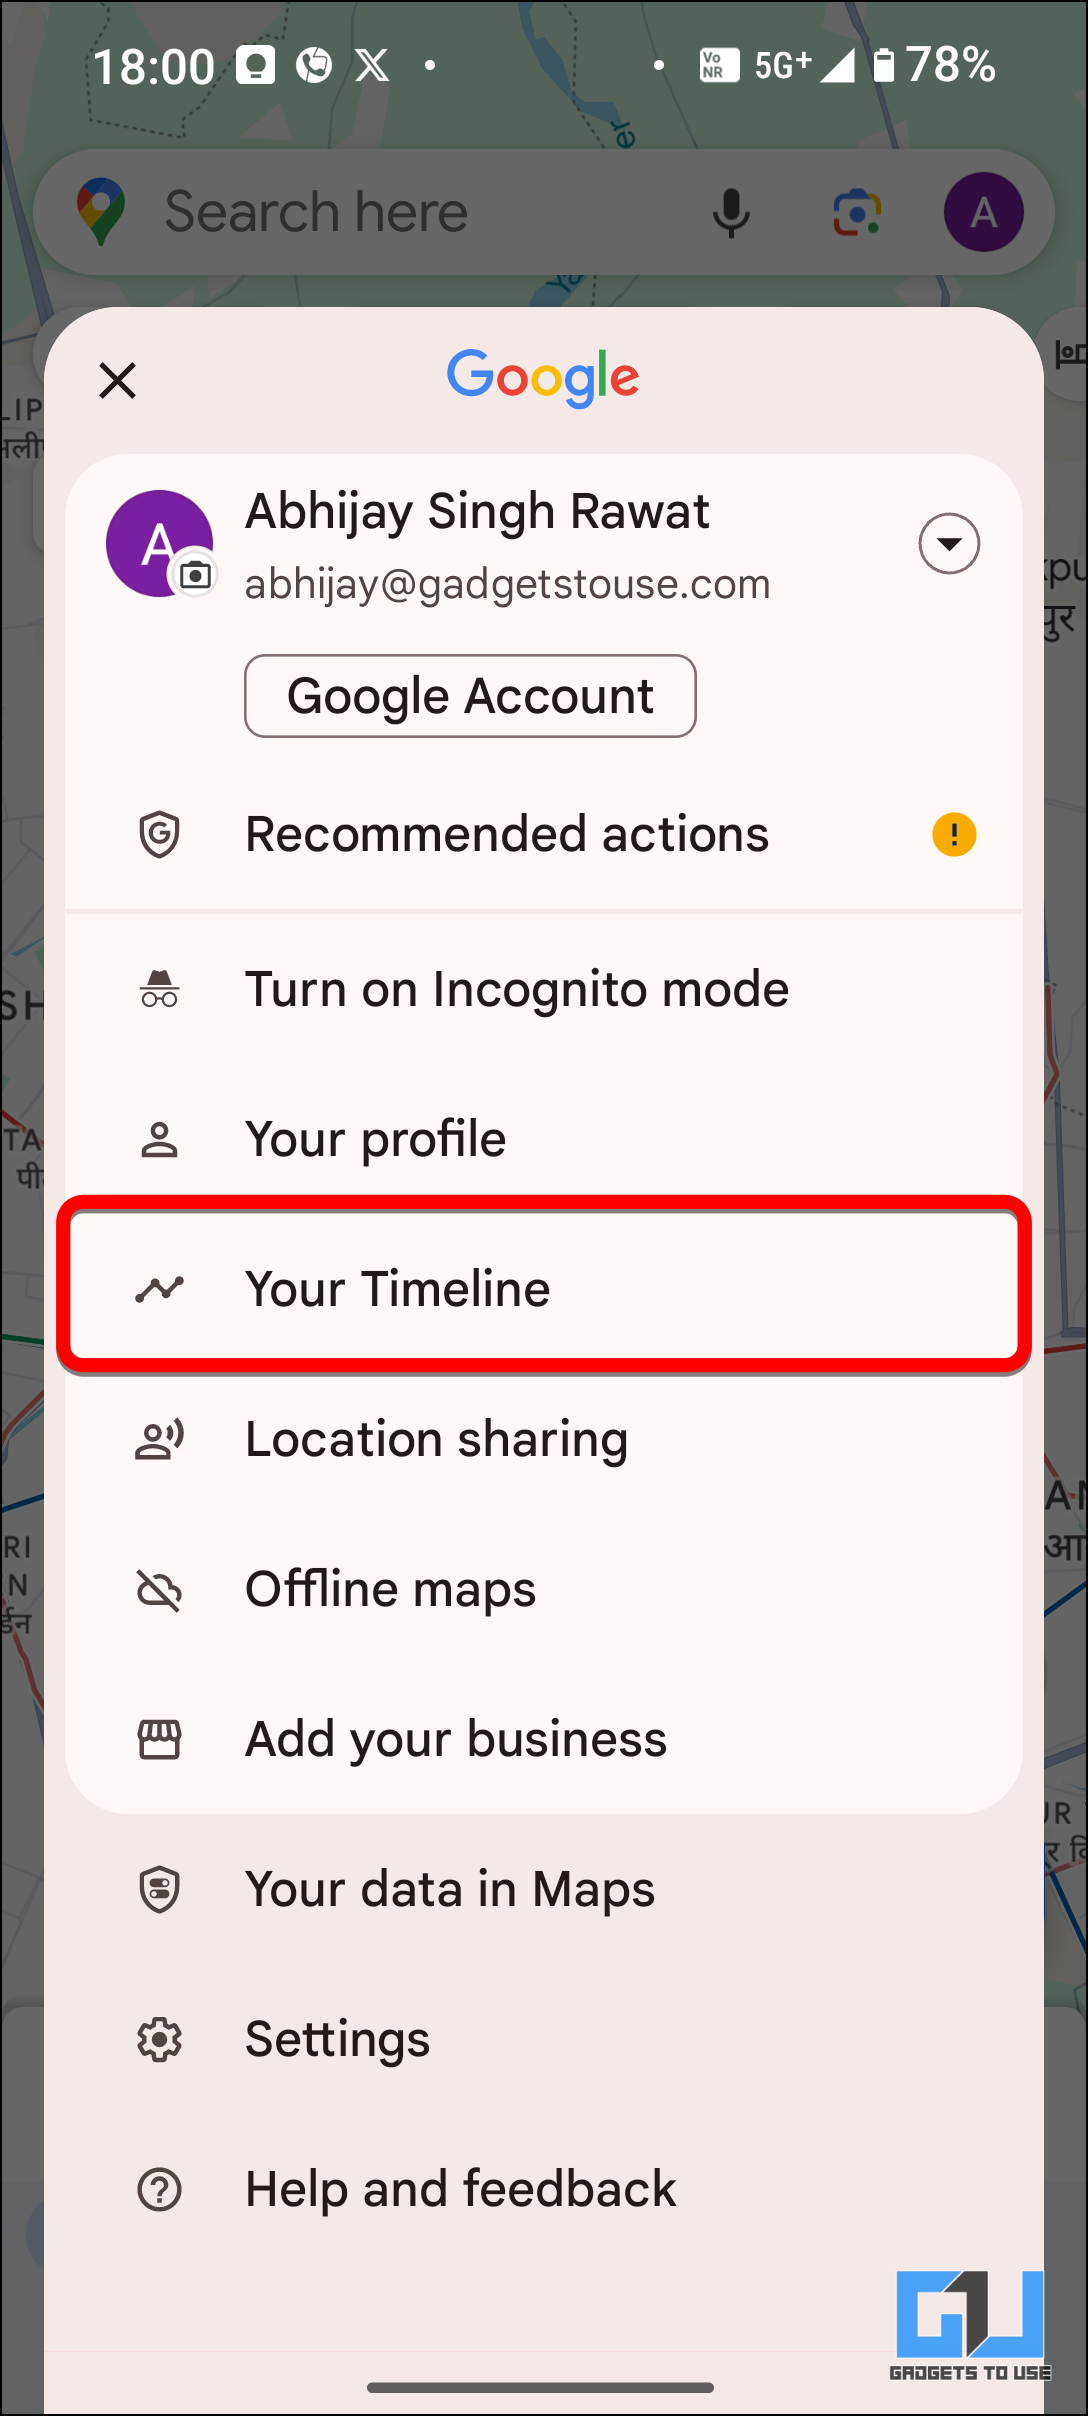
2. Next, select “Your Timeline” from the options in the menu.
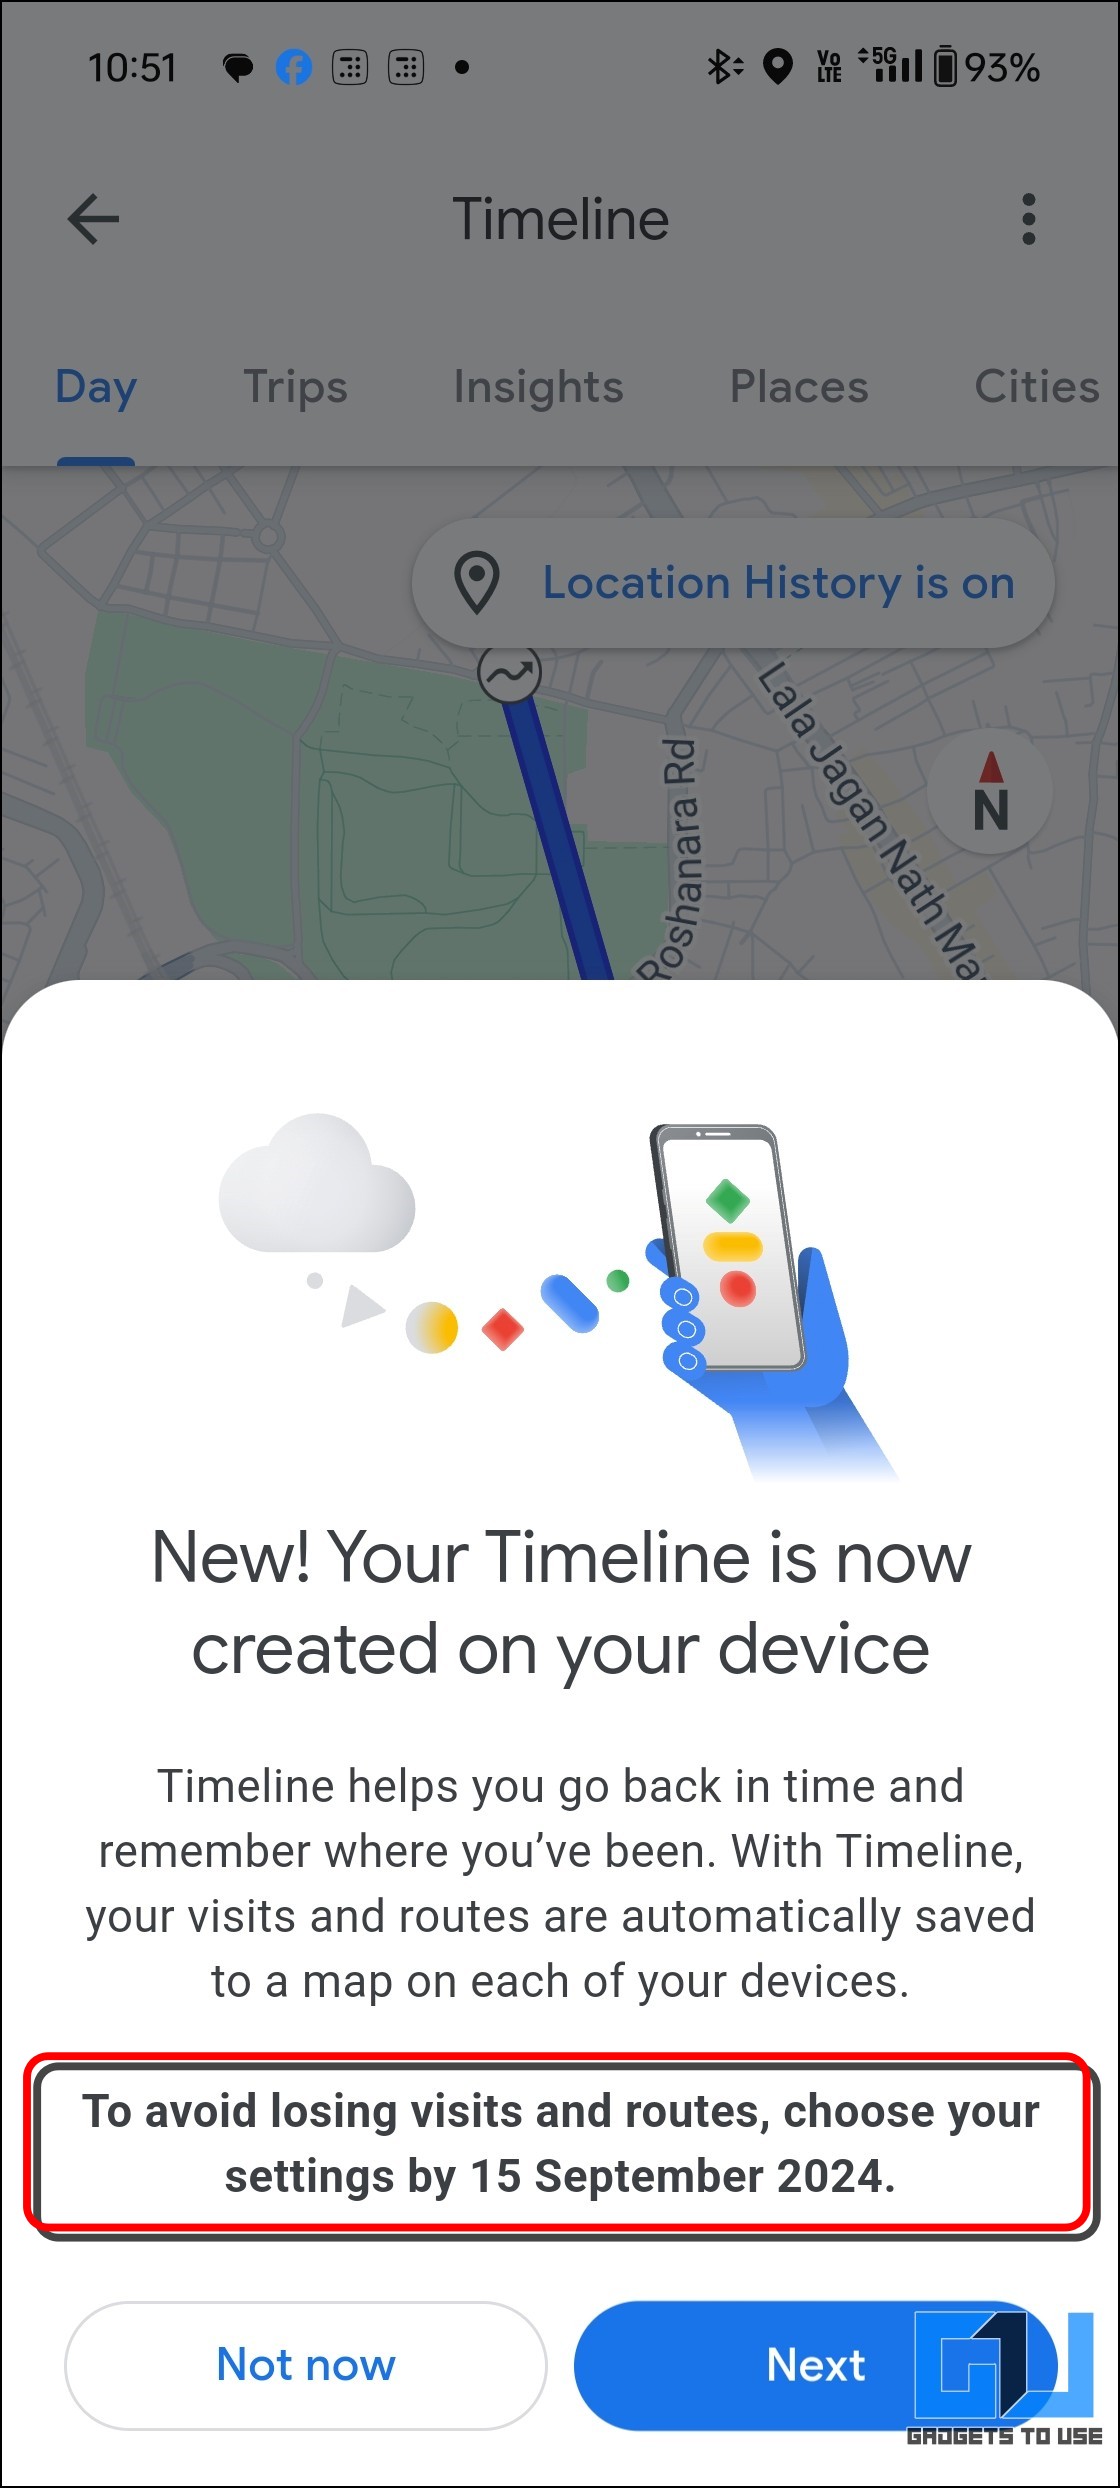
3. Then, a window will appear informing you of the new Timeline update and the warning of data loss by 15 September, 2024 if unchecked. Click on “Next.”
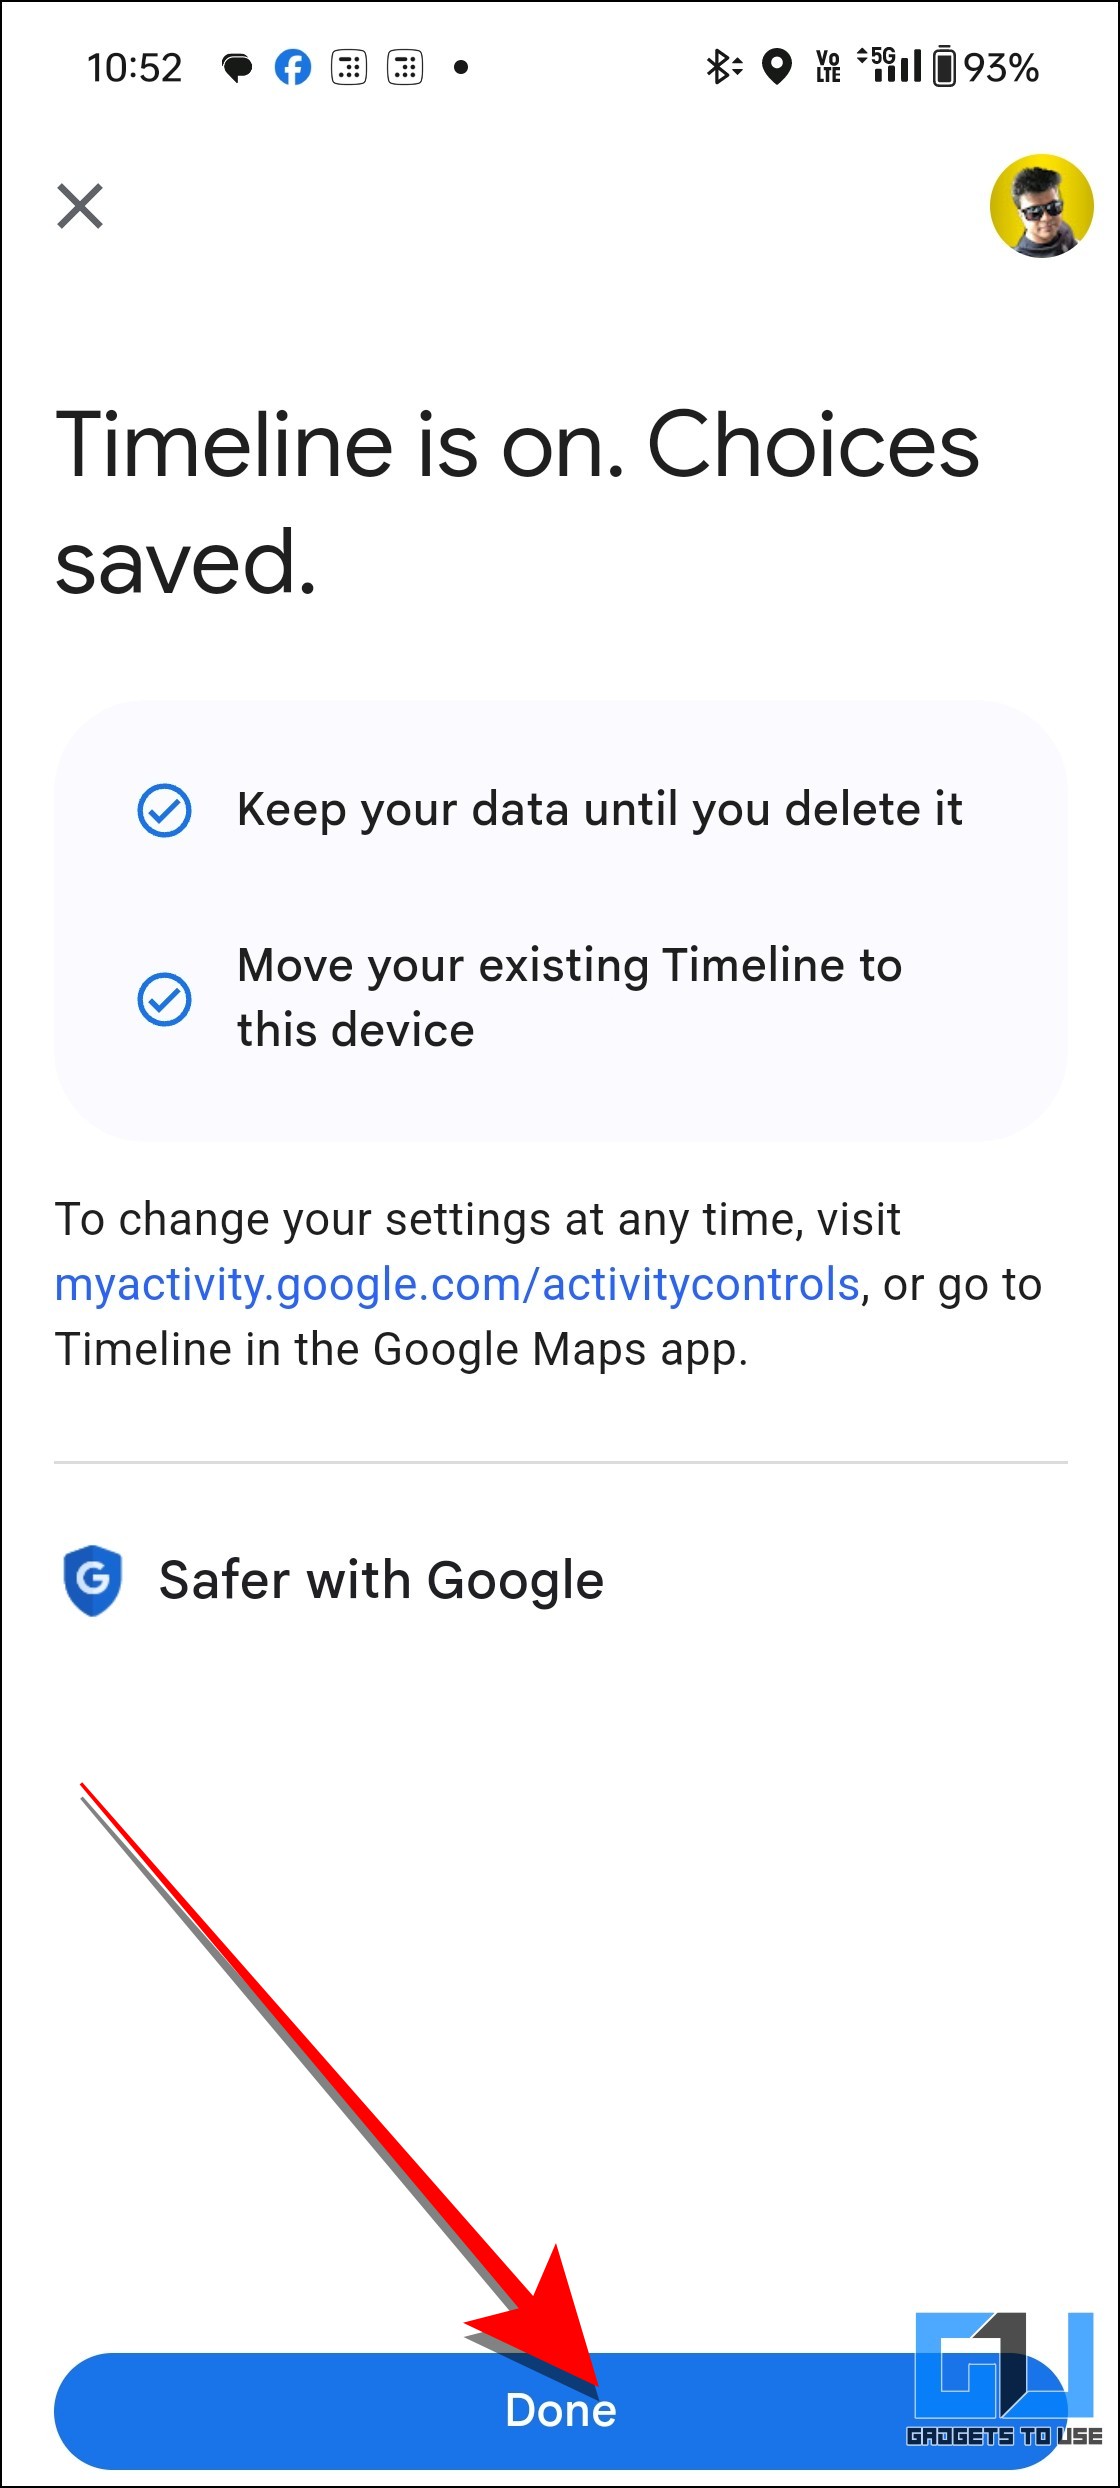
4. Then, you must choose whether to save your Timeline data (until you wish to delete them) or set up an auto-delete option.
Once done, hit “Save and continue“.
5. Next, a confirmation window will appear, showcasing your selected options for the new Timeline settings.
How To Save Timeline Data In Google Maps
And for all those who wonder, wait – if this setting makes Timeline a device-only feature, how will I recover it if I lose my phone or switch to another one? Worry not; we have you covered. Just follow these steps to save your Timeline data as an encrypted backup on Google servers.
1. Once timeline settings are done, another pop-up window appears similar like the one below.
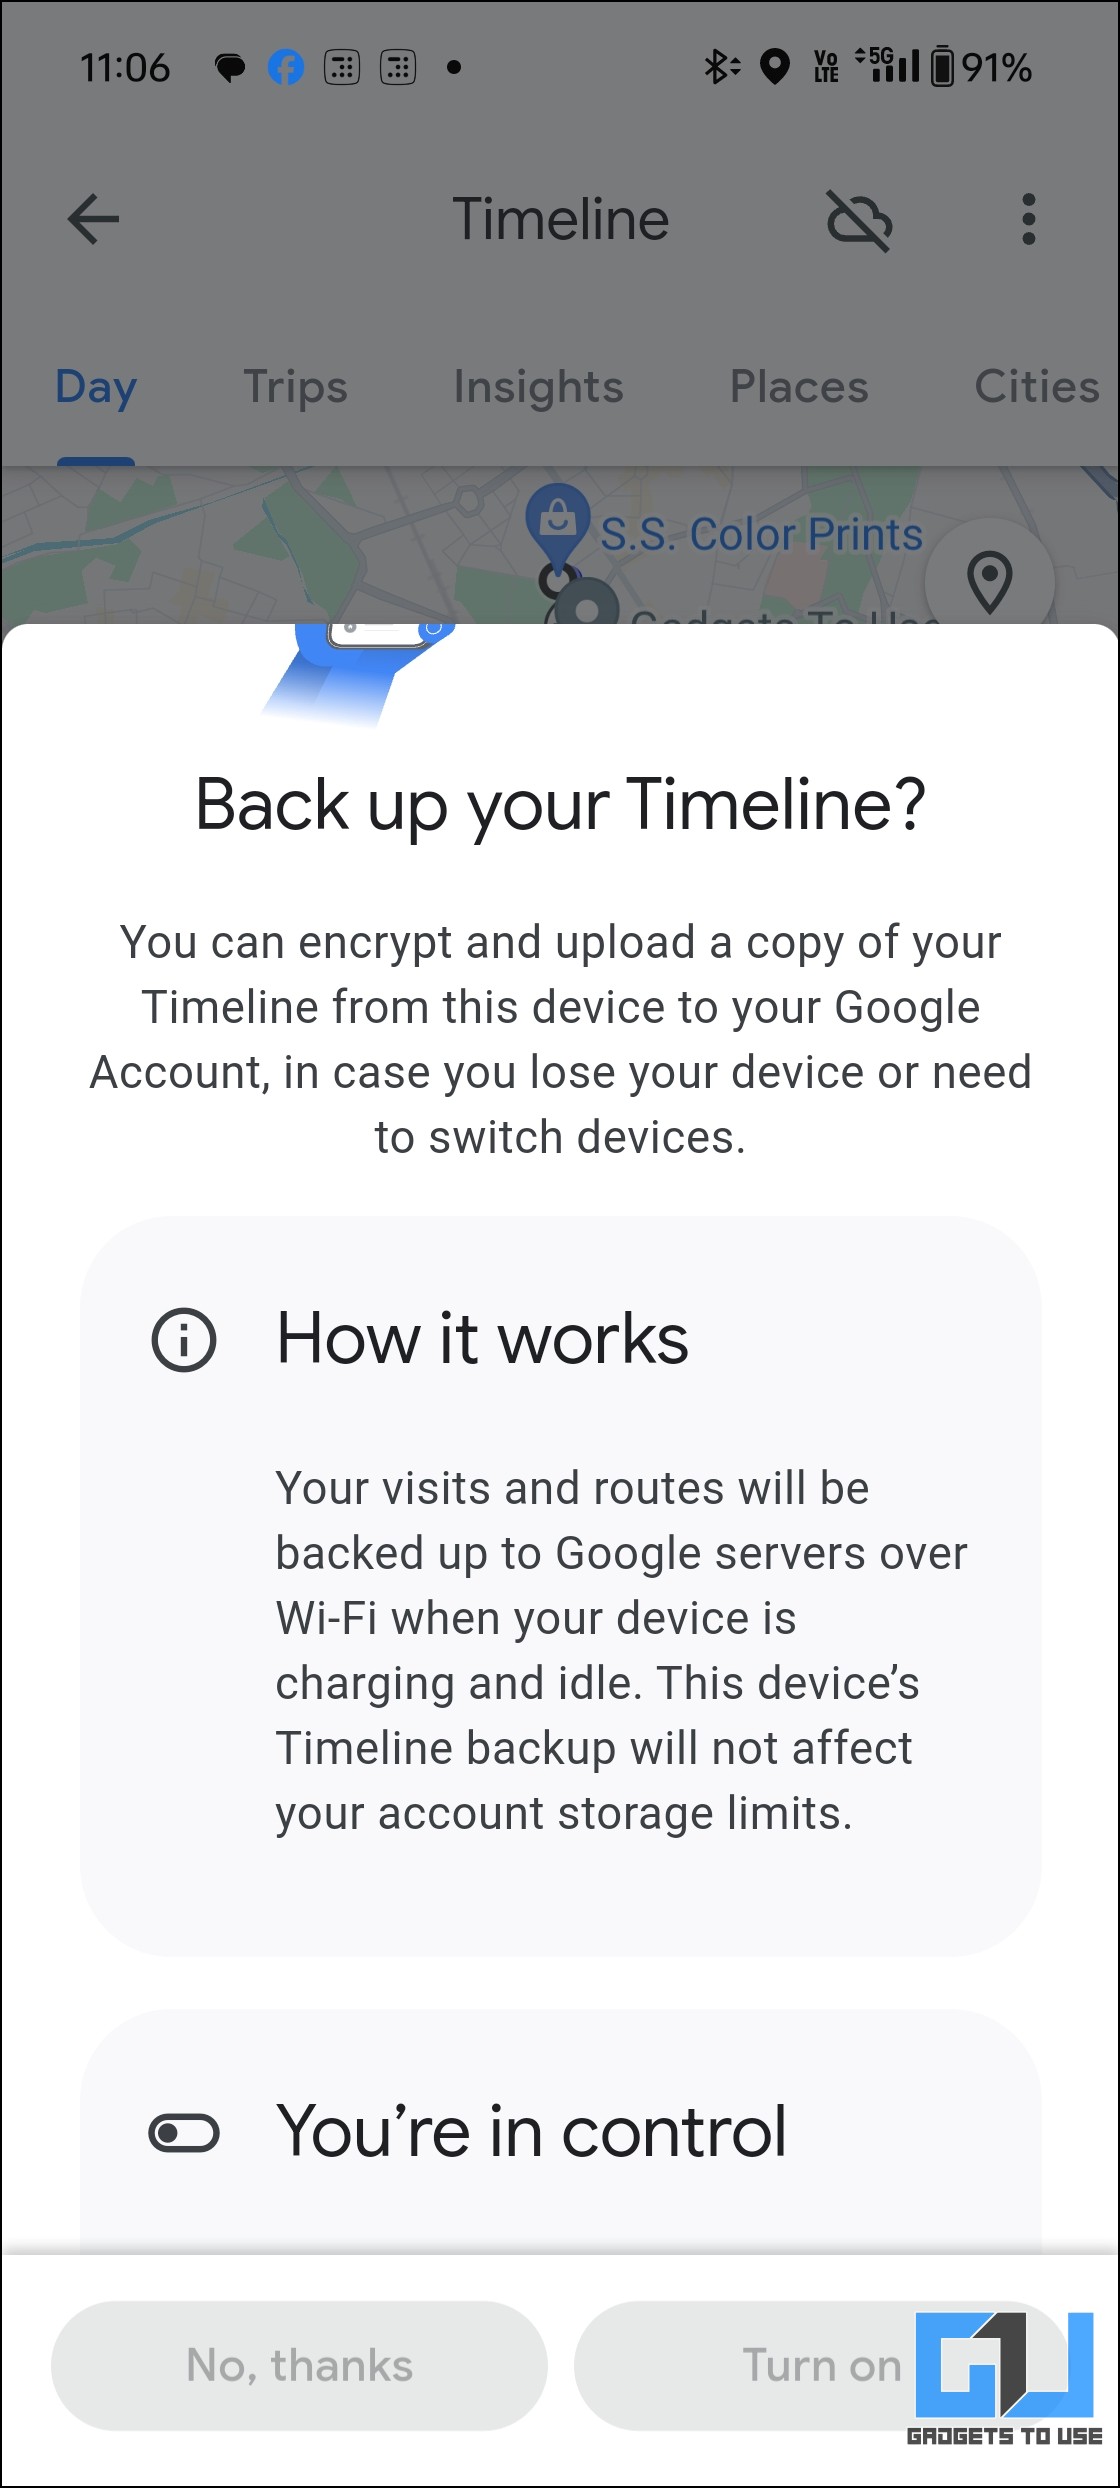
2. You can turn on this settings by tapping on “Turn on” as highlighted in the image.

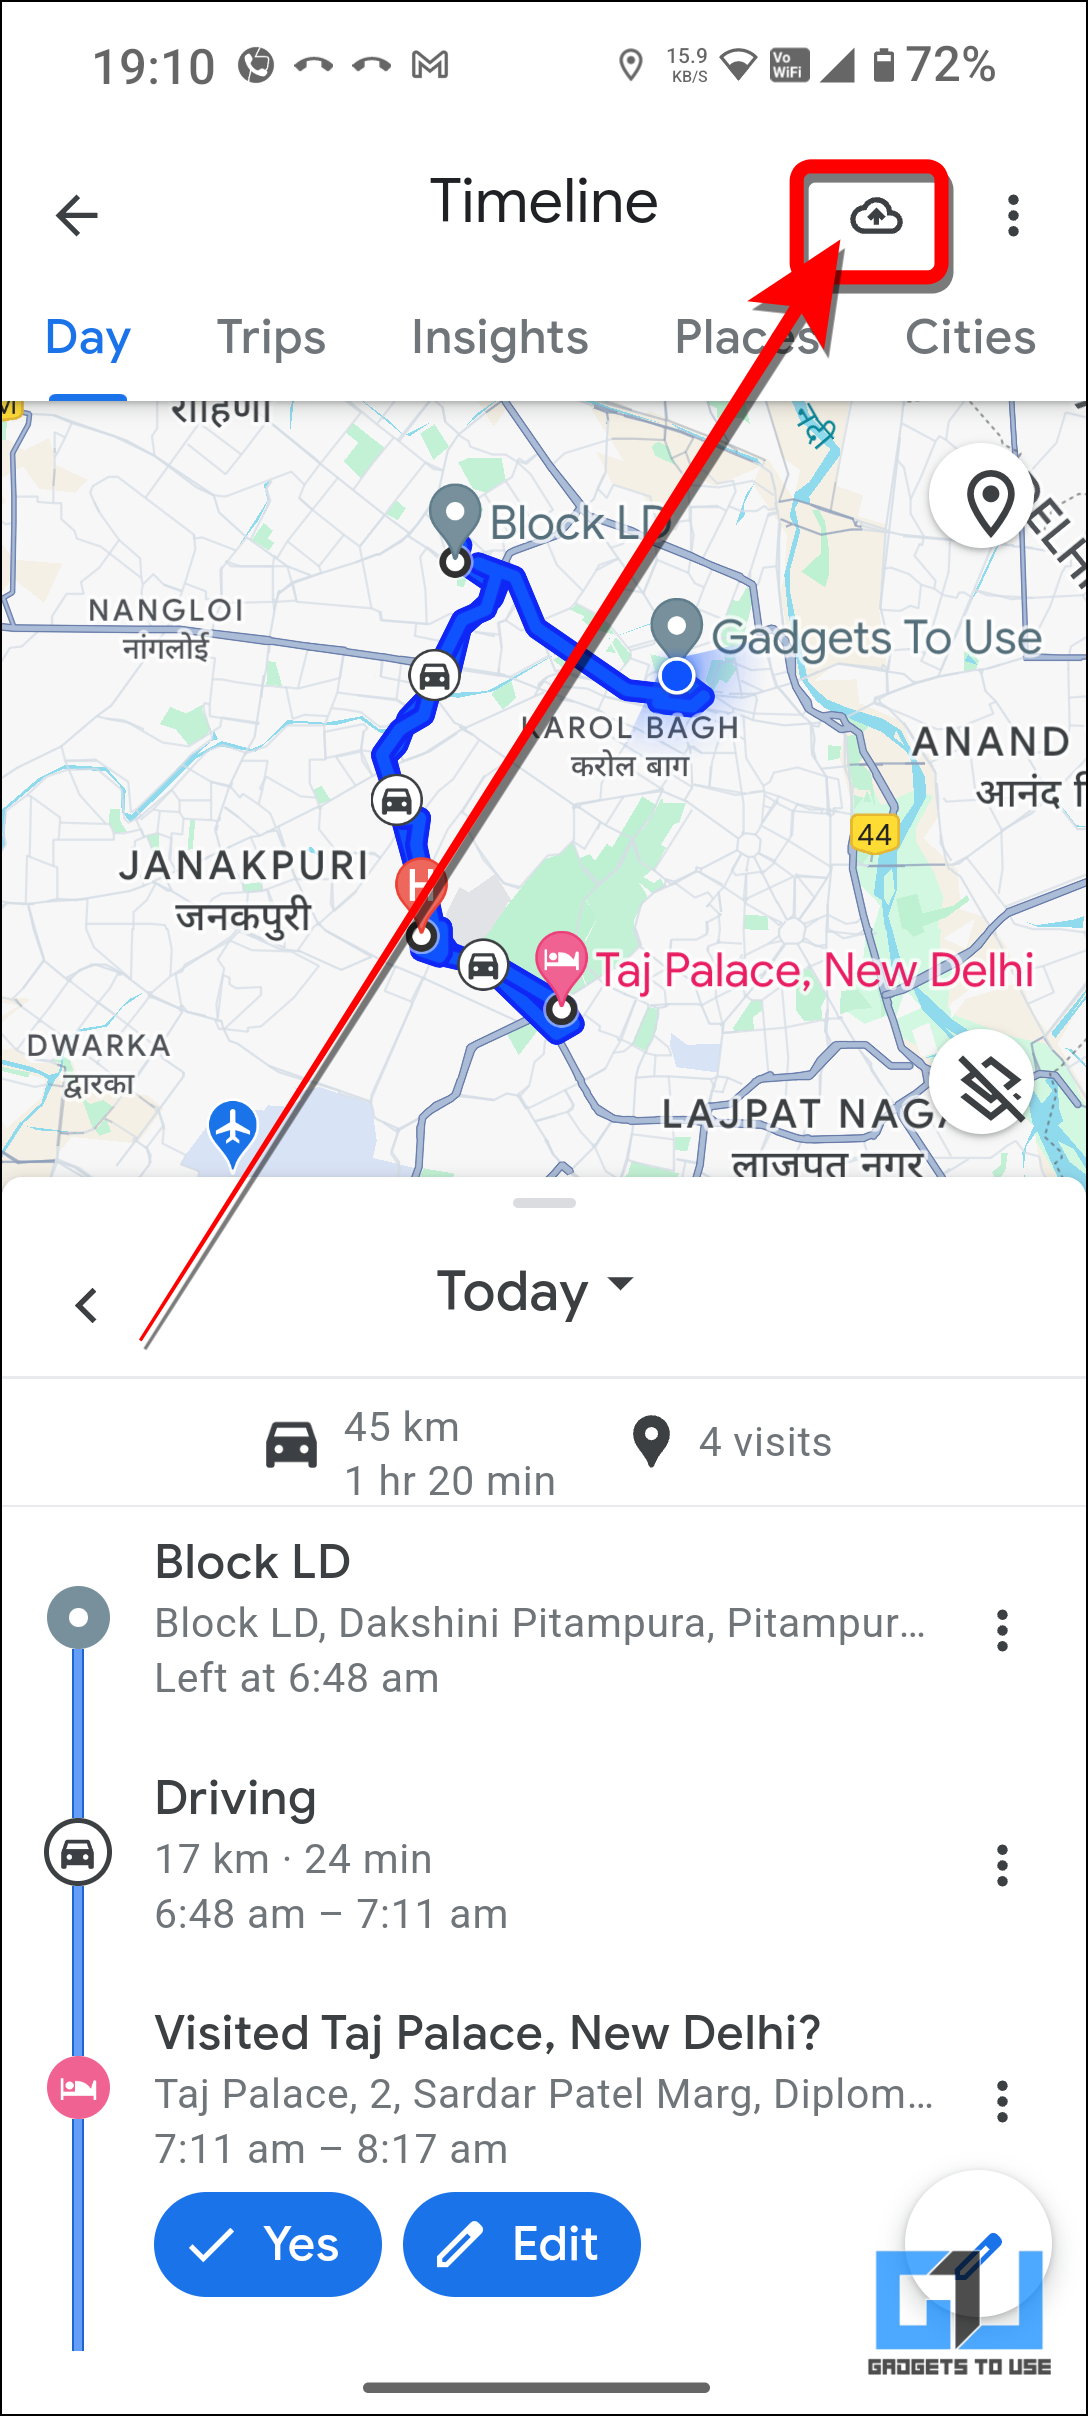
3. If you do not get the backup-window option after Timeline settings, tap on the “Cloud” icon in the Timeline screen.
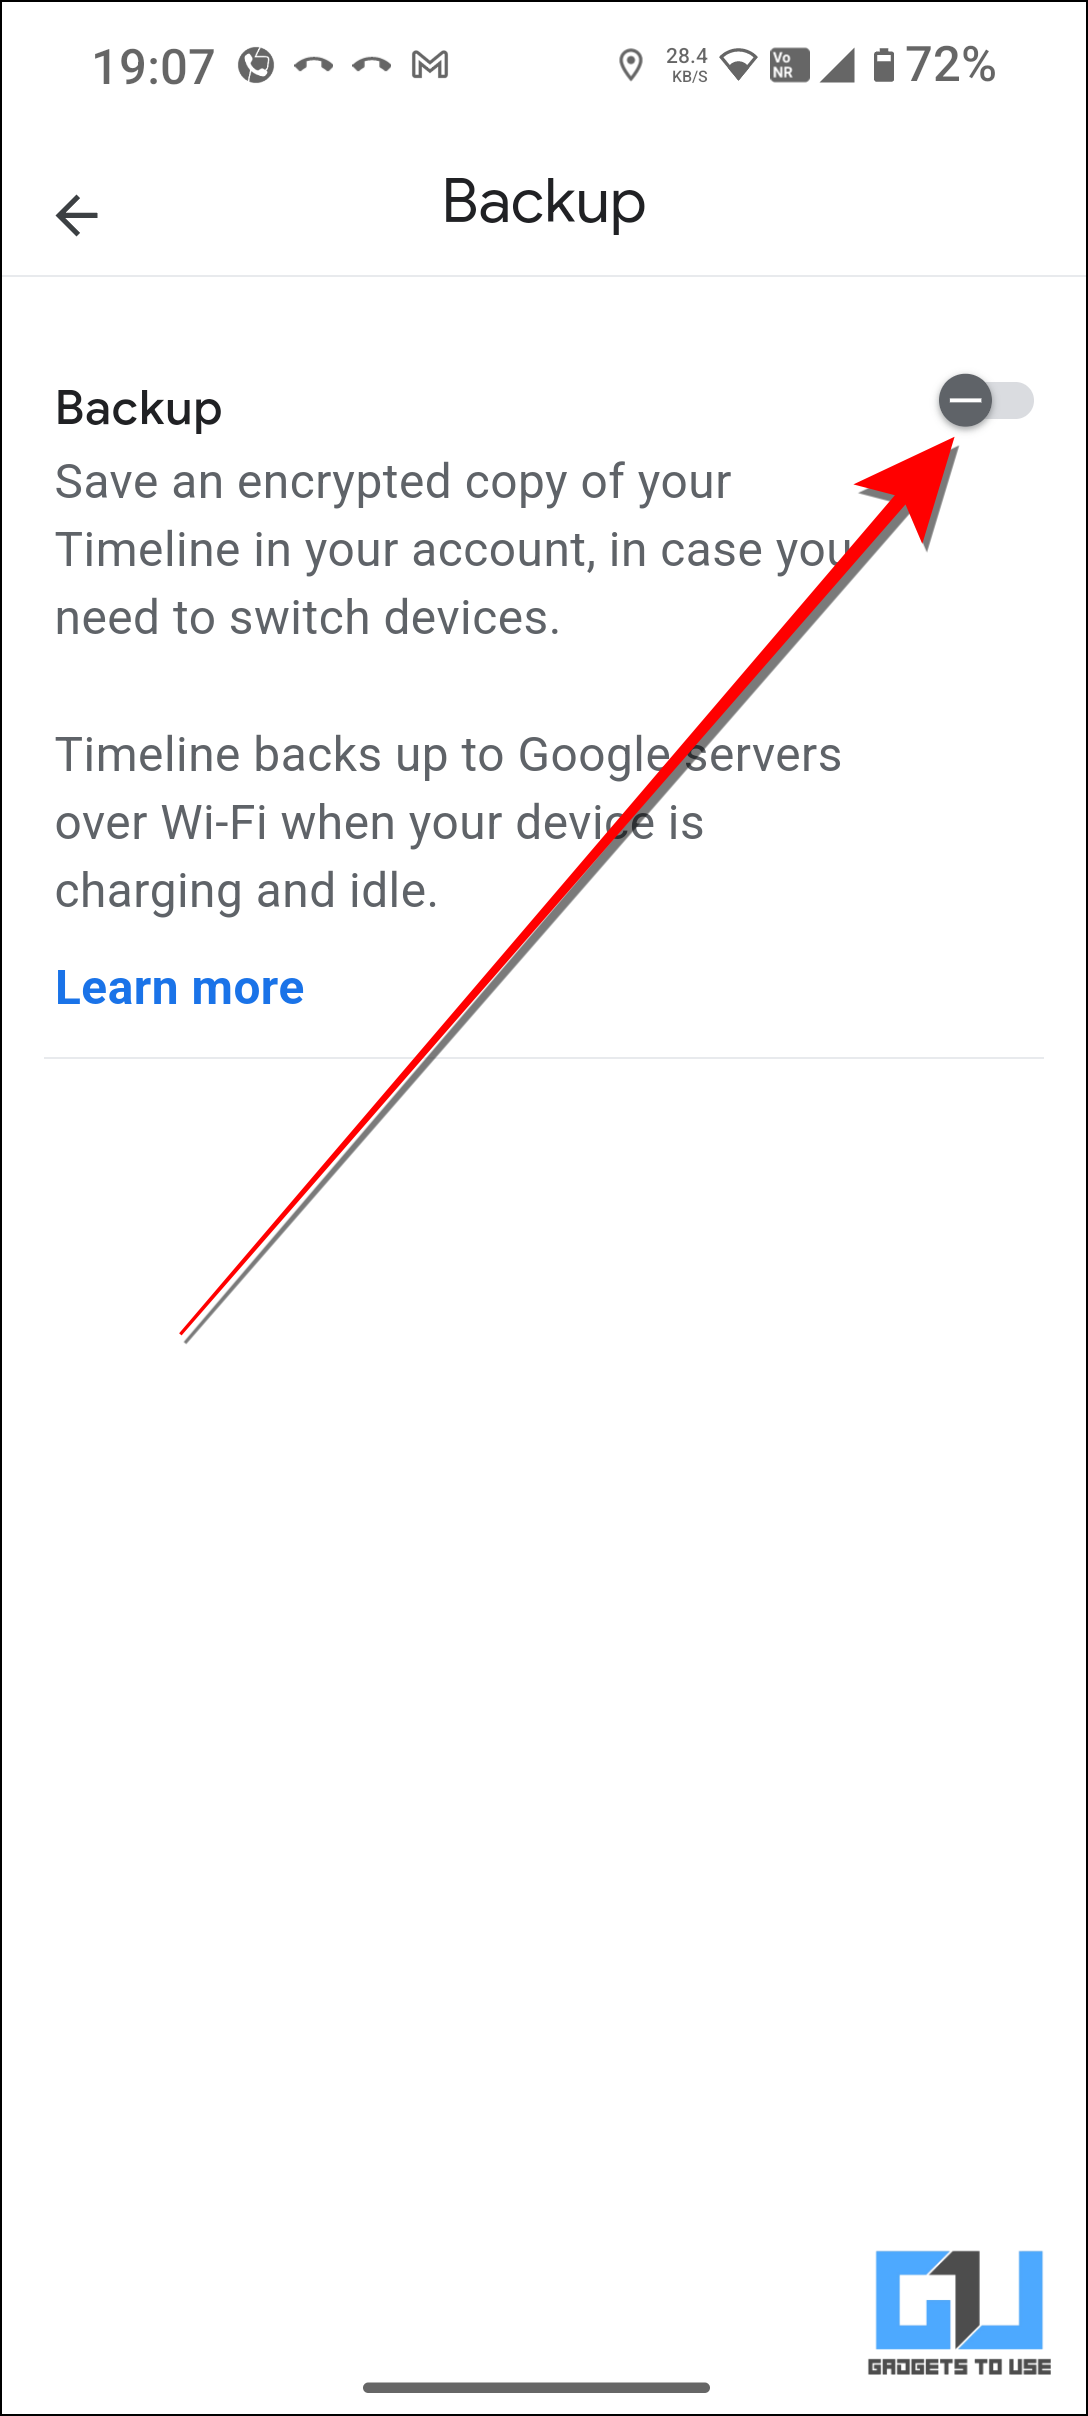
4. Next, toggle to turn on Backup and follow the on screen instructions.
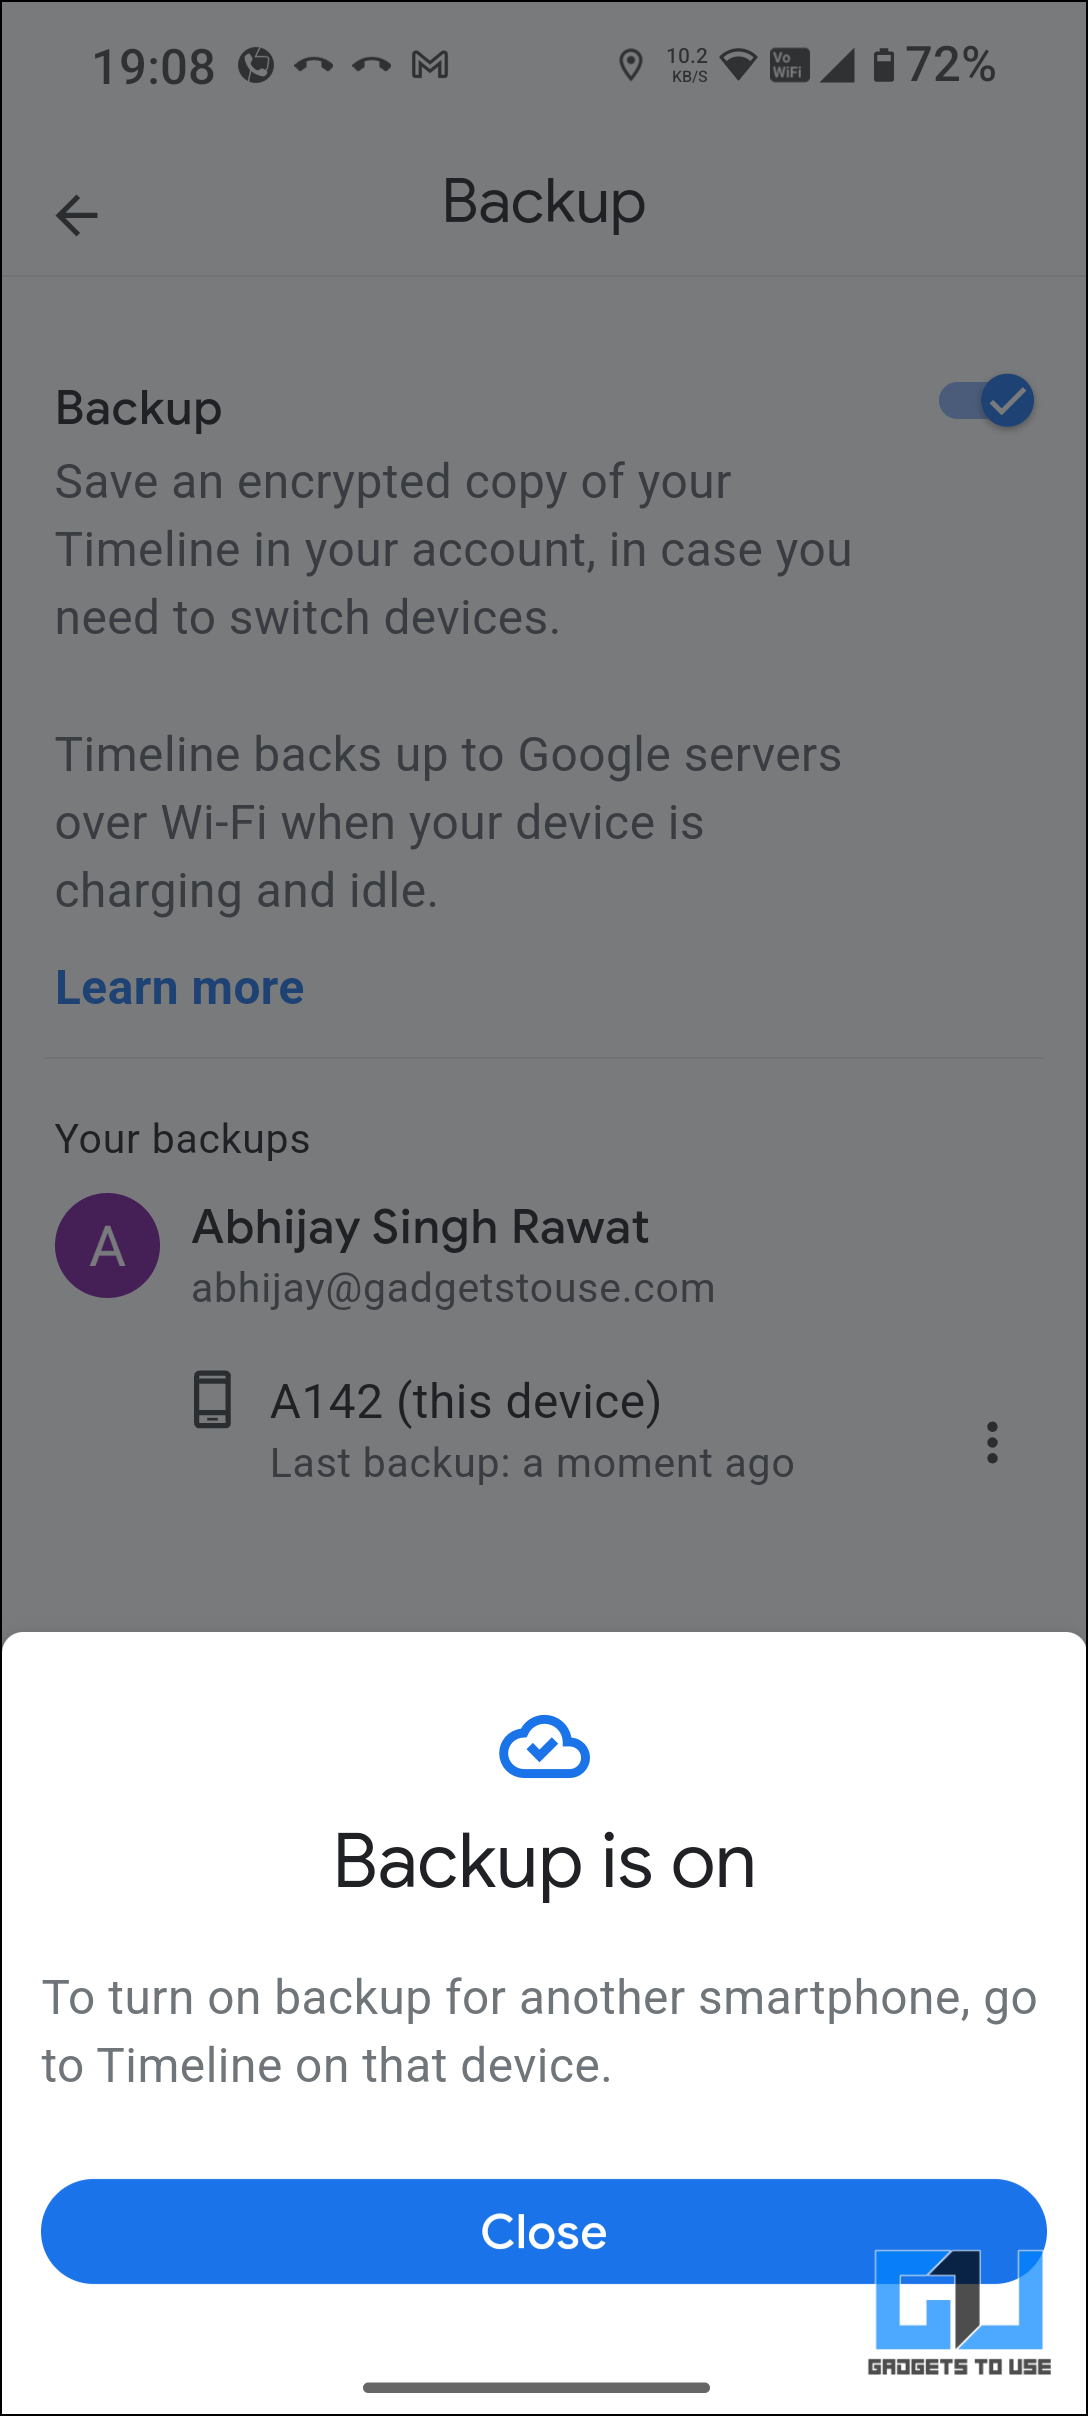
5. Once done, a confirmation screen will appear as below.
FAQs
Q. How Can I Save My Google Location History?
To save Google Location History, you must turn off Auto delete option in Timeline settings on Google Maps. For a step-by-step guide with pictures, read the article above.
Q. Does Google Maps Save My Location History?
Yes. Google Maps does store your location history using Timeline feature. However, with the new update, it will now be only saved on your devices than Google’s severs.
Q. Can I Access Google Maps Location History From The Web ?
No. Google has already started rolling out the new Timeline update, with which, all of the location history will be only visible and saved to your phone(s).
Q. How To Recover My Timeline Data From Old/lost Phone?
You can easily recover your Timeline data by taking an encrypted backup of it. To turn it on, go to Timeline>Cloud Backup (icon)> Toggle Backup to ‘ON’. For a comprehensive guide, you can check out the article above.
Wrapping Up
Google’s new Timeline will ensure that we users will be in control of our data, and still be able to save it on our own devices. In this guide, we have explored how you can tweak your settings to use this feature on your device. For more such insightful read, follow GadgetsToUse and check out the following reads as below.
- How to Find Fuel Efficient Routes on Google Maps
- 3 Ways You Can Disable Google AI Overviews in Search Results
- How to Create Google Search Notes Profile and Customize It
- What Is Audio Emoji in Google Phone and How to Disable It
- 3 Ways to Find Google Maps Route Without Traffic or Speed Cameras
You can also follow us for instant tech news at Google News or for tips and tricks, smartphones & gadgets reviews, join the GadgetsToUse Telegram Group, or subscribe to the GadgetsToUse Youtube Channel for the latest review videos.