Quick Answer
- In addition to using various apps and devices to blur out photos, you can make use of free online tools such as Peko Step to add the blur effect on a specific part of the image before posting on Twitter, Instagram, or Facebook.
- If you wish to blur out a particular region inside your photo, then you can use the native gallery app on your Android smartphone to achieve it before posting it on social media.
- Similarly, you can use the Blur Photo Effect Background app on your iOS device to blur out a specific part of your image before posting it on various social media platforms.
Blurring out part of an image can not only help you to hide sensitive content but also assists you to stay safe while sharing an image on various social media platforms. In this read, we have listed four effective ways to blur part of your photo before posting on Twitter, Instagram, or Facebook.
Also, Read | 4 Best Ways to Apply Portrait Blur Effect on any Photo for Free
Ways to Blur Part of Photo before Posting
Use Native Android Gallery App to Blur Part of a Photo
If you wish to blur out a particular region inside your photo, then you can use the native gallery app on your Android smartphone to achieve it before posting it on social media. Here’s how you can do it.
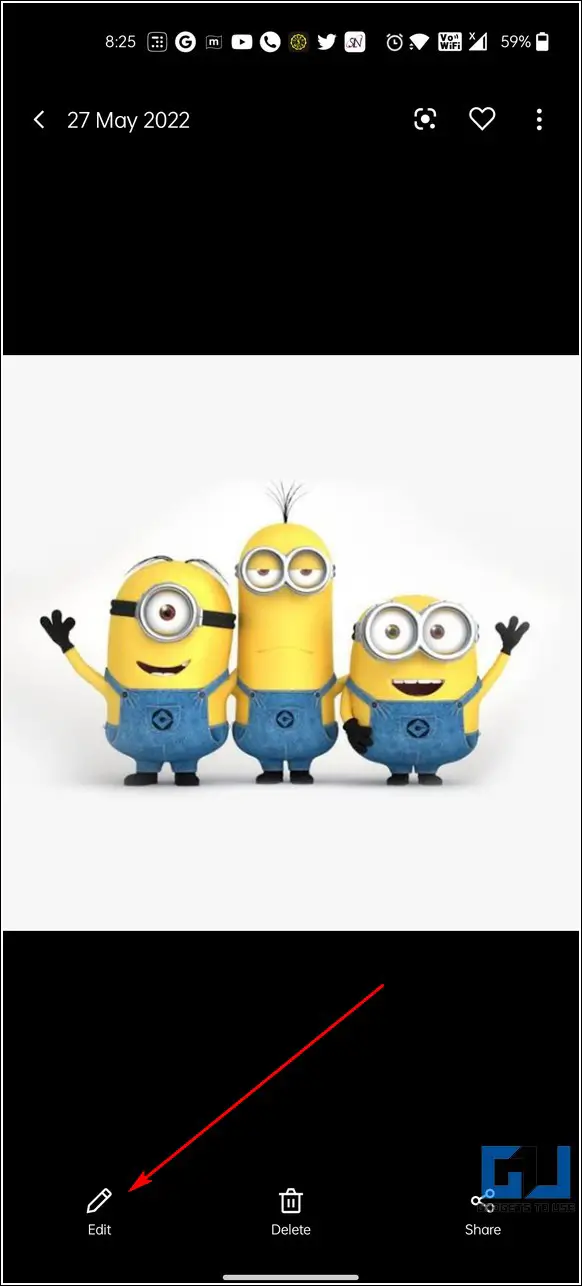
1. Open your desired photo inside the Gallery app on your Android smartphone and tap on the Edit button to make changes to it.
2. Next, tap on the Mark tab in the bottom-right corner of the app and press the Mosiac option to apply the blur effect.
3. Choose your preferred brush size and drag your finger over the region which you wish to blur. Once done, tap on the tick icon in the top-right corner to save changes.
That’s it, you’ve successfully blurred out your desired region in the image using the native gallery app.
4. You can now post this photo on your preferred social media platform such as Twitter, Instagram, or Facebook.
Add Blur to Photos Using Instagram Photo Editor
If you wish to blur out a portion of your image before posting it on Instagram, then you can use its in-built editor to hide it. Follow these steps for an easy fix.
1. Open the preferred photo on your Instagram app to post it as a normal post.
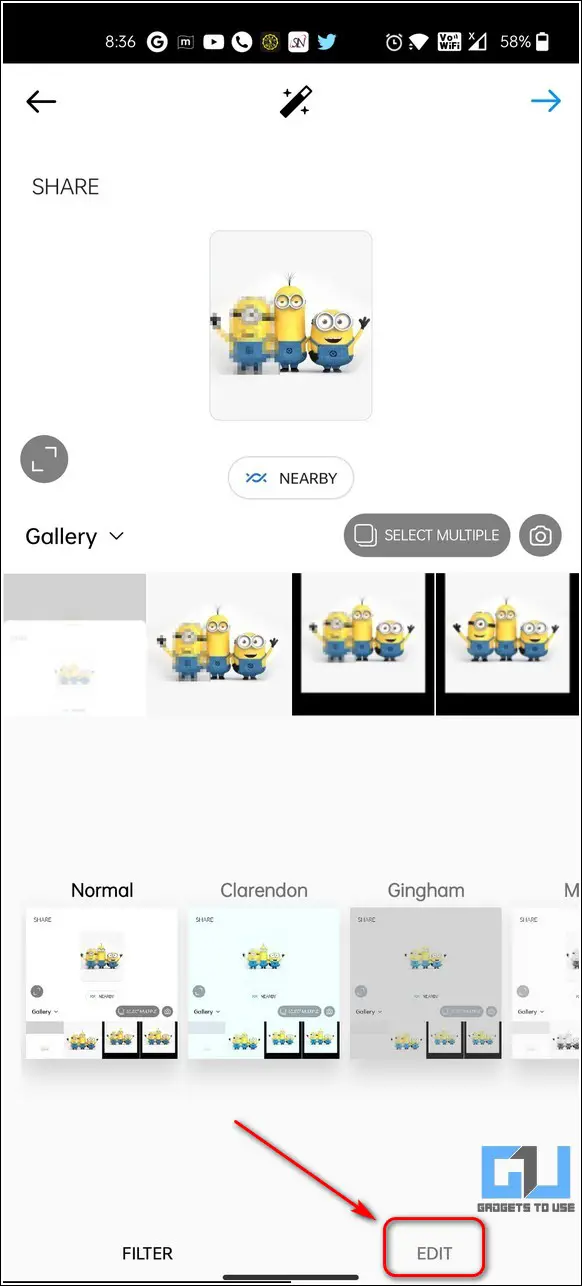
2. Next, tap on the Edit tab at the bottom-right corner and press the Tilt-Shift option.
3. Further, choose your desired blur method and drag your finger over the region on which you wish to focus. Rest all the area will get blurred out.
4. Once finished, tap on the Done button at the bottom-right corner.
5. That’s it. You can now post this edited photo on your Instagram profile with your added blur effect.
Use Free-Third Party Apps to Blur a Photo on Android/iOS
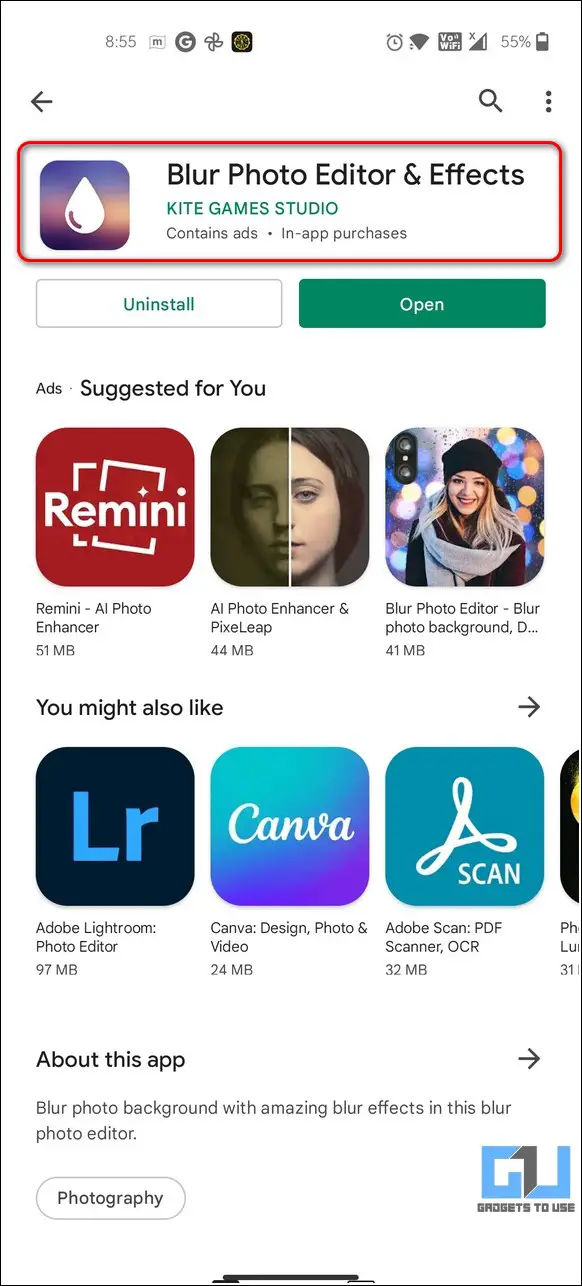
There are lots of free third-party apps available on the Google Play Store and Appstore that offer the feature to easily blur out part of a photo. One such popular Android app goes by the name of Blur Photo Editor & Effects through which you can easily hide sensitive data on your image. Here’s how you can achieve it with the help of this app.
1. Open Google Play Store on your Android device and search for the Blur Photo Editor & Effects app to install it.
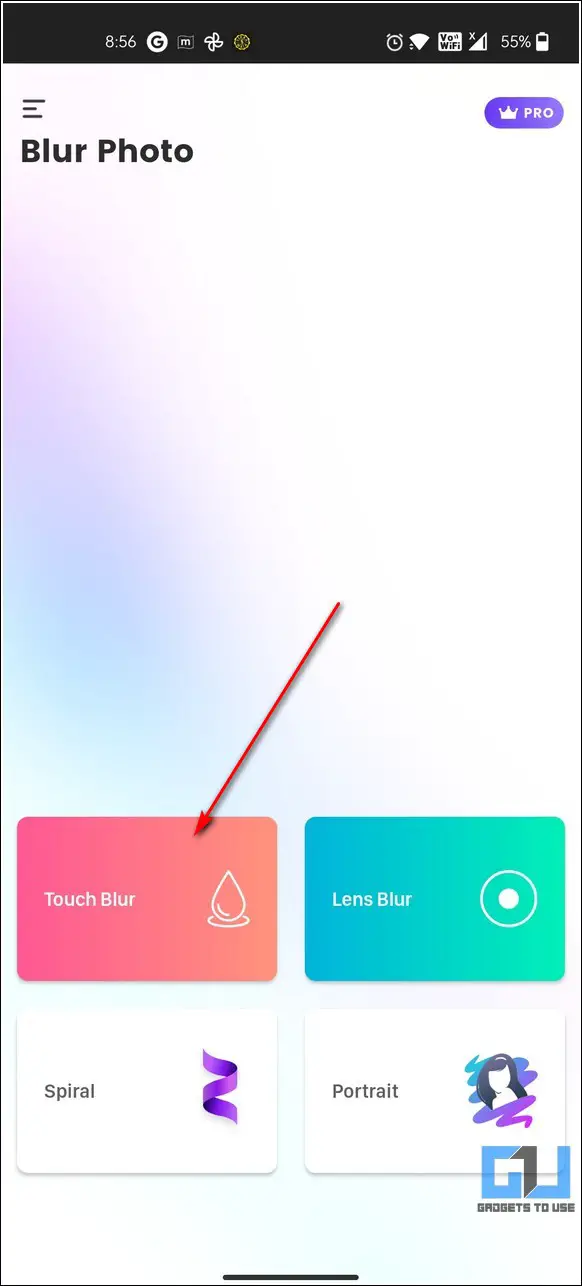
2. Next, tap on the Touch Blur button to blur out the desired region on your chosen photo.
3. Select your desired photo and tap on the Blur button at the bottom to use this effect.
4. Drag your finger over the area that you wish to blur and tap on the Next button at the top-right corner once finished.
5. Further, tap on the Save button to export the edited image to your device.
Similarly, you can use the Blur Photo Effect Background app on your iOS device to blur out a specific part of your image before posting it on various social media platforms.
Blur Images Online Before Posting on Social Media
In addition to using various apps and devices to blur out photos, you can make use of free online tools such as Peko Step to add the blur effect on a specific part of the image before posting on Twitter, Instagram, or Facebook. Follow this quick guide to using an online tool to blur out part of your photo.
Bonus Tip: How to Blur your Background in a Zoom Meeting
Now that you have learned to blur out specific parts of your image using the above-listed methods, you must also learn to blur out your background in a Zoom meeting. Check out this detailed read to blur your background in a Zoom meeting.
Related | How to Delete Blurry Pictures to Clear Space on Google Photos.
Wrapping Up: Blur it Out
So, that’s all for the top ways to blur out part of a photo before posting on Twitter, Instagram, or Facebook. If this quick read has helped you to make your digital lives safer by hiding the sensitive content on your photos, hit the like button and share this guide with your friends to make them aware of these nifty methods. Subscribe to GadgetsToUse for more interesting walkthroughs.
You can also follow us for instant tech news at Google News or for tips and tricks, smartphones & gadgets reviews, join GadgetsToUse Telegram Group, or for the latest review videos, subscribe GadgetsToUse YouTube Channel.

