Quick Answer
- Your iPhone will now ask you to enter the passcode when unlocking your iPhone after a restart, updating the software, connecting the device to a computer, installing iOS configuration profiles, and more, making it more private and secure.
- In this article, we’ll tell you how to lock text messages with a passcode or FaceID on your iPhone and iPad running iOS 14, 15, or 16.
- You can the Shortcuts app on your iPhone to create an automation that will automatically lock your iPhone when someone tries to access the Messages app.
Unlike Android, it can be tricky to lock apps and messages on an iPhone. Thankfully, you can lock the default Messages app and even the individual SMS on iOS via simple tweaks. In this article, we’ll tell you how to lock text messages with a passcode or FaceID on your iPhone and iPad running iOS 14, 15, or 16. Read on.
Locking Messages on iPhone: Why is it Required?
Many may wonder if it’s really necessary to lock your text messages. Well, while there’s no compulsion, there are benefits to it. Here are some of the common reasons why you may want to lock messages on your iPhone:
- To prevent others from seeing your private chats or messages.
- To prevent someone who has access to your iPhone from sending texts without your knowledge.
- To avoid unauthorized access to financial text messages, including transaction OTPs which may lead to fraud if fallen into the wrong hands.
How to Lock Text Messages on iPhone and iPad
On Android, you can use the built-in option to lock applications (if available) or rely on third-party app lockers. However, things are different on iOS. There’s no preloaded app locker, and third-party apps won’t work due to system restrictions.
Thankfully, there are several workarounds to lock the Messages app on an iPhone. Doing so will secure your iMessage chats and regular text messages, such as banking information and OTPs. Read on.
Make Sure Your iPhone is Passcode-Protected
Before we start, make sure a passcode or password protects your iPhone. The lock screen passcode prevents unauthorized access and shields you from anyone trying to check messages, photos, or other personal data on the device. You’d also need it for some of the methods mentioned below. Here’s how you can set up a lock screen passcode on your iPhone or iPad:
1. Open Settings on your iPhone or iPad.
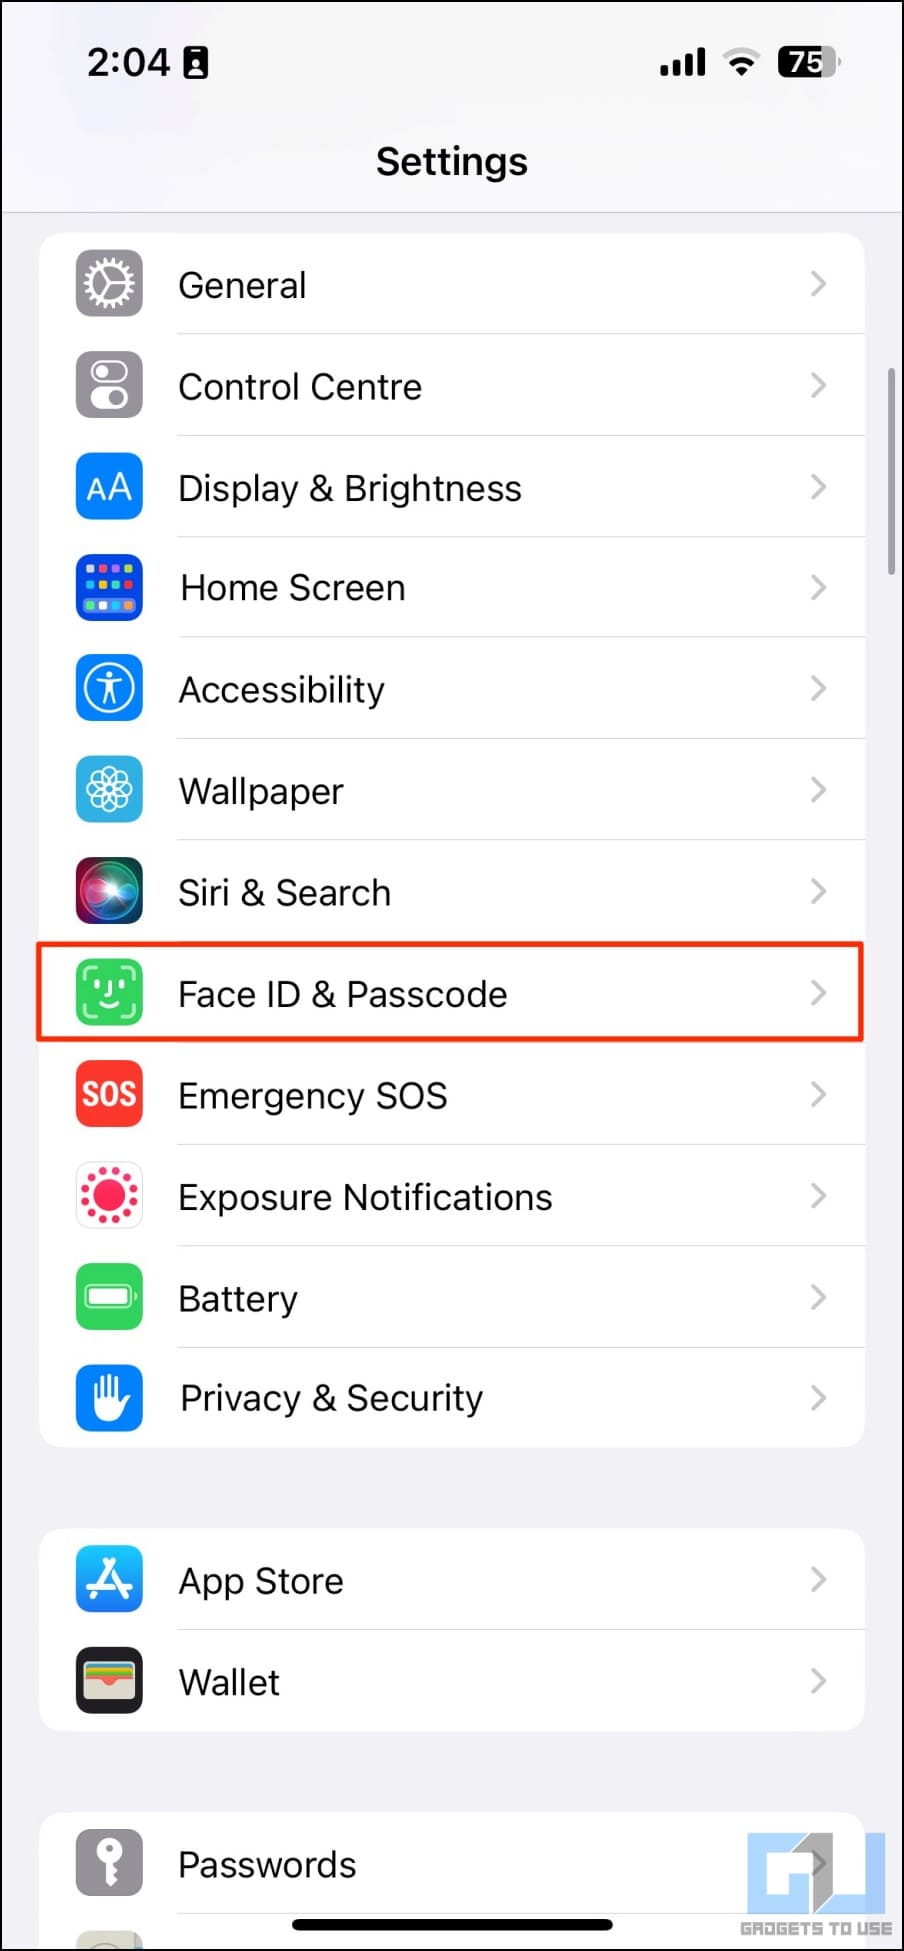
2. Scroll down and click on Face ID & Passcode (or Touch ID & Passcode for iPhones with a Touch ID).
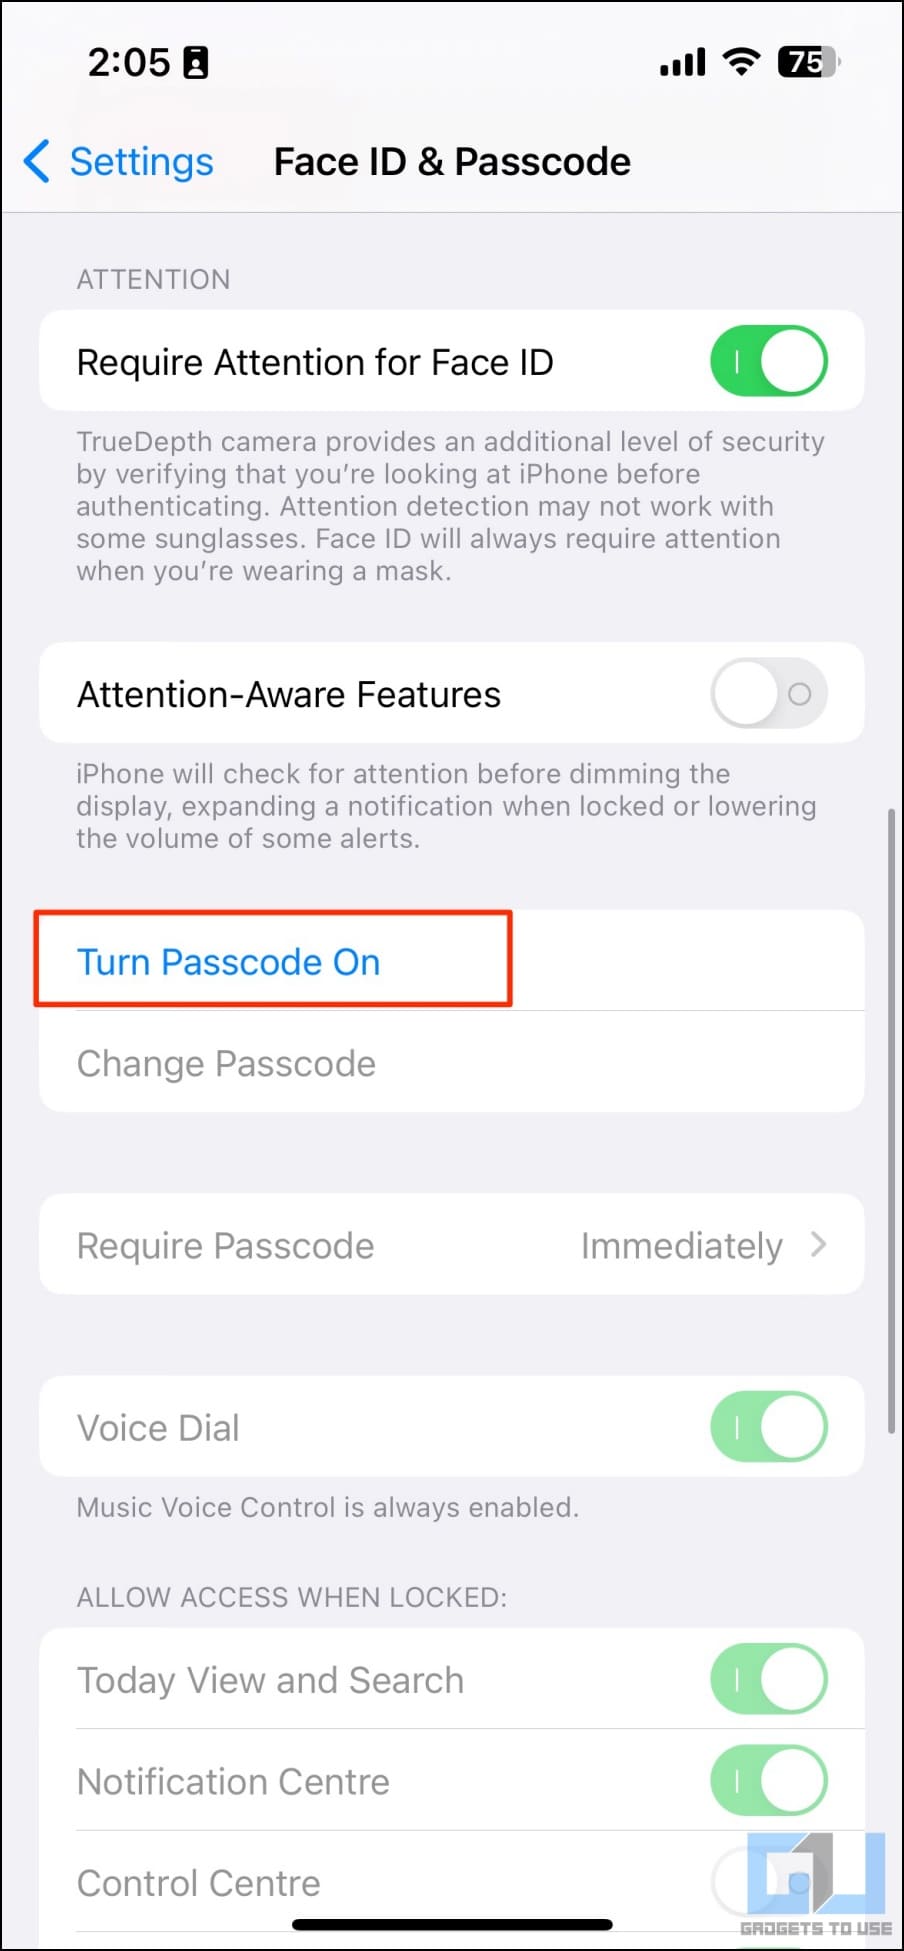
3. On this screen, tap Turn Passcode On.
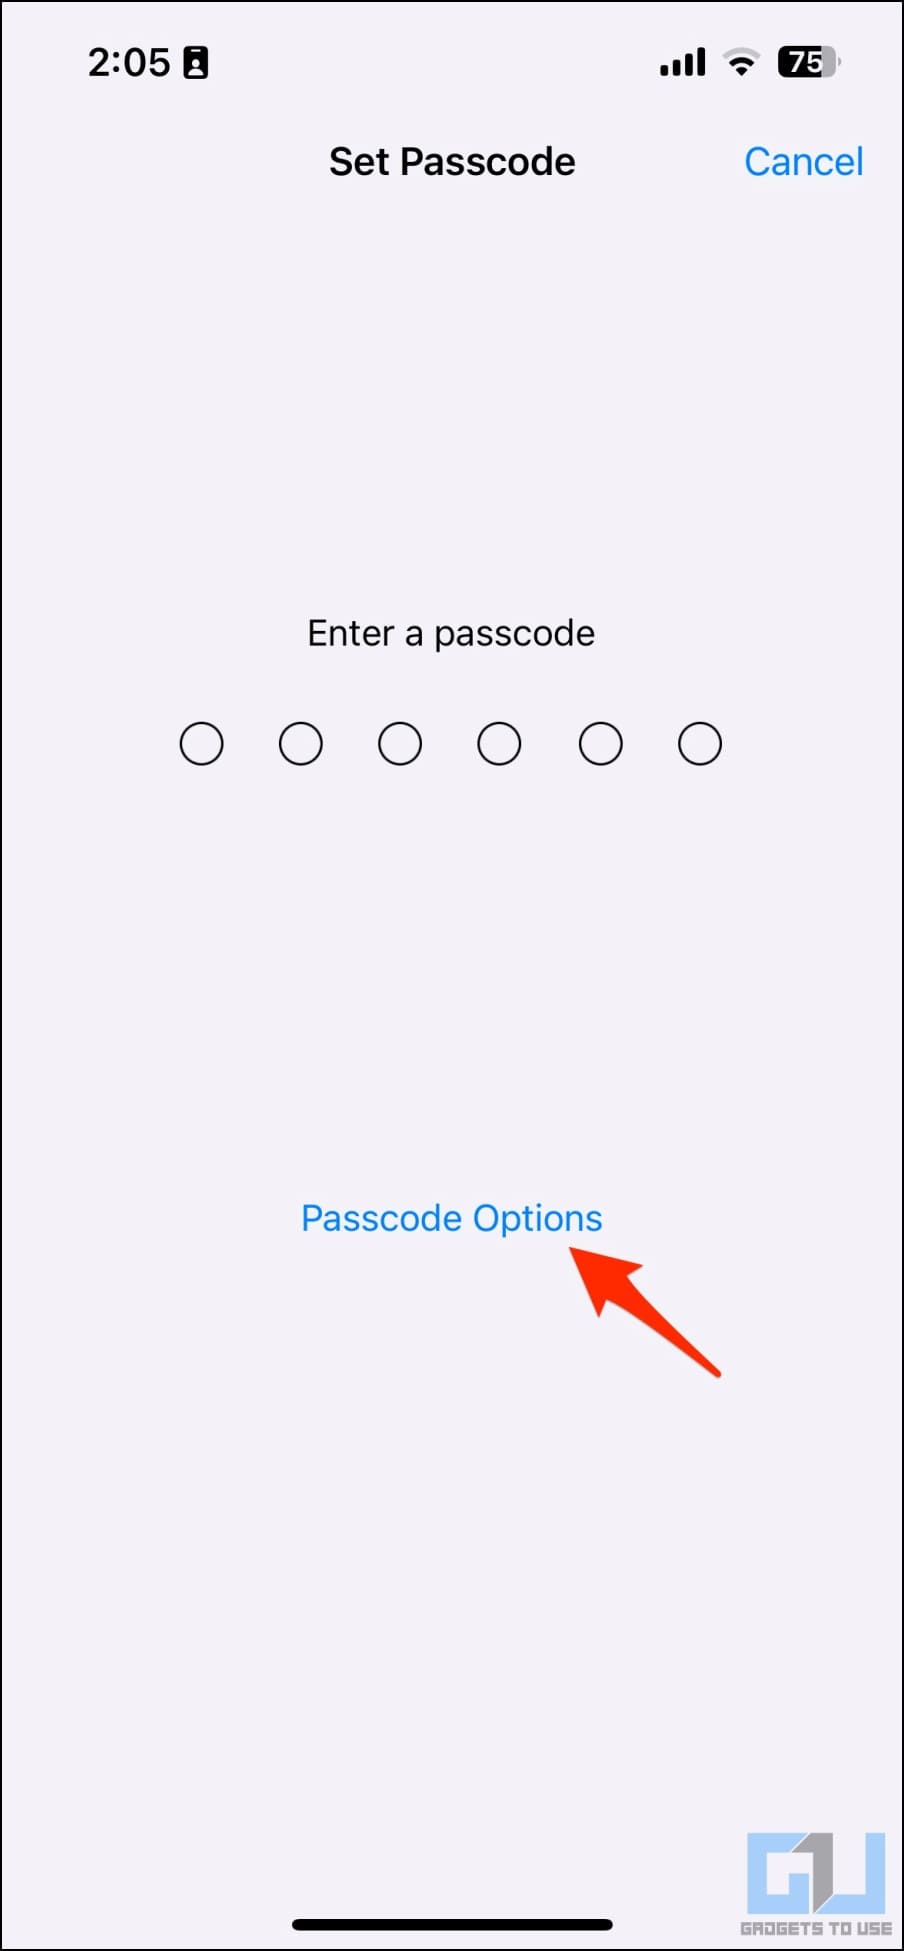
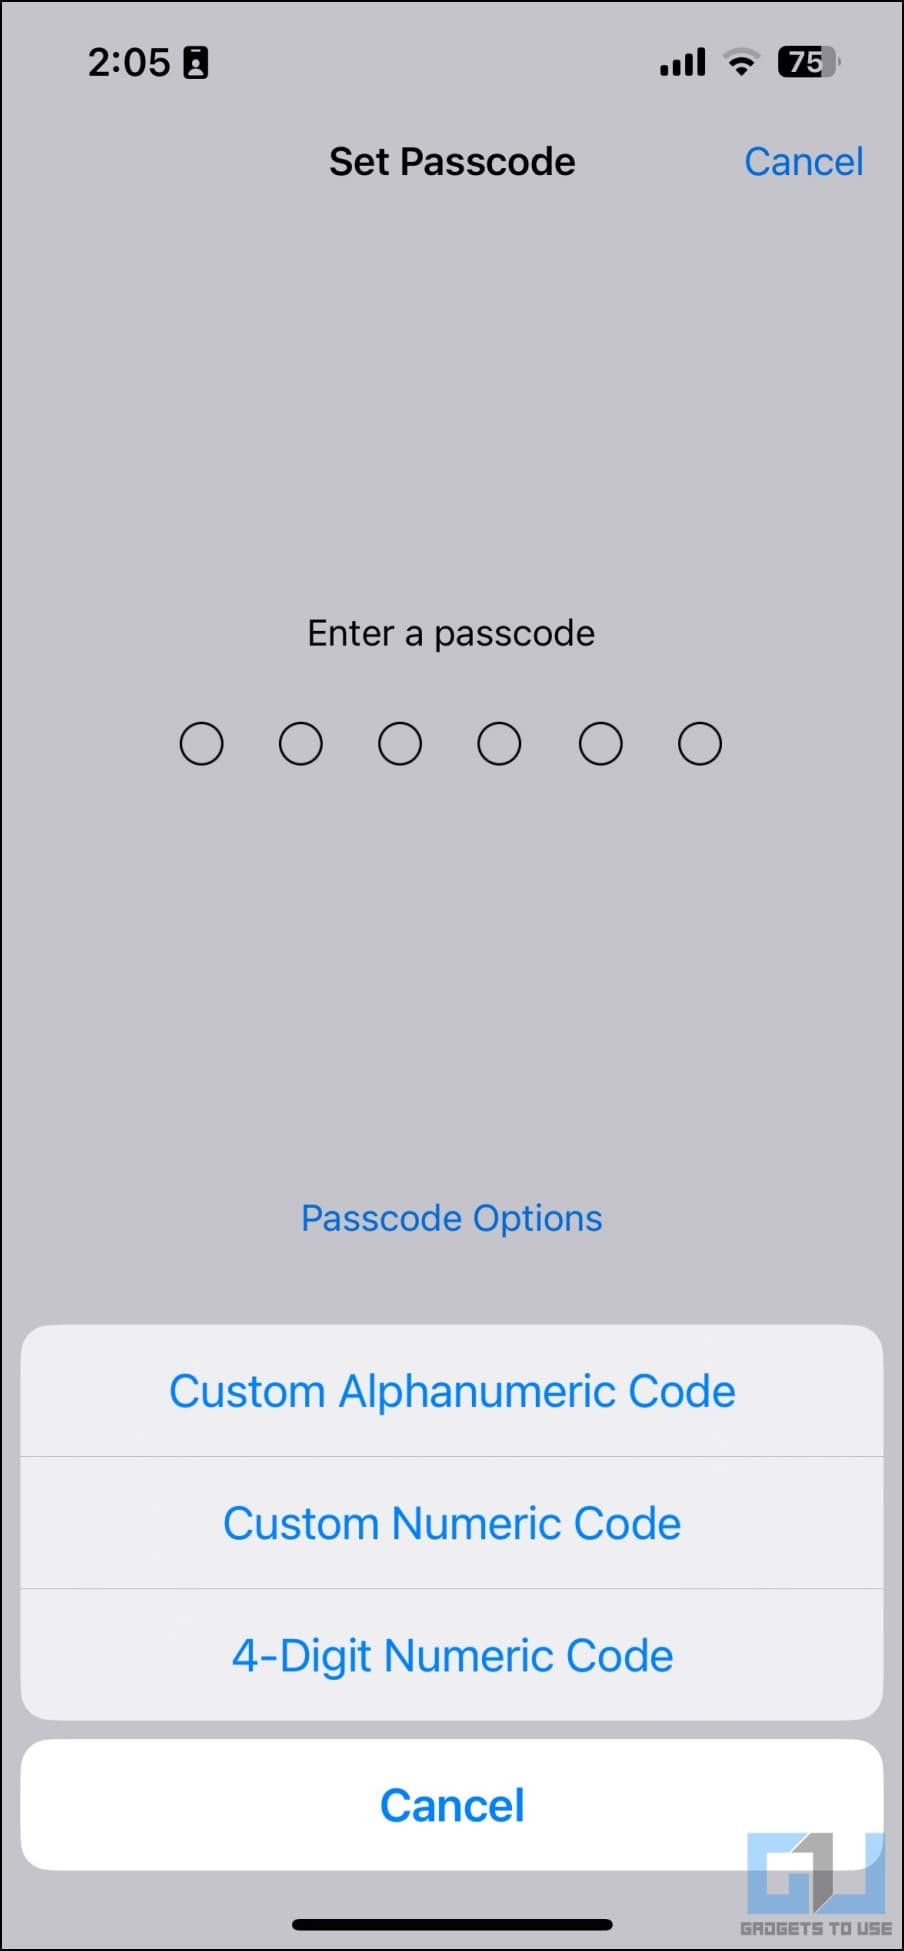
4. Enter a 6-digit passcode. You also can tap Password Options to switch to 4-digit passcode or a custom alphanumeric code.
5. Verify the passcode again when prompted.
Your iPhone will now ask you to enter the passcode when unlocking your iPhone after a restart, updating the software, connecting the device to a computer, installing iOS configuration profiles, and more, making it more private and secure.
Method 1- Lock Messages Using Shortcuts on iOS
You can the Shortcuts app on your iPhone to create an automation that will automatically lock your iPhone when someone tries to access the Messages app. You must then use your FaceID or passcode to unlock your iPhone and access the text messages. Here’s how to set it up, divided into three easy sections:
Step 1- Set a Timer in the Clock App
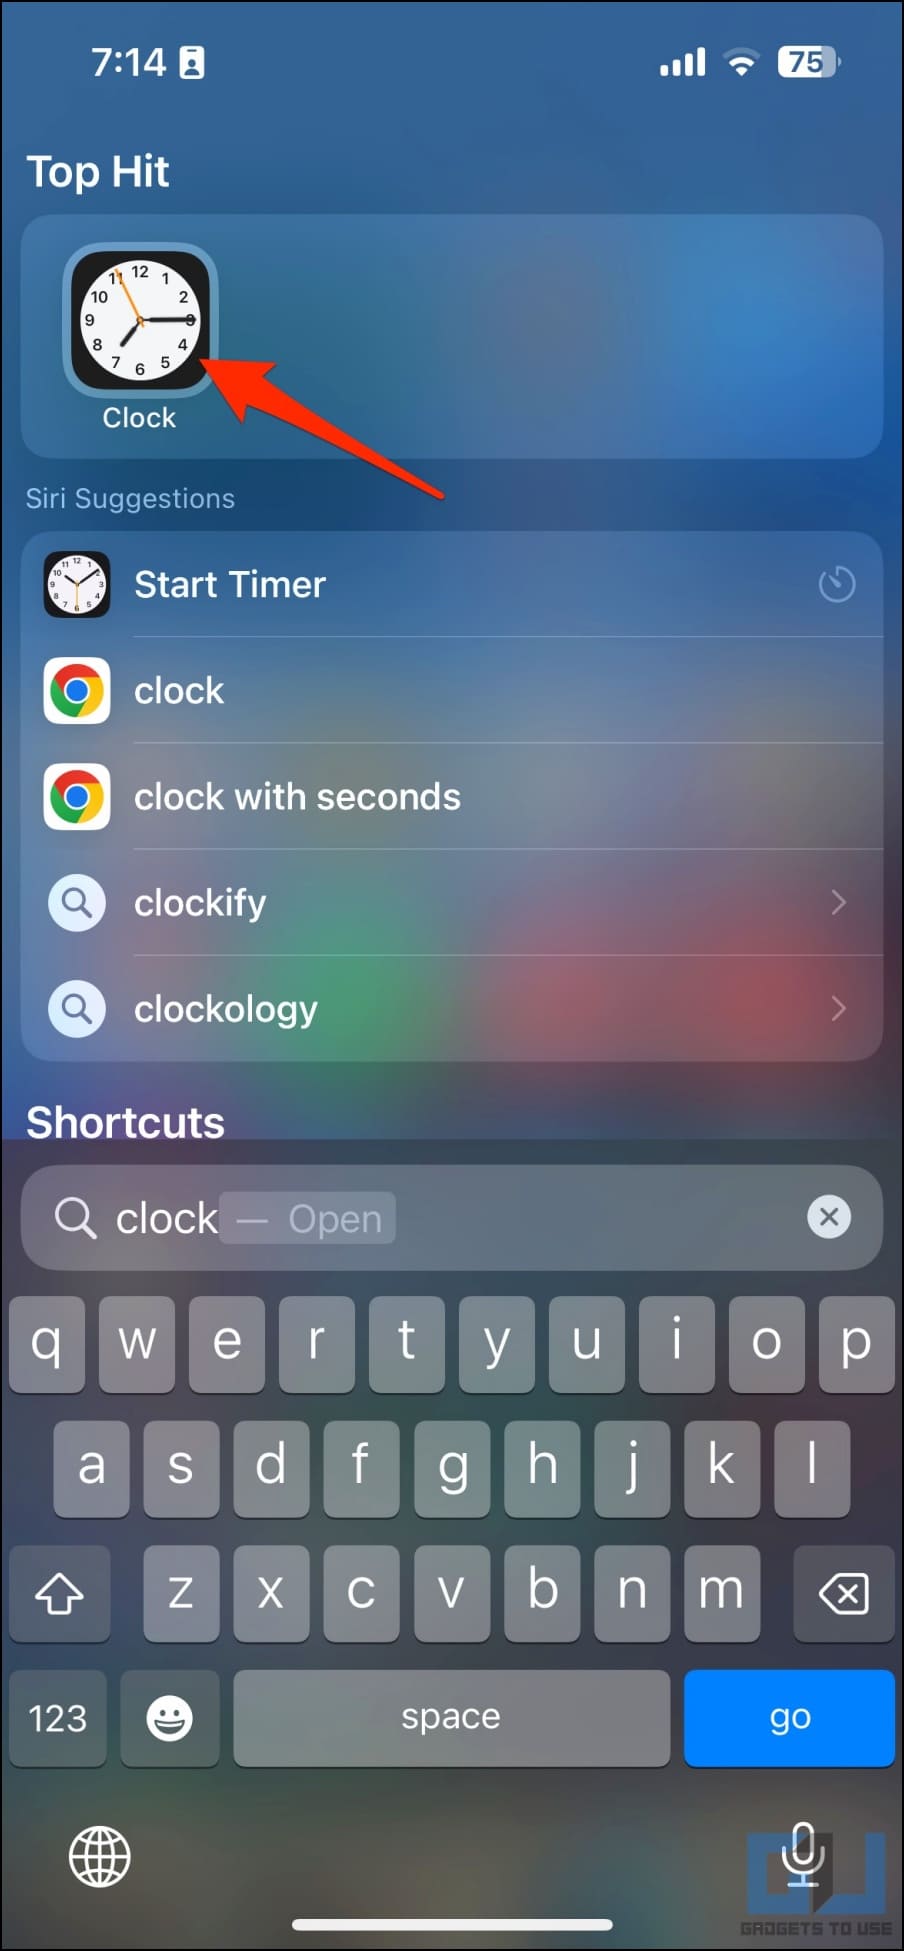
1. Open the Clock app on your iPhone or iPad.
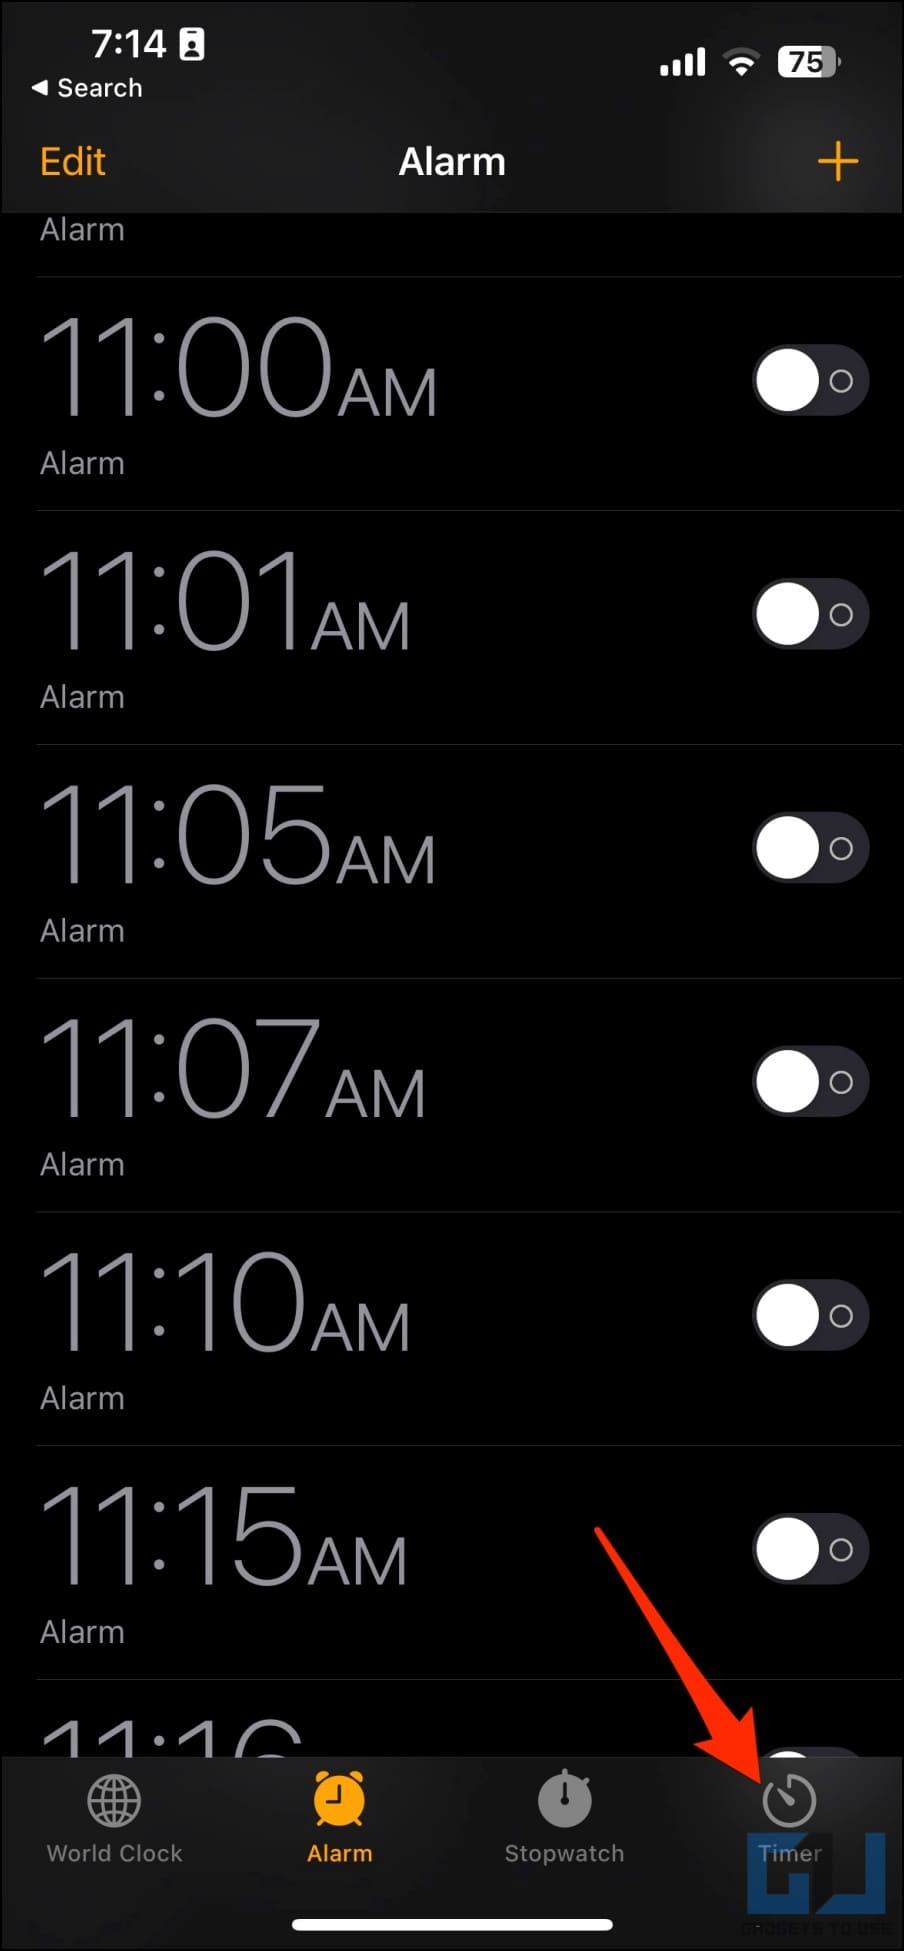
2. Switch to the Timer tab from the bottom menu.
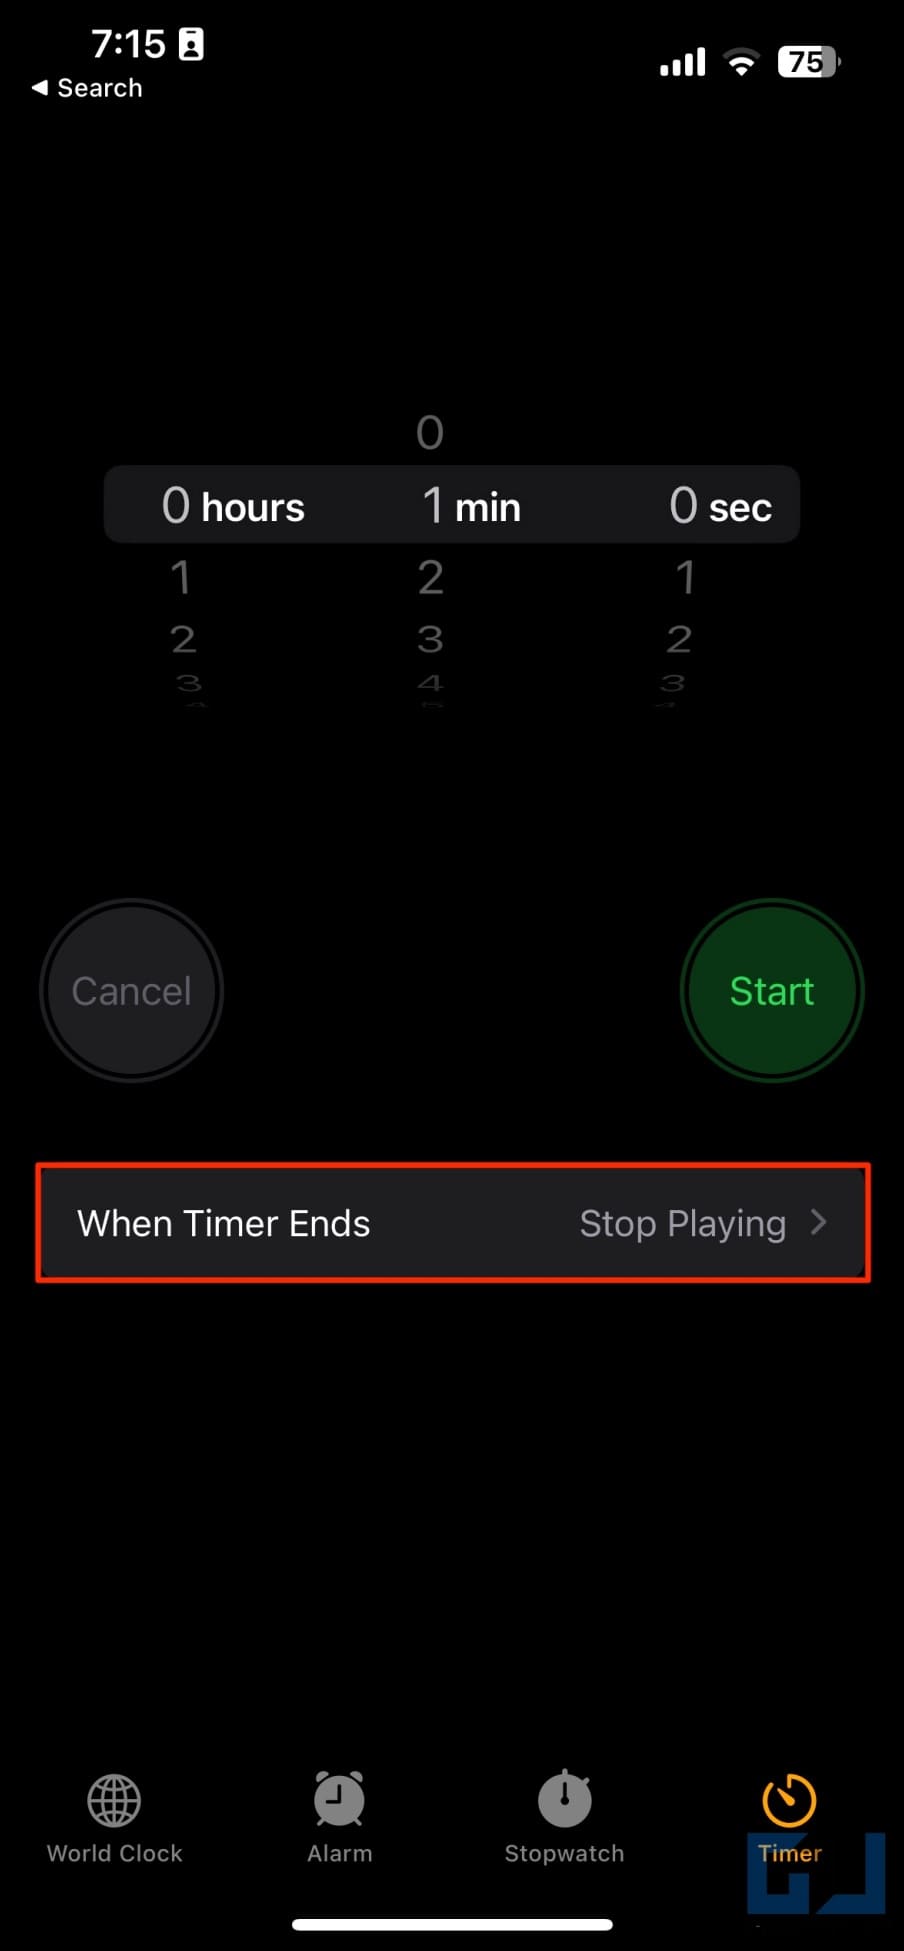
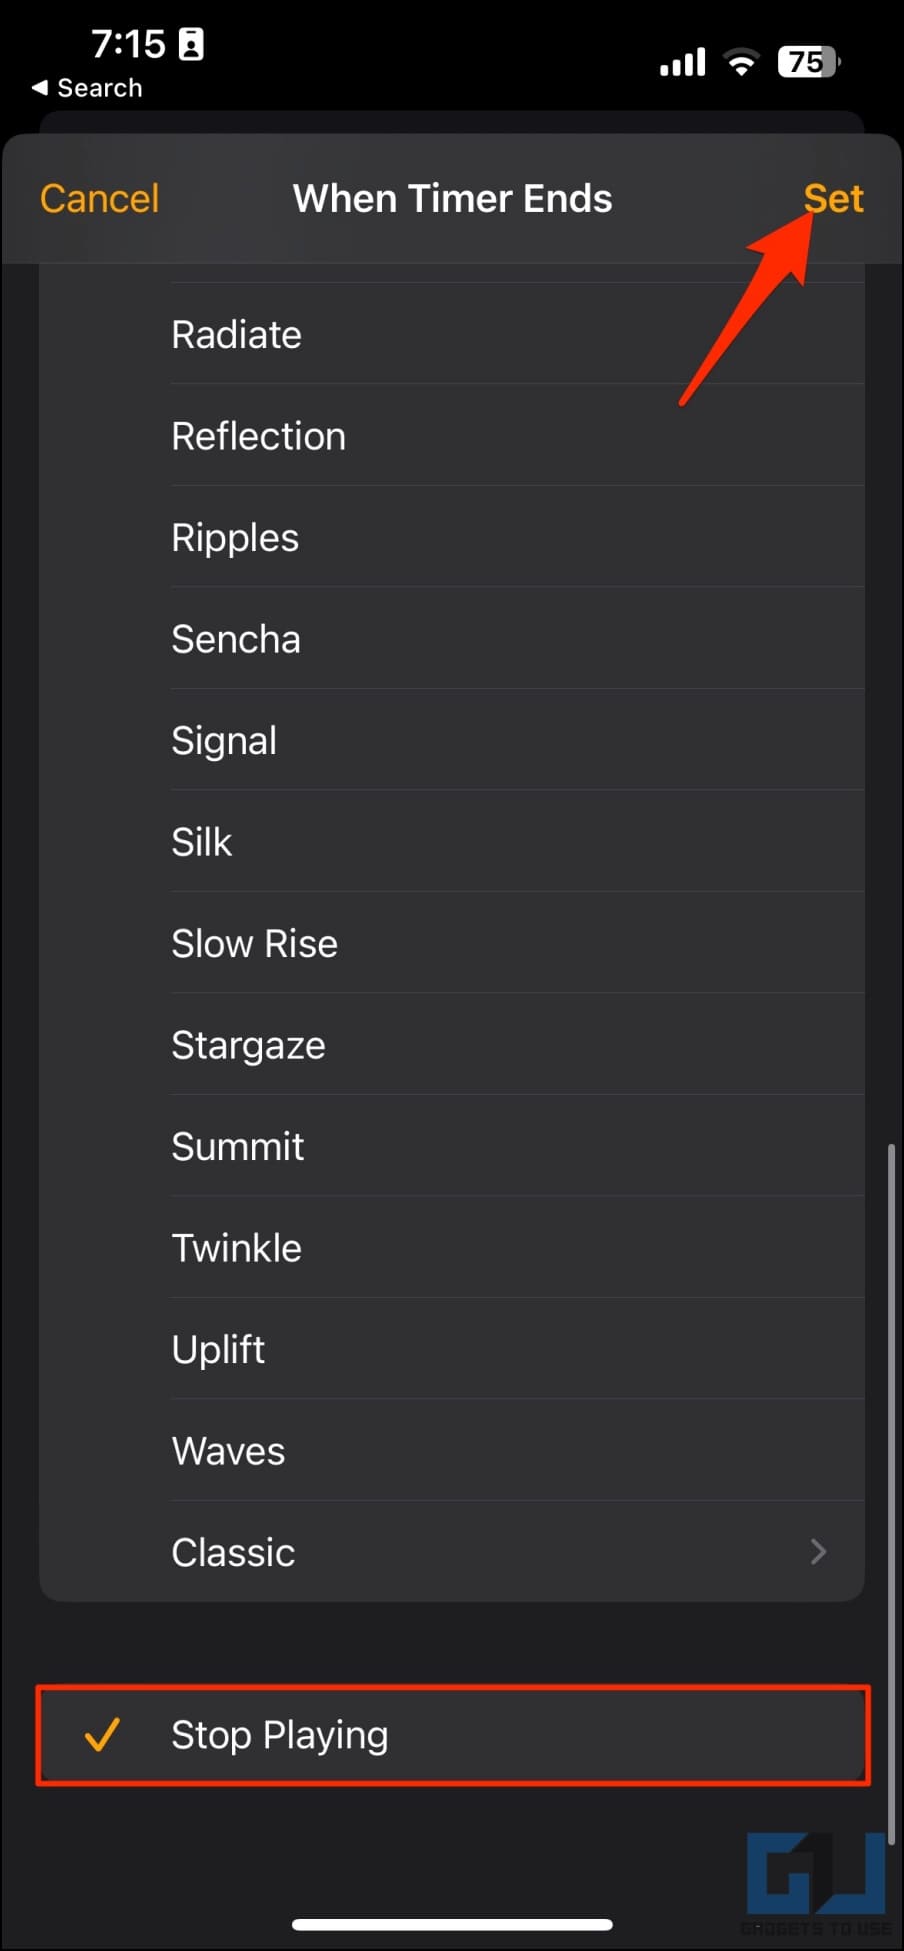
3. Here, click When Timer Ends, scroll down to the bottom, and select Stop Playing.
4. Click Set in the top right corner.
Step 2- Create an Automation in Shortcuts App
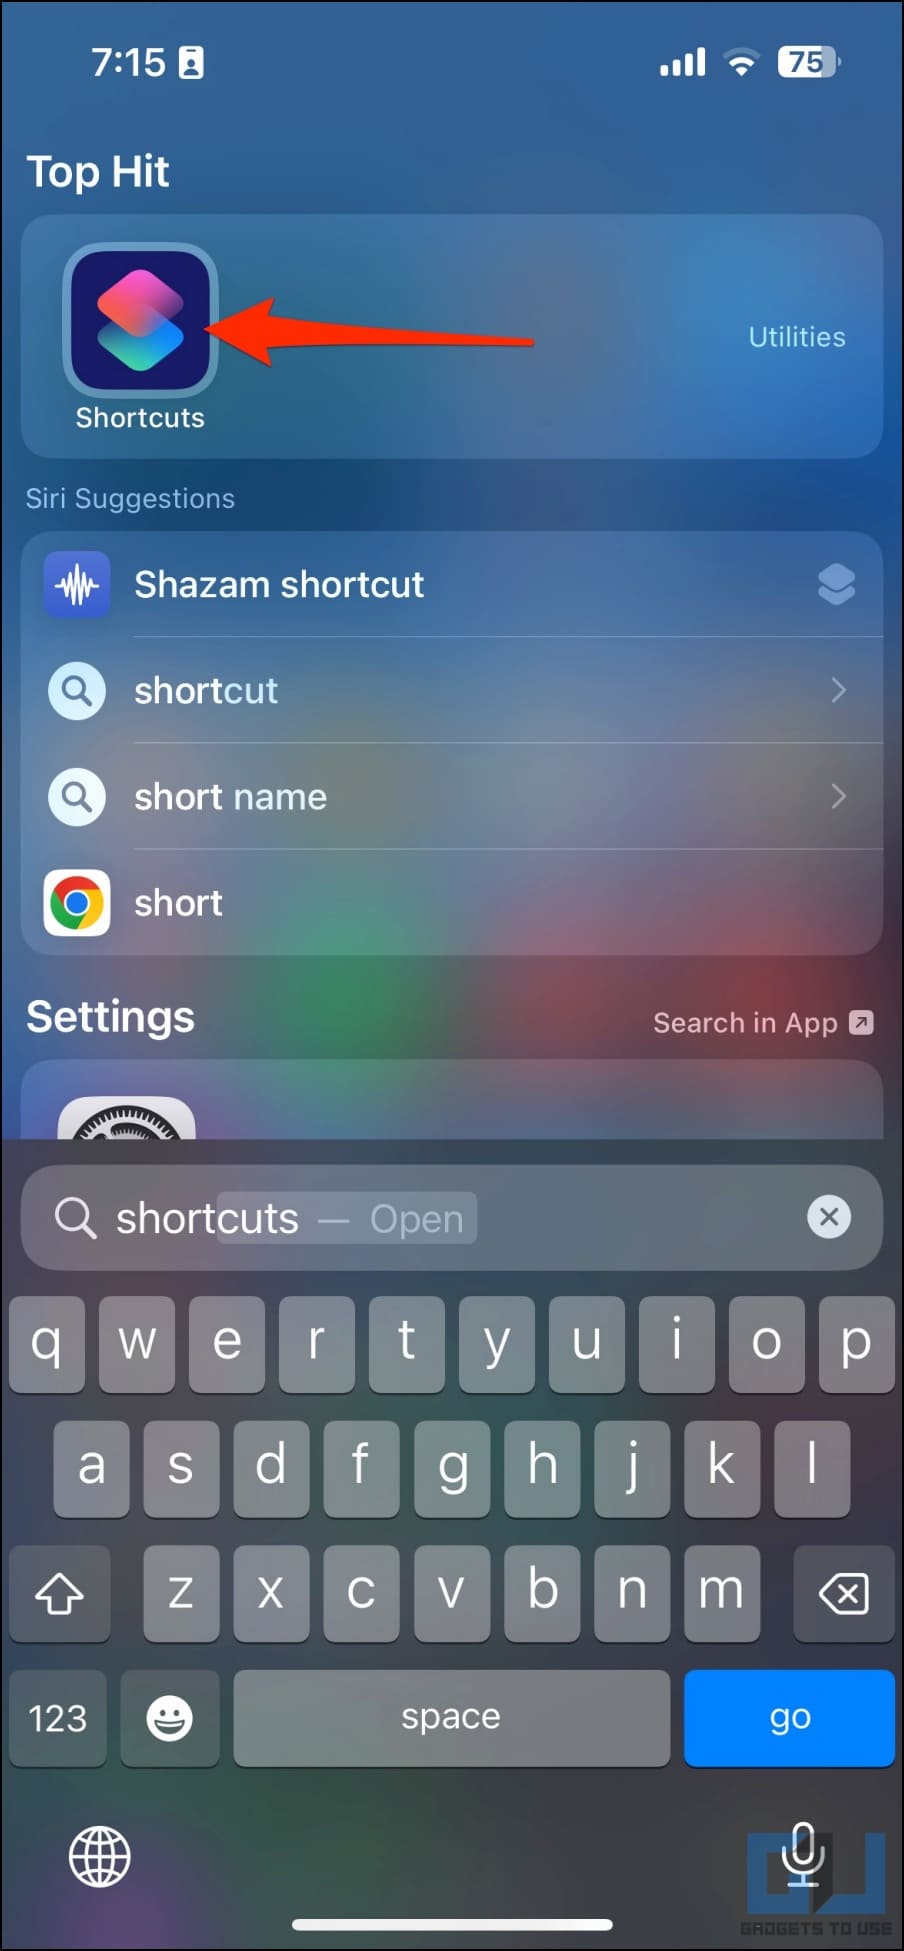
5. Now, open the Shortcuts app on the device.
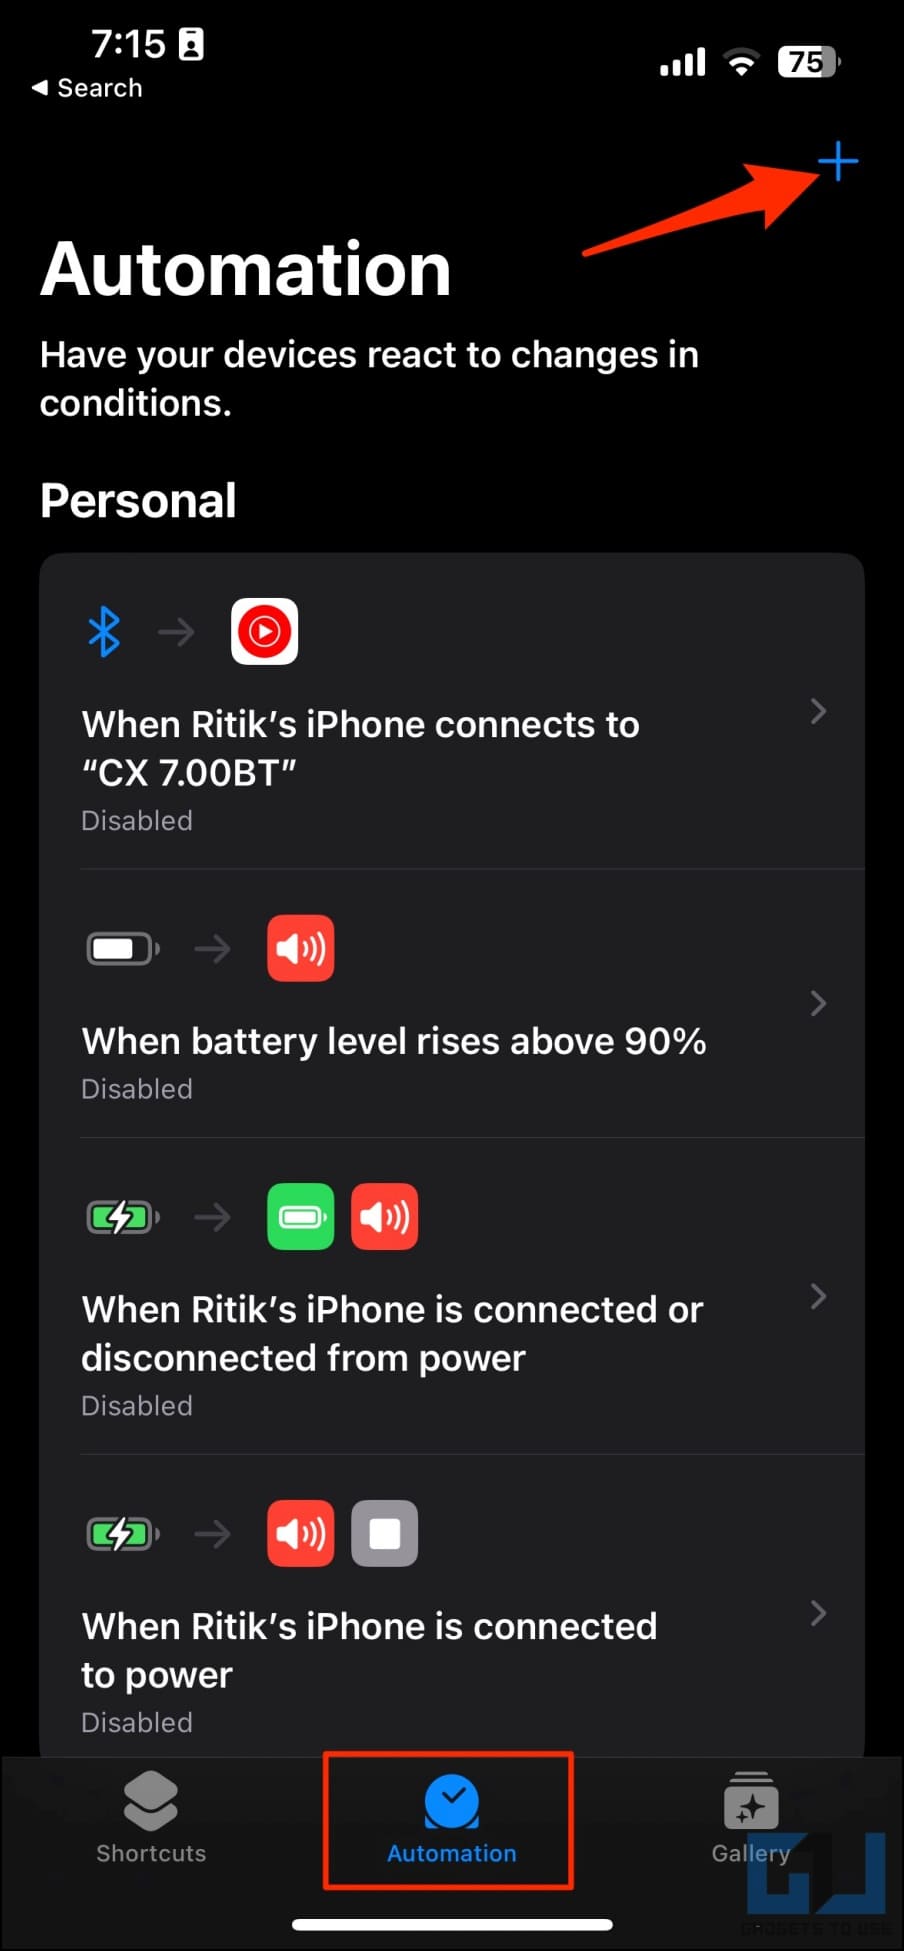
6. Switch to the Automation tab and tap the + icon.
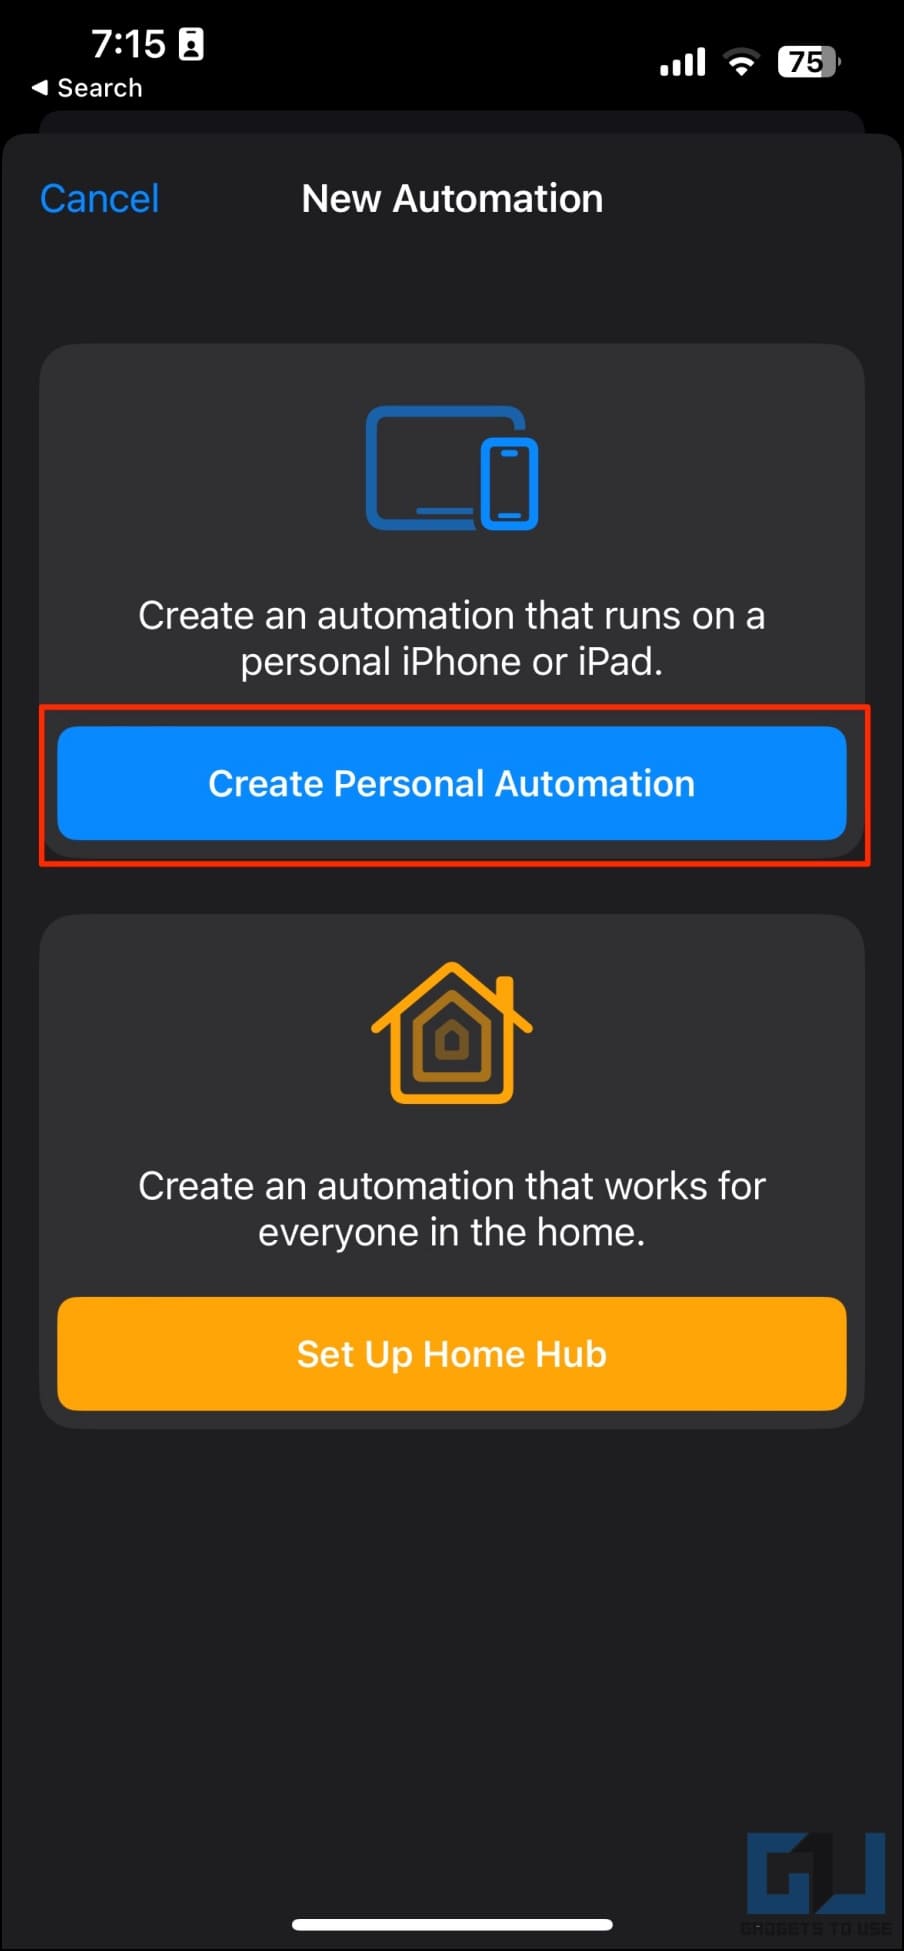
7. Click on Create Personal Automation.
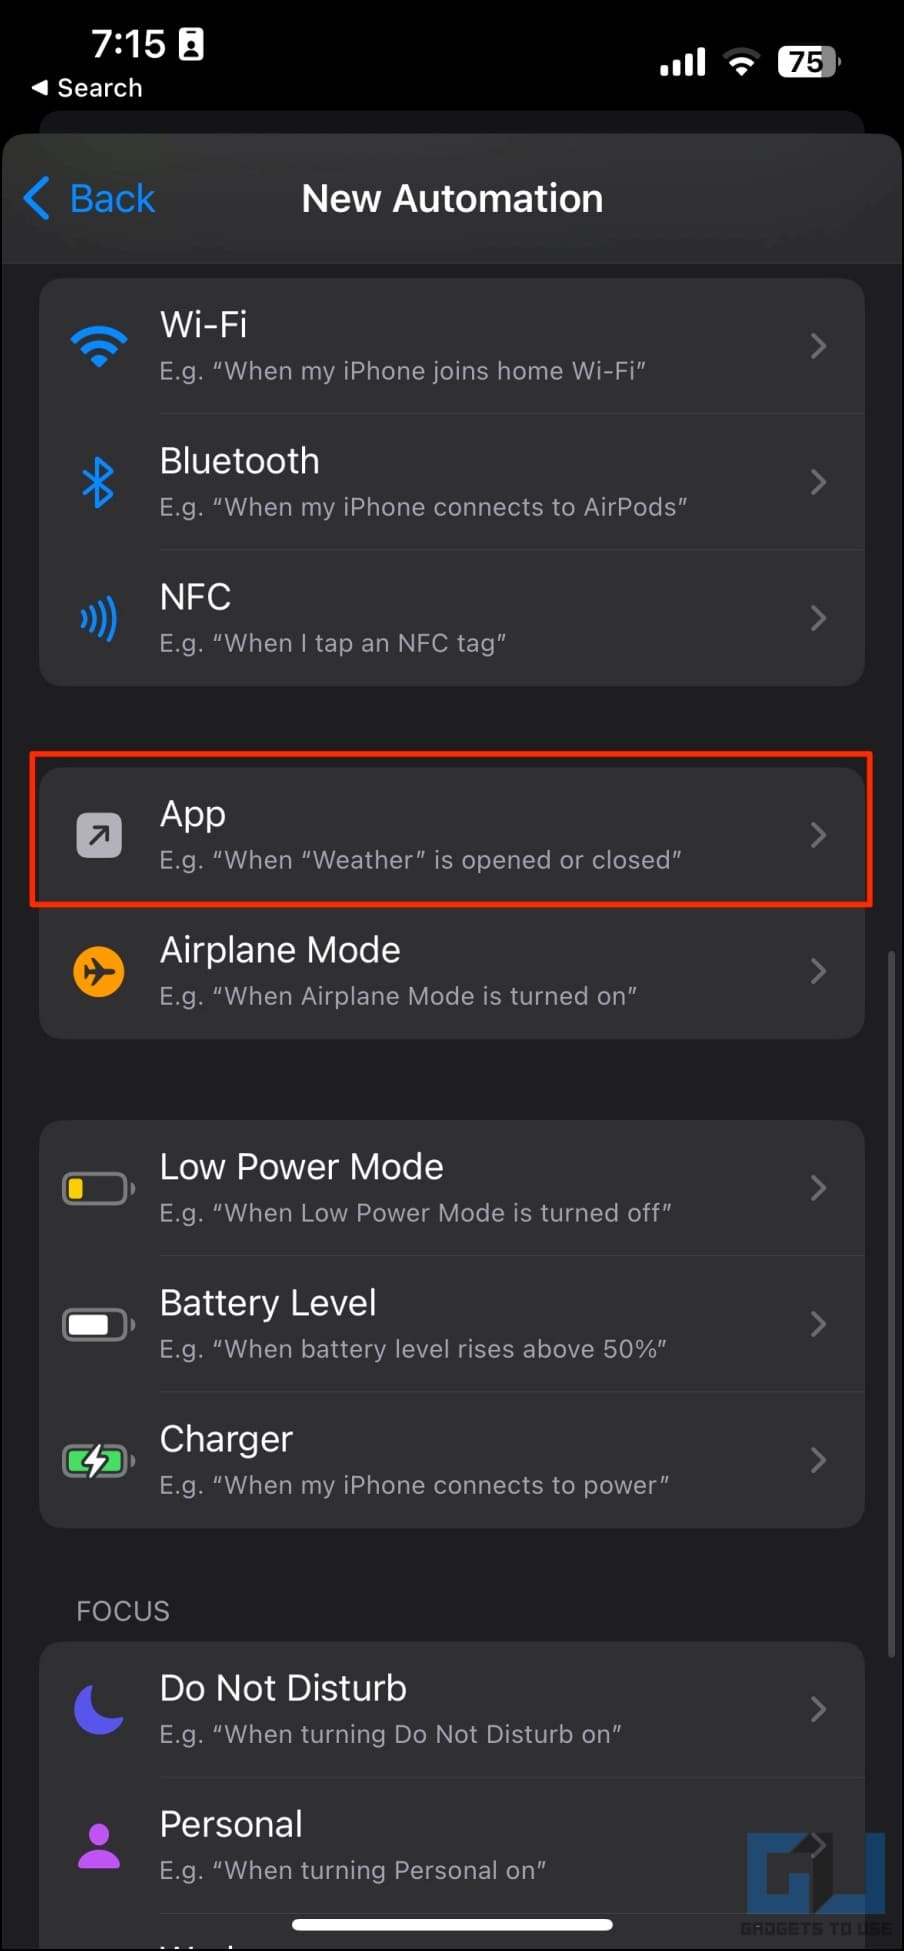
8. Scroll down and select App.
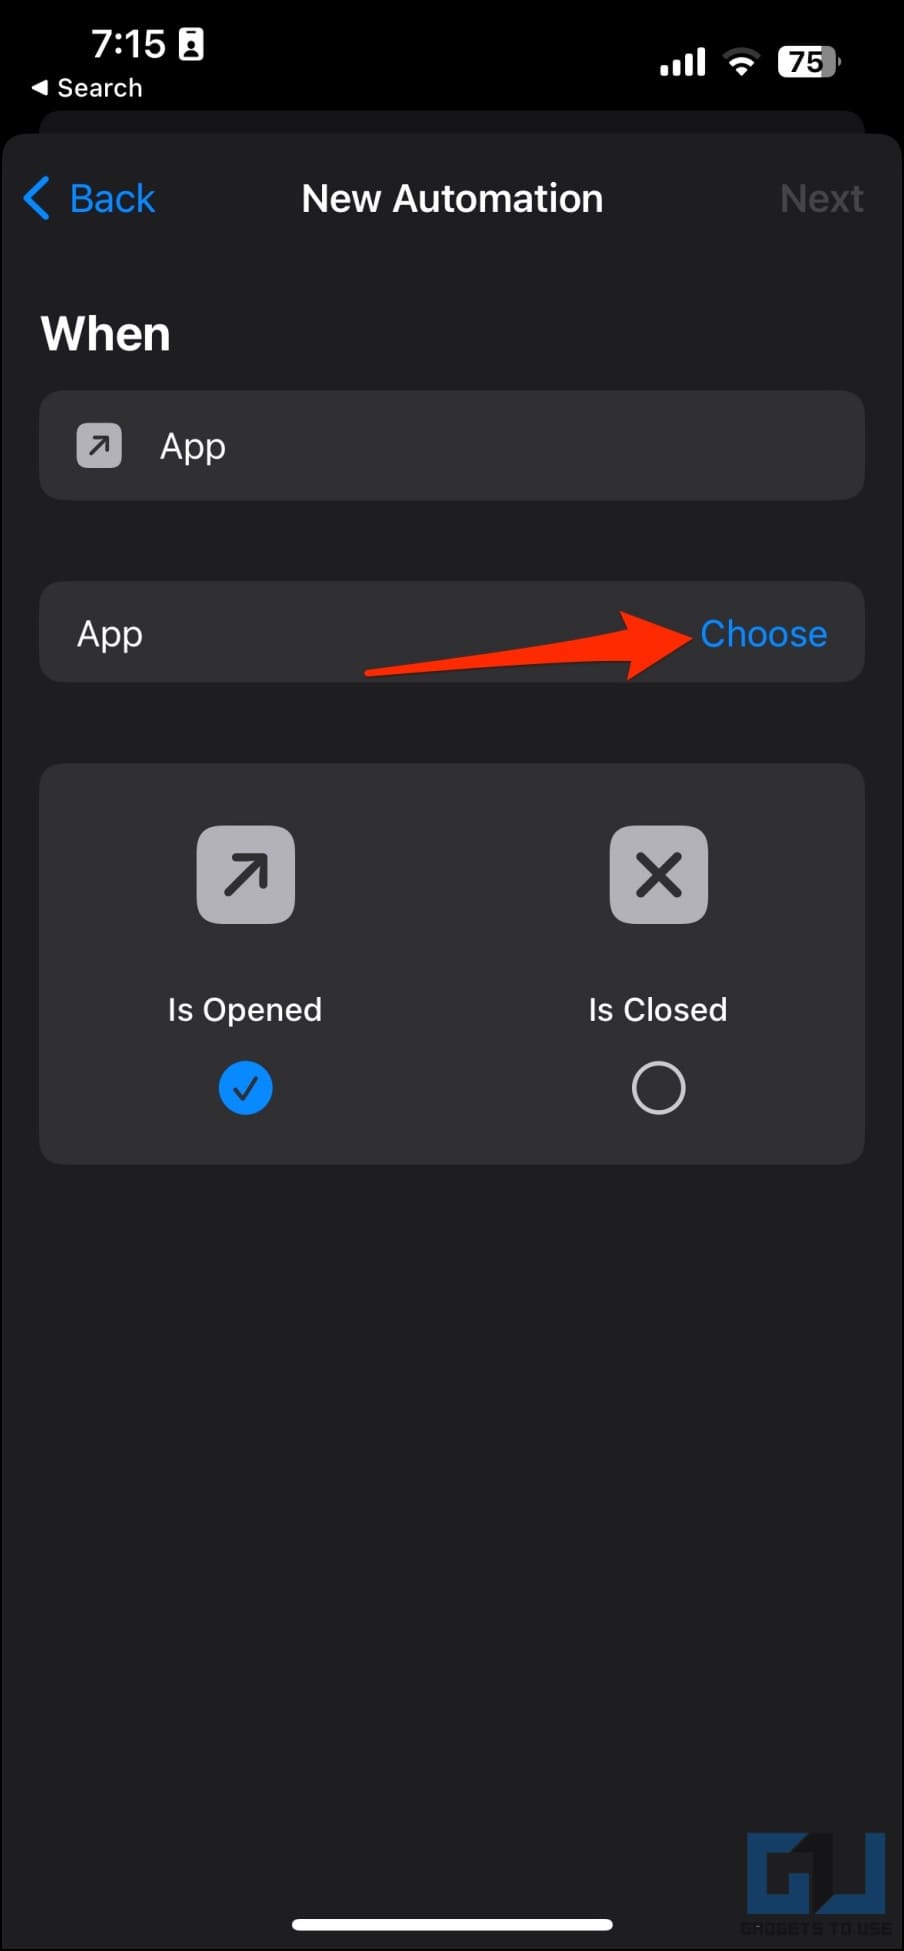
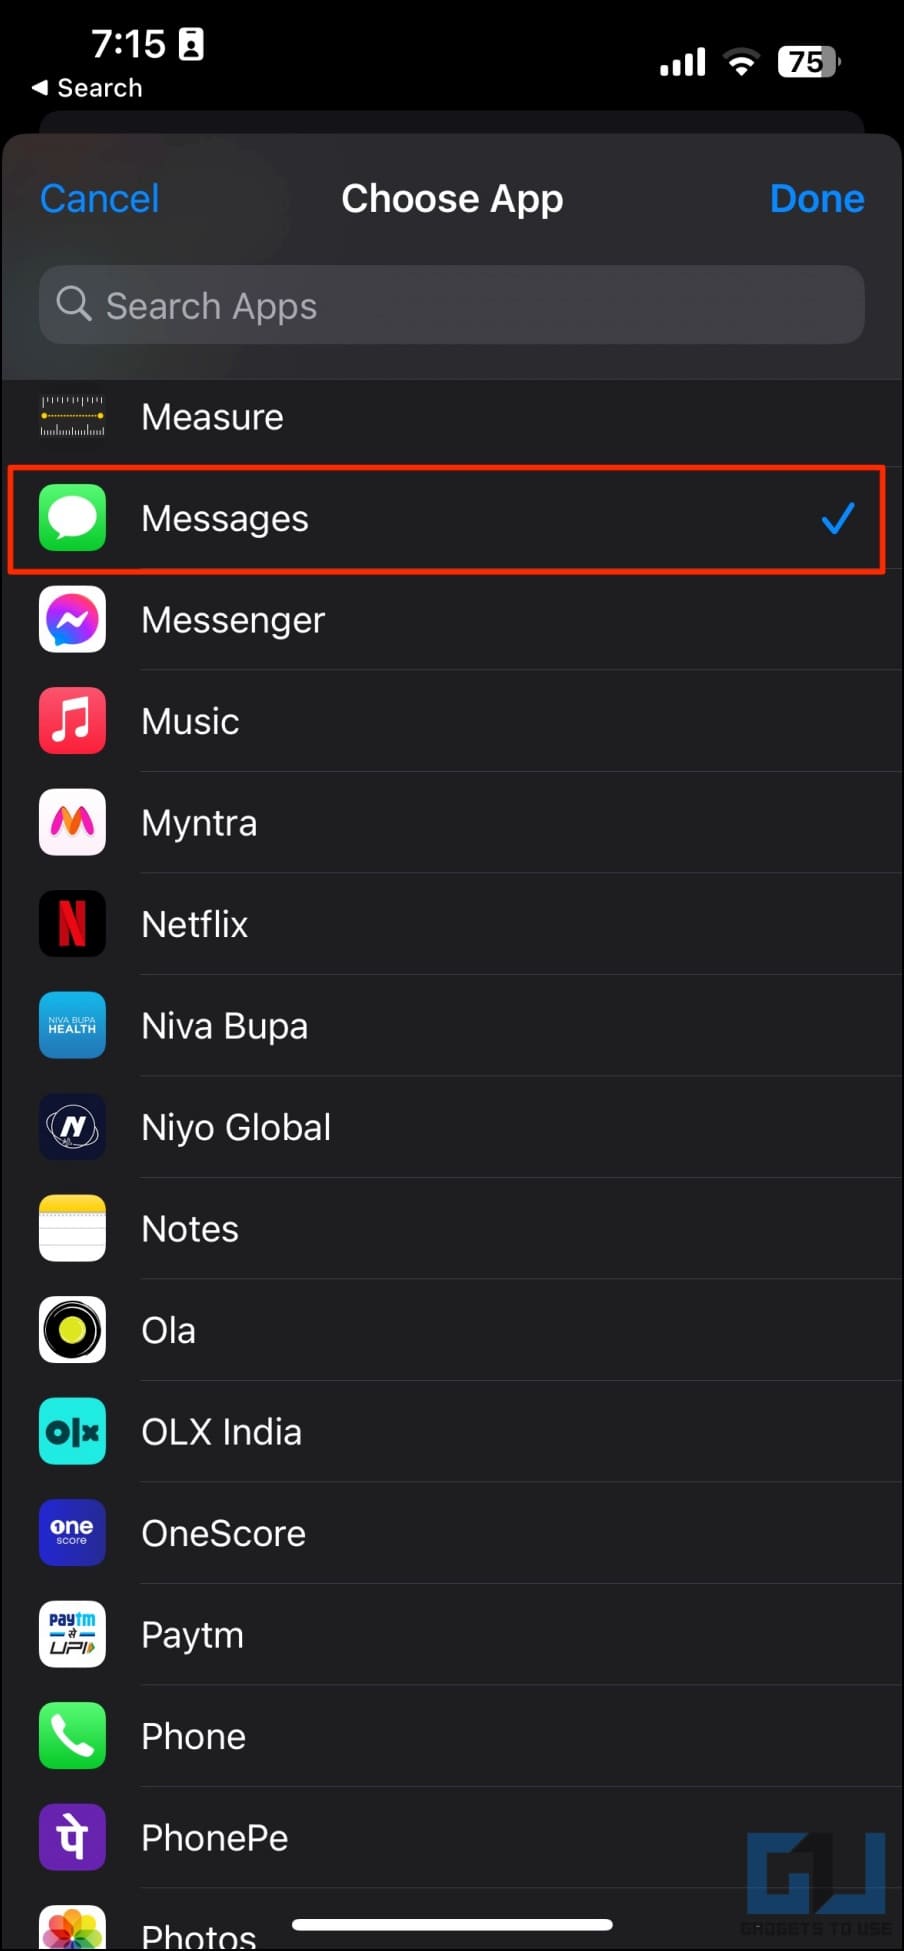
9. Click on Choose and select Messages. You can also select other texting apps you want to lock, such as Messenger.
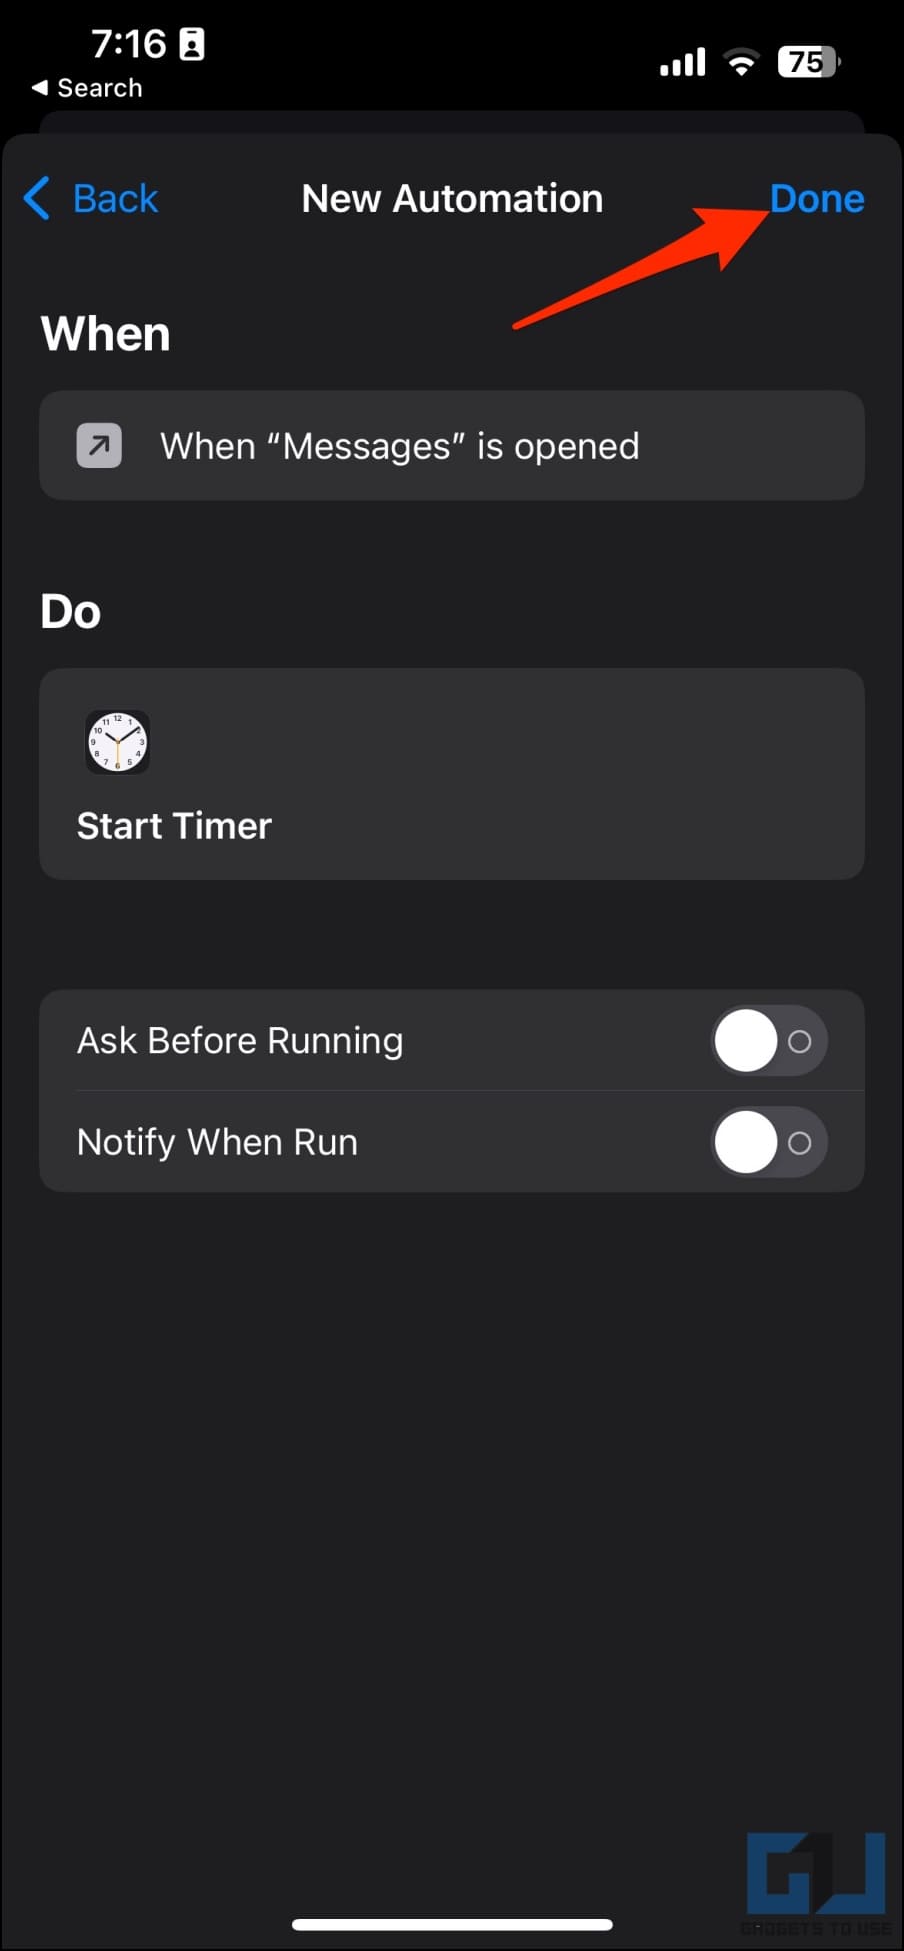
10. Click Done in the top right corner.
Step 3- Add the Timer to the Automation
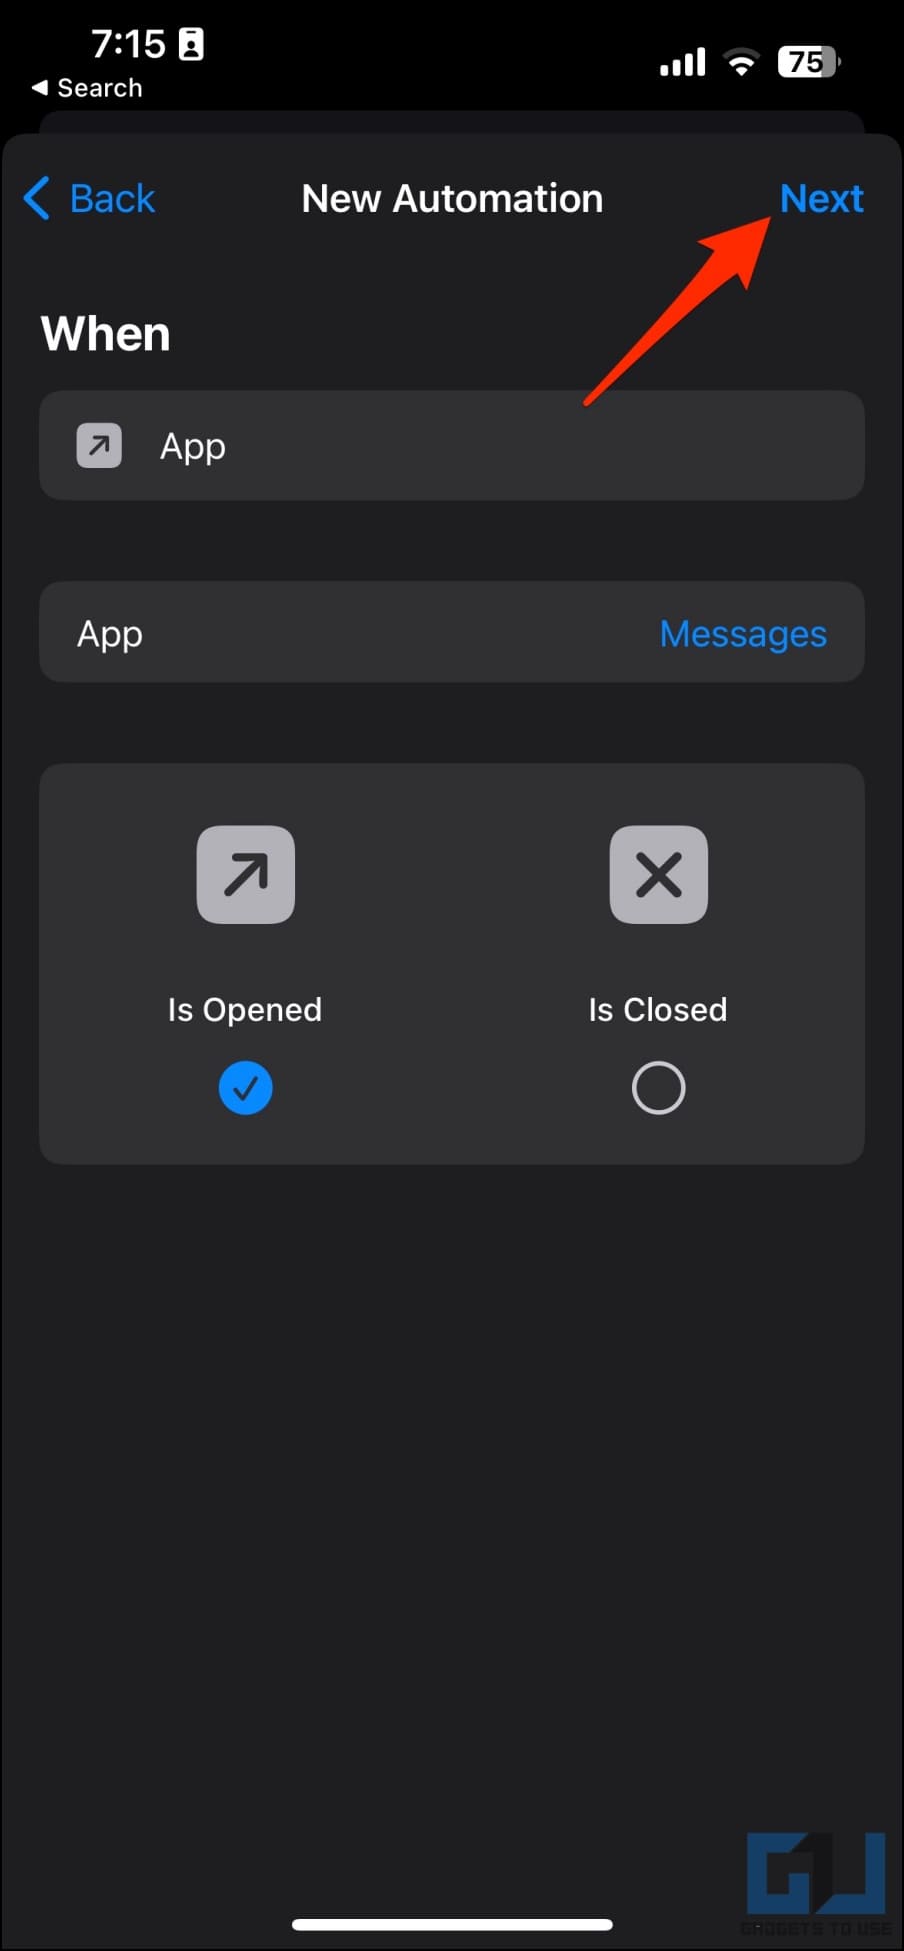
11. Once back to the automation screen, click Next in the top right corner.
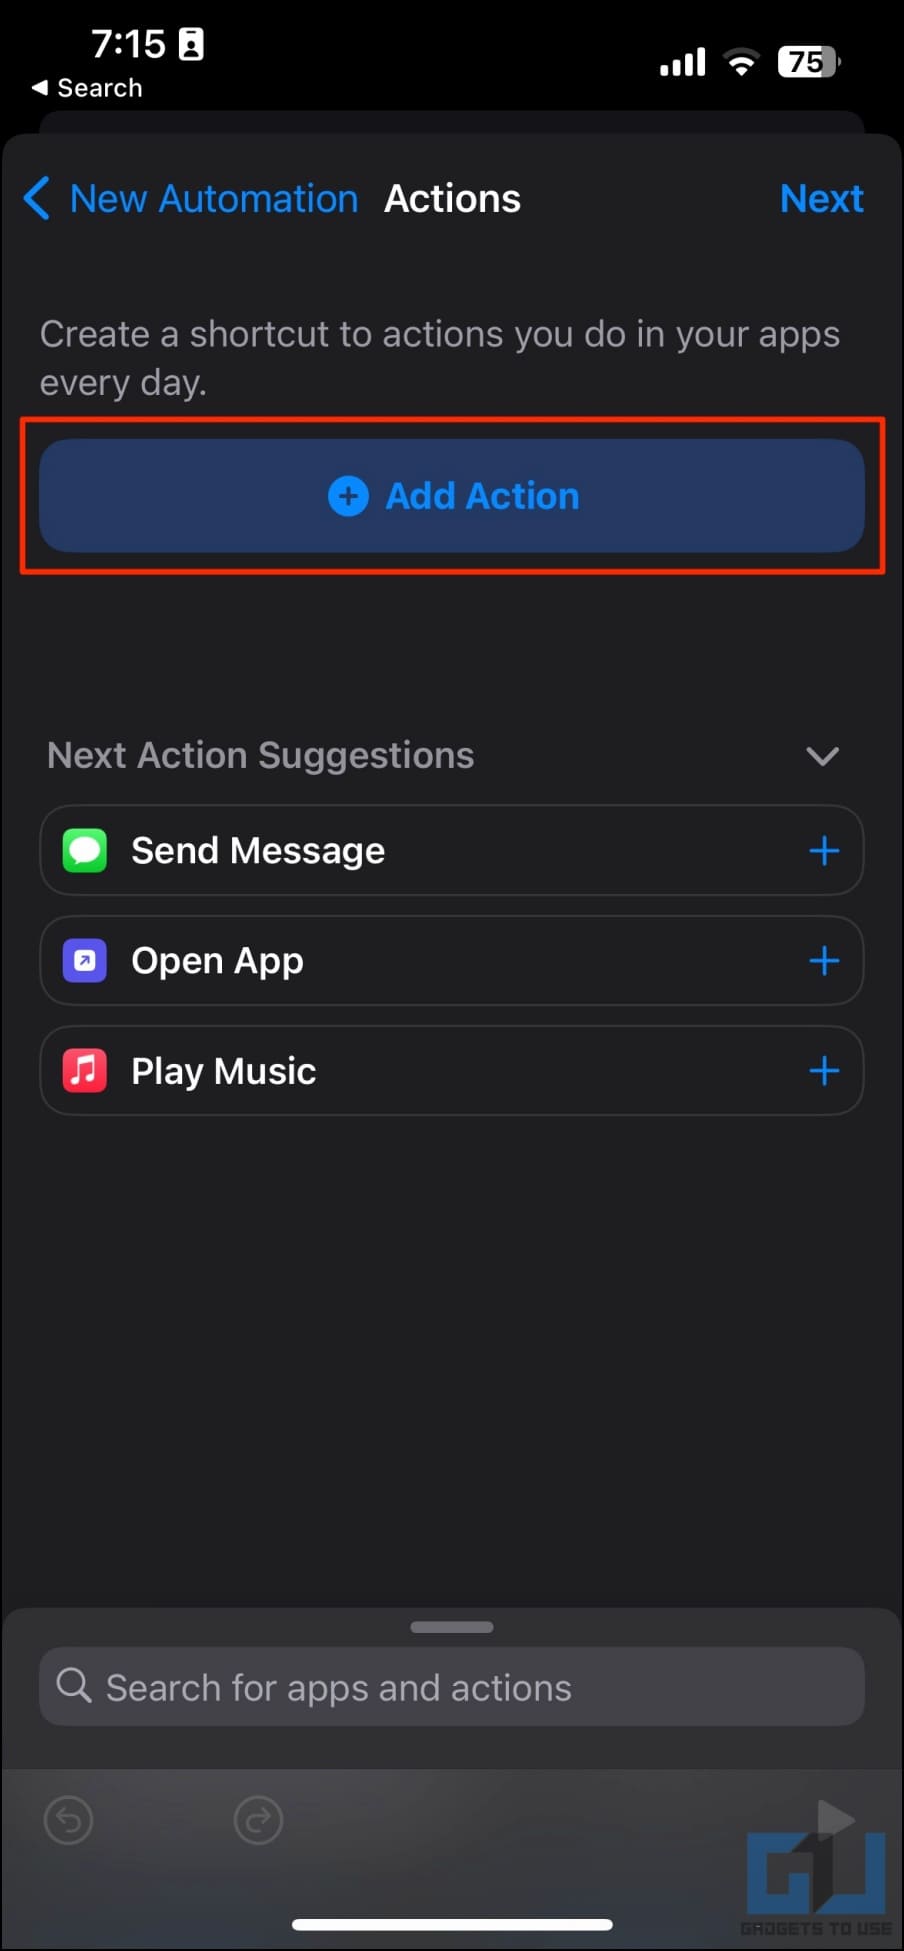
12. Tap Add Action.
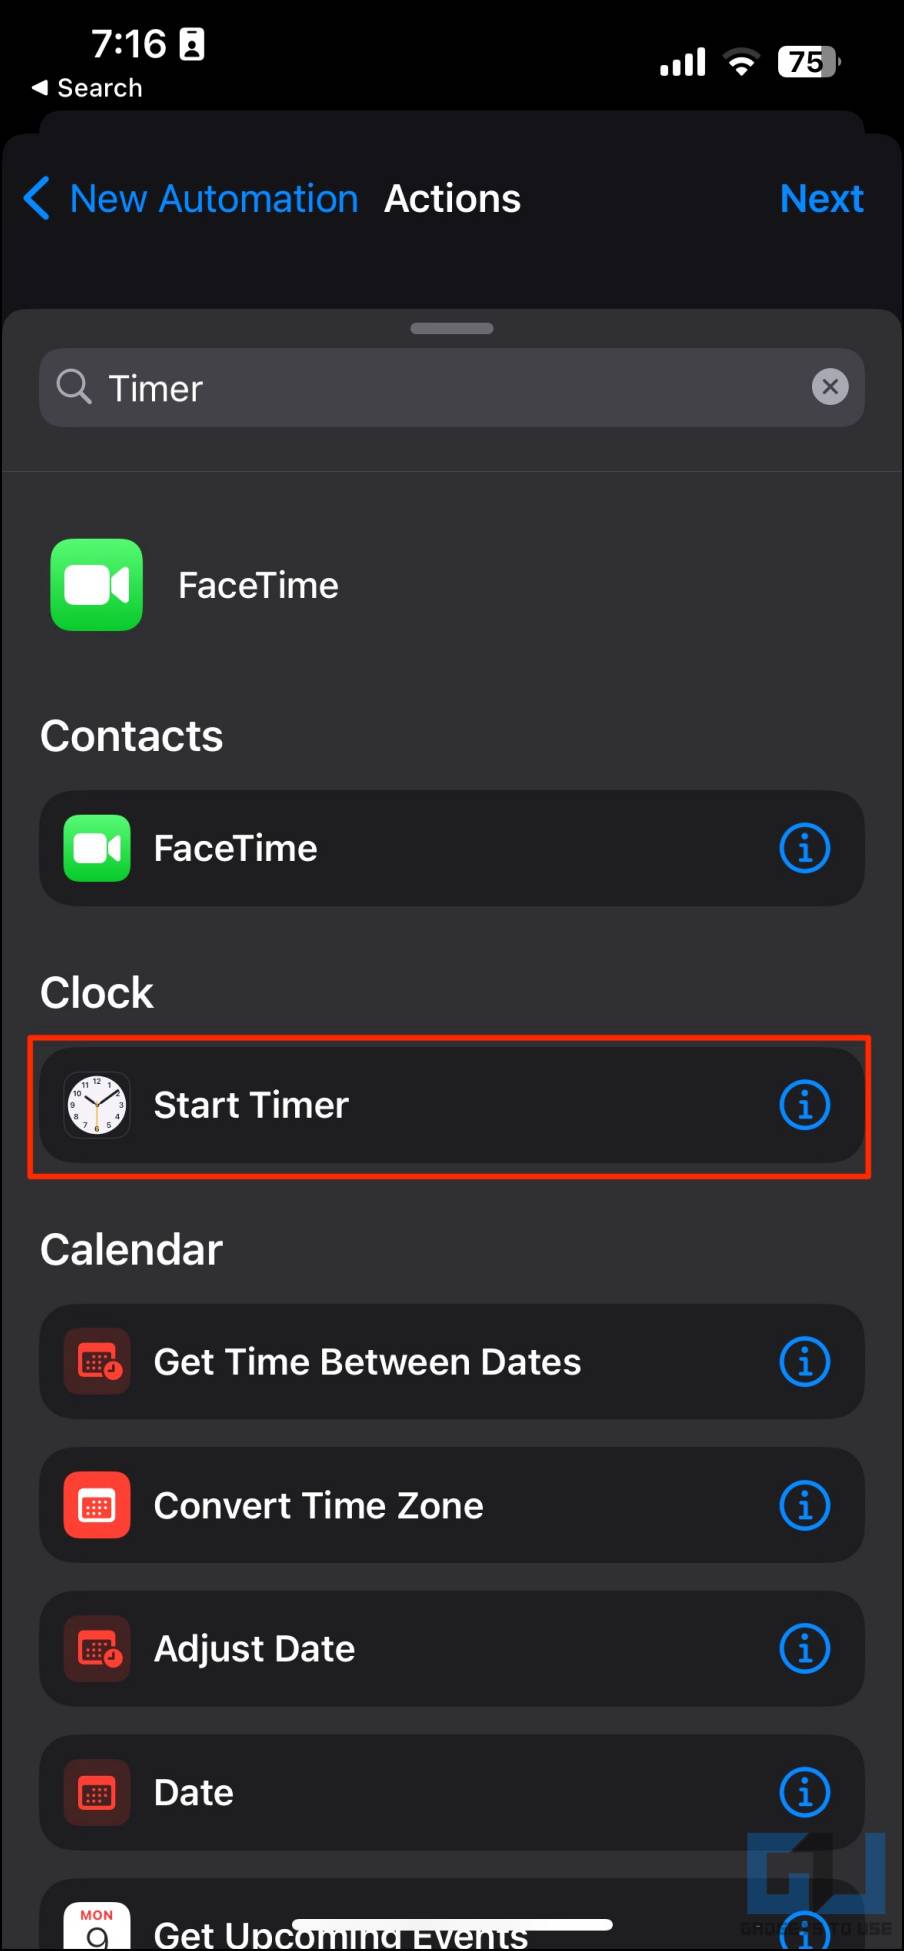
13. Search for “timer” and select Start Timer.
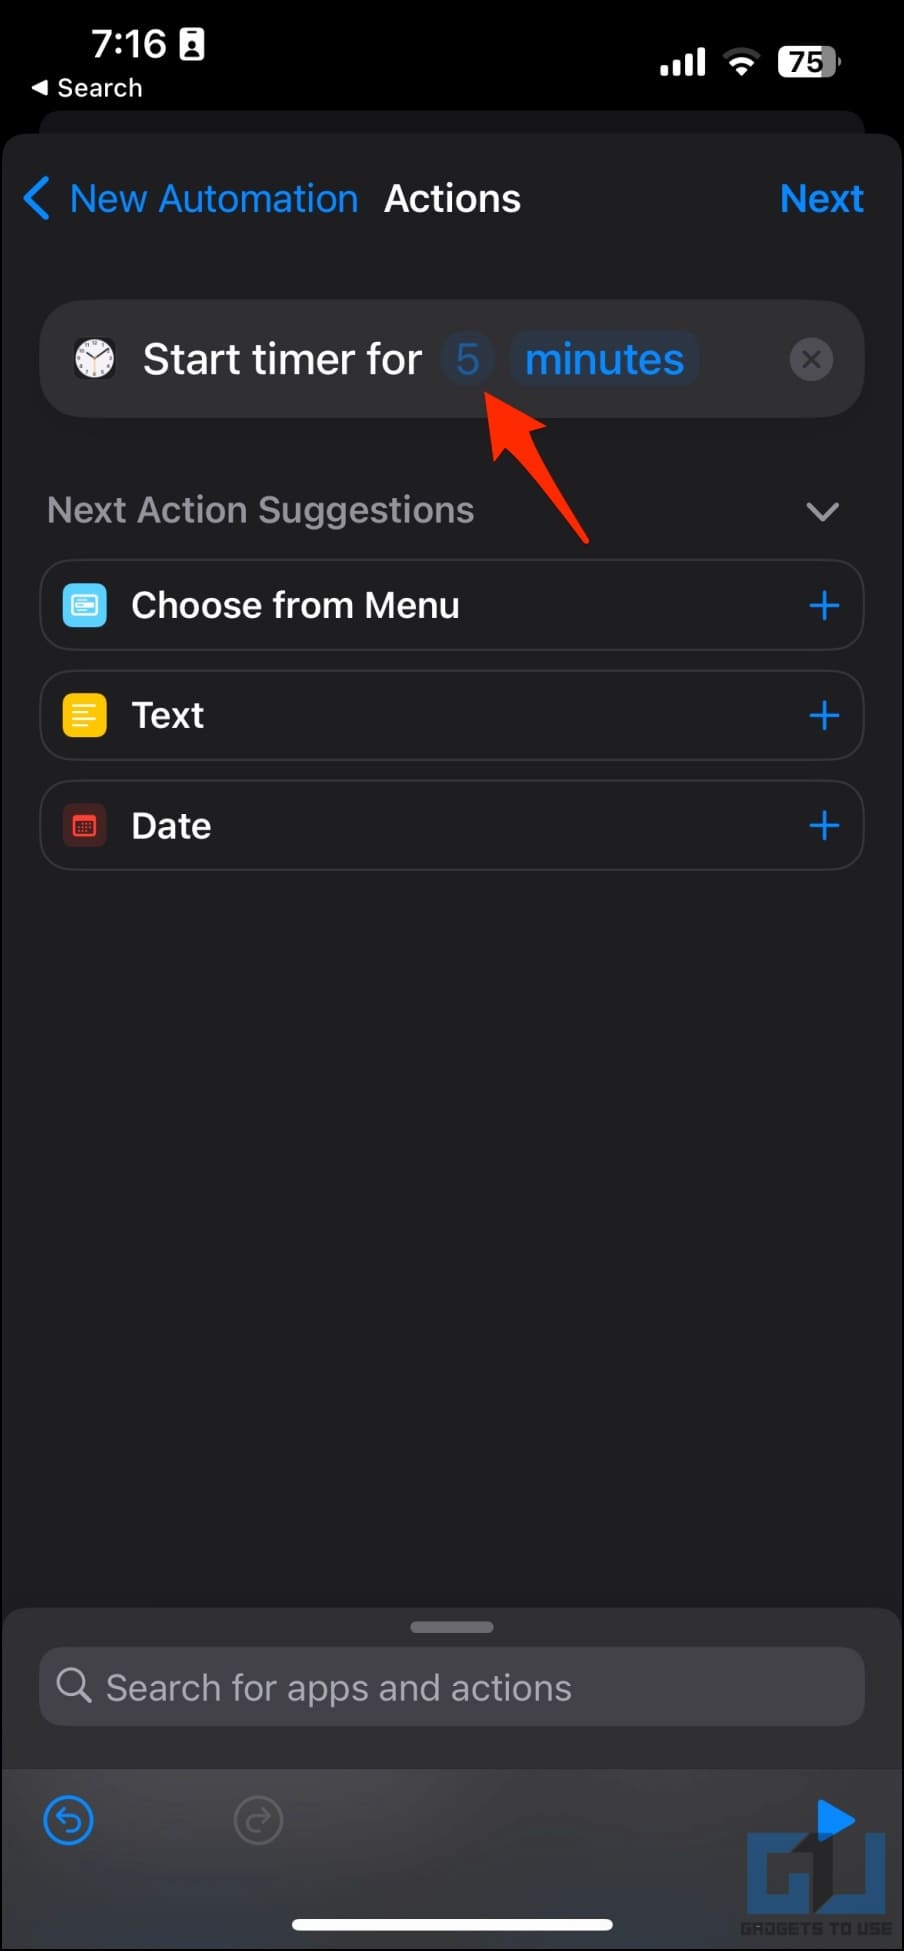
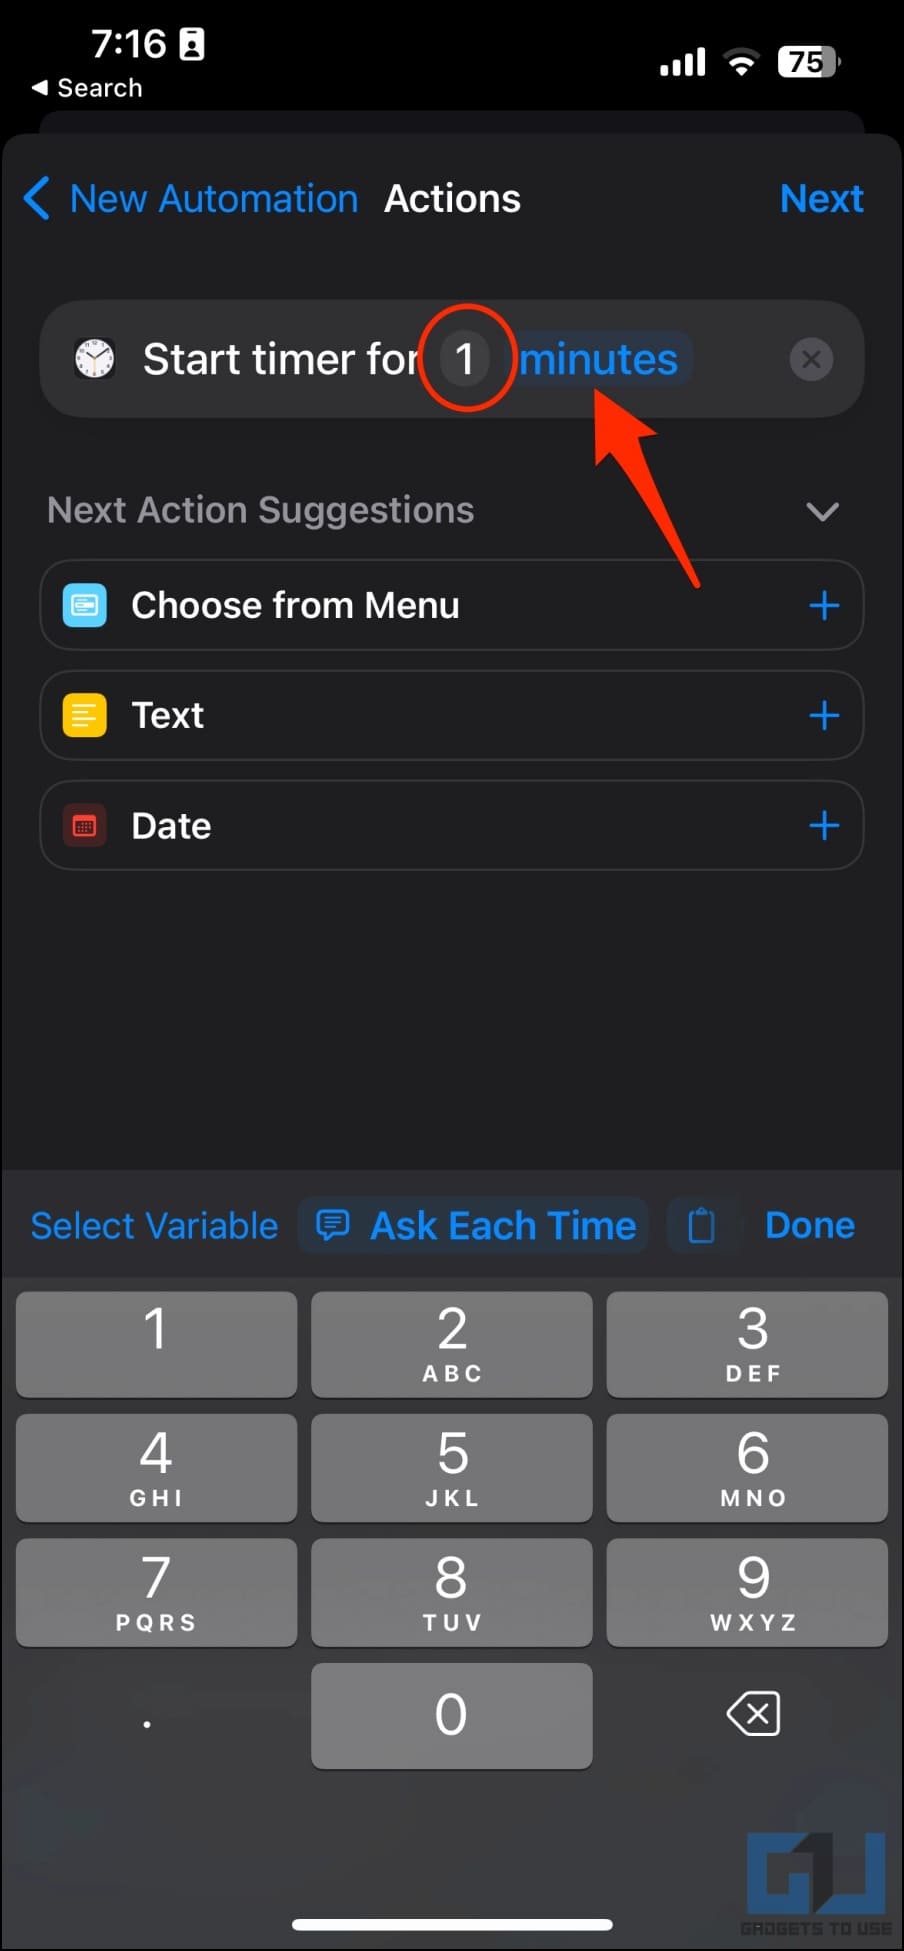
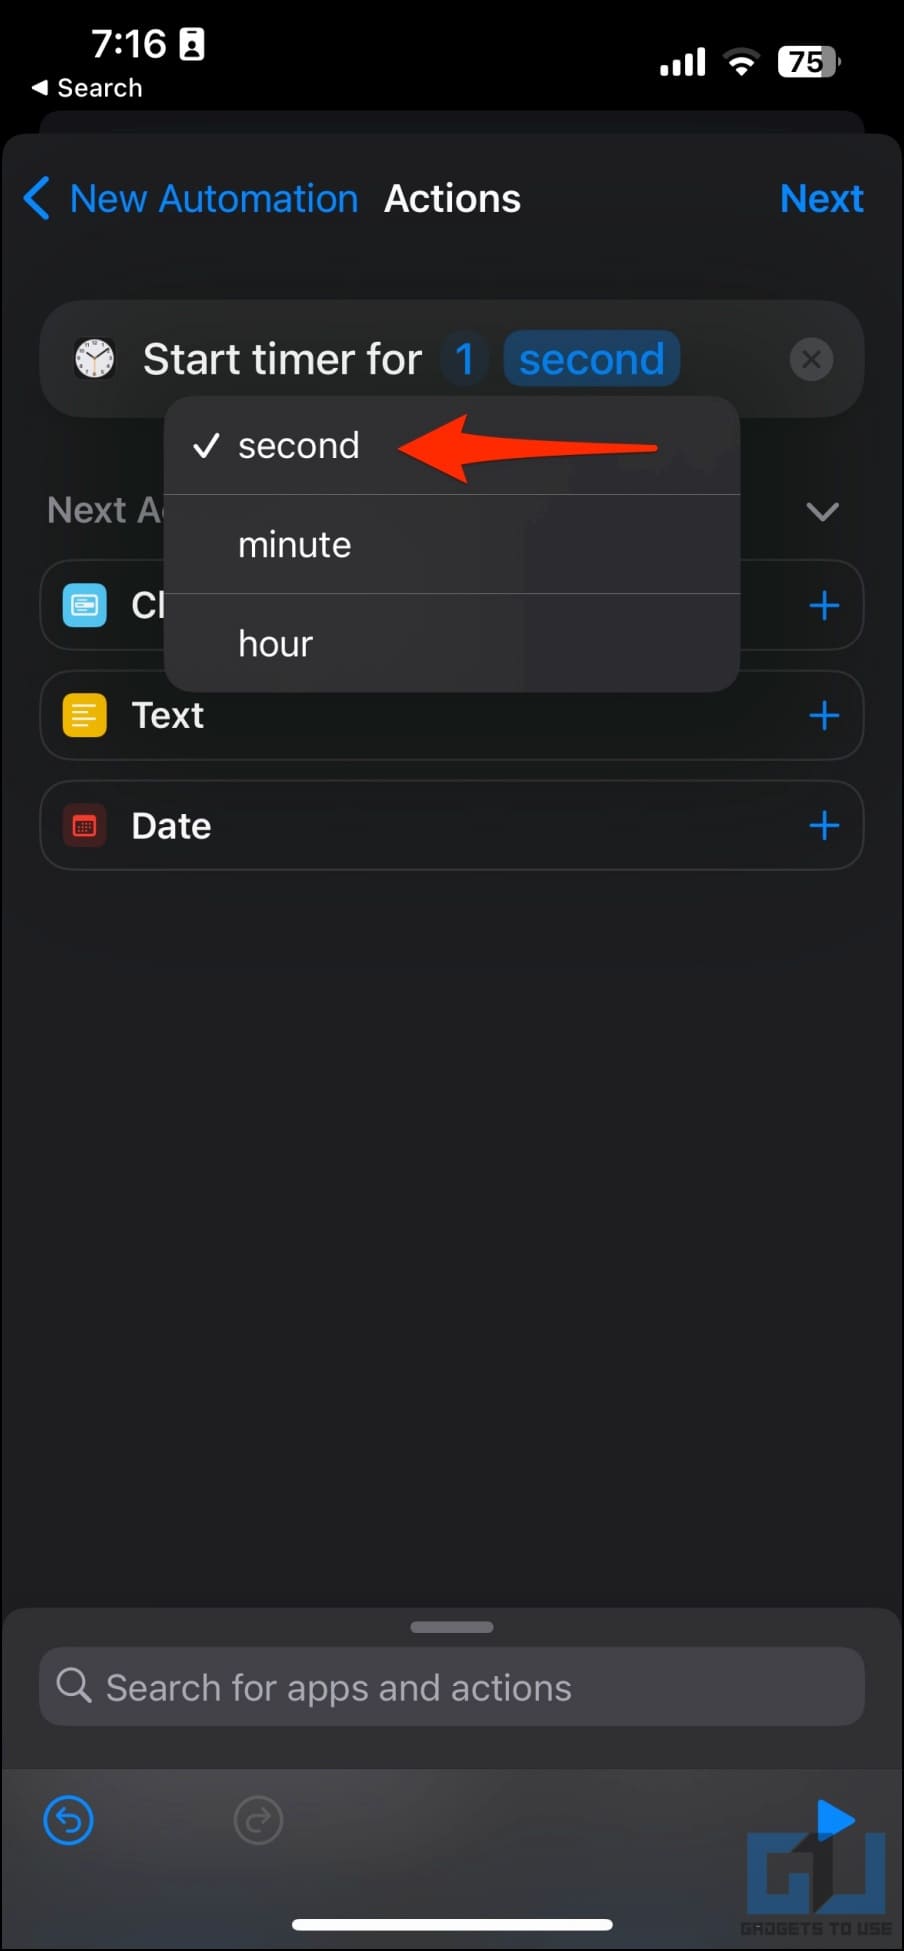
14. Tap the number next to Start timer for. Change it to 1.
15. Then tap on Minutes and change it to Seconds.
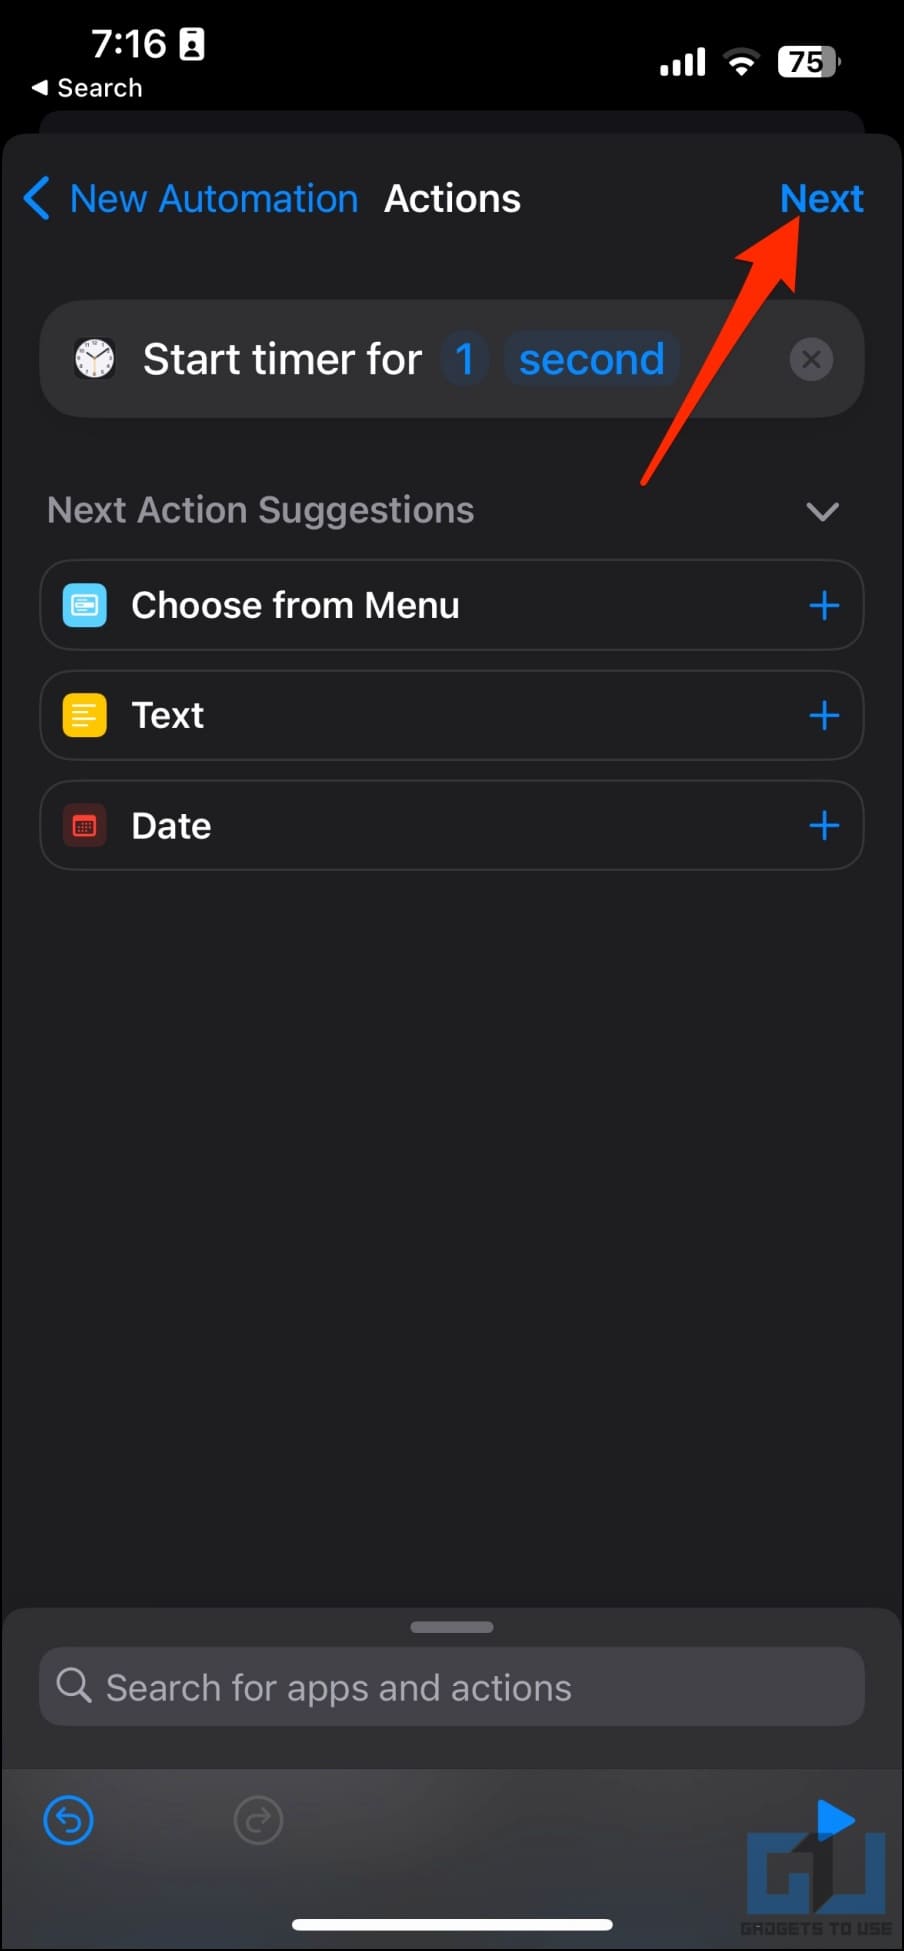
16. Once the timer is set to 1 second, click Next on the top right.
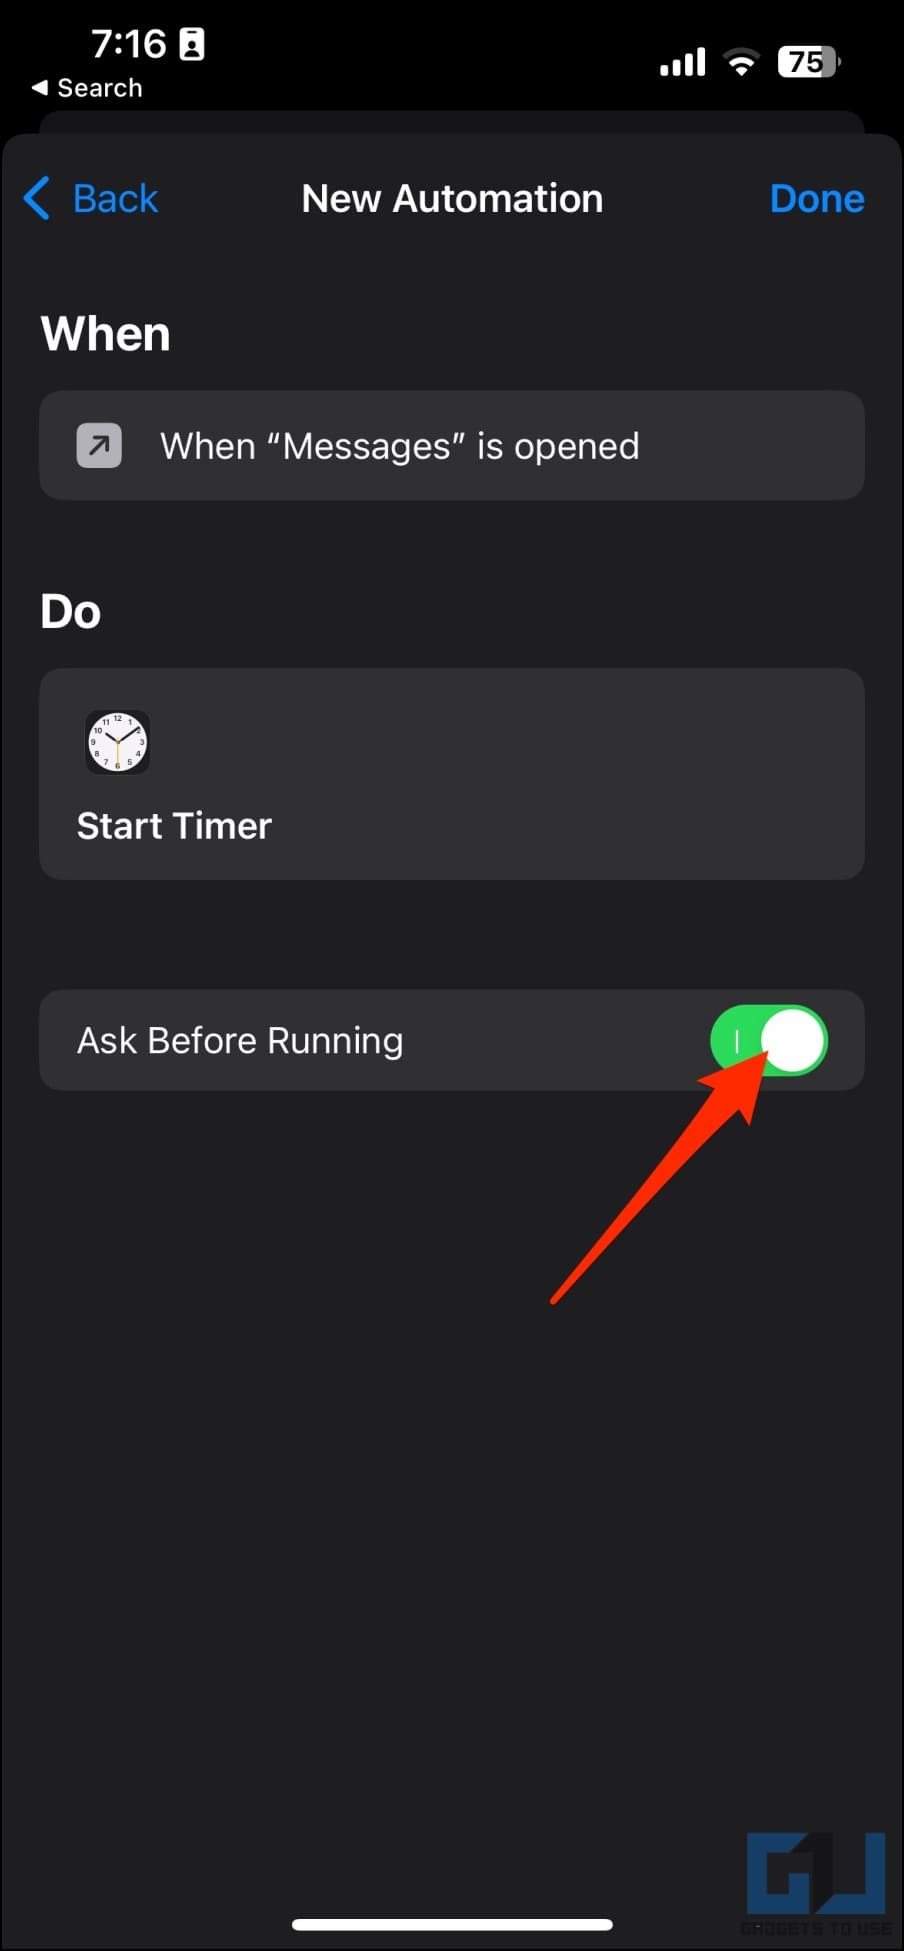
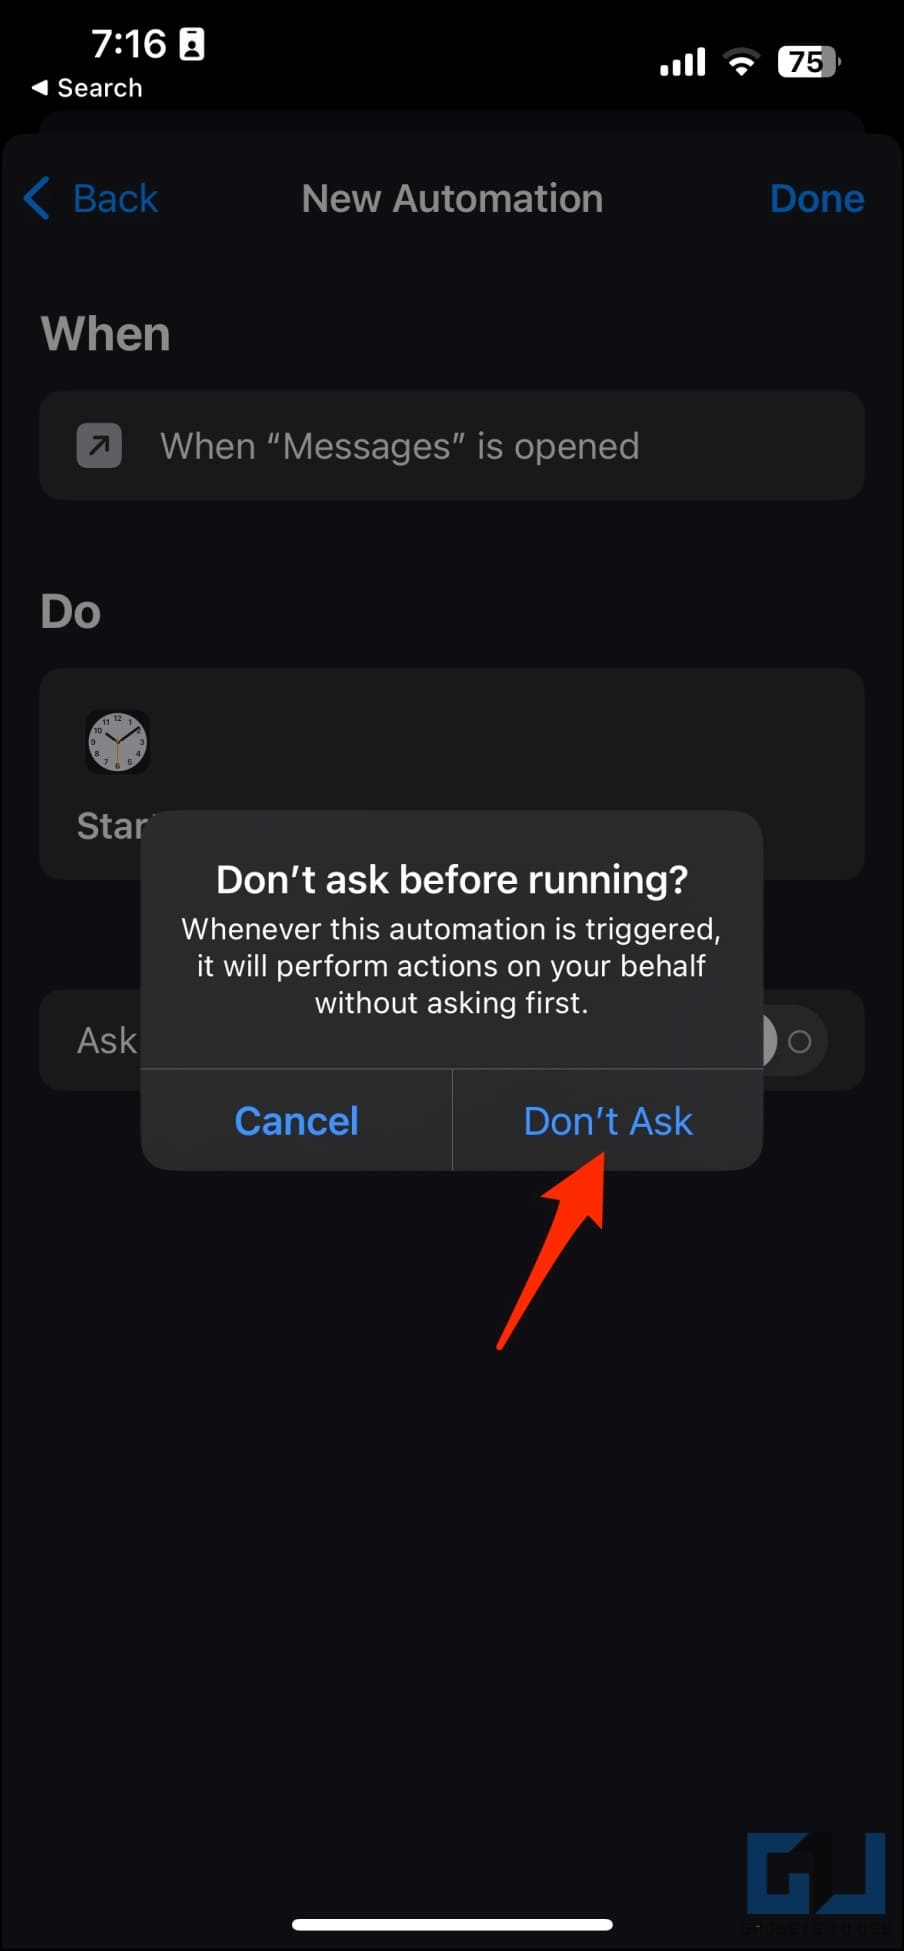
17. Uncheck the toggle for Ask Before Running. Hit Don’t Ask when prompted.
18. Also, ensure Notify When Run is disabled. Tap Done on the top right.
That’s it. When you open Messages, it will automatically lock your iPhone within one second. You must now use your FaceID or enter the iPhone passcode to read the text messages.
The shortcut will run every single time you open the Messages app. And you no longer have to worry about a third-party accessing text messages without your consent. All they have is about a second or two to read your private texts.
Method 2- Password-Protect Messages Using App Limits on iOS
Screen Time on iOS lets you know how much time you spend on the device. It also bundles parental control features like content and privacy restrictions which you can use to lock the Messages app, as shown below:
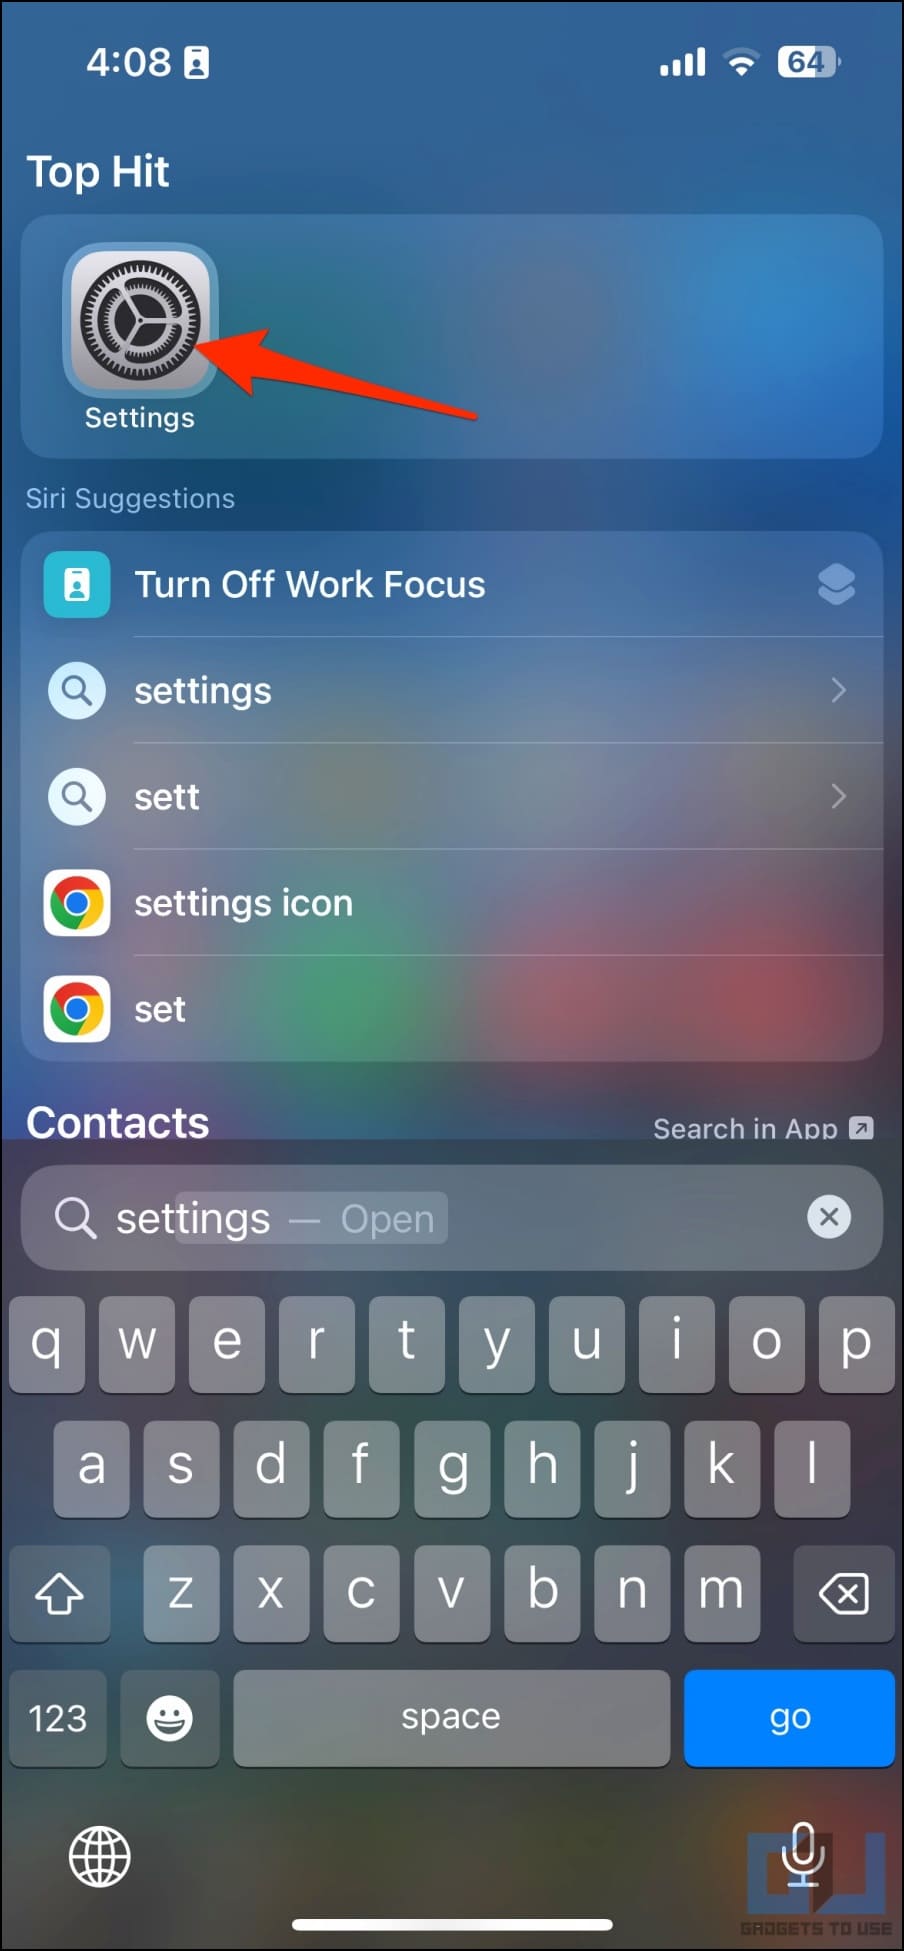
1. Open Settings on your iPhone or iPad.
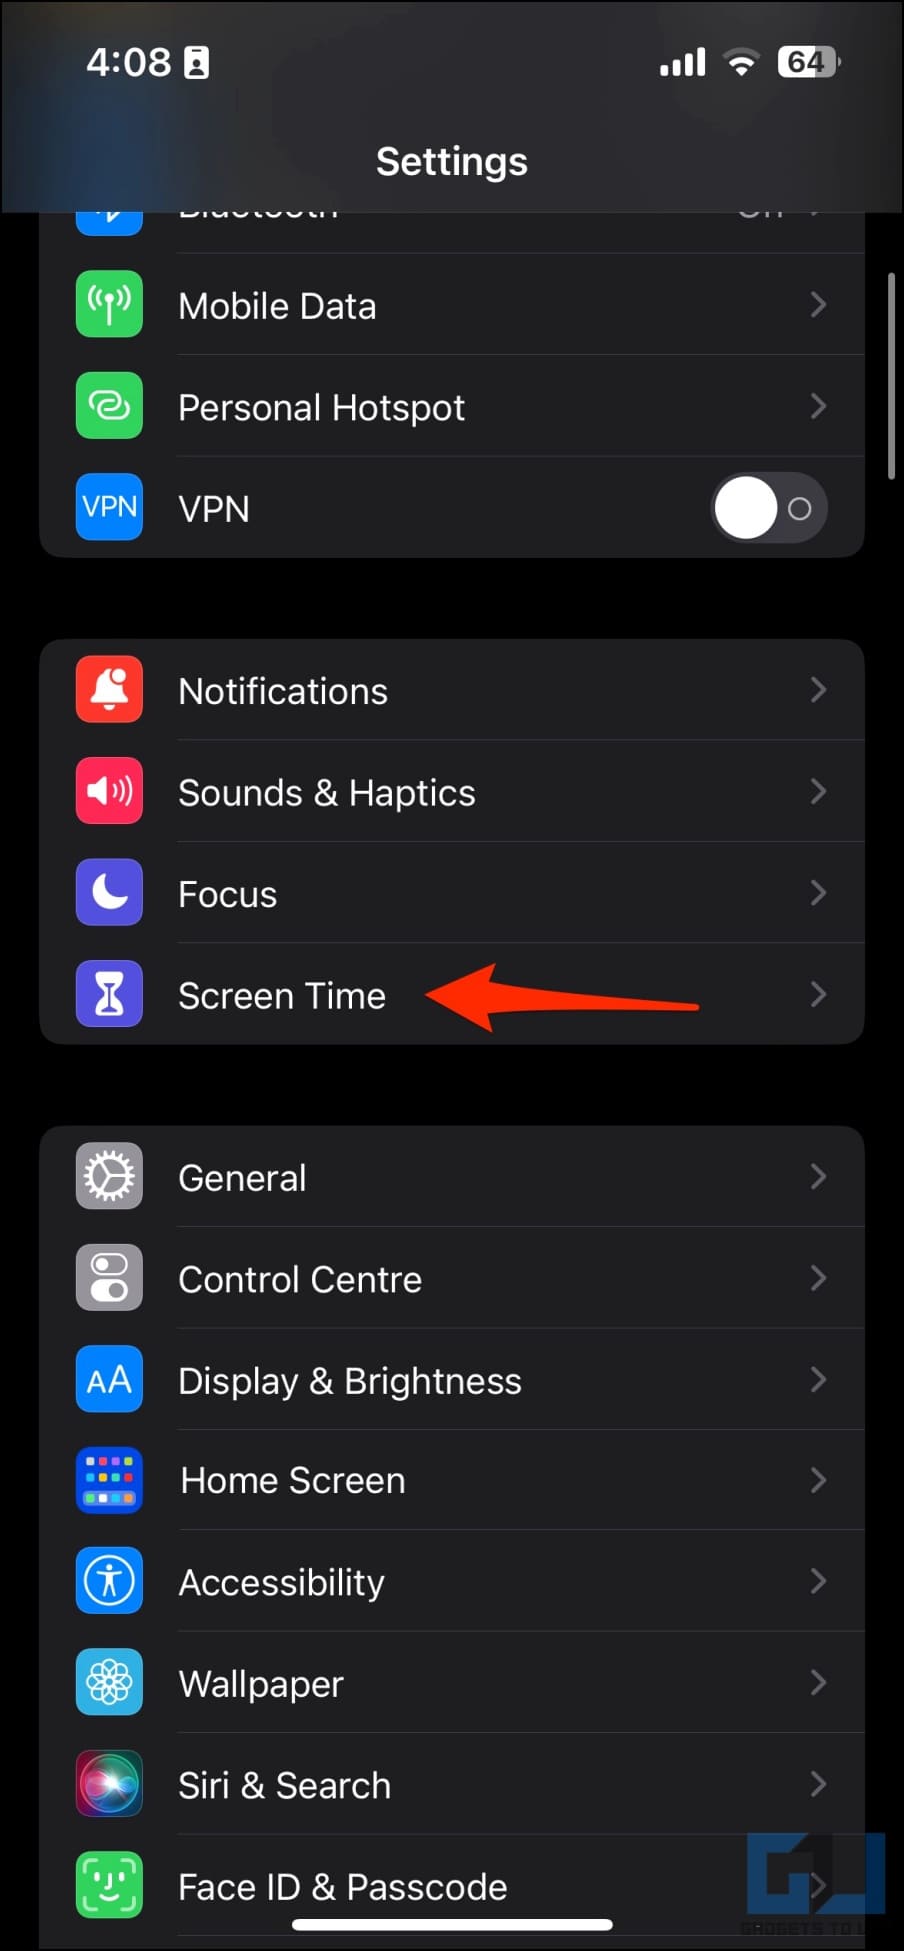
2. Scroll down and tap on Screen Time.
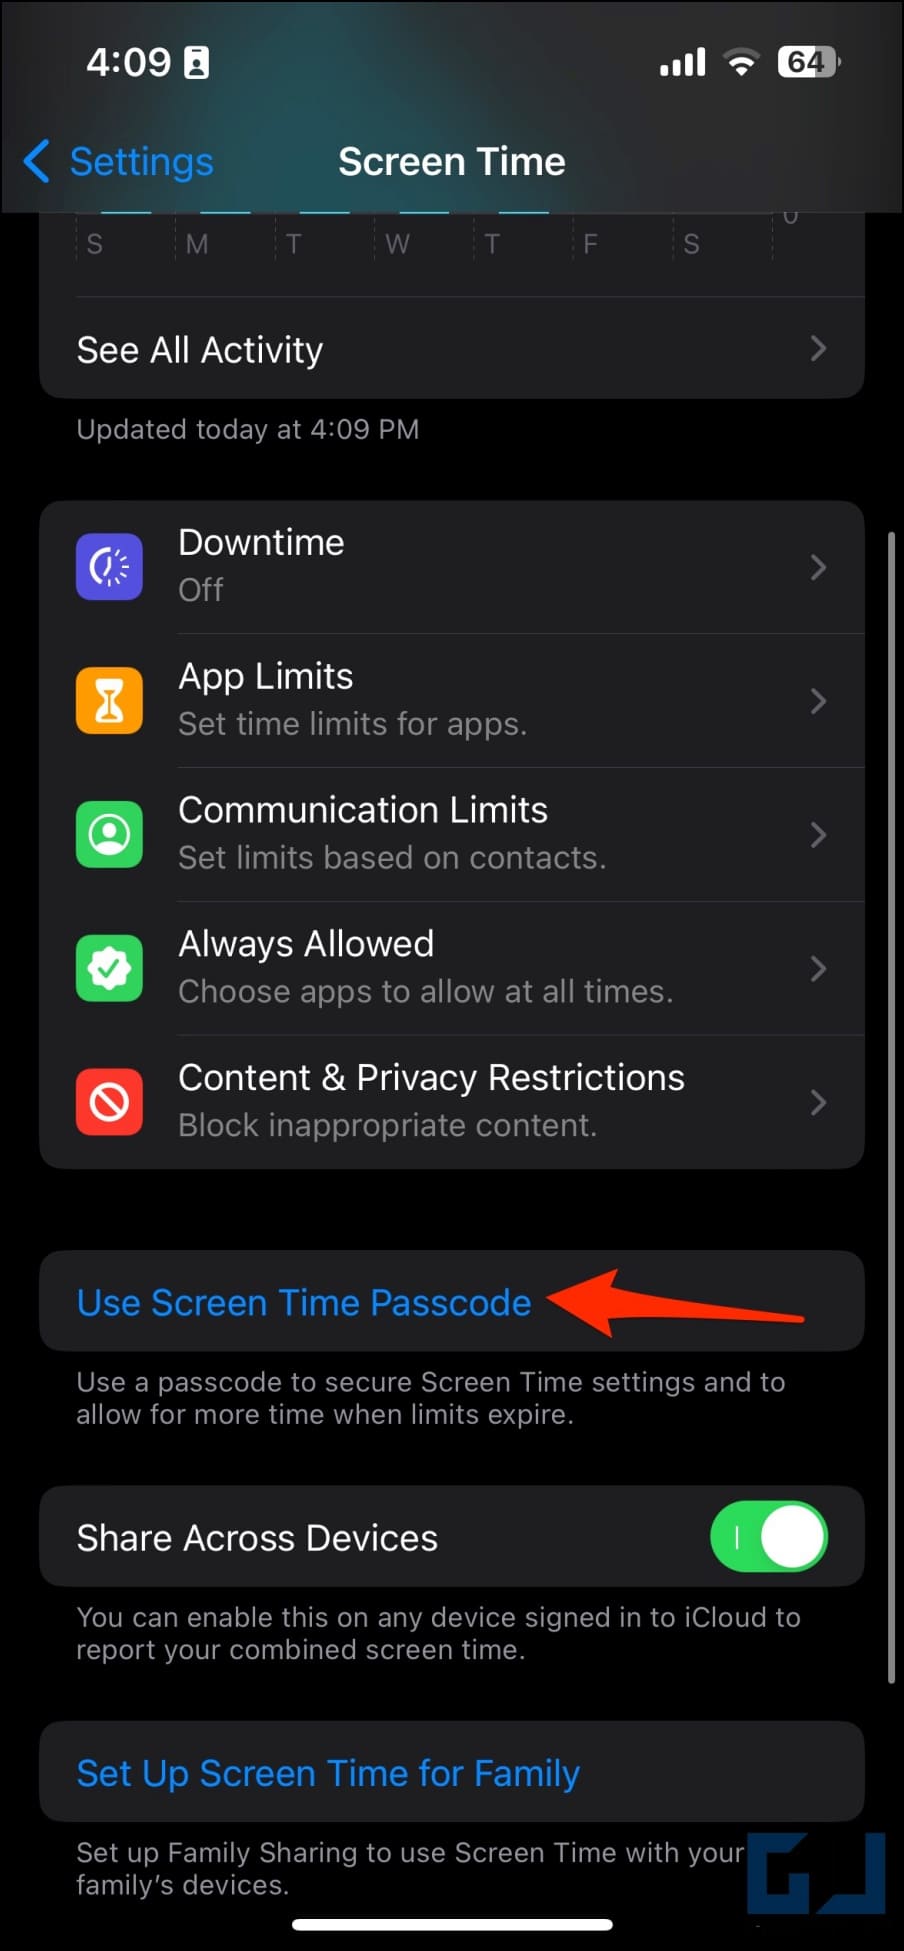
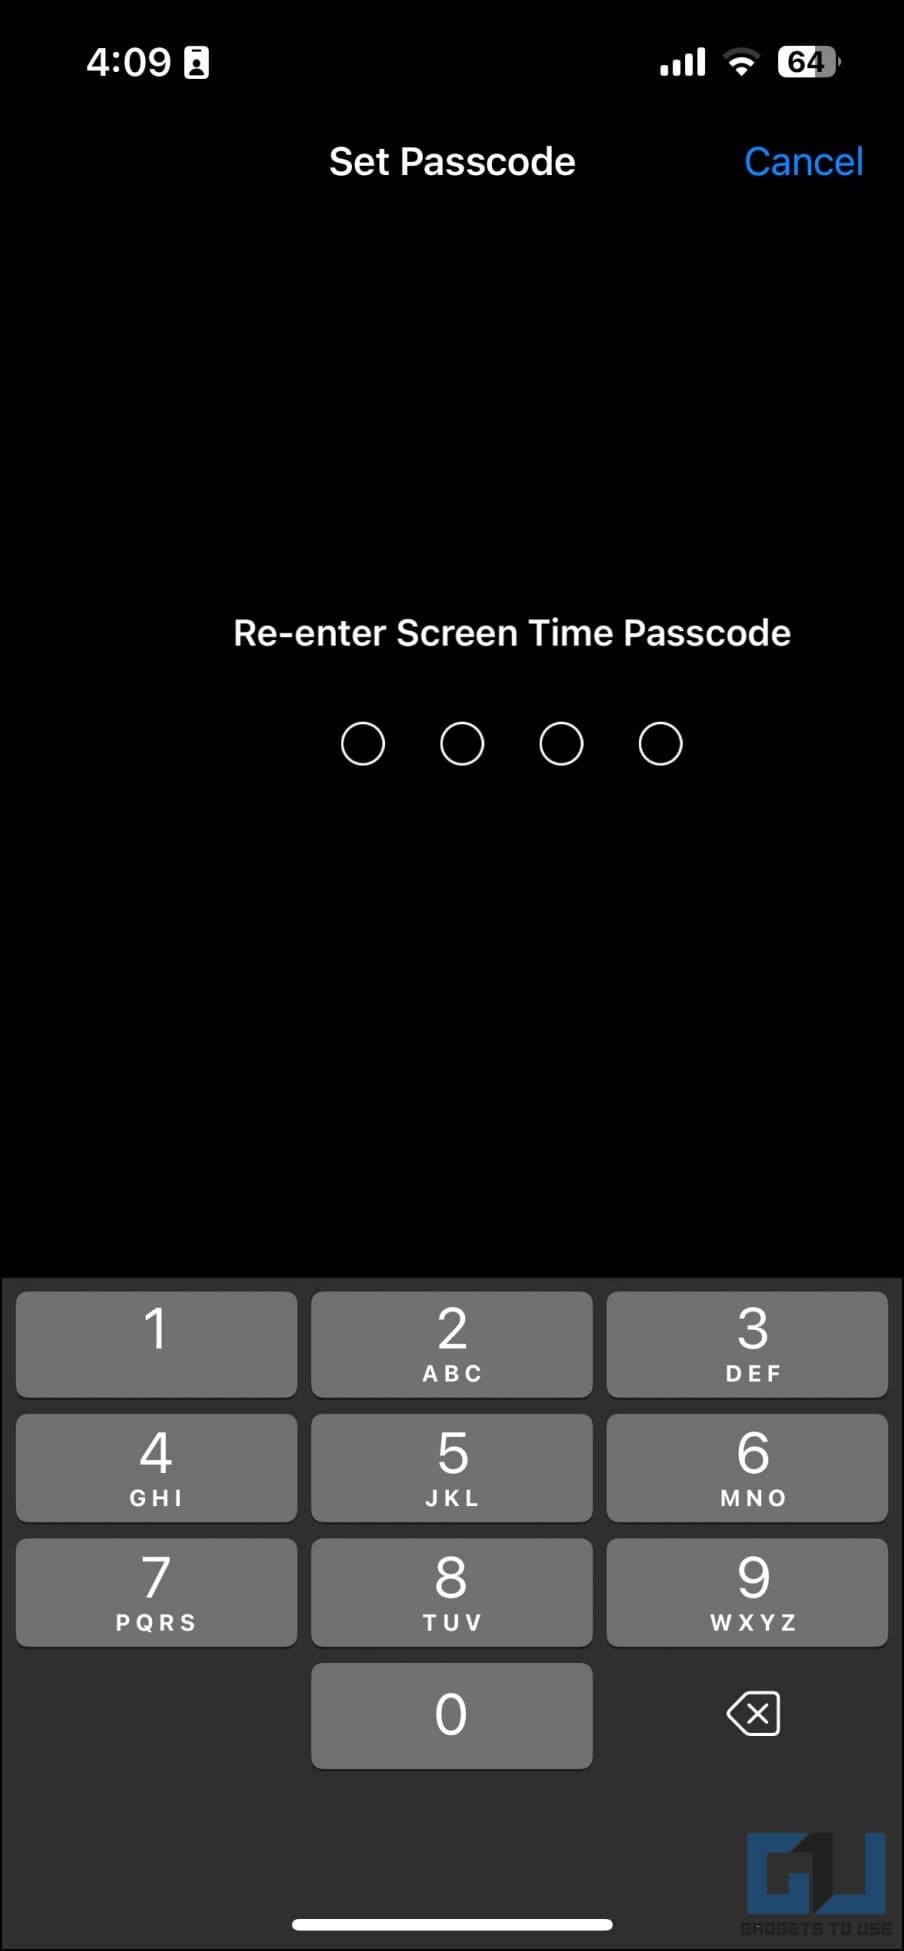
3. Turn on Screen Time if not already. Then, click Use Screen Time Passcode and follow the on-screen instructions to set a passcode of your choice. Remember it.
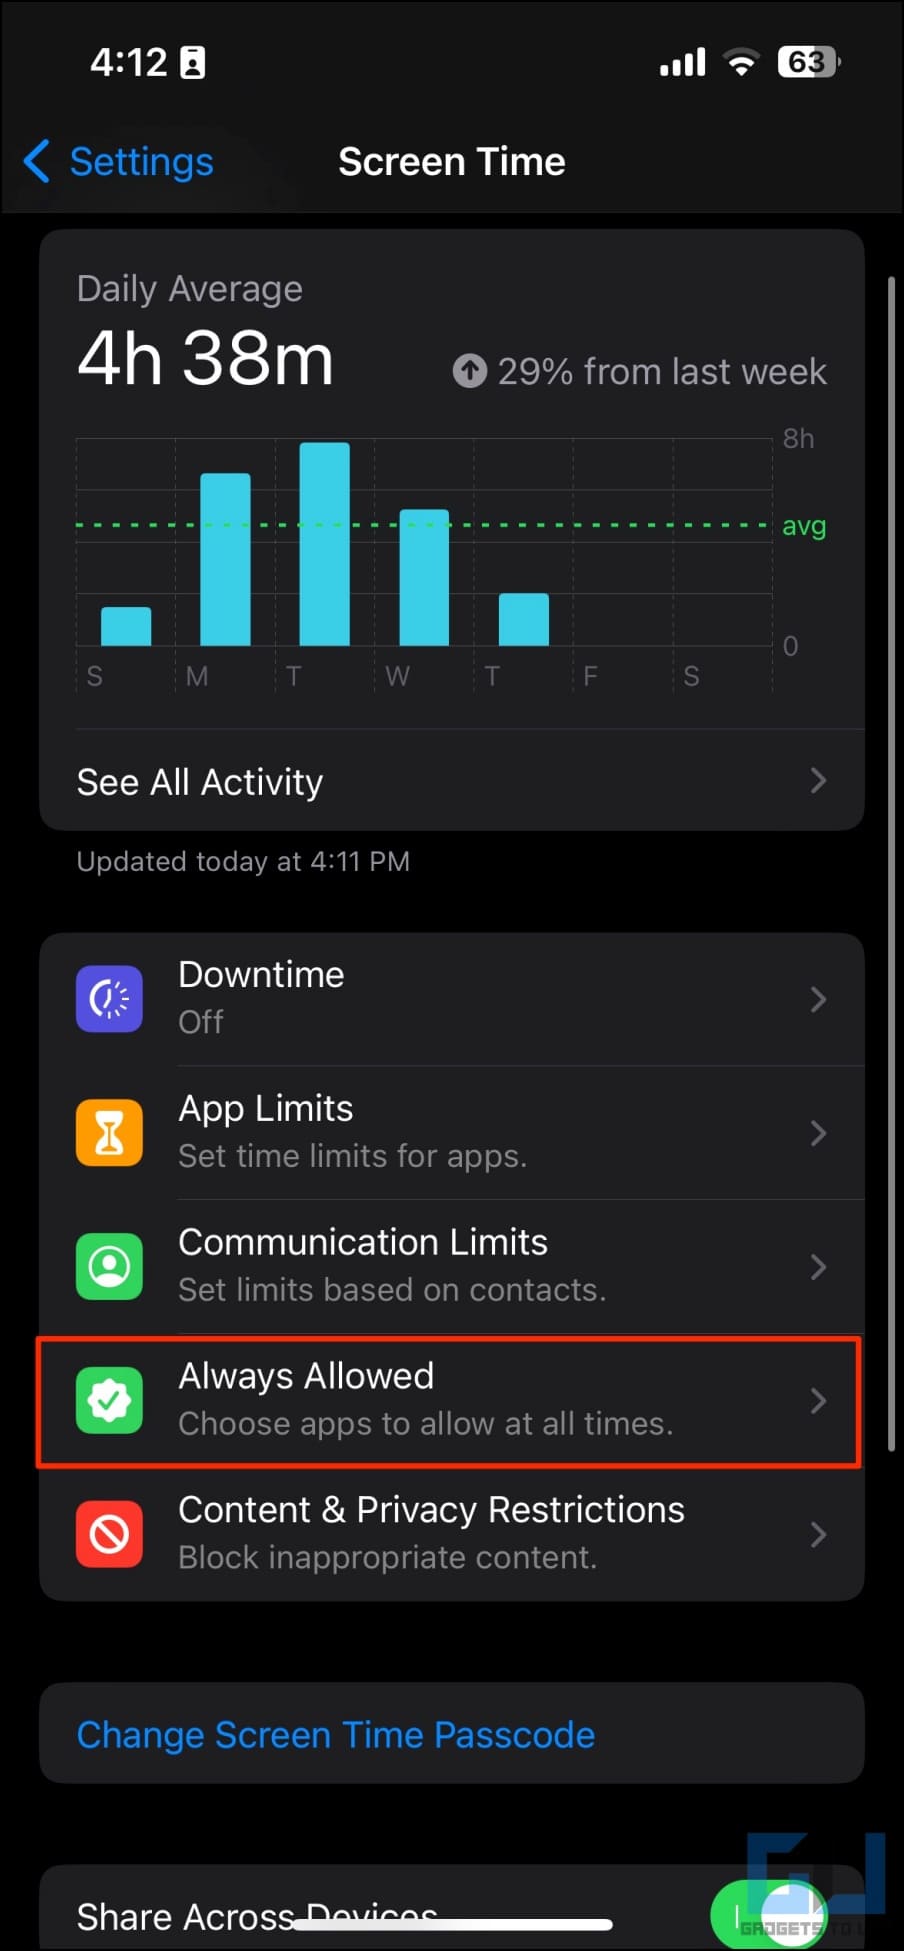
4. Next, click on Always Allowed.
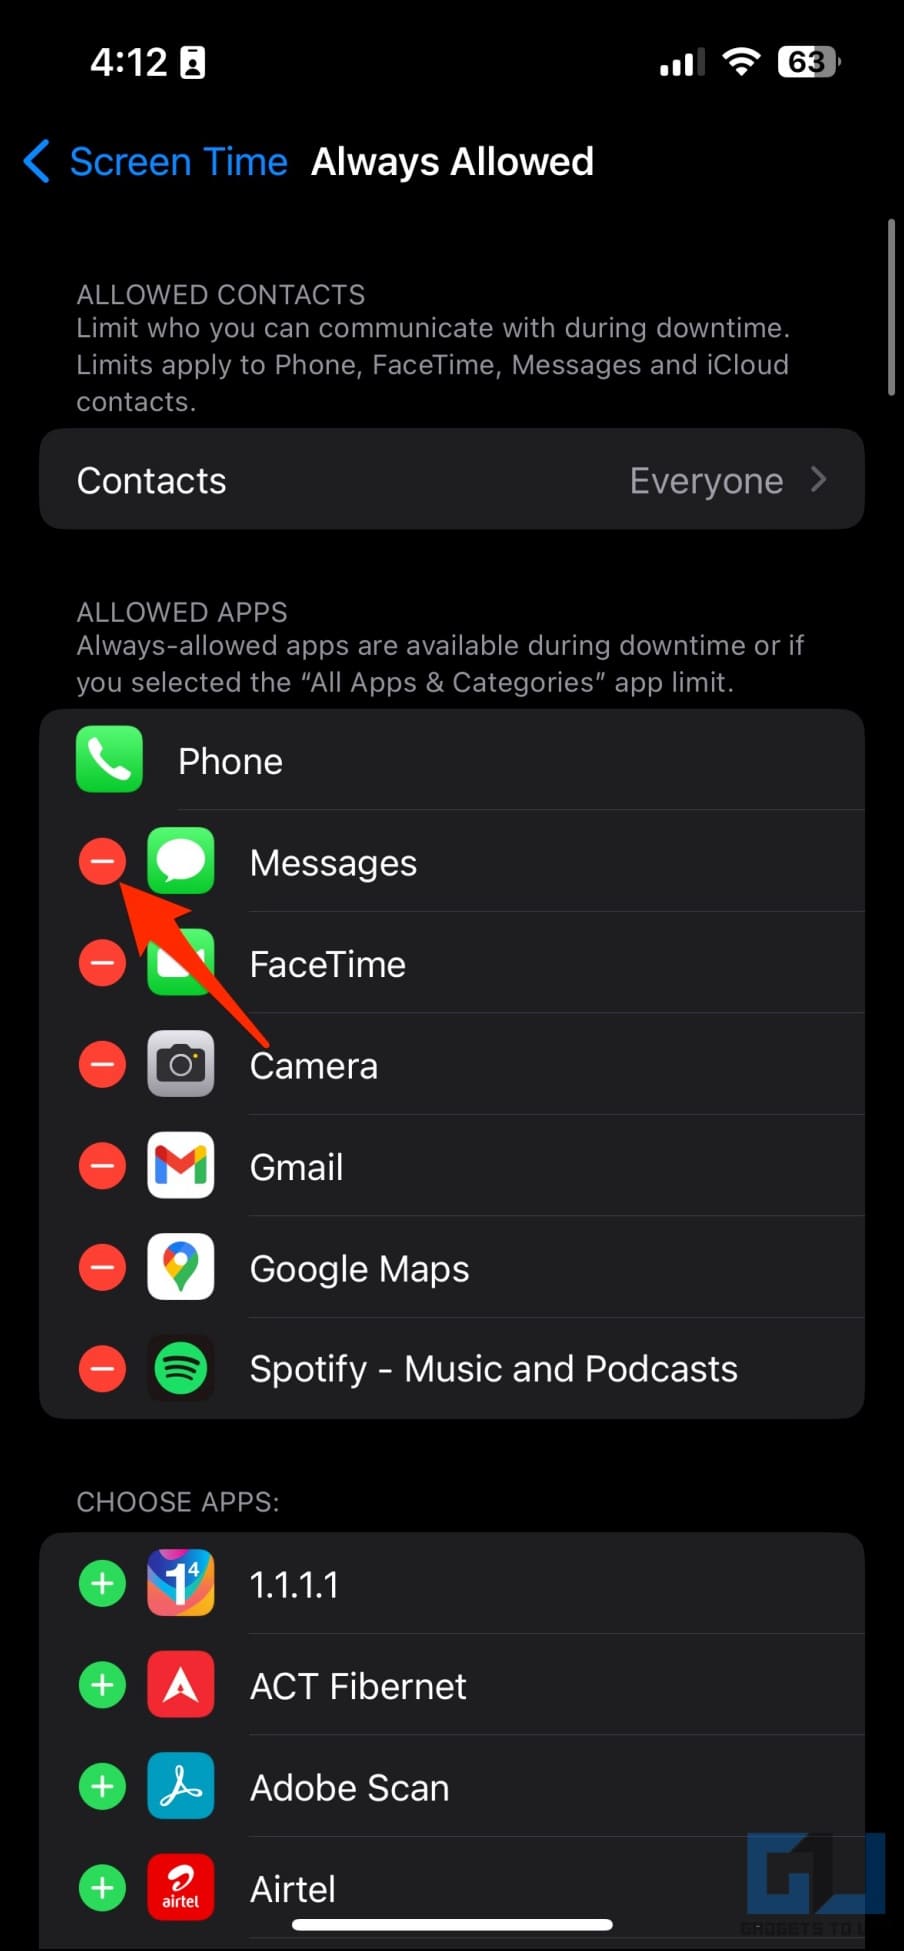
5. On the next screen, click the – icon next to the Messages app to remove it from the default list of always-allowed apps.
6. Tap Remove to confirm when prompted.
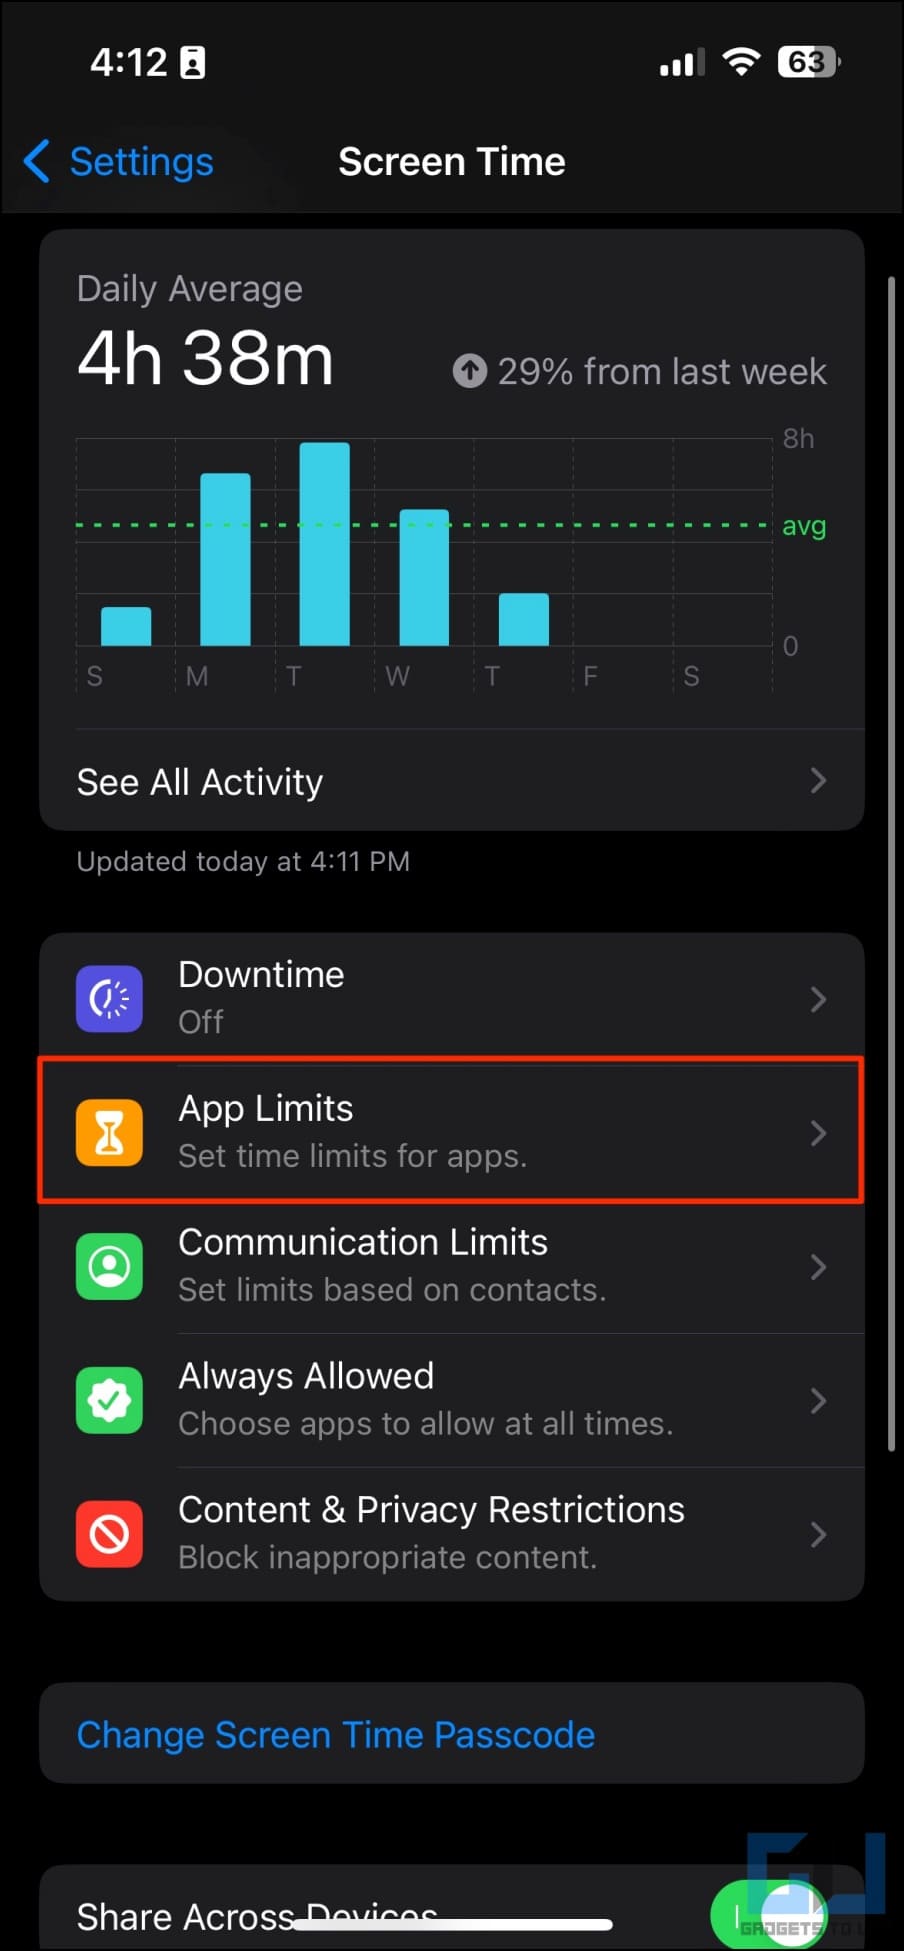
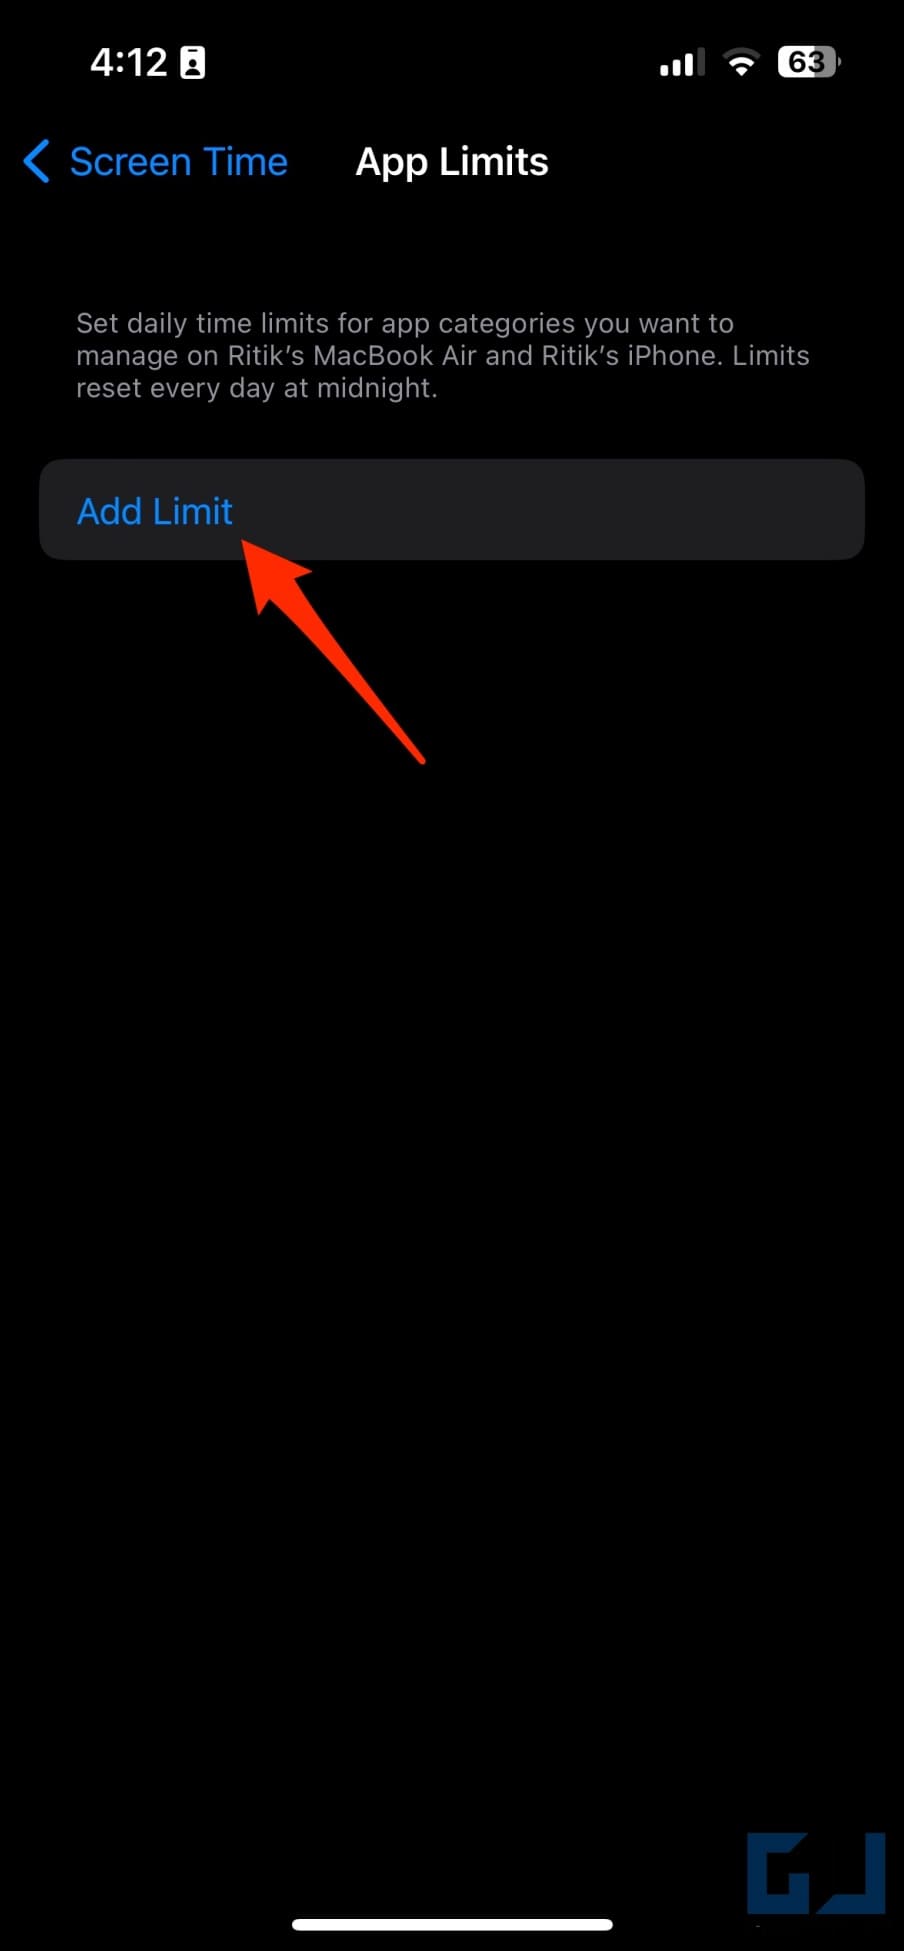
7. Go back to the Screen Time menu. Tap the App Limits option and select Add Limit.
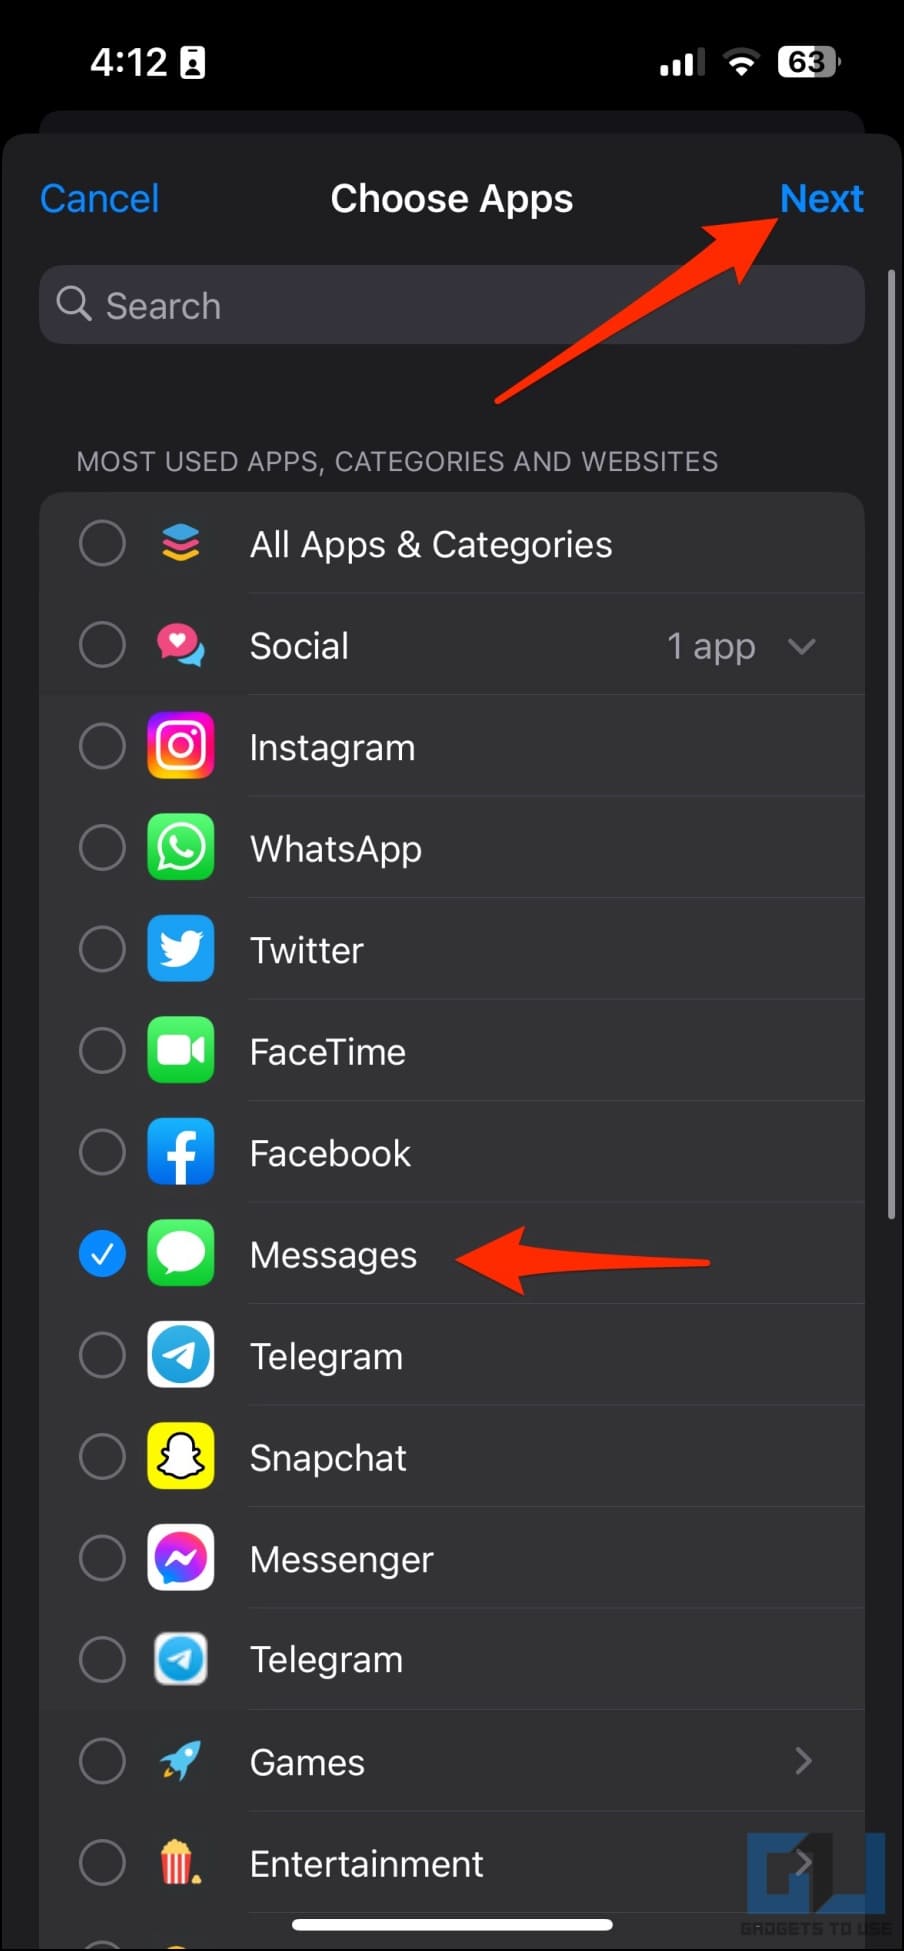
8. Choose the Social category and select the Messages app (and any other apps you want to lock).
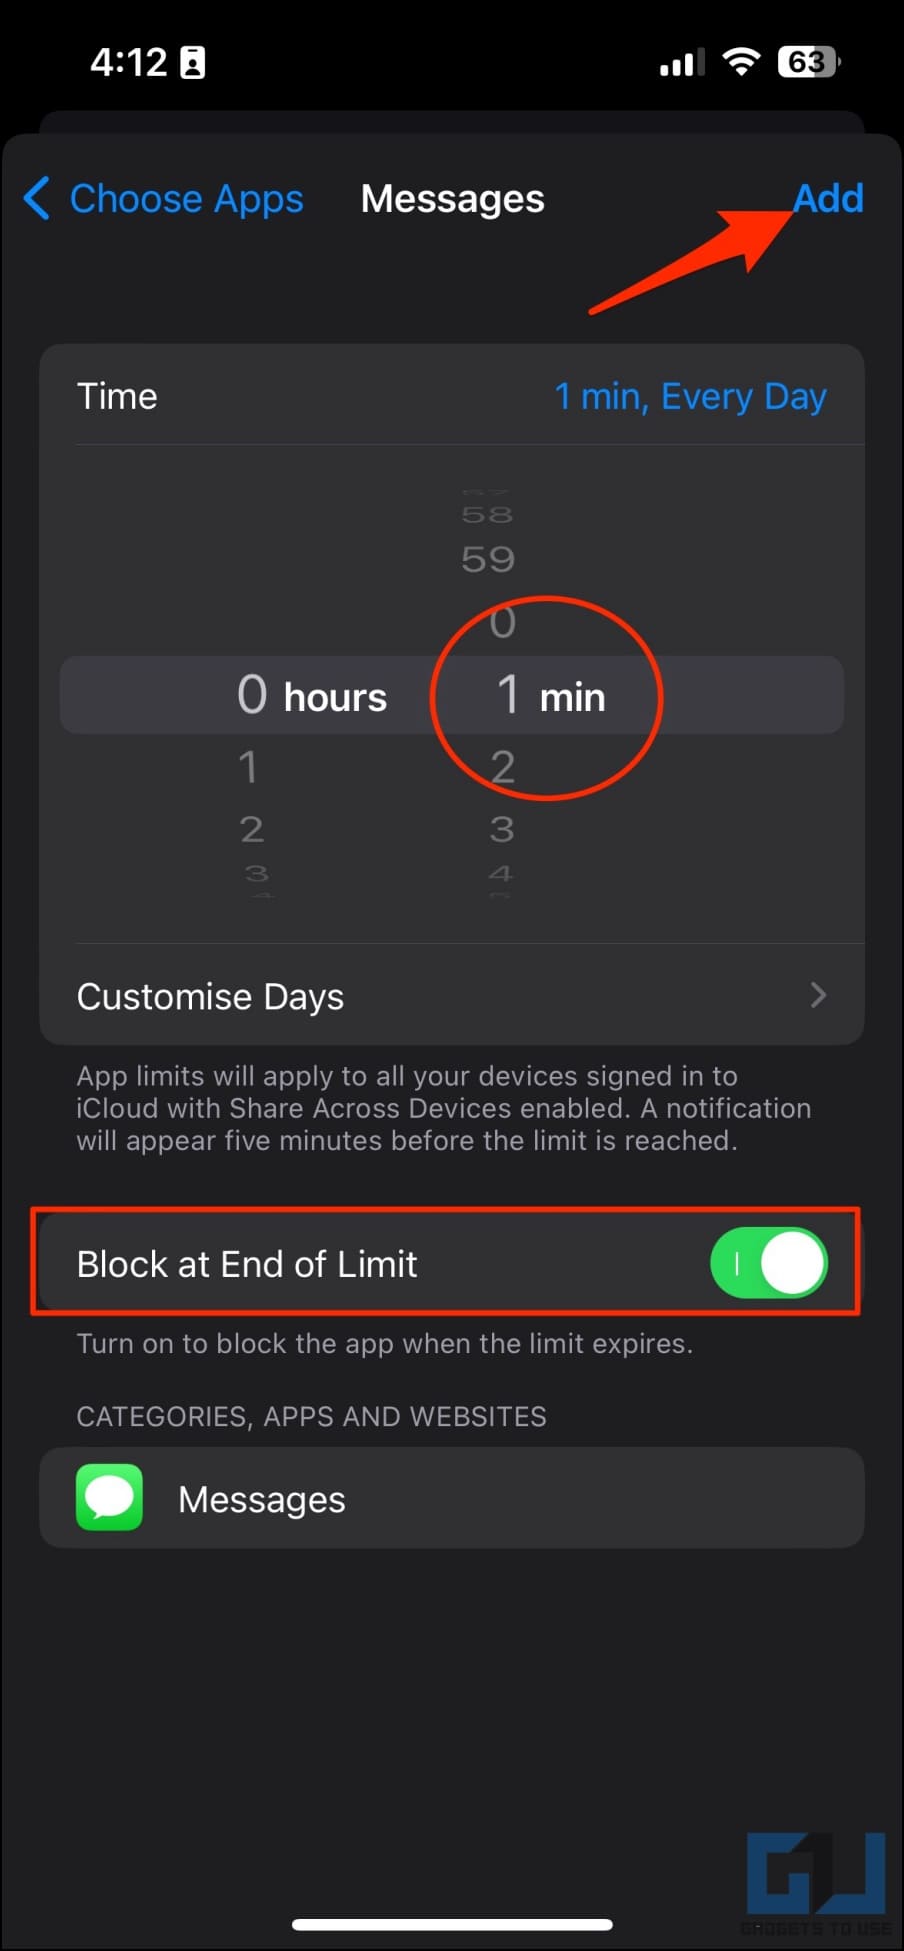
9. Click Next and use the slider to set the timer to 1 Minute. This is the daily usage limit before the Screen Time feature locks you out of the app. We’re choosing the lowest value (1 minute) since we intend to lock the Messages app.
10. Enable the toggle that says Block at End of Limit. You won’t find the option if you have not added a passcode to Screen Time.
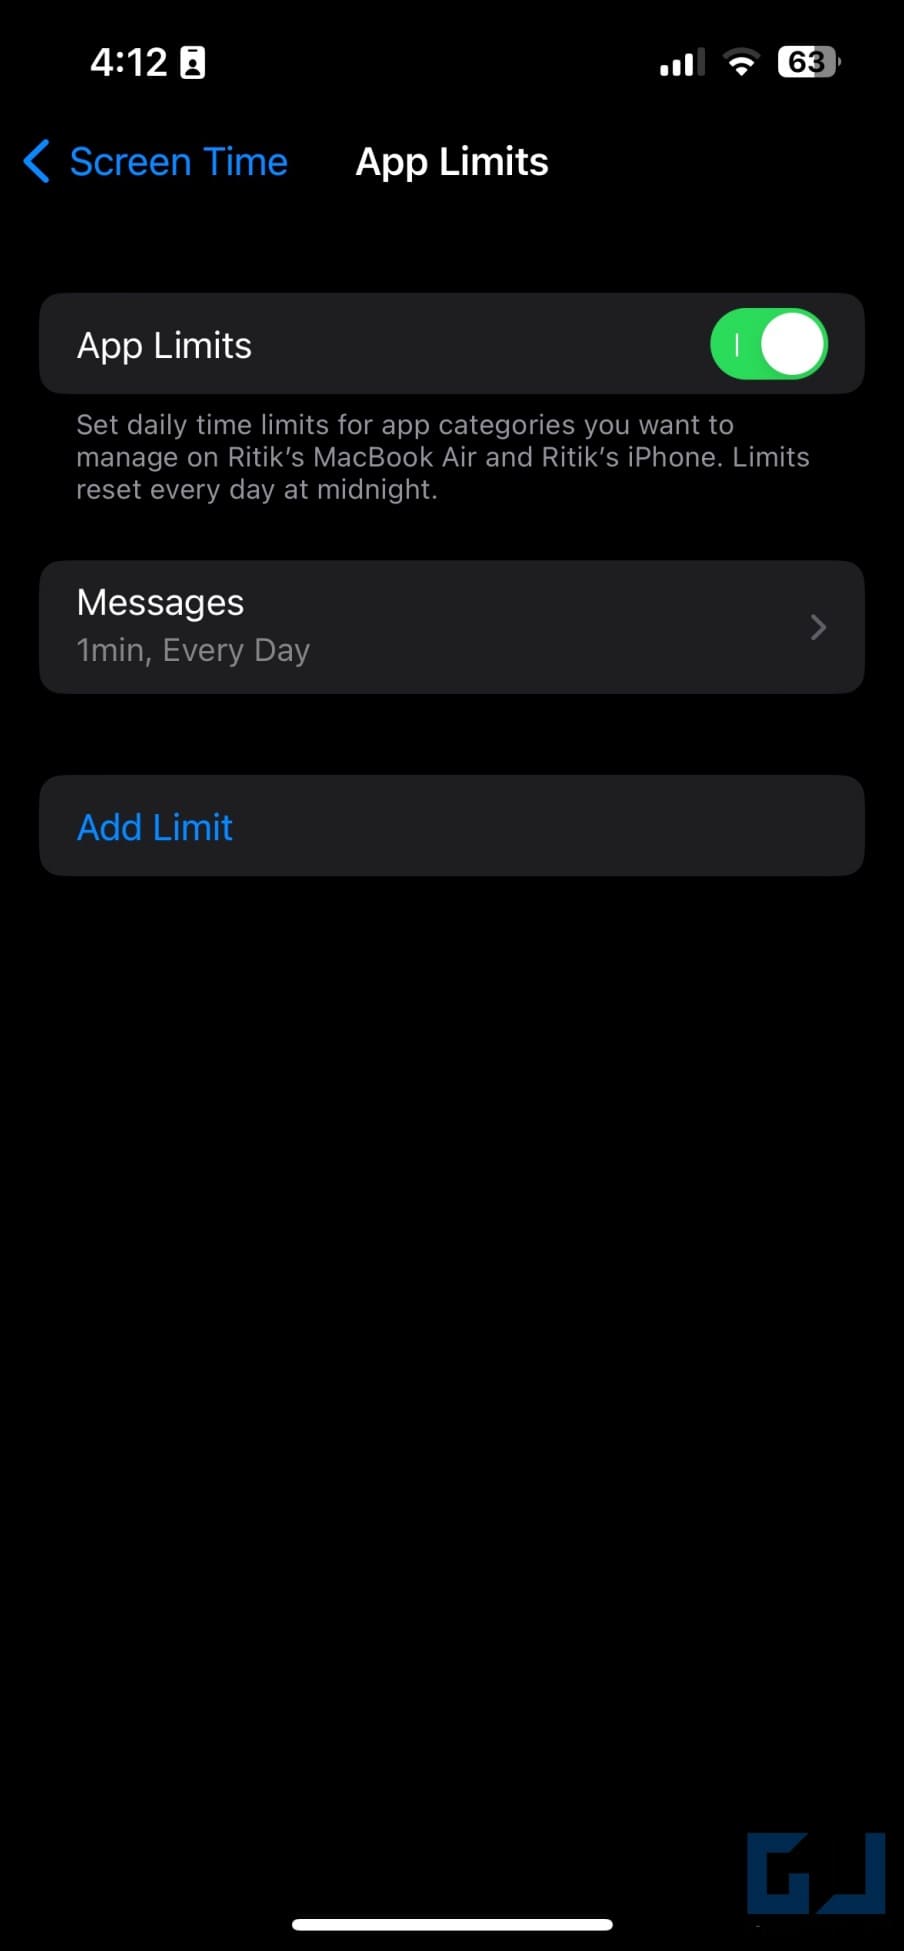
11. Finally, click Add in the top right corner.
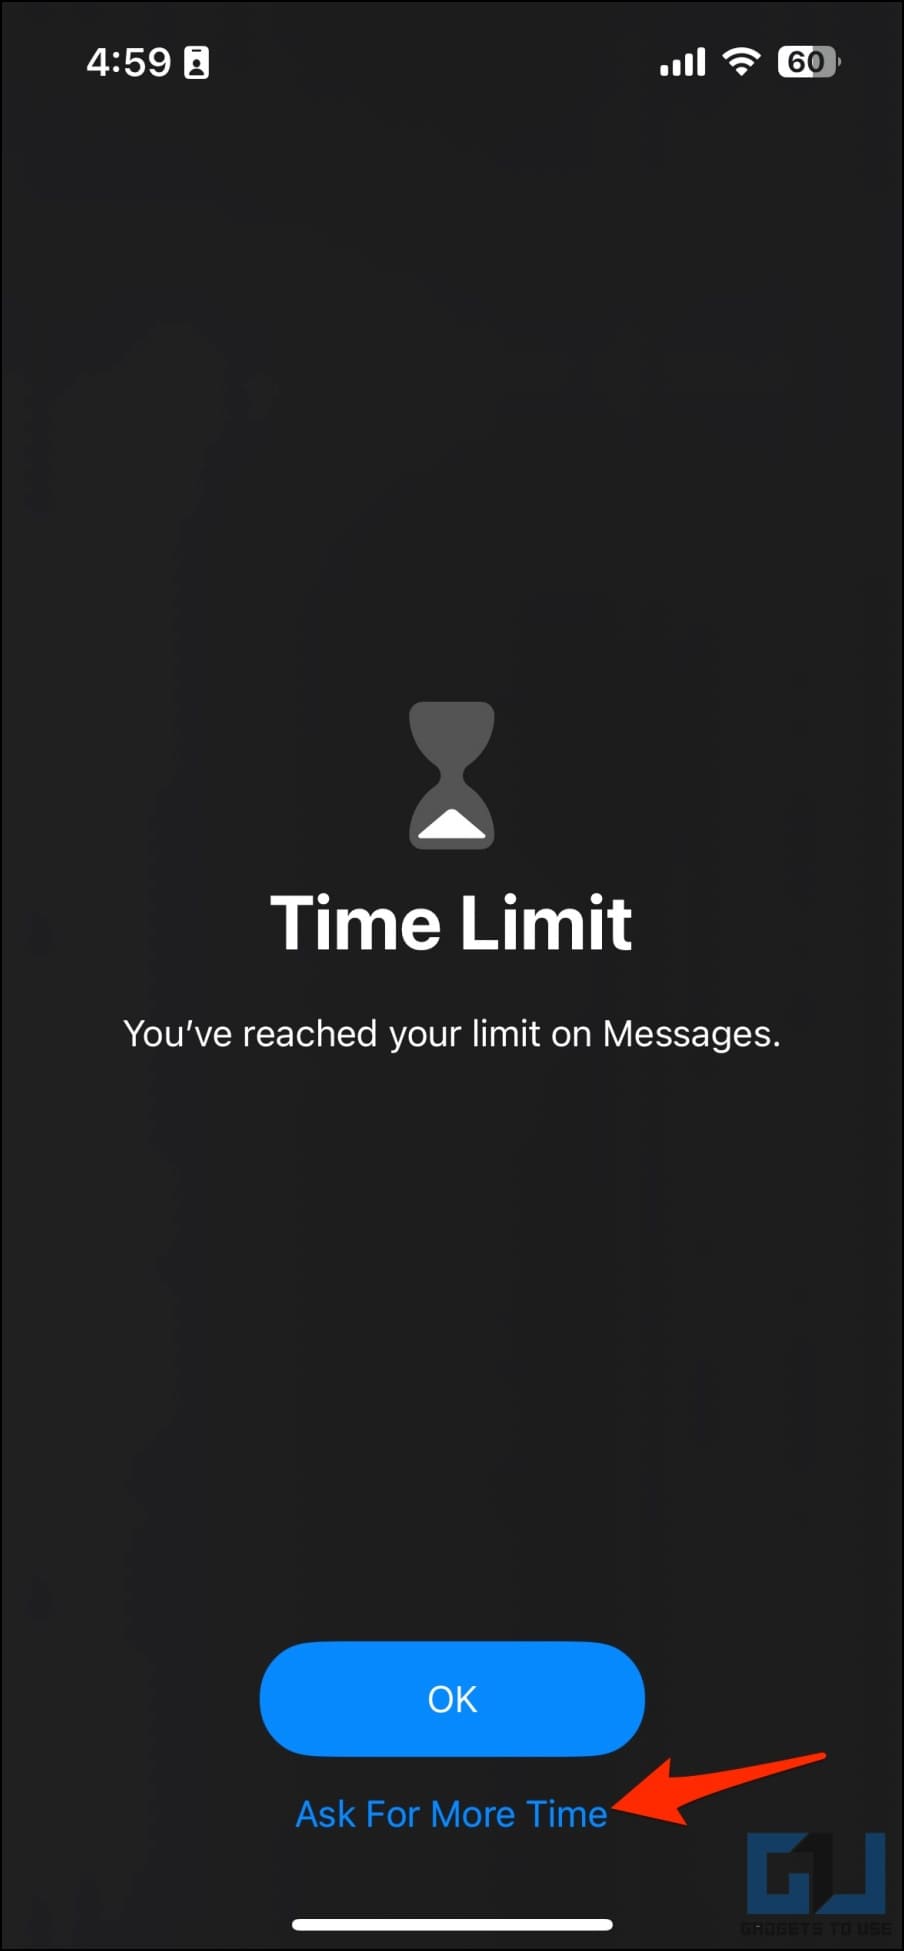
Now, open Messages and use it for 1 minute, post which Screen Time will automatically lock you out of the app, saying, “You’ve reached your limit on Messages.”
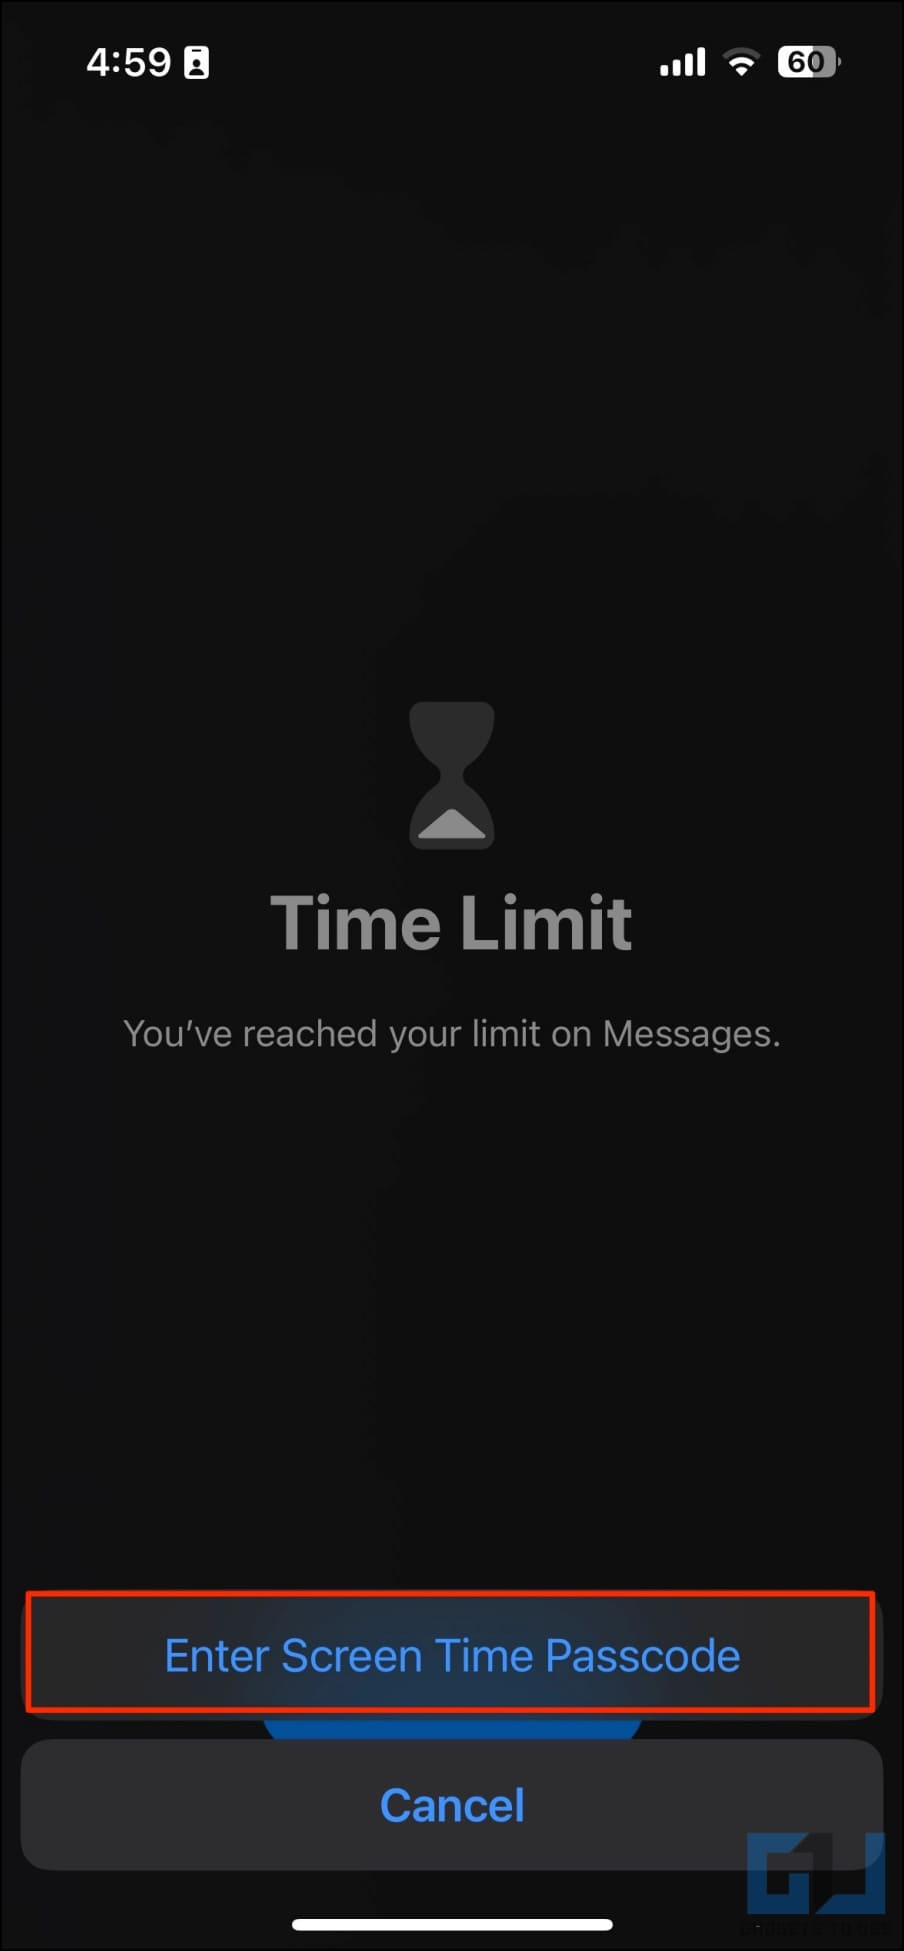
You can click on Ask for More Time. The first extra minute is free, after which it will ask for the passcode you set earlier to be able to access Messages.
This way, you can lock the Messages app with a passcode using the Screen Time feature. Just make sure to use the Messages app for a minute to trigger the time limit before you share your iPhone with kids, friends, or any other family member. You can use the same technique to lock other apps on your iPhone.
Method 3- Hide Message Previews from iOS Lock Screen
By default, iPhone shows a preview notification for all text messages. The message not only appears as a banner but is also visible on the lock screen. Here’s how you can hide messages from the iOS lock screen and prevent others from reading the text:
1. Open Settings on your iPhone.
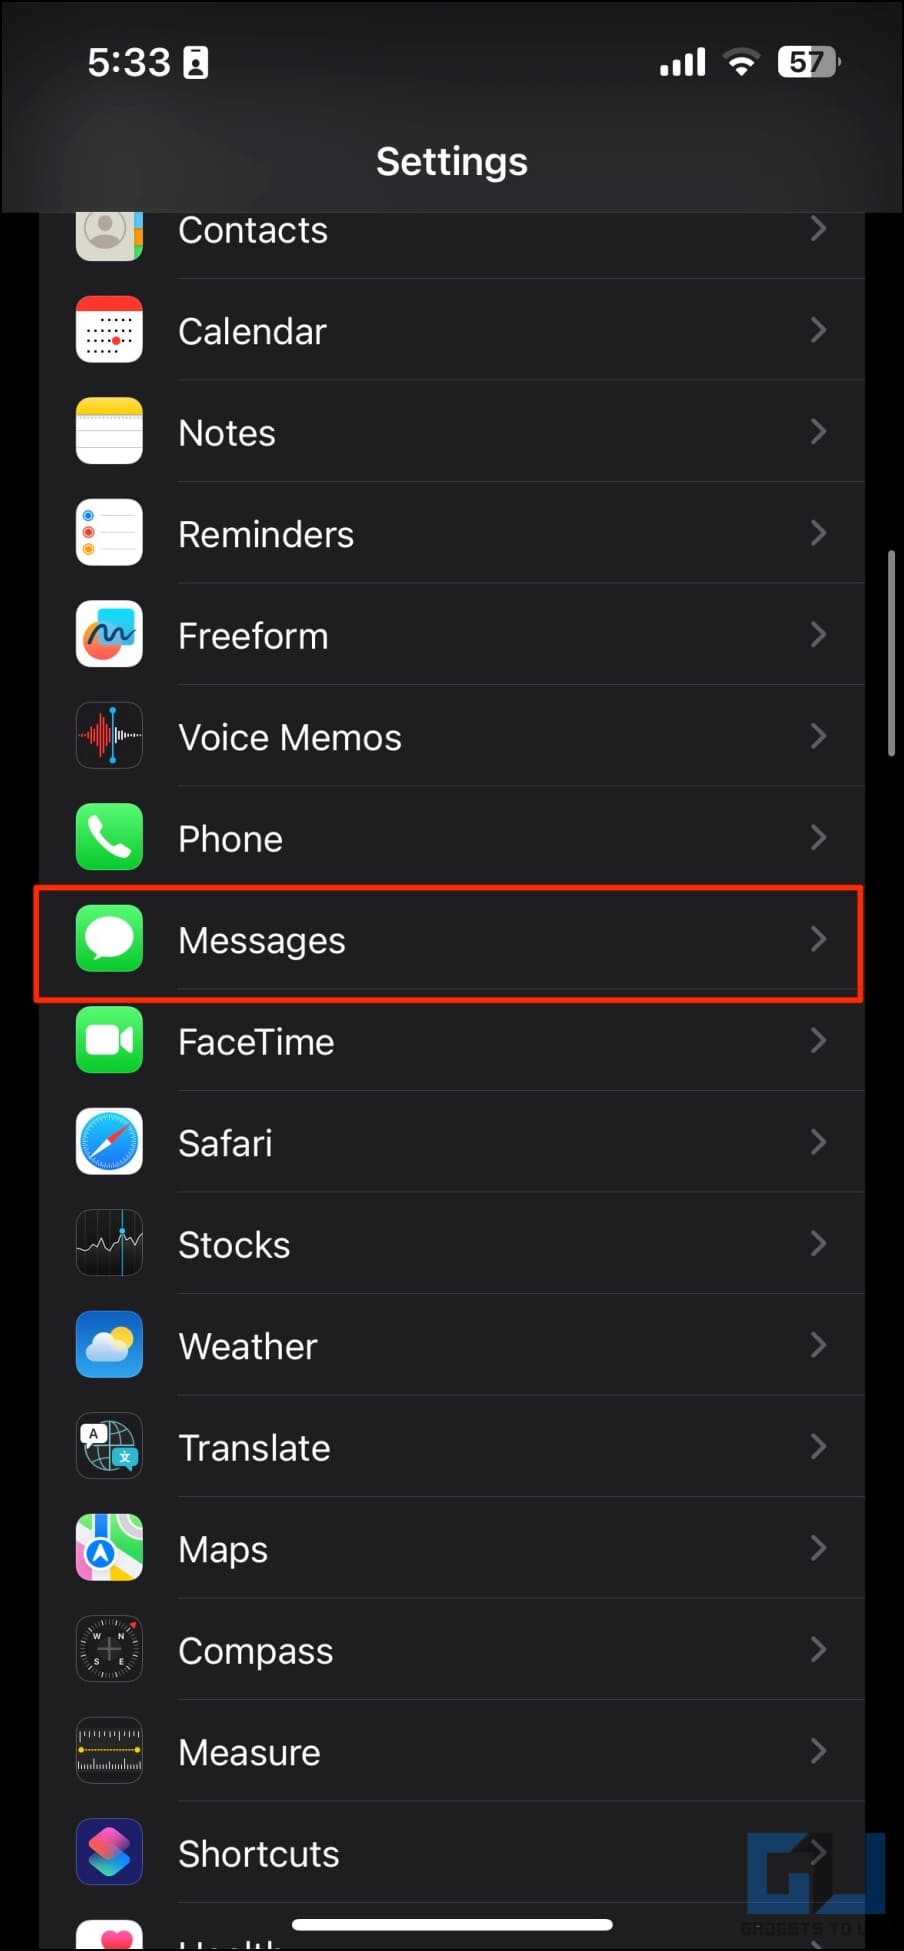
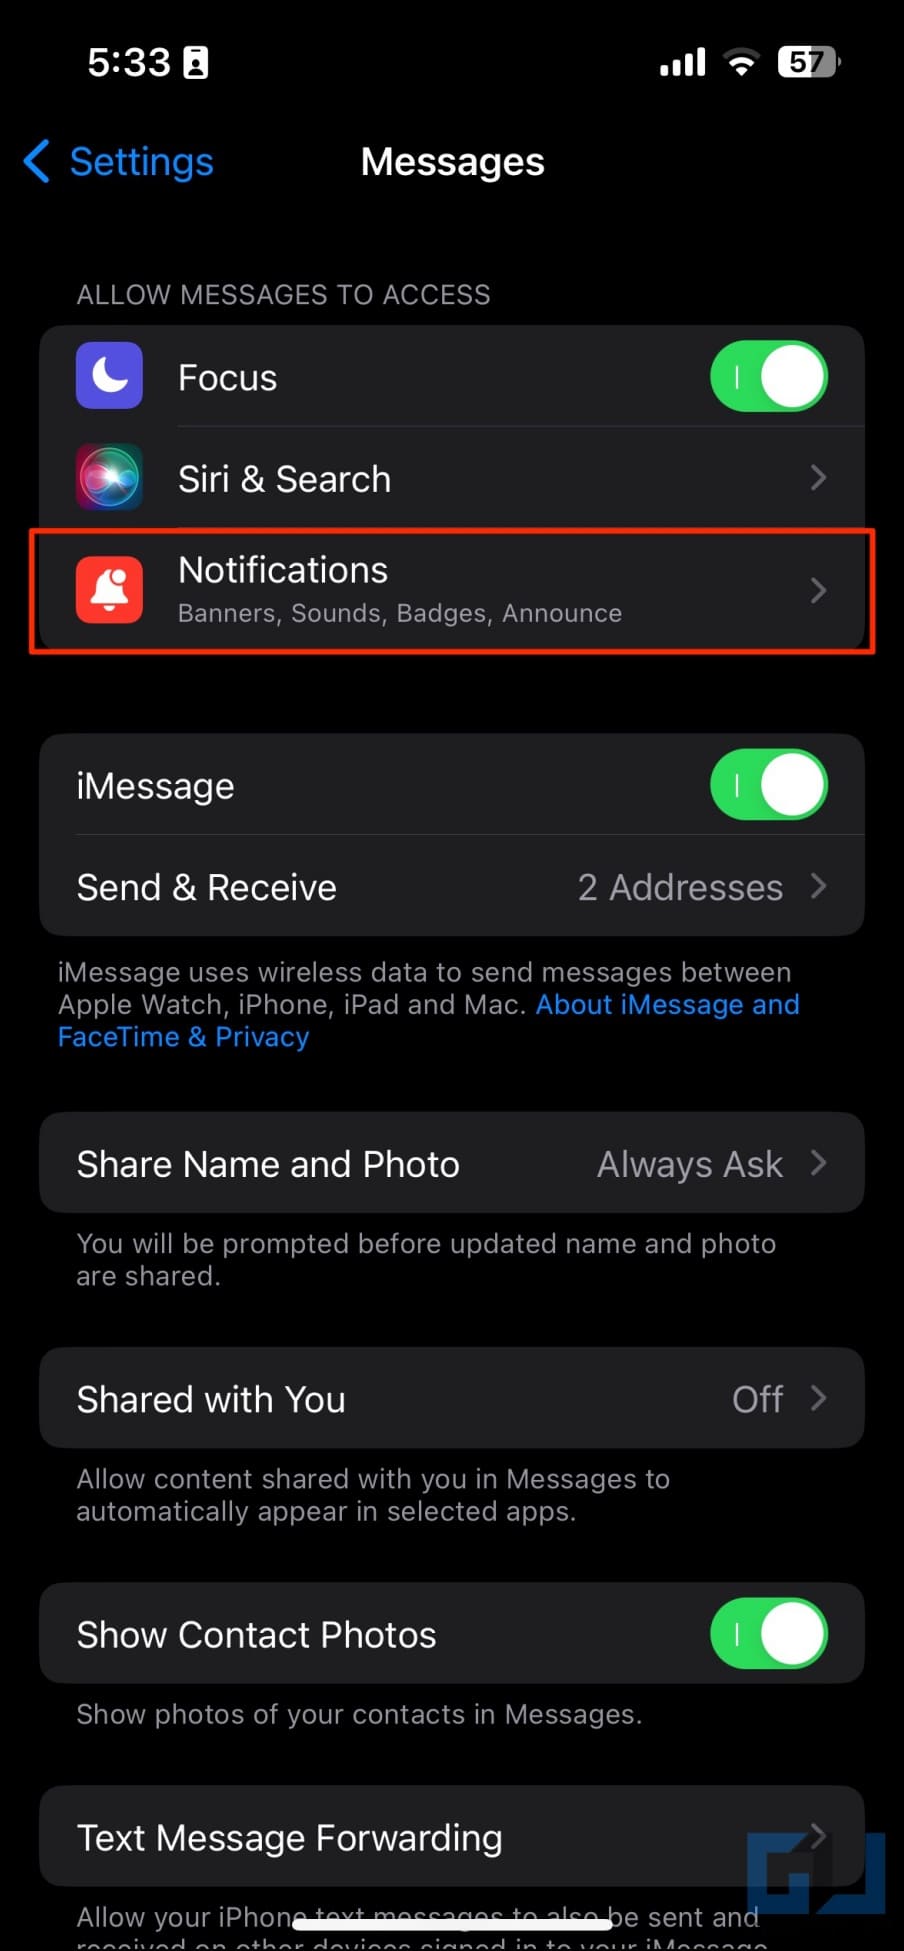
2. Scroll down and select Messages.
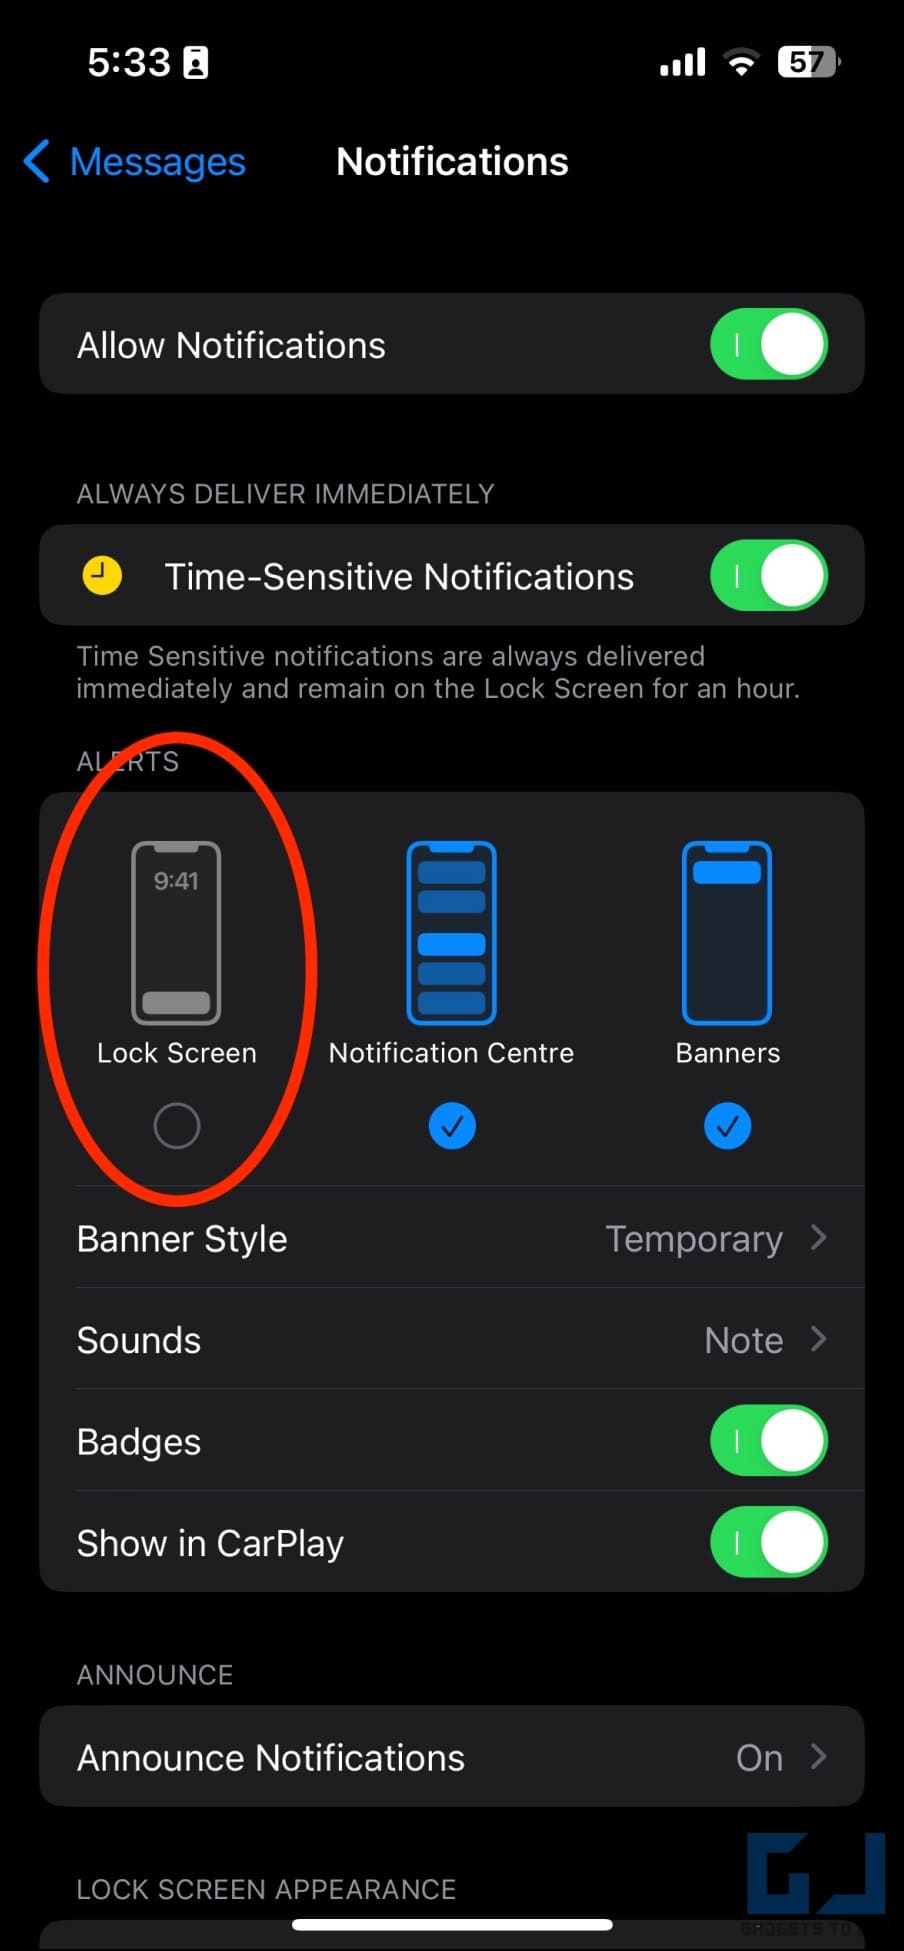
3. Click on Notifications and toggle off Lock Screen under Alerts.
This will hide the message notifications from your iPhone lock screen.
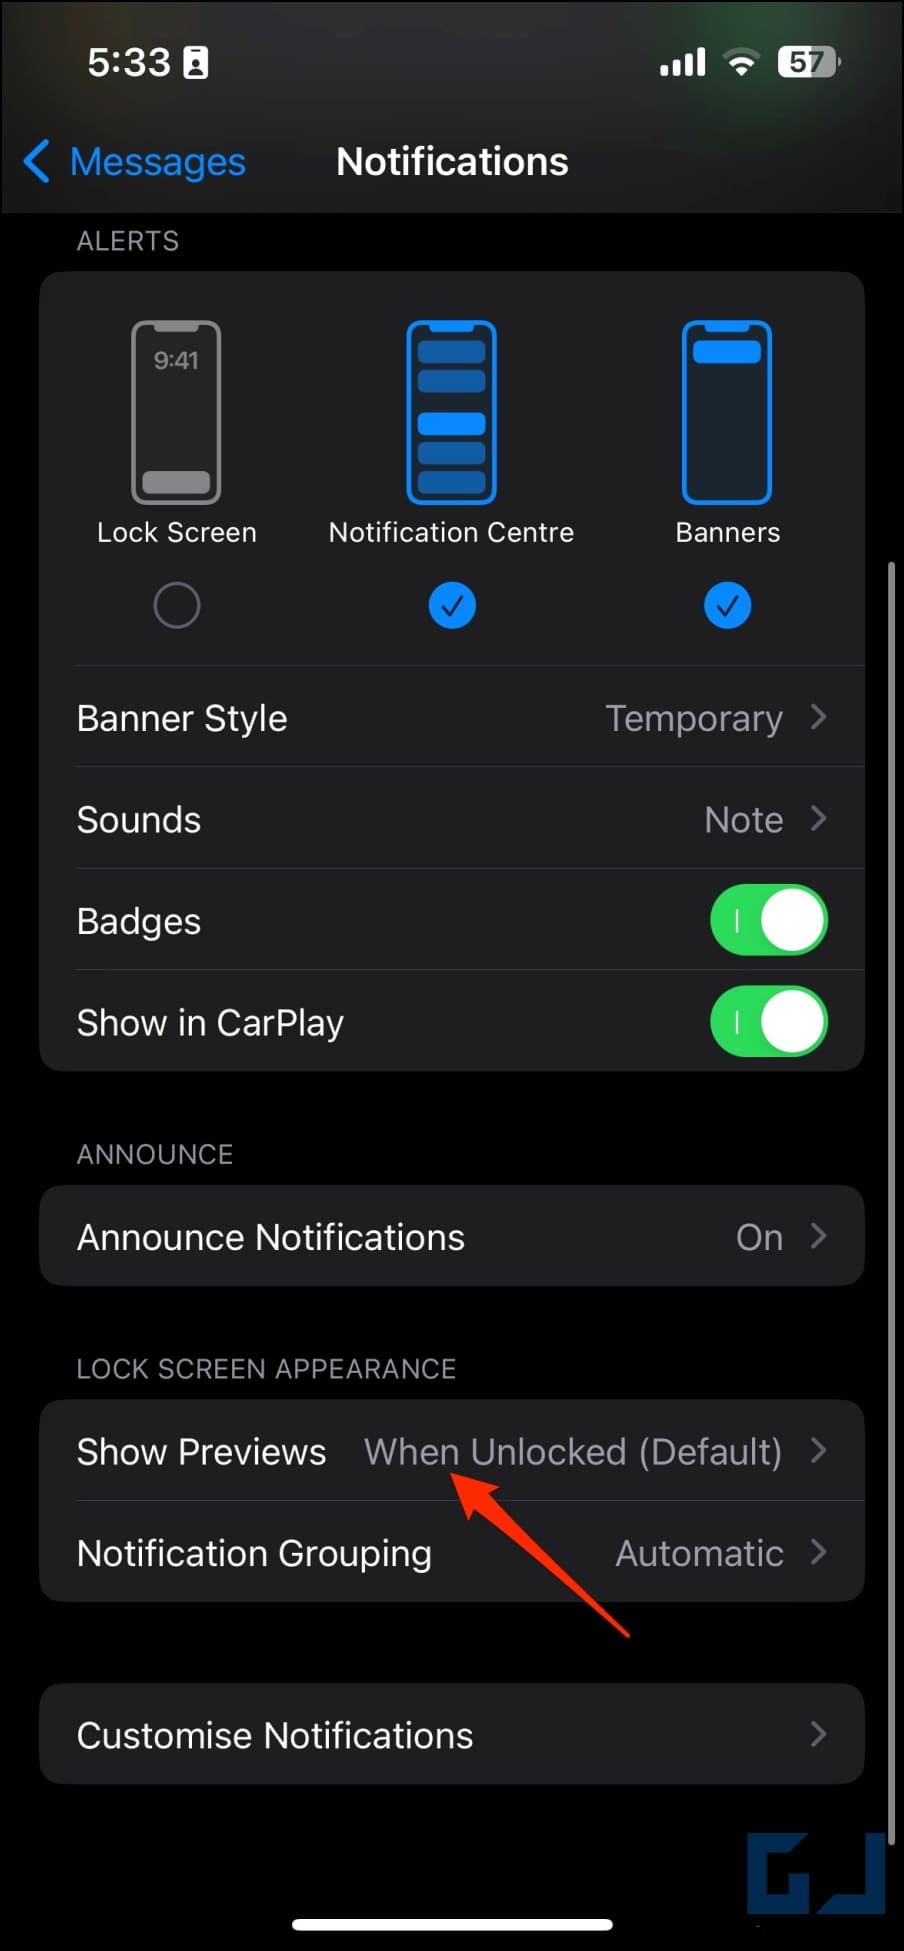
4. Furthermore, click on Show Previews.
5. Select Never to turn message previews off on iPhone. You can also keep it to When Unlocked (Default), provided only you can unlock your iPhone.
Method 4- Protect Your Messages on iCloud Using 2FA
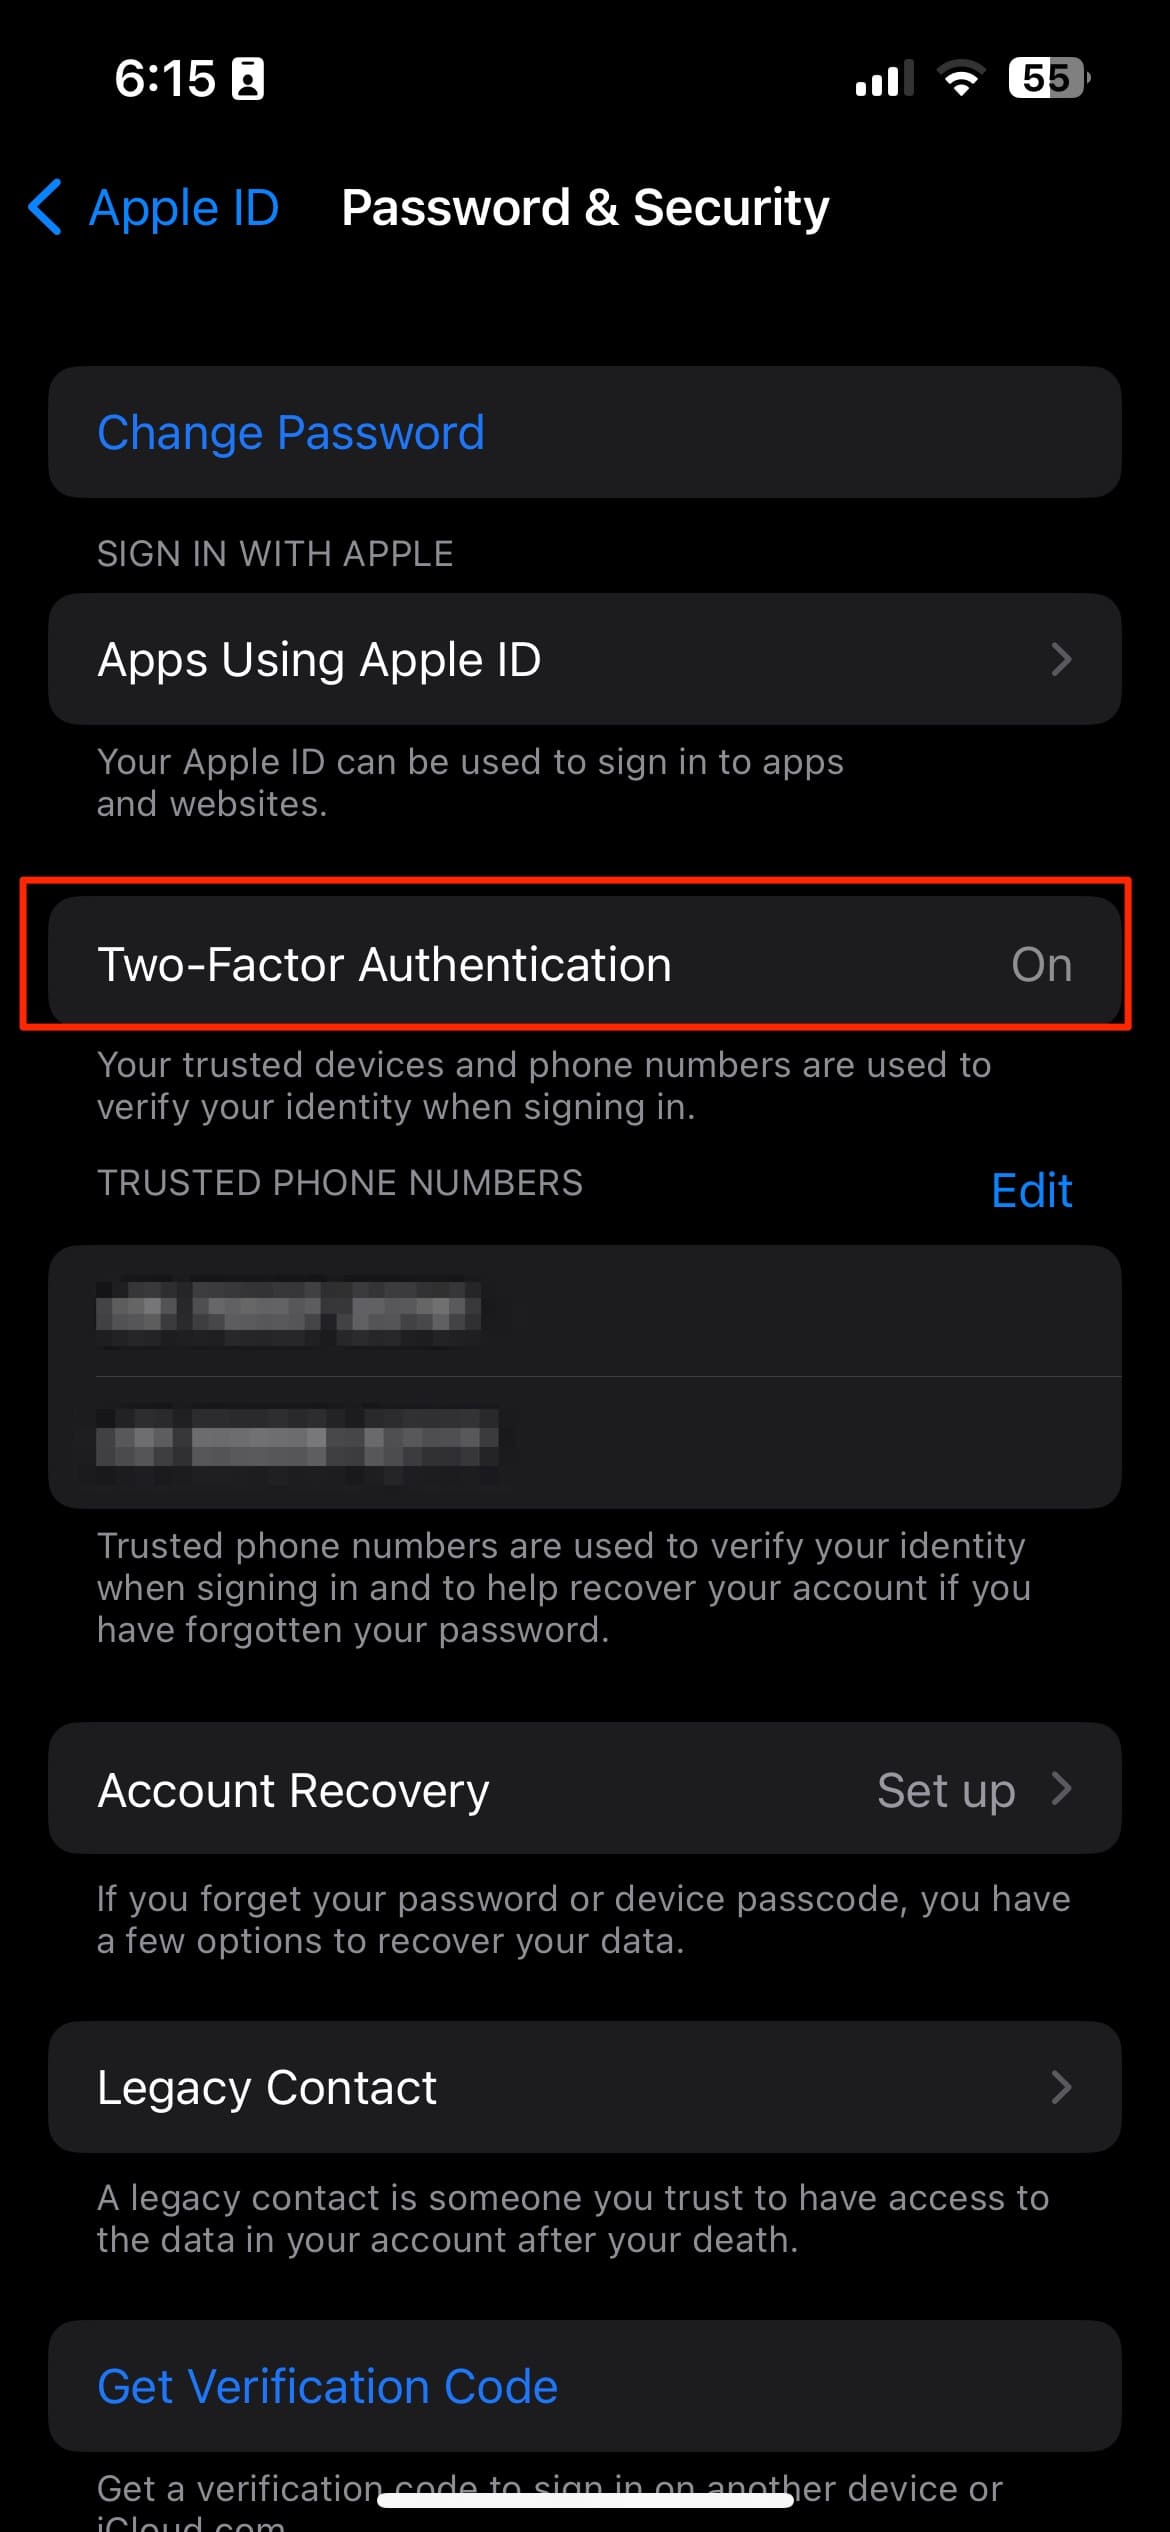
By default, anyone knowing your Apple ID credentials can log in to your iCloud dashboard and read all your messages (provided you’ve set up iCloud for Messages). To prevent it, you can enable two-factor authentication, which will send a verification code on devices you’re logged into before allowing login.
Here’s how you can turn on two-factor authentication for your Apple ID:
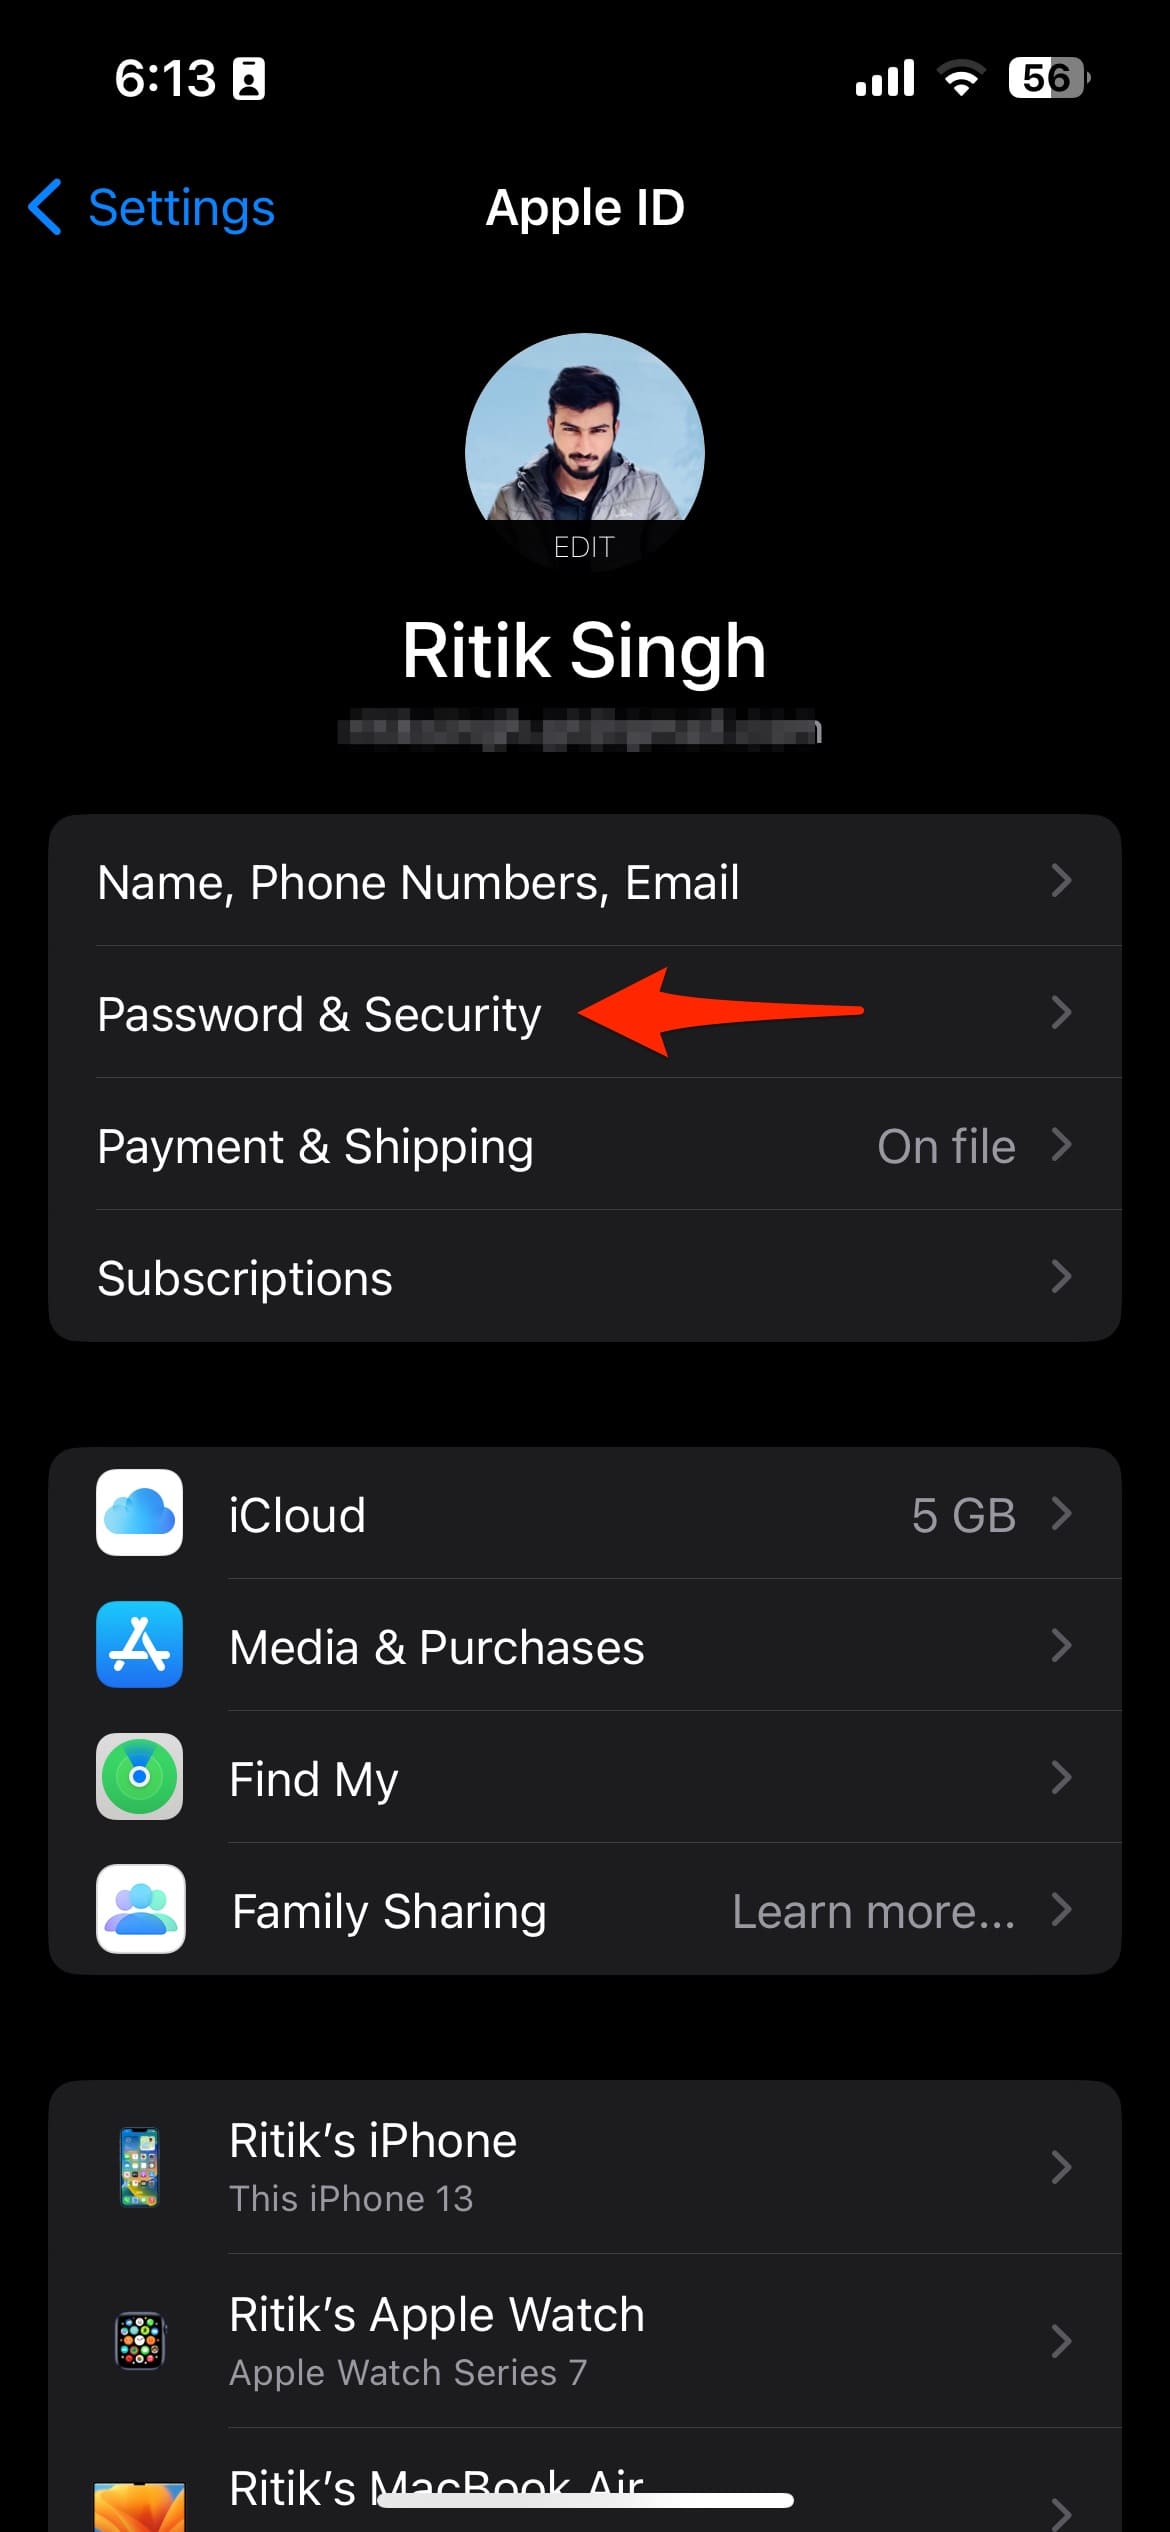
1. Open Settings on your iPhone or iPad.
3. On the next screen, tap Turn On Two-Factor Authentication.
4. Follow the on-screen instructions to set up the feature.
Method 5- Use Jailbreak Tweaks to Lock Messages on iPhone
Several tweaks like ChatLock, ComvoProtect, and more let you integrate the lock feature inside Messages (and other chatting apps). You can use the jailbreak tweaks to lock individual texts in the Messages app on your iPhone.
After you lock a conversation, you won’t be able to read its content until you unlock it with FaceID, TouchID, or a password. Most jailbreak tweaks are paid and work only on older iOS versions, but again, it’s something to explore if you’re familiar with and have previously jailbroken an iPhone.
Turn Off iMessage Sync for Even More Privacy
If iMessage sync is enabled, the messages are synchronized across all your Apple devices (where you’re logged in with your Apple ID). This may pose a privacy risk if one of the devices is in the hands of someone you don’t want to share your personal data with.
For instance, if you have an iPad at home for kids or family members, they can see the synced texts if your Apple ID is logged onto the device. Here’s how you can turn off iCloud sync for iMessage:
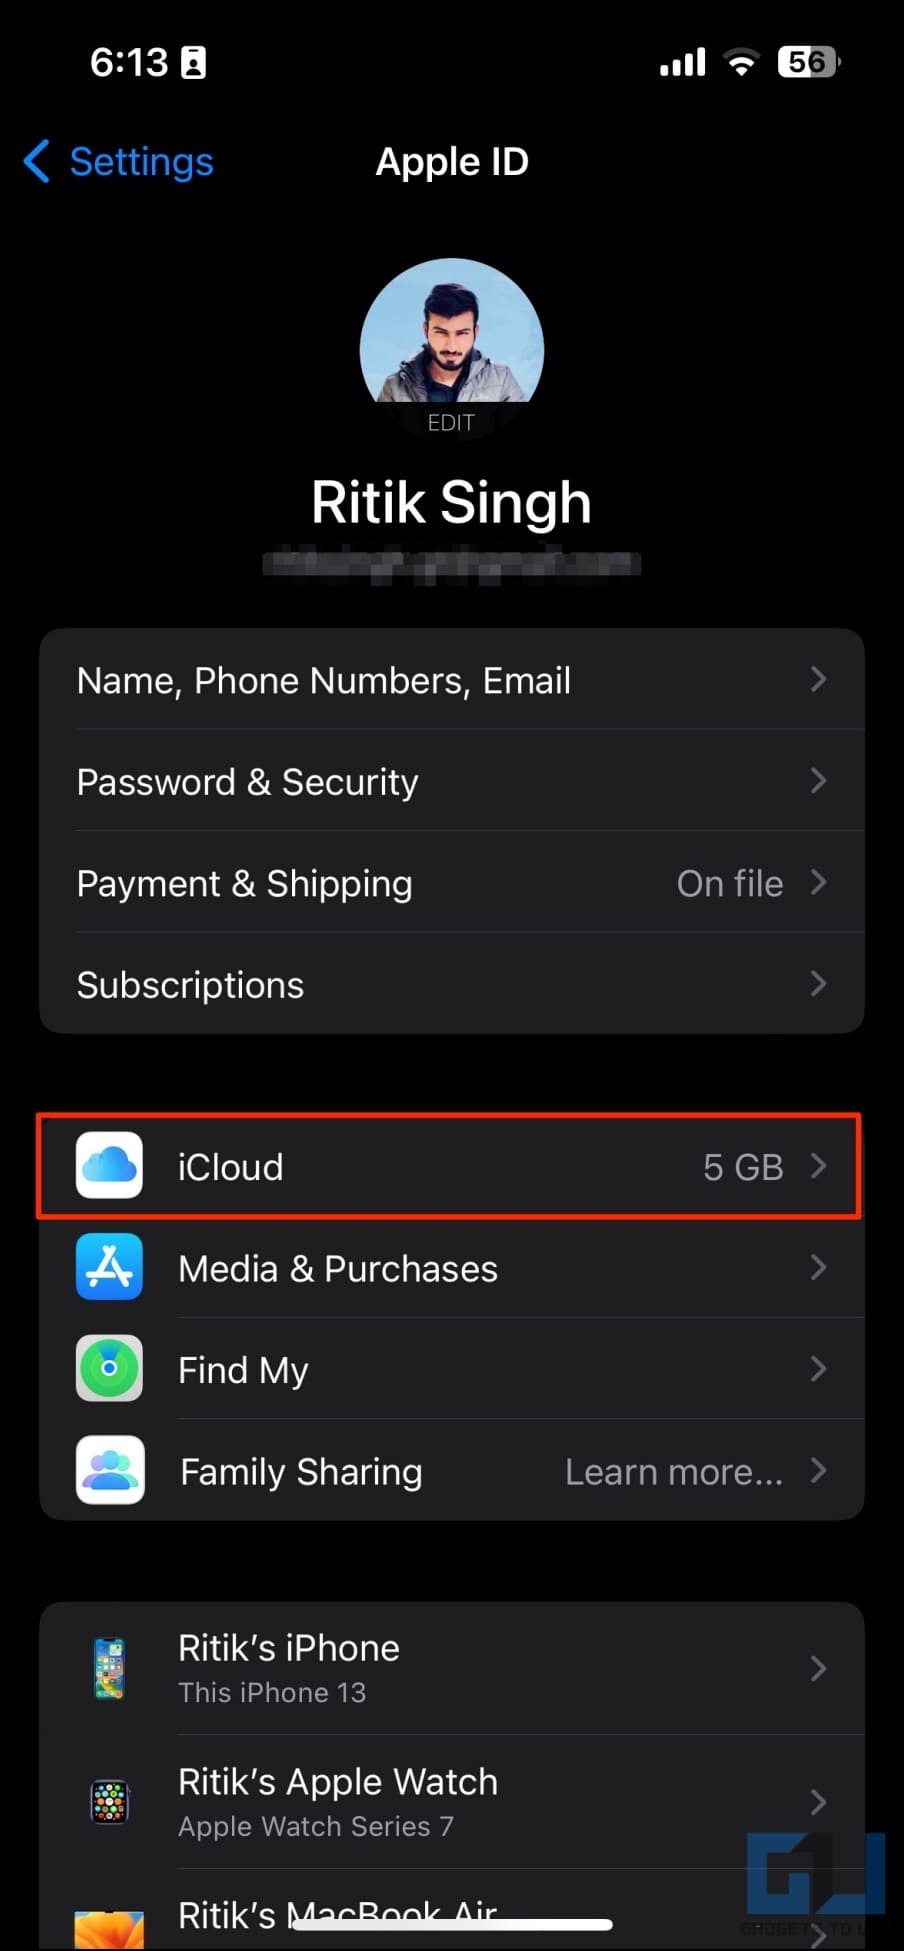
1. Open Settings on your iPhone.
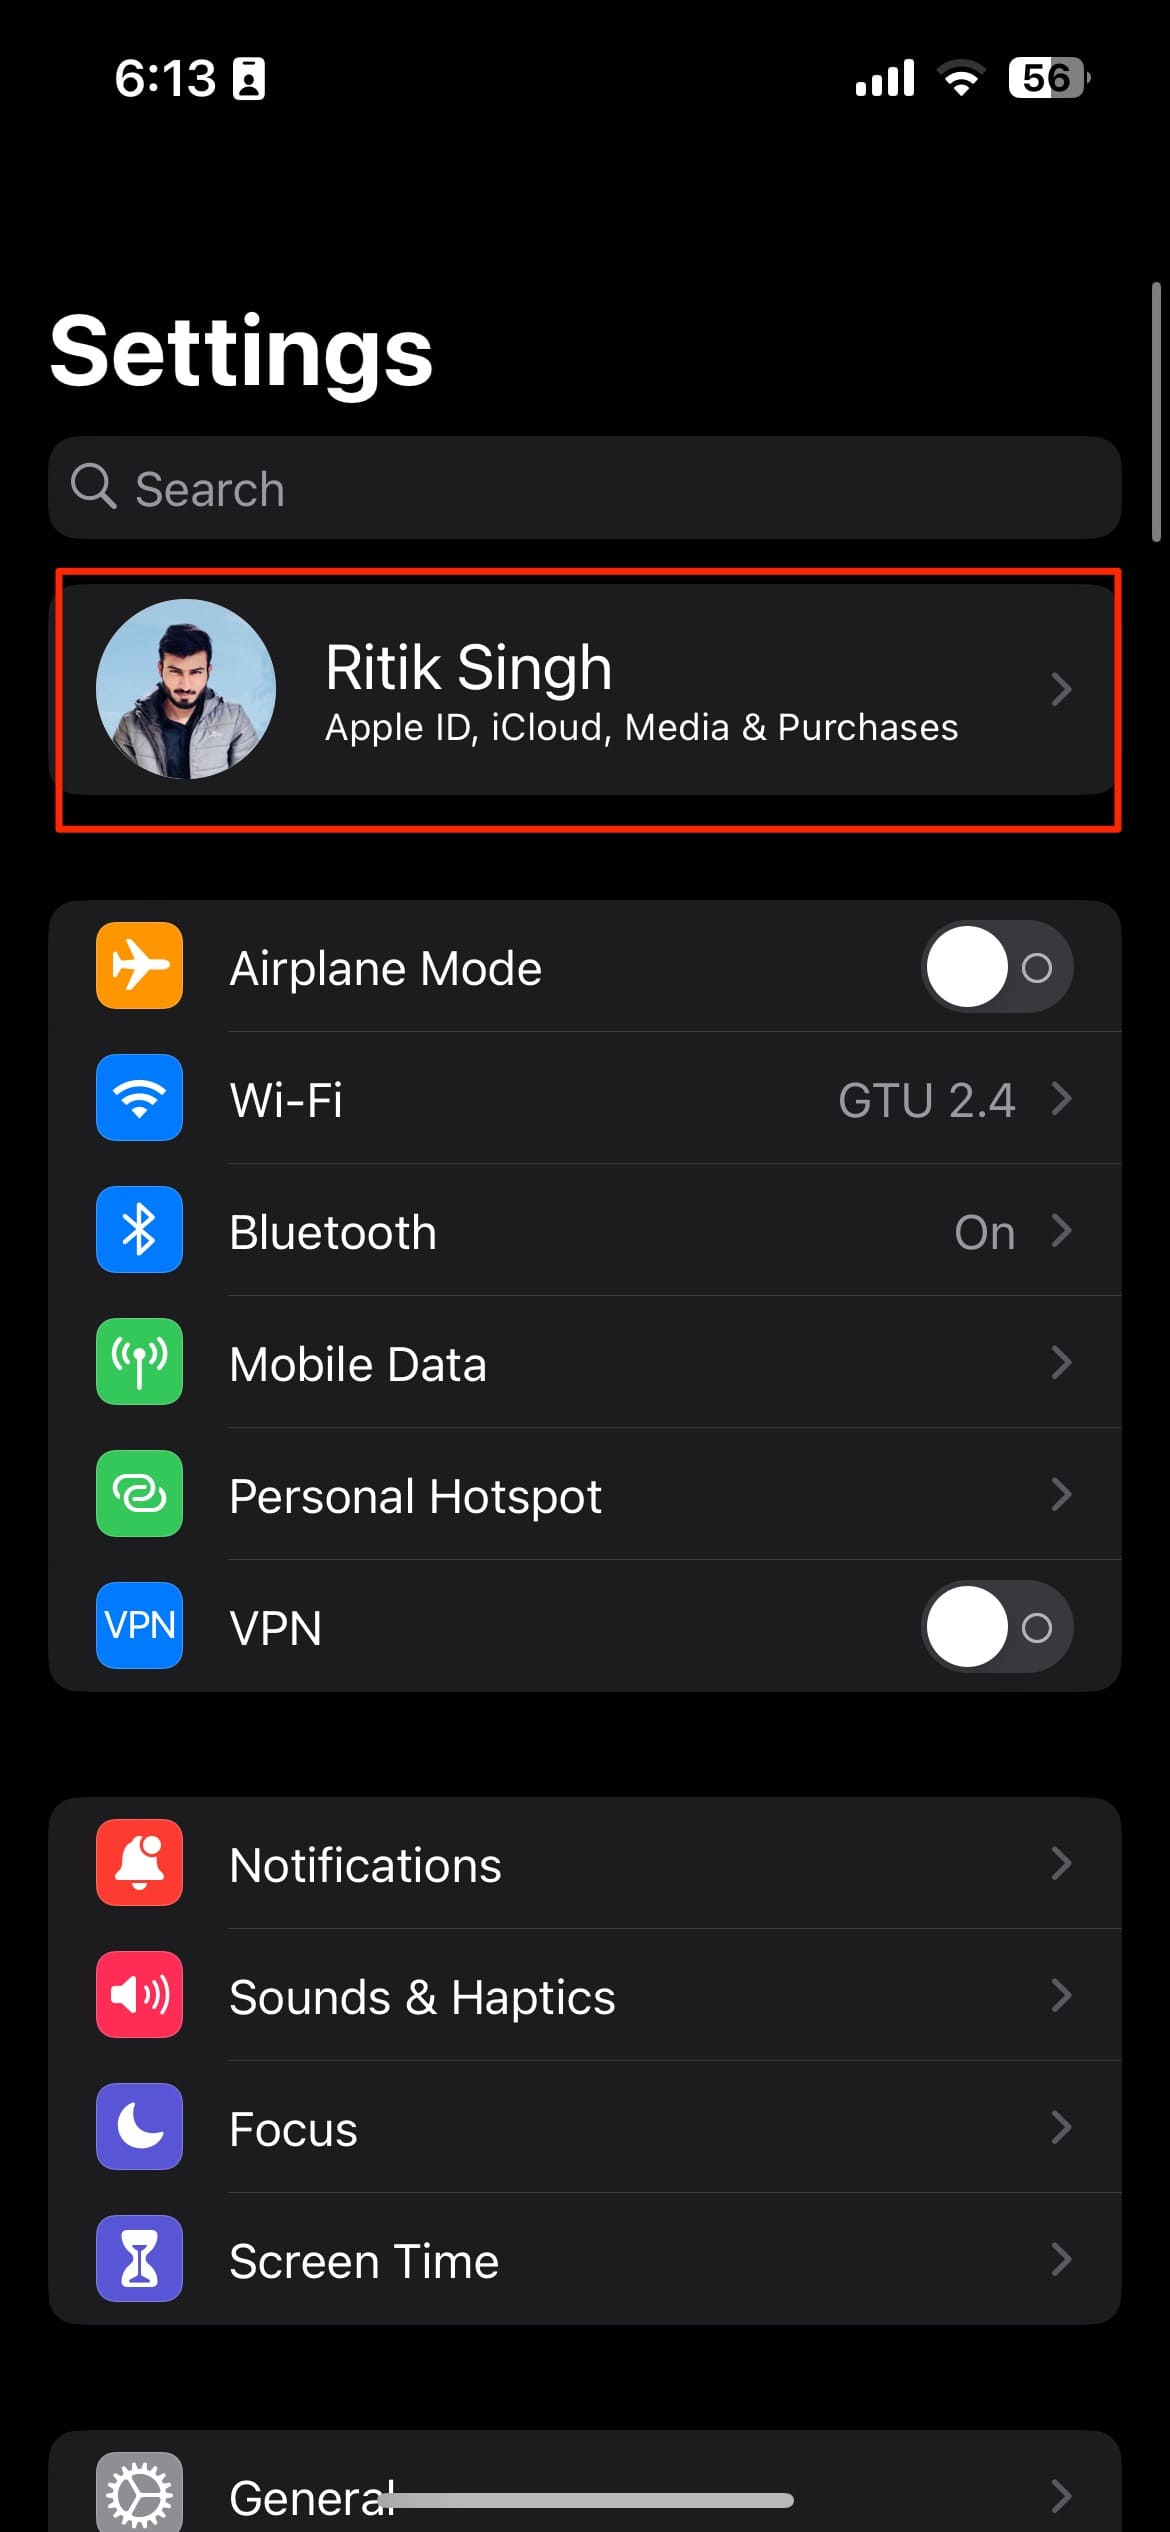
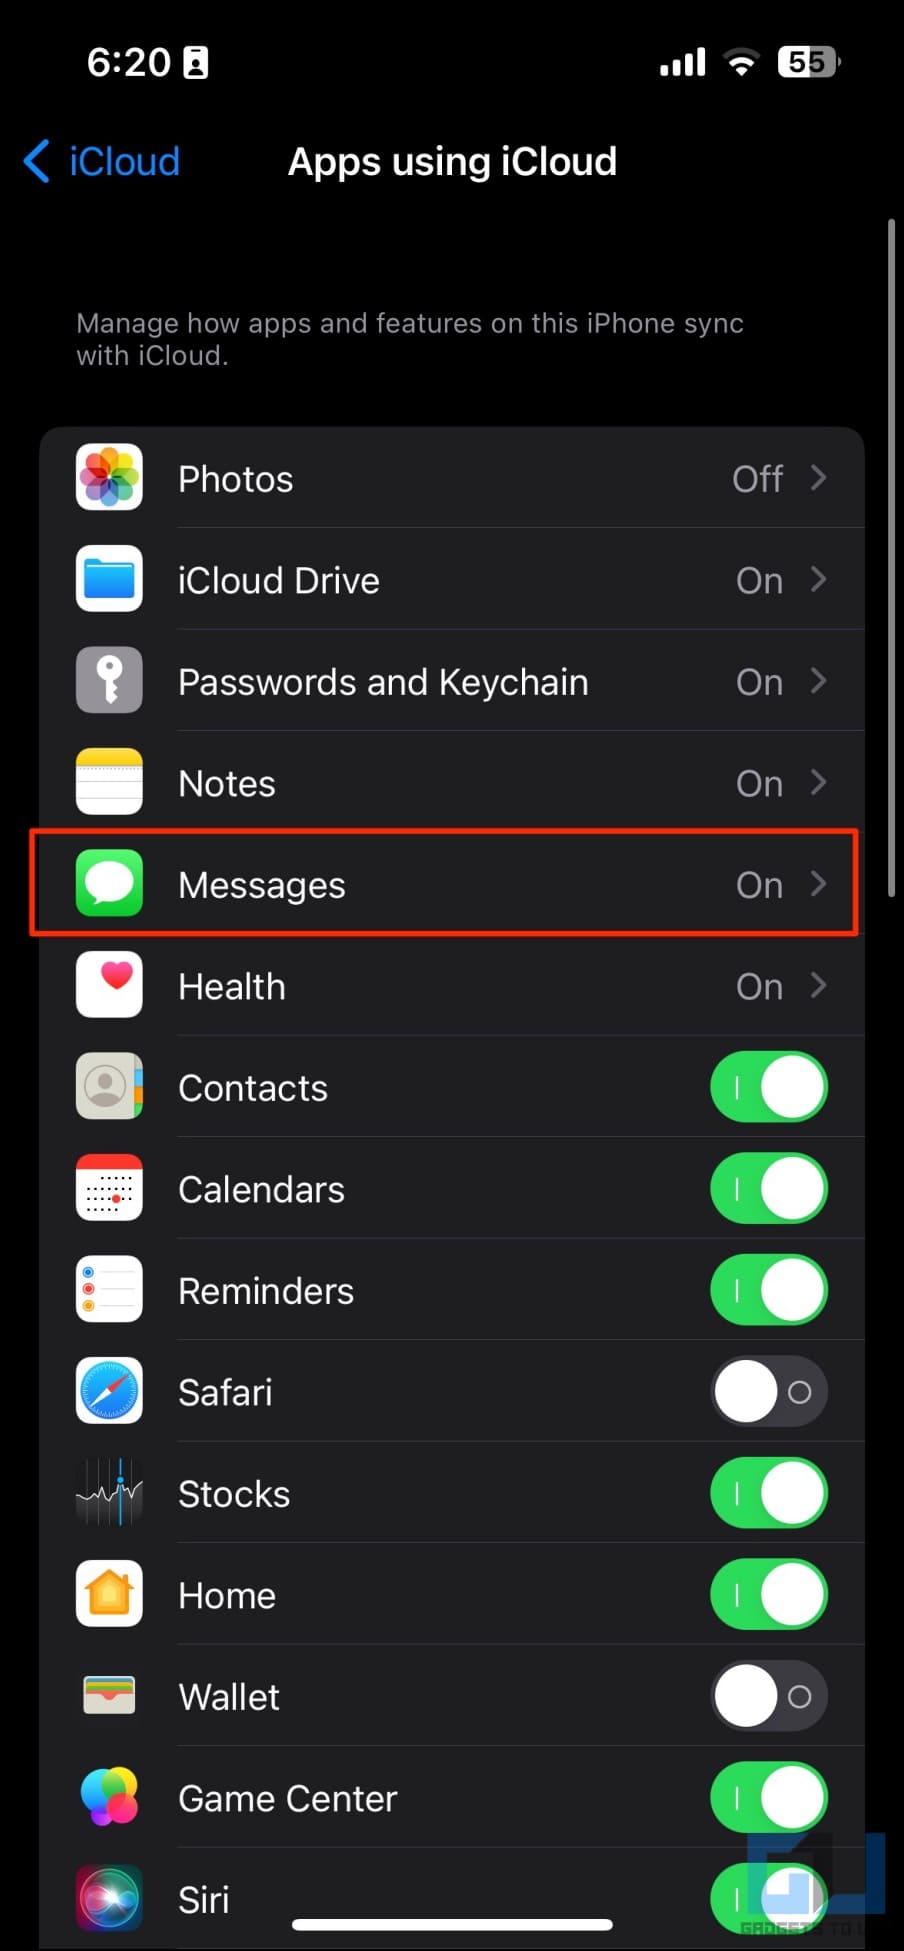
2. Tap your Apple account name on the top and select iCloud.
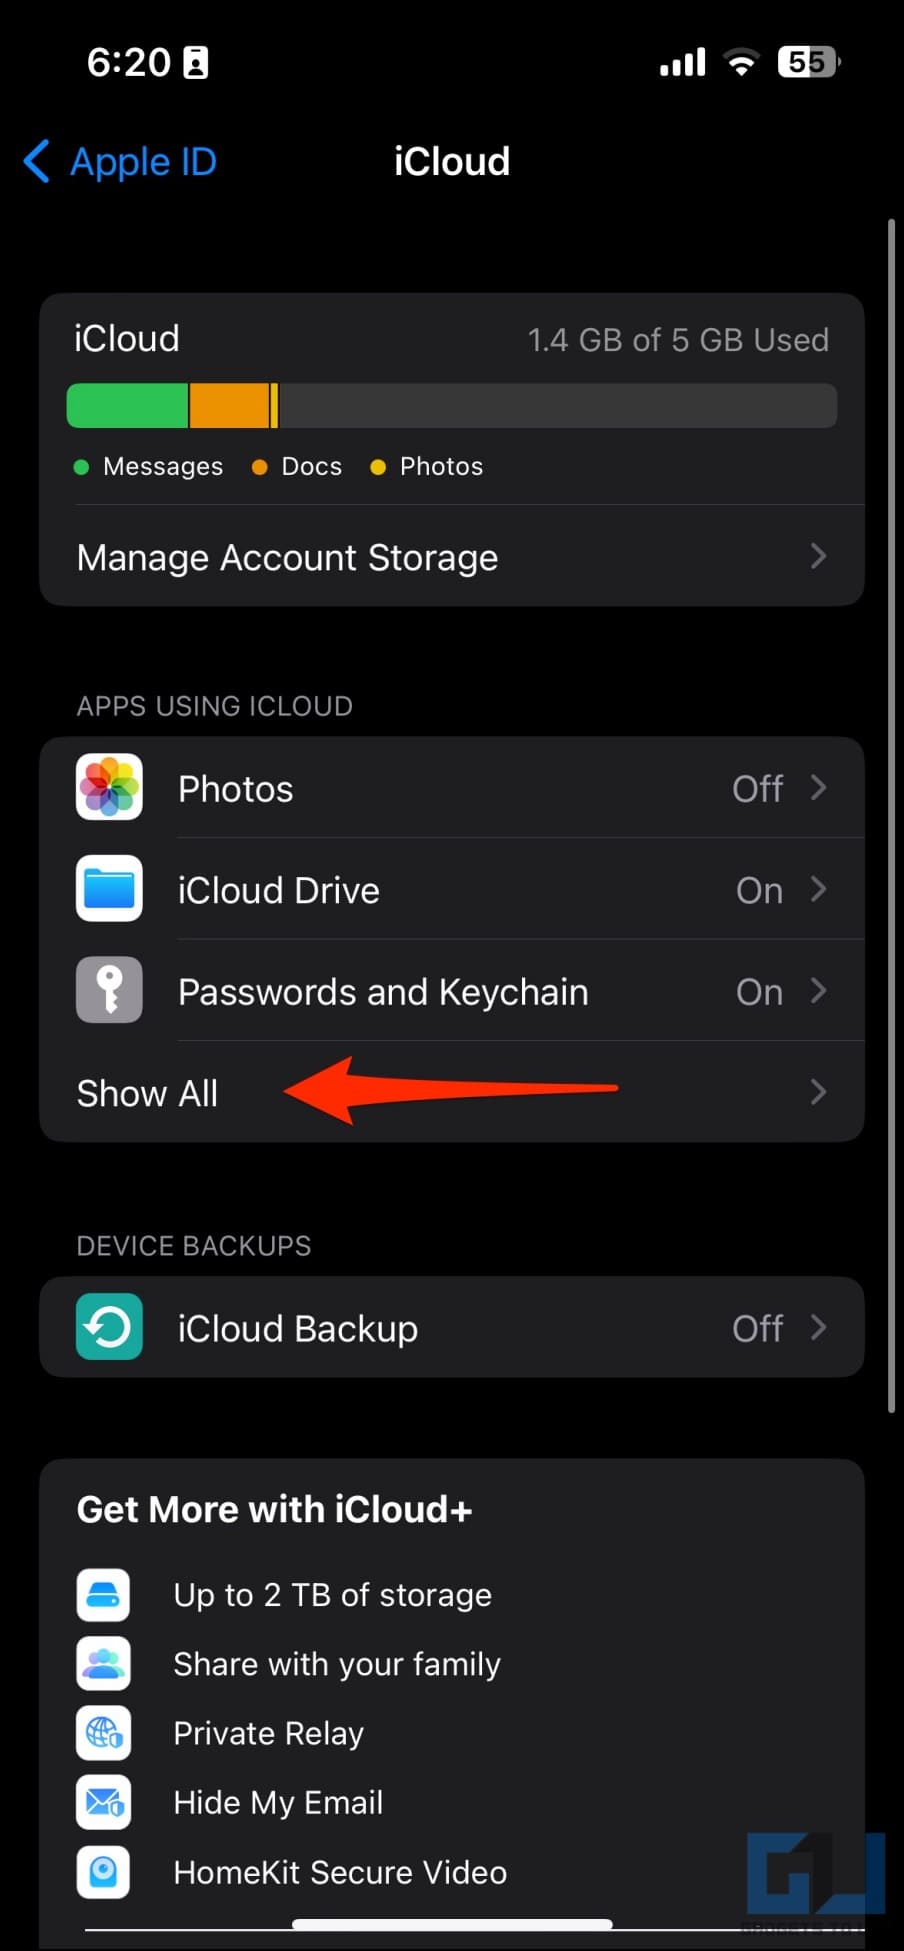
3. Tap Show All to see the full list of apps using iCloud.
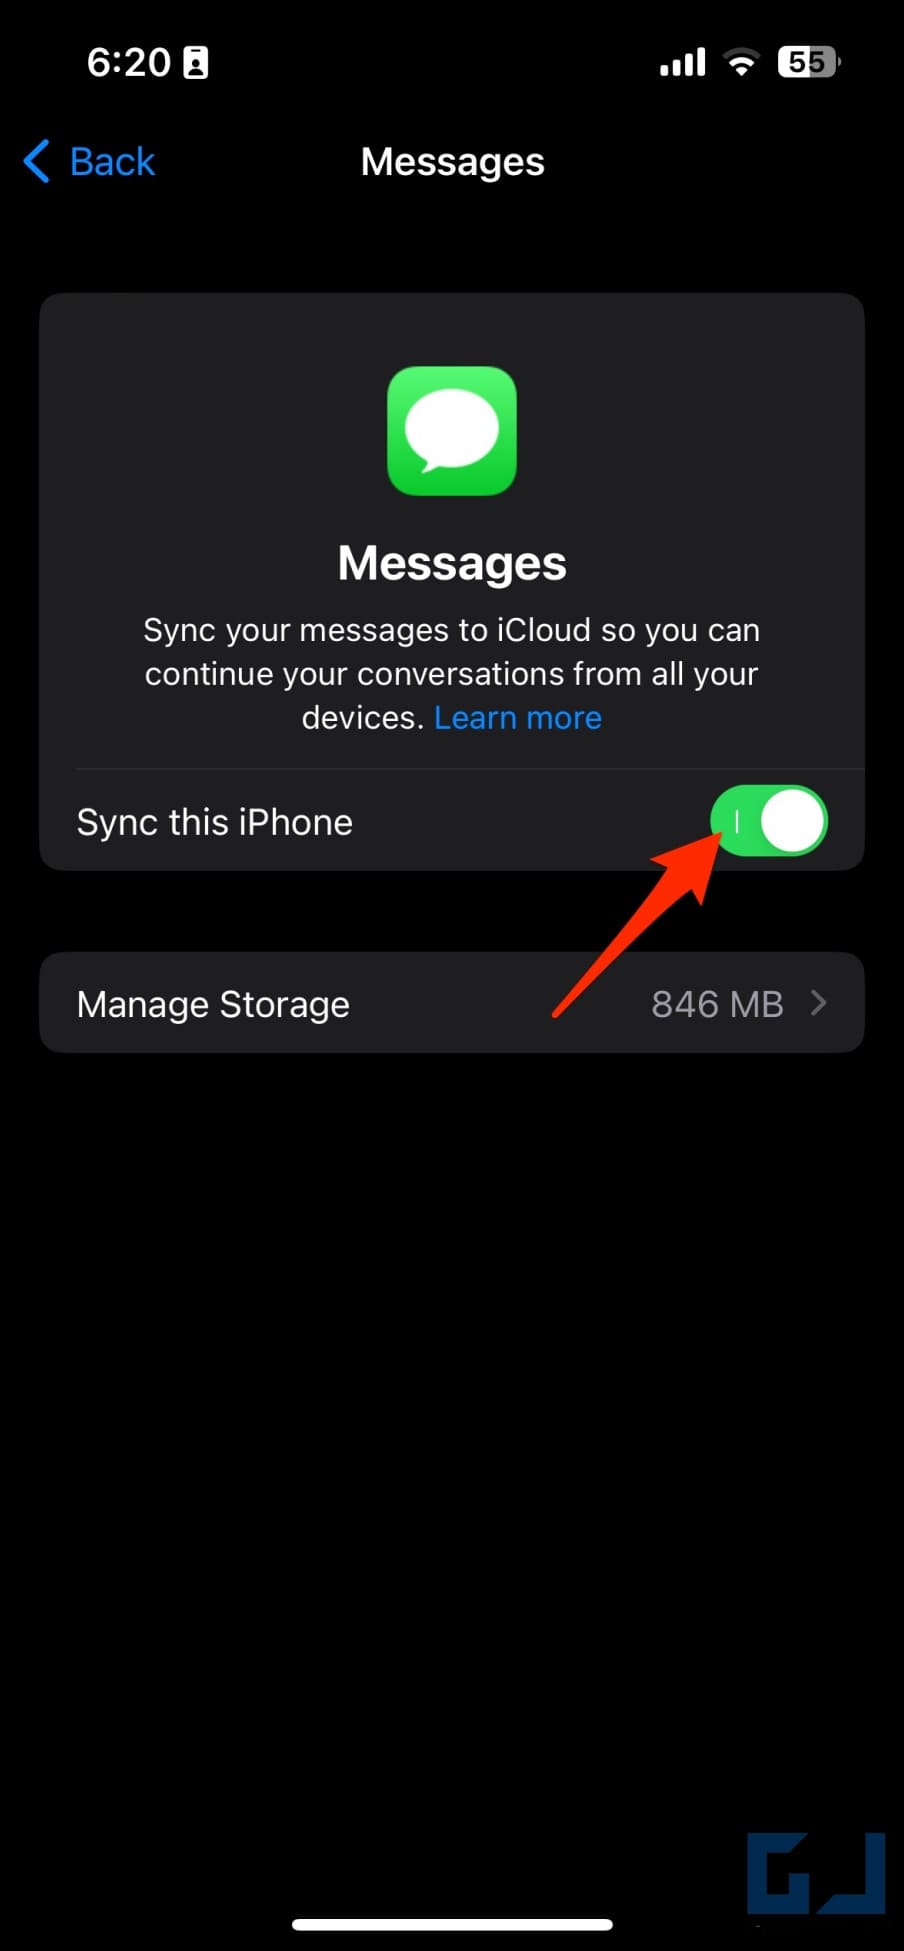
4. Click on Messages and turn off the toggle for Sync this iPhone.
Any messages you send or receive from your iPhone or iPad will no longer be synchronized with your Apple other devices.
Send Invisible Ink Messages to Avoid Peeping Eyes (iOS 10+)
If you have an iPhone running iOS 10 or newer, you can send invisible ink messages to your friends and family who also have Apple devices. Messages sent via invisible ink need the other party to tap them to read the text. This prevents it from being read by prying eyes.
Here’s how to send an invisible ink message on your iPhone:
1. Open the Messages app on your iPhone.
2. Open a new or existing chat with the person you want to send an invisible message.
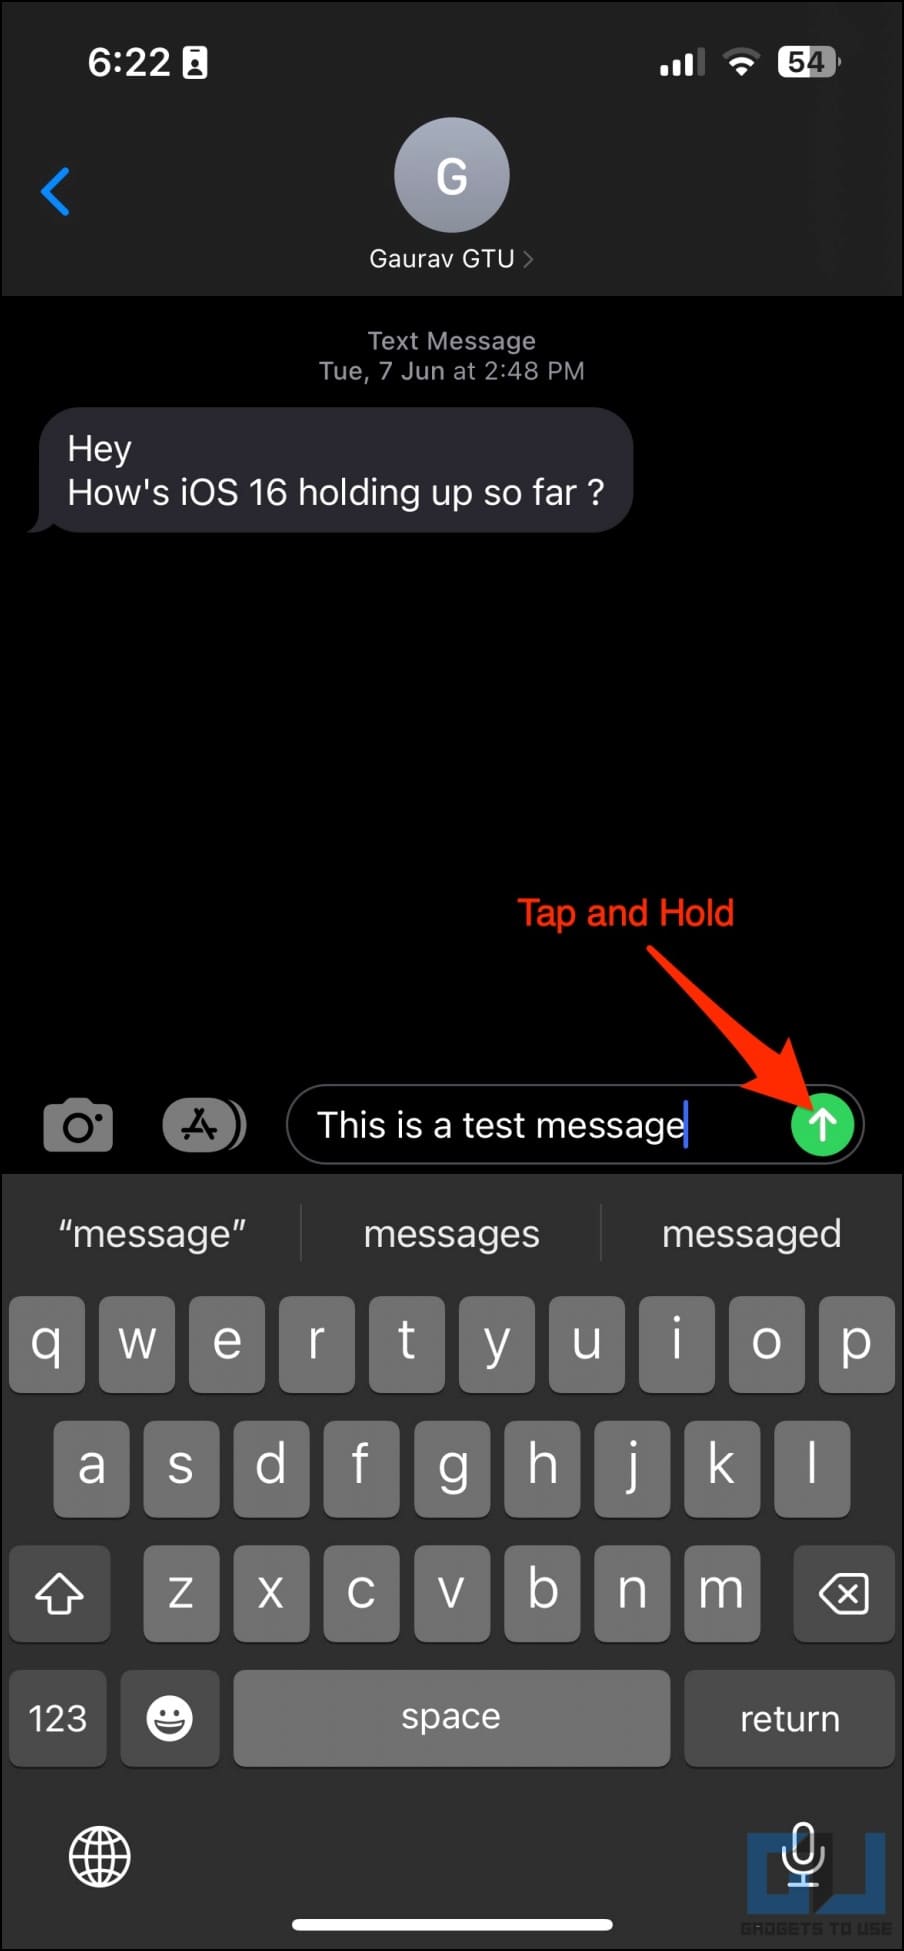
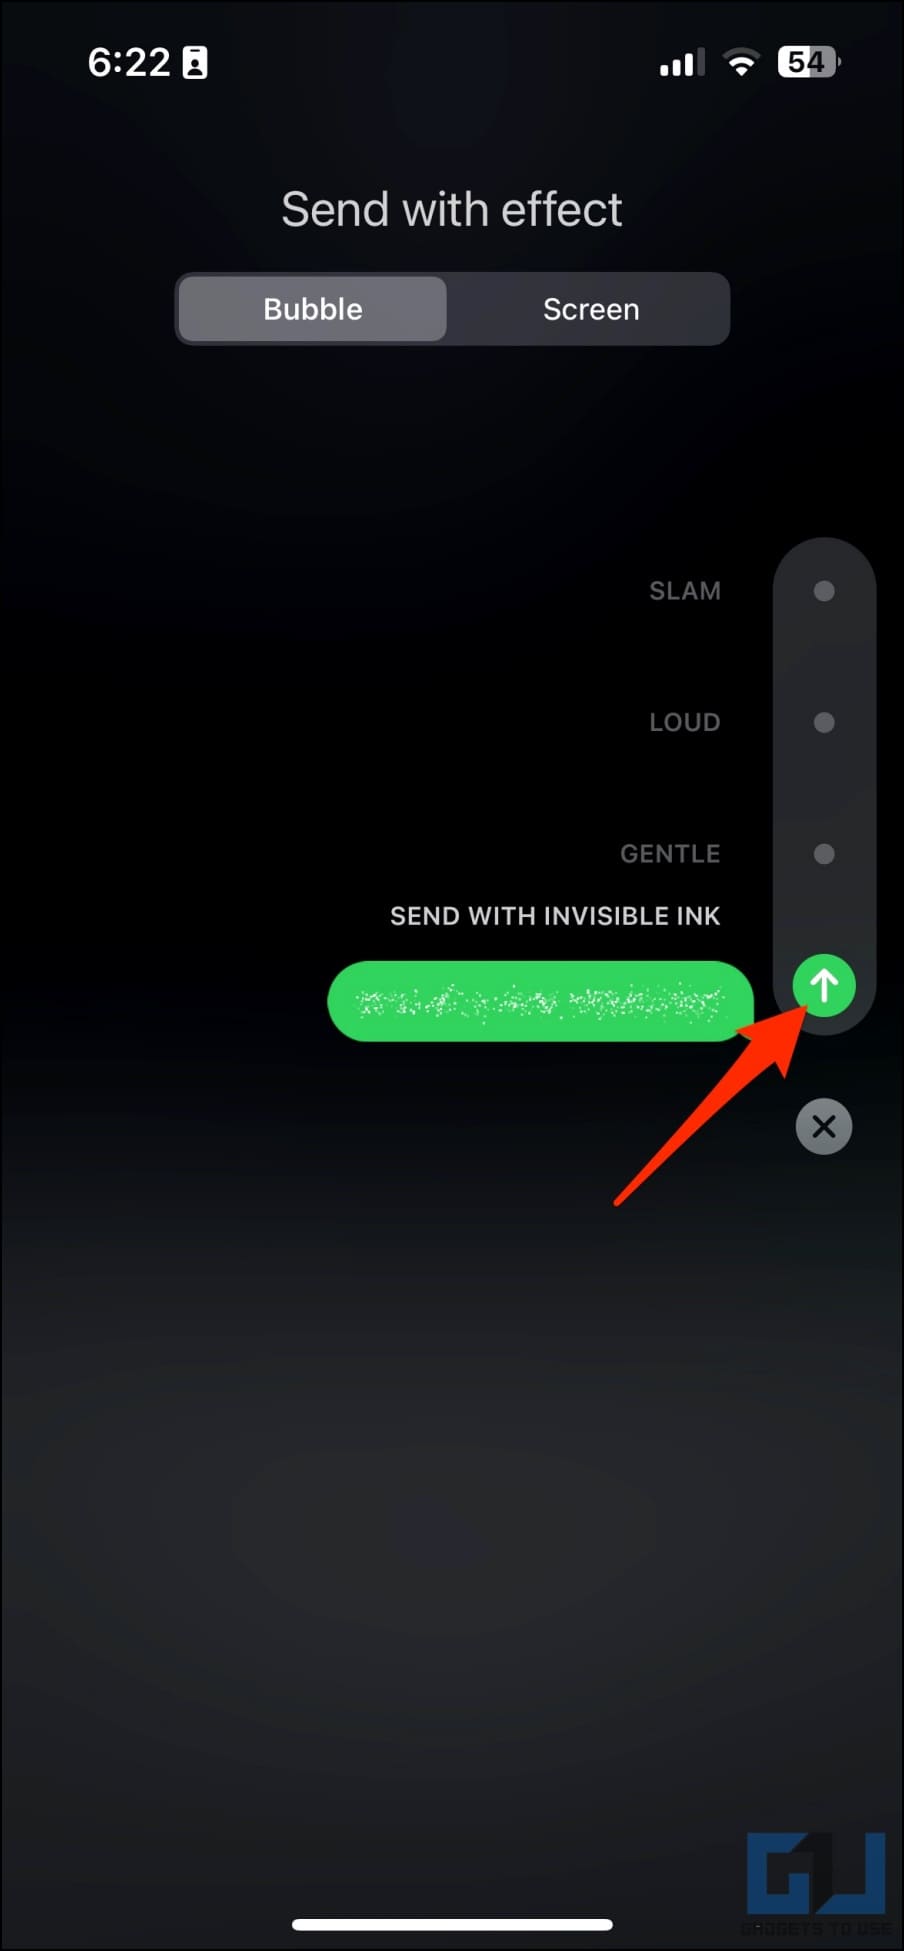
3. Type a message or insert an image. Then, touch and hold the upward arrow button.
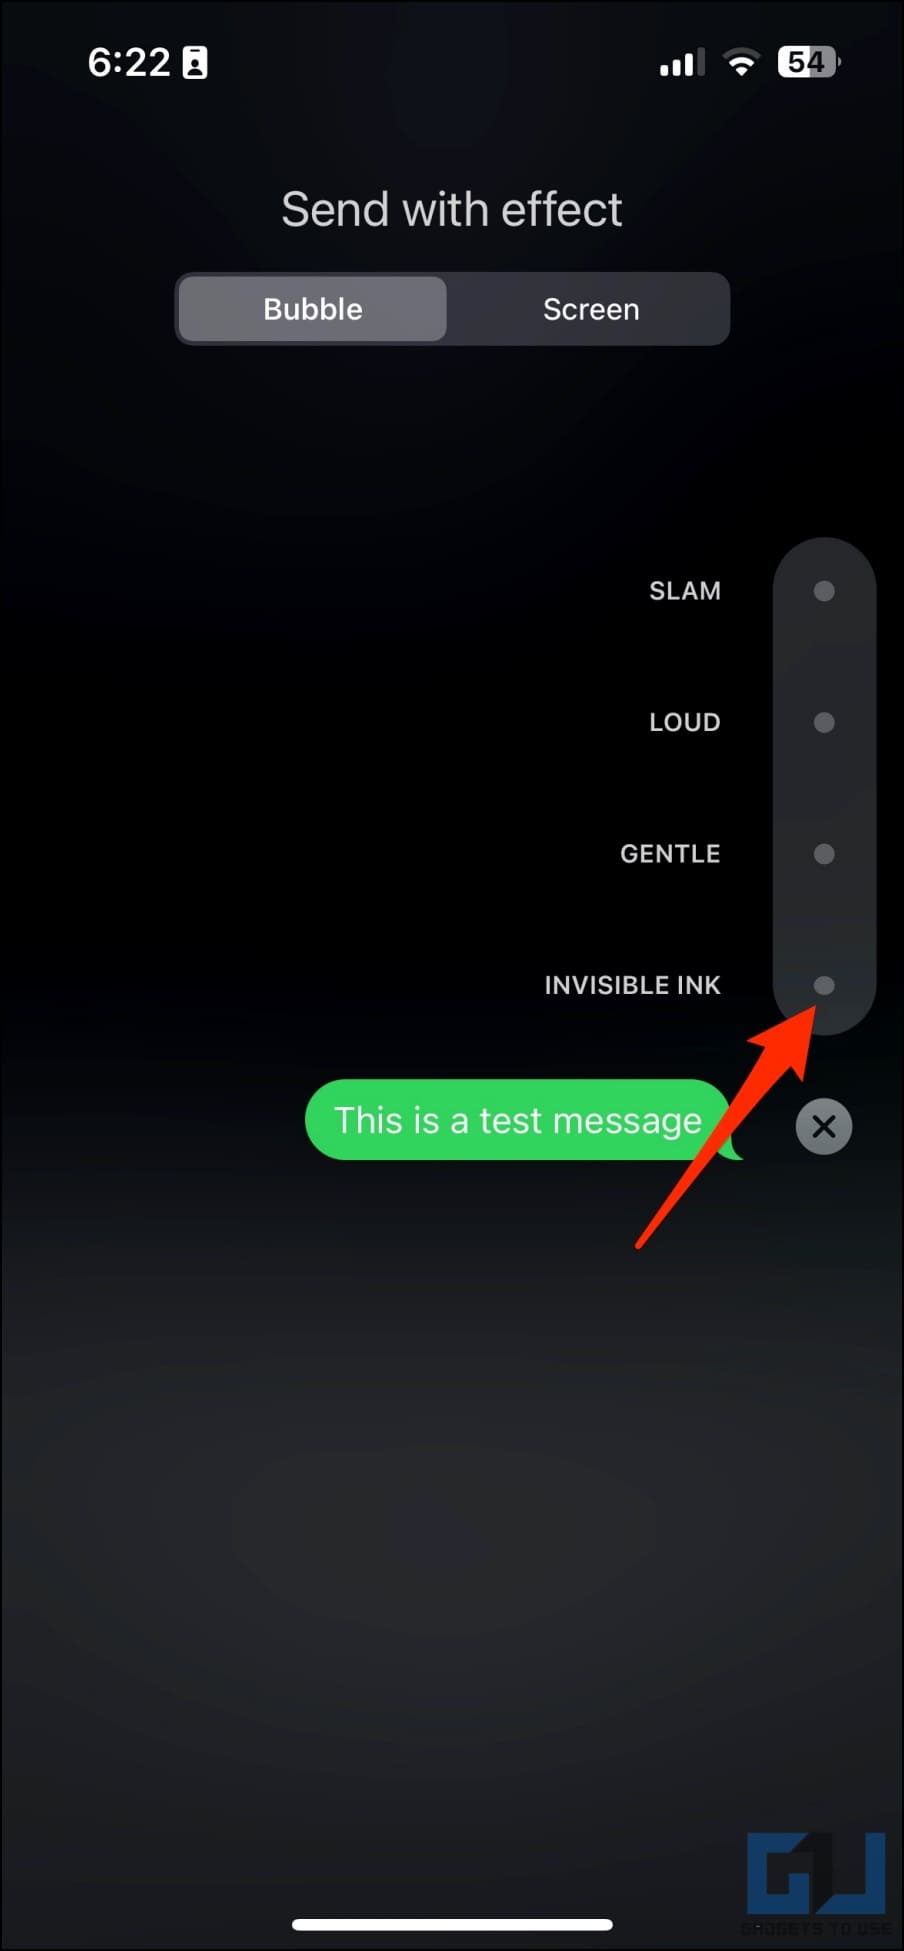
4. Select Invisible Ink from the list of animations (tap the grey dot next to it).
5. Tap the upward arrow to send the message with invisible ink.
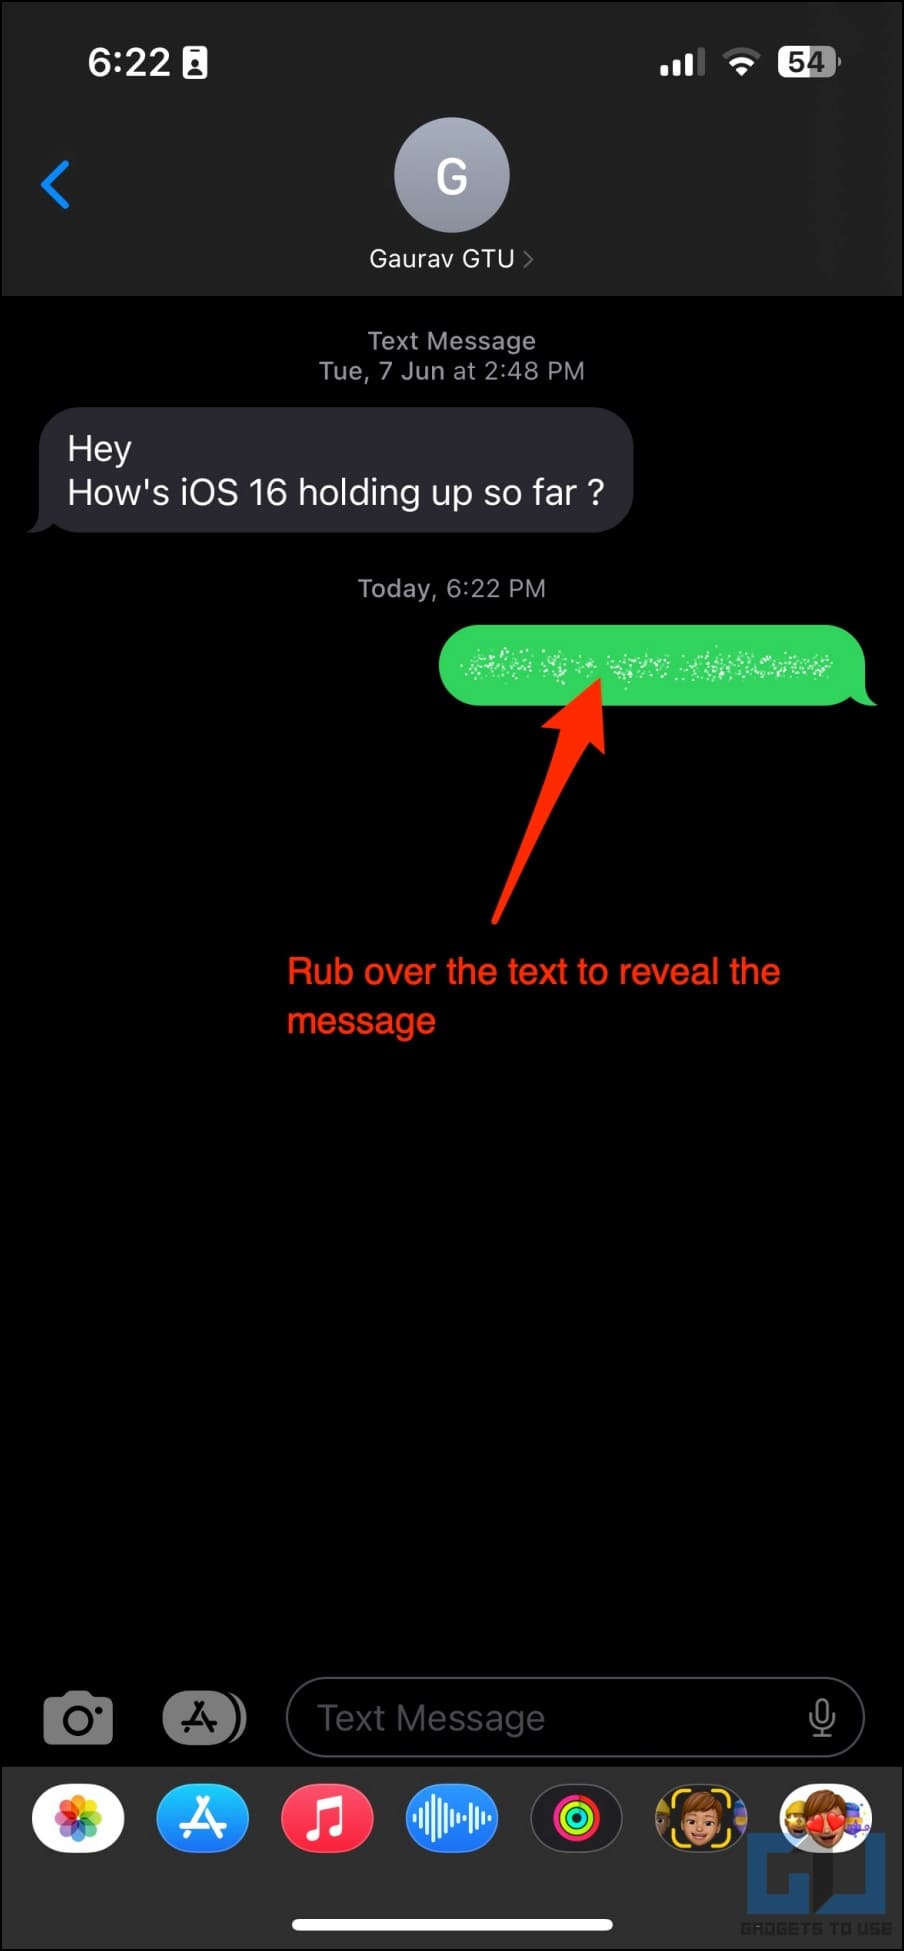
The message will appear as scribbled by default, and anyone trying to peep into your iPhone screen will not be able to see it. It will only be visible when you (or the receiver) tap and hold the message.
Use WhatsApp, Telegram, or Signal for Private Messaging
Instant-messaging apps like WhatsApp, Telegram, and Signal offer a built-in option to lock the application. You can use the feature to lock the app with Face ID, Touch ID, or passcode.
WhatsApp users can access Settings > Privacy > Screen Lock and enable Face ID. On the other hand, Telegram users can head to Settings > Privacy and Security and tap Passcode & Face ID to set a passcode. So, for specific personal chats, you can consider using WhatsApp or Telegram over iMessages.
You can check out the detailed guide to lock WhatsApp and secure Telegram chats with Touch ID or passcode.
Wrapping Up
This is how you can lock Messages on your iPhone or iPad. As mentioned, you can use Shortcuts to lock the Messages app automatically in a second or use the App Limits feature for the same. For even more privacy, you can hide message previews from the iOS lock screen and secure iCloud messaging by enabling 2FA. Let us know your preferred method by comments. In case of any more doubts or queries, feel free to contact me over email or social media.
You might be interested in:
- 4 Ways to Transfer SMS Messages From iPhone to Android
- Top 13 Ways to Hide Apps on iPhone and iPad
- 3 Ways to Hide Photos and Videos on iPhone or iPad
- 3 Ways to Recover Deleted Text Messages On iPhone
You can also follow us for instant tech news at Google News or for tips and tricks, smartphones & gadgets reviews, join GadgetsToUse Telegram Group or for the latest review videos subscribe GadgetsToUse Youtube Channel.
