Quick Answer
- Chrome OS is a very lightweight OS developed by Google and it is all based on Linux which makes it a versatile operating system.
- Now we need to create a small partition on your Windows system’s disk to install ChromeOS on it.
- In order to dual-boot Chrome OS on your Windows PC, we need to disable hibernation and fast start-up on Windows.
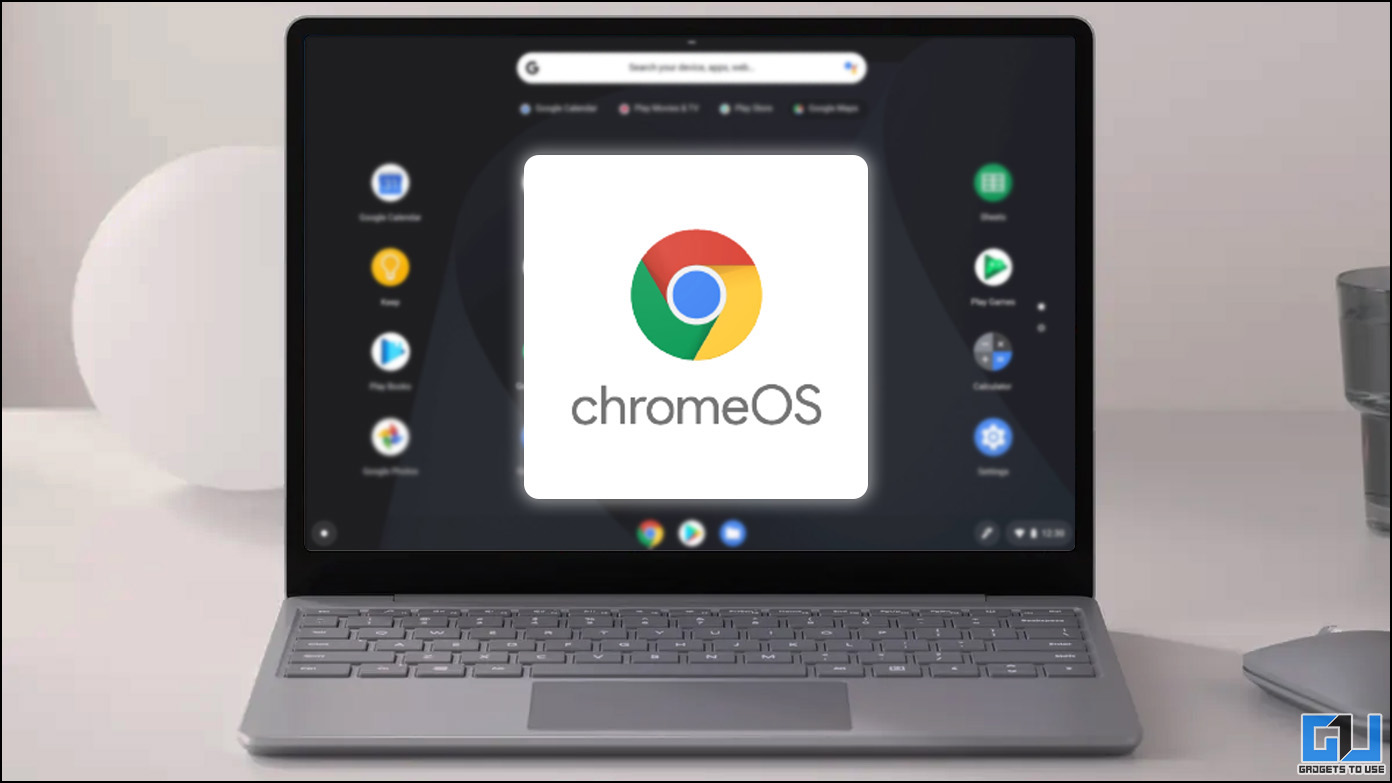
Chrome OS is a very lightweight OS developed by Google and it is all based on Linux which makes it a versatile operating system. With time, Google added some really good features to the Chrome OS like Play Store integration, Linux apps support, and more. If you want to try Chrome OS to see if it matches your taste then you install it on your PC without sacrificing your precious Windows. Here is a guide on how to Install and dual-boot ChromeOS without using a USB Drive. Meanwhile, you can also learn about Chrome OS Flex.
Prerequisites to Install ChromeOS Without USB
- 64-bit PC or laptop with at least 16 GB of empty storage space.
- The secure boot should be disabled from BIOS.
- Virtualization or Hyper-V should be enabled from BIOS.
- The system should support UEFI.
- Winrar should be installed on your Windows PC.
Step to Install ChromeOS without a USB Drive
If you have taken care of the prerequisites of Installing Chrome OS on your Windows PC. Let’s move on to the process to Install ChromeOS as Dual Boot on your Windows machine.
Disable Hibernation and fast start-up
In order to dual-boot Chrome OS on your Windows PC, we need to disable hibernation and fast start-up on Windows. To do that, open the elevated Command Prompt and execute this command:
powercfg.exe /hibernate off
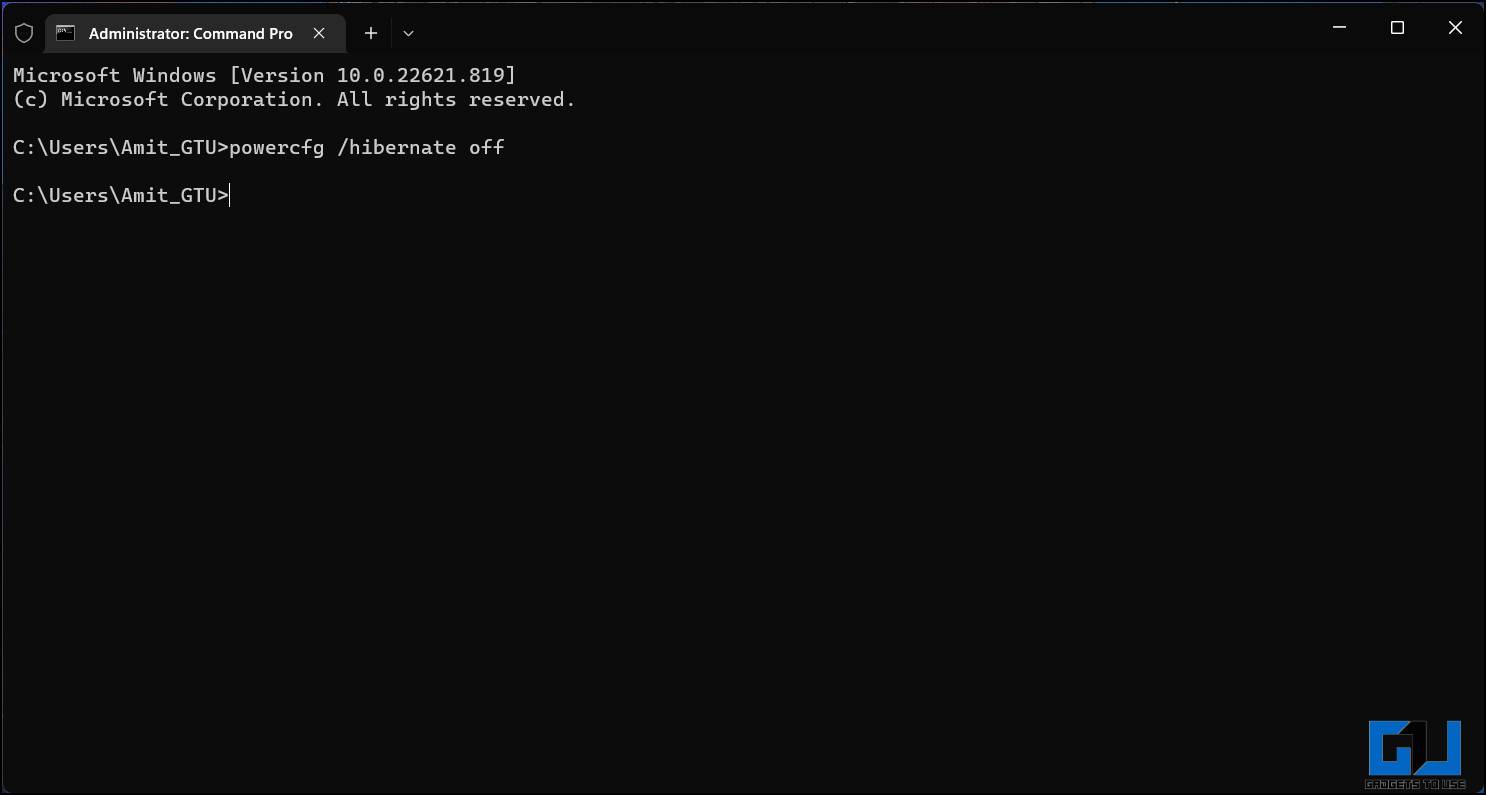
This will turn off the hibernation, and next, we need to turn off the fast start-up. Here’s how it can be done:
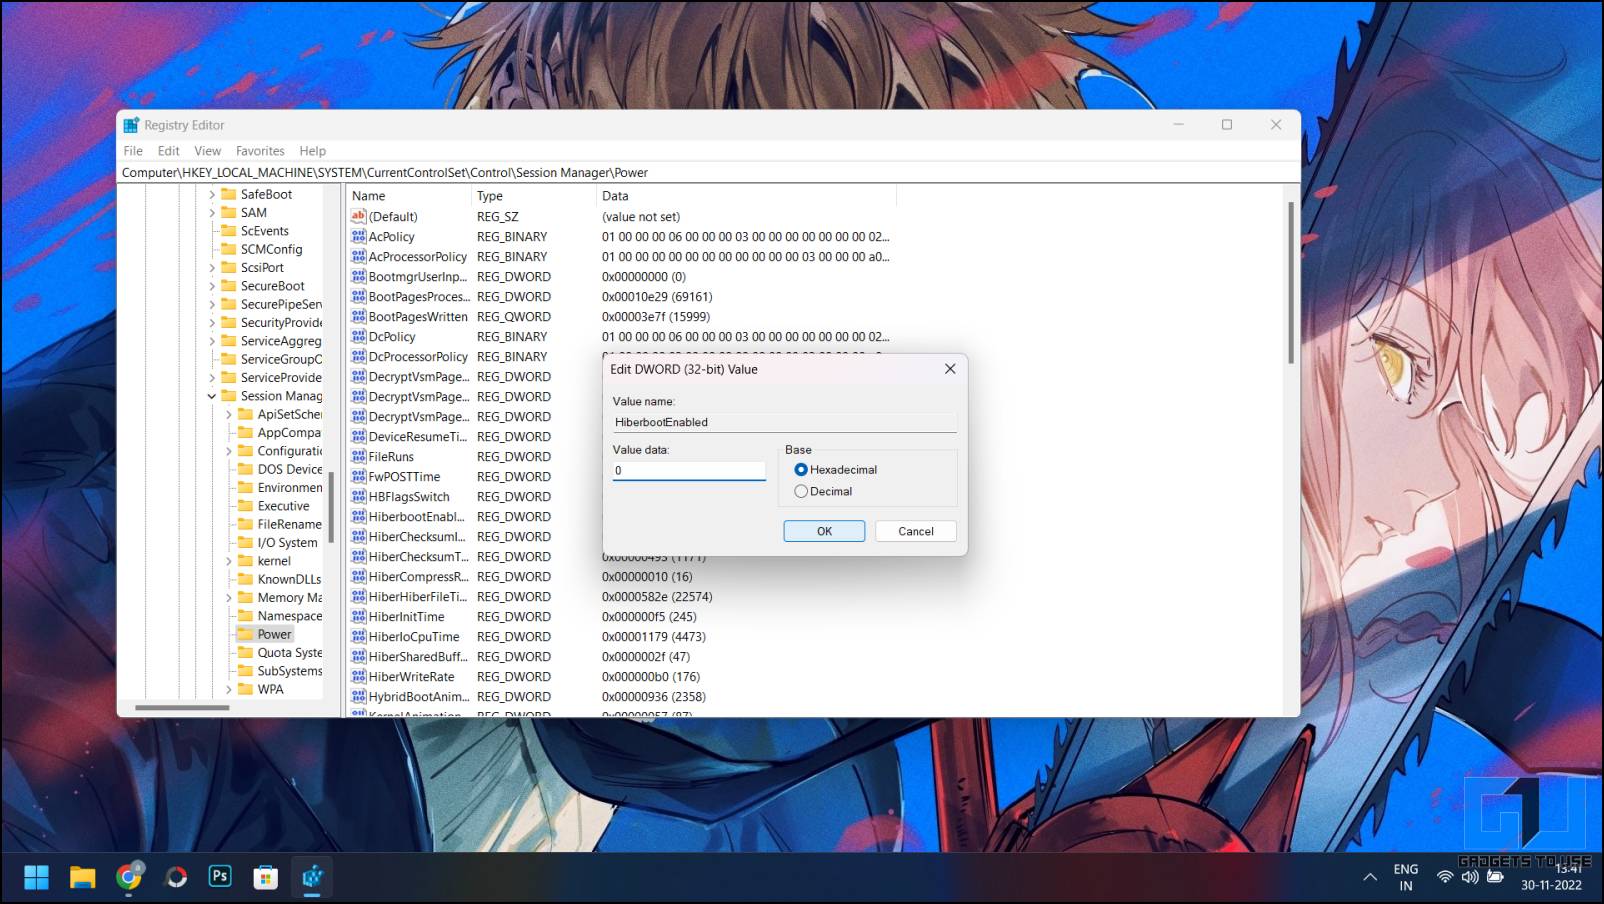
1. Open Run, type “Regedit“, and press enter, to launch the registry editor.
2. Navigate to “HKEY_LOCAL_MACHINE\SYSTEM\CurrentControlSet\Control\Session Manager\Power“, and look for the ‘HyberBootEnabled’ key and double-click it to modify.
3. In the popup, change the value from 1 to 0 to disable it.
Installing Ubuntu
Next, we need to install Ubuntu on our Windows machine and it’s very easy to do. Here’s how you can install Ubuntu on your Windows machine.
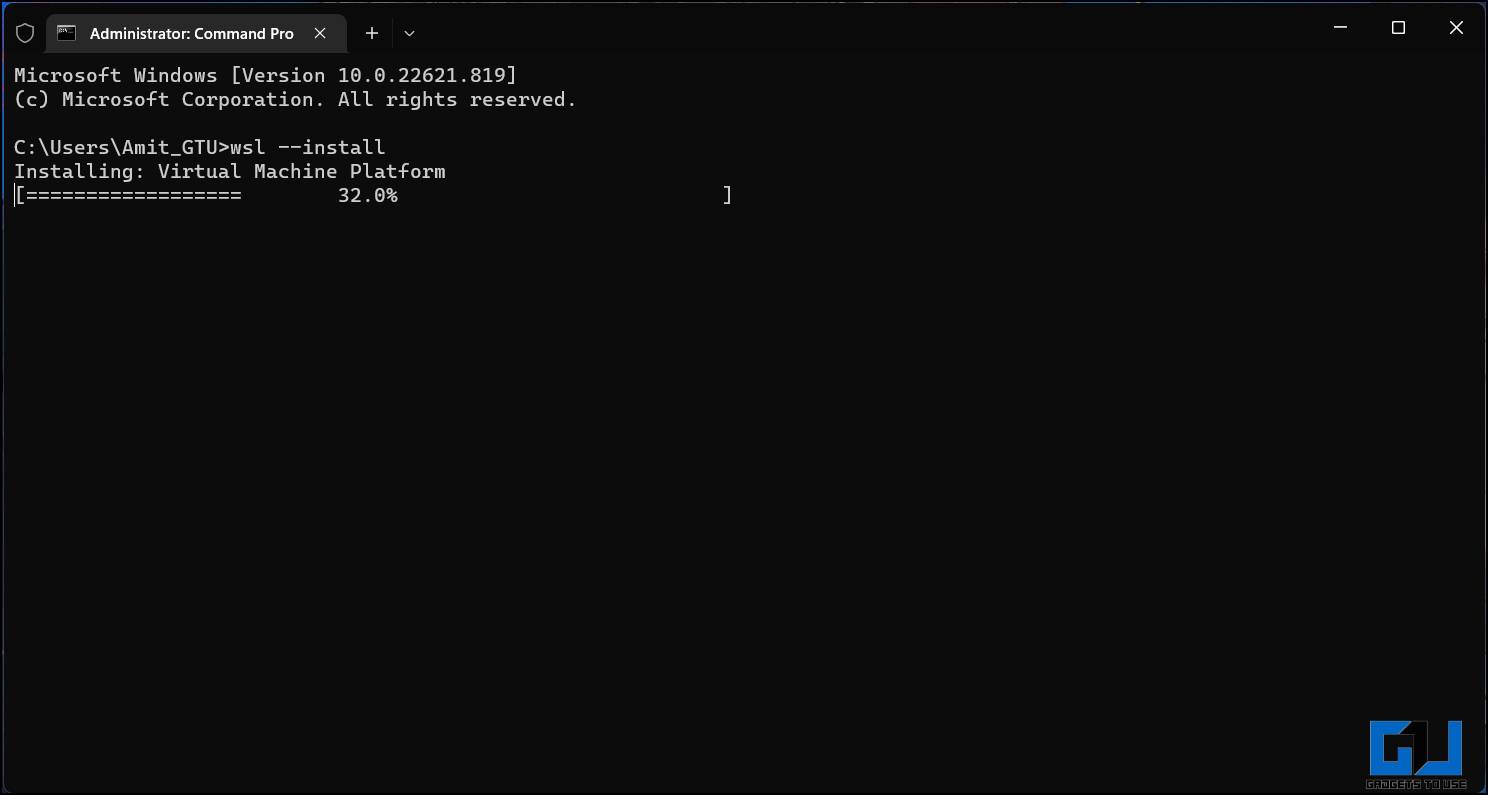
1. Open an elevated Windows Powershell and execute this command:
wsl –install
2. This will begin the installation of Ubuntu on your machine and you need to stay connected to the network during the installation.
3. Once the installation is done, launch Ubuntu from the Start menu, and create a new username and password.
Note: The password stays blank even though you are typing, just type the password and hit enter.
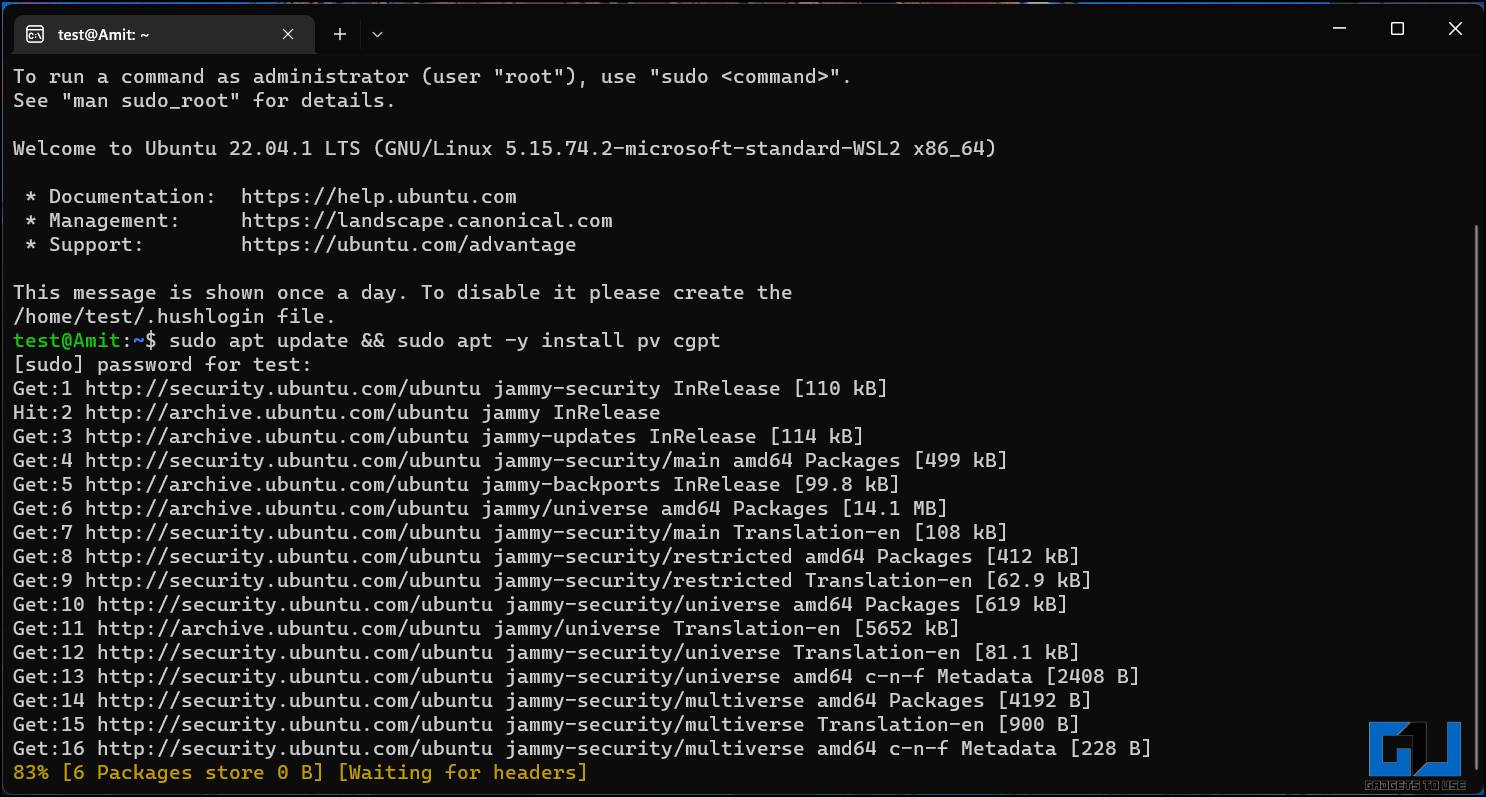
4. Now, type the following command, and press Enter.
sudo apt update && sudo apt -y install pv cgpt
This will also take some time to finish updating the apps, you need to stay connected to the internet during the whole update process.
Creating a new Partition on Windows to Install ChromeOS
Now we need to create a small partition on your Windows system’s disk to install ChromeOS on it. Follow these steps to create a partition on Windows.
1. Press Win + R to open Run, type “diskmgmt.msc” and press Enter.

2. Right-click on one of the drives that you want to create a partition from and select “Shrink Volume“.
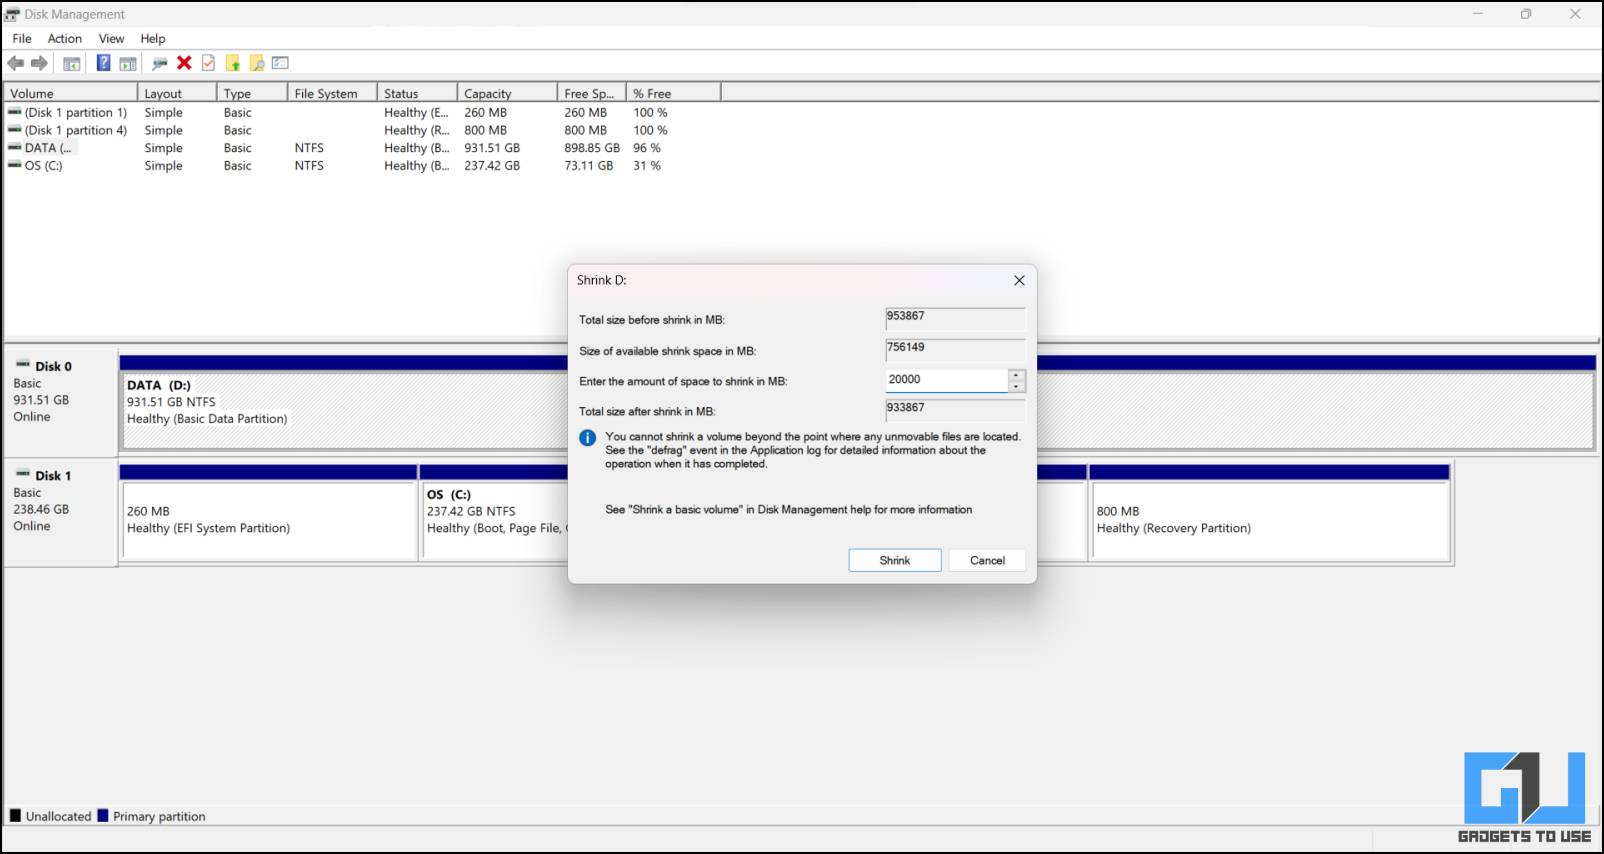
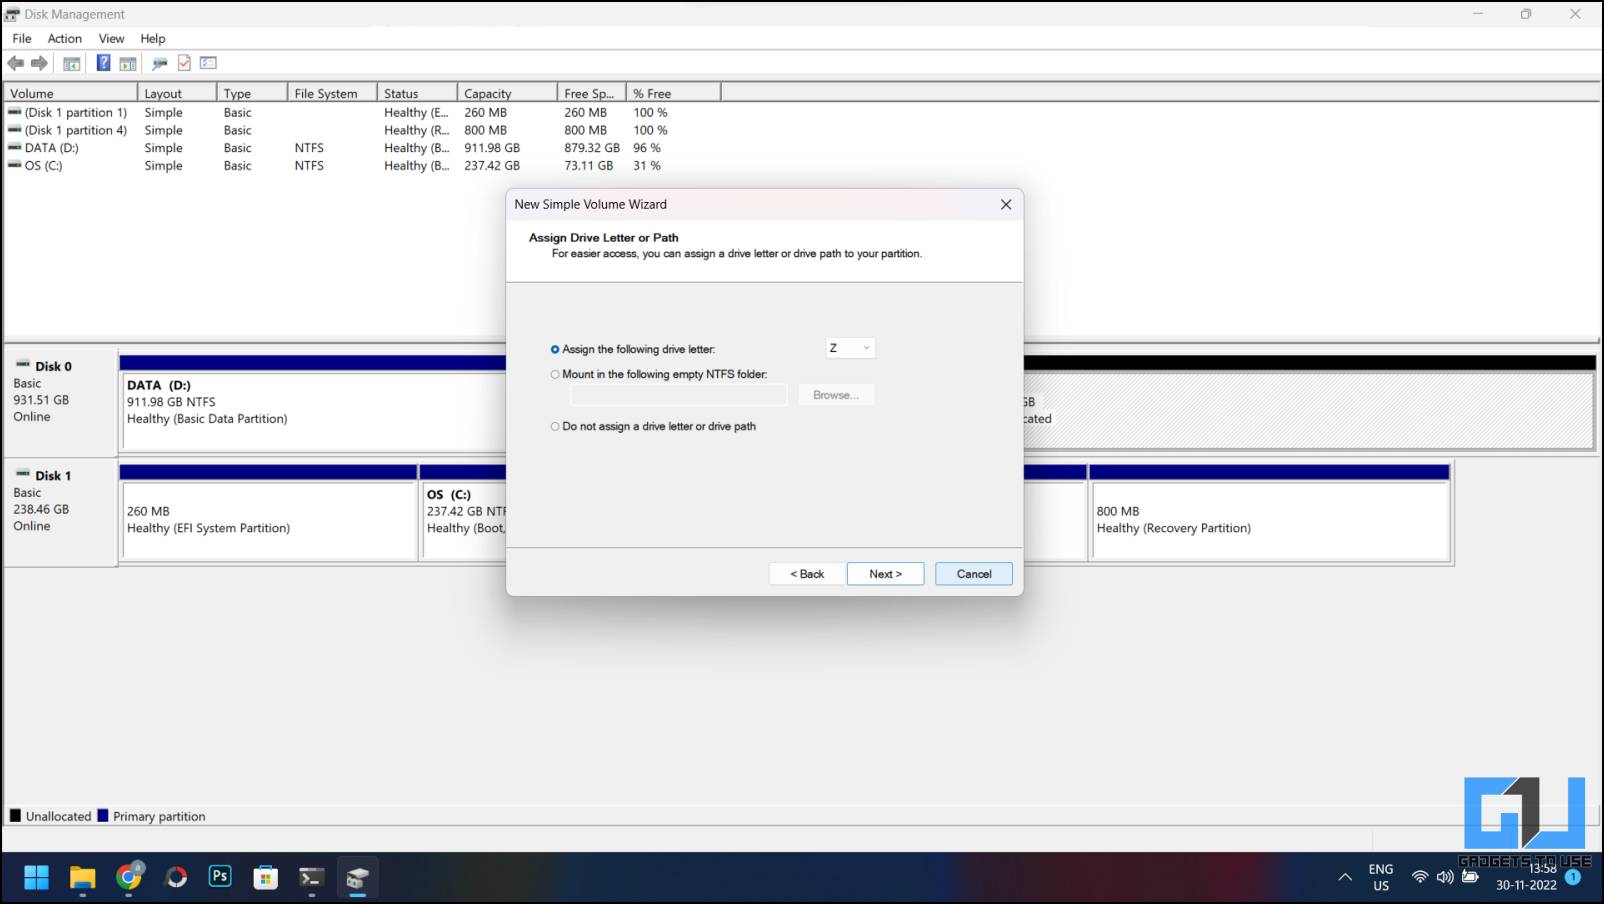
3. Type 20000 in the size section and click on Shrink, this will create an unallocated block of space.
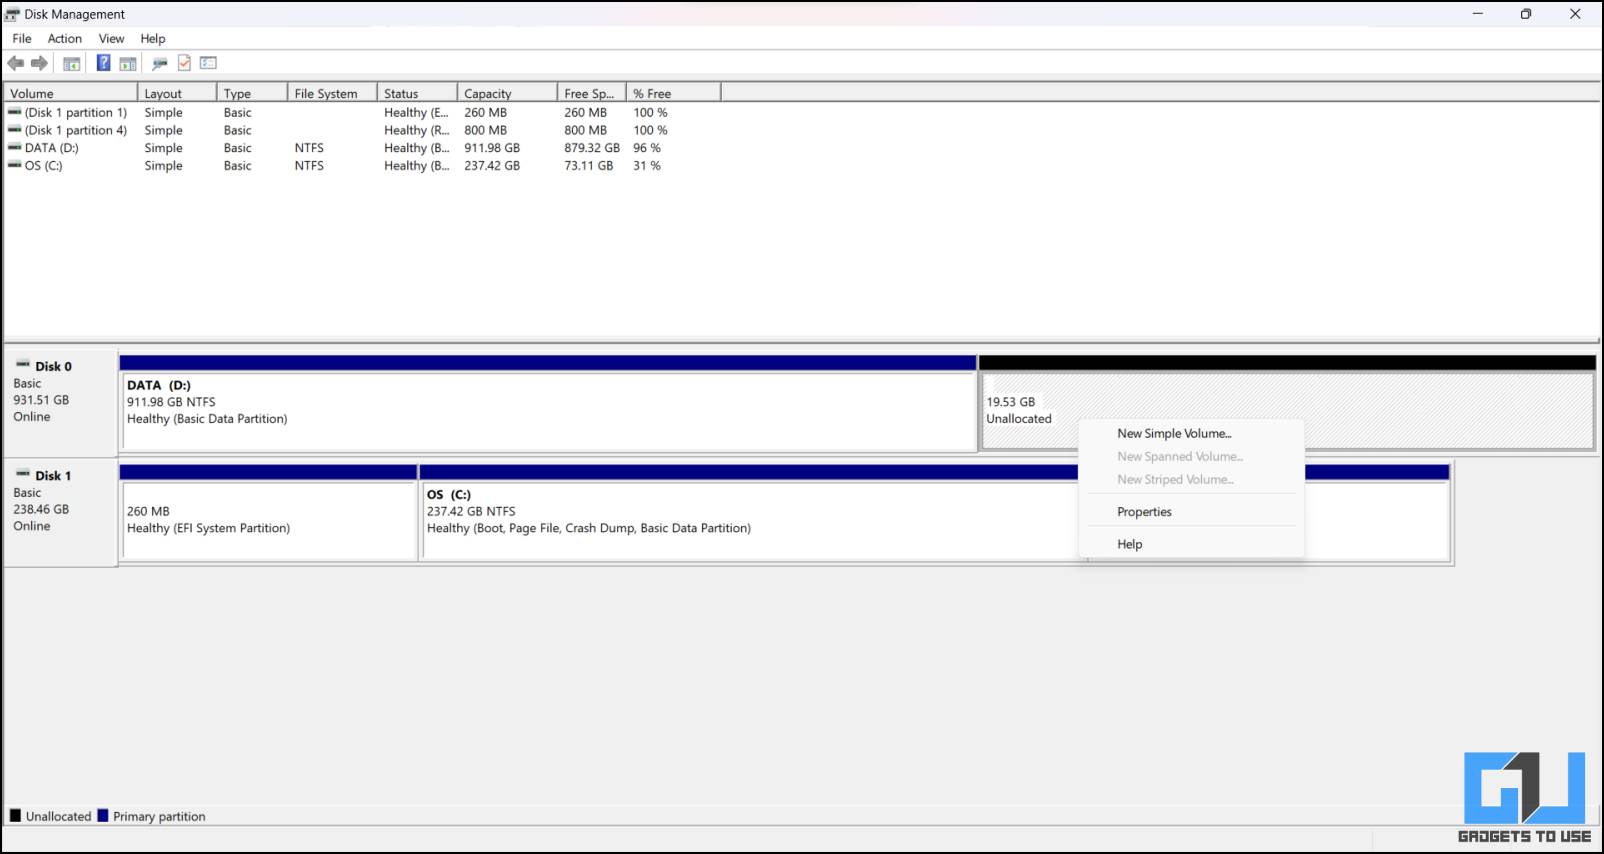
4. Right-click on the new partition you’ve created and select New simple volume. Click Next and assign the letter E to the drive and create the volume.
Now you can see this partition in your Windows explorer as an empty hard drive. Open the new partition drive and create a folder named “chromeos” inside it, we will need it later for mounting purposes.
Download the Required Files
We now need to download the Chrome OS recovery image and there are four versions of recovery images according to the CPU and its generations. Open this link and on that page, to download the latest recovery image according to your CPU and generations. Check the list below to learn, which recovery image you need to download according to your CPU.
- Intel up to 9th generation: rammus
- Intel above 9th generation: volteer
- AMD(Stony Ride and Briston Ridge): grunt
- AMD Ryzen: Zork
To make it all work, we need to download the Sebanc Brunch file. The last file you need to download is Grub2Win and once you get all the files, create a new folder named “chromeos” inside Downloads. Move all the files you’ve downloaded till now to this ‘chromeos‘ folder.
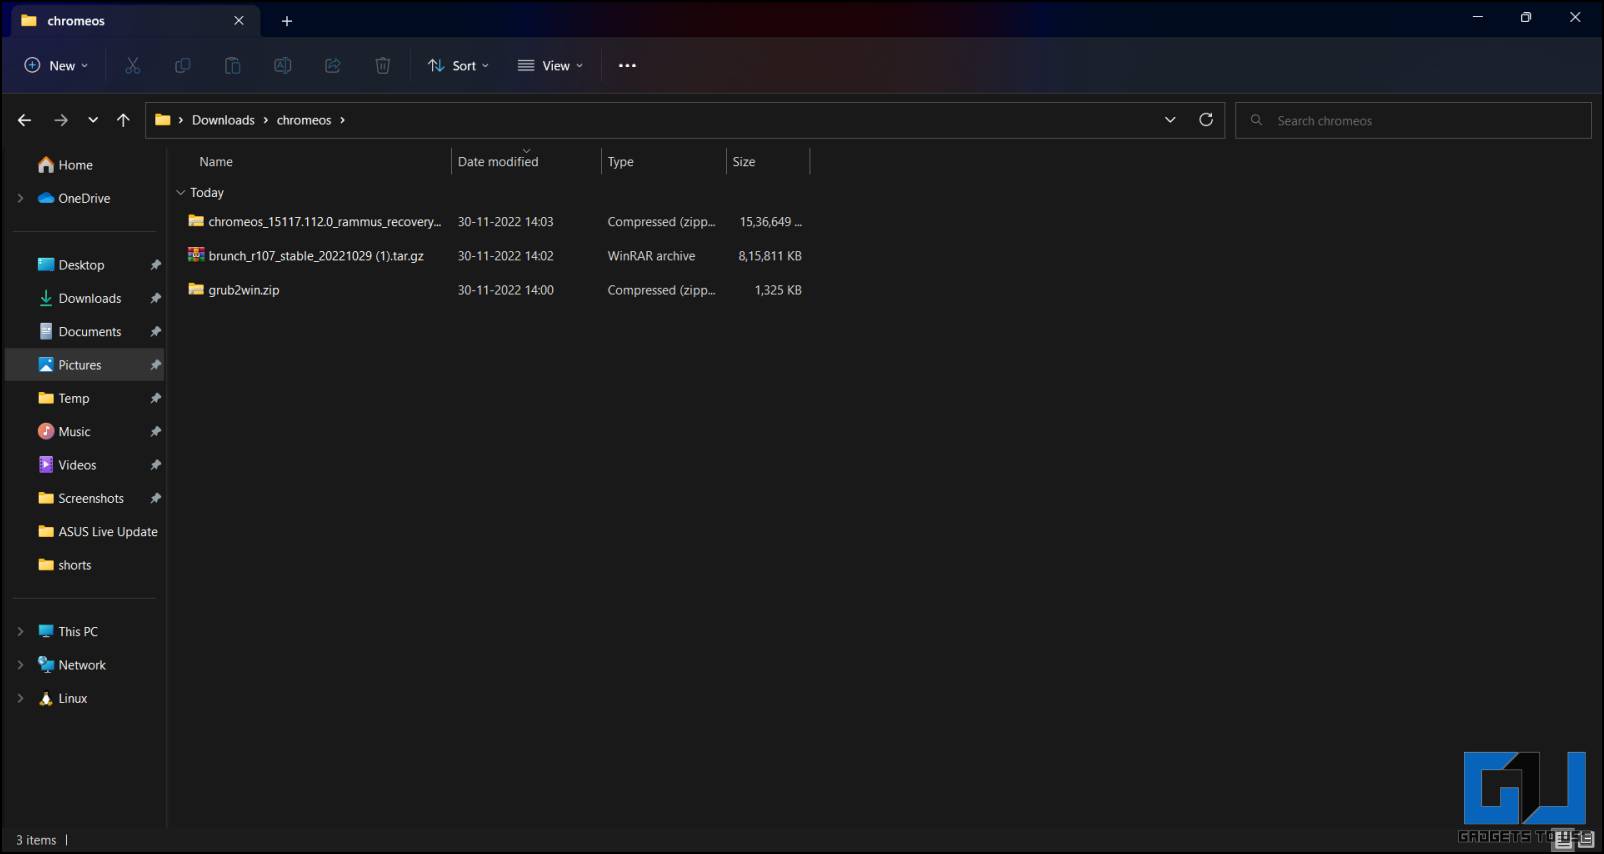
Open the ‘chromeos‘ folder, right-click on the Brunch file, and select Extract here under the Winrar menu. Once done, extract the ChromeOSzip file in the same way.
Install the Chrome OS to the New Partition
Next, we need to install the Chrome OS recovery file to the new partition that we created and for that we need Ubuntu. To do so we need to execute a few commands one by one and make sure to double-check the file or folder locations in the command before executing them.
1. Add the ‘chromeos’ folder location that we have created inside the Downloads folder. It will look something like “c/users/username/downloads/chromeos”.
cd /mnt/(your chromeos folder location)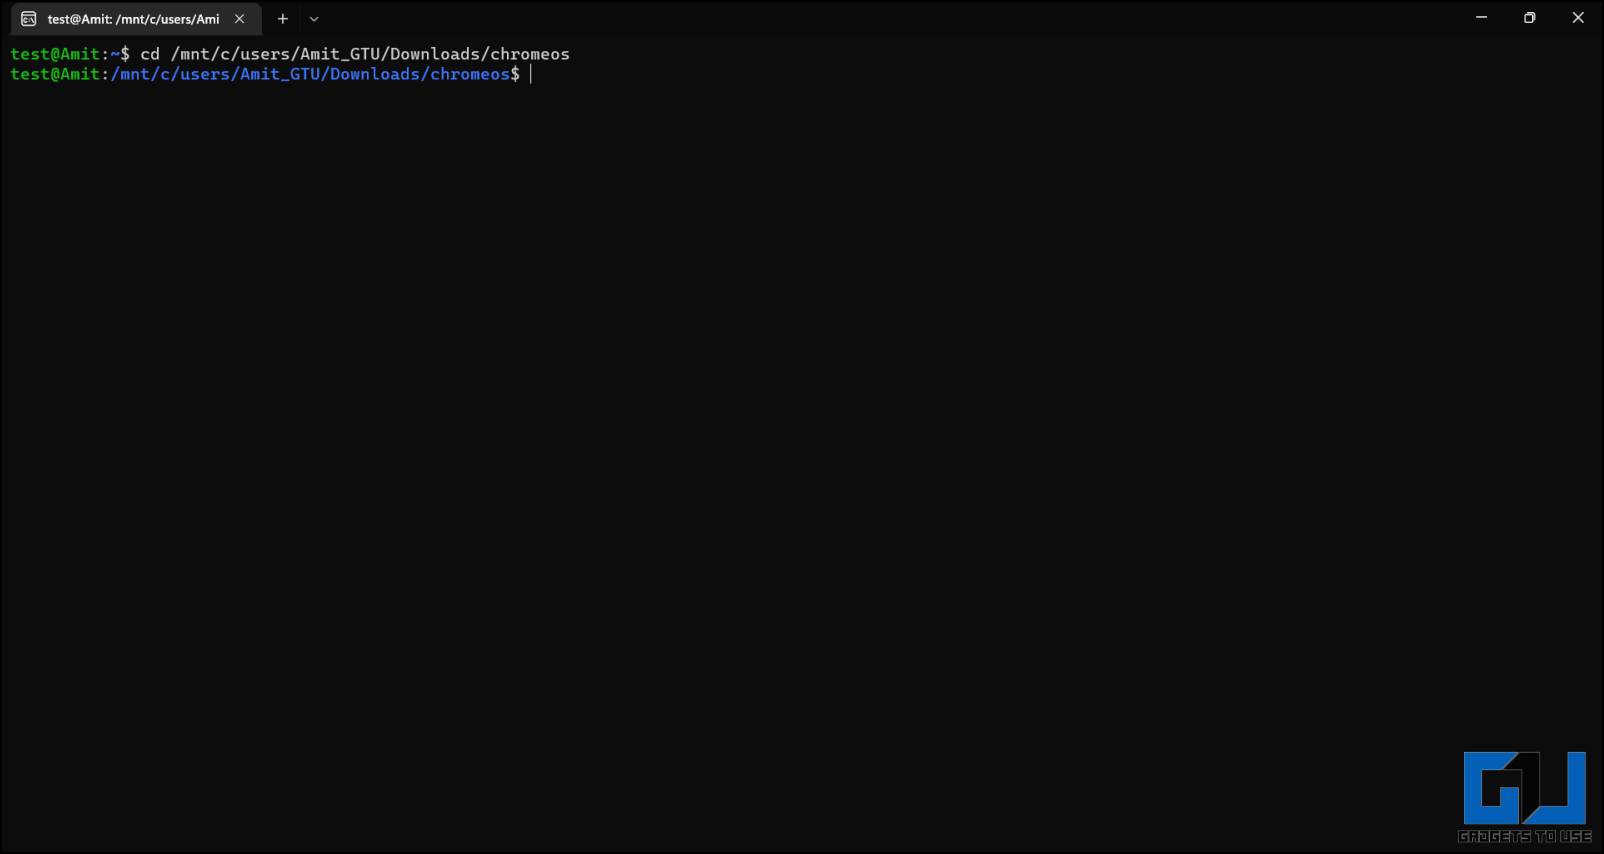
2. Next, add the recovery image name, this is the file that we extracted from rammus recovery zip file. The second bracket should be filled with the location of ‘chromeos folder’ created inside the new partition drive, eg: e/chromeos/.
sudo bash chromeos-install.sh -src (recovery image name.bin) -dst /mnt/(chromeos partition folder) -s 20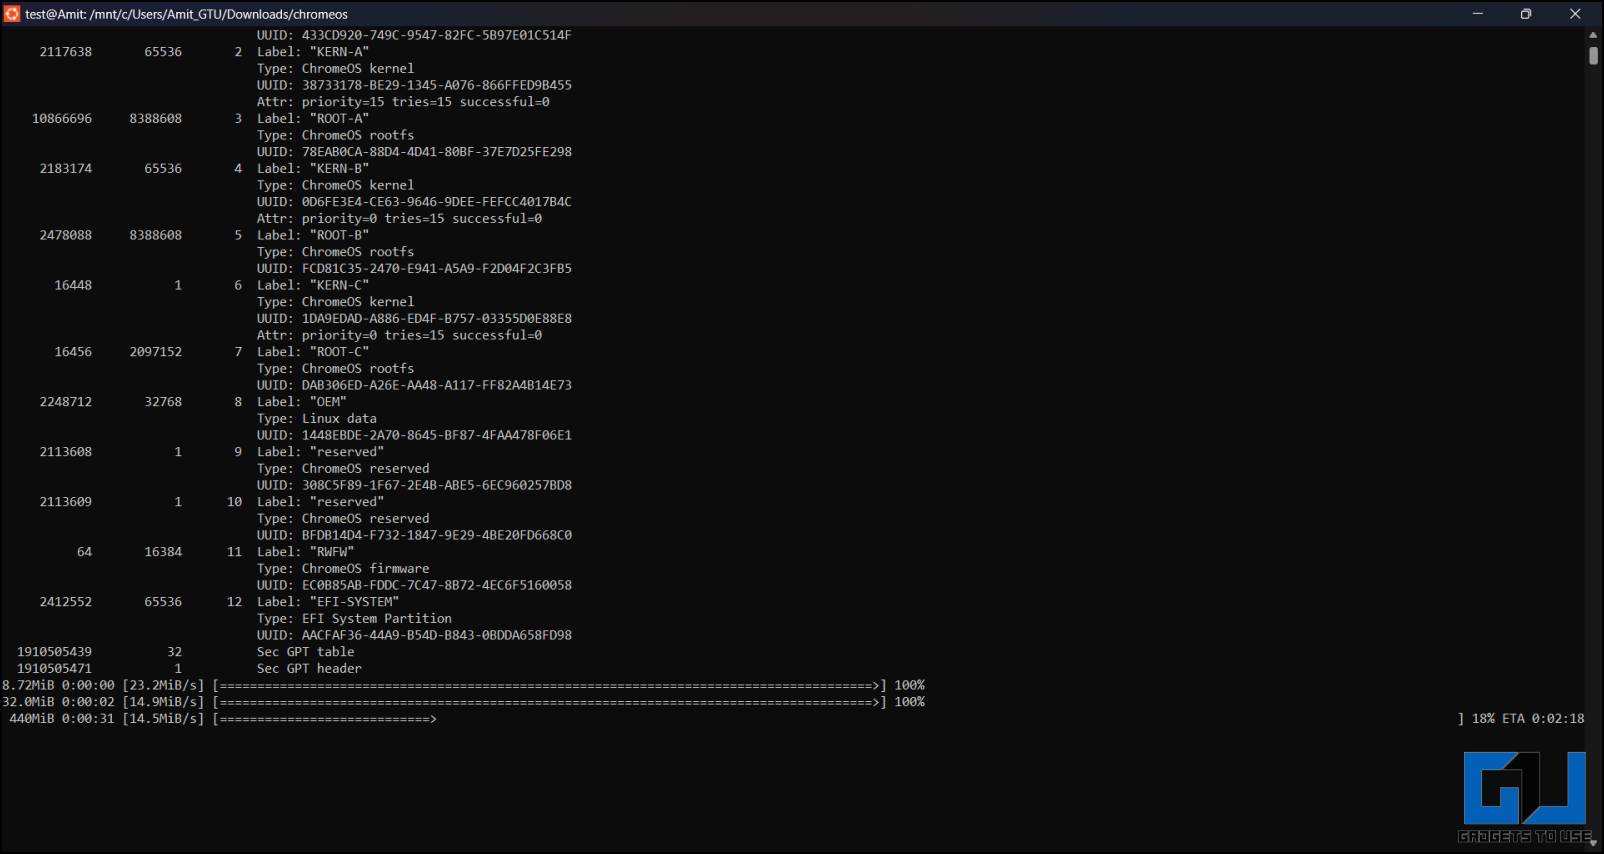
3. The process will take a few minutes and once it is done, it will give you a command to execute in Powershell. Copy that command and open a Powershell window and execute that command here.
You will get something as shown in the image below, just copy the text inside the brackets and paste it into the Ubuntu window and hit Enter.
Creating a boot entry for Chrome OS
Once ChromeOS has been installed, we need to create a boot entry for the ChromeOS image file that we created in the partitions above.
1. Extract the Grub2Win zip package and run the installer, confirm the installation, and once installed, it will open a window.

2. Now go to the new partition, created earlier and open the ‘chromeos-grub.txt‘ file to copy its contents.
3. Come back to the Grub2Win window and Click the Manage Boot Menu button.
4. Click Add a new Entry button and type ‘chromeos‘ in the title field. Click the Type drop-down menu and select Create user section.
5. Paste the code, copied in step #2, and click the cross button to close the notepad. Click Save then OK, then OK again on Grub2Win window.
Boot Chrome OS from the Boot Menu
Now, simply restart your computer and you will see a boot menu. Use the arrow keys to go down and select chromeos and press Enter key. This will boot the Chrome OS on your machine and from there you can start setting up your Chrome OS.
Wrapping Up
The process to dual boot ChromeOS without a USB drive is pretty tedious, but the result is a working dual boot Chome OS with all the features enabled. In case you get stuck at any step, feel free to reach out to us. Stay tuned to GadgetsToUse for more such walkthroughs.
Also, Read:
- How to Install Dynamic Island on Windows 11/10 for Free
- 5 Ways to See Motherboard Model Details on Windows PC or Laptop
- 15 Best Ways to Fix USB Not Detected on Windows 11
- How to Install Windows 11 on Unsupported Systems with Just a Single Tool
You can also follow us for instant tech news at Google News or for tips and tricks, smartphones & gadgets reviews, join GadgetsToUse Telegram Group or for the latest review videos subscribe GadgetsToUse YouTube Channel.