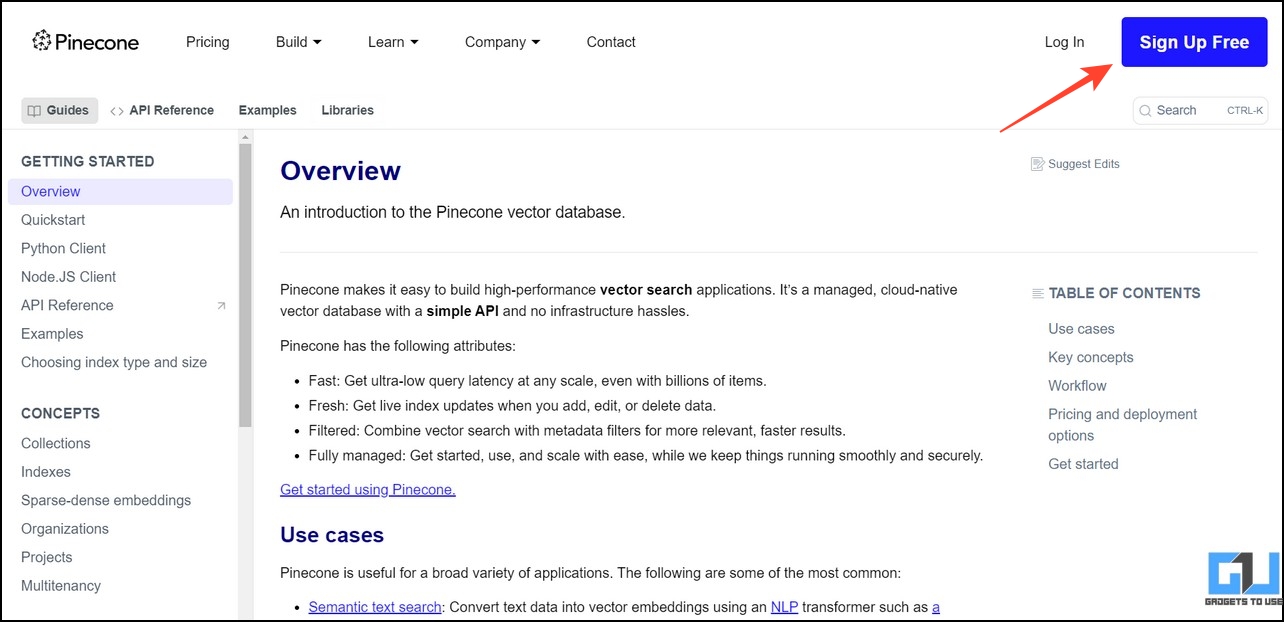
Solving mysteries with ChatGPT works great, but its effectiveness depends on the provided user inputs via prompts. What if there was a way to use it without prompts? This is where Auto-GPT comes in. Simply give it an objective, and the AI will think, reason, and execute actions autonomously for you. That said, this explainer demonstrates several ways to install and use AutoGPT on PC and mobile. Additionally, you can use ChatGPT on Windows or use Chat GPT Mac.

Install and Use Auto-GPT Manually on a PC
Auto-GPT is an open-source, experimental, Python chatbot that uses the latest GPT-4 model to automate and perform tasks with its AI agents. Consequently, you must install various software such as Git and Python along with various modules to run it on your system. Let’s look at the simplified steps to install and use the same.
Step 1: Set up the Environment to Install and Use AutoGPT
The first step for using Auto-GPT on your PC is to set up the environment variables necessary to run it. Follow these easy steps to achieve the same.
1. Download Git for Windows and double-click the setup file.
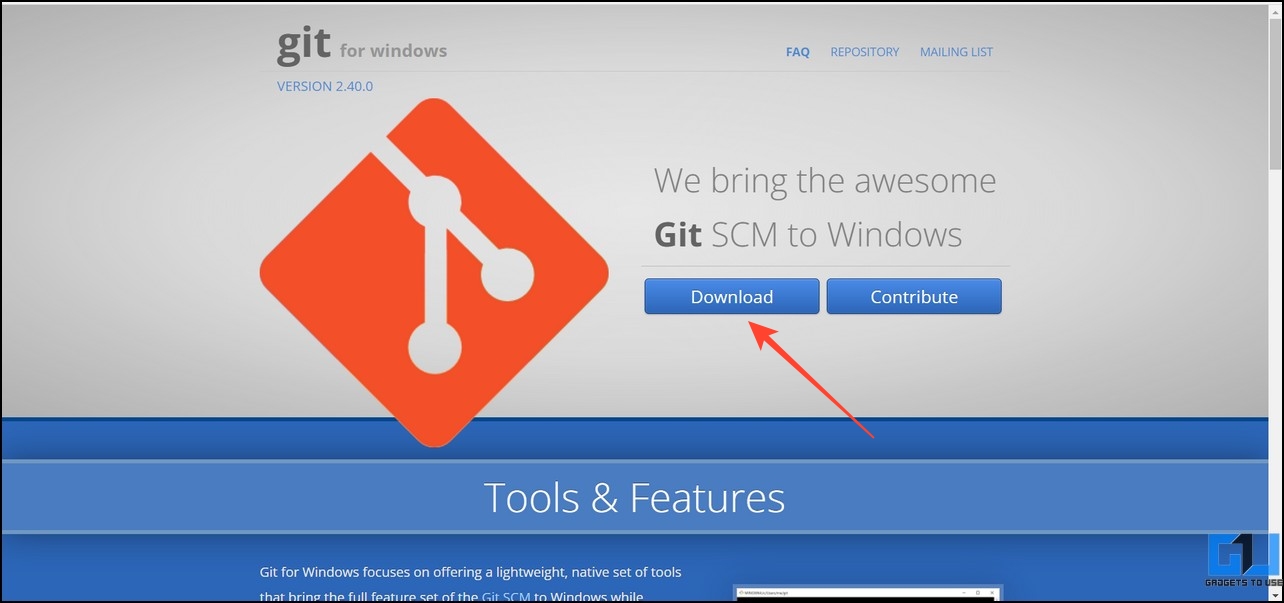
2. Follow the on-screen instructions to install Git on your system.

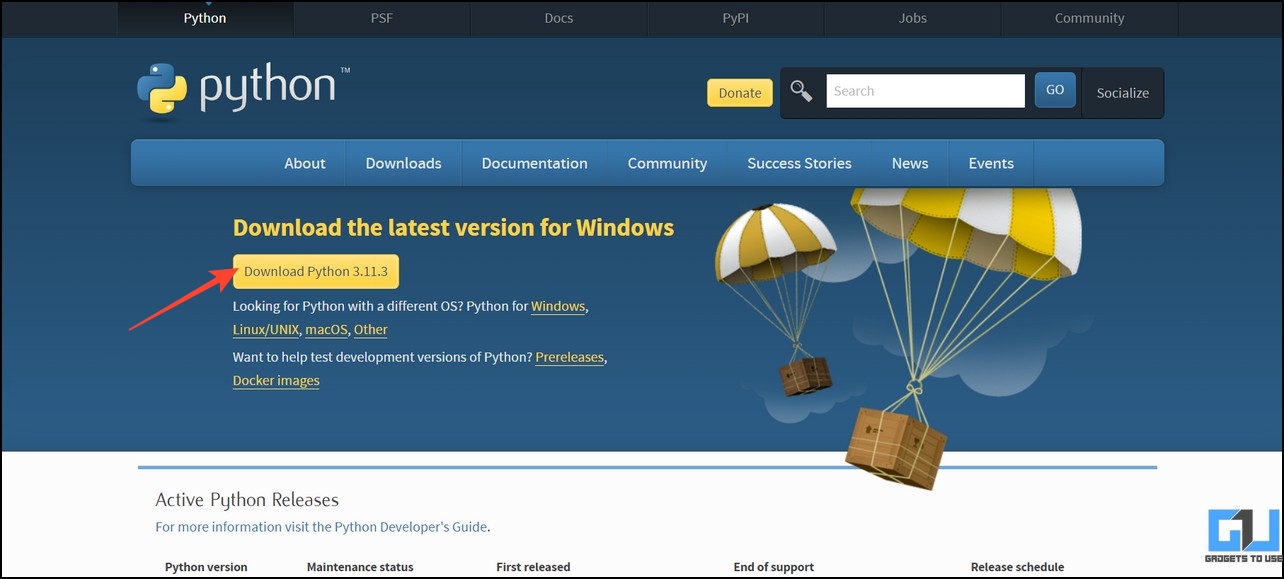
3. Next, download Python from its official website.
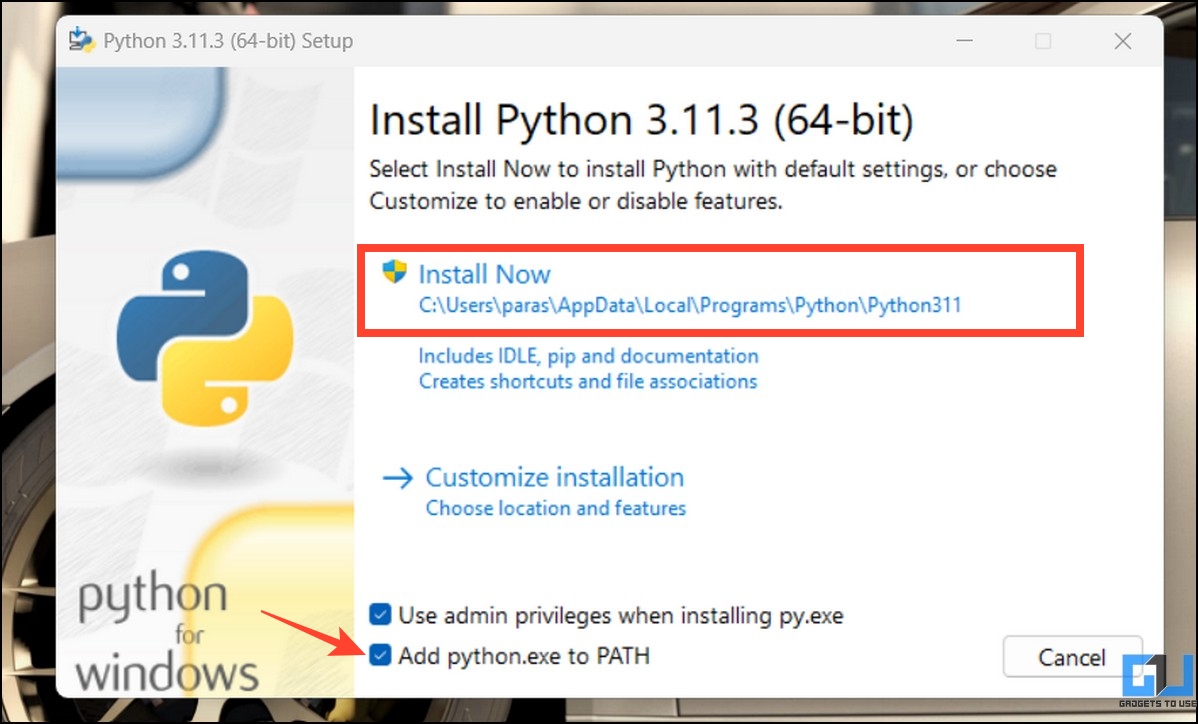
4. Open the downloaded file and check the ‘Add Python.exe to PATH‘ option. Click Install Now and follow the on-screen instructions to install Python.
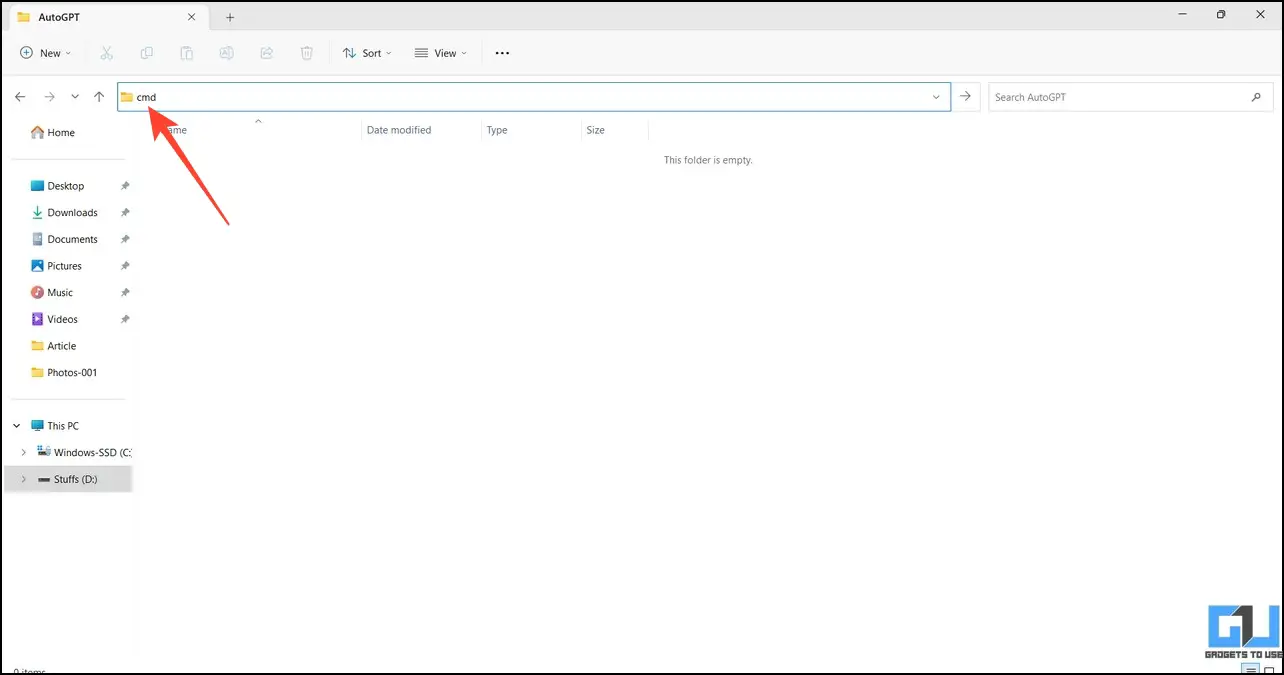
5. Navigate to your desired file directory and create a new Folder named AutoGPT.

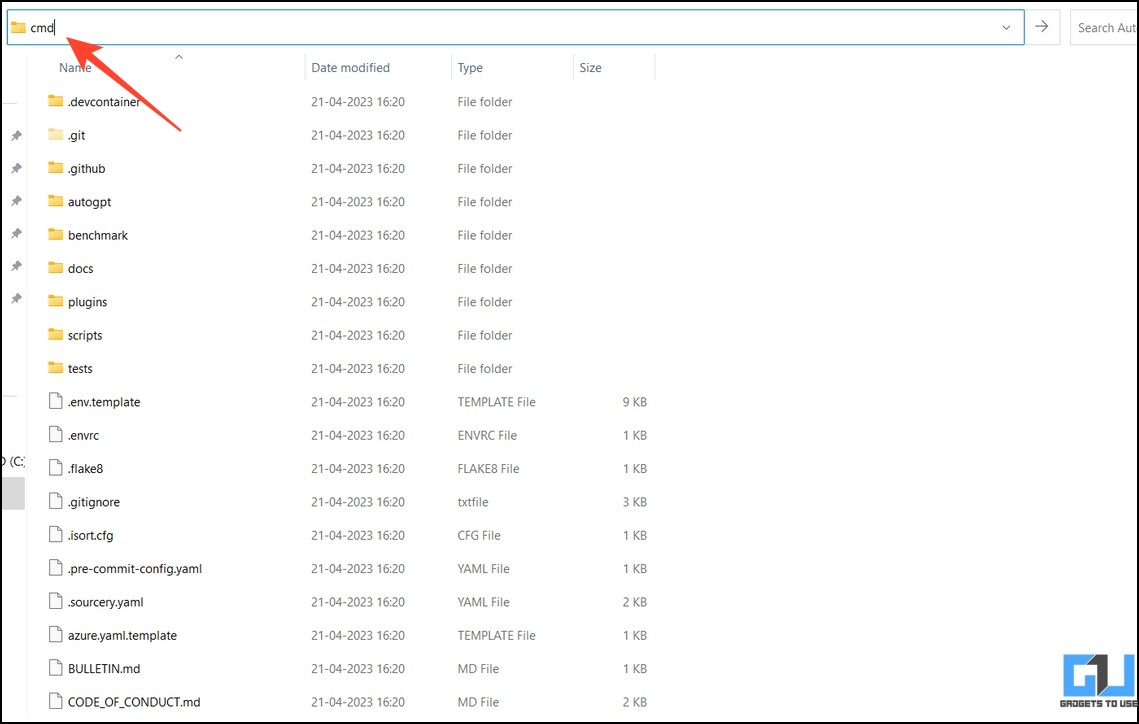
6. Open the created folder and type cmd in the navigation bar to launch Command Prompt.
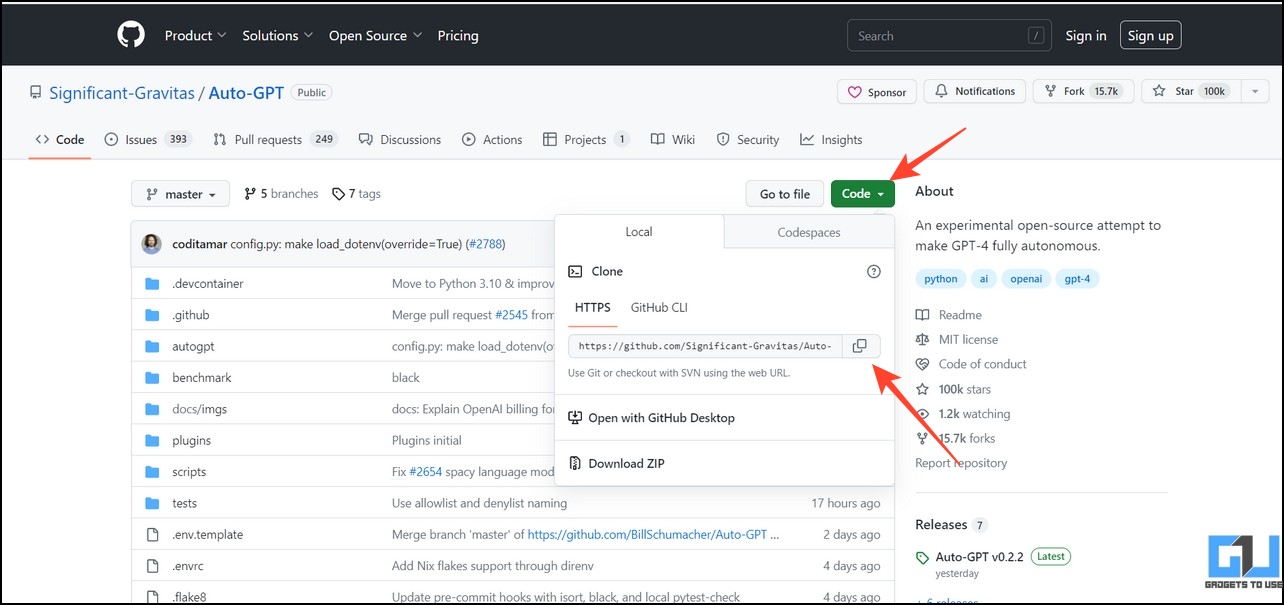
7. Copy the link to the AutoGPT repository from GitHub to clone it.
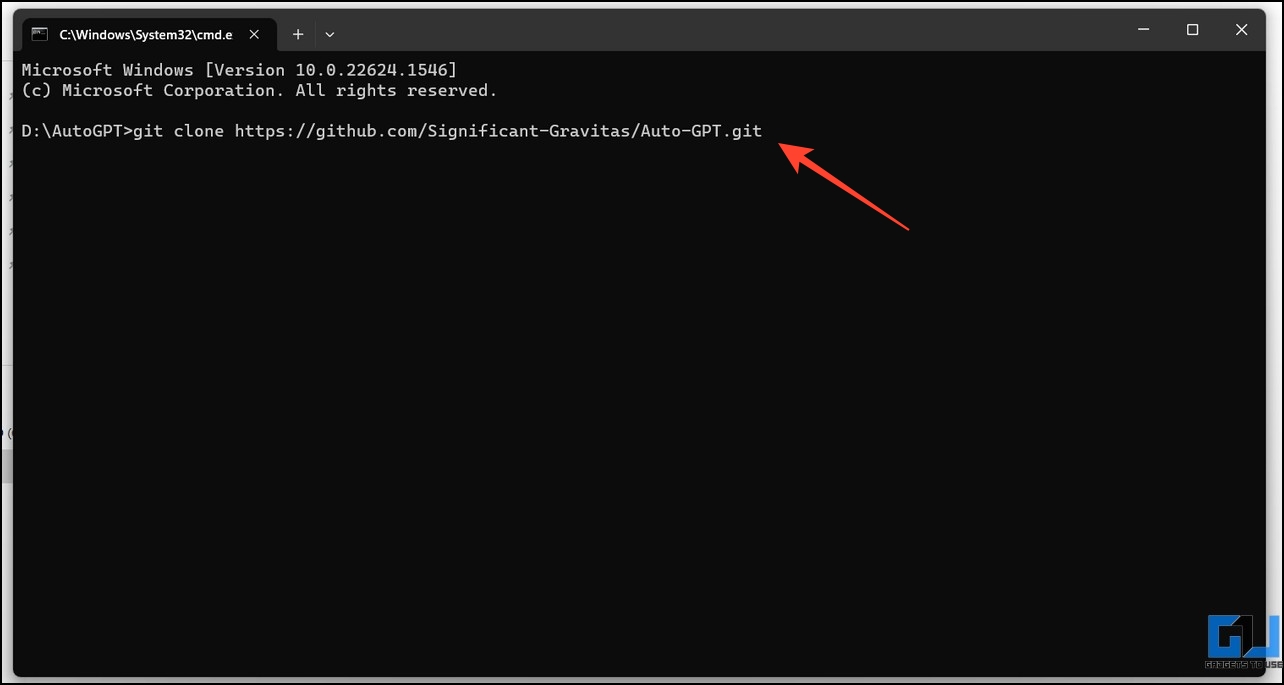
8. Next, type the following command in the terminal and execute it:
git clone <paste the copied link>
For example, git clone https://github.com/Significant-Gravitas/Auto-GPT.git
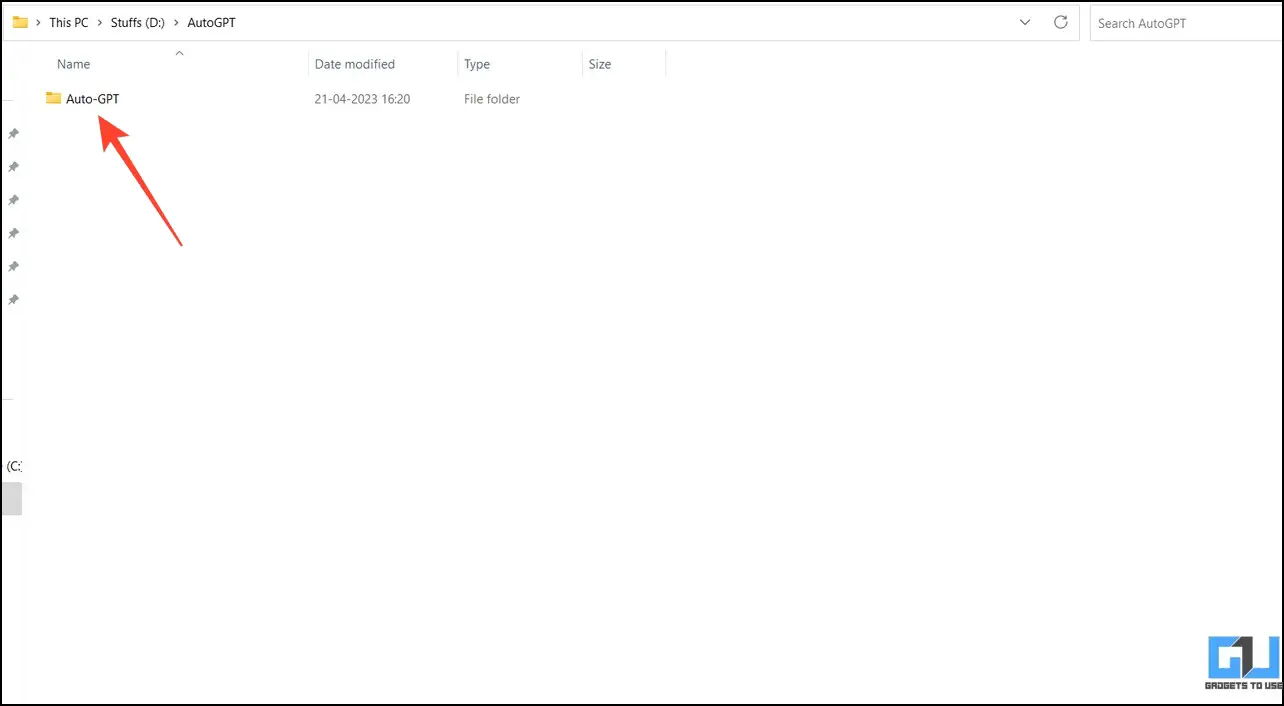
9. A new folder named ‘Auto-GPT‘ will be instantly created in the selected directory.
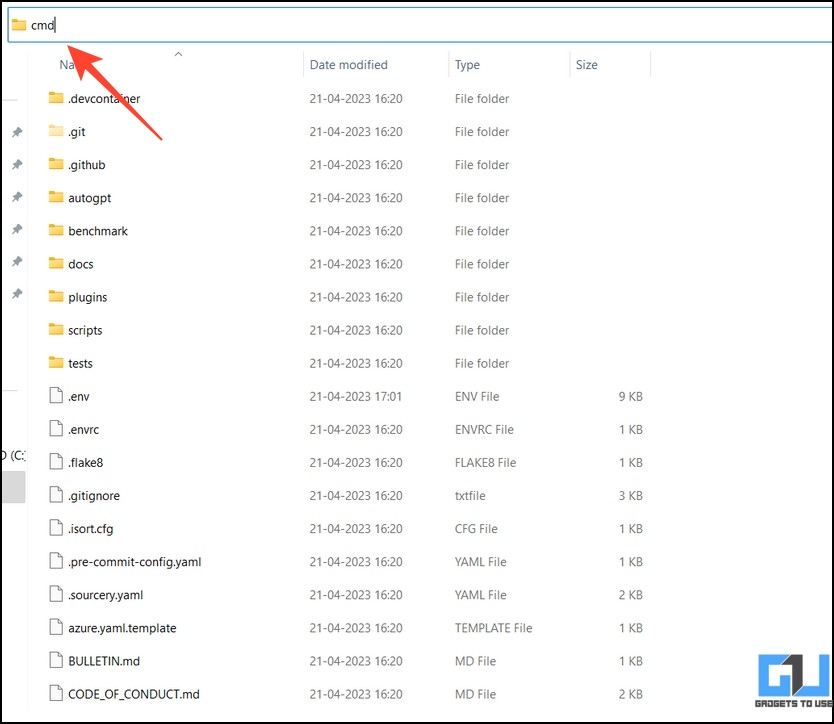
10. Now, open the Auto-GPT folder and type cmd in the navigation bar to open the command prompt window.
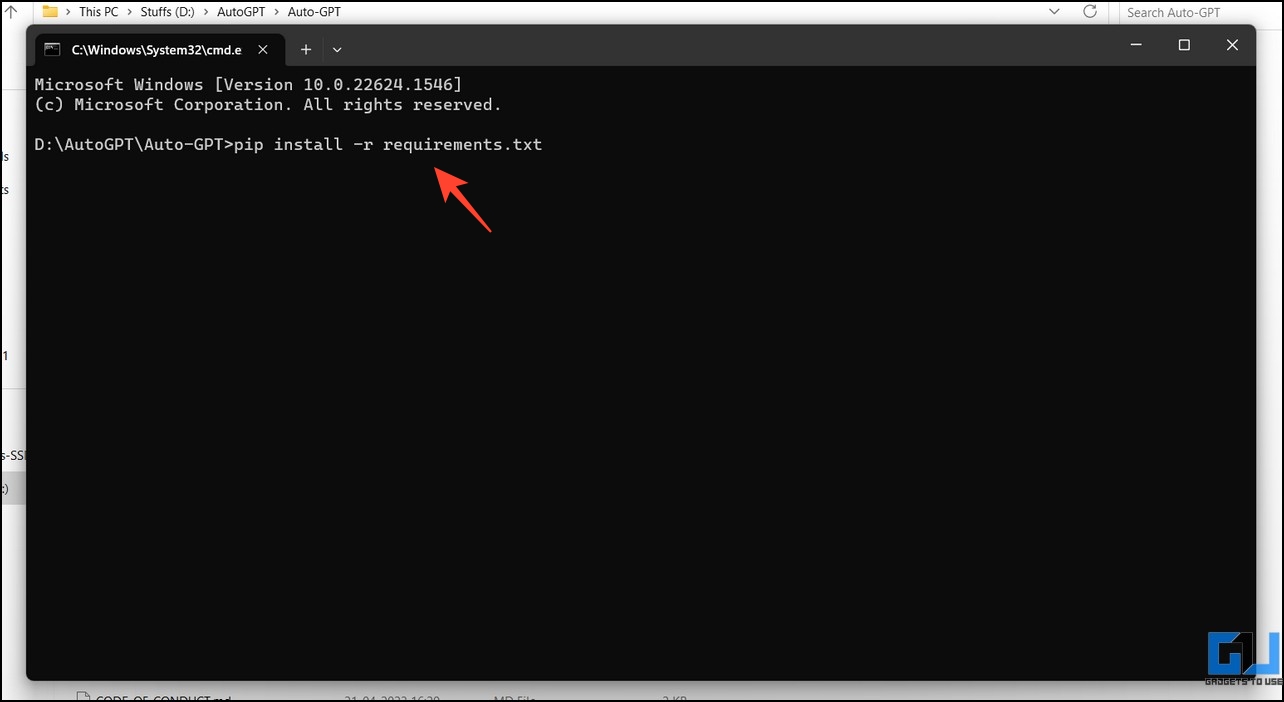
11. Type the following command to install the Python libraries required to run AutoGPT:
pip install -r requirements.txt
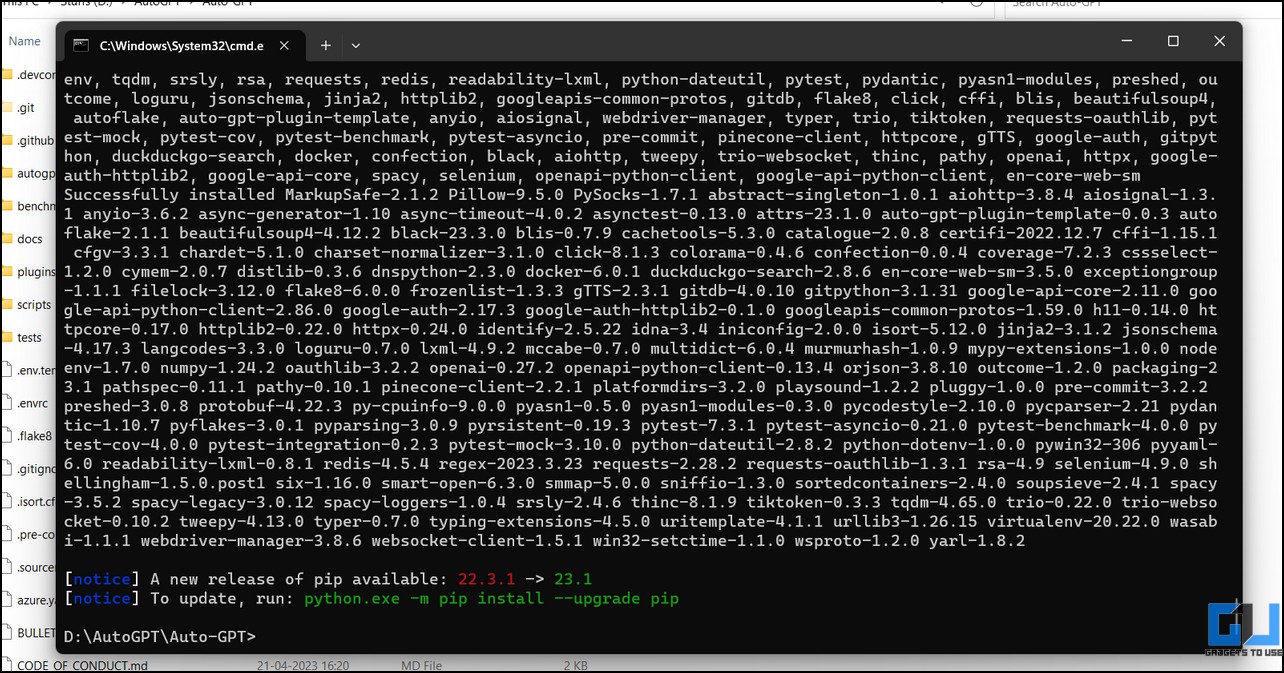
12. Wait a few seconds, for the required modules to install on your PC.
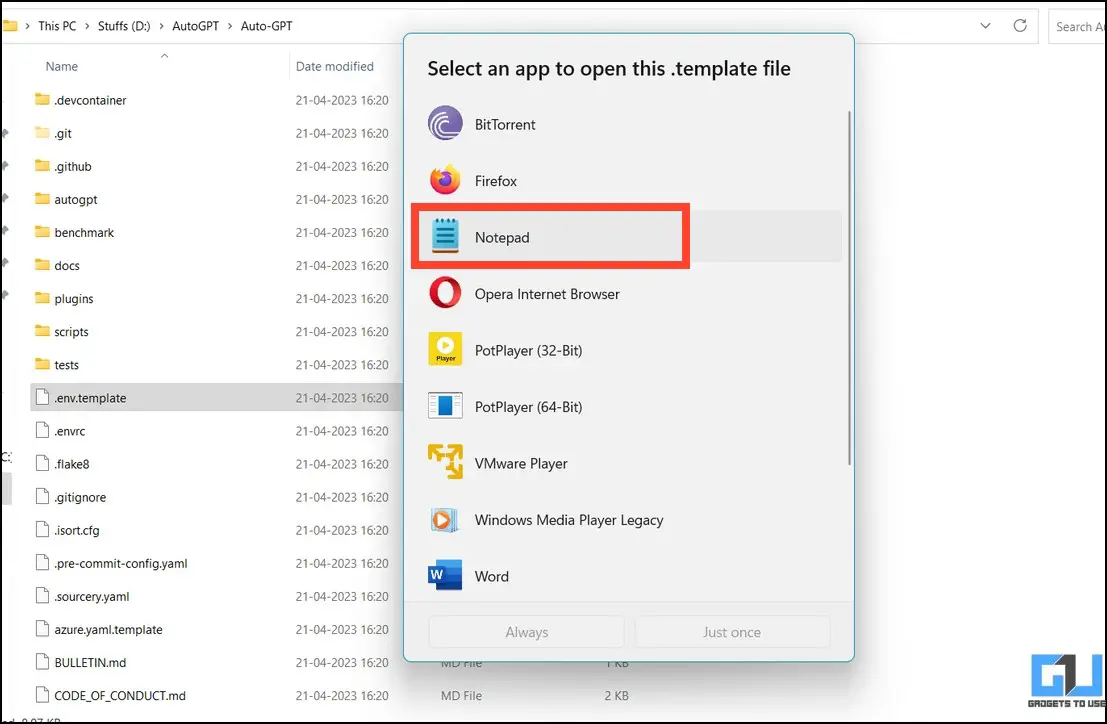
13. Now, go to the Auto-GPT folder to locate “.env.template” file and choose the Open With option from right-click menu.

14. Click on Notepad to open the .env.template file.
Step 2: Configure API Keys to Install and Use AutoGPT
After setting environment variables, the next step is configuring API keys to use Auto-GPT. It requires the Pinecone API and Open API keys for memory and authorization, respectively. Here’s how to configure it.
1. To configure the Pinecone API key for Auto-GPT, open the Pinecone website and create a new account.
2. Expand API Keys from the left sidebar and click on the Create API Key button.

3. Enter a new name for the API key and copy it to your clipboard.
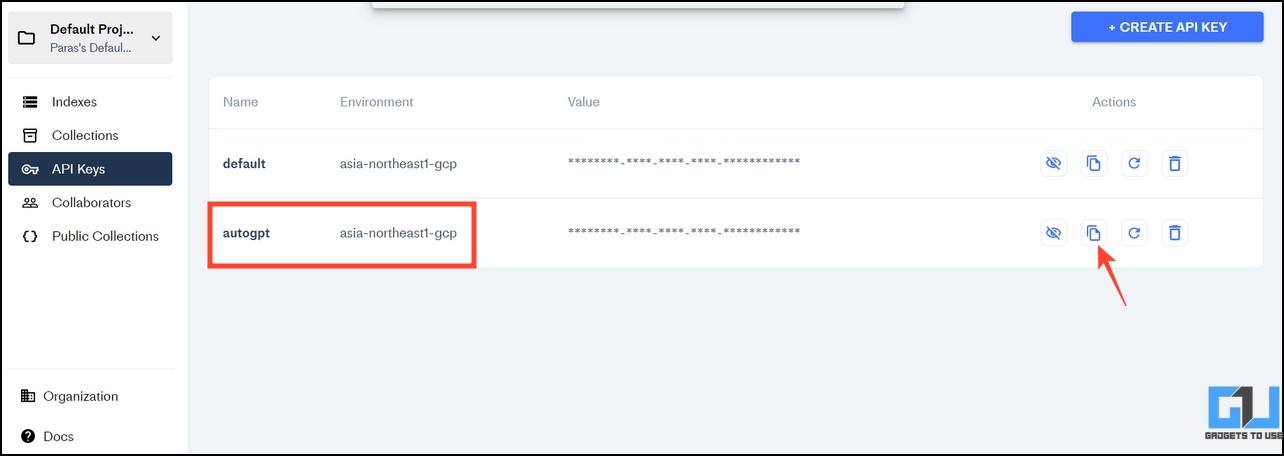
4. Now, re-open the .env.template file inside Notepad and paste the copied Pinecode key next to the Pinecone_API_Key value.
Note: Due to large amount of requests, you might fail to get the Pinecode API Keys in the free plan. You can skip it to run Auto-GPT on local memory.

5. Similarly, head over to OpenAI to get the API Keys for AutoGPT. Click on Create New secret key button under the API Keys section.
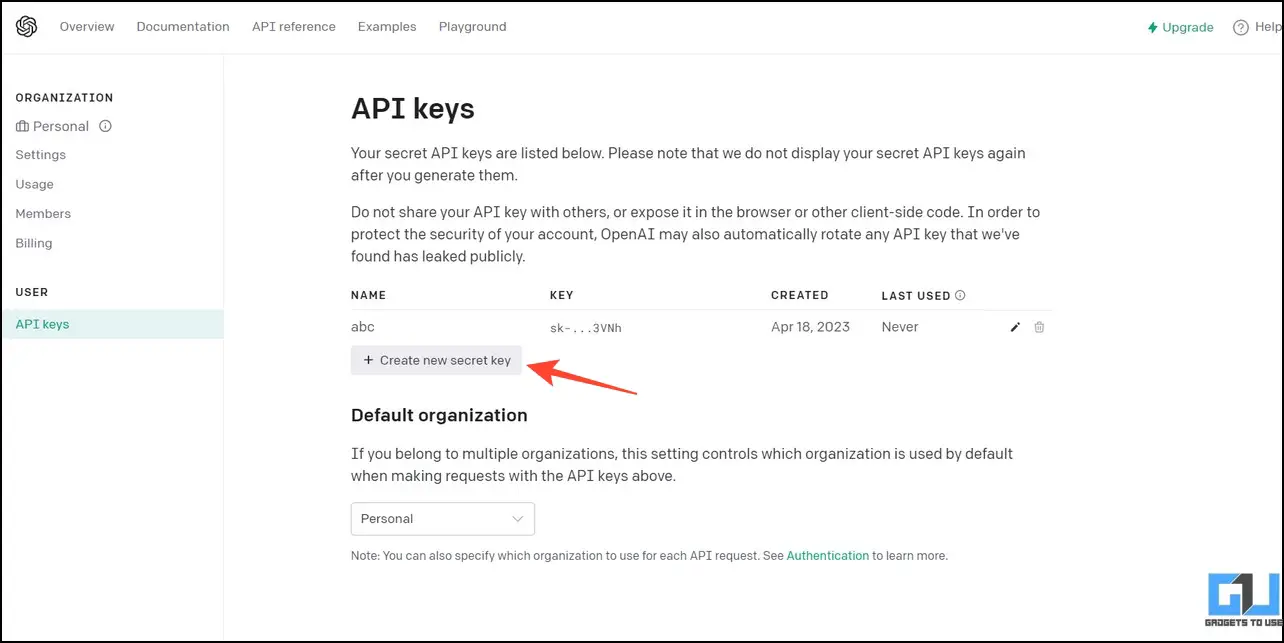
6. Provide a new name to the secret key and press the Create Secret Key button.

7. Once created, click the Copy button to copy the created API key.

8. Open the .env.template file again and locate Open_API_Key to paste the copied key in front of it. Press the Ctrl+S keys to save changes.

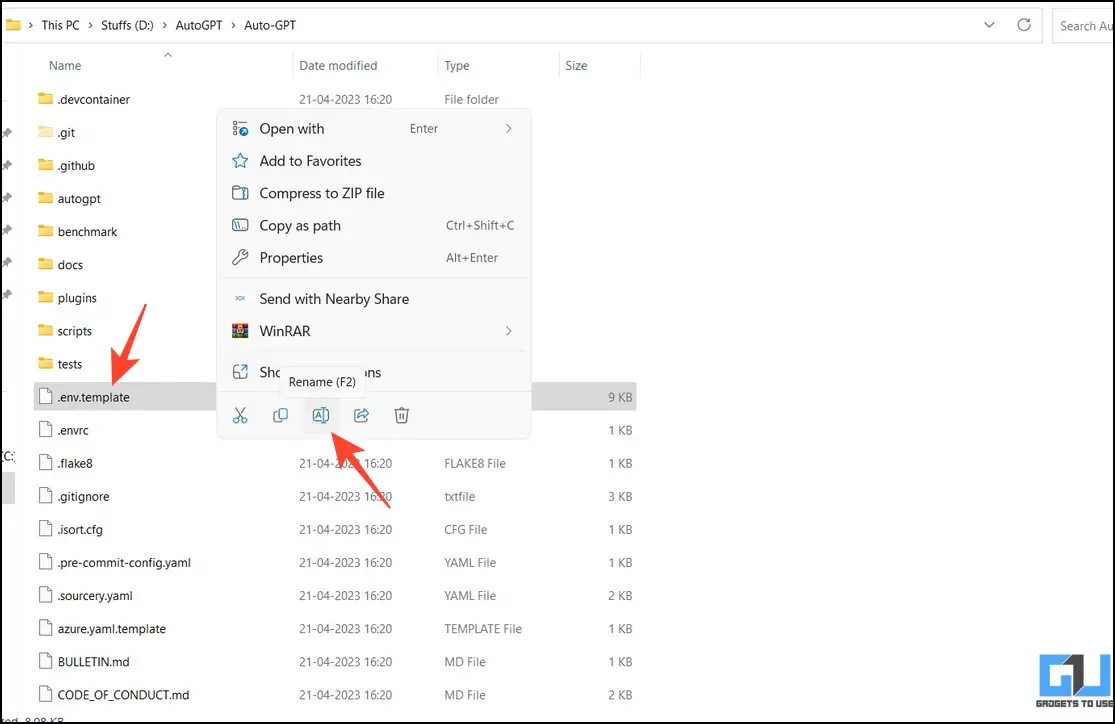
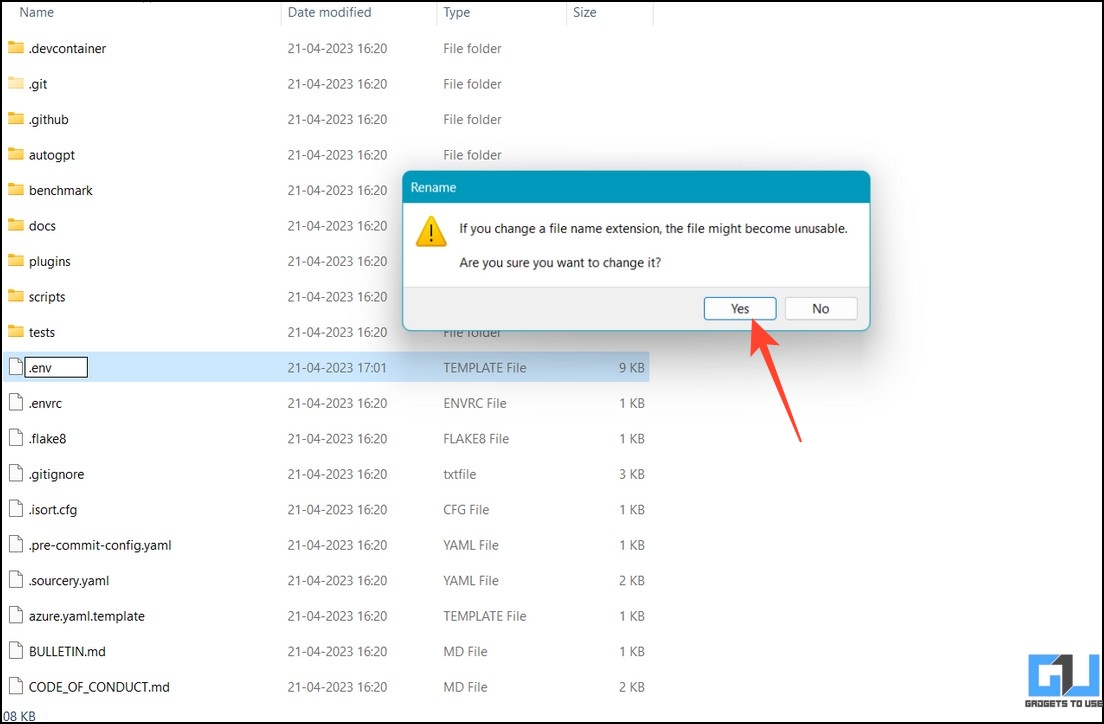
9. Finally, right-click the .env.template file to rename it to .env
10. Click Yes to save changes.
Step 3: Running the AutoGPT
Now that the environment variables and API keys are all set up, follow these easy steps to run the AutoGPT.
1. Type cmd in the navigation bar to open the command prompt window from the Auto GPT directory.
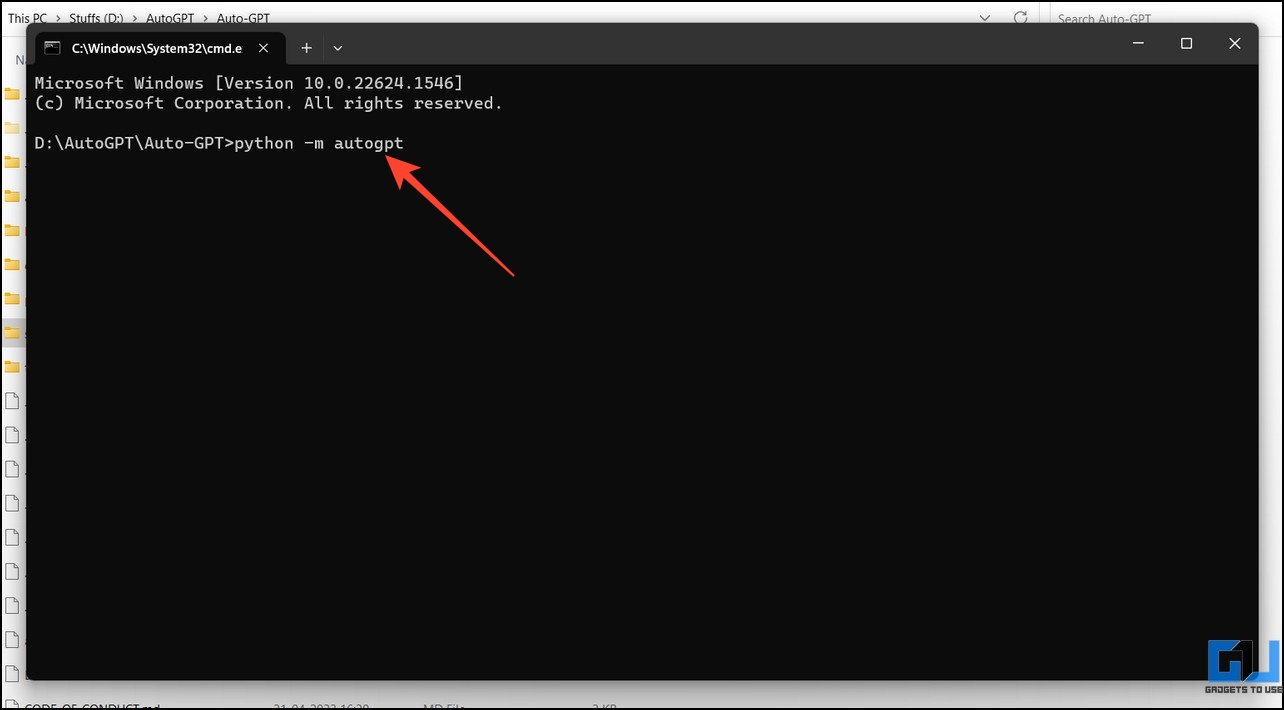
2. Copy and paste the following command to start AutoGPT in the terminal:
python -m autogpt
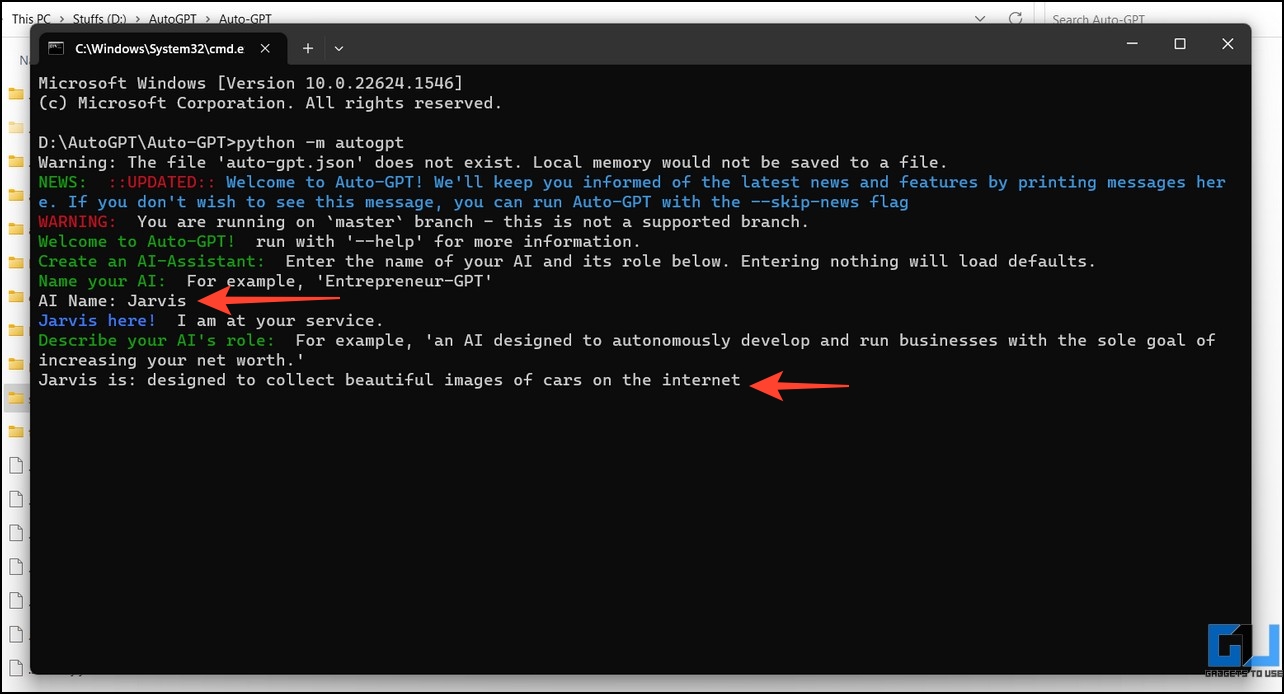
3. Now, AutoGPT will instantly start and ask you to provide a name to the AI, followed by its role.
4. Next, you can assign up to five goals to automate any task with the GPT-4 model. However, providing five goals to complete your task is not mandatory.
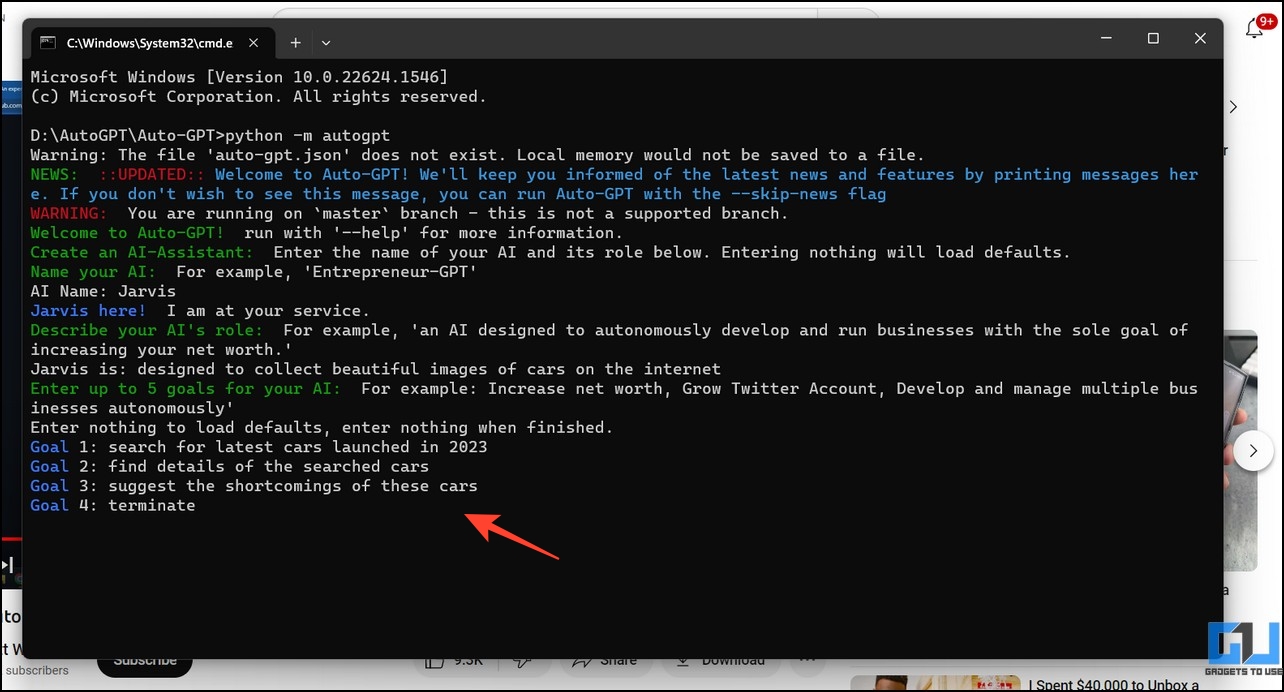
5. Hit the Enter key to process your goals with AutoGPT. The autonomous tool will now connect to the internet, search for requested goals, and classify its actions into Thoughts, Reasoning, Plans, and Criticism. During the process, it will ask you to authorize its actions to proceed further.
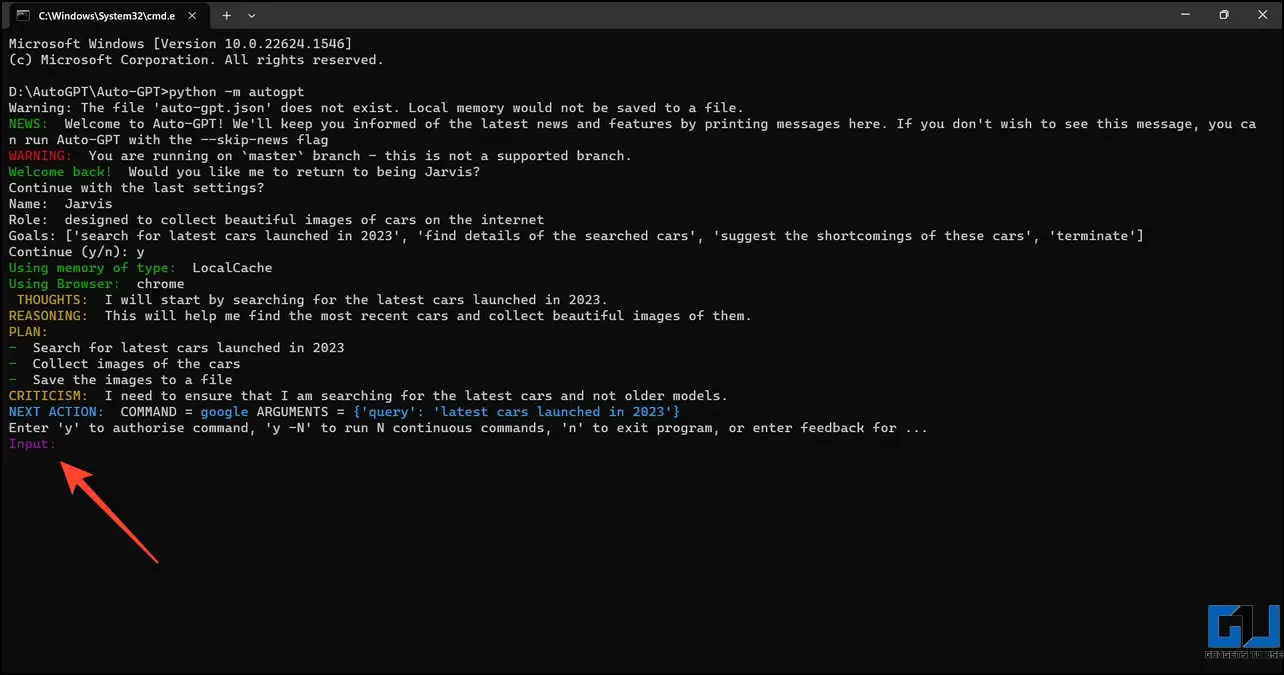
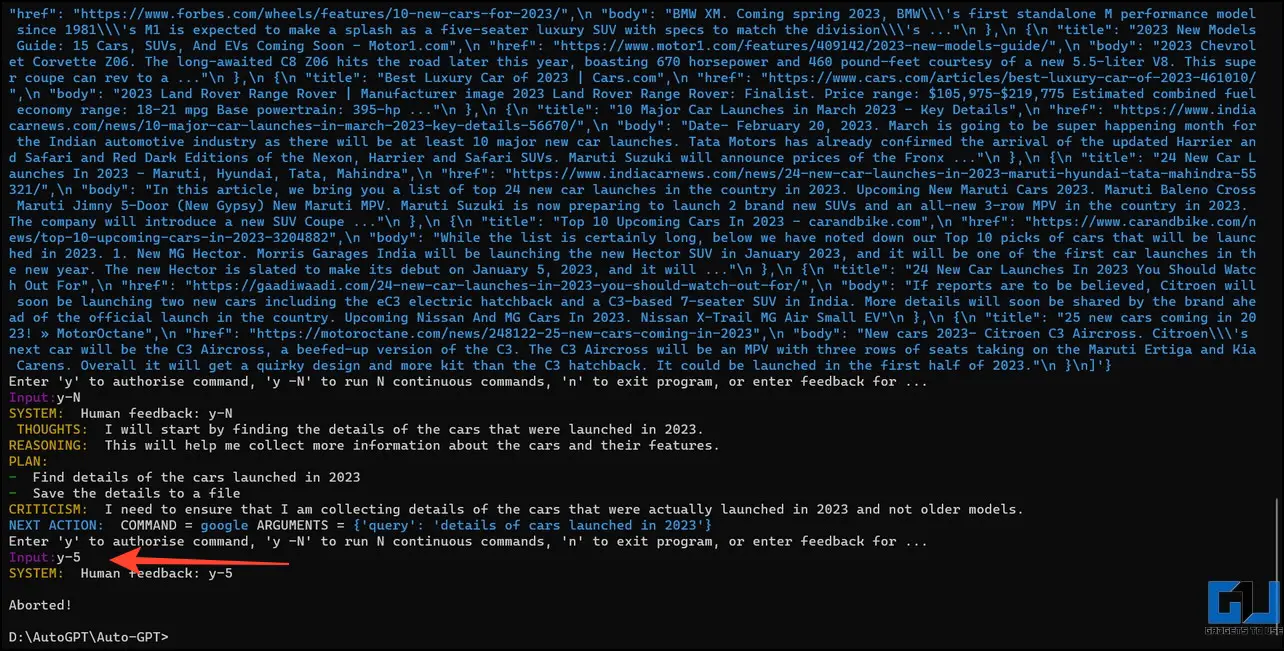
6. To authorize an action, type y in the prompt or y-N, where N stands for the number for which you want to run continuous commands without asking for authorization.
For example, y-6 will authorize AutoGPT to run the next six commands without asking the user. Alternatively, you can cancel the action by entering ‘n‘.
7. Besides getting prompted for each action, AutoGPT also has a continuous mode that provides complete authorization to AI to execute actions without asking for user permission. This is experimental and potentially dangerous as it can make the AI run forever.
8. If you’ve launched AutoGPT in the continuous mode out of curiosity, you can abort its infinite processing by pressing Ctrl+C anytime.

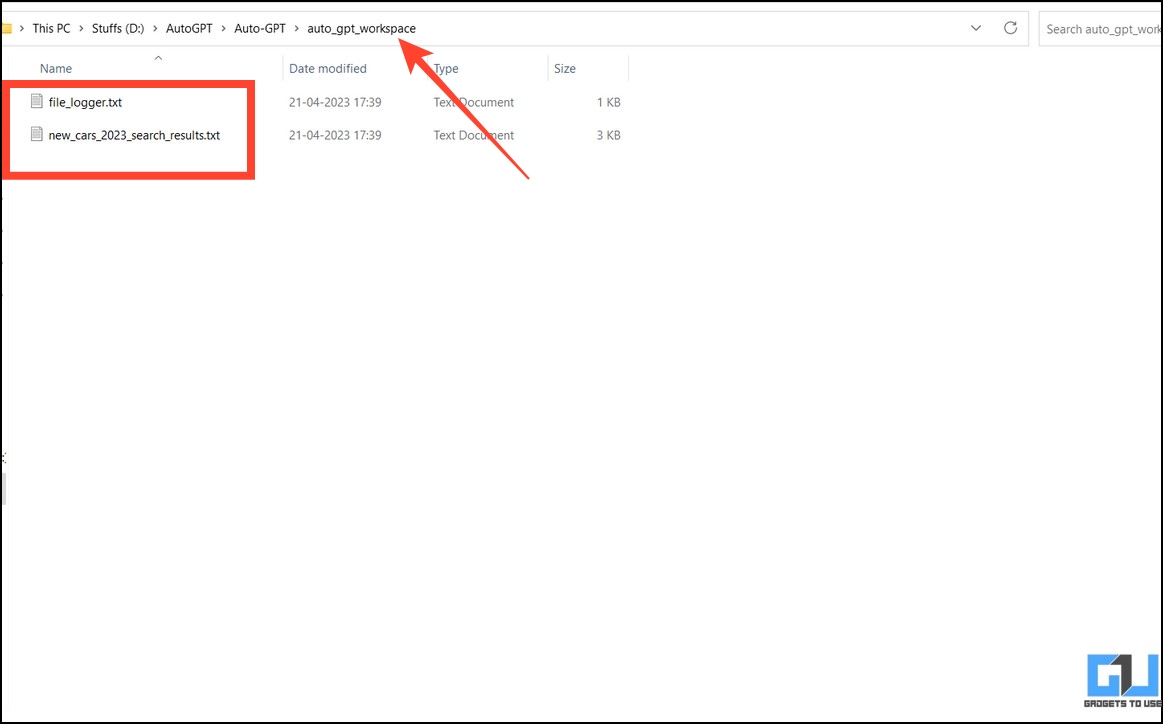
9. Once AutoGPT successfully processes your goals, they are saved to the auto_gpt_workspace folder inside the AutoGPT directory.
How to Use AutoGPT on PC via AgentGPT
Besides doing the technical heavy lifting of installing various software and executing commands, AutoGPT can be experienced on a web browser through the AgentGPT open-source project. Using this tool, you can deploy autonomous AI agents to fulfill your goal by dividing it into various tasks. For more details, check out our read on using AutoGPT with AgentGPT.
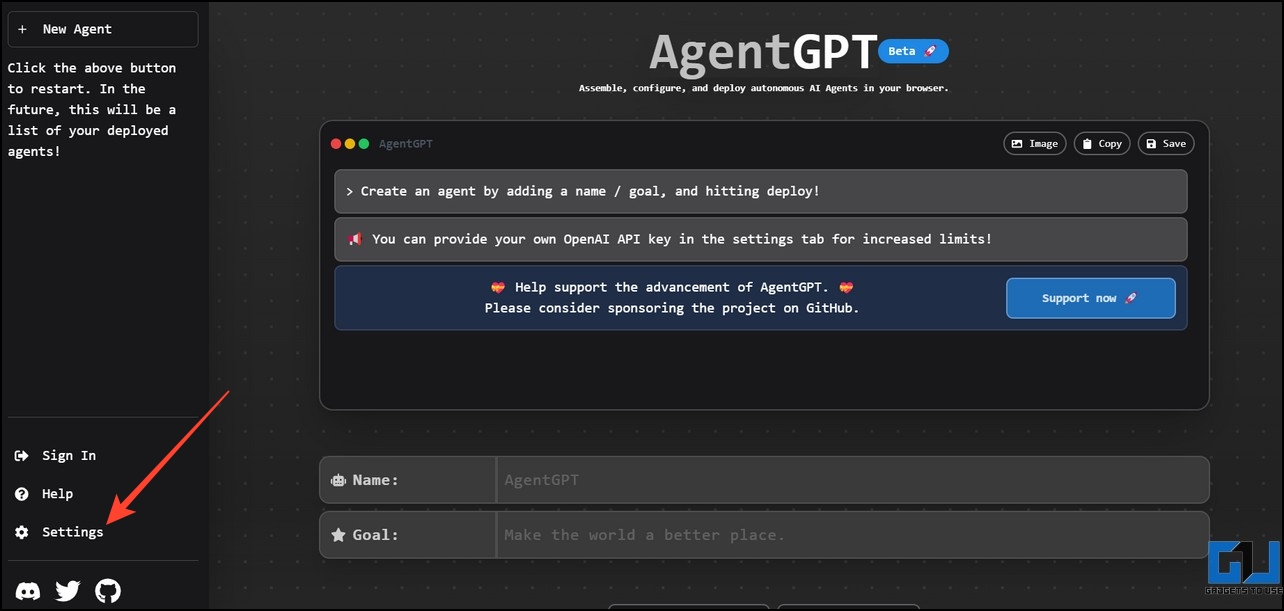
Note: Unlike AutoGPT’s Python app, AgentGPT only allows users to enter and execute a single goal.
Try Godmode Space to Use AutoGPT on a Browser
Similar to AgentGPT, Godmode Space offers a unique online tool that uses AutoGPT and BabyAGI models to generate unique and creative outputs based on the provided objective. What makes it interesting is its minimal interface that only requires a click to interact with the tool. Here’s how you can experience it on your browser:
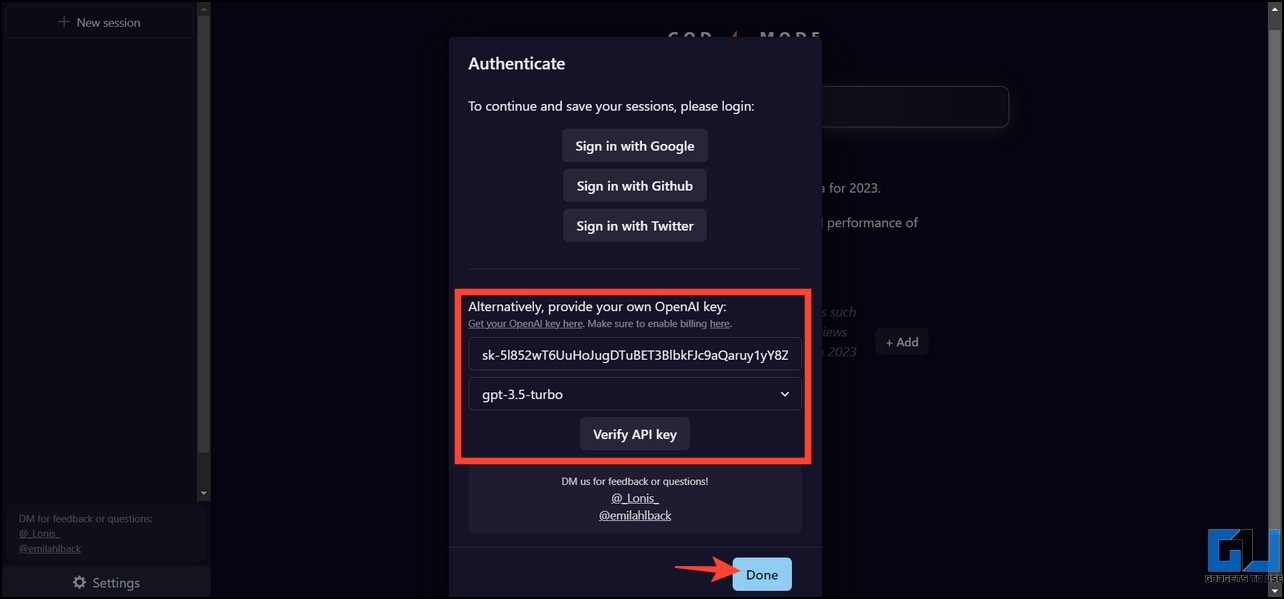
1. Access Godmode Space on your web browser and click the Settings button in the bottom-left corner.

2. Enter your OpenAI key, choose the AI model, and click the Done button.
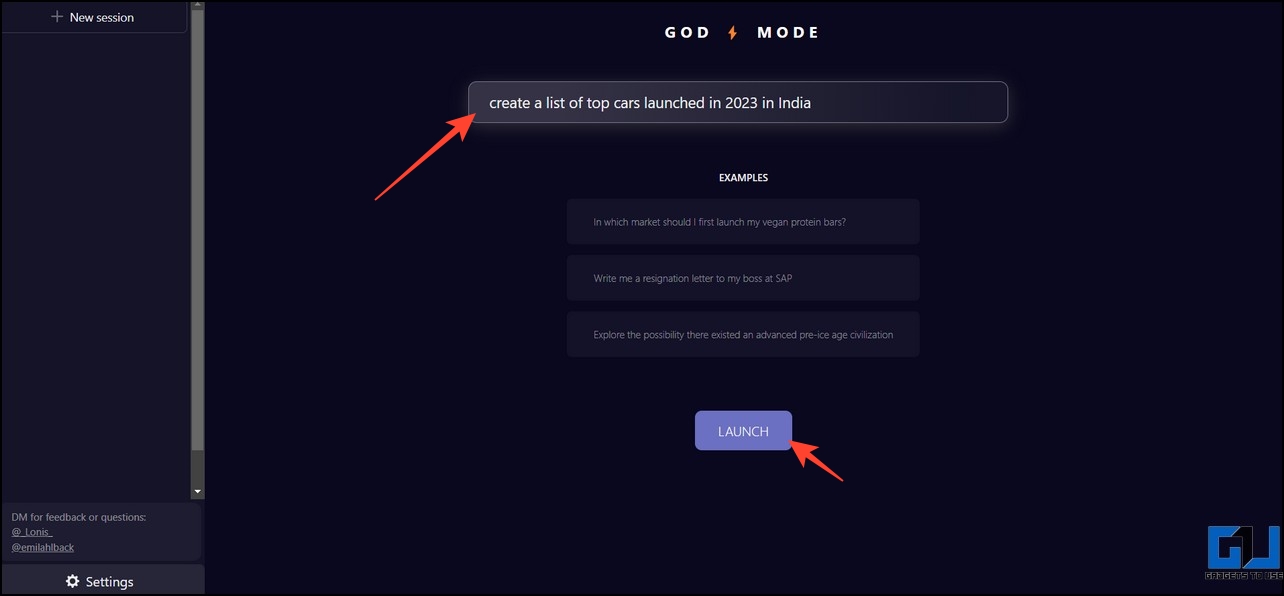
3. Next, enter your objective/goal in the search bar to process it using AutoGPT.
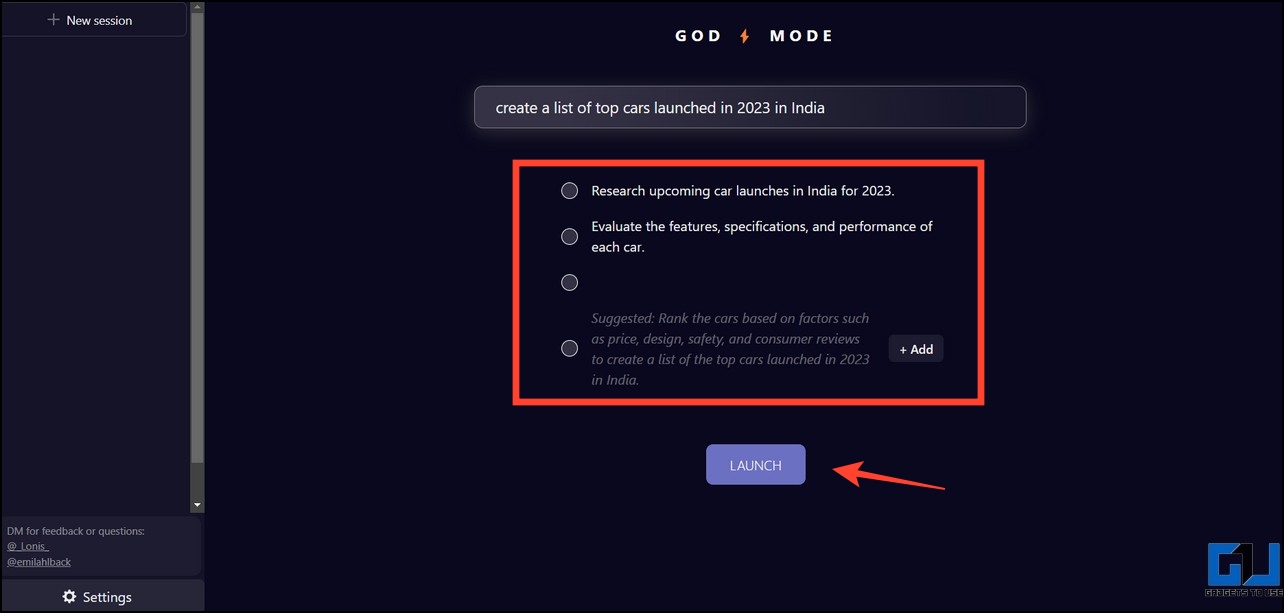
4. The tool will analyze the entered objective using its AI model and suggest tasks. You can add relevant tasks to your goal by clicking the Add button.
5. During the session, the tool will request your approval to process its decisions. You can approve them by clicking the Approve this Plan button.
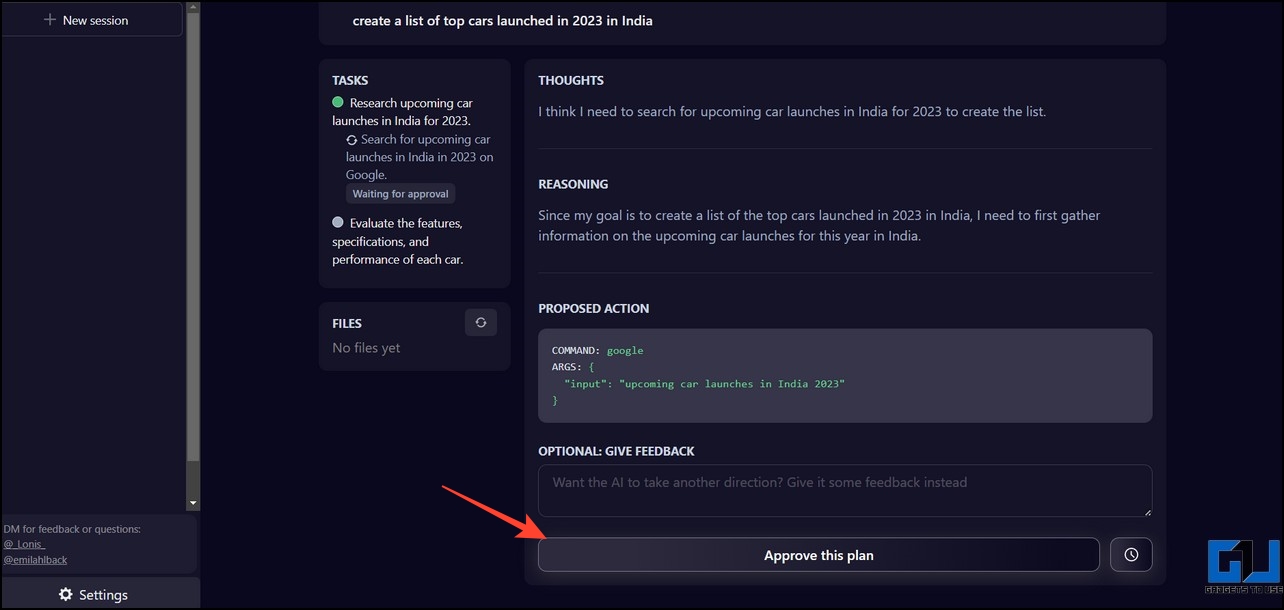
6. Alternatively, you can write feedback for a decision if you wish to deny it or change the course of processing.
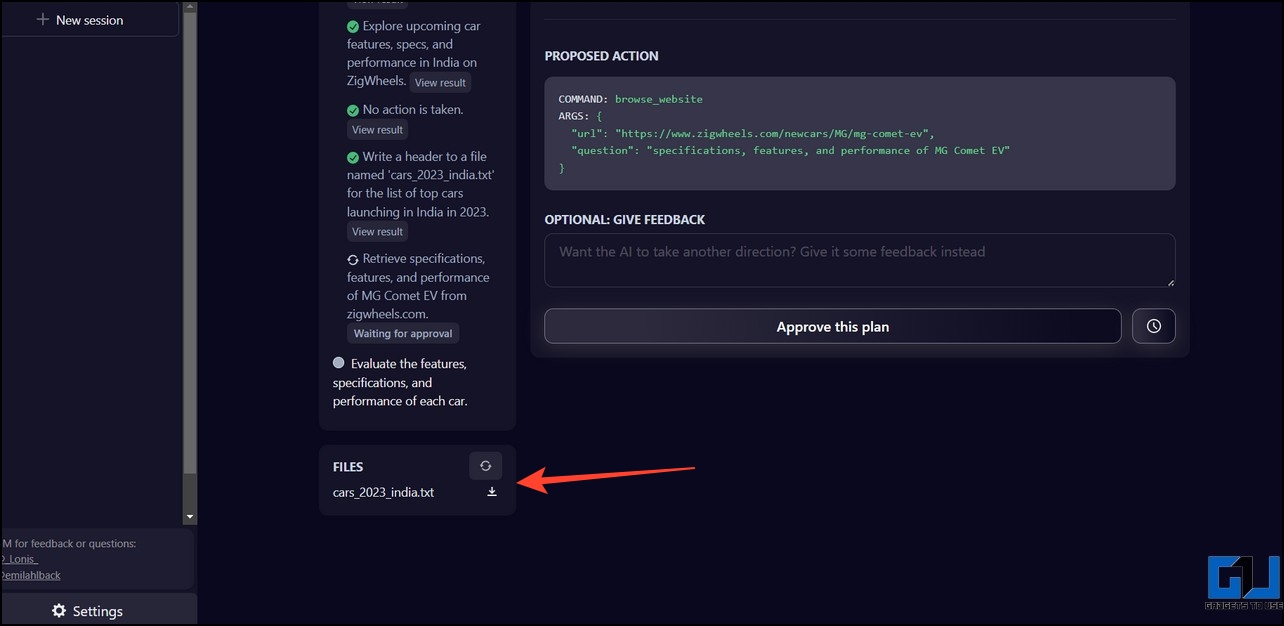
7. Once processed, you can download the results through the Files section.
FAQs
Q. How to Download and Install AutoGPT on a PC?
You need to download git for autoGPT, configure it with API keys, and execute some commands. Follow the easy steps in this explainer to download and install AutoGPT on any PC.
Q. How to Use AutoGPT?
Once you’ve set up the environment variables and API keys, you can launch AutoGPT in the terminal with the ‘python -m autogpt’ command.
Q. Can You Use AutogGPT Online Without Installing It?
Yes, you can use the AgentGPT online tool to use AutoGPT without installing it on your system. For more details, refer to the steps above.
Wrapping Up
We hope this guide has helped to install and use AutoGPT on your PC through its easy steps. If you find it useful, spread the word with your friends, and subscribe to GadgetsToUse for more quick installation guides. Meanwhile, you can check other productive ChatGPT links below:
You might be interested in the following:
- 3 Ways to Create Memes Using ChatGPT
- 6 Ways to Download or Export ChatGPT Conversations
- How to Use ChatGPT with Siri on iPhone and iPad
- 2 Ways to Use ChatGPT on Your Mac’s Menu Bar
You can also follow us for instant tech news at Google News or for tips and tricks, smartphones & gadgets reviews, join GadgetsToUse Telegram Group, or for the latest review videos subscribe GadgetsToUse Youtube Channel.