

Quick Answer
- A smile can make or break an image if you have a really good photo of yourself or a group photo and want to add a smile to a person’s non-smiling face.
- In case you want to fix the image on your Windows PC and add a smile to a non-smiling face of a person.
- However, oftentimes we end with an image without a smile, or in the case of the group photo, even a single person looking serious in the image can ruin a happy picture.
A smile is crucial in making a portrait or group image look friendly and appealing. However, oftentimes we end with an image without a smile, or in the case of the group photo, even a single person looking serious in the image can ruin a happy picture. This can be fixed by adding a smile to the person’s face using some AI tools. Today in this read, we will discuss how you can use AI to add a smile to a person’s face for free on a phone or computer. So without any further ado, let’s get started.

Methods to Make Your Images Smile With AI
A smile can make or break an image if you have a really good photo of yourself or a group photo and want to add a smile to a person’s non-smiling face. The following methods can help you fix such images and add a smile using AI. The below-mentioned methods work on Android, iOS, and PC.
Method 1 – FaceApp
The easiest way to add a smile to your or someone else’s photo is through FaceApp. It uses an advanced algorithm to add a smile to a non-smiling face by sending the image to cloud servers, and the data sent is encrypted. Here’s how to use FaceApp to add a smile to your photos.
1. Install FaceApp (Android, iOS) on your phone, and complete the setup.
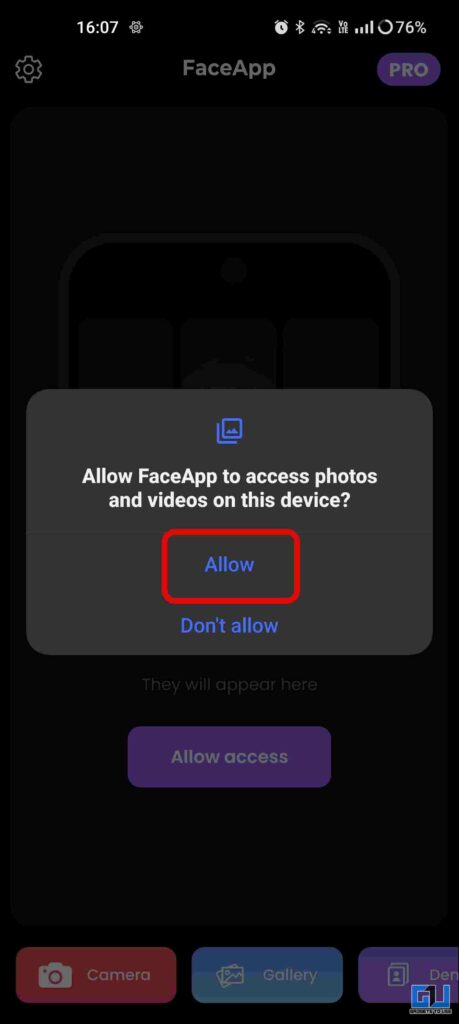
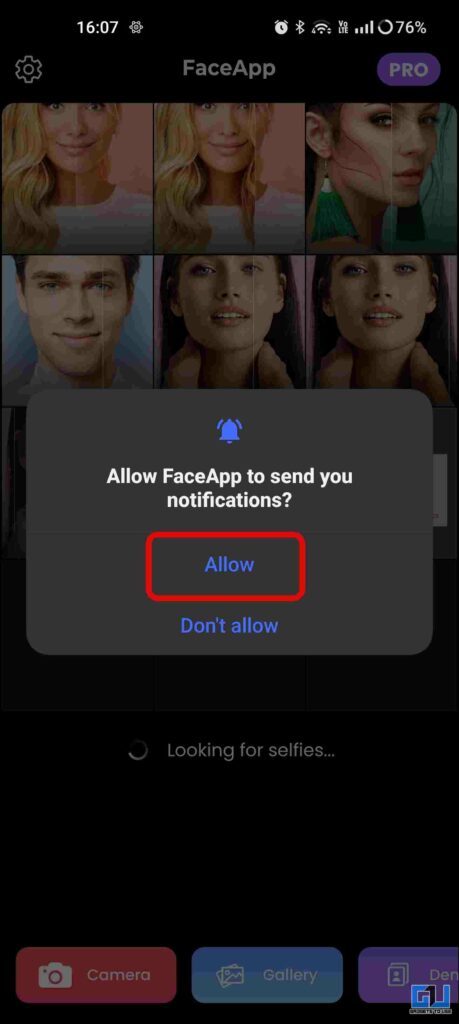
2. Allow the required permissions for the app to run properly.
3. Select the image you want to fix and add a smile.
4. On the pop-up menu, tap Agree to send your image to FaceApp’s cloud server for a short period.

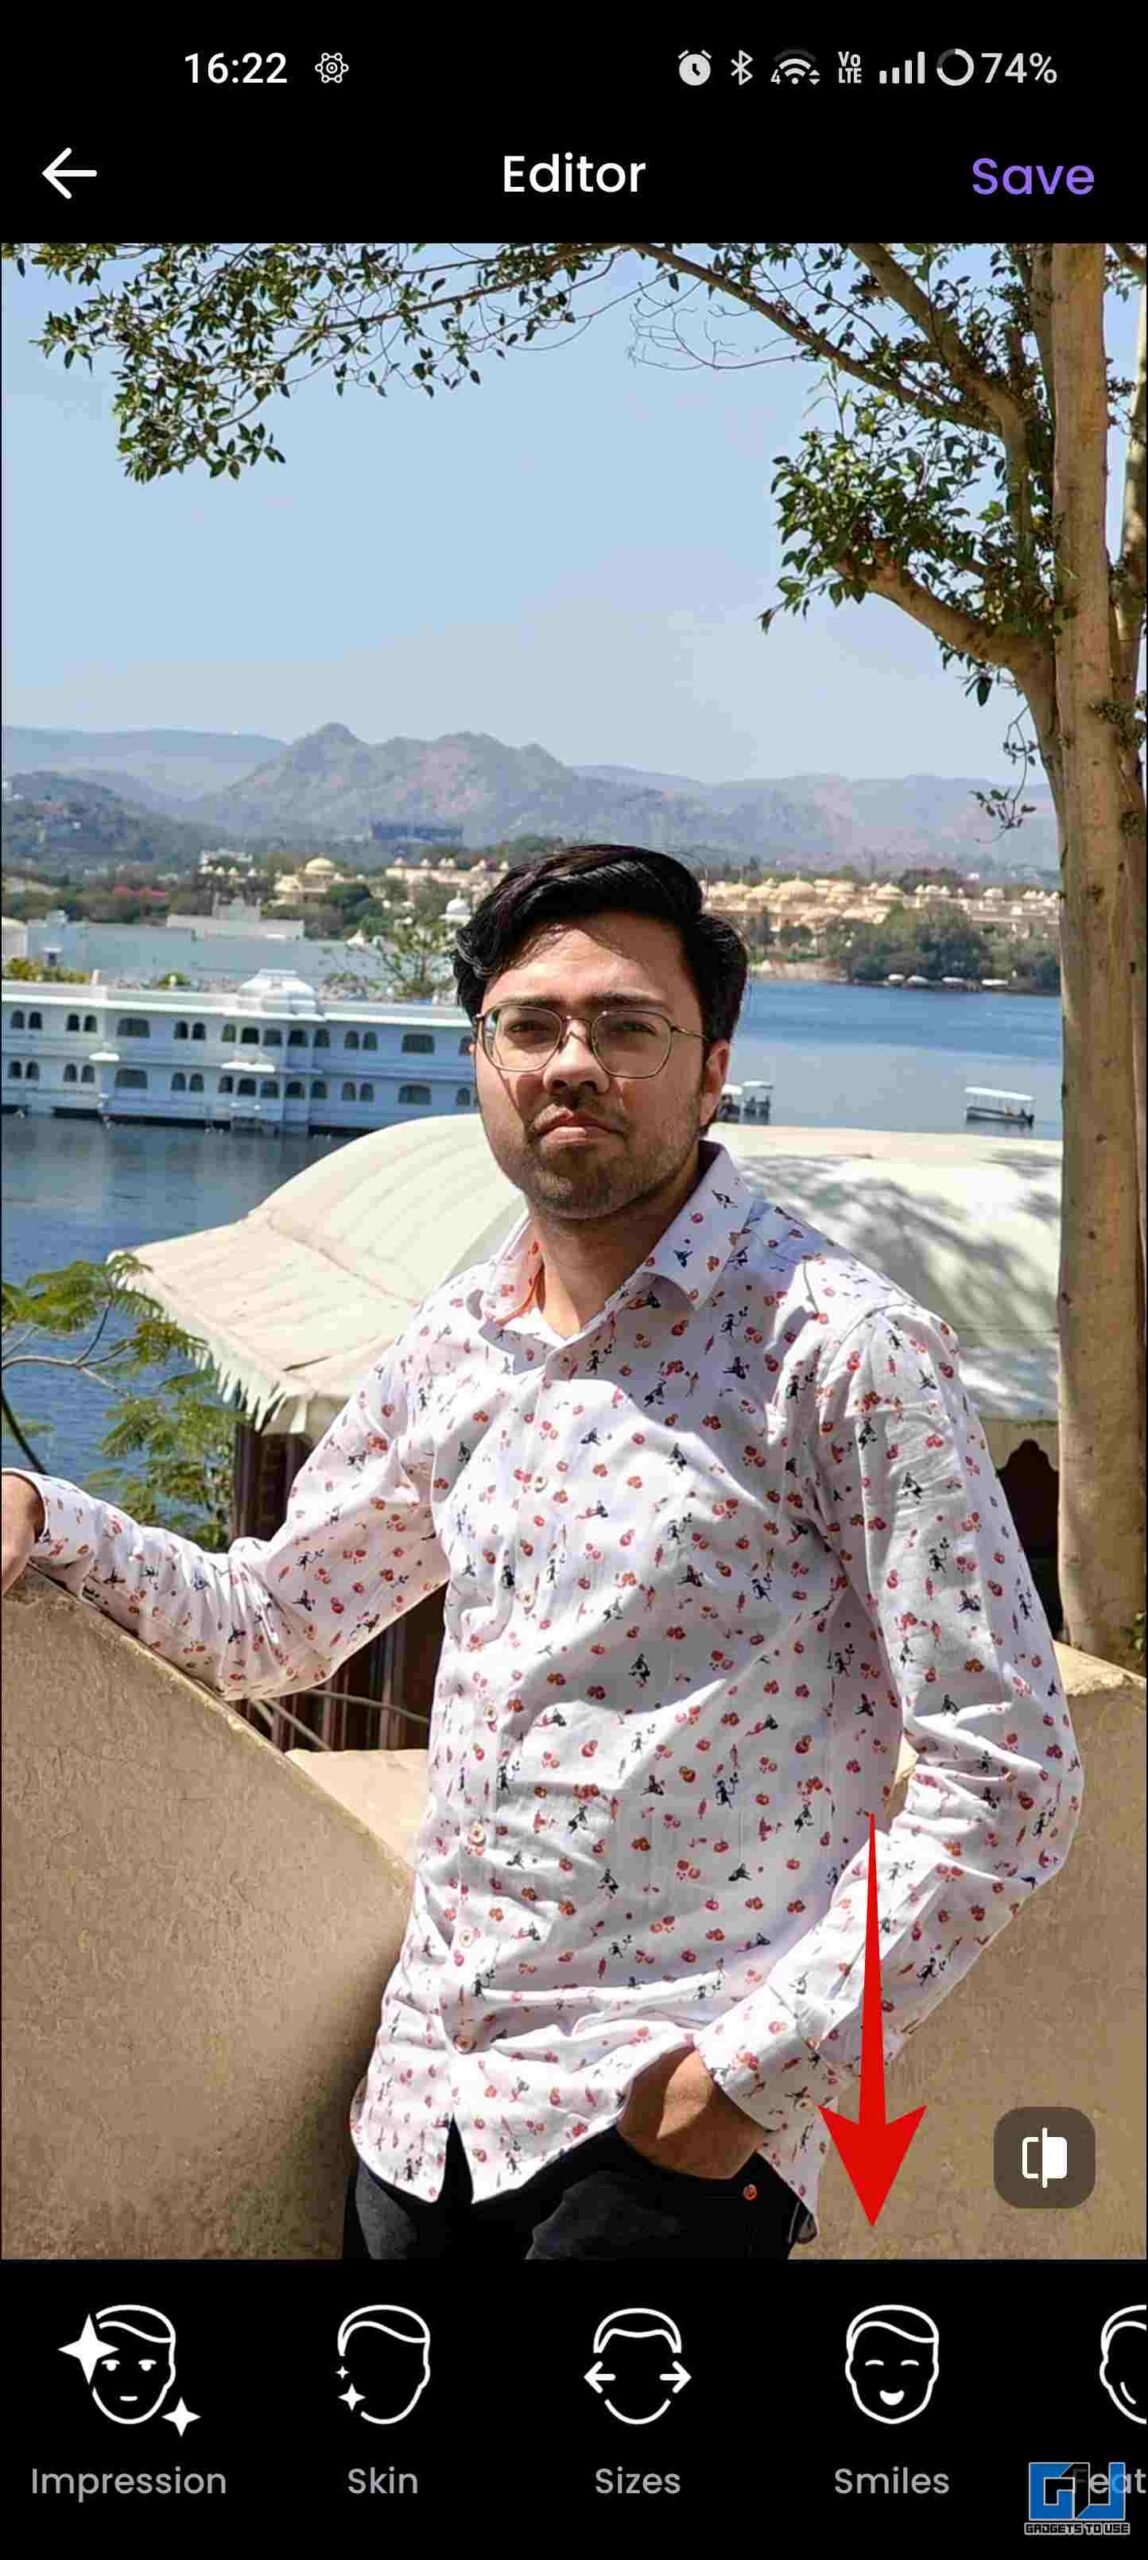
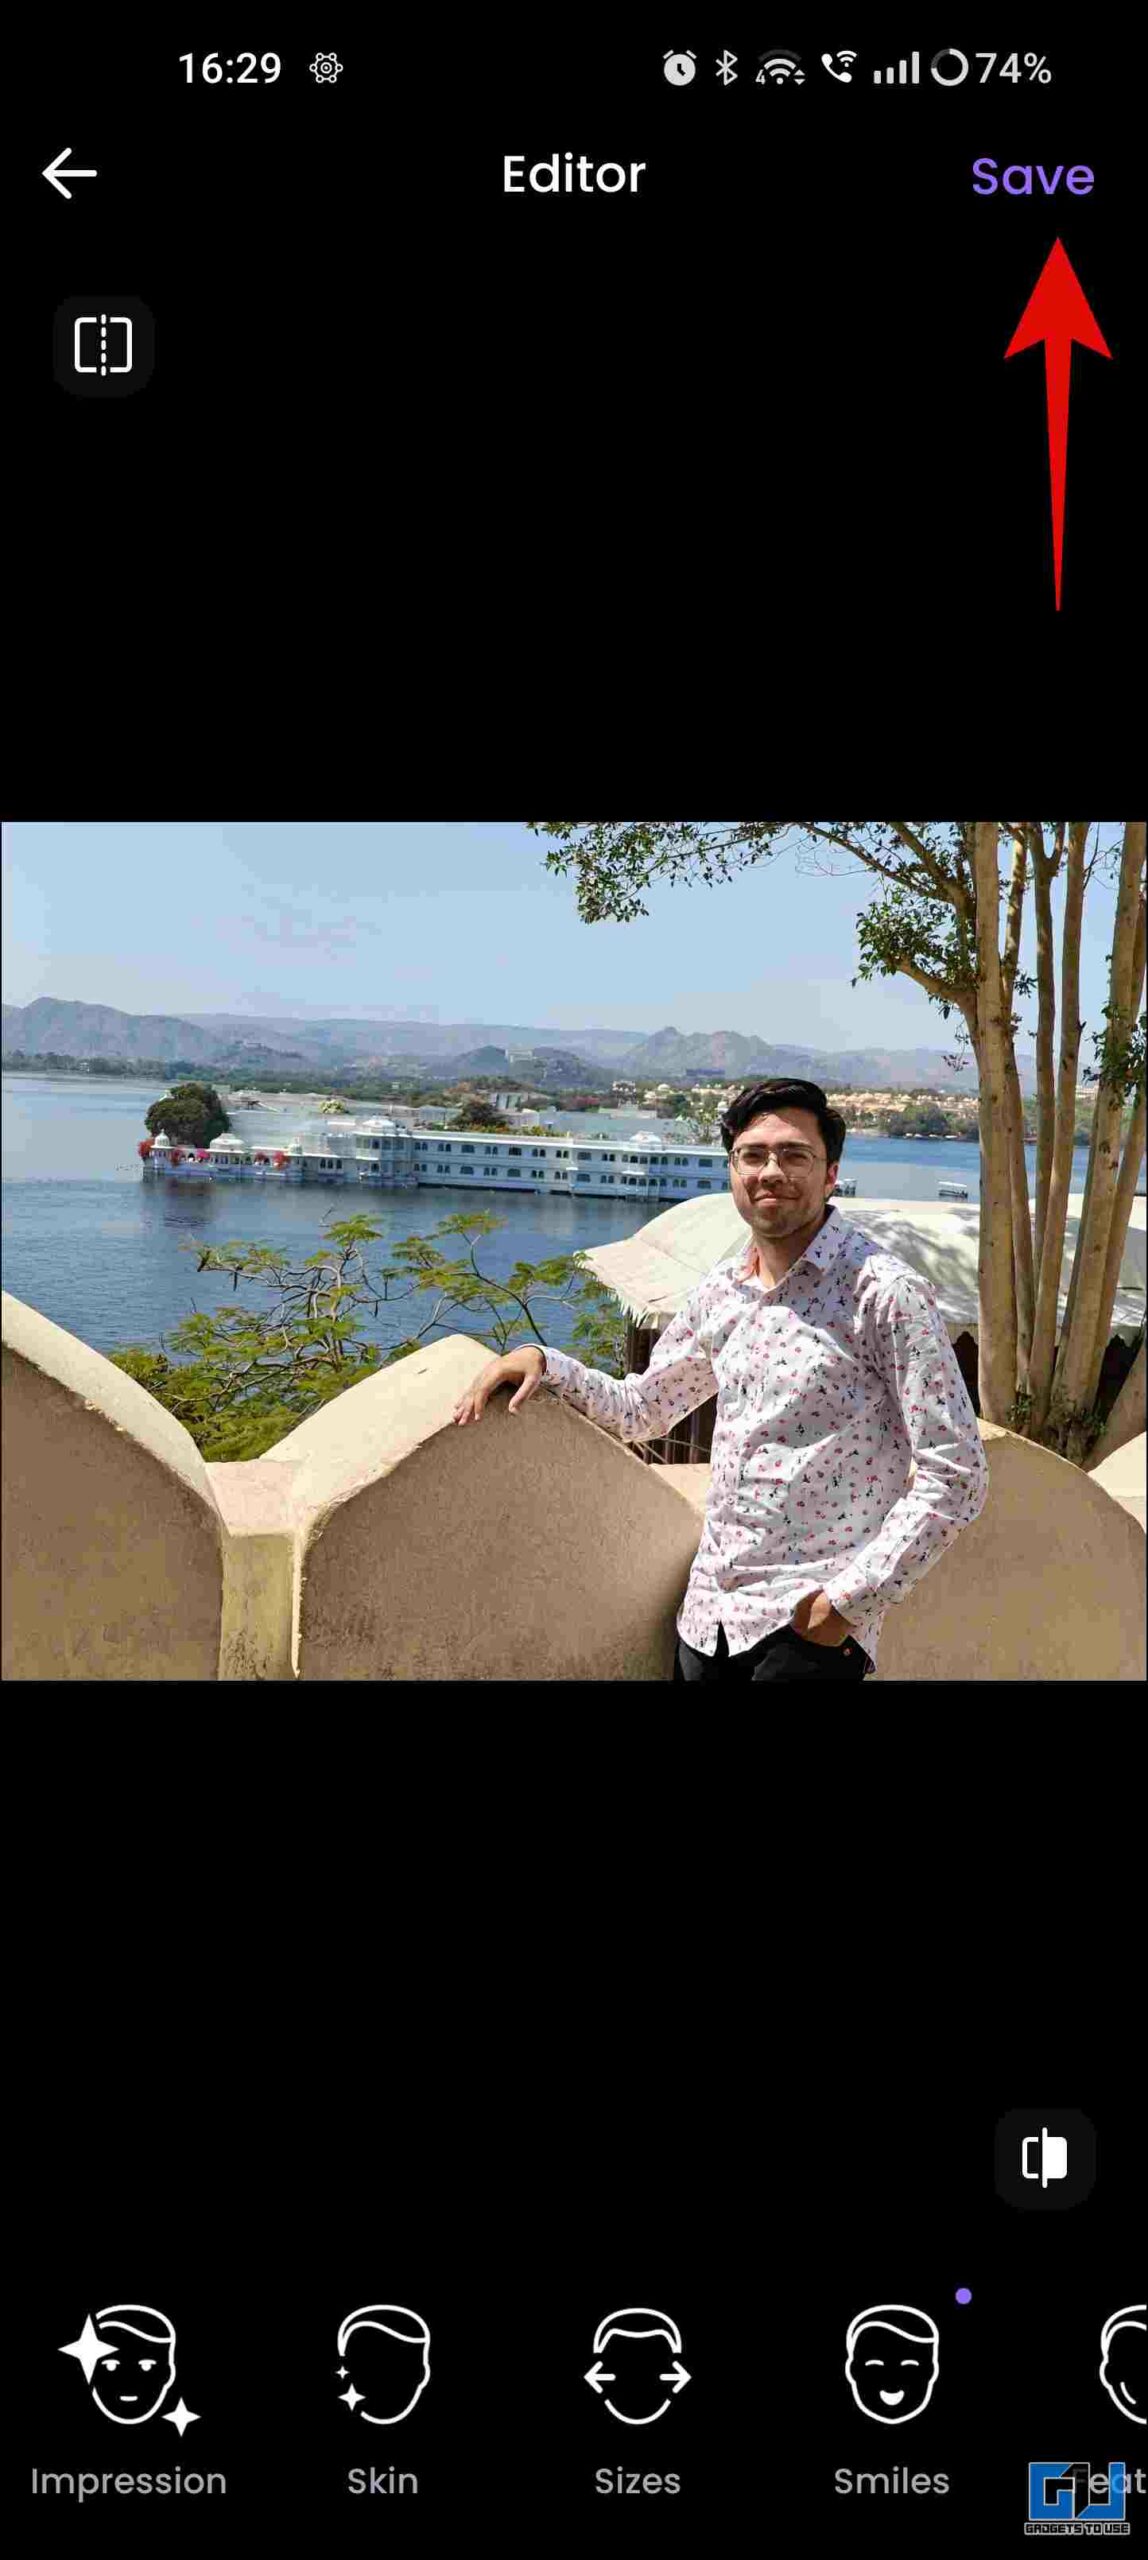
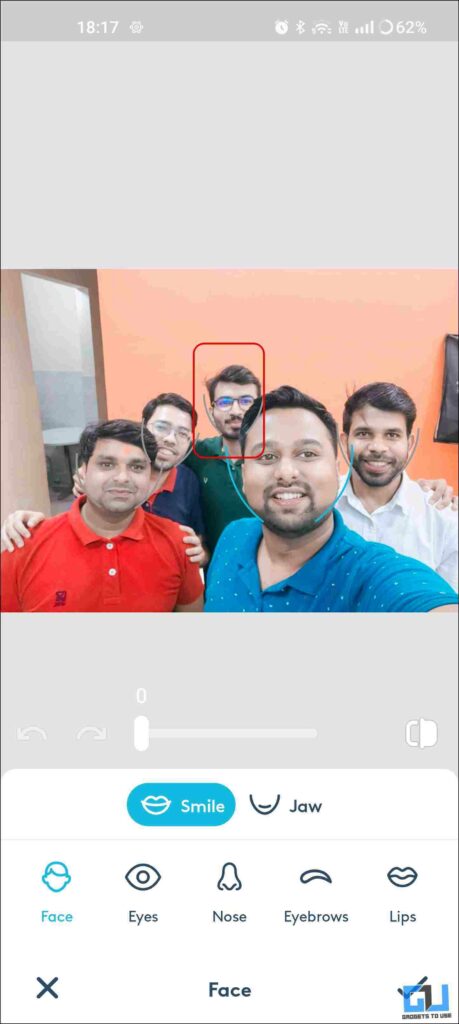
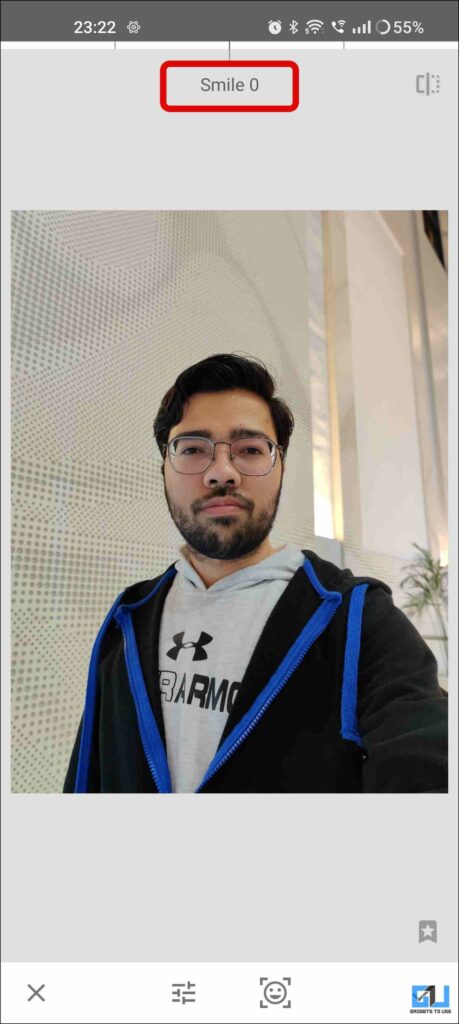
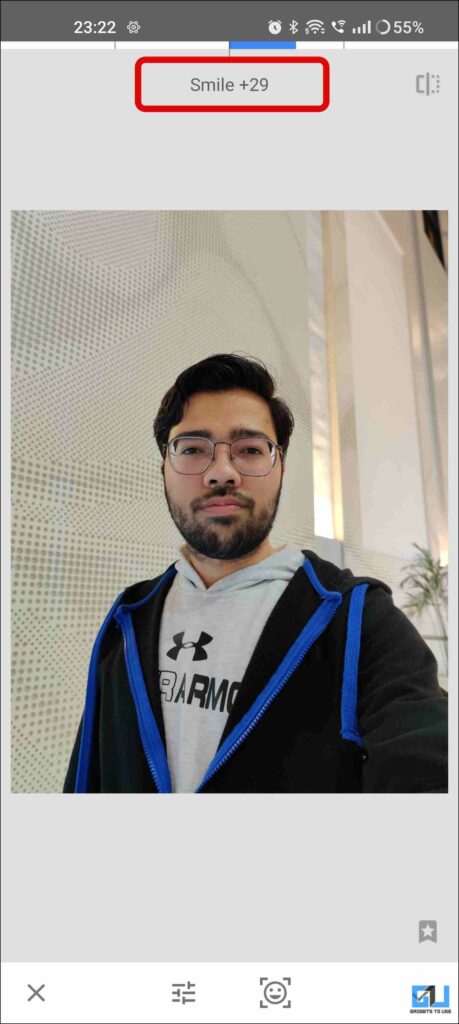
5. Next, switch to the Smiles tab from the bottom navigation bar on the image editing dashboard.
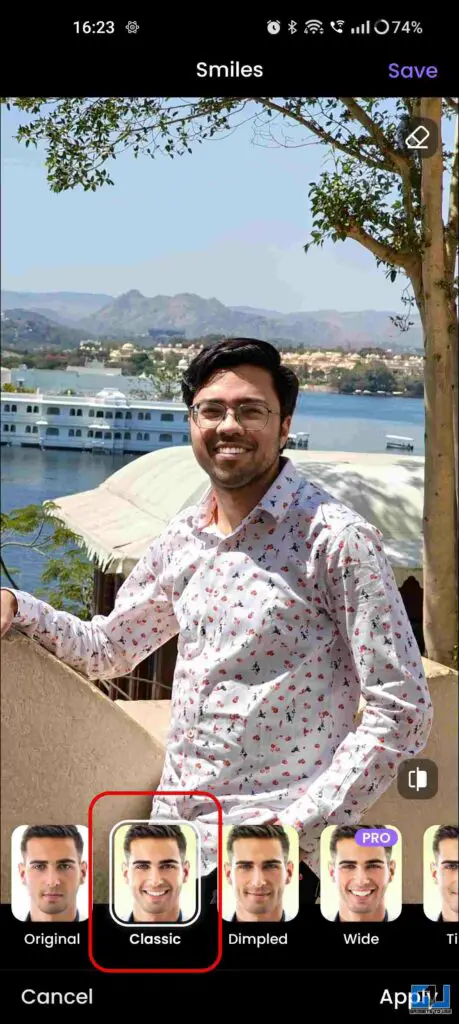
6. On the next screen, choose between the available smile option and use the one which suits best on the image. Only two options are available for free.


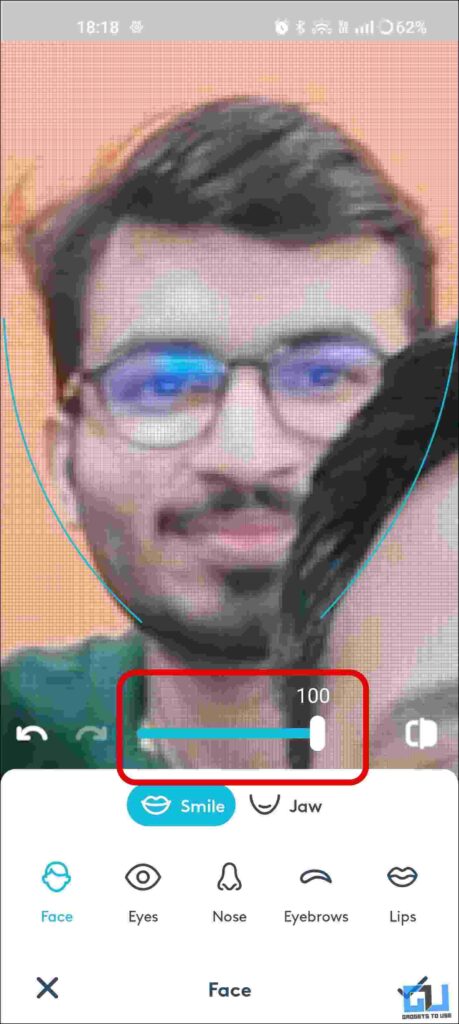
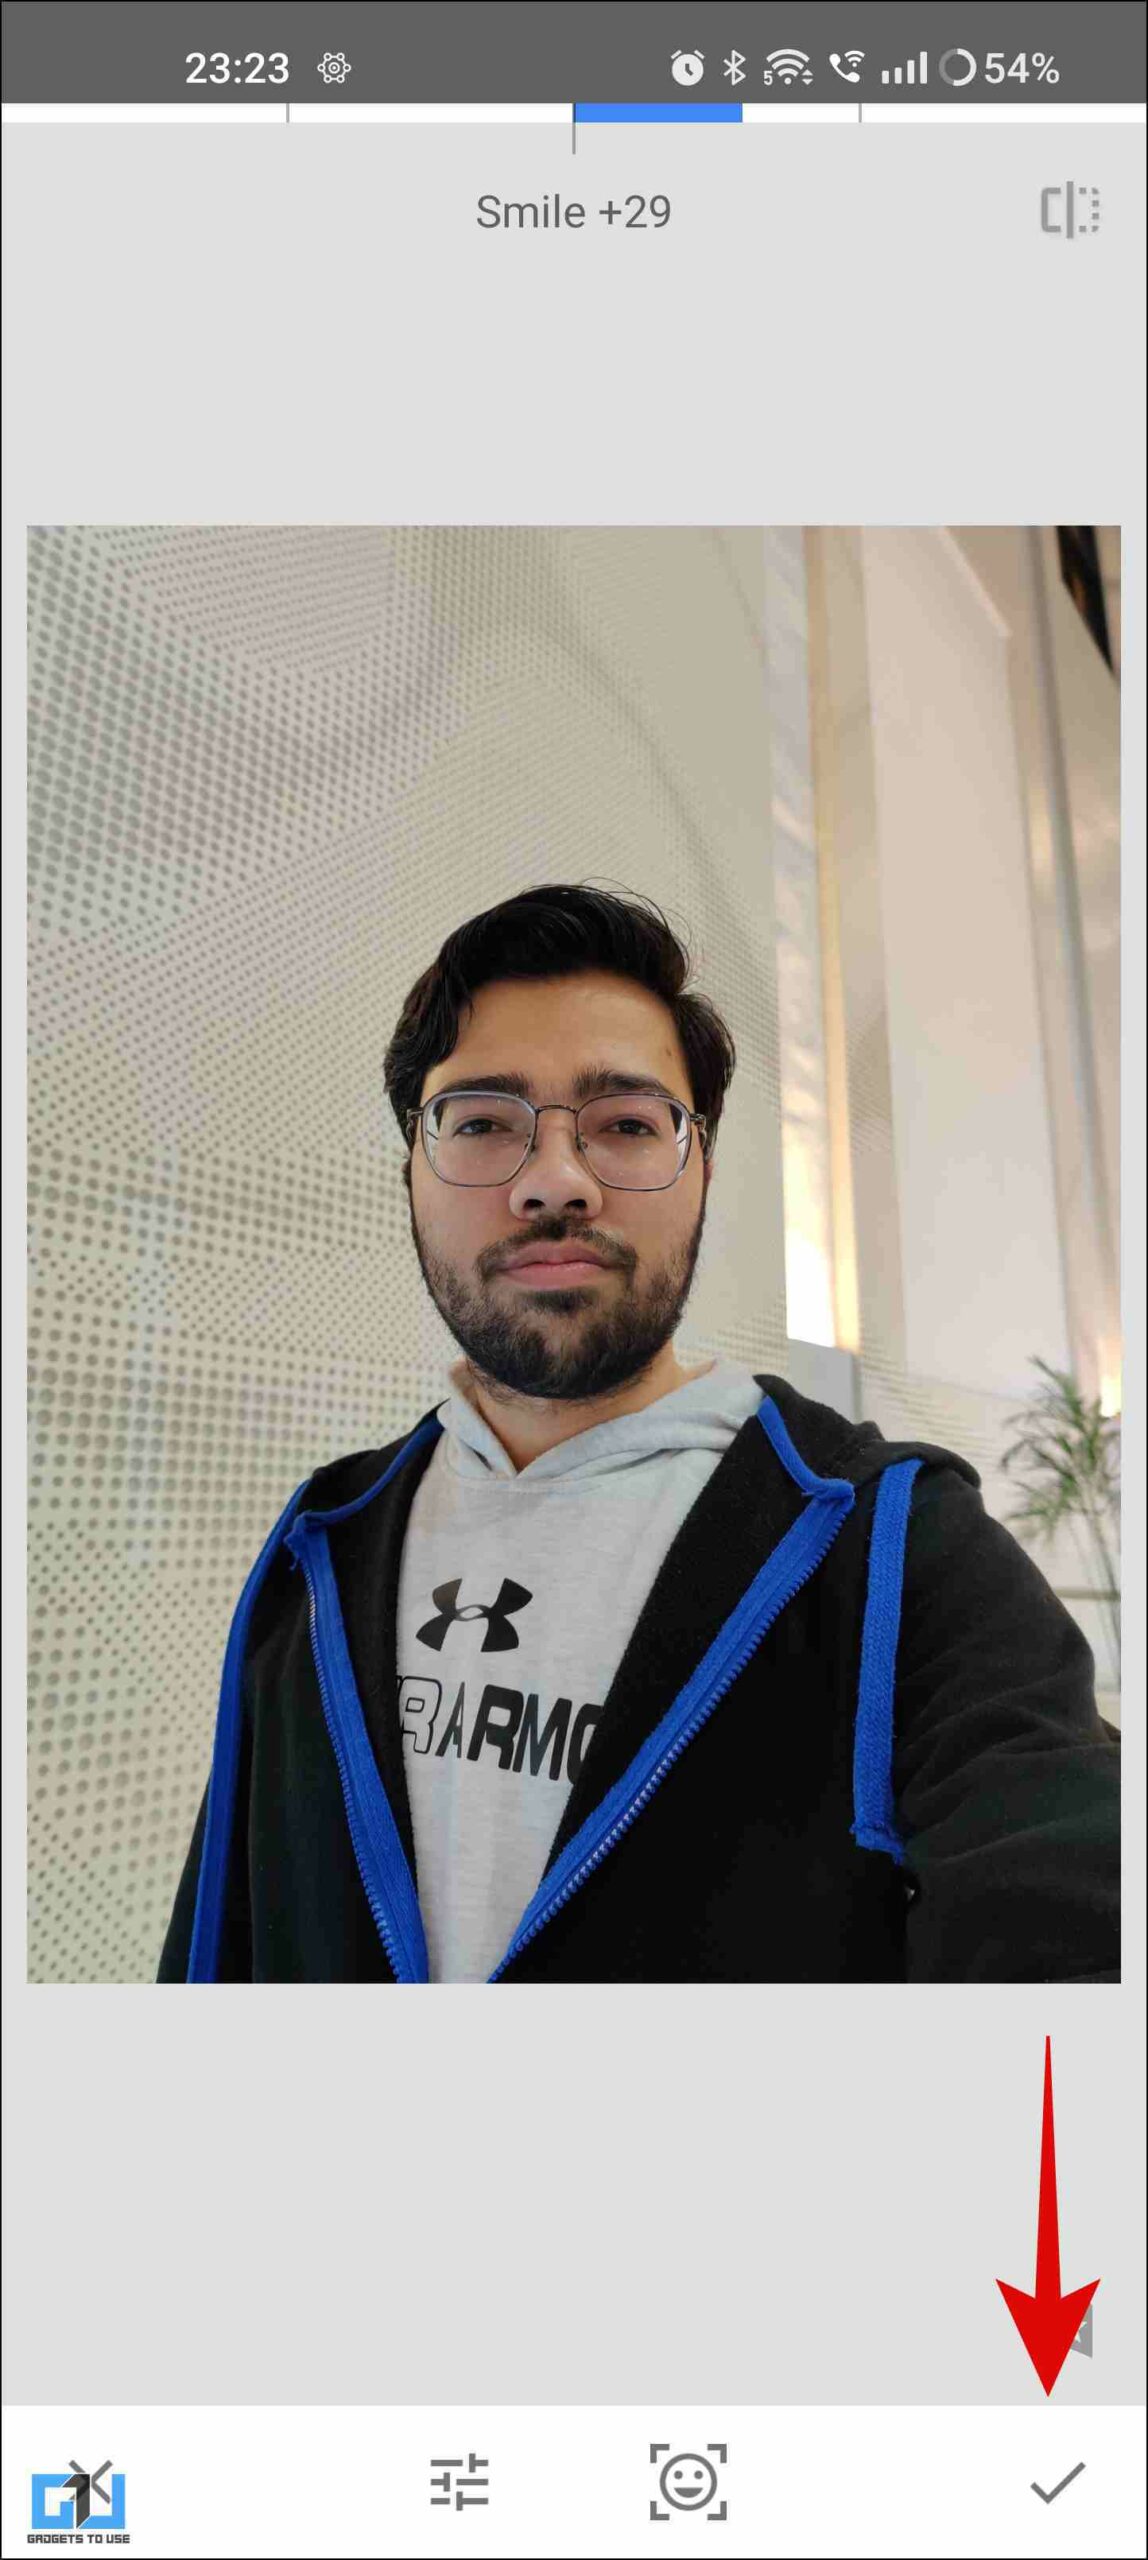
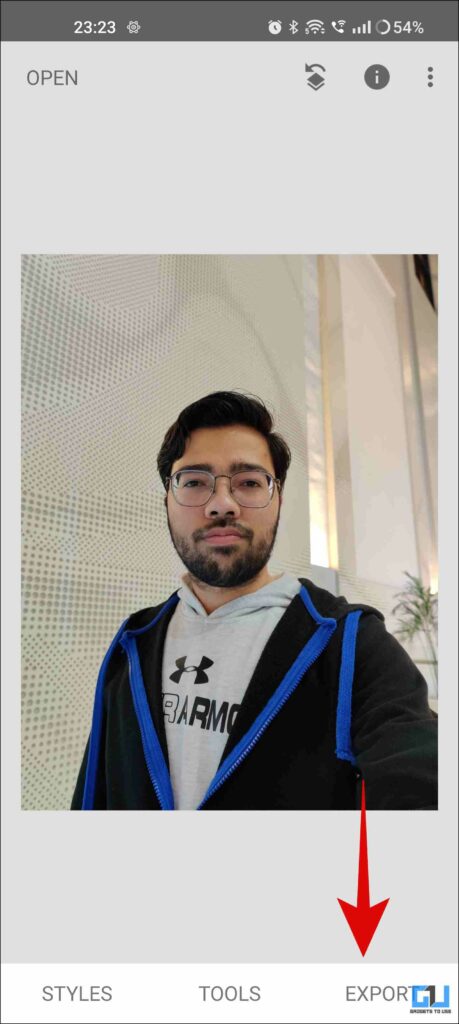
7. Once done, save the image. The saved image will have a watermark at the bottom right corner without the premium plan.
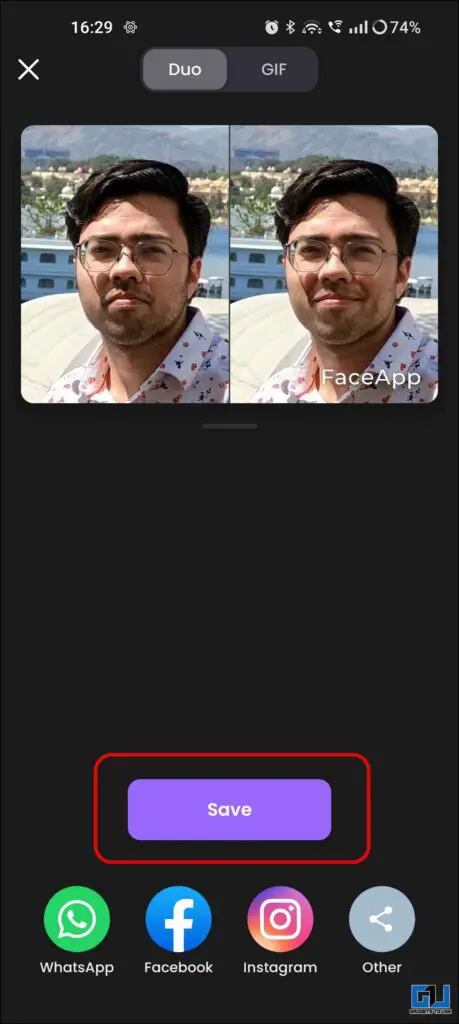
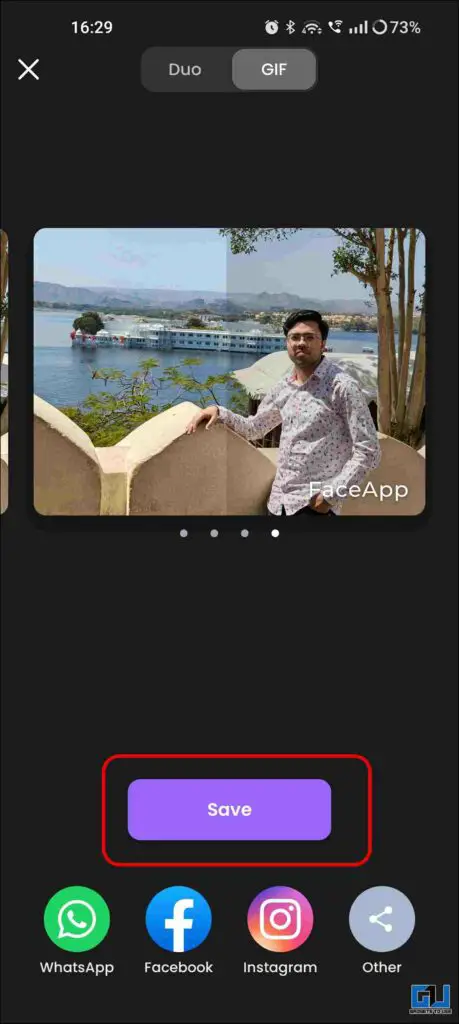
You can even save a before and after image or choose between four gif transitions revealing the image with a smile.
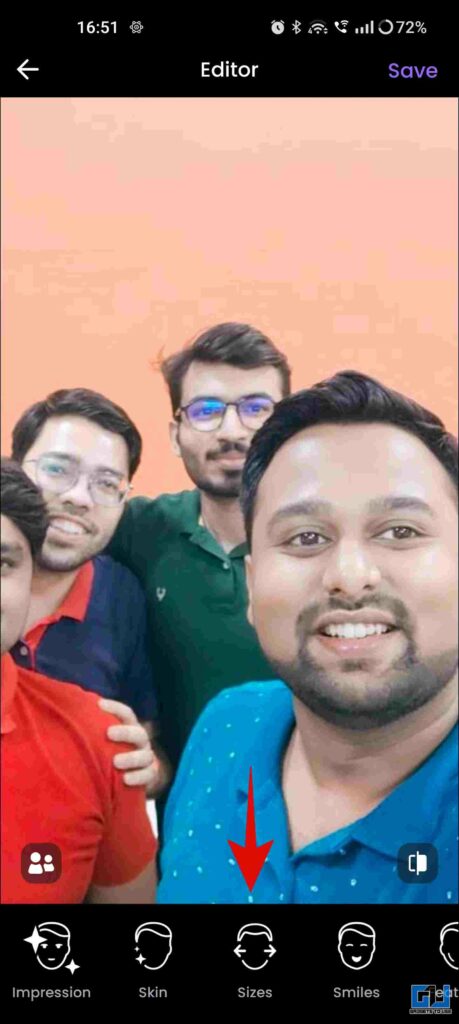
It also works on images with multiple faces; all you need to do is tap the face you want to smile and then choose a smile preset.


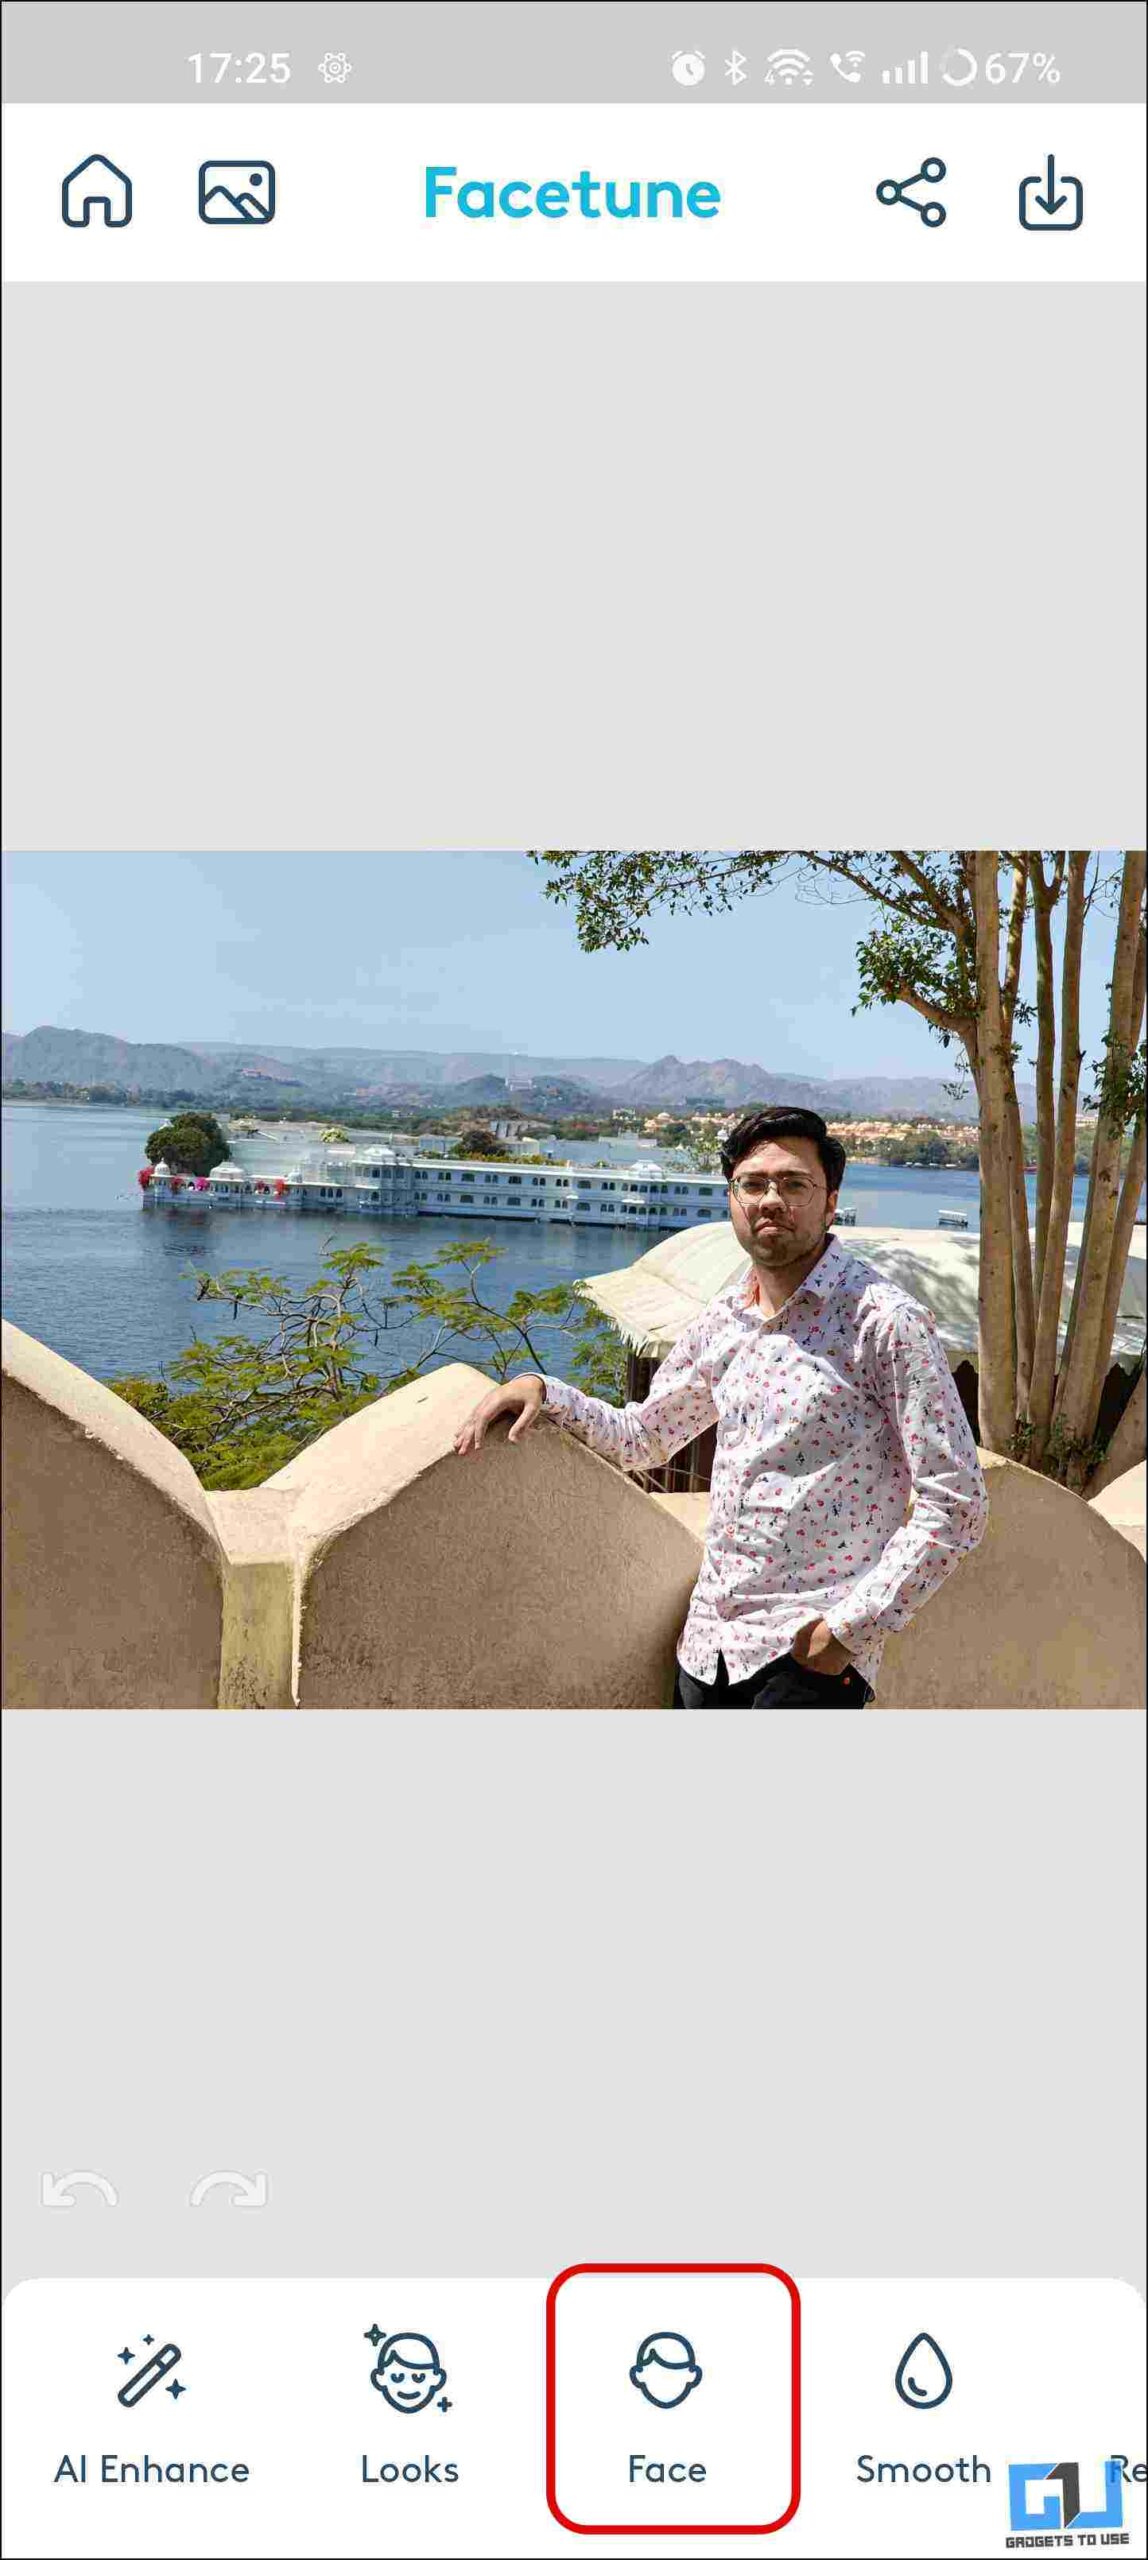
Method 2 – FaceTune App
If you don’t want any watermark on the final result, FaceTune is the way to go. It does not offer many presets like FaceApp, but it does all the processing on the device. Here’s how to add a smile using the FaceTune app.
1. Install and launch the FaceTune app (Android, iOS) on your phone.
2. Accept the terms and continue with the app.

3. Skip through the welcome screen and set it up.

4. Sign up with your Google, Facebook, or email account.

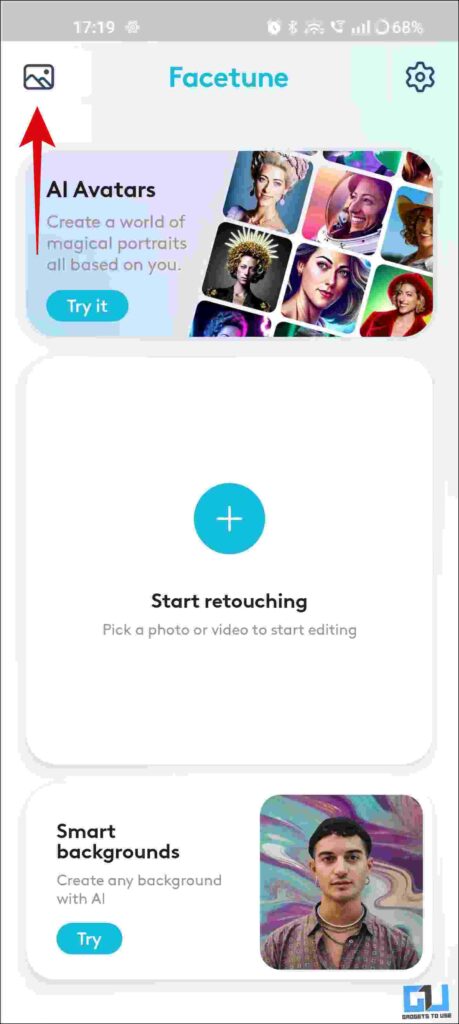
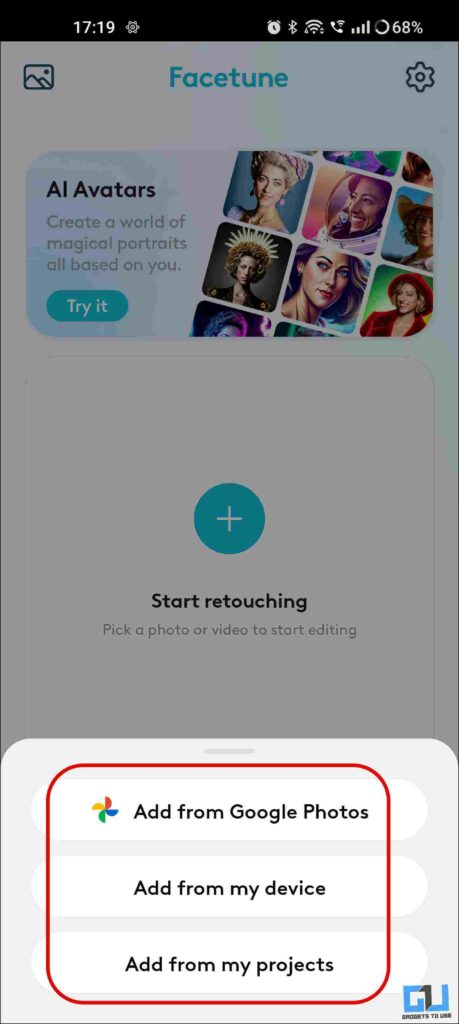
5. Once on the app dashboard, click the image icon to add your images from Google Photos, your device, or your projects.
6. Allow the app permission to access your photos.

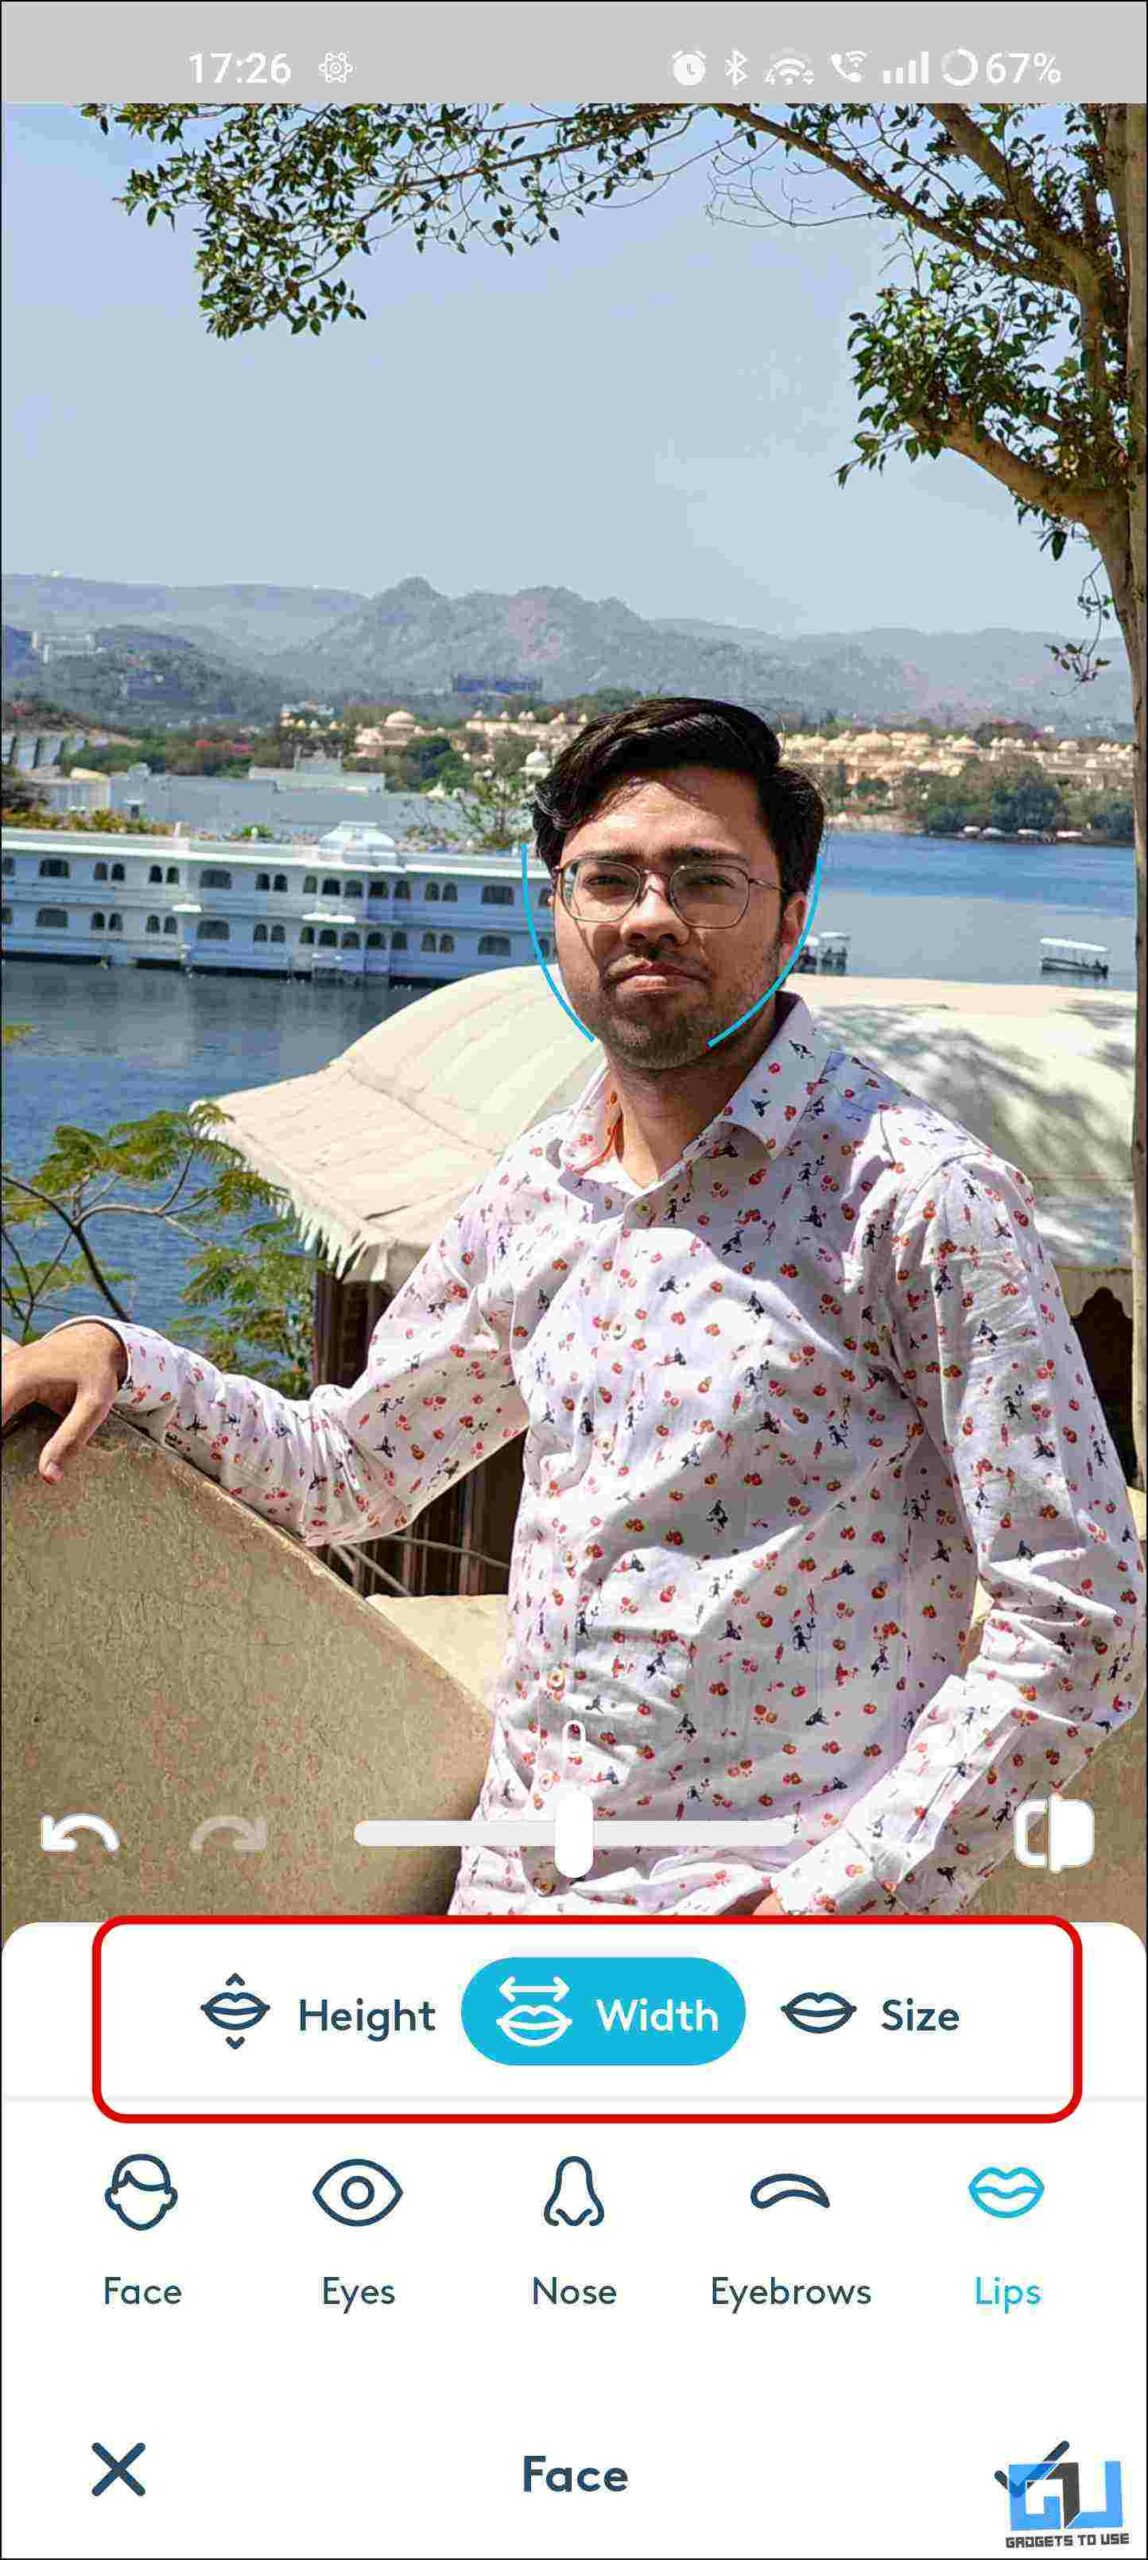
7. Once on the editing screen, go to the Face option from the bottom navigation bar.
8. On the next screen, adjust the slider to make the subject smile.
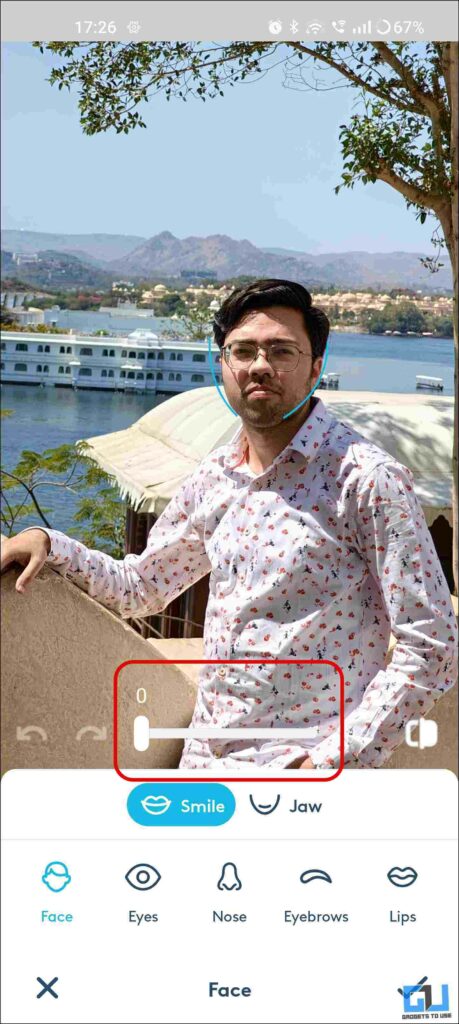

9. You can also adjust the smile’s height, width, and size.
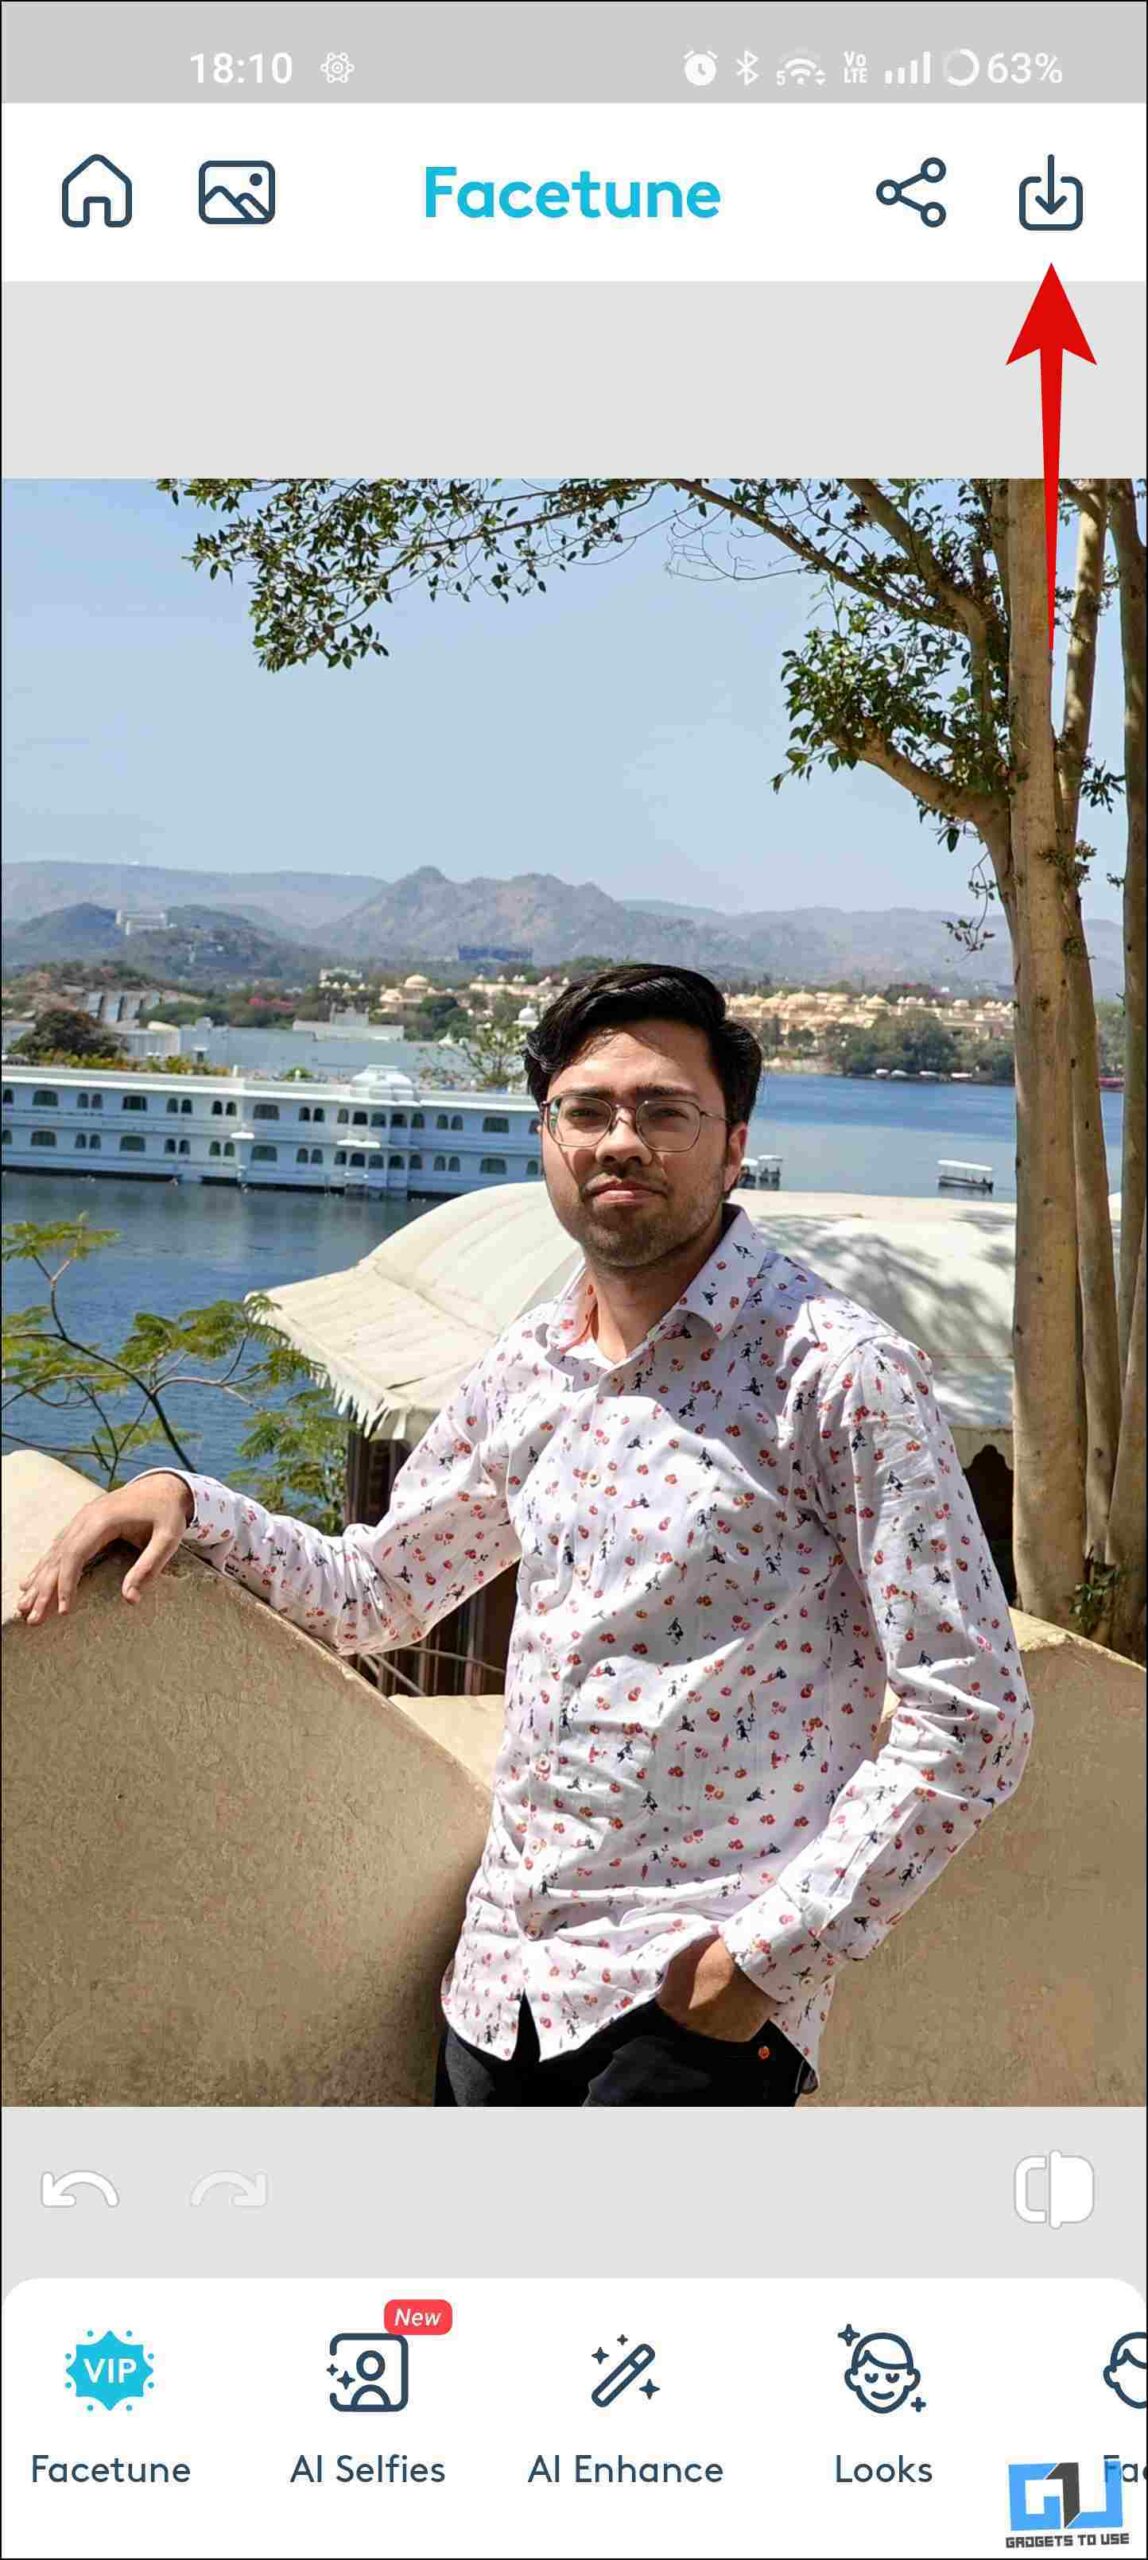
10. Finally, you can save the processed image to your phone from the download button at the top right.
It also works on images with multiple faces. You need to zoom to the face you want to smile and then adjust the smile slider.

The good thing about FaceTune is it does not add a watermark to the processed photo.


Method 3 – PhotoDiva App (Windows)
In case you want to fix the image on your Windows PC and add a smile to a non-smiling face of a person. The PhotoDiva app can be a good option to rely upon. It is free to use but adds a watermark at the bottom. Here are the steps to add a smile using the PhotoDiva app on Windows PC.
1. Download the PhotoDiva.exe file on your Windows PC, and install it.
2. Launch the application and add your photo to the app.

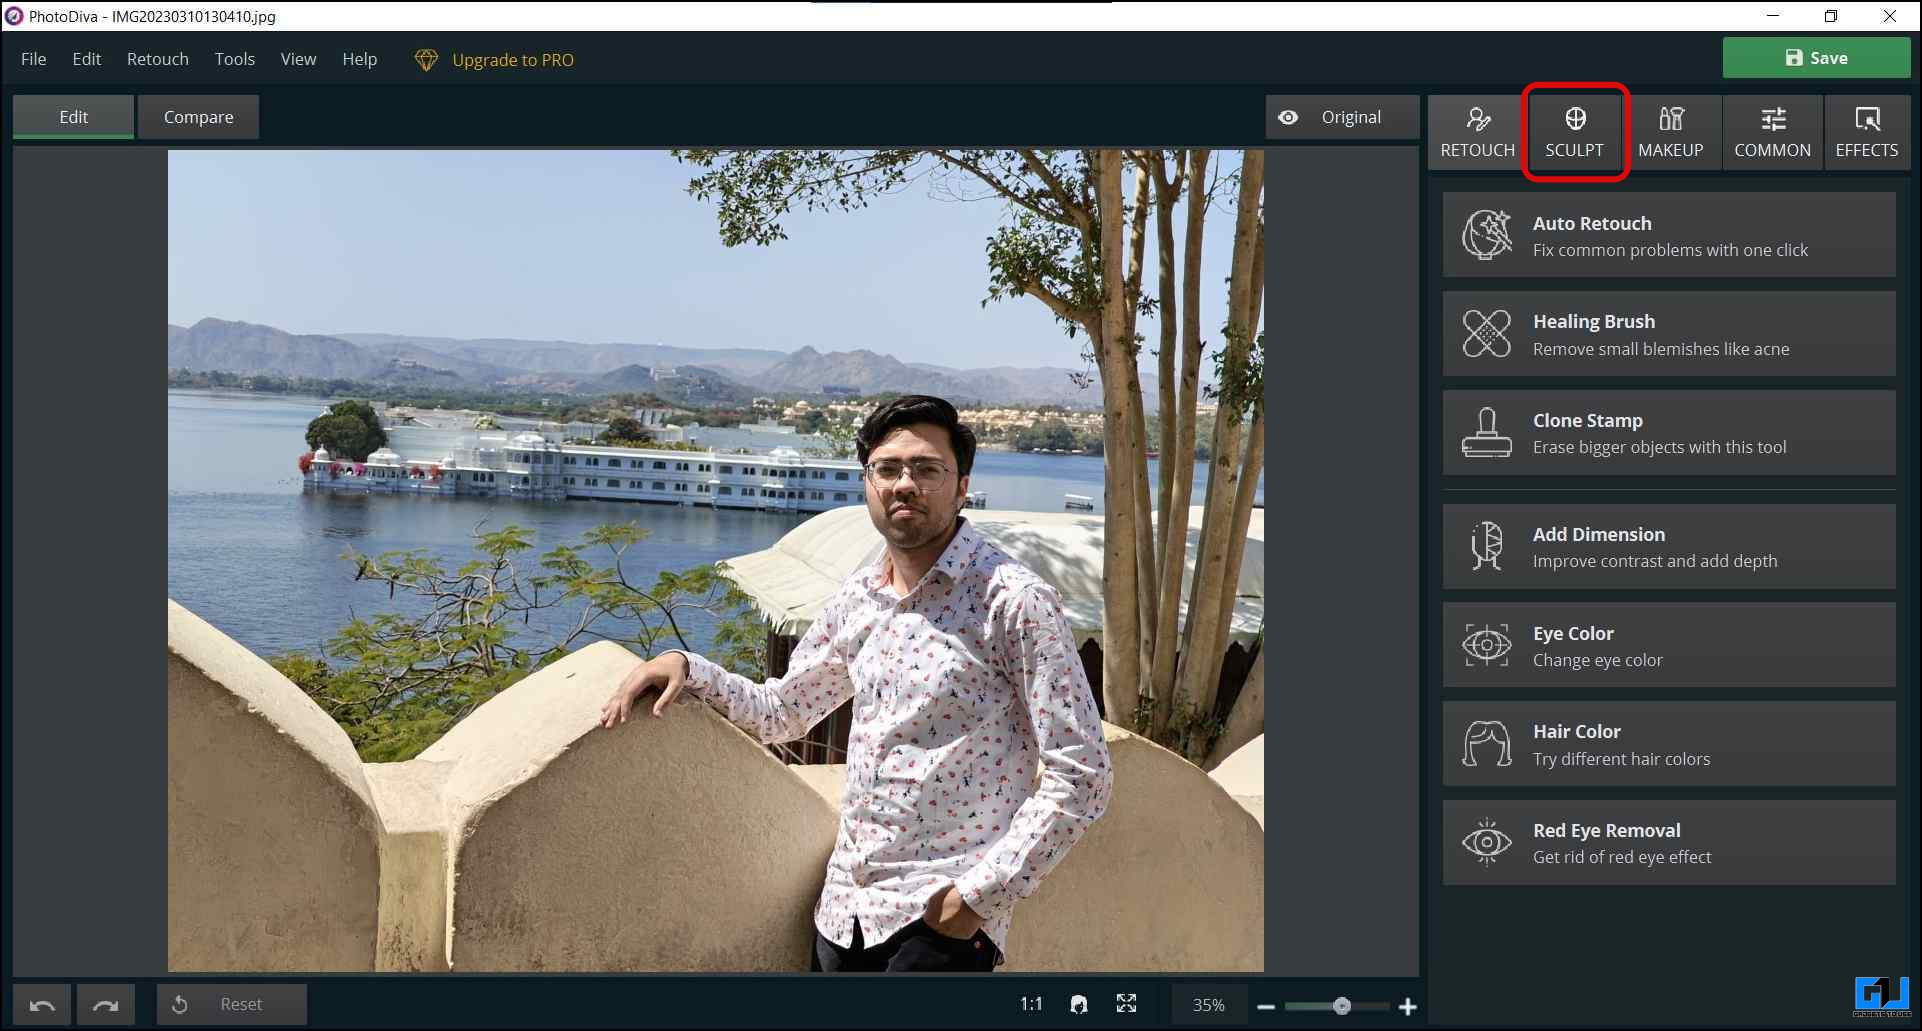
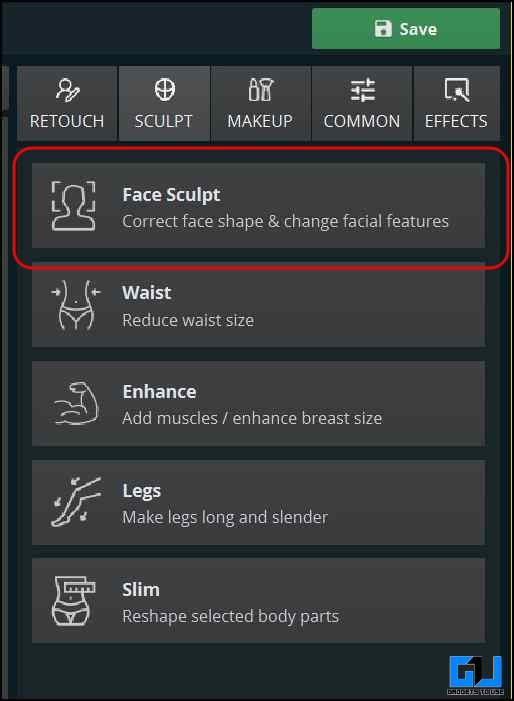
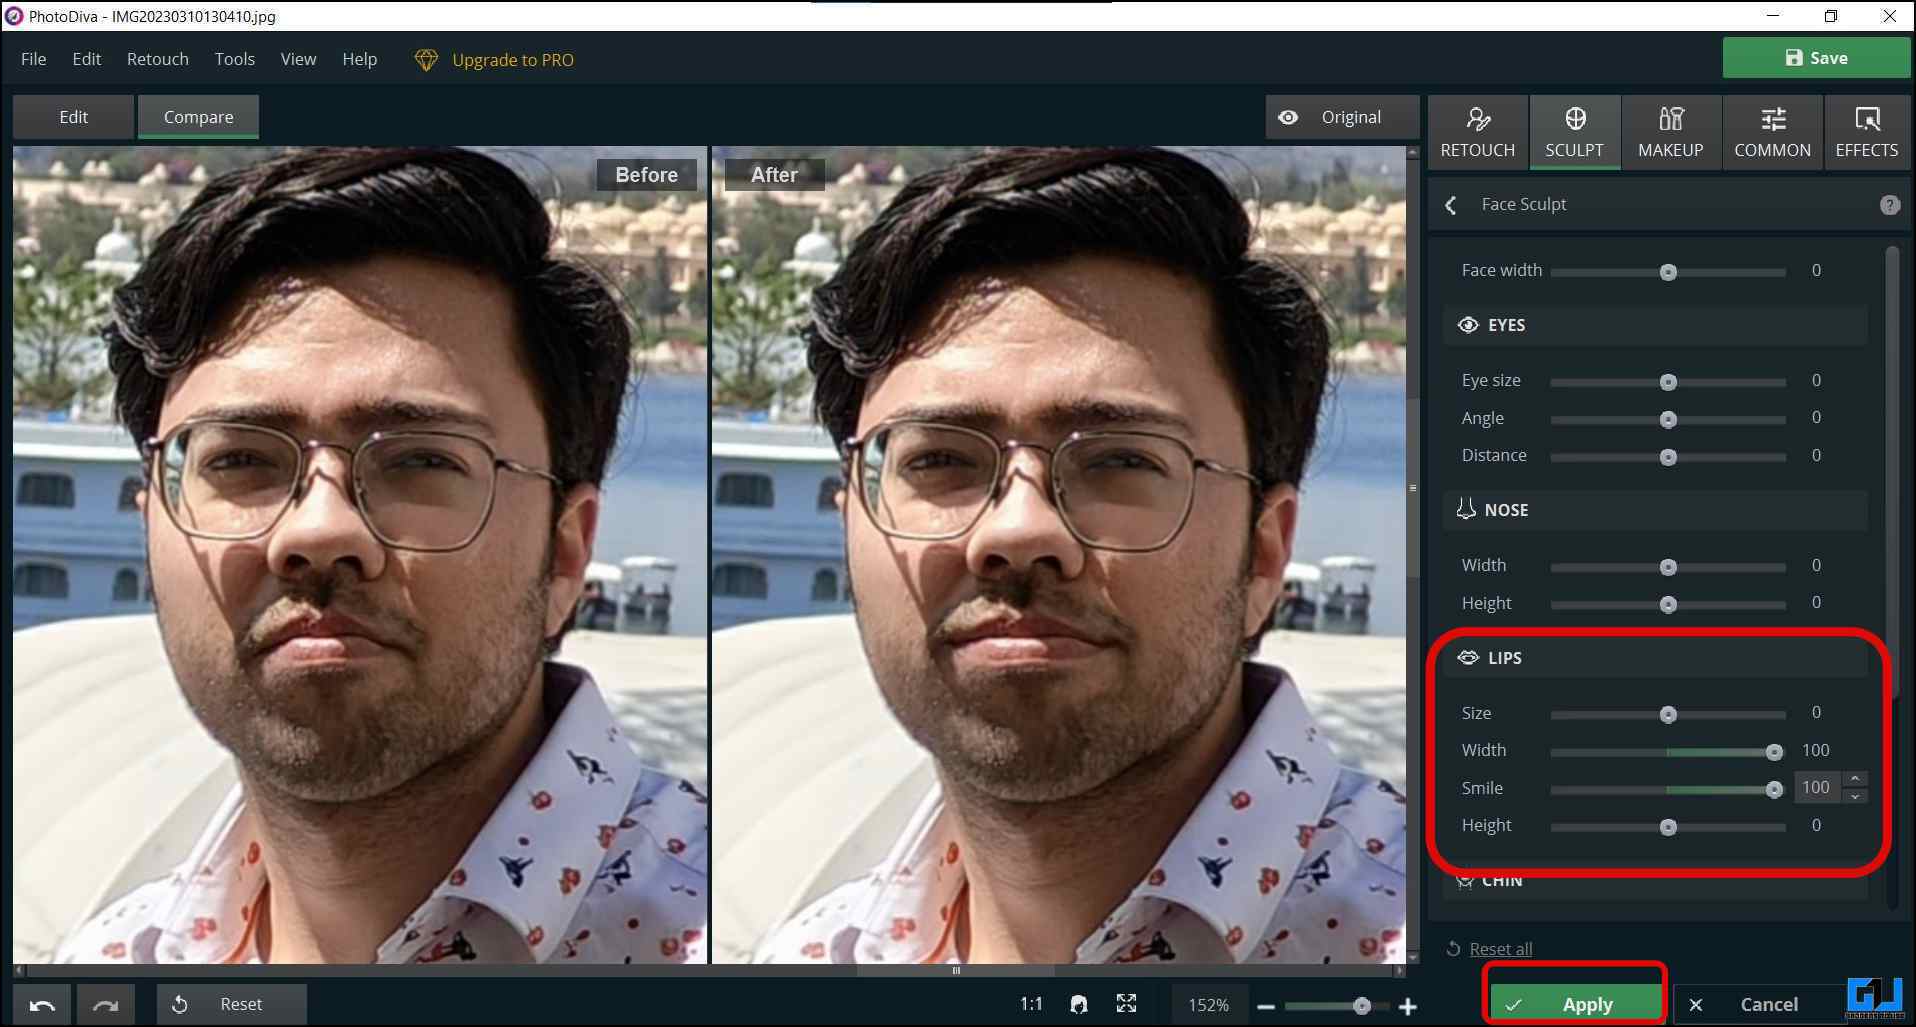
3. Now, Switch to the Sculpt tab from the right, and then go to Face Sculpt.
4. On the next screen, adjust the slider under the lips category to add a smile to the photo.
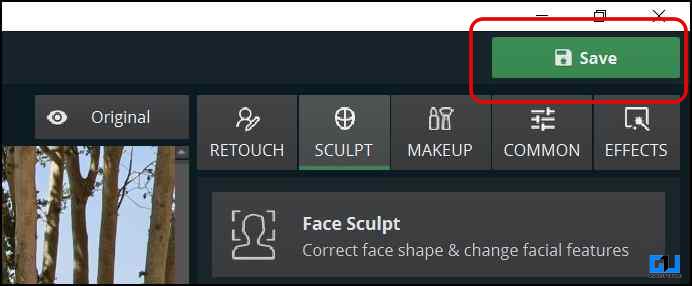
5. Click Apply once you are satisfied with the results.

6. Click Save from the top right corner to export the processed image.
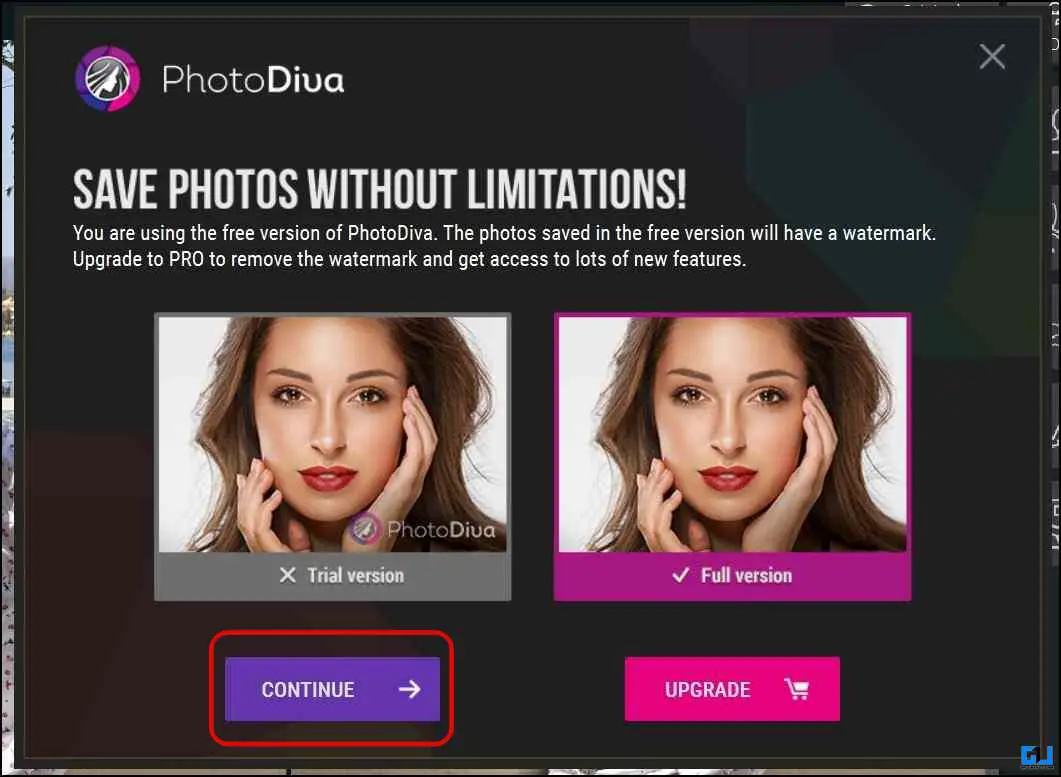
7. Click Continue to save the image with a watermark, or upgrade to the Full version to have watermark-free images.
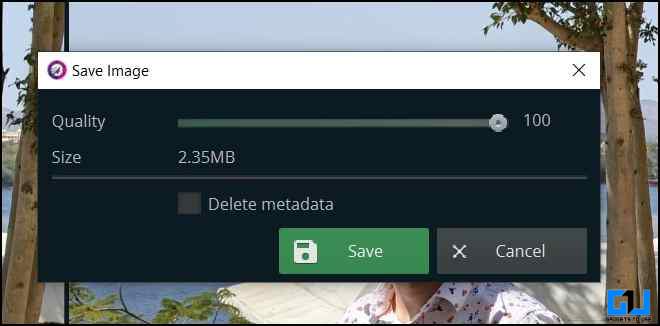
8. Choose the save location and the image quality.
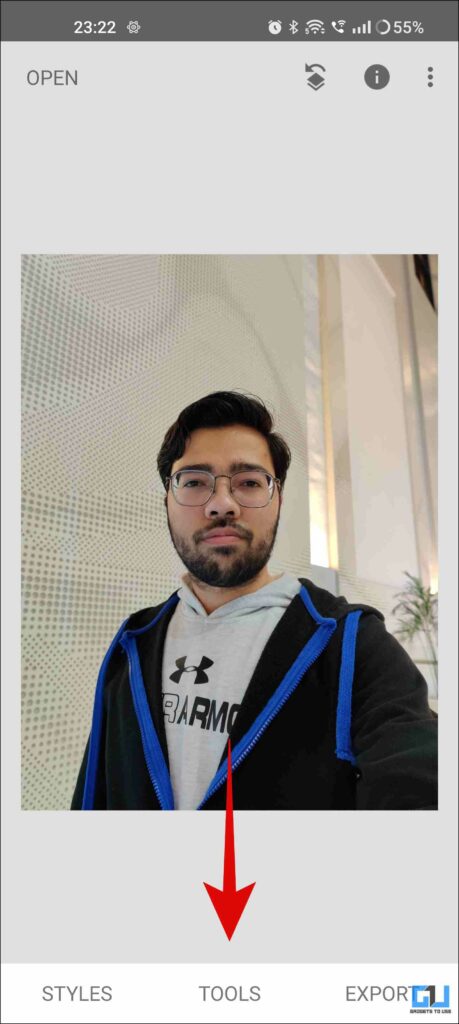
Method 4 – Snapseed
Another easy-to-use app to add a smile to your image is from Google called Snapseed. It is one of the most reliable photo editing solutions from Google. However, it does not work with multiple faces and does not produce the best results. Here’s how you can add a smile using Snapseed.
1. Install the Snapseed app (Android, iOS) on your phone, and import your photo to the app.
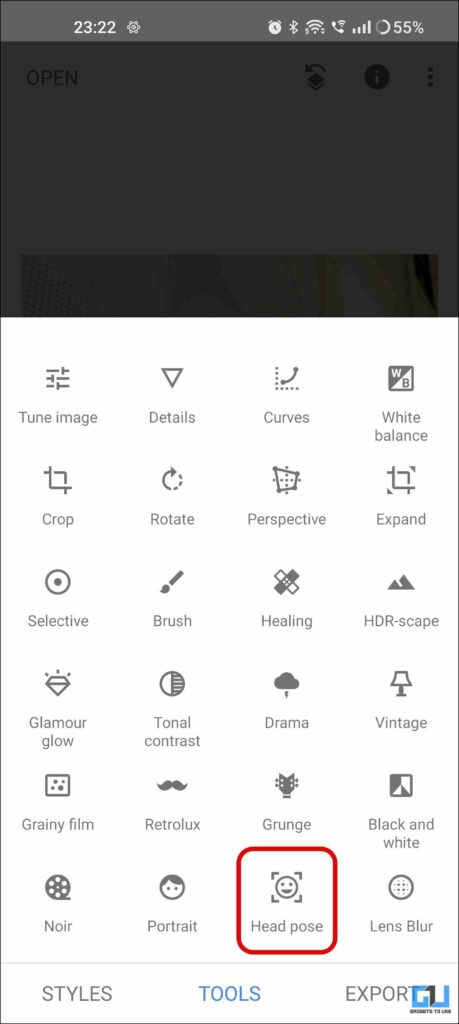
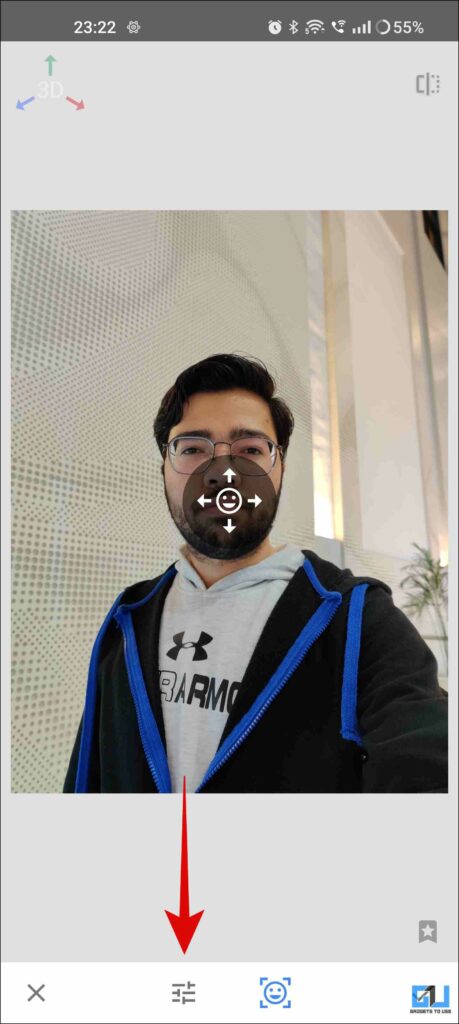
2. Switch to the Tools tab, and select the Head Pose tool.
3. Next, tap the adjustment icon, and choose smile.
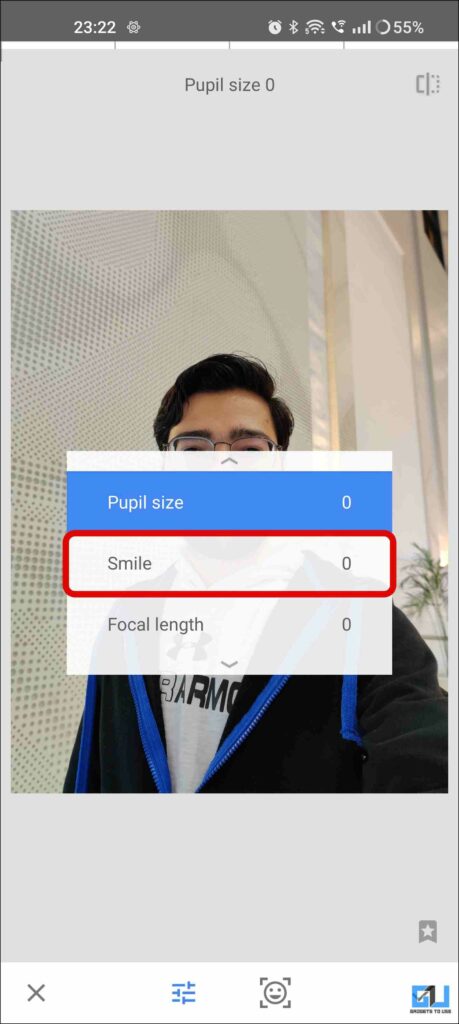
4. Swipe right or left to increase or decrease the intensity of the smile.
5. Once satisfied with the result, tap Done from the bottom right.
6. On the next screen, tap export to save the image.
Method 5 – Photoshop
Lastly, you can use Photoshop on your computer to have granular control over the smile you want to add to your image. Follow the below-mentioned steps to make anyone smile using Photoshop.
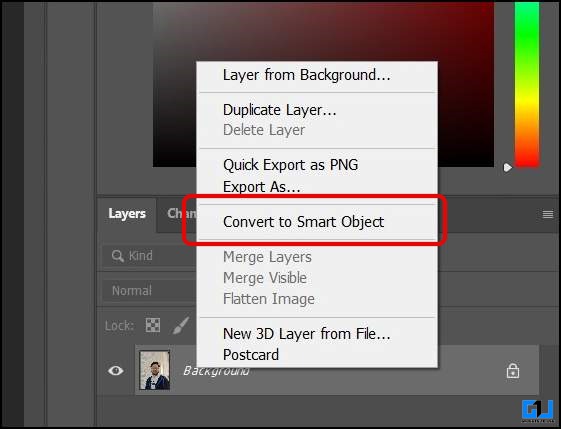
1. Import the image to Photoshop on your Windows or Mac computer.
2. Convert the image to a smart object from the layers panel.
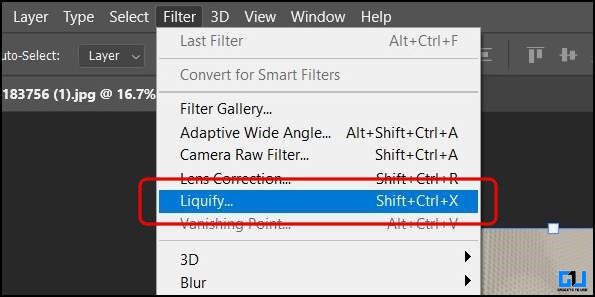
3. Go to the filters menu, and select Liquify Filter; this will open the image in a new liquify window.
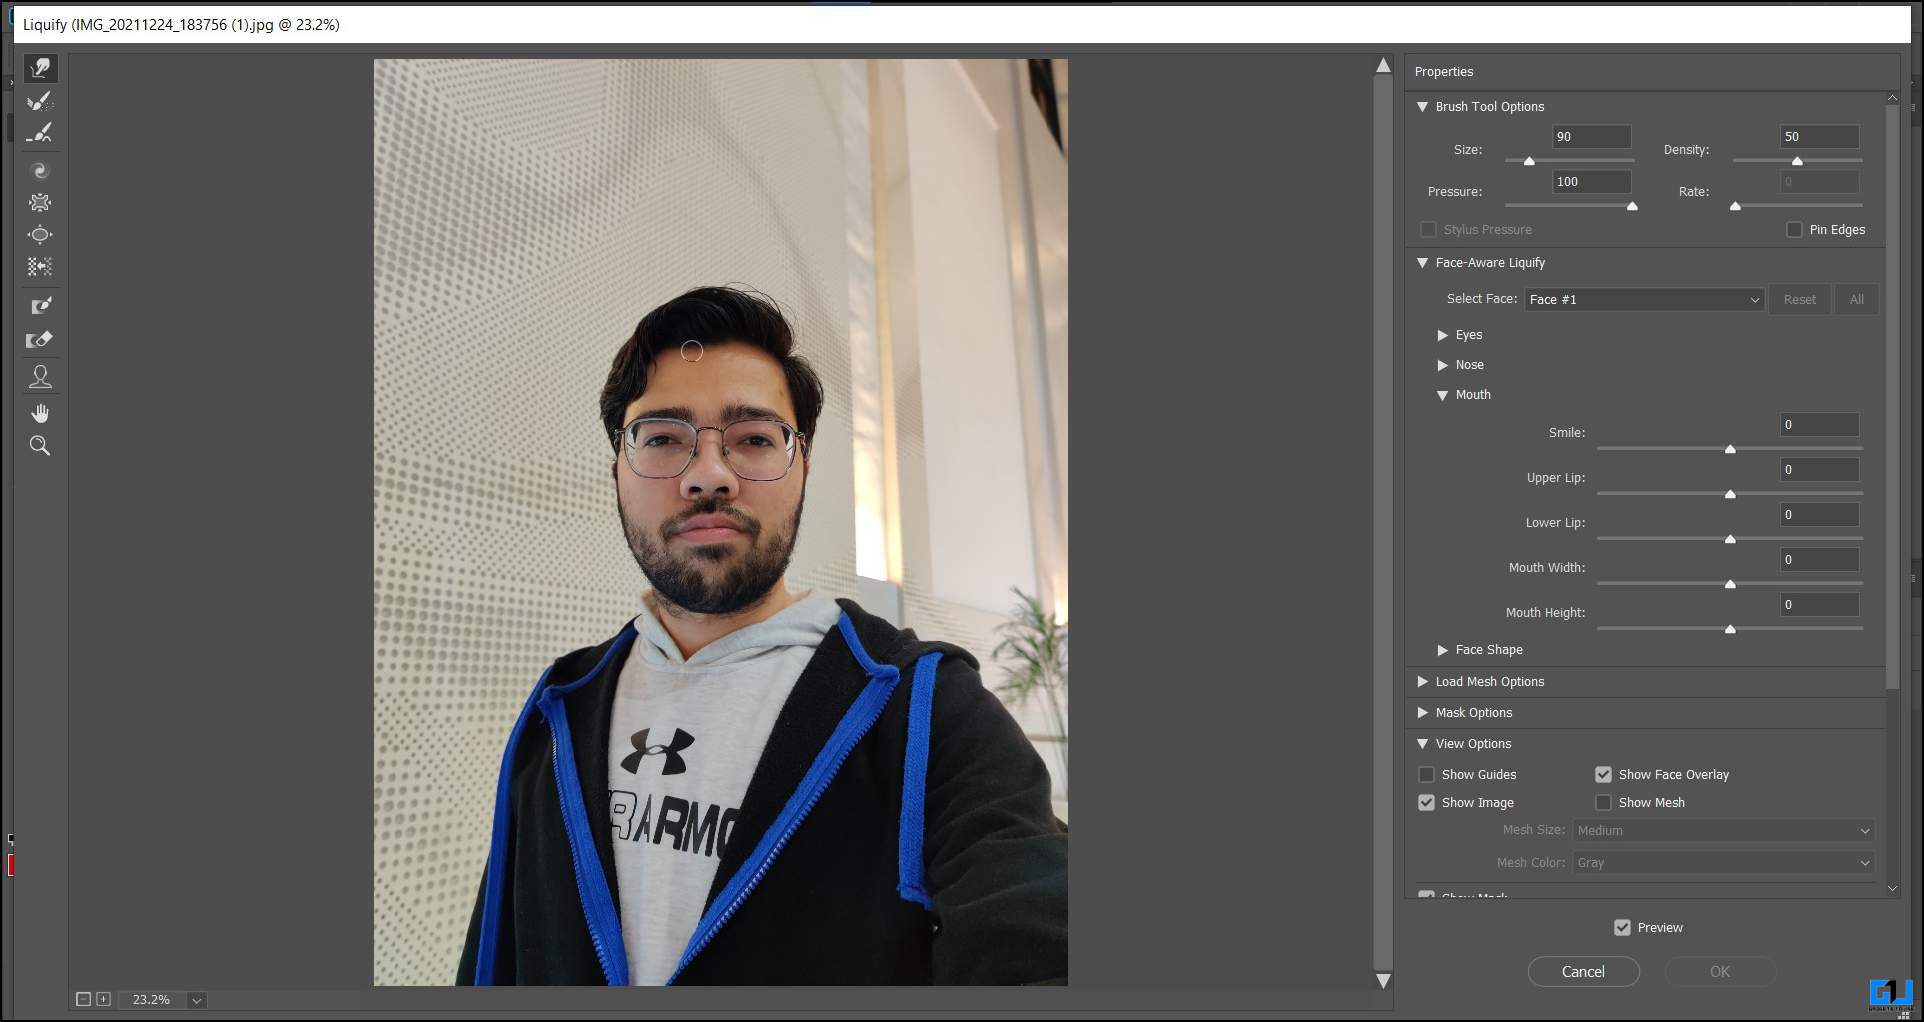
4. Now, zoom into the image using the Zoom tool, or hold the Alt key and zoom in on the image using the scroll wheel on a mouse or pinch on the trackpad.

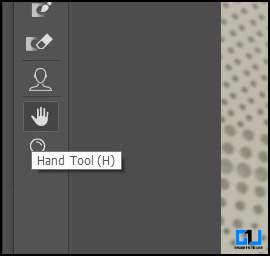
5. Next, use the hand tool or a spacebar to adjust the image’s position and bring the face to the center of the screen.
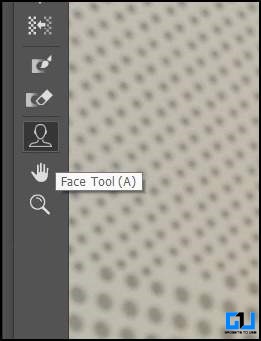
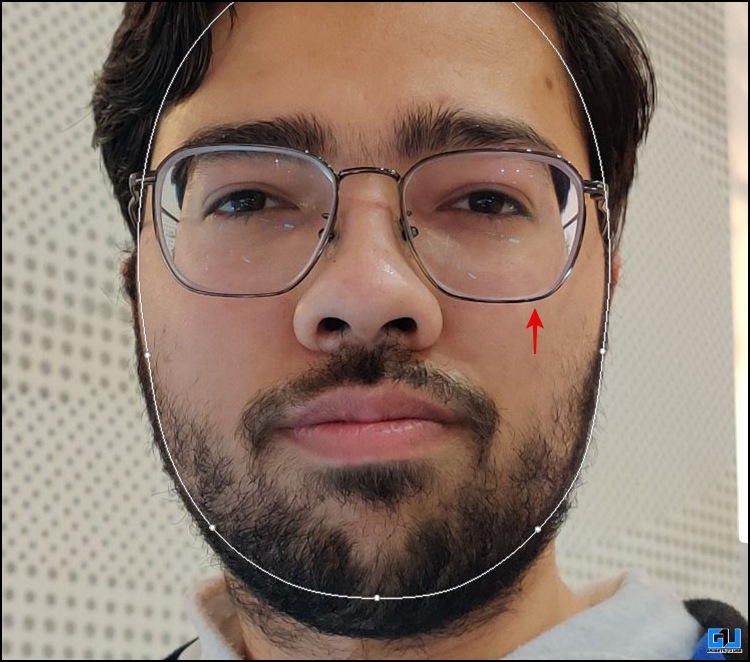
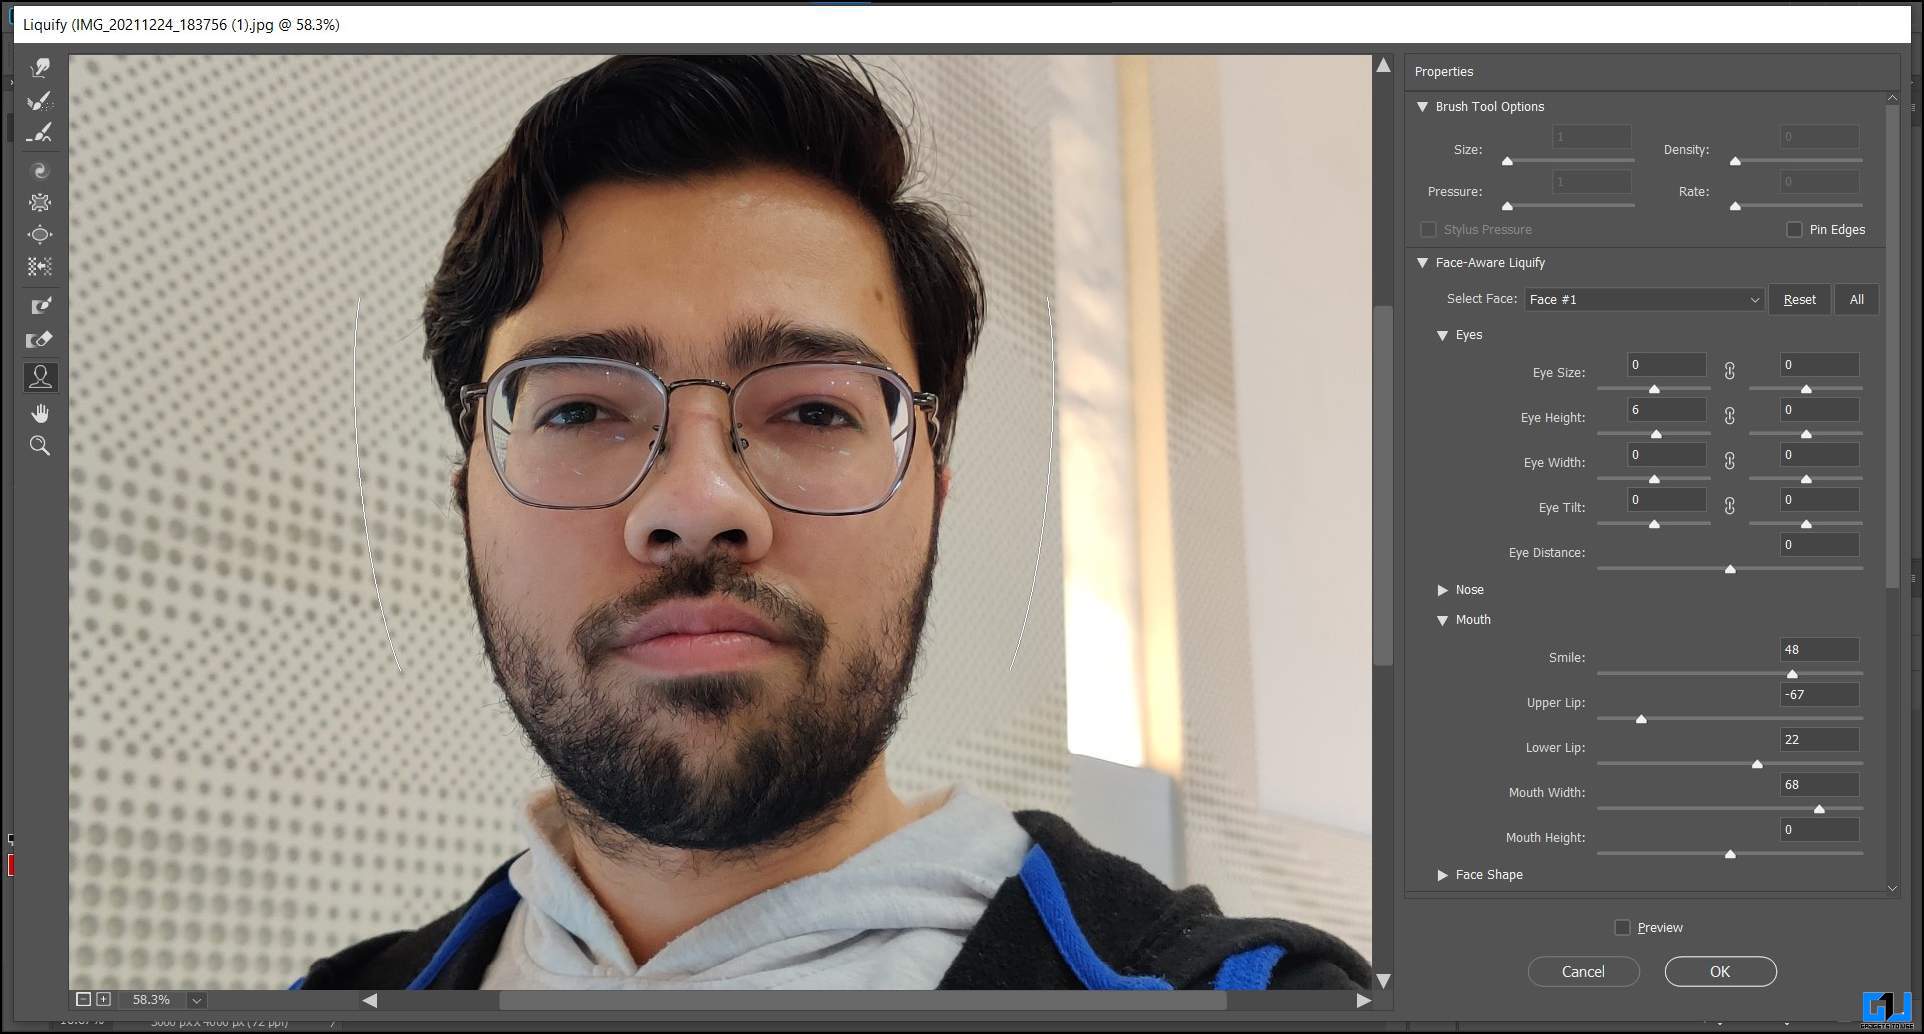
6. Now, select the Face Tool to begin.
7. Hover the cursor on the curved dotted line near the edge of the lips, and drag it upward to create a smile.

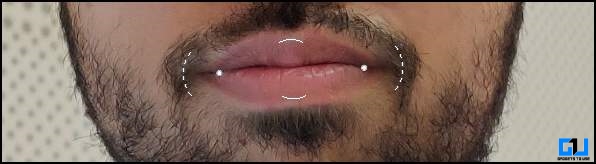
You can also adjust the smile slider under properties at the right of the screen to create a smiling effect on the person’s face.
8. Similarly, you can adjust the upper lip, lower lip, mouth width, and height to make the smile look natural.
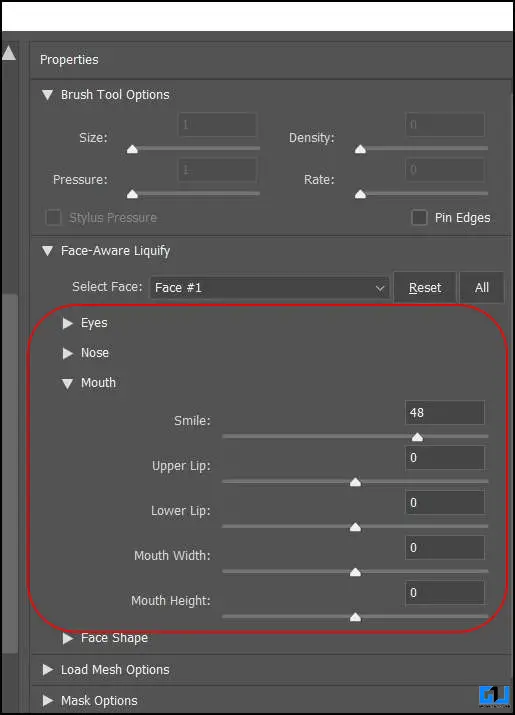
9. to make the effect more natural, we need to push the cheeks “slightly“ upwards using the Face tool.
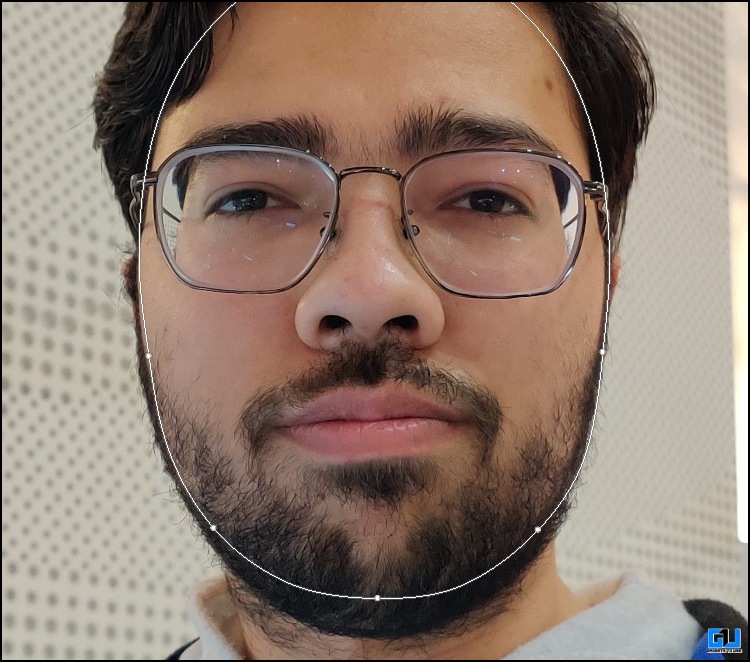
10. If the cheek adjustment has raised your eyes, you can fix it by lowering the height of your eyes using Face Tool.

11. Finally, check the preview for comparison, and once you are satisfied, click the OK button to apply the changes and save your file.

Wrapping Up
So this is how you can add a smile to your portrait, candid, or group photos using AI. Just like a smile, a good camera person and how well he/she understands the art of making you look good in front of the camera also plays crucial behind a good picture. So next time, ask the person to correct your posture and make you smile to get the perfect picture, and always check the photo once clicked. Stay tuned to GadgetsToUse for more such reads.
You might be interested in the following:
- 5 Ways to Expand an Image With AI
- 8 Effective AI Tools to Fix Your Old Photos Online for Free
- 5 Ways to Remove and Replace Video Background Using AI
- 5 Ways to Create an AI Avatar Video Talking To Yourself
You can also follow us for instant tech news at Google News or for tips and tricks, smartphones & gadgets reviews, join GadgetsToUse Telegram Group or for the latest review videos subscribe GadgetsToUse YouTube Channel.


