Quick Answer
- You can also set a Royalty amount to earn a percentage of the amount every time your NFT is sold so you can keep earning from your work.
- To start off, you will need to set up a crypto wallet to sign in and accept the payment of your NFT.
- You can add a link to your webpage for more details if you have one or your social media account.
NFT has provided digital artists with a new platform to get more exposure and easily sell their artwork. NFT platforms like OpenSea are also helping make NFTs more accessible to new consumers. So, if you are an aspiring creator or just someone curious to learn how to sell NFTs, then stick around. In this article, we will present you with a step-by-step guide to create and sell your own NFT for free. It is a simple process to understand.
Creating an NFT for Free
To start off, you will need to set up a crypto wallet to sign in and accept the payment of your NFT. Preferably Metamask as it is supported on most platforms. Most NFT marketplaces also accept MetaMask wallet as it gives you the option to store your art in your wallet. you can read our detailed guide for creating a MetaMask wallet.
Connecting Crypto Wallet with OpenSea
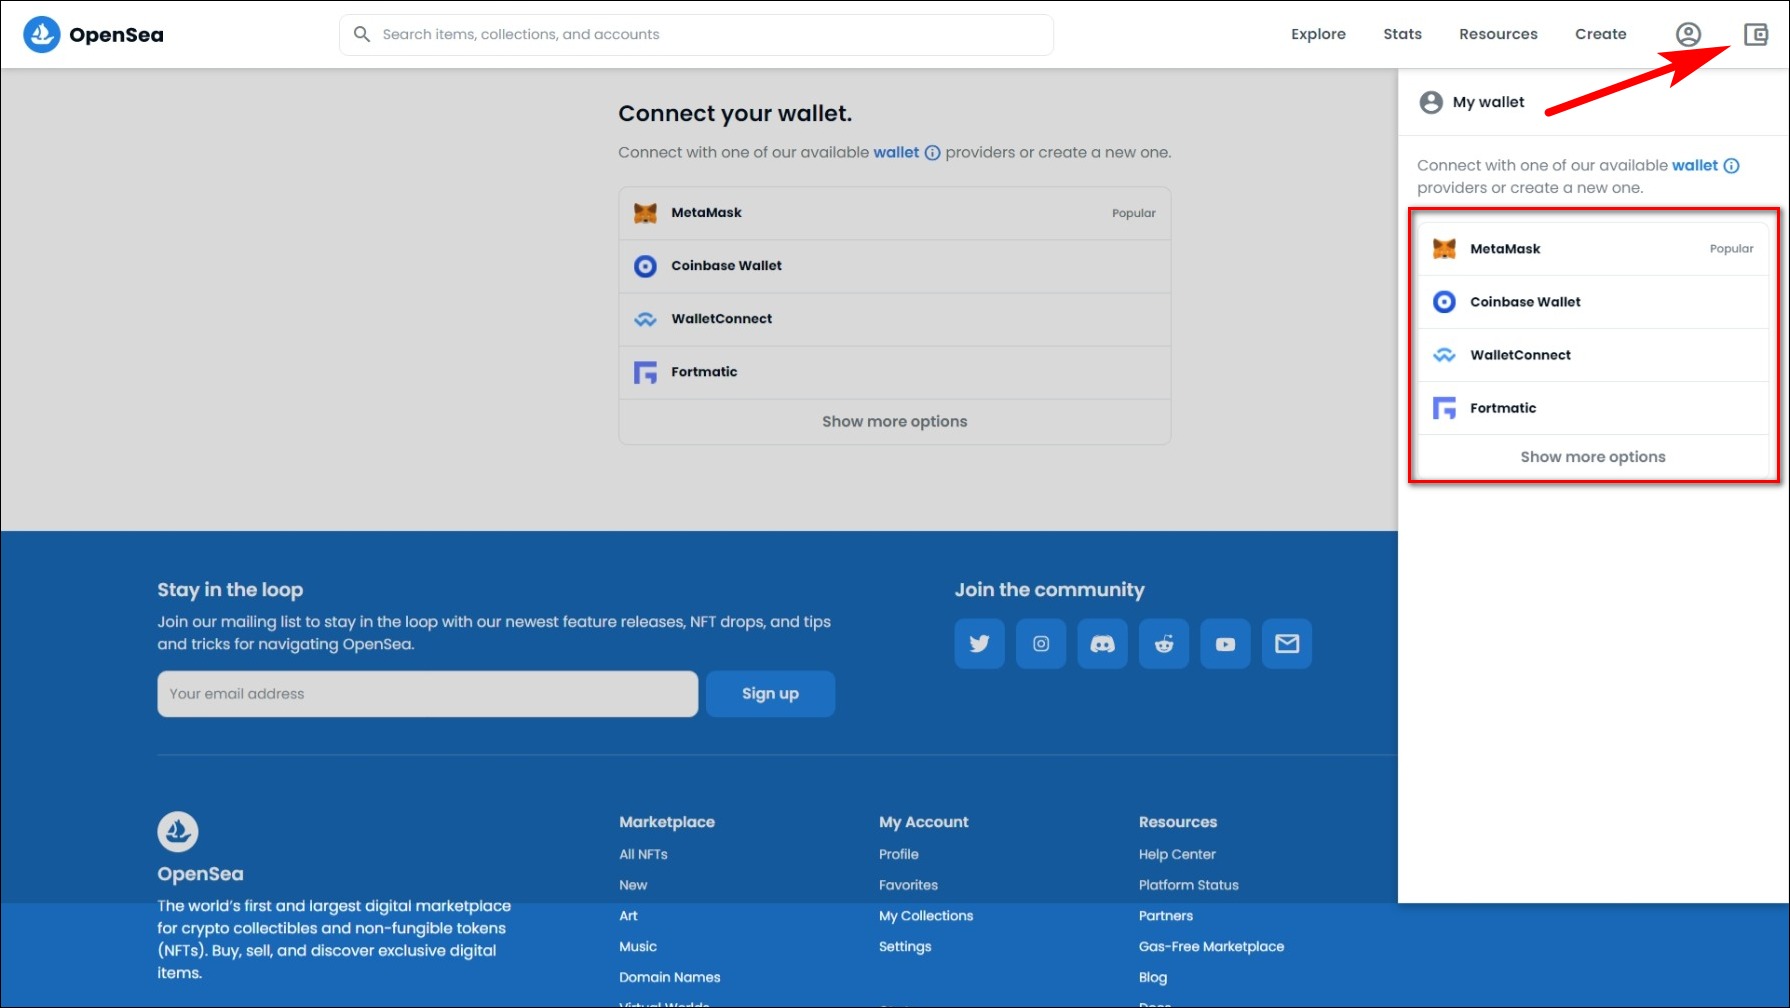
Step 1: Click on the Wallet Option on the top right-hand corner.
Step 2: Choose Metamask.
If you have any other wallet then choose that option.
Step 3: Click on Sign in on Metmask to connect your wallet.
MetaMask extension should ask you for a password. Once you enter it, your wallet will be connected to OpenSea.
Creating an NFT
Now we get to the good part- creating and listing NFT. We will use the popular NFT marketplace OpenSea to demonstrate this process.
Step 1: On the Homepage, click on Create.

Step 2: On the next page, add your artwork and fill in the details.
![]()
You can add a link to your webpage for more details if you have one or your social media account. And then add a description of the NFT. There are various options that you can add to your NFT.
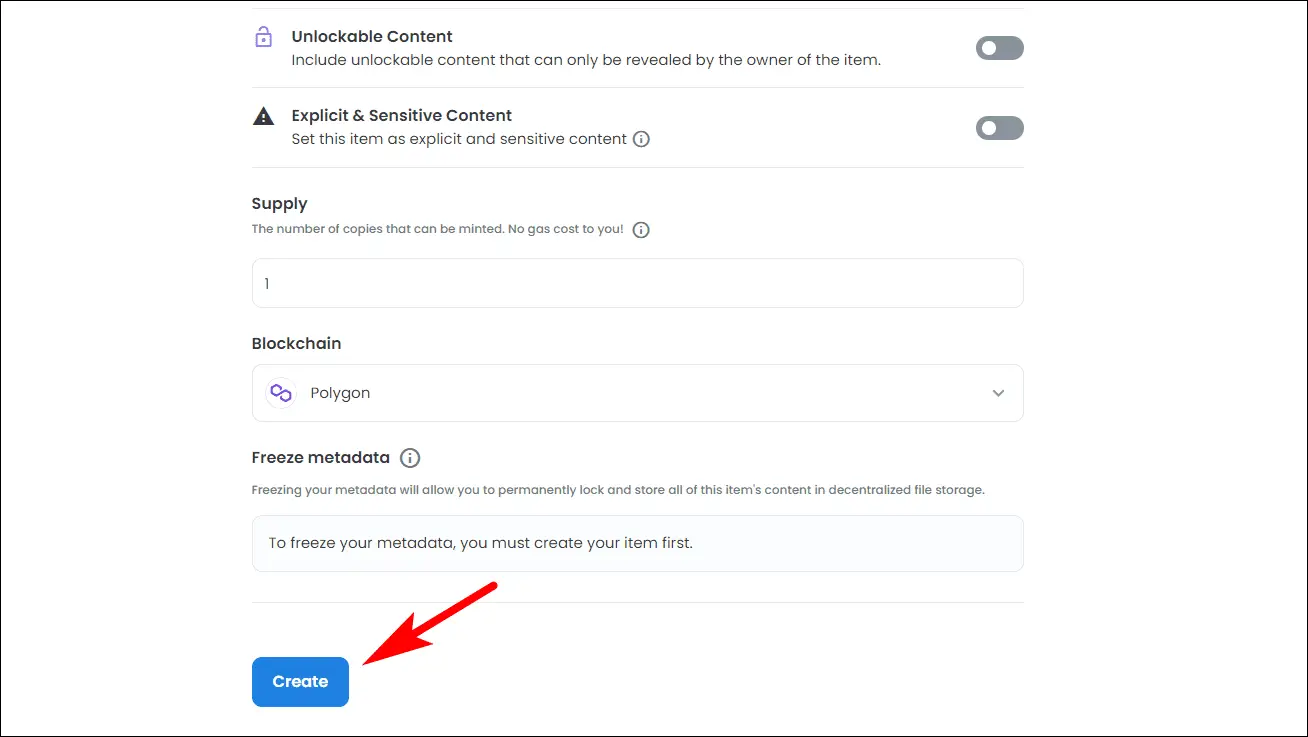
Step 3: Select the Supply of your NFT. This decides how many copies of this artwork will be available for purchase.
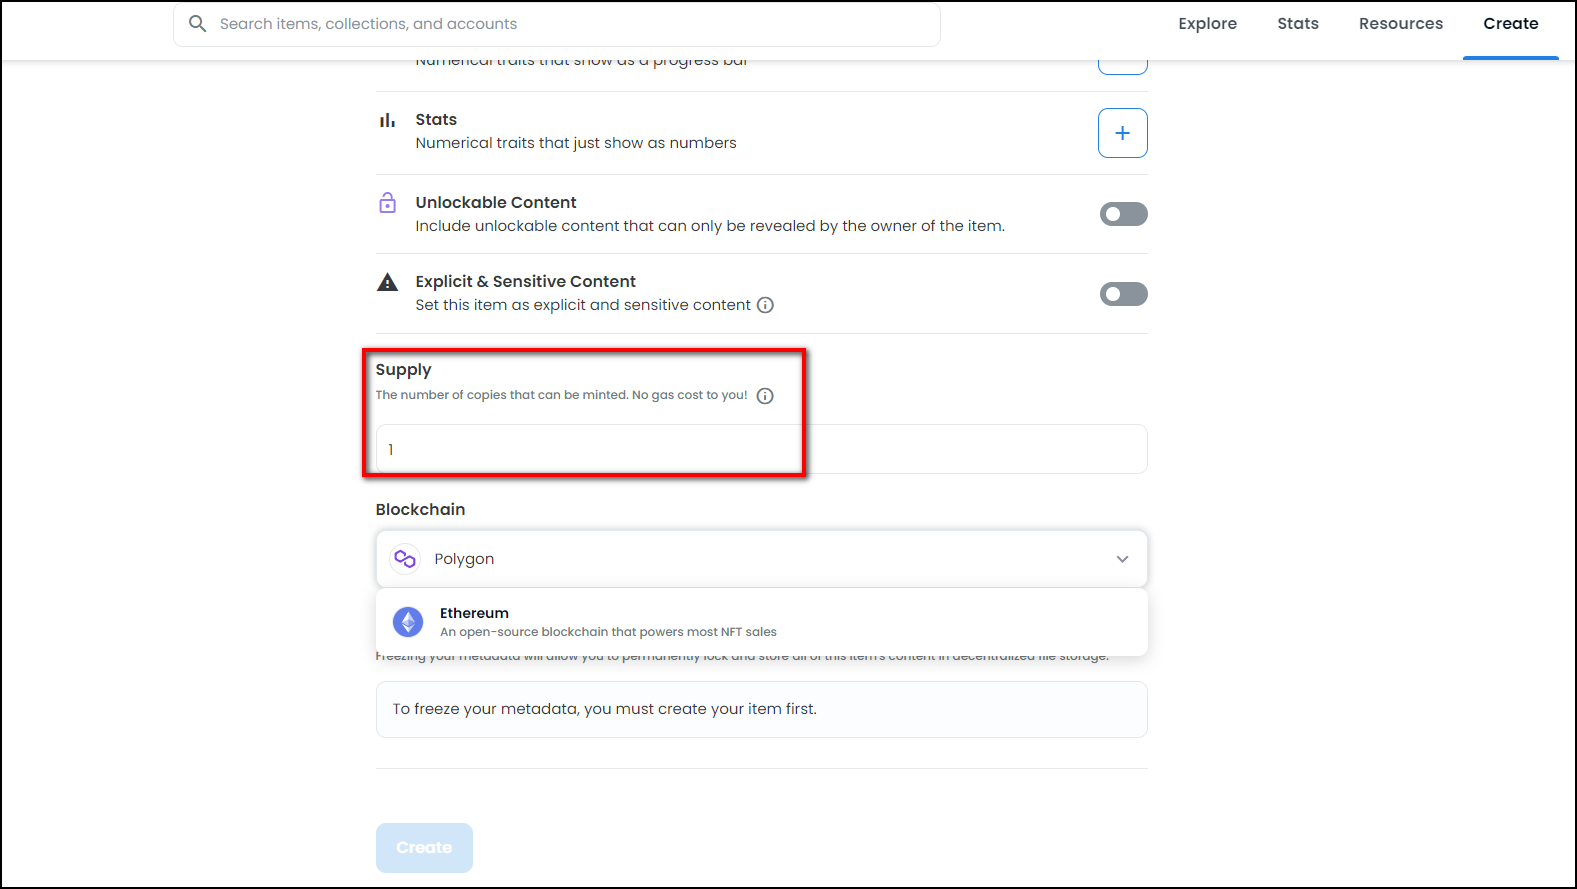
Step 4: on the Blockchain option, Choose Polygon.
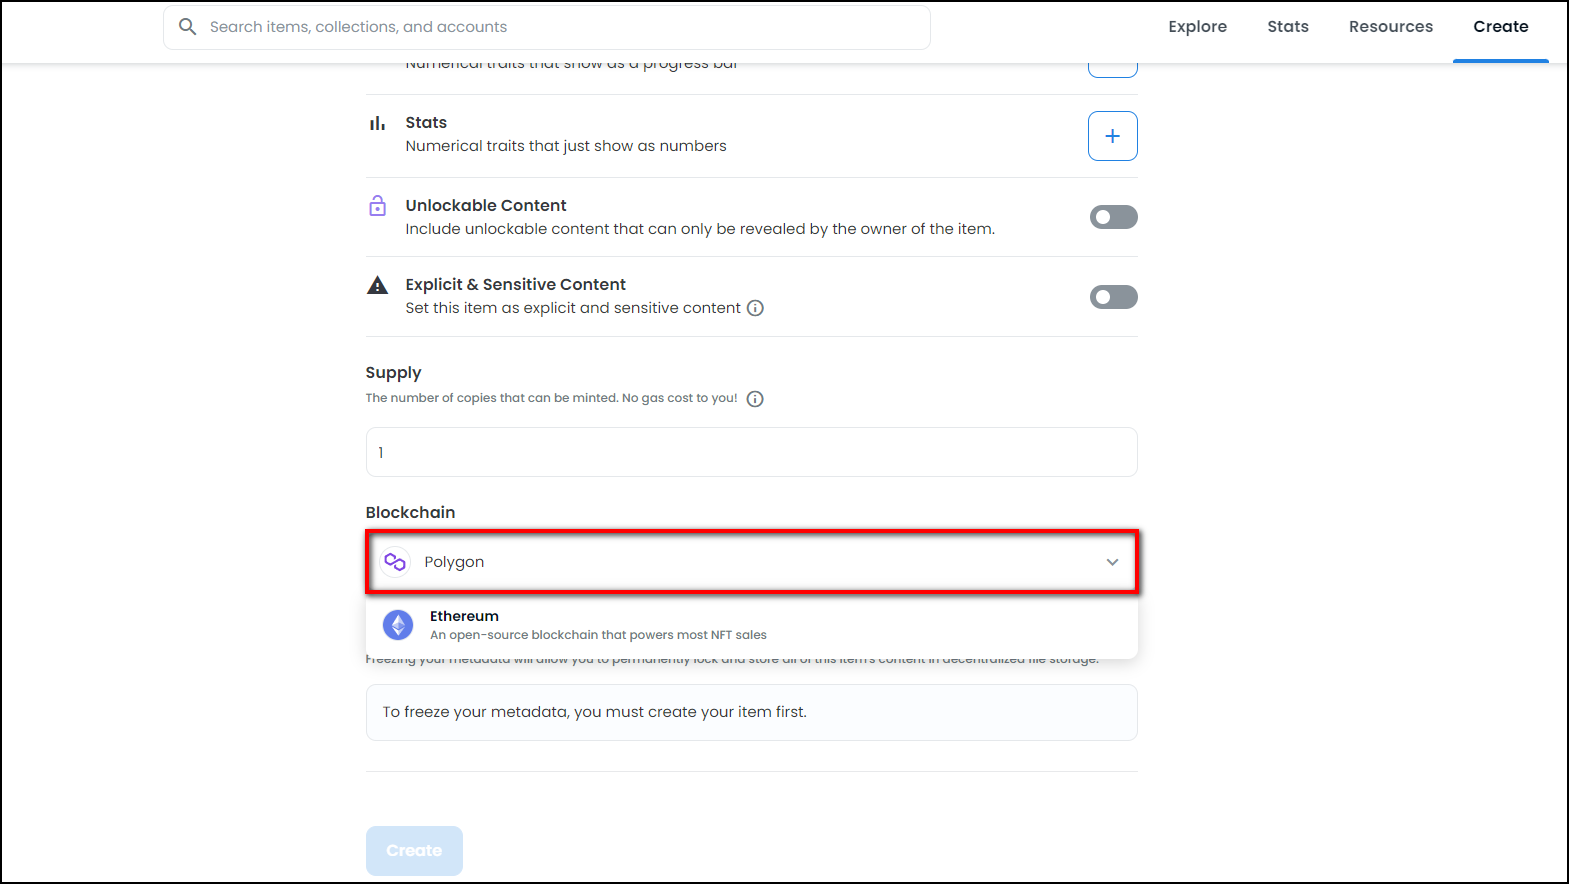
Polygon blockchain allows us to list NFT for free.
Step 5: Once you have finalized everything, Click on Create.
Great! you have turned your artwork into an NFT. Now it is time to list it for sale.
Selling and Listing Your NFT
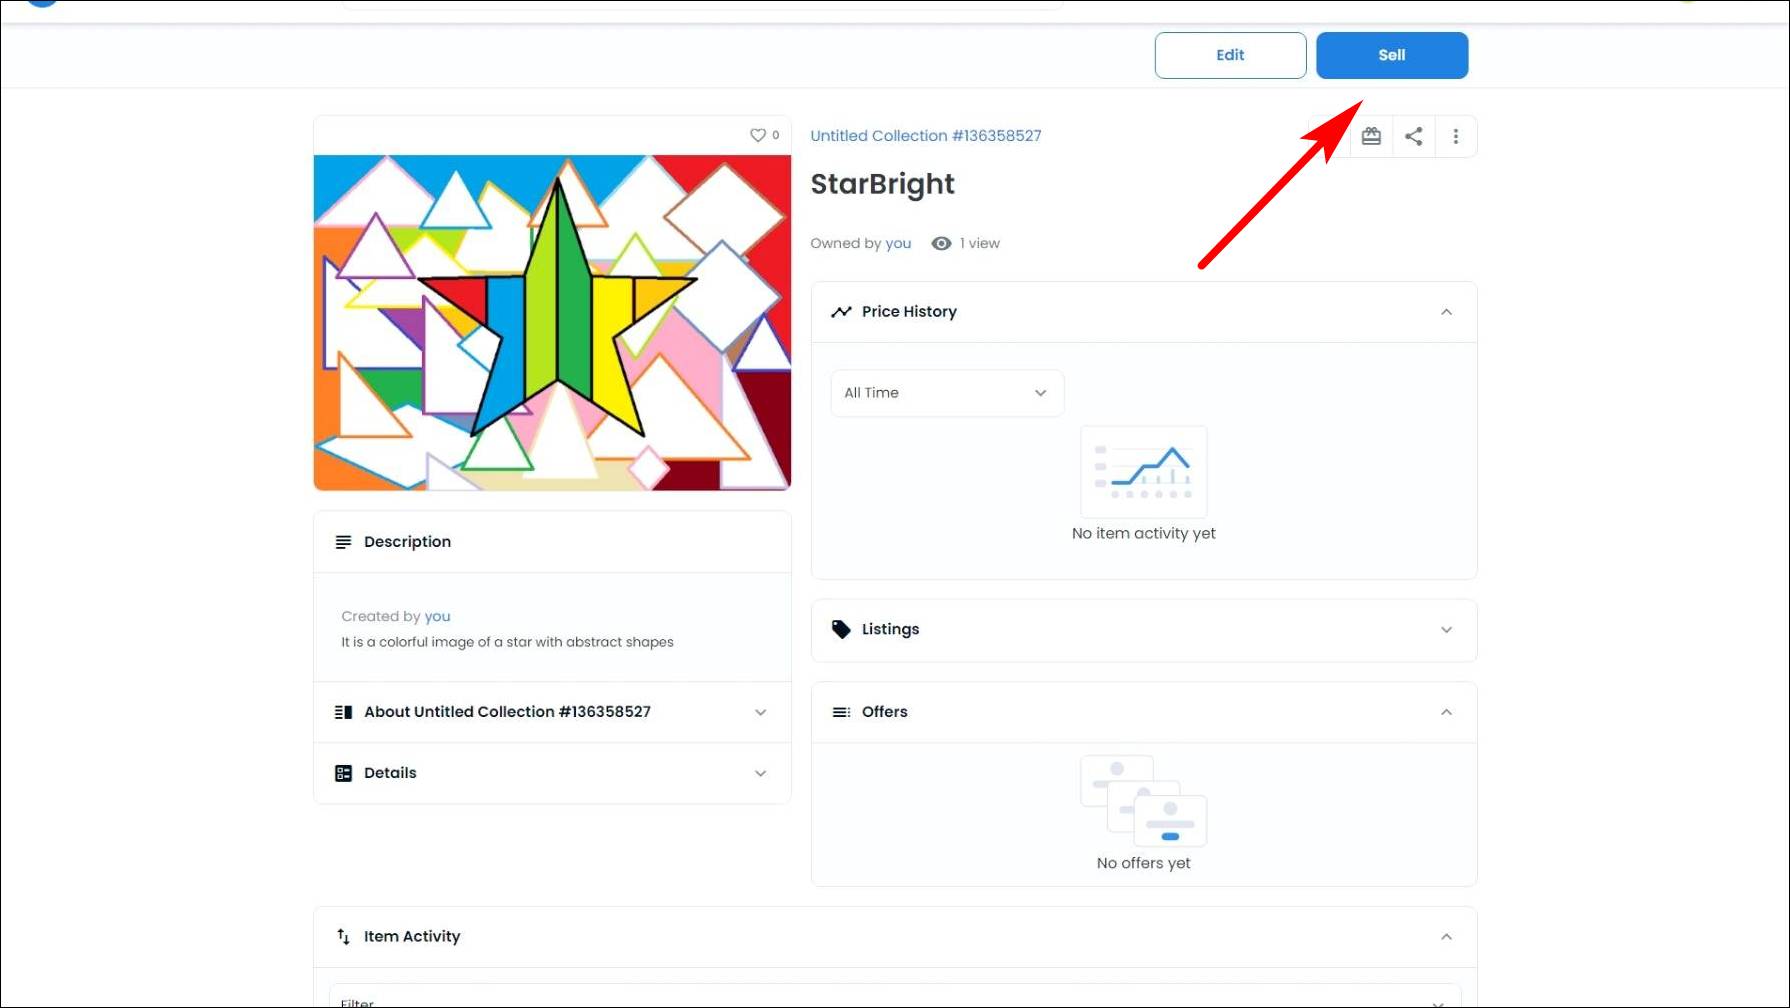
Step 6: On the next page, click on Sell at the top right-hand.
Step 7: Choose Sale type. You can choose between Fixed Price and Timed Auction.
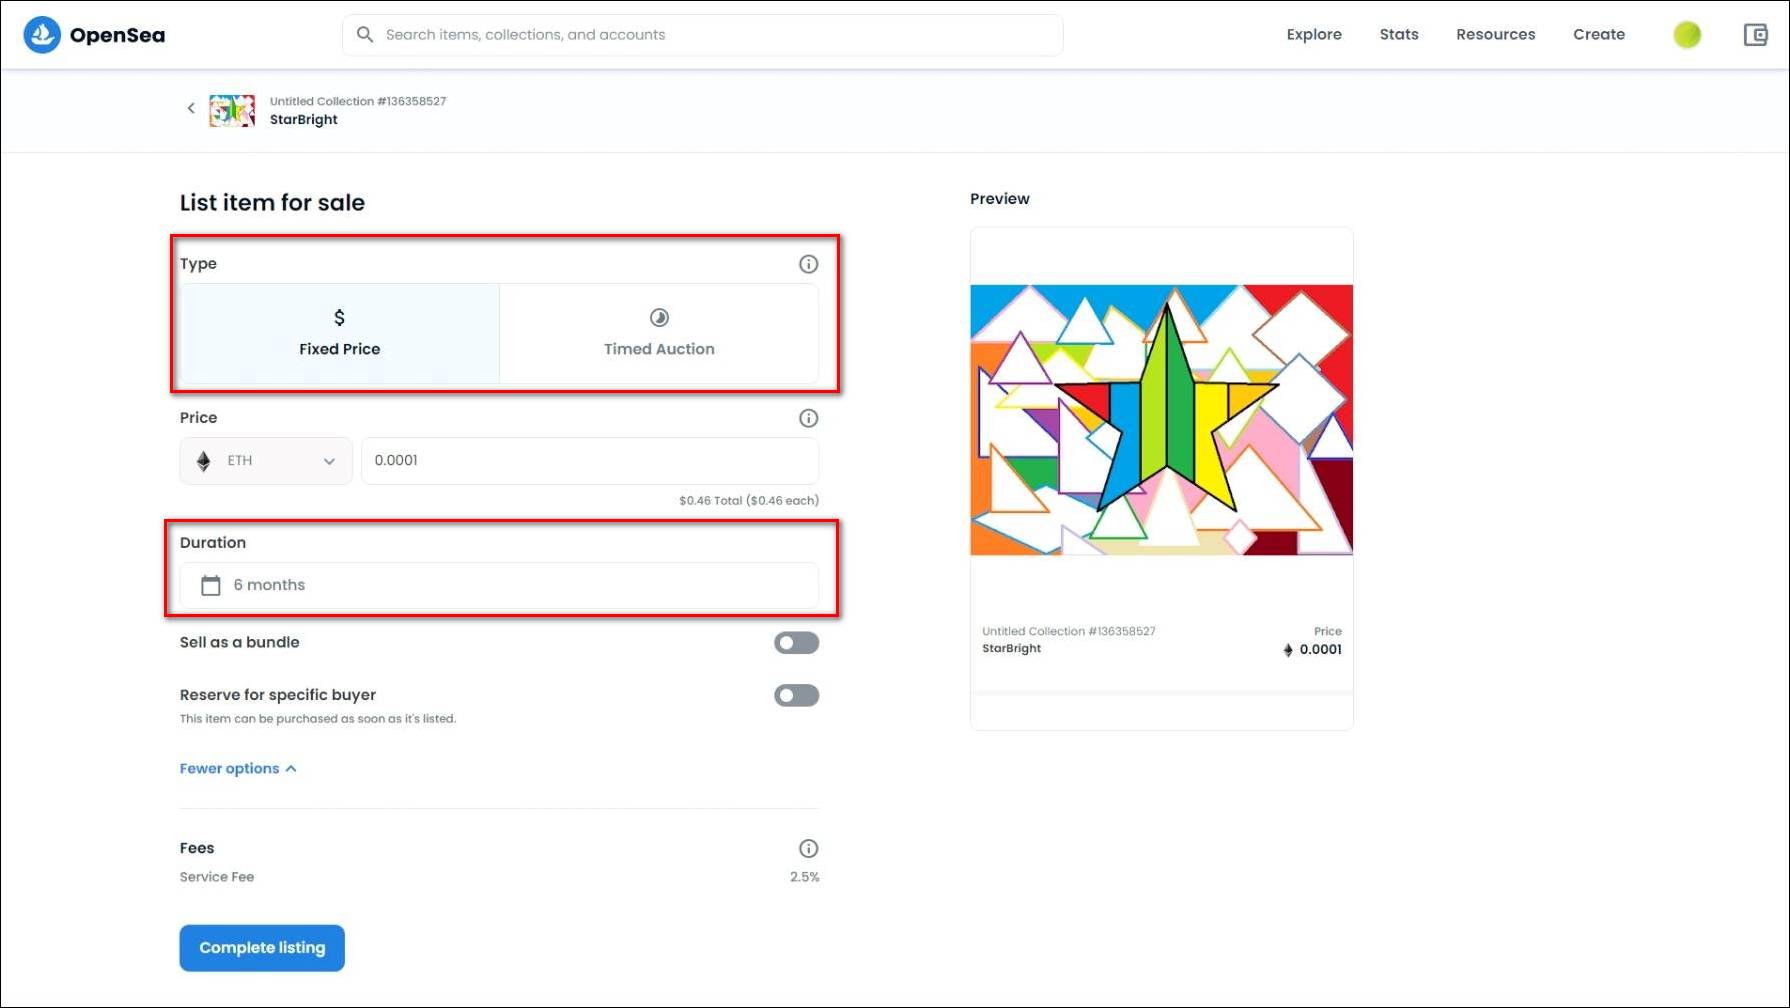
You can also set the duration you want your NFT to be available for or the auction time limit.
Step 8: Now, click on Complete listing.
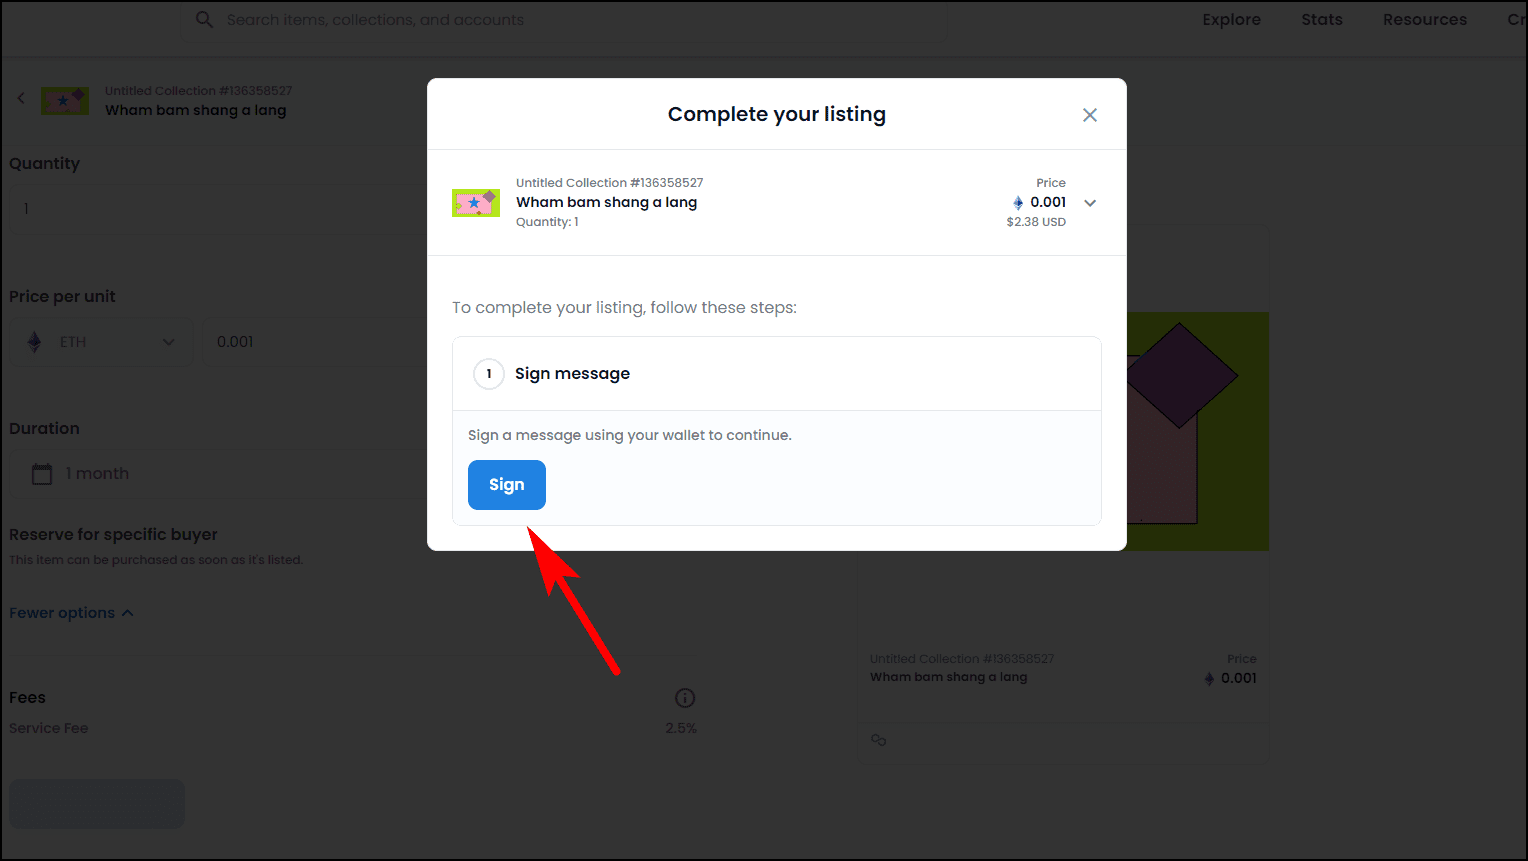
Step 9: You will have to Sign in with your wallet one more time to finish listing.
You have now successfully listed your NFT.
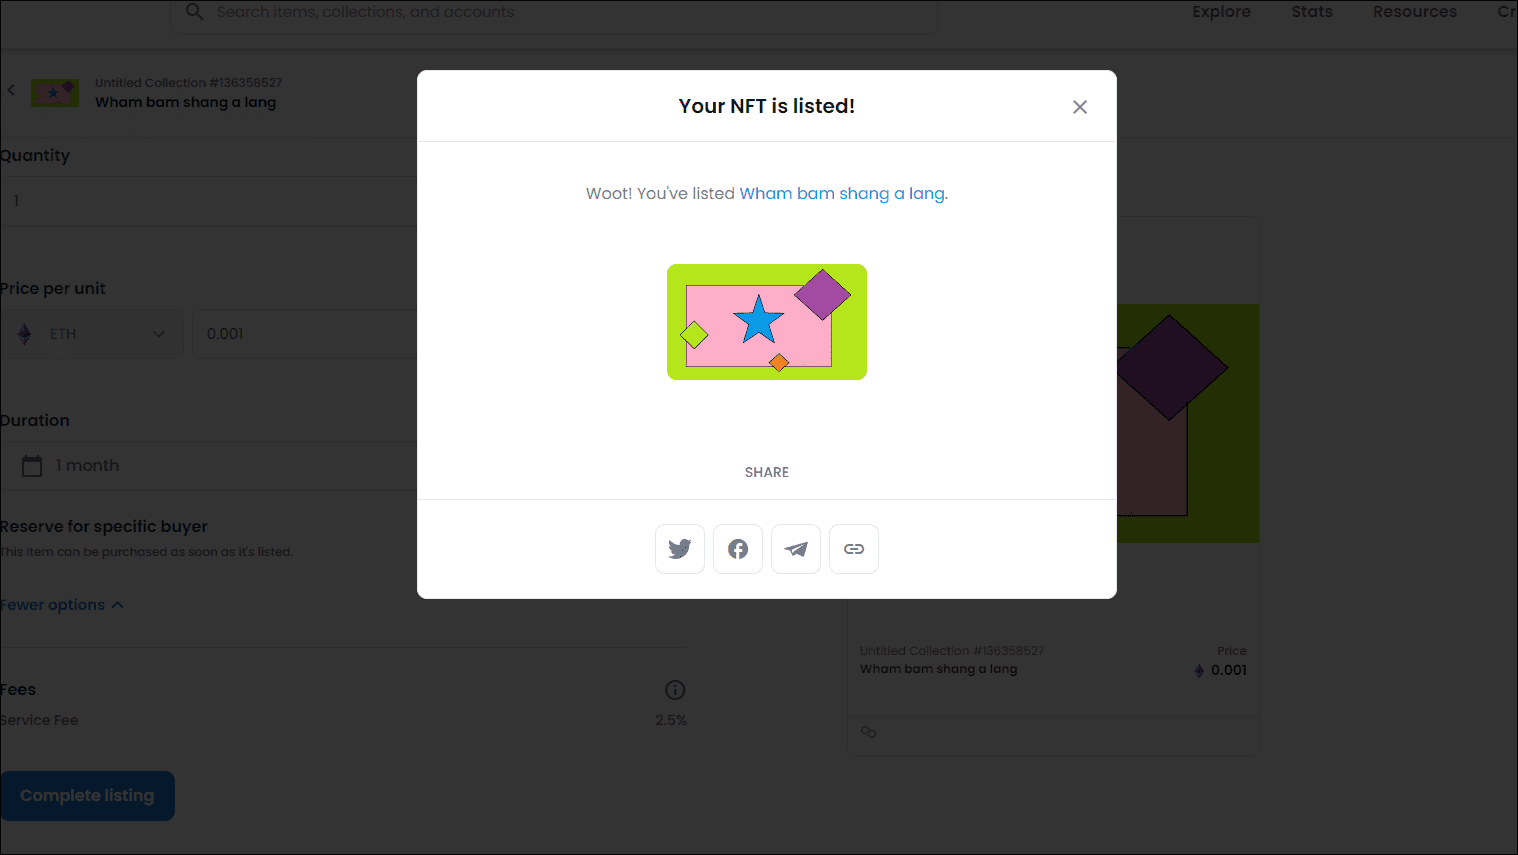 You can share the listing link to various platforms to spread the word about it and attract more people to your work, hopefully, some potential buyers. You can also set a Royalty amount to earn a percentage of the amount every time your NFT is sold so you can keep earning from your work.
Wrapping Up
As we mentioned previously, the process is simple, and we hope we helped you learn the basics of creating your own NFT. You can obviously experiment and try different sites and options or even with different art forms but the process remains the same overall.
You can also follow us for instant tech news at Google News or for tips and tricks, smartphones & gadgets reviews, join GadgetsToUse Telegram Group, or for the latest review videos subscribe GadgetsToUse Youtube Channel.