Quick Answer
- It can lock any app for a “certain time” on your iPhone except the Phone app and is available only on iOS 12 and later.
- And you will have to use your Face ID or Touch ID or enter the iPhone passcode to unlock and access the app.
- You can use the Shortcuts app on iOS to create an automation that will automatically lock your iPhone when someone tries opening the locked up.
Anyone you give your unlocked iPhone can open any app on the device and view your private data, posing a privacy risk. Thankfully, there are several workarounds to protect a system or third-party app with a passcode, Face ID, or Touch ID. In our previous post, we guided you to lock messages on your iPhone. And in this article, we’ll tell you all possible methods to lock apps on your iPhone or iPad.
Can You Lock an App on iPhone and iPad?
Unlike Android phones, you cannot directly lock an app on iOS. It neither supports third-party app lockers nor has a built-in option to lock applications.
Reasons You May Want to Lock Apps on iOS
You may want to lock apps on your iPhone for various reasons, such as:
- Stopping kids, friends, or family members from opening an app you don’t want them to access.
- Restricting others from viewing your gallery photos or videos.
- Securing your private emails, chats, or messages in applications like WhatsApp or Messenger.
- Preventing others from accessing your private data, such as financial information in messages, documents, or notepad apps.
- Preventing someone accessing your iPhone from sending or receiving texts without your knowledge.
- Locking your phone and apps on it prevents hackers from stealing your data, such as login details or emails.
How to Lock Apps on iPhone With Face ID or Passcode?
The easiest way to lock an app on iPhone is by using the shortcuts app. However, there are other ways, like screen time and app limits, that work better for preinstalled apps. You can check all the methods below:
Method 1- Lock an App Without Screen Time on iPhone (Using Shortcuts)
You can use the Shortcuts app on iOS to create an automation that will automatically lock your iPhone when someone tries opening the locked up. It will then ask for your FaceID or passcode to unlock your iPhone and access the app. Here’s how to set it up:
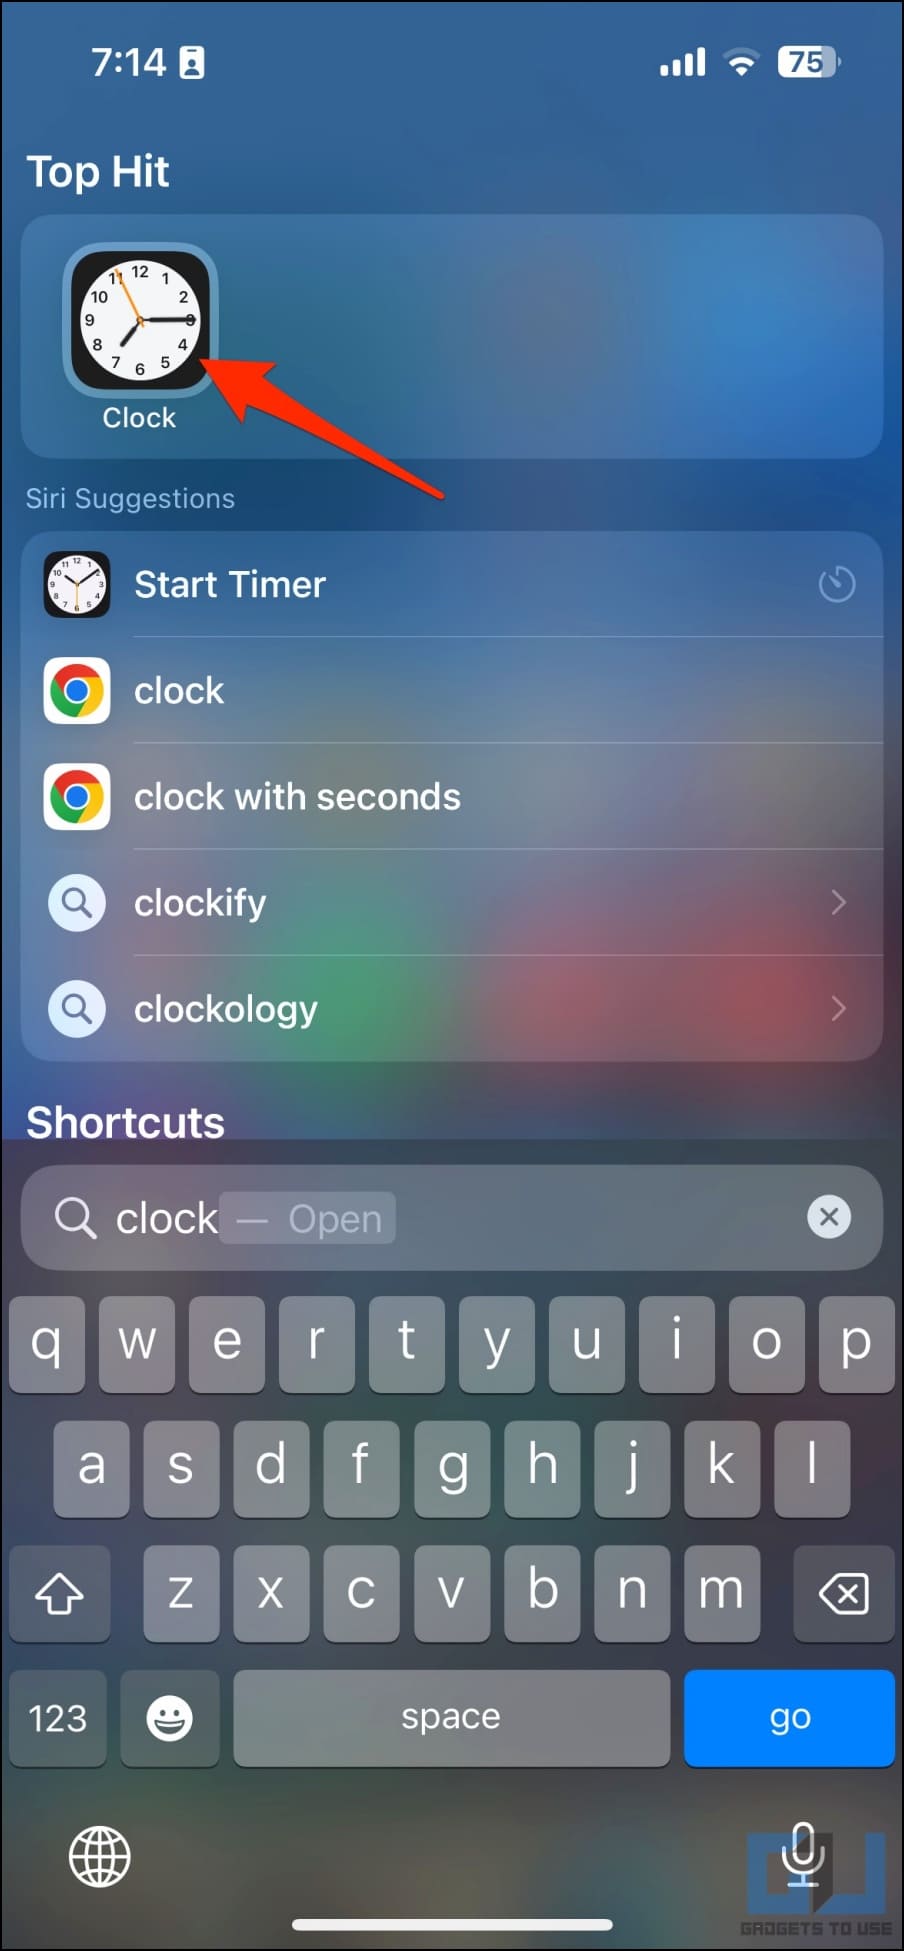
1. Open the Clock app on your iPhone.
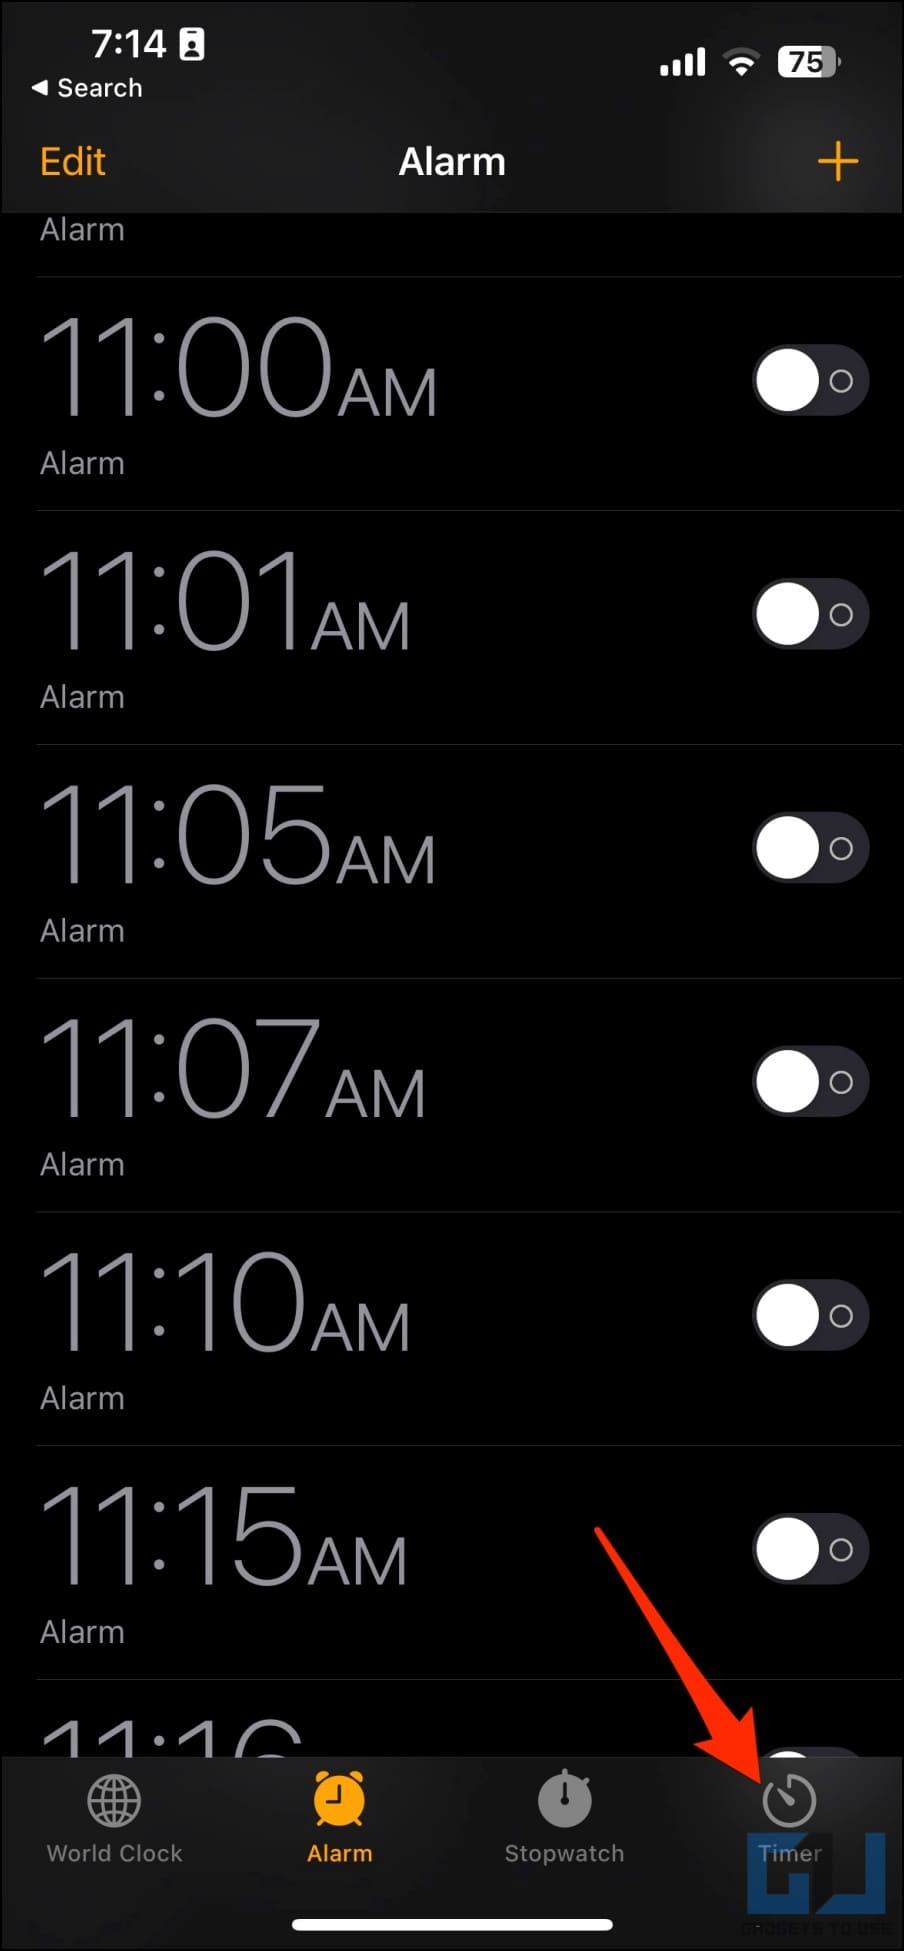
2. Select Timer in the bottom menu.
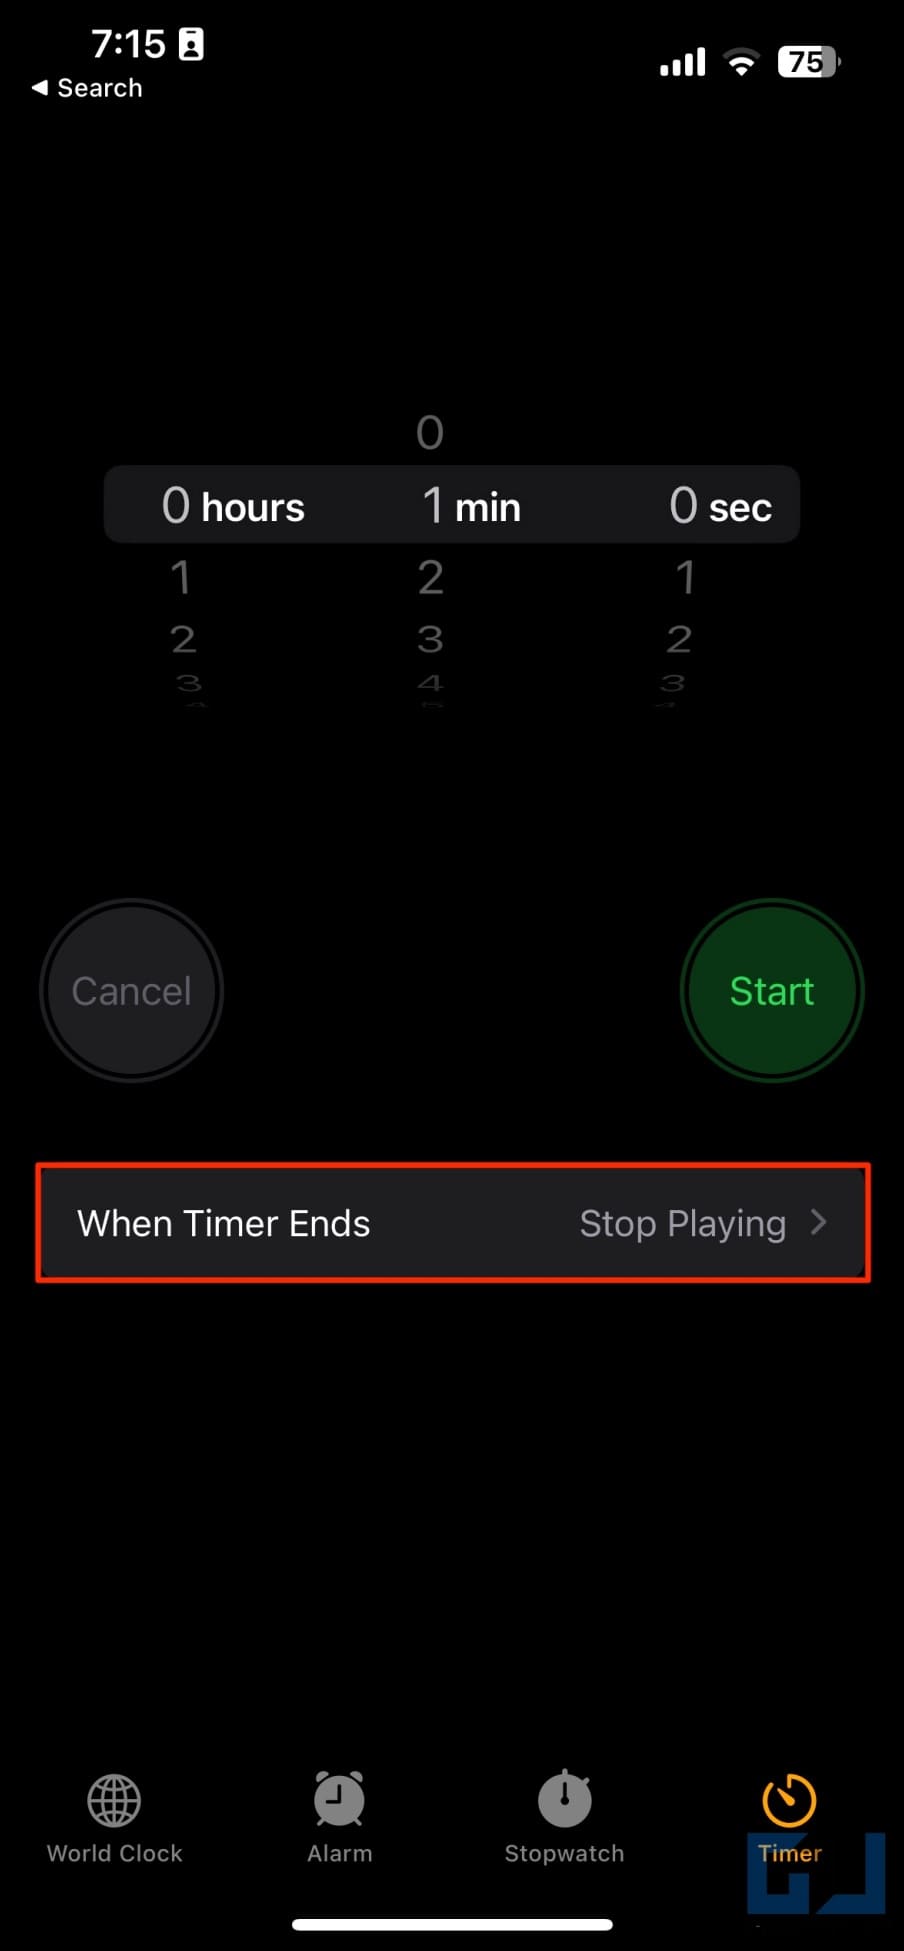
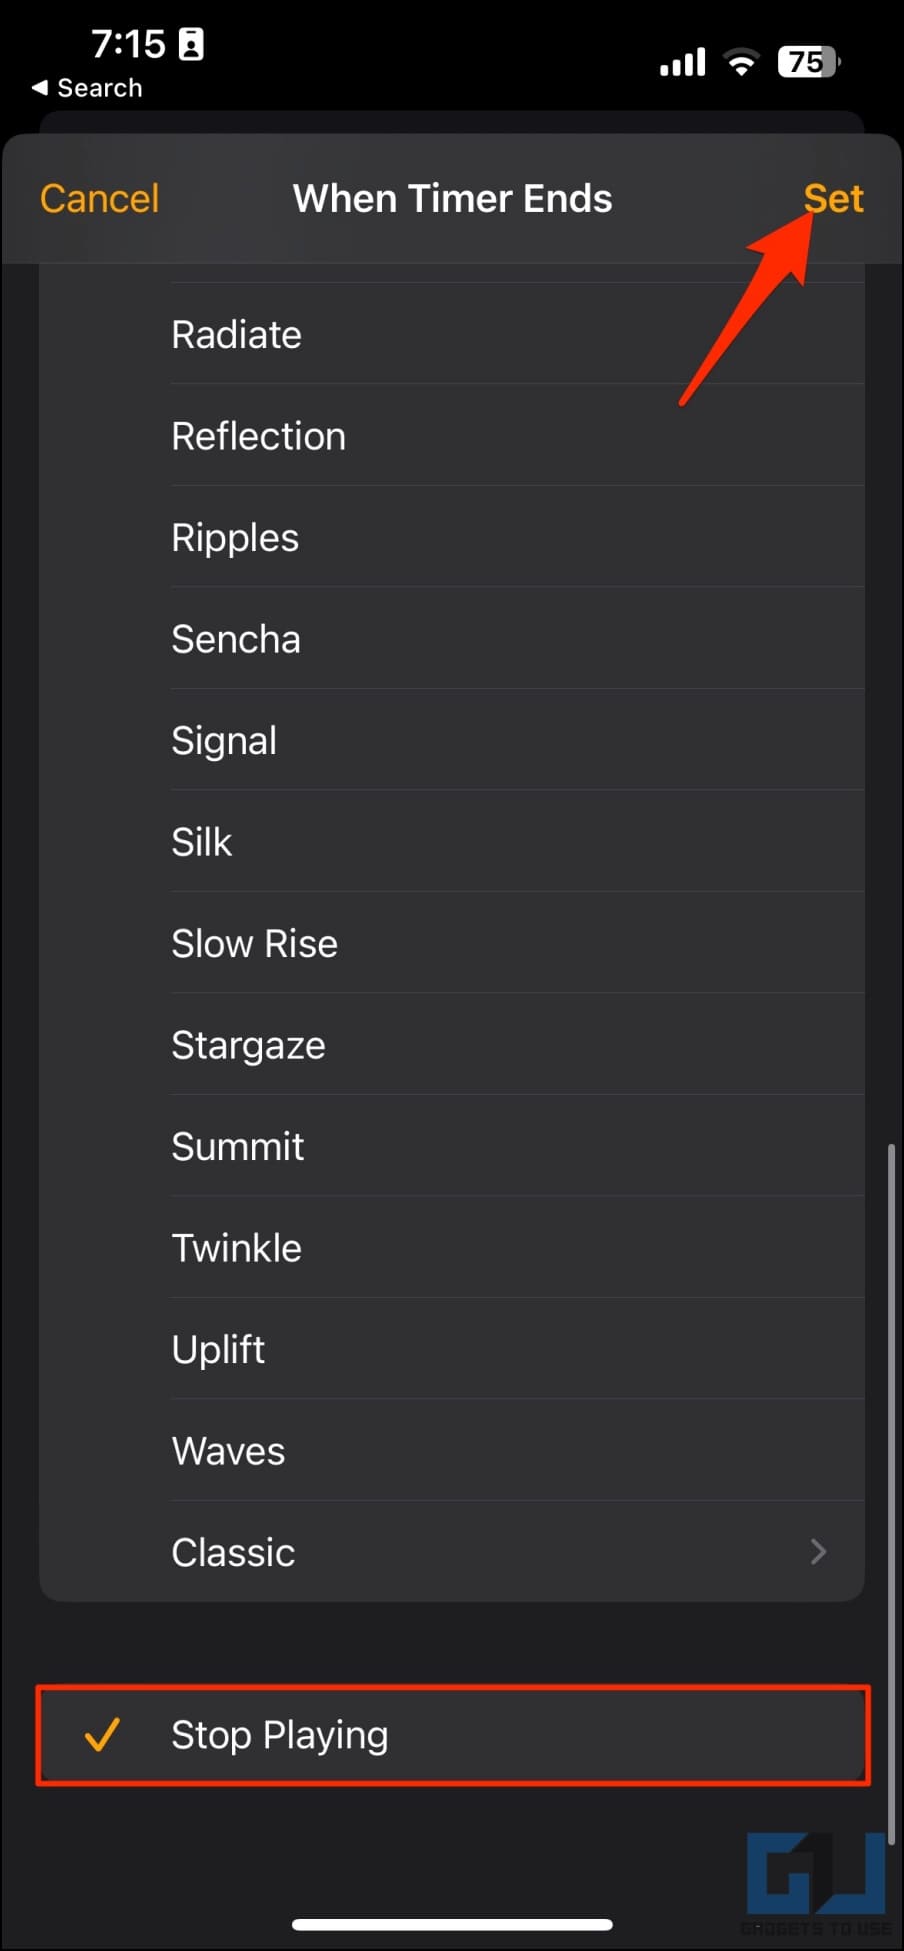
3. Click When Timer Ends, scroll down, and select Stop Playing.
4. Click Set in the top right.
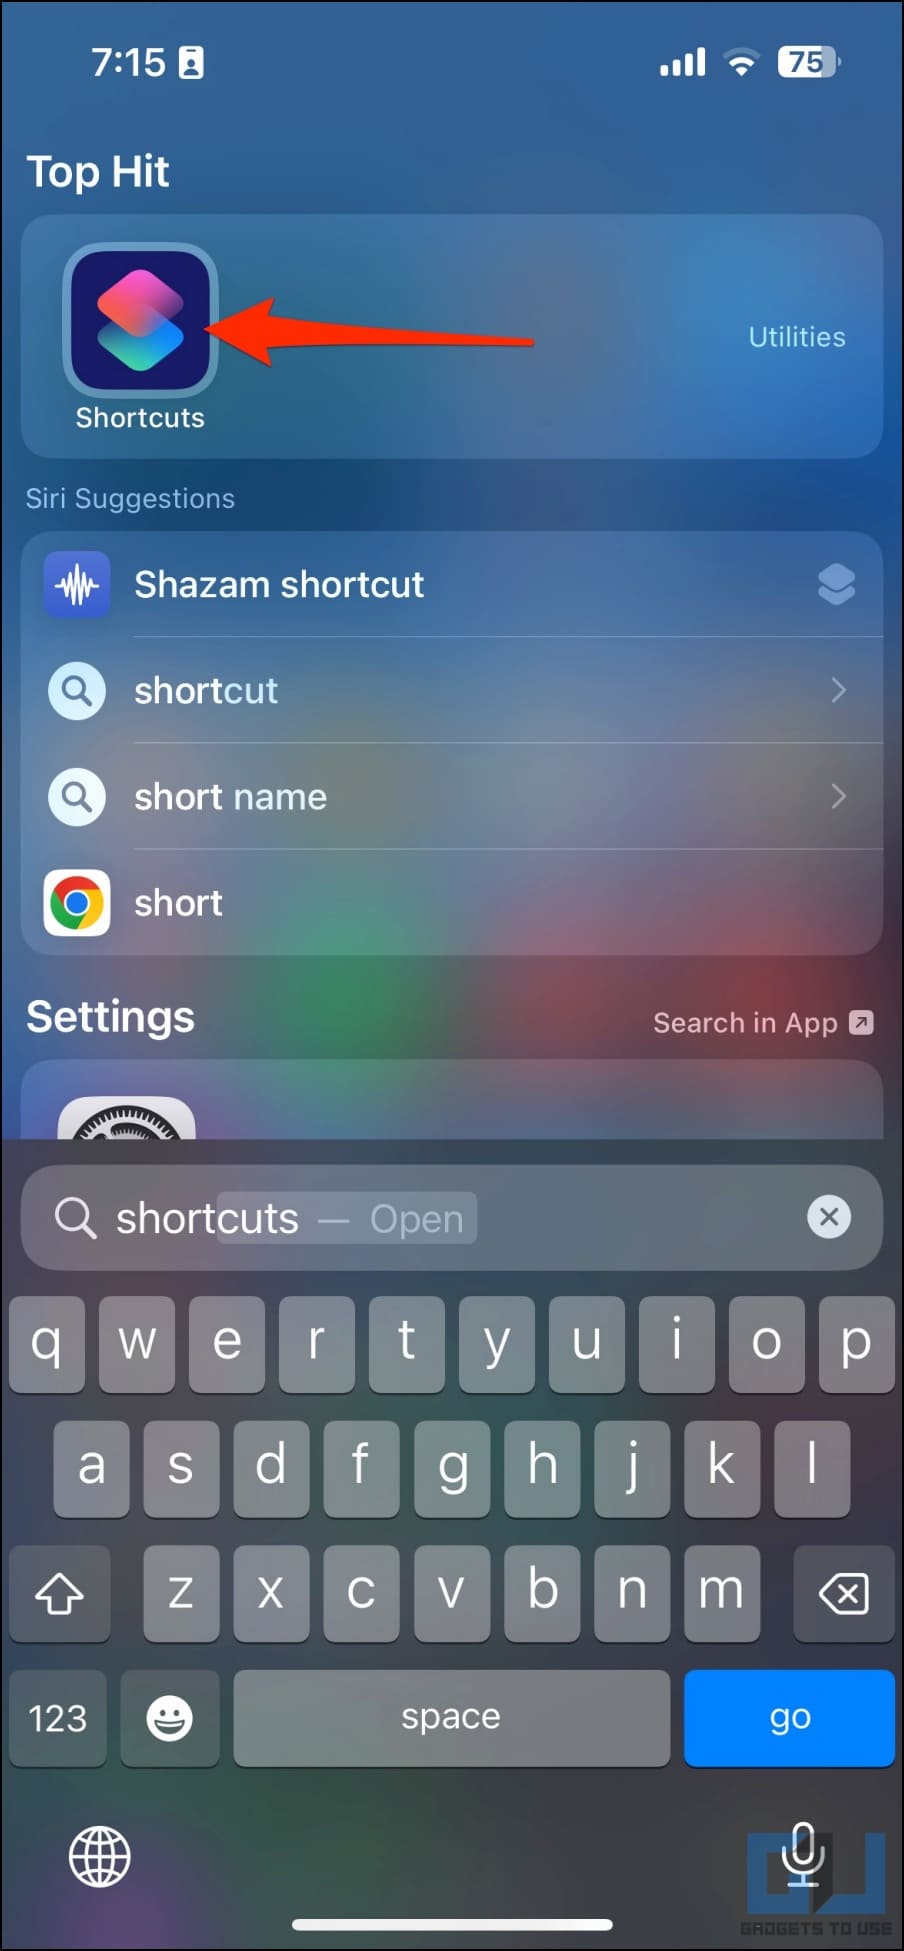
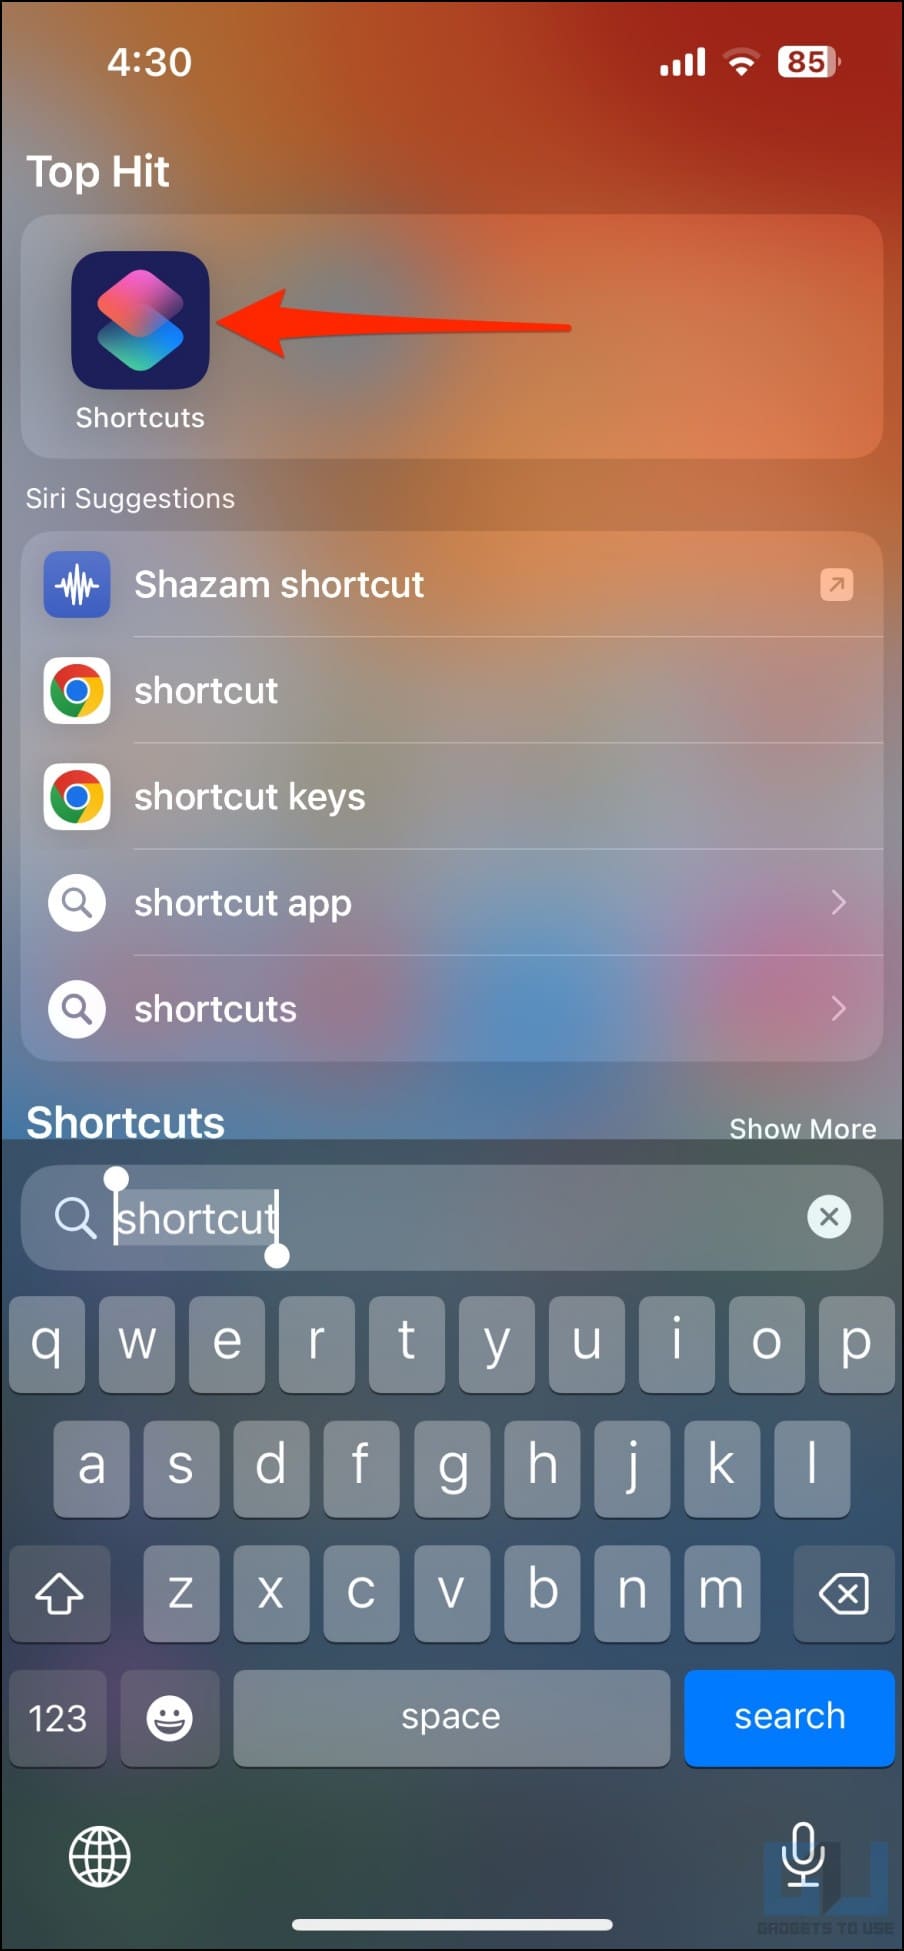
5. Open the Shortcuts app on your iPhone.
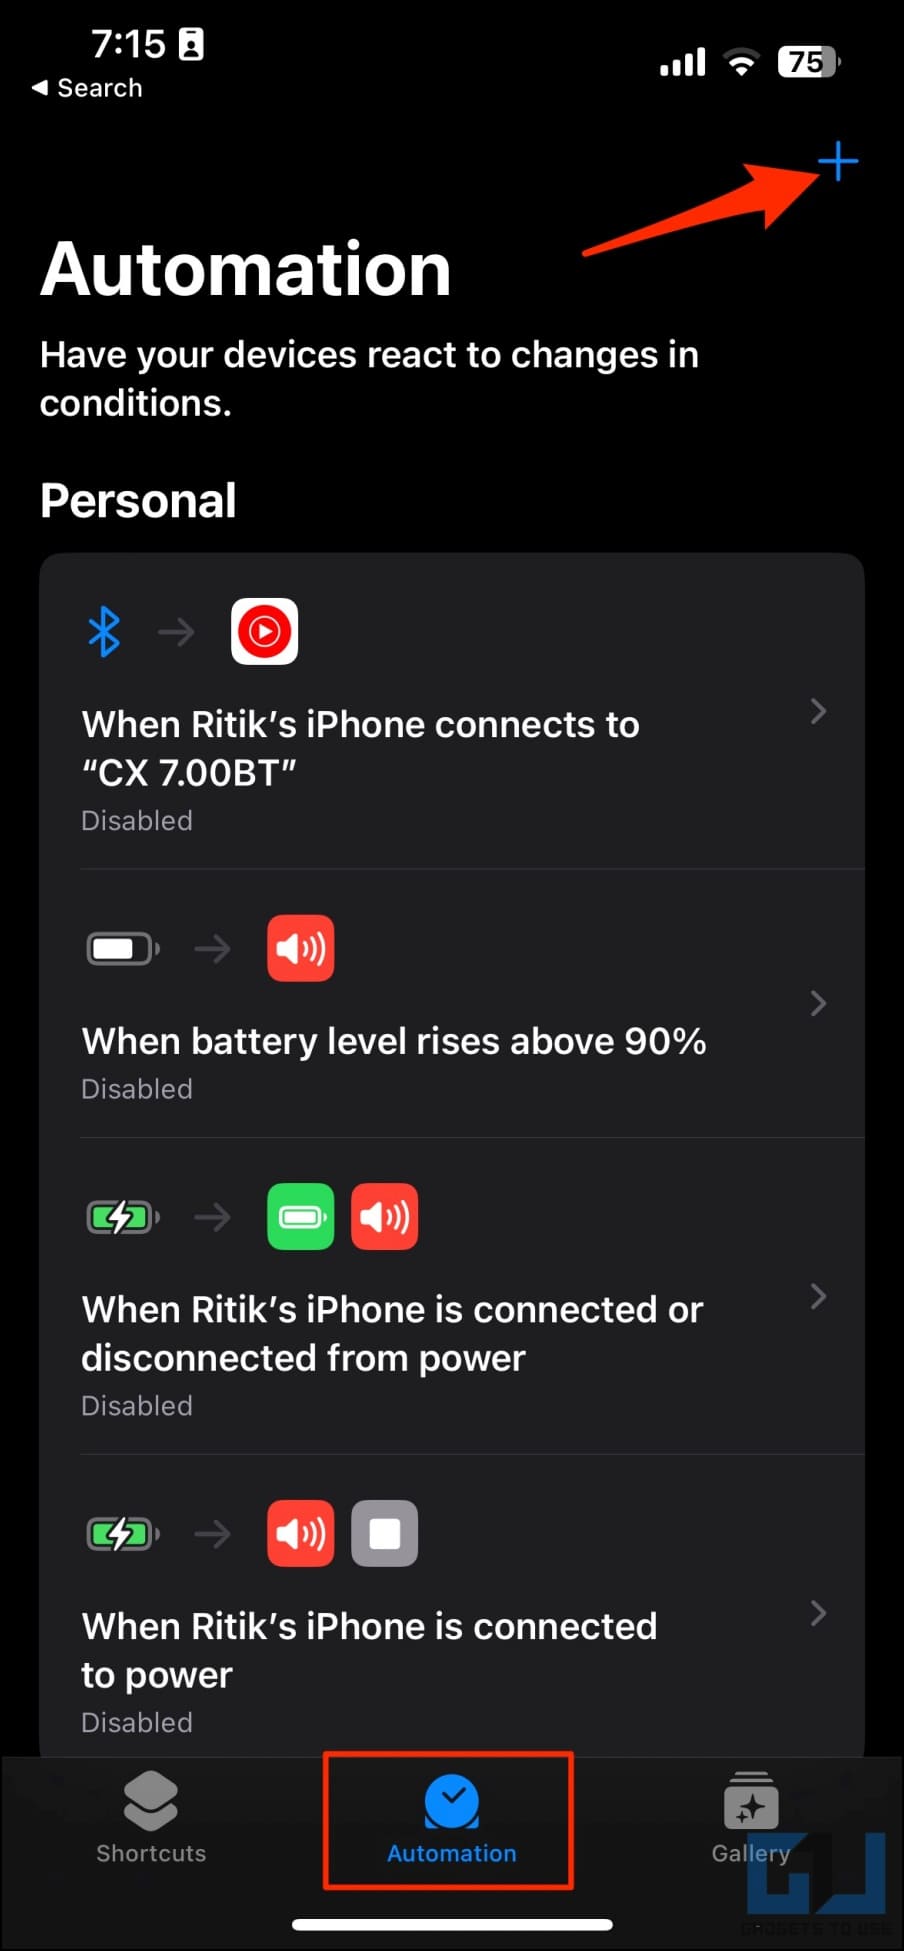
6. Select the Automation tab and tap the + icon.
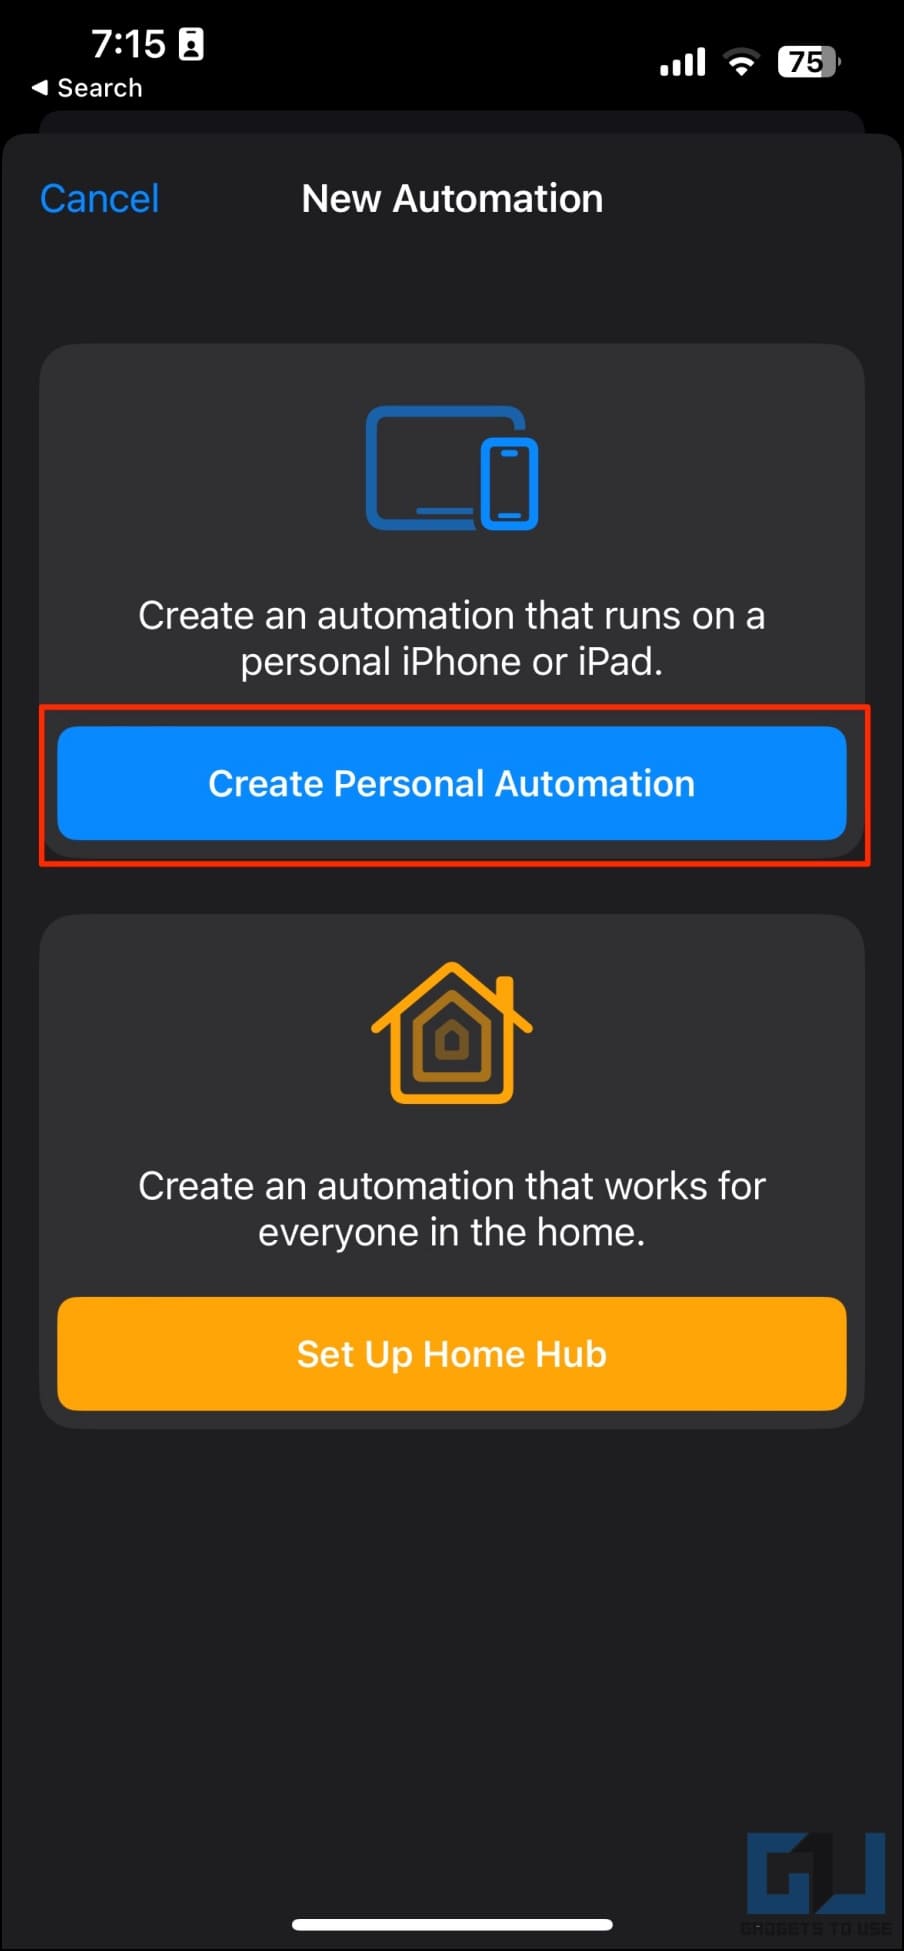
7. Click on Create Personal Automation.
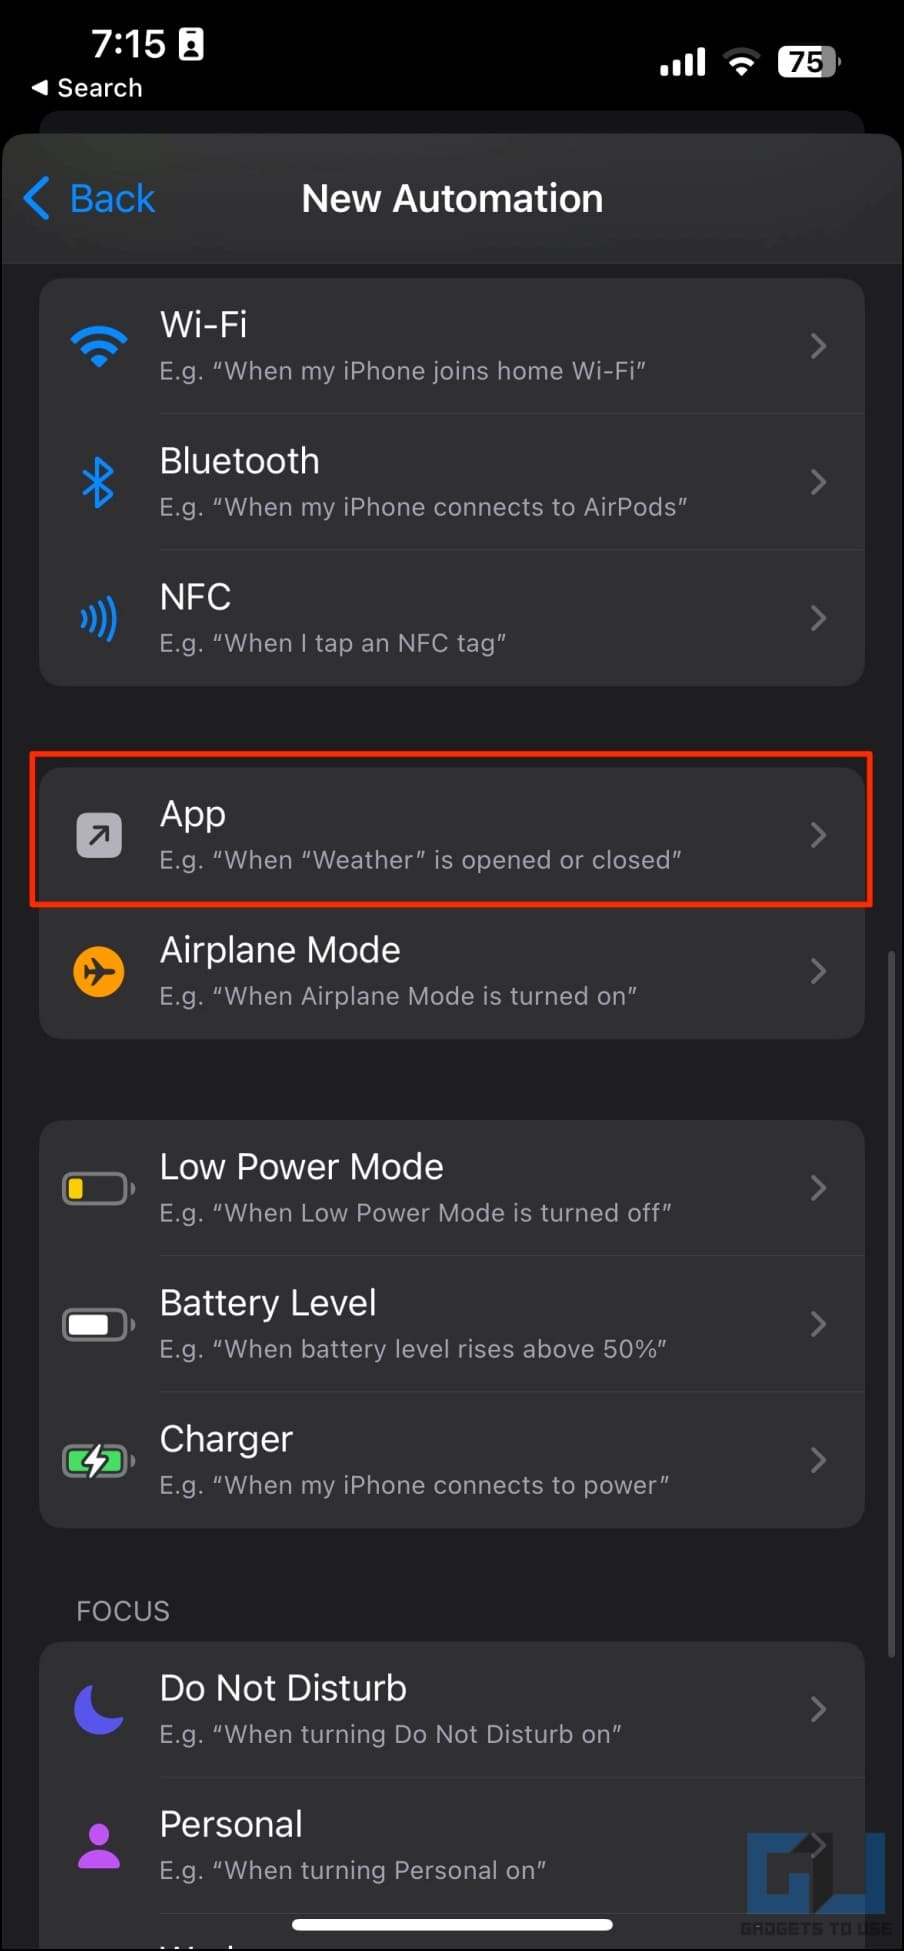
8. Scroll down and select App.
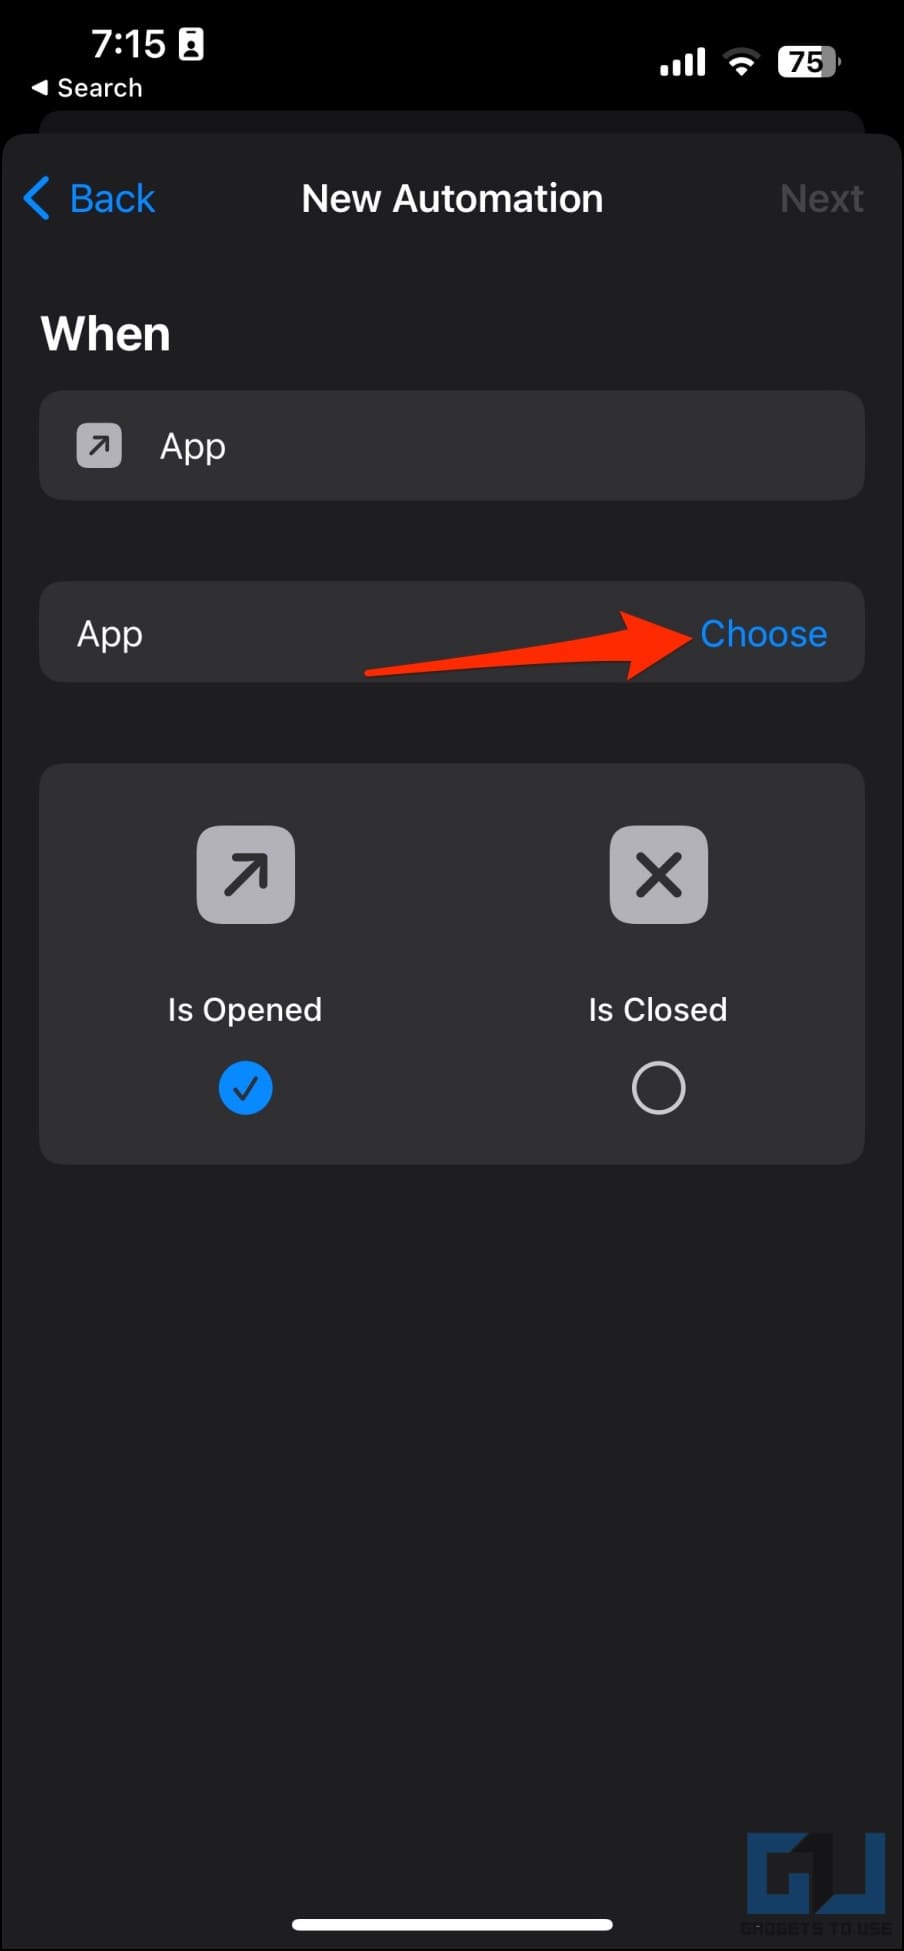
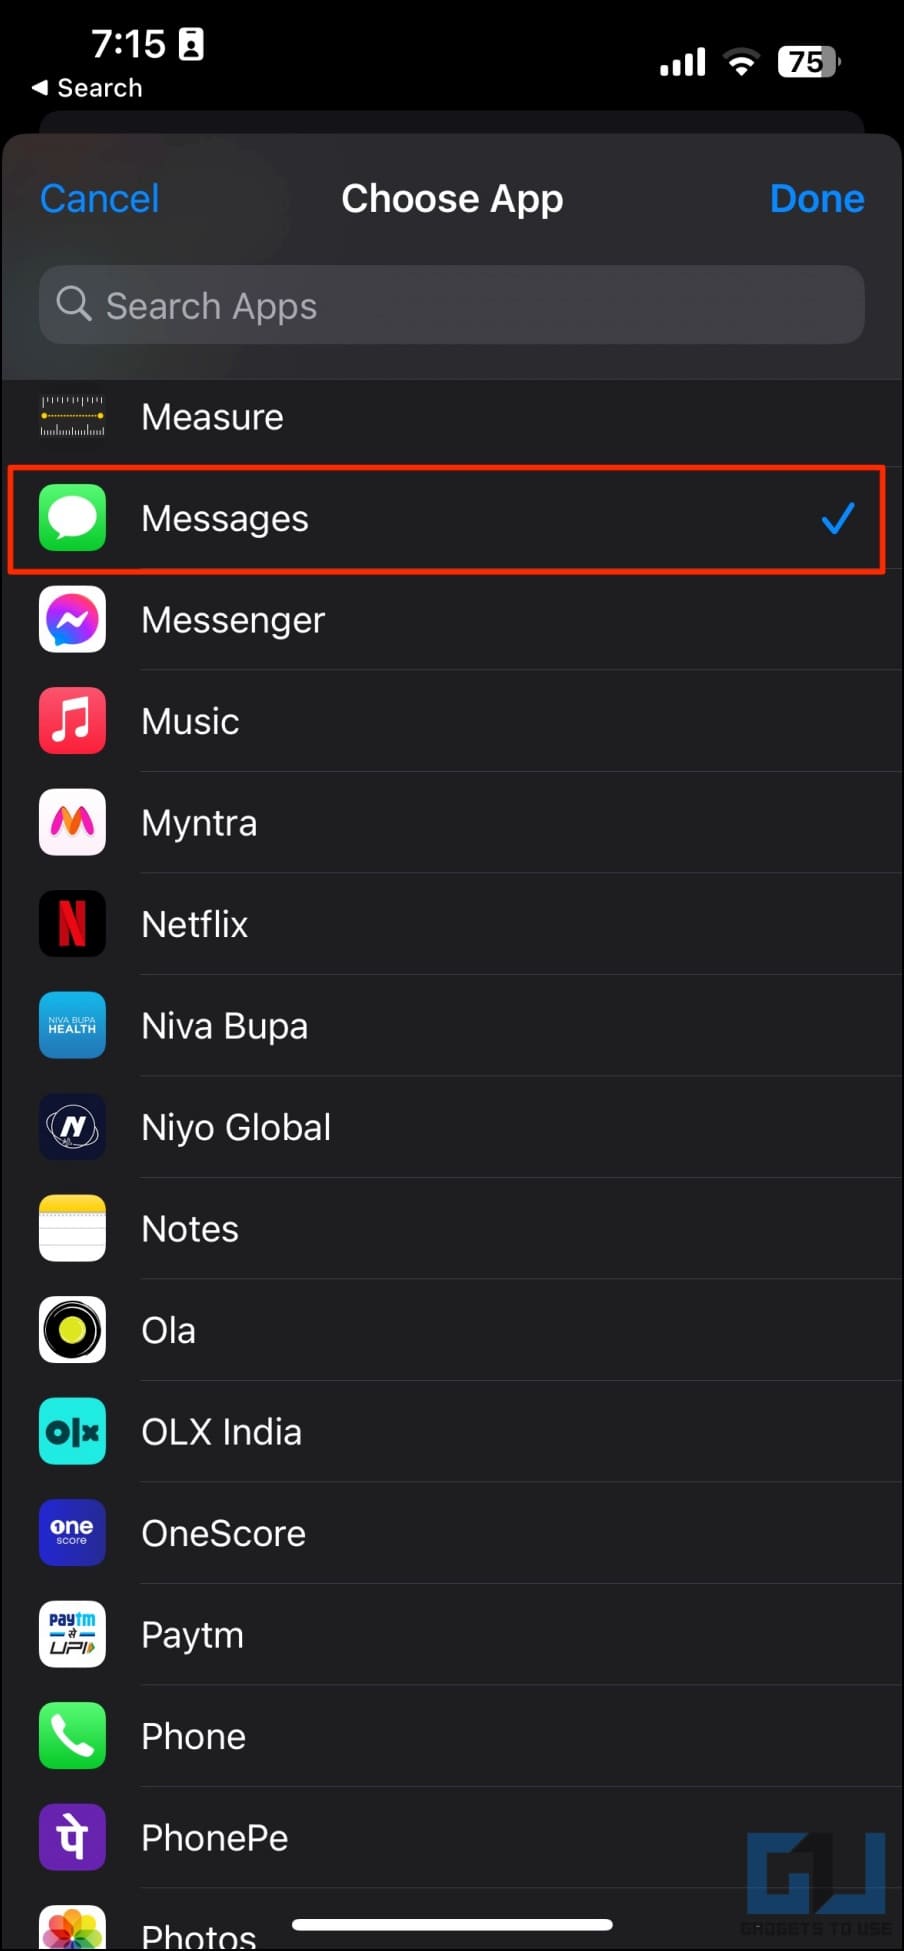
9. Tap Choose and select the apps you want to lock.
10. Click Done in the top right corner.
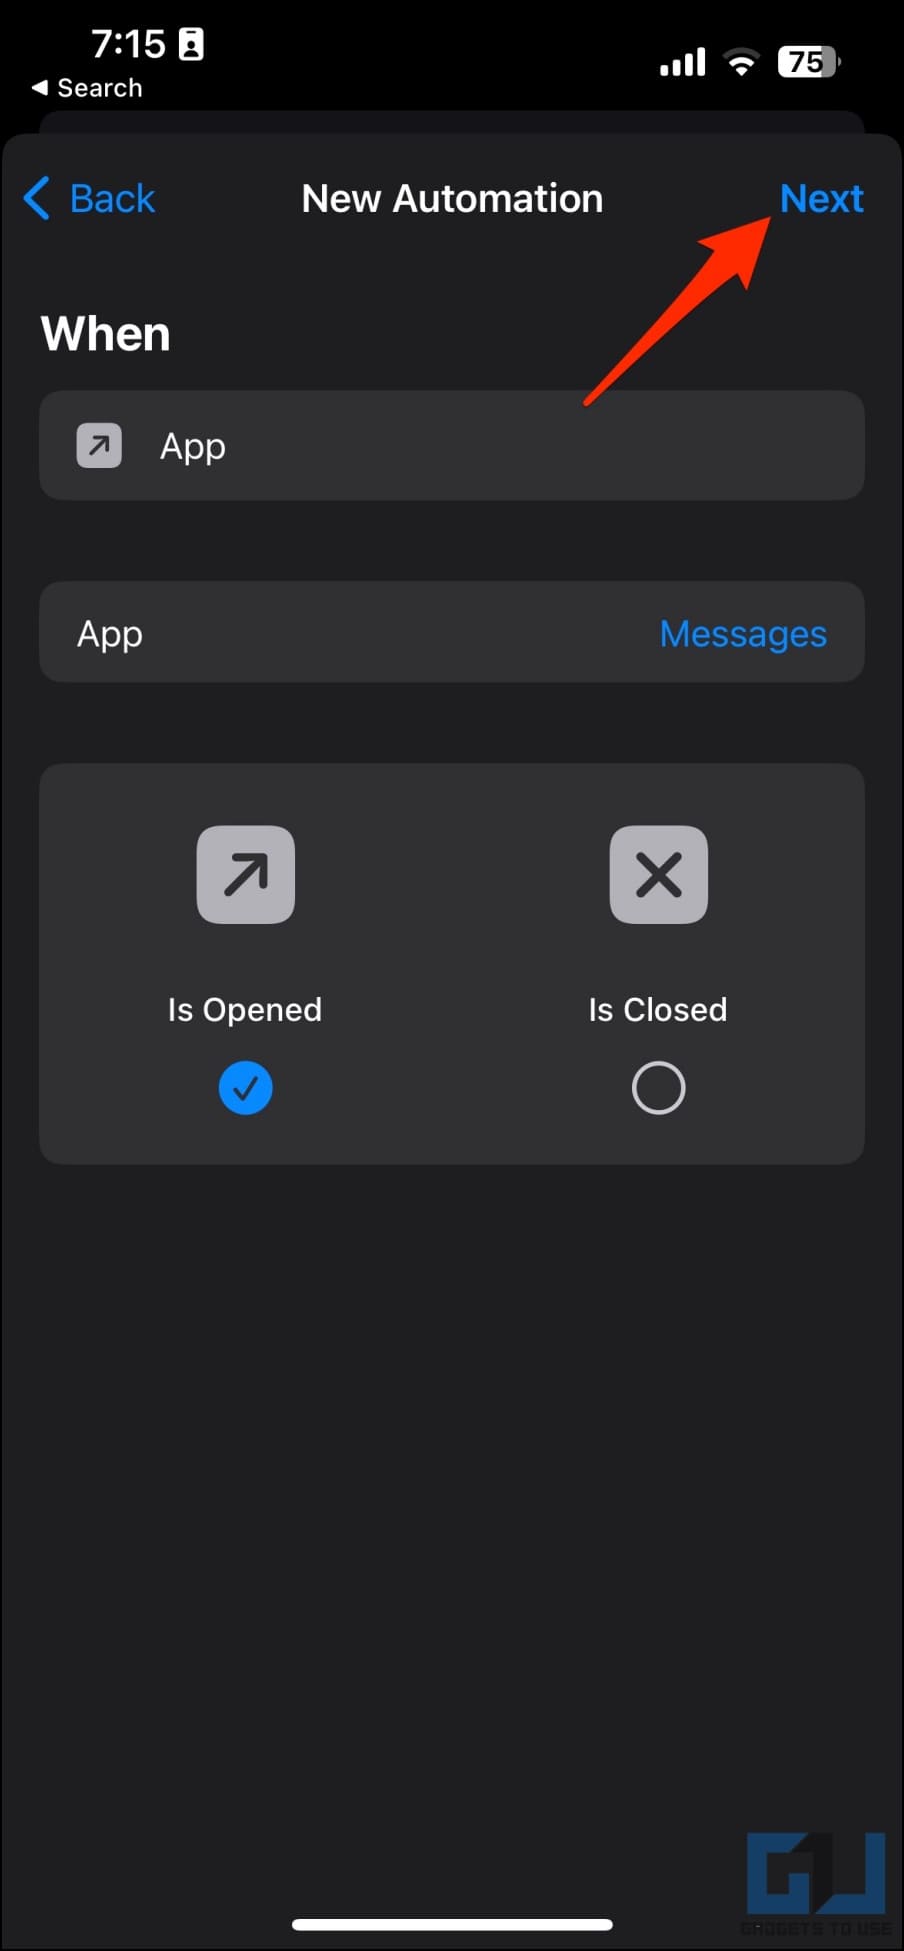
11. Once you’re back on the automation page, click Next in the top right corner.
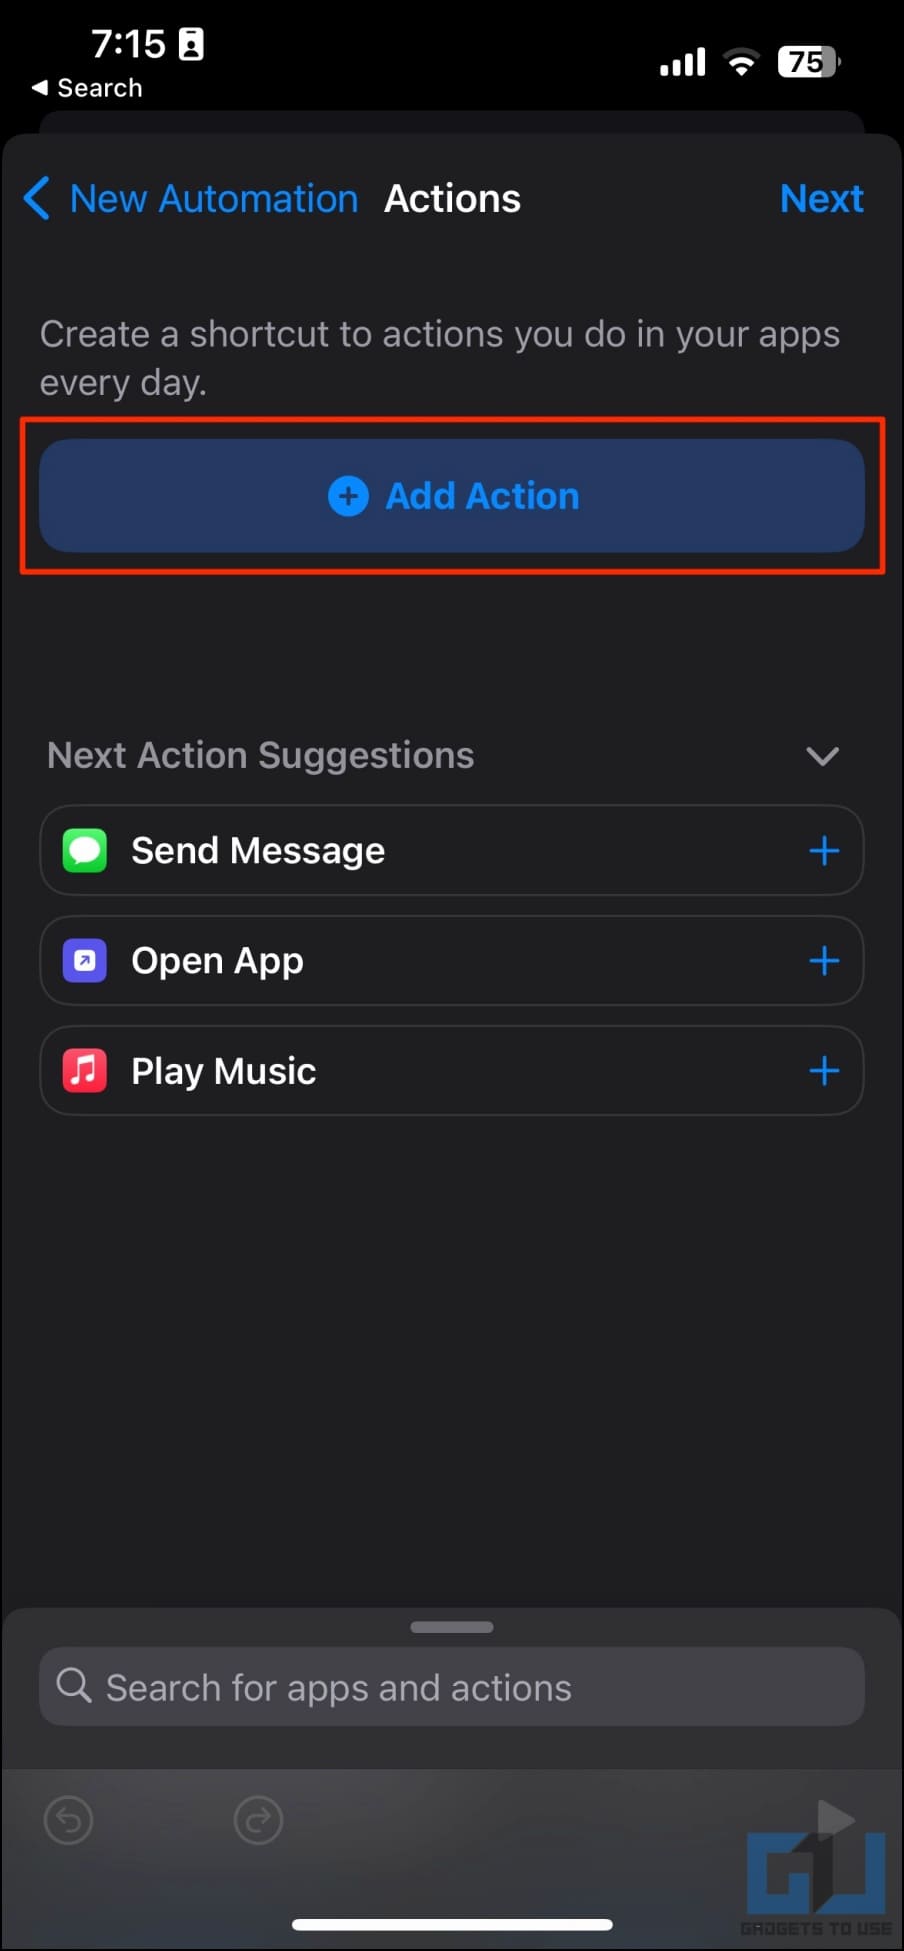
12. Tap Add Action.
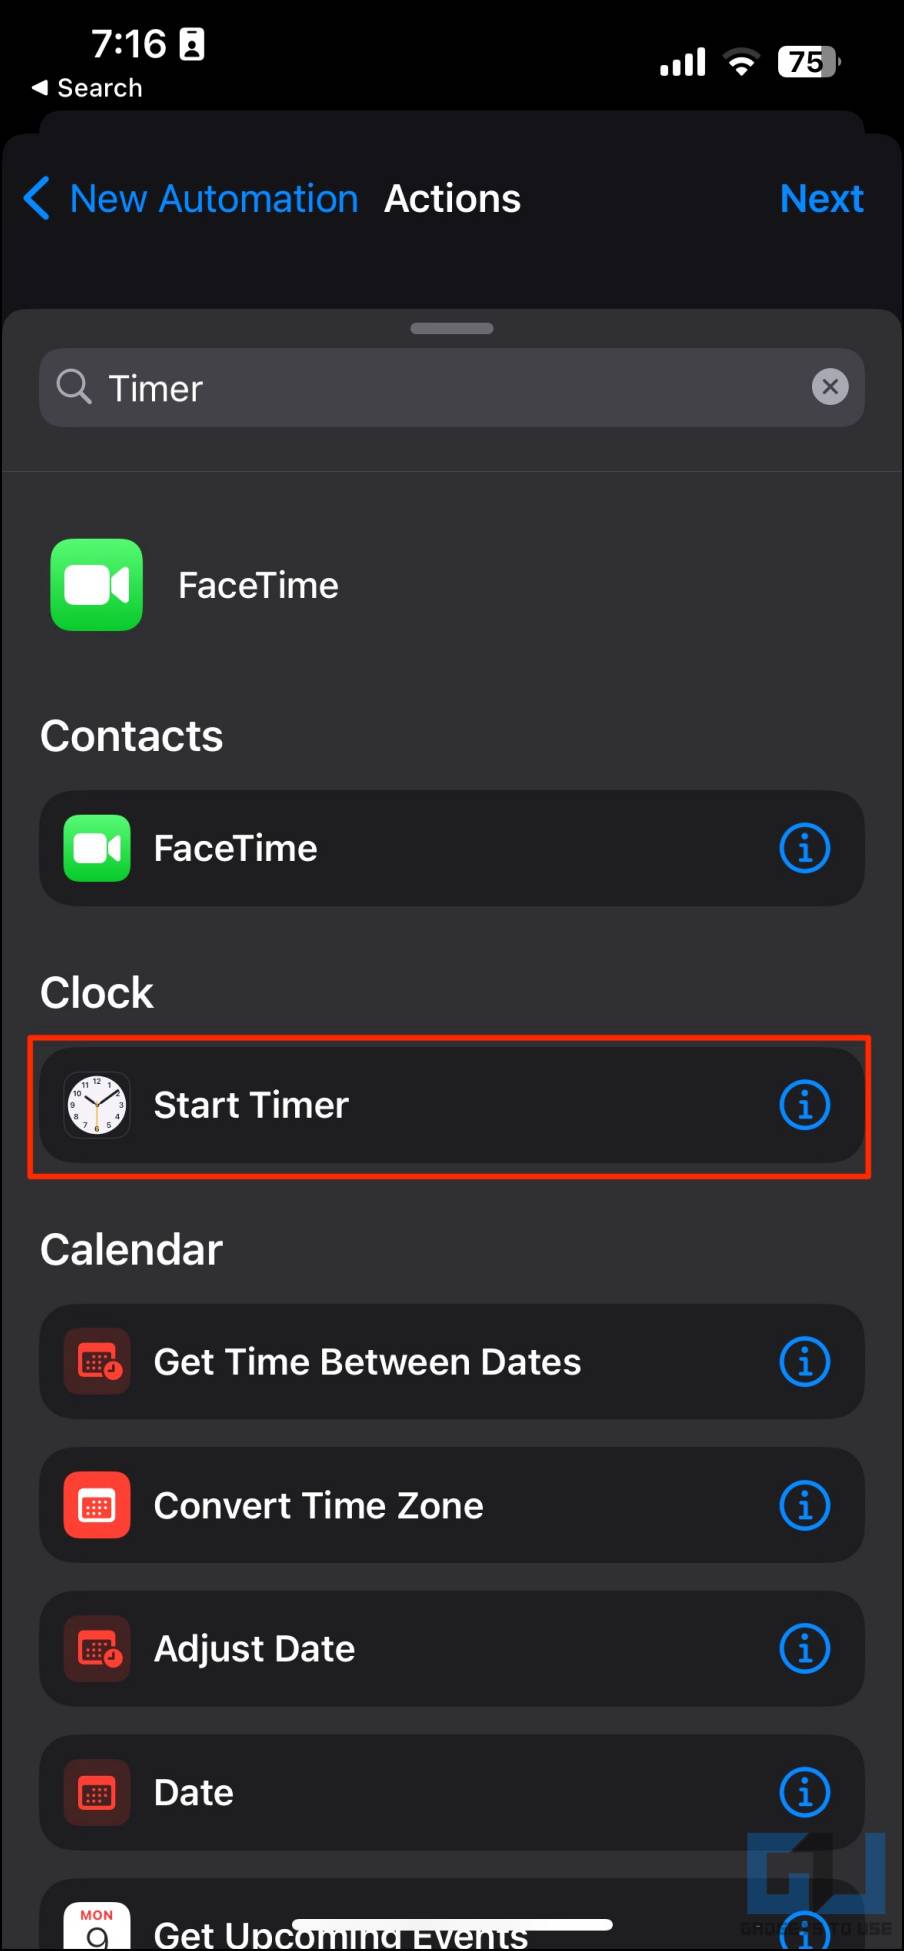
13. Search for and select Start Timer.
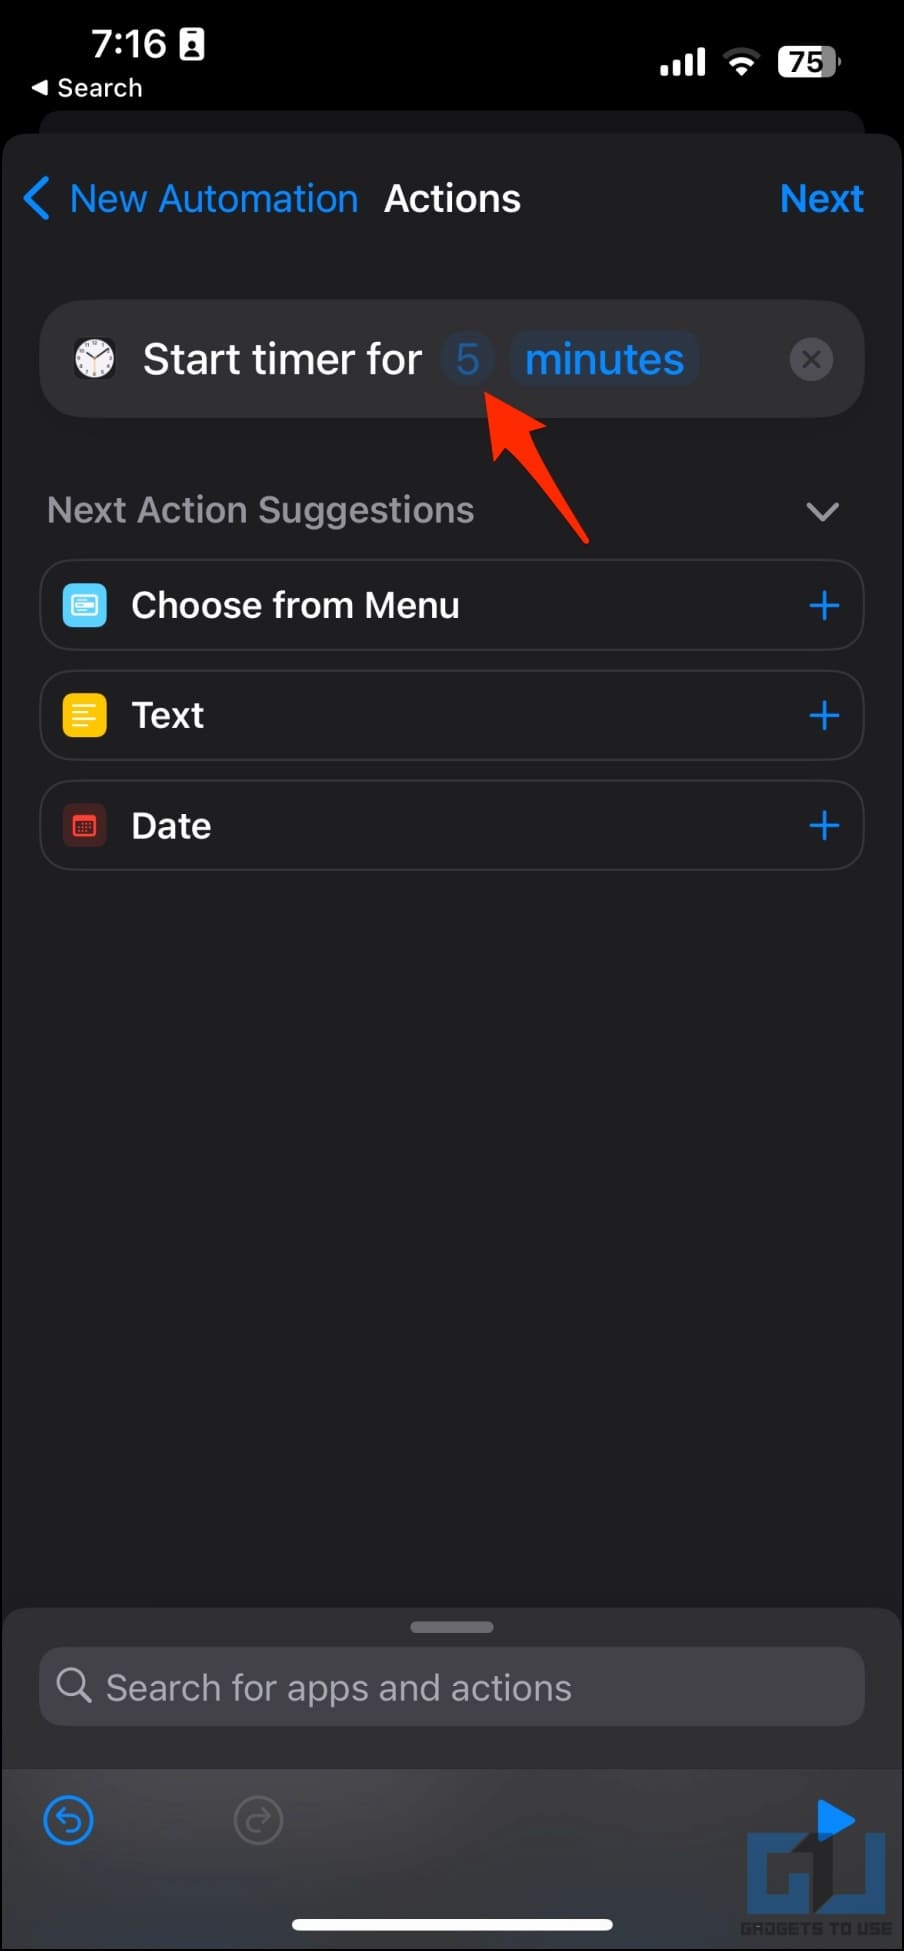
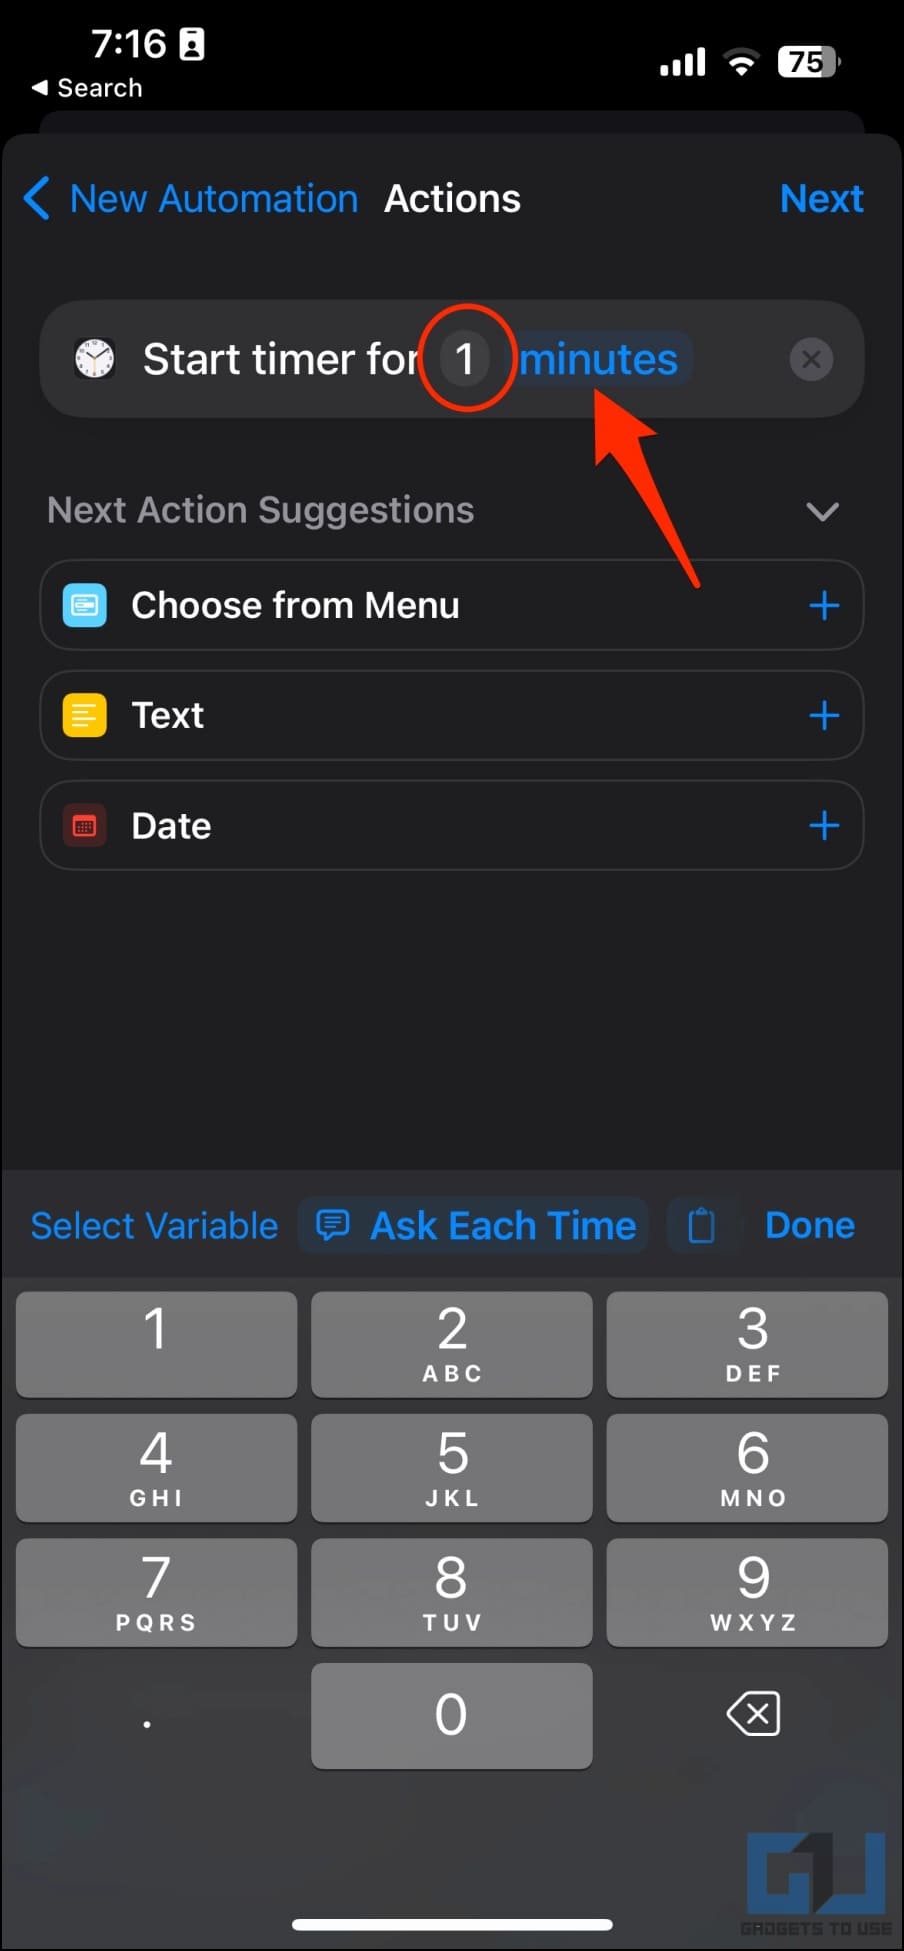
14. Tap the number against Start timer for. Change it to 1.
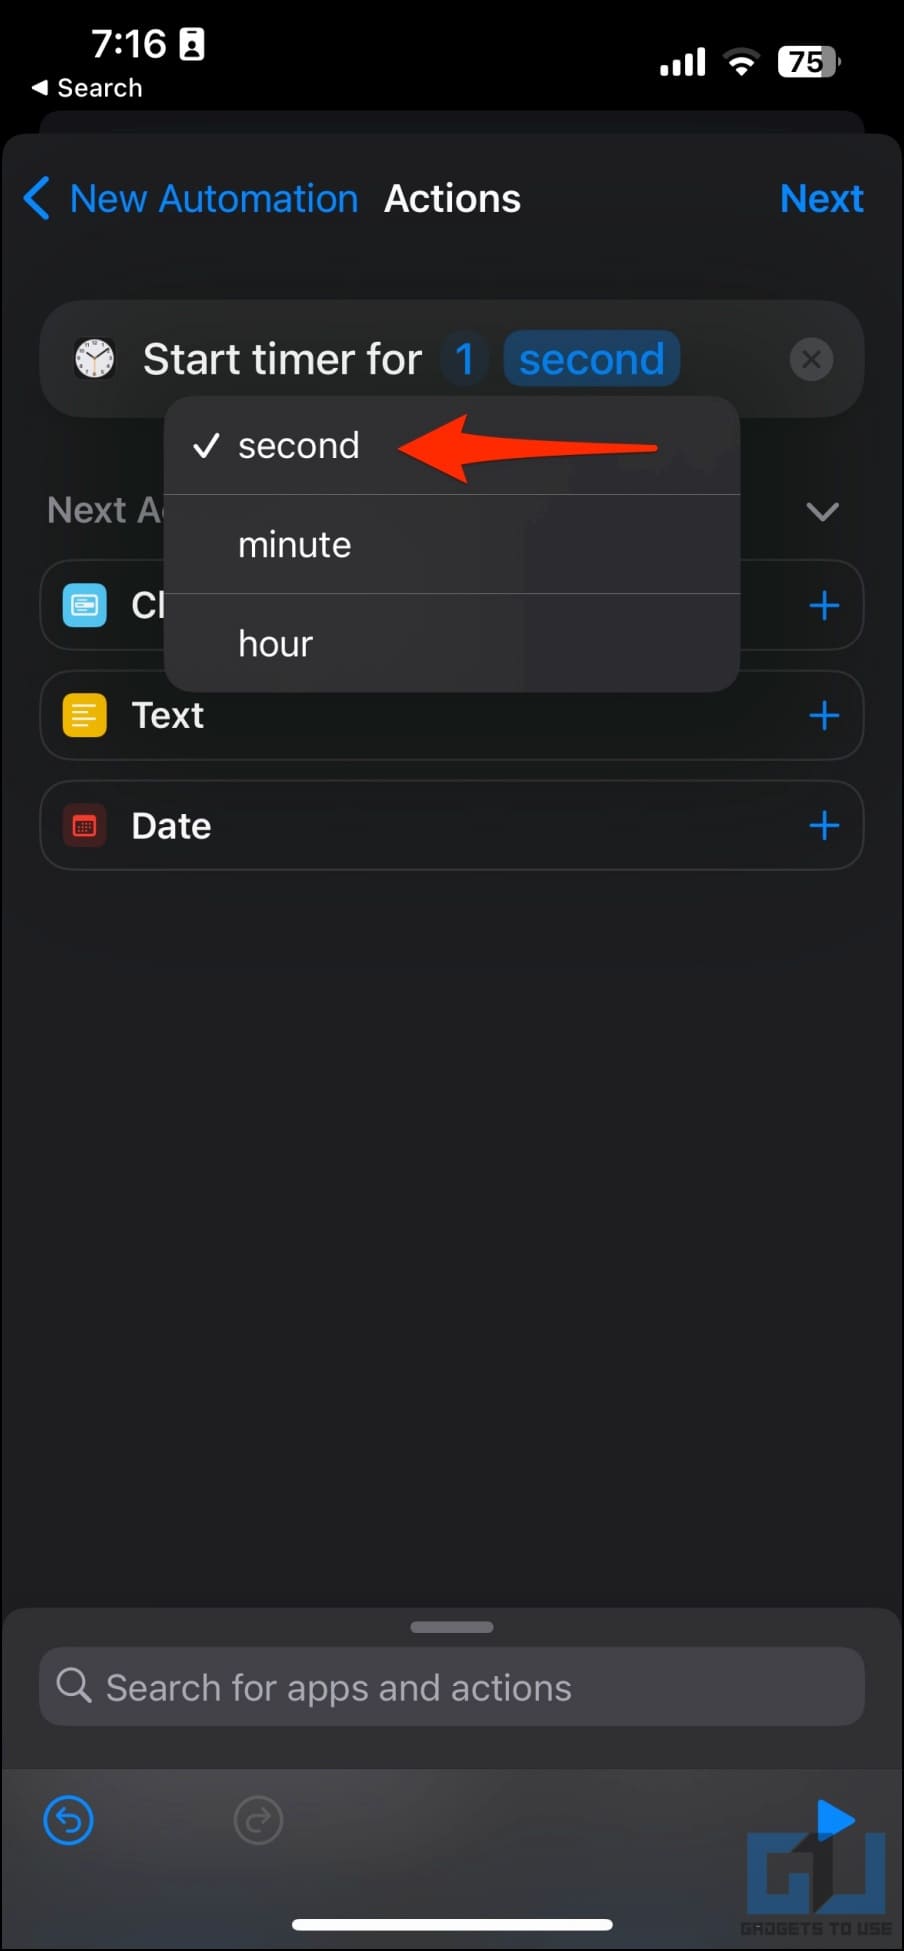
15. Next, click on Minutes and change it to Second.
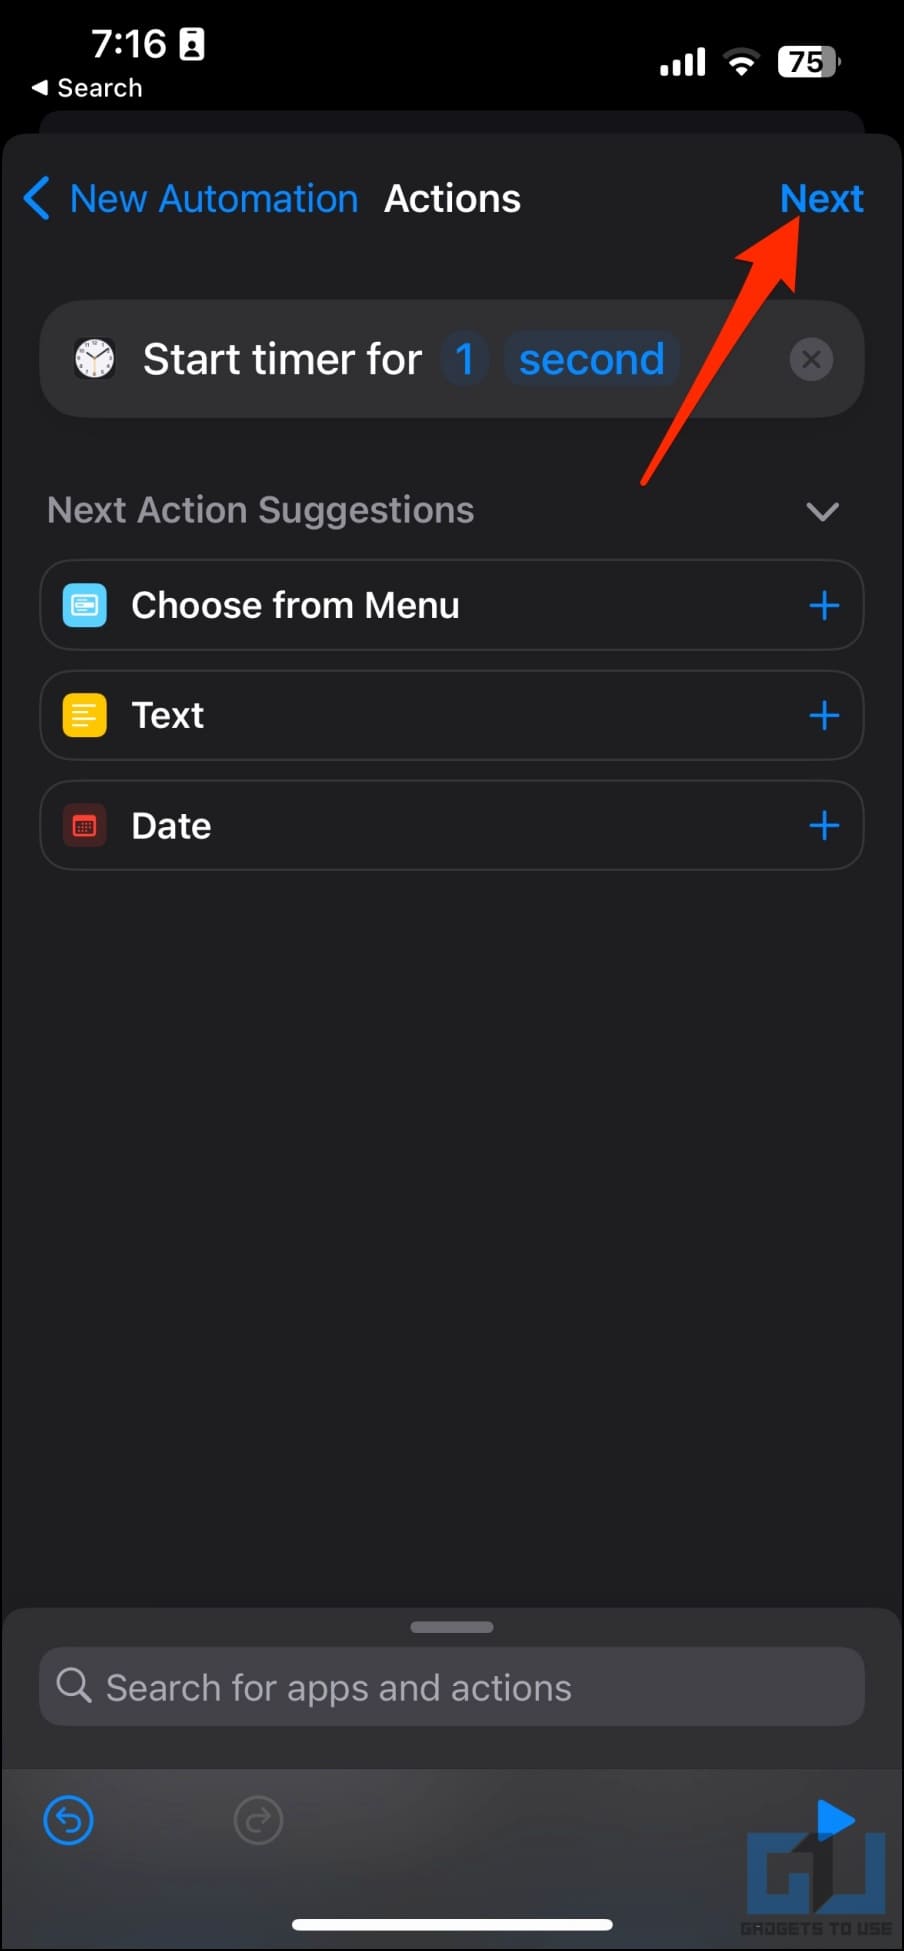
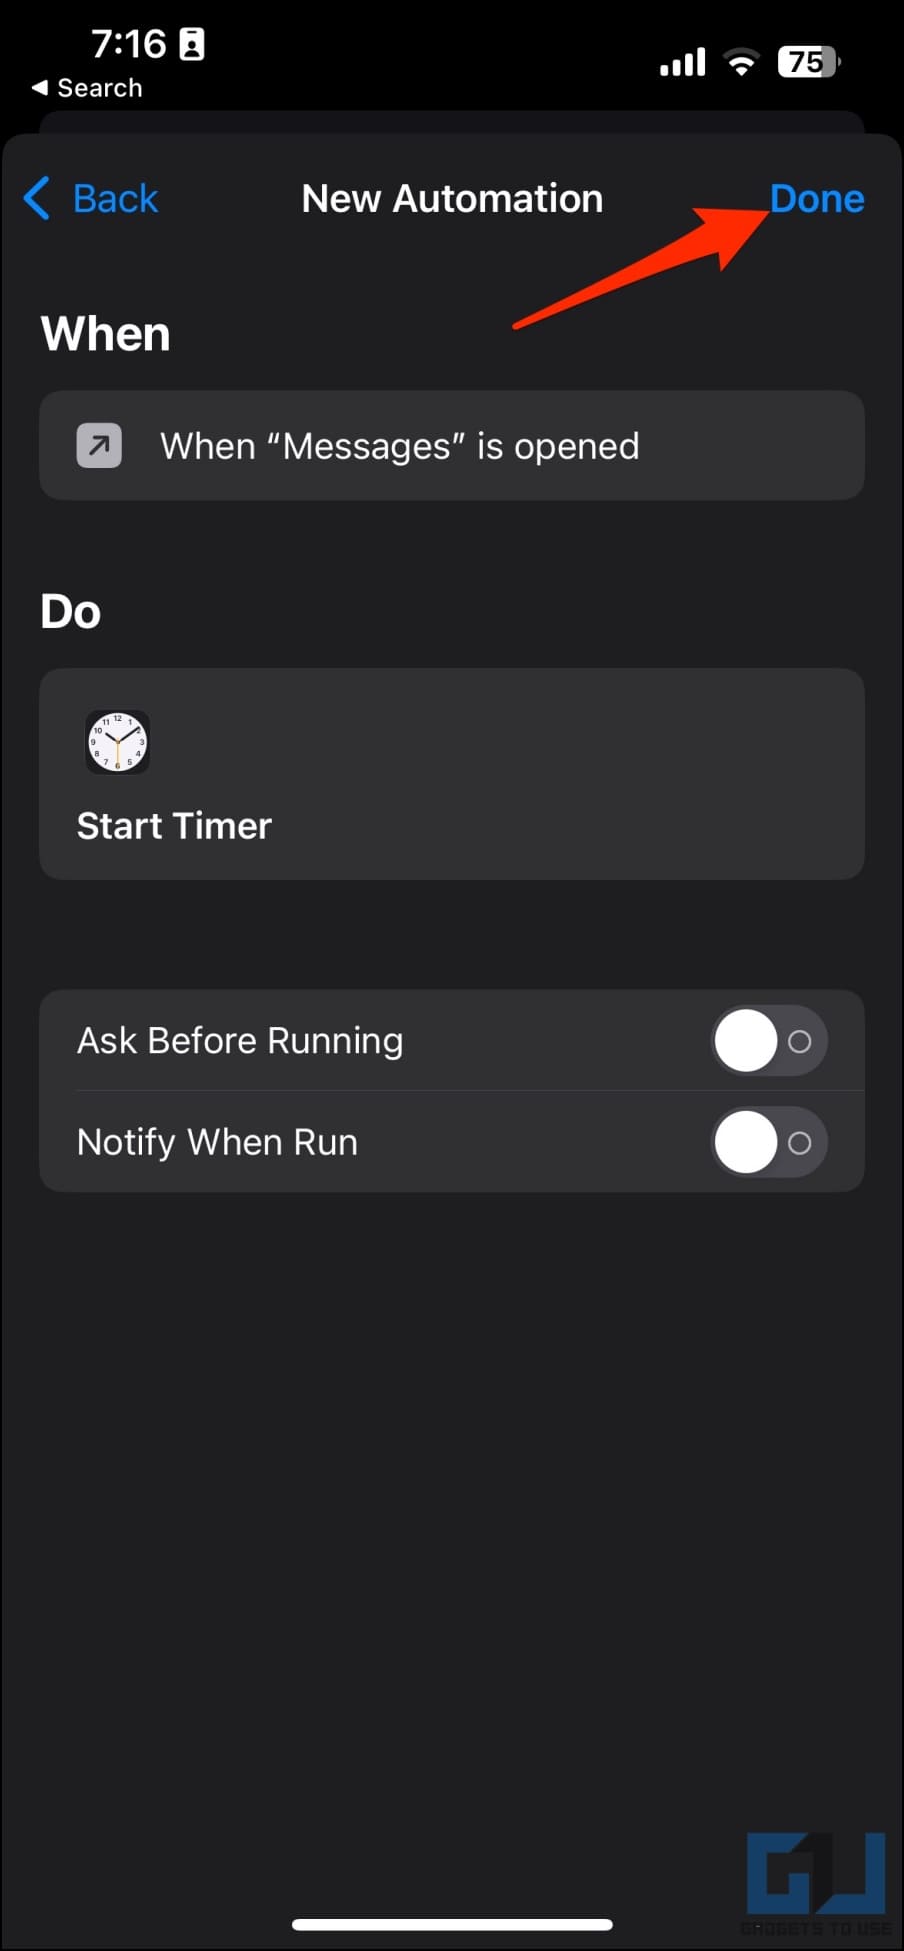
16. Once set the timer to 1 second, click Next on the top right.
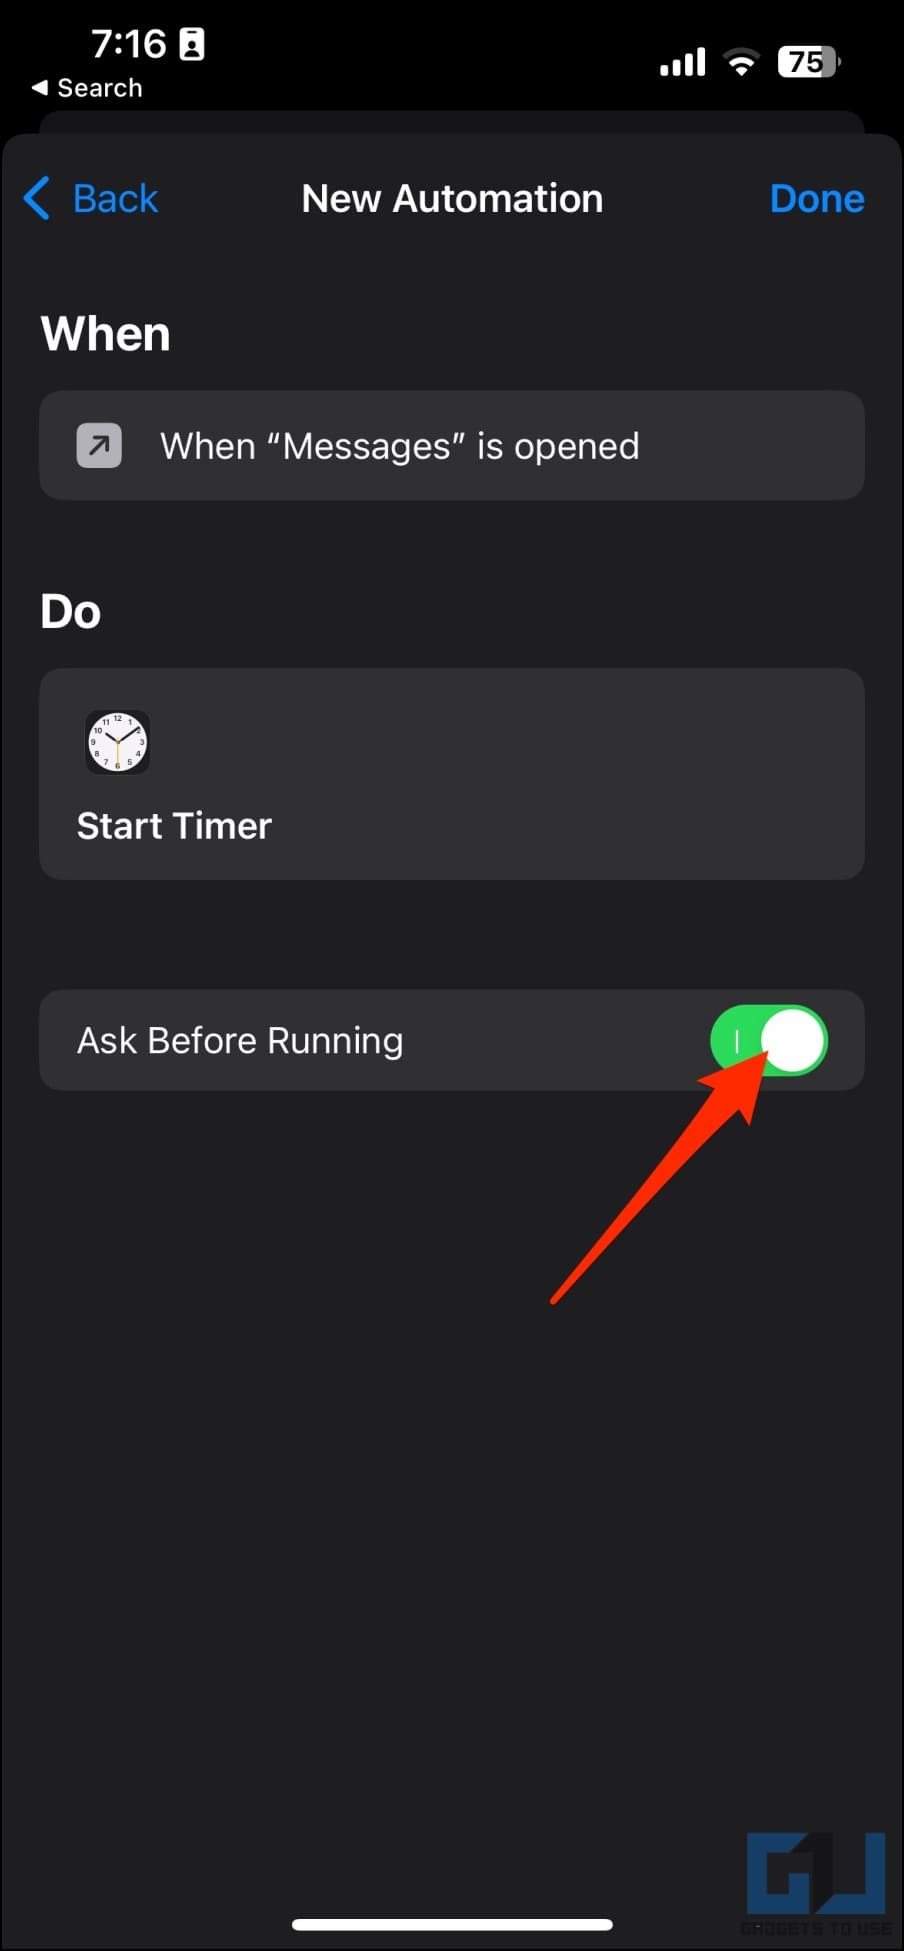
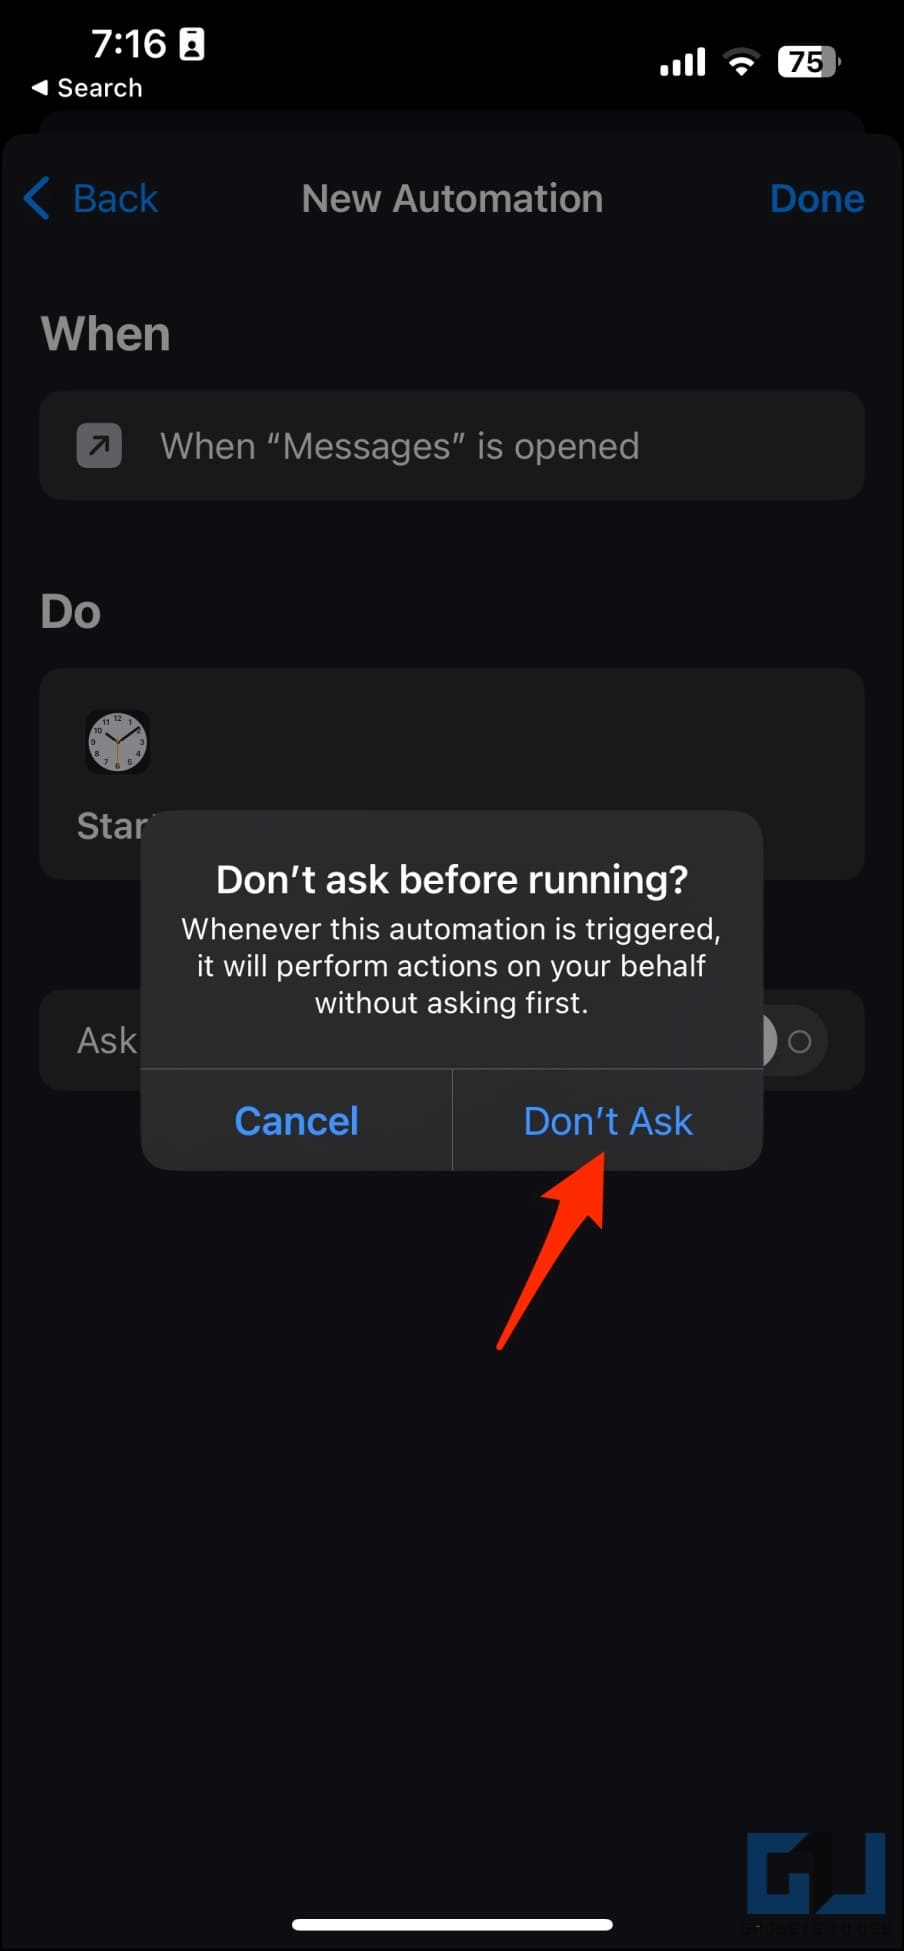
17. Disable the toggle for Ask Before Running and tap Don’t Ask.
18. Furthermore, make sure that Notify When Run is disabled. Tap Done on the top right.
Opening the selected app will automatically throw you to the iPhone lock screen within seconds. And you will have to use your Face ID or Touch ID or enter the iPhone passcode to unlock and access the app.
The shortcut will run each time you open the locked apps. This will prevent others from accessing the application without your consent.
Method 2- Lock Apps With Passcode By Limiting Screen Time
You can use the Screen Time feature on your iPhone to lock applications by restricting their screen time. It can lock any app for a “certain time” on your iPhone except the Phone app and is available only on iOS 12 and later. Here’s how to use it:
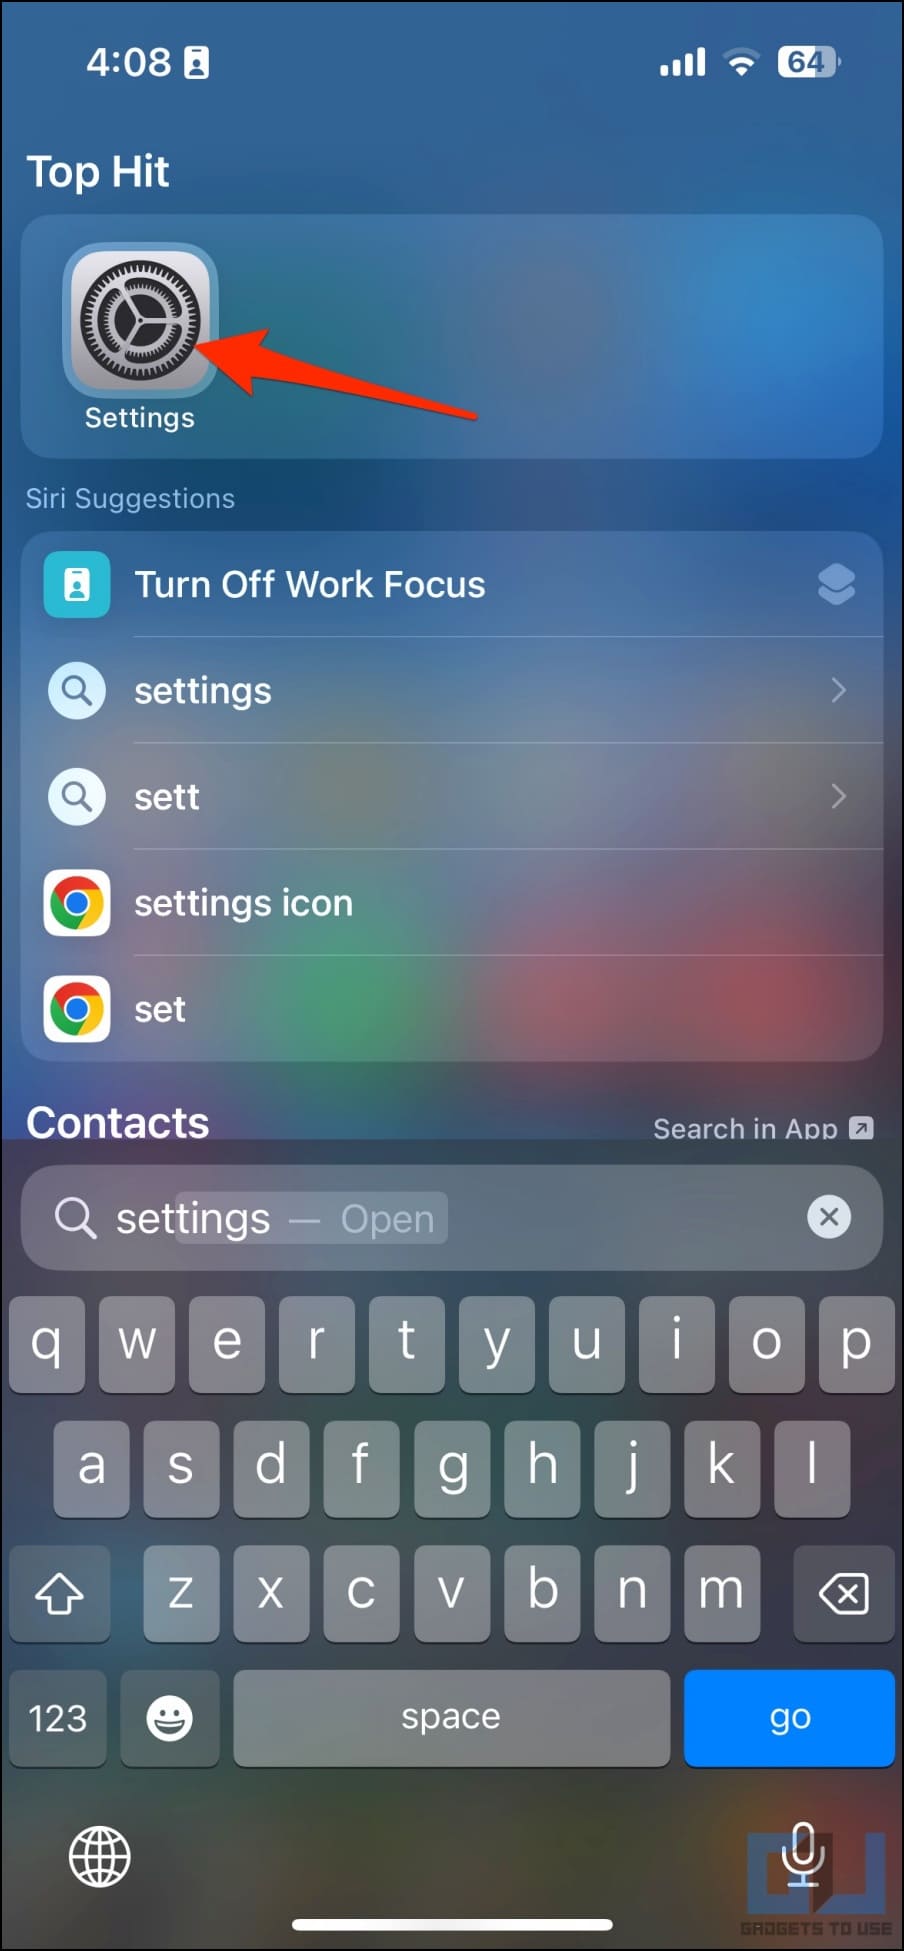
1. Open Settings on your iPhone or iPad.
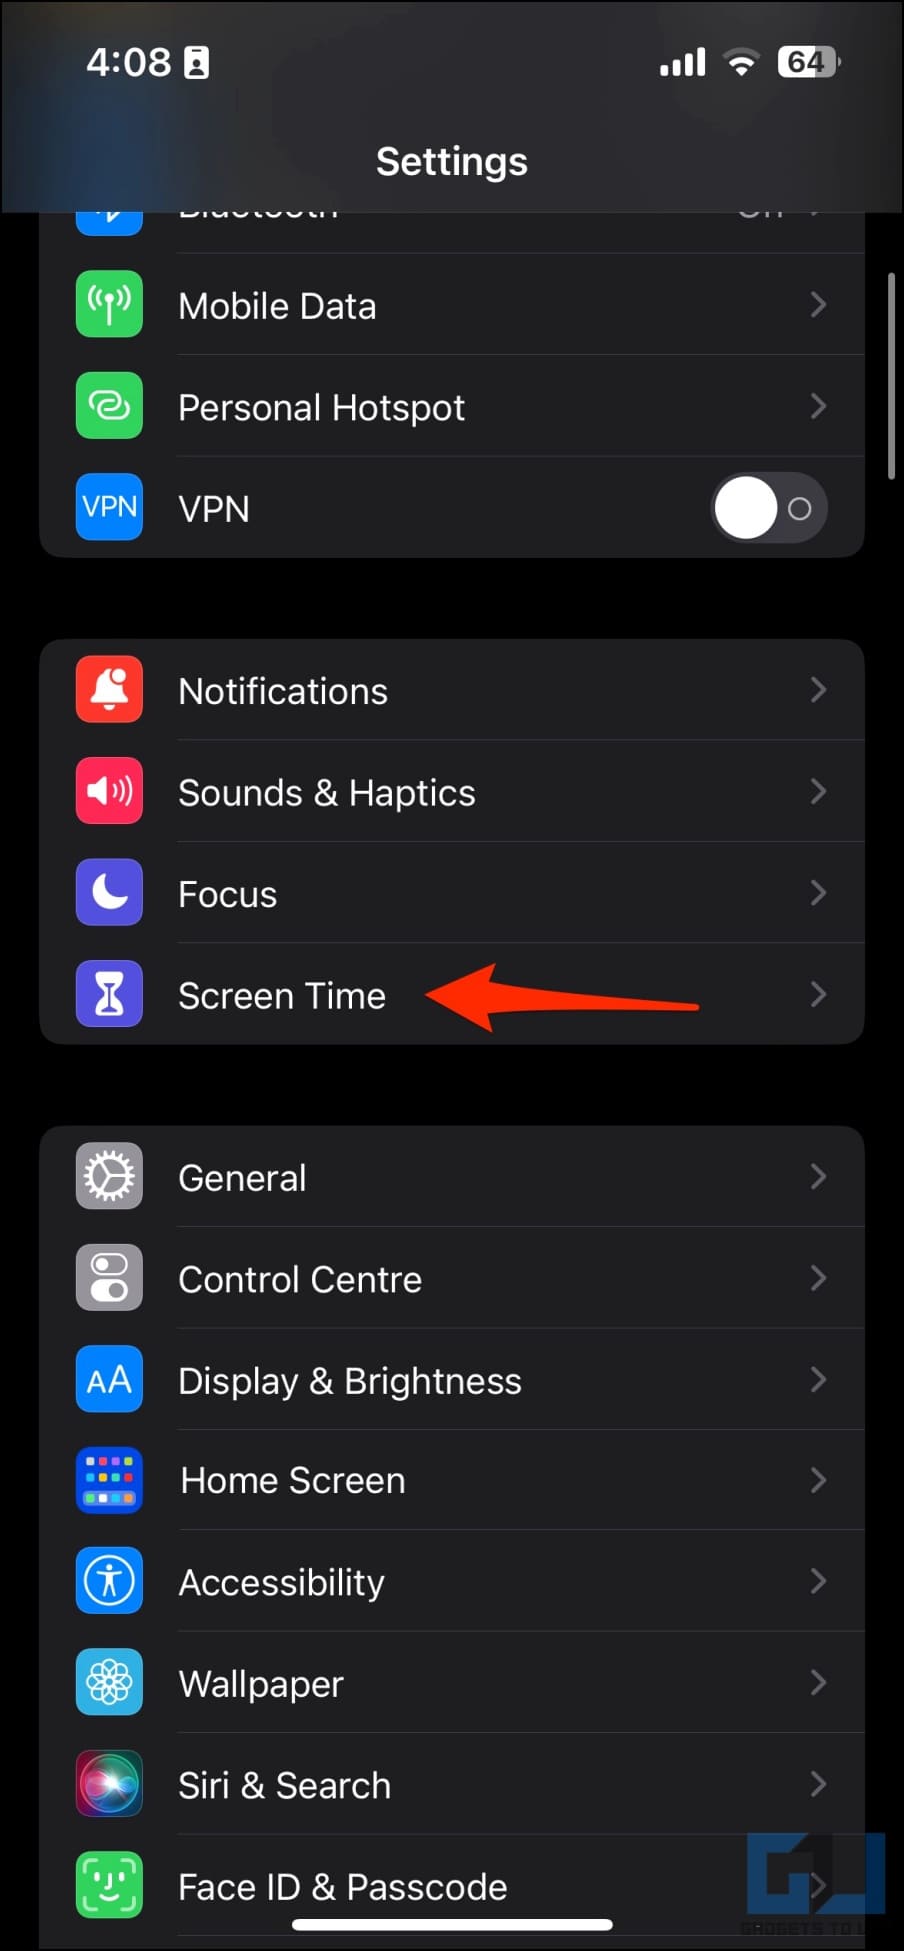
2. Scroll down and click on Screen Time.
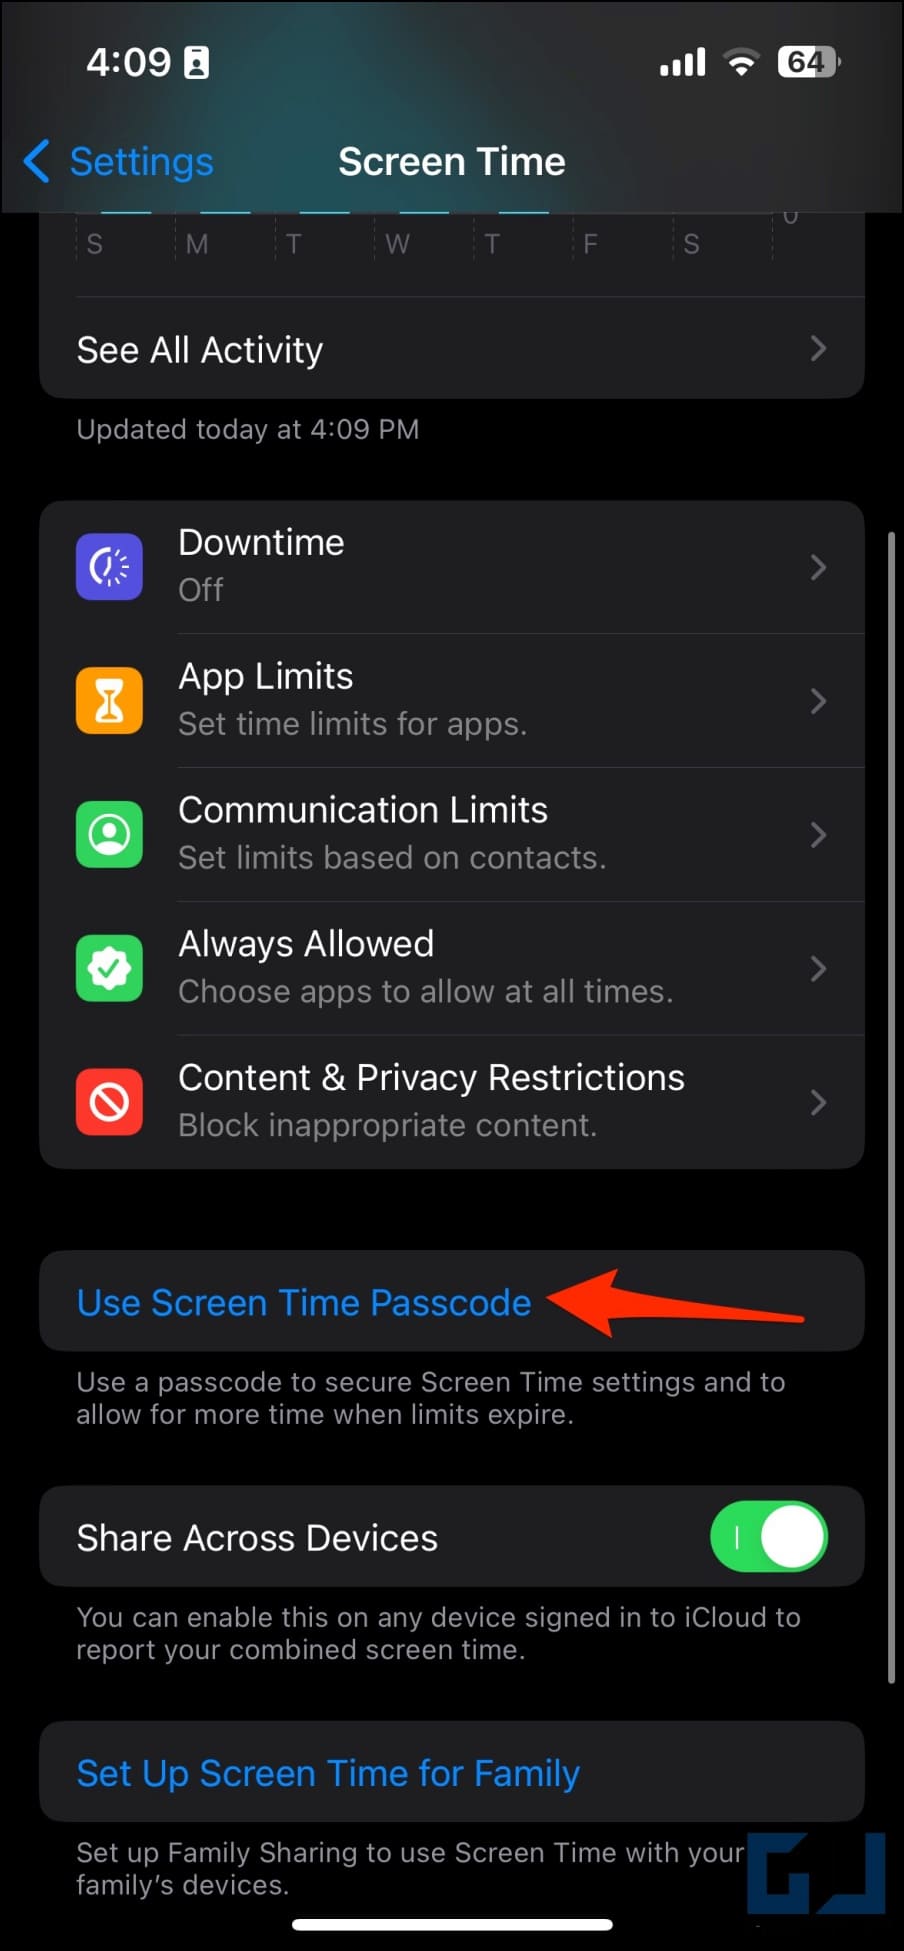
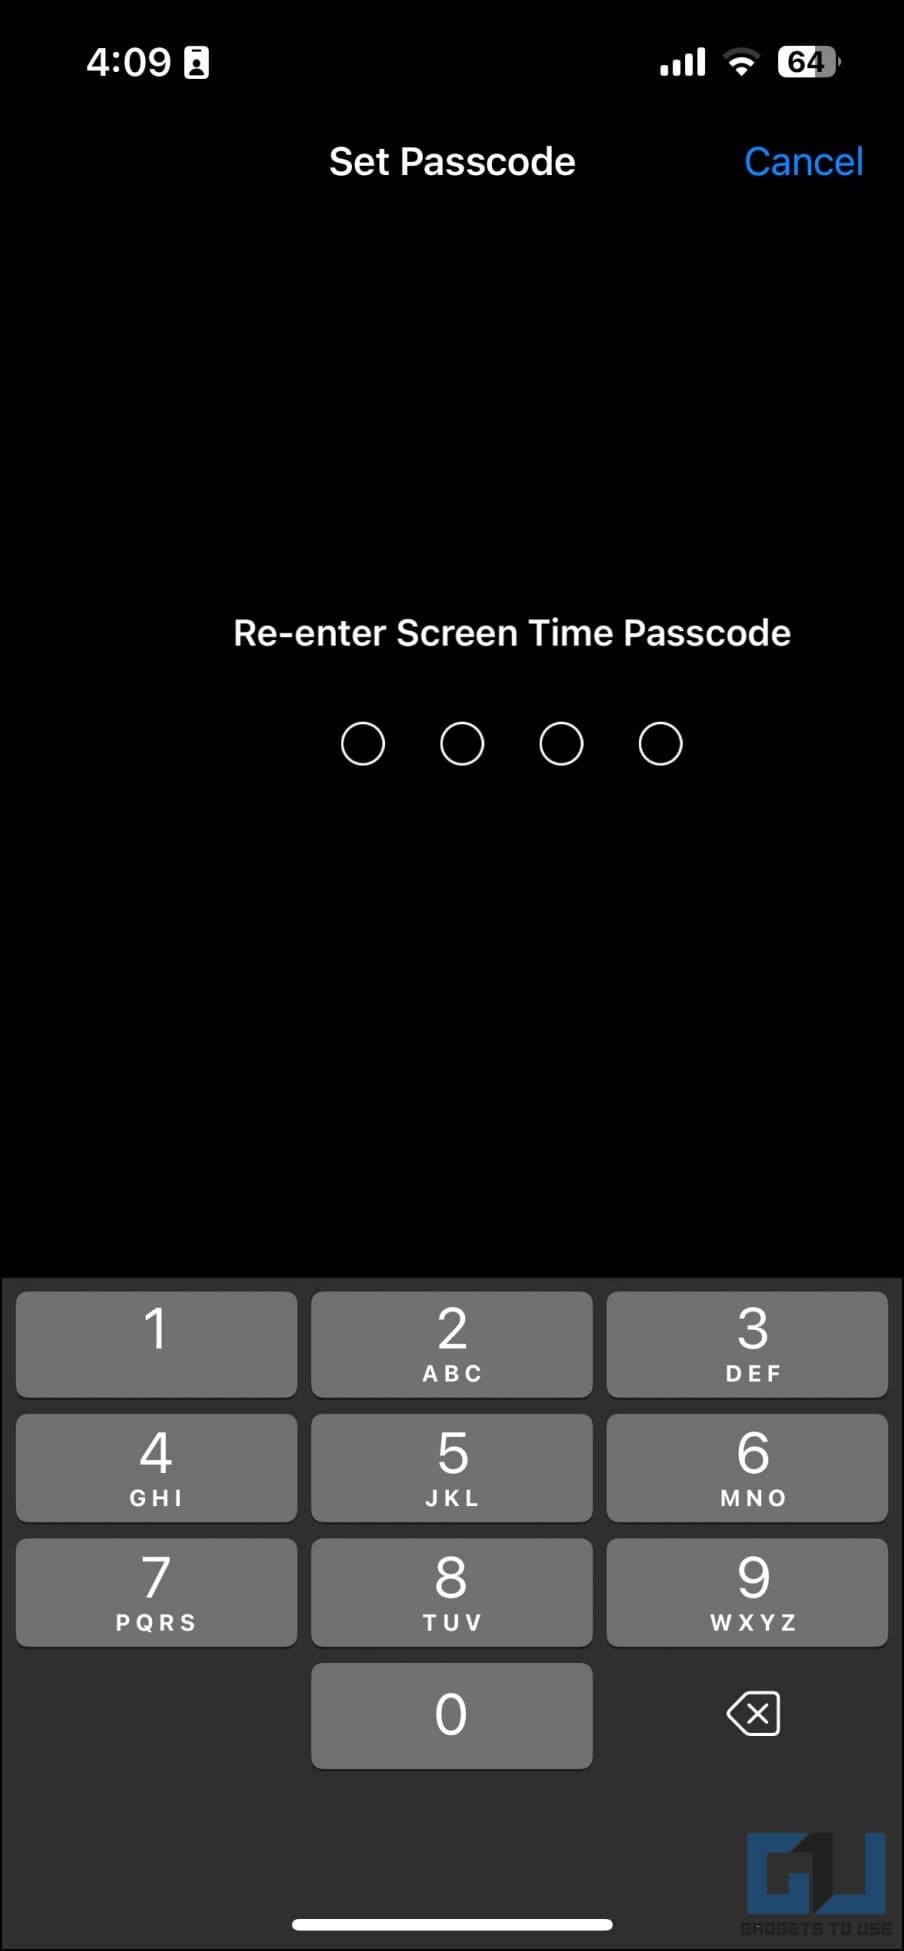
3. Turn on Screen Time if not enabled. Then, tap Use Screen Time Passcode and follow the instructions to set a passcode of your choice.
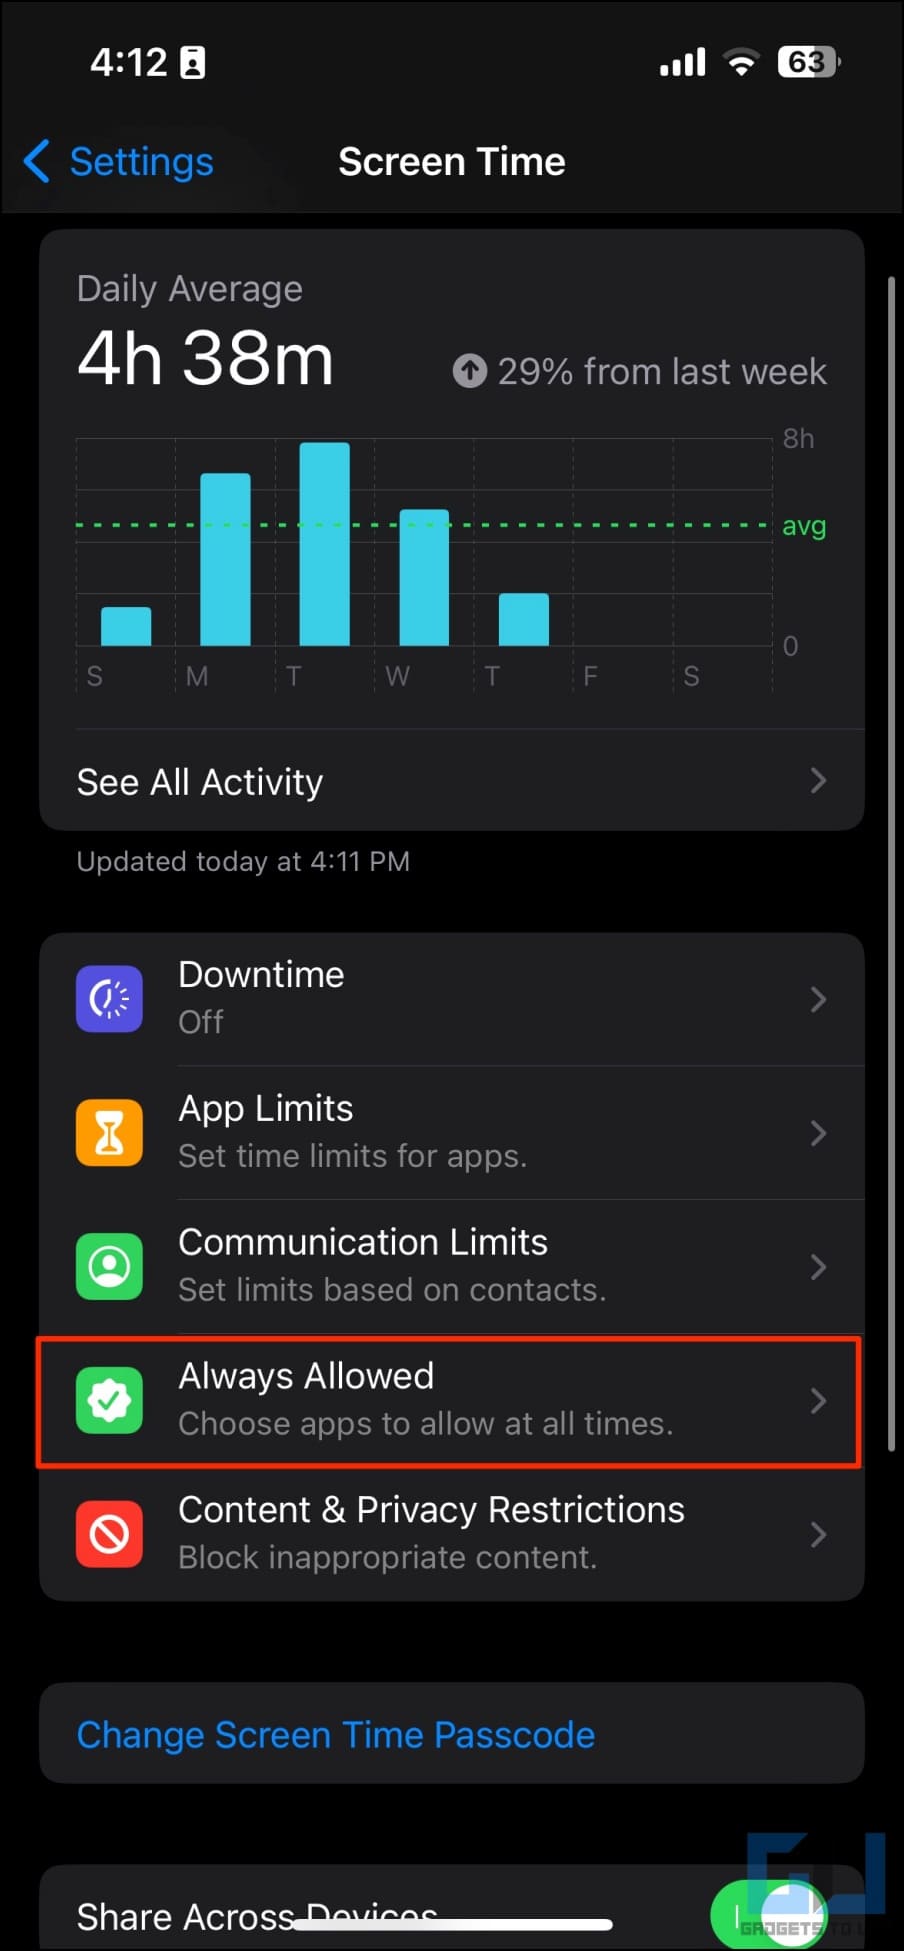
4. On the Screen Time page, click on Always Allowed.
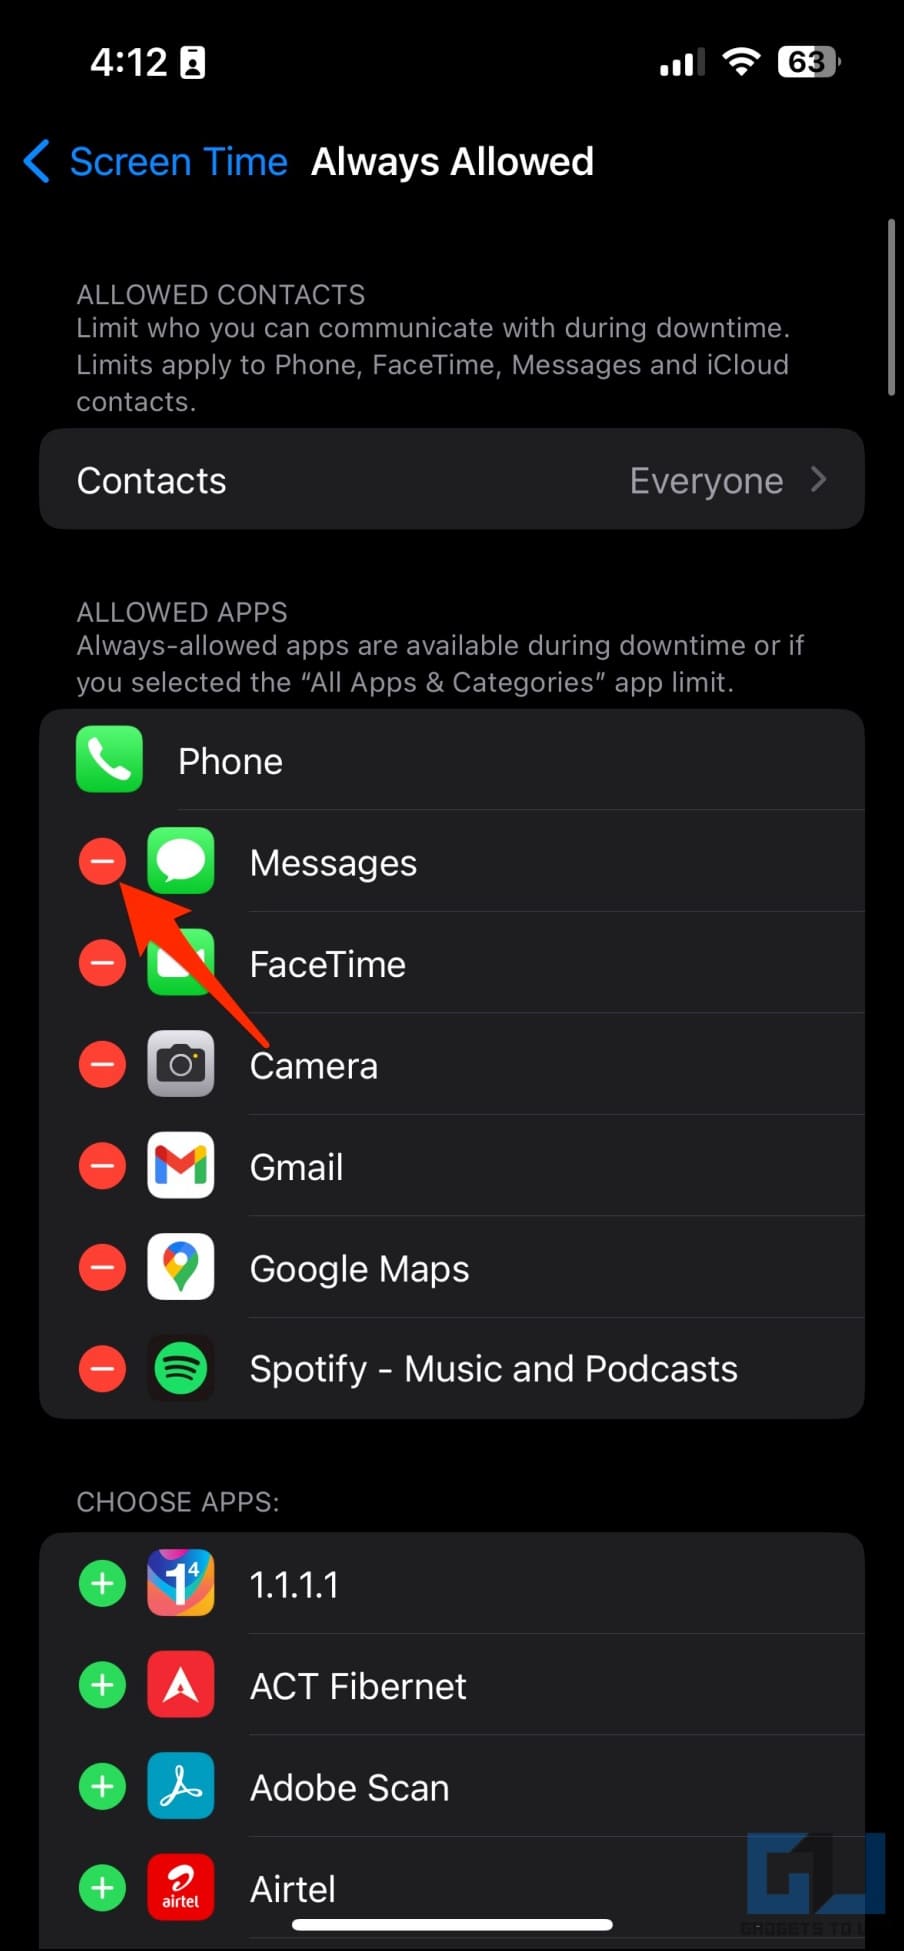
5. If the app you want to lock is in the list of always-allowed apps, click the -icon and hit Remove. Doing so will let you set restrictions on this app instead of always keeping it available.
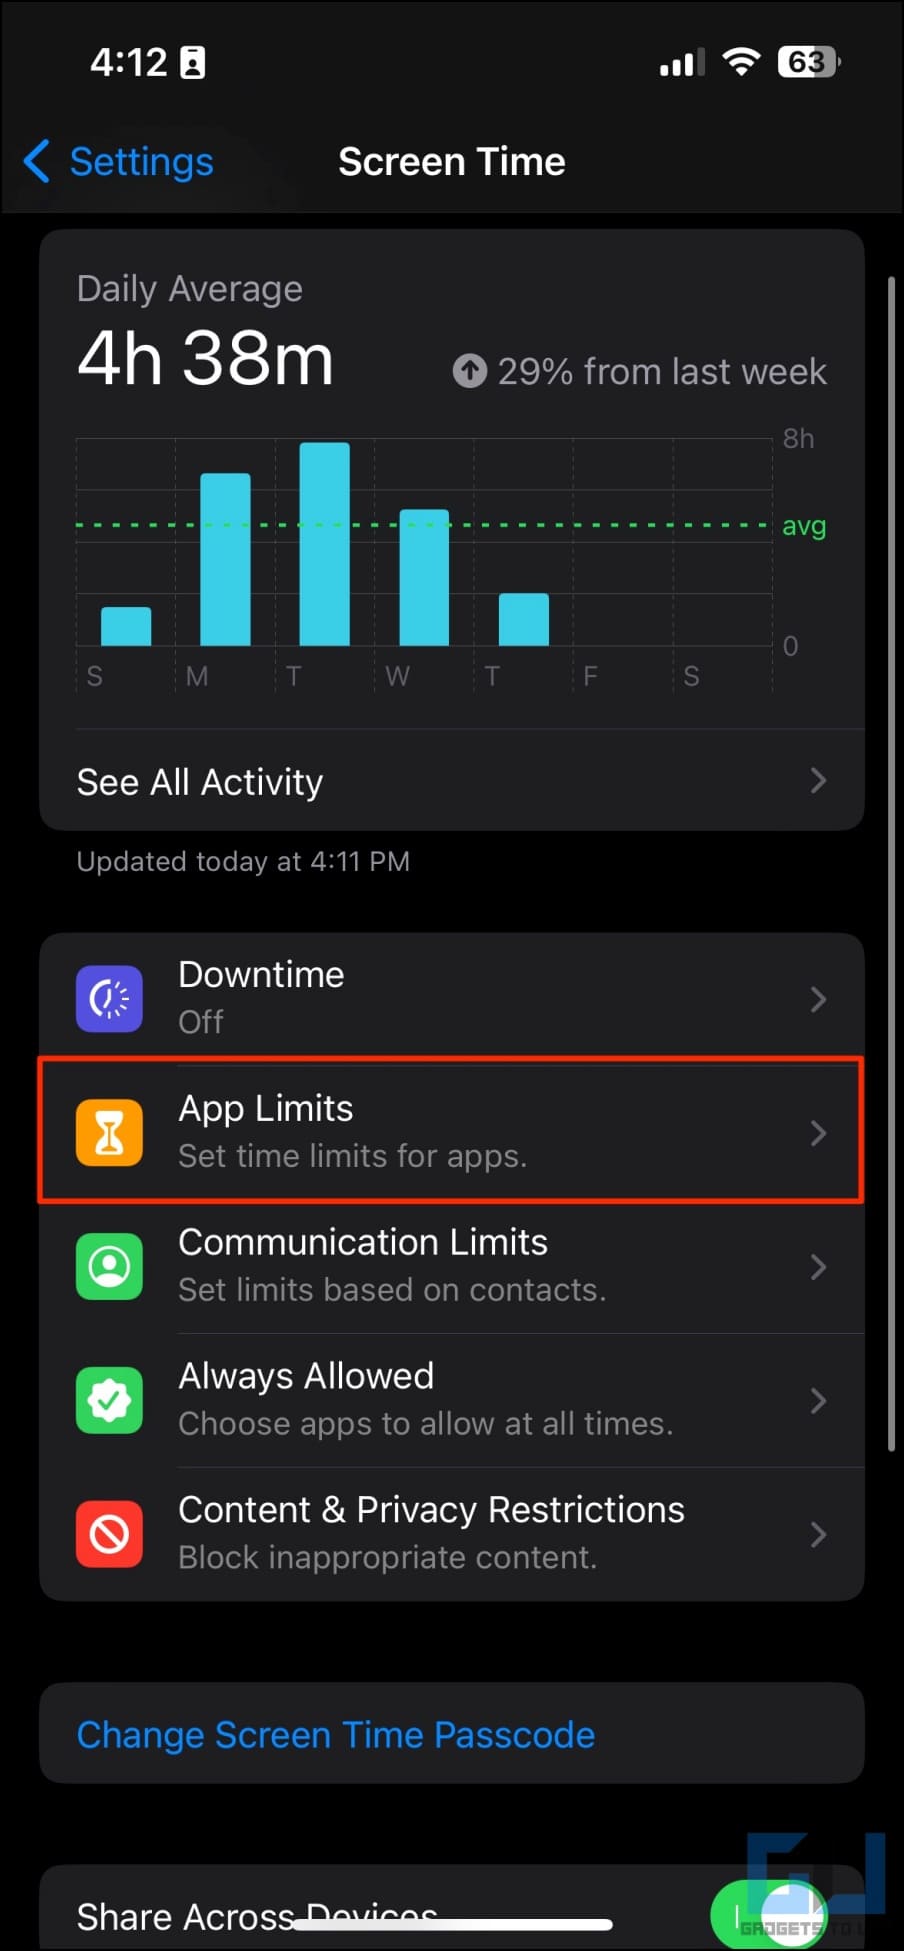
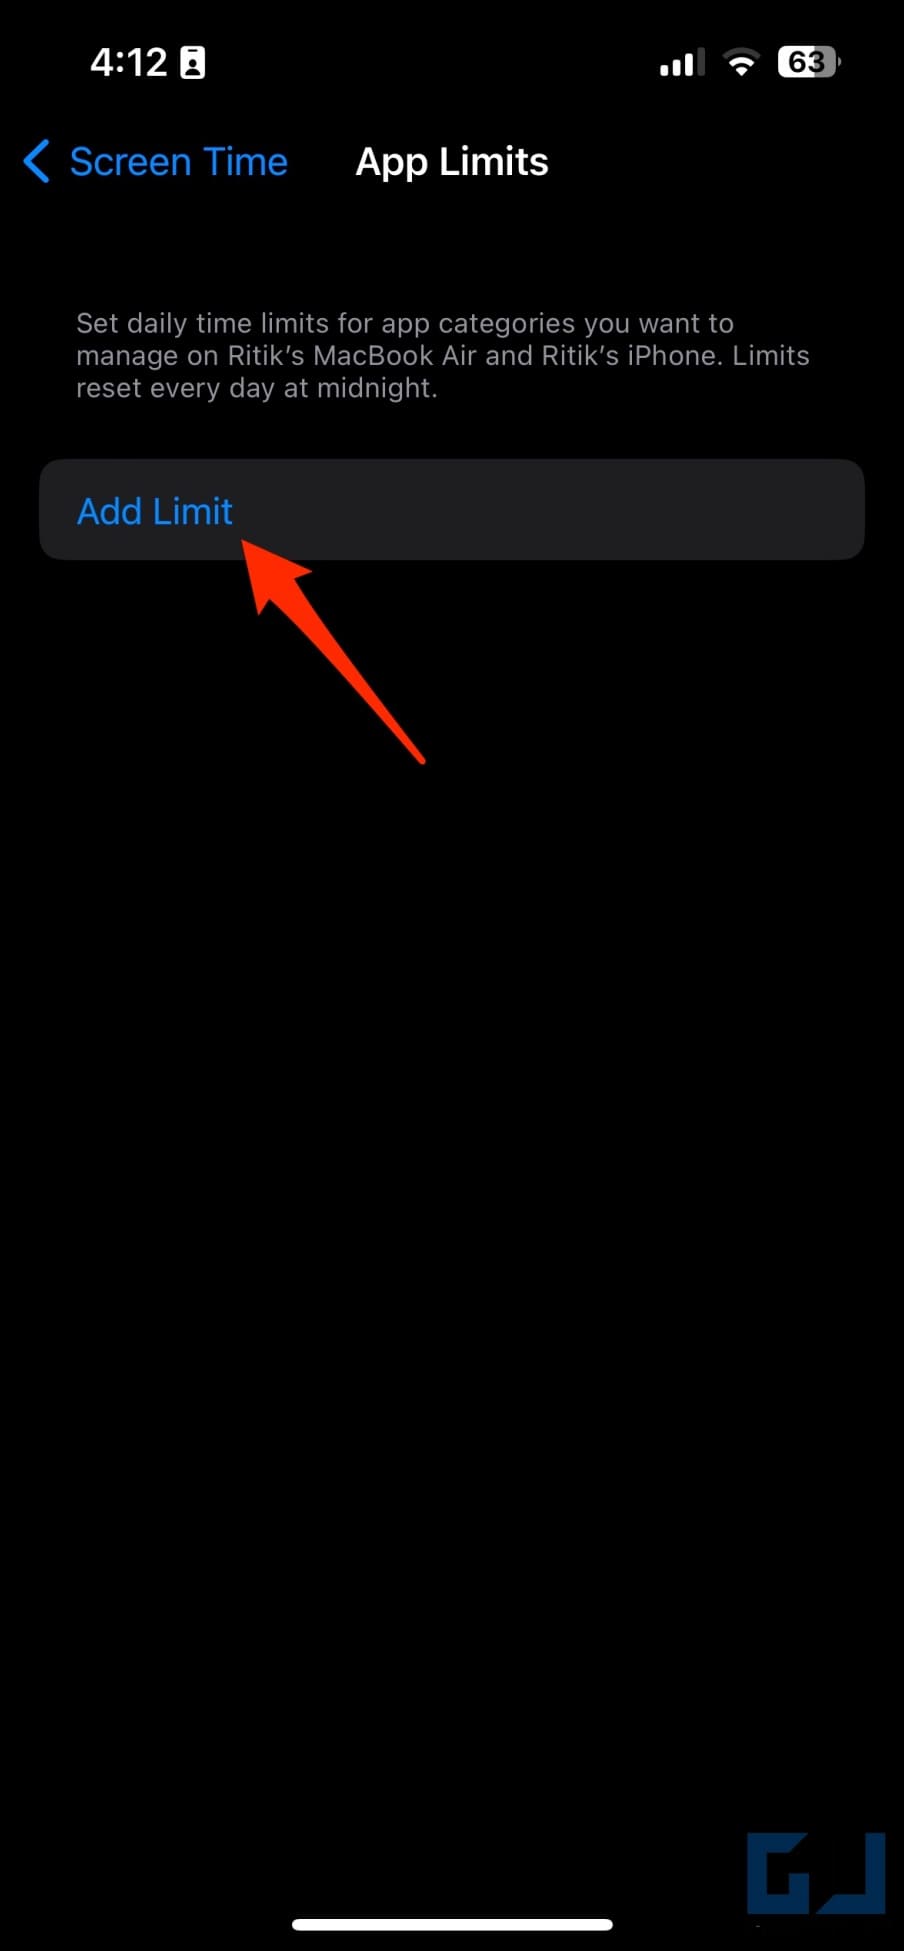
6. Go back to the Screen Time menu. Click on App Limits and select Add Limit.
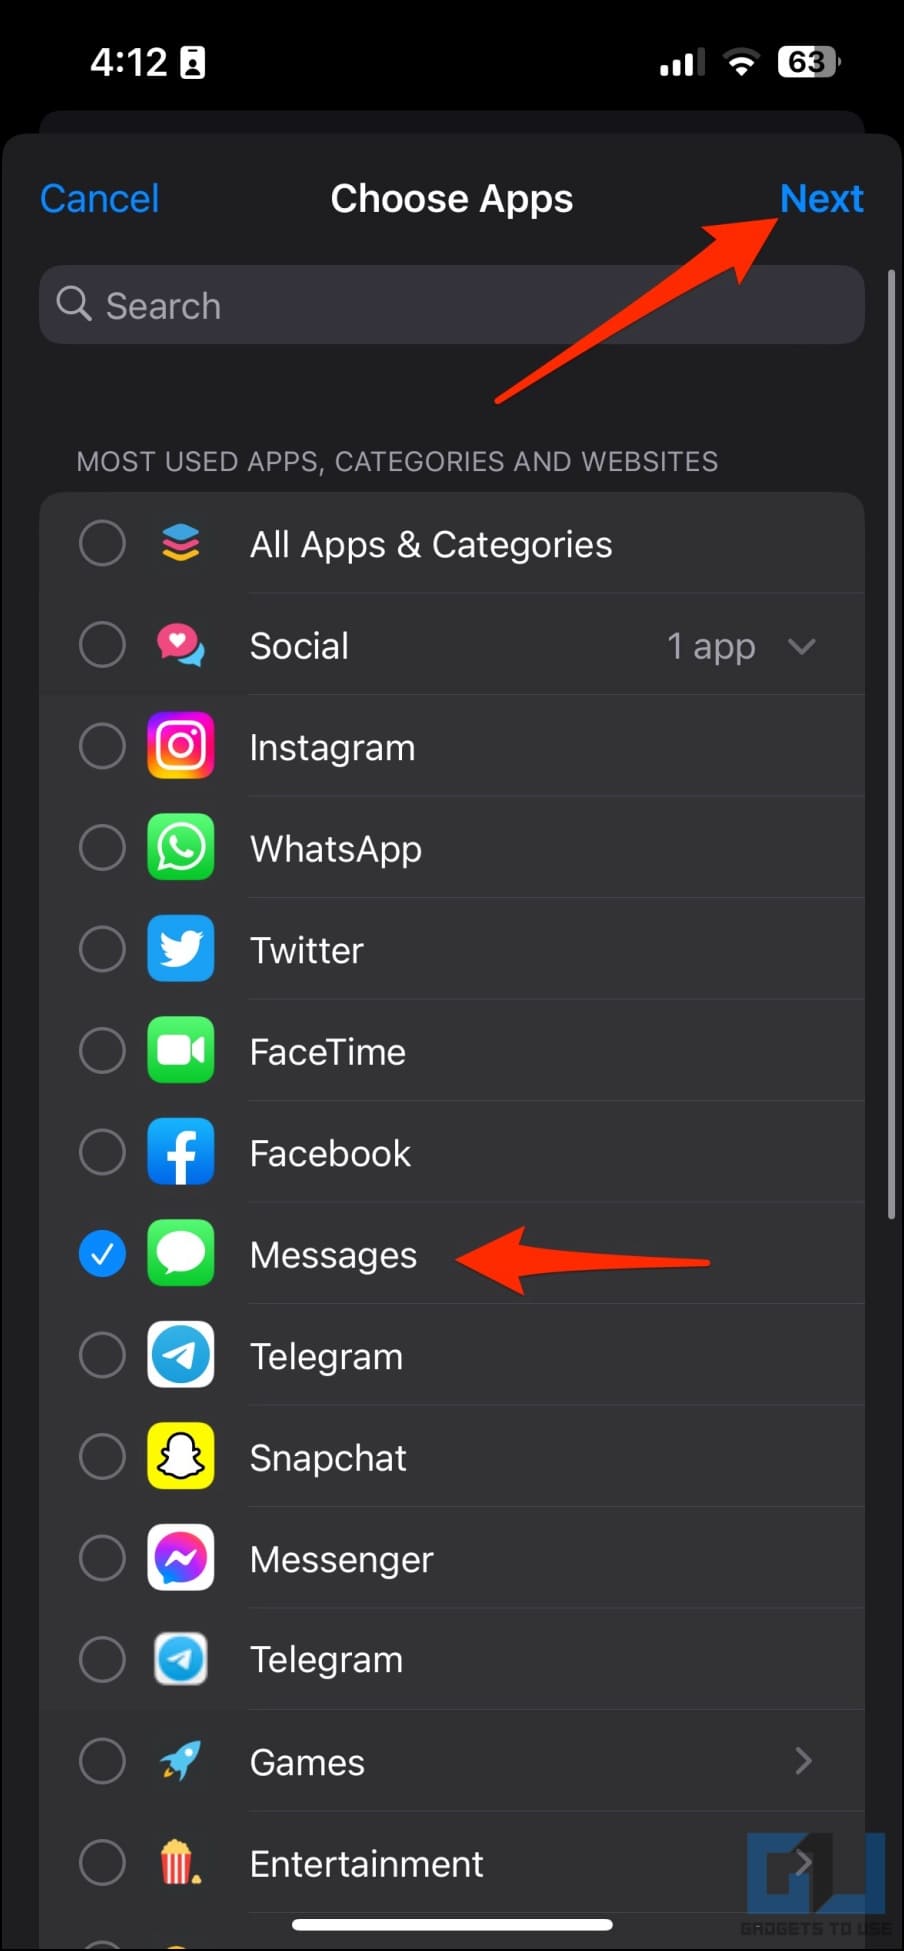
7. Choose the appropriate category and select all the apps you want to lock.
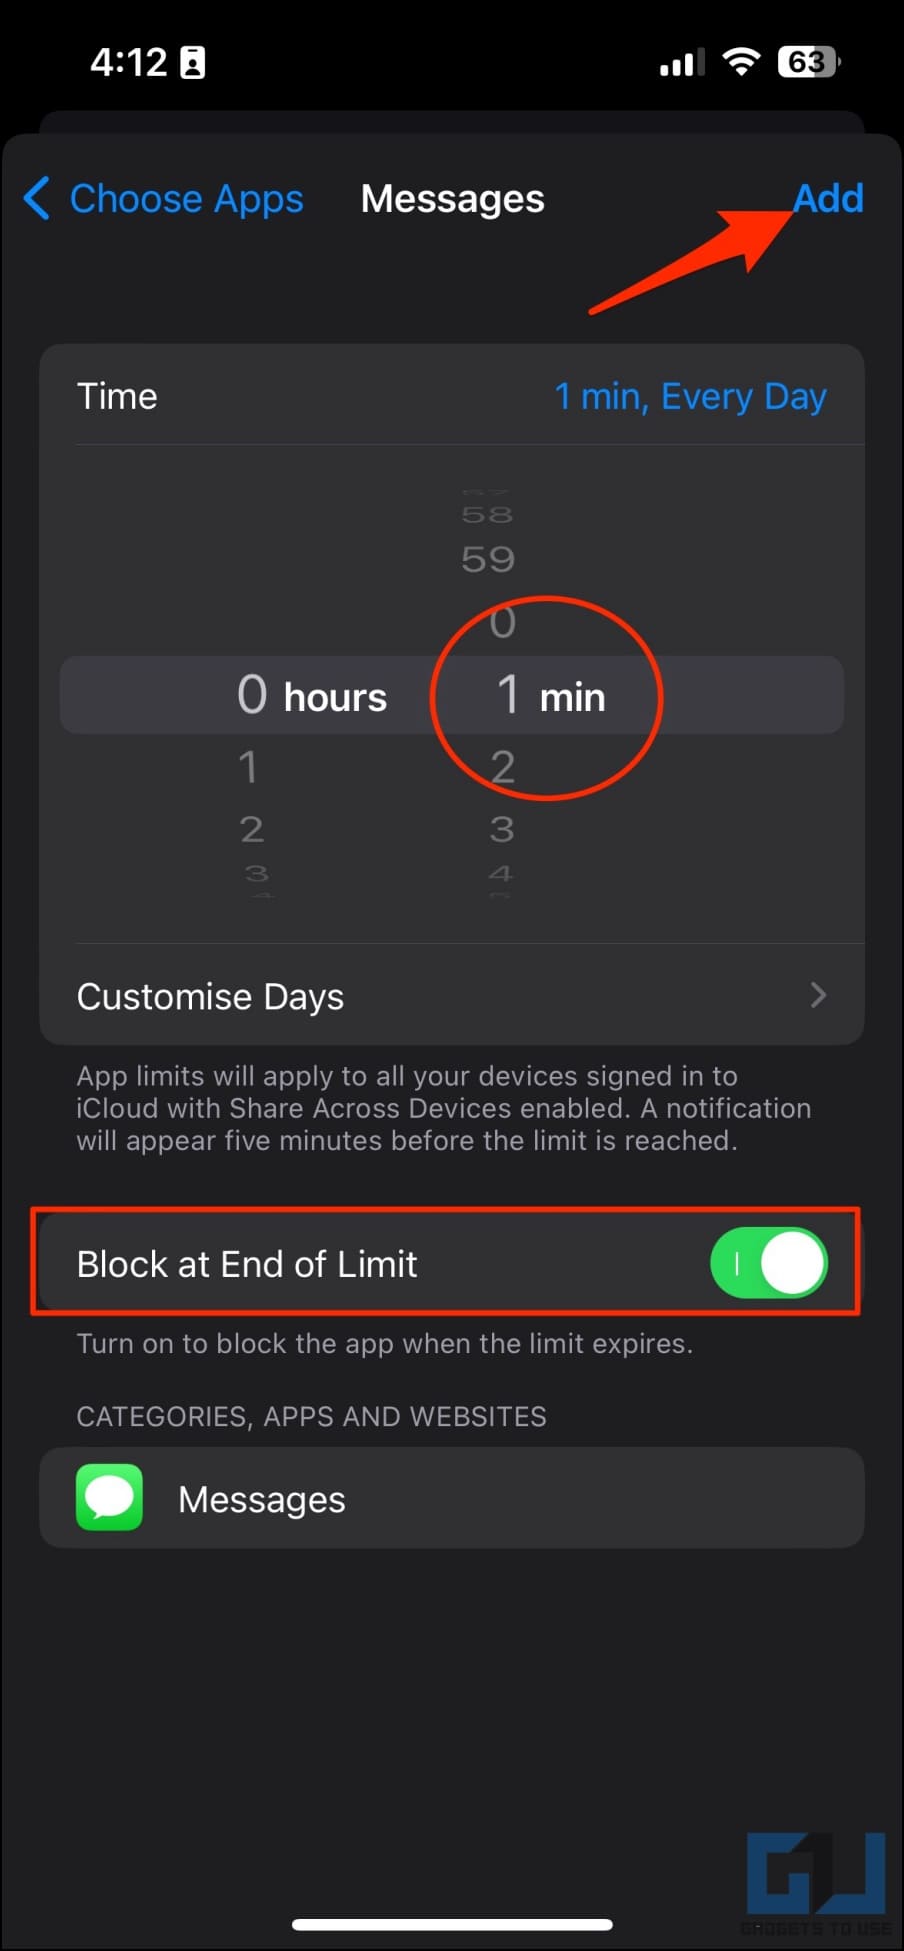
8. Click Next and set the time to 1 Minute.
This is the daily usage limit for the app. Once you cross it, Screen Time will lock you out of the app. And hence, we’re choosing the lowest value (1 minute) here.
9. On the same page, enable the toggle that says Block at End of Limit. Can’t find the option? Add a passcode to Screen Time.
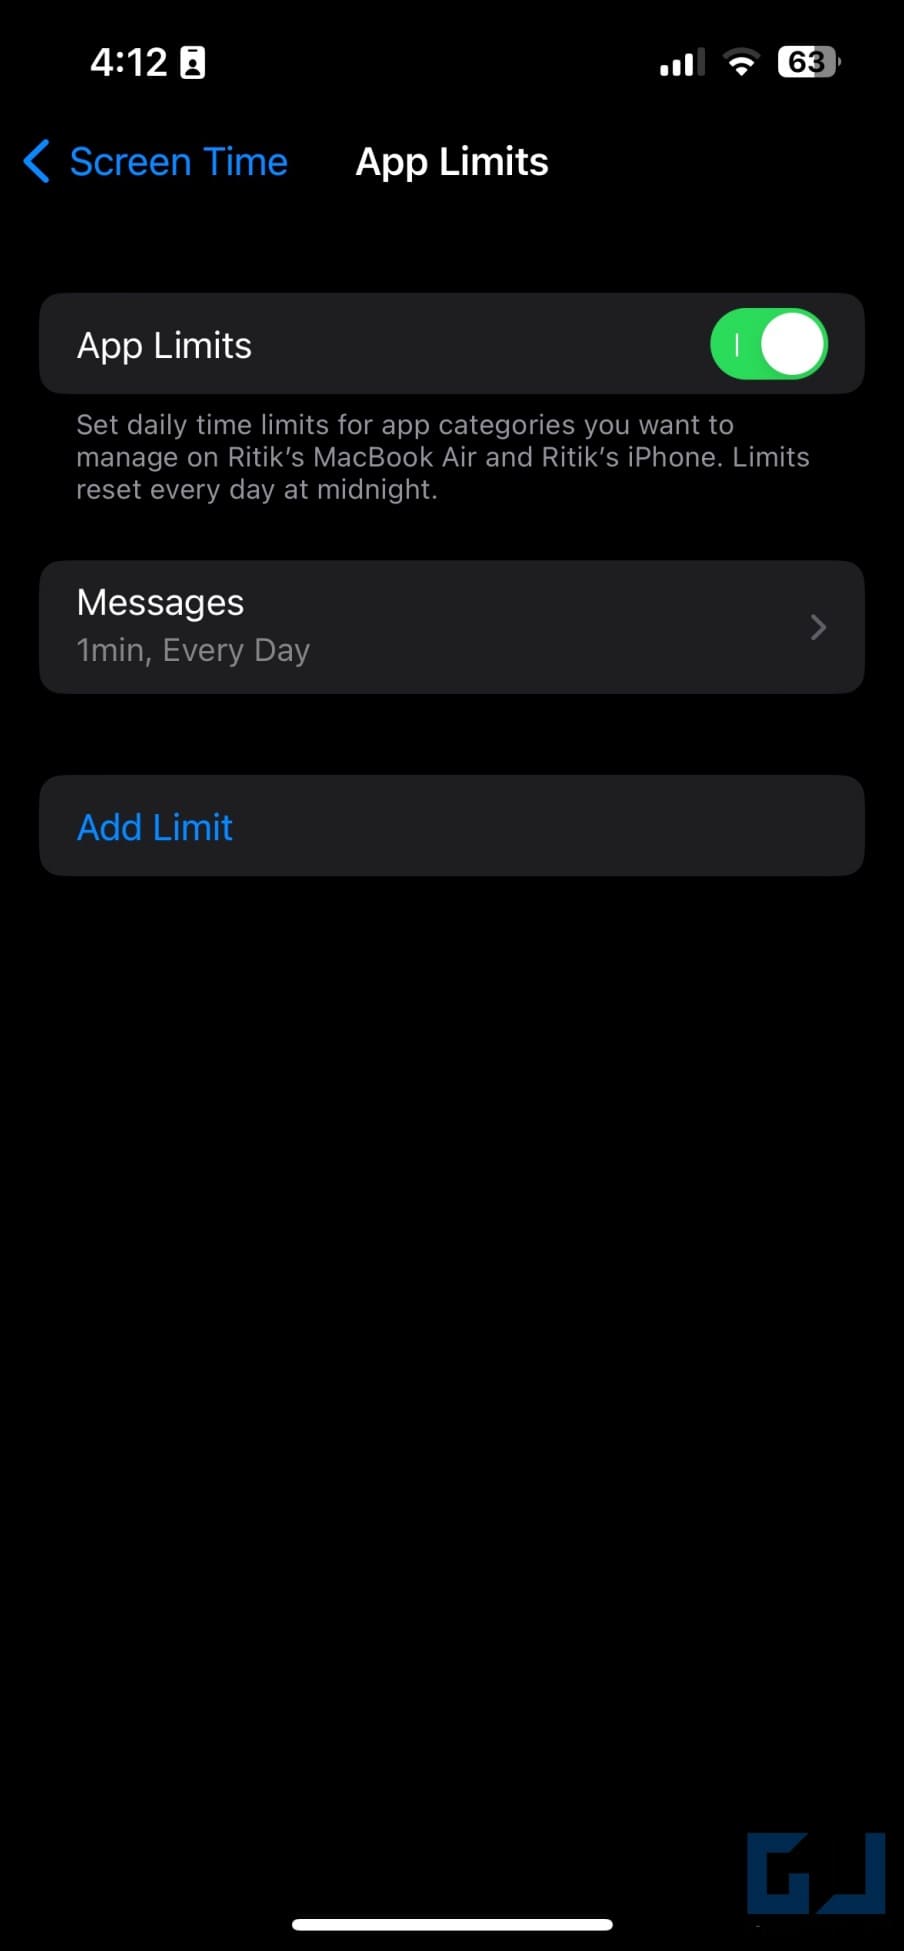
10. Lastly, tap Add in the top right to save the restriction.
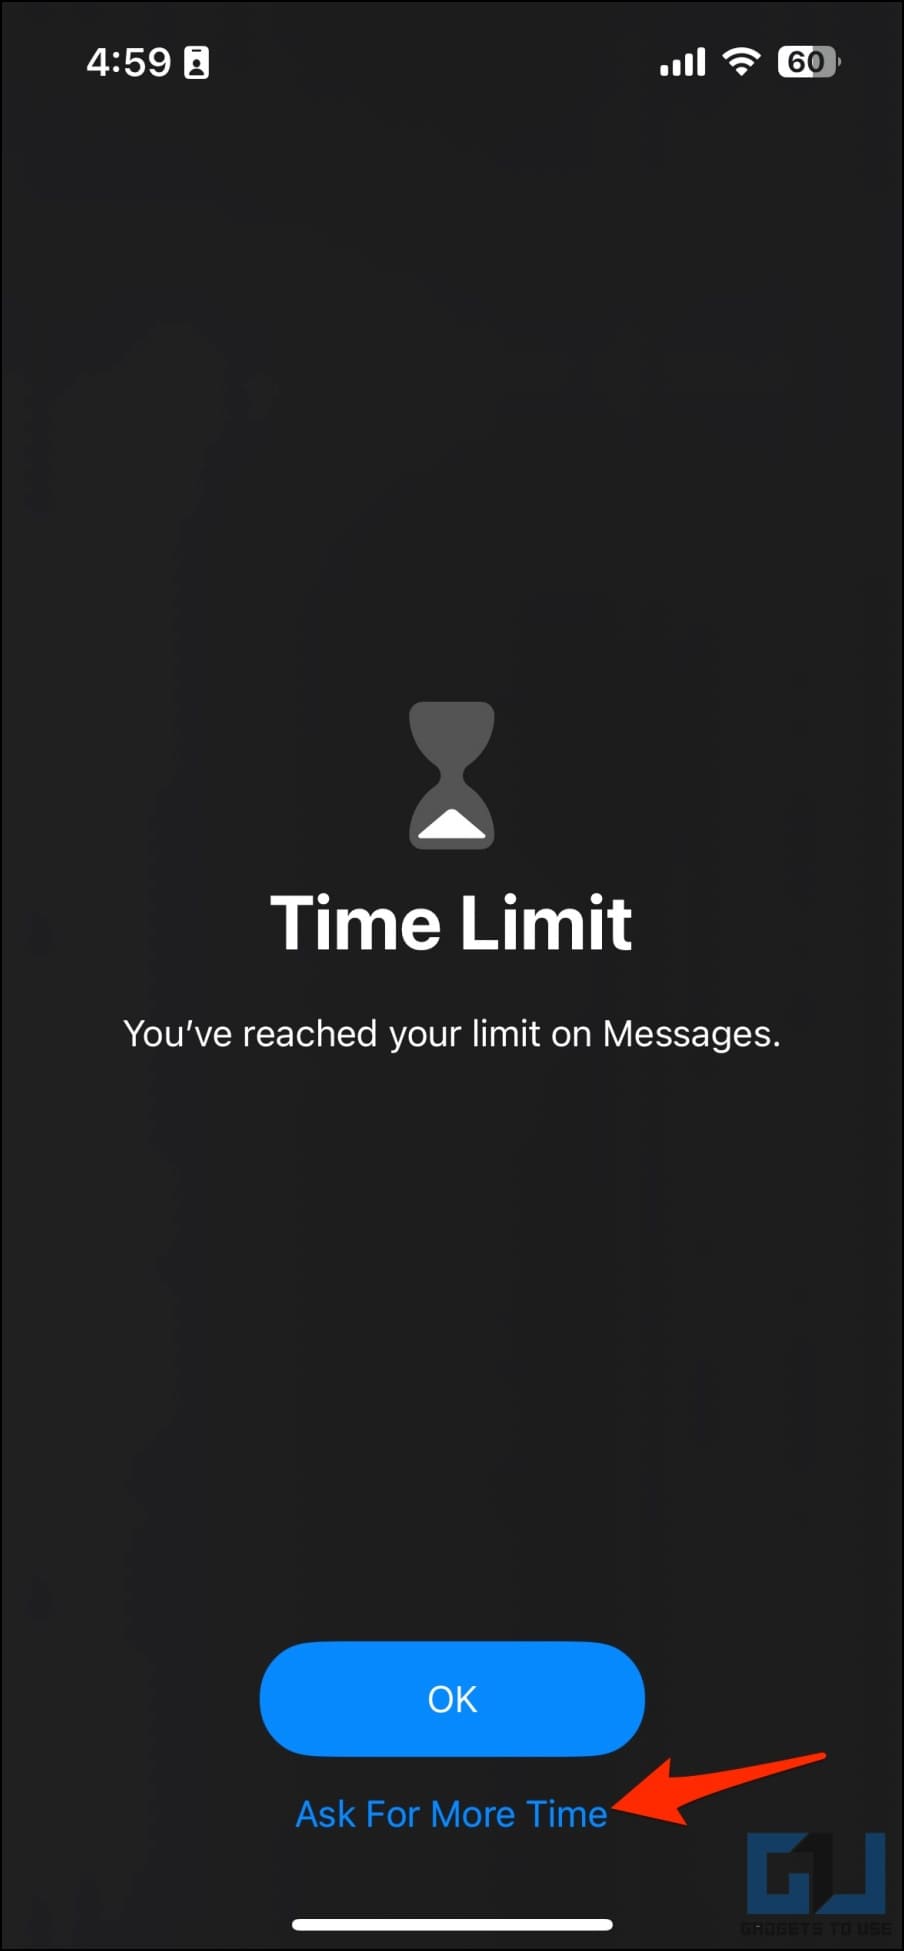
Now, open the locked app and use it for 1 minute. After which, Screen Time will automatically lock you out of the app, saying, “You’ve reached your limit on <app name>.”
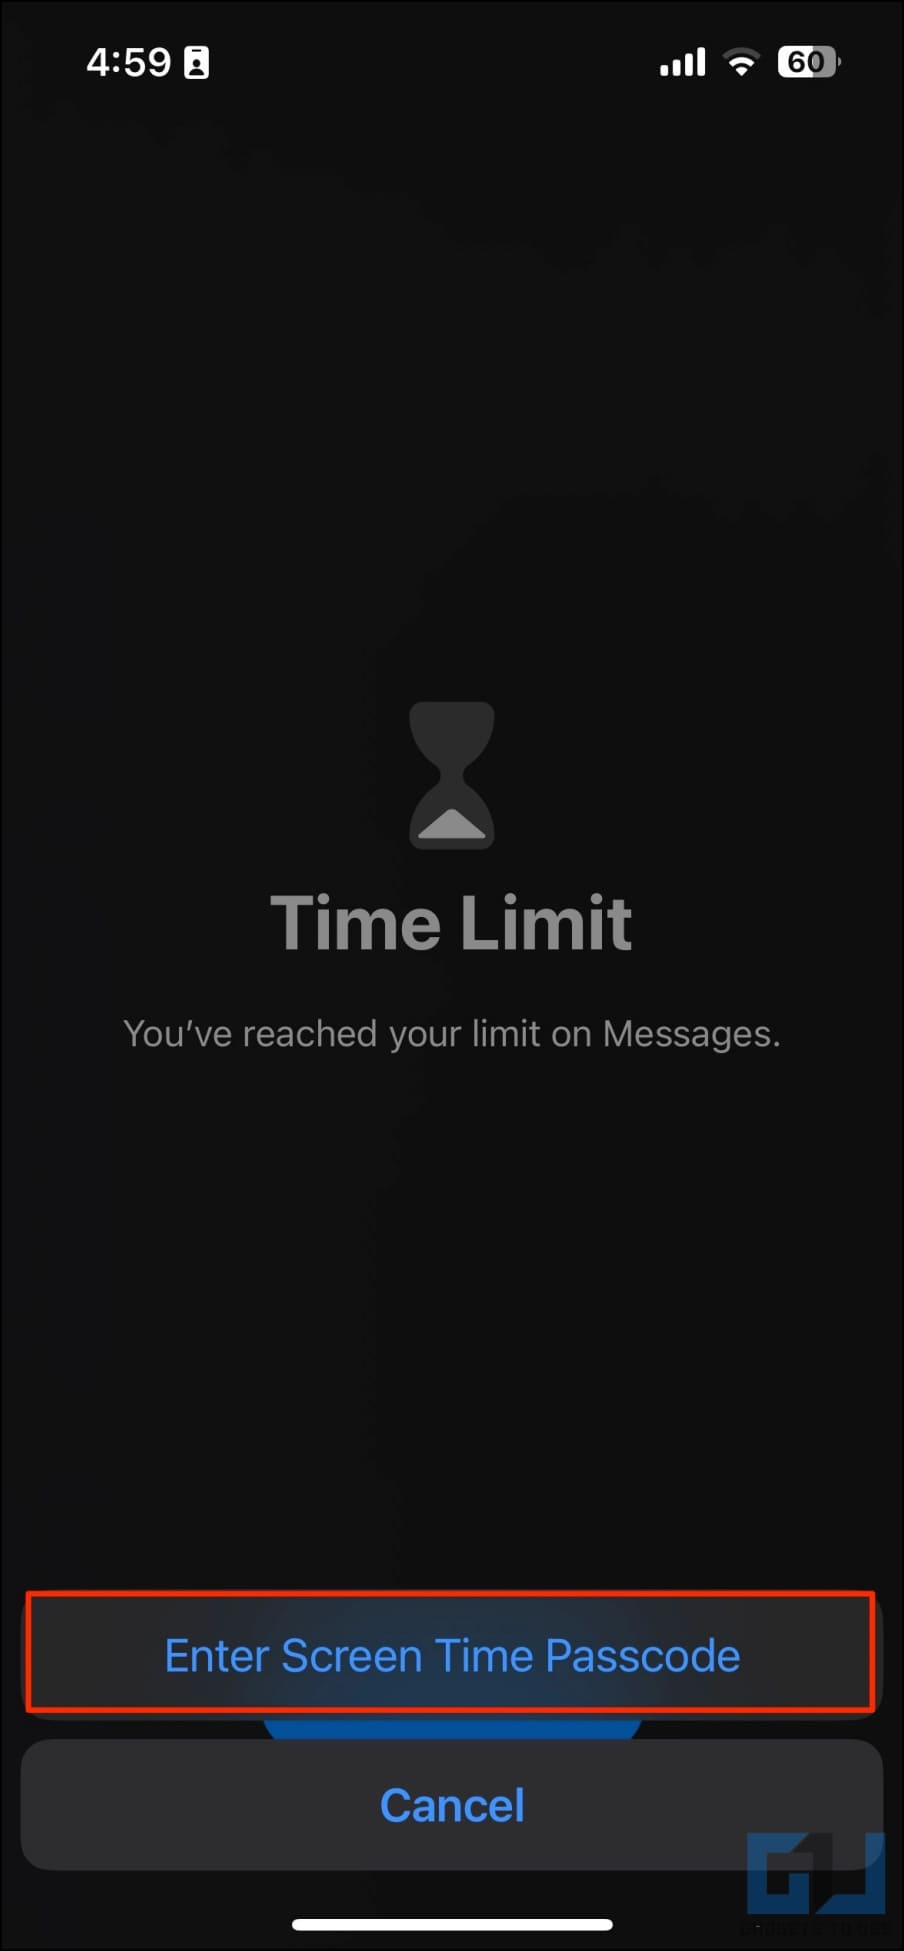
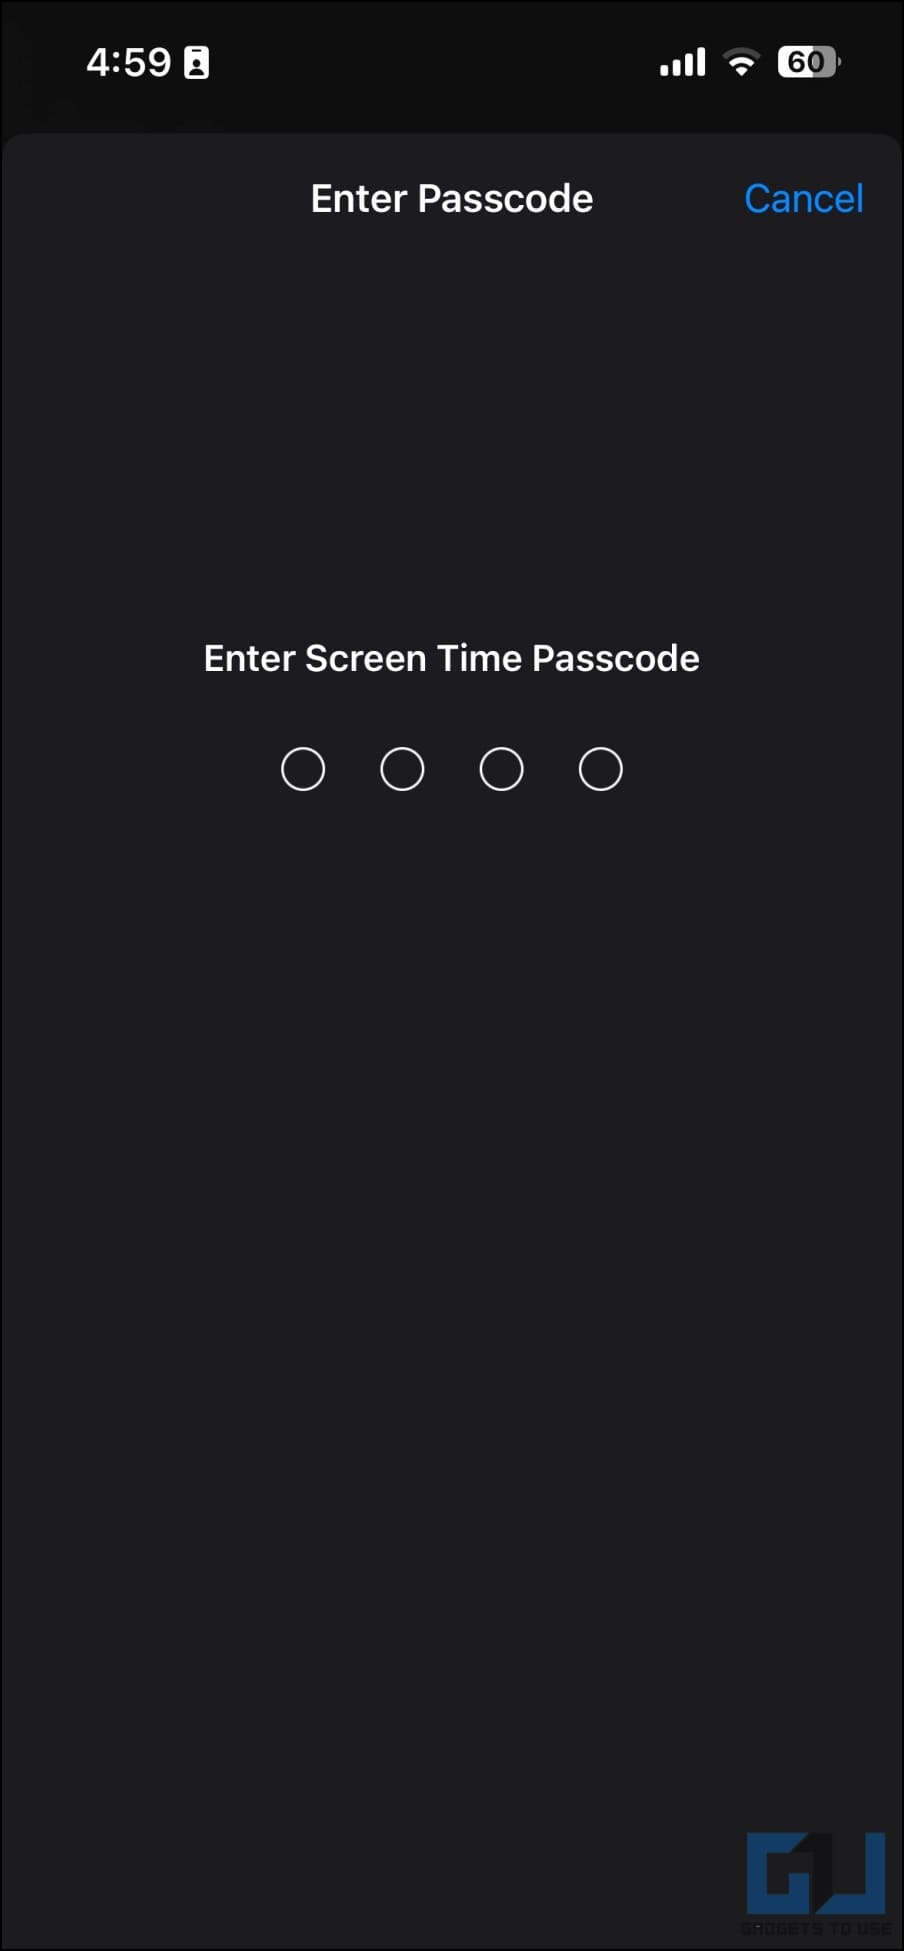
You can click on Ask for More Time. The first extra minute is free, after which it will ask for the passcode you set earlier to open the locked app.
This way, you can lock any app on your iPhone with a passcode using the Screen Time feature. Just make sure to open and use the app for a minute to trigger the time limit before sharing your iPhone with friends, family, or others.
Method 3- Lock First-Party App Using Content & Privacy Restrictions
Using Content & Privacy Restrictions on iPhone, you can hide the first-party apps and remove them completely from the view. This will prevent others from accessing that particular app on the device. However, note that it works only for specific pre-installed apps, as shown below:
1. Open Settings on your iPhone or iPad.
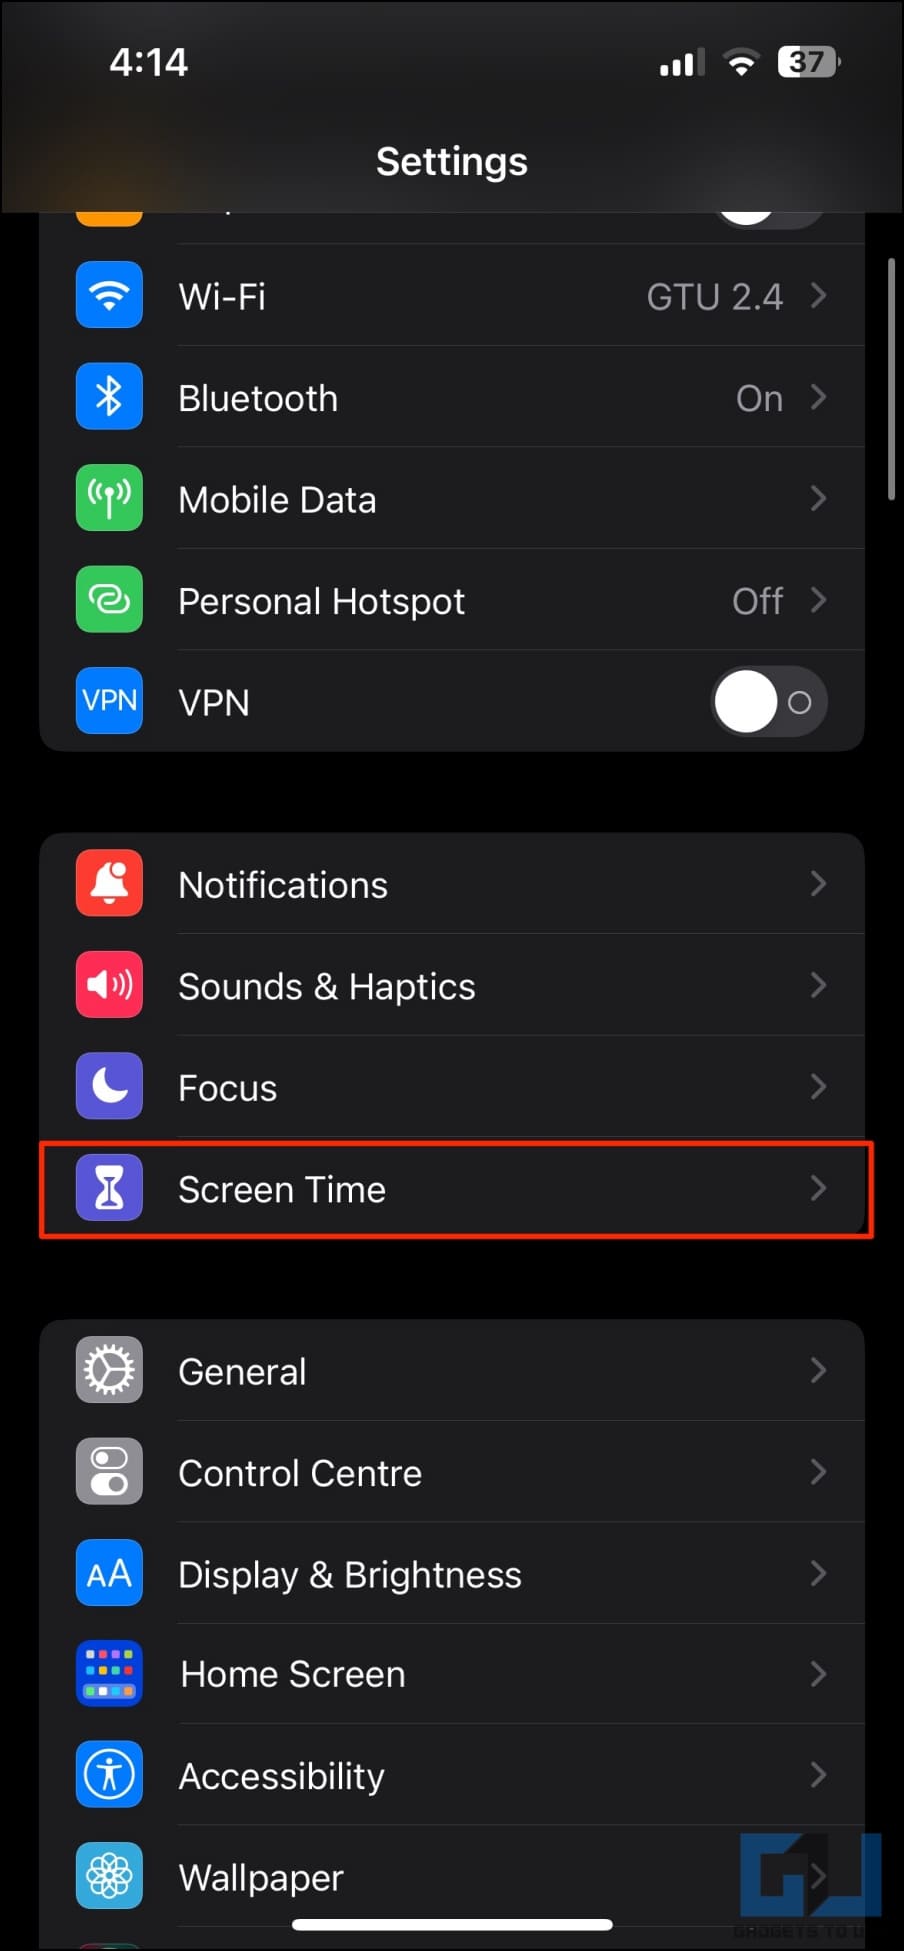
2. Scroll down and click on Screen Time.
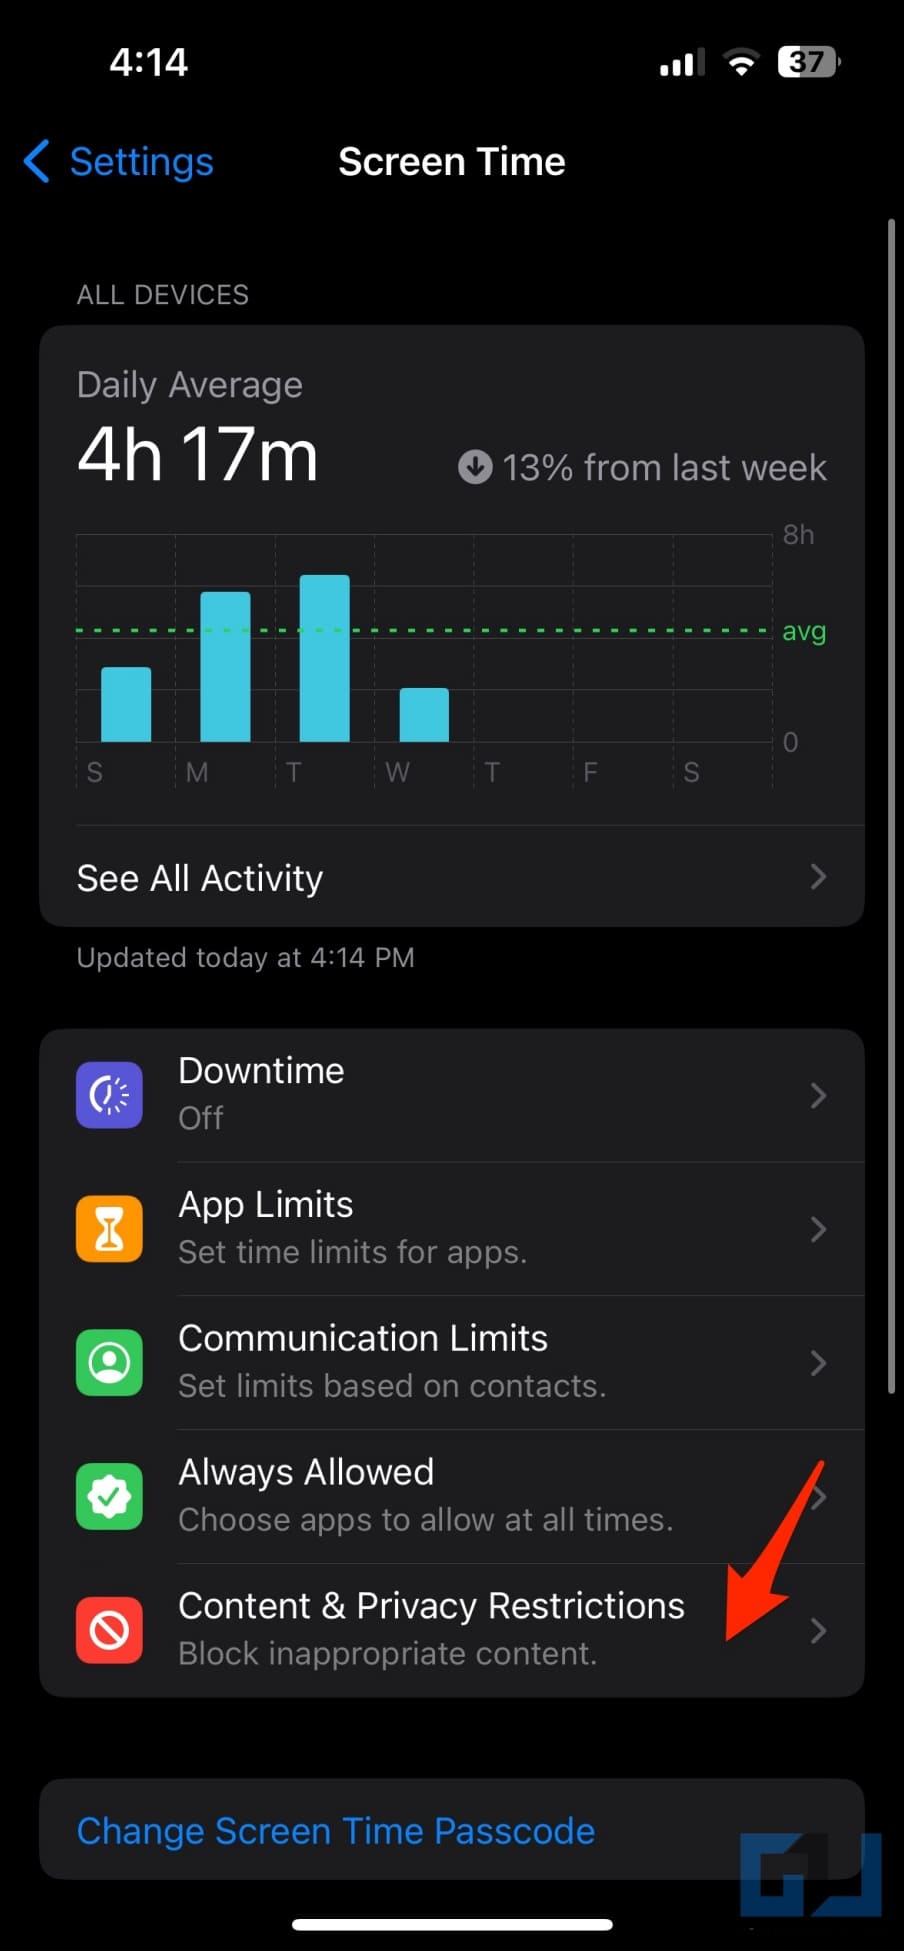
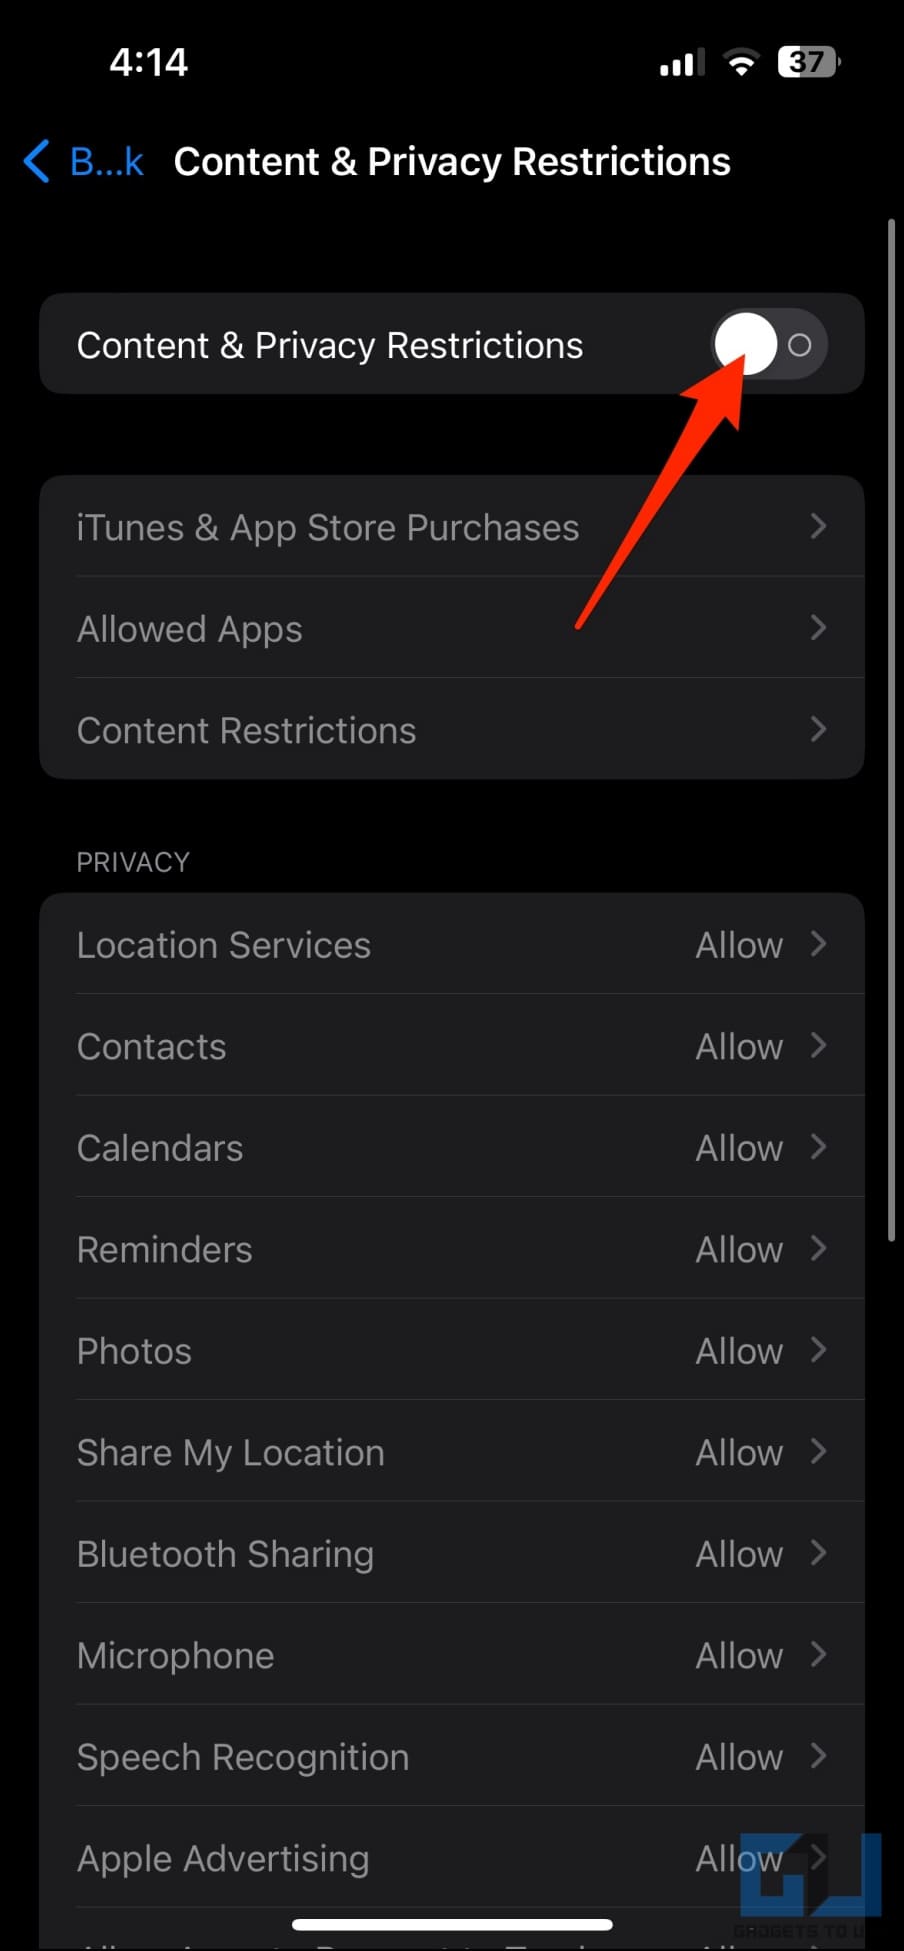
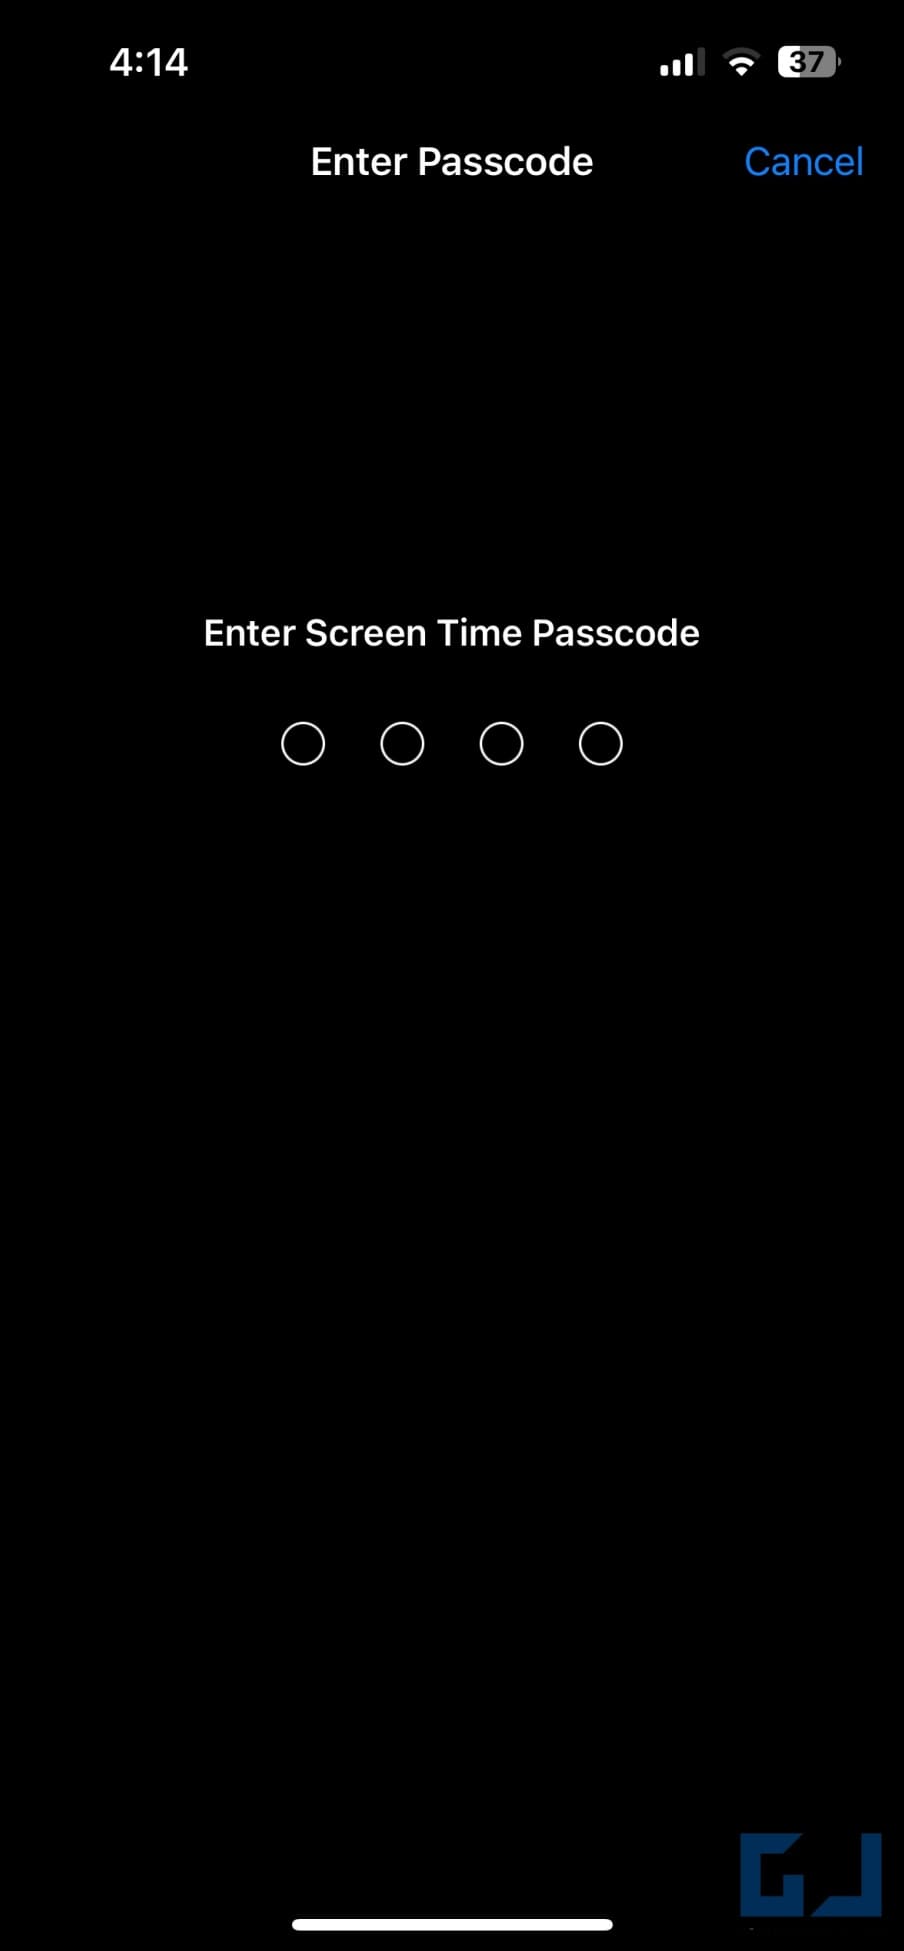
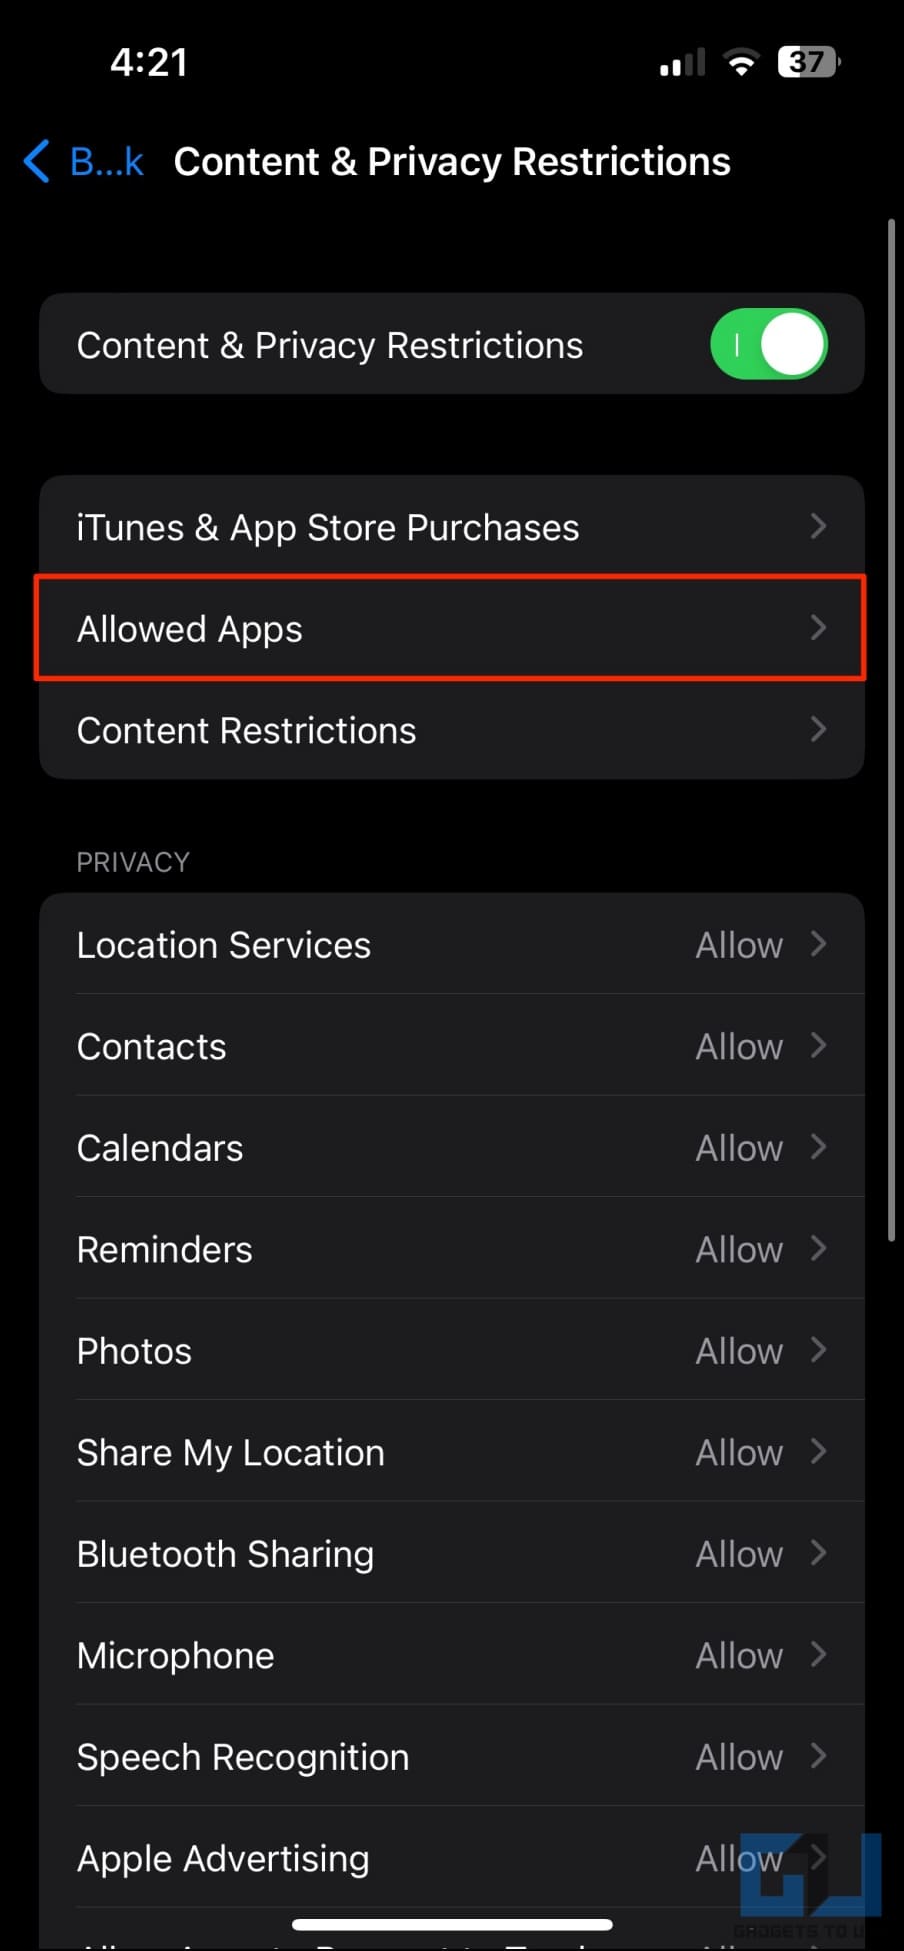
3. Here, tap Content & Privacy Restrictions. Enable the toggle and enter the passcode to turn it on. (Screen Time passcode is different from your iPhone passcode).
4. Next, click on Allowed Apps.
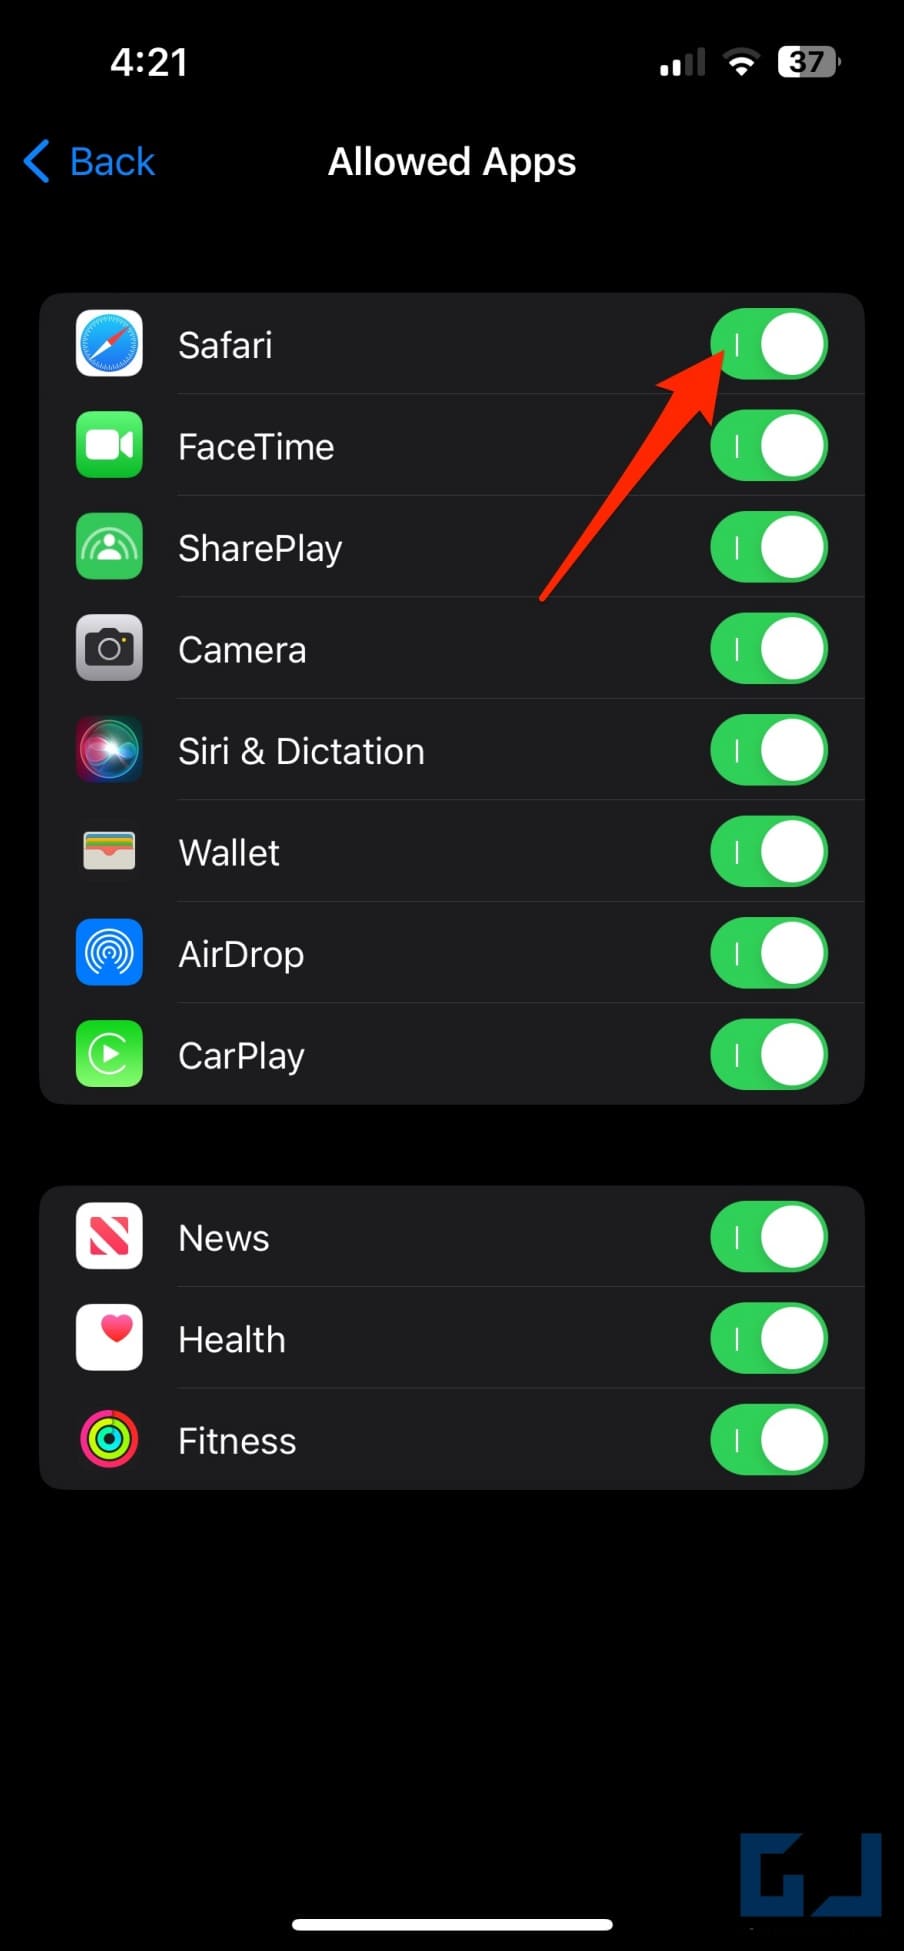
5. Turn off the toggle for the app you want to hide from the home screen and app library.
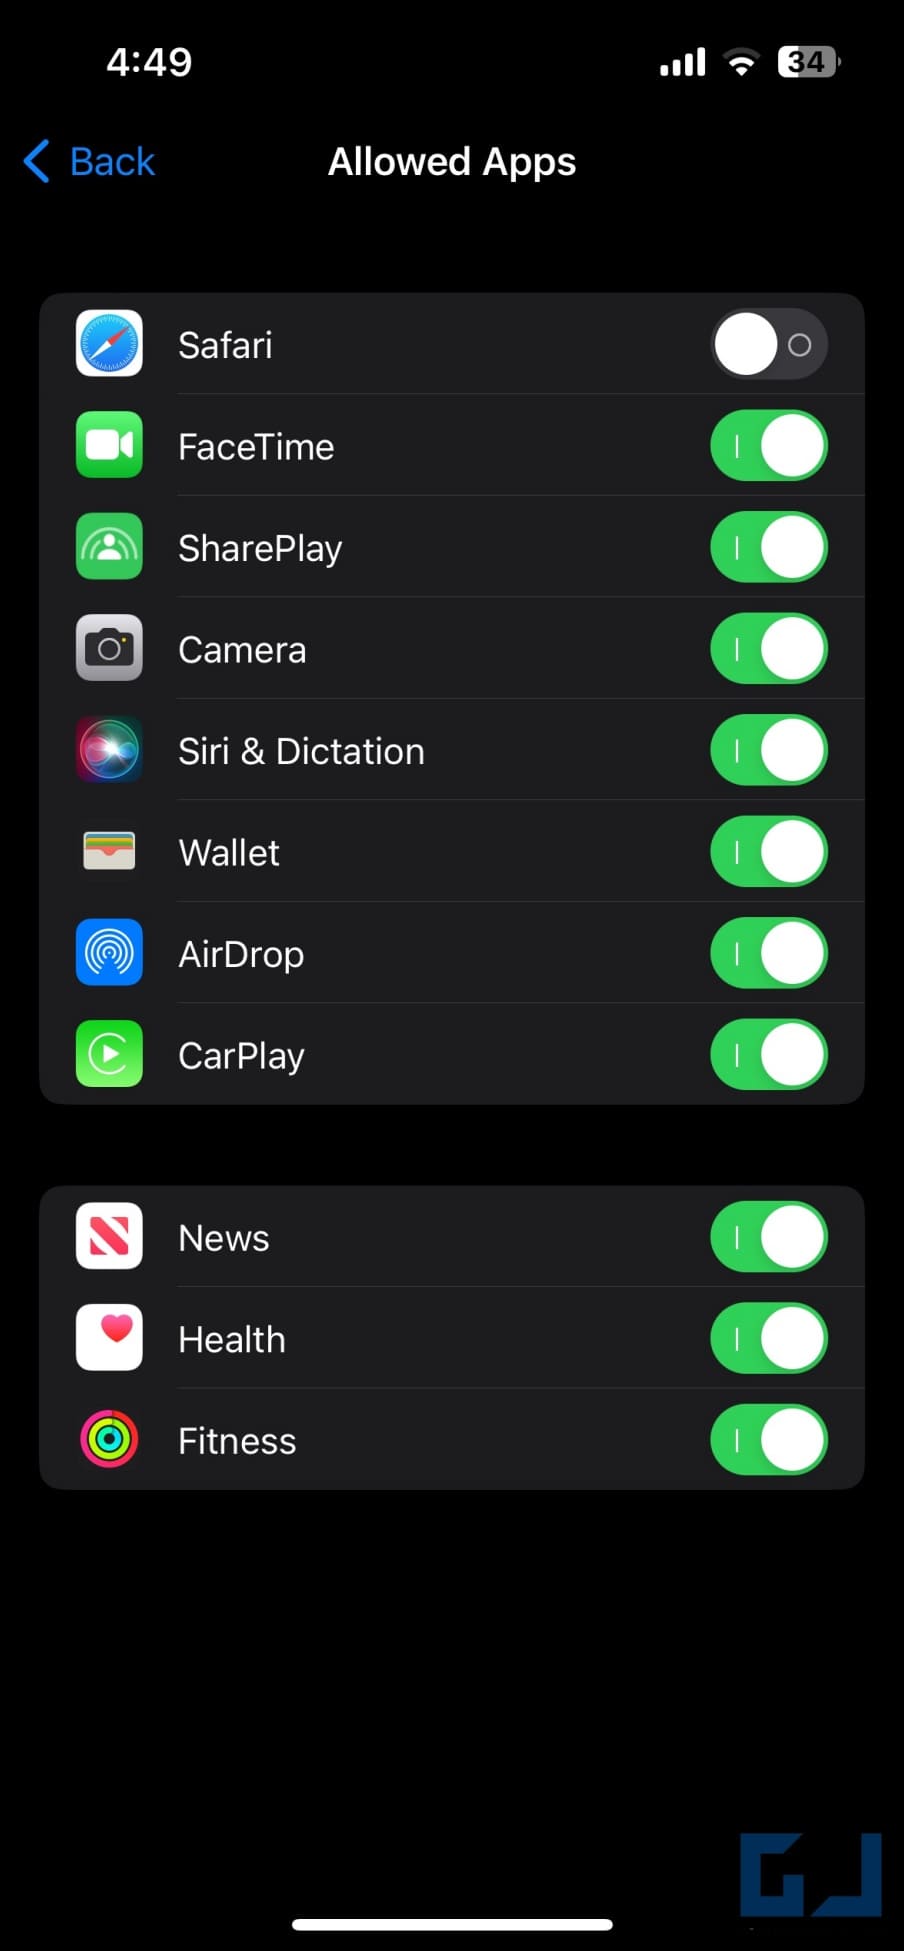
You can hide apps from first-party apps like Safari, FaceTime, SharePlay, Camera, Siri & Dictation, Wallet, AirDrop, CarPlay, News, Health, Fitness, iTunes Store, Books, and more.
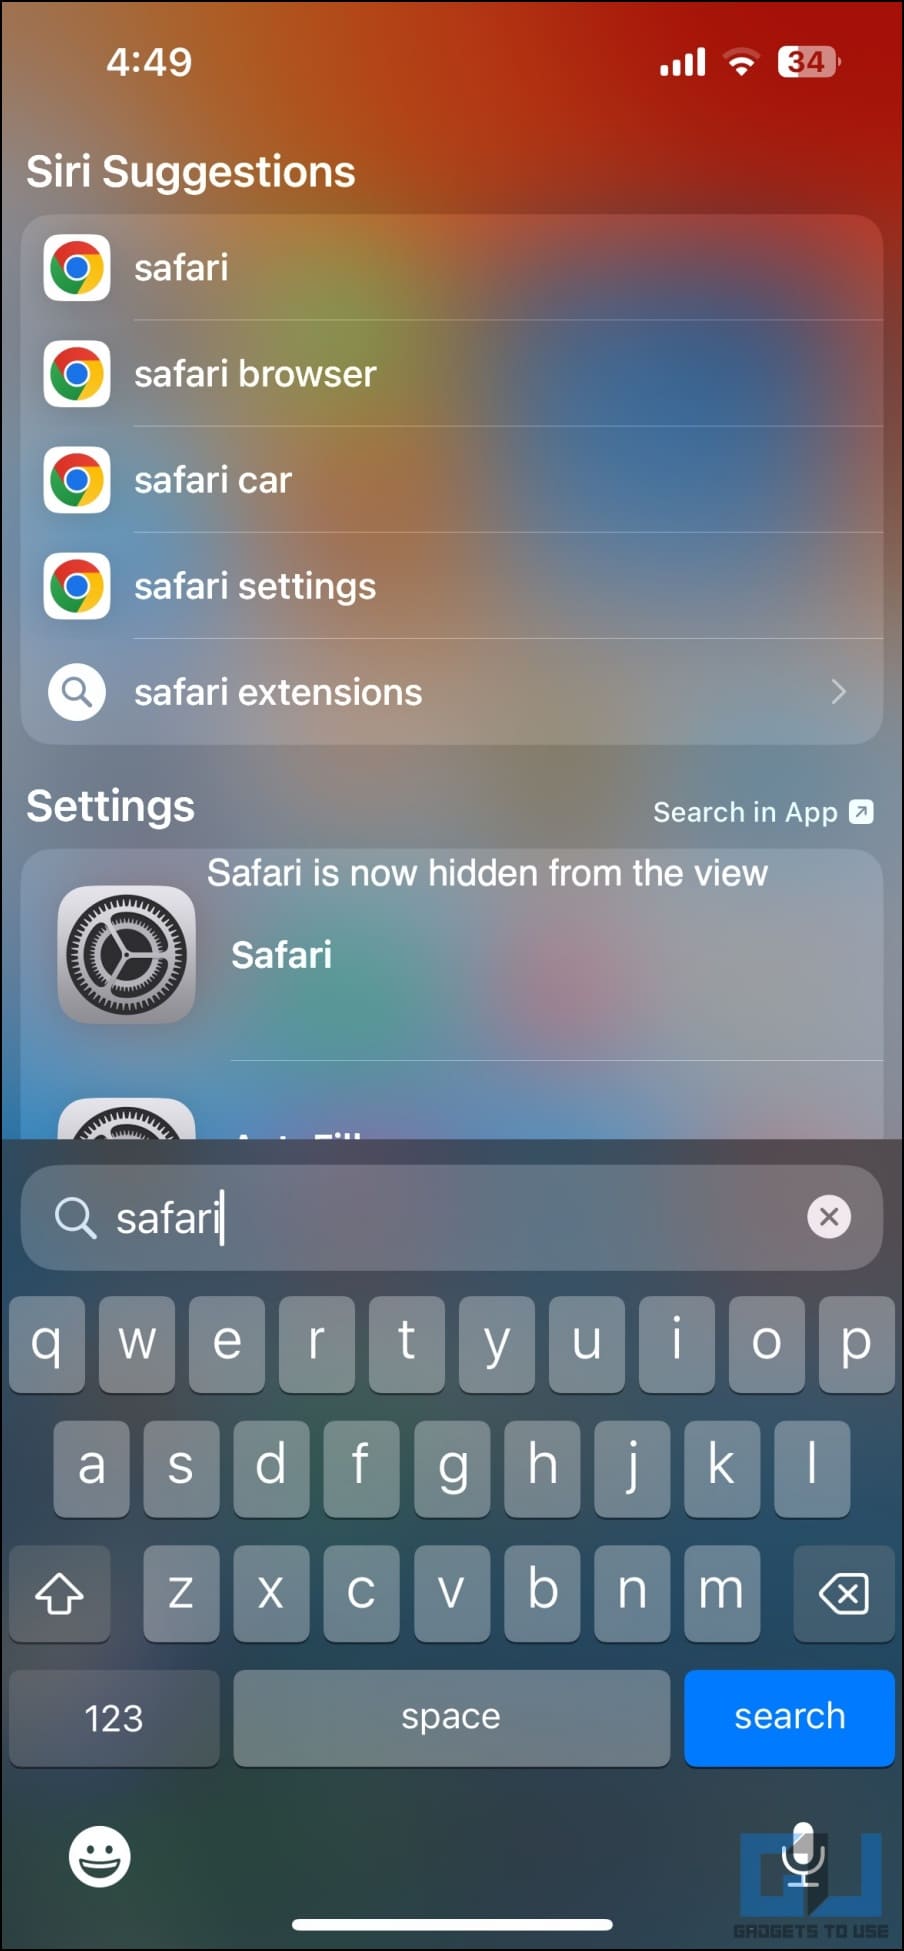
Above, we have removed Safari from the allowed list, thereby hiding it from the view on the home screen, app library, and even from the iPhone search.
Method 4- Lock Access to All Apps on iPhone Using Guided Access
Guided Access prevents you from leaving an app that’s already opened. It’s useful when sharing your iPhone with a friend or relative for a specific purpose, like searching for something on the web; here, Guided Access can prevent them from leaving the browser and opening any other app without your permission.
In short, it locks you out of all other apps except the one already opened on the iPhone. And gives you peace of mind when sharing your iPhone with others for them to make a call, check something on the web, or view photos. Here’s how you can use it:
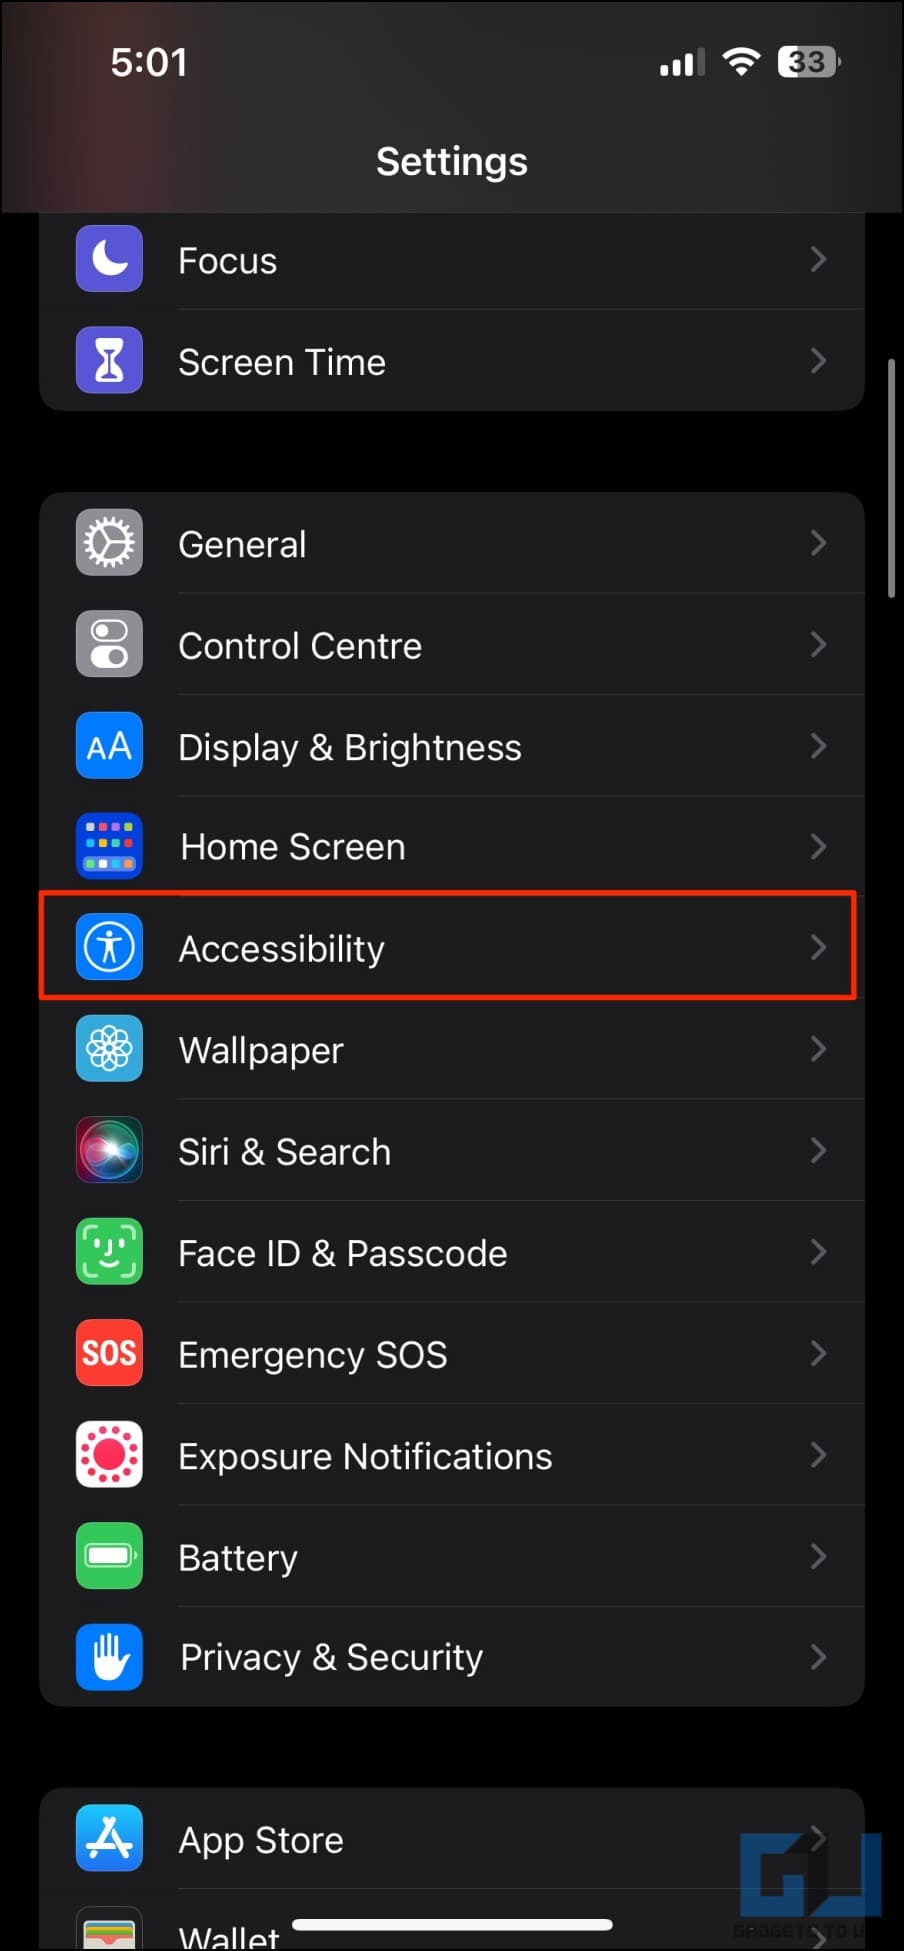
1. Open Settings on your iPhone.
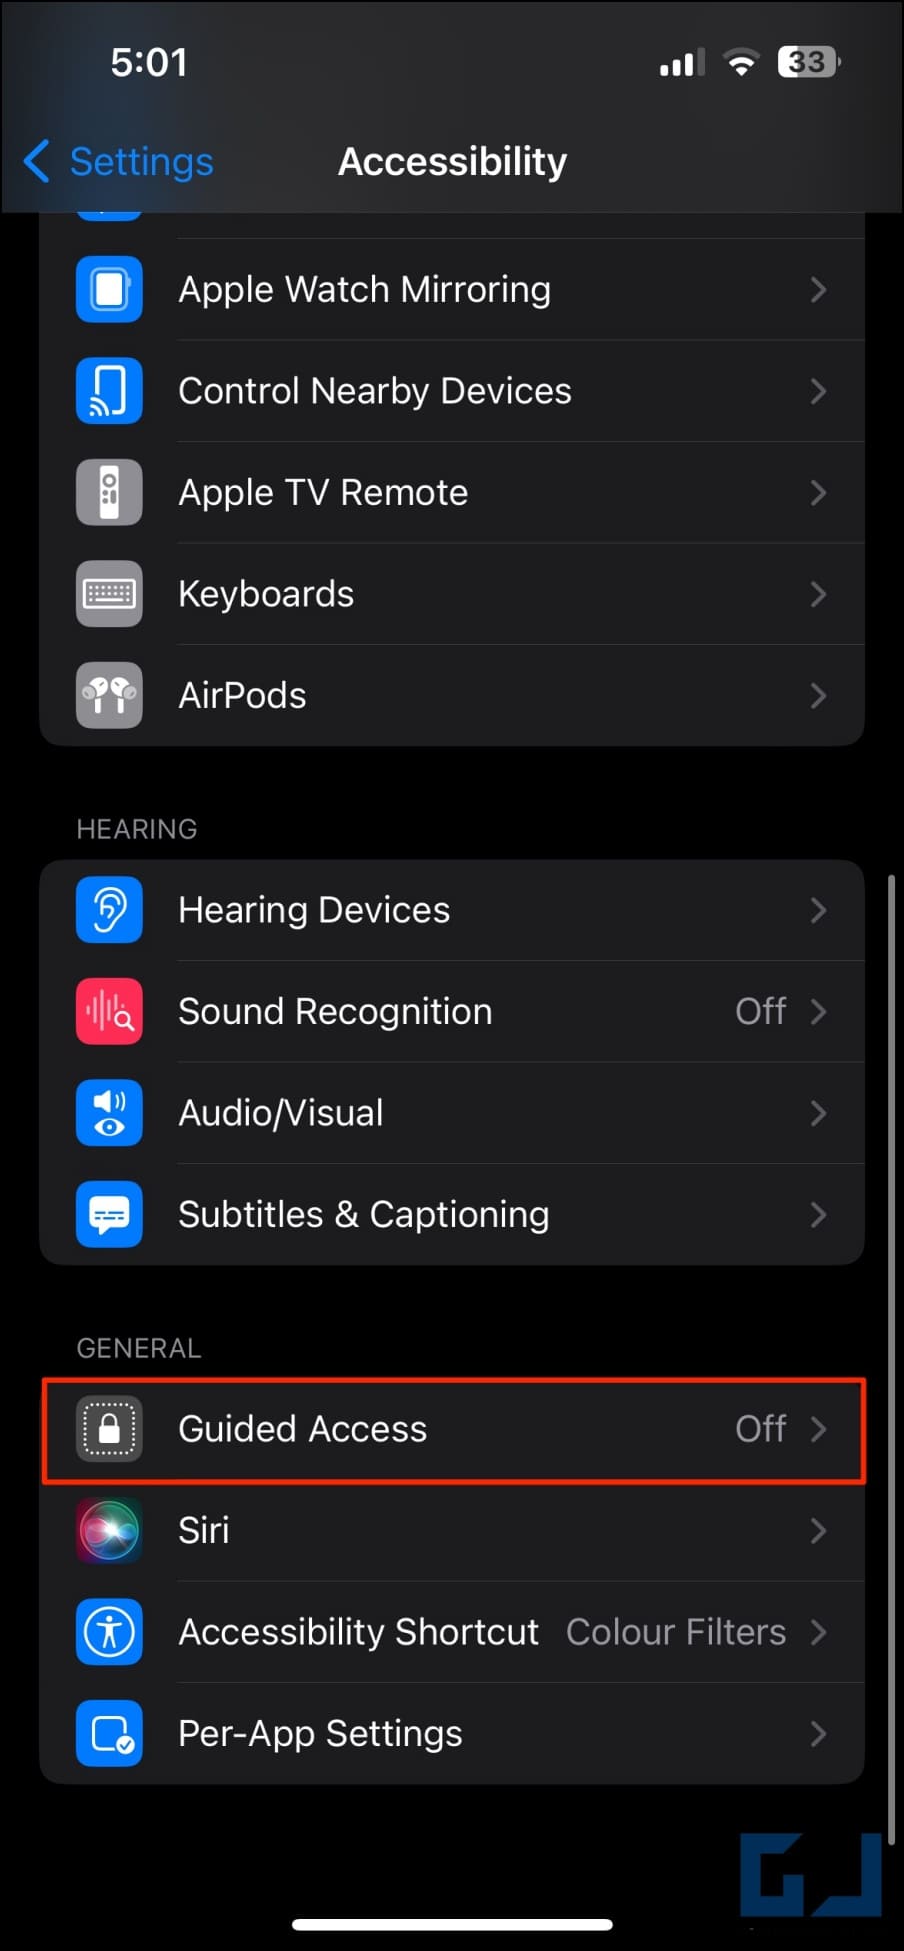
2. Scroll down and click on Accessibility > Guided Access.
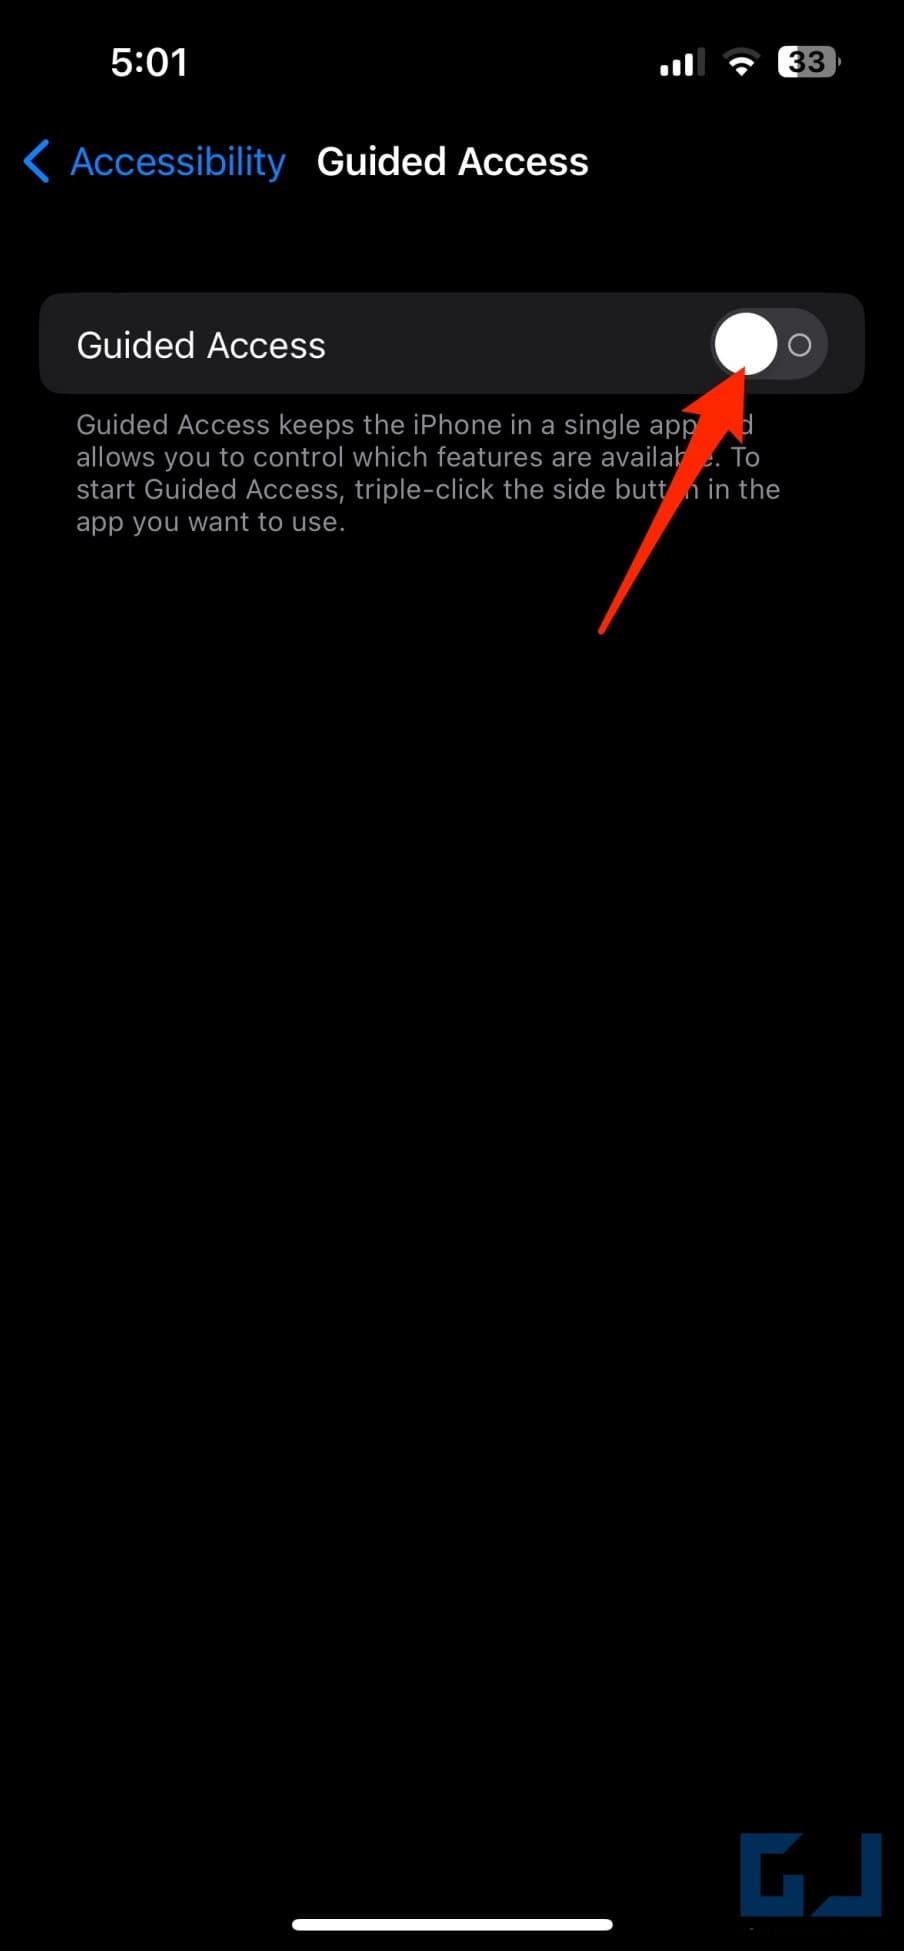
3. Enable the toggle for Guided Access.
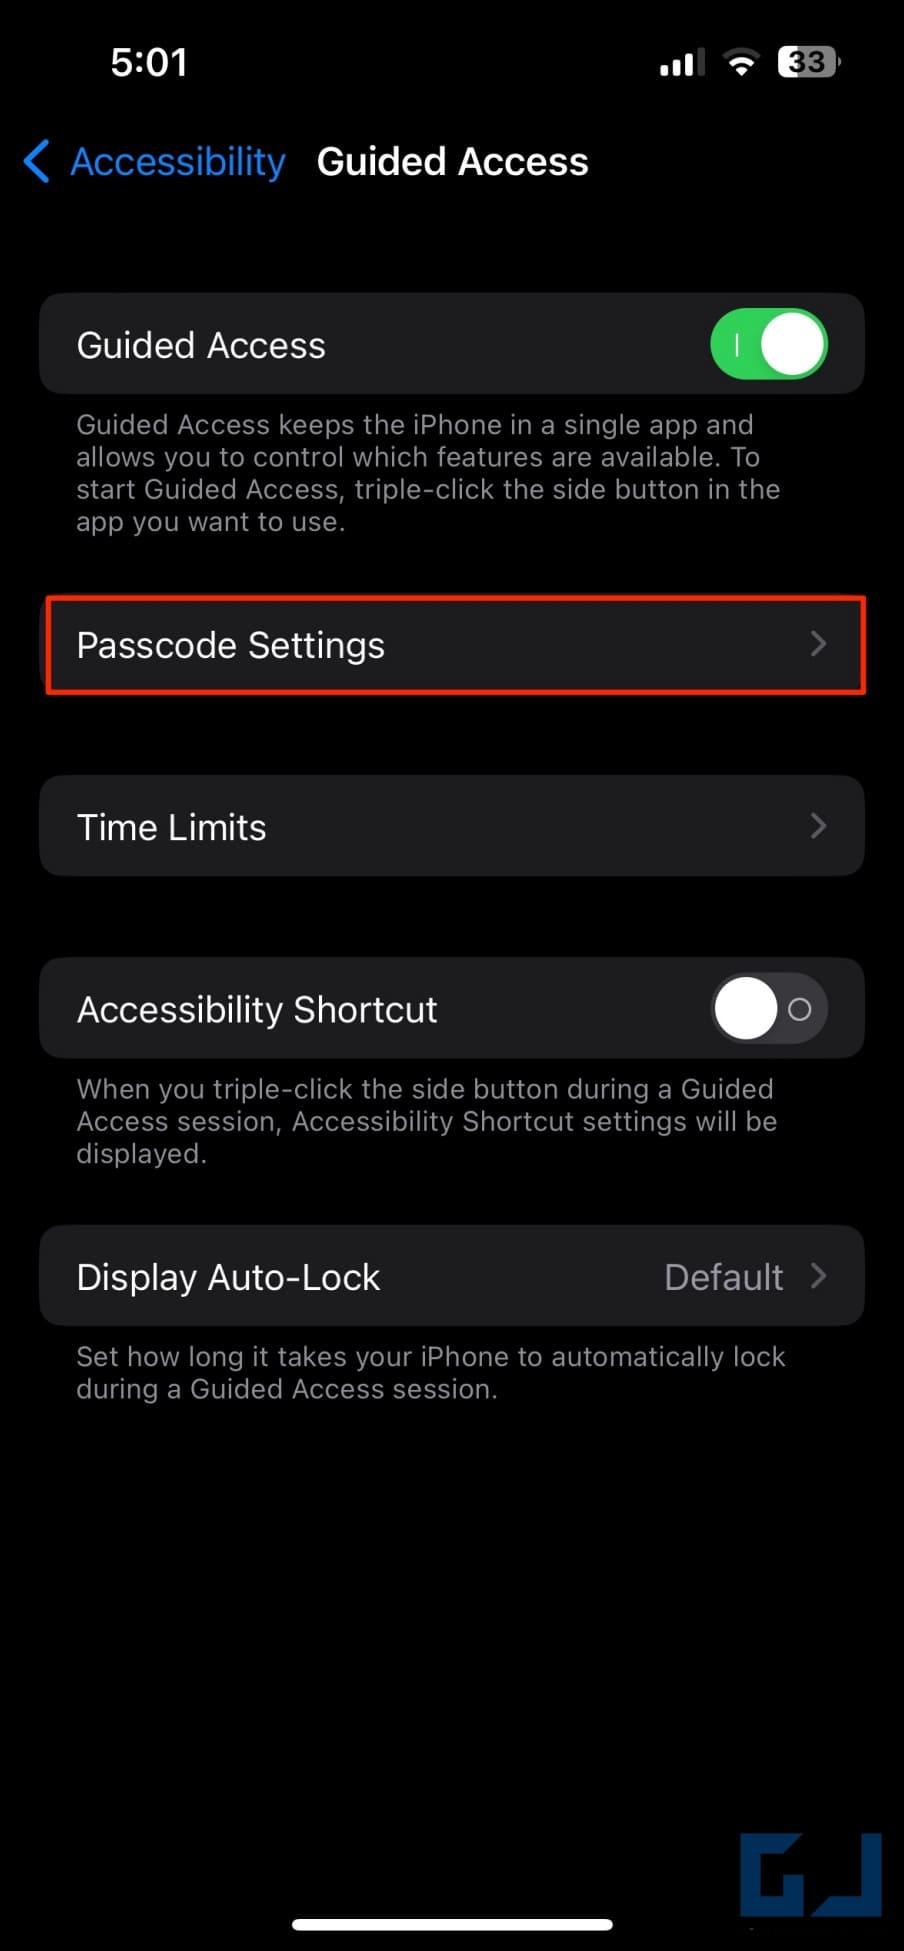
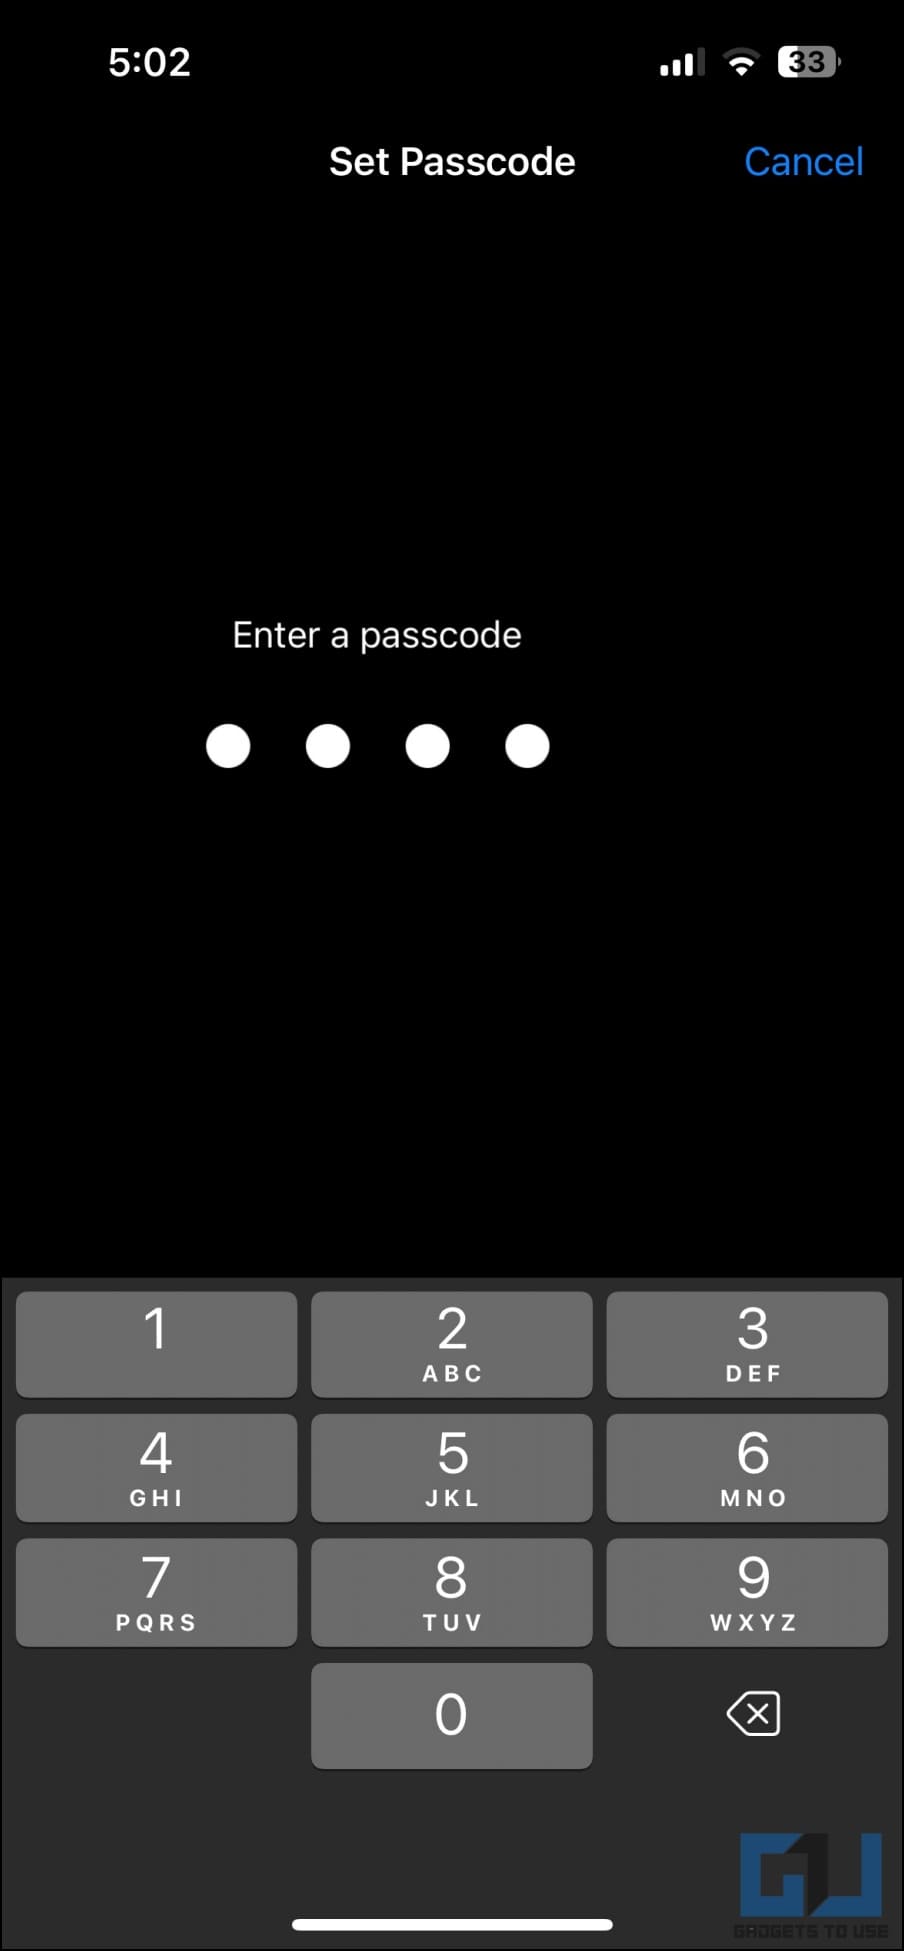
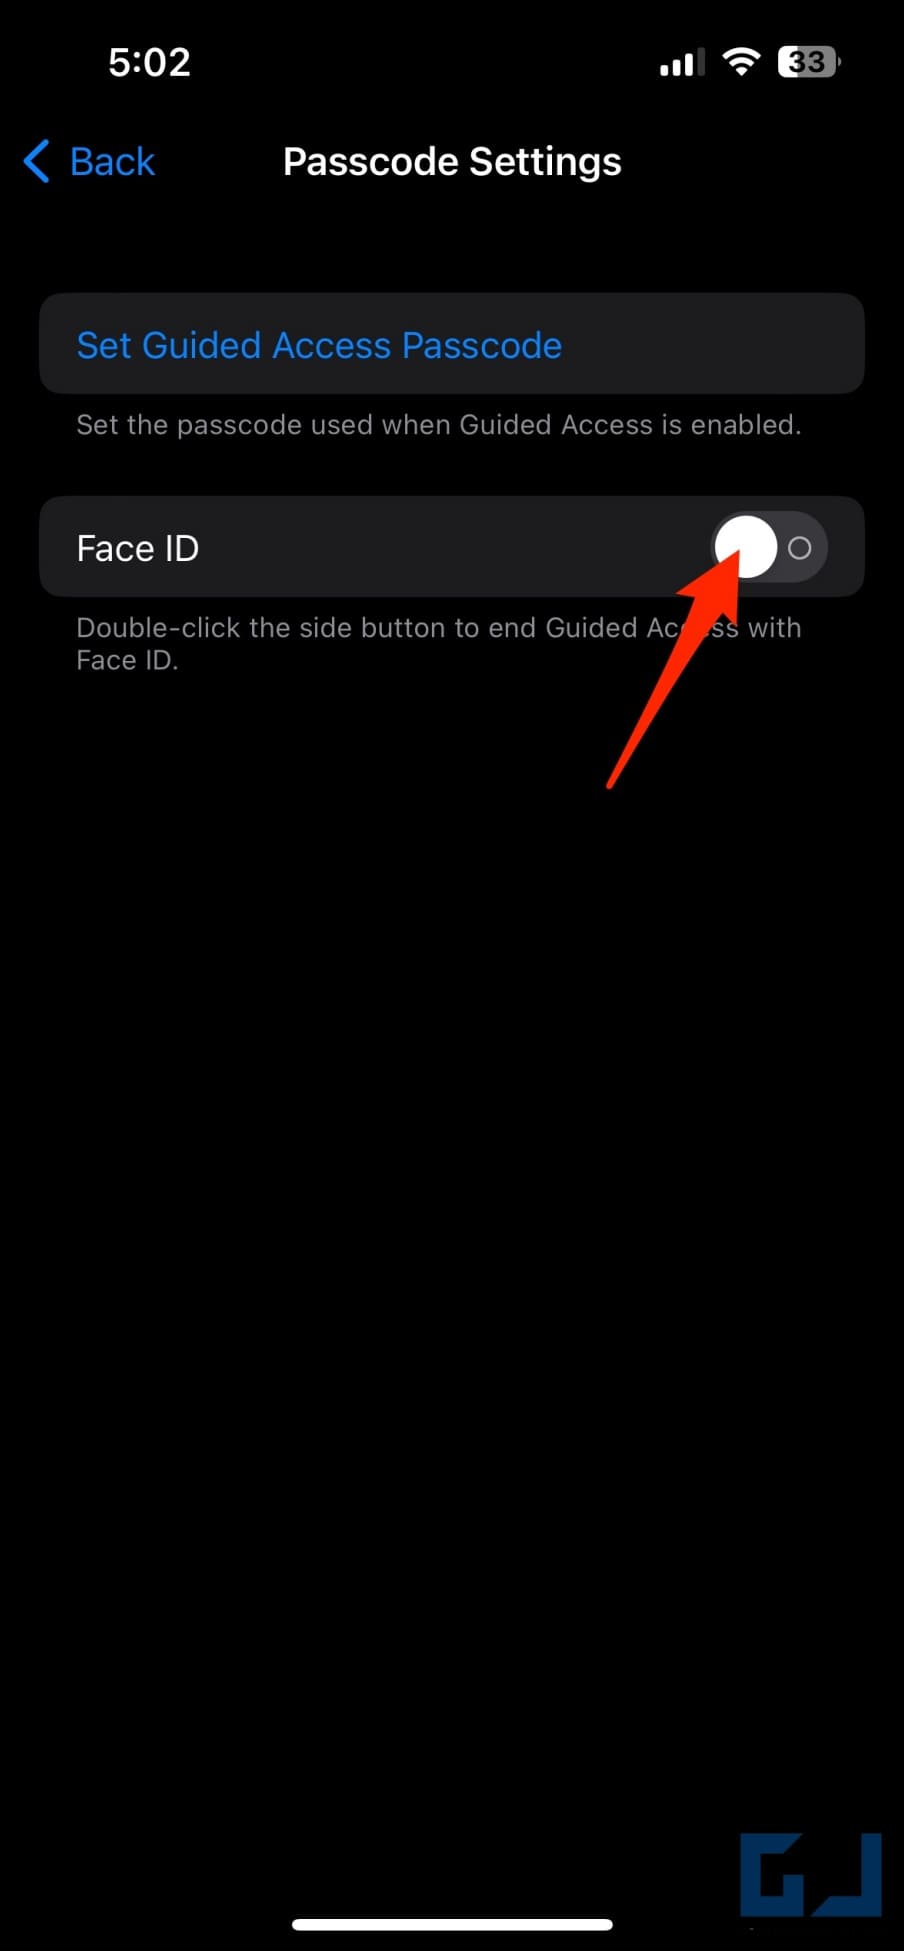
4. Click on Passcode Settings and set Guided Access Passcode.
5. Enable the toggle for Face ID or Touch ID to allow biometrics to unlock the app.
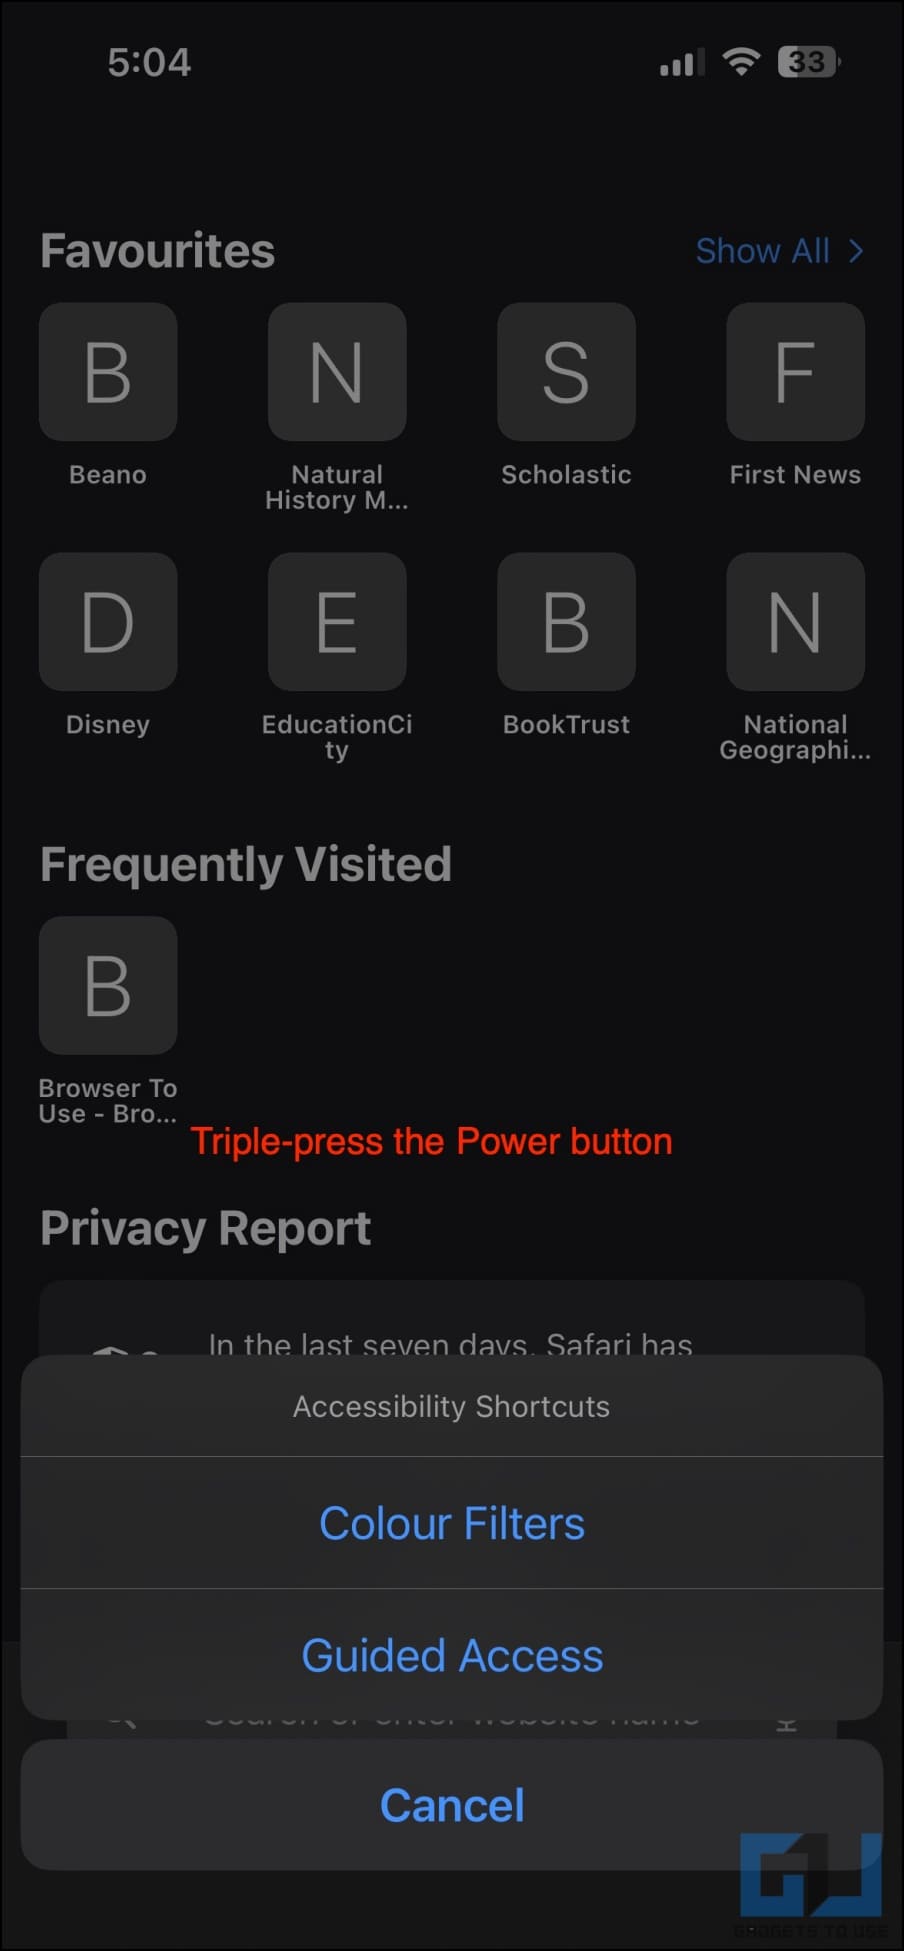
6. Once done, open any app and triple-press the Power button or touch ID to lock the iPhone to this particular app.
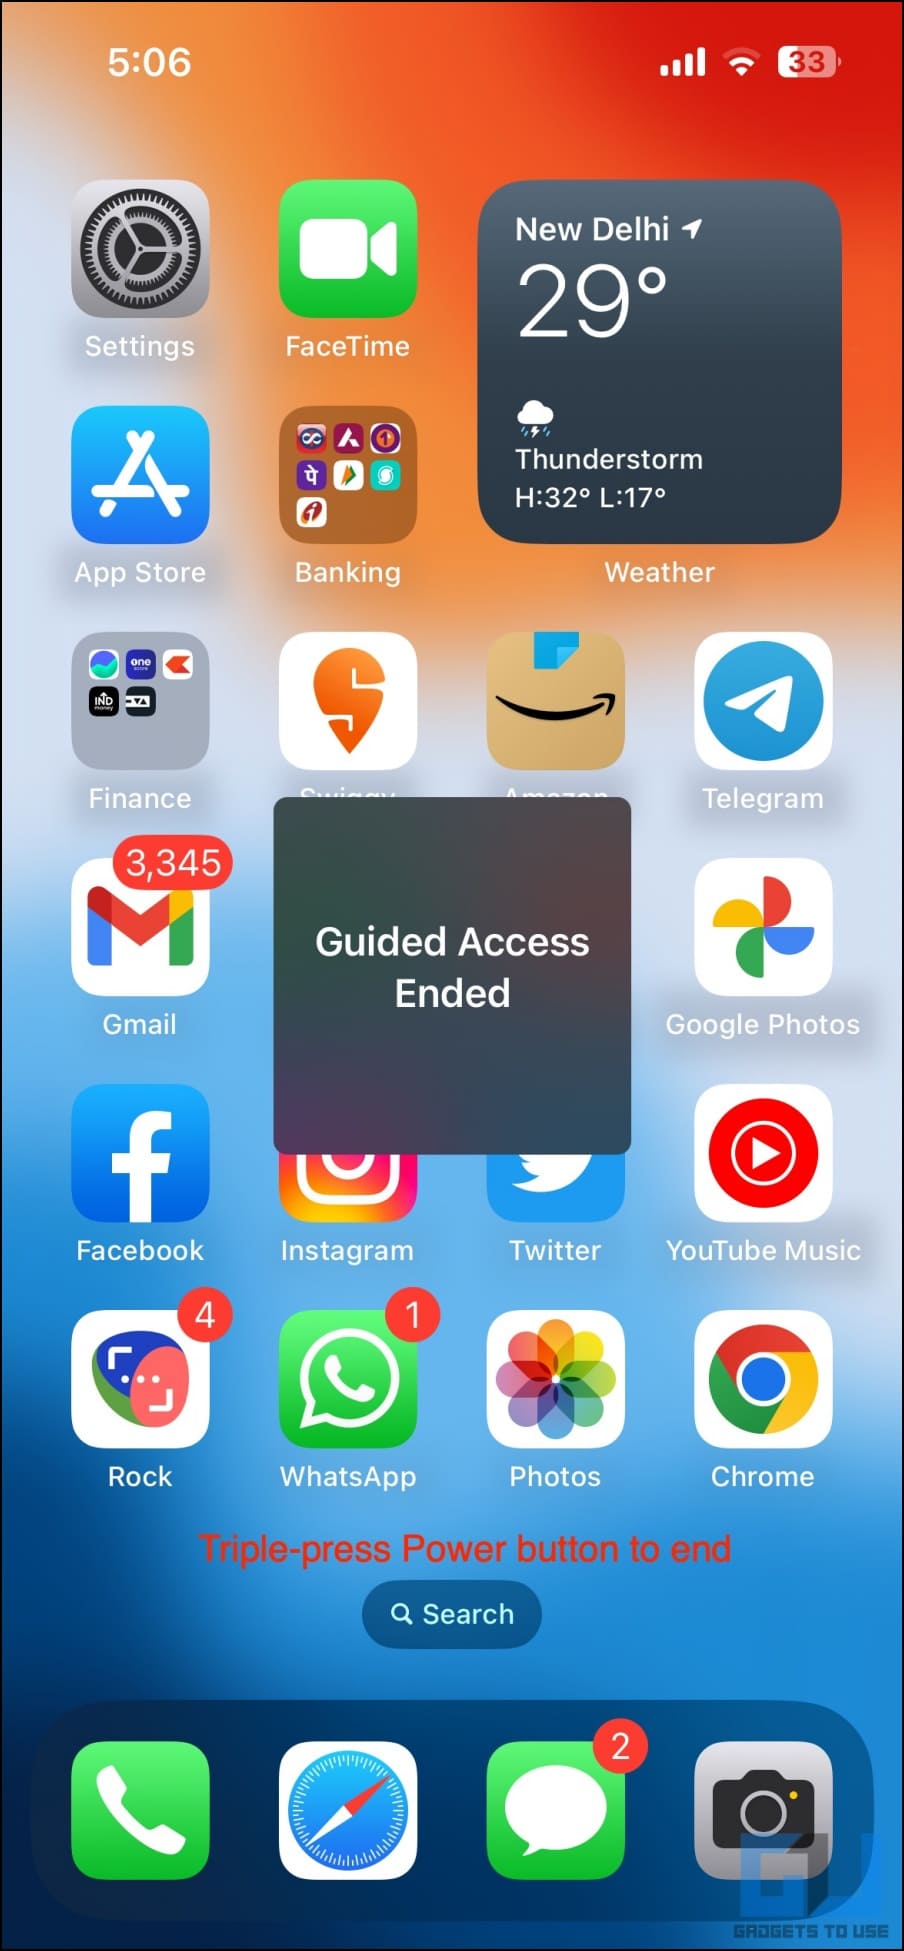
Anyone who you give your iPhone to will only be able to use the already-opened app. They cannot go back to the iPhone home screen, access the recent menu, control center, or any other app on the device. To disable Guided Access, triple-click the Power button or use Face/ Touch ID as instructed.
Method 5- Make a Password-Protected App Shortcut
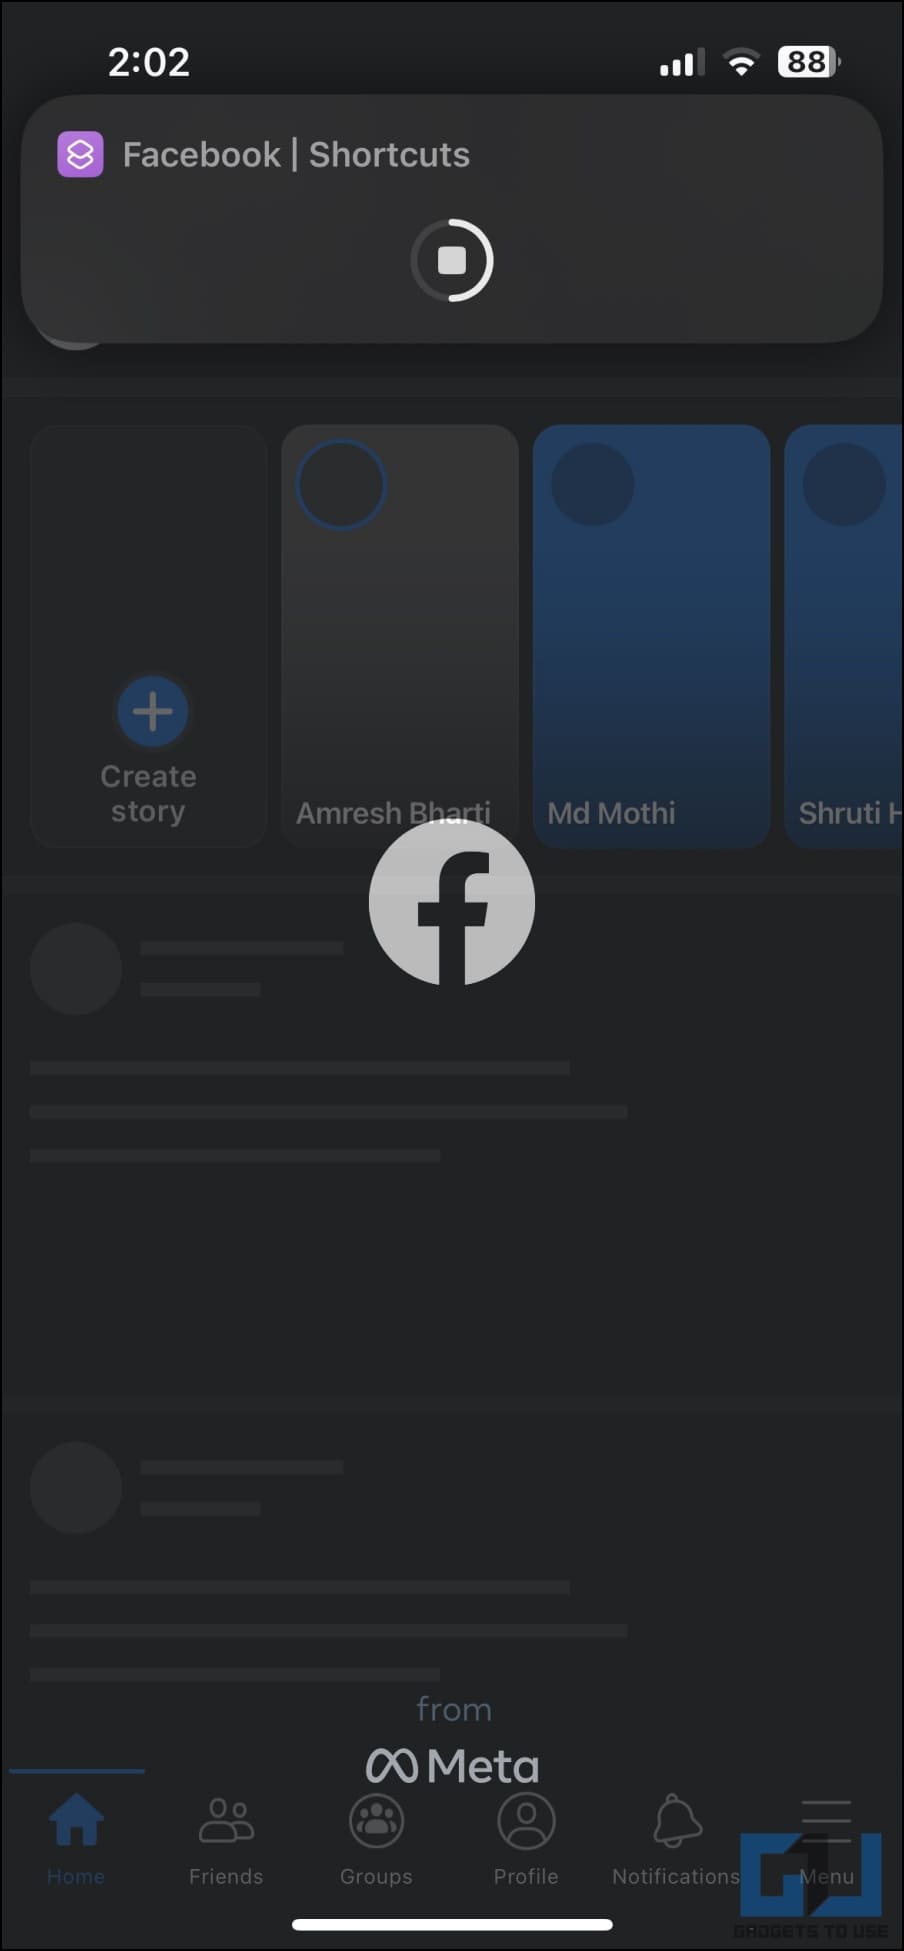
You can directly download and import the shortcut we created below using this link. Open it and tap Add Shortcut. Just make sure to customize the app, name, and homescreen app icon for the app you want to lock- by default, it’s for Facebook..
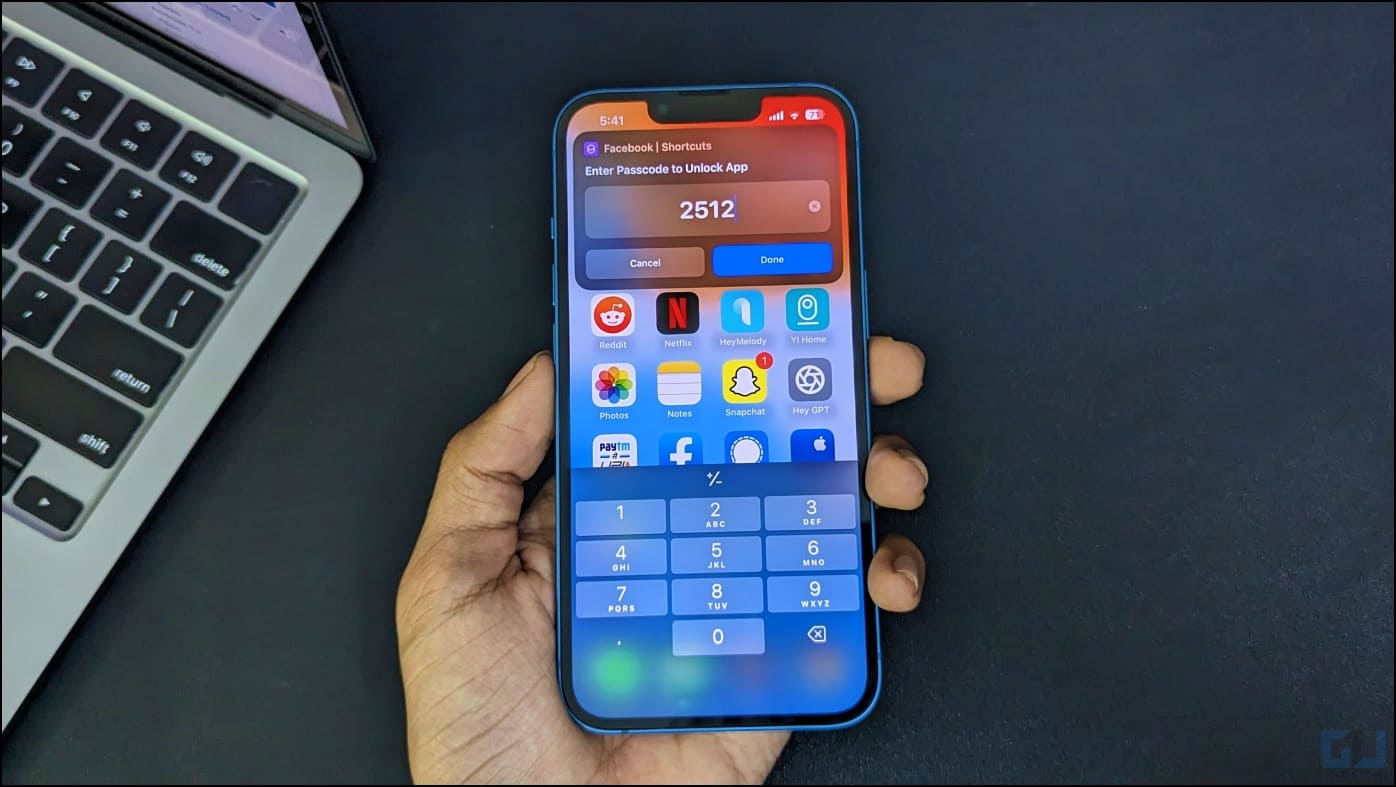
Using Shortcuts on iPhone, you can create a home screen shortcut that asks for a passcode or password to open the app you want to lock. You can hide the real app while disguising the created shortcut as the actual app on your home screen.
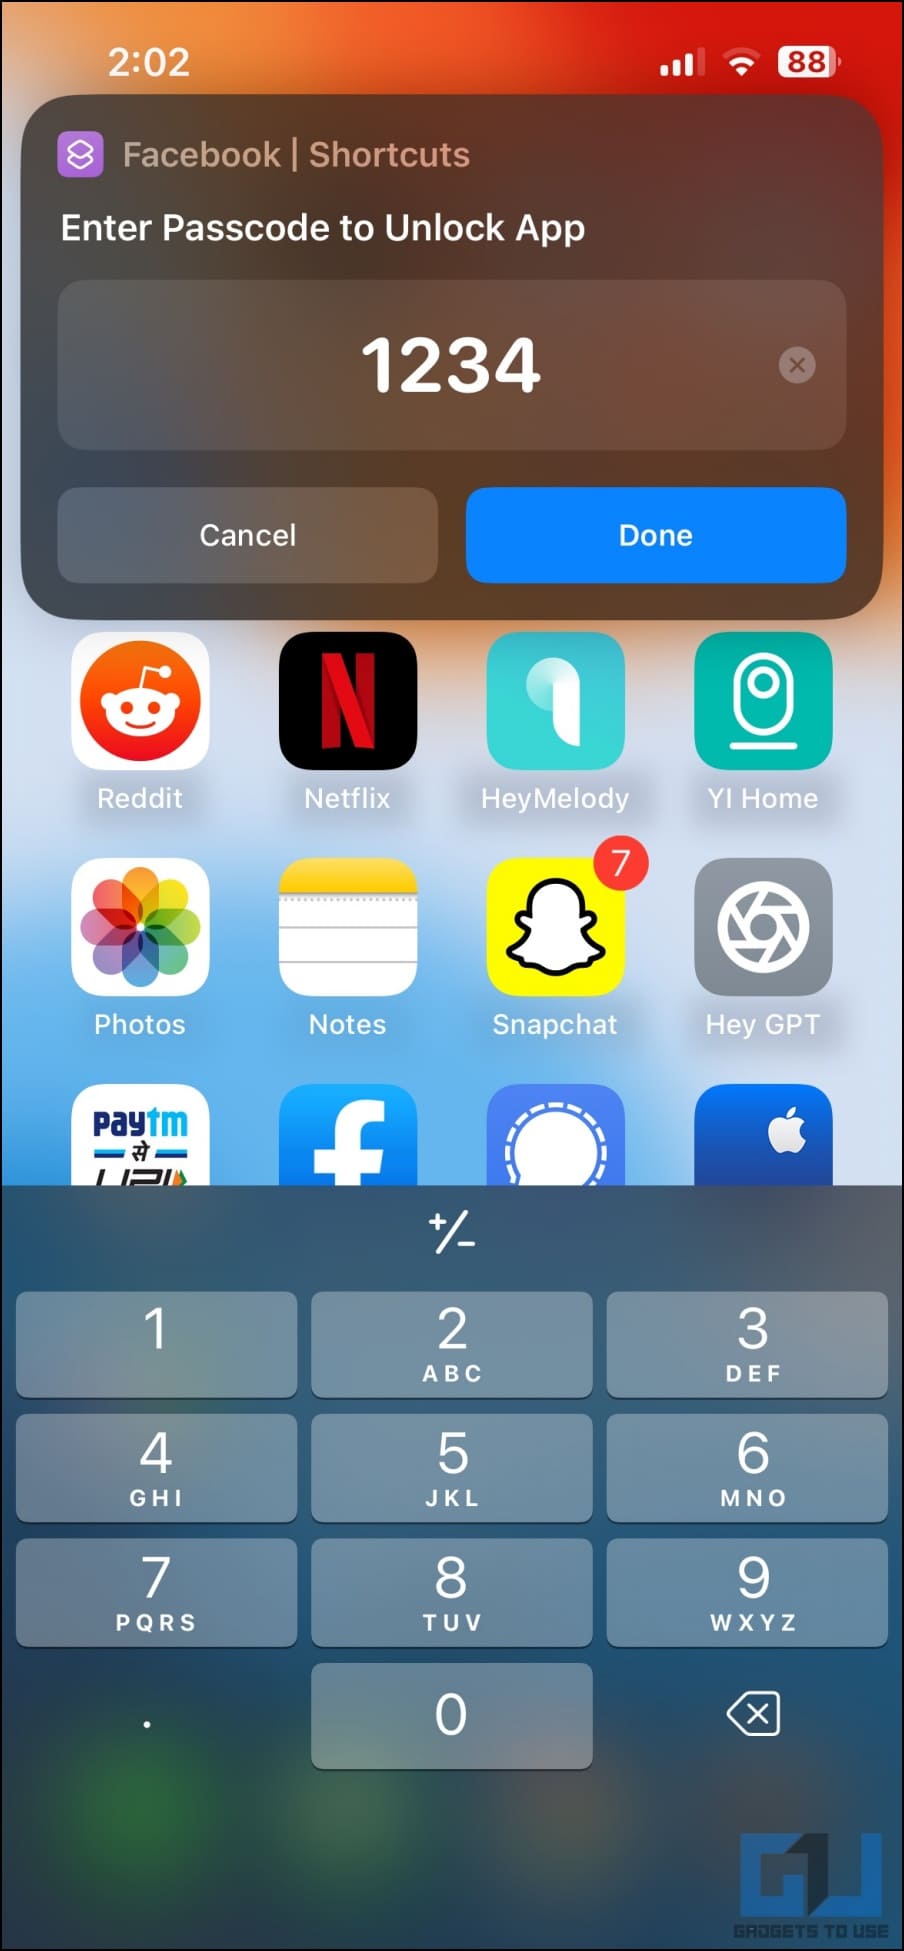
When someone opens the fake app shortcut, it will ask them for a passcode or password to access the app. If the entered password is correct, it will open the real app or do nothing otherwise. Here’s how it works:
1. Open the Shortcuts app on your iPhone or iPad.
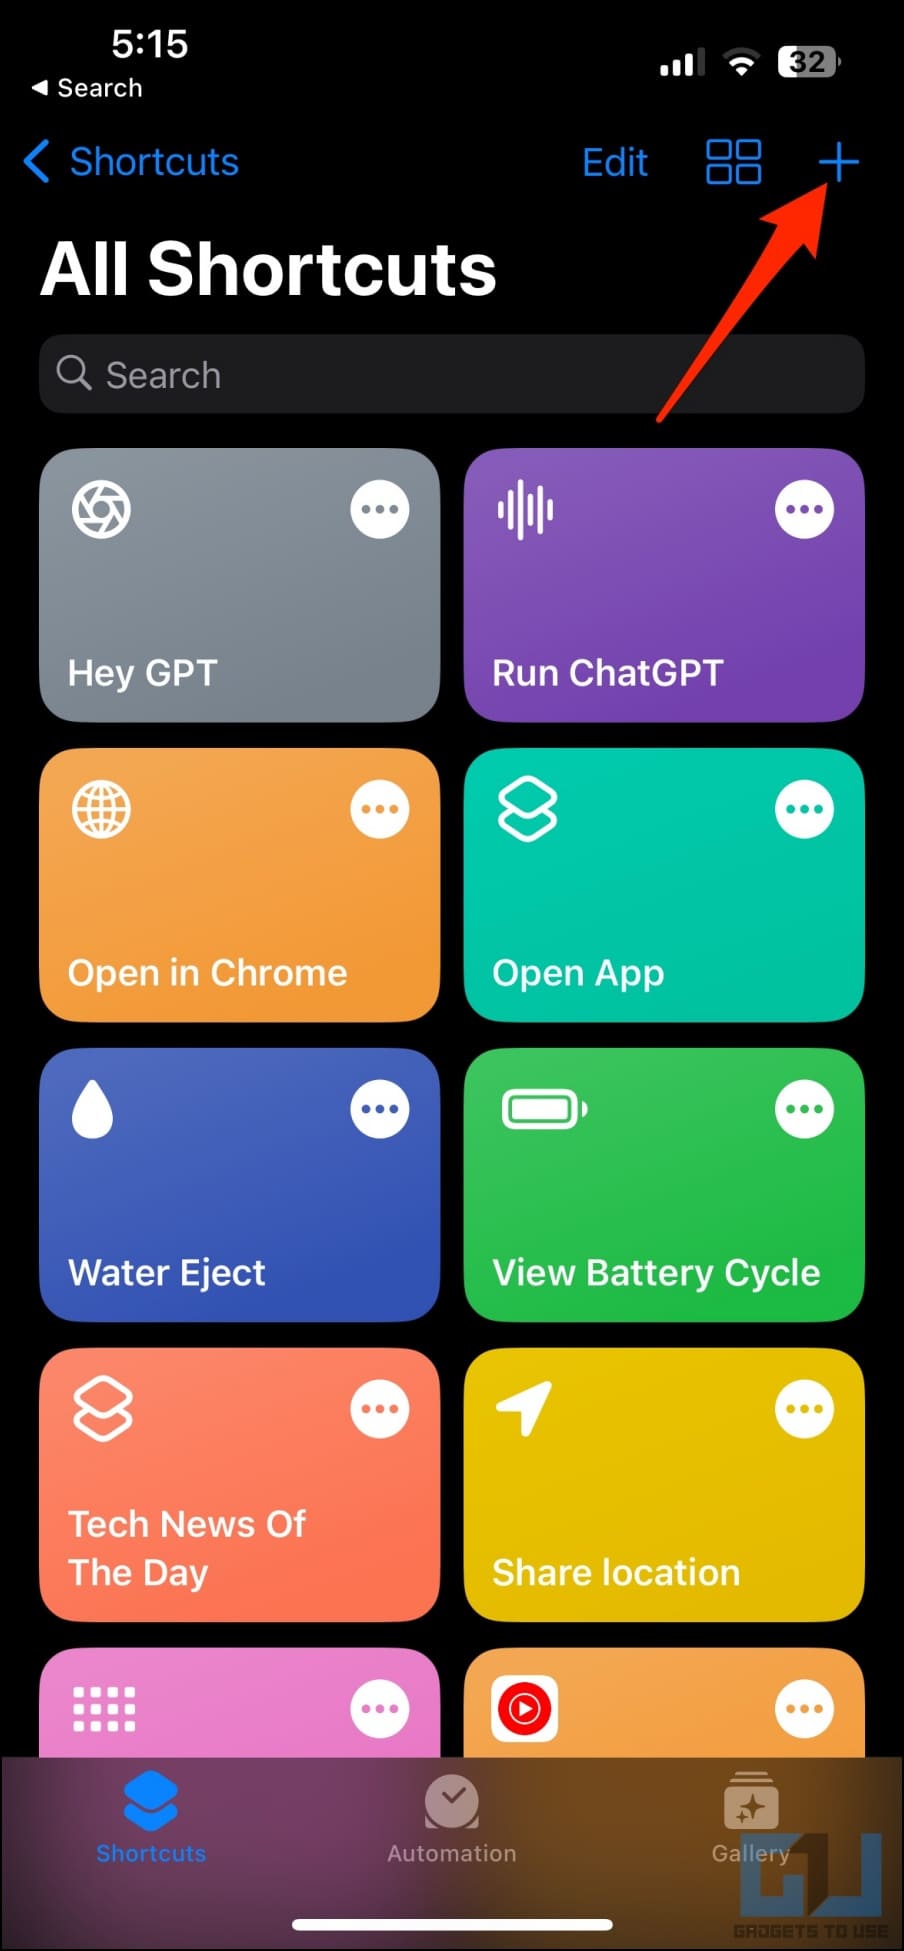
2. Tap the + icon in the top right in the Shortcuts tab.
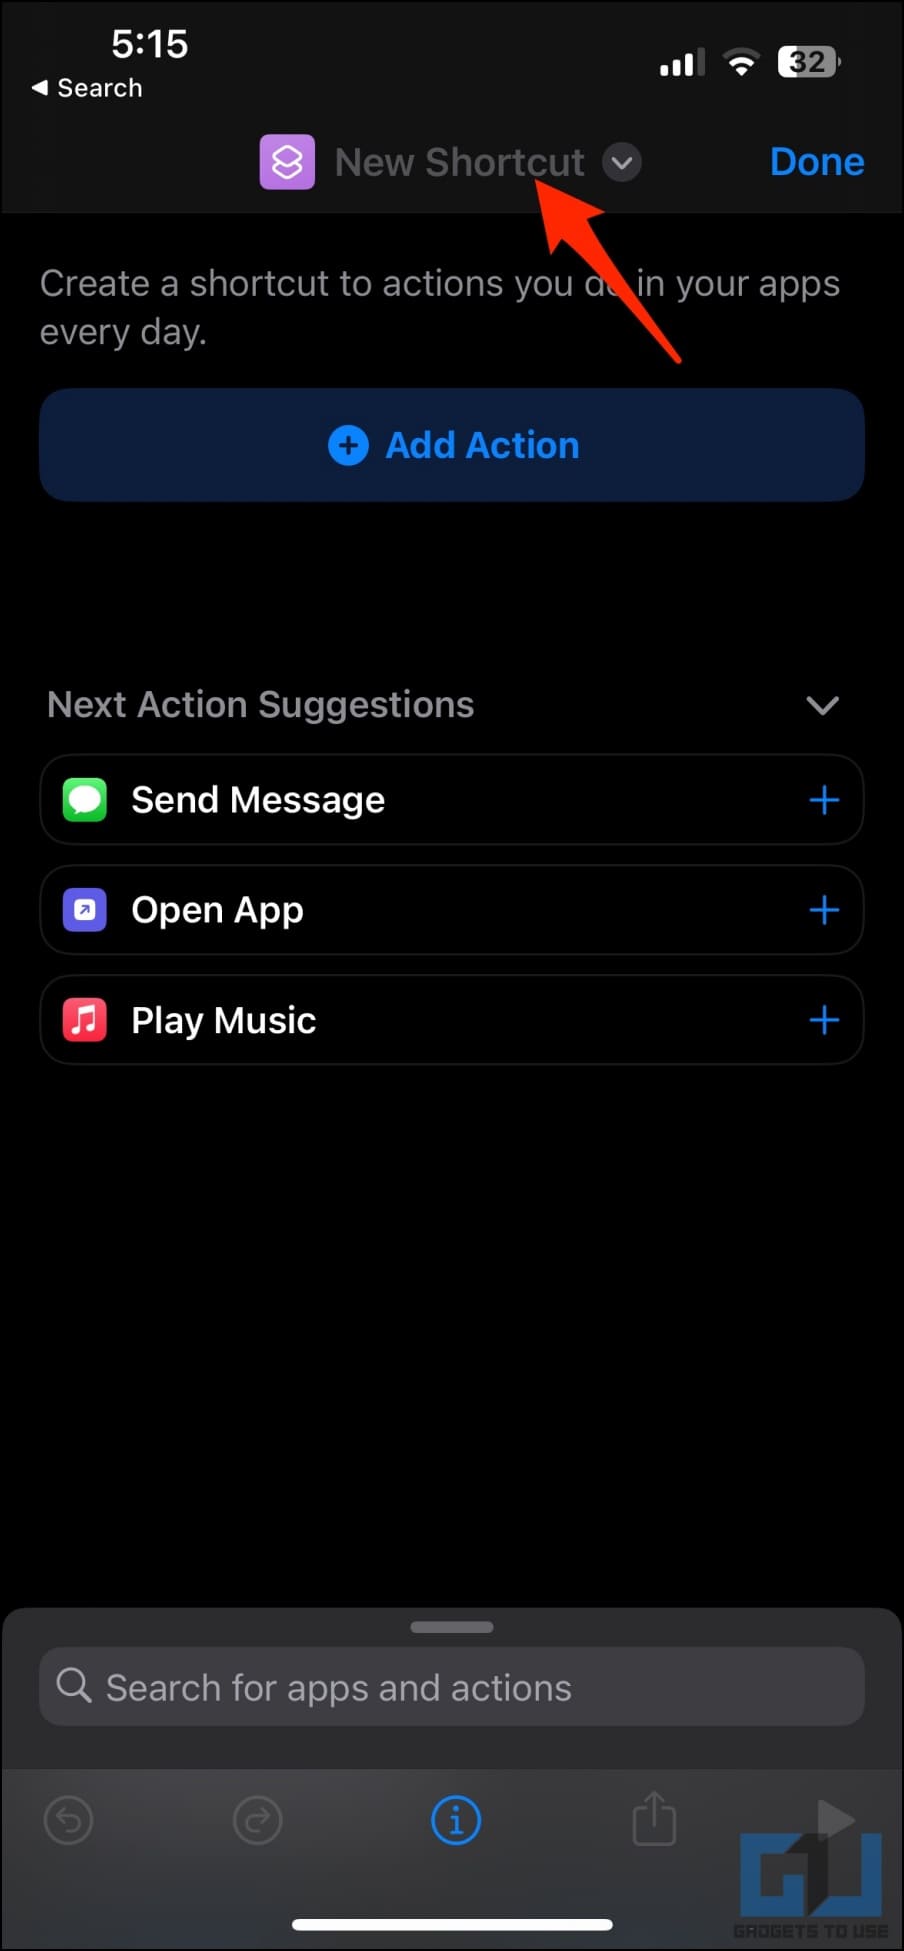
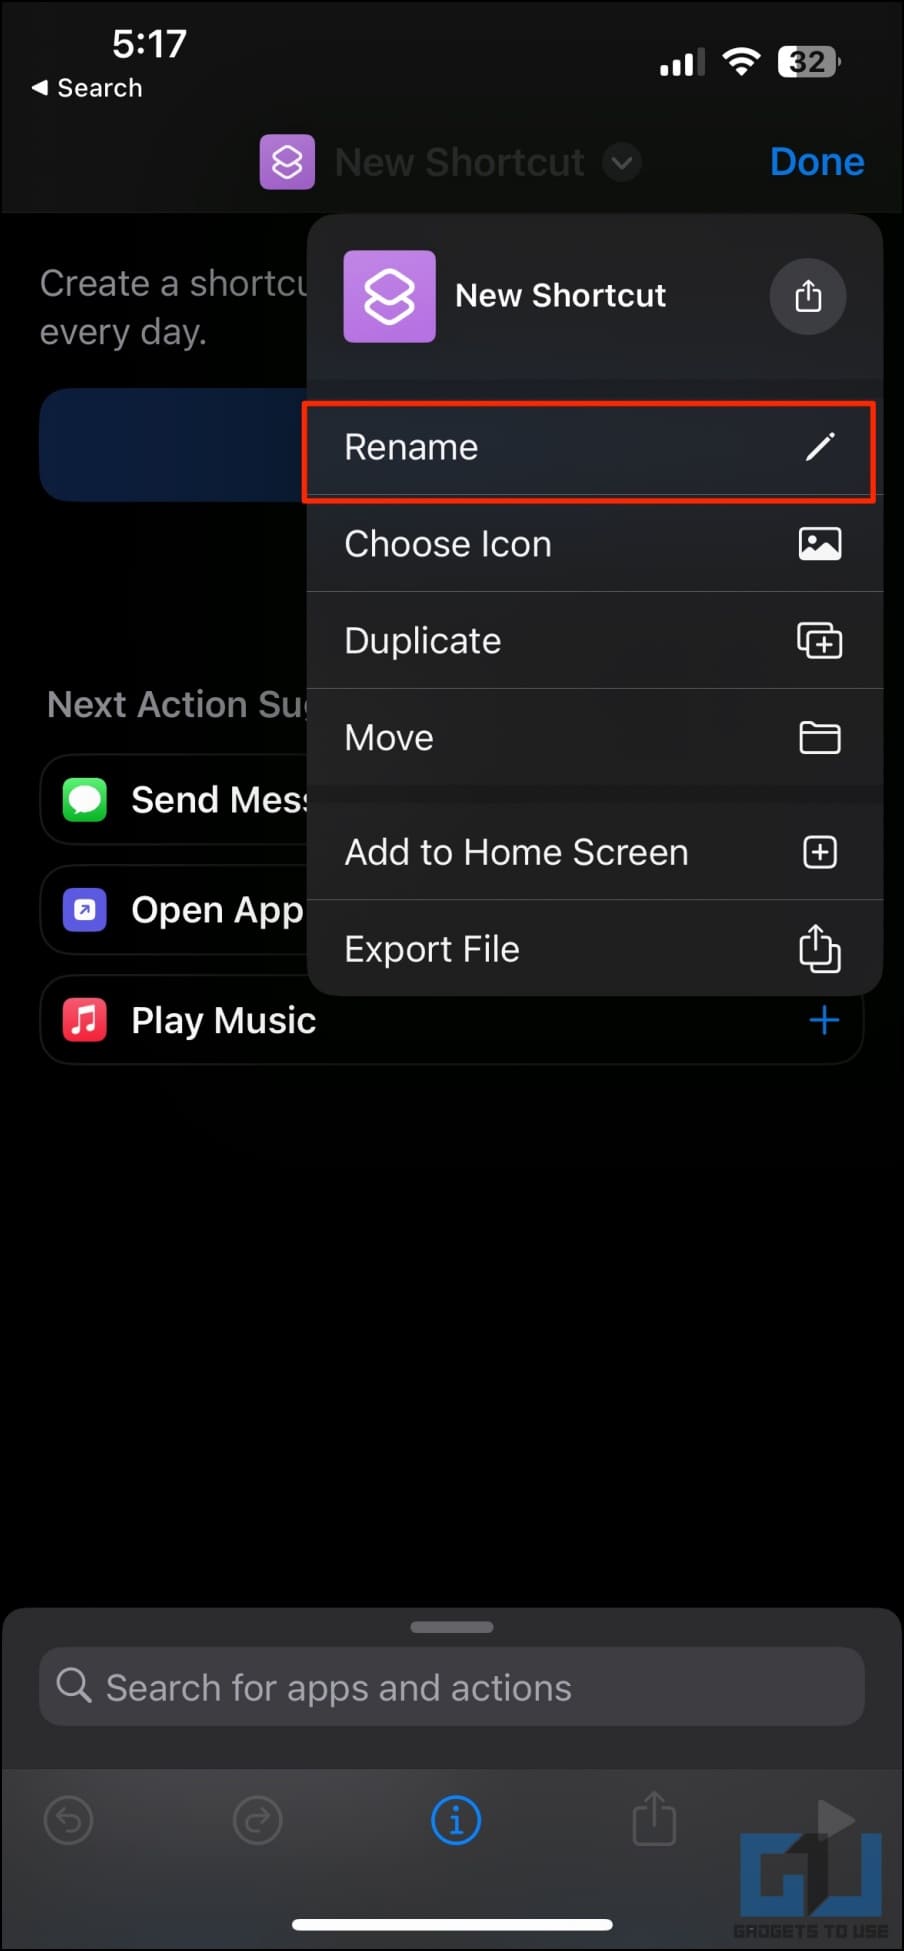
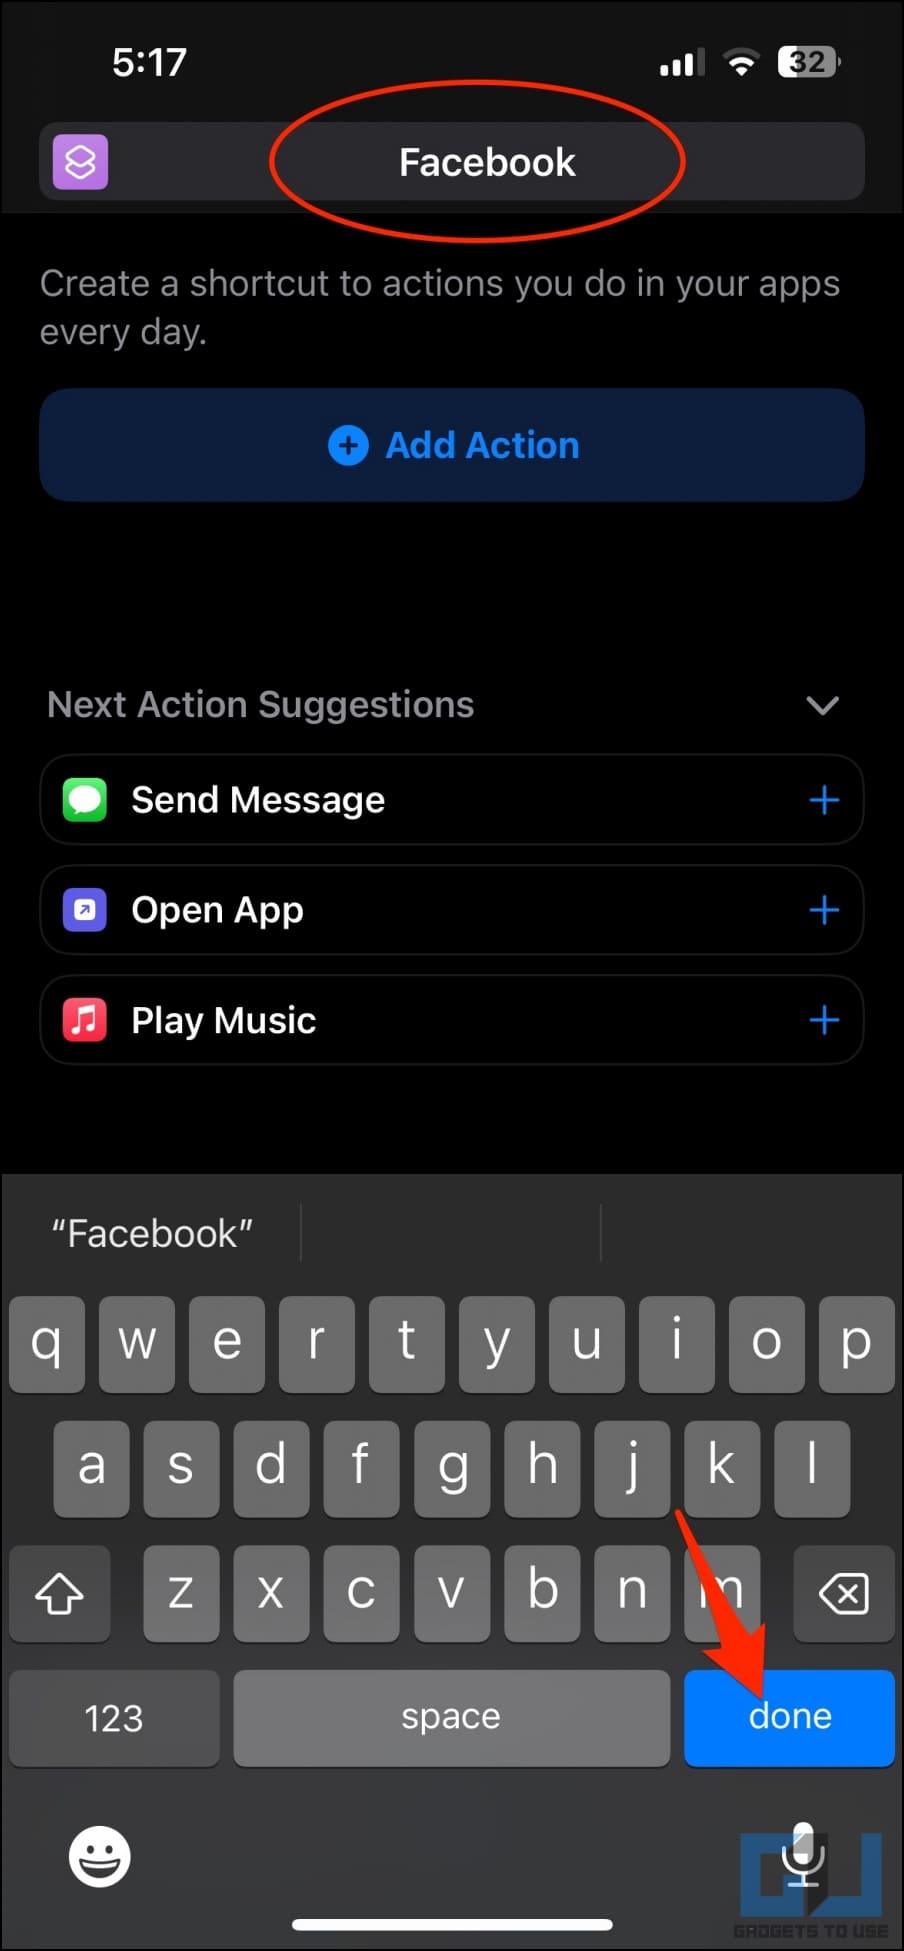
3. Tap the “New Shortcut” name on top and hit Rename. Change it to the actual app name you’re going to lock. For example, we’d rename it to “Facebook” here and tap Done on the keyboard.
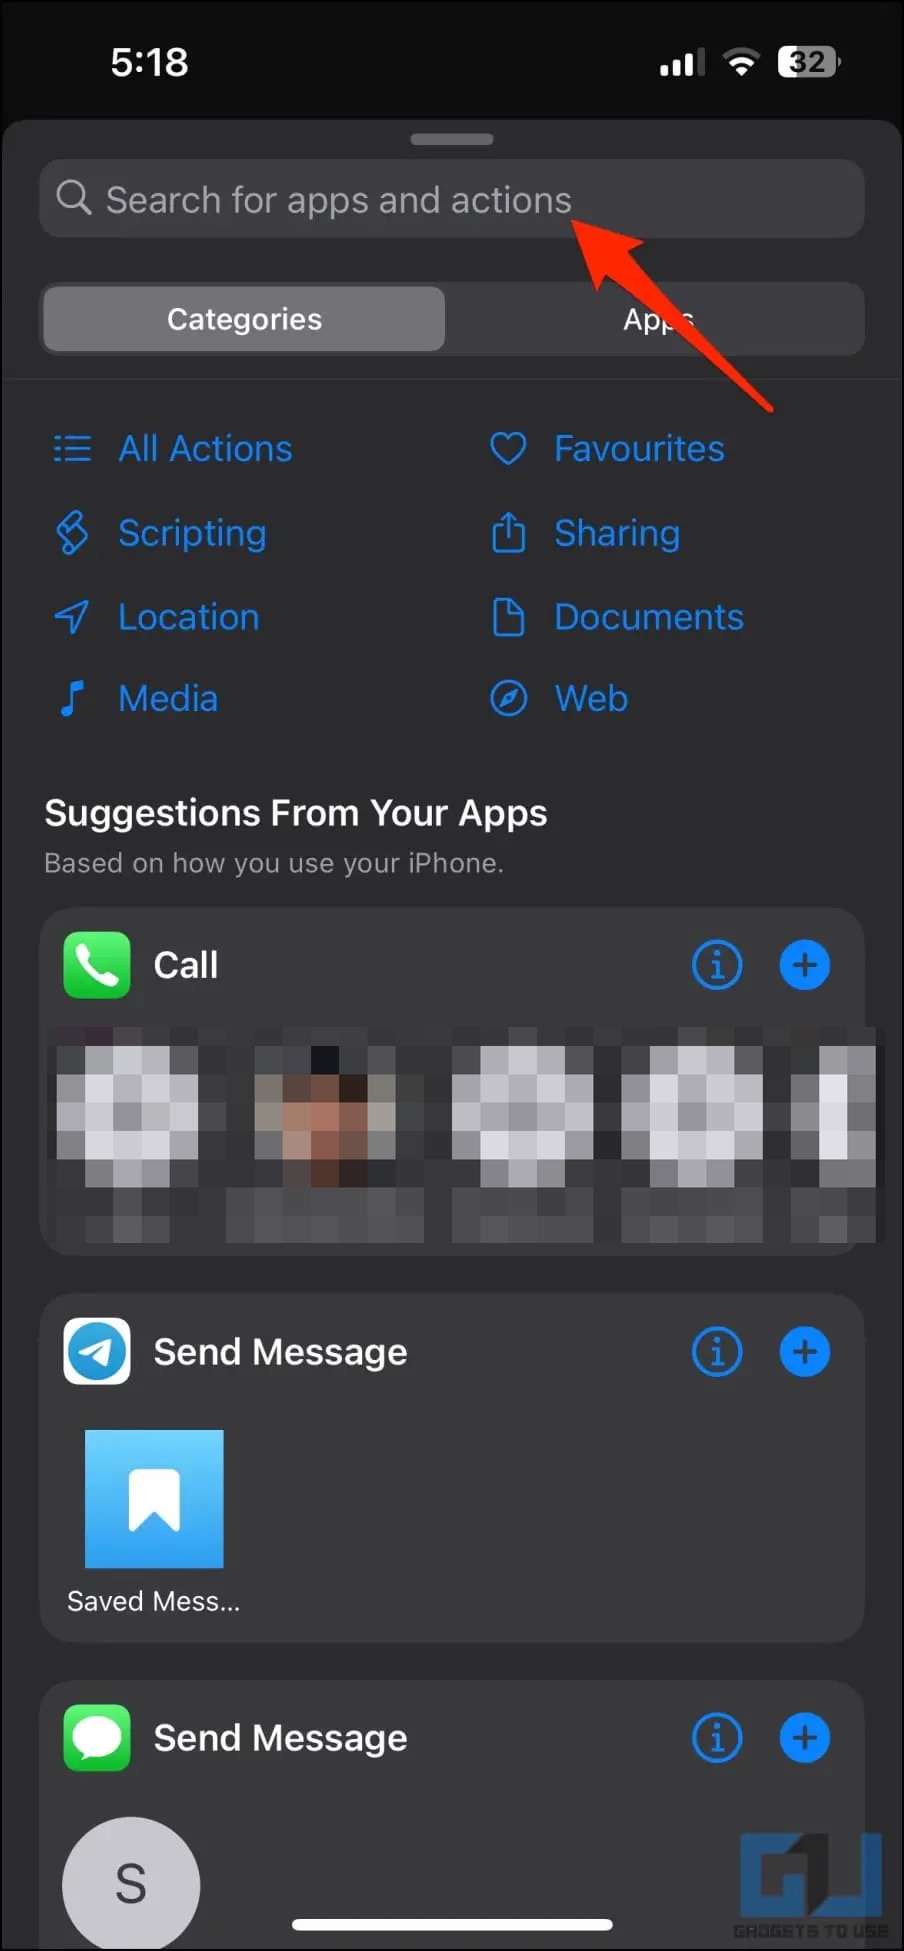
4. Next, tap the Add Action button.
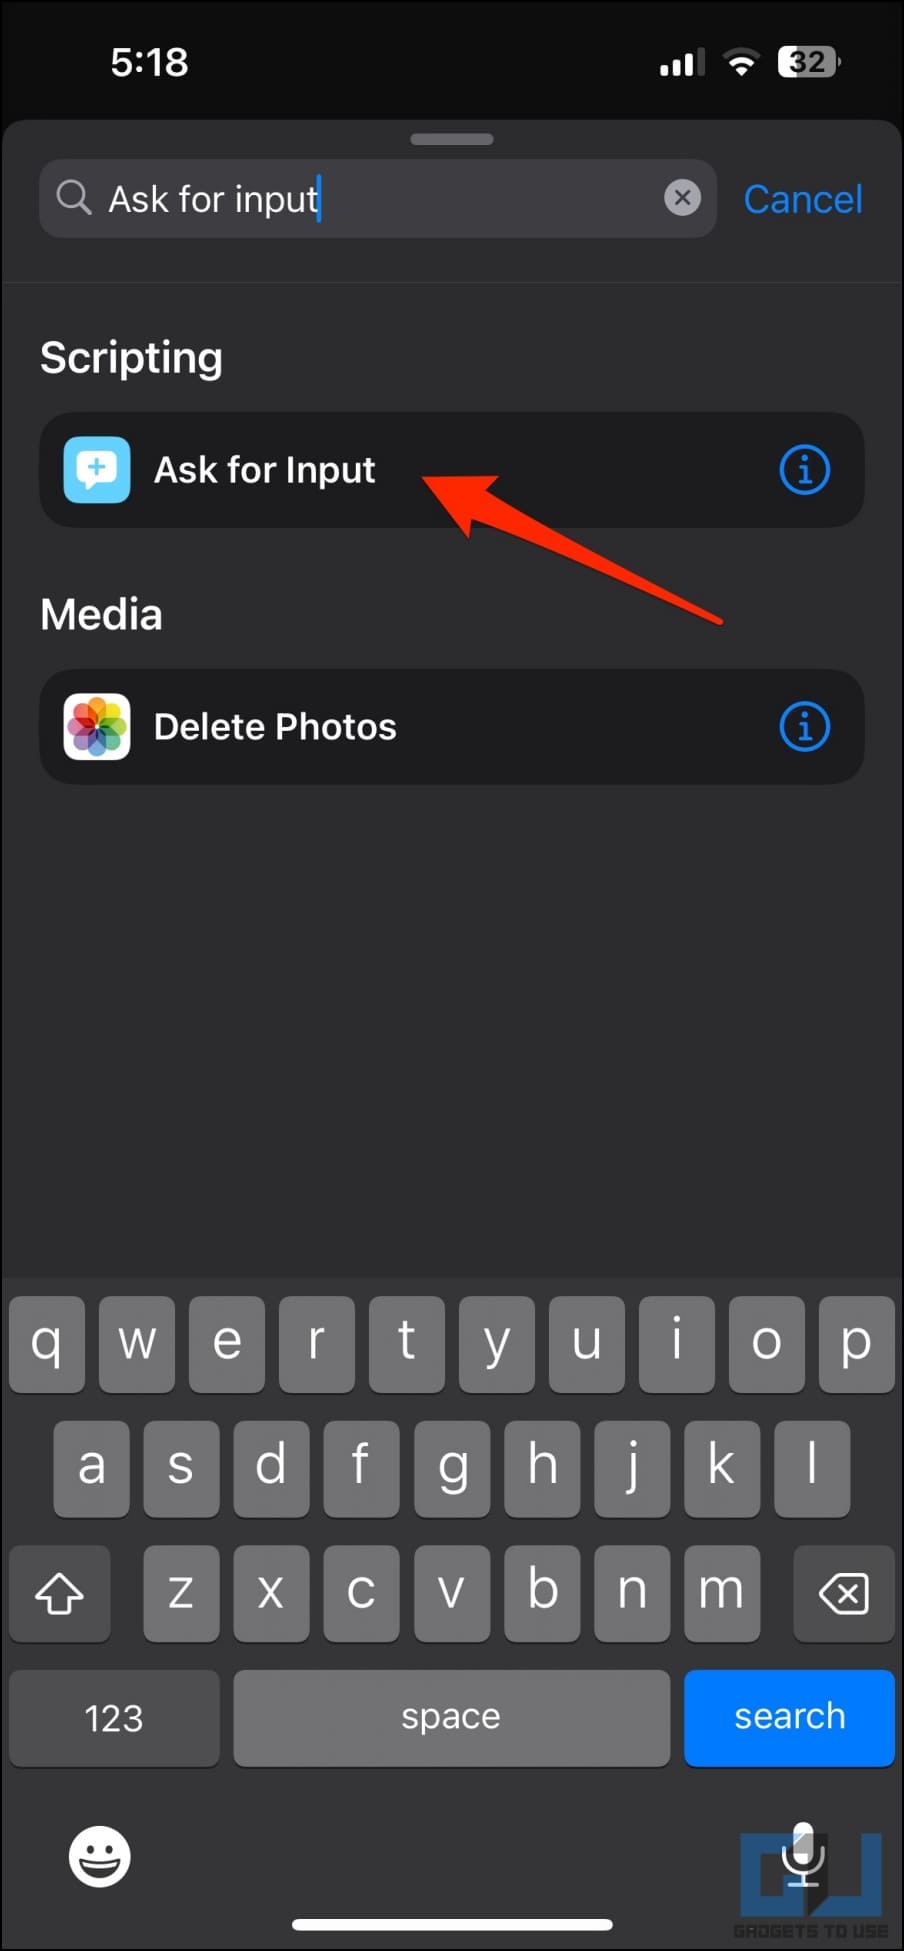
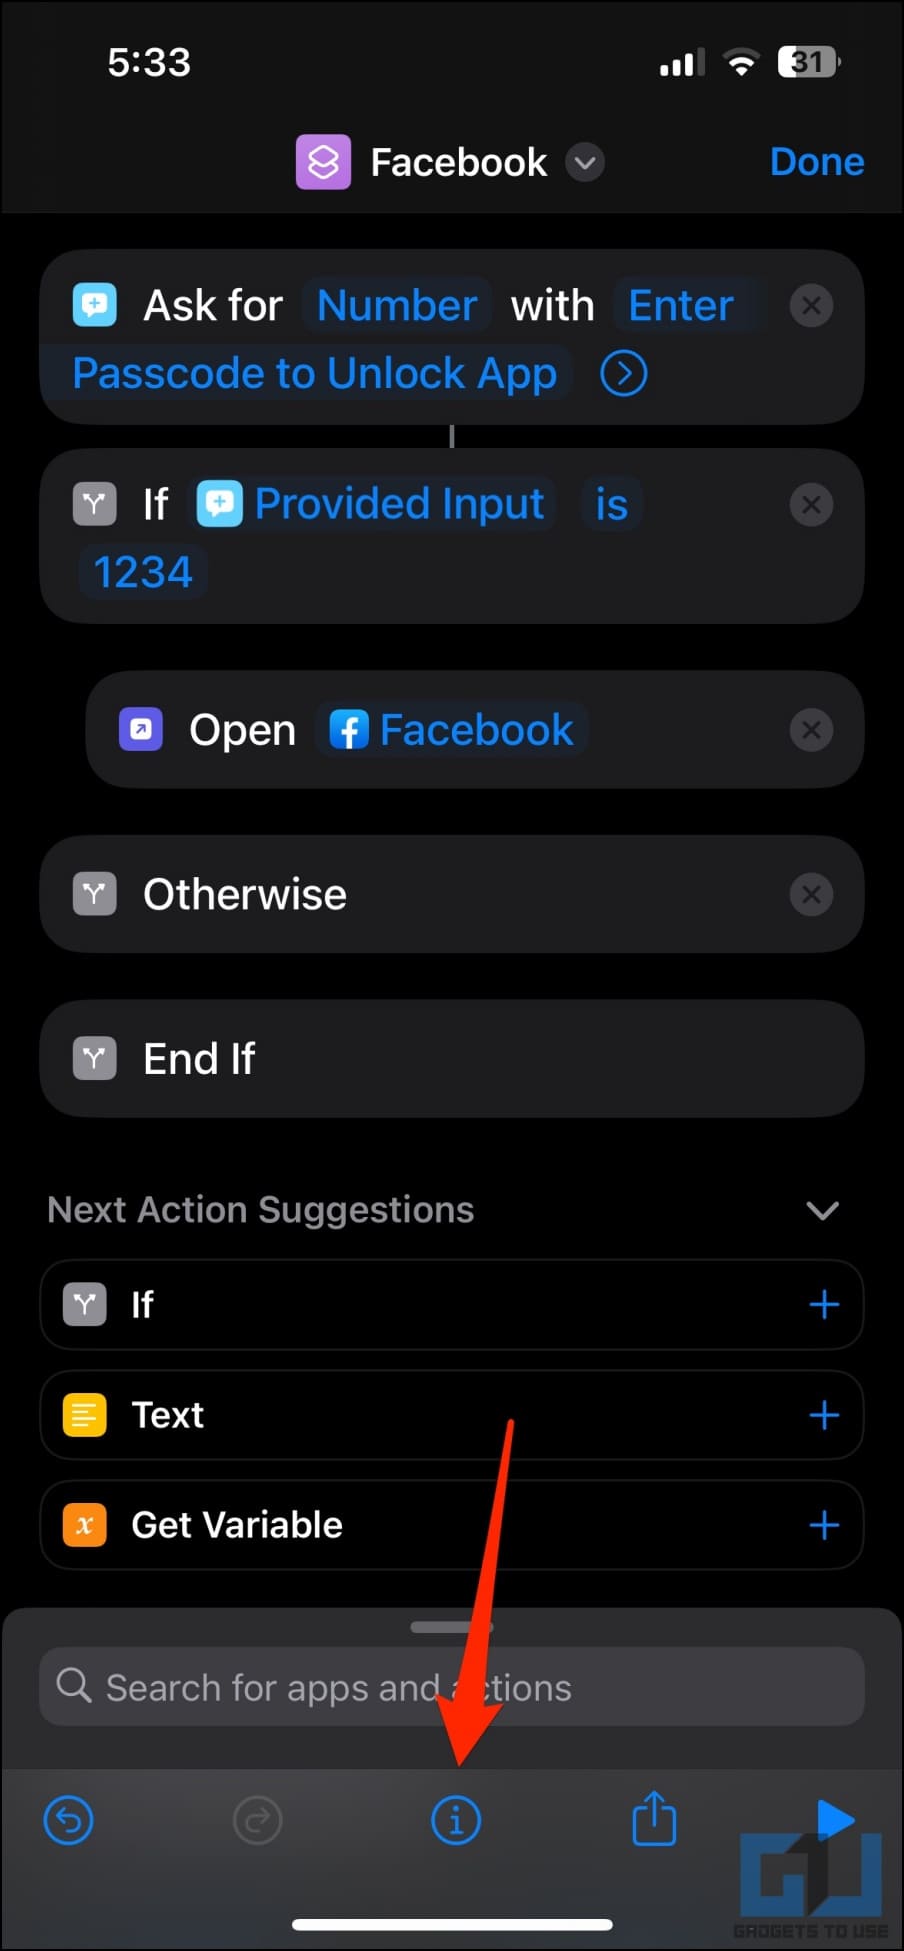
5. Search for and select the “Ask for Input” action.
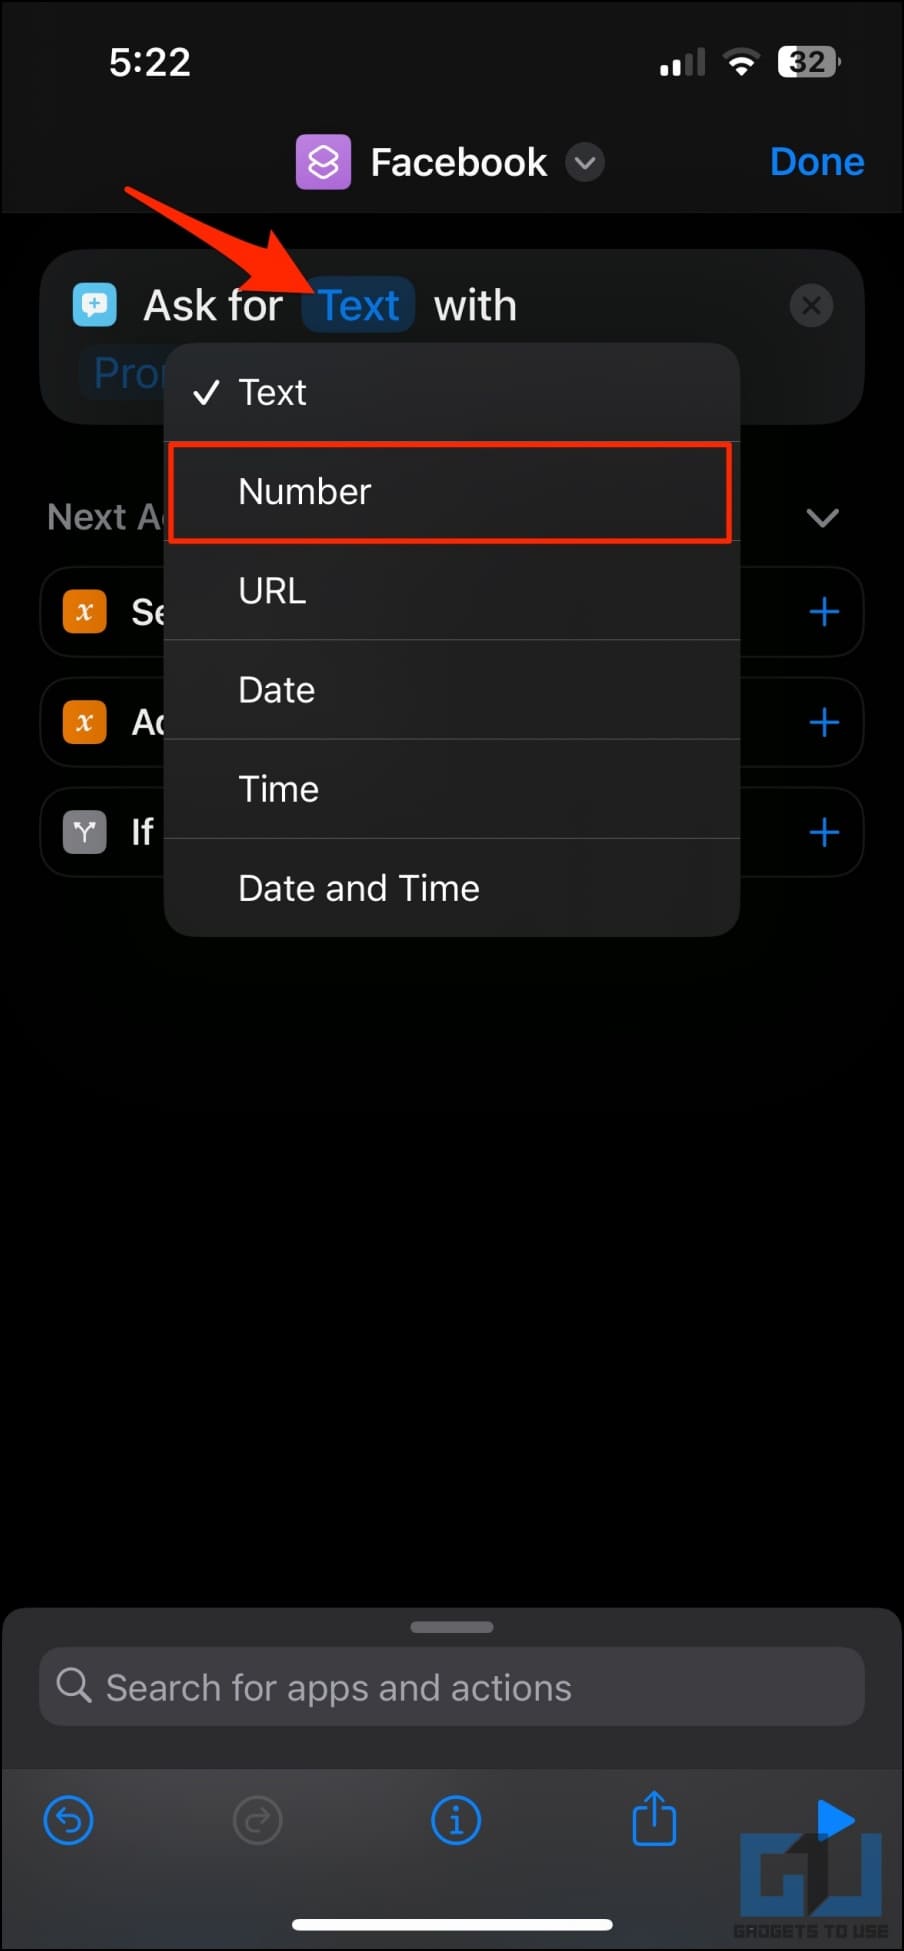
6. In the action box, click on Text to see available options:
- Text: Set an alphanumeric text as the password.
- Number: Set a string of numbers as the password.
- URL: Set any web link as a password.
- Date: Set a specific day as the key for unlocking the app.
- Time: Set a specific time as the key for unlocking the app.
- Date and Time: Set a specific day and time as the answer for unlocking the app.
We’d advise keeping it Text for an alphanumeric password or changing it to Number if you want to lock the app with a simple passcode.
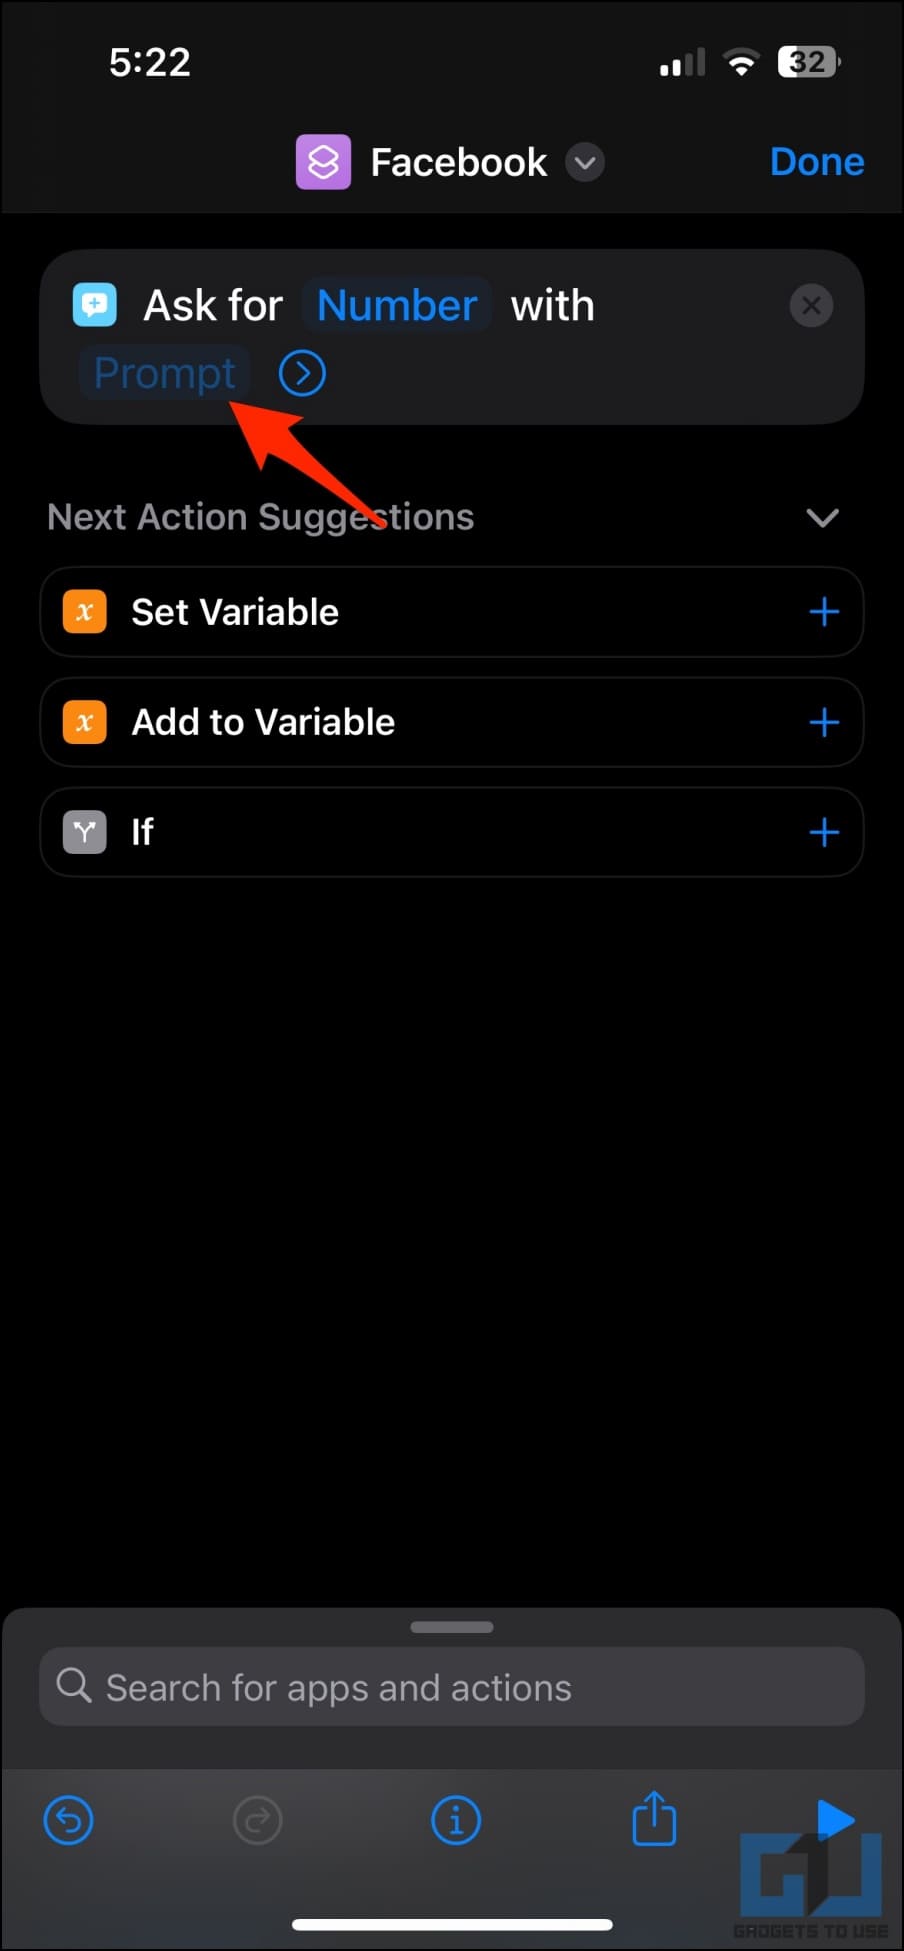
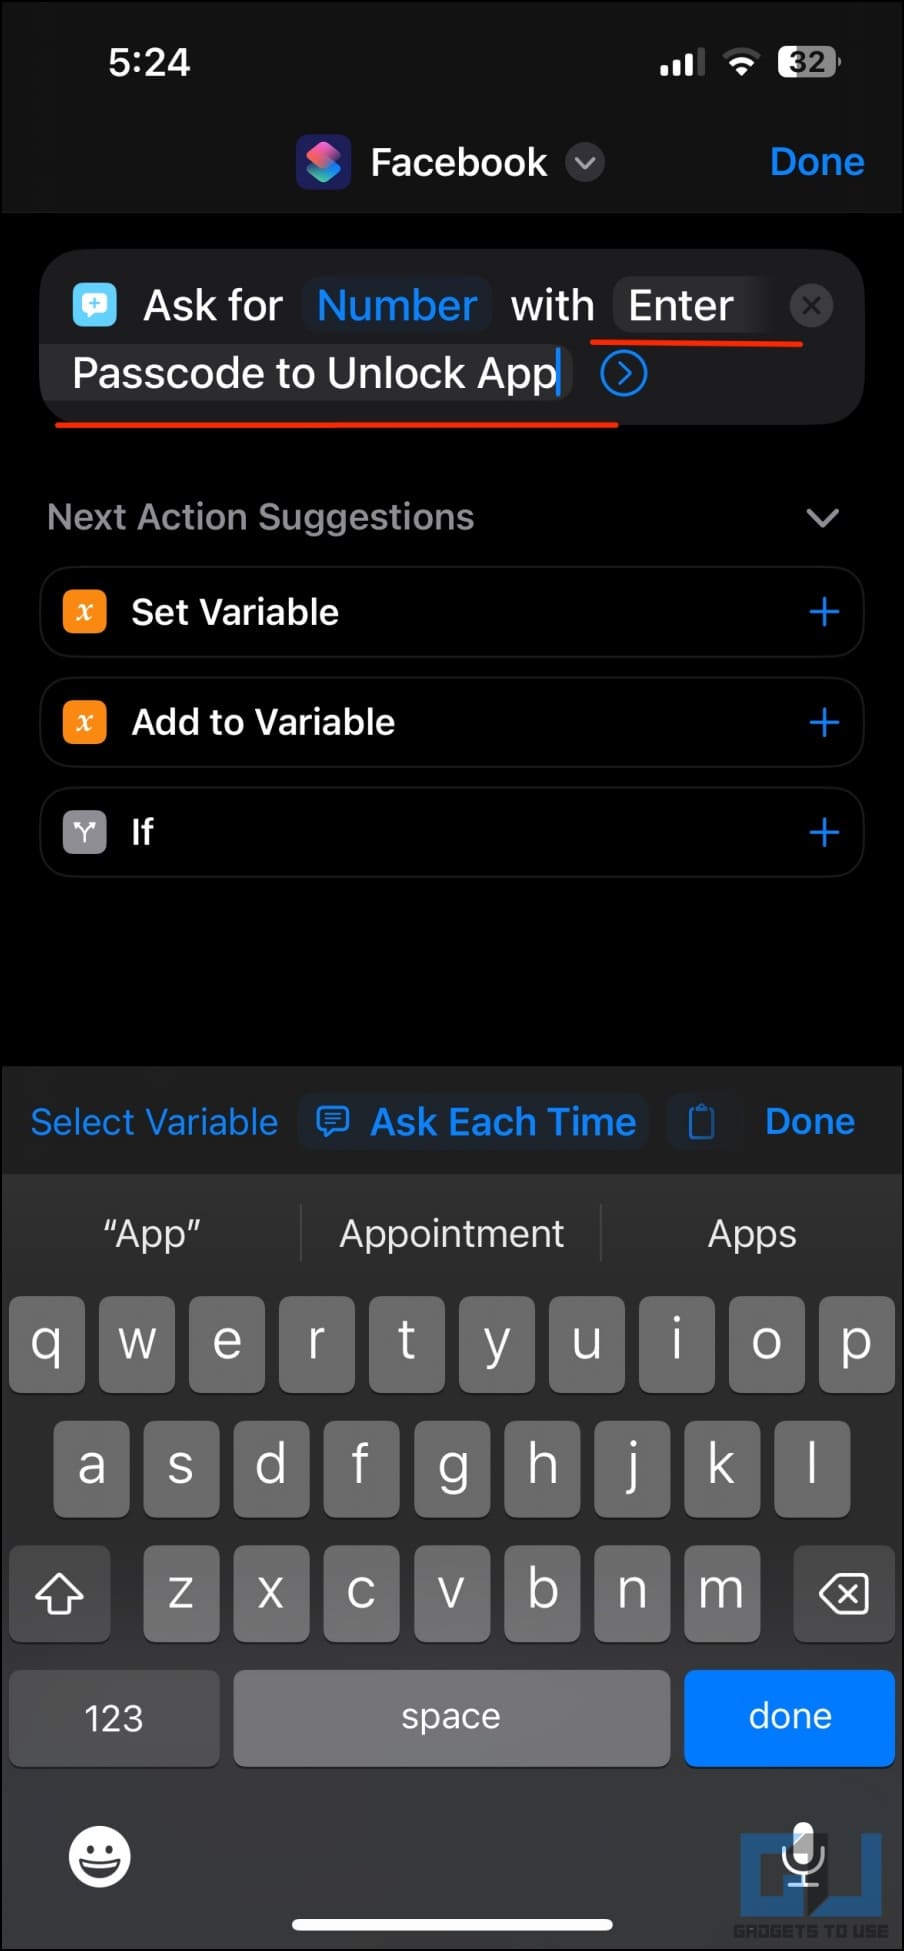
7. Click on Prompt and enter the text you want the app to show when asking for a password. For instance: “Enter Password” or “Enter Passcode to Unlock the App.”
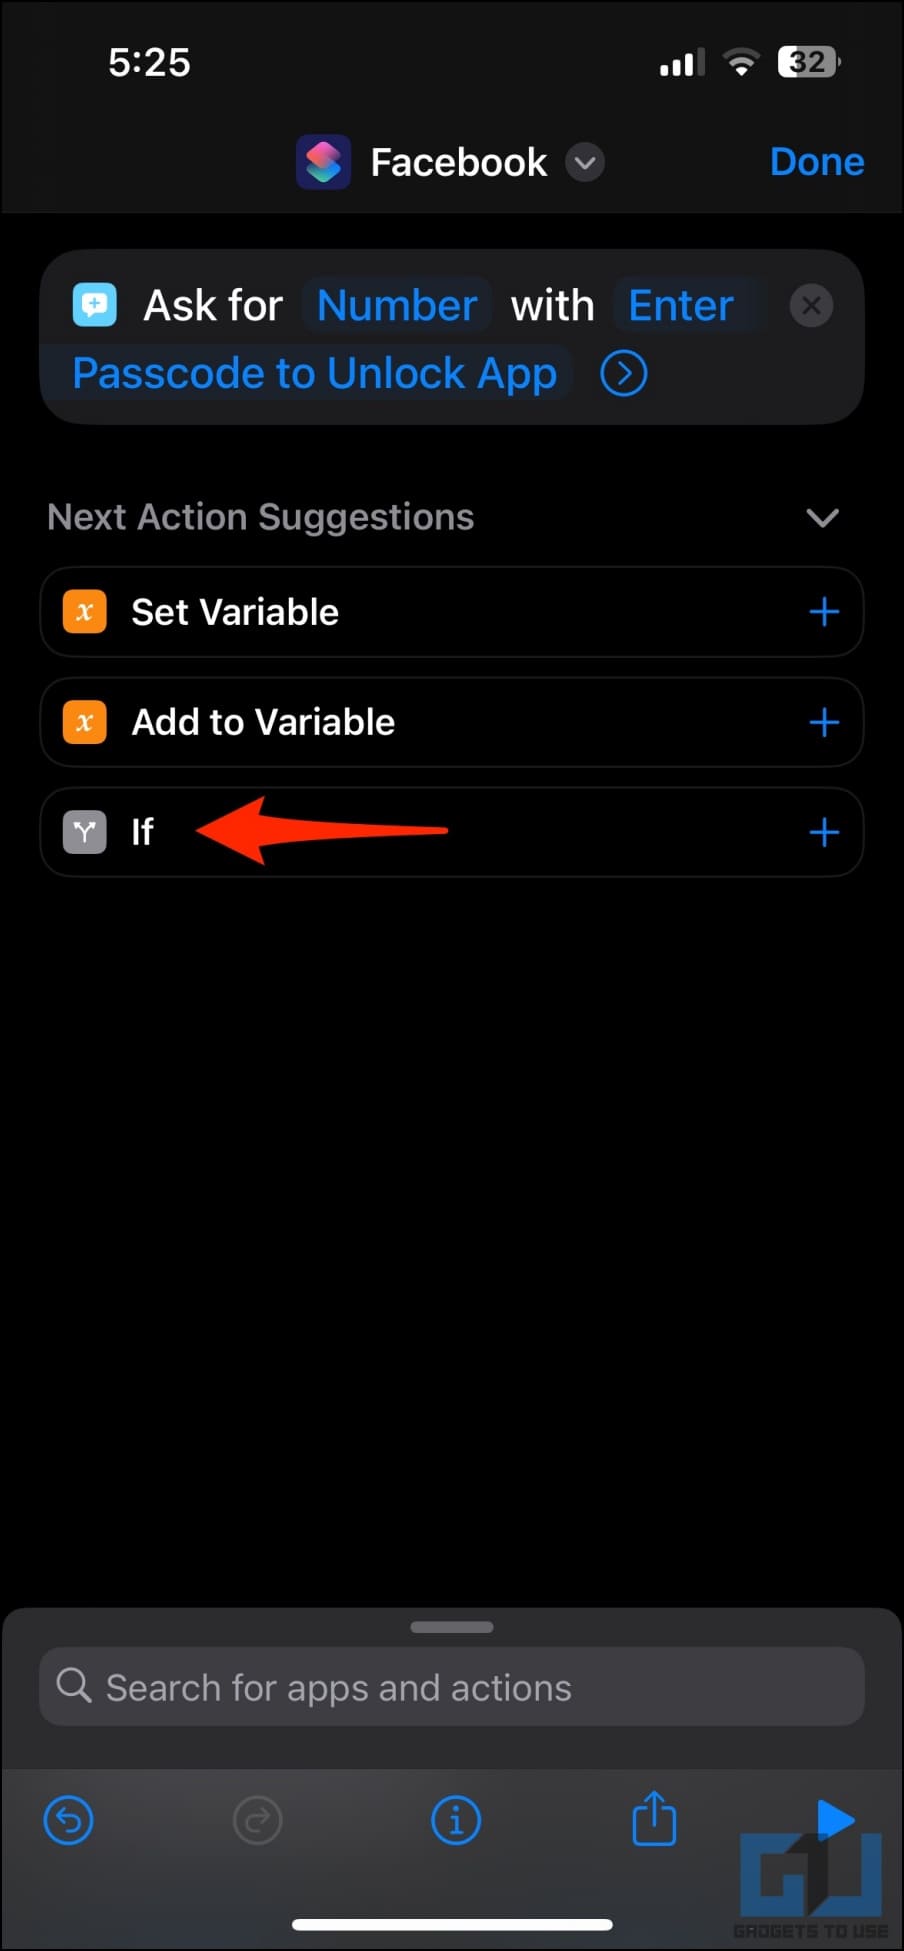
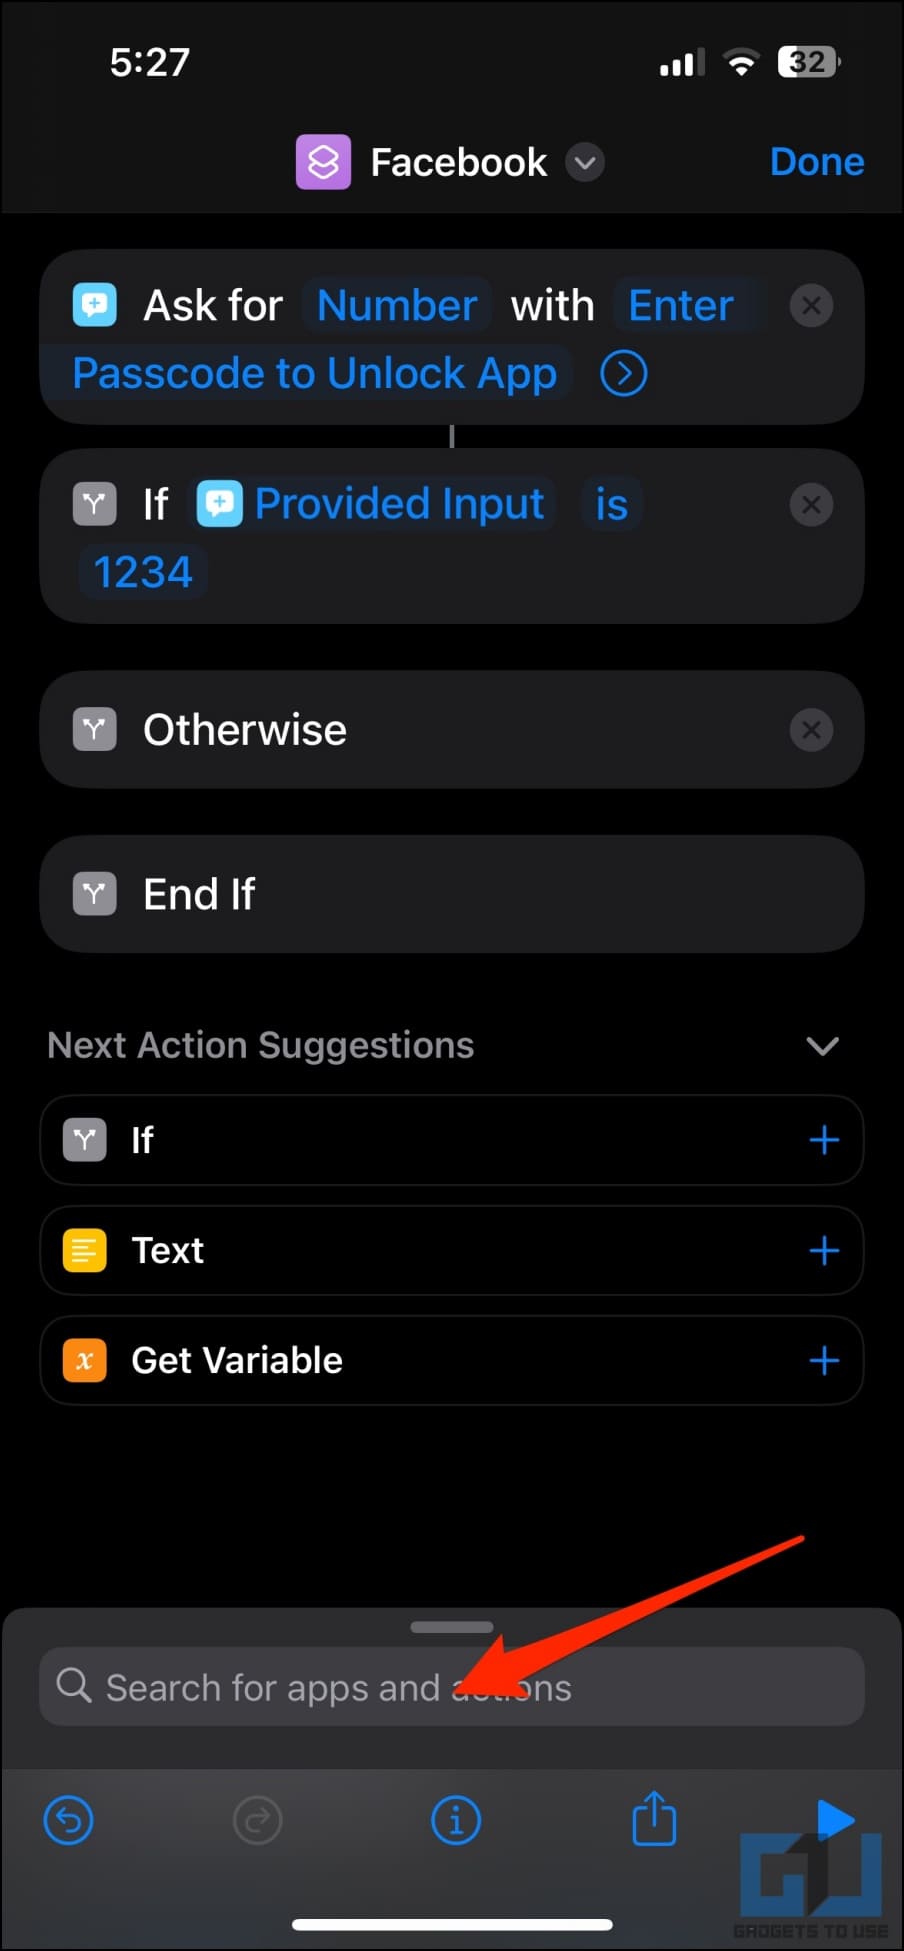
8. Now, tap the “If” action from the suggestion. If you cannot find it, use the search box at the bottom.
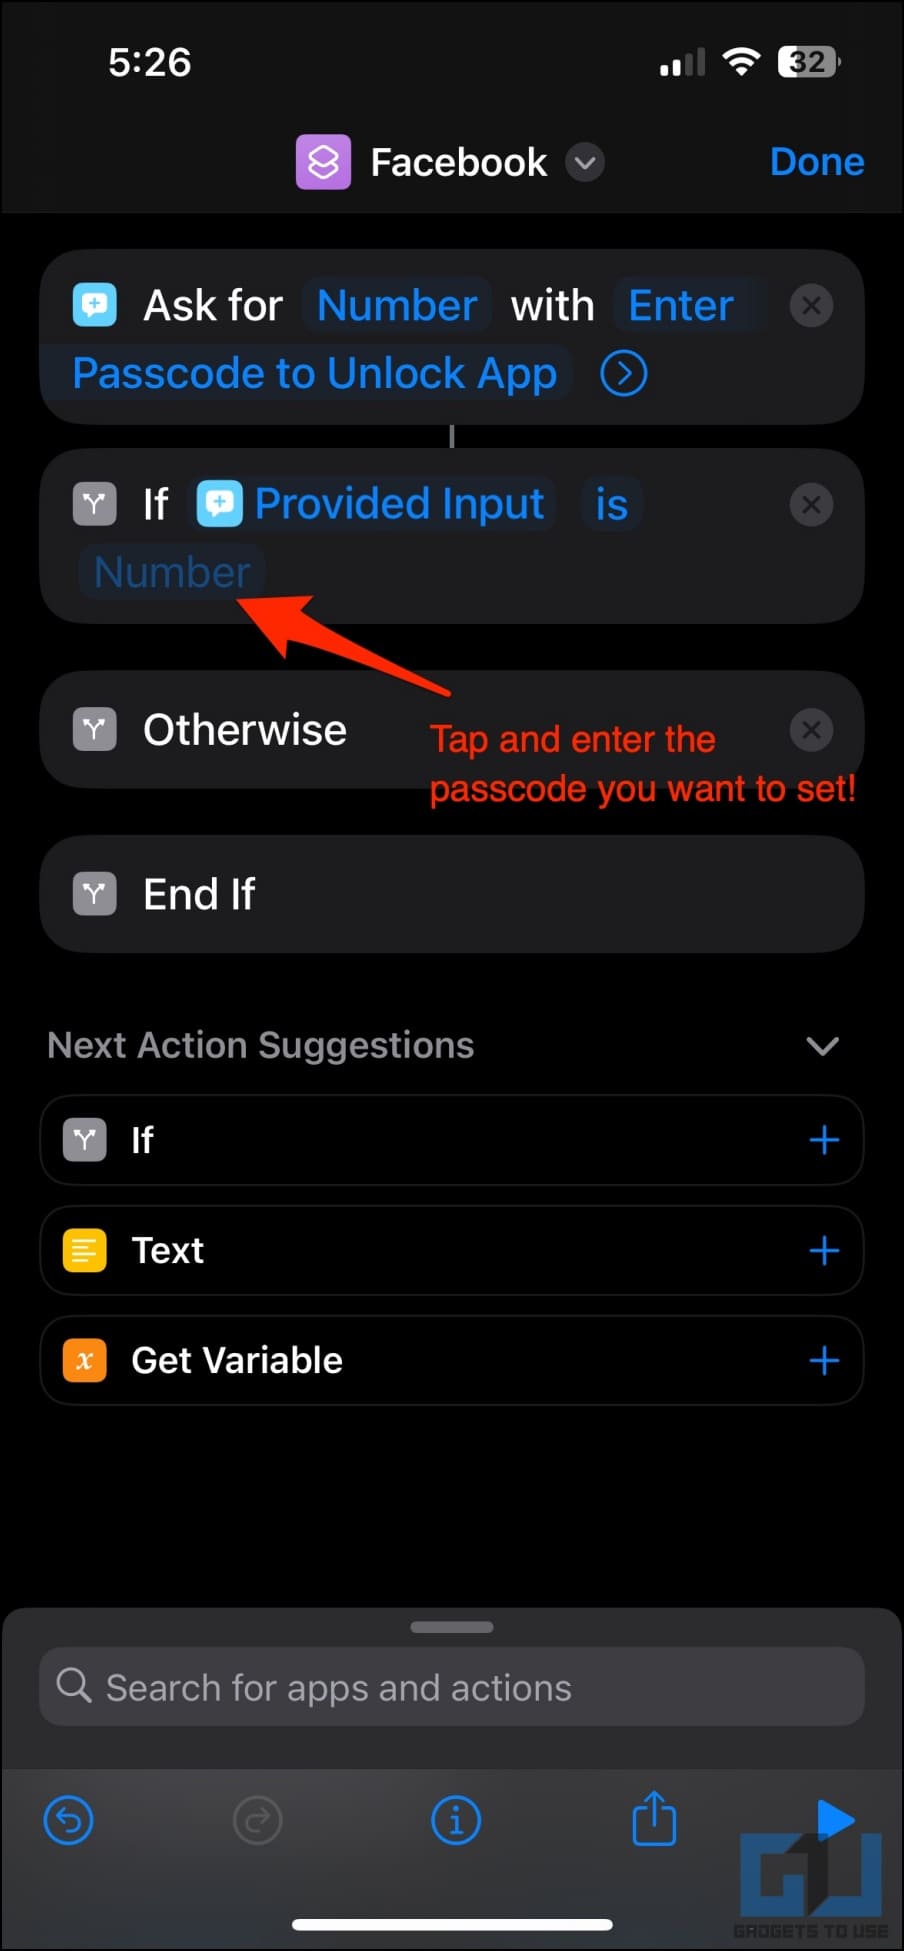
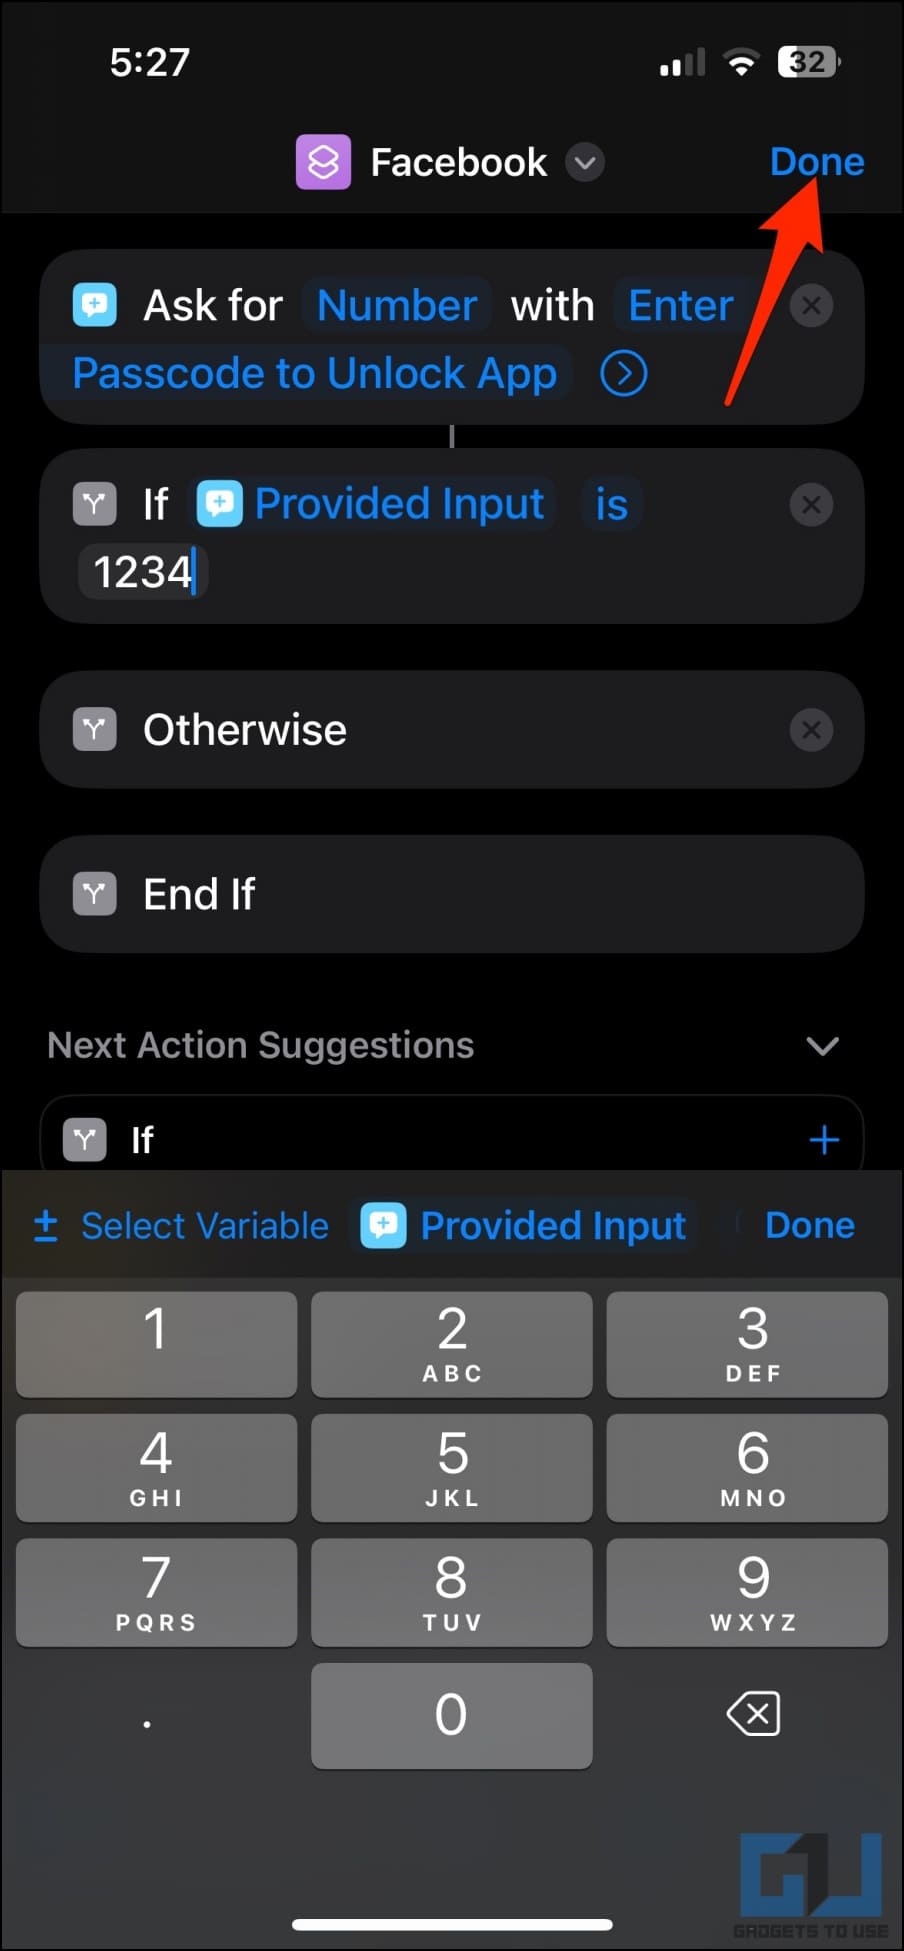
9. Tap Condition and select “is.” Then, tap Number and type the passcode you want to set for the app.
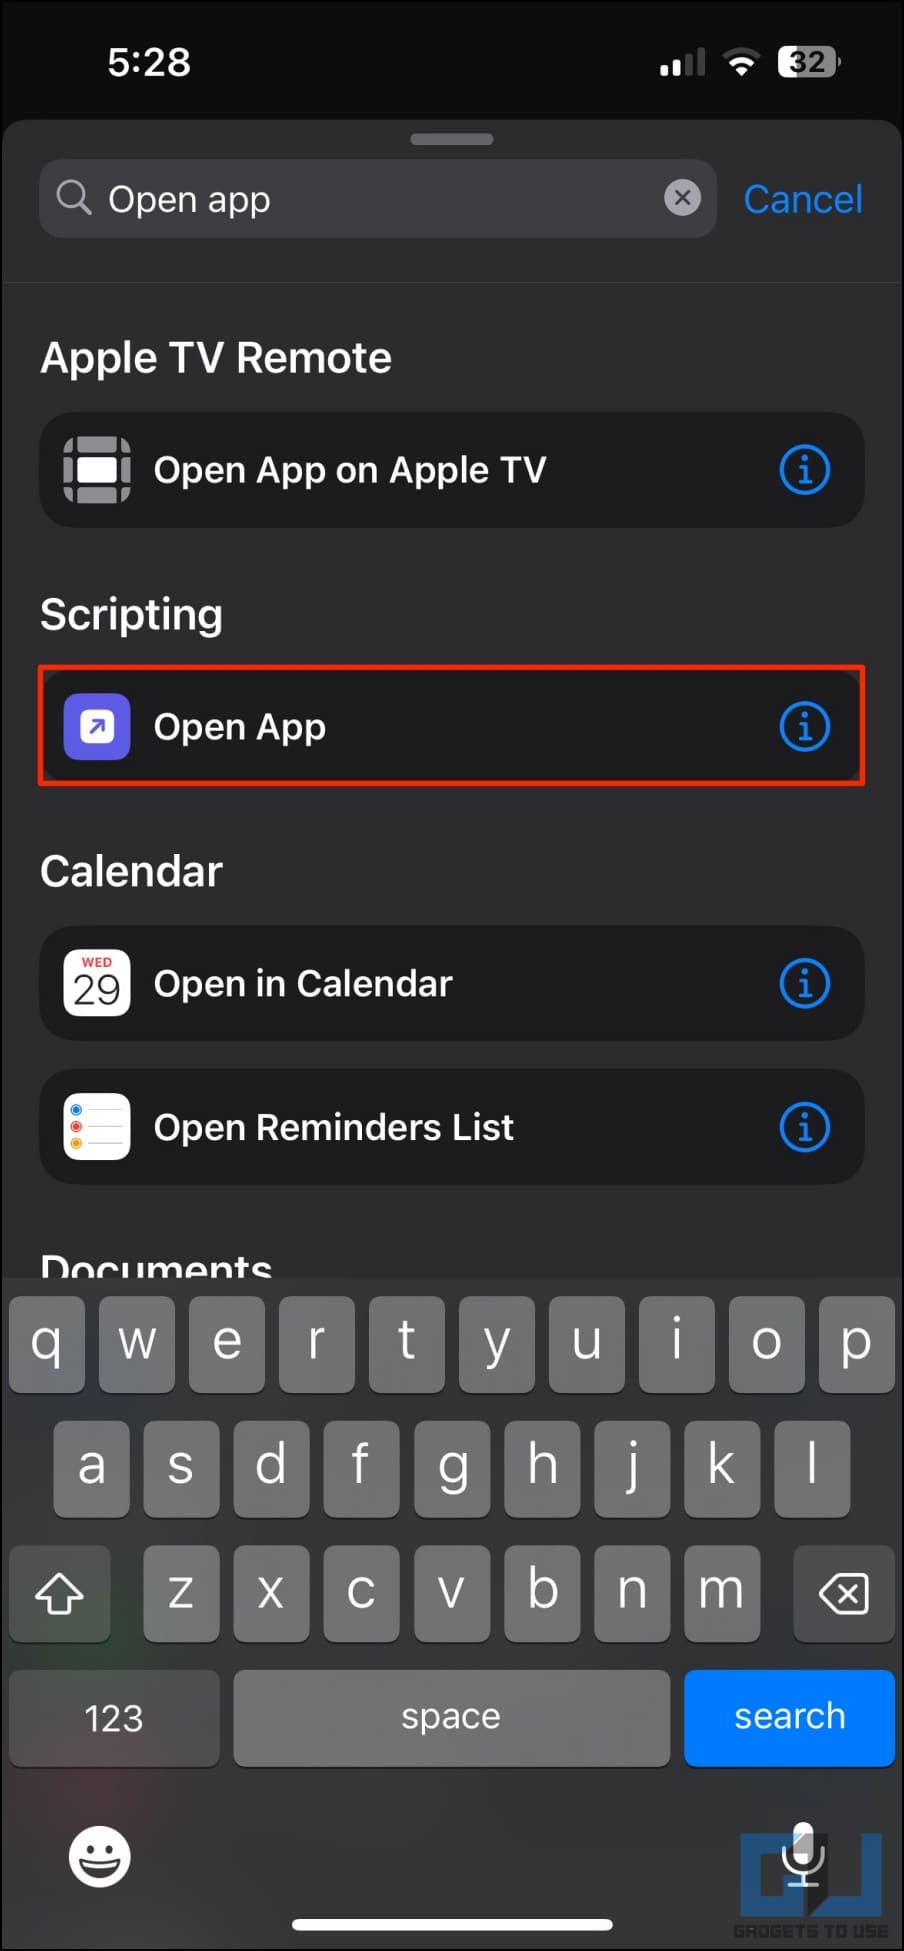
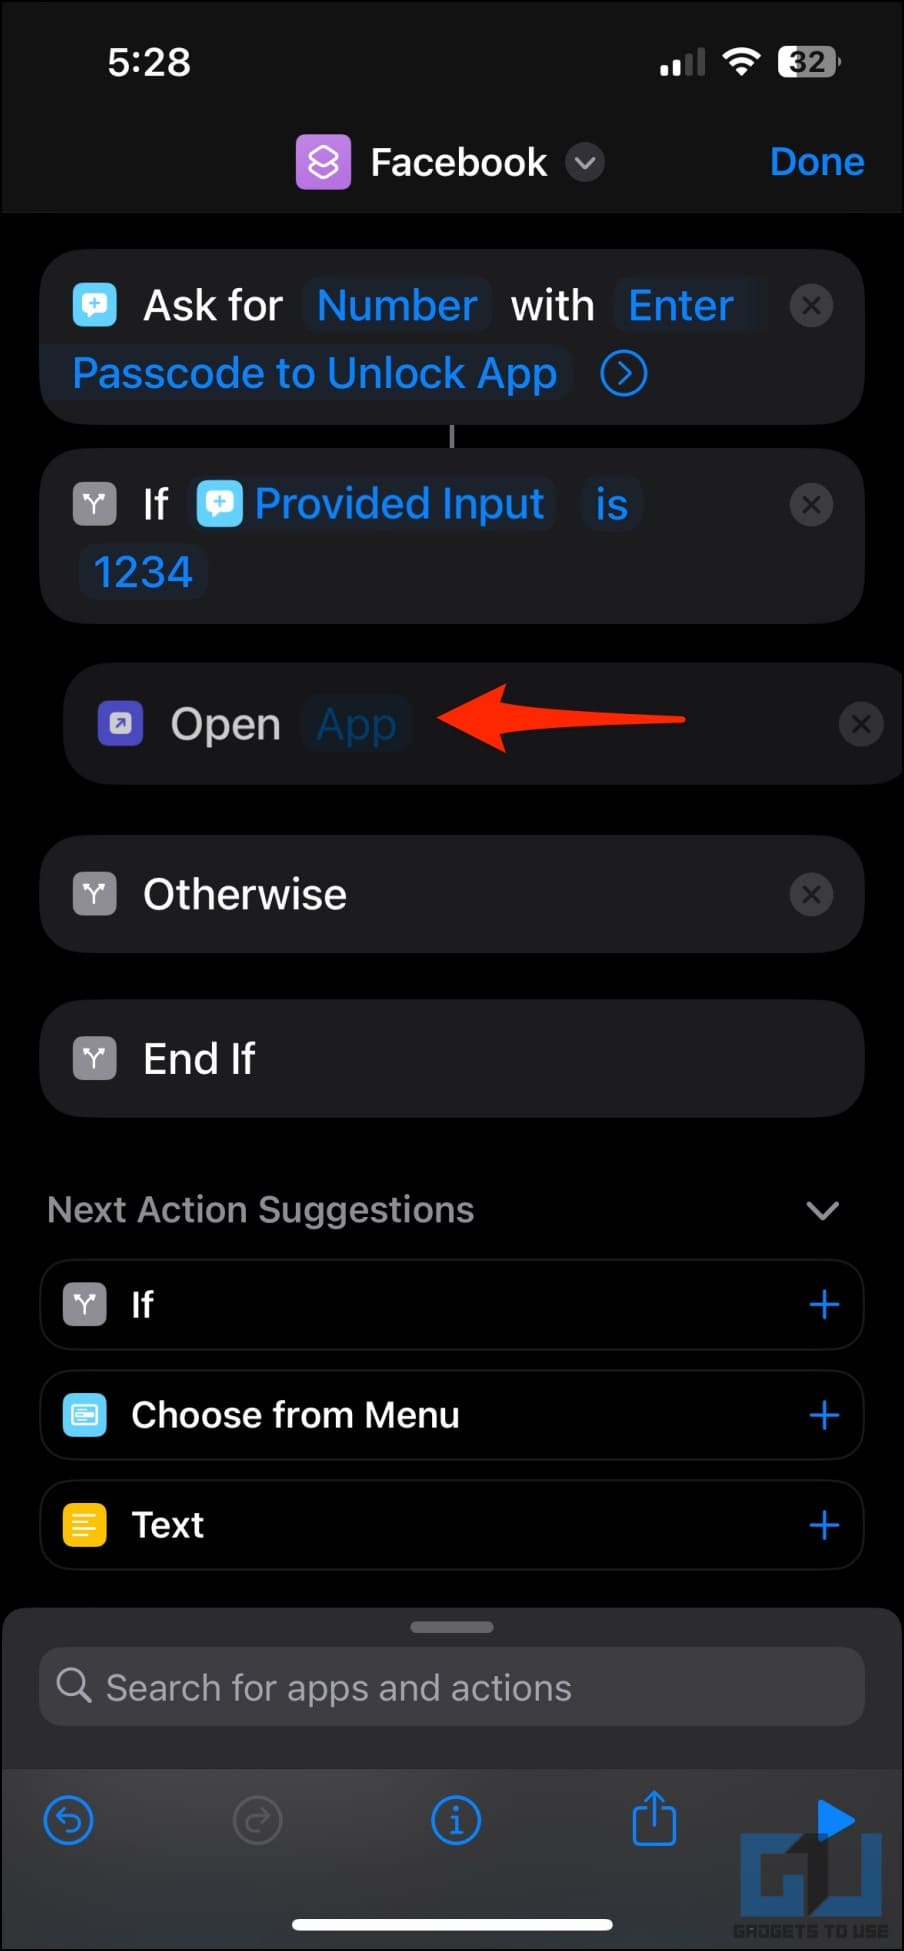
10. Now, tap the search bar at the bottom and add a new action, “Open app.” Hold and drag it between If and Otherwise actions.
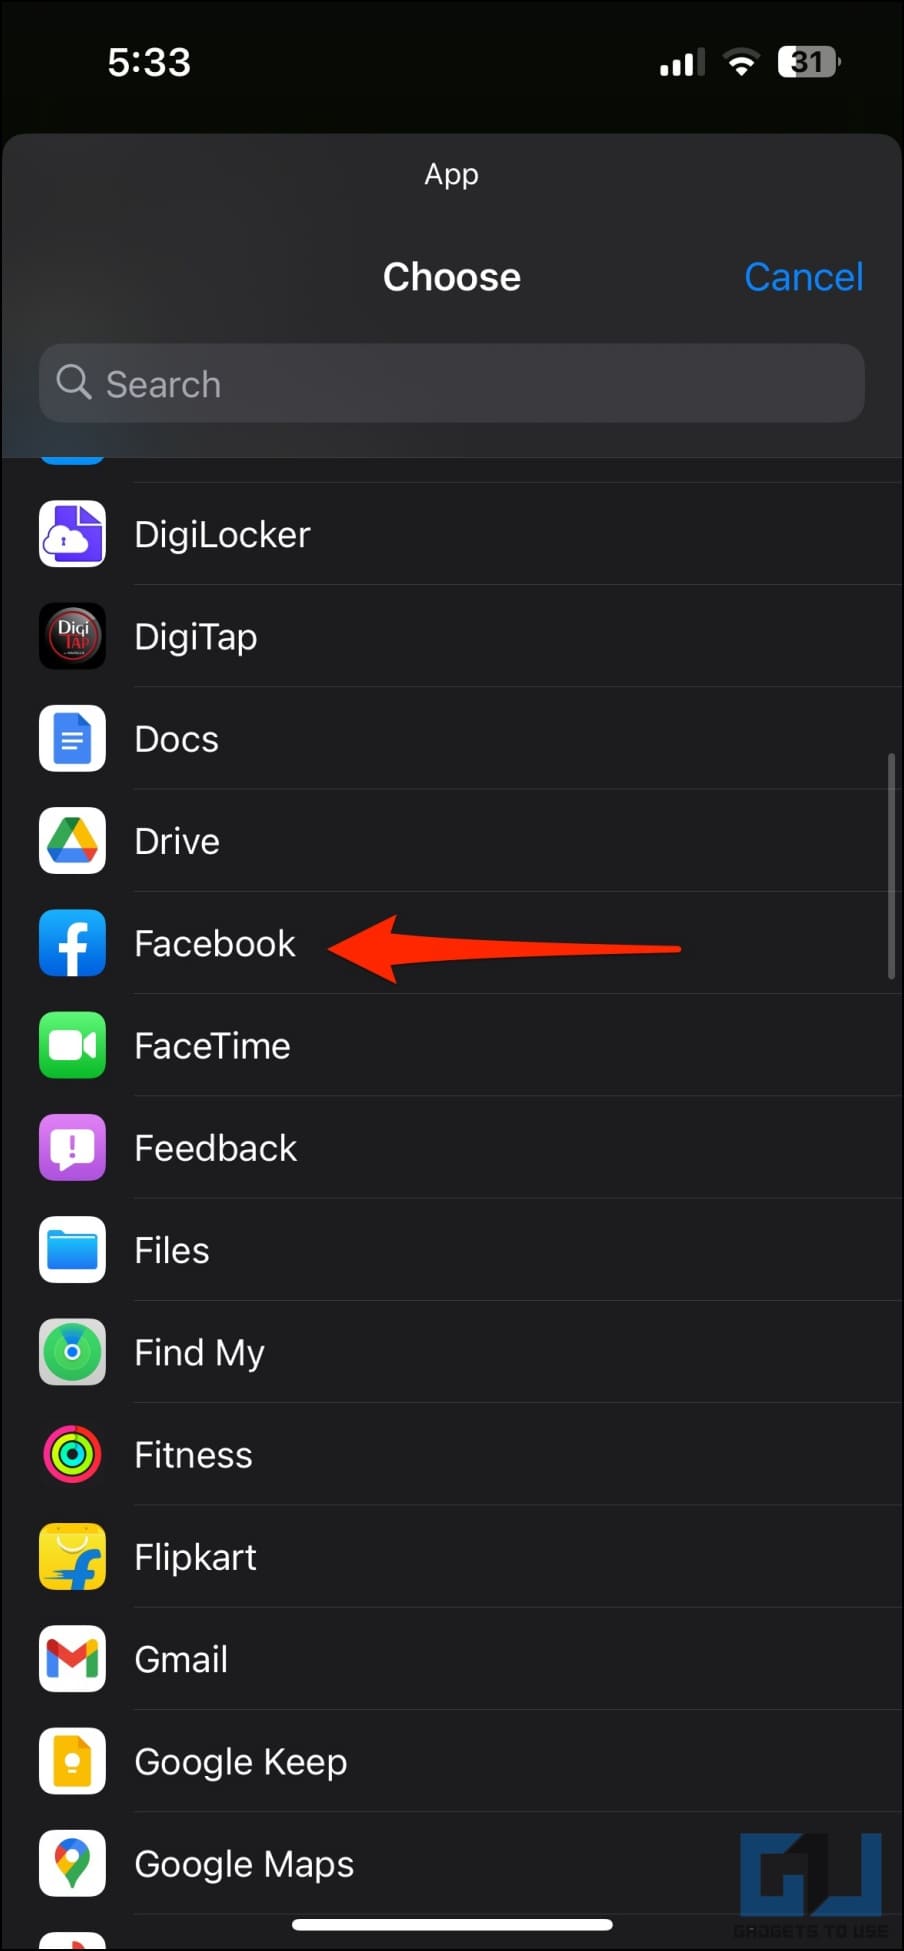
11. Tap the App and select the app you want to lock. In our case, it’s Facebook.
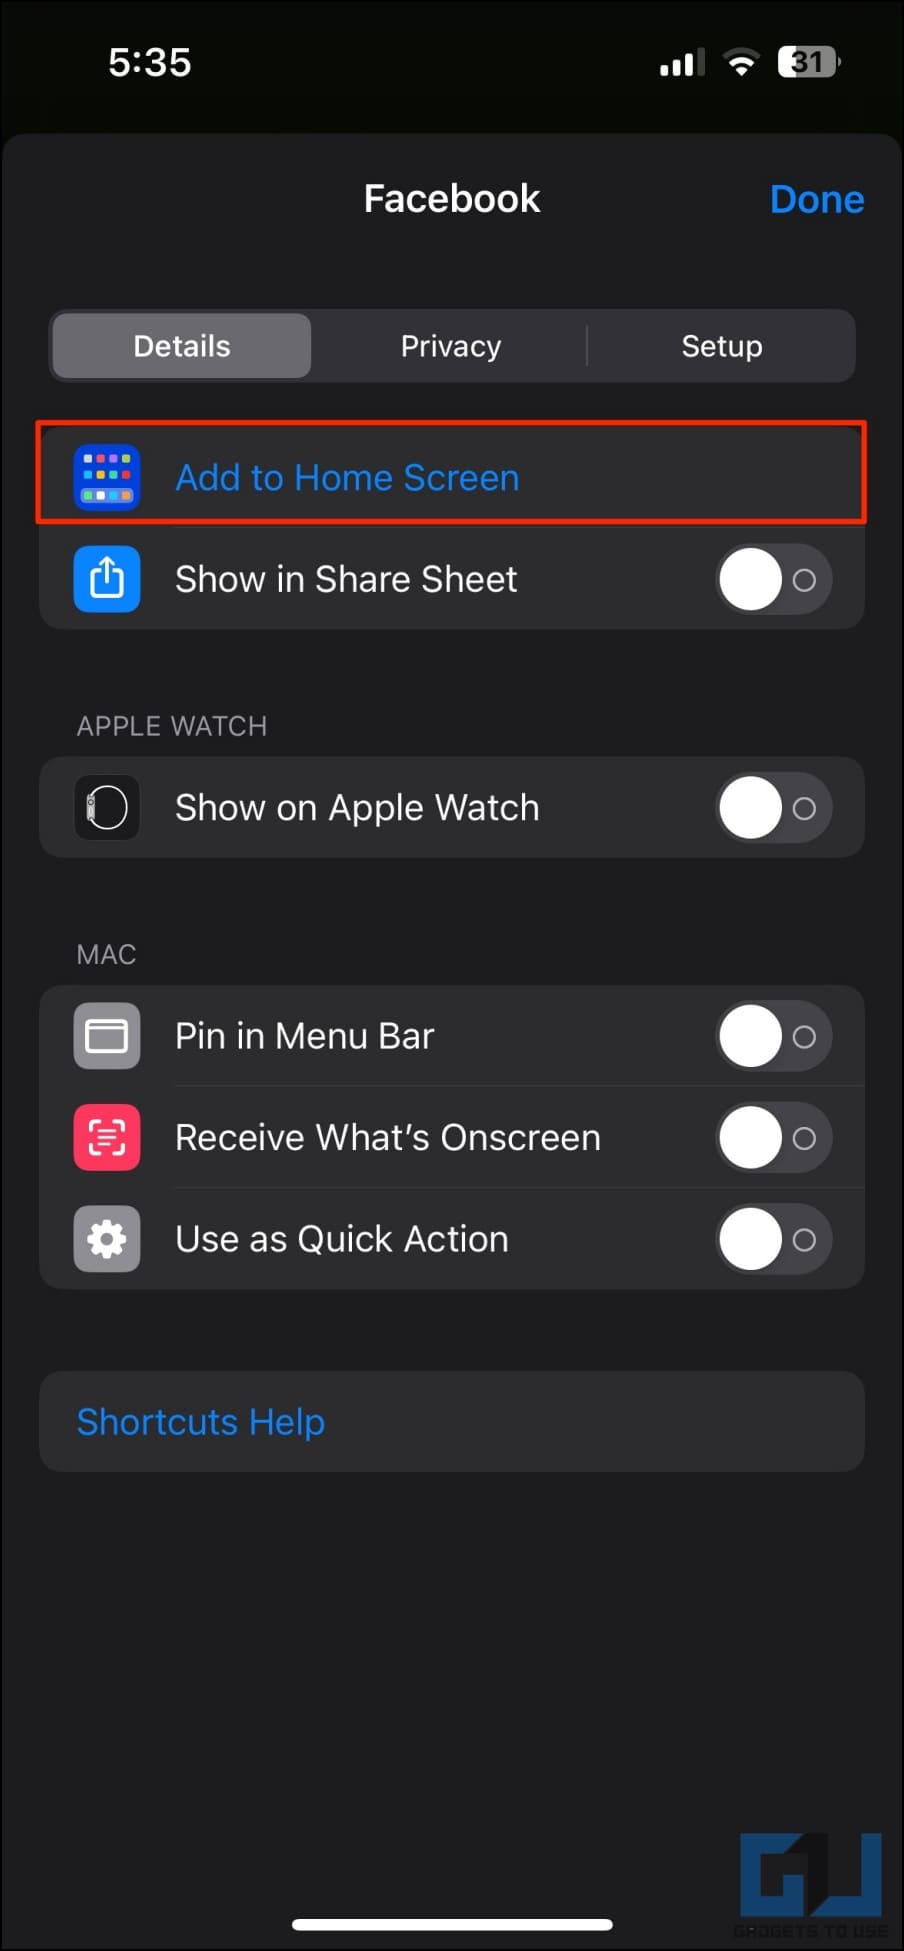
12. The shortcut is almost ready and working. Tap the i button at the bottom and click Add to Home Screen.
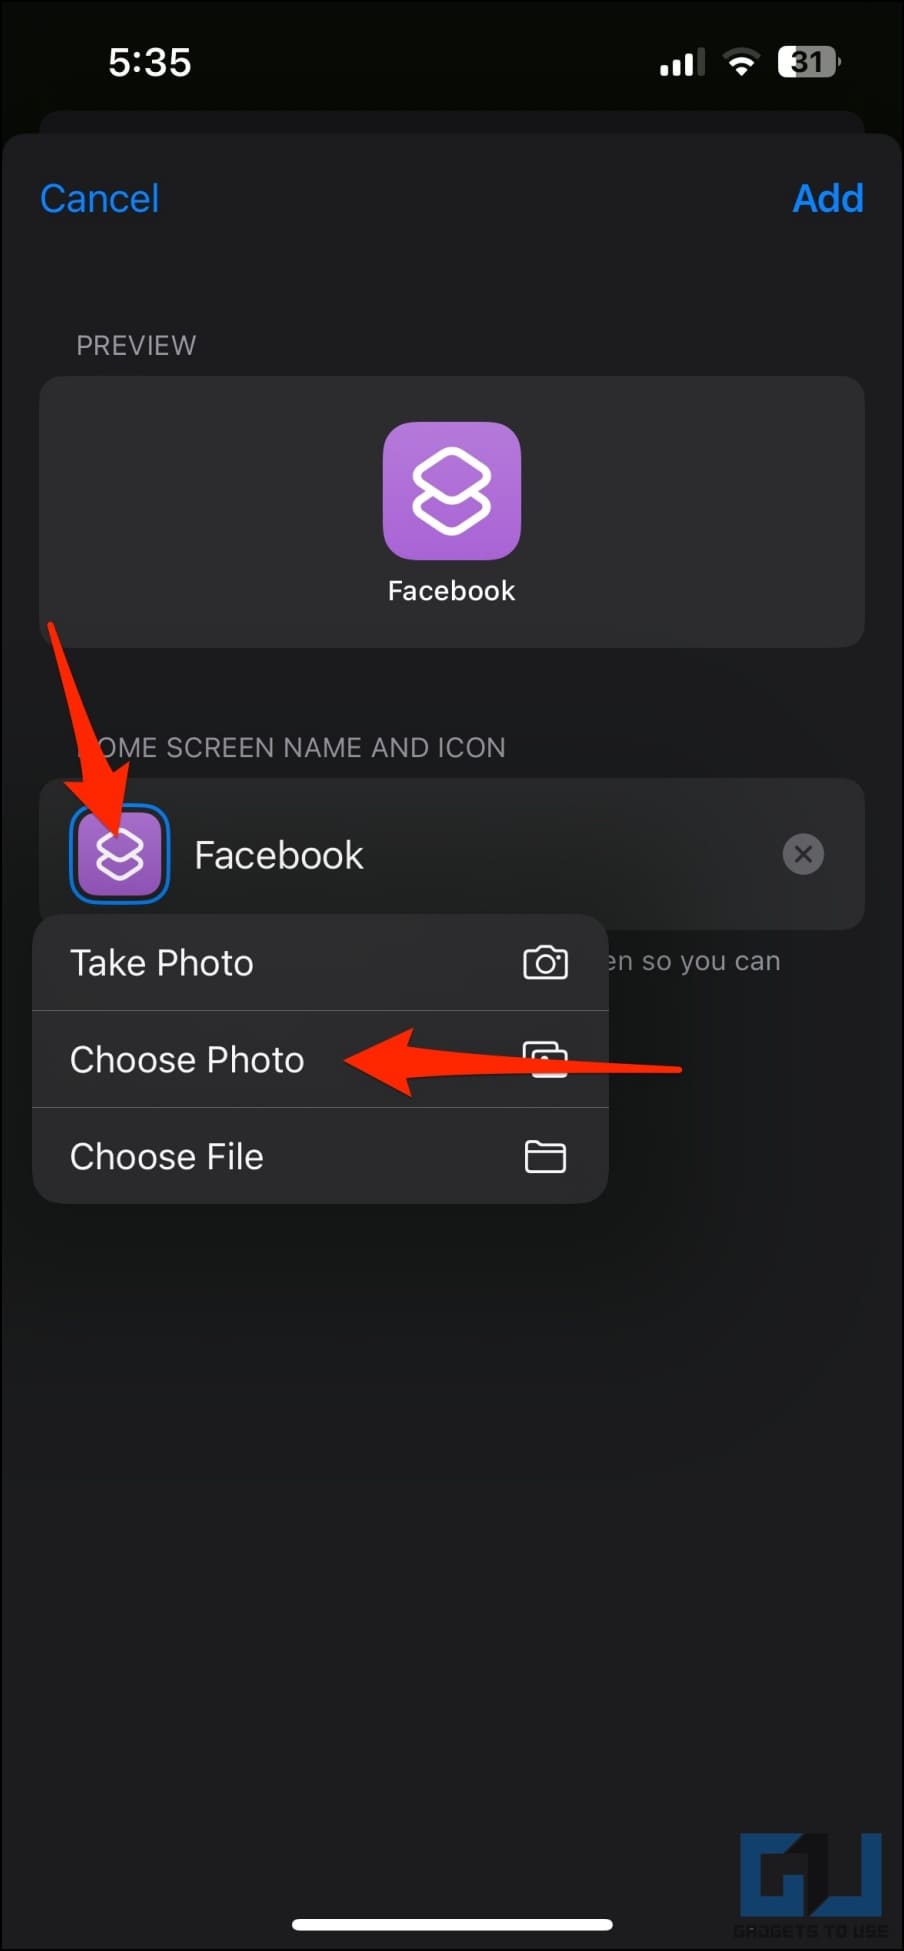
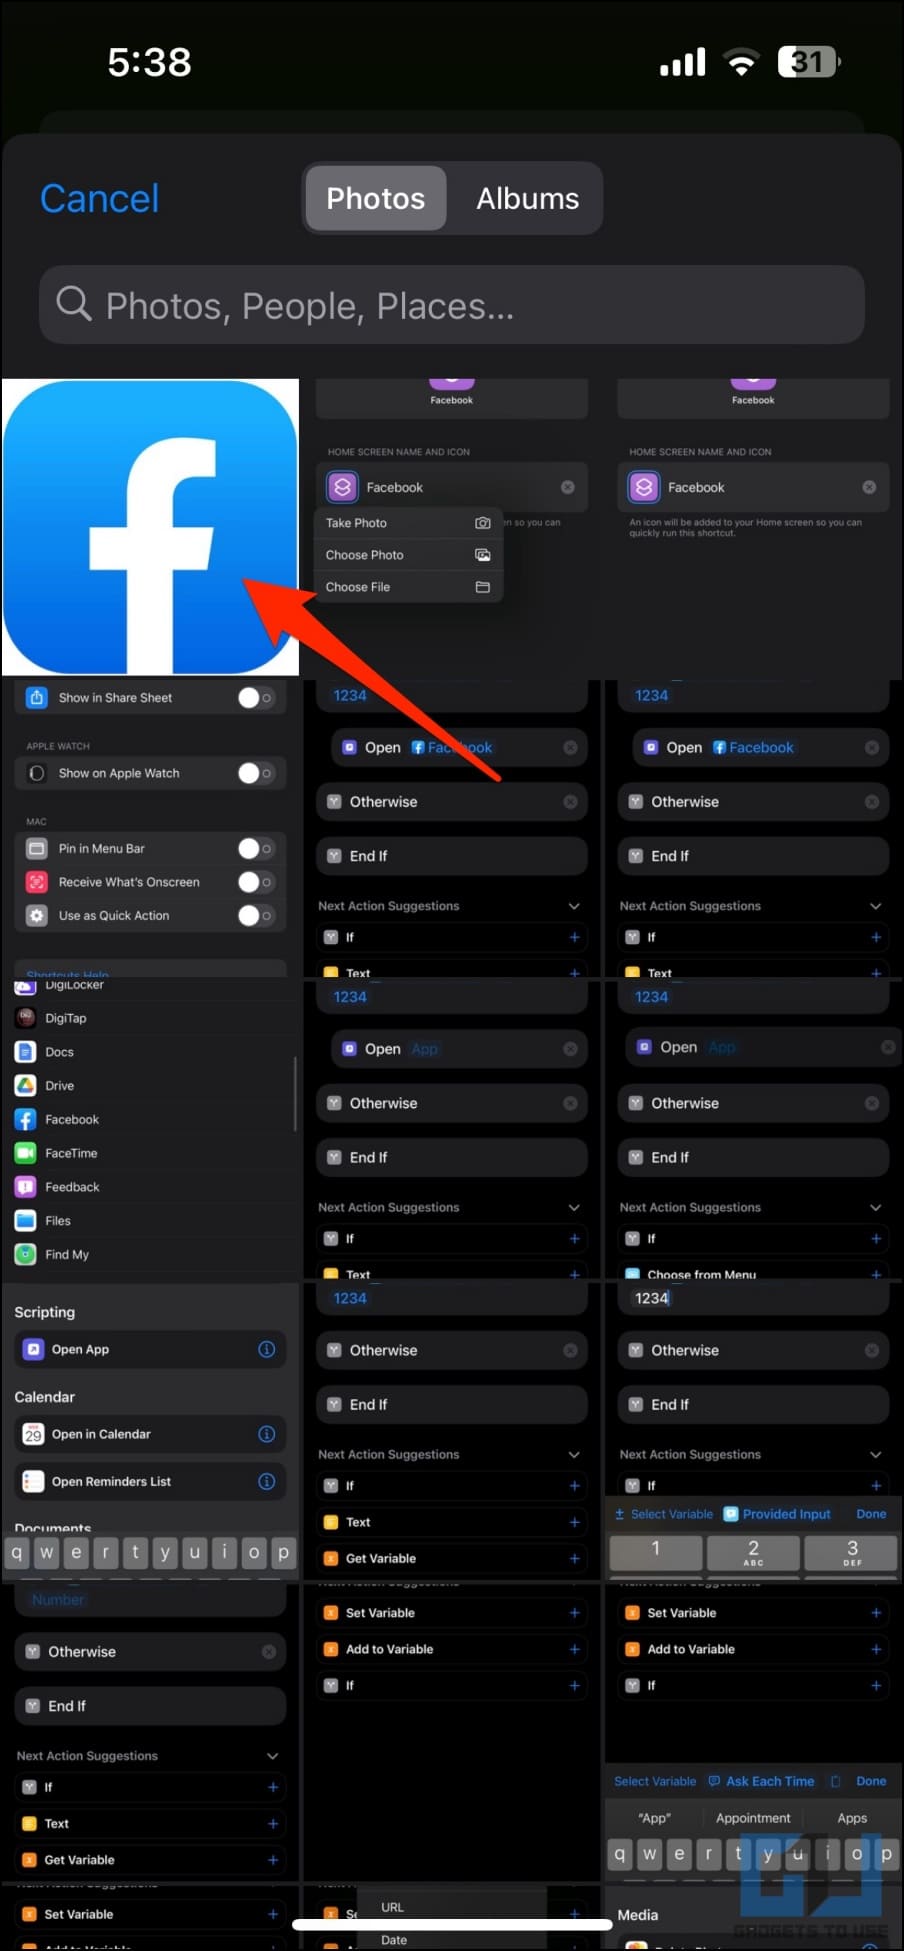
13. Here, tap the shortcut icon > Choose Photo and select the downloaded icon of the same app.
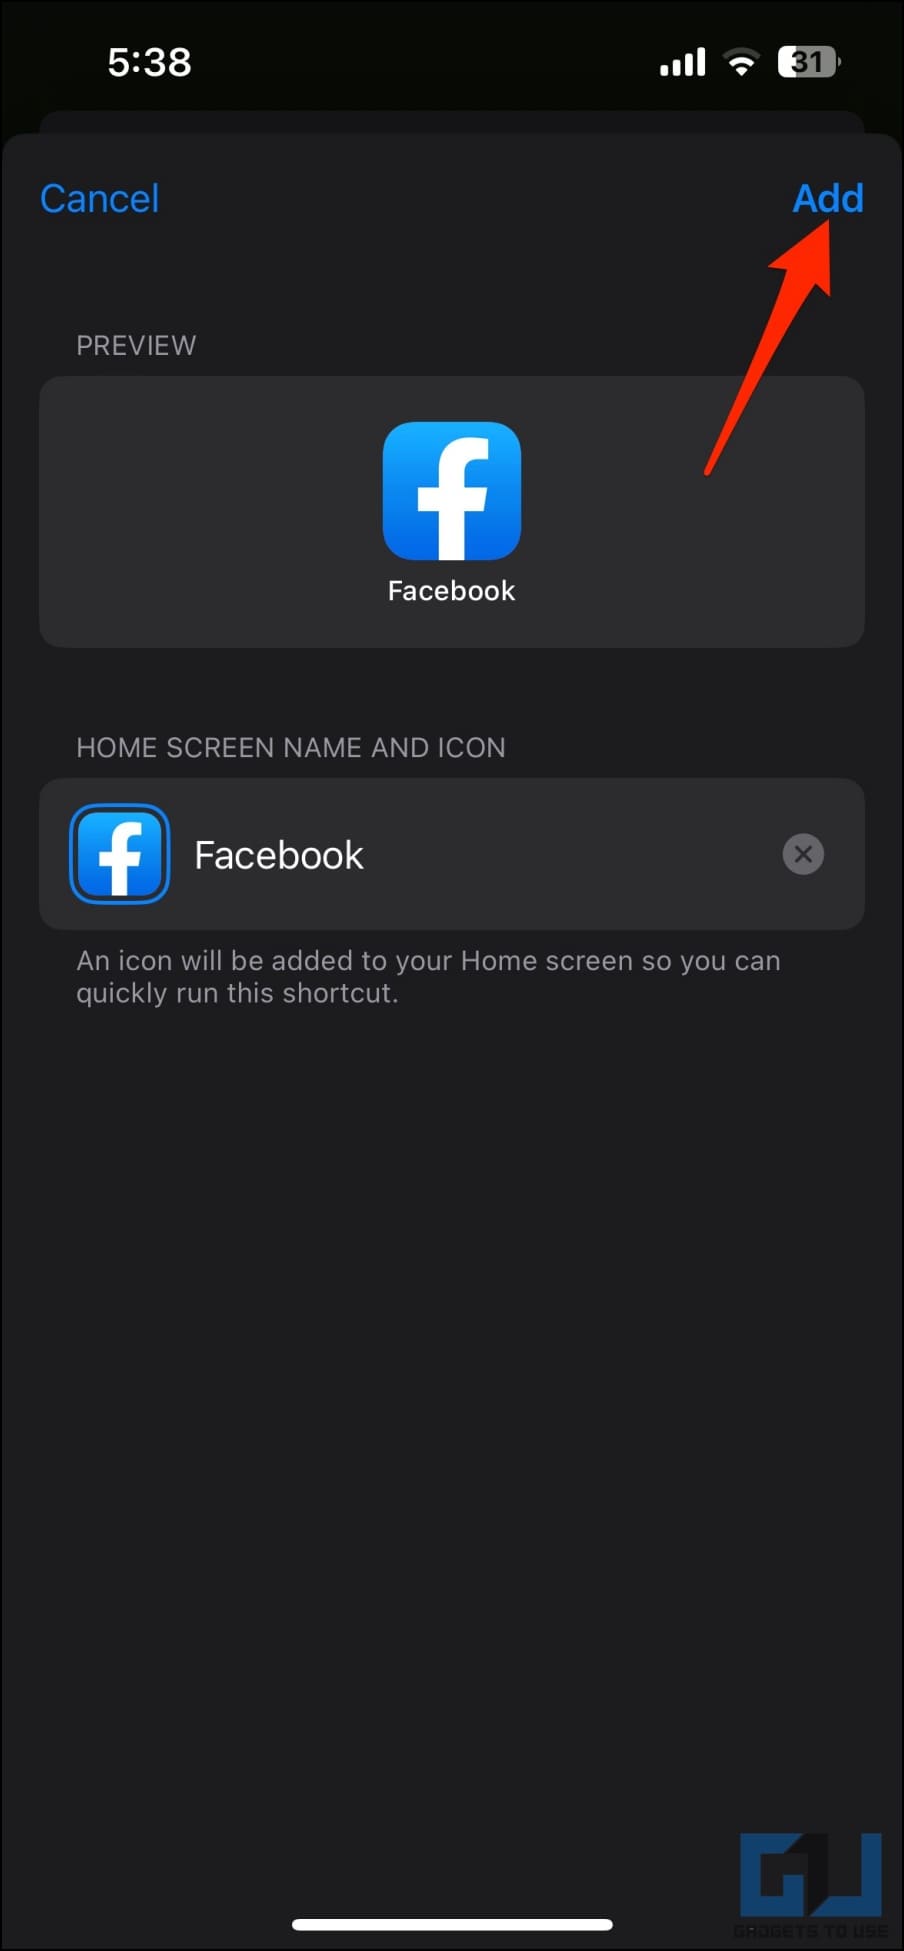
14. Crop as required, tap Choose Photo again and tap Add in the top right.
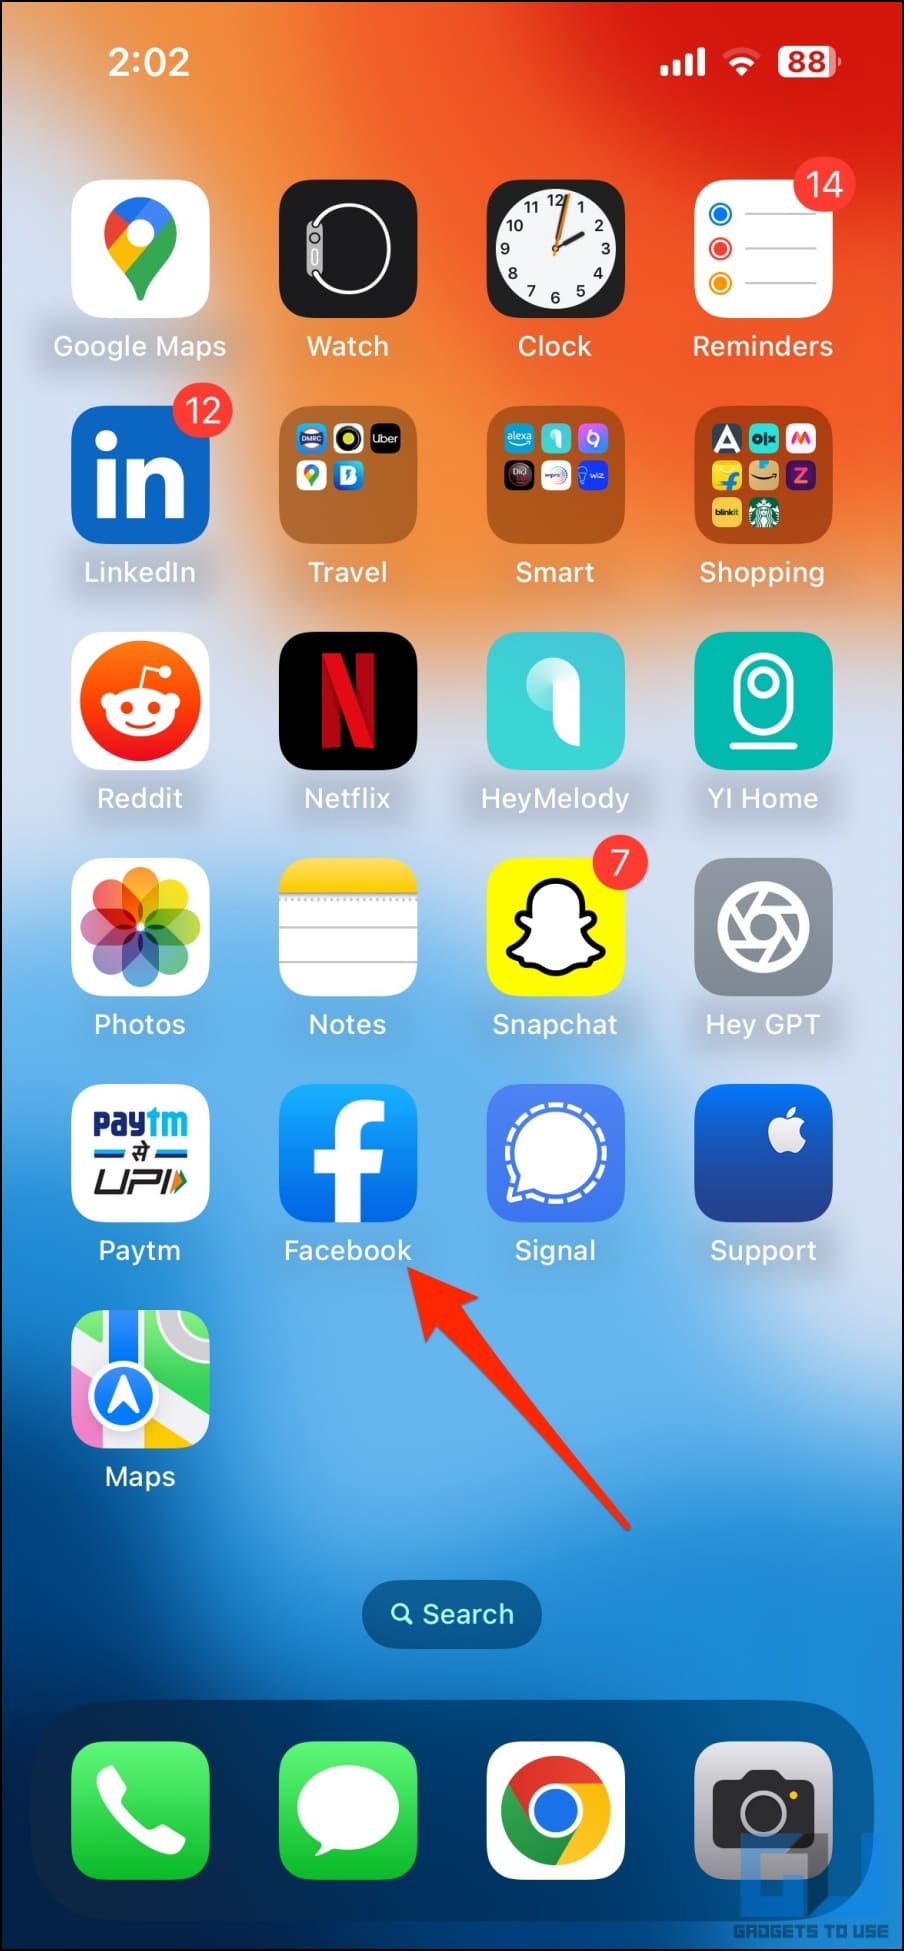
15. The image will be set as the icon for the home screen shortcut. You can now remove the real app from your home screen by long-pressing the app icon > Remove App > Remove from home screen.
When you tap the password-protected shortcut on the home screen, it will ask you to enter the passcode. If you enter the right passcode or password and tap Done, it will redirect you to the original app. If someone enters the wrong code, nothing will happen.
In the same shortcut, you can add actions to click a selfie of the intruder and save it to Photos but, we’ll discuss it some other time.
Note that anyone can access the real app directly from the library or a spotlight search. But for someone looking to quickly glance through one of your private apps on the home screen will be stopped by the password prompt.
Method 6- Lock WhatsApp, Telegram, Messenger, and Drive on iPhone
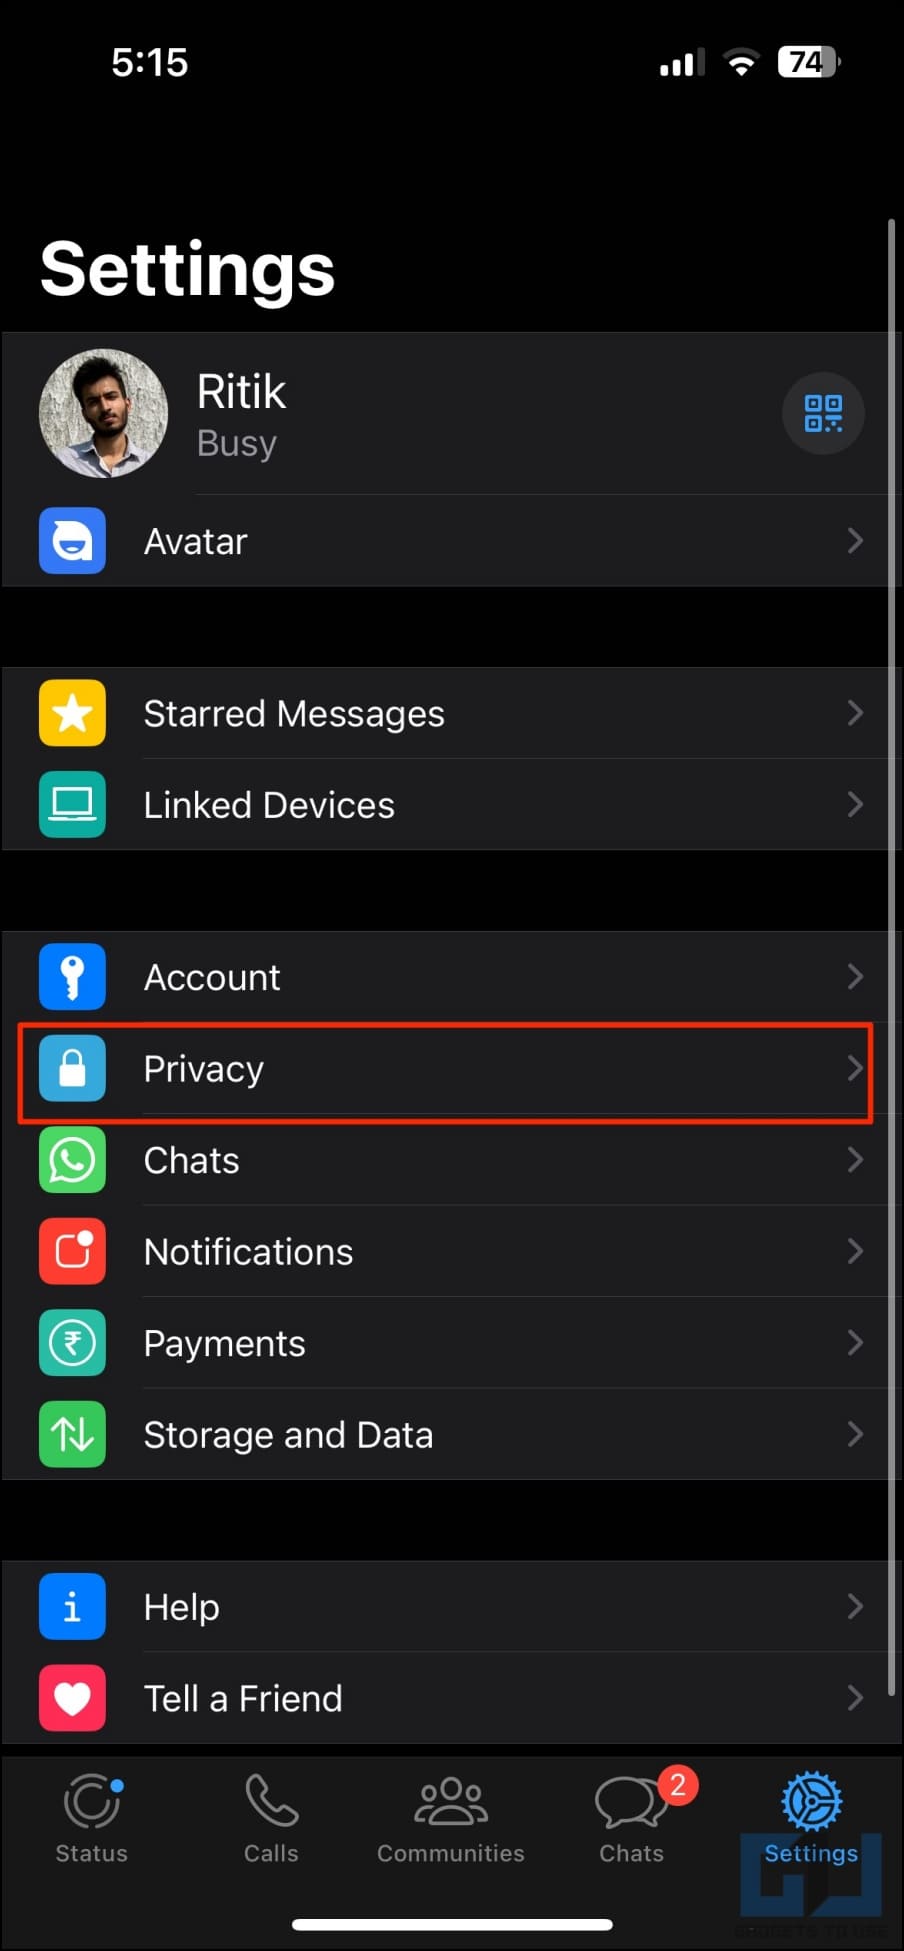
Several apps on iPhone, such as WhatsApp, Telegram, Facebook Messenger, Google Drive, and Outlook, support biometric lock. Here’s how you can protect these apps with Face ID or Touch ID:
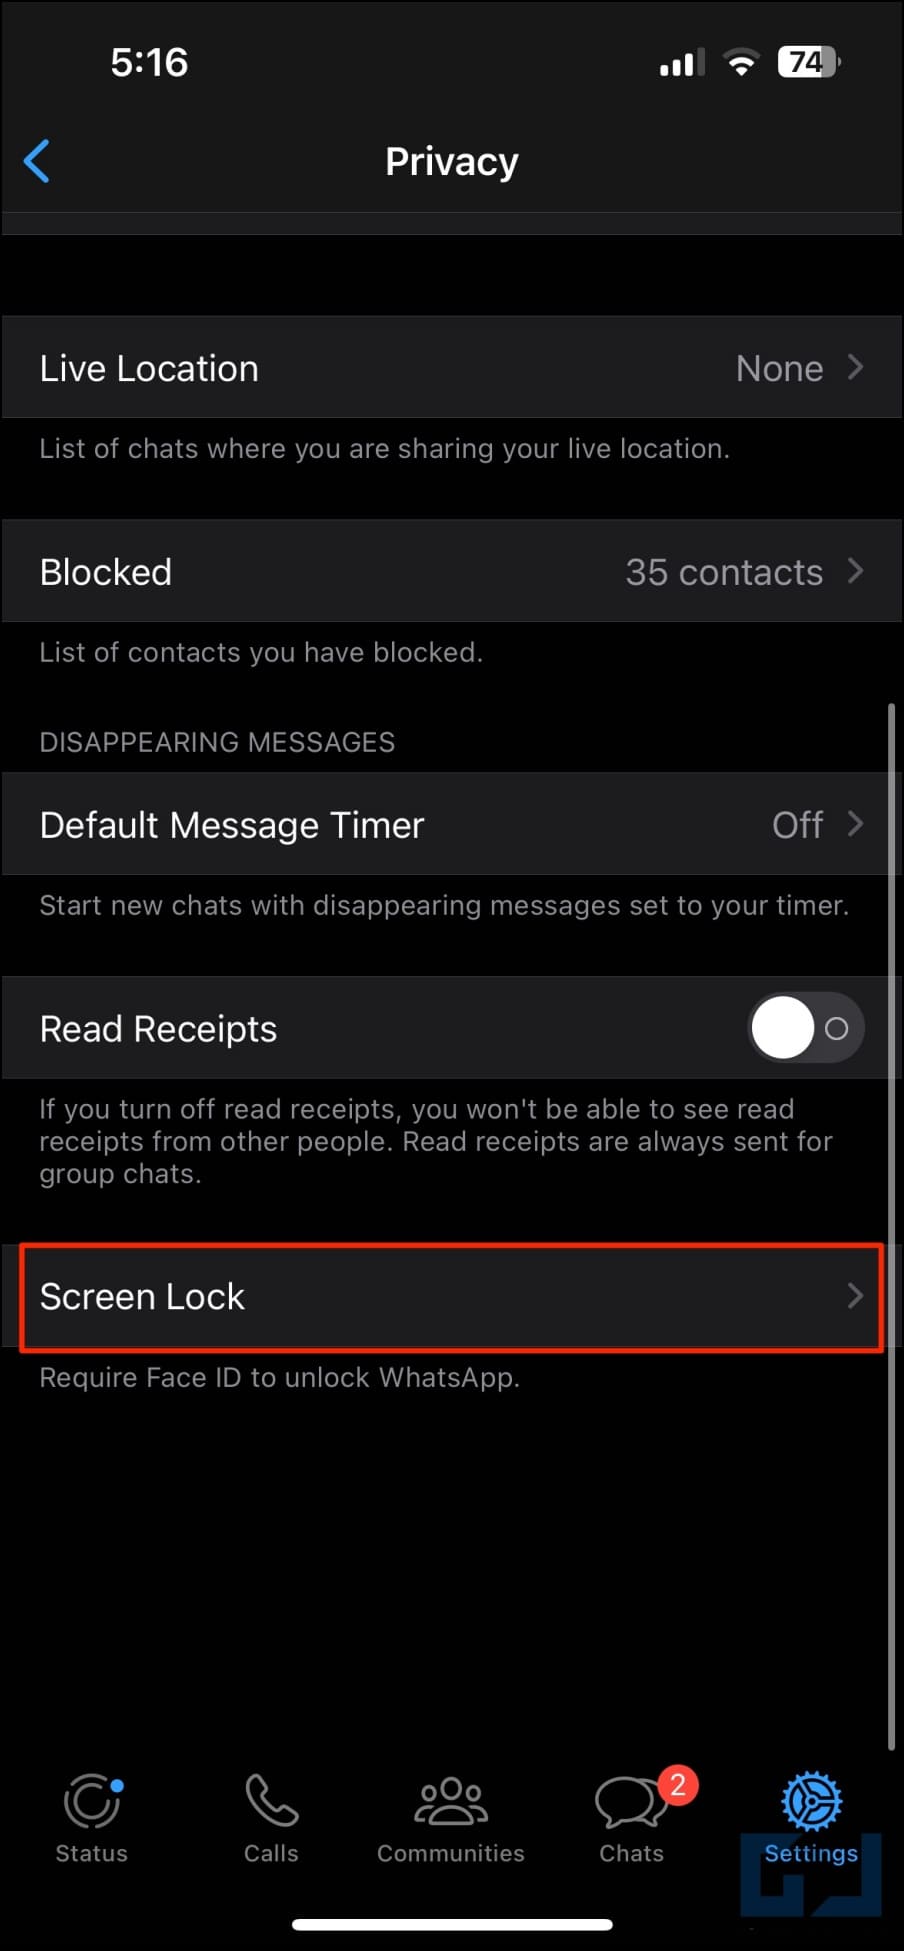
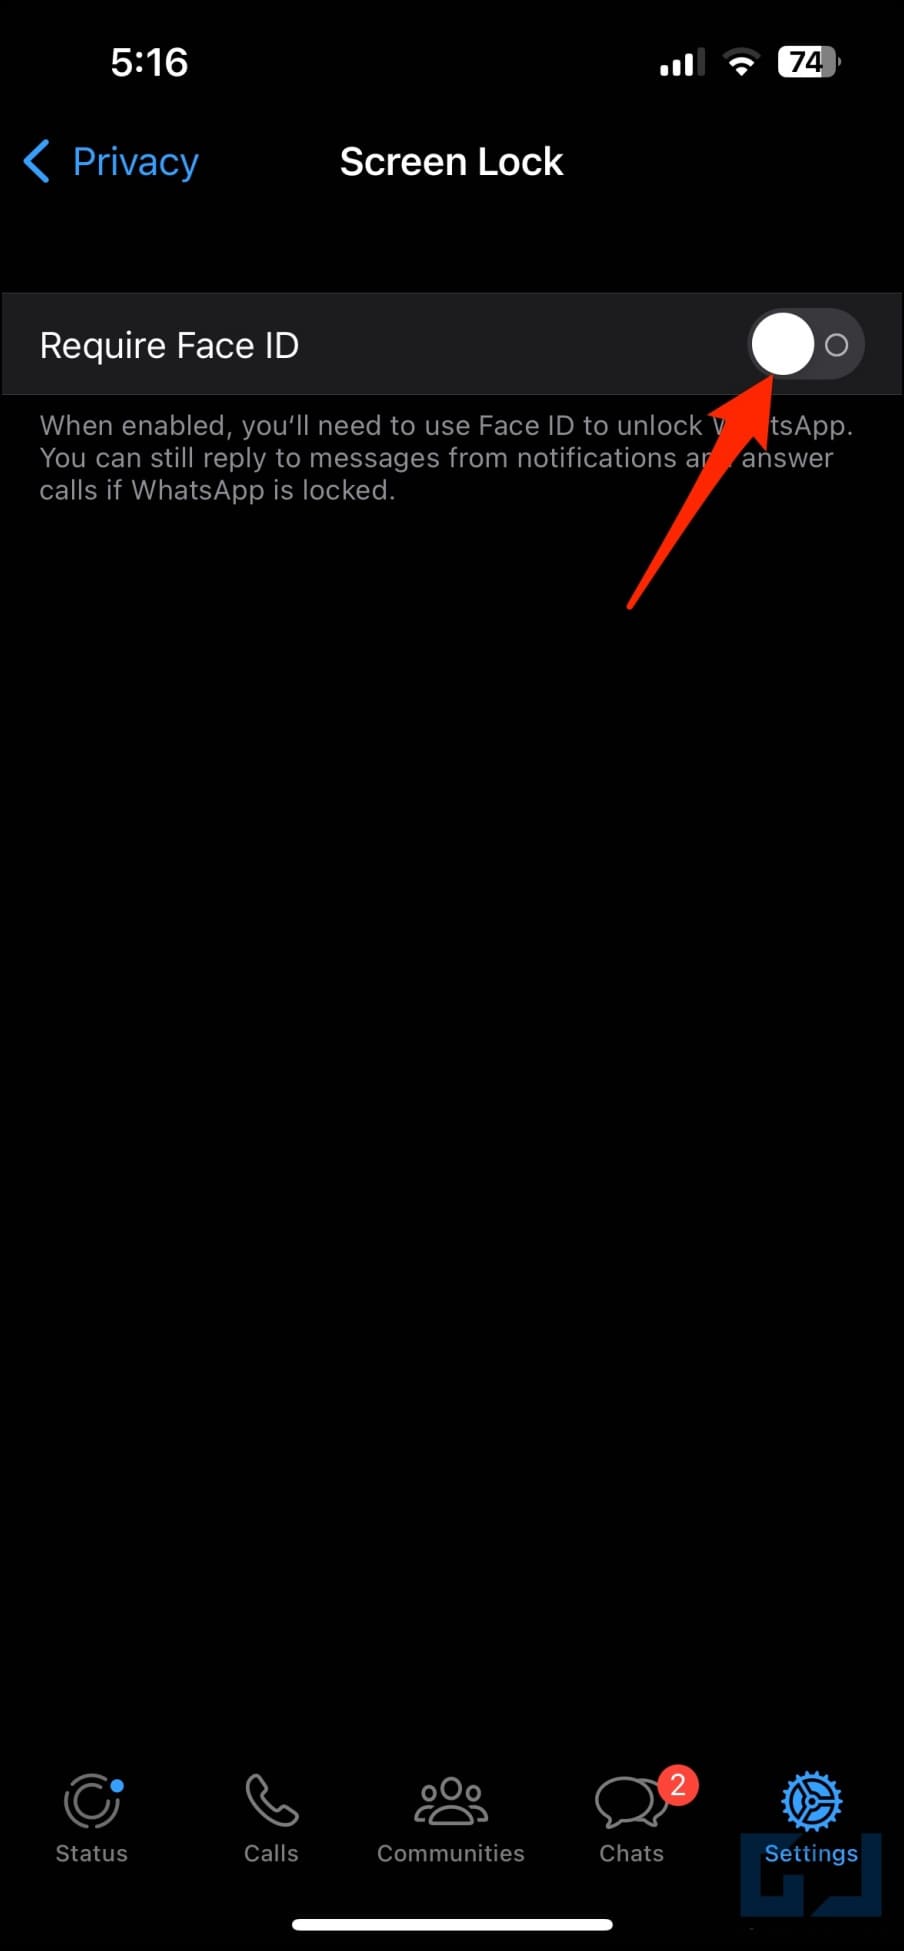
1. Open WhatsApp and head to Settings.
2. Click on Privacy.
3. Scroll down, tap Screen Lock, and enable the toggle for Require Face ID.
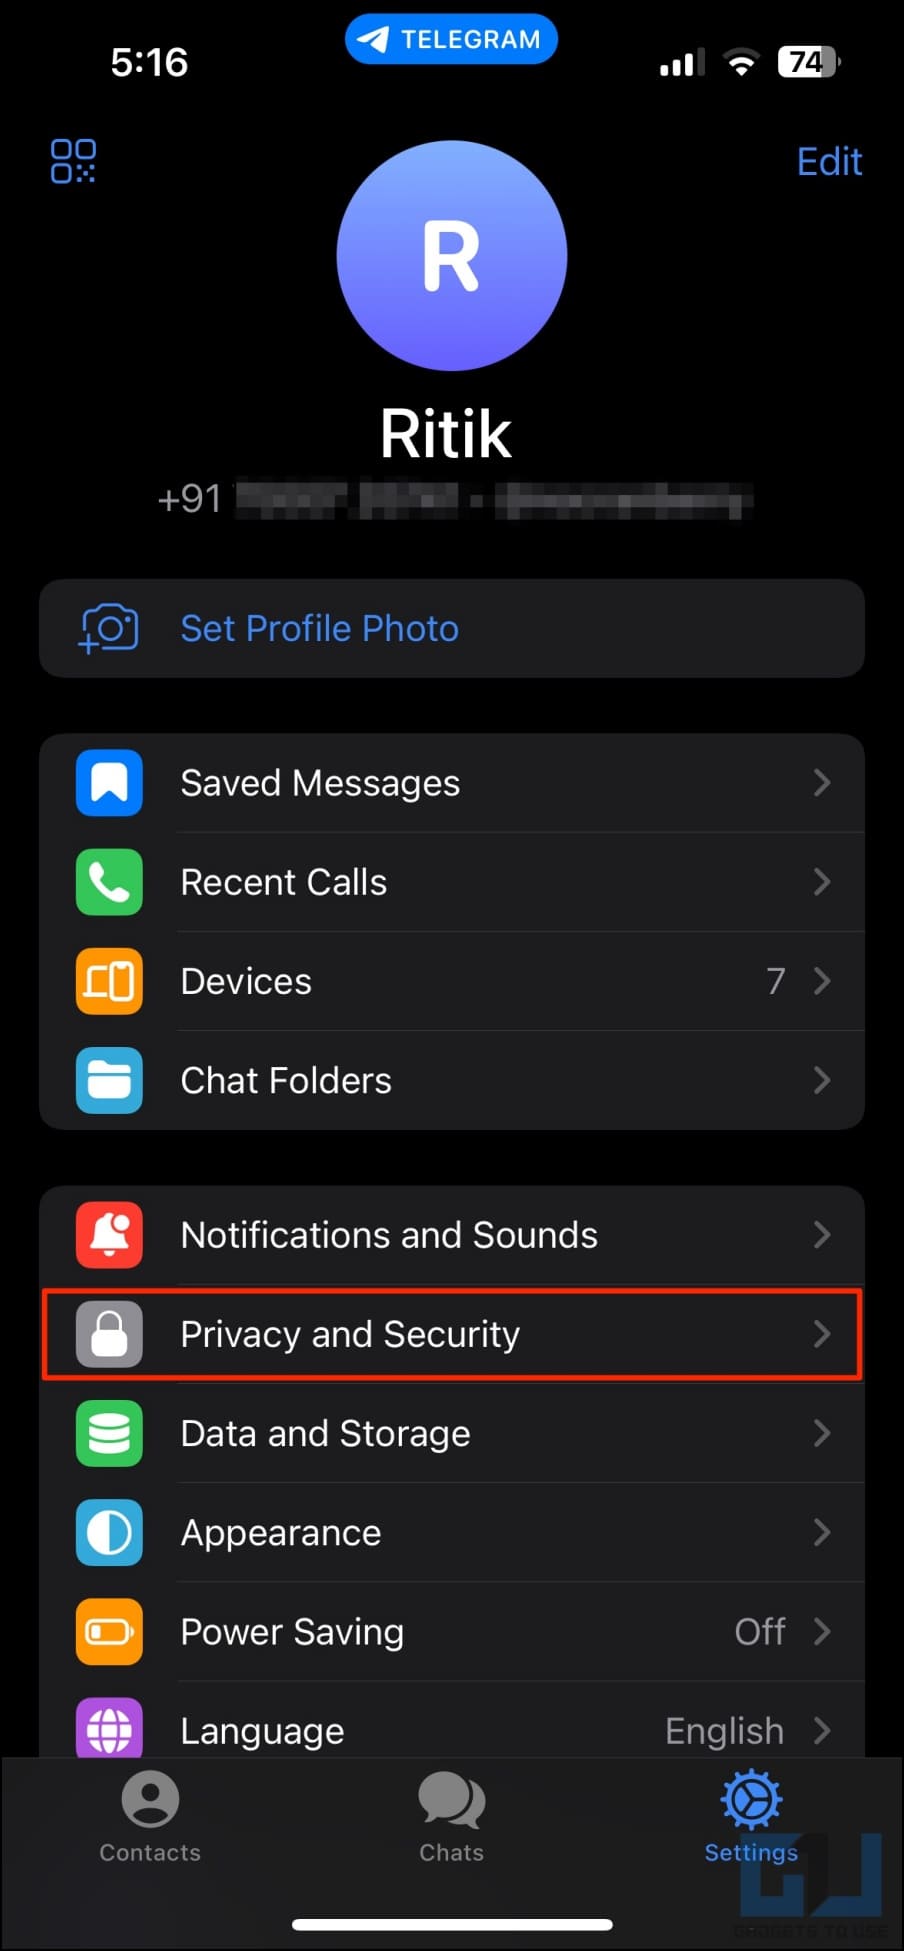
Telegram
1. Open Telegram and go to its Settings.
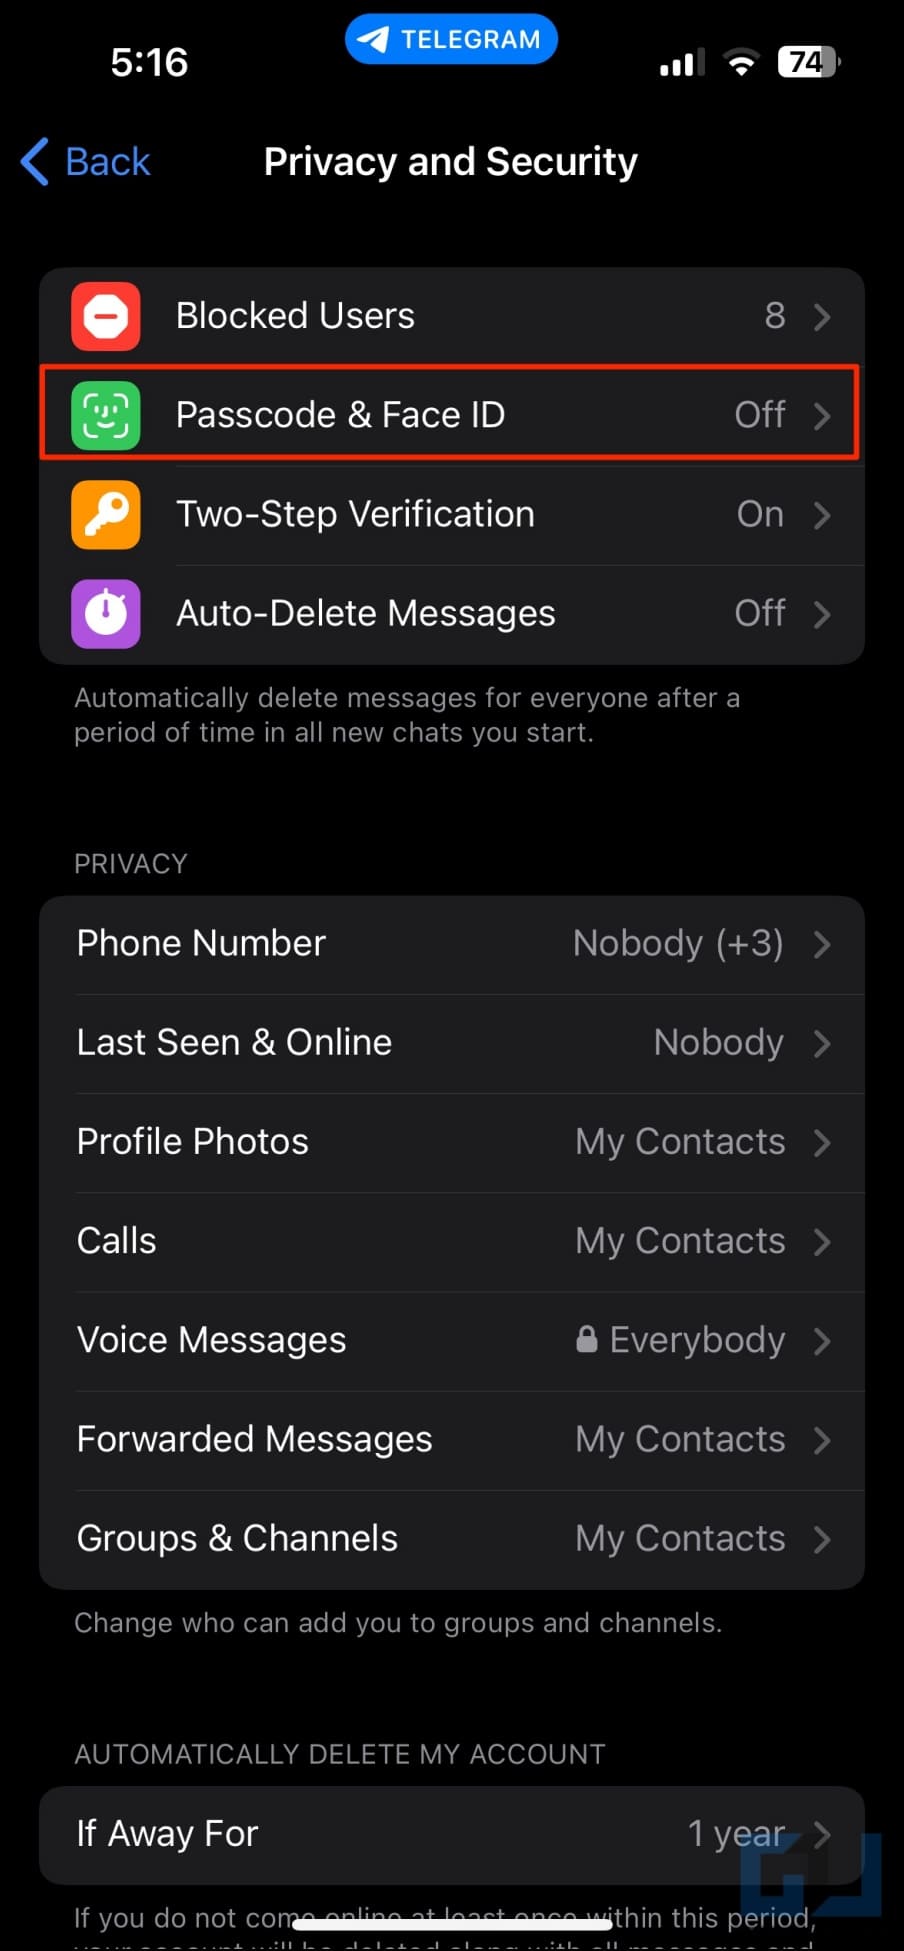
2. Click on Passcode & Face ID.
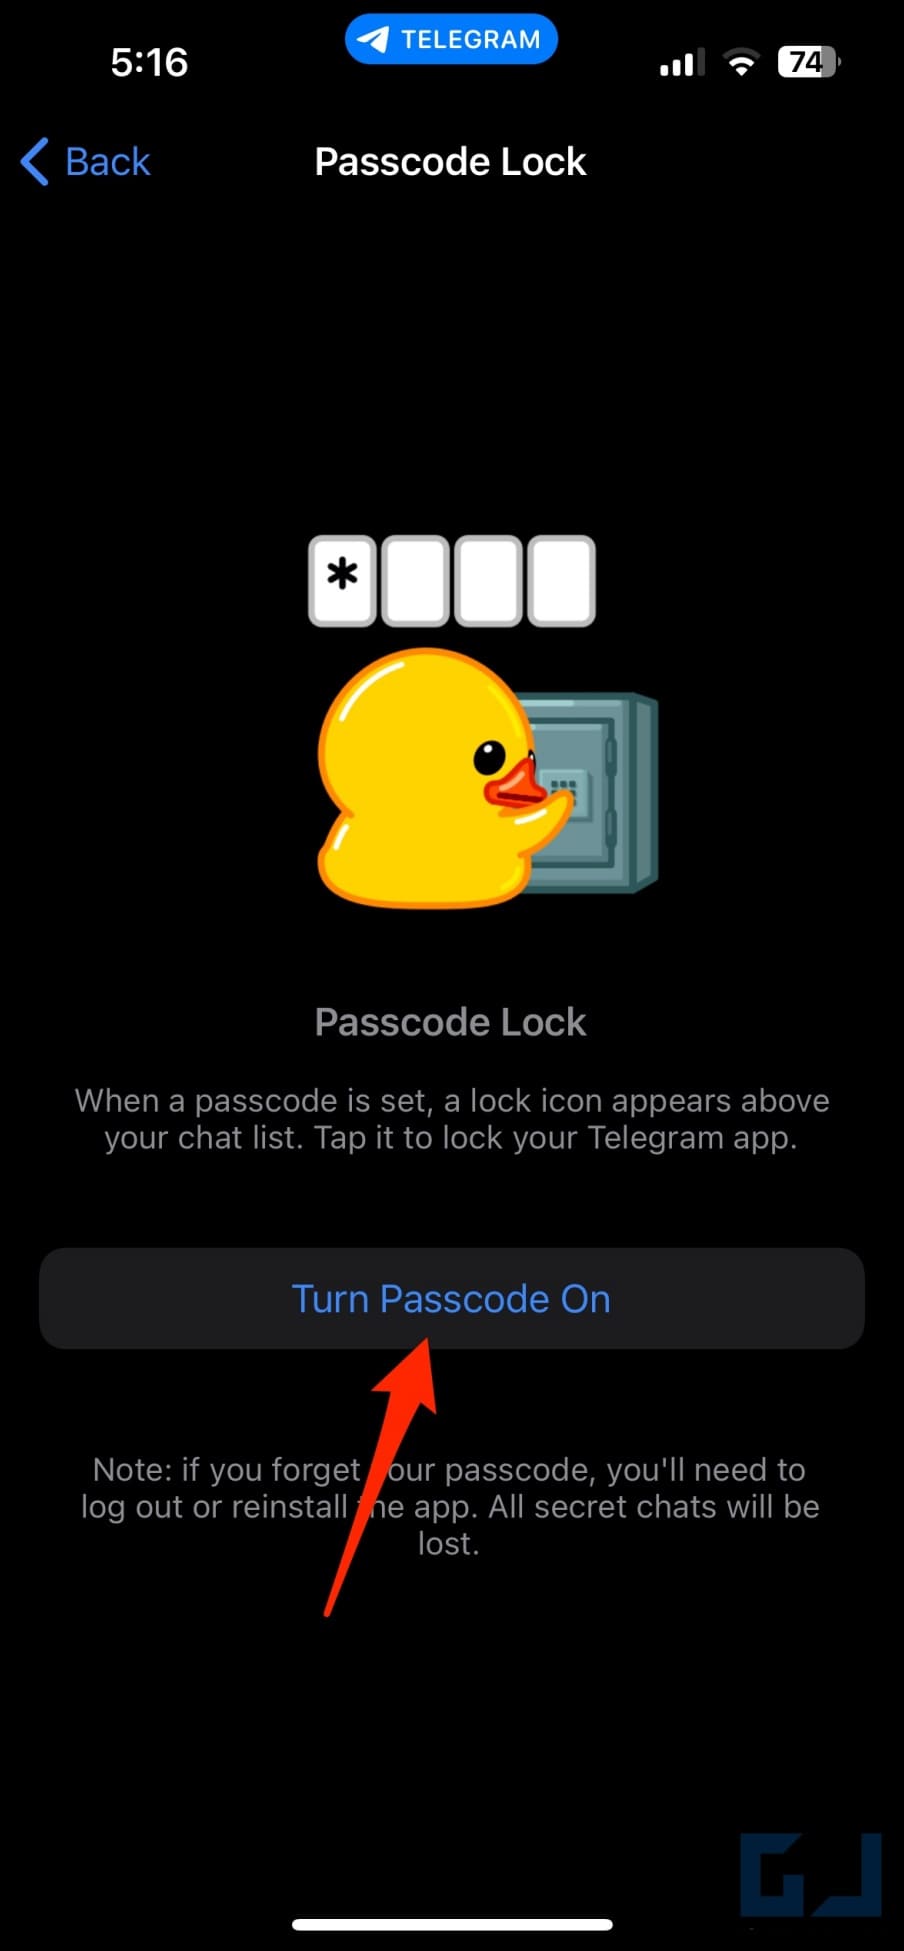
3. Tap Turn Passcode On and follow the on-screen instructions.
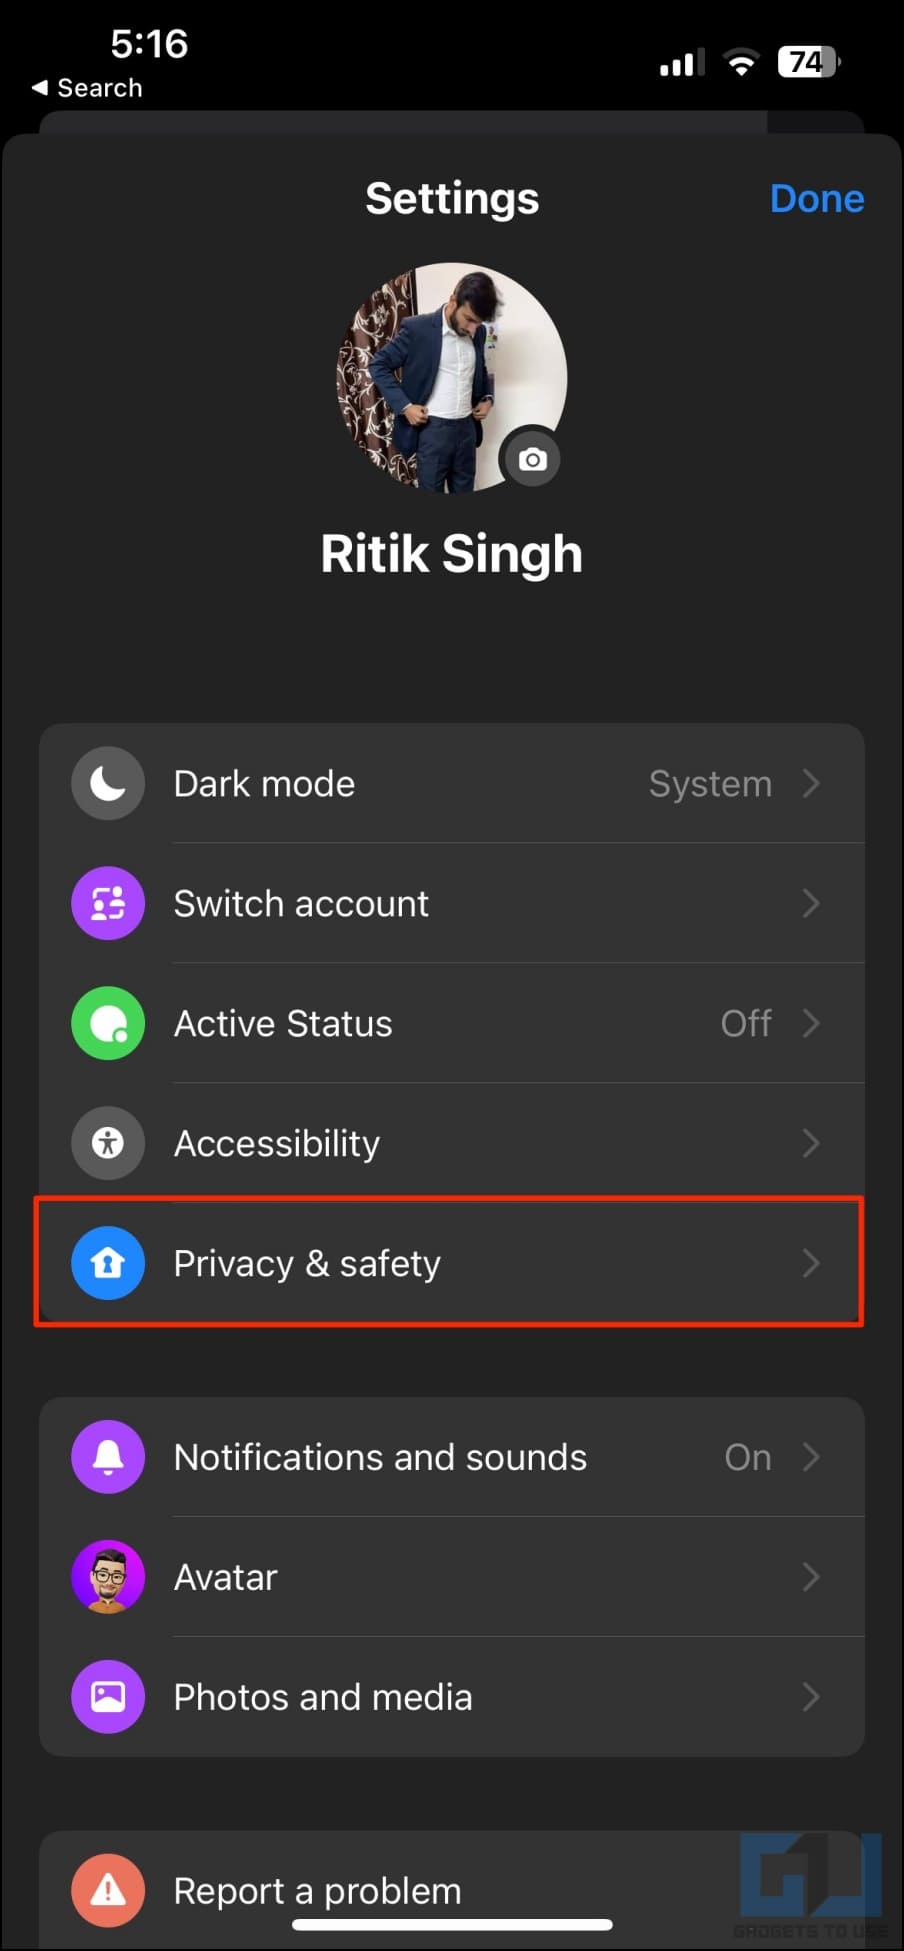
Messenger
1. Open Messenger and tap the hamburger menu on the top left.
2. Click the cog icon on the top right.
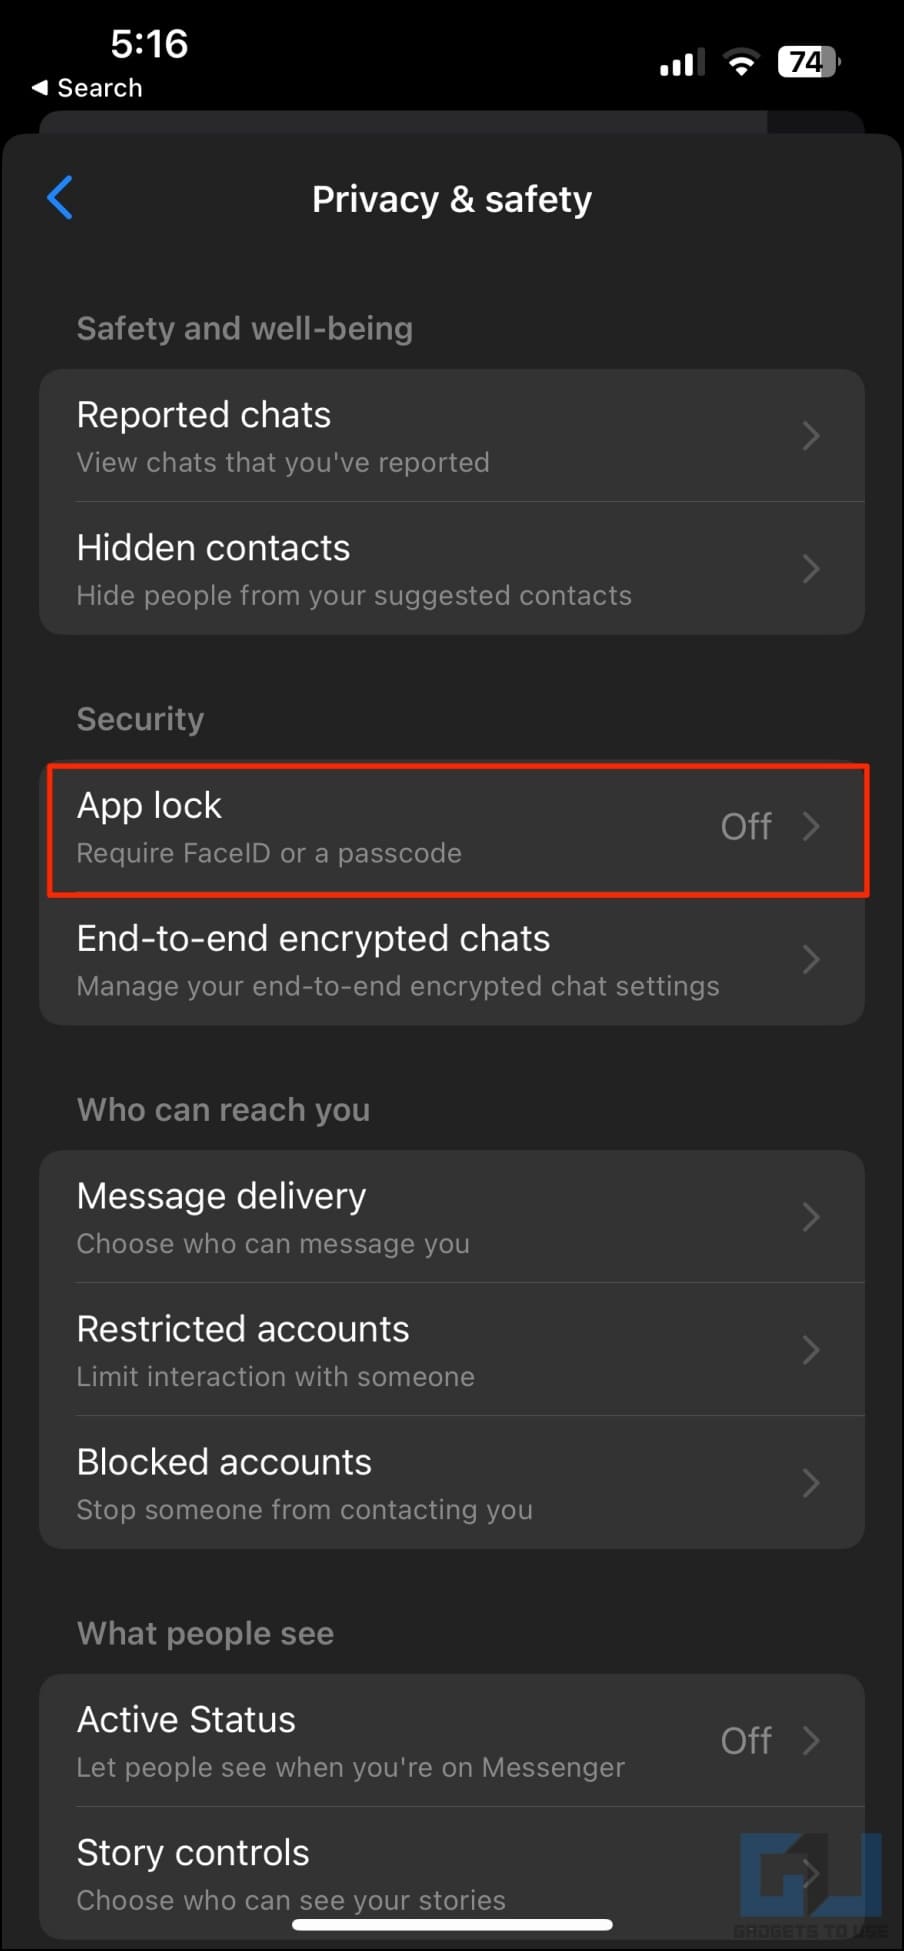
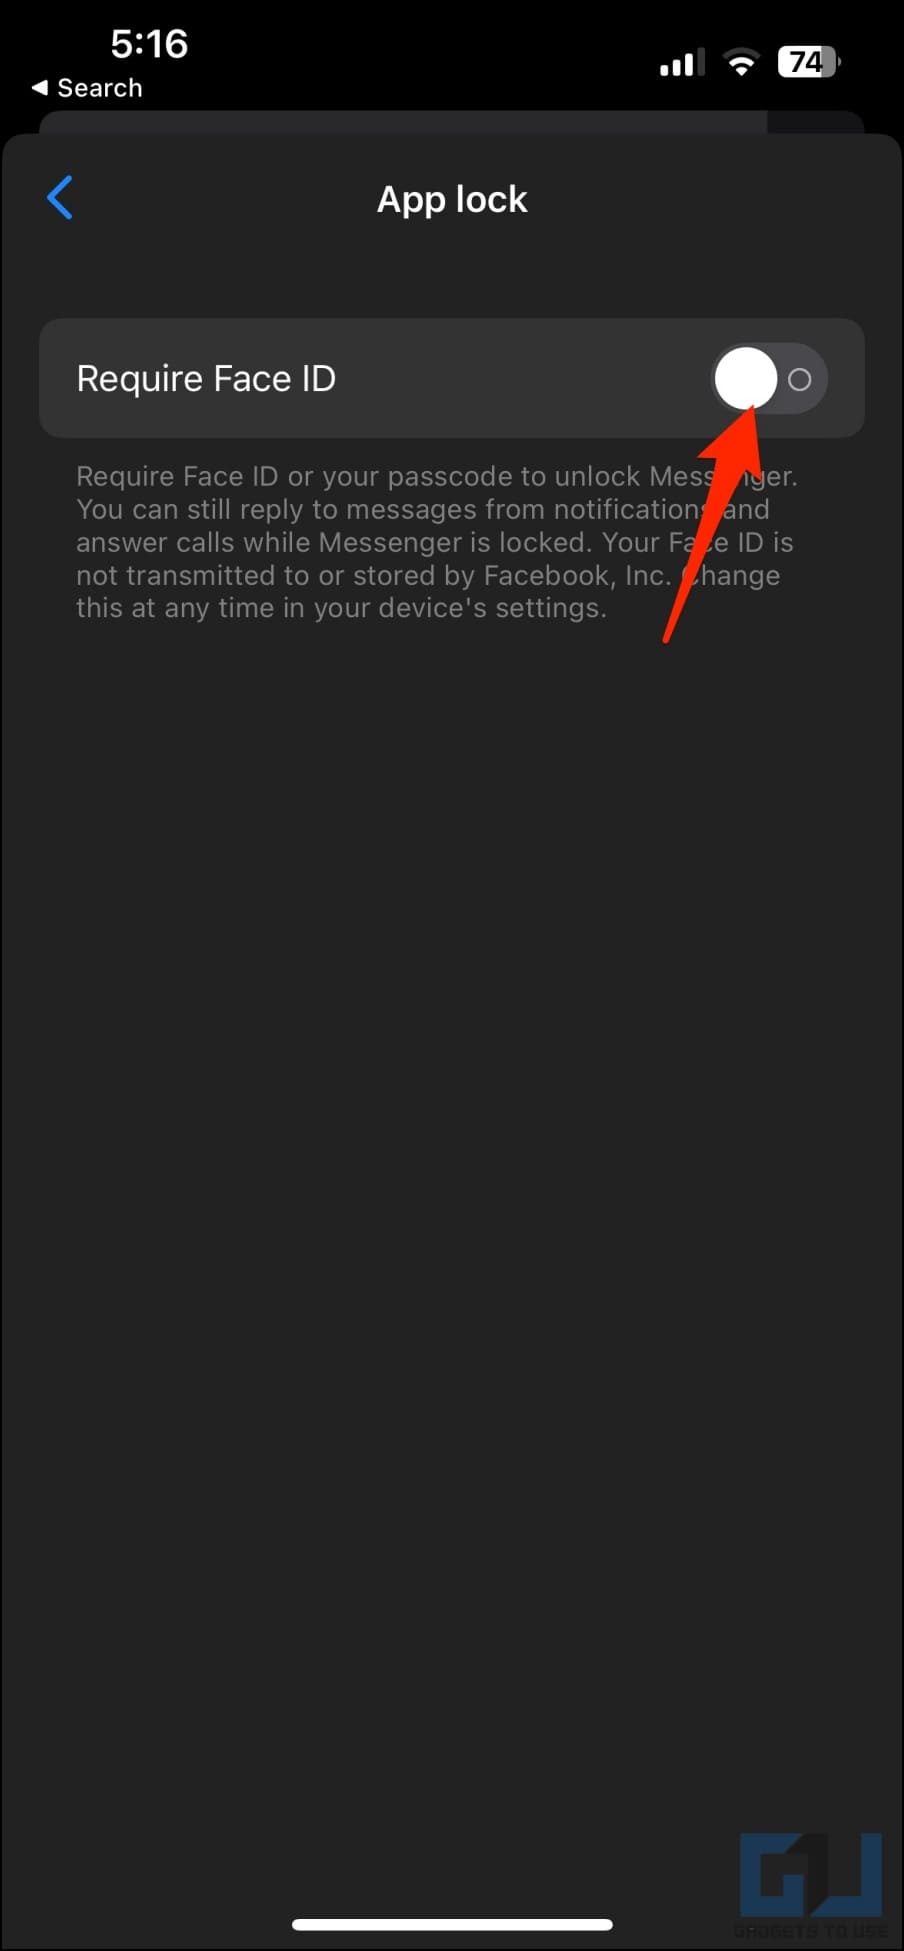
3. Select Privacy & Safety > Auto Lock > Require Face ID.
Signal
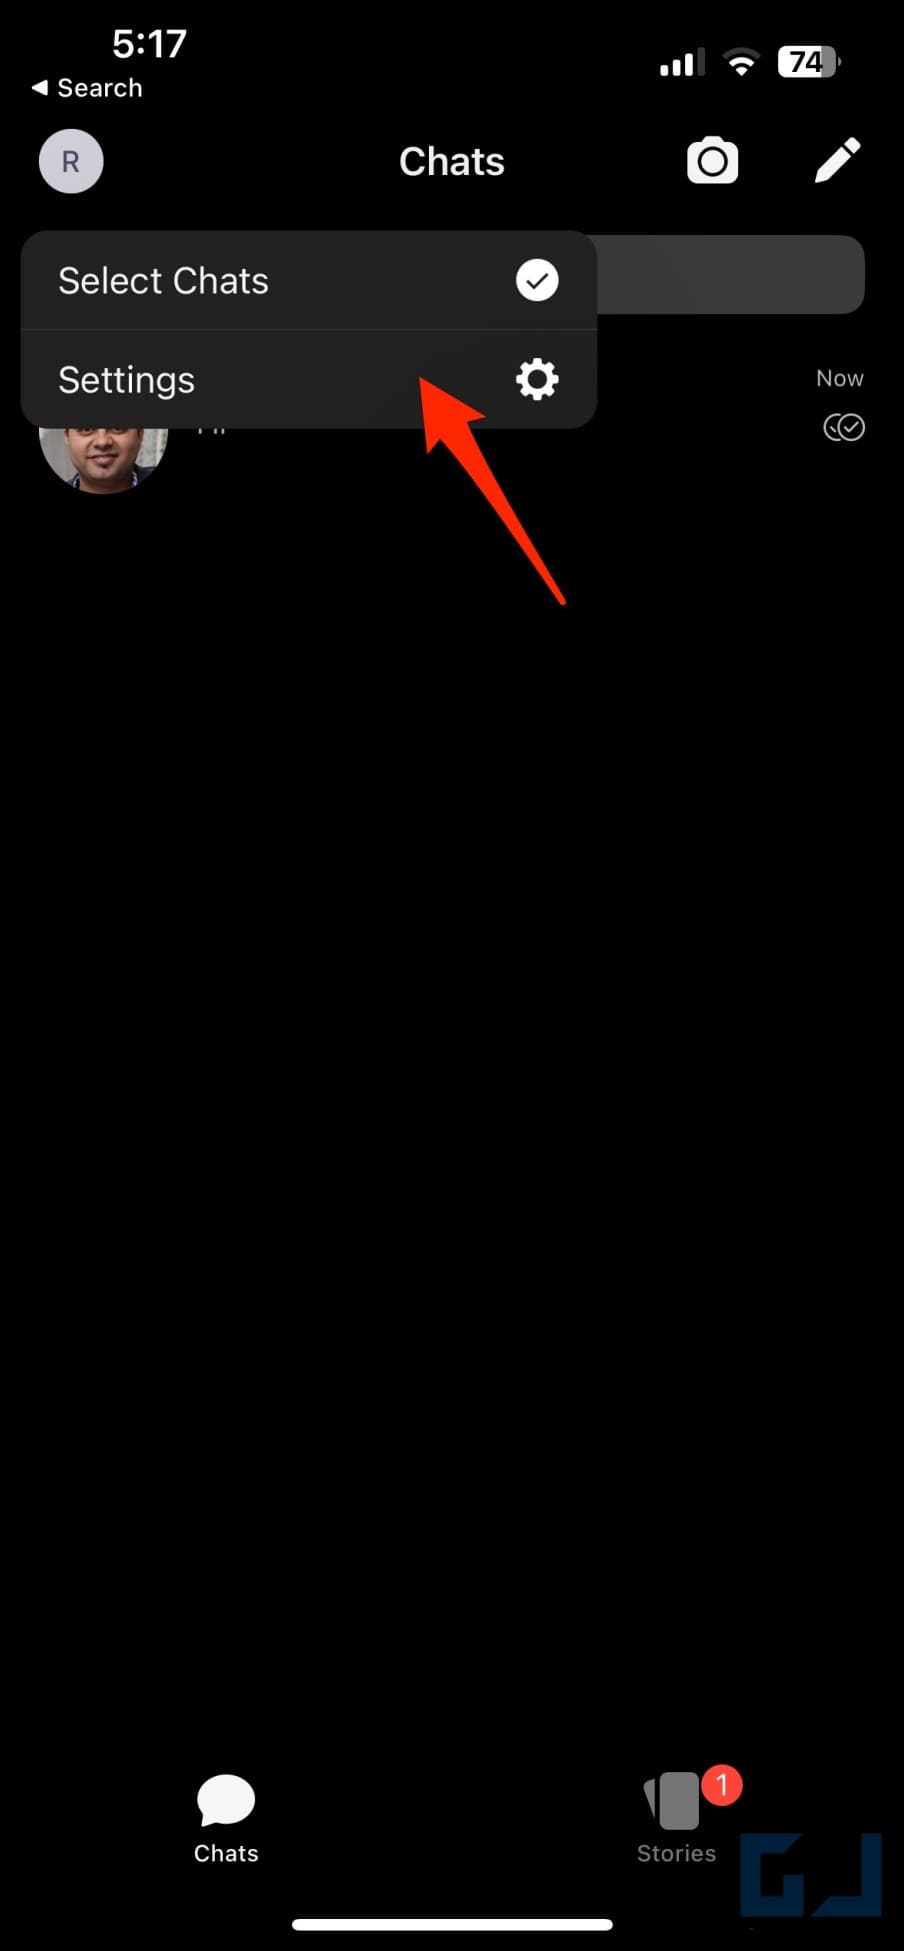
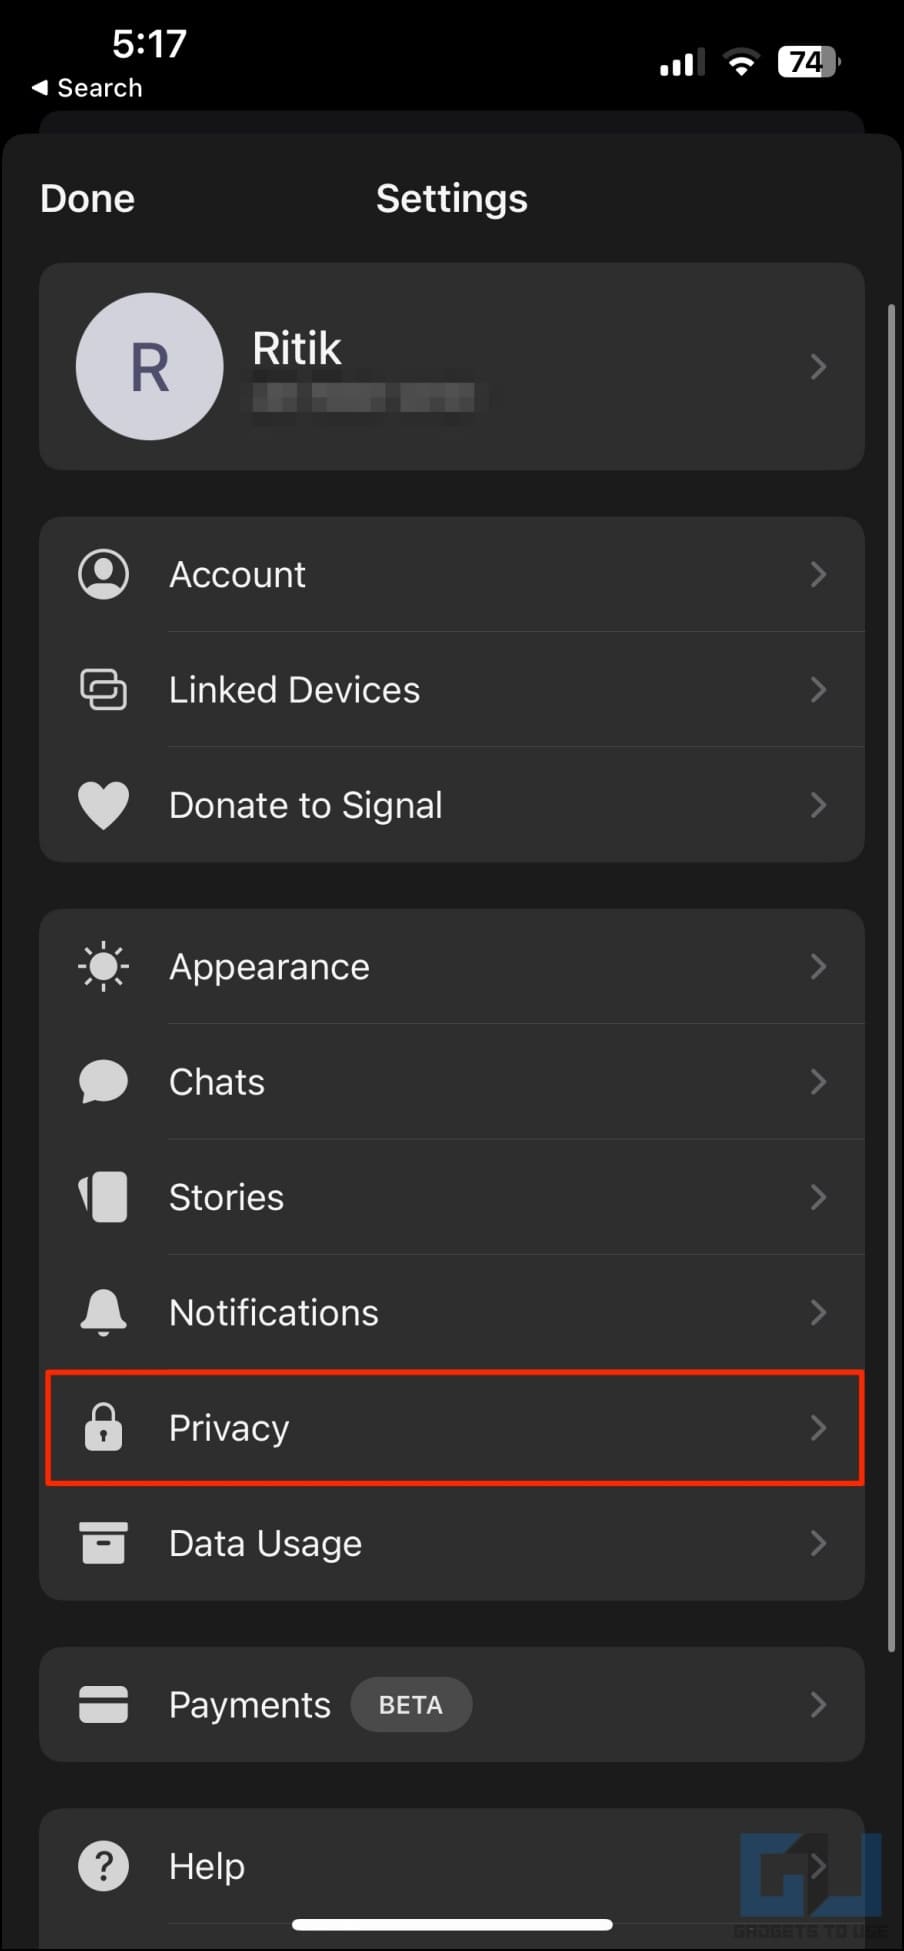
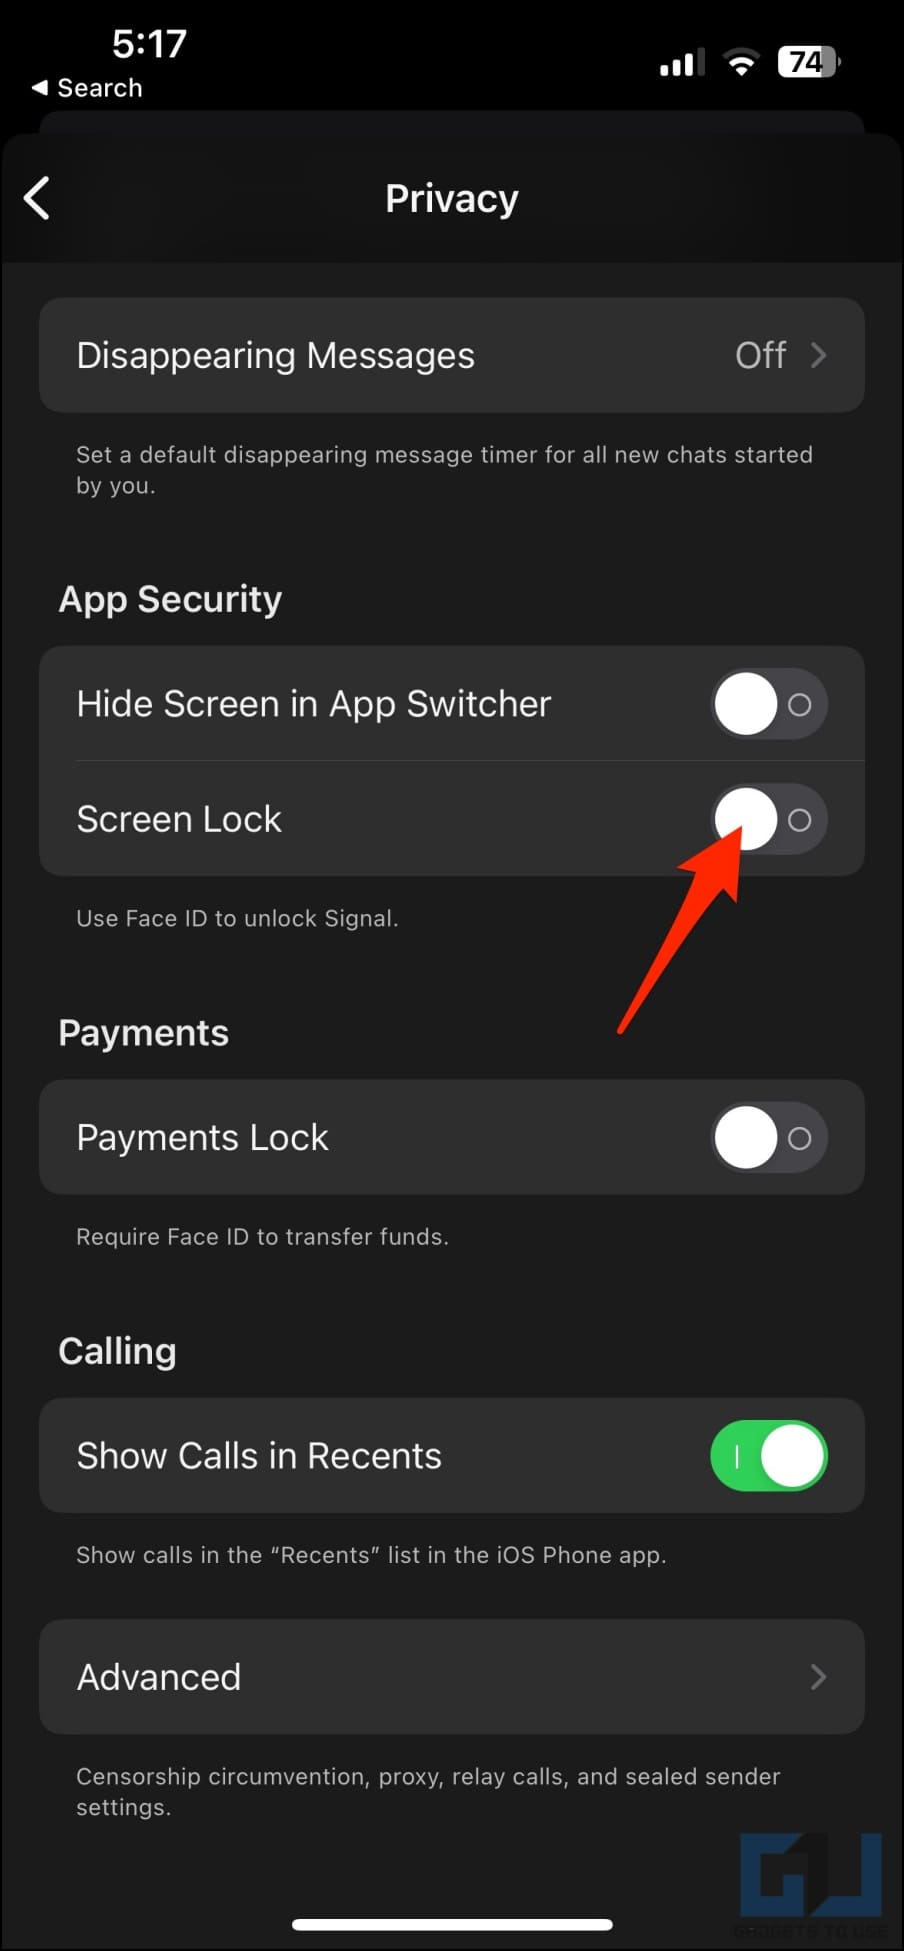
1. Open the Signal app, tap the profile icon on the top left, and select Settings.
2. Scroll down and click on Privacy.
3. Here, enable Screen Lock under App Security.
Google Drive
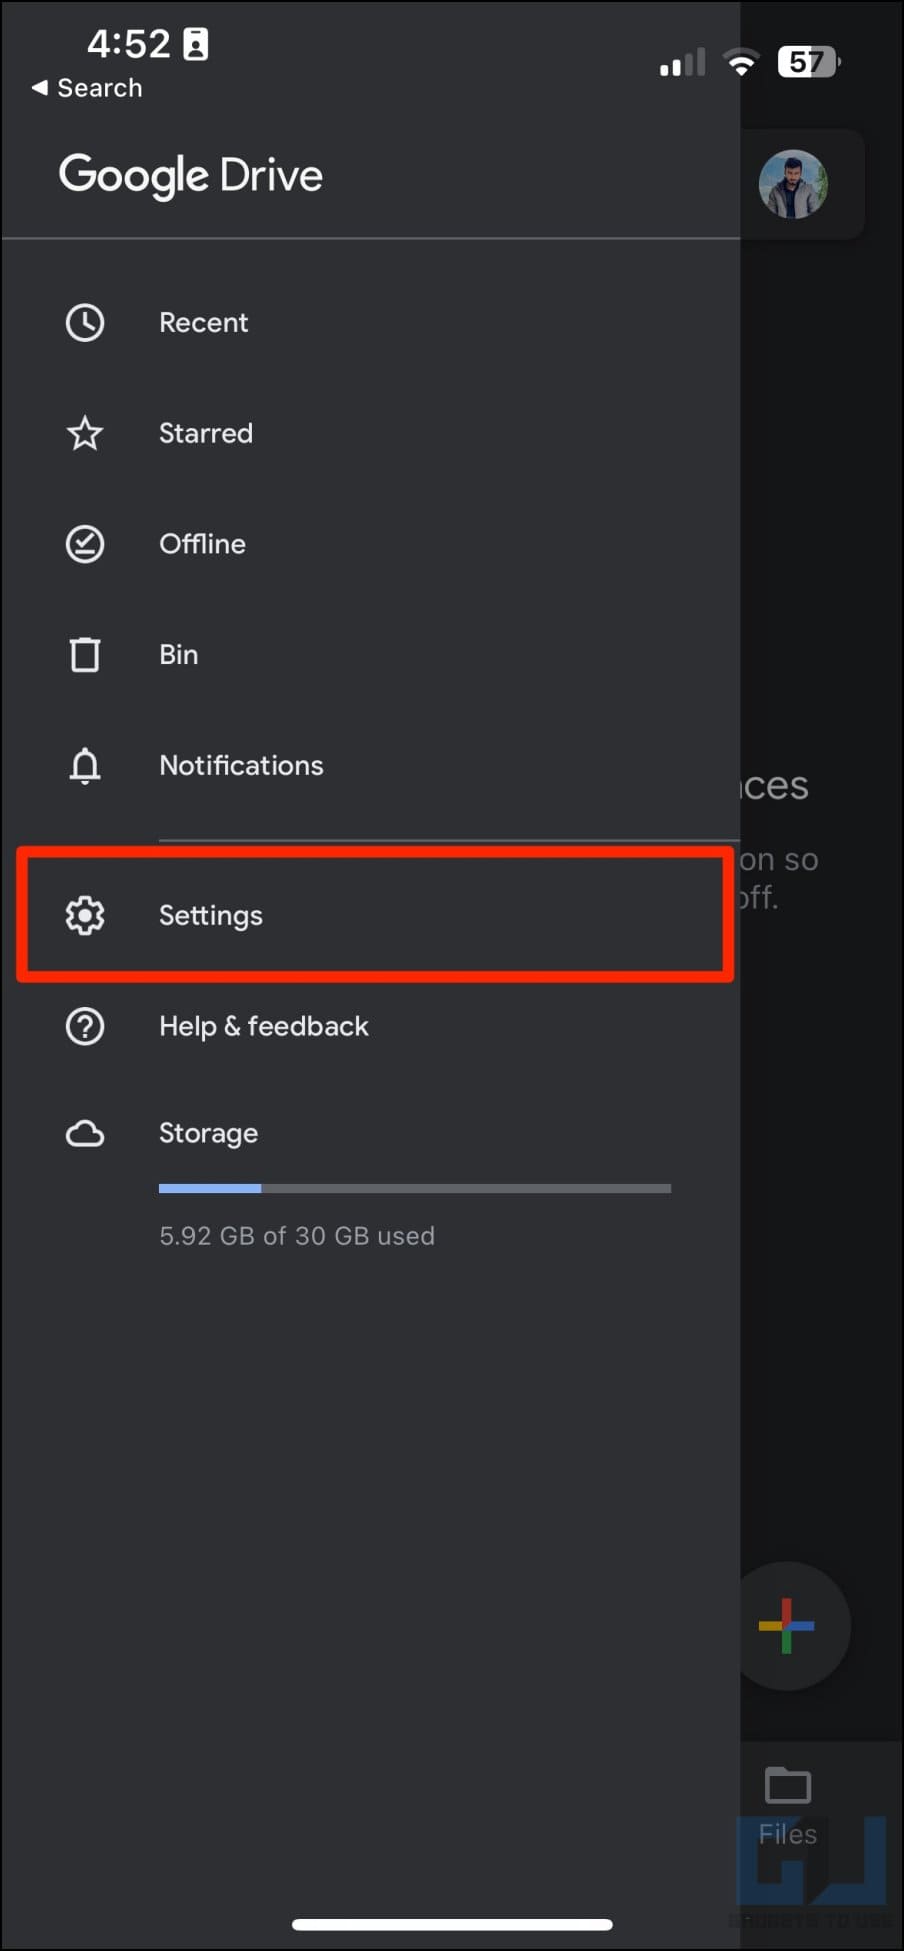
1. Open the Google Drive app on your iPhone.
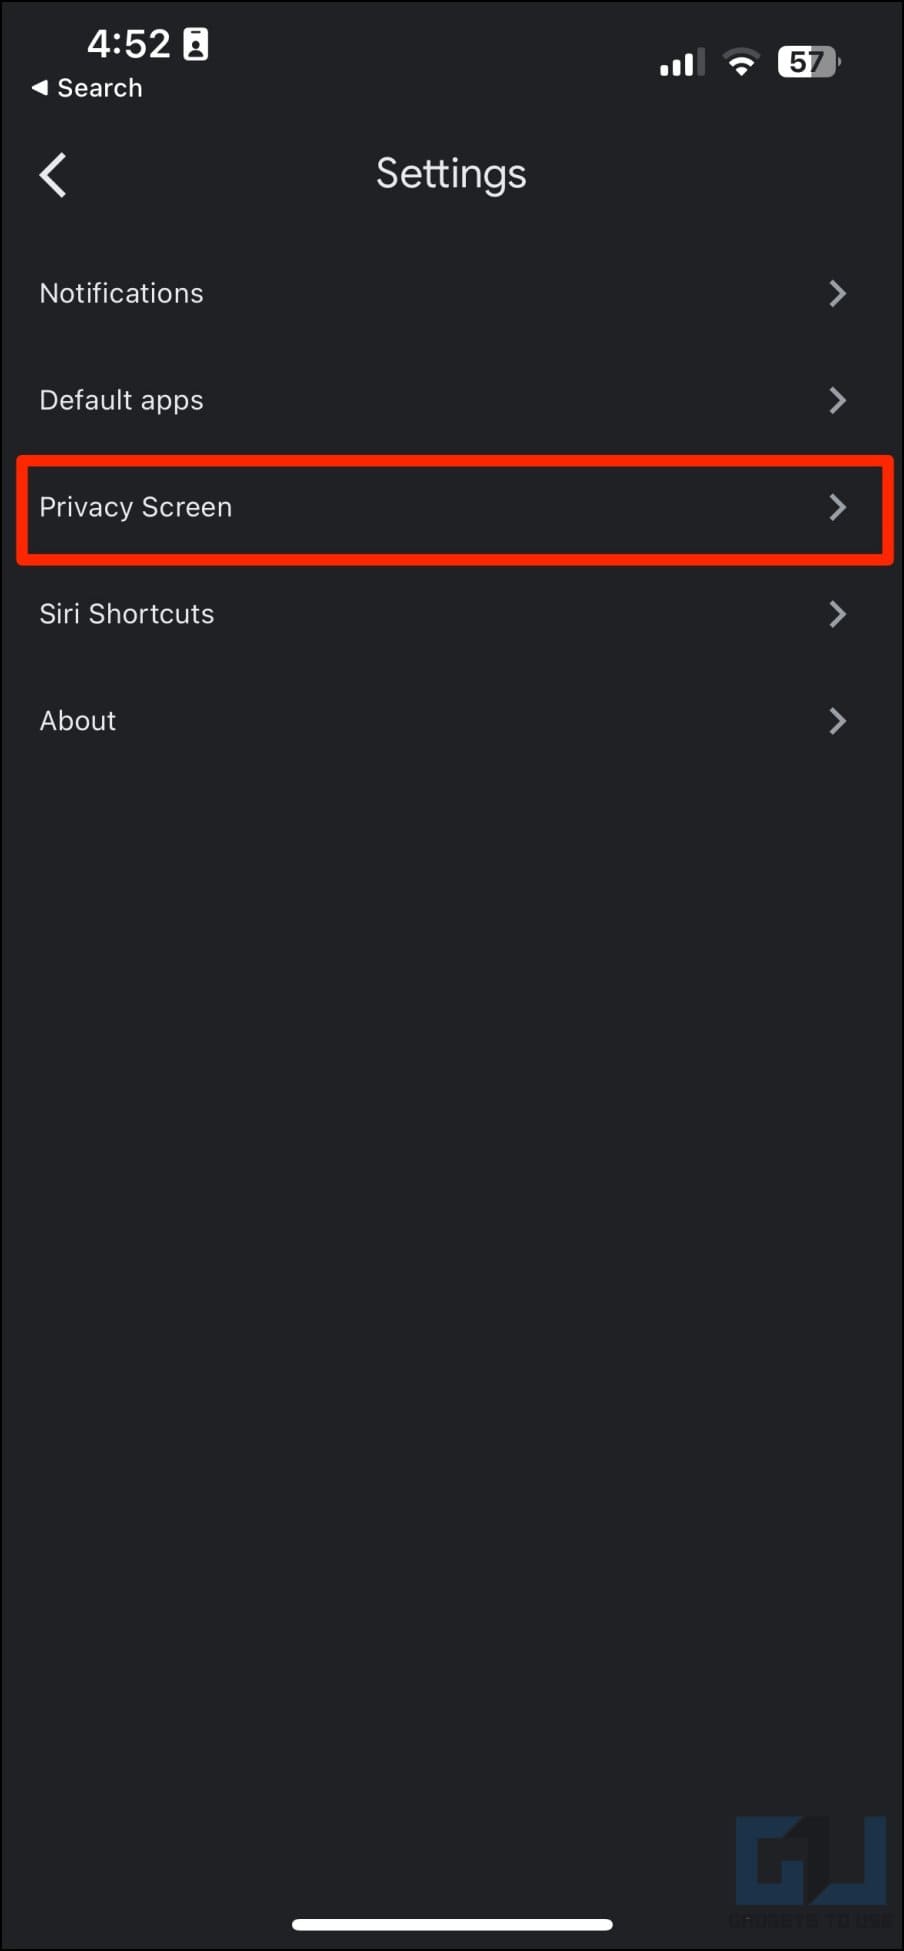
2. Click the hamburger menu > select Settings.
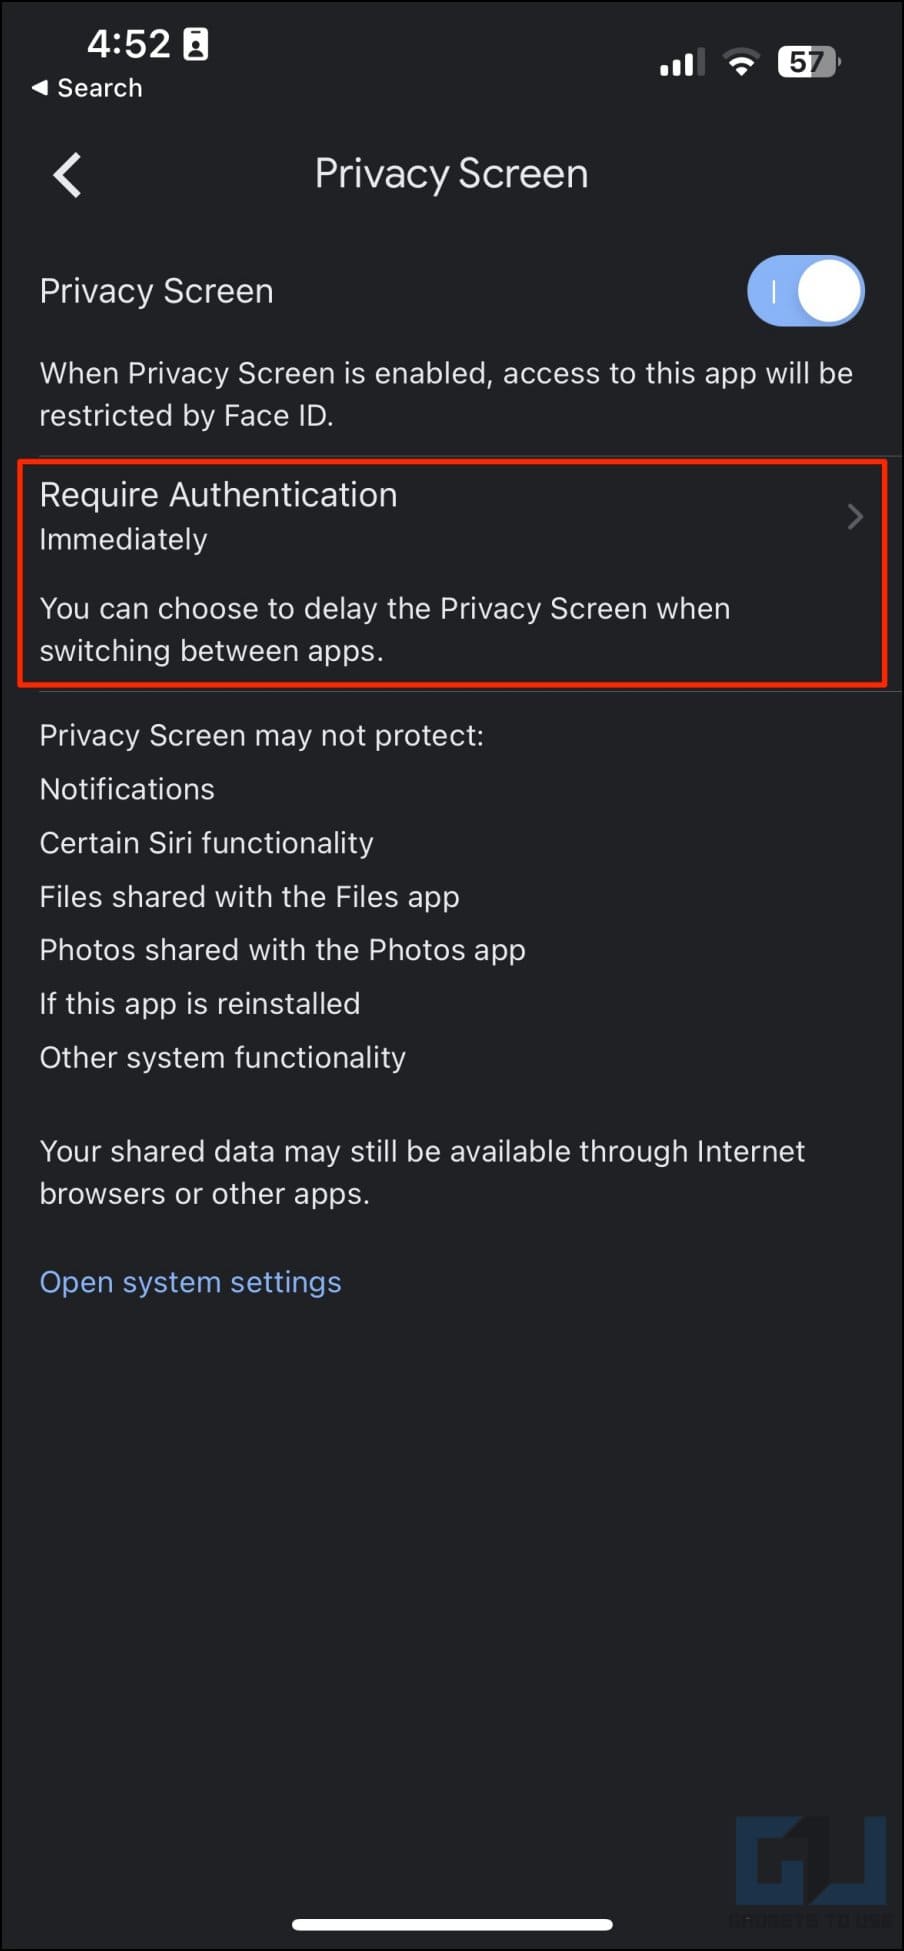
3. Select Privacy Screen and enable the toggle.
Here’s our detailed guide to locking Google Drive on iOS.
Method 7- Enable Face ID Access for Apps in Passcode Settings
You can check and enable Face ID or Touch ID for applications that support it from your iPhone Passcode settings, as follows:
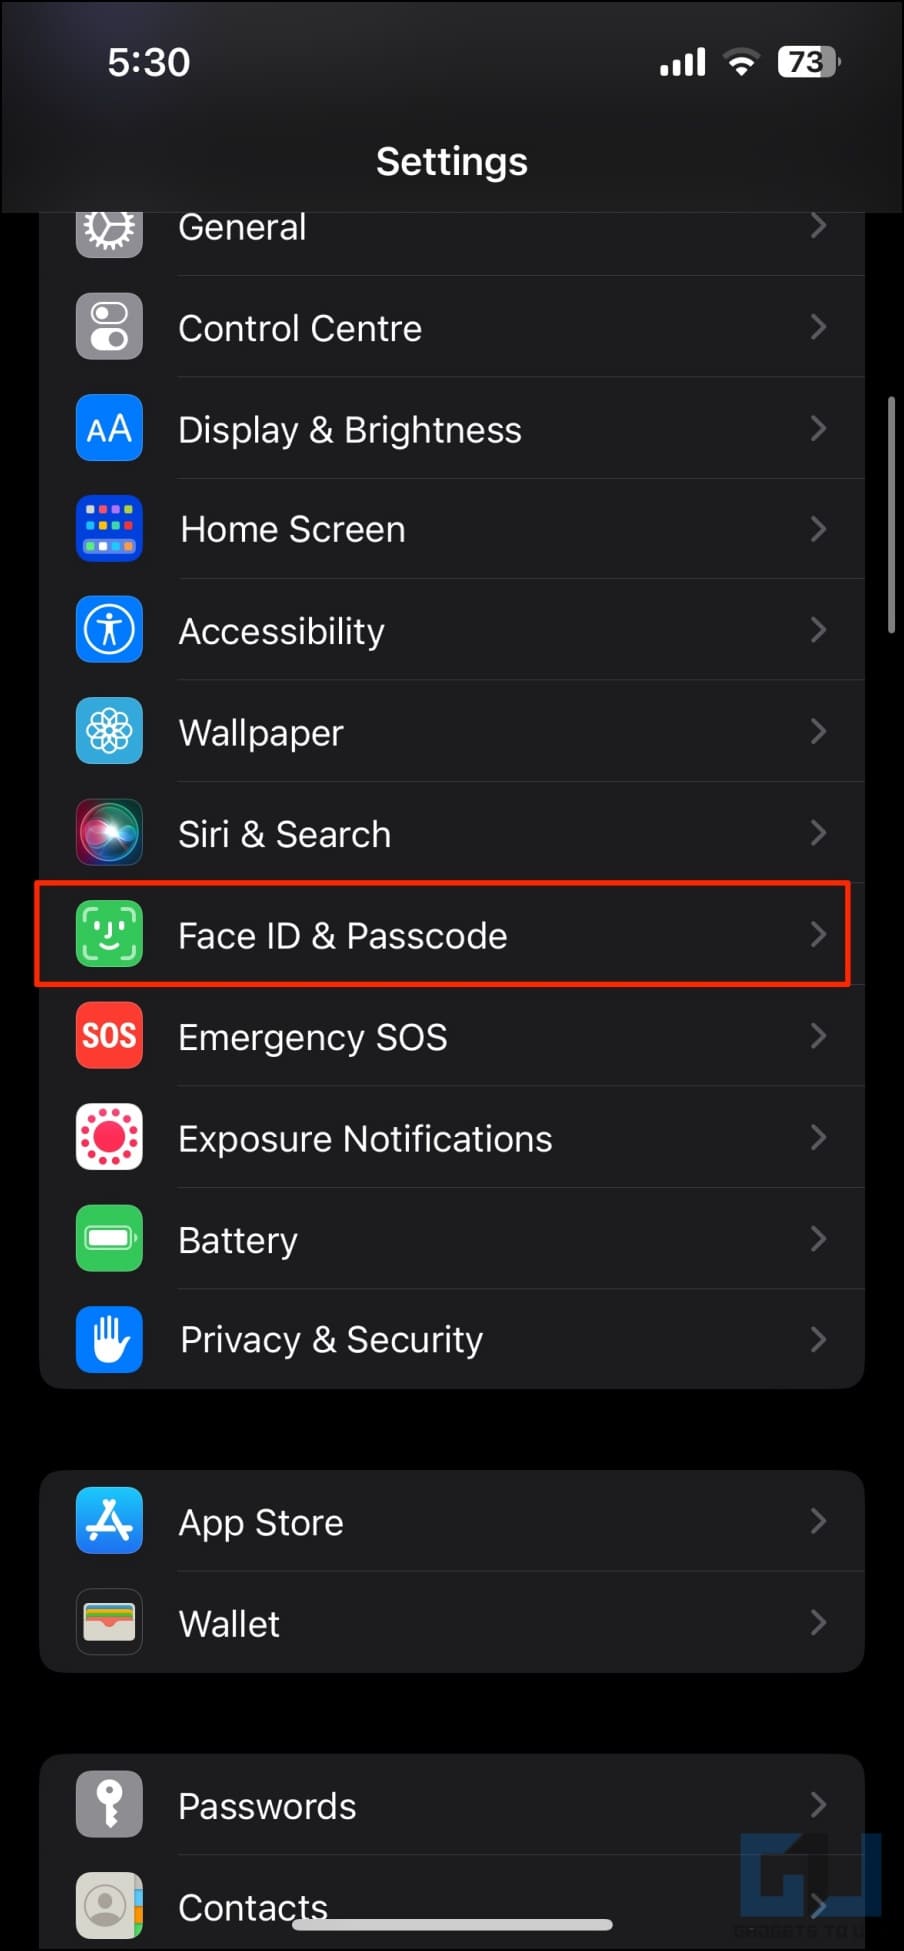
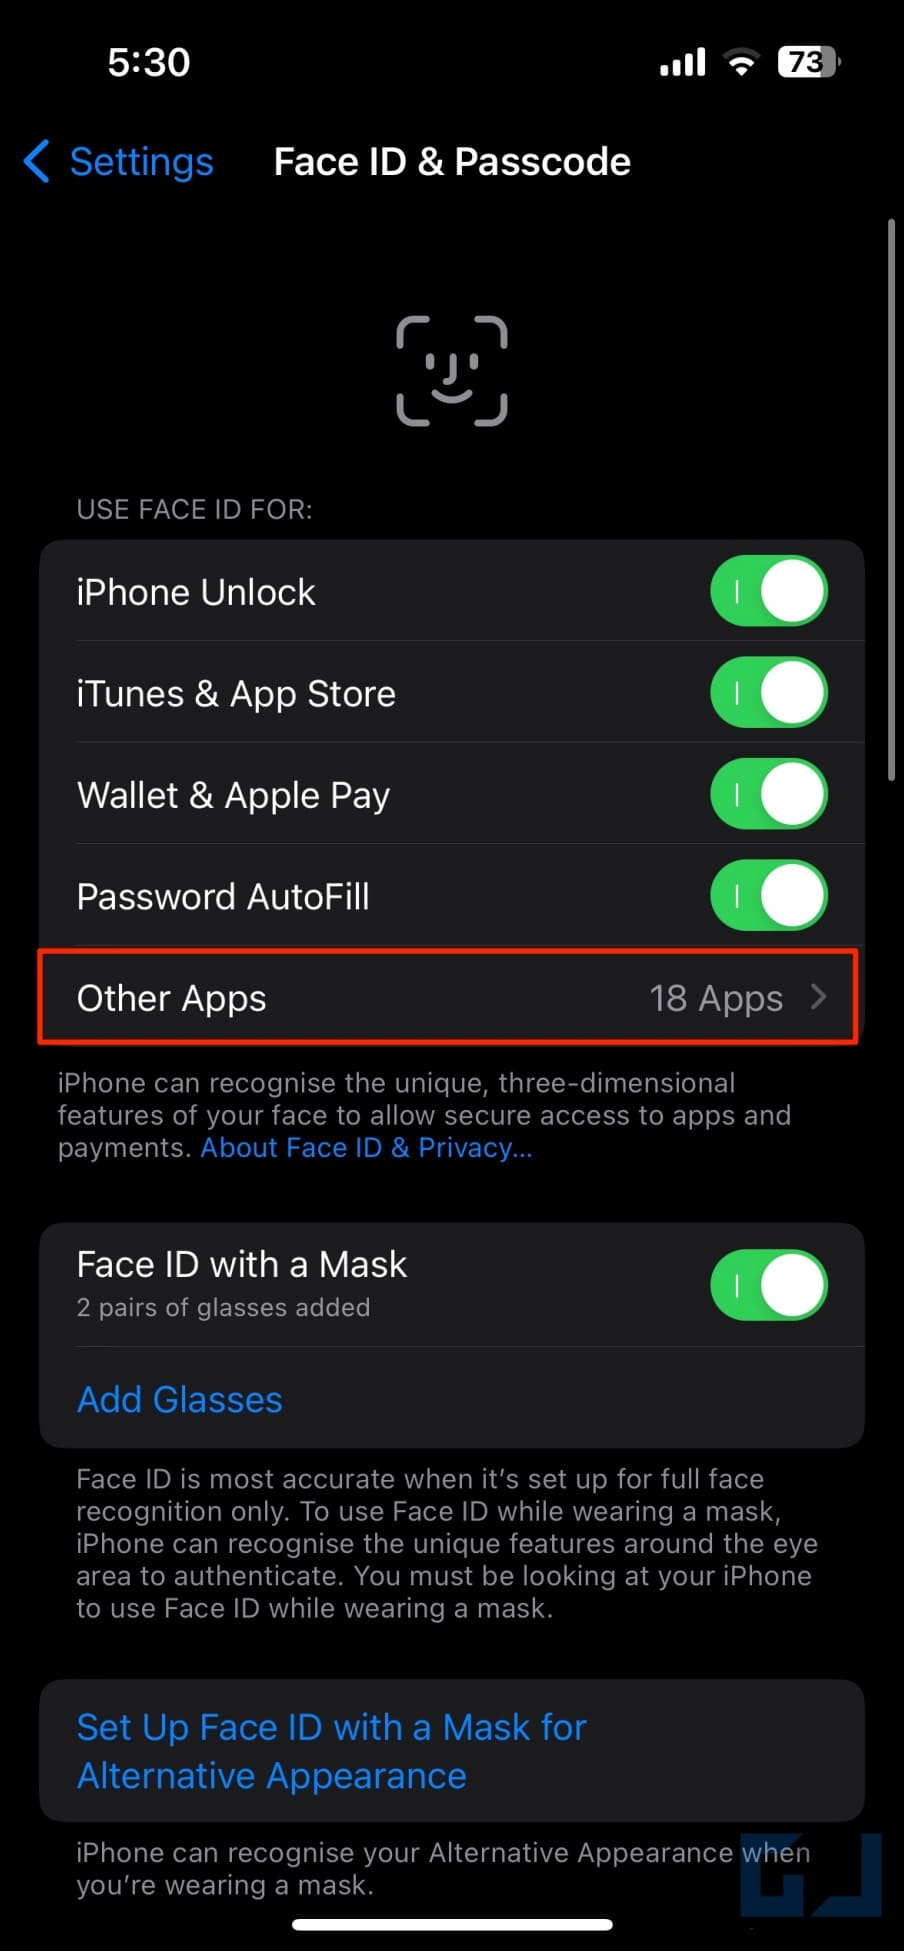
1. Open Settings and select Face ID & Passcode.
2. Here, click on Other Apps.
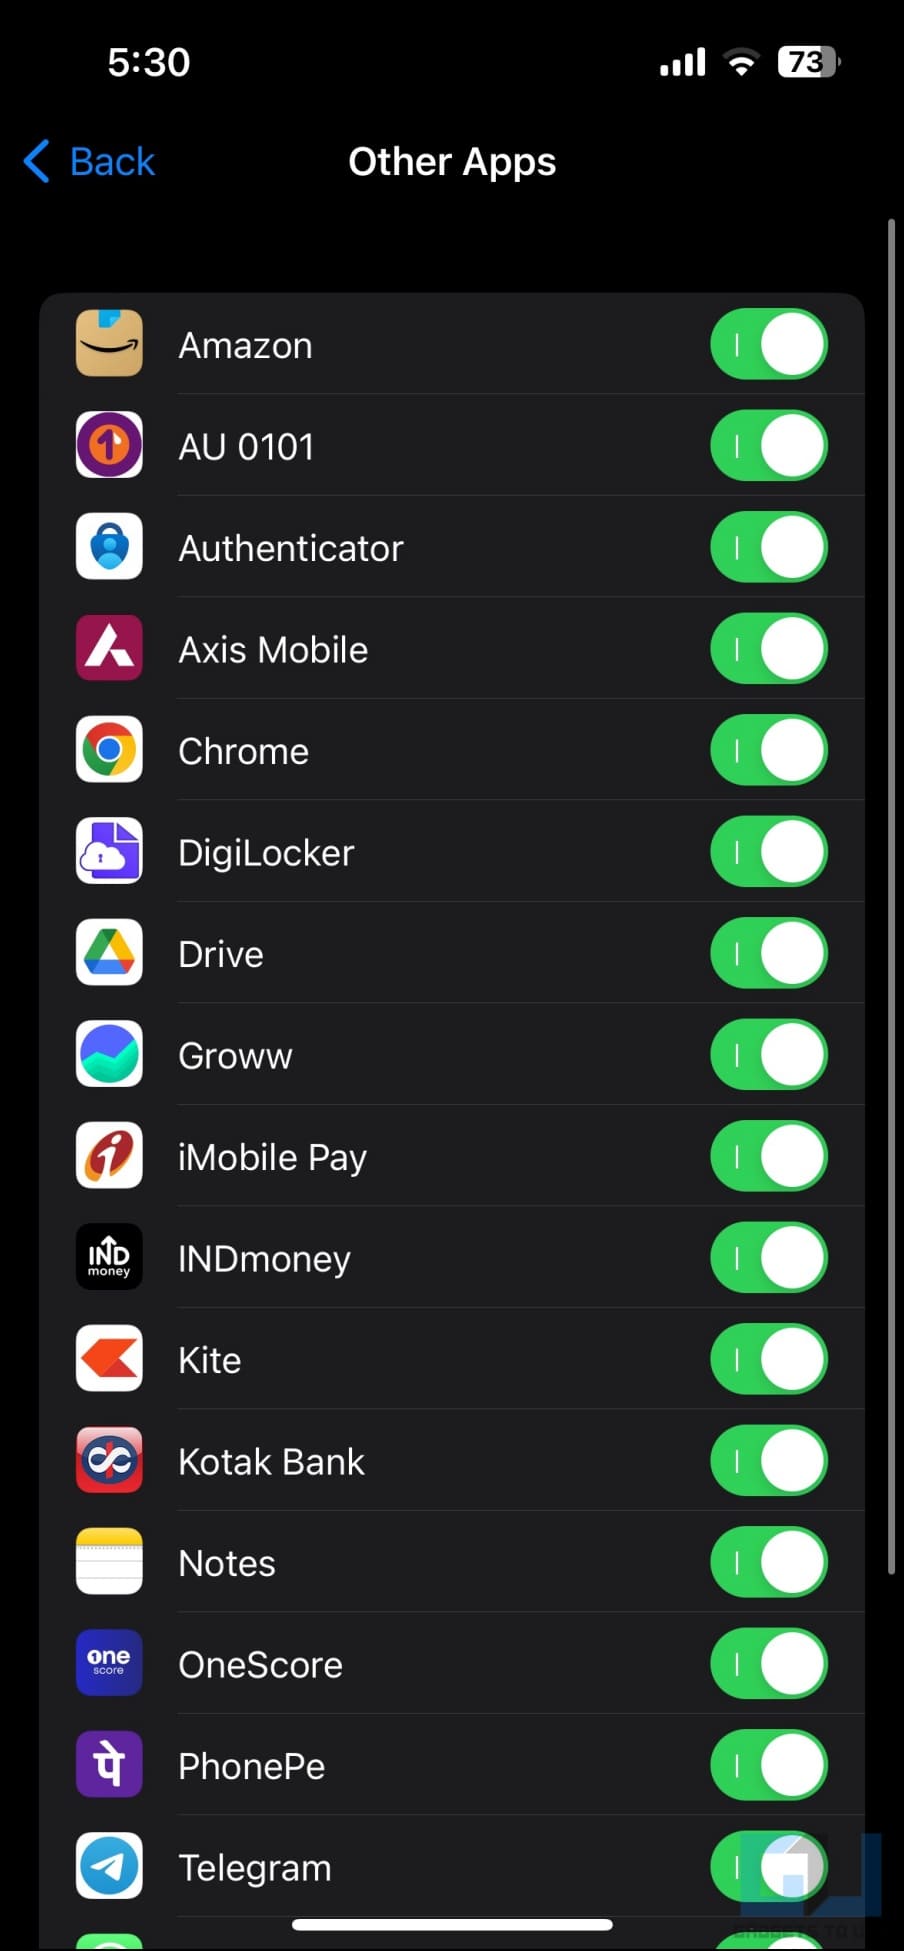
3. You’ll find the list of all apps that have requested and support Face ID authentication. You can enable or disable Face ID access for these applications on this page.
Method 8- Hide and Lock Photos and Videos on iPhone
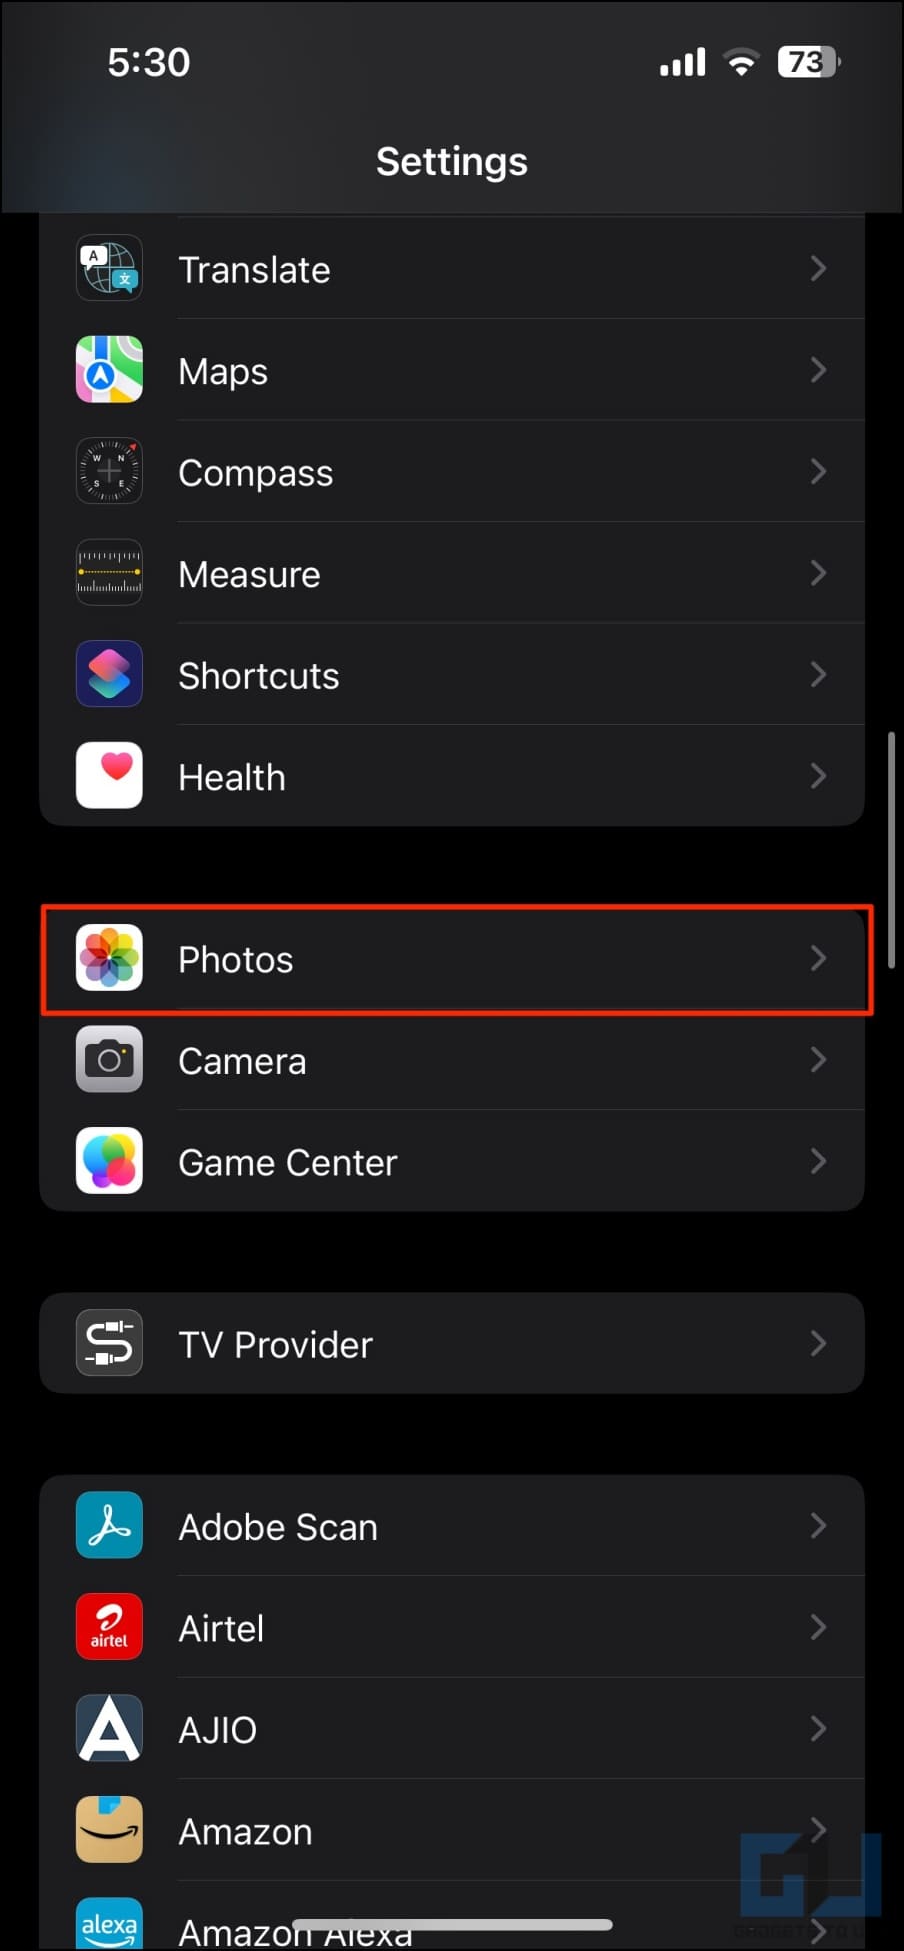
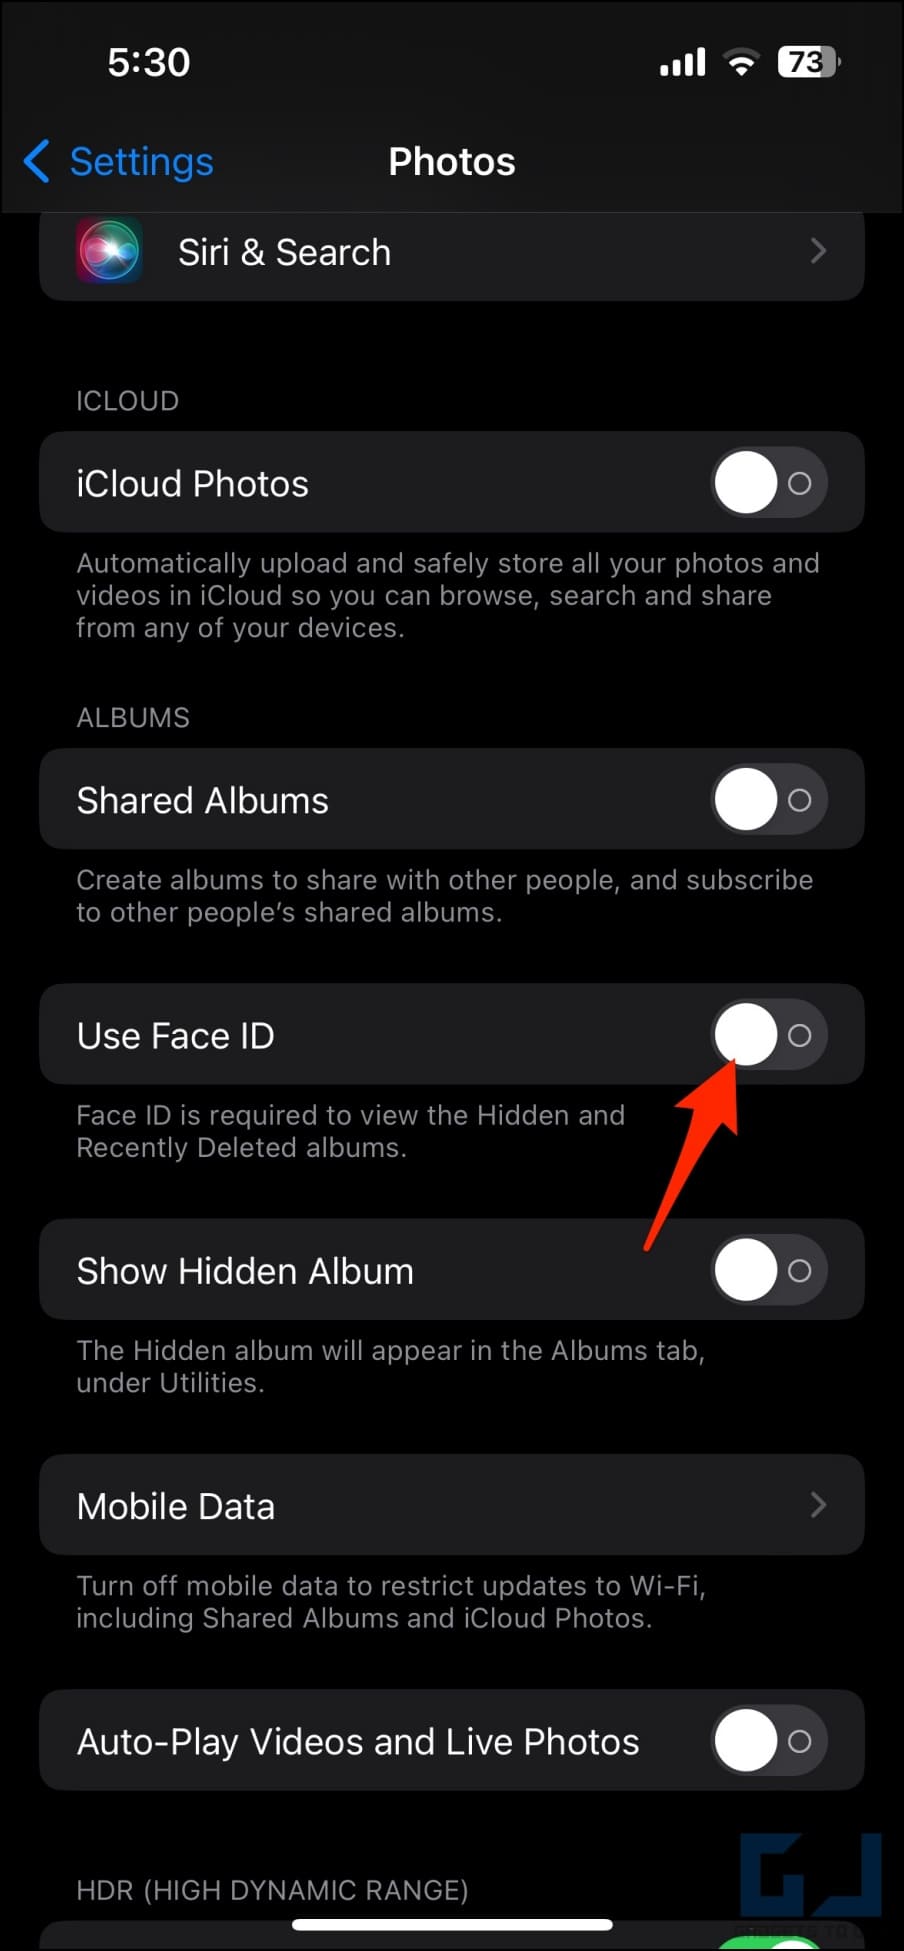
On iPhones running iOS 16 and later, you can lock the hidden folder in the Photos app to secure your private images and videos. This will prevent others from accessing your private media on the device. Here’s how to enable it:
1. Open Settings on your iPhone.
2. Scroll down and select Photos.
3. Here, scroll down and enable the toggle for Face ID.
Check our detailed guide to hide and lock photos on iPhone here.
Method 9- Jailbreak iPhone to Lock Applications
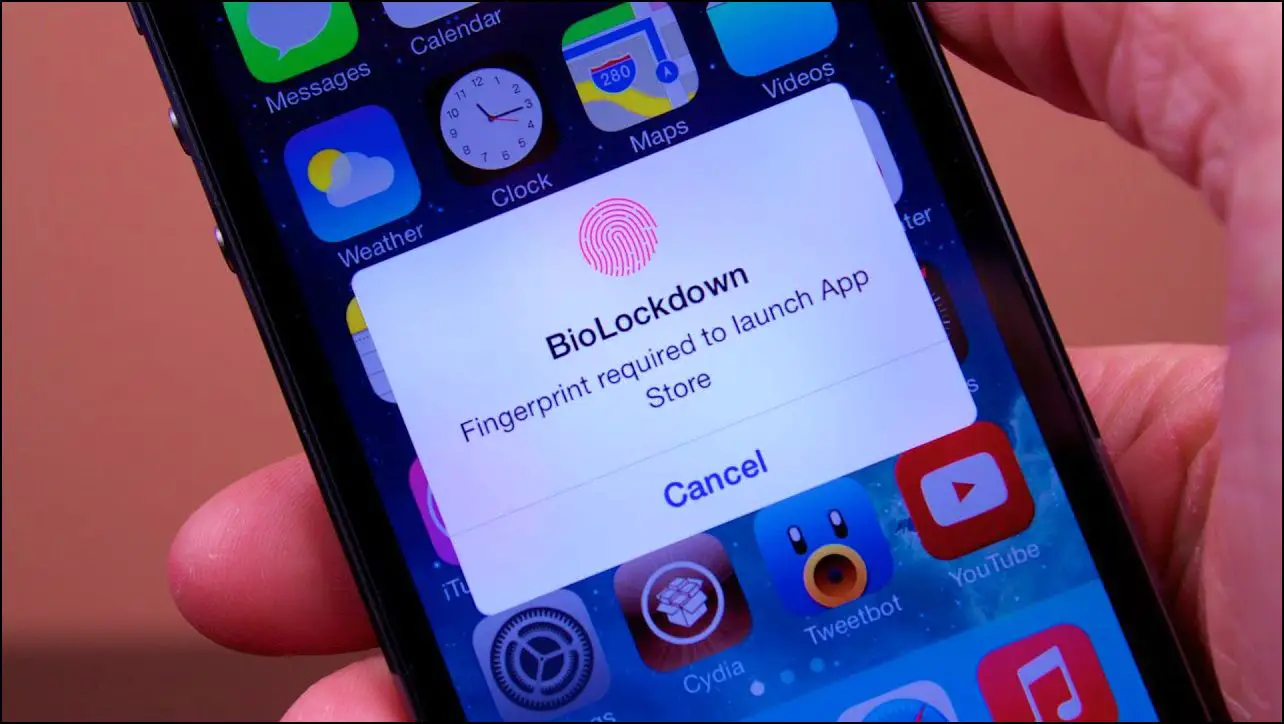
If you have a jailbroken iPhone, you can use Cydia tweaks to lock the apps onboard. This includes tweaks like App Locker, iProtect, BioProtect, BioLockDown, A-Shields, and more. However, jailbreaking your iPhone removes Apple’s safety wall, breaks the device’s warranty, and makes it vulnerable to malware and hackers. For normal users, it’s best to avoid this method.
FAQs
Q. Does iPhone Support Third-Party App Locker Apps like Android?
No, iPhone does not allow third-party apps to lock other apps. The iOS ecosystem is quite closed and does not support screen overlays for privacy reasons.
Q. What’s the Best Way to Lock Apps on iOS?
I think it’s best to use Shortcuts (shown in method 1) to lock applications on your iPhone. While it’s slightly tedious to set it up, you can enable/disable and add or remove apps from the lock list anytime. Plus, it can lock system apps and third-party applications installed on the device.
Q. What’s With the App Lock Apps available for iPhone on App Store?
Most of these applications either create a password-protected app shortcut for the home screen or allow you to hide photos or videos by saving them to the app’s private vault. And hence, they’re not simply worth installing or paying for, as you can already do that using the workarounds given above.
Wrapping Up
This is how you can lock apps on your iPhone and iPad with or without using Screen Time. I hope the above guide helps you protect the apps on your iPhone with a passcode, Touch ID, or Face ID, thereby securing you against unauthorized access. Stay tuned for more such tips, tricks, and guides.
You might be interested in:
- Trick to Lock Apps on iPhone without any Third-Party App
- 3 Ways to Get Full Battery Notification on iPhone or iPad
- 3 Ways to Lock Chats on WhatsApp (Phone, Web)
- 2 Ways to Use Google Magic Eraser on iPhone and iPad
You can also follow us for instant tech news at Google News or for tips and tricks, smartphones & gadgets reviews, join GadgetsToUse Telegram Group or for the latest review videos subscribe GadgetsToUse Youtube Channel.
