With Quick Settings tiles on Android, we can access the most-used settings and sensors within the phone without fiddling with the entire setting app (that’s why they are called Quick Settings), saving us taps and times. So, If you don’t know how to add Quick Settings Tiles on Android, here are a few methods.
Why We Should Add Quick Settings Tiles on Android?
Quick Setting tiles are the best way to access any in-phone or in-app features quickly. Besides that, there are many more reasons why you should use and add the Quick Settings tile on your Android phone. Some of those good reasons are listed below.
- It helps to access app settings like VPN or Sports App quickly.
- It saves time and extra taps to launch services and toggle on the settings.
- Comes in clutch in a time of need when you quickly need to open settings like Torch or Flight mode.
- Lowers distracting elements by not having you completely open your phone and start using it.
Now that we know why we should use the Quick Setting tiles on Android devices let’s learn a few methods to add our own custom or in-phone Quick Settings tiles.
How Do I Add Custom Quick Shortcut Tiles on Android?
Now that we know how useful the Quick Settings tiles are, here are some methods to ease your way toward adding them To your Android devices. These methods will also help you add third-party Quick Setting Tiles to your Android phone.
Method 1 – Edit the Default Quick Settings Customization
Google knew the importance of Quick Settings tiles while giving birth to Android, so there’s a simple built-in way to add and customize Quick Settings Tiles right from the Quick Settings panel. Follow these septs to edit Quick Settings Tiles by adding or removing a toggle of your choice.
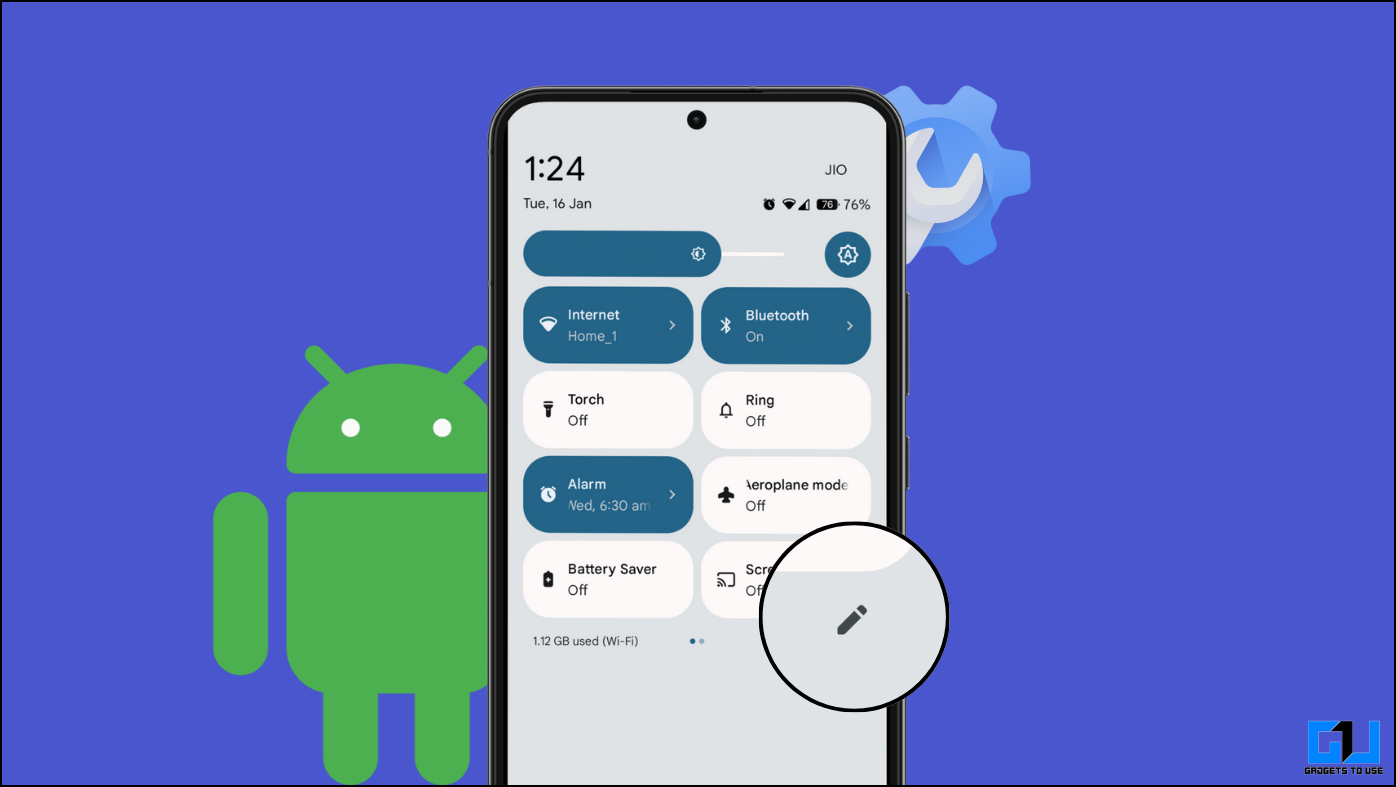
1. Swipe down the Notification Panel.
2. Once you see the Quick Settings Tiles, swipe down again.

3. Tap on Edit Icon (pencil Icon).

4. Now, swipe down till you see the extra tiles.

5. Tap and hold the Quick Settings Tile and drag it to your desired position.
You can tap and hold and then drag to rearrange the default tiles as well.
6. Once done, tap back to save your settings.
Viola! It’s that simple. Repeat this process whenever you want to add a custom tile or rearrange the default one. What if you want to create a custom tile for the third-party app you installed? Check out the next method to get that done quickly.
Method 2 – Add Quick Settings Tiles for Third-Party Apps
The Quick Settings Tiles are not only for the System settings but support third-party apps as well. Here’s how you can add tiles for supported third-party apps.
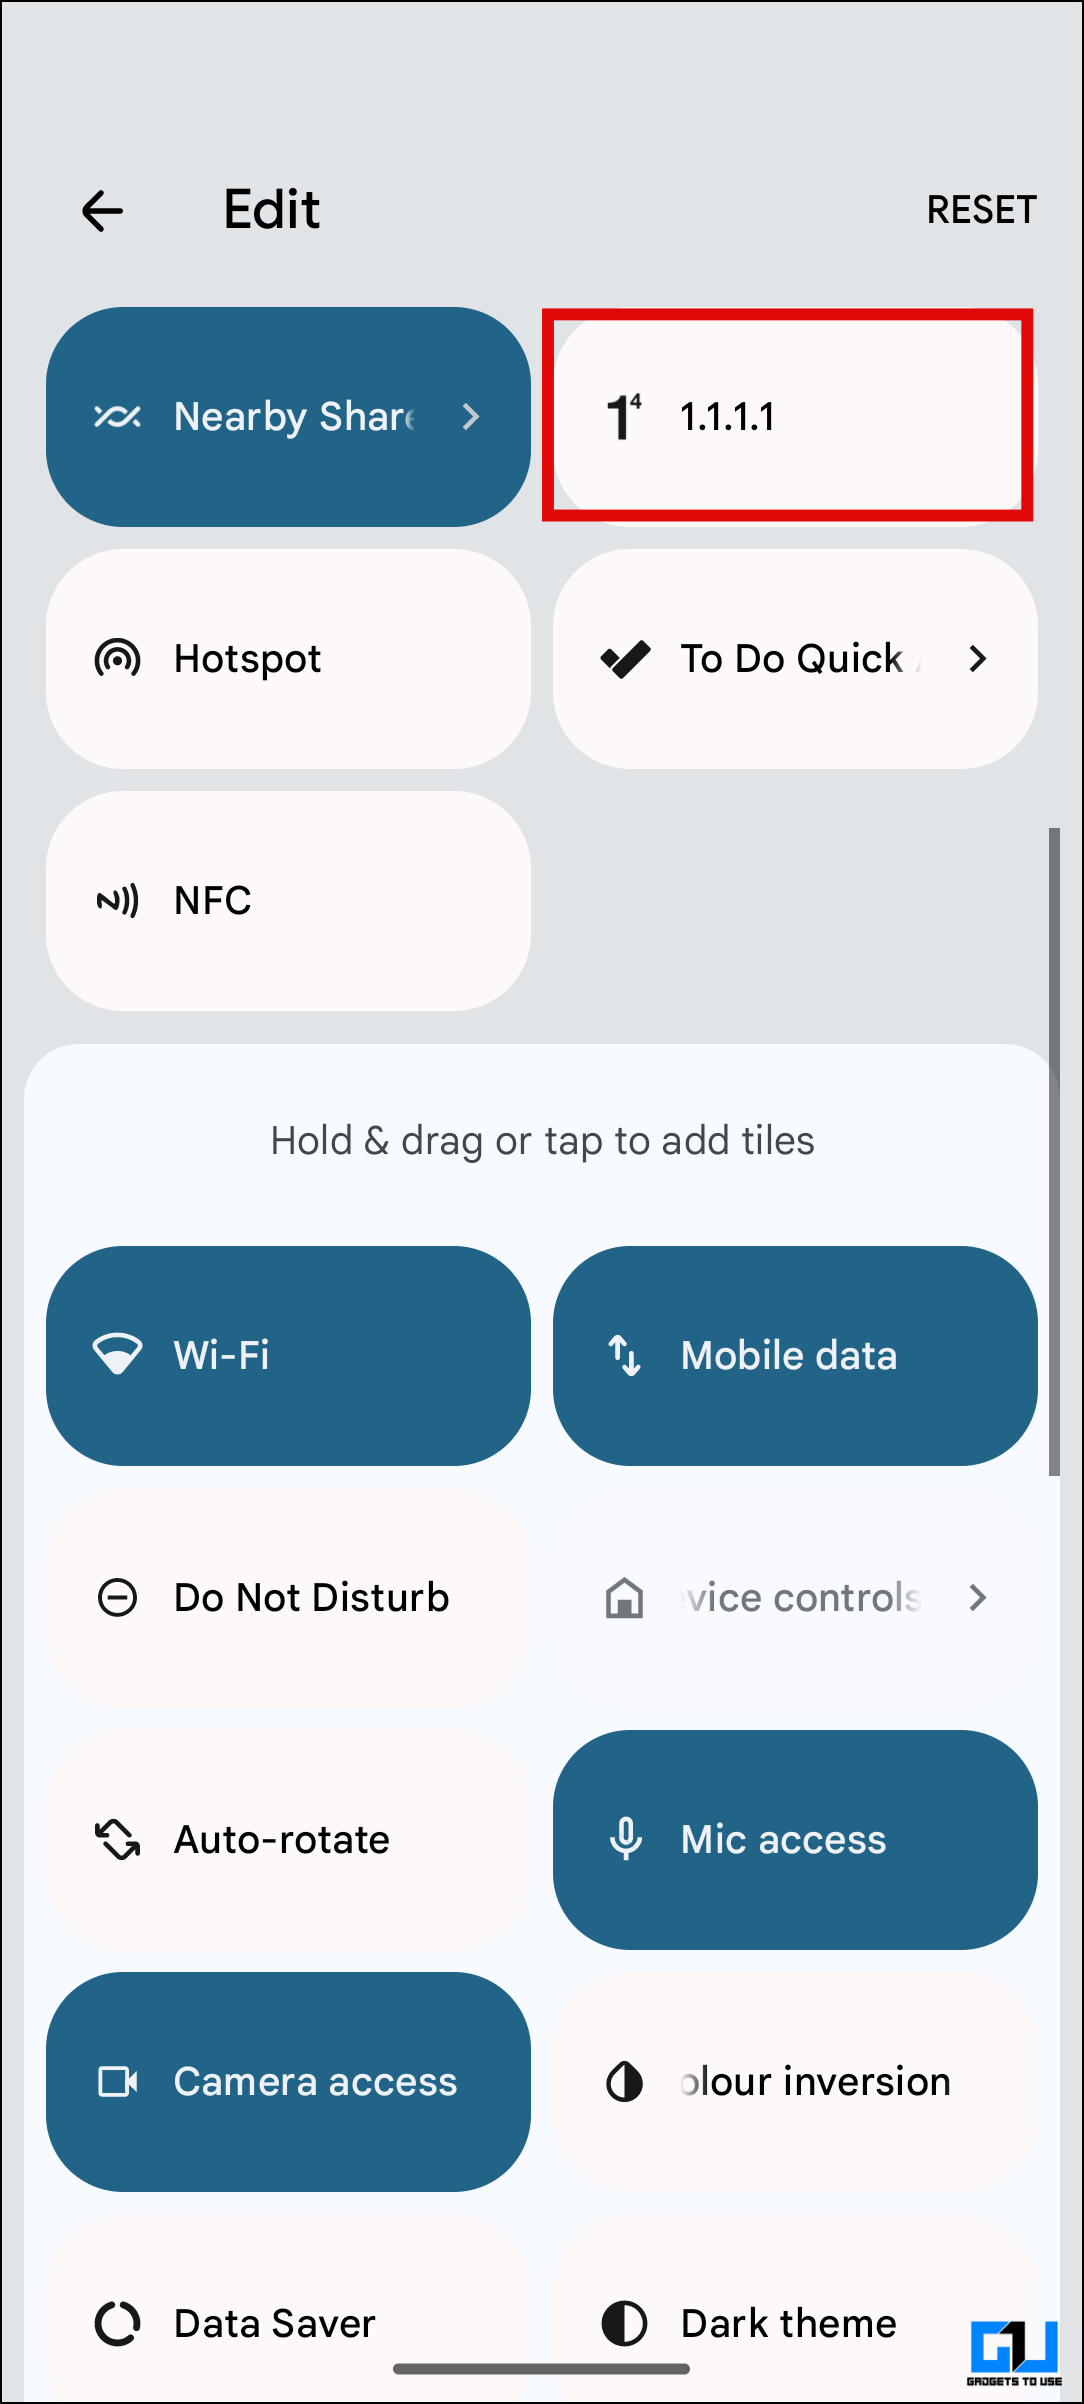
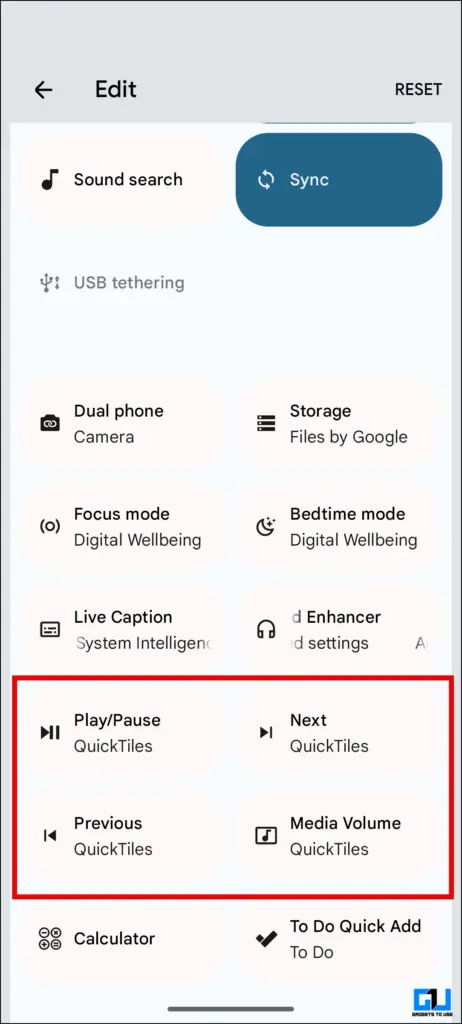
1. Follow the first four steps from the above method till you reach the Tile Customization Menu.
2. Scroll to the bottom until you see the Extra Tiles section.
Here I’m adding a quick tile for 1.1.1.1 VPN as an example.

3. Drag and drop the tile from the third-party app you like.
That’s all! It’s as easy as method one. But what if you don’t see the tile of your choice in Customization? Or if you want to create your custom tile. There’s a way to add Quick Settings Tiles using Third Pary apps and follow the next method to know how.
Method 3 – Create Custom Quick Settings Tiles on Android
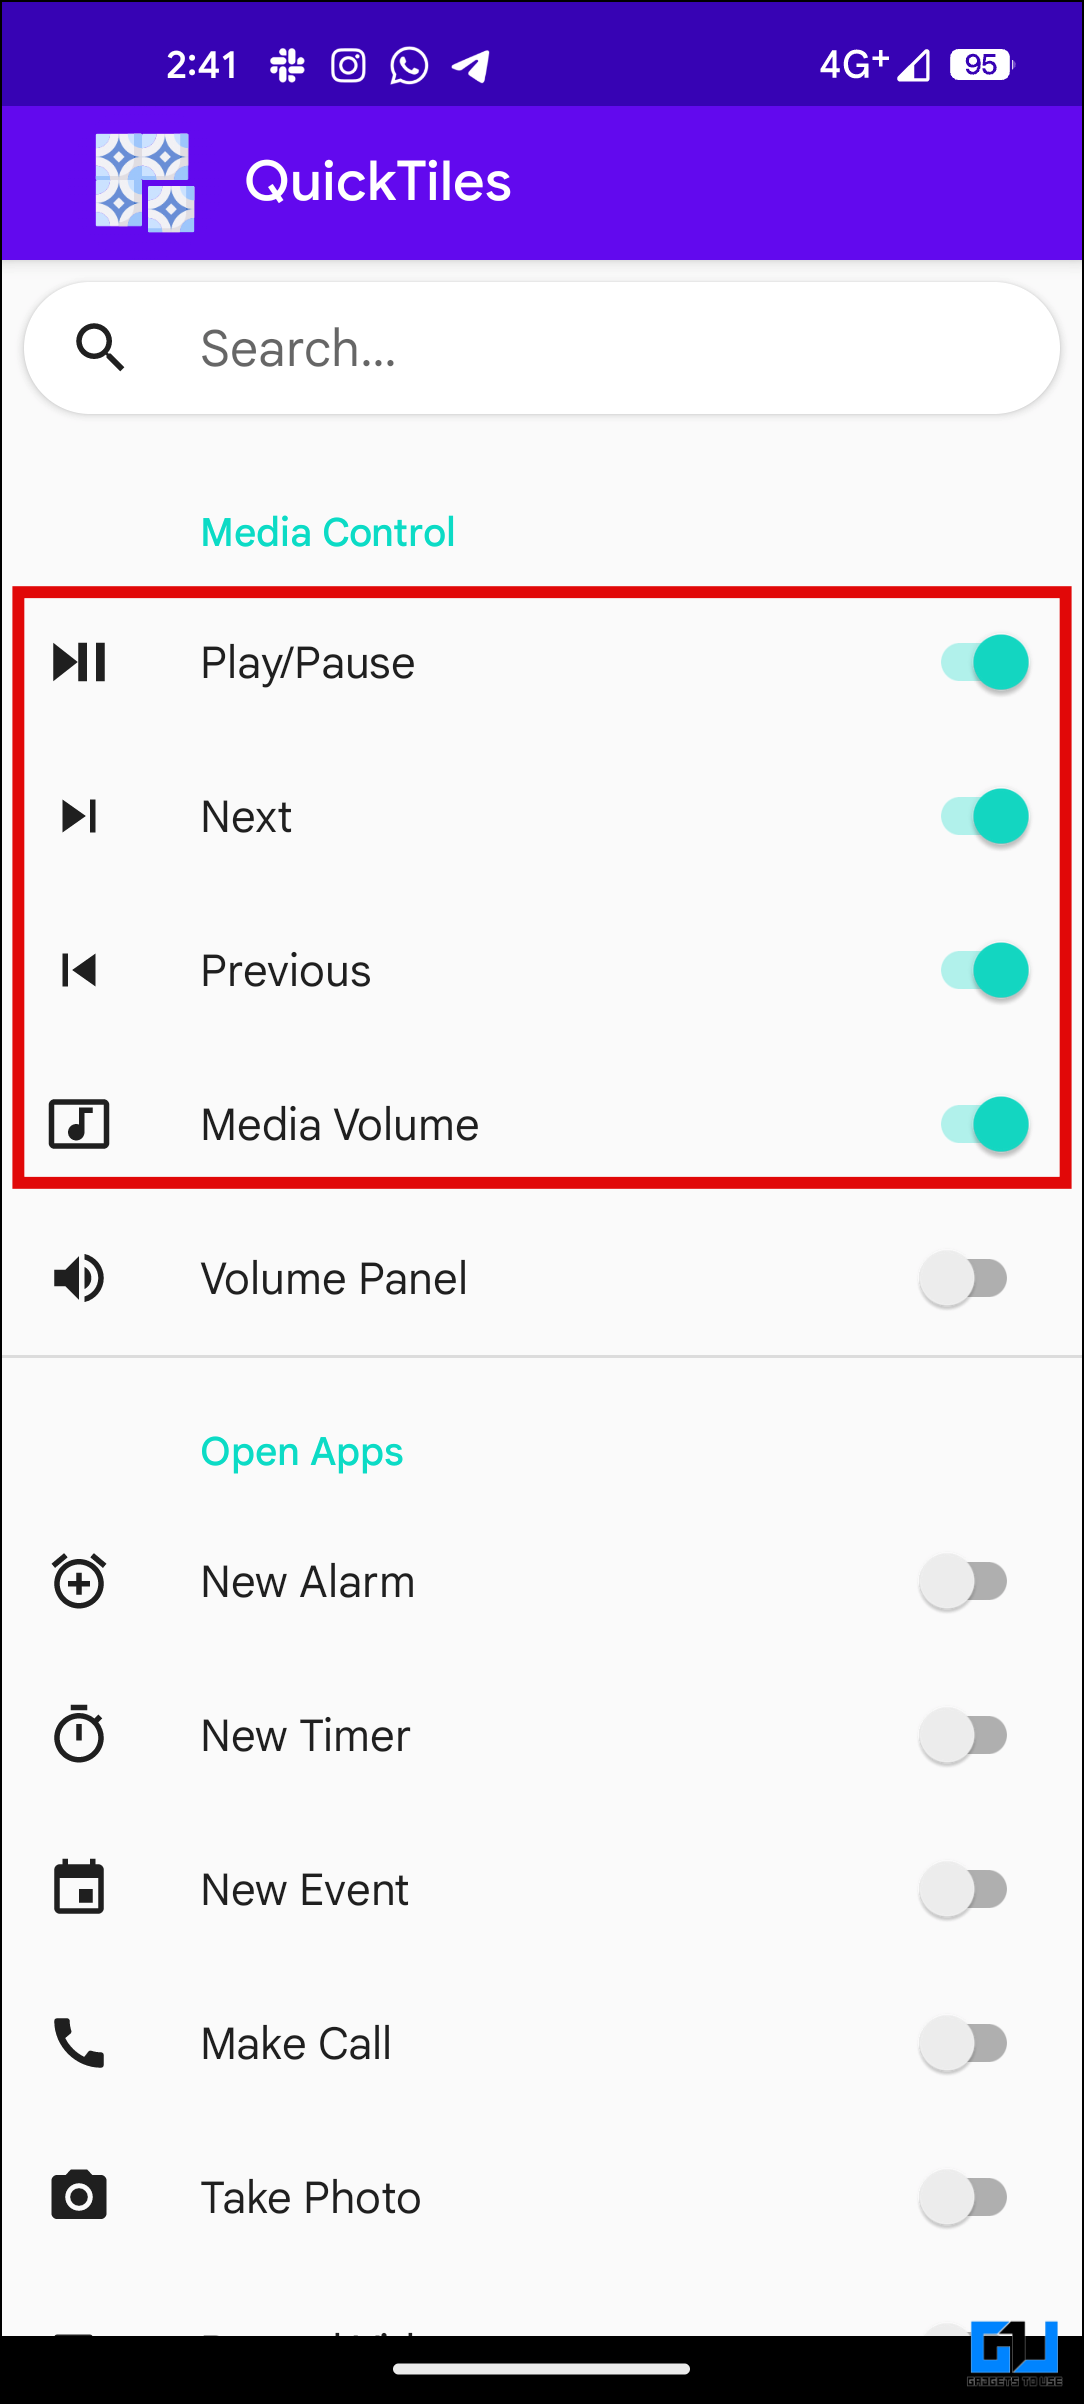
If you can not find your desired tile in Quick Settings, you can add one using third-party apps. This app will help create a custom tile in the Quick Settings Menu. First, we need to create a custom Quick Settings tile using any of the following apps and then follow the second method to add them to the Quick Settings pane. Following are the apps that can be used to create custom tiles.
Once you download any of the apps, follow these steps to start with custom Quick Setting tiles. Here I have demonstrated how to add custom tiles using Quick Tiles App.
1. Download the app and toggle on the tiles you want to add.
2. Open Quick Settings Customization according to Method One.
3. Add custom tiles from the extra tiles section inside Quick Settings customization.
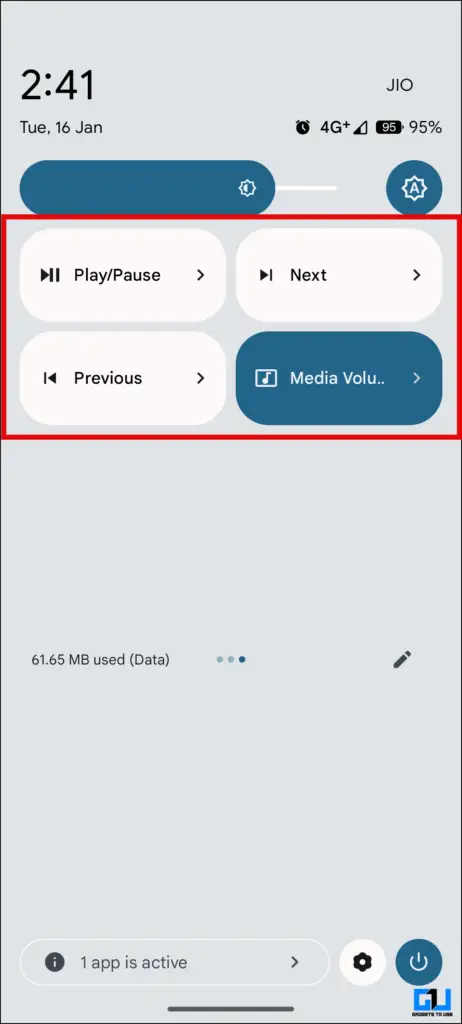
That’s it. You are all set with your customized Quick Tiles to ease your way through the Android experience.
FAQs
Q. Can I Reset Quick Settings Tile to Its Default State?
Yes. Follow the first method to the customizations and tap the Reset button in the top right corner.
Q. How Do I Know if a Third-Party App Supports Quick Tile?
You can check if the third-party app supports Quick Tile by entering the extra tiles section inside customizations.
Q. How Do I Add Custom Quick Settings to My Android Phone?
Just follow the first and third methods from the explainer to add a custom Quick Tile in the Quick Settings menu on your Android phone.
Wrapping Up
We encourage you to use Quick Settings more as it minimizes the time to enable specific settings and features. With these customization methods, you can get the most out of them. Stay tuned to GadgetsToUse for more such reads, and check the ones linked below.
Also, Read:
- 3 Ways to Get iOS 17 Standby Mode on Any Android Phone
- 3 Ways to Save Home Screen Layout and Icon Position on Android
- 5 Clever Ways to Use the Notch Area on Your Android Phone
- Best Samsung Good Lock Tips for 2024
You can also follow us for instant tech news at Google News or for tips and tricks, smartphones & gadgets reviews, join the GadgetsToUse Telegram Group, or subscribe to the GadgetsToUse Youtube Channel for the latest review videos.