Regarding suppressing annoying notifications, Do Not Disturb is genuinely a life-saver. However, if it keeps turning on automatically, you might miss some crucial updates that require your attention. Windows 11 users have often encountered this issue, and we’ve decided to fix it by listing easy methods to troubleshoot the problem in this explainer.
Reasons Behind the Issue
There can be numerous reasons why your system suddenly blocked the notifications. It can be due to a pre-scheduled DND, an active focus/gaming mode, or a system bug or glitch. Some of the common underlying reasons are as follows:
- Your system has a Do Not Disturb schedule.
- An active focus mode is suppressing new notifications.
- A system bug/glitch is turning on the Do Not Disturb mode automatically.
- You’ve unknowingly triggered the Gaming mode, etc.
How to Fix Do Not Disturb Turning On Automatically on Windows 11?
Depending on the cause, several methods exist to fix the DND mode issues on Windows 11. You can manually disable it from Windows Settings or turn off features like Focus Assist and Gaming mode to stop triggering it in the first place. If that doesn’t solve the problem, you can use Command Prompt, Registry Editor, PowerShell, or the Group Policy Editor to fix it permanently. Let’s look at each of them below:
Method 1 – Disable Do Not Disturb From the Notification Shade
The first step to fix the Do Not Disturb mode issues on Windows 11 is to disable it manually. Head to the notification shade/panel in the taskbar to quickly toggle it off.
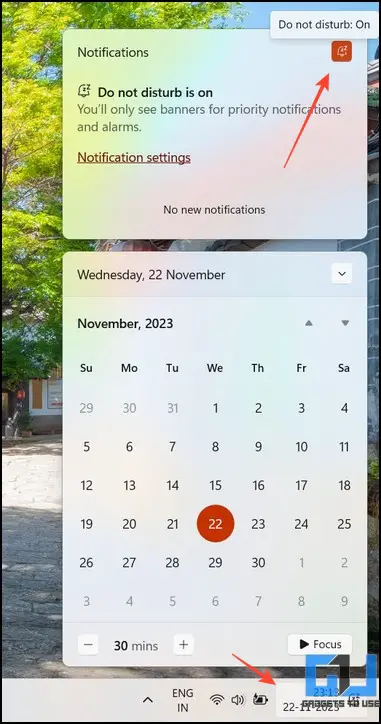
1. Click the bottom-right corner of the Windows 11 taskbar to expand the Notification Shade.
2. Click the Do Not Disturb button in the top-right to turn it off.
Method 2 – Use Windows Settings to Disable the Do Not Disturb Mode
Besides the notification shade, you can access your Windows Settings app to turn off the Do Not Disturb mode. Here’s how:
1. Open the Settings app using the Windows + I hotkeys.
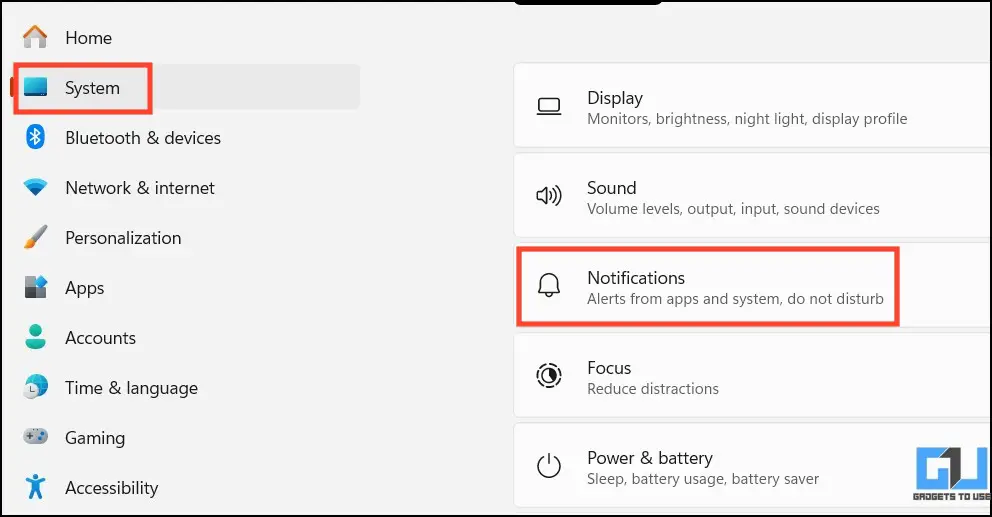
2. Expand the System in the left sidebar and click Notifications.
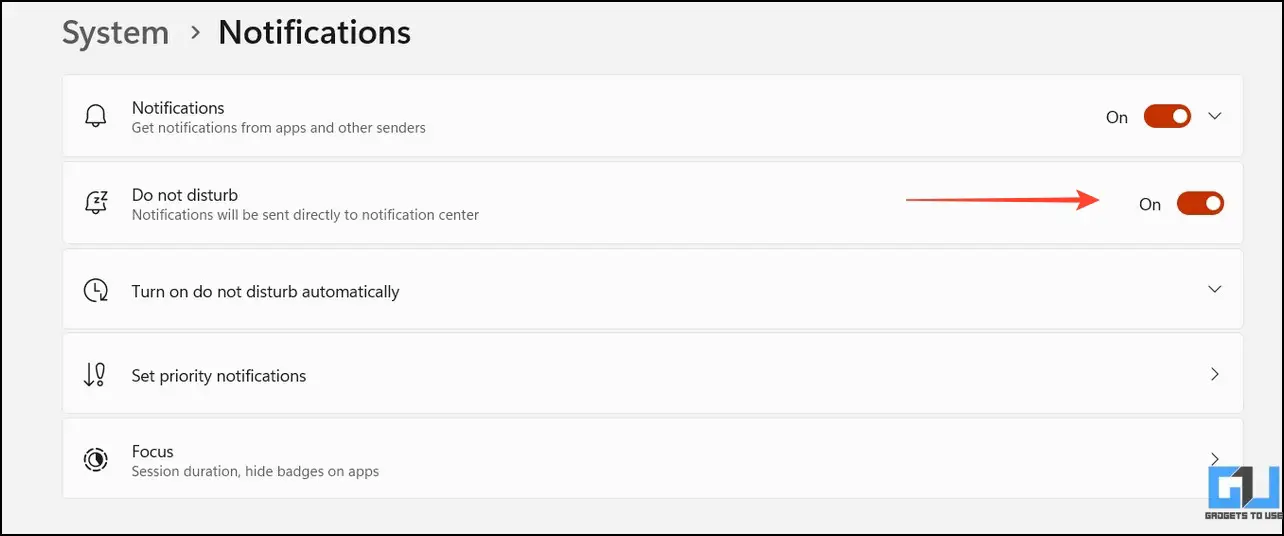
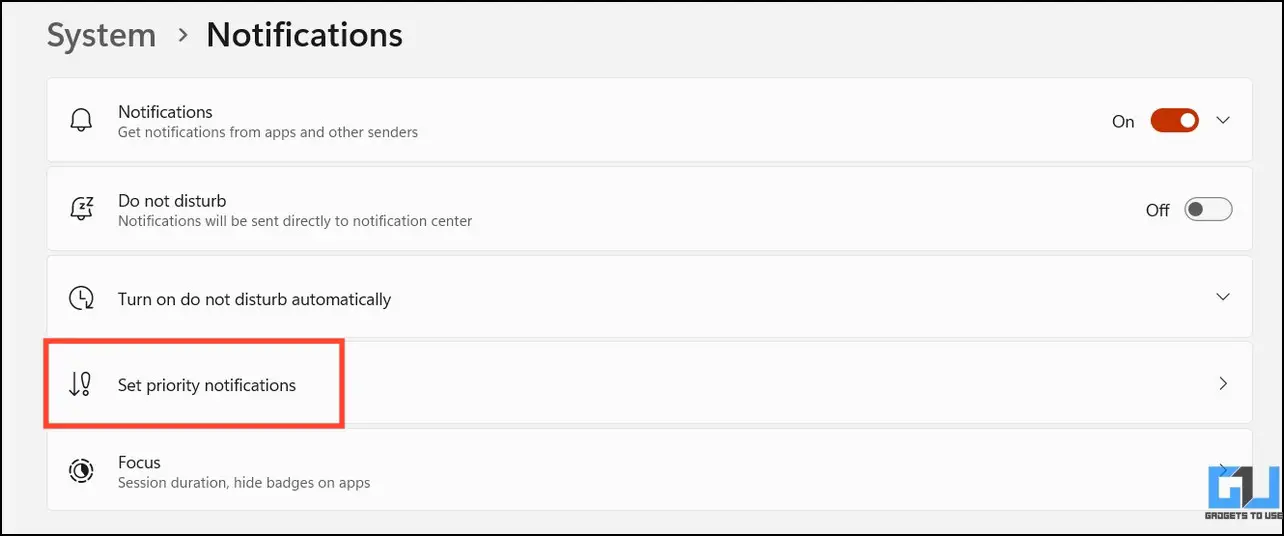
3. Turn off the toggle button for Do Not Disturb to disable it.
Method 3 – Turn off Automatic Rules
If the DND mode turns on automatically even after you’ve disabled it, an existing schedule or automatic rule is initiated. Head to the Do Not Disturb settings and uncheck all automatic rules to solve the problem.
1. Open Notifications in the Windows Settings app.
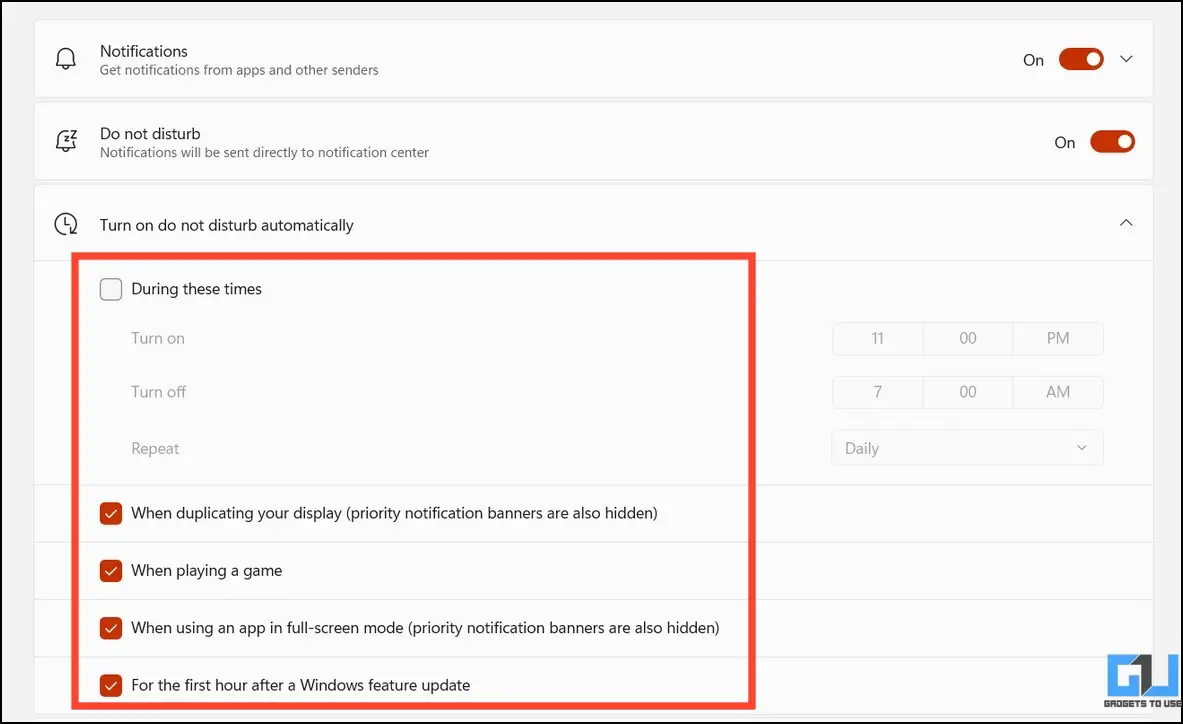
2. Click Turn on Do Not Disturb automatically and uncheck all schedules and options to avoid triggering it automatically.
Method 4 – Disable Focus Mode
The Windows Focus Mode is designed to reduce distractions, helping users increase productivity by suppressing app notifications. If you’ve enabled it accidentally or set a pre-defined schedule, you might miss crucial notifications requiring your attention. Here’s how you can turn it off:
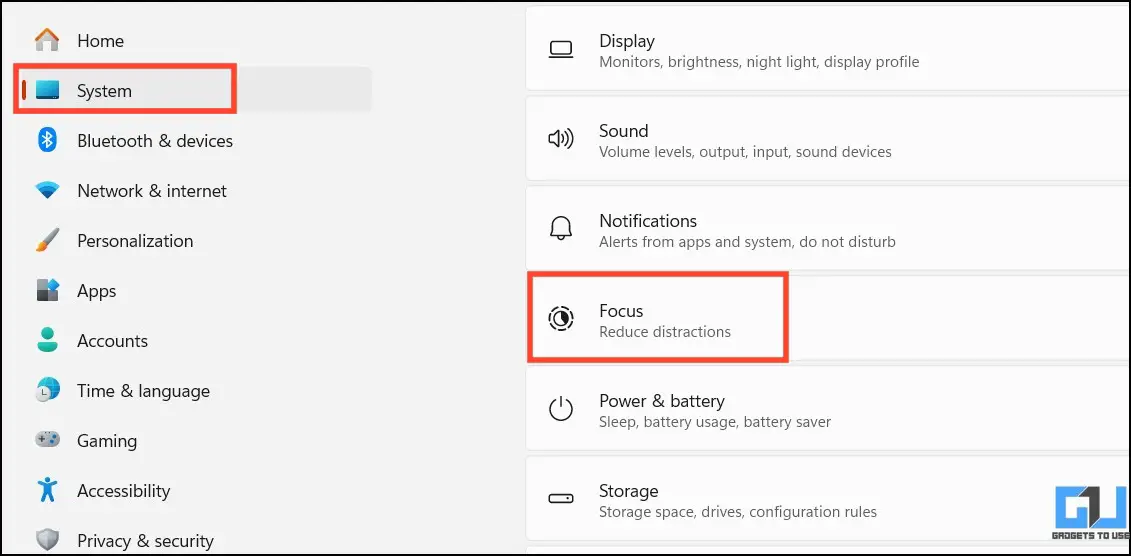
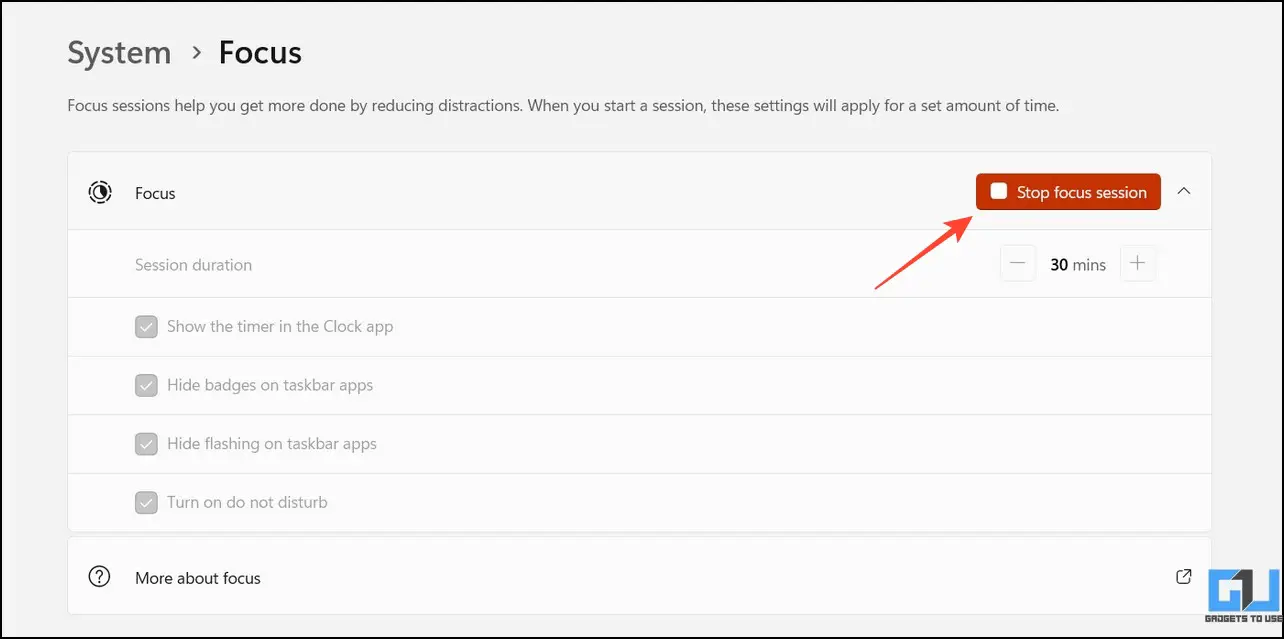
1. Open the Windows Settings app and click Focus under the System settings.
2. Press the Stop Focus Session button to turn it off.
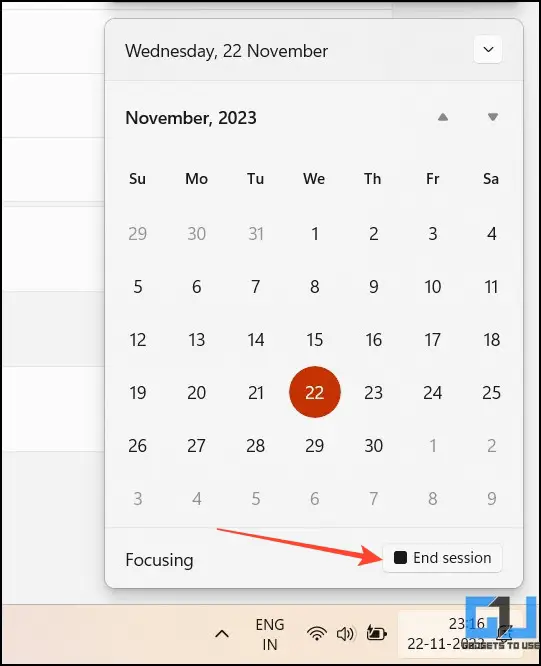
3. Alternatively, you can open the Notification Shade in the taskbar to disable an ongoing focus mode session.
Method 5 – Toggle off the Gaming Mode
The Gaming Mode is another nifty Windows 11 feature that prioritizes games over background applications. It automatically detects when you’re playing a game and suppresses all app notifications unless you’ve prioritized them. While this feature is useful for gamers, an incorrect game mode detection can make you miss important app updates. Follow these steps to turn it off on Windows 11:
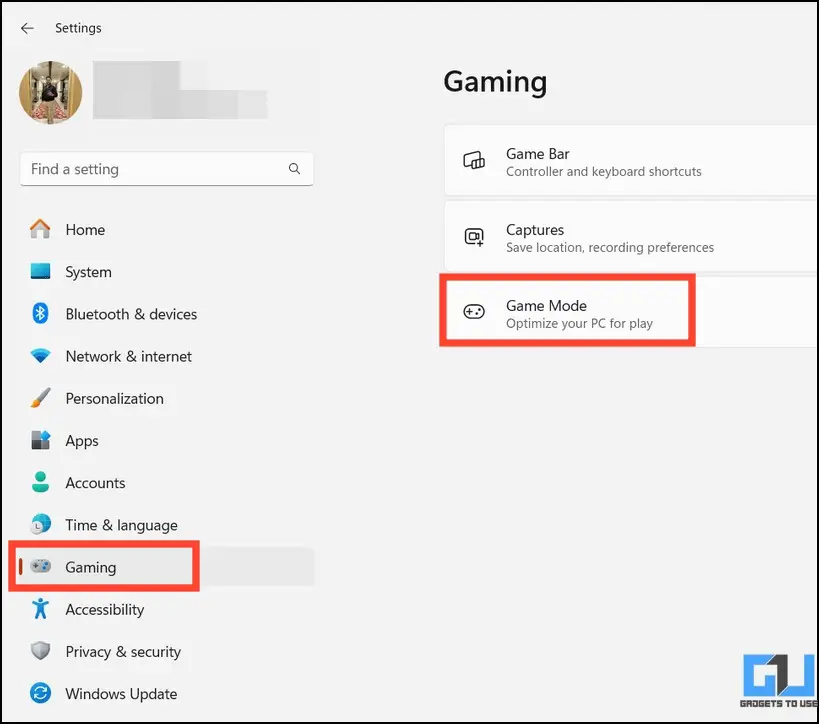
1. Press Windows + I hotkeys to open the Settings app.
2. Expand Gaming and click on Gaming Mode.
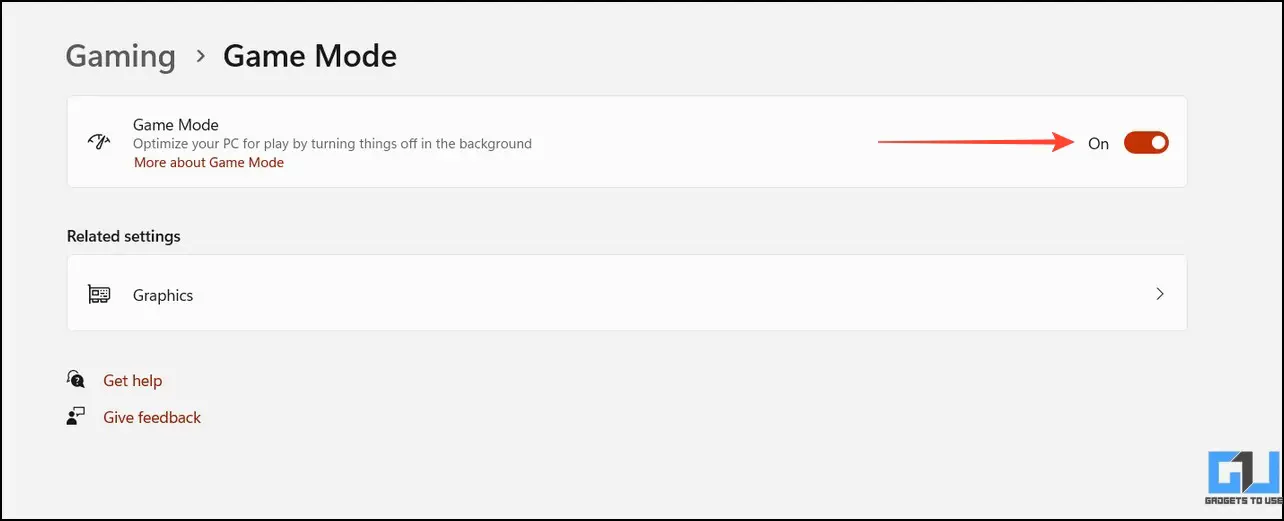
3. Finally, turn off the Game Mode toggle button to disable it.
Method 6 – Use Command Prompt to Fix DND Turning On Automatically
If disabling the focus and gaming modes didn’t solve the ‘Do Not Disturb turning on automatically’ issue, you can use Command Prompt to resolve the problem permanently. Follow these steps for an easy fix:
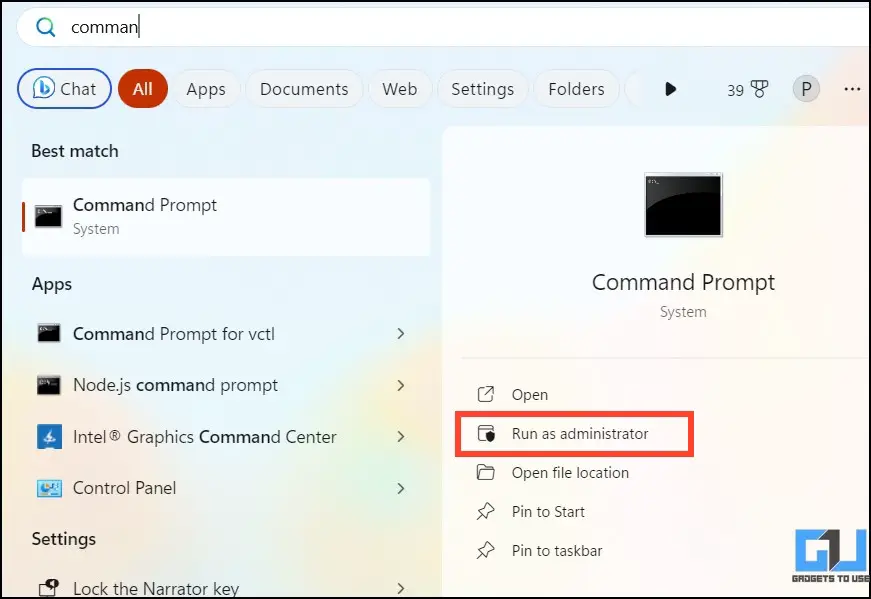
1. Press the Windows key and search for Command Prompt to run it with elevated permissions.
2. Paste the following command and hit enter to execute it:
reg add “HKCU\SOFTWARE\Microsoft\Windows\CurrentVersion\QuietHours” /v “Enabled” /t REG_DWORD /d 0 /f
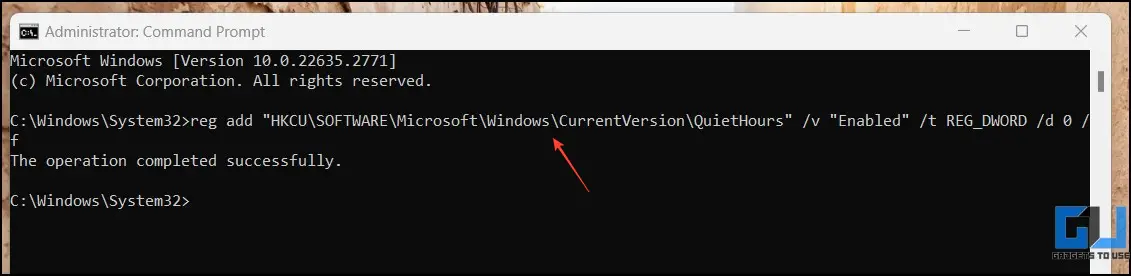
3. Reboot your Windows 11 PC to see the changes applied.
Method 7 – Use the Registry Editor
Like Command Prompt, you can edit your Windows Registry to set up keys preventing Do Not Disturb from turning on automatically. Here’s what you need to do:
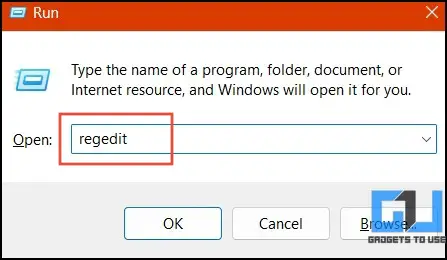
1. Press the Windows key + R and type regedit to launch the Registry Editor app.
2. Paste the following path in the navigation field:
HKEY_CURRENT_USER\Software\Microsoft\Windows\CurrentVersion\PushNotifications
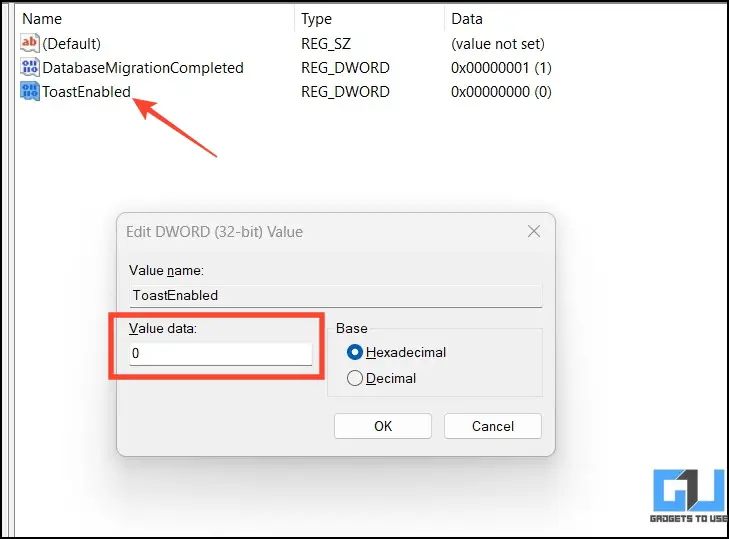
3. Right-click Push Notifications and create a new DWORD (32-bit) Value key.
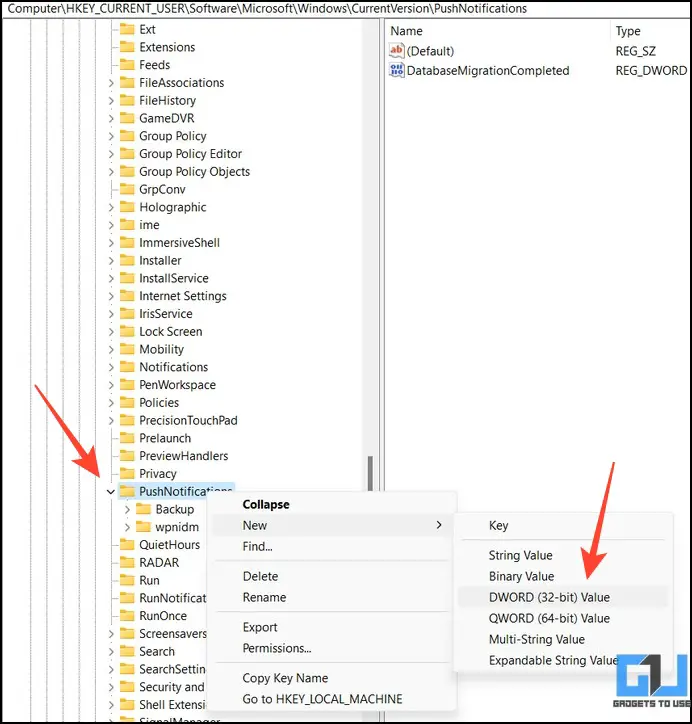
4. Name this key as ‘ToastEnabled‘ and set its value to 0. Click OK to apply changes to your registry.
Method 8 – Fix Auto DND From Windows Powershell
Command Prompt and Windows PowerShell work similarly. Consequently, you can execute a specific command on the Shell to fix the Do Not Disturb mode turning on automatically.
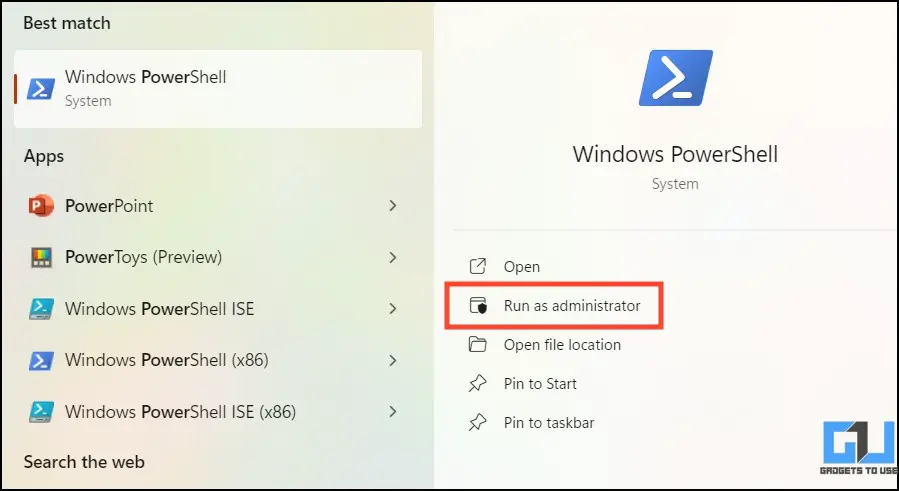
1. Launch the Windows PowerShell app with administrative permissions.
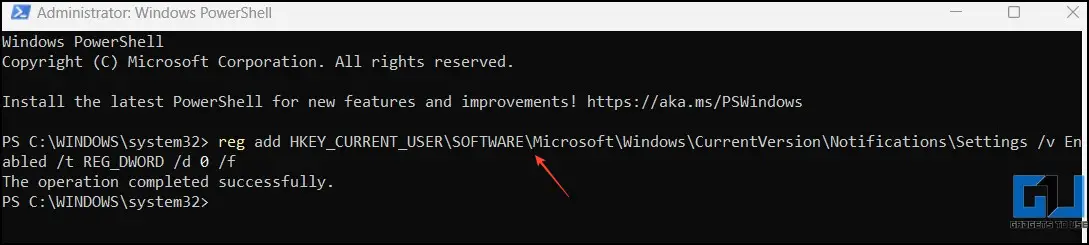
2. Copy-paste and execute the following command to fix DND turning on automatically:
reg add HKEY_CURRENT_USER\SOFTWARE\Microsoft\Windows\CurrentVersion\Notifications\Settings /v Enabled /t REG_DWORD /d 0 /f
Method 9 – Use the Group Policy Editor
Besides executing commands and editing registry files, you can also edit Windows policy rules to stop Do Not Disturb mode from initiating automatically. Follow these easy steps to do it:
1. Open the Run Dialog box and type the following to launch the Group Policy Editor app.
gpedit. msc

2. Navigate to the following path inside the Group Policy Editor:
User configuration > Administrative Templates > Start Menu and Taskbar > Notifications
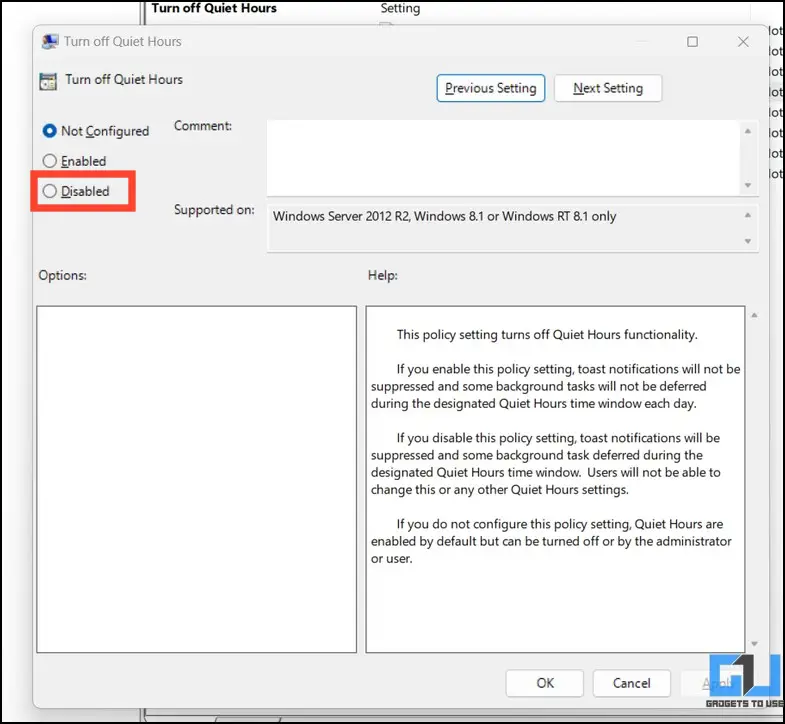
3. Double-click the Turn off Quiet Hours policy.
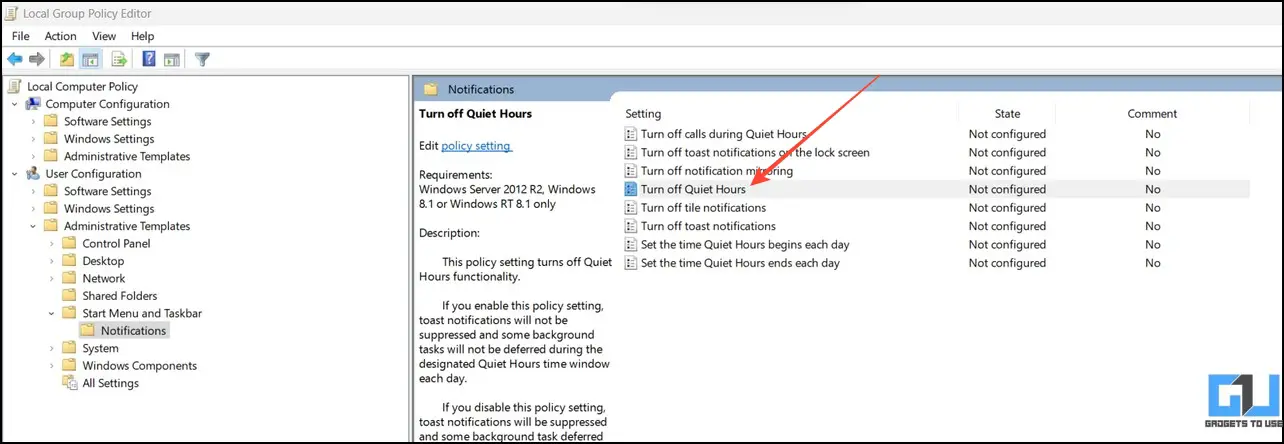
4. Set its value to Disabled and click Apply to save changes.
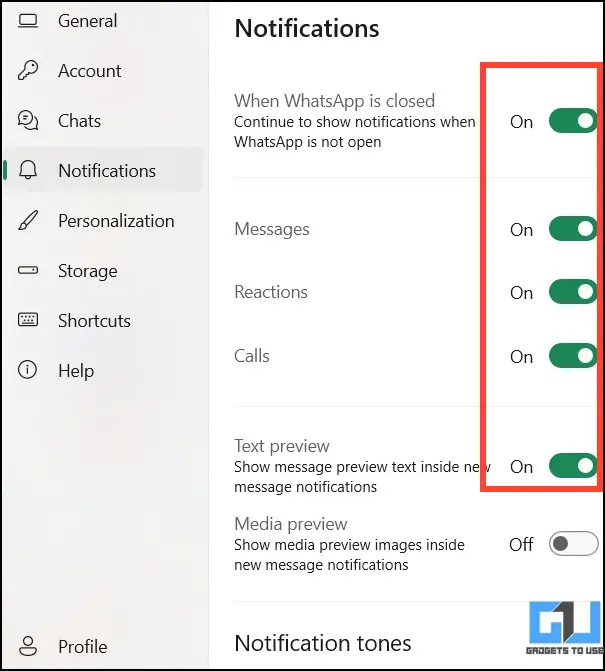
Method 10 – Verify You’ve Enabled Notifications for Apps
If you aren’t receiving notifications from a specific Windows app even when the Do Not Disturb mode is disabled, there’s something wrong with the app’s notifications. Head to that app’s settings and ensure notification sounds are enabled. For example, you can verify whether WhatsApp’s notifications are enabled.
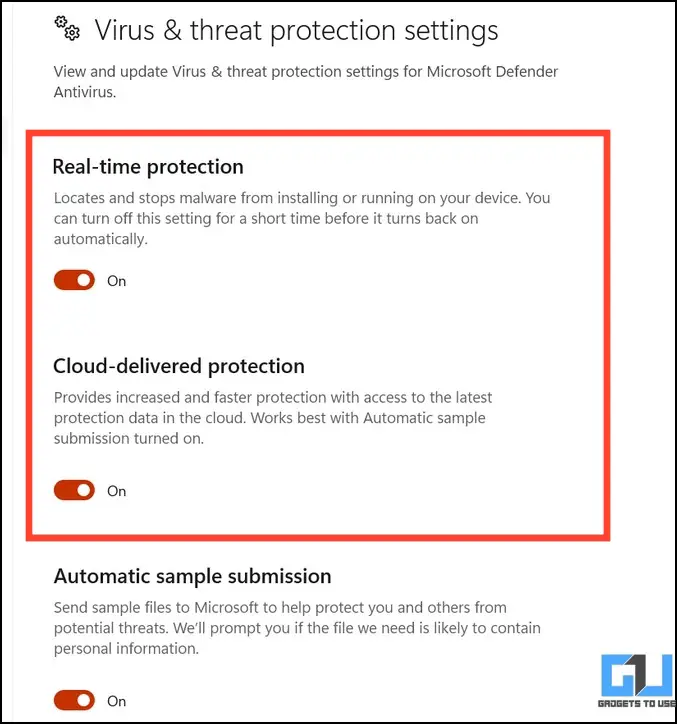
Method 11 – Disable Antivirus
Some antivirus software also blocks certain app notifications. If you’ve recently installed a third-party Antivirus software and are facing issues receiving notifications from a particular app, disabling the antivirus service becomes necessary. Head to your Antivirus settings and turn off its virus, app, and file scanning services to resume getting app notifications.
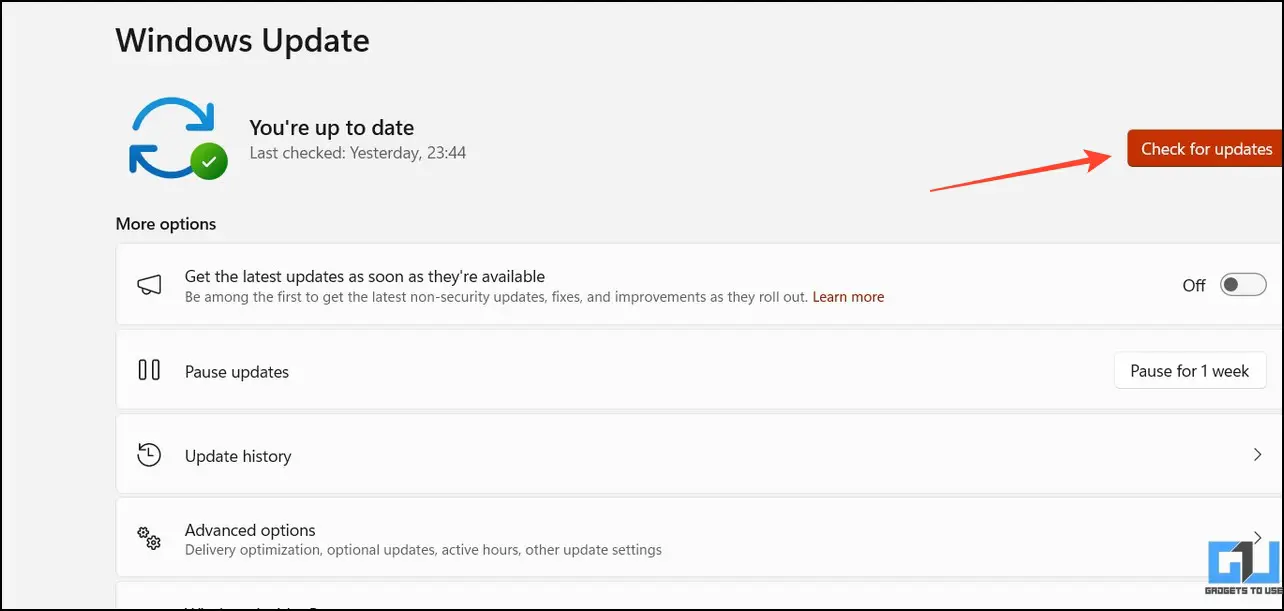
Method 12 – Update Your Windows
An existing glitch or a system bug can be another reason behind the Do Not Disturb mode turning on automatically on Windows. To fix it, open the Windows Settings app and download new updates to install it.
Bonus: Set Priority Notifications to Never Miss Updates
If nothing works, you can prioritize specific applications and never miss any notifications. Here’s how you can set it up on Windows 11:
1. Open the Windows Settings app and click Notifications to configure it.
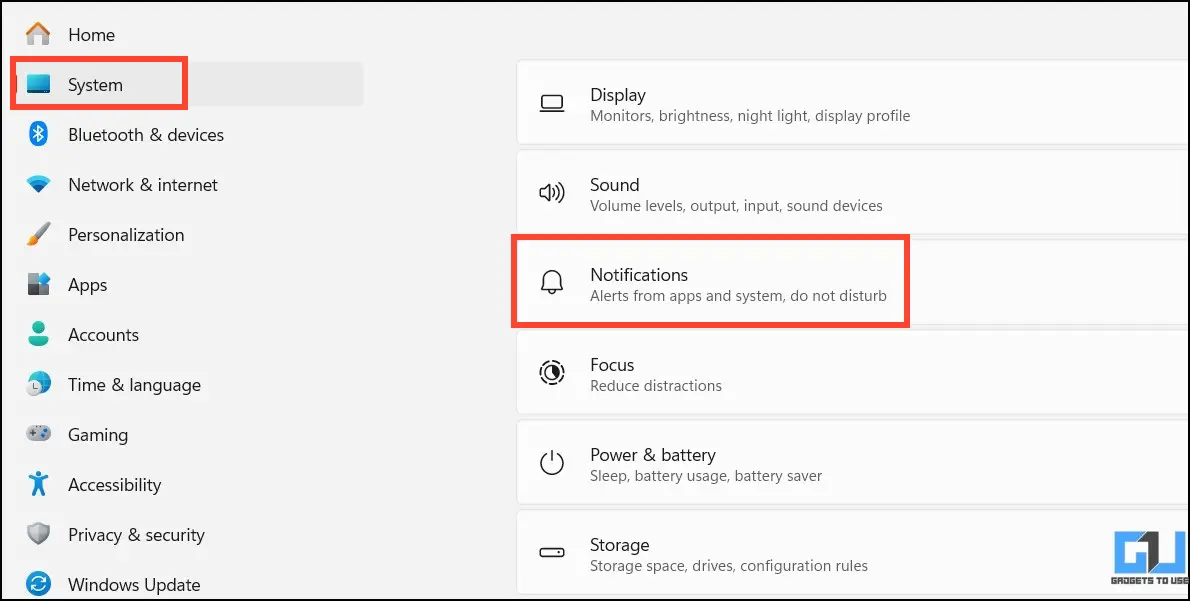
2. Next, click Set Priority Notifications below Do Not Disturb.
3. Finally, enable checkboxes for incoming calls/reminders and click Add Apps to get prioritized notifications from them.

FAQs
Q. How Do I Stop Do Not Disturb From Turning on by Itself on Windows 11?
You can try disabling it manually from the Settings app or turn off features like Focus Assist and Gaming Mode to stop them from suppressing app notifications. If that doesn’t solve the problem, you can execute commands on Command Prompt/Windows PowerShell or edit system registry values to stop Do Not Disturb from turning on automatically.
Q. How Do I Turn off the Do Not Disturb Mode on Windows 11?
Head to your Windows Settings app and click Notifications. Next, disable the toggle button to turn off the Do Not Disturb. You can also use the Notification Shade for similar results for quick access. For more details, read the steps listed above.
Q. Can I Disable Focus Assist on Windows 11?
Open Windows Settings and locate Focus under the System settings. Next, click the Stop Focus button to disable the Focus Assist session.
Wrapping Up: Adios, Auto-DND!
We hope this guide helped you fix DND issues on your Windows 11 machine. If you found it useful, spread the word with your colleagues and subscribe to GadgetsToUse for more informative reads. Also, don’t forget to check the below links for common Windows 11 fixes.
You might be interested in:
- Top 7 Ways to Fix Windows 11 Black Screen With Cursor Issue
- 12 Ways to Fix Swapped Keyboard Keys on Windows 11/10
- 15 Ways to Fix Slow Start Menu Search on Windows 11
- 16 Ways to Fix Wi-Fi Not Visible Issue on Windows 11/10
You can also follow us for instant tech news at Google News or for tips and tricks, smartphones & gadgets reviews, join GadgetsToUse Telegram Group, or for the latest review videos subscribe GadgetsToUse Youtube Channel.