If you want to insert your signature in online documents, there are many ways to do so. On Google Docs, there are ways to add images or text as watermark, so you can also add your signature by just uploading the file as image. However, if you want to insert your handwritten signature in Google Docs, there are some methods for this as well.

Ways to Insert Handwritten Signature in Google Docs
You can add your signature in Google Docs by using in-built features, or Chrome extensions or add-ons and third-party apps on mobile. These methods also let you add signature to photos, and to PDF forms as well. Read on for Google Docs!
Using Google’s Drawing Tool
You can use Google Doc’s in-built drawing tool to create and add a new signature. Follow these steps:
1. Visit Google Docs and open your document in which you want to add signature.
2. In the menu, click on “Insert” and go to “Drawing” and choose “New”.
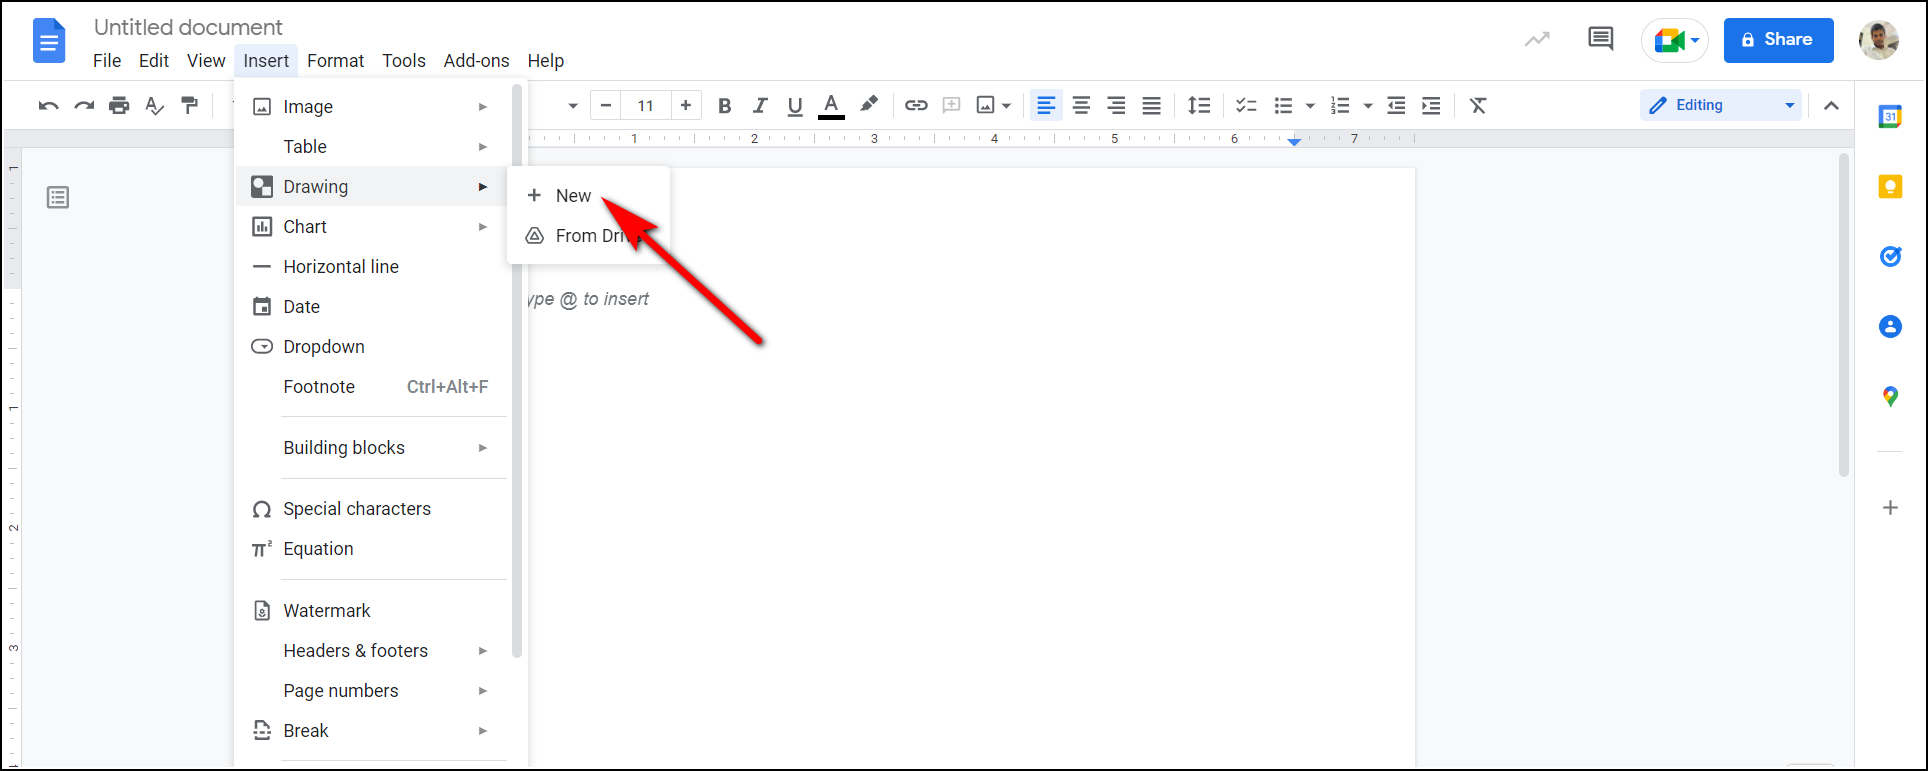
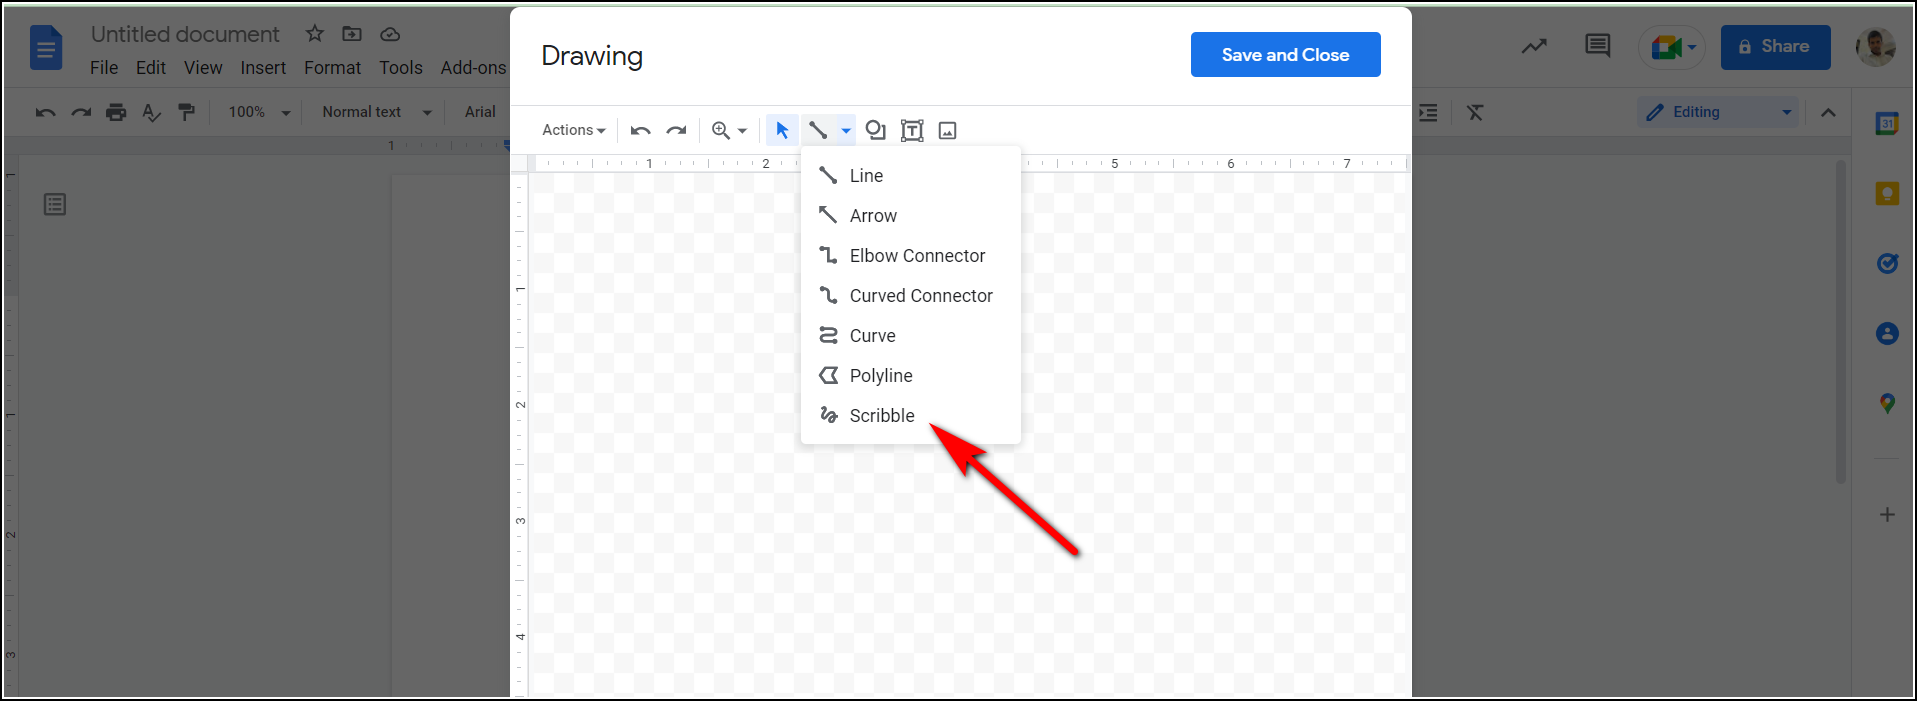
3. The drawing board will open, click on “Select Line” drop-down box.
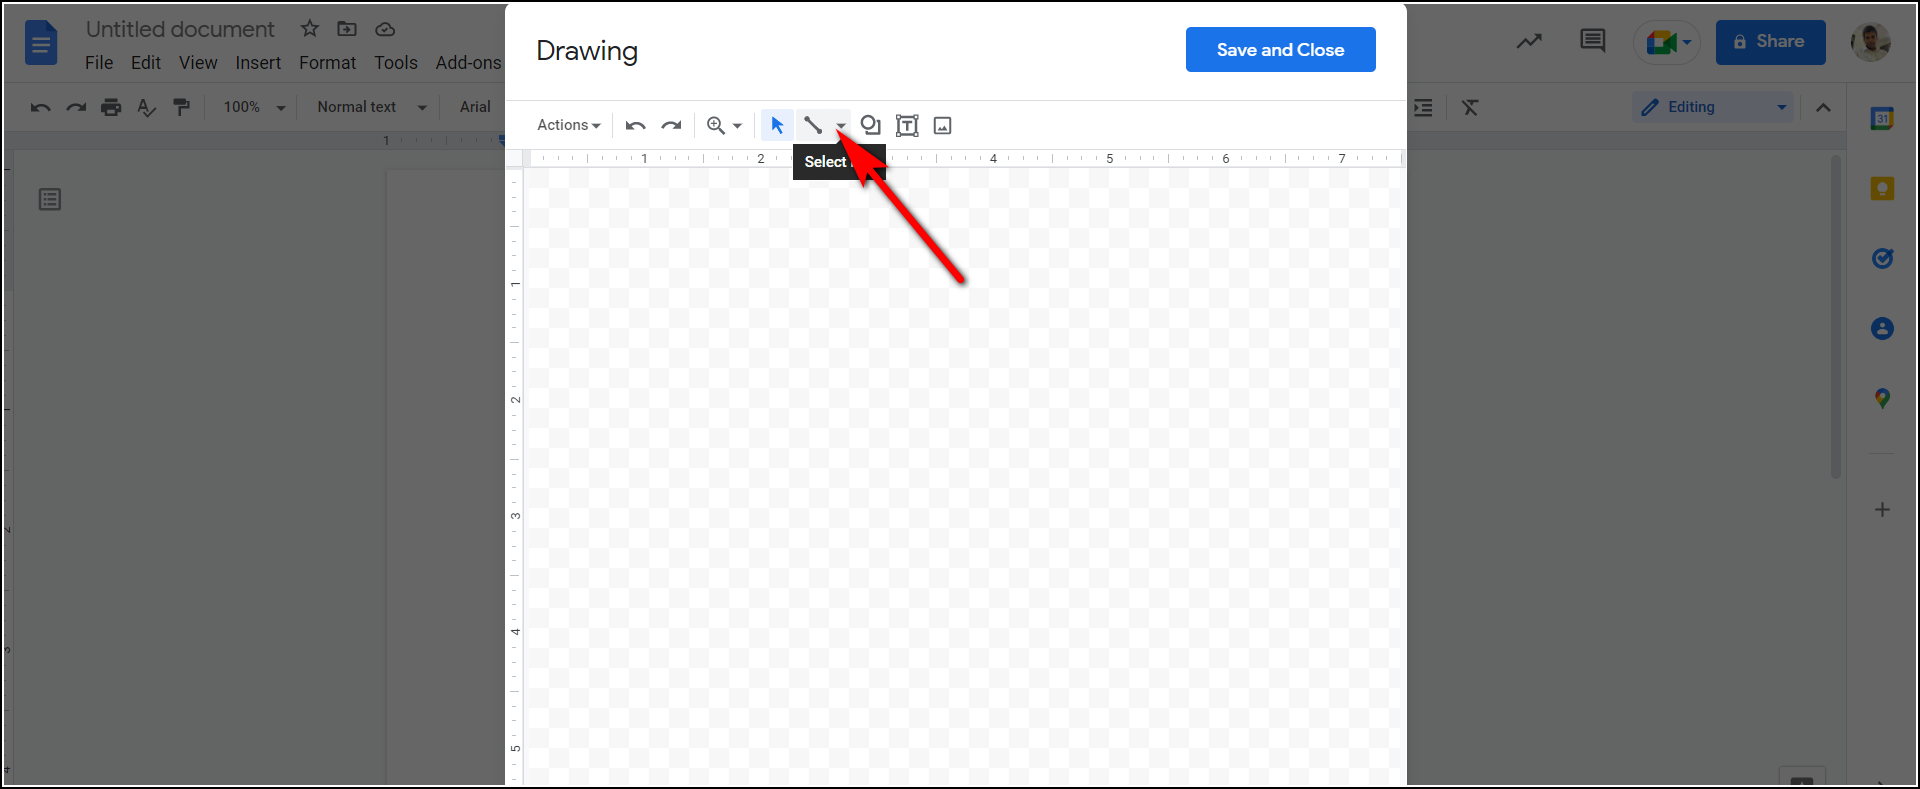
4. Select “Scribble” from the menu.
5. Now draw your signature using the + sign on the board.
6. When you’re done with your signature, select “Save and Close.”
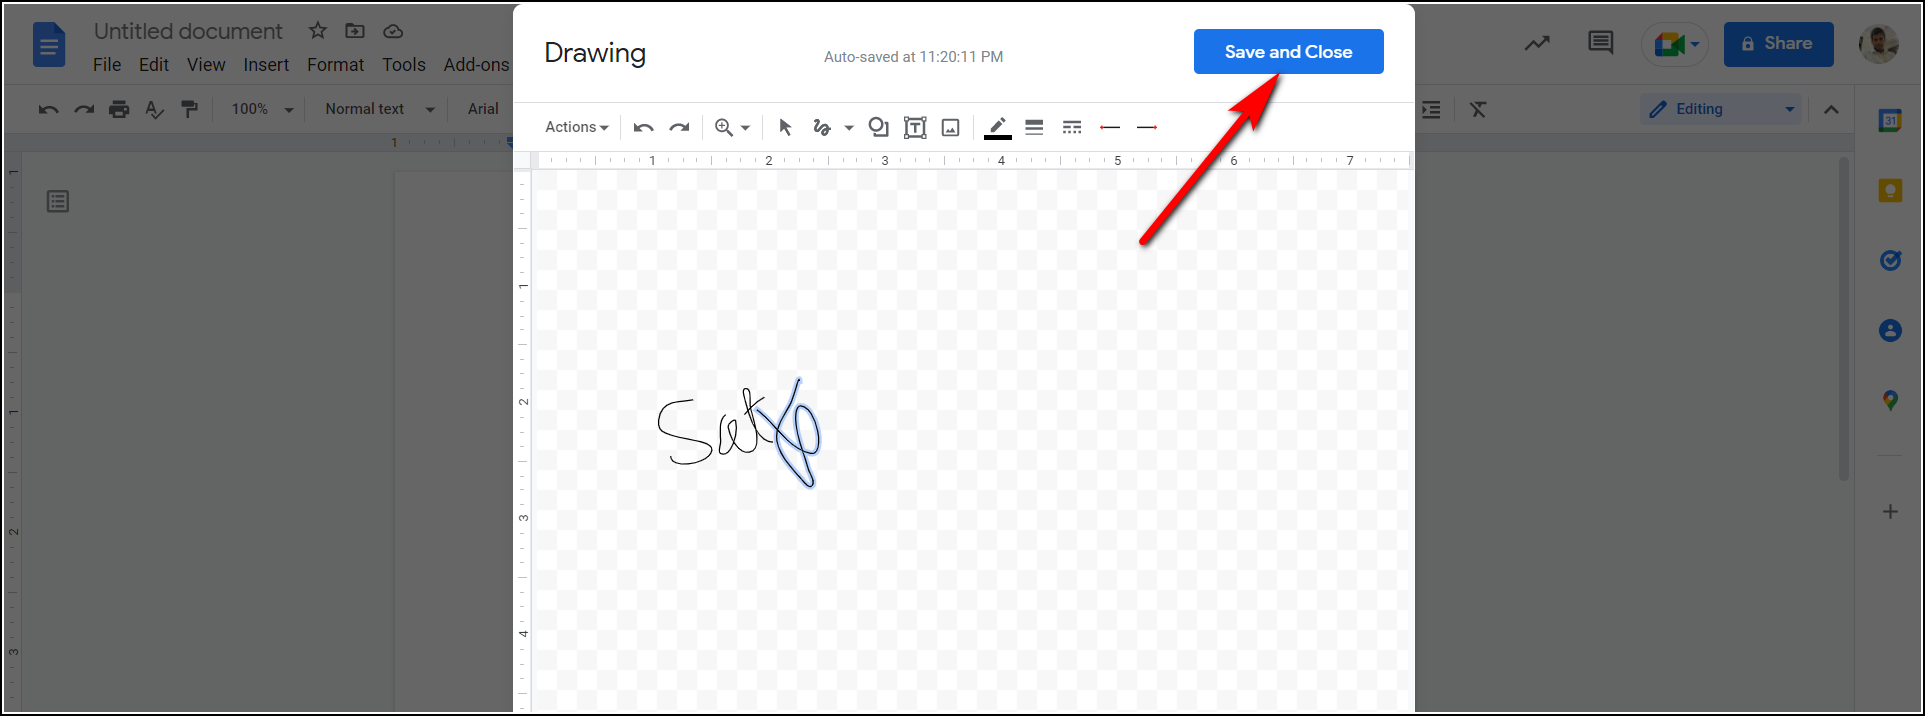
That’s it. Your hand-drawn signature will appear on your document. You can also adjust the size, width, or style of your signature using editing tools.

Using Chrome Extension
You can also use Chrome extensions to add your digital signature in Docs. These extensions appear as tools in Docs and you can then use them to create signature. One such extension is eversign. Here’s how to use this and insert your sign:
1. Open Chrome web store and install “eversign” on your browser.

2. Once installed, signup on Eversign.
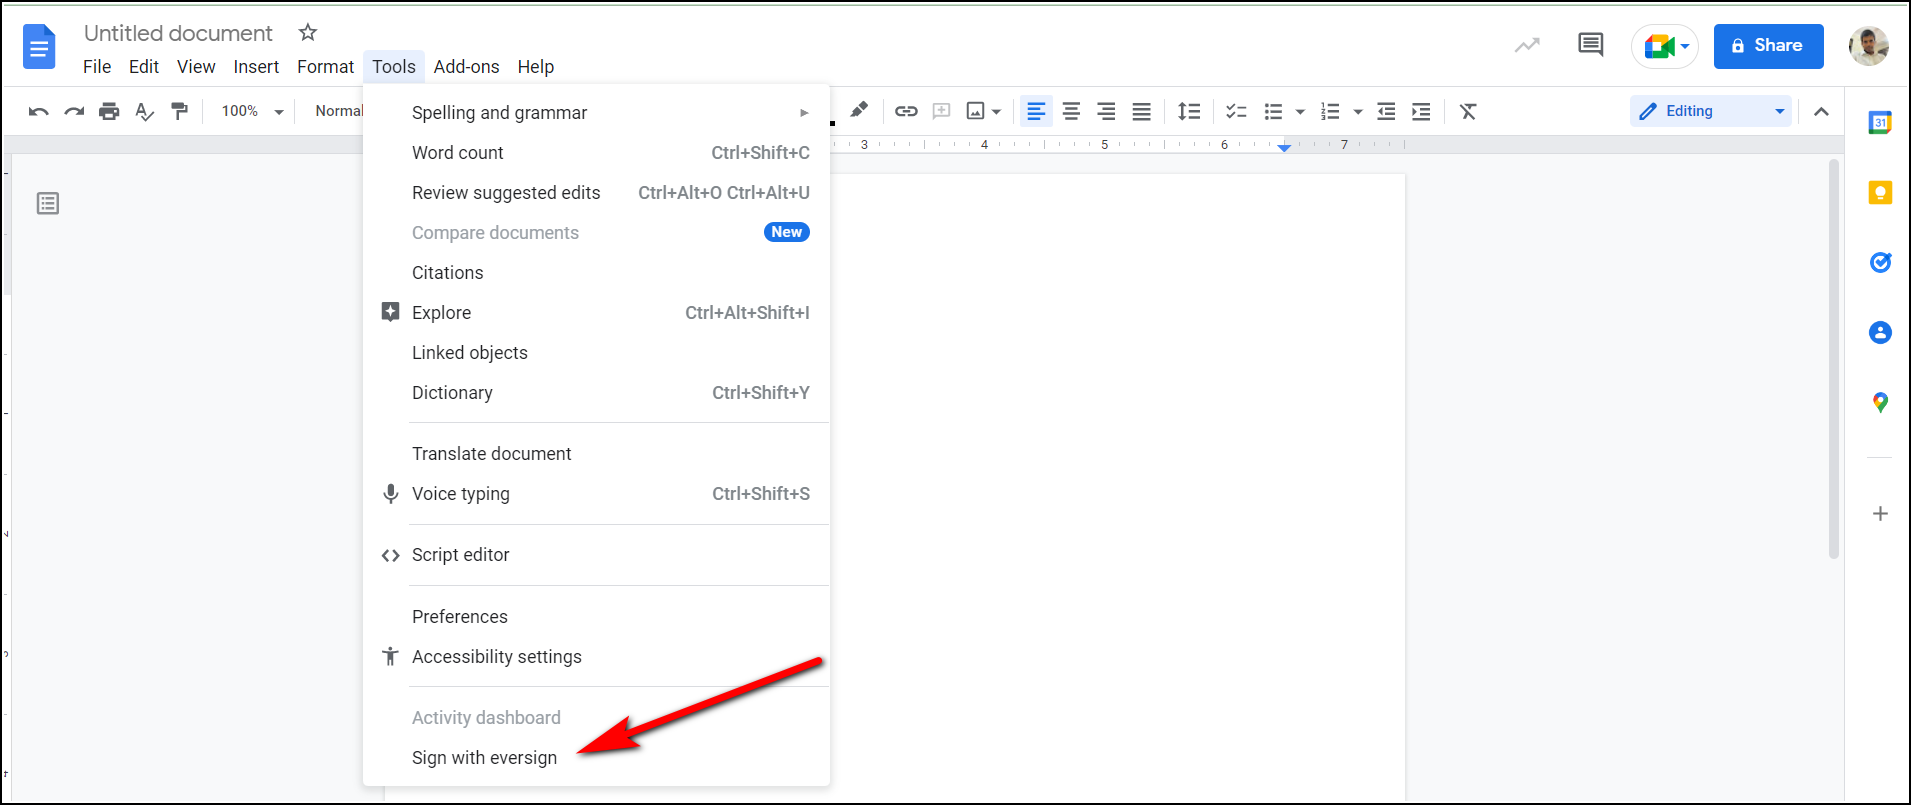
3. When it is setup, go to Google Docs and click on “Tools.”

4. You will see a new option “Sign with eversign” at the bottom.
5. Click on it and then open your Doc in eversign.
6. There, add your signature by tapping on “Start” from the left menu.
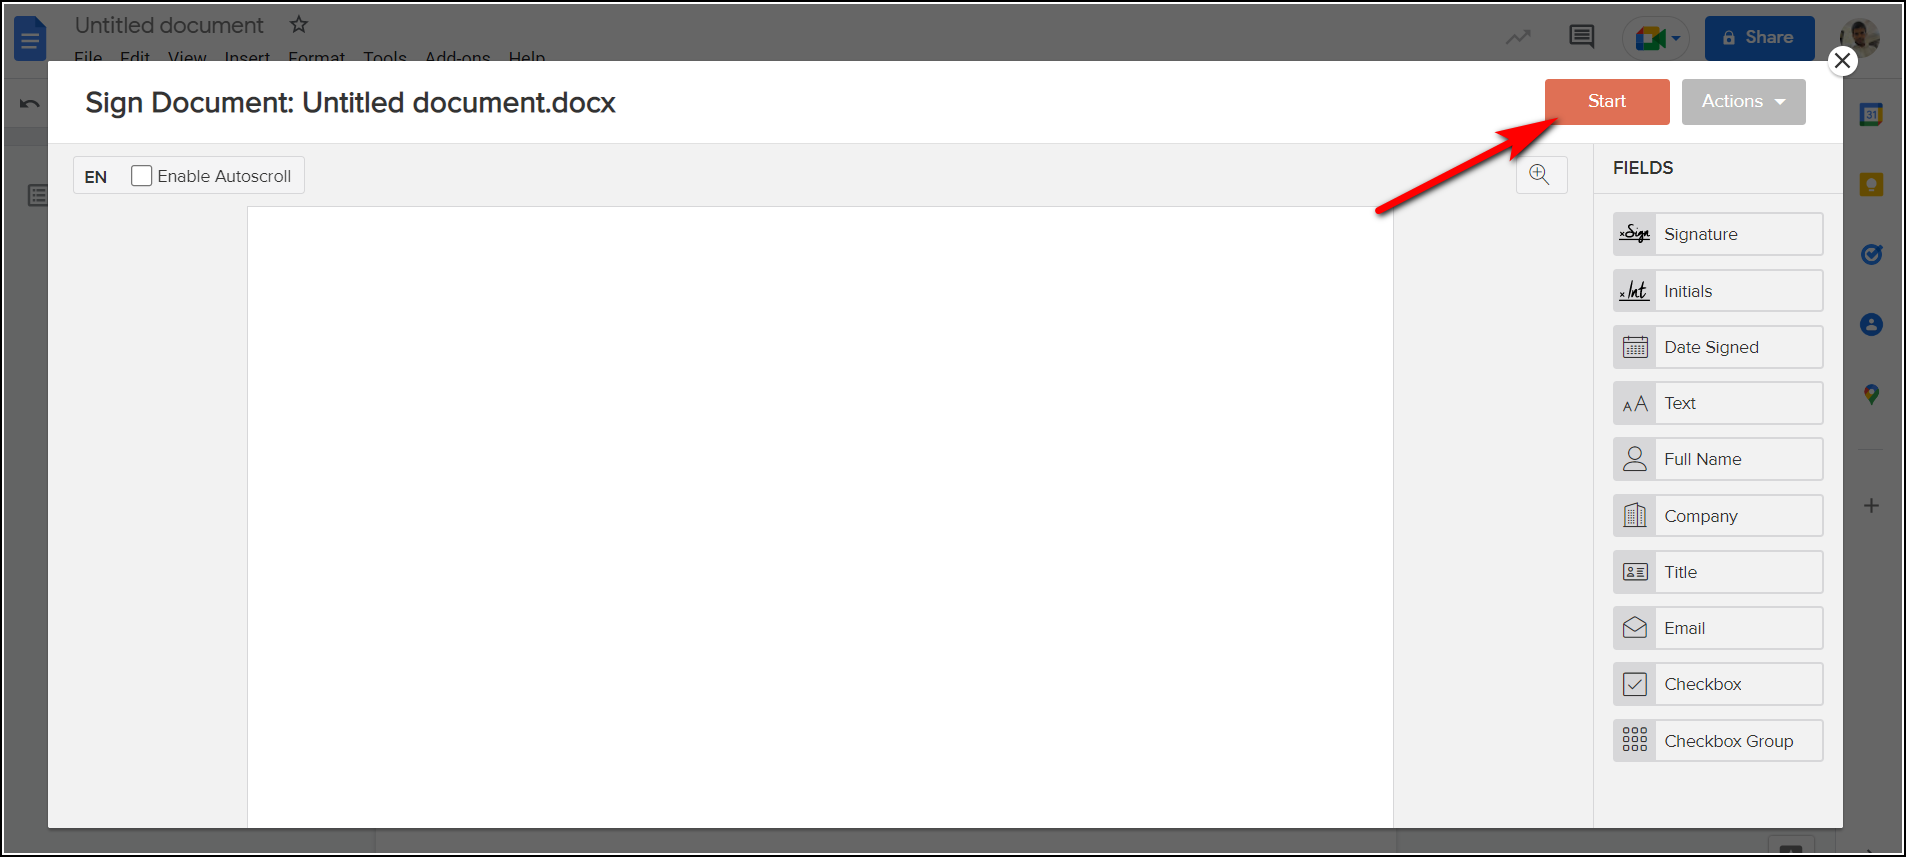
7. Here, you can add your sign by drawing, uploading new file or by typing.
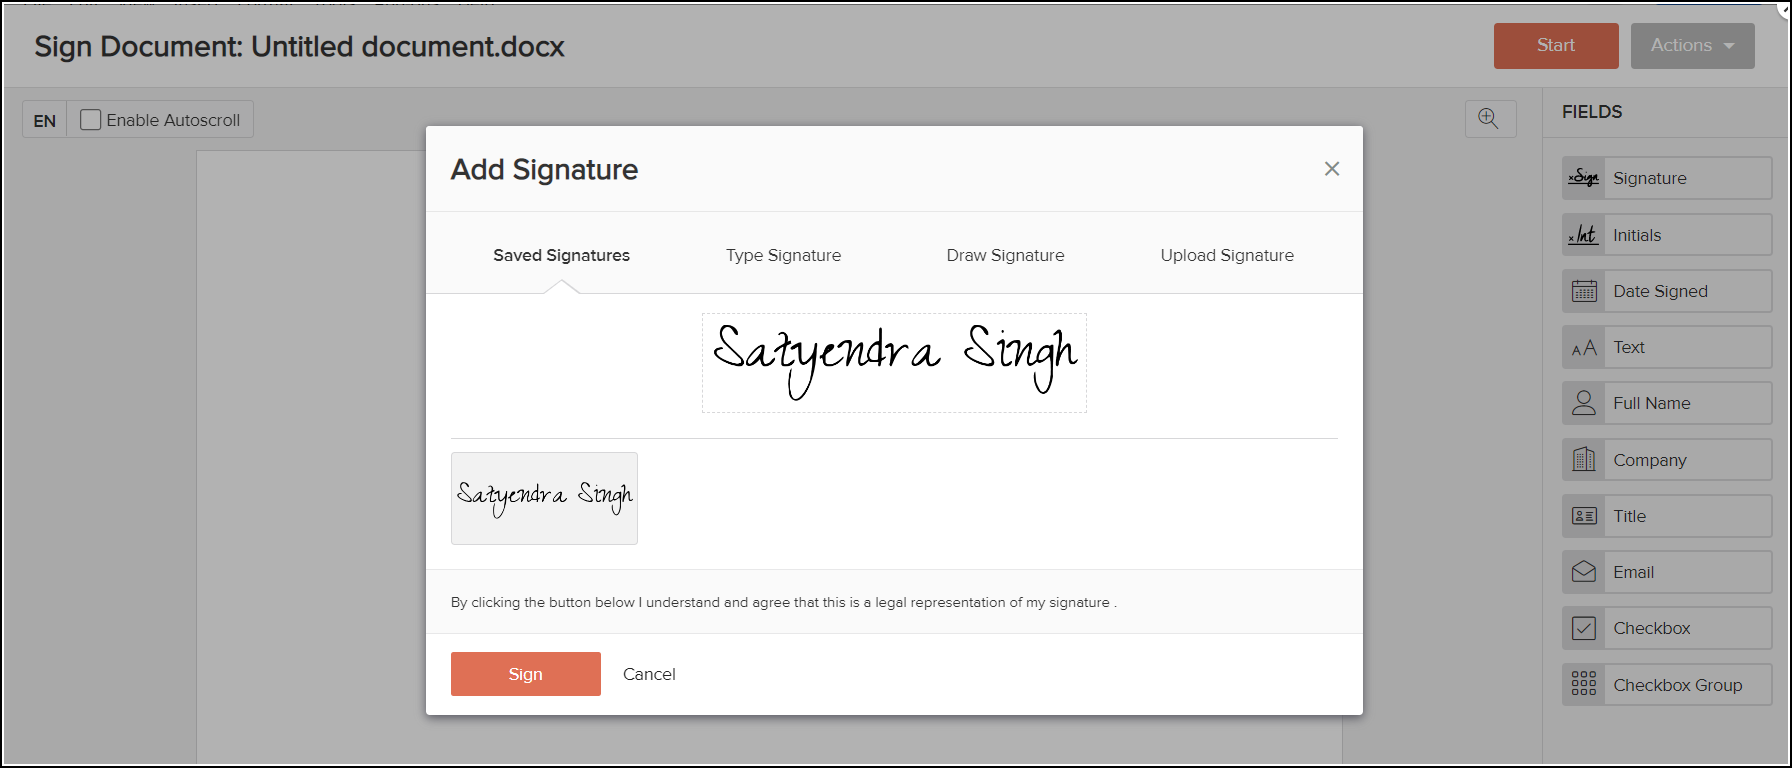
8. Once selected, click on “Sign” and that’s all.
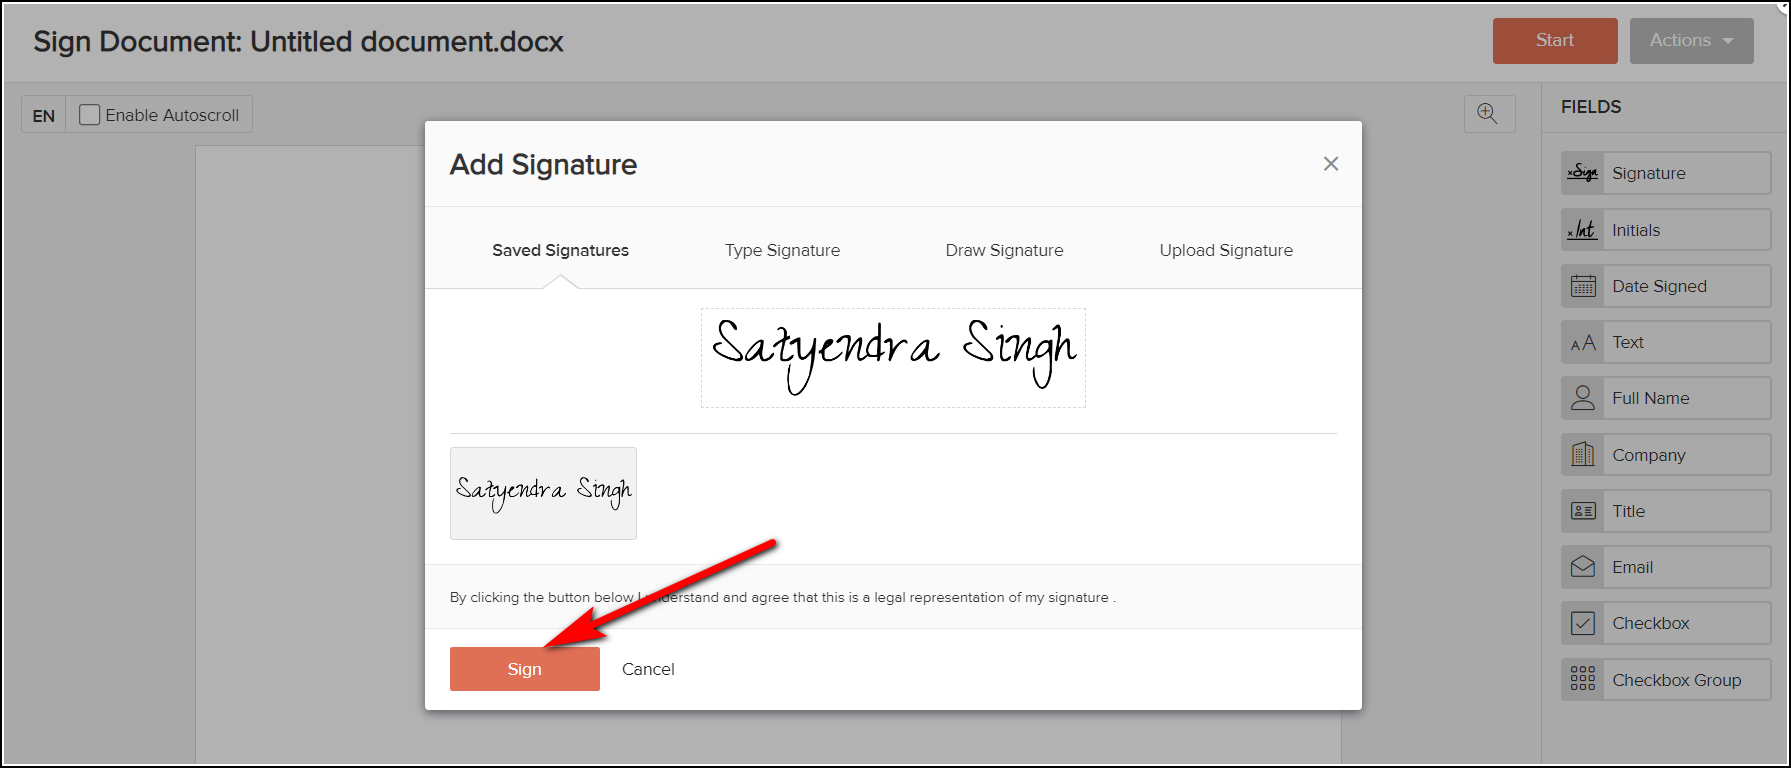
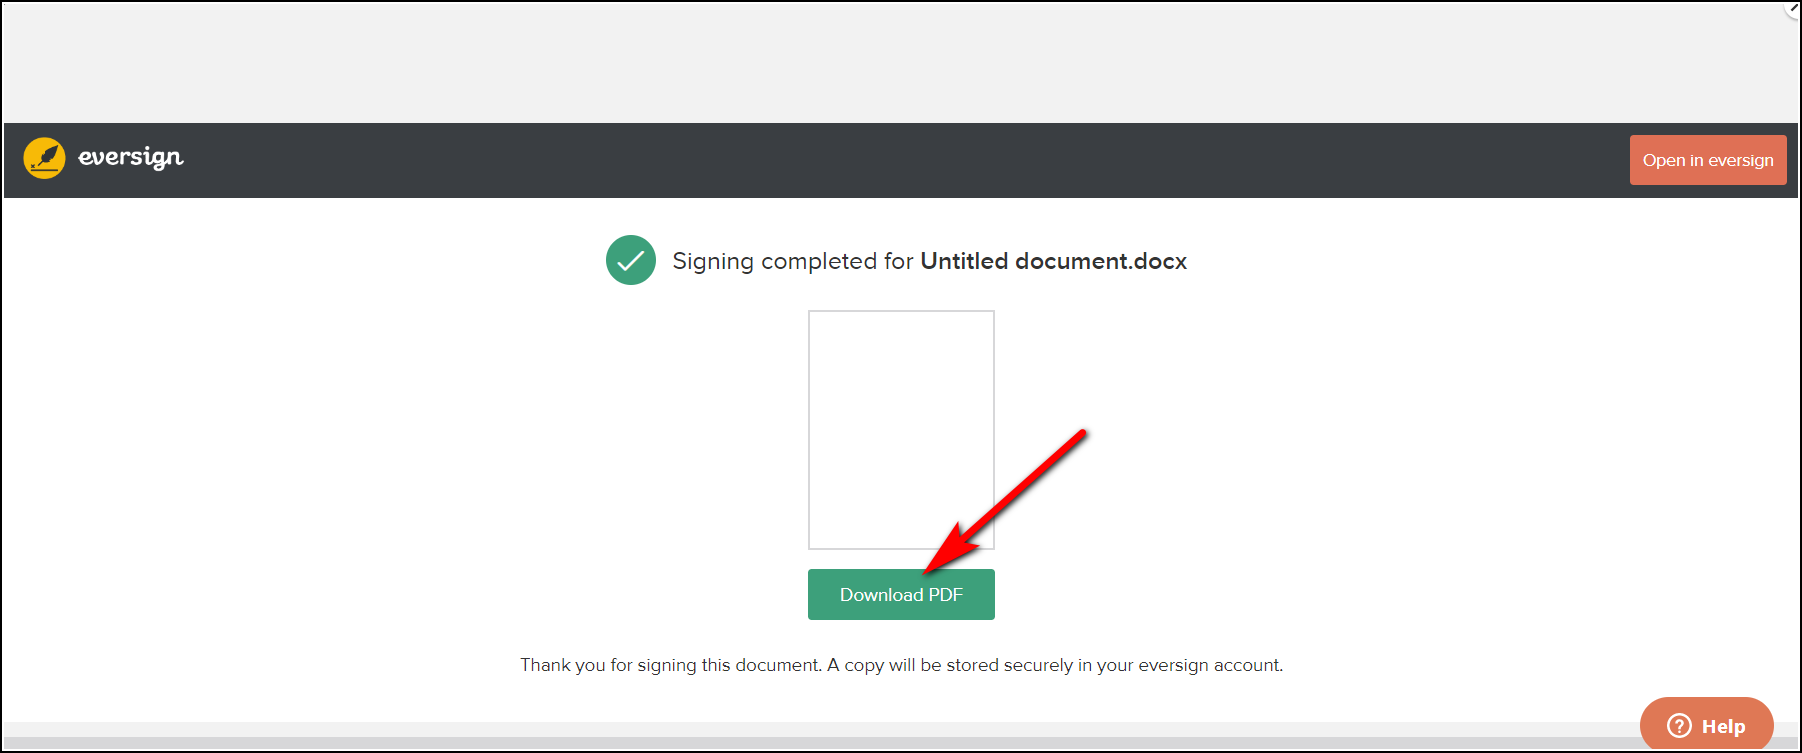
Once signature is placed at the right place, you can click “Finish” and then download your document as PDF. You can later change PDF to Doc, if you want the same.
Using Add-on on Android App
Google Docs Android app also lets you insert signature using some plugins or add-ons. One such add-on is “DocuSign” which is a versatile plugin for all types of docs. The plugin is a standalone app too so you can also use it separately. Here’s how to use it on Docs:
1. Open the Google Docs app and open a document that you want to sign.
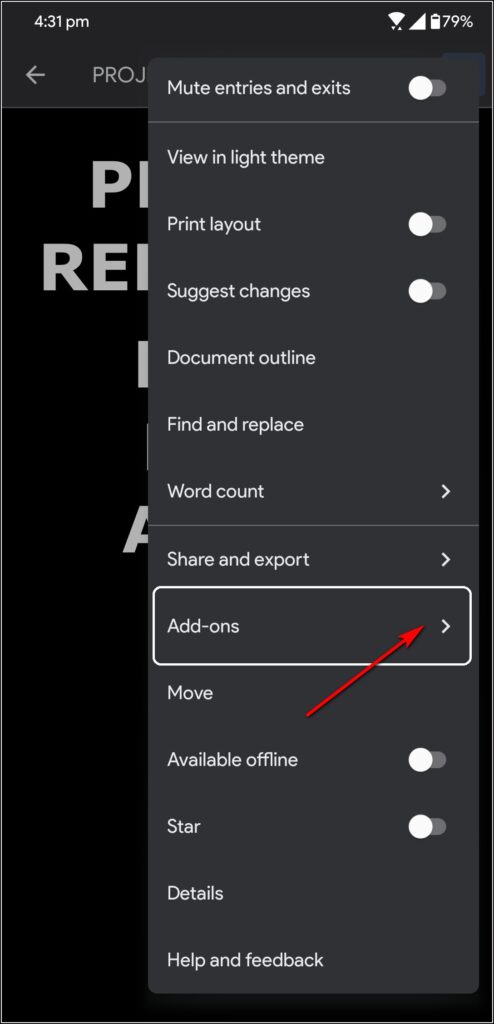
2. Now tap the three dots and select the “Add-ons” option from the menu.
3. Select “Get addons” from there and then choose DocuSign.
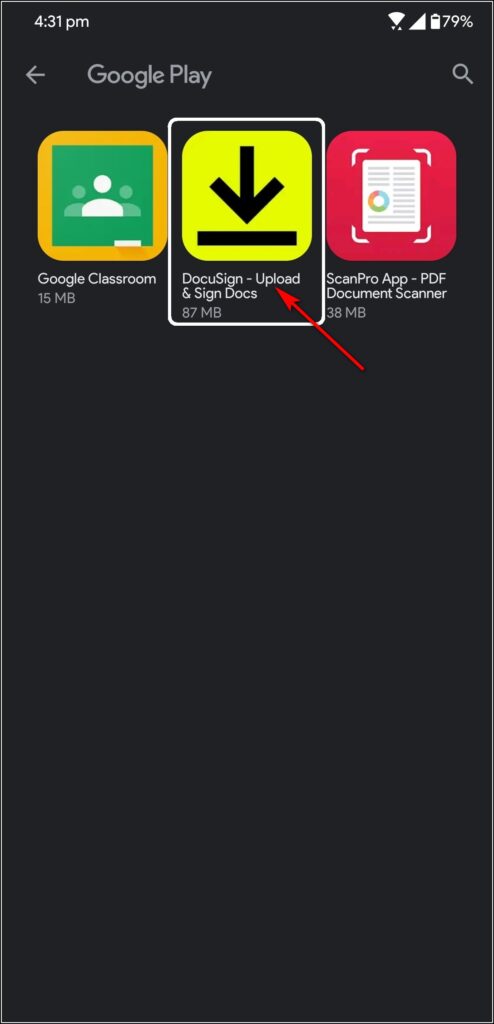
4. It will download the app from the Play Store.
5. Now go back to the doc and open the three-dot menu again.
6. Go to Add-ons and you will see the DocuSign there. Tap and select “Sign a Document.”
7. It will redirect you to the DocuSign app where you can add your sign to the doc.
That’s all. Once the sign is added, you can download or share the document.
So these are the top three ways to insert your signature in Google Docs on PC or on mobile. For more such tech tips, follow us on social media!
Related:
- 6 Best Tips and Tricks to Use Google Docs Like A Pro
- Top 8 Ways to Save Images from Google Docs on PC and Mobile
You can also follow us for instant tech news at Google News or for tips and tricks, smartphones & gadgets reviews, join GadgetsToUse Telegram Group, or for the latest review videos subscribe GadgetsToUse Youtube Channel.